Whenever I’m planning a new project, I love asking one question first: how can this clay piece make my everyday life easier? These functional clay ideas are the kind of practical, satisfying makes you’ll actually use—and they still leave plenty of room for your personal style.
Stamped Clay Coasters for Everyday Drinks
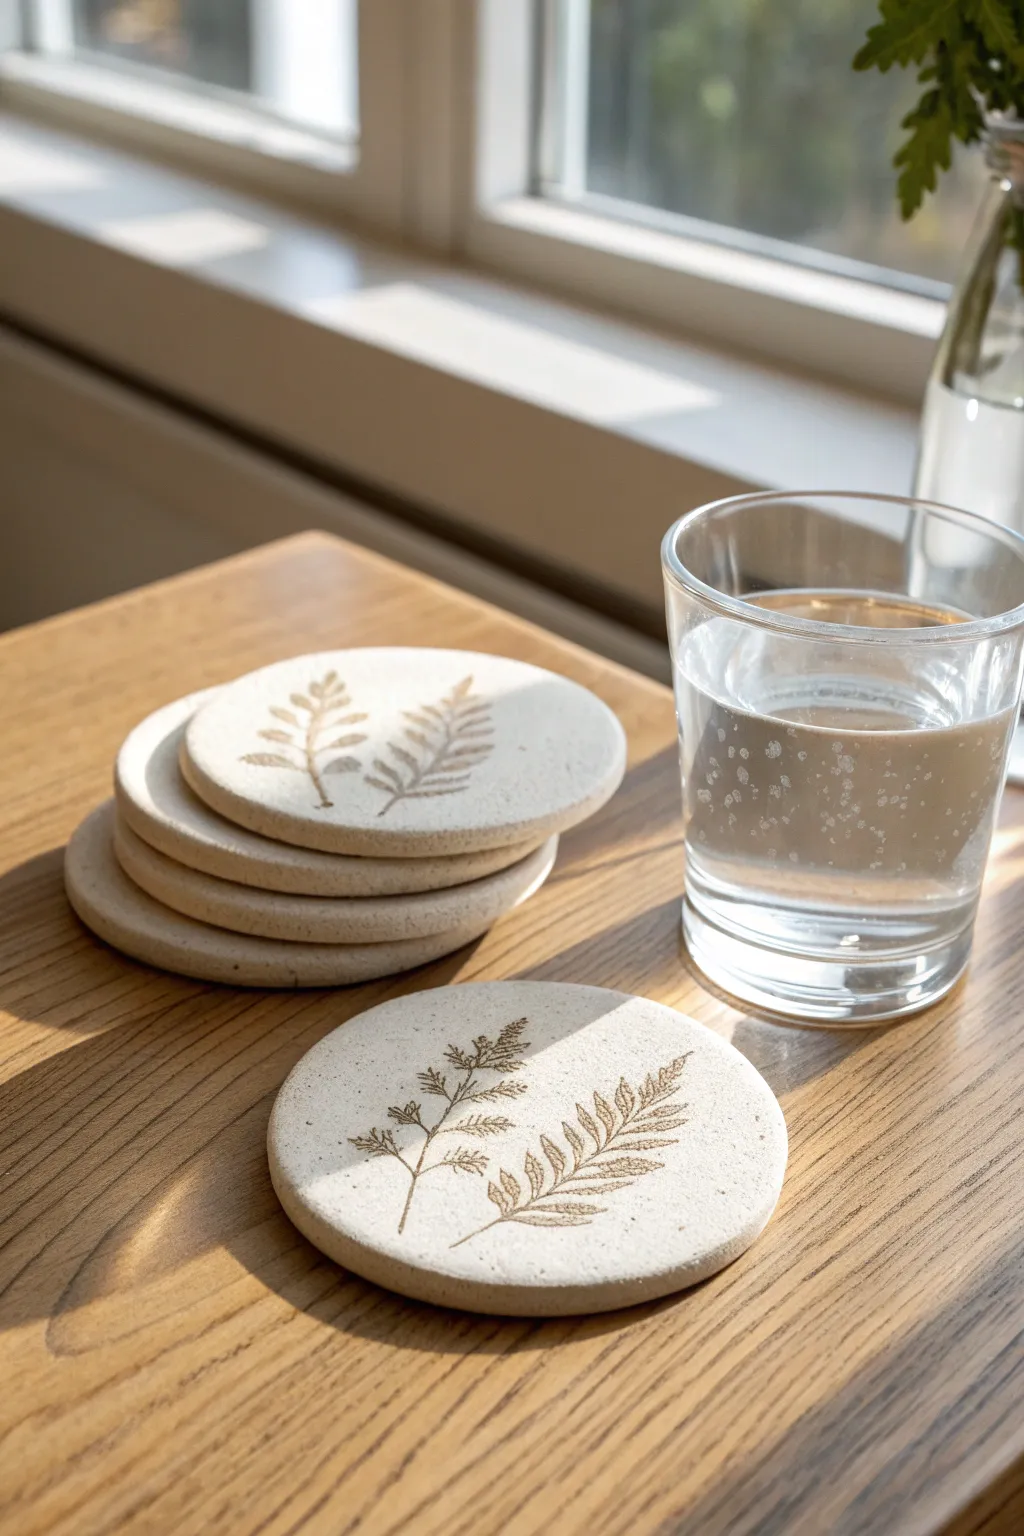
Bring a touch of nature to your coffee table with these elegant, minimalist coasters featuring delicate fern impressions. The unglazed, stone-like finish and organic motifs create a serene, grounded aesthetic perfect for holding your daily hydration.
Detailed Instructions
Materials
- White or light beige stoneware clay (speckled clay works beautifully)
- Circular cookie cutter (approx. 4 inches diameter)
- Fresh or pressed fern leaves (or botanical rubber stamps)
- Rolling pin
- Canvas mat or heavy fabric scraps
- Wooden guide strips (approx. 1/4 inch thick)
- Sponge
- Clear matte acrylic sealer (optional, for non-fired clay)
Step 1: Preparation & Rolling
-
Prepare your workspace:
Lay down a piece of canvas or heavy fabric on a sturdy table. This prevents the clay from sticking and adds a subtle texture to the underside of your coasters. -
Wedge the clay:
Take a handful of clay and knead or wedge it thoroughly to remove any air bubbles. This is crucial to prevent cracking later during the drying or firing process. -
Set up guides:
Place two wooden guide strips on either side of your working area. These will help ensure your rolling pin creates a perfectly even slab of clay. -
Roll the slab:
Place your wedged clay between the guides. Using the rolling pin, roll the clay out until the pin rests on the wooden strips, creating a uniform thickness of about 1/4 inch. -
Smooth the surface:
Take a damp sponge or a flexible rib tool and gently glide it over the surface of the clay slab. Remove any canvas texture or imperfections to create a pristine canvas for your stamping.
Step 2: Creating the Impressions
-
Arranging the botanicals:
Select your fern leaves or stamps. For a natural look similar to the photo, position two smaller fronds slightly off-center, pointing towards each other but not touching. -
Pressing the design:
If using real leaves, place them vein-side down. Gently roll over them with the rolling pin just once with firm pressure to embed them into the clay without distorting the slab’s shape. -
Removing the leaves:
Find the stem of the leaf and carefully peel it back to reveal the impression. If using a stamp, lift it straight up to avoid smudging the fine lines of the design. -
Deepening the detail:
I like to sometimes trace the main stem line with a needle tool if the impression is too faint, just to ensure the design remains visible after drying. -
Cutting the shape:
Position your circular cutter over the design, ensuring the botanical motif is nicely framed within the circle. Press down firmly to cut the coaster shape.
Prevent Warping
For flat forms, dry clay very slowly. Sandwich drying coasters between two pieces of drywall or wood boards to keep them perfectly flat.
Step 3: Finishing Touches
-
Remove excess clay:
Lift away the scrap clay from outside the circle before attempting to move the coaster itself. -
Edge refinement:
Even the cleanest cut can leave a sharp edge. Dip your finger in a little water and gently run it around the rim of the coaster to soften and round the corner. -
Drying process:
Place the coasters on a flat board covered with paper. To prevent warping—a common headache with flat pieces—place another board and a light weight on top of them as they dry slowly. -
Bisque firing (if using ceramic clay):
Once bone dry, fire the coasters in a kiln to bisque temperature (usually Cone 06 or 04). If using air-dry clay, simply let them cure completely according to package instructions. -
Applying a collecting wash:
To highlight the leaf veins like in the image, mix a small amount of iron oxide or brown acrylic paint with water. Brush it into the grooves, then wipe the surface clean with a damp sponge, leaving color only in the recesses. -
Final sealing:
For functional coasters, protection is key. If ceramic, fire again to maturity (unglazed stoneware is often naturally non-absorbent enough). If air-dry, apply two coats of a matte waterproof sealer to protect against condensation rings.
Texture Tip
For that speckled stone look without a kiln, knead dried tea leaves or cracked pepper into white air-dry clay before rolling it out.
Now you have a stunning set of nature-inspired coasters ready to protect your furniture


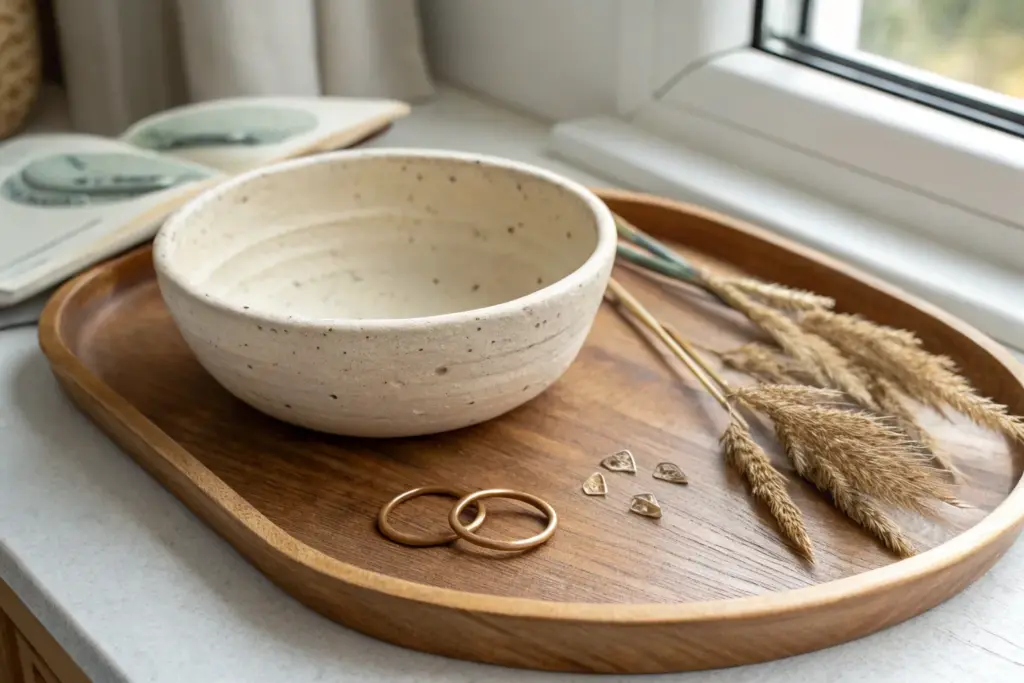
Trinket Dish Catch-All for Keys and Coins
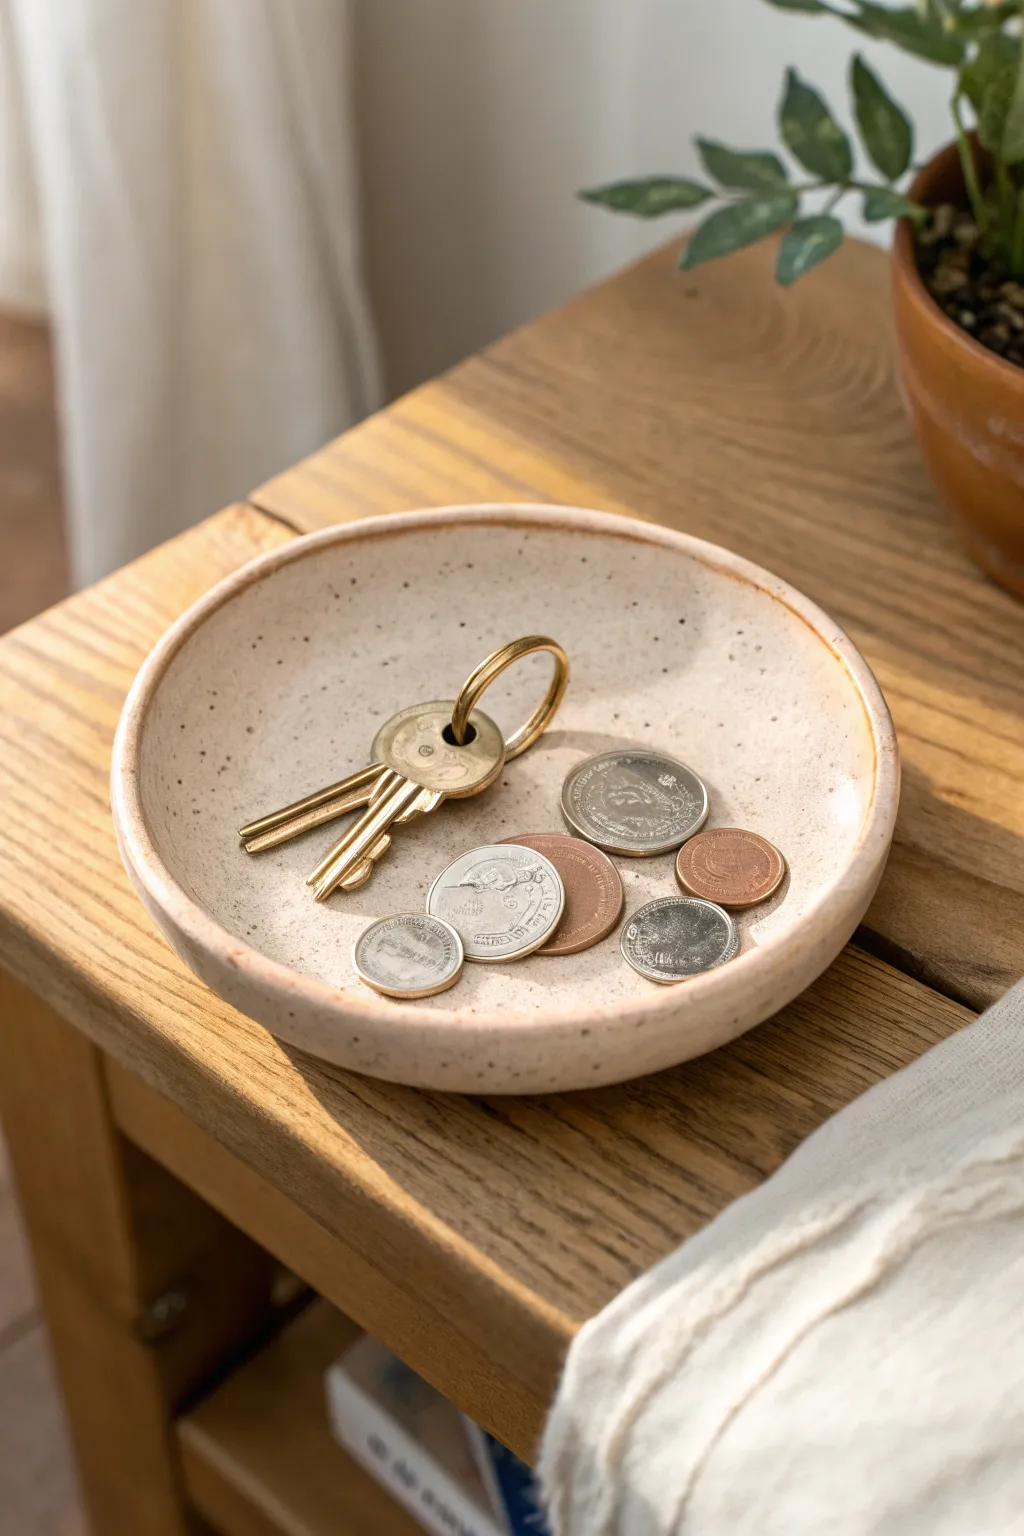
Keep your entryway organized with this charming, minimalist trinket dish designed for everyday essentials. Made from speckled clay with a soft, rounded rim, its natural aesthetic brings a touch of earthy elegance to any tabletop.
Step-by-Step Tutorial
Materials
- Speckled white stoneware clay (cone 5/6)
- Fettling knife
- Pin tool
- Rolling pin
- Wooden guide strips (1/4 inch thick)
- Small sponge
- Rib tool (flexible rubber or metal)
- Clear or transparent white glaze
- Kiln access
- Small bowl for water
- Canvas board or mat
Step 1: Shaping the Form
-
Prepare the Clay:
Begin by wedging a baseball-sized ball of speckled stoneware clay to remove any air bubbles and verify the particle distribution is even. -
Roll the Slab:
Place the clay between two 1/4 inch wooden guide strips on your canvas board. Roll the clay out into a smooth slab using the rolling pin, ensuring even thickness throughout. -
Compress the Surface:
Take your rib tool and gently compress the surface of the slab. This aligns the clay particles to prevent cracking and creates a smooth finish for the bottom of your dish. -
Cut the Circle:
Find a circular template (like a small bowl or lid about 5-6 inches wide) or simply freehand a circle. Use your pin tool or fettling knife to cut out the base shape. -
Smooth the Edges:
Run a slightly damp sponge or your finger along the cut edge to soften the sharpness before you begin shaping. -
Lift the Walls:
Cup the clay circle in the palm of one hand. With your other hand, gently pinch and lift the edges upward to create a shallow curve. -
Refine the Rim:
I like to spend extra time here smoothing the rim with a damp sponge or chamois cloth to ensure it feels pleasant to the touch. -
Check the Curve:
Set the dish down on a flat surface to check that the bottom is stable. If it wobbles, gently press the center down or tap the dish on the table to flatten the base slightly.
Rim Perfection
Use a small strip of chamois leather to compress the rim while the clay is plastic. This creates that professional, ultra-smooth rounded edge seen in the photo.
Step 2: Drying and Bisque Firing
-
Slow Dry:
Place the dish on a board and cover it loosely with plastic. Let it dry slowly for a day or two to prevent warping. -
Uncover:
Remove the plastic and let the piece dry completely until it is bone dry and room temperature to the touch. -
Sponge Finish:
Once bone dry, take a nearly dry sponge and gently wipe away any final rough spots or sharp bits on the rim. -
Bisque Fire:
Load the bone-dry piece into the kiln for a bisque firing (usually Cone 04 or 06) to harden the clay for glazing.
Step 3: Glazing and Final Fire
-
Clean the Bisqueware:
Wipe the fired piece with a damp sponge to remove any kiln dust. This ensures the glaze adheres properly. -
Wax the Bottom:
Apply wax resist to the very bottom foot of the dish to prevent it from sticking to the kiln shelf during the final firing. -
Apply Glaze:
Dip the entire dish into a bucket of clear or transparent white glaze. Alternatively, you can pour the glaze over the dish if you don’t have a dipping bucket. -
Check Thickness:
Ensure the glaze isn’t too thick, as this obscures the lovely speckles in the clay. Shake off any excess drips gently. -
Clean the Rim:
Check the rim for any sharp glaze drips and smooth them with a finger if the glaze is still wet. -
Glaze Fire:
Fire the piece again to the maturity temperature of your clay body (likely Cone 5 or 6). Let the kiln cool completely before removing your new catch-all dish.
Add a Texture Pop
Before lifting the walls, press a piece of lace or a textured leaf into the wet slab. The clear glaze will pool in the impressions, highlighting the design.
Now you have a perfectly sized spot to keep track of your keys and loose change


Cone or Cactus Ring Holder for Sink-Side Storage
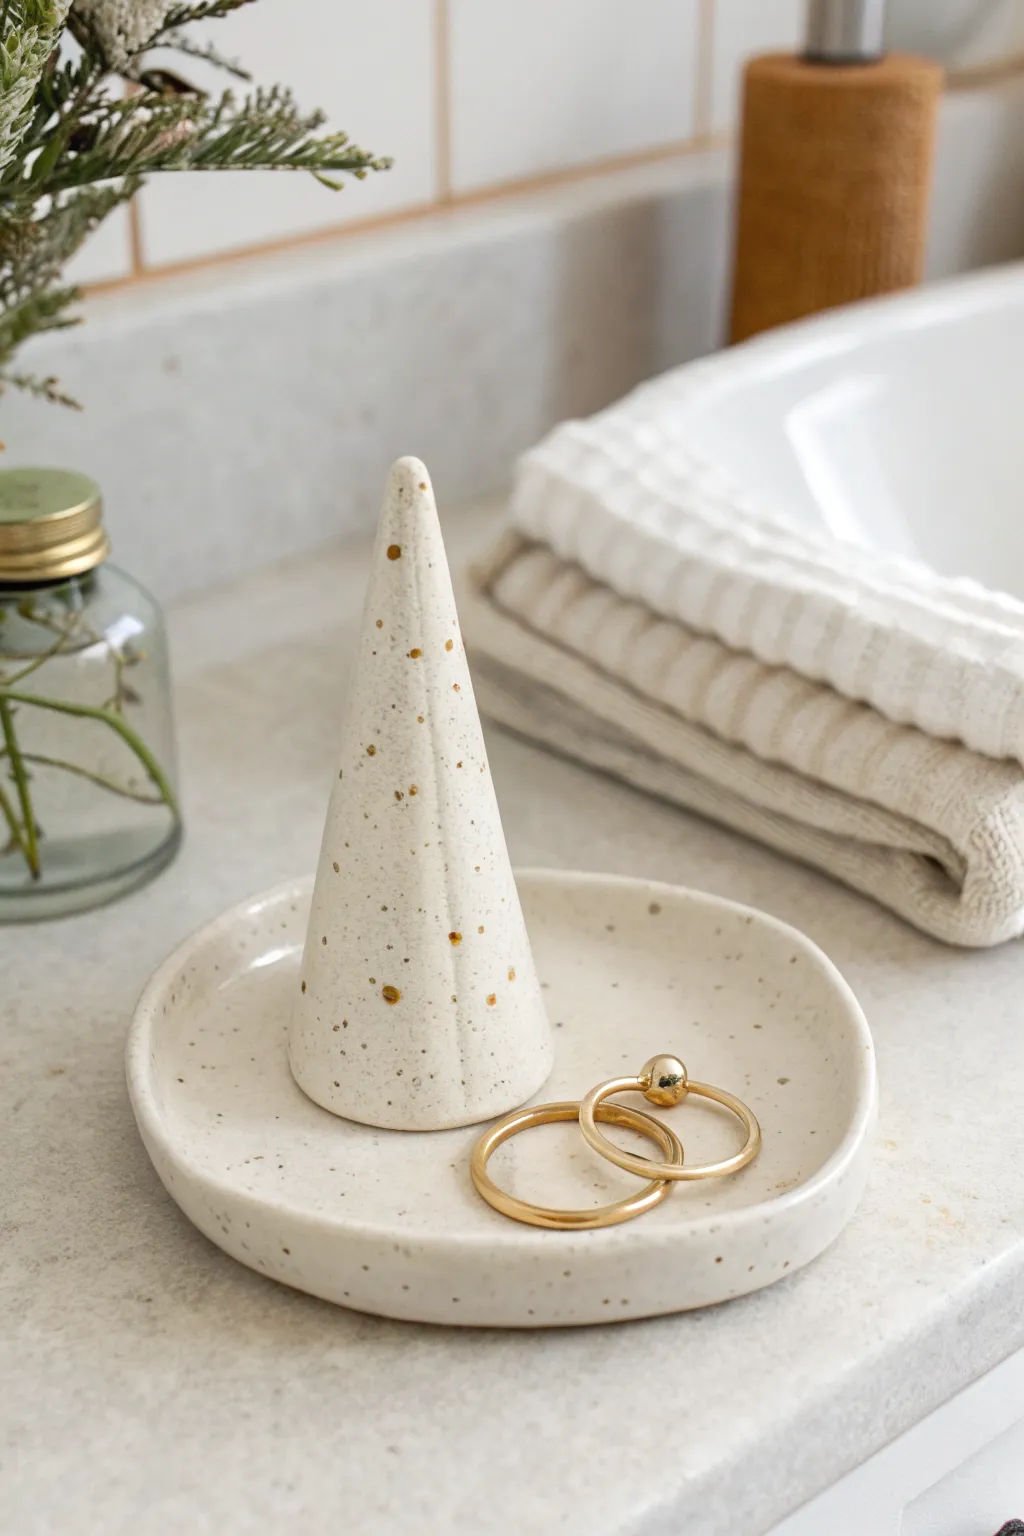
Keep your favorite rings safe and stylishly displayed with this minimalist two-piece clay set. Featuring a sleek central cone and a matching catch-all dish, the speckled finish and subtle gold accents give it a high-end, pottery studio look.
Step-by-Step Guide
Materials
- White polymer clay or air-dry clay
- Speckled clay additive (e.g., ground pepper or faux granite powder) if not using pre-speckled clay
- Rolling pin
- Circular cookie cutter (approx. 4 inches)
- Small knife or clay blade
- Sandpaper (fine grit)
- Gold acrylic paint or liquid gold leaf
- Small stiff paintbrush (for splattering)
- Glaze or varnish (glossy or satin finish)
Step 1: Creating the Base Dish
-
Prepare the Clay:
Start by conditioning your white clay until it is soft and pliable. If your clay isn’t pre-speckled, knead in a small amount of your speckling agent like coarse black pepper or dried coffee grounds to achieve that organic, stone-like texture. -
Roll the Slab:
Roll out the conditioned clay into a smooth slab that is roughly 1/4 inch thick. Aim for an even thickness to ensure the dish sits flat. -
Cut the Circle:
Use your circular cookie cutter or trace around a bowl with a clay knife to cut out a perfect circle. This will form the base of your jewelry dish. -
Form the Rim:
Gently gently pinch and curve the outer edge of the circle upwards to create a shallow rim. Smooth out any fingerprints with a bit of water (for air-dry clay) or baby oil (for polymer clay).
Uneven Splatter?
If globs are too big, practice flicking the brush on a scrap paper first. Distance matters: hold the brush about 6-8 inches away for a fine mist.
Step 2: Sculpting the Central Cone
-
Shape the Cone:
Take a separate ball of clay and roll it between your palms to form a smooth snake, then focus pressure on one end to taper it into a cone shape. It should be tall enough to hold rings but stable enough not to tip. -
Base check:
Tap the wide bottom of the cone firmly against your work surface to flatten it completely. This ensures it will stand upright securely on the dish. -
Refine the Apex:
Gently smooth the tip of the cone so it isn’t too sharp. You want a rounded point that won’t scratch delicate jewelry. -
Add Subtle Facet (Optional):
If you look closely at the inspiration, there’s a very subtle vertical line or seam. You can gently press the side of a ruler into the cone to create a faint decorative vertical indentation if desired.
Marble Effect
Twist two slightly different shades of white or beige clay together before rolling for a subtle, stony marble effect underneath the speckles.
Step 3: Finishing and Assembly
-
Dry or Bake:
Follow the manufacturer’s instructions for your specific clay. If baking polymer clay, place both pieces on a tile or parchment paper. If using air-dry clay, let it sit for 24-48 hours until fully hardened. -
Sand Smooth:
Once fully cured and cool, take your fine-grit sandpaper and lightly buff the edges of the dish and the surface of the cone to remove any rough spots or fingerprints. -
Secure the Cone:
Apply a strong adhesive (like super glue or E6000) to the bottom of the cone and press it firmly into the center of the dish. Let the glue cure completely. -
Gold Splatter Prep:
Prepare a small amount of gold paint or liquid gold leaf. I find it helpful to place the project inside a cardboard box to catch stray splatters. -
Apply the Splatter:
Load a stiff brush with the gold medium and use your thumb to flick the bristles, sending fine droplets of gold onto the cone and dish. Less is more here; aim for a delicate dusting. -
Seal the Piece:
Finish by applying a coat of clear varnish or glaze over the entire piece. This protects the gold accents and gives the ‘ceramic’ a glossy, finished sheen.
Place your new ring holder by the sink and enjoy the extra sparkle it brings to your daily routine


Pinch-Pot Mug with a Comfy Handle
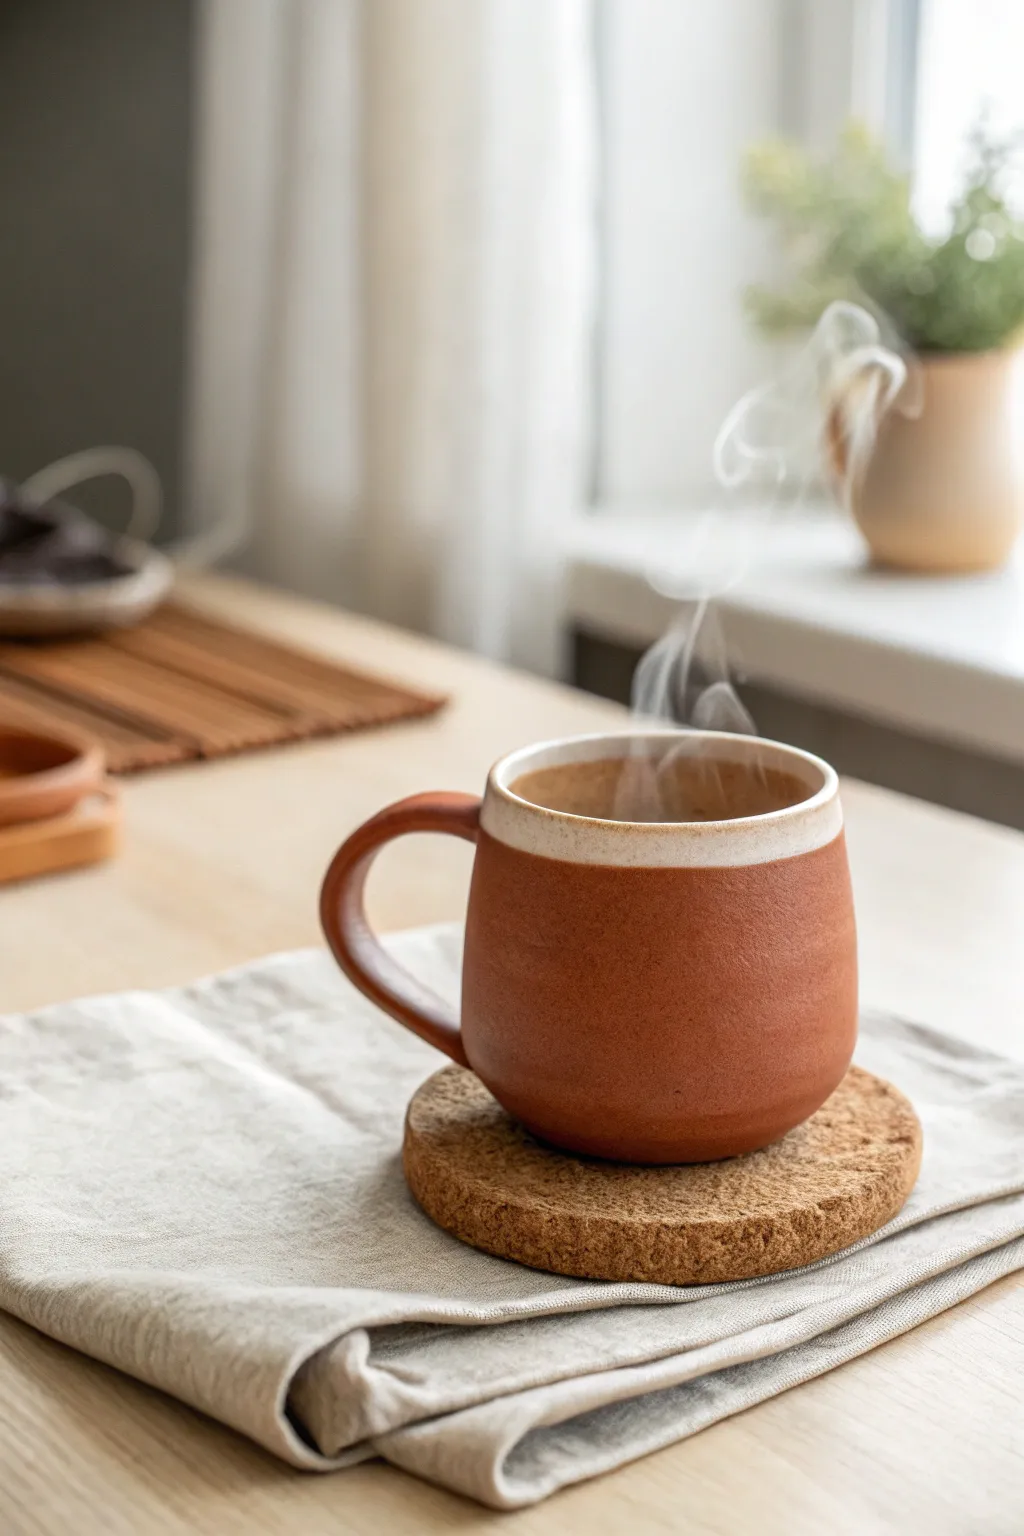
Embrace the warmth of handmade ceramics with this cozy, earthy mug featuring a wide, comforting handle and a distinct two-tone finish. Using a red clay body and a simple white glaze for the rim creates a beautiful contrast that highlights the raw, natural texture of the material.
How-To Guide
Materials
- Red stoneware clay (with fine grog)
- Potter’s wheel (optional, can be hand-built)
- Rib tool (kidney shaped)
- Needle tool
- Loop tool for trimming
- Sponge
- Scoring tool or fork
- Slip (clay and water mixture)
- White dipping glaze
- Suds/sponge for smoothing
- Kiln for bisque and glaze firing
Step 1: Forming the Body
-
Prepare the Clay:
Start by wedging a ball of red stoneware clay, approximately 1 lb, to remove air bubbles and ensure consistency. -
Open the Form:
Whether centering on a wheel or starting a pinch pot by hand, open the ball of clay in the center, pressing your thumbs down while supporting the outside. -
Pull the Walls:
Pull or pinch the walls upward to create a cylinder. Aim for a slightly bulbous, rounded bottom half that tapers just slightly inward toward the rim for that cozy, cupped shape. -
Shape the Belly:
Use a flexible rib tool on the inside of the mug to push the belly out gently while supporting the outside with your hand or a sponge. This gives it the rounded profile seen in the image. -
Refine the Rim:
Compress the rim with a damp sponge or a piece of chamois leather to ensure it is smooth and comfortable for drinking. Leave the rim slightly thick for durability. -
Trim the Base:
Once leather hard, trim away excess clay from the bottom to create a slight foot or a defined curve where the mug meets the table.
Step 2: Attaching the Handle
-
Pull a Handle:
Pull a strap of clay for the handle. For this style, keep it relatively wide and flat rather than perfectly round, aiming for an even thickness. -
Shape the Curve:
Bend the pulled strap into a ‘C’ shape or ear shape and let it set up until it holds its form but is still flexible (stiff leather hard). -
Score and Slip:
Identify attachment points on the mug body—one near the rim and one just below the belly’s widest point. Score these areas thoroughly and apply slip. -
Attach and Smooth:
Press the handle firmly onto the scored areas. Use a modelling tool or your wooden knife to blend the clay seams seamlessly into the mug body. -
Check Alignment:
Flip the mug upside down or look from a distance to ensure the handle is perfectly vertical and aligned with the mug’s center of gravity. -
Slow Drying:
Cover the mug loosely with plastic to dry slowly. This prevents the handle (which often dries faster) from cracking away from the body.
Smooth Operator
Burnish the unglazed exterior with a smooth stone or the back of a spoon when bone dry. This compresses the clay particles, making the raw area feel satiny smooth against your hands after firing.
Step 3: Glazing and Firing
-
Bisque Fire:
Once bone dry, fire the mug in the kiln to a bisque temperature (usually Cone 04 or 06) to prepare it for glazing. -
Wax the Bottom:
Apply wax resist to the bottom of the mug and up the side about 1/4 inch to prevent glaze from running onto the kiln shelf. -
Glaze the Interior:
Pour a food-safe white or cream glaze into the mug, swirl to coat the entire interior, and pour out the excess. -
Dip the Rim:
Hold the mug upside down and dip just the top 1/2 to 3/4 inch into the white glaze. Hold it there for 3 seconds to get a nice opaque white band. -
Leave the Body Bare:
Leave the rest of the exterior unglazed. The beauty of this piece is the contrast between the smooth white rim and the raw, toasted red clay body. -
Glaze Fire:
Fire the mug again to the maturation temperature of your specific clay body (likely Cone 5 or 6 for stoneware).
Speckle Surprise
Use a clay body like ‘Speckled Buff’ or add granular manganese to your red clay. When fired, these specks will bleed through the white rim glaze for added visual texture.
Now brew your favorite tea or coffee and enjoy the comforting warmth of your new creation

The Complete Guide to Pottery Troubleshooting
Uncover the most common ceramic mistakes—from cracking clay to failed glazes—and learn how to fix them fast.
Bud Vase Set for Tiny Flower Cuttings
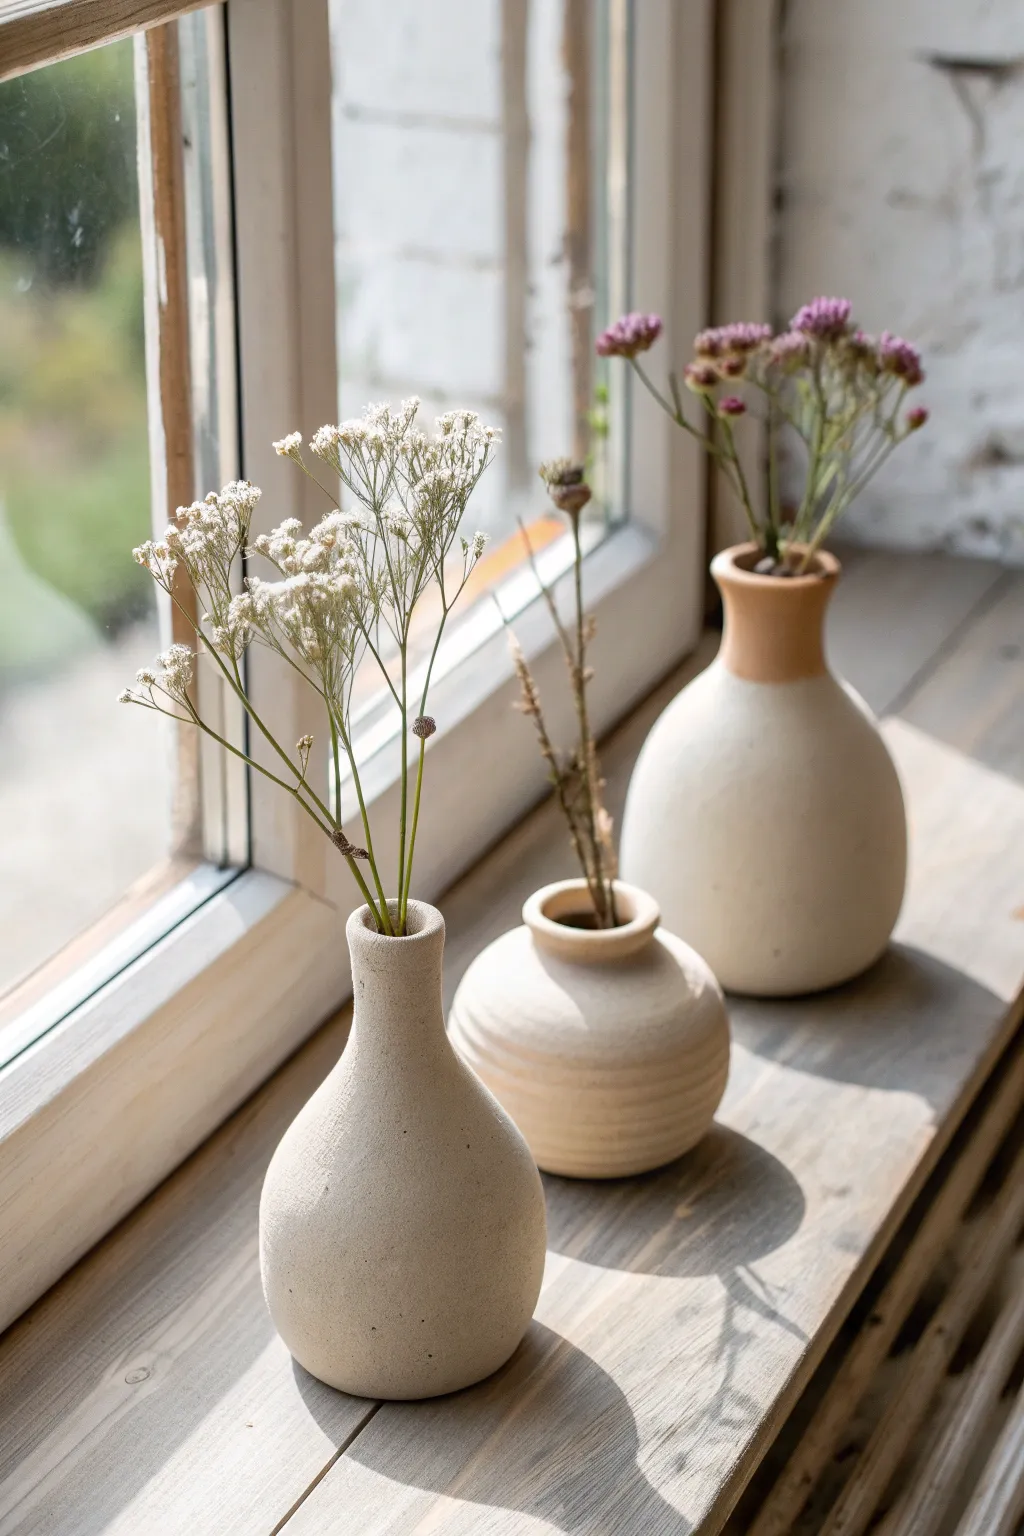
Create a serene vignette with this set of three distinct bud vases, designed to showcase delicate dried stems or tiny fresh cuttings. The project features natural, matte textures and varied silhouettes—a tall bottle shape, a ridged sphere, and a classic dropped-neck form—unified by a cohesive speckled clay body.
Detailed Instructions
Materials
- Speckled stoneware clay (white or light beige)
- Pottery wheel (optionally usable for hand-building with modifications)
- Wooden modeling tools
- Pin tool
- Sponge
- Wire cutter
- Rib tool (kidney)
- Small trimming loop tool
- Matte white or clear glaze (food safe if using fresh water)
- Kiln
Step 1: Shaping the Tall Bottle Vase
-
Center and open:
Begin with about 1 lb of clay. Center it on the wheel and open a narrow hole, pushing down until you have about a half-inch floor thickness. -
Pull the cylinder:
Pull the walls up, keeping them relatively thick at the bottom to support the height. Aim for a conical shape initially, wider at the base and tapering upward. -
Shape the belly:
Use a rib or your fingers inside the pot to push the belly out gently near the bottom third, creating that nice weighted look. -
Collar the neck:
Using both hands, gently squeeze the upper clay inward (collaring) to narrow the neck significantly. Do this in stages, compressing the rim after each squeeze to prevent buckling. -
Refine the mouth:
Smooth the very top rim so it’s rounded and soft, perfect for holding a single stem.
Collaring Success
When narrowing a neck, keep the clay wet and speed up the wheel slightly. If the clay starts to twist or wrinkle, stop immediately and sponge excess water from the inside before trying again.
Step 2: Creating the Ridge-Textured Sphere
-
Form a low mound:
Use a slightly smaller amount of clay (0.75 lb). Center it low and wide, then open it up. -
Belly it out:
Push the walls outward aggressively to create a round, spherical shape, bringing the top in slightly to form a closed-in shoulder. -
Add the ridge texture:
While the wheel is spinning slowly, take the rounded end of a wooden tool or your finger wrapped in a sponge. Press gently into the side of the pot at regular intervals from bottom to top to create the horizontal grooves. -
Form the lip:
Pull a very short, vertical neck—just enough to create a distinct rim above the rounded body.
Step 3: Throwing the Two-Tone Dropped Neck Vase
-
Establish the base:
Throw a cylinder similar to the first vase, but focus on creating a wider, more bulbous main body that tapers severely toward the top. -
Create the structural transition:
Where the neck meets the body, use a wooden tool to define a sharp transition line. This visual break is crucial for the two-tone glazing effect later. -
Flare the rim:
Open the top rim slightly wider than the tall bottle vase, giving it a gentle trumpet flare. -
Remove from wheel:
Wire cut all three vessels from the bat and let them stiffen to leather-hard.
Fixing a Wobbly Rim
If the rim becomes uneven while throwing, use a needle tool to slice off a thin strip at the very top while the wheel spins. This re-levels the opening instantly.
Step 4: Trimming and Finishing
-
Trim the foot rings:
Once leather-hard, place each vase upside down on the wheel (secured with clay lugs/wads). Trim away excess clay from the bottom to create a neat foot ring. -
Texture refinement:
Use a damp sponge to smooth any harsh throwing lines on the tall and dropped-neck vases, leaving the ridges on the small sphere crisp and intentional. -
Bisque fire:
Allow the pots to dry completely (bone dry) before loading them into the kiln for a bisque fire (typically cone 04).
Step 5: Glazing
-
Wax the bottoms:
Apply wax resist to the foot of each vase so glaze doesn’t stick to the kiln shelf. -
Glaze the tall and round vases:
Dip or brush the tall bottle and the ridged sphere entirely in a matte white or clear glaze that allows the clay speckles to show through. -
Two-tone application:
For the dropped-neck vase, dip the entire piece in the white glaze first. Then, careful sponge away the glaze from the neck area to reveal the raw clay body, or use wax resist on the neck before dipping if you want a sharper line. -
Final firing:
Fire the pieces to the temperature appropriate for your clay and glaze (likely cone 5 or 6). I prefer a slow cooling cycle to encourage a nice matte surface.
Once fired, these sturdy little vessels are ready to hold dried grasses or fresh clover from your garden walk
Coil-Built Planter with a Matching Drip Tray
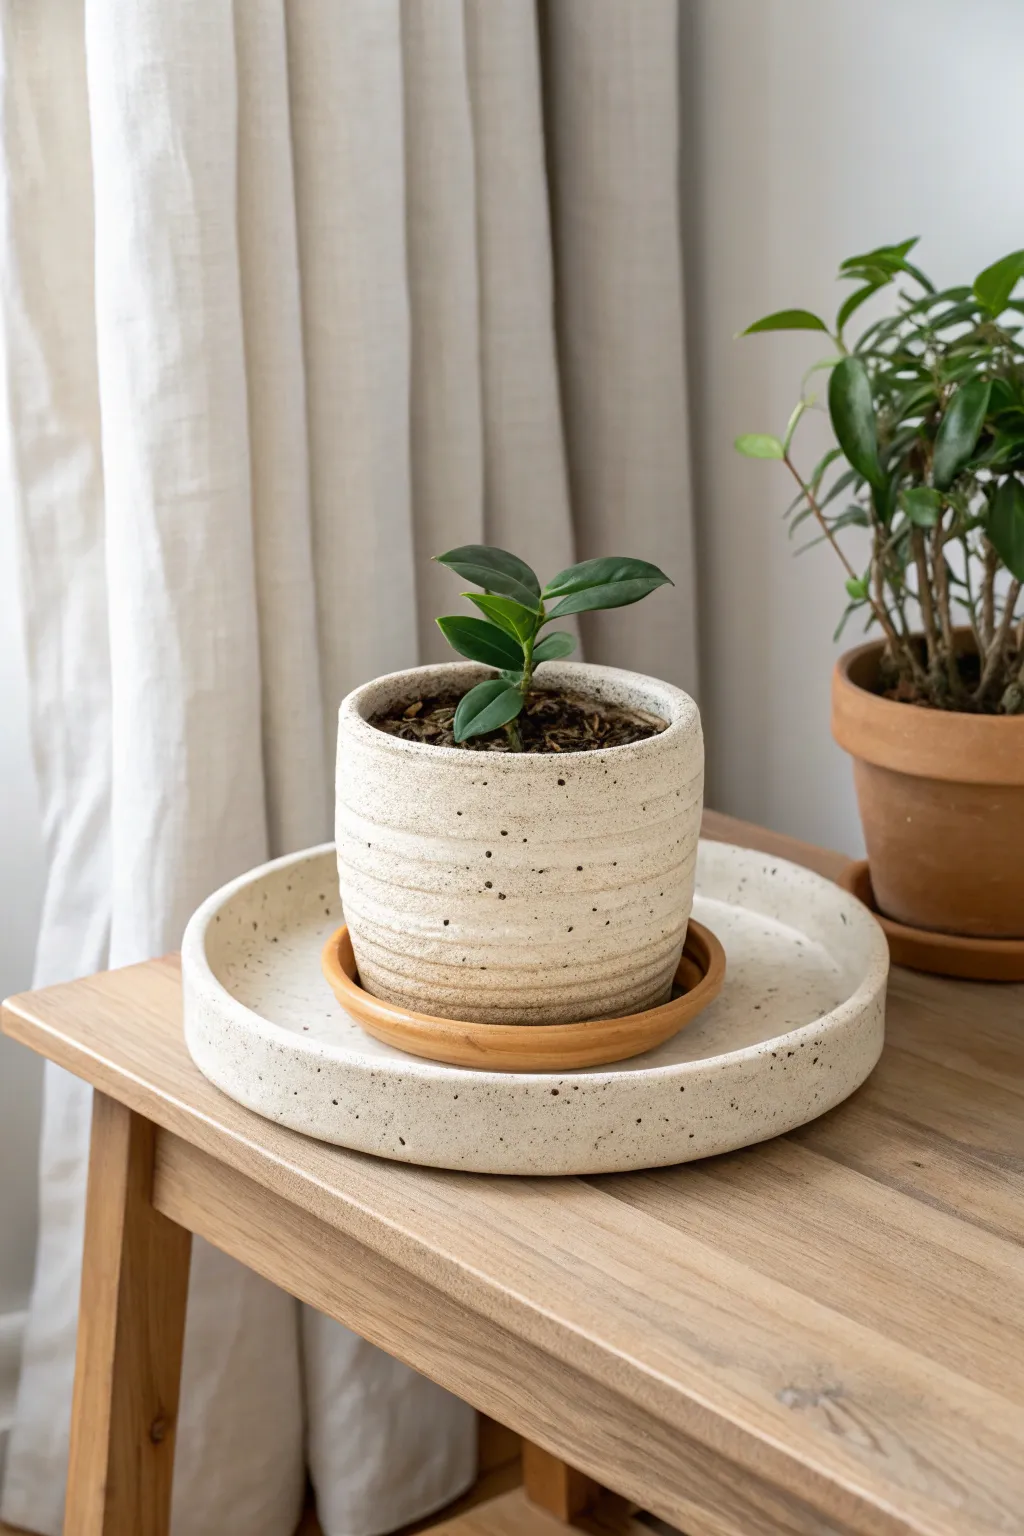
This charming, handmade planter set features a subtle texture created through coil building, paired with a modern, oversized drip tray. The minimalist cream glaze with delicate speckles gives it a rustic yet contemporary feel perfect for any houseplant.
Step-by-Step Guide
Materials
- Speckled buff stoneware clay
- Pottery wheel (optional, for the tray base or trimming)
- Small banding wheel
- Needle tool
- Scoring tool or serrated rib
- Wooden modeling tool
- Soft silicone or rubber rib
- Rolling pin and canvas (or slab roller)
- Circle cutter or template (approx. 4-inch and 8-inch)
- Sponge and water
- Matte cream/white glaze
- Kiln
Step 1: Forming the Planter Base
-
Roll the base slab:
Begin by rolling out a slab of speckled clay to about a 1/4 inch thickness. Use a circle cutter or a template to cut a 4-inch base for your pot. -
Score and slip:
Place your clay circle on a banding wheel. Thoroughly score the outer edge of the top surface and apply a generous amount of slip or water to prepare it for the first coil. -
Roll your coils:
Roll out several snake-like coils of clay on your table. Aim for a consistent thickness, slightly thicker than a pencil, to ensure sturdy walls.
Clean Coil Lines
To keep the coil definition crisp on the outside, always support the wall from the inside with one hand while gently pressing or smoothing the outside with a rib.
Step 2: Building the Planter Walls
-
Attach the first coil:
Lay the first coil directly on top of the scored edge of your base. Cut the ends at an angle where they meet to create a seamless join. -
Blend the interior:
Using your thumb or a wooden tool, smear the clay from the coil downwards onto the base on the inside of the pot. This bonds the clay structurally. -
Continue building up:
stack subsequent coils on top of one another. Score and slip between each layer if your clay is getting dry, though with fresh clay merely pressing them firmly is often enough. -
Defining the texture:
As you build, do not overly smooth the exterior. Instead, gently press the coils together to seal them while leaving the horizontal lines visible. I like to run a wet finger lightly along the grooves to soften sharp edges without erasing the distinctive coil look. -
Shape the rim:
Once you reach a height of about 4-5 inches, level off the rim. You can trim it with a needle tool while spinning the banding wheel or simply compress it with a damp sponge for a soft, rounded lip.
Warped Trays?
If your drip tray curls up while drying, place a wooden board on top of the rim (with a small weight) while it’s in the leather-hard stage to press it back down.
Step 3: Creating the Oversized Tray
-
Prepare the large slab:
For the oversized saucer, roll out a larger slab of clay, roughly 3/8 inch thick. Cut an 8-inch circle to serve as the tray’s floor. -
Add the rim coil:
Roll a single, thick coil for the tray’s edge. Score and slip the perimeter of your large base slab, then attach the coil on top. -
Refine the tray shape:
Blend the coil to the base on the inside thoroughly to prevent leaks. On the outside, smooth the transition so the tray looks like one cohesive shallow dish. -
Dry slowly:
Large flat pieces like trays are prone to warping. Cover your tray loosely with plastic and let it dry very slowly to keep it perfectly flat.
Step 4: Finishing and Glazing
-
Bisque fire:
Once both pieces are bone dry, load them into the kiln for a bisque firing (usually Cone 04) to prepare them for glazing. -
Apply the glaze:
Dip or brush a matte cream or soft white glaze onto both the planter and the tray. The speckles from the clay body will burn through the light glaze. -
Wipe the feet:
Carefully sponge off any glaze from the bottom of the planter and the bottom of the tray so they don’t fuse to the kiln shelf. -
Glaze fire:
Fire the pieces again to the maturity temperature of your clay (typically Cone 5 or 6 for stoneware). Allow the kiln to cool completely before unloading.
Once cooled, pair your new pot with a leafy green friend and enjoy the organic texture you’ve created


What Really Happens Inside the Kiln
Learn how time and temperature work together inside the kiln to transform clay into durable ceramic.
Spoon Rest That Keeps Counters Clean
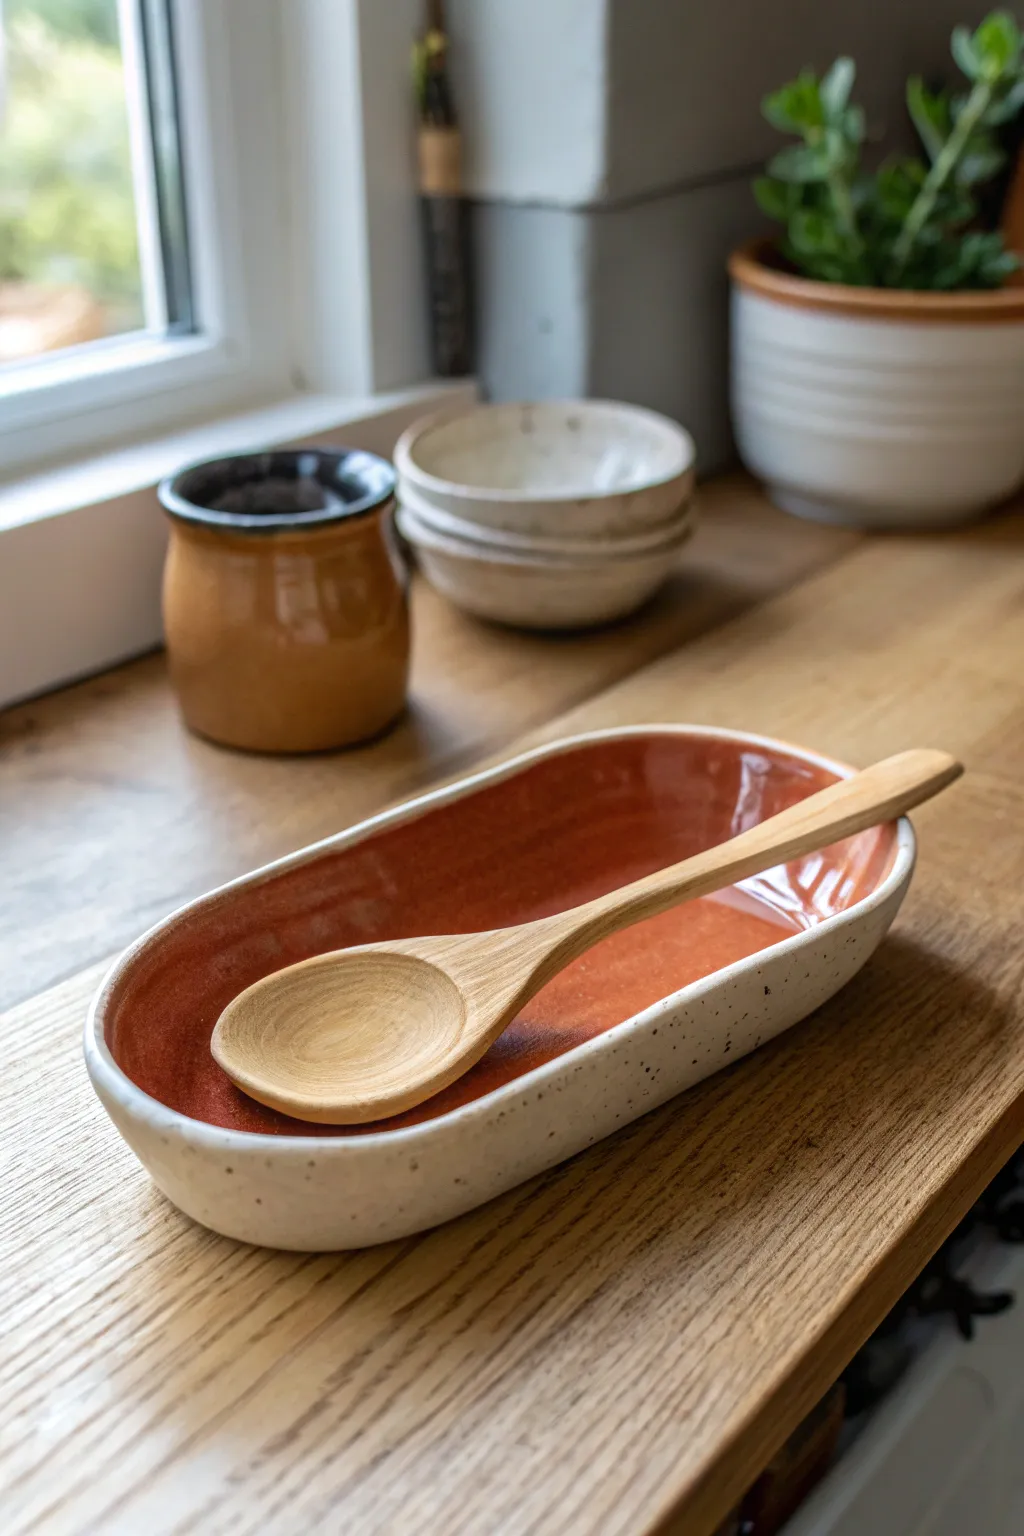
Keep your kitchen counters spotless with this charming, handcrafted spoon rest featuring a warm terracotta interior and a speckled cream exterior. Its elongated oval shape is perfectly sized to cradle your favorite wooden spoons and spatulas while adding a touch of rustic elegance to your cooking space.
Step-by-Step Tutorial
Materials
- Speckled Stoneware Clay (e.g., Laguna Speckled Buff)
- Pottery Slab Roller or sturdy rolling pin
- Oval template (paper or cardstock, approx. 4×8 inches)
- Needle tool or fettling knife
- Soft rib tool (rubber or silicone)
- Sponge
- Terracotta-colored glossy glaze (cone 5/6)
- Clear or Cream matte glaze (optional for exterior)
- Canvas board or ware board
- Kiln (or access to a firing service)
Step 1: Forming the Base
-
Prepare the Clay:
Begin by wedging a softball-sized piece of speckled stoneware clay to remove any air bubbles. This ensures your spoon rest won’t crack during firing. -
Roll the Slab:
Roll the clay out into an even slab, aiming for a consistent thickness of about 1/4 inch. If you are using a rolling pin, guide sticks on either side can help maintain uniformity. -
Smooth the Surface:
Take your soft rib tool and gently compress the slab on both sides. This aligns the clay particles and removes any canvas texture from the rolling process. -
Cut the Shape:
Place your paper oval template onto the slab. Using a needle tool, trace around the template and cut out the oval shape, holding the tool perpendicular to the table for a clean edge.
Warping Woes
If your oval shape warps while drying, try drying it on a piece of drywall or placing a small weighted bag of sand inside the center during the initial drying phase.
Step 2: Creating the Rim
-
Prepare the Coil:
Roll a separate long coil of clay, roughly the thickness of a pencil. This will become the raised wall of your spoon rest. -
Score and Slip:
Using a serrated tool or fork, score (scratch) the outer perimeter of your oval base. Do the same to one side of your clay coil. Apply a small amount of slip or water to the scored areas. -
Attach the Coil:
Gently press the coil onto the edge of the base, working your way around the oval. Trim any excess coil where the ends meet and blend the seam together securely. -
Blend the Wall:
Use your thumb or a modeling tool to smear the clay from the coil down onto the base on the inside. Then, do the same on the outside, ensuring the wall and base become one seamless piece. -
Lift and Shape:
With a damp sponge or your fingers, pinch the wall gently to lift it upward. Aim for a height of about 3/4 inch, creating a shallow basin.
Glaze Resist Trick
Apply liquid wax resist to the rim and exterior before pouring the interior glaze. This ensures a crisp line and keeps the outside raw clay perfectly clean.
Step 3: Refining and Drying
-
Smooth the Rim:
Run a damp chamois or sponge over the top edge of the rim to round it off comfortably. Nobody likes sharp edges on kitchenware. -
Refine the Interior:
Use the soft rib again on the interior floor of the spoon rest to ensure the transition between the wall and the floor is smooth and easy to clean. -
Slow Dry:
Loosely cover the piece with plastic and let it dry slowly to the leather-hard stage. This prevents warping as the moisture evaporates. -
Bisque Fire:
Once the piece is bone dry, fire it in the kiln to a bisque temperature (usually Cone 04). This hardens the clay and prepares it for glazing.
Step 4: Glazing
-
Clean the Bisqueware:
Wipe the fired piece with a slightly damp sponge to remove any dust, which can cause glaze defects like crawling. -
Glaze the Interior:
Pour a warm terracotta-colored glaze into the center of the spoon rest. Tilt the piece to coat the entire interior floor and the inner walls, stopping exactly at the rim. -
Wipe the Exterior:
If you want the natural speckled clay body to show (as in the photo), simply leave the exterior unglazed. If any terracotta glaze dripped over, wipe it away cleanly with a sponge. -
Final Fire:
Fire the piece again to the maturation temperature of your clay and glaze (likely Cone 5 or 6). I always double-check the glaze bottle instructions just to be safe. -
Sanding:
After the final firing, briefly sand the bottom of the spoon rest with wet-dry sandpaper to ensure it won’t scratch your counter.
Now you have a custom ceramic piece ready for your next culinary adventure
Utensil Crock for Spatulas and Wooden Spoons
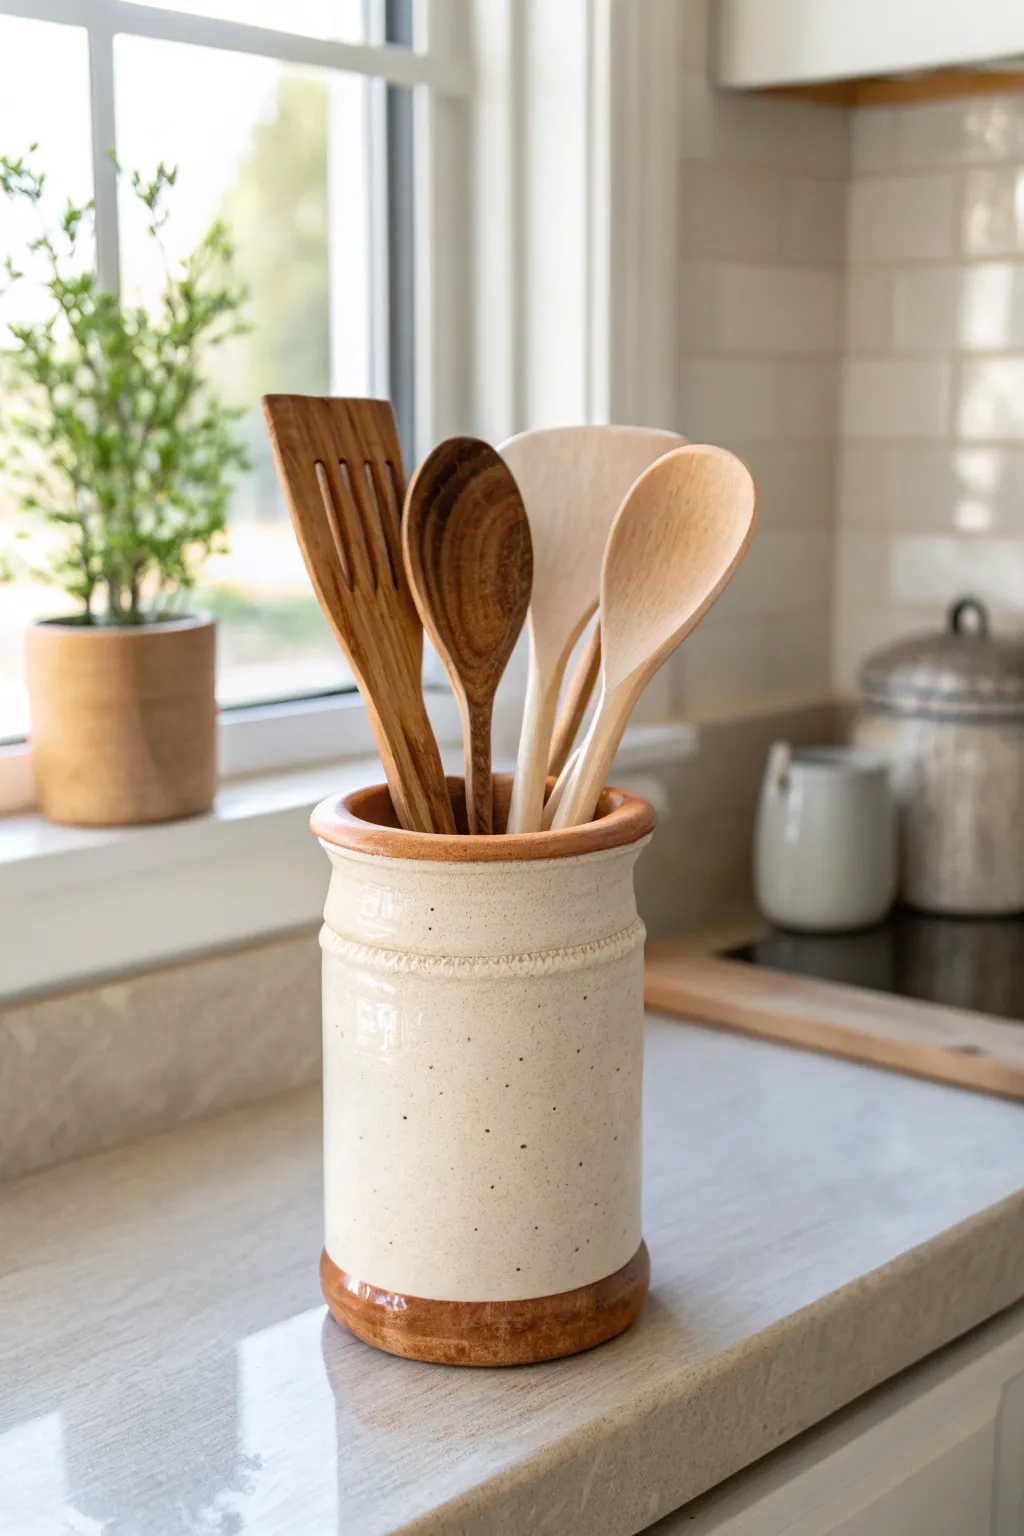
Keep your kitchen tools organized with this charming, farmhouse-style crock that features a lovely speckled finish and warm earth tones. Its sturdy cylindrical shape and decorative rim make it both a practical storage solution and a beautiful countertop accent.
Step-by-Step
Materials
- Stoneware clay (smooth or with fine grog)
- Pottery wheel
- Throwing tools (sponge, wooden rib, needle tool, wire tool)
- Trimming tools
- Small roulette wheel or texture stamp tool
- Speckled cream or oatmeal glaze
- Warm brown/amber glaze (for accents)
- Loop tool
- Kiln
Step 1: Throwing the Form
-
Center the clay:
Begin with about 3-4 pounds of well-wedged clay. Center it firmly on the wheel head, ensuring a wide enough base to support the height of tall utensils without tipping. -
Open the floor:
Open the clay to create a flat inside bottom. Compress the floor thoroughly with a wooden rib or your fingers to prevent S-cracks during the drying process. -
Pull the walls:
Pull the walls up vertically to form a straight cylinder. Aim for a height of about 6-7 inches to comfortably hold standard kitchen tools. Keep the wall thickness consistent, roughly 1/4 inch throughout. -
Shape the rim:
Slightly thicken and round the very top lip for durability. Create a distinct visual break about 1.5 inches below the rim by using a wooden rib to press slightly, defining the upper band area. -
Refine the surface:
Use a metal or wooden rib to smooth the outside walls, removing throwing lines if you want a clean canvas, or leaving subtler lines for hand-made character.
Clean Texture Tip
Apply the decorative roulette texture when the clay is soft-leather hard. If it’s too wet, the pattern will warp; too dry, and it won’t impress deeply enough.
Step 2: Adding Detail & Trimming
-
Create the texture band:
While the clay is leather hard but still on the wheel (or centered again), use a decorative roulette wheel or stamp. Press it gently into the clay just below the defined upper rim section to create the horizontal textured pattern shown in the image. -
Wire off:
Run a wire tool under the base to separate the pot from the bat. Allow the piece to dry to a leather-hard state. -
Trim the foot:
Invert the crock onto the wheel head and center it. Trim away excess clay from the bottom, creating a distinct foot ring that mirrors the visual weight of the rim. -
Smooth edges:
Sponge down any sharp edges created during trimming. This is when I like to verify the texture band is clean and free of burrs. -
Bisque fire:
Let the piece dry completely (bone dry) before loading it into the kiln for the bisque firing (usually Cone 04 or 06).
Step 3: Glazing Process
-
Wax the foot:
Apply wax resist to the very bottom of the foot ring to prevent glaze from sticking to the kiln shelf. -
Apply the main glaze:
Pour a speckled cream or oatmeal glaze inside the crock, swirl to coat, and pour out. Then, dip the exterior into the same glaze bucket, stopping just short of the bottom foot if you want the raw clay exposed, or overlapping for effect. -
Clean back the accents:
Using a damp sponge, carefully wipe the glaze off the rounded top rim and the bottom foot ring area. You want to expose the clay body or prepare these spots for a contrasting color. -
Paint the rim and base:
Brush a warm amber or iron-rich brown glaze onto the exposed top rim and the bottom foot band. Be careful to follow the line neatly. -
Highlight the texture:
If heavy glaze covered your texture band, gently rub it with a finger to thin the glaze on the high points, which will help the pattern pop after firing. -
Glaze fire:
Fire the piece to the maturity temperature of your clay and glaze combination (typically Cone 5, 6, or 10).
Add Handles
Before drying, attach two small lug handles or loop handles on opposite sides of the textured band to give the crock a vintage stoneware jug appearance.
Once cooled, fill this sturdy vessel with your favorite wooden spoons to bring instant warmth to your kitchen counter

TRACK YOUR CERAMIC JOURNEY
Capture glaze tests, firing details, and creative progress—all in one simple printable. Make your projects easier to repeat and improve.
Soap Dish with Drainage Ridges
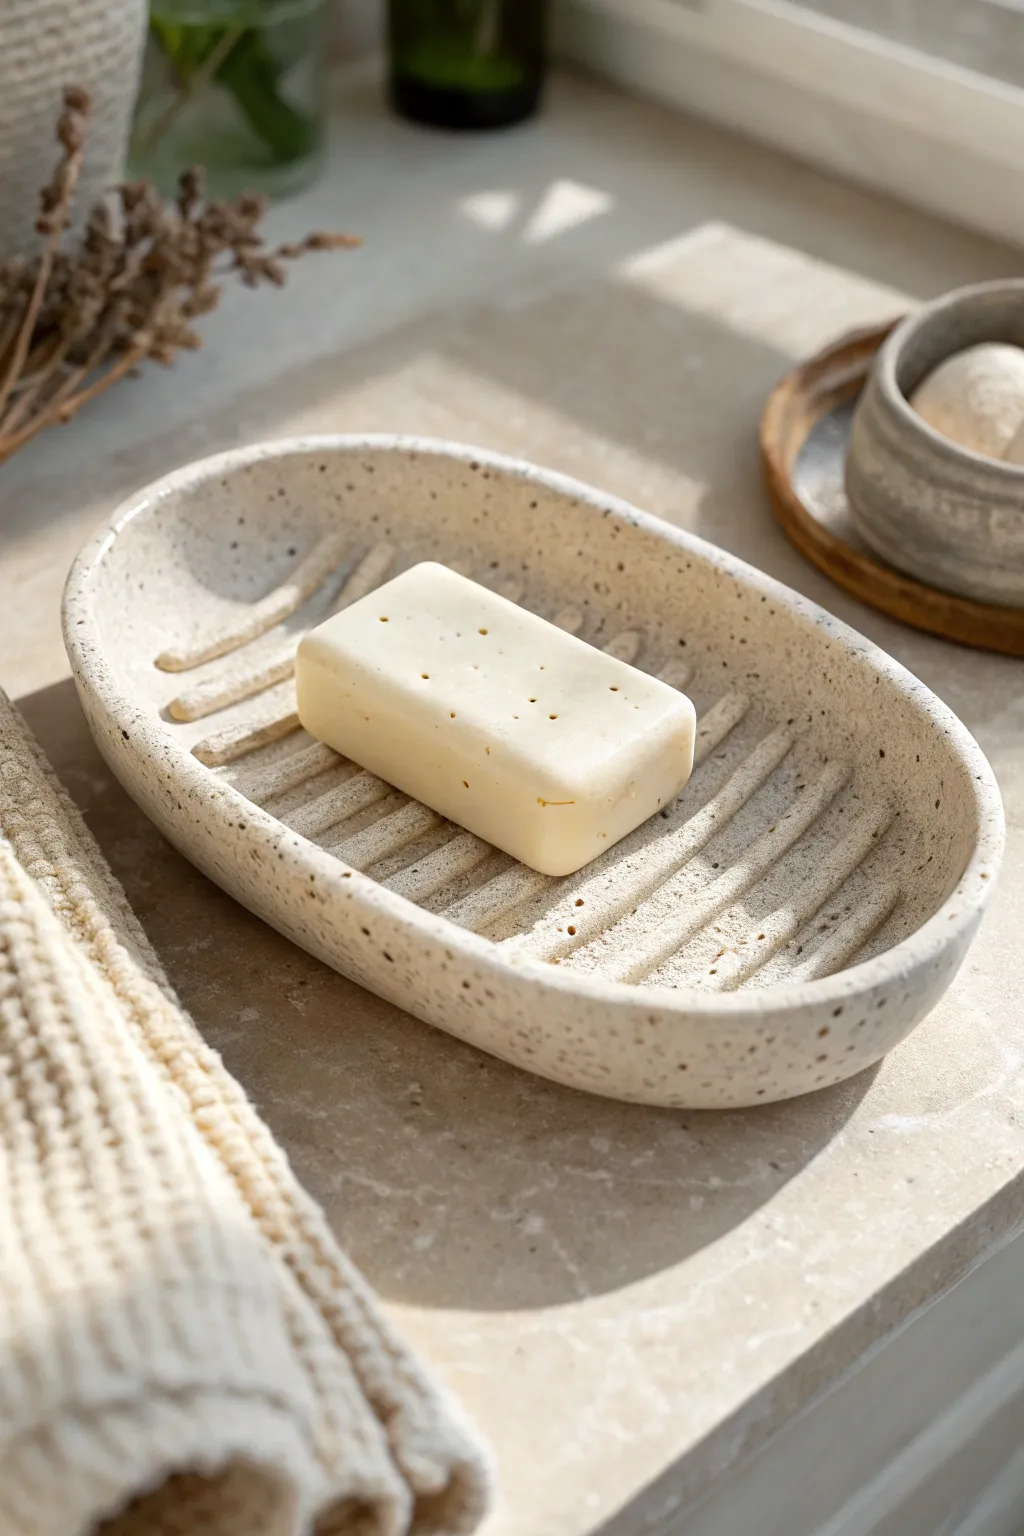
This project combines organic beauty with genuine utility, featuring deep ridges that keep your soap dry and lasting longer. Utilizing a speckled clay body gives it that effortlessly textured, stoneware look right from the start.
Detailed Instructions
Materials
- Speckled stoneware clay (mid-fire or low-fire depending on your kiln)
- Rolling pin
- Two wooden guide strips (approx. 1/4 inch thick)
- Oval paper template or oval cookie cutter
- Pointed pottery knife or needle tool
- Clean sponge
- Flexible metal or rubber rib
- Wooden modeling tool or loop tool (for carving/shaping ridges)
- Small bowl of water
- Canvas or ware board
Step 1: Preparing the Base
-
Wedge the clay:
Begin by thoroughly wedging a ball of speckled clay to remove air bubbles and ensure particle alignment, which prevents warping later. -
Set up your guides:
Place your wooden guide strips on either side of the clay ball on your canvas. This ensures your slab is a perfectly even thickness. -
Roll out the slab:
Roll the clay flat using the rolling pin. Rotate the clay occasionally to keep the texture consistent, pressing down until the pin rests on both guide strips. -
Smooth the surface:
Take your flexible rib and gently compress the surface of the slab. This removes canvas texture and aligns the clay particles for strength. -
Cut the shape:
Place your oval template onto the clay. Trace carefully around the edge with your needle tool or knife, keeping the blade upright for a clean vertical cut. -
Refine the rim:
Lift the oval slab and smooth the sharp cut edges with a damp sponge or your finger to soften them slightly.
Warping Woes?
If the base curls up while drying, place a small sandbag or a weighted board wrapped in plastic directly on the center of the dish during the drying phase.
Step 2: Shaping and Adding Ridges
-
Lift the edges:
Gently curve the outer rim of the oval upwards to create a shallow bowl shape. You can do this by pinching lightly or pressing it into a foam mold if you have one. -
Prepare coils:
Roll out several thin coils of clay, about the thickness of a pencil. These will become the drainage ridges. -
Score the base:
Using a serrated tool or needle, scratch parallel lines across the interior floor of your dish where the ridges will sit. -
Apply slip:
Dab a small amount of water or pottery slip onto the scored lines to act as glue. -
Attach the coils:
Press the coils firmly onto the scored lines. Space them evenly to ensure good water drainage. -
Blend the ridges:
Use a wooden modeling tool to smooth the bottom edges of the coils onto the floor of the dish so they look integrated rather than just stuck on. -
Shape the ridges:
I like to gently press down on the tops of the coils to flatten them slightly, making a stable platform for the soap. -
Clean connections:
Use a damp brush to wipe away any excess slip or rough marks where the ridges meet the dish floor.
Step 3: Finishing Touches
-
Final smoothing:
Once the piece has stiffened to leather-hard, give the entire surface a final wipe with a barely damp sponge. -
Dry slowly:
Cover the dish loosely with plastic to let it dry slowly. This is crucial for preventing the flat base from warping as it shrinks. -
Bisque fire:
Fire the piece to bisque temperature (usually cone 04) once it is bone dry. -
Glaze application:
Apply a clear or semi-transparent matte glaze to show off the natural speckles of the clay body. -
Final firing:
Fire the piece to the maturity temperature of your clay (likely cone 5 or 6 for stoneware).
Pro Tip: Clean Lines
Use the rounded back of a spoon to burnish the spaces between the ridges; this compacts the clay and makes cleaning soap scum much easier later.
Place your favorite bar of soap on the ridges and enjoy the functional elegance you created
Toothbrush Holder That Actually Stays Upright
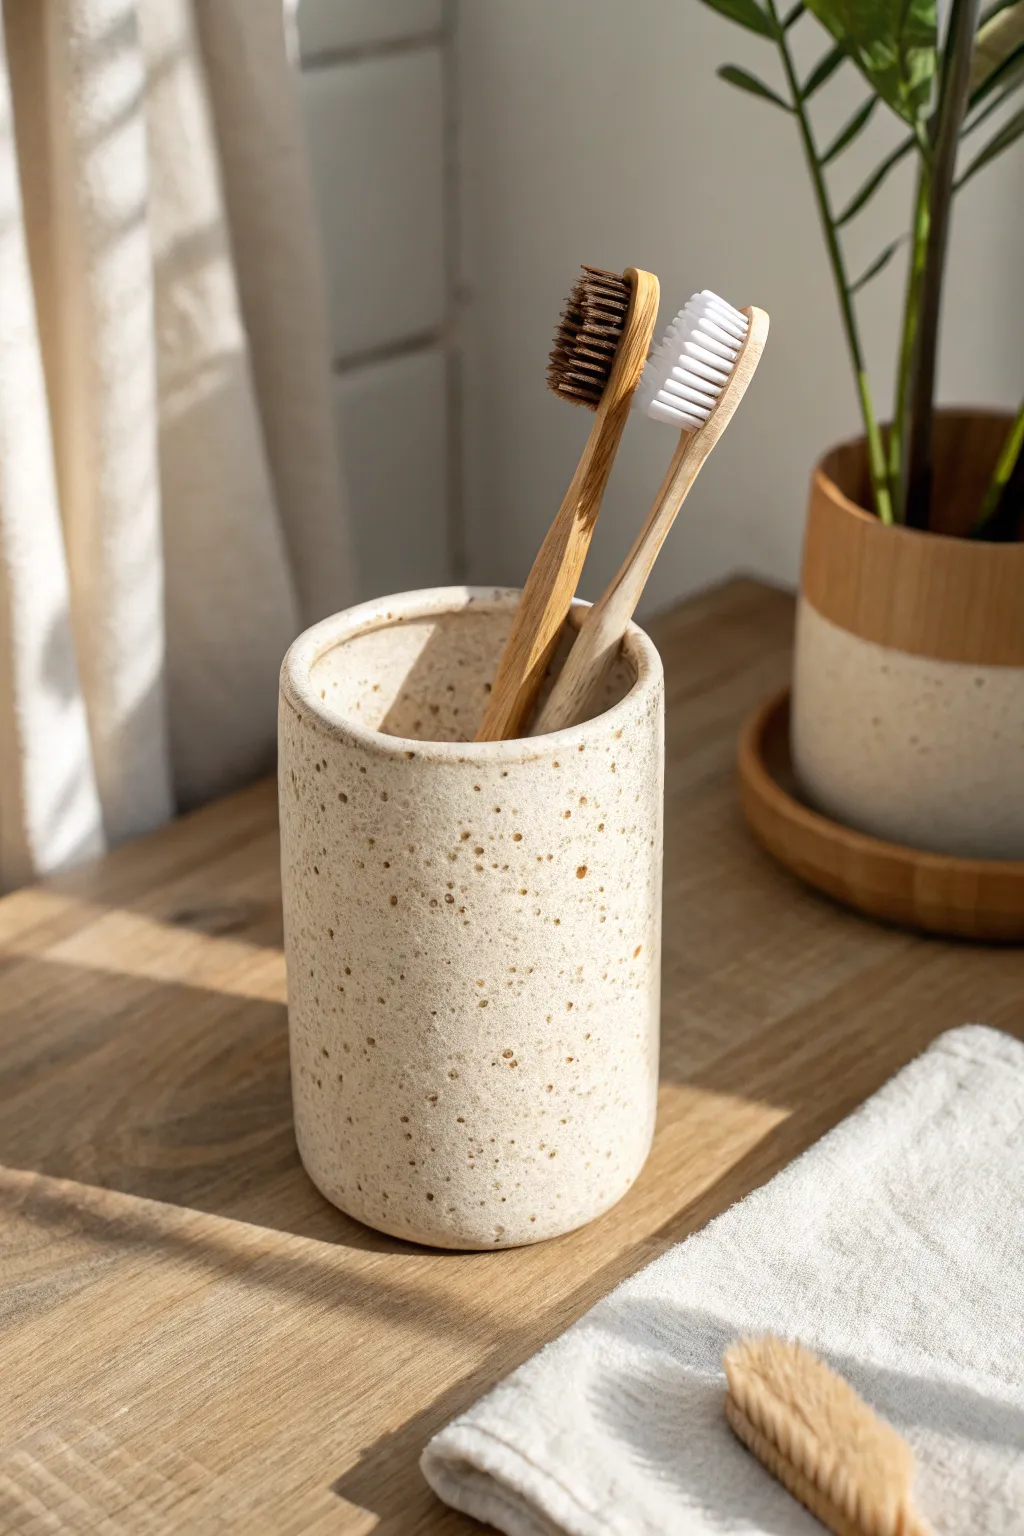
This rustic, minimalist toothbrush holder solves the tipping problem with a weighted base and a perfectly straight-walled cylinder design. The warm, speckled glaze gives it an earthy, handmade charm that complements bamboo accessories beautifully.
Step-by-Step
Materials
- Stoneware clay (smooth or with grog)
- Speckled clay body OR speckled glaze
- Rolling pin
- Canvas work surface
- Guide strips or dowels (1/4 inch thickness)
- Fettling knife
- Serrated rib and rubber rib
- Slip (clay mixed with water)
- Needle tool
- Sponge
- Straight edge/Ruler
- Circular template (approx. 3-3.5 inches diameter)
- Kiln
Step 1: Forming the Base and Walls
-
Prepare your clay:
Begin by wedging your stoneware clay thoroughly to remove air bubbles. This is crucial for a durable piece that won’t crack in the kiln. -
Roll out the slab:
Roll your clay out on a canvas surface. Use 1/4 inch guide strips on either side of the clay to ensure the slab is perfectly even in thickness throughout. -
Cut the base:
Using your circular template, cut out the base of your holder with a needle tool. A 3-inch diameter is usually sufficient for holding a couple of brushes without taking up too much counter space. -
Measure the wall length:
To determine the length of the rectangle needed for the walls, you can wrap a piece of string around your circular base and measure it, or calculate the circumference (diameter × 3.14). -
Cut the wall slab:
Cut a rectangular strip of clay based on your measurement. The height is up to you, but 4 to 5 inches works well for standard toothbrushes. -
Bevel the edges:
On the short ends of your rectangular strip, cut 45-degree angles in opposite directions. This allows the seam to overlap seamlessly when you cylinderize the clay.
Step 2: Assembling the Cylinder
-
Score the contact points:
Score the beveled edges of the wall strip and the outer perimeter of your circular base using a serrated rib or needle tool. Scoring creates texture for the slip to grab onto. -
Join the walls:
Apply slip to the beveled edges. Stand the rectangle up and curve it into a cylinder, pressing the beveled ends together firmly to create a seal. -
Attach to base:
Score and slip the bottom edge of the cylinder. Place it onto the circular base and press down gently to join. -
Secure the seam:
I like to run a thin coil of soft clay along the interior bottom seam and smooth it out with my finger or a modeling tool to ensure a watertight bond. -
Smooth the exterior:
Use a rubber rib to compress and smooth the vertical seam on the outside. Working the rib up and down helps blend the clay until the join line disappears completely. -
Refine the rim:
Use a slightly damp sponge to round off the top rim of the cylinder. A rounded rim is more chip-resistant than a sharp edge and feels better to the touch. -
Add visual weight:
For that grounded look, check that the bottom corners are slightly softened but distinct, maintaining the separation between the vertical wall and the flat surface it sits on.
Wobbly Cylinder?
If your cylinder warps while attaching it to the base, insert a cardboard tube or a rolled-up magazine inside the clay cylinder to support the walls while you work on the seams.
Step 3: Finishing and Glazing
-
Dry slowly:
Cover the piece loosely with plastic for the first day to let the moisture even out, then uncover to let it reach bone dry state. -
Bisque fire:
Fire the piece in the kiln to cone 04 (or your clay’s specific bisque temperature) to prepare it for glazing. -
Clean surface:
Wipe the bisqued piece with a damp sponge to remove any dust, which can prevent the glaze from adhering properly. -
Apply glaze:
Dip or brush on your chosen glaze. To achieve the look in the photo, use a matte white or cream glaze on a speckled clay body. The iron specks in the clay will burn through the glaze. -
Wipe the foot:
Carefully wipe any glaze off the very bottom of the piece (the foot) with a sponge so it doesn’t fuse to the kiln shelf. -
Final fire:
Fire the piece to the glaze maturity temperature (often Cone 5 or 6 for stoneware) and allow the kiln to cool completely before opening.
Make it a Set
Create a matching planter by simply increasing your template sizes. Use a 5-inch circle for the base and calculate the new wall length. Dip the rims in a darker glaze for contrast.
Once fired, place the holder on your bathroom vanity for an instant upgrade to your daily routine
Desk Organizer Tray for Paper Clips and Pins
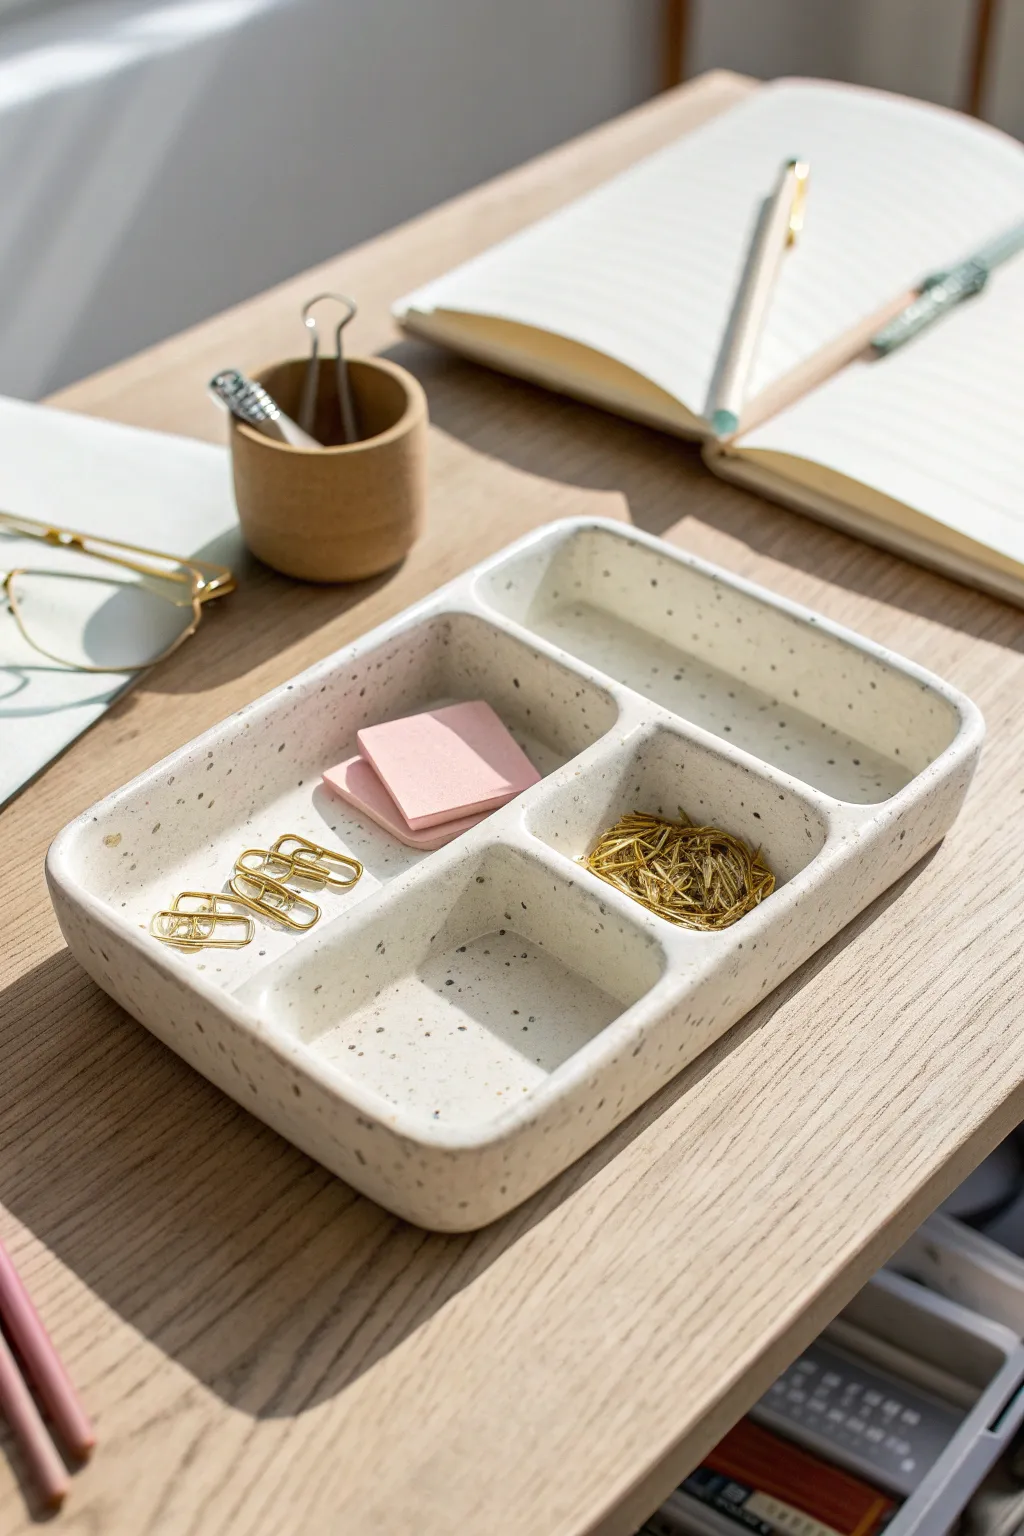
Keep your desk tidy with this sleek, minimalist tray featuring a charming speckled finish. The four distinct compartments are perfectly sized for everything from paper clips to sticky notes, combining practicality with handmade warmth.
Step-by-Step
Materials
- Air-dry clay or polymer clay (white or cream)
- Acrylic rolling pin
- Clay knife or craft blade
- Ruler
- Sandpaper (fine grit)
- Small sponge
- Water bowl
- Old toothbrush or stiff bristle brush
- Brown and black acrylic paint
- Matte varnish or sealant
Step 1: Forming the Base
-
Condition the Clay:
Begin by kneading your white clay until it is soft, pliable, and free of any air bubbles. -
Roll the Slab:
Roll out a large slab of clay to a uniform thickness of about 1/4 inch. Using guide sticks or depth bands on your rolling pin helps ensure an even surface. -
Cut the Base Rectangle:
Measure and cut a rectangle approximately 5 inches by 8 inches for the base using your ruler and craft knife. Smooth the cut edges gently with your finger. -
Create Side Walls:
Roll out long strips of clay, also 1/4 inch thick. Cut these strips to be roughly 1 inch tall. You will need enough length to go around the entire perimeter of your base.
Step 2: Building the Structure
-
Score and Slip:
Score the outer edges of your base and the bottom edge of your wall strips by making small hatch marks. Apply a little water or liquid clay (slip) to these roughed-up areas to act as glue. -
Attach the Outer Walls:
Press the wall strips onto the base firmly. Smooth the seams on both the inside and outside using a modeling tool or your finger to ensure a strong bond. -
Round the Corners:
Instead of sharp 90-degree angles, gently curve the clay where the walls meet at the corners to replicate the soft, rounded look of the original tray. -
Create Dividers:
Cut three more strips of clay for the interior dividers: one long strip to run lengthwise down the middle, and two shorter strips to create the cross-sections. -
Install the Long Divider:
Score and slip the center line of the tray. Place the long divider strip down the middle, leaving a gap at one end if you want one large compartment, or running it fully across for symmetry. -
Add Cross Sections:
Install the shorter perpendicular strips to create the smaller square compartments. I find using a small square object to check the spacing helps keep things even.
Cracks while drying?
If you see hairline cracks appearing as the clay dries, mix a tiny bit of fresh clay with water to make a paste and fill them in immediately, then smooth over.
Step 3: Refining and Finishing
-
Smoothing Connections:
Carefully smooth all interior joints where the dividers meet the walls and floor. A slightly damp sponge works wonders here to erase fingerprints. -
Top Edge Cleanup:
Ensure all the top edges of the walls and dividers are level. You can gently slice off any excess height with your blade and then round over the edges with a wet finger. -
Drying:
Allow the tray to dry completely. For air-dry clay, this usually takes 24-48 hours. Turn it over halfway through to let the bottom dry evenly. -
Sanding:
Once fully dry, use fine-grit sandpaper to buff away any burrs or rough patches, focusing on the rim and corners for a professional finish. -
Create the Speckles:
Dilute a small amount of brown and black acrylic paint with water. Dip an old toothbrush into the mixture and run your thumb across the bristles to flick tiny specks of paint over the entire tray. -
Seal the Tray:
After the paint speckles are dry, apply two coats of a matte varnish or sealant to protect the clay from moisture and wear.
Seamless Finish
Use a damp paintbrush (instead of a finger) to smooth the hard-to-reach inside corners of the compartments for a perfectly clean, professional look.
Now you have a custom organizer ready to declutter your workspace with style
Photo or Place-Card Holder with a Simple Slot

This minimalist card holder mimics the organic texture of a porous river stone or light pumice. Its simple domed shape and clean lines make it a versatile functional piece for displaying photos or assigning seats at a table.
Detailed Instructions
Materials
- Air-dry clay or polymer clay (stone or granite color)
- Rolling pin
- Small bowl or sphere mold (optional for shaping)
- Craft knife or fettling knife
- Hard cardstock or thick plastic strip (for creating the slot)
- Wire texture tool, toothbrush, or stiff bristle brush
- Fine-grit sandpaper
- Acrylic matte varnish (optional)
Step 1: Shaping the Base
-
Prepare your clay:
Start by conditioning a lump of clay about the size of a tangerine until it is soft and pliable. If you are using polymer clay, ensure it’s fully warmed up to prevent cracking. -
Form a ball:
Roll the clay between your palms to create a smooth, tight sphere. Try to eliminate any major seams or air pocket folds during this rolling process. -
Create the dome:
Place the ball on your work surface and gently press down on the top with the flat of your hand to flatten the bottom. You want a distinct half-sphere or dome shape that sits stable and flat. -
Smooth the surface:
Dip your finger in a little water (for air-dry clay) or baby oil (for polymer) and smooth the curve of the dome to remove any fingerprints or imperfections.
Step 2: Texturing
-
Begin texturing:
To achieve that porous, pumice-like look, take a stiff-bristled brush or toothbrush and dab it randomly all over the curved surface of the dome. -
Add larger craters:
Use a needle tool or the blunt end of a small paintbrush to poke specific, slightly larger holes scattered across the surface. Vary the pressure so some holes are deeper than others. -
Soften the texture:
I like to gently pat the textured surface with a fingertip just once or twice to knock down any sharp peaks created by the brushing, giving it a naturally worn stone feel. -
Refine the shape:
Ensure that your texturing didn’t warp the overall shape. Verify the bottom is still perfectly flat against the table.
Sticky Slot Solution
If your knife sticks when cutting the deep slot, lightly coat the blade with cornstarch (air dry) or a tiny bit of oil (polymer) before pressing down.
Step 3: Creating the Slot
-
Position the cut:
Identify the very center of your dome. You will be making a straight cut directly across the top. -
Make the incision:
Using a sharp blade or fettling knife, press straight down into the clay to create the initial guideline for the slot. Cut about halfway down into the dome. -
Widen the gap:
Take a piece of thick cardstock or a plastic strip (ideally the same thickness as whatever you plan to display) and gently rock it into the cut you just made. -
Set the width:
Leave the cardstock or plastic divider inside the slot while the clay begins to set. This ensures the opening doesn’t close up while drying. -
Clean the edges:
If the cutting process raised the clay around the slot, gently smooth strictly those edges back down to maintain the rounded silhouette.
Natural Speckling
Knead a generous pinch of spent coffee grounds or black pepper into your white clay before shaping for an authentic speckled stone effect.
Step 4: Finishing
-
Initial drying:
Allow the piece to dry (air-dry) or bake it according to the package instructions (polymer). If baking, make sure to remove any plastic spacers first, though paper cardstock can usually remain. -
Sand the bottom:
Once fully cured or dry, place a sheet of sandpaper on a flat surface and rub the bottom of your holder against it in a circular motion to ensure it sits perfectly flat. -
Check the slot:
Test your slot with a card. If it’s too tight, carefully fold a piece of sandpaper and run it through the groove to widen it slightly. -
Dust off:
Use a soft, dry brush to whisk away any sanding dust from the textured crevices. -
Seal (Optional):
For durability, apply a clear matte varnish. Avoid glossy finishes if you want to maintain the natural stone appearance shown in the example.
Your stylish stone-effect holder is now ready to showcase your favorite memories or guide guests to their seats with understated elegance
Bookends with Chunky, Stable Shapes
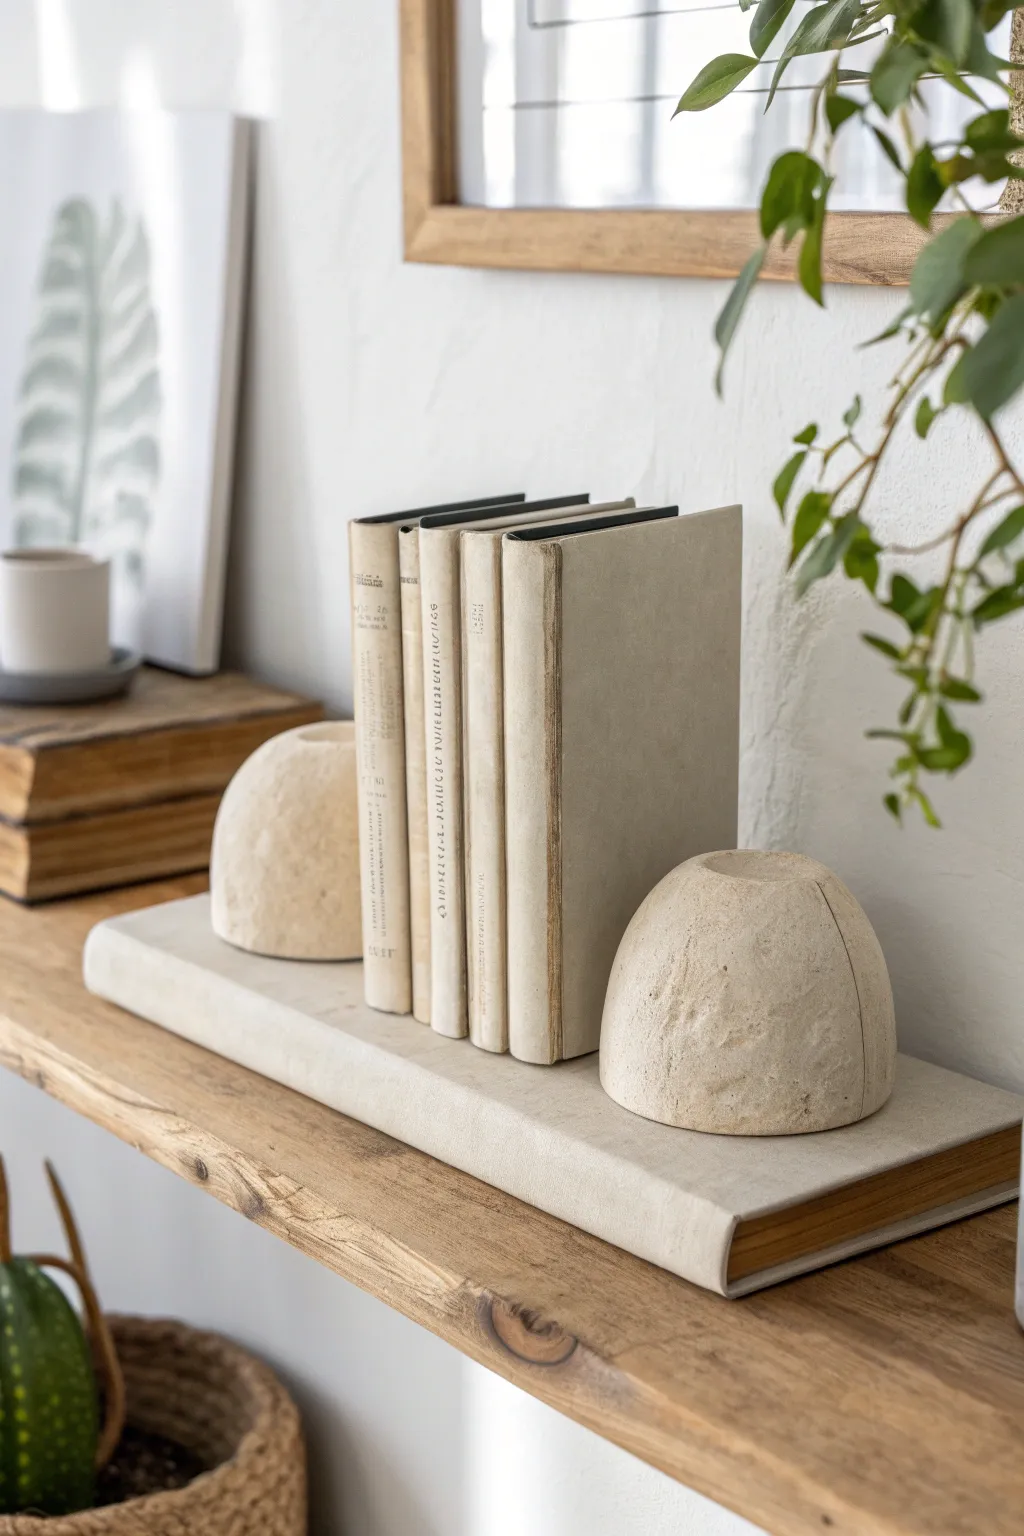
These understated, organic bookends rely on heavy, stable shapes to keep your reading collection in check while adding a touch of rustic modernism to your shelves. The textured, stone-like finish and soft geometric dome shape create a perfect balance between functional weight and visual softness.
How-To Guide
Materials
- Air-dry clay (stone color or white)
- Small mixing bowl or rounded form (for shaping)
- Plastic wrap
- Rolling pin
- Clay wire cutter or sharp knife
- Sandpaper (medium and fine grit)
- Weighting material (clean pebbles or sand)
- Acrylic paint (beige, warm grey, white)
- Sea sponge or stiff brush
- Matte spray sealer
Step 1: Forming the Base Shape
-
Prepare the Molds:
Select a bowl or rounded object that is roughly the size you want your bookends to be. Line the inside of this bowl with plastic wrap to prevent sticking, ensuring the plastic is as smooth as possible. -
Roll the Exterior Shell:
Roll out a slab of clay to about 1/2 inch thickness. Cut a circle large enough to line your bowl mold. Press the clay firmly into the lined bowl to create a smooth, domed exterior shell. -
Add Weight:
Functional bookends need mass. While the shell is still in the mold, fill the bottom third with heavier scraps of clay or even embed a small bag of clean stones/sand in the center, ensuring they are completely encased in fresh clay so they don’t spoil the finish. -
Create the Solid Core:
Fill the rest of the dome with solid blocks of clay. Knead and press these layers down firmly to remove air pockets and ensure the structure is dense and heavy. -
Level the Bottom:
Once the mold is filled, use a wire cutter or a straight edge to slice the bottom flush with the rim of the bowl. This ensures your bookend sits perfectly flat on the shelf.
Weighted Core Tip
Use a smooth river rock as the core weight inside the clay. It saves clay and guarantees the bookend is heavy enough to hold large hardcovers.
Step 2: Refining and Cutting
-
Initial Firming:
Let the clay sit in the mold for a few hours until it is leather-hard. It needs to be firm enough to hold its shape when removed, but soft enough to cut cleanly. -
Unmold the Domes:
Gently pull the plastic wrap to release the clay dome from the bowl. Place it flat-side down on your work surface. -
Cut the Vertical Face:
To make this functional against books, you need a flat vertical side. Take your wire cutter or sharp knife and slice off a vertical segment from one side of the dome, creating a flat face perpendicular to the base. -
Form the Top Depression:
Using your thumb or a small rounded tool, gently press a shallow concave indentation into the very top of the dome. This adds a subtle design detail seen in the reference. -
Texturize the Surface:
I like to take a crumpled ball of aluminum foil or a rough stone and dab it lightly over the exterior. This mimics the pitted, natural texture of limestone or travertine. -
Slow Drying:
Cover the pieces loosely with plastic and let them dry slowly over 2-3 days. This prevents cracking in such a thick block of clay.
Step 3: Finishing the Stone Look
-
Sand the Flat Sides:
Once bone dry, use medium grit sandpaper on the bottom and the vertical cut face. Focus on making these genuinely flat so they make good contact with the shelf and books. -
Soften the Edges:
Gently sand the rounded dome surface to remove any sharp ridges from the texture, but leave the deeper pits. You want it to feel worn, not scratchy. -
Base Coat Painting:
Mix a warm beige acrylic paint. Apply a solid base coat to the entire piece and let it dry completely. -
Sponge Detailing:
Dip a sea sponge into a lighter off-white or cream color. Blot most of the paint onto a paper towel, then lightly dab the sponge over the dome to highlight the texture. -
Adding Depth:
For a realistic stone look, water down a tiny bit of darker grey-brown paint. Wash this into the deeper crevices and textures, then quickly wipe the surface with a rag, leaving the dark pigment only in the pits. -
Seal the Surface:
Finish with a matte spray sealer to protect the paint and give the clay a unified, non-shiny finish resembling honed stone.
Fixing Cracks
Thick clay often cracks while drying. Make a paste of clay dust and water (slip) to fill any fissures, then sand smooth once dry before painting.
Place your new textured architectural pieces on a shelf and enjoy the sophisticated weight they add to your display
Sound-Boosting Phone Dock from a Hollow Form
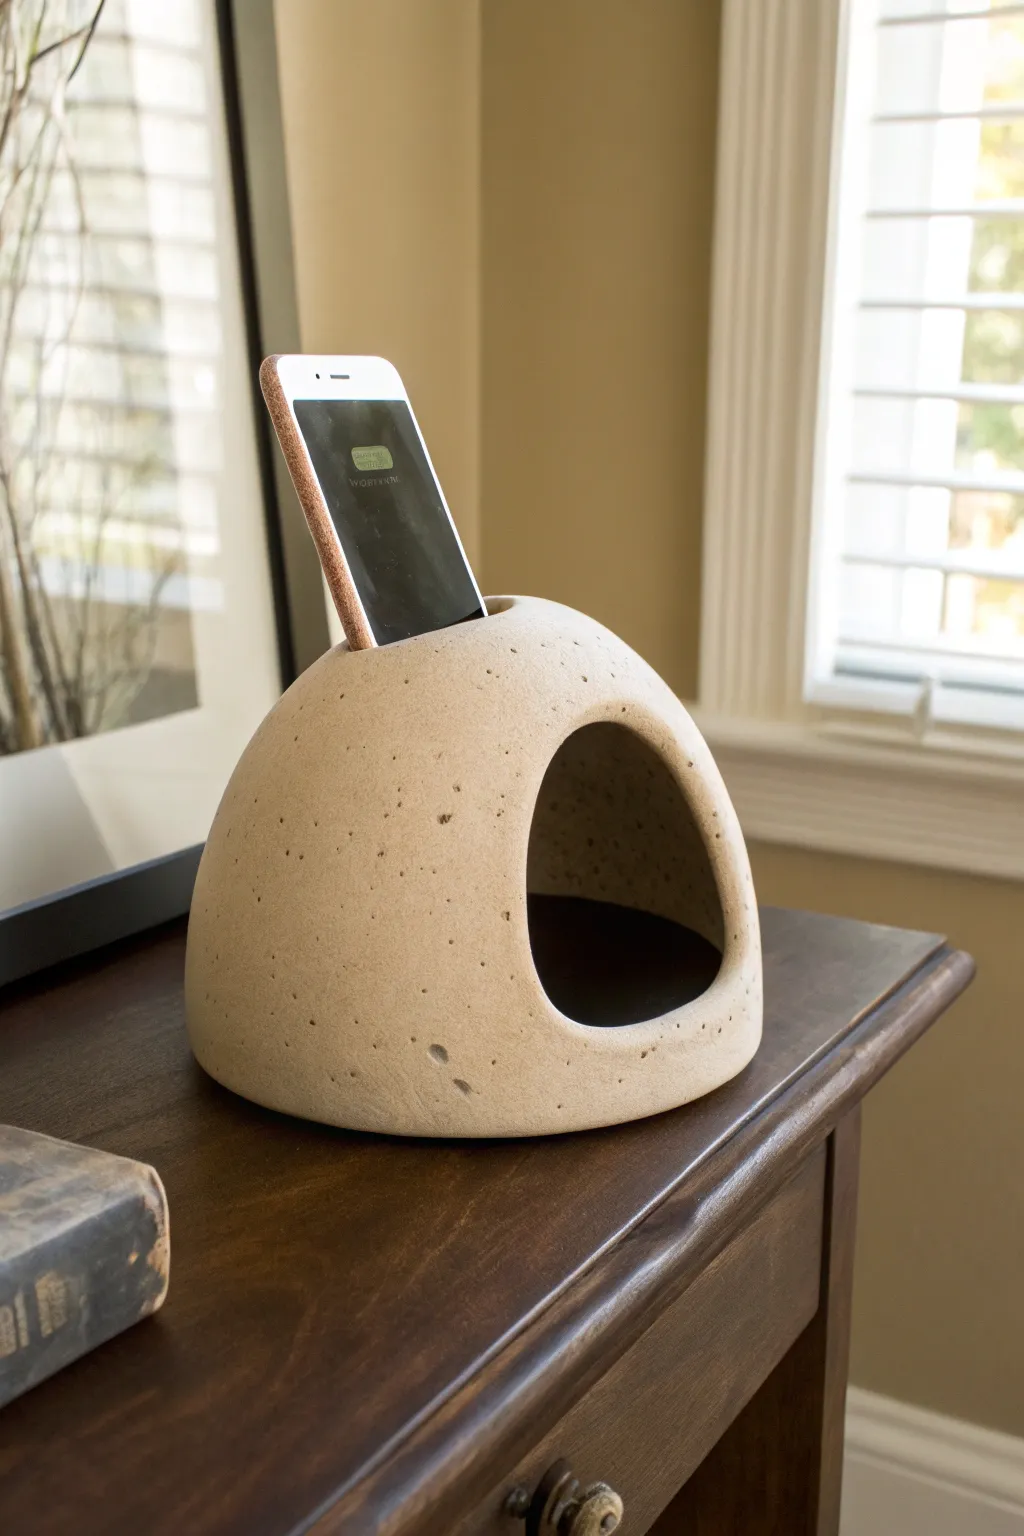
Enhance your smartphone’s audio naturally with this minimalist clay amplifier, designed to look like a polished river stone. The hollow, speckled clay form captures sound from your device’s speaker and directs it outward through a resonant chamber, blending function with sculptural beauty.
Detailed Instructions
Materials
- Stoneware clay (speckled or buff)
- Pottery wheel (optional, can be hand-built)
- Rib tool (metal or rubber)
- Needle tool
- Fettling knife
- Loop carving tool
- Sponge
- Ruler or calipers
- Plastic wrap
- Matte clear glaze
Step 1: Forming the Hollow Shape
-
Prepare the clay:
Begin by thoroughly wedging about 3-4 pounds of speckled stoneware clay to remove air bubbles. This ensures the walls will be consistent and strong enough to support the dome shape without collapsing. -
Throw a closed form:
Center your clay on the wheel and open it up, pulling the walls into a cylinder first. Slowly collar the neck inward as you pull up, aiming to close the top completely to create a sealed, hollow bubble. If you aren’t using a wheel, build two pinch pots of equal size and score and slip them together to form a sphere. -
Shape the dome:
Use a rib tool to smooth the outside curve, compressing the clay to create a clean, semi-spherical profile. The bottom half should be slightly wider than the top, giving it a grounded, pebble-like stability. -
Flatten the base:
While the air is trapped inside providing support, gently flatten the bottom of the form either by paddling it or slicing it off the wheel with a wire tool and setting it on a flat board. This creates the flat resting surface. -
Initial stiffening:
Allow the closed form to dry to a soft leather-hard stage. It needs to be firm enough to handle carving but soft enough to cut cleanly without chipping.
Step 2: Carving and Refining
-
Measure your device:
Measure the width and thickness of your phone (including its case). Mark a rectangular slot on the top curve of the dome that is slightly wider and thicker than your device to account for clay shrinkage—usually about 12-14% depending on your specific clay body. -
Cut the phone slot:
Using a fettling knife or needle tool, carefully cut out the rectangular slot. Test the angle visually; you want the phone to lean back slightly for stability, not stand perfectly vertical. -
Map the sound port:
On the front face of the dome, sketch a large, organic oval or arched opening. This will be the mouth of the ‘speaker’ that projects the sound. -
Excavate the opening:
Cut out the main opening with your knife. Once the large piece of clay is removed, you can see inside the hollow form. I like to use a loop tool here to thin out the interior walls if they seem too heavy, effectively tuning the chamber. -
Smooth the interior:
Use a damp sponge or your fingers to smooth the interior seams and surfaces. A smoother interior reflects sound waves better than a rough one, so take your time burnishing the inside walls. -
Refine the edges:
Compress and round off the cut edges of the phone slot and the sound port with a damp chamois or sponge. Sharp edges can scratch your phone or chip easily after firing.
Acoustic Tuning
For better sound amplification, smooth the inside walls thoroughly. A glossy glaze on the INTERIOR acts as a sound reflector, while a raw exterior keeps the rustic look.
Step 3: Finishing and Firing
-
Add surface texture:
If your clay isn’t naturally speckled, you can flick iron oxide or a dark slip onto the surface with a stiff toothbrush to mimic the stone look seen in the example. -
Slow drying:
Cover the piece loosely with plastic to let it dry slowly and evenly. Since the form has openings, uneven drying can cause the rim of the sound port to warp or crack. -
Bisque fire:
Once bone dry, bisque fire the piece to the appropriate cone (usually Cone 06 or 04) to prepare it for glazing. -
Glazing application:
Apply a very thin coat of matte clear glaze to the exterior to seal the clay while keeping the raw, sandy texture visible. You can glaze the interior more heavily for a smoother, sound-reflective surface. -
Final firing:
Fire the piece to maturity (Cone 5, 6, or 10 depending on your clay). Ensure the bottom is wiped clean of glaze so it doesn’t fuse to the kiln shelf.
Custom Fit
Add a small hole or channel at the bottom rear of the dome to thread a charging cable through, allowing you to charge your phone while enticing the room with music.
Place your finished dock on a bedside table to enjoy richer audio without any electricity.