When you’re craving easy pottery ideas, the best projects are the ones you can finish without perfect symmetry, fancy tools, or a steep learning curve. These are my go-to beginner wins—simple forms with big payoff, so you can actually use what you make and feel proud of it fast.
Pinch Pot Bowls That Actually Feel Good in Your Hands
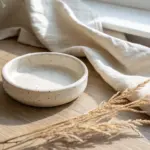
These charming, rustic bowls rely on the beautifully imperfect nature of hand-pinching clay to create a form that nests perfectly in the palm. Finished with a speckled creamy white glaze and a raw, toasted rim, they strike a balance between modern minimalism and earthy warmth.
Detailed Instructions
Materials
- Stoneware clay (preferably a speckled buff body)
- Small bowl of water
- Sponge
- Comparison calipers (optional)
- Rib tool (wooden or silicone)
- Fettling knife or needle tool
- Carving tool (optional for texture)
- Creamy matte white glaze
- Iron oxide wash (or a dark brown underglaze)
- Small paintbrush
- Kiln access
Step 1: Forming the Bowl
-
Prepare your clay:
Start with a ball of clay roughly the size of a tennis ball. Ensure it is well-wedged to remove air bubbles, which helps prevent explosions in the kiln later. -
Open the form:
Hold the ball in your non-dominant hand. Push your thumb deep into the center of the ball, stopping about a half-inch from the bottom to leave enough thickness for the base. -
Begin pinching:
Using a rhythmic pinching motion between your thumb (inside) and fingers (outside), start rotating the clay. Work from the bottom center, slowly moving up the walls. -
Establish the curve:
Aim for an even thickness of about a quarter-inch throughout the walls. Gently flare the rim outward slightly if you want the open shape seen in the photo. -
Refine the shape:
Set the pot on a flat surface and gently press down on the inside center to flatten the bottom just enough so it doesn’t rock. I like to tap the pot lightly on the table to settle the base. -
Smooth the interior:
Use a slightly damp sponge to wipe the interior, smoothing out deep fingerprints while leaving slight undulations that show the handmade process. -
Defining the rim:
Using your fingers or a moist chamois cloth, compress the rim. Allowing the rim to remain slightly uneven adds to the organic aesthetic shown in the example.
Step 2: Refining and Drying
-
Initial stiffening:
Let the bowl dry to a leather-hard state. This usually takes a few hours or overnight under loose plastic, depending on humidity. -
Trimming (optional):
If the bottom feels too heavy, turn the bowl over and gently trim away excess clay with a carving tool to create a small foot ring, though a flat bottom works well for this rustic style too. -
Adding texture:
Lightly scrape the exterior with a serrated rib tool if you want to enhance the vertical texture lines before the final smoothing. -
Bisque fire:
Allow the piece to bone dry completely (it will feel room temperature, not cool). Fire it in the kiln to cone 04 (or your clay body’s bisque temperature).
Cracked Rim?
If the rim starts splitting while pinching, your clay is likely too dry. Score the crack, add a tiny bit of slip (clay mud), and compress the area firmly with your fingers to heal same.
Step 3: Glazing and Finishing
-
Clean the bisque:
Wipe the fired bowl with a damp sponge to remove any kiln dust. This ensures the glaze adheres properly to the surface. -
Apply the oxide rim:
Dip a small brush into iron oxide wash or dark brown underglaze. carefully paint a thin line along the very edge of the rim. -
Sponge back the rim:
Using a clean, damp sponge, gently wipe the oxide off the rim. The dark color will remain in the textures and pores of the clay, creating that toasted edge effect. -
Glazing the interior:
Pour your creamy white glaze inside the bowl, roll it around to coat the entire interior surface, and pour the excess back into your bucket. -
Glazing the exterior:
Hold the bowl by the foot (or base) and dip the exterior into the white glaze. You can also brush it on if you prefer a more streaky, handmade look. -
Cleaning the foot:
Crucially, wipe the bottom of the bowl and about 1/8th inch up the side completely clean of glaze. This prevents the bowl from fusing to your kiln shelf. -
Final Fire:
Fire the bowl to the maturity temperature of your clay and glaze (likely Cone 5 or 6 for stoneware). Allow the kiln to cool naturally before handling.
Pro Tip: Speckles
To get the speckled look in the photo without buying special clay, look for a ‘Granite’ or ‘Speckled’ glaze, which has iron filings suspended in the mix that burst during firing.
Once cooled, fill your new bowl with treats or jewelry and enjoy the tangible warmth of your own craftsmanship


Coil-Built Planters for a Little Shelf Jungle Moment
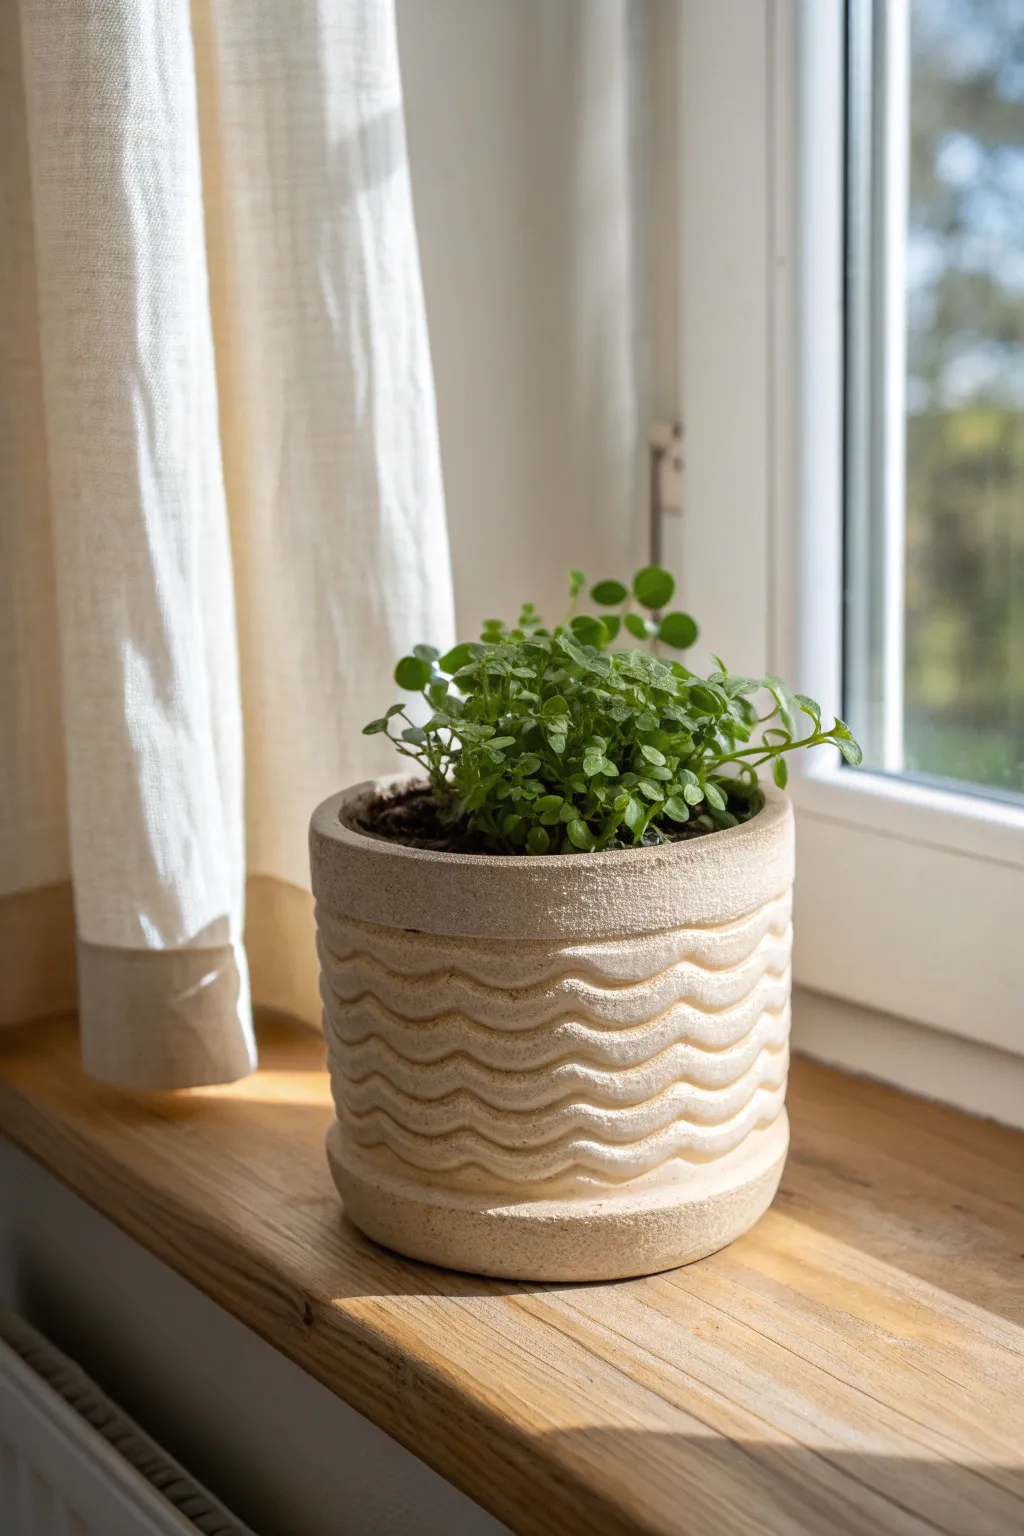
Embrace the imperfect charm of hand-built ceramics with this coil-constructed planter featuring organic wave detailing. The natural, unglazed-style finish mimics carved stone, making it a perfect neutral home for bright green foliage like creeping jenny or pilea.
Step-by-Step Guide
Materials
- Stoneware clay (smooth or with grog)
- Pottery wheel (optional, but helpful for banding)
- Banding wheel or turntable
- Rolling pin
- Canvas mat or cloth
- Needle tool
- Scoring tool (or fork)
- Slip (clay mixed with water)
- Loop tool (curved carving tool)
- Rib tool (metal or rubber)
- Sponge
- Wire cutter
- Kiln
Step 1: Building the Base and Walls
-
Roll the base:
Start by rolling out a slab of clay to about a 1/4-inch thickness. Use a round template or bowl to cut out a circle for the base of your pot, roughly 5-6 inches in diameter. -
Prepare the coils:
Roll out several long ropes of clay, aiming for a consistent thickness similar to your pinky finger. Keep them uniform to ensure the walls rise evenly. -
Score and slip:
Deeply score the outer edge of your circular base. Apply a generous amount of slip. Do the same to one side of your first coil. -
Attach the first layer:
Press the first coil onto the base rim. Use your thumb or a modeling tool to blend the clay from the coil down onto the base on the inside to create a seamless seal. -
Continue upward:
Continue stacking coils one on top of another, scoring and slipping between each layer. As you build, ensure you blend the coils together on the interior surface for strength. -
Smooth the exterior:
Once you have reached your desired height (about 5-6 inches), use a rib tool to blend the coils on the outside. Unlike the inside, you want this surface completely smooth, erasing the individual coil lines to create a blank cylinder. -
Refine the rim:
Use a damp sponge to smooth the top rim. You can add a final coil slightly recessed inside the top edge to create the thicker, styled lip seen in the photo.
Step 2: Carving the Waves
-
Leather hard stage:
Let the pot dry until it is leather hard. It should be firm enough to handle without warping but soft enough to carve easily. -
Map the pattern:
Place the pot on a banding wheel. Using a needle tool, lightly scratch horizontal guidelines where you want your wave pattern to sit, leaving a smooth band at the top and bottom. -
Carve the first wave:
Using a loop tool, carve a continuous wavy line around the pot. Rotate the banding wheel slowly as you move your hand up and down to create a rhythmic undulation. -
Follow the rhythm:
Repeat this process for the subsequent lines below. I find it easiest to follow the curve of the line above, keeping the spacing relatively consistent but embracing slight organic variations. -
Deepen the grooves:
Go back over your carved lines to deepen them if needed. The goal is to create distinct ridges that will catch the light and create shadows.
Groove Smoothness
After carving, run a damp paintbrush through the grooves. This smooths out rough tool marks without destroying the crisp edges of the waves.
Step 3: Finishing Touches
-
Clean up burrs:
Once the carving crumbs have dried a bit more, gently brush them away with a soft brush or your finger. Avoid using a wet sponge here, as it can muddy the crisp edges of your carving. -
Create the stone texture:
To achieve the sandstone look, dab a sponge with a very small amount of slip containing grog (or just dab a textured sponge) over the smooth top and bottom bands. This removes the ‘slickness’ of the clay. -
Dry slowly:
Cover the pot loosely with plastic to let it dry slowly and evenly, which prevents cracking. -
Bisque fire:
Fire the piece in the kiln to bisque temperature. -
Glazing decision:
For the exact look in the photo, you might choose to leave the exterior unglazed if your clay body is naturally sandy-colored. Apply a clear matte glaze to the interior to make it waterproof. -
Final firing:
Fire the piece one last time according to your clay and glaze specifications.
Speckled Finish
Use a clay body with manganese speckles or ‘grog’ in it. When fired unglazed, it amplifies that natural stone aesthetic.
Pop in your favorite leafy plant and enjoy the natural texture this adds to your windowsill


Slab Trays for Keys, Jewelry, and All the Tiny Things
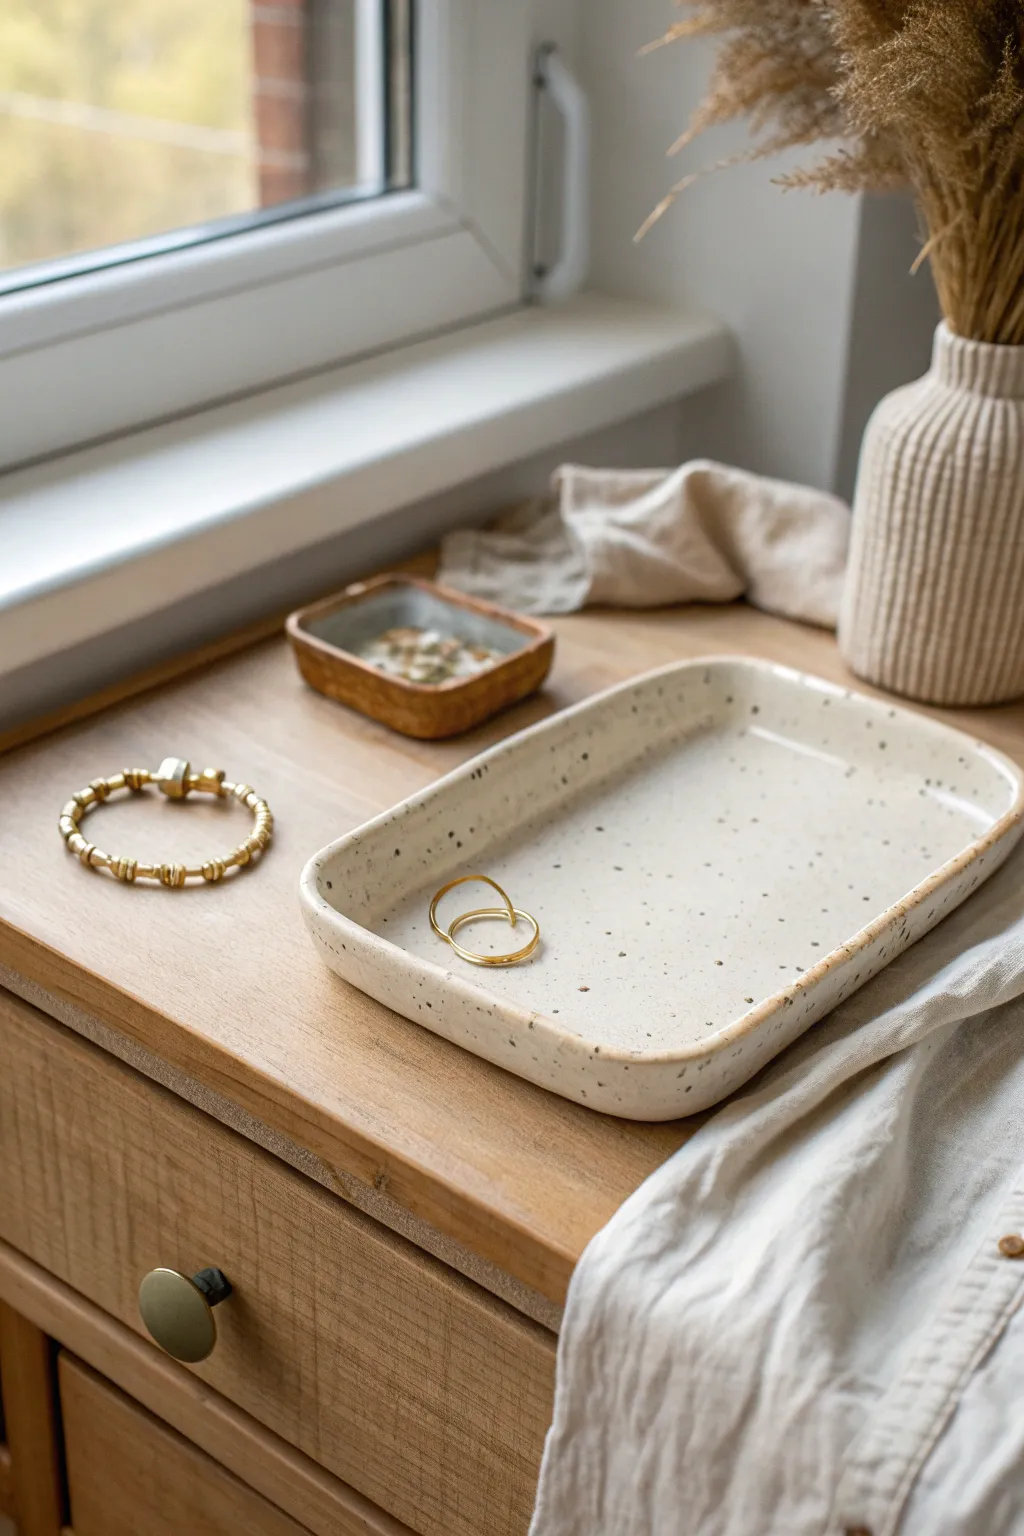
This minimalist slab tray combines functional design with the organic warmth of speckled stoneware, making it the perfect landing spot for your daily essentials. Its gentle, raised rim and natural glaze finish create a modern aesthetic that feels right at home on any dresser or entryway table.
Step-by-Step Tutorial
Materials
- Speckled buff stoneware clay
- Rolling pin
- Canvas or slab mat
- Two 1/4-inch guide sticks (optional)
- Rectangular paper template (approx. 5×8 inches)
- Needle tool or fettling knife
- Rib tool (soft silicone or rubber)
- Modeling tool or wooden spoon
- Sponge
- Clear or translucent white glossy glaze
- Kiln
Step 1: Preparing the Slab
-
Wedge the clay:
Start by thoroughly wedging a ball of speckled buff stoneware clay to remove any air bubbles and ensure the consistency is uniform. -
Roll out the slab:
Place your clay on a canvas or slab mat. Using a rolling pin, roll the clay out into a flat sheet. If you have guide sticks, place them on either side of the clay to ensure an even 1/4-inch thickness. -
Smooth the surface:
Before cutting, take a soft rib tool and gently compress the surface of the clay in both directions. This aligns the clay particles, preventing future warping, and removes the canvas texture. -
Cut the shape:
Lay your rectangular paper template onto the smooth slab. hold it steady with one hand while tracing around the edge with a needle tool or fettling knife to cut out your rectangle. -
Soften the corners:
The tray in the photo has rounded corners rather than sharp 90-degree angles. Use your knife or a finger to gently round off the four sharp corners of your rectangle.
Rim Stability Tip
If your clay walls keep flopping down while you work, let the freshly cut slab sit out for 20-30 minutes to firm up slightly before you start bending up the edges.
Step 2: Forming the Tray
-
Define the rim:
Lightly mark a border about 1/2 inch from the edge all the way around using your thumb or a tool, but don’t cut through. This visually marks where the wall will rise. -
Lift the edges:
Gently lift the edges of the slab upward with your fingers. I like to support the outside with one hand while using a damp sponge on the inside to smooth the transition from floor to wall. -
Refine the curve:
The goal is a soft, continuous curve rather than a sharp angle. Use the curve of a wooden modeling tool or the back of a spoon to press against the expanding interior wall while supporting the exterior. -
Level the rim:
Look at the tray from eye level. If the rim is wavy, gently paddle it down with a wooden spatula or trim the excess with a needle tool to ensure it is level. -
Smooth the lip:
Take a small strip of chamois or a damp sponge and run it over the top edge of the rim. This rounds it off nicely and ensures it will be comfortable to touch after firing.
Warping Woes?
Slabs love to warp. To fix this, dry your tray on a slotted rack or a piece of drywall so air hits the bottom and top evenly. Flip it over gently halfway through drying.
Step 3: Finishing and Firing
-
Dry slowly:
Cover the tray loosely with plastic to let it dry slowly. This is crucial for slab pieces to prevent warping at the edges. Once leather hard, you can sponge away any final imperfections. -
Bisque fire:
Once bone dry, fire the piece to Cone 04 (or your clay body’s bisque temperature) in the kiln. -
Wipe down:
After the kiln cools, wipe the bisque-fired tray with a damp sponge to remove any dust that might resist the glaze. -
Apply glaze:
Dip the tray or brush on three even coats of a clear or translucent white glossy glaze. This transparency allows the beautiful natural speckles of the clay body to show through. -
Wipe the foot:
Ensure the bottom of the tray is completely free of glaze. You can use a wax resist before glazing or simply wipe the bottom clean with a wet sponge. -
Glaze fire:
Fire the tray again to the maturity temperature of your clay and glaze (typically Cone 5 or 6 for stoneware).
Now you have a sleek, speckled organizer ready to hold your favorite rings and trinkets


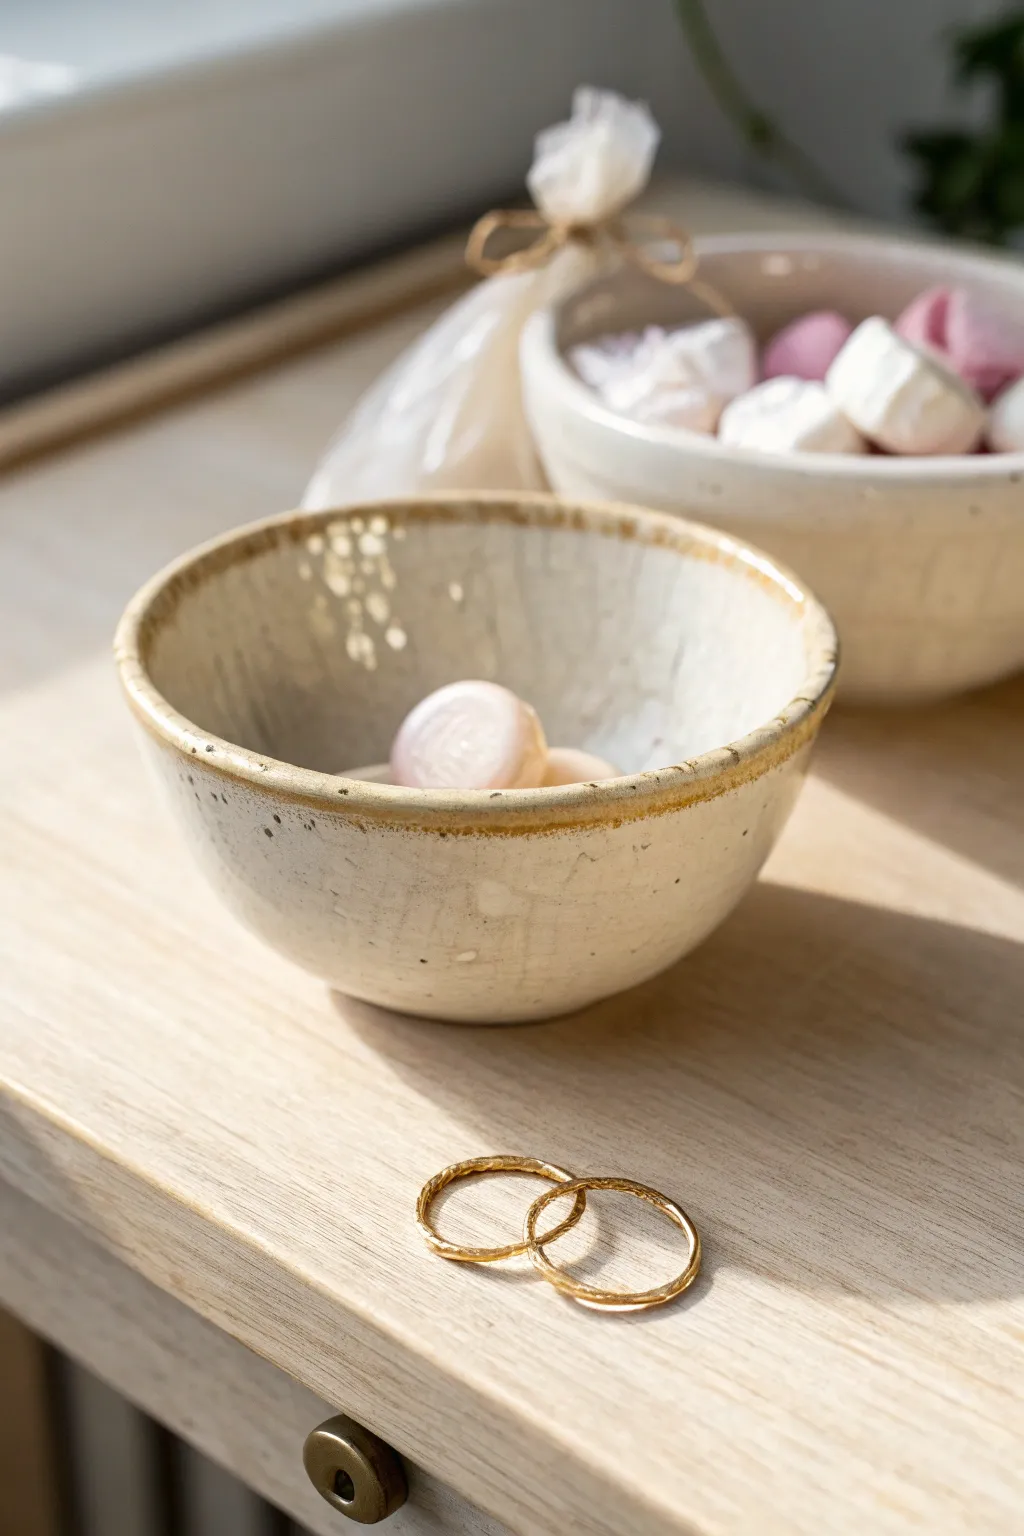
Thumbprint Ring Dishes That Take Five Minutes to Shape
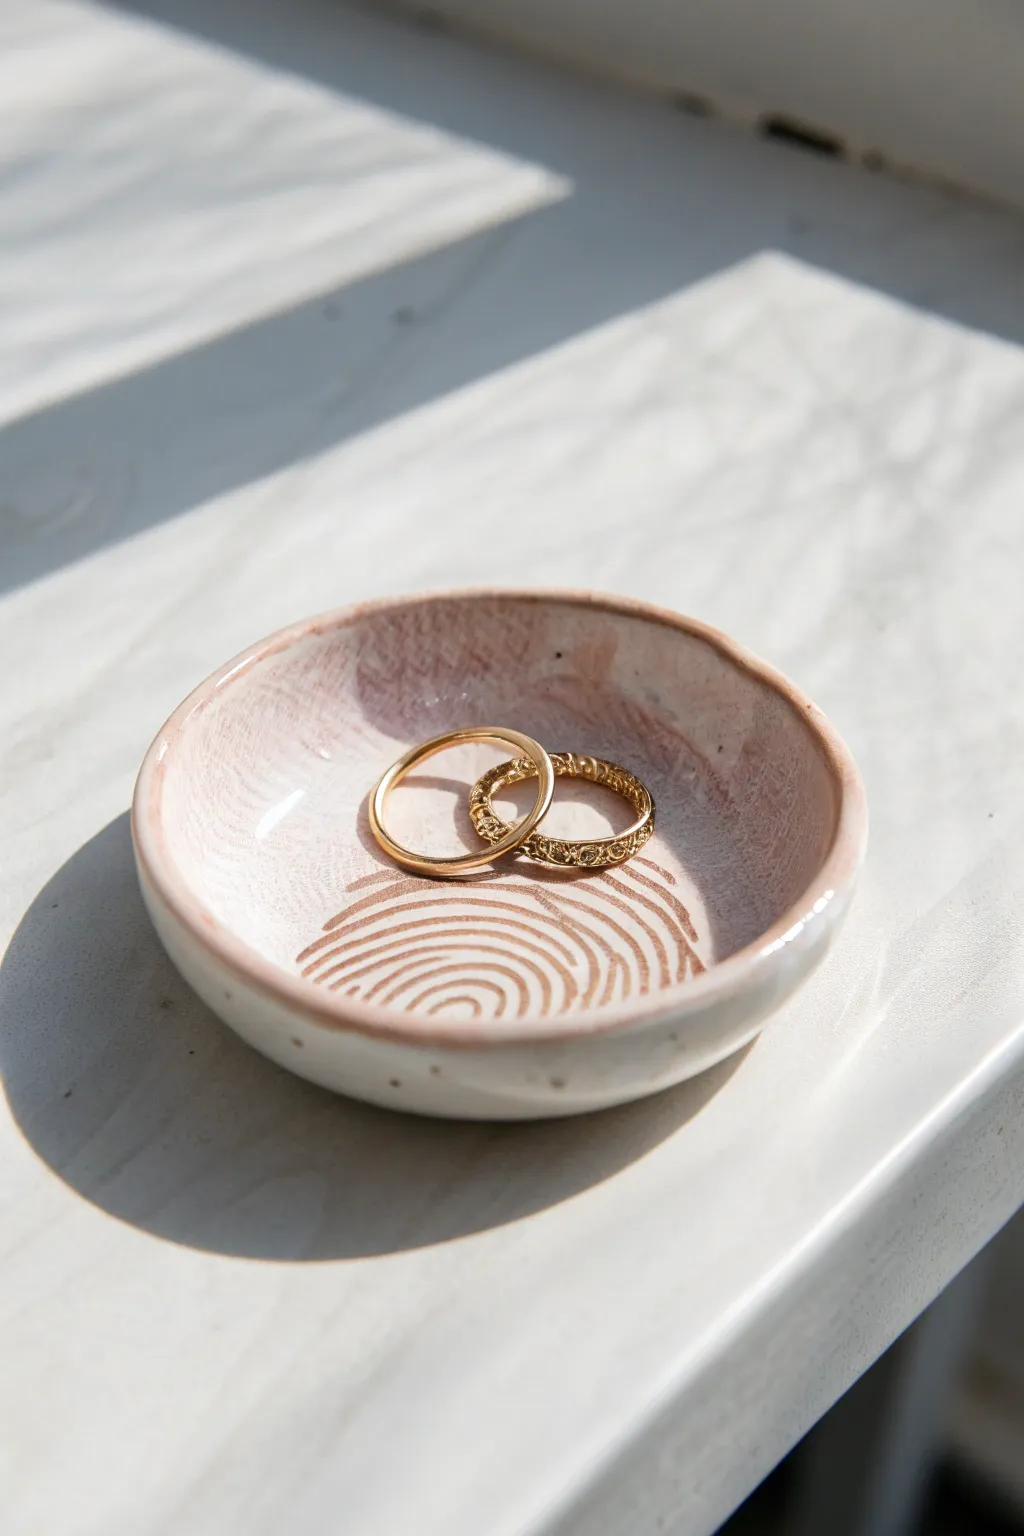
This charming little jewelry holder captures a personal touch quite literally, featuring a distinct fingerprint texture highlighted by a warm, earthy glaze. The soft pinkish-white finish creates a delicate contrast against the raw clay texture, making it perfect for holding your favorite gold bands.
Step-by-Step
Materials
- White stoneware or polymer clay (if not firing)
- Rolling pin
- Circle cookie cutter (approx. 3-inch)
- Small sponge
- Bowl of water
- Pottery rib tool or old credit card
- Underglaze pencil or dark brown oxide wash
- Clear or semi-transparent milky white glaze
- Kiln (if using stoneware) or Oven (if using polymer)
Step 1: Shaping the Form
-
Prepare the clay:
Begin by wedging a small ball of white clay to remove any air bubbles. You want the consistency to be smooth and pliable, like firm dough. -
Roll the slab:
Roll the clay out into a slab that is roughly 1/4 inch thick. Aim for an even thickness throughout so the dish dries and fires without warping. -
Cut the circle:
Press your circle cookie cutter firmly into the slab to create a perfect round disc. Lift away the excess clay. -
Smooth the edges:
Dip your finger in a little water and run it gently along the cut edge of the circle. This softens the sharp angle left by the cutter, giving it that handmade feel. -
Create the curve:
Place the clay circle in the palm of your hand. Gently cup your hand to encourage the clay to slump slightly, creating a shallow bowl shape. -
Refine the rim:
While holding the curved shape, use your thumb and forefinger to pinch the rim slightly to define it, ensuring the walls aren’t too thick.
Step 2: Adding the Texture
-
The thumbprint technique:
This is the signature step. Press your thumb repeatedly into the bottom interior of the dish. Don’t smooth it out; you want the ridges of your skin and the depressions of your thumb to leave a visible, overlapping texture. -
Clean up:
Check the underside of the dish. If your pressing distorted the bottom, gently tap it against your table surface to flatten the foot just enough so it won’t wobble. -
Dry slowly:
Set the dish aside to dry to the ‘bone dry’ stage. I find covering it loosely with plastic for the first few hours helps prevent the rim from cracking. -
Bisque fire:
If using ceramic clay, load the piece into the kiln for a bisque firing (typically Cone 04) to harden it for glazing.
Uneven Texture?
If the clay feels too sticky to get a good print, dust your thumb lightly with cornstarch before pressing. This acts as a release agent and burns off later.
Step 3: Glazing and Finishing
-
Highlight the texture:
Mix a small amount of iron oxide wash or use a dark brown underglaze. Paint this directly into the thumbprint depressions in the center of the dish. -
Wipe back:
Immediately use a damp sponge to wipe away the excess dark color from the raised surfaces. The dark pigment should remain only in the deep crevices of the texture, enhancing the pattern. -
Apply the main glaze:
Dip the entire dish into a semi-transparent milky white glaze. If you want that pinkish hue from the example, choose a glaze that breaks translucent over texture or has a slight blush tint. -
Clean the foot:
Wipe the bottom of the dish completely clean of glaze with a sponge to prevent it from fusing to the kiln shelf. -
Final smooth:
lightly rub the dry glaze surface to smooth out any drips or thick spots before the final firing. -
Glaze fire:
Fire the piece again to the maturation temperature of your chosen clay and glaze (often Cone 6 for stoneware).
Add a Gold Rim
After the final glaze firing, apply a ring of precious metal gold luster to the rim and re-fire at a low temperature (around Cone 018) for extra luxury.
Place this little gem on your nightstand to keep your rings safe and stylish

The Complete Guide to Pottery Troubleshooting
Uncover the most common ceramic mistakes—from cracking clay to failed glazes—and learn how to fix them fast.
Spoon Rests That Keep Your Counter a Little Less Chaotic
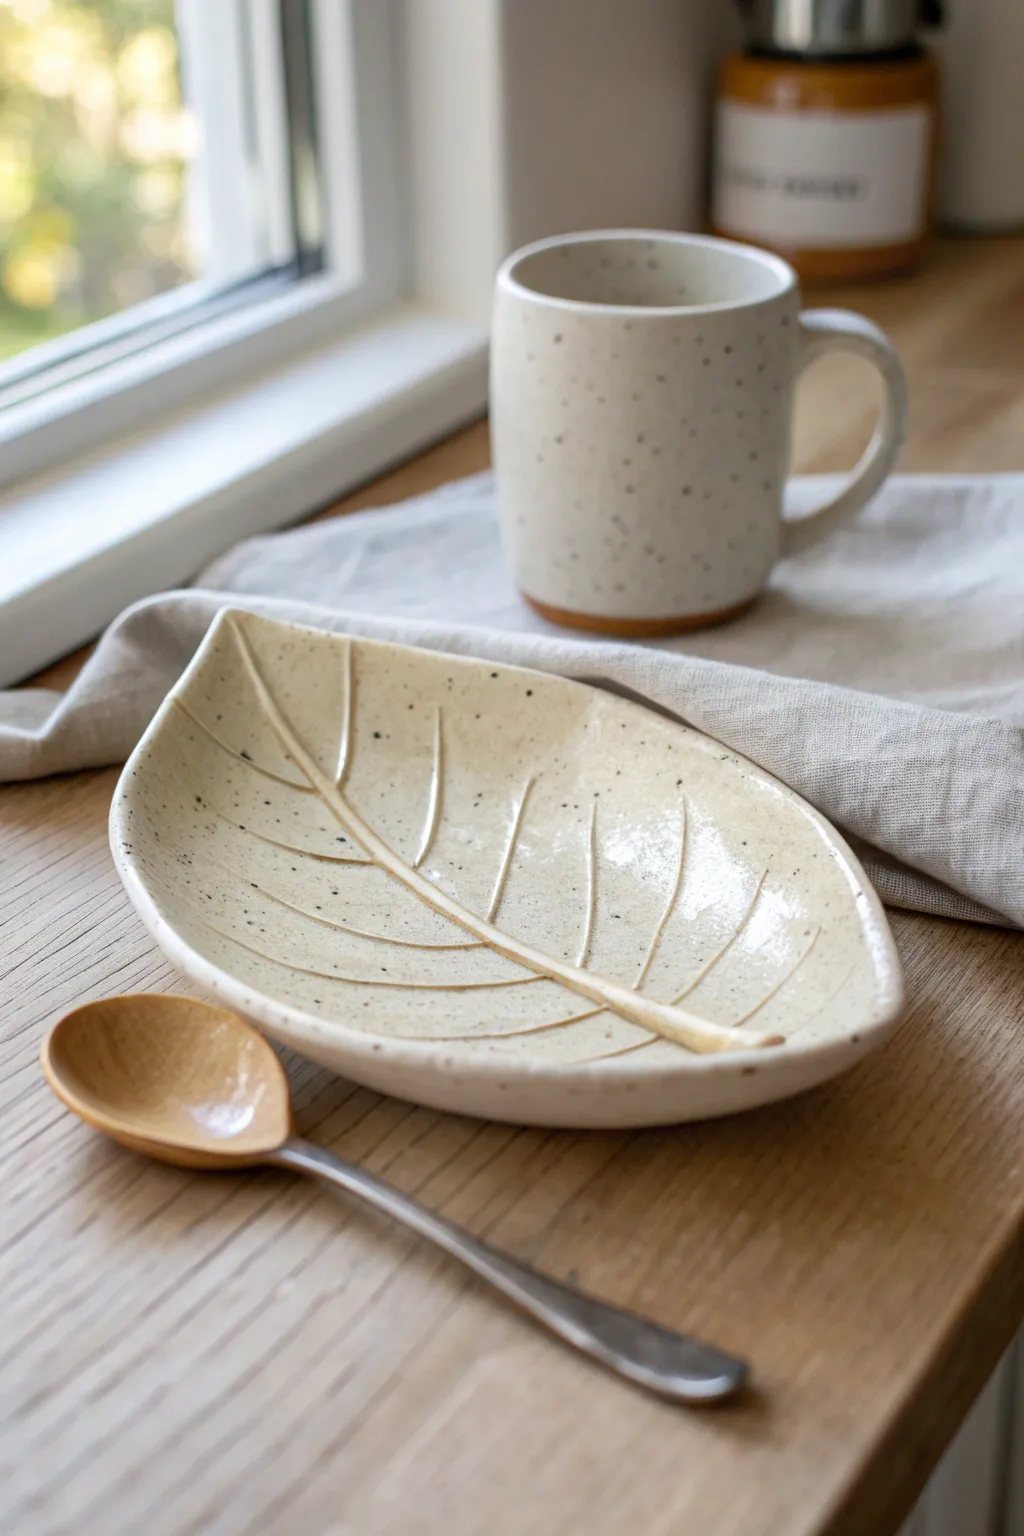
Bring a touch of nature to your kitchen with this elegant yet functional leaf-shaped spoon rest. Using simple slab-building techniques and a speckled clay body, you’ll create a durable resting spot for your utensils that doubles as rustic décor.
Step-by-Step Guide
Materials
- Speckled stoneware clay (mid-fire)
- Rolling pin
- Guide sticks or slats (approx. 1/4 inch thick)
- Needle tool
- Leaf template (paper or cardstock)
- Modeling tool or wooden rib
- Small sponge
- Clear or transparent glossy glaze
- Canvas or slab mat
- Scoring tool (serrated rib)
- Slip (clay mixed with water)
Step 1: Forming the Leaf Base
-
Prepare your clay:
Begin by wedging a ball of speckled stoneware clay to remove any air bubbles. You want a piece roughly the size of a grapefruit to ensure you have enough material to work with. -
Roll the slab:
Place your clay on a canvas board or slab mat. Using guide sticks on either side to maintain an even thickness, roll the clay out until it is a uniform slab, approximately 1/4 inch thick. -
Cut the shape:
Lay your leaf template gently on top of the slab. Using a needle tool, trace around the template and cut out the leaf shape. Remove the excess clay and set it aside for recycling. -
Smooth the edges:
Dip your finger or a small sponge in a little water and run it along the cut edges of the clay leaf. This softens the sharp angles left by the needle tool and prevents future chipping. -
Create the curvature:
Lift the leaf gently and cradle it in your palm or place it into a shallow bowl mold lined with plastic. You want to give it a slight concave curve so that any liquids from a spoon will pool in the center rather than running off the sides.
Keep it clean
Use a barely damp chamois strip to compress the rim of your slab before shaping. This seals the clay particles and significantly reduces the chance of rim cracks.
Step 2: Adding Vein Details
-
Roll vein coils:
Take a small pinch of your leftover clay and roll it into a very thin coil, almost like a piece of spaghetti. It should be long enough to reach from the stem end to the tip of the leaf. -
Score the center line:
Use your needle tool to lightly score a straight line down the center of your leaf where the main vein will go. Apply a tiny amount of slip or water to the scored area. -
Attach the main vein:
Place the long thin coil onto the scored line. Press it down gently but firmly to adhere it fully. I like to use a wooden modeling tool here to blend the sides of the coil slightly into the leave surface so it looks organic. -
Create side veins:
Roll smaller, shorter coils for the diagonal veins. Score lines branching off from the main center vein, apply slip, and attach these smaller coils, pressing them down to secure. -
Refine the surface:
Once all veins are attached, use a damp sponge to smooth over them gently. You want them to look like raised ridges rather than stuck-on worms. -
Add texture (optional):
If you want extra visual interest, you can lightly tap the surface with a stiff brush or a rock to enhance the organic feel, though the speckled clay does a lot of the work for you.
Make a set
Create a matching set of nesting leaves by cutting three different sizes. They look wonderful stacked on the counter when not in use.
Step 3: Drying and Firing
-
Slow drying:
Place your finished piece on a board, loosely covered with plastic. Let it dry slowly to the leather-hard stage, then uncover it to dry completely to bone dry. This helps prevent warping. -
Bisque fire:
Load the bone-dry spoon rest into the kiln and bisque fire it to cone 04 (or according to your clay body’s instructions). -
Glazing:
Once cooled, wipe the piece with a damp sponge to remove dust. Dip the entire piece into a clear or transparent glossy glaze. This specific look relies on the glaze being transparent so the natural speckles of the clay show through prominently. -
Wipe the foot:
Carefully wipe any glaze off the very bottom of the spoon rest with a damp sponge so it doesn’t stick to the kiln shelf. -
Glaze fire:
Fire the piece again to the maturity temperature of your clay and glaze combination—usually cone 5 or 6 for mid-fire stoneware.
Now your counter is protected by a beautiful piece of handmade art that is ready for your next cooking adventure
Soap Dishes With Easy Drainage Ridges
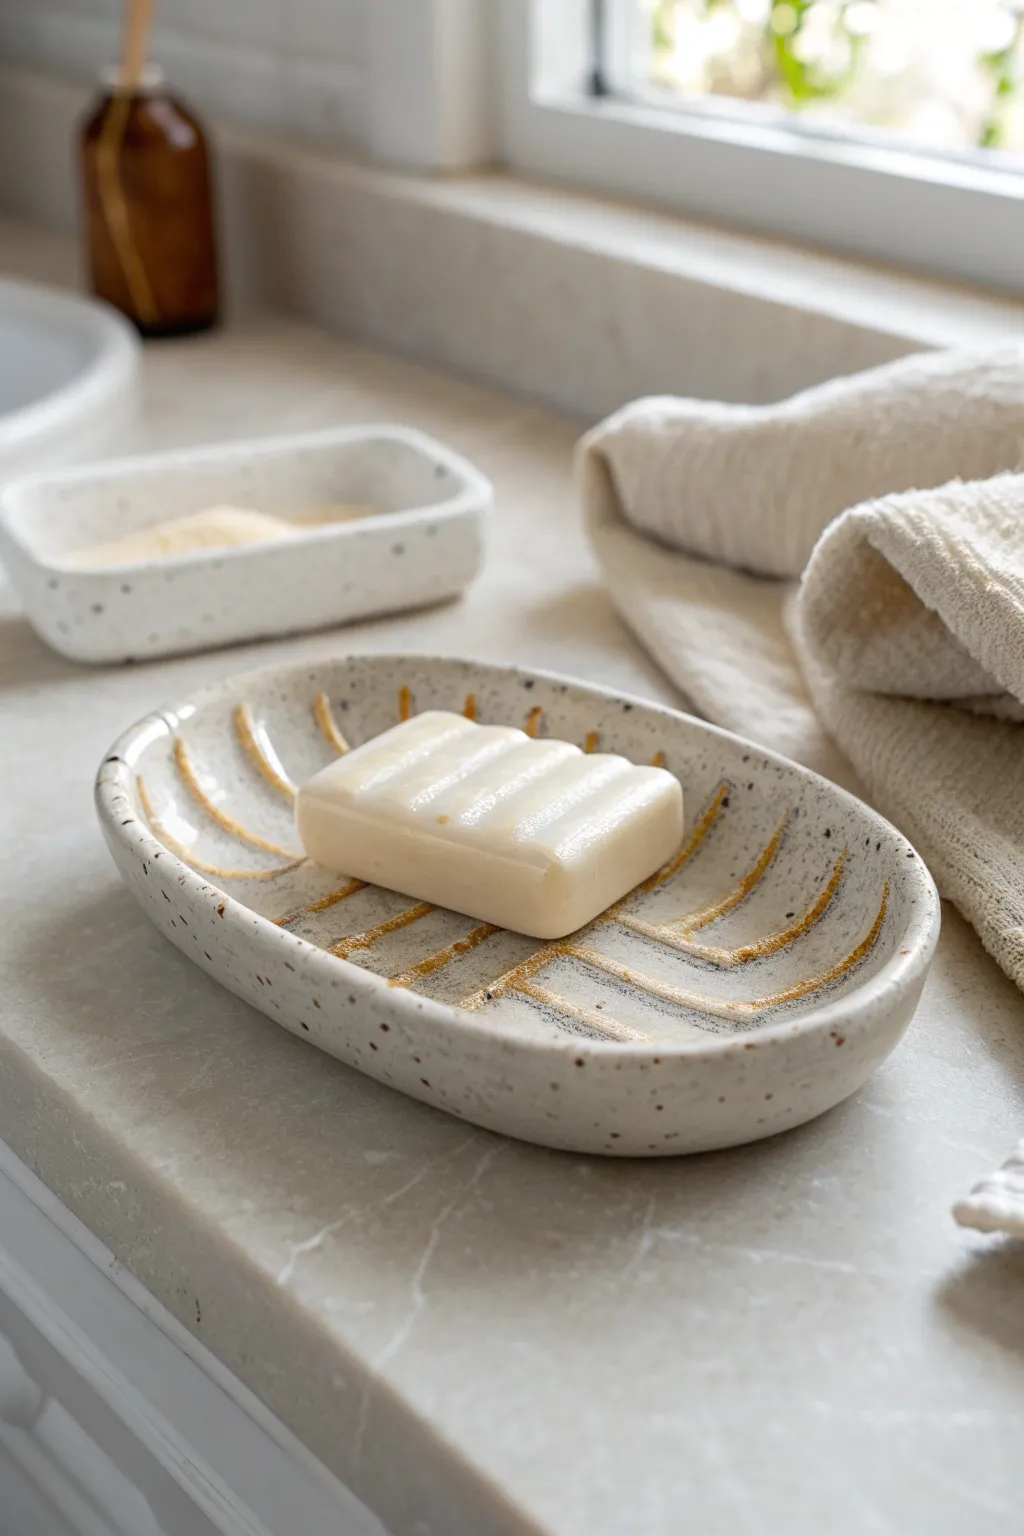
This charming, oval-shaped soap dish combines functionality with earthy aesthetics, featuring a creamy speckled clay body and striking golden-yellow accents. The built-in ridges aren’t just decorative; they ensure your soap dries perfectly between uses by allowing airflow underneath.
How-To Guide
Materials
- Speckled stoneware clay (white or cream)
- Roller or rolling pin
- Guide sticks (optional, for even thickness)
- Oval paper template
- Fettling knife or needle tool
- Small carving loop tool (medium width)
- Sponge
- Misting bottle
- Clear or white glossy glaze
- Golden-yellow underglaze or oxide wash
- Small detail brush
Step 1: Shaping the Form
-
Prepare the slab:
Begin by wedging your speckled clay to remove air bubbles. Roll it out into an even slab, aiming for a thickness of about 1/4 to 3/8 of an inch. If you want perfect uniformity, use guide sticks on either side of your roller. -
Cut the shape:
Place your oval paper template lightly onto the slab. Using your needle tool or fettling knife, trace around the template to cut out the base shape. -
Smooth the edges:
Take a slightly damp sponge and run it around the cut rim to compress the clay and remove any sharp angles or burrs left from cutting. -
Form the curve:
Gently lift the edges of the oval to create a shallow bowl shape. You can do this by pressing the slab into a foam piece or simply cupping it in your hands and tapping the center on a table. I like to smooth the inside curve with a flexible rib to ensure it’s seamless.
Clean Lines Tip
If your carving tool leaves ragged edges, wrap the slab in plastic for an hour. Slightly softer clay carves smoother than dry clay.
Step 2: Carving and detailing
-
Dry to leather hard:
Set the dish aside until it reaches a leather-hard state. It should be firm enough to hold its shape without warping but still soft enough to carve into easily. -
Mark the ridge lines:
Lightly sketch your design with a needle tool. Draw lines radiating from the center outward, leaving a small untouched spine in the very middle. -
Carve the drainage channels:
Using your small loop tool, carve out the marked lines. Apply steady, gentle pressure to create grooves that are deep enough to catch water but not so deep they weaken the slab. -
Clean up the crumbs:
Wait for the carved areas to stiffen slightly, then use a soft brush or a barely damp sponge to smooth away the little crumbs of clay created by the carving tool. -
Refine the rim:
Give the rim one final pass with your sponge to ensure it is rounded and feels pleasant to the touch.
Step 3: Decoration and Firing
-
Bisque fire:
Once the piece is bone dry, fire it in the kiln to bisque temperature (usually cone 04 or 06, depending on your clay body). -
Apply the accent color:
Using a small detail brush, paint the golden-yellow underglaze exclusively into the carved grooves. If you get some on the uncarved surface, wipe it away quickly with a clean, damp sponge. -
Let the underglaze dry:
Allow the colored ridges to dry completely before moving to the next step. -
Glaze the piece:
Dip the entire soap dish into a clear or semi-opaque milky white glaze. This will seal the clay and make the speckles pop while keeping the surface hygienic and easy to clean. -
Wipe the foot:
Flip the dish over and thoroughly wipe any glaze off the bottom so it doesn’t fuse to your kiln shelf. -
Final fire:
Place the dish in the kiln for the final glaze firing, following the temperature guidelines for your specific clay and glaze combination (commonly cone 5 or 6).
Drainage Holes
For functional variety, punch three small holes in the central spine before firing. This lets water drain directly into a sink below.
Now you have a stylish, functional piece that brings a spa-like feel to your bathroom counter


What Really Happens Inside the Kiln
Learn how time and temperature work together inside the kiln to transform clay into durable ceramic.
Bud Vases That Don’t Need Perfect Symmetry

This charming, organically shaped bud vase embraces imperfection with its speckled clay body and warm, horizontal accent stripes. Its narrow neck is perfect for holding just a couple of wildflower stems, making it a simple yet elegant addition to any windowsill.
Step-by-Step Tutorial
Materials
- Speckled Stoneware Clay (e.g., Laguna Speckled Buff)
- Red Iron Oxide wash or Terracotta underglaze (for stripes)
- Clear Matte or Satin Glaze
- Potter’s wheel (or hand-building tools for pinch method)
- Sponge
- Wire cutter
- Rib tool (wooden or silicone)
- Needle tool
- Trimming tools
- Soft fan brush
Step 1: Throwing the Form
-
Center the clay:
Start with a small ball of clay, roughly 1 pound. Center it on the wheel, keeping in mind that since we are aiming for an organic look, if it’s slightly off-center, that adds to the charm. -
Open the vessel:
Drill your thumbs down into the center, leaving about a half-inch of thickness for the floor. Open the clay outward, but keep the base relatively narrow to achieve that bulbous bottom shape. -
Pull the walls:
Begin your pulls. Bring the clay up into a cylinder first. Ensure you maintain thickness at the bottom of the walls and gradually thin it out as you rise. -
Shape the belly:
Using a rib tool on the outside and your hand on the inside, gently push the clay outward from the inside to create the rounded ‘belly’ of the vase. Keep the top rim somewhat thick for now to support the next step. -
Collar the neck:
Place both hands around the top third of the pot and gently squeeze inward (collaring) to narrow the opening. Do this in several passes, pulling up slightly after each squeeze to keep the clay wall even. -
Refine the rim:
Once the neck is narrow enough to hold a single flower, use a chamois or your sponge to smooth and round the lip of the vase.
Oxide Wash Tip
If using iron oxide, mix it quite thin with water. Too thick, and it can act as a flux and run; applied as a wash, it stains the clay comfortably.
Step 2: Trimming and Decorating
-
Dry to leather hard:
Wire the pot off the bat and let it dry until it reaches a leather-hard state. It should be firm enough to handle without deforming but still cool to the touch. -
Trim the foot:
Center the pot upside down on the wheel. Use a trimming tool to remove excess weight from the bottom and define a clean curve that flows into the belly. -
Smooth the surface:
I like to run a smooth rib over the trimmed area to burnish the clay slightly, highlighting those natural speckles in the stoneware. -
Apply the bands:
Place the pot back upright on a banding wheel (or slowly spin the main wheel). Dip a soft brush into Red Iron Oxide wash or terracotta underglaze. -
Paint the stripes:
While the wheel spins slowly, hold the brush steady against the lower third of the vase to create two or three thick, horizontal bands. Let the bristles drag naturally for a textural look.
Step 3: Glazing and Firing
-
Bisque fire:
Load the bone-dry vase into the kiln and bisque fire it to cone 04 (or your clay body’s specific recommendation). -
Wax the bottom:
Apply wax resist to the foot of the vase and slightly up the side if you want the raw clay texture to remain exposed at the very base. -
Apply clear glaze:
Dip the entire vase into a clear matte or satin glaze. This will seal the clay and make it waterproof while allowing the speckles and the painted stripes to show through clearly. -
Check the thickness:
Ensure the glaze isn’t too thick inside the narrow neck; pour out excess glaze quickly to prevent dripping or running during the firing. -
Clean the foot:
Use a damp sponge to wipe any stray glaze droplets off the waxed foot ring. -
Final firing:
Fire the glazed piece to maturity (usually Cone 5 or 6 for stoneware). Once cool, sand the bottom lightly if there are any rough burrs.
Level Up: Texture
Before the clay dries, gently press a piece of coarse linen or canvas against the belly to add a subtle tactile weave texture under the glaze.
Now your vase is ready to hold fresh blooms and bring a bit of effortless nature indoors
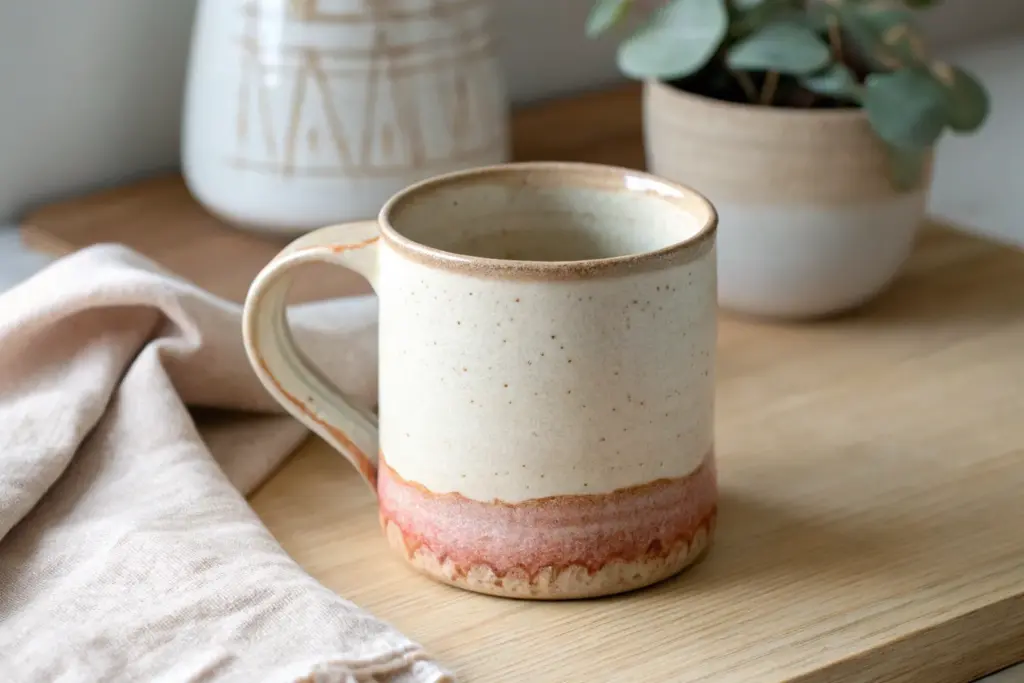
Easy Slab Mugs With a Simple Strap Handle

Embrace the cozy vibes with this rustic, slab-built mug featuring a deep indigo glaze and subtle speckling. The simple cylindrical form and sturdy strap handle make it an approachable project perfect for beginners looking to create functional art.
Detailed Instructions
Materials
- Stoneware clay (smooth or with grog)
- Rolling pin
- Canvas or slab mat
- Rectangular paper template (approx. 4″ x 10″)
- Circular cookie cutter or template (for base)
- Needle tool or fettling knife
- Serrated rib or scoring tool
- Slip (clay mixed with water)
- Wooden modeling tool
- Sponge
- Deep blue gloss glaze
- White or light gray glaze (for speckling)
- Stiff paintbrush or toothbrush
Step 1: Creating the Body
-
Roll the Slab:
Start by wedging your clay to remove air bubbles, then roll it out onto your canvas using the rolling pin. Aim for an even thickness of about 1/4 inch, ensuring the slab is large enough for your rectangular template. -
Cut the Wall:
Lay your rectangular template onto the clay. Using your needle tool or fettling knife, cut precisely around the template to create the main body of the mug. -
Cut the Base:
Use your circular cutter or base template to cut out the bottom of the mug from the remaining slab. The circle should correspond to the diameter your rectangle will create when rolled. -
Bevel the Edges:
On the short ends of your rectangular slab, cut a 45-degree angle on opposite sides. This beveling allows the ends to overlap seamlessly without creating a thick lump at the seam. -
Score and Slip:
Rough up the beveled edges using your serrated rib. Apply a generous amount of slip to the scored areas. -
Form the Cylinder:
Gently lift the slab and curl it into a cylinder, pressing the slipped beveled edges together firmly. I like to support the inside with one hand while smoothing the outside seam with a rib to make it disappear. -
Attach the Base:
Score and slip the bottom edge of your cylinder and the outer edge of your circular base. Press the cylinder onto the base. -
Reinforce the Seam:
Roll a very thin coil of clay and press it into the interior seam where the wall meets the floor. Smooth this out with a wooden tool or your finger to ensure a watertight seal.
Seamless Seams
Use a wooden paddle to gently tap the outside of the cylinder seam against a dowel held inside. This compresses the join and makes the wall thickness perfectly uniform.
Step 2: Handle and Finishing
-
Make the Strap Handle:
Cut a strip of clay from your remaining slab, about 3/4 inch wide and 5 inches long. Smooth the sharp edges with a damp sponge so it feels comfortable to hold. -
Shape the Handle:
Gently curve the strip into a ‘C’ or ear shape over your finger. Let it stiffen slightly for about 10–15 minutes so it holds its shape during attachment. -
Attach the Handle:
Score and slip the attachment points on the mug body and the ends of the handle. Press the handle firmly onto the mug, ensuring it is straight. -
Smooth Connections:
Use a small wooden tool to blend the clay from the handle onto the mug body, eliminating any gaps. Wipe with a damp sponge for a clean finish. -
Bisque Fire:
Allow the mug to dry completely (bone dry) before firing it in the kiln to bisque temperature (usually cone 04).
Thumb Rest Trick
Before attaching the handle, press your thumb gently into the top curve of the strap to create a subtle indentation. It adds a professional ergonomic touch.
Step 3: Glazing
-
Base Glaze:
Dip the entire mug into a bucket of deep blue gloss glaze. hold it by the foot for a few seconds, then lift and shake gently to remove excess drips. -
Clean the Foot:
Use a wet sponge to wipe glaze off the very bottom of the mug and about 1/4 inch up the side. This creates the unglazed ‘foot ring’ seen in the photo and prevents the mug from sticking to the kiln shelf. -
Add Speckles:
Dip a stiff brush or toothbrush into white glaze. Run your thumb across the bristles to flick tiny droplets of white glaze onto the blue surface. Vary the density to create a natural, starry look. -
Rim Detail:
The glaze on the rim often thins during firing, creating the brownish breaks seen in the image. If you want to accentuate this, carefully wipe the very edge of the rim with a damp sponge to thin the glaze layer slightly. -
Final Fire:
Fire the mug again to the glaze temperature recommended for your clay and glaze (typically cone 5 or 6). Let the kiln cool completely before unloading.
Once cooled, fill it with your favorite hot beverage and enjoy the warmth of your handmade creation

TRACK YOUR CERAMIC JOURNEY
Capture glaze tests, firing details, and creative progress—all in one simple printable. Make your projects easier to repeat and improve.
Snack Plates With Wavy Rims for Instant Charm
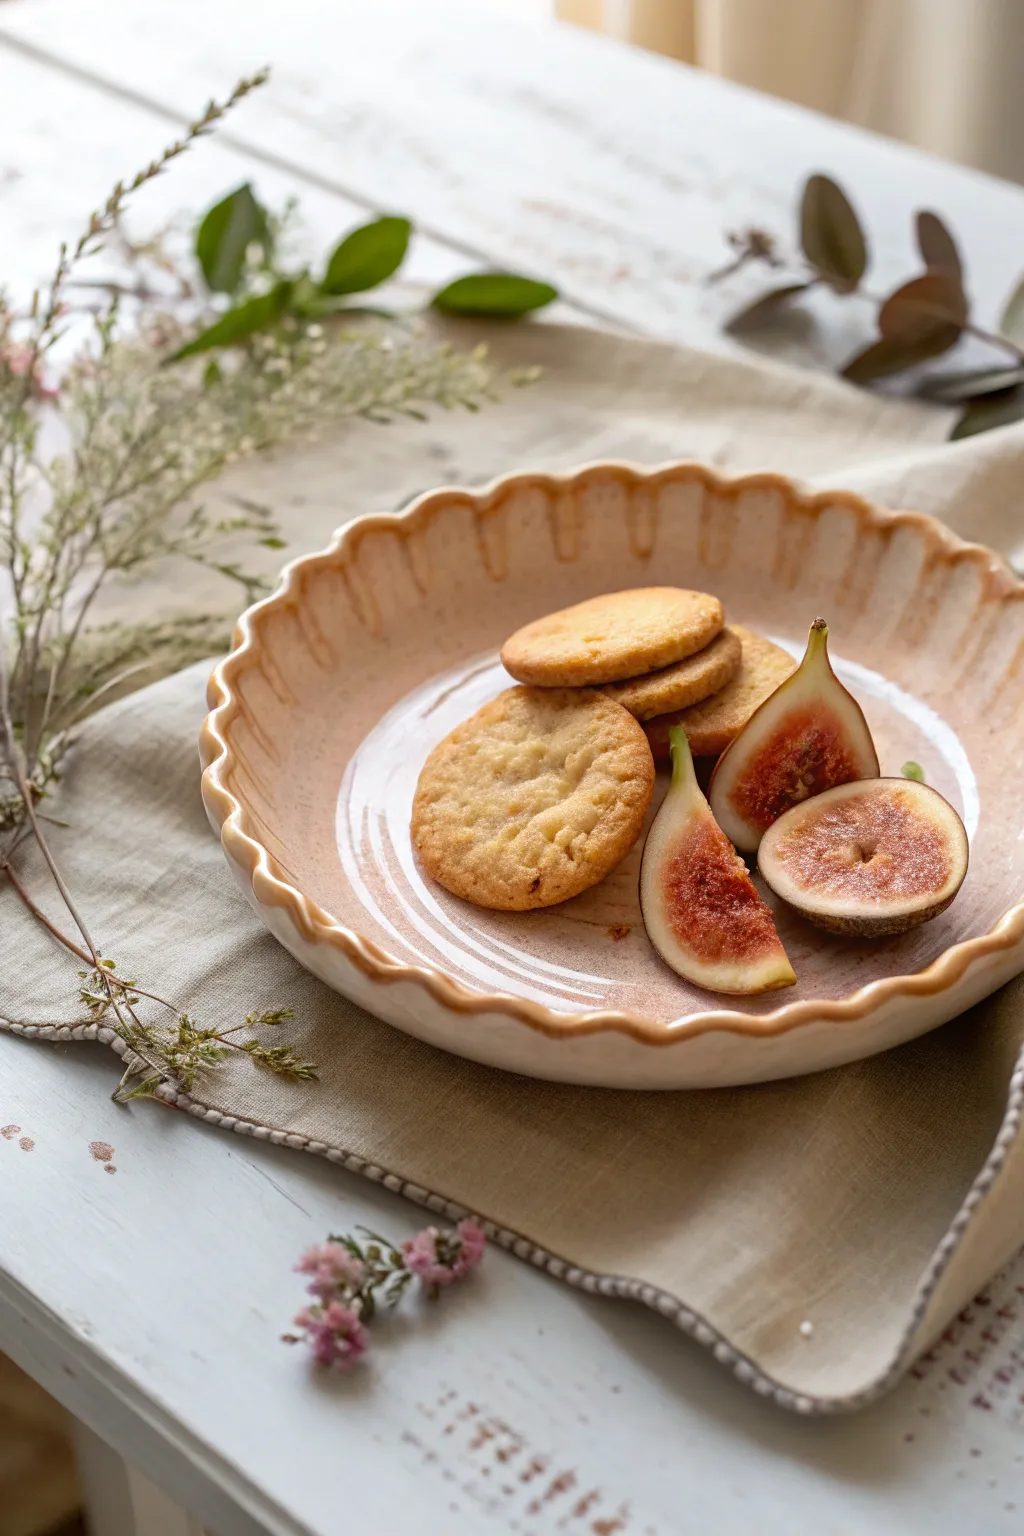
This charming, shallow dish features a distinctively fluted edge and a soft, marbled glaze finish that feels both modern and rustic. It’s the perfect size for serving afternoon biscuits or fresh fruit, adding an instant handmade touch to your table.
Step-by-Step Guide
Materials
- Light-colored stoneware clay (smooth)
- Rolling pin
- Canvas work surface or slab mat
- Circular template (paper or flexible plastic, approx. 6-8 inches)
- Needle tool or fettling knife
- Rib tool (soft kidney)
- Potter’s sponge
- Slump mold or a shallow bowl/plate to use as a form
- Cornstarch or plastic wrap (for release)
- Fingers or a thick dowel tool
- Glossy clear glaze
- Amaco Potter’s Choice ‘Toasted Sage’ or similar warm beige glaze
- Pale pink underglaze or glaze for marbling effect
Step 1: Forming the Slab
-
Prepare your clay:
Begin by wedging your stoneware clay thoroughly to remove any air bubbles. Work it until it feels smooth and plastic. -
Roll out the slab:
Using your rolling pin, flatten the clay into a slab about 1/4 inch thick. I like to rotate the slab and roll in different directions to ensure even thickness and prevent warping later. -
Compress the surface:
Take your flexible rib tool and gently drag it across the surface of the clay in long, smooth strokes. This compresses the clay particles and creates a lovely, smooth finish. -
Cut the circle:
Place your circular template onto the slab. Using a needle tool, trace around the edge carefully to cut out your plate base. Remove the excess clay.
Uneven Waves?
If your rim looks messy, use a dowel or brush handle instead of your finger to press the indentations. This creates a uniform, consistent wave depth.
Step 2: Shaping the Wavy Rim
-
Place on the mold:
Dust your slump mold (or an upside-down bowl) lightly with cornstarch to prevent sticking. Carefully lift your clay circle and center it over the mold. -
Slump the form:
Gently press the clay down so it conforms to the curve of the mold. Don’t press too hard on the rim yet; focus on establishing the bottom curve. -
Mark your intervals:
Visually divide the rim into even sections where you want the waves to be. You can make light marks if it helps, but freehanding keeps it organic. -
Create the flutes:
Support the underside of the rim with one finger. With your other hand, gently press down into the rim between your supporting fingers to create a downward curve. -
Refine the wave:
Repeat this push-and-pull motion around the entire circumference. Alternate pressing up from the bottom and down from the top to create a rhythmic, undulating wave pattern. -
Smooth the edge:
Dip your sponge in water and wring it out almost completely. Run it along the very edge of the rim to soften any sharp angles created by the cutting tool. -
Dry slowly:
Allow the plate to dry slowly on the mold until leather hard. If you remove it too soon, the waves might collapse.
Step 3: Glazing and Finishing
-
Bisque fire:
Once bone dry, fire the piece to cone 04 (or your clay body’s bisque temperature) in the kiln. -
Clean the bisque:
Wipe the fired plate with a damp sponge to remove any kiln dust before glazing. -
Apply base color:
Pour a warm beige or toasted sage glaze into the interior of the plate, swirl it to coat, and pour out the excess. Brush the exterior with the same glaze. -
Create the swirl effect:
While the base glaze is still wet, drop small dollops of pale pink glaze or underglaze inside the curve of the bowl. -
Marble the colors:
Gently tilt the plate or use a soft fan brush to lightly drag the pink through the beige, creating a soft, streaky marbled effect similar to the reference photo. -
Clean the foot:
Use a sponge to wipe away all glaze from the very bottom foot of the plate so it doesn’t stick to the kiln shelf. -
Glaze fire:
Fire the plate to the final maturation temperature (likely cone 5 or 6) as specified by your glaze manufacturer instructions.
Add Texture
Before cutting your circle, press a piece of lace or a textured rolling pin into the slab to give the interior a subtle pattern beneath the glaze.
Now you have a beautiful, custom serving piece ready for your next gathering
Incense Holders That Double as Tiny Catch-All Dishes
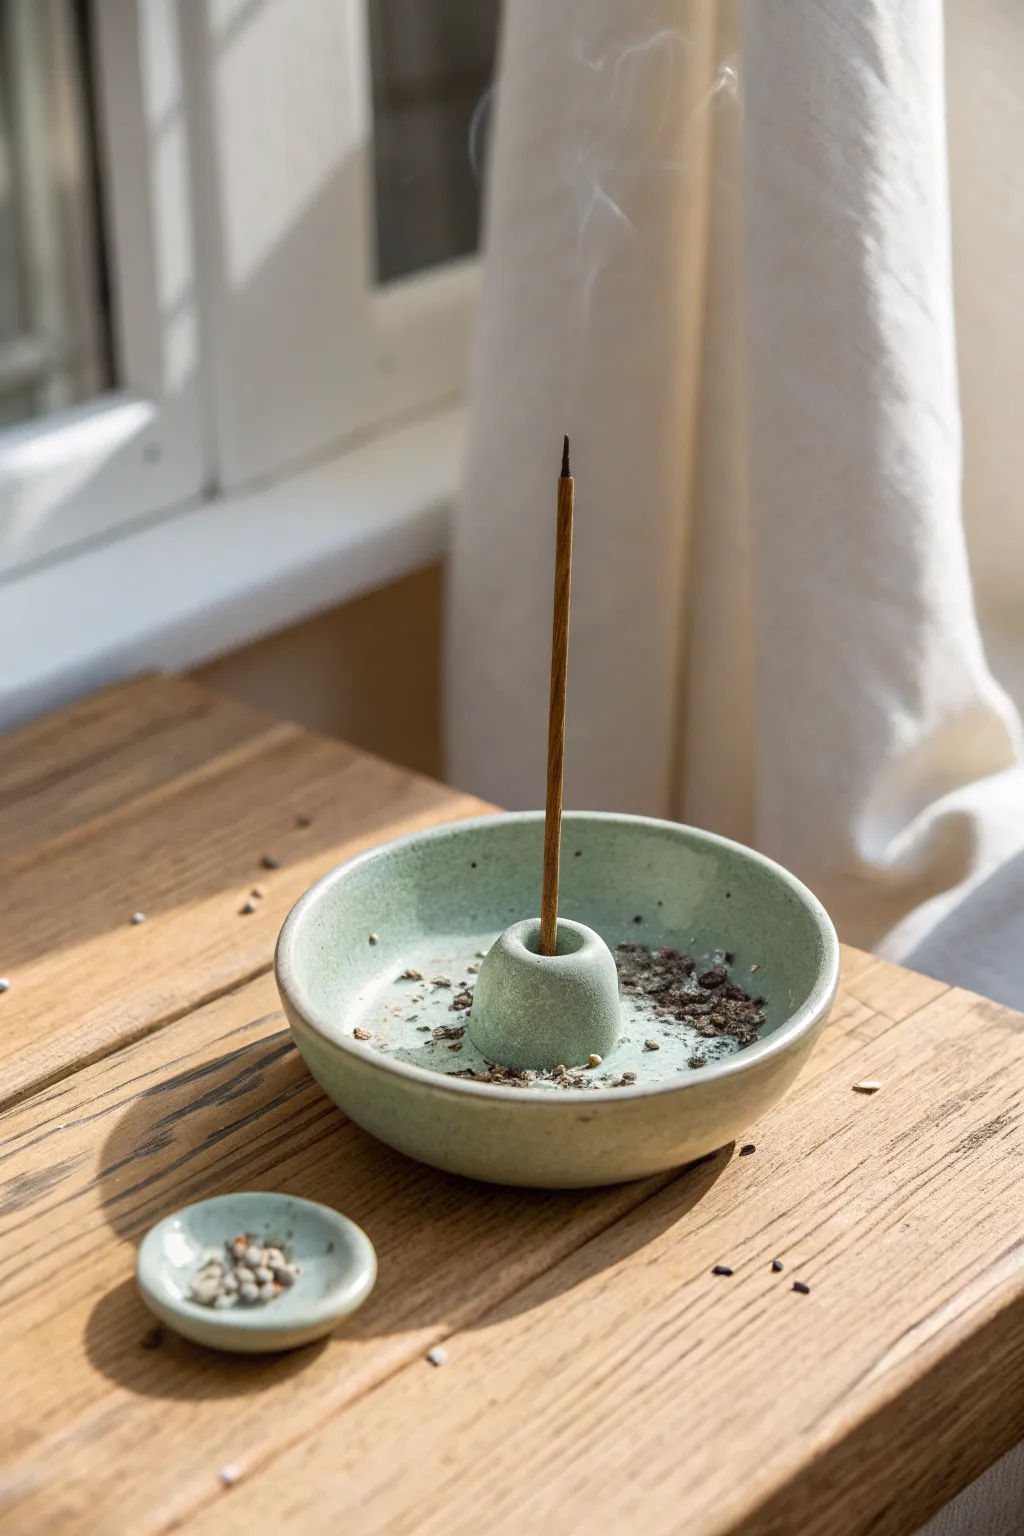
This project combines minimalism with utility, featuring a gentle, speckled mint glaze that catches the light beautifully. The design consists of a shallow catch-all bowl centered with a raised holder, perfect for keeping ash contained while adding a serene touch to your space.
Detailed Instructions
Materials
- White stoneware clay (preferably with grog or speckles)
- Rolling pin
- Canvas mat or wooden board
- Needle tool
- Small round cookie cutter (approx. 4-5 inches)
- Sponge
- Rib tool
- Straw or small drill bit (approx. 2-3mm)
- Score and slip tool (or fork)
- Mint green stoneware glaze (speckled)
- Clear glaze (optional)
- Kiln access
Step 1: Forming the Base
-
Prepare the Clay:
Begin by wedging a baseball-sized amount of stoneware clay to remove air bubbles. This ensures a smooth, crack-free finish later on. -
Roll the Slab:
Flatten the clay on your canvas mat using the rolling pin. Aim for a consistent thickness of about 1/4 inch across the entire slab. -
Cut the Circle:
Place your round cookie cutter or a bowl template onto the clay and cut out a perfect circle using the needle tool. Remove the excess clay. -
Shape the Bowl:
Gently lift the edges of the circle with your fingertips to create a slight curve. I like to use a damp sponge to smooth the rim immediately, softening any sharp angles. -
Refine the Curve:
Use a rib tool on the inside of the bowl to compress the clay and perfect the shallow, concave shape. Ensure the bottom remains flat enough to sit stably on a table.
Step 2: Creating the Holder
-
Form the Nub:
Take a small grape-sized piece of left-over clay and roll it into a ball. Gently flatten the bottom and taper the top slightly to create a soft cone or dome shape. -
Create the Insertion Hole:
Using a straw or a tool with a diameter slightly larger than a standard incense stick, press a hole vertically into the center of the dome. Don’t go all the way through; stop about 3/4 of the way down. -
Score the Surfaces:
Rough up the bottom of the dome and the precise center of your bowl using a scoring tool or fork. This texture is crucial for a strong bond. -
Apply Slip:
Dab a generous amount of clay slip (watered-down clay) onto the scored areas of both pieces. -
Attach the Holder:
Press the dome firmly into the center of the bowl. Give it a tiny twist to lock the clay particles together. -
Clean the Seam:
Use a small, damp brush or your finger to smooth the seam where the dome meets the bowl. It should look like one seamless piece of clay.
Hole too small?
If the hole shrinks too much after firing, carefully use a small diamond file or a handheld rotary tool bit to gently widen the opening without cracking the ceramic.
Step 3: Finishing and Glazing
-
Optional Tiny Dish:
If you have extra clay, pinch a very tiny bowl (about 1 inch wide) to serve as a companion piece for holding unburned cones or matches. -
Slow Dry:
Loosely cover your piece with plastic and let it dry slowly to the leather-hard stage, then uncover to let it reach bone dry. This prevents warping. -
Bisque Fire:
Fire the piece in the kiln to a bisque temperature (usually cone 04 approx. 1945°F) to harden the clay for glazing. -
Wax the Bottom:
Apply wax resist to the bottom foot of the bowl to prevent glaze from sticking to the kiln shelf. -
Glaze Application:
Dip the bowl into your mint green glaze. Shake off excess gently. Make sure the glaze doesn’t clog the incense hole; blow into it gently if needed to clear it. -
Glaze Fire:
Fire the piece again to the maturation temperature of your specific clay and glaze (often cone 5 or 6). Let the kiln cool completely before opening.
Natural Texture
Mix fine sand or crushed dried clay into your fresh clay body before rolling. This creates an organic, gritty texture that looks amazing under matte glazes.
Now you have a serene, functional piece of art ready to hold your favorite scents
Botanical-Imprint Coasters You Can Make in a Set
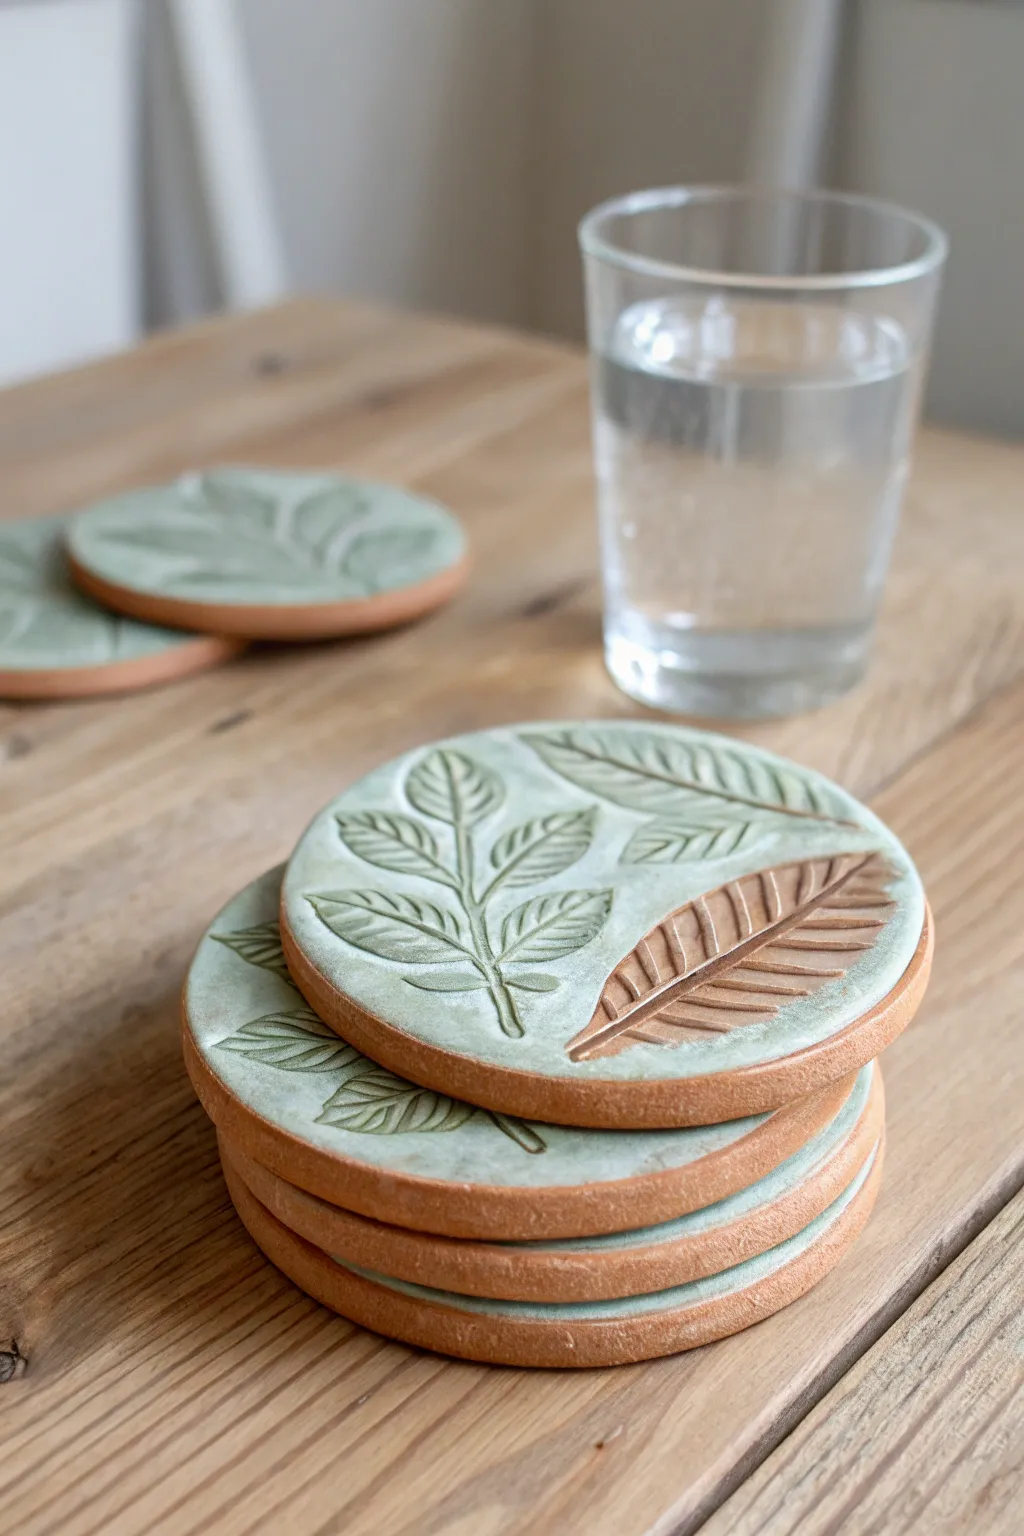
These charming coasters capture the delicate veins of real leaves in permanent ceramic form. The contrast between raw terracotta clay and a soft, washed glaze creates a rustic, organic look perfect for any coffee table.
How-To Guide
Materials
- Terracotta or red stoneware clay
- Rolling pin
- Two wood slats or guide sticks (approx. 1/4 inch thick)
- Round cookie cutter (approx. 4 inches diameter)
- Fresh, deeply veined leaves (sage, mint, or small fern)
- Pottery sponge
- Celadon or light green glaze (food safe)
- Small paintbrush
- Wax resist (optional)
- Pottery kiln
Step 1: Shaping the Clay
-
Prepare your workspace:
Begin by setting up a canvas cloth or a clean wooden board to work on so your clay doesn’t stick. -
Roll the slab:
Place a ball of terracotta clay between your two guide sticks. Roll the clay out into a smooth, even slab; the sticks ensure the thickness is perfectly uniform. -
Smooth the surface:
Using a slightly damp sponge or a rubber rib, gently smooth out the clay surface to remove any canvas texture or imperfections. -
Position the leaves:
Select your leaves—I find that stiff leaves with prominent veins work best. Arrange them vein-side down onto the clay slab. -
Impress the botanicals:
Gently roll over the leaves with your rolling pin. Apply firm, even pressure to embed them into the clay without making the slab too thin. -
Cut the shapes:
Place your round cutter over the leaf impressions framing the design nicely. Press down firmly to cut your coaster shapes. -
Remove the leaves:
Carefully peel the leaves away to reveal the detailed imprint underneath. Use a needle tool to life the edge if they are stuck. -
Clean the edges:
Once you lift the circles from the scrap clay, smooth the cut edges with a damp finger to remove any sharp burrs.
Step 2: Drying and Bisque Firing
-
Slow drying:
Place the coasters on a flat geometric board. To prevent curling, you can place a lightweight board on top of them as they dry to the leather-hard stage. -
Bone dry:
Allow the clay to dry completely until it is bone dry and room temperature to the touch. This usually takes a few days depending on humidity. -
Bisque fire:
Load the bone-dry coasters into the kiln and bisque fire them (usually to cone 04) to prepare them for glazing.
Warped Edges?
Flat items like coasters love to warp. Dry them slowly away from drafts, and flip them over once a day during the drying process to ensure even airflow.
Step 3: Glazing and Finishing
-
Clean the bisque:
Wipe the fired coasters with a damp sponge to remove any kiln dust, which can prevent glaze from adhering properly. -
Apply the glaze:
Brush a coat of light green or celadon glaze over the top surface, ensuring it gets down into the deep recesses of the leaf veins. -
The wipe-back technique:
While the glaze is still slightly damp, take a clean, moist sponge and gently wipe across the surface. The goal is to remove most of the glaze from the high points of the clay while leaving it trapped in the leaf impressions. -
Selective painting:
Leave the un-imprinted sections of the coaster coated with a thin, translucent layer of glaze for that washed look seen in the photo. -
Clean the bottom:
Ensure the bottom and the side rim of the coaster are completely free of glaze so they don’t stick to the kiln shelf. -
Glaze fire:
Fire the coasters again to the maturation temperature of your specific clay and glaze combination.
Pro Tip: Depth Check
Don’t press leaves so hard that they nearly cut through the clay. You only need about 1-2mm of depth to catch the glaze beautifully.
Stack your finished set on the table and enjoy the permanent touch of nature inside your home
Ceramic Paint Palettes That Make You Feel Like a Real Artist
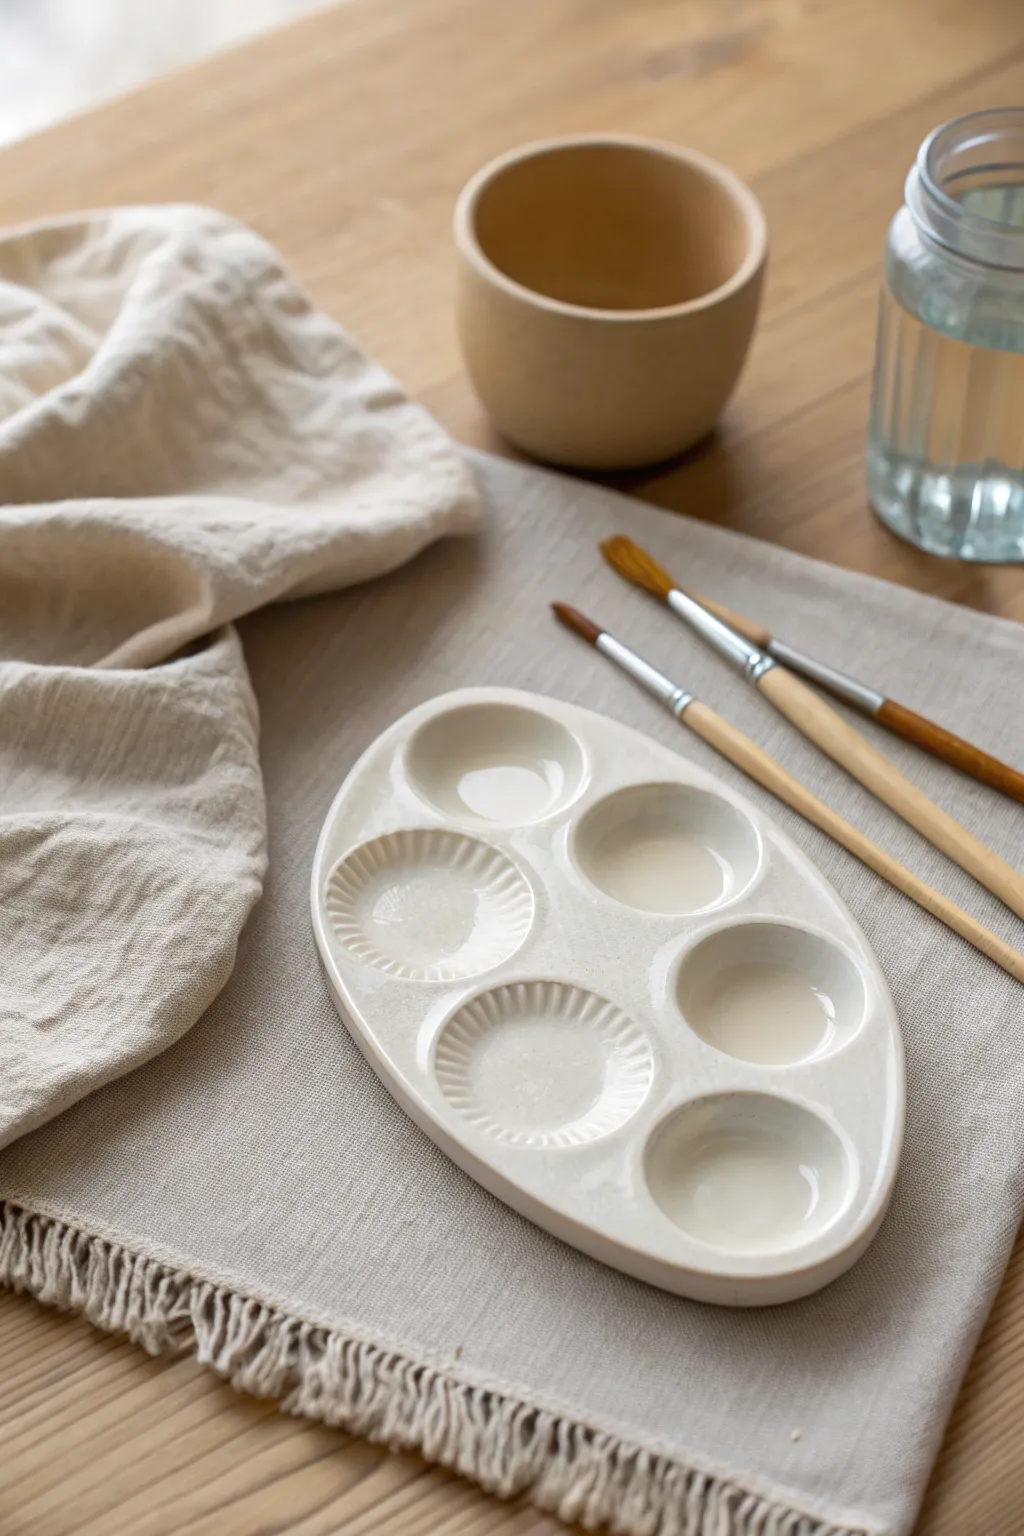
Elevate your painting sessions with this elegant, hand-built ceramic palette featuring a mix of smooth wells for mixing and fluted wells for texture. The clean, creamy white glaze and soft oval shape give it an organic feel that makes color mixing feel like a ritual in itself.
Step-by-Step
Materials
- White stoneware clay (smoothing body)
- Oval template (paper or cardstock)
- Slab roller or rolling pin
- Canvas work surface
- Needle tool or fettling knife
- Rounded rib tool (silicone or wood)
- Small spherical mold or rounded measuring spoon (for pressing wells)
- Fluted tart tin or scalloped fondant cutter (for textured wells)
- Soften sponge
- Glossy white glaze
- Kiln (or access to firing services)
Step 1: Slab Preparation
-
Roll the slab:
Begin by rolling out your white stoneware clay on a canvas surface. You want an even slab that is roughly 1/4 to 3/8 inch thick; too thin and it will warp, too thick and it becomes heavy. -
Smooth the surface:
Take a soft rib tool and compress the clay slab on both sides. This aligns the clay particles to prevent warping later and creates a pristine canvas for your palette. -
Cut the shape:
Place your paper oval template onto the slab. Using your needle tool or a fettling knife, carefully trace around the template, holding the tool perpendicular to the table for a clean, straight edge. -
Refine the rim:
Once the excess clay is removed, use a damp sponge or your finger to gently round over the sharp cut edges of the oval to ensure they are soft to the touch after firing.
Step 2: Creating the Wells
-
Map out spacing:
Lightly visualize or very faintly mark where your six wells will go. They should be evenly spaced, leaving enough clay between them so the walls don’t collapse. -
Press smooth wells:
For the four smooth wells, take your spherical mold or a rounded measuring spoon. Gently press it into the clay slab, rotating it slightly to create a clean, concave depression without tearing the clay. -
Support the back:
As you press down, I like to keep one hand underneath the slab to gently cup the clay as it pushes downward, which prevents the palette from getting stuck to the table. -
Create fluted wells:
For the two textured wells, use a small fluted tart tin or a scalloped cutter. Press it firmly into the remaining spots to imprint that lovely ridged pattern, which is perfect for wiping excess paint off your brush. -
Clean up edges:
Inspect the rim of each well. If the clay has displaced or created a sharp ridge, smooth it down with a damp sponge or a soft modeling tool.
Keep it Flat
To prevent curling edges while drying, place a small weighted bag (filled with sand or rice) gently in the center of the palette while it stiffens up.
Step 3: Finishing and Firing
-
Dry slowly:
Place the palette on a board covered with newspaper or drywall board. Loosely cover it with plastic to let it dry very slowly, which helps maintain that perfect flat shape. -
Bisque fire:
Once bone dry, fire the piece to bisque temperature (usually cone 04). This sets the shape and prepares the clay to accept the glaze. -
Wipe down:
After the kiln cools, wipe the bisque-ware with a damp sponge to remove any dust that might prevent the glaze from adhering properly. -
Apply glaze:
Dip, brush, or pour a glossy white glaze over the entire piece. A glossy finish is crucial here because it allows watercolor or acrylics to be wiped away easily later. -
Clean the foot:
Carefully wipe all glaze off the bottom surface of the palette. If you leave glaze on the bottom, it will fuse to the kiln shelf during the final firing. -
Glaze fire:
Fire the palette again to the maturity temperature of your clay and glaze (typically cone 6 for stoneware). Allow the kiln to cool completely before removing your new tool.
Uneven Wells?
If pressing the wells distorts the oval shape, wait until the clay is leather hard, then use a rasp or knife to trim the outer edge back to a perfect oval.
Now you have a stunning, reusable surface for your future masterpieces that cleans up like a dream
Mini Clay Magnets for Quick Wins and Cute Gifts
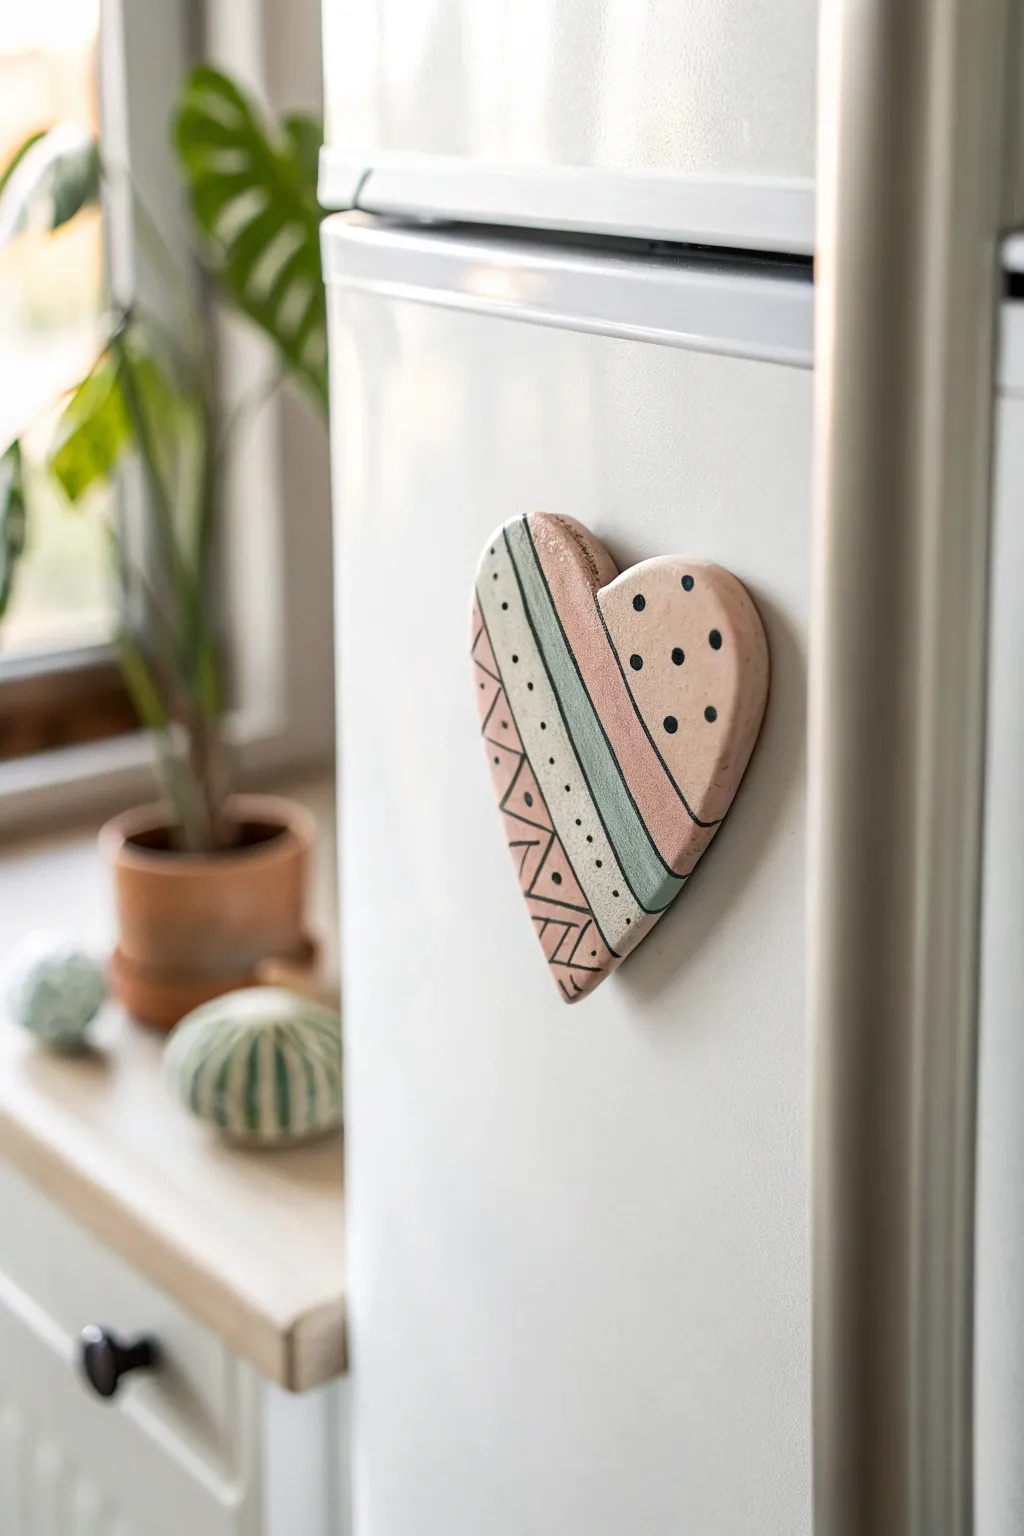
Add a touch of handmade charm to your fridge with this earthy, patterned heart magnet. Featuring soft pastel stripes and geometric details, this project is perfect for using up scrap clay and experimenting with simple surface designs.
Step-by-Step Tutorial
Materials
- White air-dry clay or polymer clay
- Rolling pin
- Heart-shaped cookie cutter (approx. 2-3 inches)
- Acrylic paints (terracotta/dusty pink, sage green, cream/off-white)
- Fine grit sandpaper
- Fine tip black paint pen or thin detail brush
- Black acrylic paint
- Strong round magnet
- E6000 or strong super glue
- Matte varnish or sealant
Step 1: Shaping the Base
-
Condition the Clay:
Begin by taking a small handful of white clay and kneading it in your hands until it becomes soft, pliable, and free of cracks. -
Roll it Out:
Using a rolling pin, flatten the clay to an even thickness of about 1/4 inch (6mm). You want it thick enough to be sturdy but not so heavy it slides down the fridge. -
Cut the Shape:
Press your heart-shaped cookie cutter firmly into the clay. If you don’t have a cutter, you can sketch a heart on paper, cut it out, place it on the clay, and trace around it with a craft knife. -
Smooth the Edges:
Dip your finger in a little water (for air-dry clay) or baby oil (for polymer) and gently run it around the cut edges to smooth out any roughness or sharp corners. -
Initial Drying/Baking:
Follow your specific clay’s instructions. If baking polymer clay, place on a baking sheet and bake as directed. If using air-dry clay, let it sit on a flat surface for 24-48 hours until completely hard. -
Sand for Perfection:
Once fully cured or dry, use fine-grit sandpaper to gently buff the surface and edges, ensuring a perfectly smooth canvas for your painting.
Step 2: Painting the Design
-
Base Coat (Optional):
If you want a uniform look, paint the entire heart with a coat of cream or off-white paint first and let it dry. This helps the striped colors pop. -
Draft the Sections:
Lightly sketch diagonal lines across the heart with a pencil to mark where your different colored sections will go near the left side. -
Paint the Terracotta Sections:
Using a flat brush, paint the far left curvy edge and the large right-hand section of the heart with a dusty pink or terracotta shade. -
Add Sage Green:
Fill in the central stripe with a muted sage green paint. I find that mixing a tiny bit of grey into green gives it that perfect modern pottery look. -
Paint the Cream Stripes:
Fill the remaining narrow stripes with a cream or beige color to separate the green and pink sections. -
Let Colors Set:
Allow the blocked-out colors to dry completely before adding the fine details to prevent smudging.
Uneven Stripes?
If your painted lines look shaky, use thin washi tape or painter’s tape to mask off the sections before painting. Peel the tape away while the paint is still slightly wet for crisp edges.
Step 3: Adding Details & Assembly
-
Draw Divider Lines:
Using a fine-tip black paint pen (or a very steady hand with a liner brush), draw thin black lines separating each colored section. -
Add Geometric Patterns:
On the far left pink section, draw a zigzag line. Add small triangles inside the zigzags for a tribal look. -
Create Dots:
On the cream stripe next to the green, add a column of tiny black dots. On the large right-hand pink section, add larger, scattered polka dots. -
Seal the Project:
Once the ink is fully dry, apply a coat of matte varnish. This protects the clay from moisture and gives it a professional finished texture. -
Attach the Magnet:
Flip the heart over. Apply a dab of strong glue to the back center and press your round magnet firmly into place. -
Final Cure:
Let the glue cure according to the package instructions (usually over night) before stickng it to your refrigerator.
Make it a Set
Create two matching hearts but invert the color scheme on the second one (e.g., make the main body green instead of pink) for a coordinated but dynamic duo on your fridge.
Now you have a stylish piece of mini-decor that turns your refrigerator into an art gallery
Stamped Ornaments That Look Handmade in the Best Way
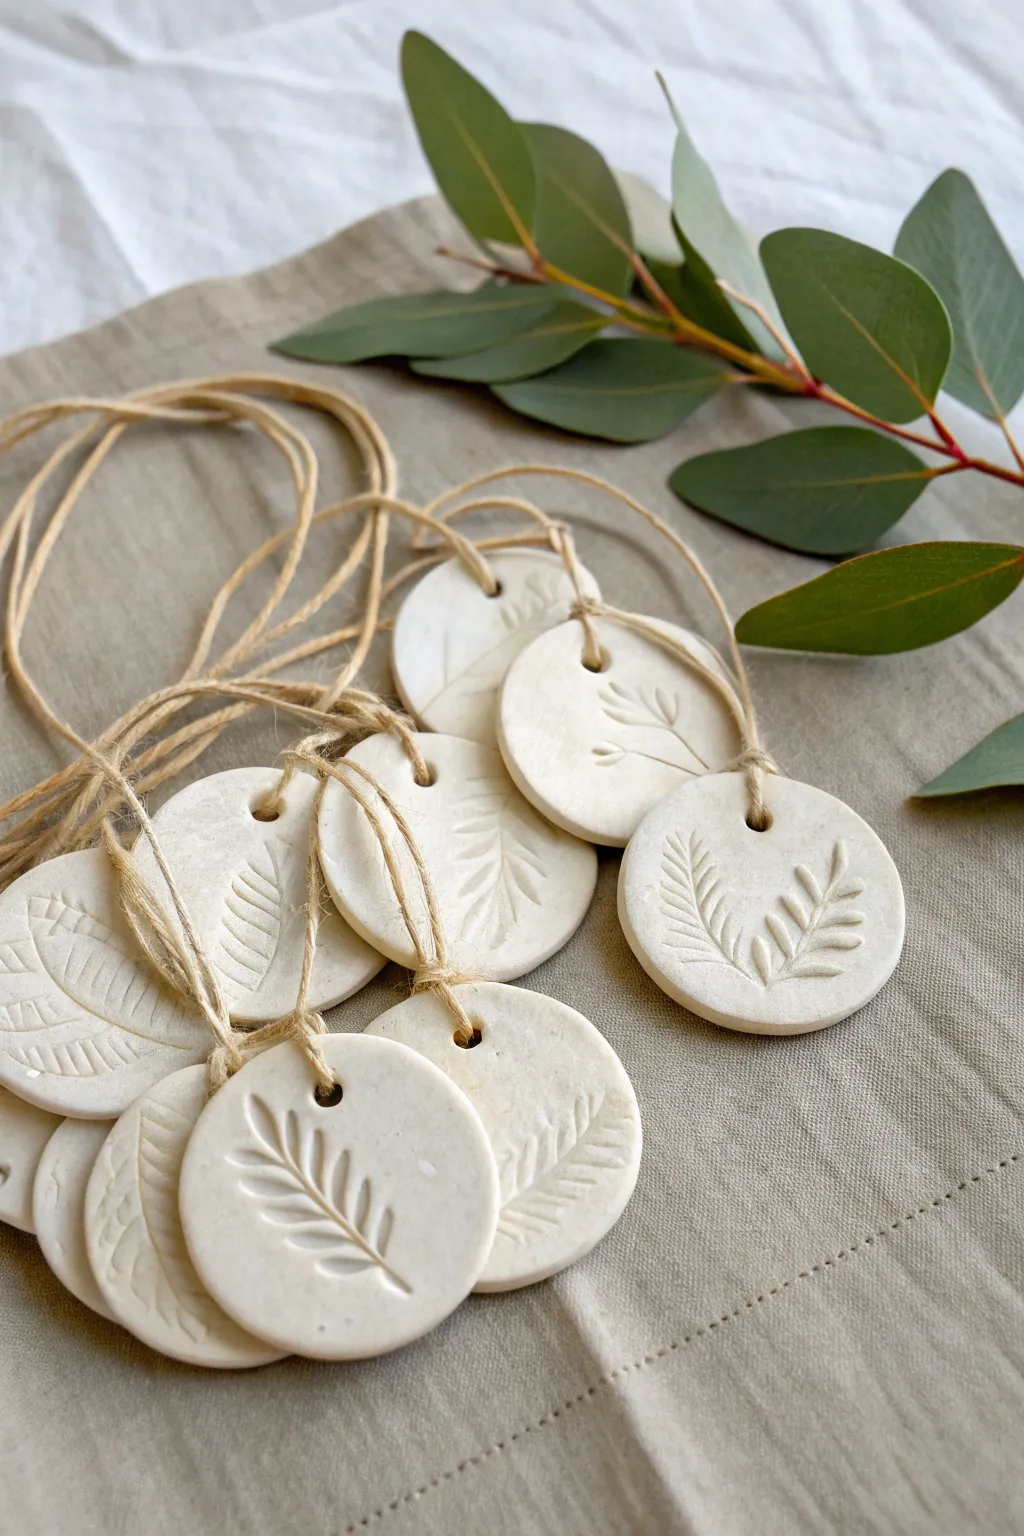
Embrace the imperfect beauty of handcrafted pottery with these simple, stamped clay ornaments. Featuring delicate botanical impressions and natural twine, they bring an earthy, minimalist charm to any decor or gift wrapping.
Step-by-Step Guide
Materials
- Air-dry clay (white or off-white)
- Rolling pin
- Various fresh foliage (ferns, eucalyptus, or strong-veined leaves)
- Round cookie cutter or biscuit cutter (approx. 2-3 inches)
- Straw or wooden skewer
- Jute twine or hemp cord
- Parchment paper or canvas cloth
- Fine-grit sandpaper
- Clear matte sealant (optional)
Step 1: Preparing the Clay
-
Set up your workspace:
Lay down a piece of parchment paper or a canvas cloth on a flat surface. This prevents the clay from sticking and picks up a subtle, nice texture on the back. -
Condition the clay:
Take a handful of air-dry clay and knead it briefly in your hands to warm it up and ensure it creates a smooth, pliable consistency without air bubbles. -
Roll the slab:
Place the clay on your workspace and use the rolling pin to flatten it into an even slab. Aim for a thickness of about 1/4 inch—thick enough to be sturdy, but thin enough to look elegant. -
Smooth the surface:
Inspect the rolled slab for any cracks or uneven spots. Dip your finger in a tiny bit of water and gently smooth out the surface to create a perfect canvas for your prints.
Clean Edges Pro Tip
Before drying, dip your finger in a tiny bit of water and run it along the cut edges of the fresh clay. This acts like a burnishing tool, removing raw cut marks for a professional finish.
Step 2: Impressing and Cutting
-
Select your botanicals:
Choose small sprigs of greenery. The image shows leaves with distinct patterns like ferns or eucalyptus, which leave crisp, recognizable impressions. -
Position the foliage:
Lay your chosen leaf directly onto the clay slab. Consider the placement carefully; you can center a single sprig or have a leaf entering from the side for an asymmetrical look. -
Press designs:
With the leaf in place, gently roll over it with your rolling pin once. Apply firm, even pressure to embed the leaf into the clay, but don’t push so hard that you distort the slab’s thickness too much. -
Reveal the print:
carefully peel the leaf away from the clay. Use the tip of a craft knife or a needle tool to lift the stem if it’s stuck, revealing the detailed veins left behind. -
Cut the shapes:
Position your round cutter over the imprinted design to frame it perfectly. Press down firmly to cut the circle, then lift the cutter. -
Remove excess clay:
Peel away the scrap clay from around your cut circles. You can ball this up and re-roll it for more ornaments. -
Create the hanging hole:
Use a straw or a wooden skewer to poke a hole near the top edge of the circle. Make sure the hole is distinct and fully cleared so you can thread twine through it later. -
Refine the edges:
Dip your finger in water again and gently run it along the cut edge of the circle to smooth out any sharpness or roughness left by the cutter.
Level Up: Color Wash
Mix a tiny drop of green or brown watercolor paint with water. Brush it over the dried impression, then wipe the surface with a damp cloth. The color will stay in the veins, highlighting the texture.
Step 3: Drying and Finishing
-
Begin the drying process:
Transfer the clay discs to a clean sheet of parchment paper or a wire cooling rack. Keep them in a cool, dry place away from direct sunlight. -
Rotate frequently:
Air-dry clay tends to curl as moisture evaporates unevenly. Every few hours, flip the ornaments over to ensure they dry flat. -
Wait for full cure:
Allow the pieces to dry completely, which usually takes 24 to 48 hours depending on humidity. The clay will turn a chalky white and feel hard to the touch. -
Sand the imperfections:
Once fully dry, take a piece of fine-grit sandpaper and very lightly sand the edges if they feel rough. I prefer to do this over a trash bin to catch the fine dust. -
Optional sealing:
If you want to protect the ornaments from moisture or oils, brush on a thin layer of matte clear sealant. This preserves the natural, raw look while adding durability. -
Measure the twine:
Cut lengths of jute twine or hemp cord, roughly 8 to 10 inches long for each ornament. -
Attach the hanger:
Thread the twine through the hole you created. Bringing the two ends together, tie a simple overhand knot or a slip knot to secure the loop.
Gather your finished ornaments and arrange them on a branch, tie them to gifts, or hang them in a window to enjoy their delicate, natural beauty.
Ring Cones That Keep Your Nightstand From Eating Jewelry
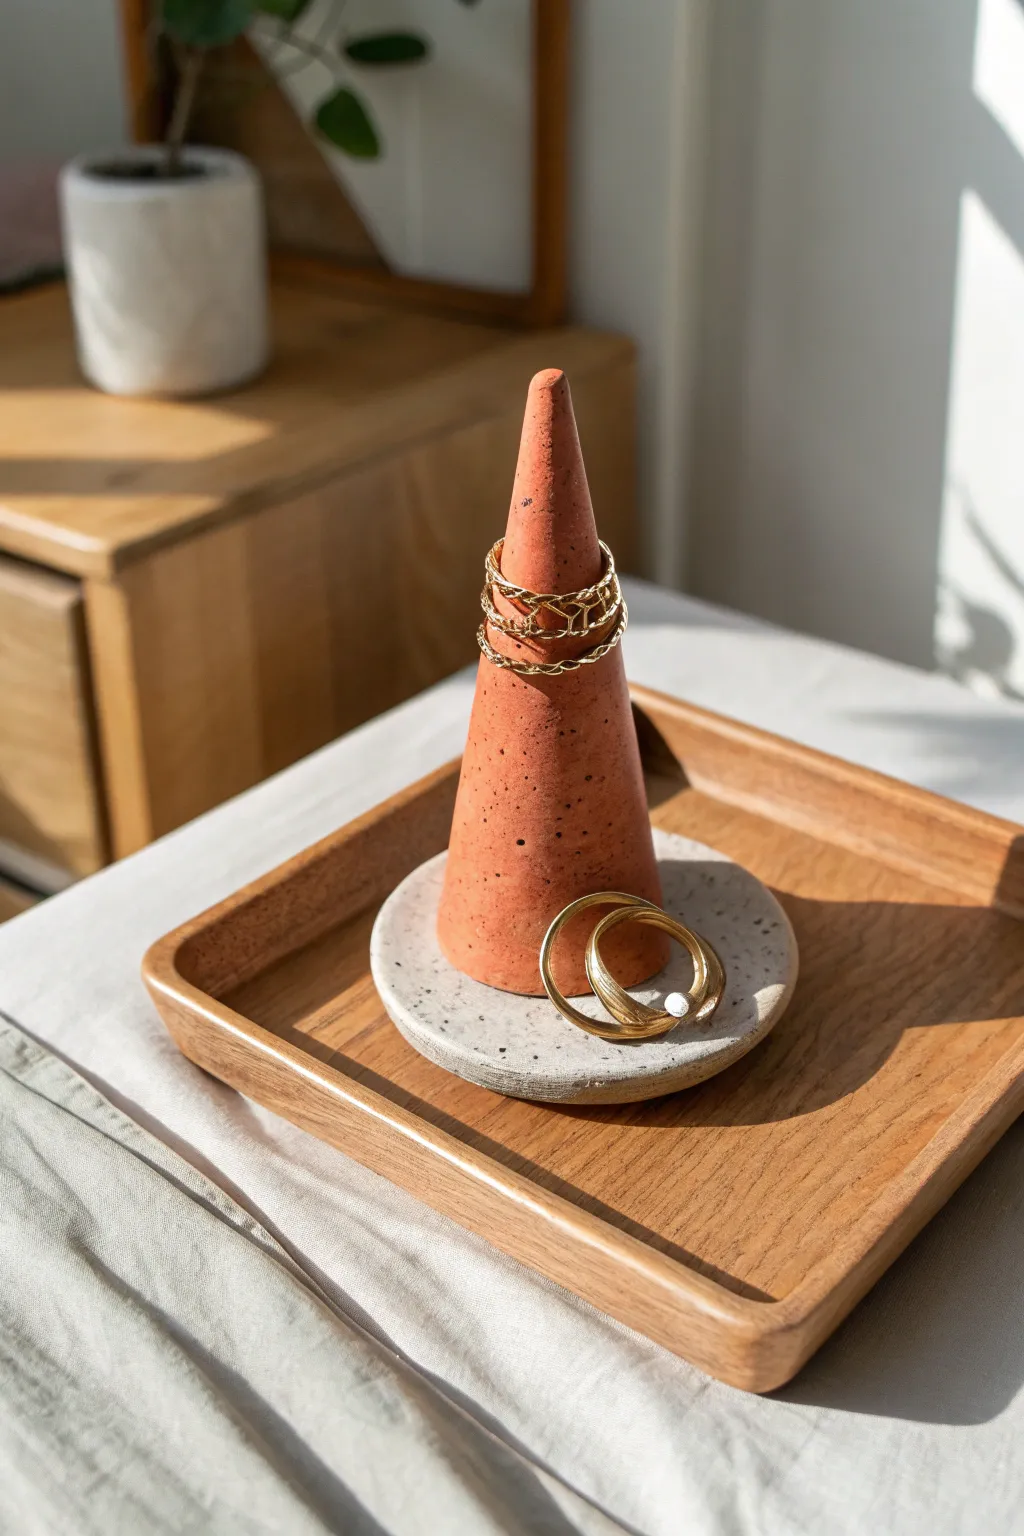
This minimalist jewelry holder combines jagged earth tones with sleek modern geometry. The project features a rusty red clay cone centered on a flat, speckled white base dish, perfect for keeping daily rings organized yet displayed beautifully.
Detailed Instructions
Materials
- Polymer clay (Terracotta or rust color)
- Polymer clay (White or granite effect)
- Acrylic rolling pin
- Sharp blade or clay slicer
- Circle cutter (approx. 3-4 inches)
- Black pepper or dried coffee grounds (for speckling)
- Sandpaper (fine grit)
- Oven
- Liquid polymer clay (or strong craft glue)
- Parchment paper
Step 1: Forming the Cone
-
Condition the clay:
Start by taking a block of your terracotta-colored polymer clay. Knead it thoroughly in your hands until it becomes warm, pliable, and free of any cracks. -
Roll a snake:
Roll the clay into a thick log or snake shape on your work surface to get the general volume ready for shaping. -
Shape the rough cone:
Stand the log up and begin pinching the top while pressing the bottom against the table. You want to create a rough pyramid shape, tapering upwards. -
Refine the surface:
Roll the cone shape back and forth on your table using the palm of your hand. Apply even pressure to smooth out lumps and ensure the cone is perfectly round. -
Check the height:
Aim for a height of about 3 to 4 inches. If it’s too tall and skinny, tap the tip gently to compress it; if too short, roll it slightly longer. -
Flatten the base:
Once you are happy with the cone shape, slice the bottom off cleanly with your sharp blade to ensure it stands completely flat and vertical without wobbling. -
Add texture (optional):
The cone in the photo has a natural, slightly porous look. To mimic this, you can gently pat the surface with a stiff toothbrush or a crumpled ball of aluminum foil.
Fixing a Wobbly Cone
If your cone leans after baking, sand the bottom of the base aggressively on one side until level, or attach a small felt pad to the uneven side.
Step 2: Creating the Speckled Dish
-
Prepare the white clay:
Condition your white polymer clay as you did before. If you don’t have pre-speckled granite clay, we will make our own custom mix. -
Add the speckles:
Flatten the white clay and sprinkle a pinch of ground black pepper or dried coffee grounds onto it. Fold the clay over and knead it until the specks are evenly distributed. -
Roll the slab:
Using your acrylic roller, roll the speckled clay out into an even sheet, approximately 1/4 inch thick. I like to use guide sticks here to keep the thickness perfectly uniform. -
Cut the circle:
Use your circle cutter to punch out a clean disc. If you don’t have a cutter, trace around a glass and cut carefully with your blade. -
Smooth the edges:
Dip your finger in a little bit of baby oil or cornstarch and run it around the cut edge of the circle to soften the sharp angle.
Make it Marble
Don’t stop at solid colors. Twist two clay colors together before shaping the cone to create a chic marble effect vs the solid terracotta look.
Step 3: Assembly and Baking
-
Position the cone:
Place your terracotta cone directly in the center of the speckled round base. Press down firmly to adhere them, but be careful not to distort the cone shape. -
Secure the bond:
For extra durability, I recommend adding a drop of liquid polymer clay between the cone and the base before pressing them together. -
Bake carefully:
Place your assembled piece on parchment paper to prevent shiny spots. Bake according to your specific clay brand’s instructions (usually 275°F for 15-30 minutes). -
Cool it down:
Let the piece cool completely inside the oven with the door slightly ajar. Rapid cooling can sometimes cause cracks where the two pieces join. -
Final finish:
Once cool, lightly sand the bottom of the dish if there are any rough spots. The matte finish is key to this look, so no glaze is needed.
Place this stylish little sculpture on your bedside table and enjoy how it catches the morning light
Easy Wall Hangings Made From Simple Clay Tiles
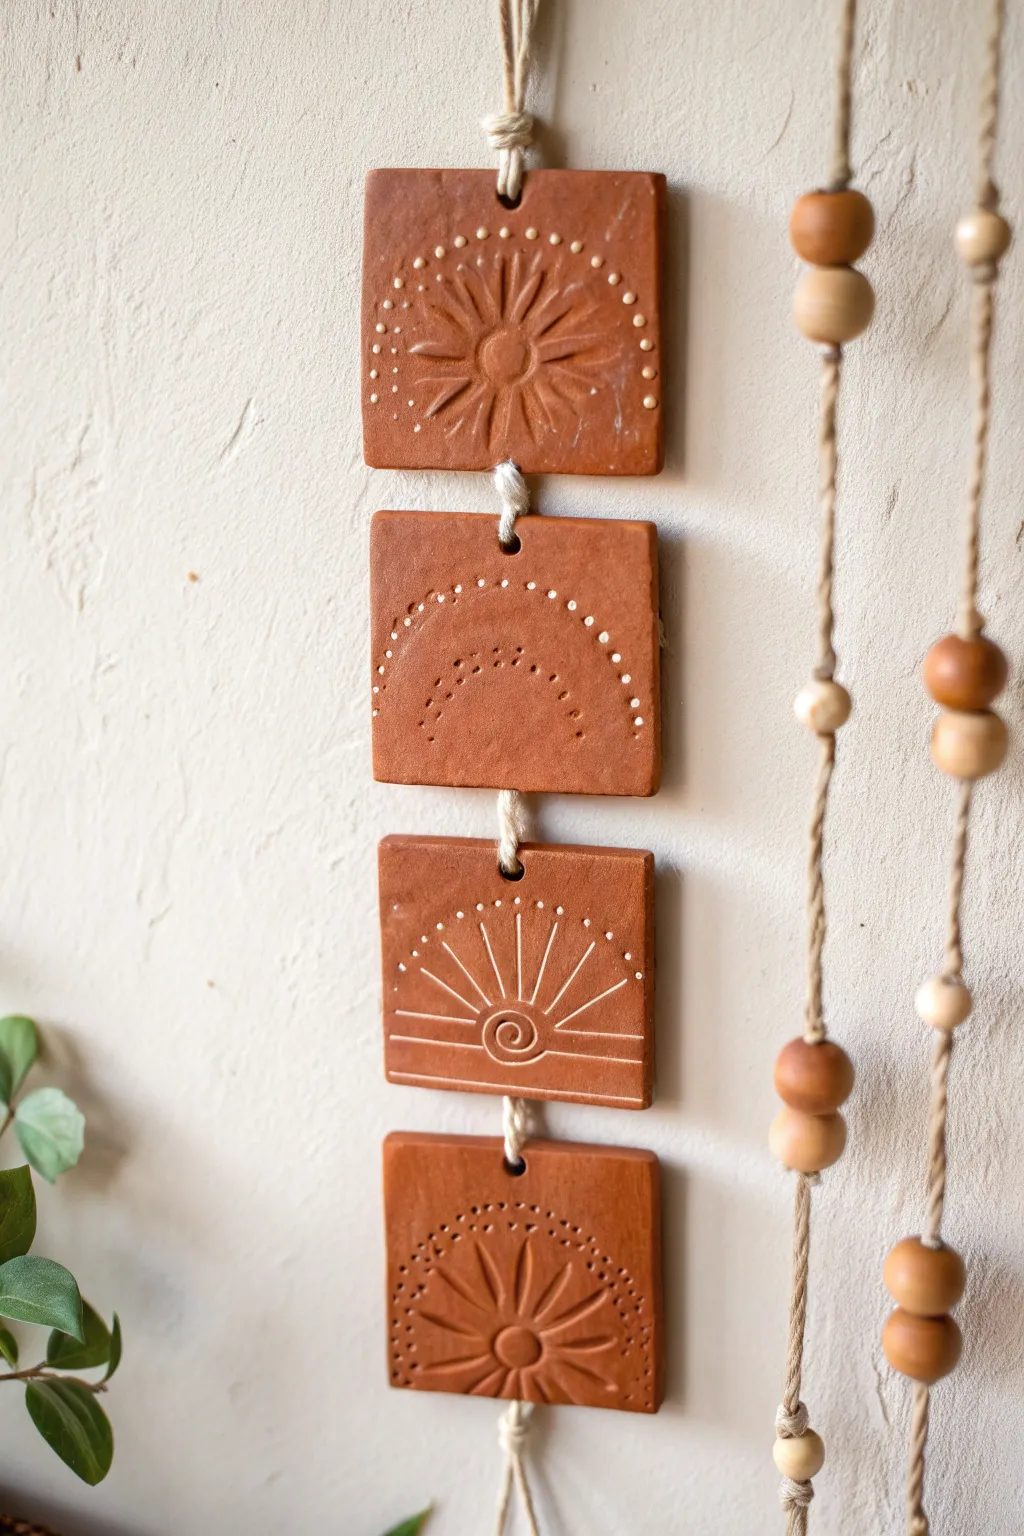
Embrace the warmth of natural textures with this simple yet striking wall hanging made from hand-stamped clay tiles. Suspended with rustic twine and wooden beads, these etched terracotta squares bring a touch of earthy boho charm to any vertical space.
Step-by-Step
Materials
- Air-dry clay (terracotta color) or oven-bake polymer clay
- Rolling pin
- Square cookie cutter (approx. 3-4 inches) or ruler and knife
- Clay carving tools or a large needle tool
- Small coffee straw or chopstick (for making holes)
- Jute twine or hemp cord
- Assorted wooden beads (natural finish)
- Fine-grit sandpaper
- Water and sponge (for smoothing)
- White acrylic paint (optional, for inlay)
- Clean rag or paper towel
Step 1: Shaping the Tiles
-
Prepare your workspace:
Lay down a canvas mat or parchment paper to prevent sticking. Take a large handful of your terracotta-colored clay and knead it until it is soft, pliable, and free of air bubbles. -
Roll out the slab:
Using your rolling pin, flatten the clay into an even slab. Aim for a thickness of about 1/4 inch (6mm). If you want uniform thickness, place two wooden rulers on either side of the clay to guide the rolling pin. -
Cut the squares:
Use a square cookie cutter to stamp out four identical squares. Alternatively, measure and cut 3-inch squares using a ruler and a sharp knife. You’ll need four tiles for this specific design. -
Smooth the edges:
Dip your finger in a little water and gently run it along the cut edges of each square to smooth down any roughness or sharp corners. This gives the tiles a more finished, professional look. -
Create hanging holes:
Use a straw or a chopstick to poke a hole in the center of the top and bottom edge of each square. Important: The very top tile needs only one hole at the bottom (if hanging from a loop) or top and bottom depending on your rigging preference, while the very bottom tile only needs a hole at the top. For the design shown, put top and bottom holes in all tiles to allow for flexible stringing.
Step 2: Carving the Designs
-
Plan the patterns:
Lightly sketch your designs into the damp clay with a needle tool. The reference image features two sunbursts (top and bottom), a dotted rainbow arch (second from top), and a rising sun with rays (third). -
Etch the sunbursts:
For the top and bottom tiles, carve radiating lines from a central circle. Use a tool with a small loop tip to scoop out the clay slightly, creating depth. Add a border of small dots around the upper arc. -
Carve the rainbow arch:
On the second tile, create a rainbow shape using dashed lines or dots. Vary the texture by poking deep, small holes for the outer arch and dashed lines for the inner arches. -
Detail the rising sun:
For the third tile, carve a spiral or swirl in the lower center. Draw straight rays extending outward and upward from this spiral. Add white paint to the grooves later if you want them to pop. -
Allow to dry:
Let your clay tiles dry completely according to package instructions. Air-dry clay usually takes 24-48 hours. If using oven-bake clay, bake it now.
Cracked Clay?
If hairline cracks appear while air-drying, mix a tiny amount of fresh clay with water to make a paste (slip) and fill the cracks. Smooth over with a finger.
Step 3: Assembly & Finishing
-
Sand imperfections:
Once fully dry (and cool, if baked), use fine-grit sandpaper to gently smooth the edges again. Be careful not to sand away your carved designs. -
Optional white inlay:
To mimic the high-contrast look in some pottery, dilute white acrylic paint with a little water. Brush it into the grooves, then immediately wipe the surface with a damp rag, leaving paint only in the recessed lines. -
Cut the cord:
Cut a long length of jute twine. You will need a distinct central strand that runs through the tiles, and potentially separate strands for the side bead decorations. -
String the first tile:
Thread the twine through the top hole of the top tile. Tie a secure stain knot or overhand knot underneath the hole to hold the tile in place, or loop it through and knot at the top for suspension. -
Connect the tiles:
Determine the spacing you want between tiles (about 1 inch is standard). Tie a knot, thread through the top hole of the next tile, run the string down the back, out the bottom hole, and knot again. Repeat until all four tiles are connected. -
Add side garlands:
Cut two additional long pieces of twine. Tie knots and thread various sizes of wooden beads onto them, leaving random spacing between clusters of beads. I find varying the bead sizes creates a nice rhythm. -
Final assembly:
Attach these beaded strands to the very top loop or mounting point of your main tile strand so they hang alongside the clay pieces.
Pro Tip: Clean Lines
When carving the designs, let the clay firm up slightly (leather hard) for 20 minutes before carving. It prevents the clay from dragging and creates cleaner cuts.
Hang your new terracotta creation near a window to catch the light and enjoy the handmade warmth it brings to the room.
Textured “Noodle” Pots With Raised Clay Lines for a Wow Finish
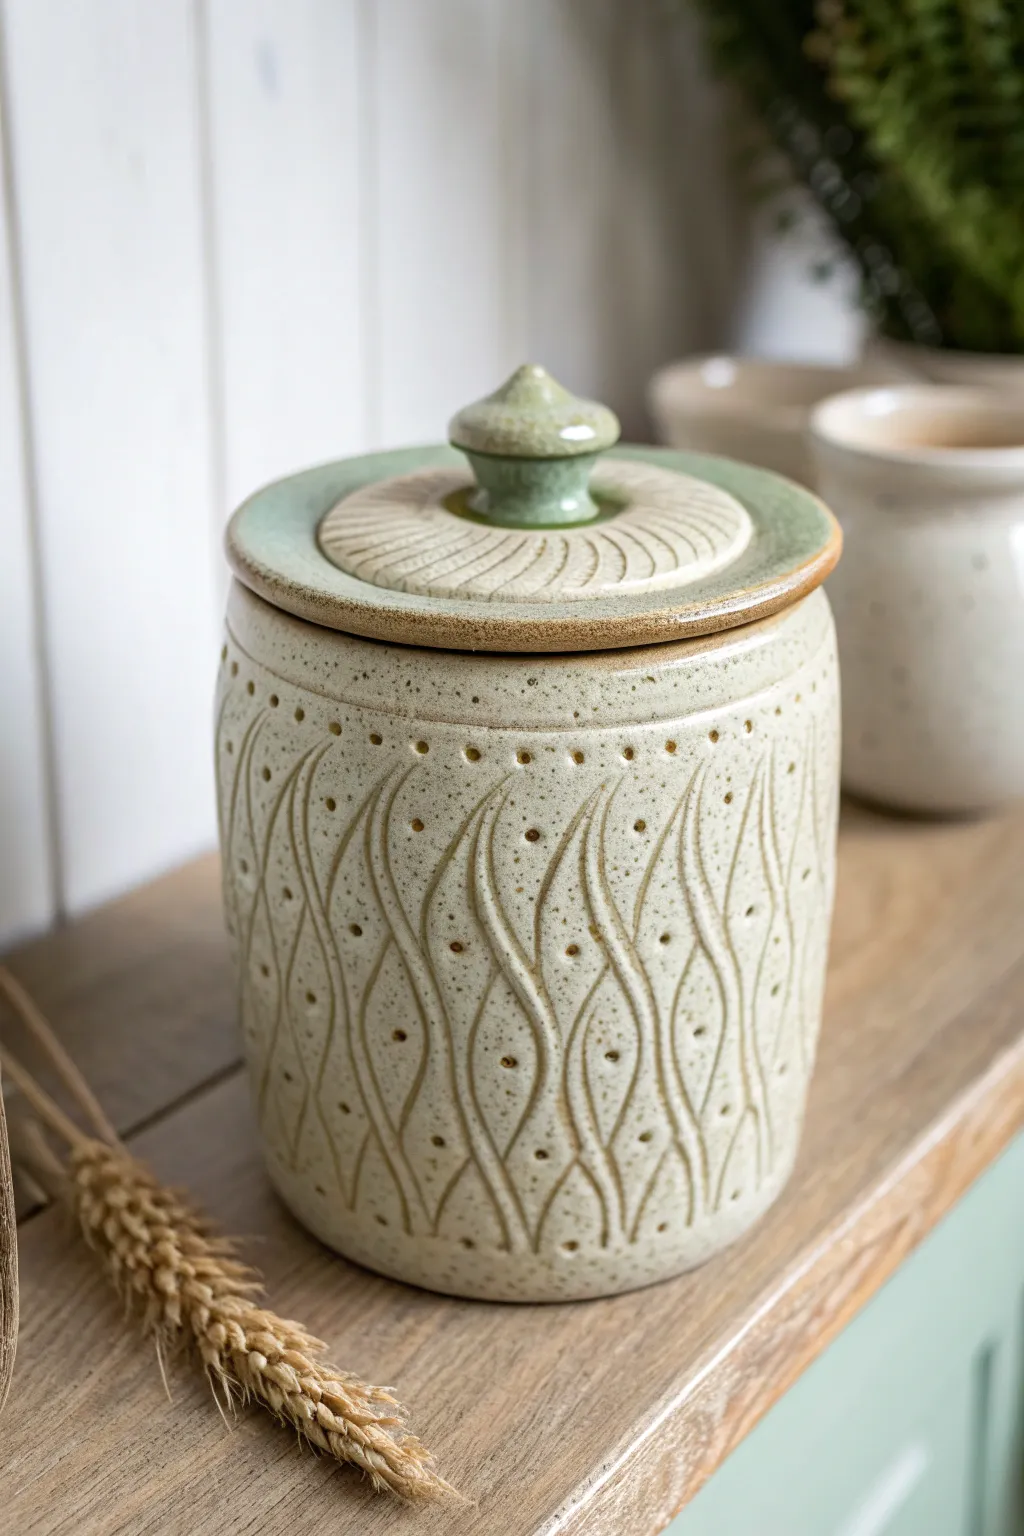
This charming lidded jar combines classic wheel-thrown forms with intricate surface decoration using slip trailing and impressed textures. The result is a tactile, speckled piece featuring elegant, wave-like ridges and a soft, earthy glaze palette that feels both rustic and refined.
Detailed Instructions
Materials
- Stoneware clay (preferably a speckled buff body)
- Pottery wheel
- Throwing tools (sponge, ribs, wire cutter)
- Slip trailer bottle with a medium precision tip
- Thick slip (made from your clay body)
- Small round tool or drill bit (for impressing dots)
- Trimming tools
- Calipers
- Cream/oatmeal speckled glaze
- Celadon or transparent green glaze (for the lid)
- Wax resist
Step 1: Throwing the Form
-
Center and open:
Begin with about 2-3 lbs of well-wedged speckled stoneware clay. Center it firmly on the wheel and open the clay to a flat interior floor, leaving enough thickness for trimming later. -
Pull the walls:
Pull the walls up into a straight cylinder first to ensure even thickness. For this specific jar, you want to gently swell the belly outward while keeping the rim slightly narrower, creating a soft, barrel-like silhouette. -
Create the gallery:
Using a wooden modeling tool or your fingers, split the rim carefully to create a ‘gallery’—the internal shelf where the lid will sit. Ensure this ledge is distinct and sharp so the lid fits snugly. -
Measure and finish the rim:
Before removing the pot from the wheel, measure the gallery width with calipers. Smooth the rim with a chamois to prevent sharpness. -
Throw the lid:
Using a smaller ball of clay (about 1 lb), throw a lid ‘off the hump’ or centered on a bat. Use your caliper measurement to ensure the lid’s flange matches the jar’s gallery exactly. Shape a distinct, decorative knob at the center.
Step 2: Adding Texture & Decoration
-
Trimming:
Once both pieces are leather hard, trim the bottom of the jar to create a clean foot ring. Trim the underside of the lid to remove excess weight. -
Carving the lid:
While the lid is leather hard, use a carving tool to etch a spiral or radial pattern into the top surface of the lid, radiating from the knob outward. -
Prepare the slip:
Fill your slip trailer with thick throwing slip made from the same clay body. The consistency should be like thick frosting—stiff enough to hold a line without running. -
Pipe the vertical swirls:
On the jar’s body, gently squeeze the slip trailer to draw vertical, wavy S-curves. Start from the bottom and sweep upward, overlapping the tails of the curves slightly to create an interlocking leaf-like pattern. -
Add dot accents:
Once the slip lines have stiffened slightly but are not bone dry, use the back of a small drill bit or a round styling tool to press rows of small holes or dimples between the slip lines and near the rim. This adds the perforated look. -
Dry slowly:
Cover the piece loosely with plastic. Uneven drying between the added slip and the main body can cause cracking, so I always let these dry very gradually over several days. -
Bisque fire:
Once fully bone dry, bisque fire the pieces to Cone 04 (or your clay’s specific bisque temperature).
Slip Consistency
Test your slip on a scrap slab first. If the lines slump, let the slip dry in the bottle for an hour. If they crack, add a drop of vinegar to the mix.
Step 3: Glazing
-
Clean and wax:
Wipe the bisque ware with a damp sponge to remove dust. Apply wax resist to the foot ring of the jar and the contact points of the lid and gallery to prevent them from fusing shut. -
Apply the main glaze:
Dip the entire jar and the outside of the lid into a creamy oatmeal glaze. This semi-opaque glaze works best as it breaks into a warm brown over the raised slip textures and reveals the clay’s speckles. -
Accent the lid:
Carefully dip or brush the knob and the very edge of the lid rim with a green celadon glaze. This translucent green will pool beautifully in the carved spiral details. -
Final wipe:
Check the gallery and foot one last time to ensure no stray glaze droplets remain. -
Glaze fire:
Fire the kiln to the maturity temperature of your clay and glaze (likely Cone 5 or 6 for stoneware).
Make it a Set
Use this same ‘noodle’ slip technique on mugs or bowls to create a matching breakfast set. The texture offers amazing grip for hand-held items.
Once cooled, fill your beautiful new jar with kitchen staples or use it as a standalone decorative piece.