If you can roll a nice even “snake,” you can build just about anything with coil clay. Here are my favorite coil-building ideas—from the classic pots everyone loves to the weirder, artsy pieces that always get people asking, “How did you make that?”
Easy Coil Planter With a Matching Saucer
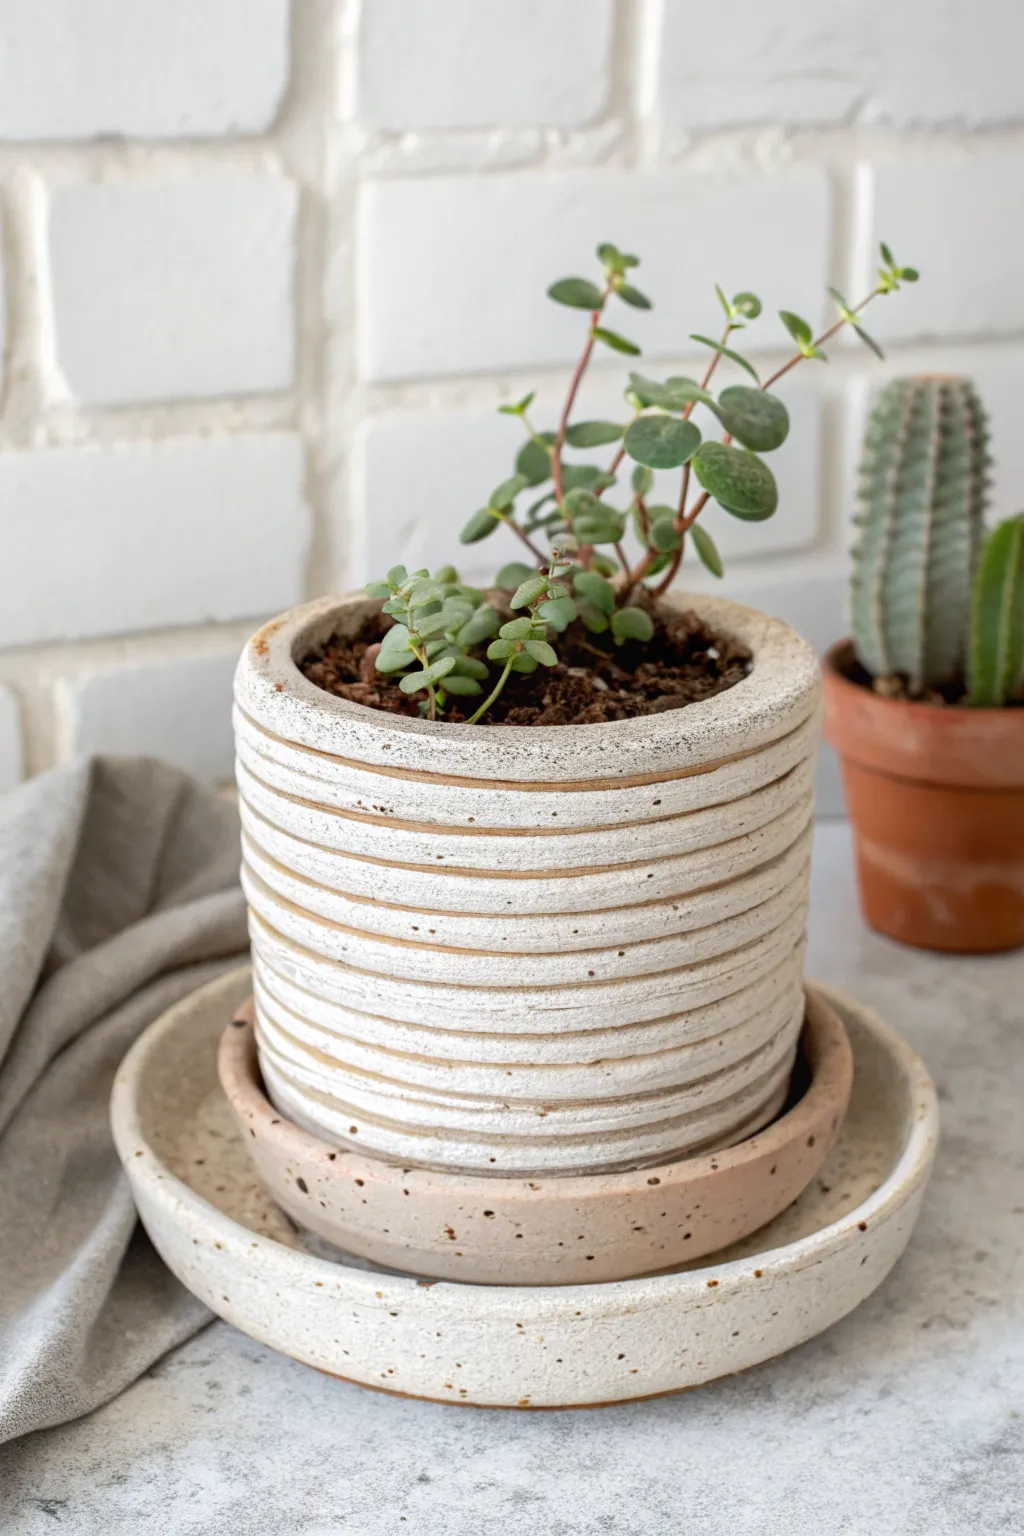
Embrace the texture of hand-building with this minimalist planter that highlights its own construction method through exposed coils. Finished with a speckled white glaze, this set features a unique double-saucer catch tray that adds visual weight and functionality.
Detailed Instructions
Materials
- Speckled Stoneware Clay (cone 5/6 recommended)
- Clay Roller or rolling pin with guide strips
- Circle template or compass
- Fettling knife or needle tool
- Scoring tool (serrated rib or needle)
- Slip (clay and water slurry)
- Wooden modeling tool
- Sponge
- White Satin or matte glaze (food safe)
- Small kiln (unless using air-dry clay, though kiln-fired follows image best)
Step 1: Building the Planter Base
-
Roll the slab:
Begin by wedging your speckled clay to remove air bubbles. Roll out a slab approximately 1/4 inch thick. This will form the base of your pot and the saucers. -
Cut the bases:
Using a circle template or a found object like a bowl, cut out three circles. One will be the planter floor (approx. 4 inches), one for the inner saucer (4.5 inches), and one for the larger outer saucer (5.5 inches). -
Smooth the edges:
Run a damp finger or a soft sponge around the cut edges of your discs to compress the clay and remove any sharp crumbs.
Keep it Straight
Use a banding wheel while building. Spin it slowly as you stack coils to easily spot if one side is getting higher or wider than the other.
Step 2: Coiling the Walls
-
Make the coils:
Take a chunk of clay and roll it into a long snake on your work surface. Use long strokes from your fingertips to your palms to keep it even. Aim for coils that are roughly the thickness of your pinky finger. -
Score and slip foundational layer:
Take your smallest base circle. Thoroughly score the outer rim and apply a generous amount of slip. -
Attach the first coil:
Lay your first coil directly onto the slipped rim. Cut the ends at a diagonal angle where they meet, score and slip the join, and press them firmly together. -
Blend the interior:
To ensure structural integrity, use a wooden modeling tool or your thumb to smudge the clay from the coil downwards onto the base on the *inside* of the pot only. The outside will remain untouched to preserve the texture. -
Build upward:
Score the top of the first coil and apply slip. Place the next coil directly on top. Repeat the internal blending process—smudging the top coil down into the one below it on the inside surface. -
Refine the shape:
As you stack roughly 8-10 coils, check that your walls are straight vertical cylinders, not flaring out. I find using a ruler held against the side helps keep things aligned. -
Finish the rim:
Once you reach the desired height, use a damp chamois or sponge to gently round off the very top coil so it is smooth and pleasant to touch.
Step 3: Creating the Saucers
-
Form saucer rims:
For both remaining base discs, roll thinner coils. Score and slip the edges of the discs and attach just one or two coils to create a shallow lip. -
Blend saucer interiors:
Just like the pot, blend the coil down into the base on the inside so the saucer is water-tight. -
Smooth the outer edges:
For the saucers shown in the image, the outside isn’t heavily ribbed like the pot. Use a rubber rib or sponge to smooth the outside of the saucer coils for a sleeker contrast.
Cracking Coils?
If coils crack while rolling, your clay is too dry. Spritz the work surface with water or wrap the clay in a damp towel for an hour before trying again.
Step 4: Firing and Glazing
-
Bisque fire:
Allow all pieces to dry very slowly under loose plastic to prevent warping. Once bone dry, bisque fire them to Cone 04. -
Apply the glaze:
Dip or brush a satin white glaze over the pieces. The image shows a glaze that breaks over high points, revealing the brown clay beneath the white, so apply a medium layer—not too thick. -
Wipe the texture:
This is crucial for the look: take a damp sponge and gently wipe the glaze off the raised ridges of the coils on the main planter. This exposes the raw clay lines. -
Final firing:
Glaze fire to the maturity temperature of your clay (likely Cone 5 or 6). The heat will integrate the white glaze with the iron speckles in the clay.
Stack your saucers, pot your favorite succulent, and enjoy the organic feel of your new ceramic home


Textured Corrugated Coil Pot That Shows Every Ridge
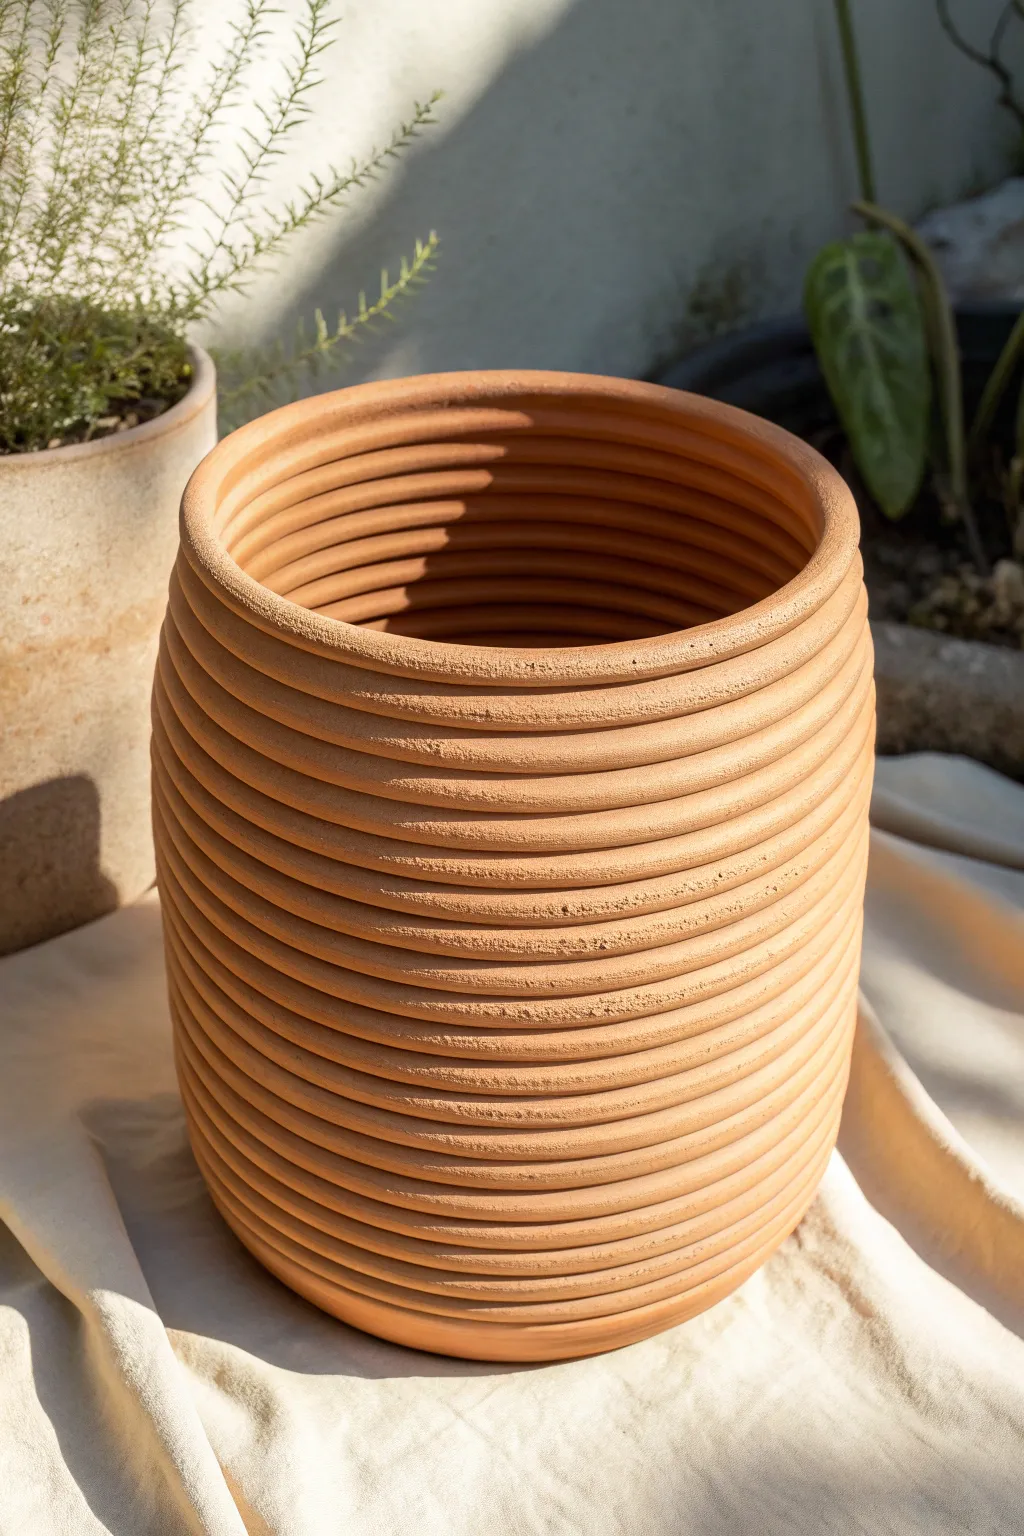
Embrace the raw beauty of hand-building with this striking planter that celebrates the coil itself. Instead of smoothing away the evidence of construction, this project highlights every ridge and rounded edge for a texture that feels both ancient and modern.
Step-by-Step Guide
Materials
- Terracotta stoneware clay
- Clay extruder (optional, but recommended for uniformity)
- Fettling knife
- Serrated rib tool
- Slip (clay and water mixture)
- Scoring tool
- Wooden modeling tool
- Ware board or bat
- Sponge
Step 1: Base Construction
-
Prepare the slab:
Begin by rolling out a circular slab of clay approximately 1/4 to 1/2 inch thick. This will serve as the strong foundation for your pot. -
Cut the circle:
Use a needle tool or fettling knife to cut a clean circle from your slab. A diameter of 6-8 inches works well for a medium-sized planter like the one pictured. -
Score the edge:
Take your serrated tool and rough up the outer 1/2 inch perimeter of your base. Apply a generous amount of slip to this roughened area to prepare it for the first coil.
Consistent Coils
If hand-rolling, use two wooden slats of equal thickness as guides. Roll your hands over the clay between the slats to ensure the coil is perfectly even from end to end.
Step 2: Creating the Coils
-
Extrude or roll:
For that perfect, machine-like consistency shown in the image, I highly recommend using a clay extruder with a medium circle die. If rolling by hand, strive for extreme consistency, rolling coils that are about equal to the thickness of a finger. -
Keep them moist:
Make several long coils at once, but keep them under plastic immediately. You need the clay to remain plastic and flexible for the stacking process.
Step 3: Stacking and Shaping
-
Lay the first coil:
Place your first coil directly onto the scored and slipped edge of the base. Cut the ends at an angle where they meet to increase surface area for the join. -
Secure the interior:
This is crucial: Do not smooth the outside. Instead, use your wooden tool or finger to firmly blend the clay *only on the inside* of the pot, merging the coil down into the base. -
Score individual layers:
Lightly score the top of the placed coil and apply a thin layer of slip. This ensures a strong bond without needing to smudge the exterior texture later. -
Build upward:
Continue stacking coils one by one. To create the gentle outward swell seen in the photo, place each new coil ever so slightly toward the outer edge of the coil below it. -
Hidden reinforcement:
After every 2-3 layers, pause to smooth the interior wall completely. This internal blending is the only thing holding the pot together since we are leaving the outside untouched. -
Tapering back in:
Once you reach the widest part of the belly (about halfway up), begin placing coils slightly toward the inner edge of the previous layer to bring the shape back in.
Sagging Walls?
If the pot starts to wobble as you build, the clay is too wet or the wall is too heavy. Stop building and let the lower section stiffen up with a heat gun or time before adding more height.
Step 4: Refining the Rim
-
Leveling the top:
As you near the desired height, check that your rim is level. You may need to gently tap the top coil with a flat board to even it out without squashing the round profile. -
Finishing the lip:
For the final coil, pay extra attention to the join. Smooth the seam impeccably so it becomes invisible, creating a continuous, uninterrupted ring at the top. -
Cleaning the exterior:
Wait until the pot is leather hard. Use a slightly damp sponge to very gently wipe the exterior coils. You aren’t smoothing them; you are just removing any sharp crumbs or loose bits of clay. -
Final drying:
Cover the pot loosely with plastic to let it dry slowly. Because the coils are thick and the connections are only internal, slow drying prevents cracking between layers.
Once fired, the rhythmic shadows created by the ridges will make this pot a standout piece in your collection


Coil Tea Light Holder With Cutout Openings
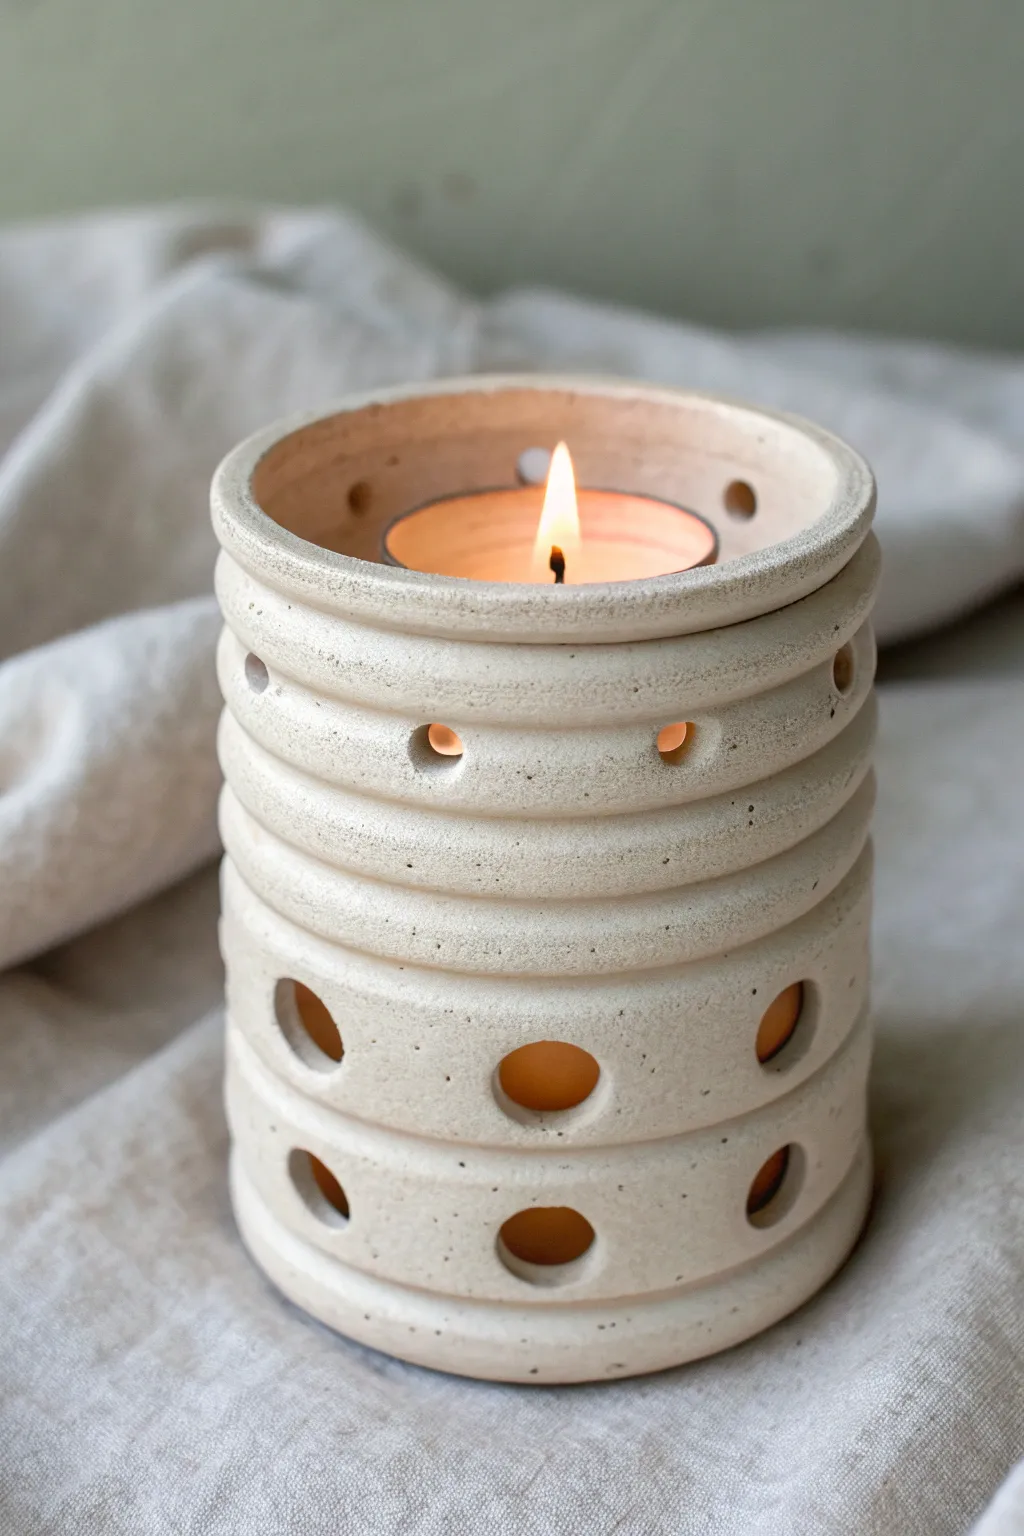
This rustic, elegant candle holder uses thick coils to build a sturdy cylinder that glows from within. The evenly spaced circular cutouts allow the candlelight to dance through the ceramic walls, creating a cozy atmosphere perfect for quiet evenings.
How-To Guide
Materials
- Stoneware clay (smooth or lightly speckled)
- Circular clay cutters (small and medium sizes)
- Sharp needle tool
- Rib tool (kidney shaped, wood or metal)
- Scoring tool or fork
- Slip (clay and water mixture)
- Sponge
- Rolling pin
- Canvas or cloth board for working surface
- Matte white or transparent glaze
Step 1: Forming the Base
-
Prepare the slab base:
Begin by rolling out a flat slab of clay approximately 1/4 inch thick. Use a circular cutter or trace around a jar lid to cut a perfect circle for your base, ensuring it is slightly wider than a standard tea light. -
Roll your coils:
Take a chunk of clay and roll it on your table to create long, even snakes. Aim for a thickness of about 1/2 inch to 3/4 inch—these need to be substantial to match the chunky aesthetic of the piece. -
Score and slip the first ring:
Rough up the outer edge of your base circle and apply a dab of slip. Place your first coil on top of this edge, pressing down gently to adhere it without squashing the round shape of the coil.
Clean Cuts Every Time
Wrap a piece of thin plastic wrap over the clay wall before pressing your circle cutter into it. This creates a soft, rounded edge on the hole and eliminates the need for extensive sanding later.
Step 2: Building the Walls
-
Stacking the rings:
Continue adding coils one on top of the other. The key here is not to blend the coils completely on the outside; you want that distinct ribbed texture to remain visible. -
Secure the interior:
While keeping the outside defined, I suggest using your thumb or a modeling tool to smear the clay downwards on the *inside* of the vessel. This bonds the coils together for structural integrity without ruining the exterior pattern. -
Check vertical alignment:
As you build upward, step back occasionally to ensure your cylinder is rising straight up and not flaring out. You want a consistent diameter from bottom to top. -
Create the rim:
Once you have reached your desired height (about 4-5 inches is usually good for a tea light), add one final coil. You can flatten this top edge slightly with a paddle or block of wood for a clean finish. -
Smooth the interior walls:
Use a slightly damp sponge or a rib tool to smooth the inside walls where you blended the coils. A smooth interior makes it easier to clean out melted wax later.
Step 3: Carving and Finishing
-
Let it firm up:
This step is crucial: let the pot dry to a ‘leather hard’ state. If you try to cut holes while the clay is too soft, the walls will collapse. -
Plan your cutouts:
Look at the coil lines. The design features holes punched directly through specific coil rows. Decide on a pattern—the example uses larger holes near the bottom and smaller ones near the top. -
Punch the lower holes:
Using a medium circular cutter, press firmly through the clay wall on the designated lower coils. Twist the cutter gently as you pull it out to remove the clay plug cleanly. -
Punch the upper holes:
Switch to a smaller cutter for the upper section. Ideally, place these holes in the alternating spaces compared to the row below for visual balance. -
Clean the edges:
Once the holes are cut, use a damp sponge or your finger to smooth any sharp burrs or rough edges around the openings. -
Bisque fire:
Allow the piece to dry completely until bone dry, then fire it in the kiln to a bisque temperature. -
Glaze application:
Dip or brush your piece with a matte white or clear glaze to highlight the natural speckle of the clay. Be careful not to let glaze pool too thickly inside the cutout holes. -
Final firing:
Fire the piece again to your clay body’s maturation temperature (likely Cone 5 or 6 for stoneware).
Collapsing Walls?
If the cylinder wobbles as you build, stop immediately. The clay is too wet to support the weight. Use a heat gun briefly or wait an hour before adding the next heavy coil.
Place a tea light inside and enjoy the warm, patterned glow your new handmade ceramic piece casts on the table


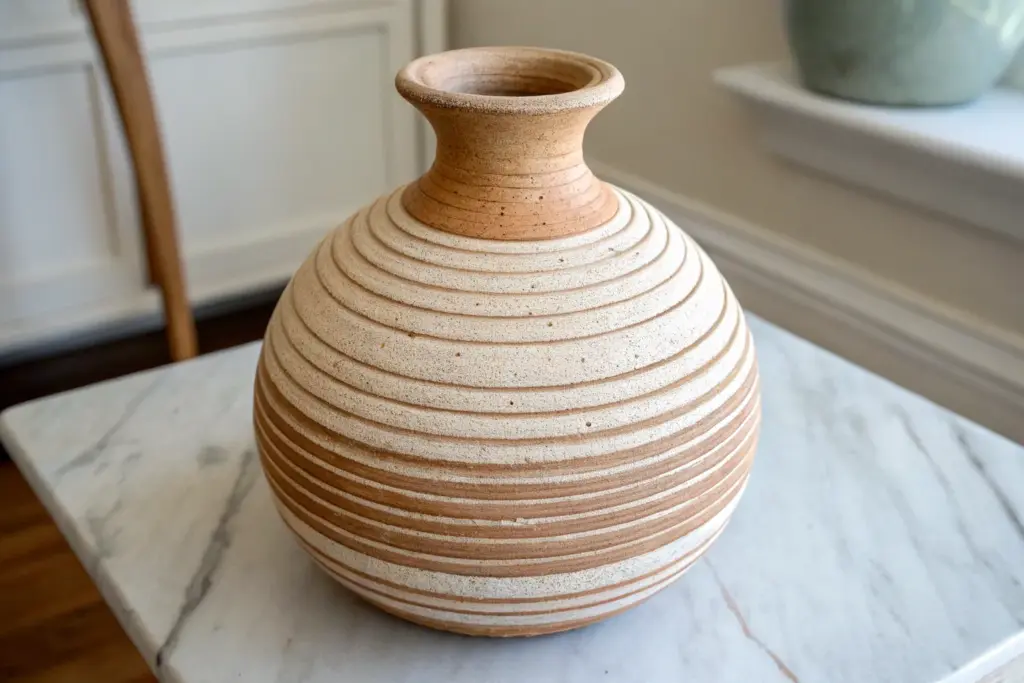
Donut-Shaped Coil Ring Vessel for a “How Is That Standing?” Look
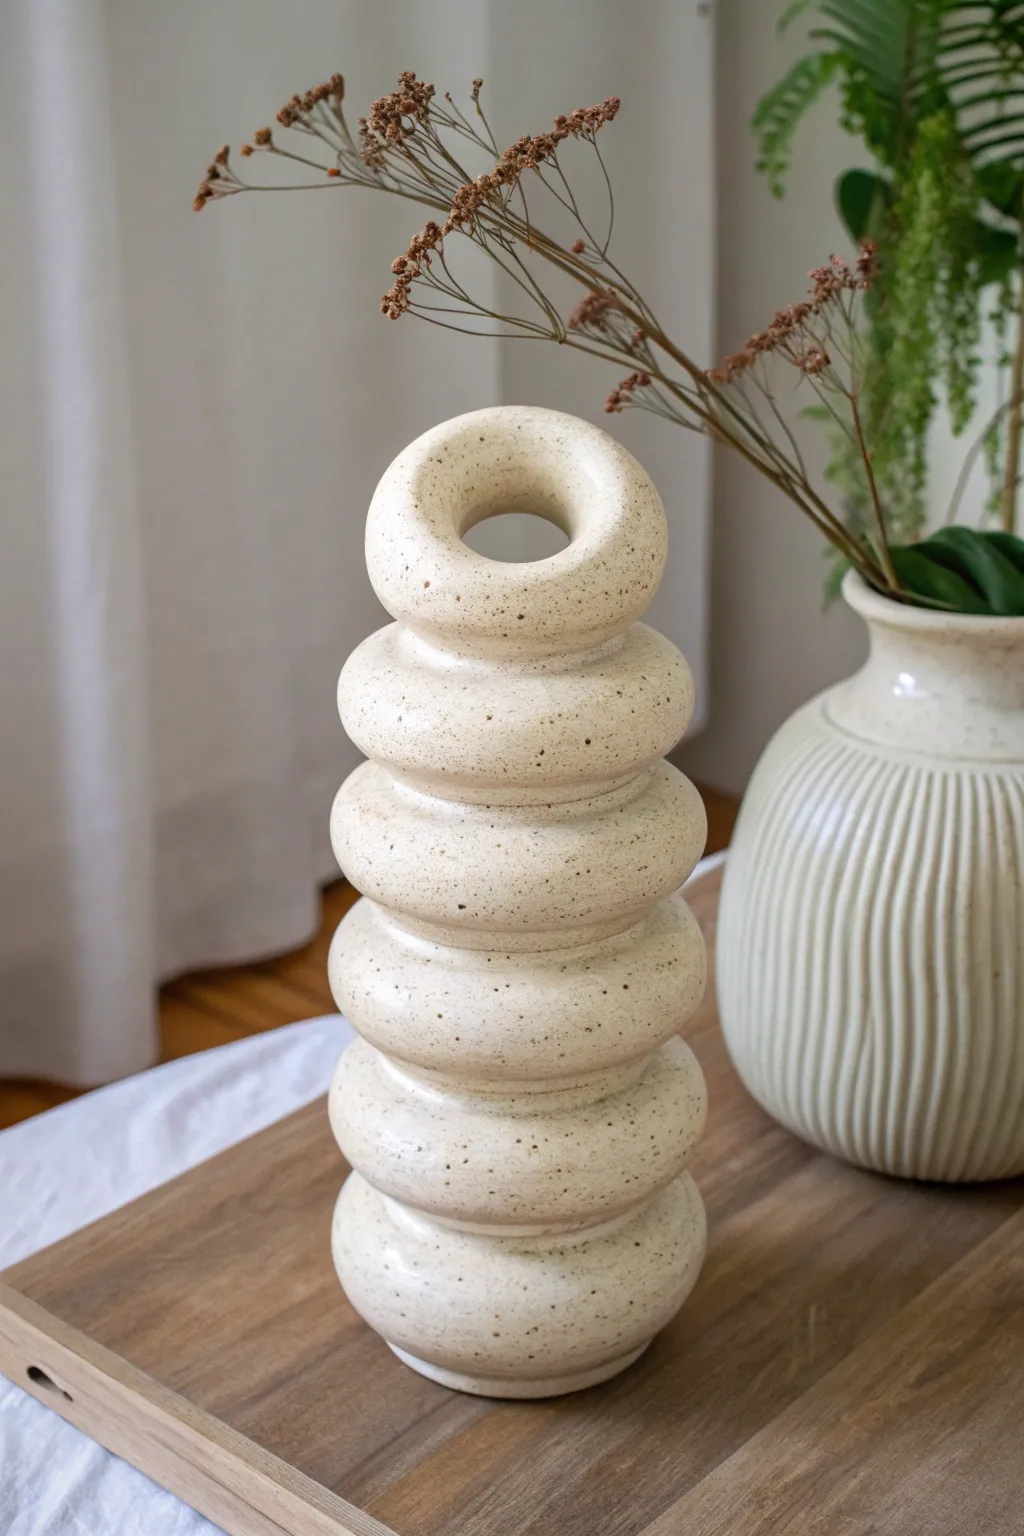
Defy gravity with this playful, architectural vessel that stacks rounded forms into a totem-like structure. The creamy speckled glaze and repetitive curves give it a modern, organic feel that looks deceptively difficult to construct.
Step-by-Step Tutorial
Materials
- Stoneware clay (speckled or buff)
- Clay scoring tool or serrated rib
- Slip (clay mixed with water)
- Wooden modeling tool
- Rubber kidney rib
- Sponge
- Rolling pin (optional)
- Speckled oatmeal or cream glaze
- Kiln
Step 1: Forming the Base Rings
-
Prepare your clay:
Begin by thoroughly wedging your stoneware clay to remove air bubbles. Since this is a structural piece, uniform consistency is key to prevent sagging later. -
Roll the first coil:
Roll out a thick, even coil of clay on your work surface. Aim for a thickness of about 1.5 inches to ensure the ‘donut’ shapes look plump and substantial. -
Create the base ring:
Curve the coil into a circle with a diameter of roughly 4-5 inches. Join the ends by cutting them at a 45-degree angle, scoring, slipping, and smoothing the seam. -
Close the bottom:
Roll a small slab and cut a circle slightly smaller than the base ring. Score and slip it onto the bottom of your first ring to create a floor for the vase. -
Repeat the ring process:
Create five distinct rings. They should ideally graduate very slightly in size or remain uniform, but avoid making the upper rings significantly heavier than the base. -
Initial refinement:
Before stacking, smooth each ring individually with a damp sponge or rubber rib. It’s much harder to reach the crevices once they are attached.
Don’t Squish It!
Work in stages. Build the bottom three rings, cover loosely with plastic, and let them stiffen for a few hours before adding the top section to prevent slumping.
Step 2: Stacking the Structure
-
Score the contact points:
On your base ring (the one with the floor), score the top surface heavily. Score the bottom of the second ring. -
Apply slip and attach:
Apply a generous amount of slip. Place the second ring on top of the first, pressing down firmly but gently to avoid deforming the round shape. -
Blend the interior connection:
Reaching inside the vessel, use a wooden modeling tool to drag clay from the top ring down to the bottom ring. Smooth this seam completely for strength; the outside seam can be left deep for visual definition. -
Continue building up:
Repeat this stacking process for the next three rings. Ensure you step back frequently to check that the tower is rising straight and not leaning. -
Let it stiffen:
I usually let the stack firm up to leather-hard at this stage. If you add the top piece while the base is too soft, the whole tower might slump.
Step 3: The Vertical Topper & Glazing
-
Form the vertical ring:
Create one final ring, perhaps slightly smaller than the others. Instead of laying it flat, shape it to stand vertically on its edge. -
Notch the connection:
You may need to gently curve the bottom of this vertical ring so it sits flush against the rounded top of the stack. Test the fit before applying slip. -
Secure the top:
Score, slip, and attach the vertical donut. Use small coils of clay to reinforce the connection point on the inside of the ring where it meets the stack. -
Final smoothing:
Go over the entire piece with a soft, damp sponge to remove any finger marks or sharp burrs. -
Bisque fire:
Once bone dry, fire the piece to bisque temperature (cone 04 usually) to prepare it for glazing. -
Apply the glaze:
Pour a speckled cream or oatmeal glaze inside the vessel first, swirling to coat. Then, dip or brush the exterior. This specific look relies on the speckles interacting with the clay body. -
Final Glaze Fire:
Fire to the maturation temperature of your clay and glaze (often cone 5 or 6). Ensure the footing is wiped clean so it doesn’t fuse to the kiln shelf.
Raw Clay Texture
For a more rustic, textural look, skip the glaze on the exterior and use a speckled clay body that fires to a warm white. Just glaze the interior for waterproofing.
Place your finished vessel in a spot with good natural light to highlight the rhythmic shadows created by the stacked coils