If you’ve been craving fresh clay sculpting ideas, you’re in the right place—there’s something so satisfying about turning a squishy lump into a tiny world. I pulled together my favorite projects that feel doable at the kitchen table, but still give you that “I made this!” spark.
Cute Animal Pinch Pot Sculptures
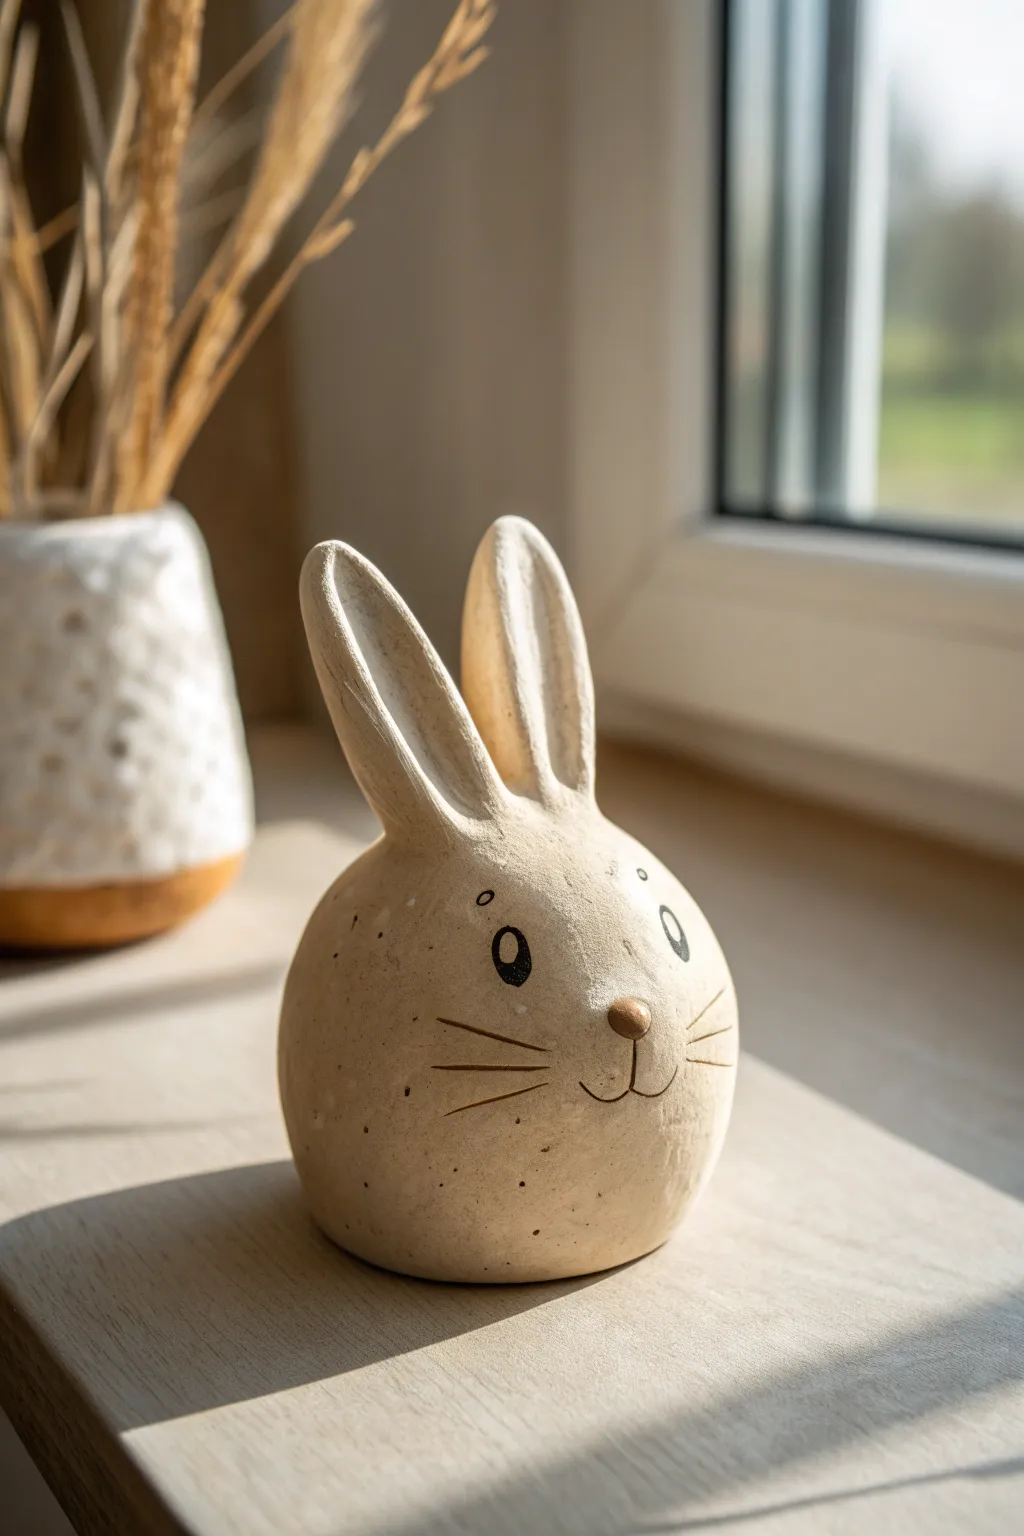
This charming rabbit sculpture uses a simple inverted pinch pot technique to create a rounded, organic form that feels modern and sweet. The natural speckled finish and delicate painted features make it a perfect windowsill companion or spring decoration.
Step-by-Step
Materials
- Speckled stoneware clay (or beige polymer clay)
- Small rolling pin
- Pin tool or needle tool
- Scoring tool (or an old toothbrush)
- Slip (clay mixed with water)
- Fine grit sandpaper
- Fine-point black acrylic paint or underglaze pencil
- Small paintbrush
- Sponge
Step 1: Forming the Body
-
Prepare the clay:
Start with a ball of clay roughly the size of a large orange. Wedge it well to remove air bubbles and ensure a consistent texture. -
Create the pinch pot:
Push your thumb into the center of the ball. Gently pinch and rotate the clay between your thumb and fingers to open up a hollow bowl shape. -
Shape the dome:
Since this bunny is a closed mound shape, flip your pinch pot upside down on your work surface. Gently pat the walls to round them out and create a smooth, domed ‘hill’ shape. -
Refine the surface:
Smooth out any finger marks with a damp sponge or a shaping rib. Aim for a slightly matte, organic finish rather than perfectly polished glass-smoothness. -
Close the bottom:
If you want a hollow sculpture (recommended for firing), leave the bottom open but smooth the rim so it sits flat. If using polymer clay, you can keep it solid but pack it tightly.
Step 2: Sculpting the Ears
-
Roll coils:
Roll out two thick coils of clay, roughly 2-3 inches long. These will become the ears. -
Flatten and shape:
Gently flatten the coils into elongated oval shapes. Taper the top ends slightly so they look like soft points. -
Indent the ears:
Use your thumb or a modeling tool to press a shallow indentation down the center of each ear, giving them that characteristic concave rabbit ear look. -
Score the attachment points:
Mark the spots on top of the head where the ears will go. Use your scoring tool to scratch rough hatch marks on both the head and the base of the ears. -
Attach the ears:
Apply a dab of slip to the scored areas. Press the ears firmly onto the head. I like to tilt them slightly outward for a more curious expression. -
Blend the seams:
Use a small wooden tool or your finger to smooth the clay from the base of the ear down onto the head, completely blending the seam so the ears look like they grew out of the body.
Ears Falling Off?
If ears droop or detach, your clay might be too wet. Prop them up with crumpled paper towels or sponges while the clay stiffens, and ensure you score deeply before joining.
Step 3: Adding Details
-
Add the nose:
Roll a tiny, pea-sized ball of clay. Score a small spot on the front of the ‘face’ and attach this ball using a little clip, flattening it slightly to create a button nose. -
Allow to dry:
Let your sculpture dry slowly away from direct drafts. If using air-dry or kiln clay, wait until it is bone dry. If using polymer, bake according to package instructions. -
Sand for texture:
Once fully dry (or baked and cooled), gently sand the surface with fine-grit sandpaper to enhance that speckled, stone-like texture. -
Paint the eyes:
Using a very fine brush and black paint, draw two vertical ovals for eyes. Leave a tiny negative space unpainted inside the oval for a highlight, or add a white dot later. -
Add the whiskers:
Paint three very thin, delicate lines radiating outward on each cheek area for the whiskers. Keep your hand steady and light. -
Define the mouth:
Draw a small vertical line down from the nose, connecting to a simple ‘w’ shape to form the mouth smile. -
Highlight the nose:
Paint the clay nose button with a soft brown or muted gold tone to make it stand out against the speckled body.
Natural Speckles
If you don’t have speckled clay, mix coarse black pepper or dried coffee grounds into plain clay before sculpting. Upon firing or baking, this creates a realistic faux-stone look.
Place your finished bunny near natural light to show off the lovely speckled texture you created


Tiny Turtle With Textured Shell
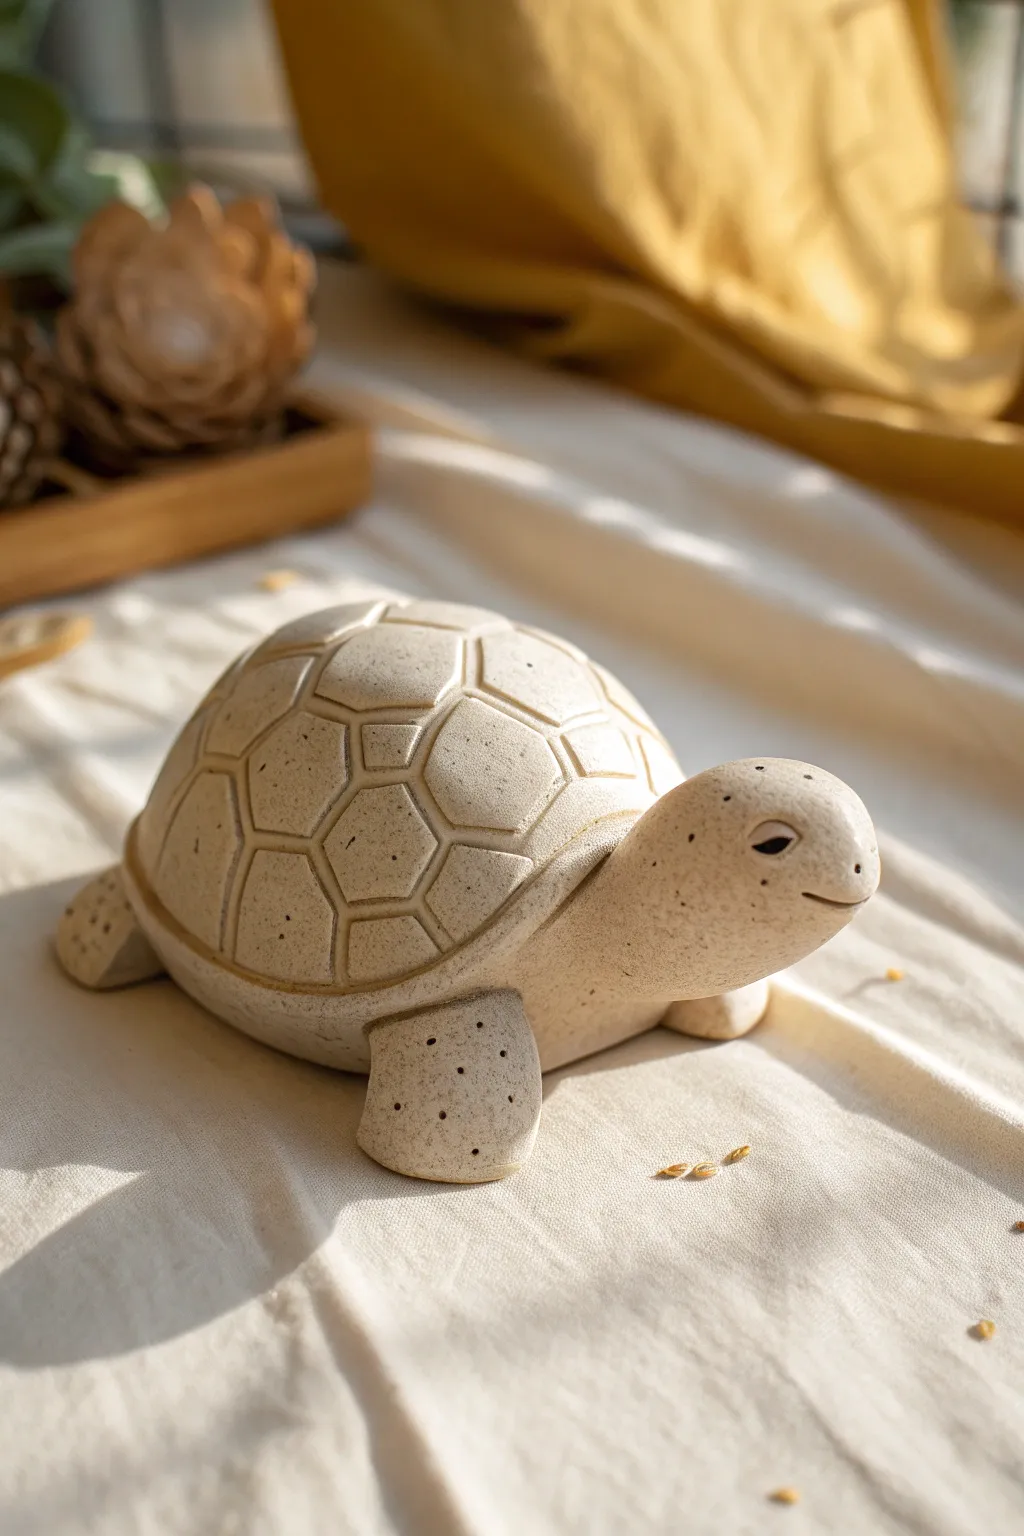
This charming turtle features a geometric shell pattern and a lovely speckled finish that mimics natural stone. Its smooth, rounded form and serene expression make it a delightful project for beginner sculptors looking to practice carving techniques.
How-To Guide
Materials
- Speckled stoneware clay (or beige polymer/air-dry clay mixed with black pepper/sand)
- Needle tool or toothpick
- Loop tool or small carving gouge
- Rubber kidney tool or soft sponge
- Rolling pin
- Slip and scoring tool (if using water-based clay)
- Modeling tool with a small ball tip
Step 1: Forming the body
-
Shape the base:
Start with a ball of clay roughly the size of a tangerine. Gently flatten the bottom against your work surface to create a stable base, then smooth the top into a perfect dome shape for the shell. -
Create the head:
Roll a smaller ball of clay into a thick teardrop shape. The rounded end will be the head, and the tapered end will attach to the body. Gently curve the neck slightly upward. -
Attach the head:
Press the tapered end of the neck under the front rim of the shell. If you are using water-based clay, score and slip the connection point first to ensure it doesn’t crack off later. -
Sculpt the flippers:
Roll four smaller balls of clay for the legs. Flatten them slightly into rounded, paddle-like shapes. The front flippers should be slightly larger than the rear ones. -
Attach the limbs:
Tuck the flippers underneath the shell’s edge at the four corners. Blend the clay on the underside where it meets the body so the connection is seamless and hidden.
Clean Carving
Let the clay leather-harden slightly (about 30 minutes) before carving the shell lines. Soft clay drags and clumps; firmer clay carves cleanly.
Step 2: Detailing and Texturing
-
Refine the surface:
Before carving, smooth the entire surface of the shell and head with a damp sponge or rubber kidney. We want a clean canvas for those geometric lines. -
Outline the scutes:
Using a needle tool, lightly sketch the pattern of the shell. Start with a central hexagon at the very top, then draw a ring of hexagons around it, followed by the border scutes along the bottom rim. -
Carve the grooves:
Once you are happy with the sketch, use a small loop tool or V-gouge to carve out the lines. I find creating a consistent depth makes the final piece look much more professional. -
Soften the edges:
After carving, run a damp finger or soft brush over the carved lines to knock down any sharp burrs or clay crumbs. -
Define the rim:
Use your needle tool to create a distinct horizontal line separating the domed shell from the turtle’s underbelly, giving the shell a specific thickness.
Glaze Approach
To keep the stony look, wipe a dark oxide wash into the cracks and sponge the rest clean properly before firing. Matte glazes work best.
Step 3: Adding Personality
-
Create the eyes:
Use a small modeling tool or the back of a needle tool to gently indent two almond shapes for eyes. Angle them slightly downward for a sleepy look. -
Define the eyelids:
Roll tiny, thin worms of clay and place one over the top of each eye indentation to create a heavy eyelid. Blend the top edge of this coil into the head. -
Add the pupil:
Poke a small, deep hole in the center of the eye indentation to create the pupil shadow. -
Carve the smile:
Use a curved tool or fingernail to deeply impress a small, gentle smile line just below the snout. -
Stipple texture:
Using a needle tool, poke random small holes all over the skin of the head and flippers. Vary the depth slightly to create an organic, porous texture like coral or stone.
Once fully dry or baked, this little stone companion is ready to bring a sense of calm to your desk or garden shelf


Simple Sitting Cat Figurines
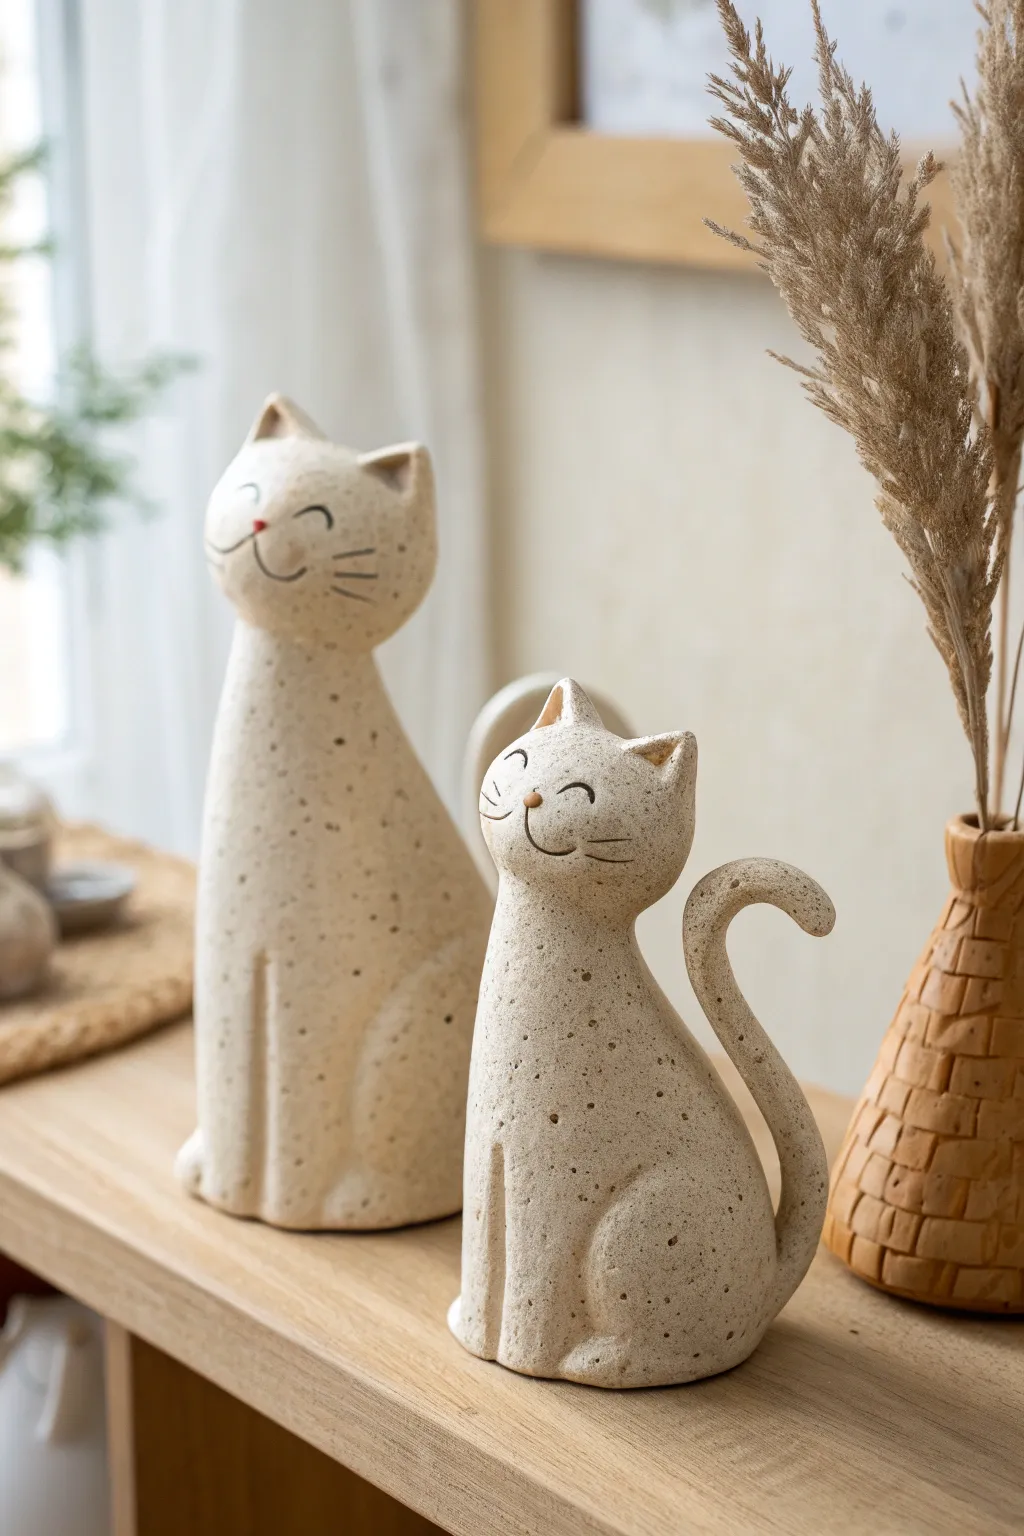
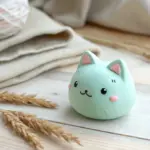
These charming, stylized cat figurines rely on simple, smooth shapes and a distinct speckled texture to bring character to your shelf. Their minimal facial features and upward gaze give them a sweet, contented expression perfect for a beginner sculpting project.
Step-by-Step Tutorial
Materials
- Speckled stoneware clay (or polymer clay with faux granite effect)
- Clay sculpting tools (needle tool, rib tool)
- Small bowl of water (for smoothing)
- Scoring tool or old toothbrush
- Rolling pin
- Clear matte glaze (if firing) or matte varnish
Step 1: Forming the Body
-
Prepare the base:
Start with a handful of well-wedged speckled clay. Roll it into a smooth cone shape that is wider at the bottom and tapers gently toward the top where the neck will be. The base needs to be flat so the cat sits stable. -
Elongate the neck:
Gently pull and smooth the clay upwards from the top of your cone to create a long, graceful neck area, ensuring there’s a smooth transition from the rounded body. -
Define the chest:
Using your thumb, press gently into the front of the cone to create a subtle chest definition, keeping the overall form sleek and upright. -
Add front legs:
Roll a small coil of clay and flatten it slightly. Score and slip the front of the body, then attach the coil vertically to represent the front legs. Use a sculpting tool to carve a line down the center to separate the two paws. -
Shape the hind legs:
Roll two tear-drop shapes for the haunches. Attach these to the lower sides of the cone body using the score and slip method, blending the edges seamlessly for that smooth, organic look.
Step 2: Head and Features
-
Shape the head:
Roll a separate ball of clay for the head. Shape it into a soft oval, slightly wider at the cheeks. -
Create ears:
Pinch two small triangles from the top of the head ball to form ears. Use your thumb to create the inner ear depression, keeping the tips slightly rounded rather than sharp. -
Attach the head:
Score the top of the neck and the bottom of the head. Apply slip (clay water glue) and press the head firmly onto the body. I find that giving it a slight upward tilt adds to the happy expression. -
Smooth the connection:
Use a wooden modeling tool or your finger to smooth clay from the neck up onto the head, ensuring a strong bond that won’t crack during drying. -
Add the face:
To make the cheeks pop, adhere two very small, flattened circles of clay to the front of the face. Between and slightly above them, add a tiny contrasting triangle or ball for the nose.
Clean Lines Pro-Tip
For the crispest smile lines, let the clay firm up to ‘leather hard’ stage before carving. Soft clay drags and creates crumbs, but firm clay carves cleanly.
Step 3: Tail and Details
-
Form the tail:
Roll a long, tapered coil for the tail. It should be thicker at the attachment point and get thinner toward the tip. -
Attach the tail:
Score the back of the figurine near the base. Attach the tail, curling it upward against the body or looping it freely like the smaller cat in the image. -
Carve the expression:
Using a needle tool, carefully etch two curved lines for closed, smiling eyes. Add faint whisker lines on the attached cheek pads. -
Final smoothing:
Go over the entire piece with a slightly damp sponge or finger to remove fingerprints and rough edges. The key is a soft, matte finish. -
Dry and finish:
Let the piece dry slowly under plastic to prevent cracking. If using ceramic clay, bisque fire, apply a clear matte glaze, and glaze fire. For decorative finishes, a simple varnish works well.
Head Falling Off?
If the head feels unstable, insert a small piece of toothpick or dry spaghetti into the neck before attaching the head. This acts as an internal armature.
Once fired or sealed, these little speckled companions are ready to sit cheerfully on your mantle


Owl Sculptures With Feather Texture Stamps

Capture the charm of woodland wildlife with this textured owl sculpture that mimics the look of carved stone. Using basic hand-building techniques and clever texturing, you’ll create a durable and adorable figure with impressive feather details.
Step-by-Step
Materials
- Air-dry clay (stone gray or white)
- Small round wooden base (optional)
- Feather texture stamp or U-shaped sculpting tool
- Rolling pin
- Aluminum foil (for armature)
- Slip (clay mixed with water)
- Needle tool
- Sponge
- Large wooden beads or brown marbles (for eyes)
- Acrylic paints (cream, brown, grey)
- Matte sealant spray
Step 1: Building the Anatomy
-
Create the core:
Start by crumpling aluminum foil into a large egg shape. This will be the armature for your owl’s body, saving clay and reducing drying time. Make a slightly flatter ball of foil for the head. -
Cover the body:
Roll out a slab of clay to about 1/4 inch thickness. Wrap this completely around your foil egg body, smoothing the seams together with a little water until invisible. -
Form the head:
Repeat the process for the head, covering the foil ball with a clay slab. Once smooth, score the bottom of the head and the top of the body with a needle tool. -
Attach the pieces:
Apply slip to the scored areas and press the head firmly onto the body. Blend the clay across the seam with your thumb so the neck transition is smooth and secure. -
Shape the ears:
Pinch the clay at the top corners of the head to form two triangular ear tufts. Curve them slightly inward for a natural look. -
Add the base:
Create a thick disc of clay for the base. Score and slip the bottom of the owl, then press it onto the disc. Smooth the edges of the base for a clean, round finish.
Clean Feather Impressions
If your stamp sticks to the clay, dust the clay surface lightly with cornstarch or dip your tool in water before pressing it into the chest area.
Step 2: Detailing the Face and Wings
-
Form the eye discs:
Roll two balls of clay and flatten them into thick discs. Attach these to the face area using slip, pressing down the edges to blend them partially into the head. -
Insert the eyes:
Press your wooden beads or marbles firmly into the center of the clay discs. If using plain clay balls for eyes instead, press them in and use a small tool to create a pupil indentation. -
Sculpt the beak:
Form a small diamond shape of clay. Attach it between the lower part of the eye discs, curving the bottom point downward to create a hooked beak. -
Define the wings:
Roll out two teardrop-shaped slabs for wings. Attach them to the sides of the body, blending only the top and front edges so the back edges stand out slightly.
Cracking While Drying?
Surface cracks happen if the outer layer dries too fast. Fill small fissures with a paste made of clay and vinegar, then smooth over.
Step 3: Texturing and Finishing
-
Stamp the chest feathers:
Using a U-shaped tool or a dedicated feather stamp, press a pattern of overlapping ‘scales’ into the chest clay. Work from the bottom up so the feathers look properly layered. -
Detail the wings:
Carve long vertical lines down the length of the wings to simulate flight feathers. Add smaller U-shaped impressions near the ‘shoulder’ of the wing. -
Texture the forehead:
Use a needle tool to scratch fine lines radiating from the center of the forehead up towards the ears. -
Create the feet:
Roll six small sausage shapes for toes. Attach three to the bottom front of the owl on each side, blending them so they look like they are gripping the base. -
Add stone texture:
I like to gently dab a textural sponge or a crumpled ball of foil over the smooth parts of the clay (like the back and head) to give it a pitted, stone-like surface. -
Dry thoroughly:
Allow the sculpture to dry completely. Since there is a foil core, this might take 24-48 hours depending on humidity. -
Paint and seal:
Once dry, apply a wash of diluted cream or grey paint to highlight the textures. Paint the beak and eyes brown if needed. Finish with a matte sealant spray to protect your work.
Place your stoic little owl on a shelf where he can keep watch over your home

The Complete Guide to Pottery Troubleshooting
Uncover the most common ceramic mistakes—from cracking clay to failed glazes—and learn how to fix them fast.
Snail Sculptures With Swirled Coil Shells
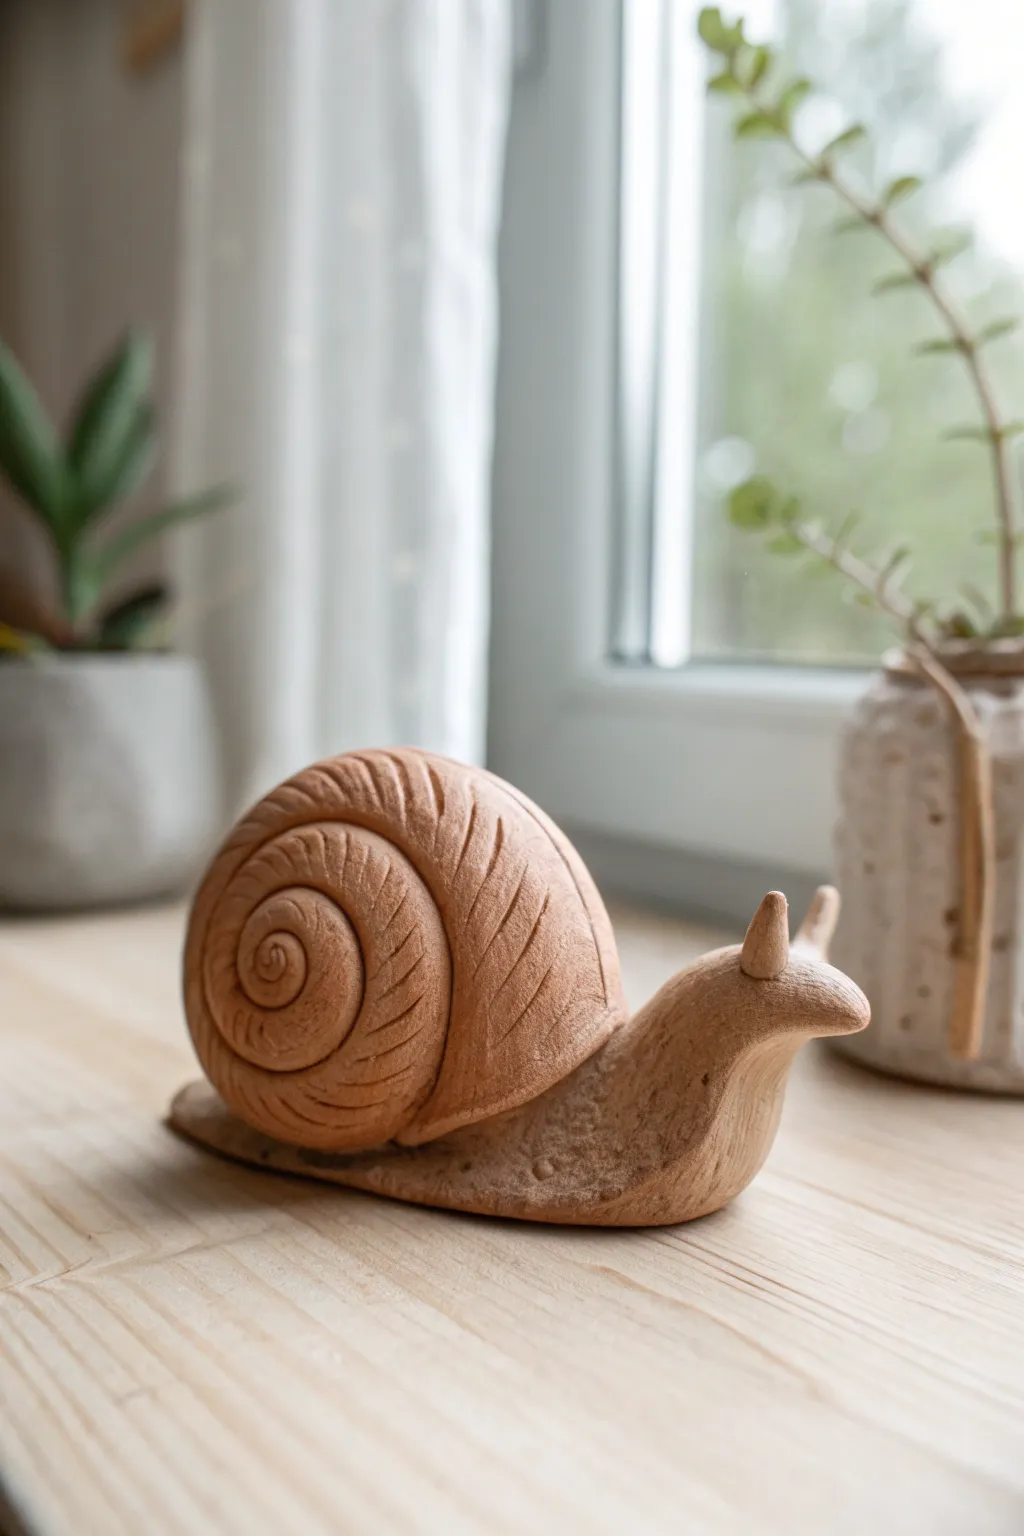
Capture the slow, peaceful charm of nature with this tactile snail sculpture. By using a terracotta-colored clay and careful carving techniques, you can mimic the warm look of carved wood while enjoying the malleability of clay.
Step-by-Step
Materials
- Terracotta air-dry clay or polymer clay (wood effect optional)
- Sculpting tools (needle tool, loop tool)
- Texture sponge or stiff bristle brush
- Rolling pin
- Water and slip (for joining)
- Fine grit sandpaper
- Matte varnish (optional)
Step 1: Forming the Body base
-
Shape the main slug:
Start with a solid log of clay about the length of your hand. Roll one end to be slightly tapered for the tail and keep the other end thicker for the head and chest area. -
Flatten the base:
Gently press the log onto your work surface to create a flat bottom. This ensures your snail won’t tip over once the heavy shell is added. -
Lift the head:
Bend the thicker end upwards carefully to create the neck and head. Smooth out any wrinkles that form at the bend using a bit of water on your finger. -
Refine the tail:
Pinch and smooth the tail end so it tapers off naturally into a flat, rounded point, similar to a real snail’s foot.
Step 2: Creating the Shell
-
Roll a long coil:
Roll a massive snake of clay. It should be thick at one end and gradually taper to a smaller point at the other. You’ll need substantial length to get a good swirl. -
Begin the spiral:
Starting with the smallest tapered end, tightly curl the clay in on itself. Keep the coil vertical (standing on its side) rather than flat like a cinnamon roll. -
Build the volume:
Continue wrapping the thicker part of the coil around the center. As you wrap, slightly overlap the previous layer to build height and a domed shape. -
Blend the interior seams:
On the side of the shell that will attach to the body, blend the coils together completely so you have a smooth, solid surface for attachment. -
Define the outer coil:
On the visible sides, use a modeling tool to deepen the groove between the coil layers to make the spiral pattern distinct.
Keep it clean
Wipe your tools frequently while carving the shell grooves. Clay buildup on the tool will create messy, jagged lines instead of clean cuts.
Step 3: Assembly and Texture
-
Attach shell to body:
Score the back of the snail body and the flat spot on the shell. Apply slip (clay glue), press firmly together, and smooth the clay at the seam to lock it in place. -
Carve the shell ridges:
Using a needle tool or a small loop tool, carve angled, crescent-shaped grooves across the shell’s coils. These should follow the curve of the spiral to mimic growth lines. -
Smooth the ridges:
Run a damp finger or soft brush over your carving marks to soften the sharp edges. I like to do this immediately so the lines look worn and organic rather than erratic. -
Texture the skin:
Press a coarse sponge or stipple a stiff brush gently against the ‘skin’ part of the body to create a subtle, bumpy texture, contrasting with the smoother shell.
Create a display
Before drying, press the snail onto a textured piece of actual wood or slate to mold the base perfectly to a custom display stand.
Step 4: The Head and Details
-
Add the antennae:
Roll two small, short cones of clay. Score the top of the head and attach them securely, blending the clay downwards so they don’t look like they were just stuck on. -
Shape the face:
Gently pinch the front of the face to create a slight snout area. Snails don’t have complex facial features, so keep the shapes simple and rounded. -
Final smoothing check:
Look over the entire piece. Smooth out any accidental fingerprints, especially on the shell ridges, to maintain that professional finish. -
Dry and refine:
Let the sculpture dry completely (24-48 hours depending on thickness). Once dry, give it a light sanding with fine-grit sandpaper to achieve that wood-carved texture.
Place your finished snail near a sunny window to let the natural light highlight the deep grooves of the shell
Mushroom Buddies With Faces
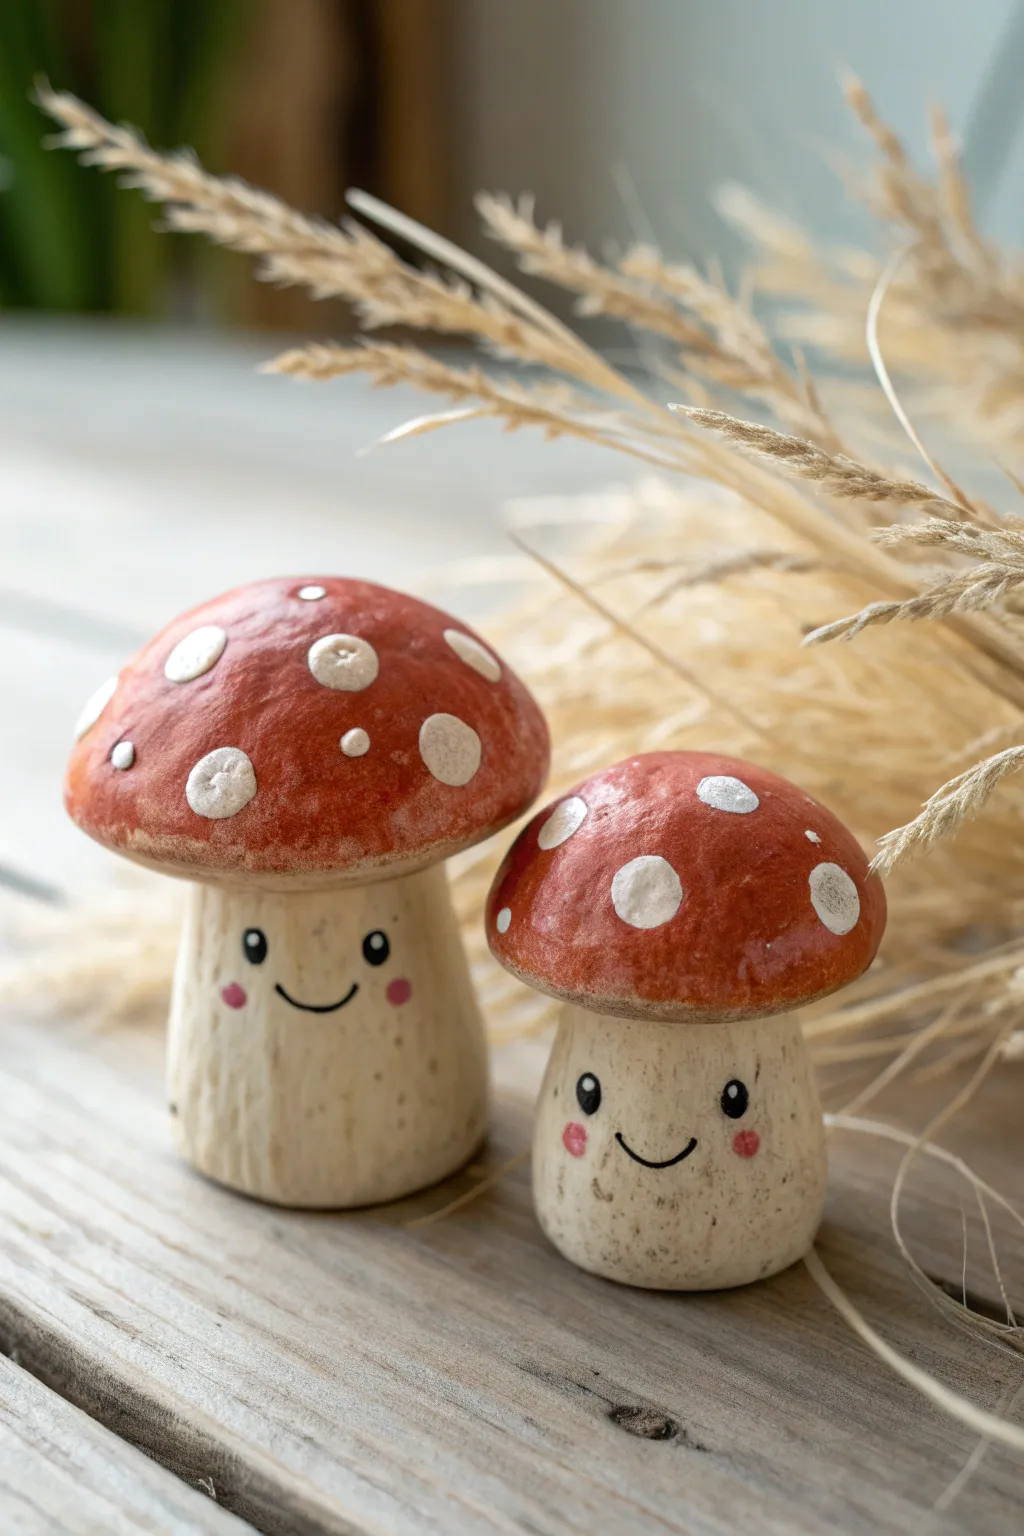
These charming clay mushroom figurines add a touch of woodland whimsy to any shelf with their cheerful smiles and classic red caps. This project involves sculpting simple organic shapes and using careful painting techniques to achieve that semi-glossy, textured look.
Step-by-Step Tutorial
Materials
- Air-dry clay or polymer clay (white or beige)
- Acrylic paints (red, warm beige/cream, white, black, pink)
- Matte and Gloss varnish/sealant
- Sculpting tools (needle tool, small ball stylus)
- Aluminum foil (for armatures)
- Fine grit sandpaper
- Detail paintbrushes (fine liner, small flat brush)
- Old toothbrush or stiff bristle brush
Step 1: Sculpting the Base Forms
-
Prepare the cores:
To save clay and reduce weight, crumple small pieces of aluminum foil into two cone-like cylinders for the stems and two domes for the caps. One set should be slightly smaller than the other to create the size difference seen in the photo. -
Wrap the stems:
Condition your clay until pliable, then roll it into a sheet about 1/4 inch thick. Wrap the clay around your foil stem cores. Smooth the seams completely with your fingers or a smoothing tool so the cylinder looks seamless and slightly wider at the base. -
Texturize the stems:
Before the clay hardens, take an old toothbrush or a stiff bristle brush and gently tap it all over the stem surface. This creates the subtle, organic pitting texture visible in the reference. -
Form the caps:
Roll two balls of clay and flatten them slightly into dome shapes over your foil cap cores. Ensure the edges curve downward and inward slightly, creating a nice mushroom silhouette. -
Attach caps to stems:
Score the top of the stem and the underside of the cap with a needle tool. Apply a small amount of water (for air-dry) or liquid clay (for polymer) to the scored areas and press them firmly together. Blend the clay slightly at the connection point underneath for stability. -
Refine the shape:
Smooth out any fingerprints on the cap using a little water or baby oil. The top should be very smooth, contrasting with the textured stem. -
Dry or Bake:
Follow the manufacturer instructions for your specific clay. If using air-dry clay, let it dry for at least 24-48 hours. If baking, ensure you use an oven thermometer for accuracy.
Step 2: Painting & Details
-
Base coat the stems:
Mix a warm beige or cream color. Paint the entire stem area. I like to let this dry briefly and do a second coat to ensure the foil core doesn’t show through the texture. -
Adding stem depth:
Dilute a tiny bit of light brown paint with water to make a wash. Brush this over the textured stem and immediately wipe the surface with a paper towel. The darker paint will stay in the tiny texture pits, enhancing the organic look. -
Paint the caps:
Apply a vibrant reddish-orange acrylic paint to the mushroom caps. This often takes 2-3 thin coats to get a solid, opaque color without brushstrokes showing. -
Paint the spots:
Using a small round brush, paint white circles scattered across the red cap. Don’t make them perfect circles; slightly irregular shapes look more natural. Vary the sizes, placing some larger spots near the bottom edge. -
Add texture to spots:
Once the white spots are dry, mix a tiny bit of grey into your white. Stipple this gently onto the center of the larger spots to give them a slightly raised, rough appearance. -
Draw the faces:
Use a very fine detail brush or a black paint pen. Paint two small, wide-set eyes about halfway down the stem. Between them, paint a simple, upward-curved U-shape for the smile. -
Add eye highlights:
Dip the tip of a toothpick or a needle tool into white paint. Add a tiny white dot to the upper right corner of each black eye pupil. This ‘catchlight’ brings the character to life. -
Rosy cheeks:
Dilute pink paint until it is semi-transparent. Dab two small spots just below and outside the eyes to create the blushing cheeks.
Uneven Paint Job?
If your red paint looks streaky, use a soft, wide brush and apply multiple thin layers rather than one thick gloop. Sand lightly between dried coats.
Step 3: Finishing Touches
-
Seal the stem:
Coat the stem portion with a matte varnish. This preserves the natural, earthy feel of the stalk. -
Gloss the cap:
Apply a high-gloss varnish to the red cap only. This makes the mushroom look fresh and moist, providing a lovely contrast against the matte stem.
Weighted Bottoms
Before baking or drying, press a heavy metal washer into the base of the stem. This lowers the center of gravity so your mushrooms won’t tip over easily.
Place these two little friends together on a windowsill or desk to brighten your day.


What Really Happens Inside the Kiln
Learn how time and temperature work together inside the kiln to transform clay into durable ceramic.
Mini Frogs Perched on Lily Pads
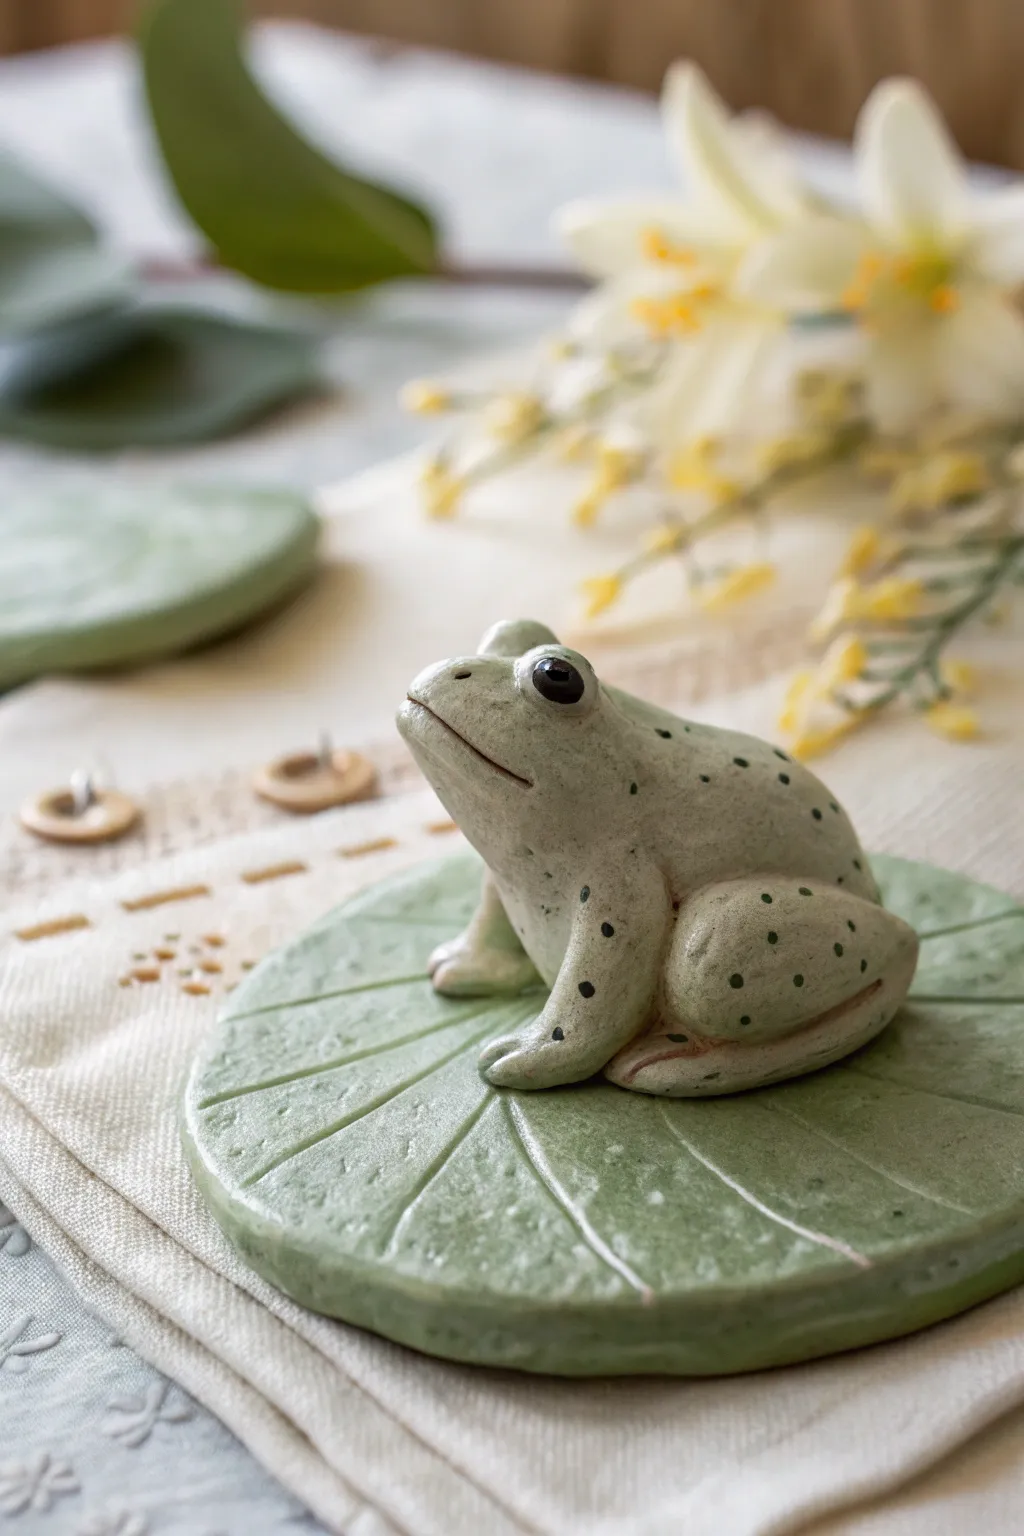
Capture the charm of a pond-side afternoon with this delightful clay project featuring a smooth, speckled frog resting on a textured lily pad. The finished piece has a polished, ceramic-like quality that makes it a perfect little desk companion or decorative accent.
How-To Guide
Materials
- Light sage green polymer clay (for the frog)
- Darker leafy green polymer clay (for the lily pad)
- Black polymer clay (tiny amount for eyes)
- Black acrylic paint
- Fine-tipped paintbrush or toothpick
- Needle tool or clay sculpting tool
- Rolling pin
- Circular cookie cutter (approx. 3-4 inches)
- Gloss glaze or varnish
- Soft texture sponge or sandpaper (optional)
Step 1: Sculpting the Lily Pad Base
-
Prepare the base clay:
Begin by conditioning the darker green clay until it is soft and pliable. Roll it out into a smooth, even sheet about 1/4 inch thick to ensure sturdy support for your frog. -
Cut the shape:
Use your circular cookie cutter to punch out a perfect circle. Gently smooth the edges with your finger to remove any sharp cut marks. -
Texture the surface:
Lightly press a texture sponge or piece of sandpaper onto the surface to give it a natural, organic matte finish rather than a shiny plastic look. -
Detail the veins:
Using the needle tool, gently carve radiating lines from the center of the circle outward to the edge, mimicking the veins of a lily leaf. Press lightly so you don’t cut all the way through.
Step 2: Forming the Frog
-
Shape the body:
Take a walnut-sized ball of the sage green clay and roll it into a smooth teardrop shape. This will be the main body; flatten the bottom slightly so it sits stable. -
Create the legs:
Roll two smaller logs for the back legs. Bend them into a ‘V’ shape and press them firmly against the back sides of the body, smoothing the seams so they look integrated. -
Add the front arms:
Roll two small, thin cylinders for the front arms. Attach them under the chest area, positioning them upright so the frog looks alert and perched. -
Detail the toes:
Use your needle tool to make tiny indentations at the end of each limb to suggest toes, keeping the look stylized and soft. -
Sculpt the face:
Gently press a horizontal line across the front of the face for the mouth. Use a ball tool or your finger to make slight indentations where the eyes will go. -
Insert the eyes:
Roll two tiny spheres of black clay. Press them gently into the eye sockets you created, flattening them just enough so they bulge slightly but don’t stick out too far.
Clean Seams
To erase fingerprints or seams between clay parts, use a tiny amount of baby oil or clay softener on your fingertip and gently rub the area before baking.
Step 3: Finishing Touches
-
Assemble the piece:
Place your frog onto the center of the lily pad. Press down gently to ensure a good bond between the two clay pieces. -
Bake the clay:
Bake the project according to your clay manufacturer’s instructions. Usually, this is around 275°F (135°C) for 15-30 minutes, but check your specific package. -
Cool down:
Allow the piece to cool completely before handling. This is crucial as the clay hardens fully only after cooling. -
Apply speckles:
Dip a toothpick or very fine brush into black acrylic paint. specificially, I like to dilute the paint slightly so it flows better. Dot tiny random speckles across the frog’s back and legs. -
Seal the work:
Once the paint is totally dry, apply a coat of gloss glaze to the frog to make it look wet and shiny. You can leave the lily pad matte for a nice textural contrast.
Realistic Veins
Vary the pressure on your needle tool when drawing leaf veins. Make the lines deeper near the center and faintly fade them out as they reach the edge.
Now you have a charming little pond friend to brighten up your shelf or garden pot
Pocket-Size Dragons With Simple Scales
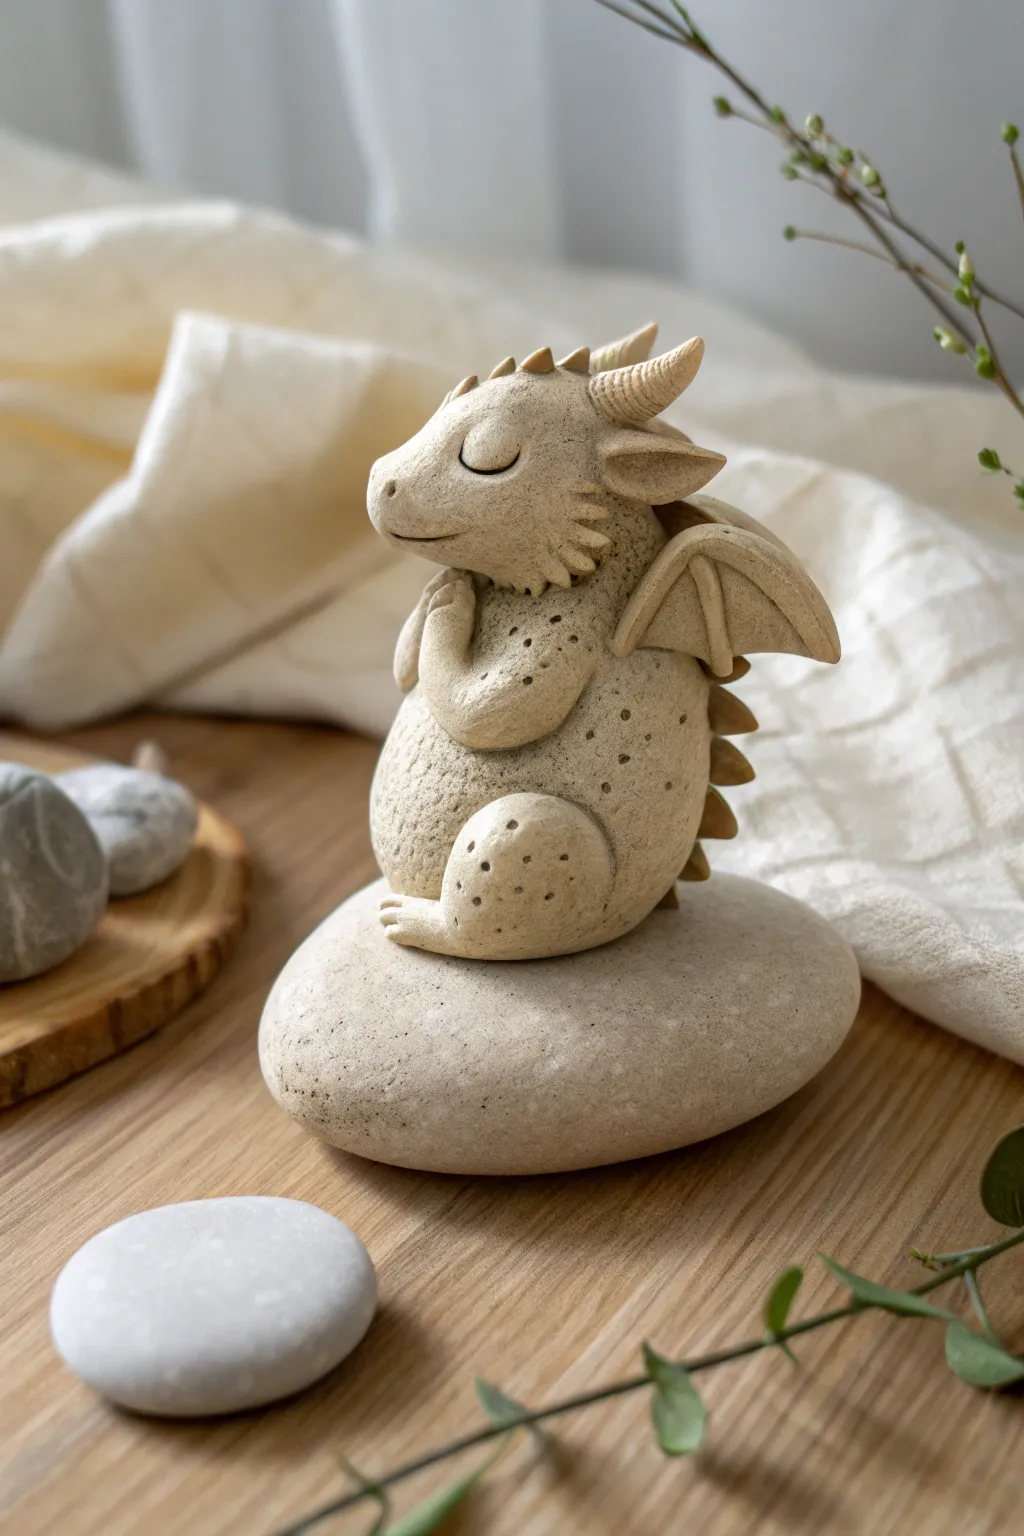
Create a serene companion for your desk or garden with this peaceful stone-sitting dragon sculpture. Using textured limestone-colored polymer or air-dry clay, you’ll learn how to craft gentle curves and simple dotted scales to achieve a look that mimics natural carved stone.
Detailed Instructions
Materials
- Limestone or granite-colored polymer clay (or air-dry clay)
- Large, smooth river stone (palm-sized base)
- Small ball tool
- Needle tool or toothpick
- Rubber shaping tool
- Soft brush (for smoothing)
- Aluminum foil (optional, for armature)
- Oven (if using polymer clay) or drying rack
Step 1: Forming the Base Body
-
Prepare the stone:
Begin by cleaning and drying your river stone thoroughly. This rock will serve as both the display base and a baking surface if you are using polymer clay, so ensure it sits stable and flat on your work surface. -
Shape the torso:
Roll a smooth ball of clay about the size of a golf ball or slightly larger, depending on your stone’s size. Gently shape it into a teardrop or pear shape, flattening the bottom so it sits securely on the stone. -
Add the legs:
Create two smaller ovals for the hind legs. Press these onto the lower sides of the body. Use your thumb to smooth the seam where the leg meets the torso, but leave the outer thigh round and bulbous. -
Sculpt the feet:
Attach small, flat pads at the bottom of the legs for feet. Use your needle tool to gently impress three lines into each foot to create toes. -
Create the arms:
Roll two sausage shapes for the arms. Attach them near the upper chest, bending them at the elbows so the hands meet peacefully in the center or rest on the belly.
Stone Effect
Mix black pepper or fine dried tea leaves into your beige clay before sculpting. This creates a speckled, granite-like texture without needing to paint it later.
Step 2: Designing the Head & Face
-
Shape the head:
Roll a second, slightly smaller teardrop for the head. Attaching it to the neck area, ensure the snout points comfortably forward. I often use a small piece of wire or toothpick inside the neck for added stability here. -
Refine the snout:
Use your thumb to gently press an indentation midway down the face to distinguish the forehead from the snout. Round off the nose tip. -
Carve the expression:
With the needle tool, carve a long, curving line for the mouth that turns slightly upward at the corner. Above this, carve two U-shaped curves for the closed, sleeping eyes. -
Add the frills:
On the cheeks, add small triangles of clay and texture them with lines to look like fins or side-frills. Blend the back edges into the head.
Head Slumping?
If the heavy head droops while the clay is soft, prop it up with a small wedge of cardstock or a folded paper towel. Remove this support carefully once the clay hardens.
Step 3: Wings, Horns, and Texture
-
Construct the wings:
Flatten two triangles of clay. Add a ‘snake’ of clay along the top edge for the wing bone. Attach these to the back of the shoulder blades, folding the wing membrane down so they looked tucked in. -
Form the horns:
Roll two small cones and twist them slightly to create a spiral texture. Attach these to the top of the head, pointing backward. -
Add the spinal ridges:
Create a series of small, triangular spikes. Run them in a line from the top of the head, down the back of the neck, and along the spine to the tail area. -
Texture the skin:
Take your small ball tool or the dull end of a needle tool. Gently press random dot patterns into the thighs, belly, and cheeks. Vary the pressure: lighter dots near the edges, deeper ones in the center of clusters. -
Final smoothing:
Before curing, check for any accidental fingerprints. Dip a soft brush in baby oil (for polymer) or water (for air-dry) and lightly brush the smooth areas to remove imperfections. -
Curing:
Bake the dragon directly on the stone according to your clay package directions. The stone acts as a heat sink, so let it cool down in the oven completely before removing to prevent cracking.
Place your little stone guardian on a sunny windowsill where he can nap peacefully

TRACK YOUR CERAMIC JOURNEY
Capture glaze tests, firing details, and creative progress—all in one simple printable. Make your projects easier to repeat and improve.
Fantasy Creature Mashups (Cat-Unicorn, Bunny-Dragon)
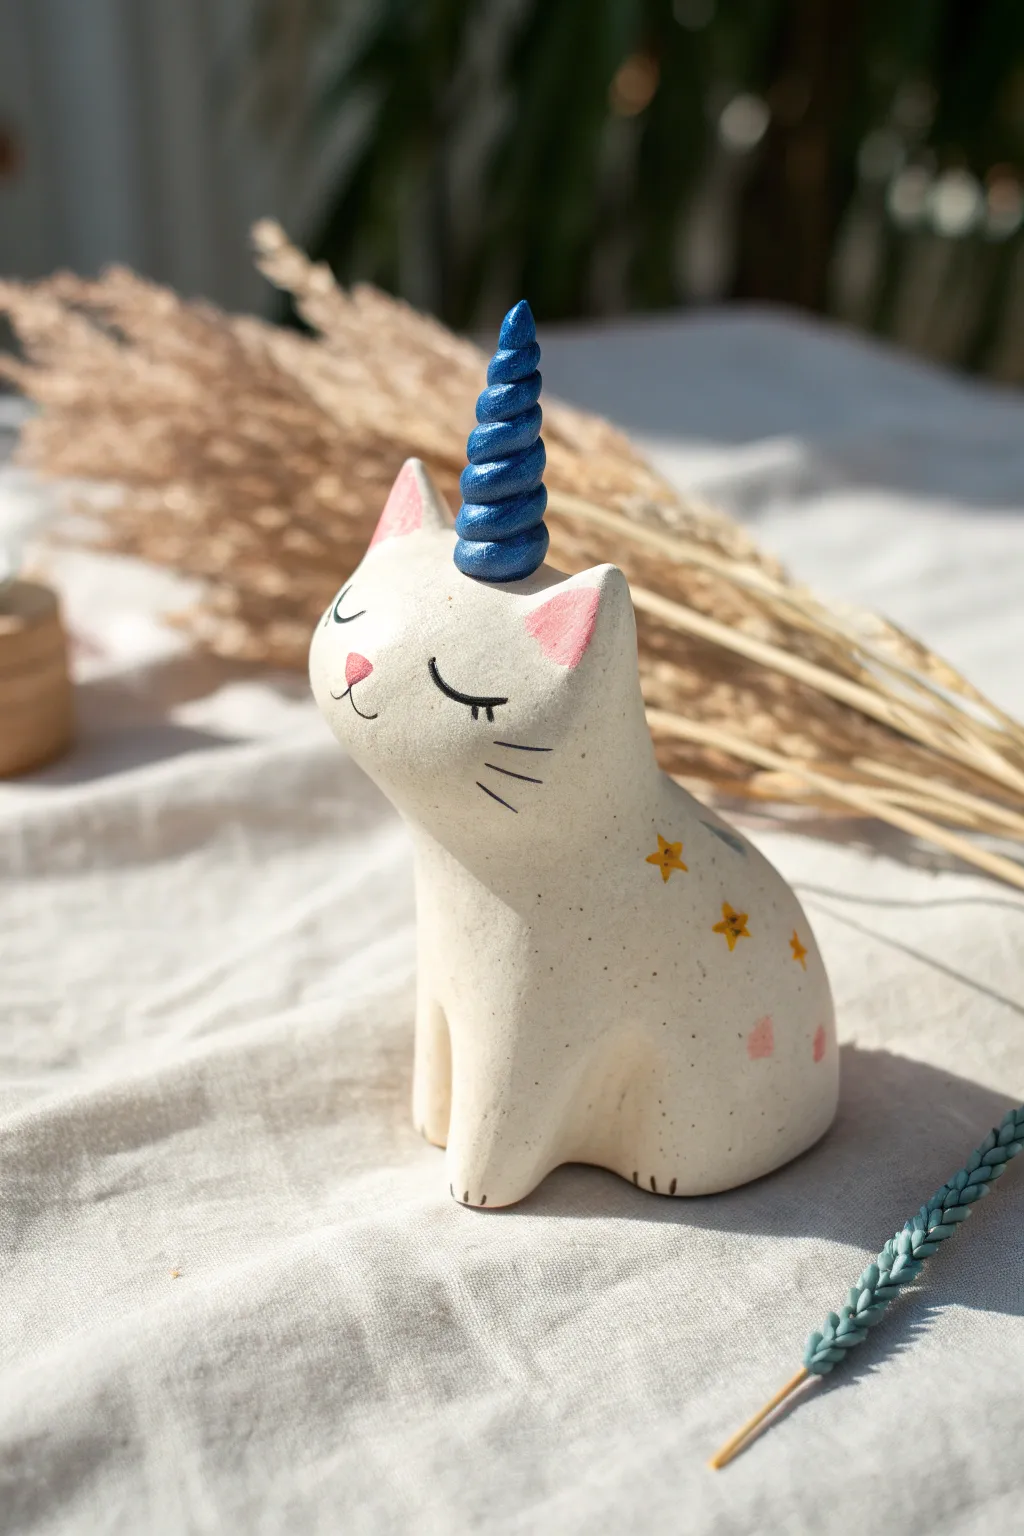
This adorable mashup combines the serene elegance of a cat with the magical charm of a unicorn. With its starry flank, sparkling blue horn, and peaceful expression, this air-dry or polymer clay figure makes a perfect desk guardian or thoughtful handmade gift.
Step-by-Step
Materials
- White sculpting clay (air-dry, polymer, or stoneware)
- Blue clay (or blue acrylic paint)
- Acrylic paints (black, pink, yellow, blue)
- Fine detail paintbrush
- Sculpting tools (needle tool, smoother)
- Gloss varnish or glaze
- Water (for smoothing)
- Foil or wire armature (optional for structure)
Step 1: Forming the Base Body
-
Shape the Torso:
Begin with a ball of white clay about the size of a tennis ball. Roll it into a smooth, upright pear shape, ensuring the bottom is flat so the figure will stand securely without wobbling. -
Form the Chest and Neck:
Gently pull the upper portion of the pear shape upwards and slightly backwards to define the chest area and create a thick, sturdy neck. Smooth out any fingerprints with a little water. -
Sculpt the Head:
At the top of the neck, mold the clay into a rounded, slightly flattened sphere for the head. Seamlessly blend the clay from the neck into the head so there are no visible join lines.
Step 2: Adding Animal Features
-
Shape the Ears:
Create two small triangles of white clay. Pinch the tops slightly to round them off, then attach them firmly to the top of the head. Use your blending tool to merge the bottom of the ears into the skull. -
Define the Face:
Gently press your thumb into the front of the face to create a subtle snout area. It doesn’t need to be pronounced; a soft curve works best for this style. -
Create the Front Legs:
Roll two sausage-like coils of clay. Attach them vertically to the front of the chest. Blend the top of the legs into the body, leaving the bottom paws defined. -
Sculpt the Paw Details:
Using a needle tool or a dull knife, gently press three small vertical lines into the bottom of each front leg to create toes. -
Form the Hind Curve:
For the sitting posture, add a small, flat curve of clay to the side of the haunch to suggest a bent back leg, blending the edges completely so it looks like a bump under the skin.
Clay Texture Trick
To mimic the speckled stoneware look in the photo without a kiln, mix small grains of black pepper or dried used coffee grounds into your white air-dry clay before sculpting.
Step 3: The Magical Horn
-
Make the Horn Base:
Take a piece of blue clay—or white clay if you plan to paint it later—and roll it into a thin, tapered cone shape. -
Add the Spiral Texture:
Using a needle tool or the edge of a ruler, gently press a spiral indentation starting from the base and twisting up to the tip to give it that classic unicorn look. -
Attach the Horn:
Score the bottom of the horn and the center of the cat’s forehead. Apply a dab of water or liquid clay (slip) and press the horn firmly into place.
Rainbow Upgrade
Instead of a single blue horn, marble together pink, blue, and purple clay before rolling the horn to create a beautiful galaxy swirl effect.
Step 4: Finishing and Painting
-
Smooth and Dry:
Check the entire sculpture for rough spots. Use a slightly damp sponge or finger to smooth everything down. Let the sculpture dry completely according to your clay’s instructions. -
Paint the Horn:
If you used white clay, paint the horn a shimmering deep blue. I like to add a touch of metallic medium to the blue paint for extra magic. -
Add Facial Features:
Using a very fine brush and black paint, draw two downward curves for sleepy eyes, adding small lashes. Paint a small pink triangle for the nose and a thin ‘W’ shape for the mouth. -
Paint the Ears and Cheeks:
Fill the inner triangles of the ears with soft pink paint. You can also dry-brush a tiny circle of pink on the cheeks for a blush effect. -
Decorate the Flank:
Paint small yellow stars scattered across the cat’s side and back. Add tiny pink dots or hearts between the stars for variety. -
Apply Varnish:
Once all paint is thoroughly dry, coat the entire piece in a gloss or semi-gloss varnish to protect the paint and give it a ceramic-like shine.
Place your magical creation near a window where the light can catch the sparkle of its horn and bring a little fantasy to your day
Animal Planter Sculptures With “Hair” Succulents
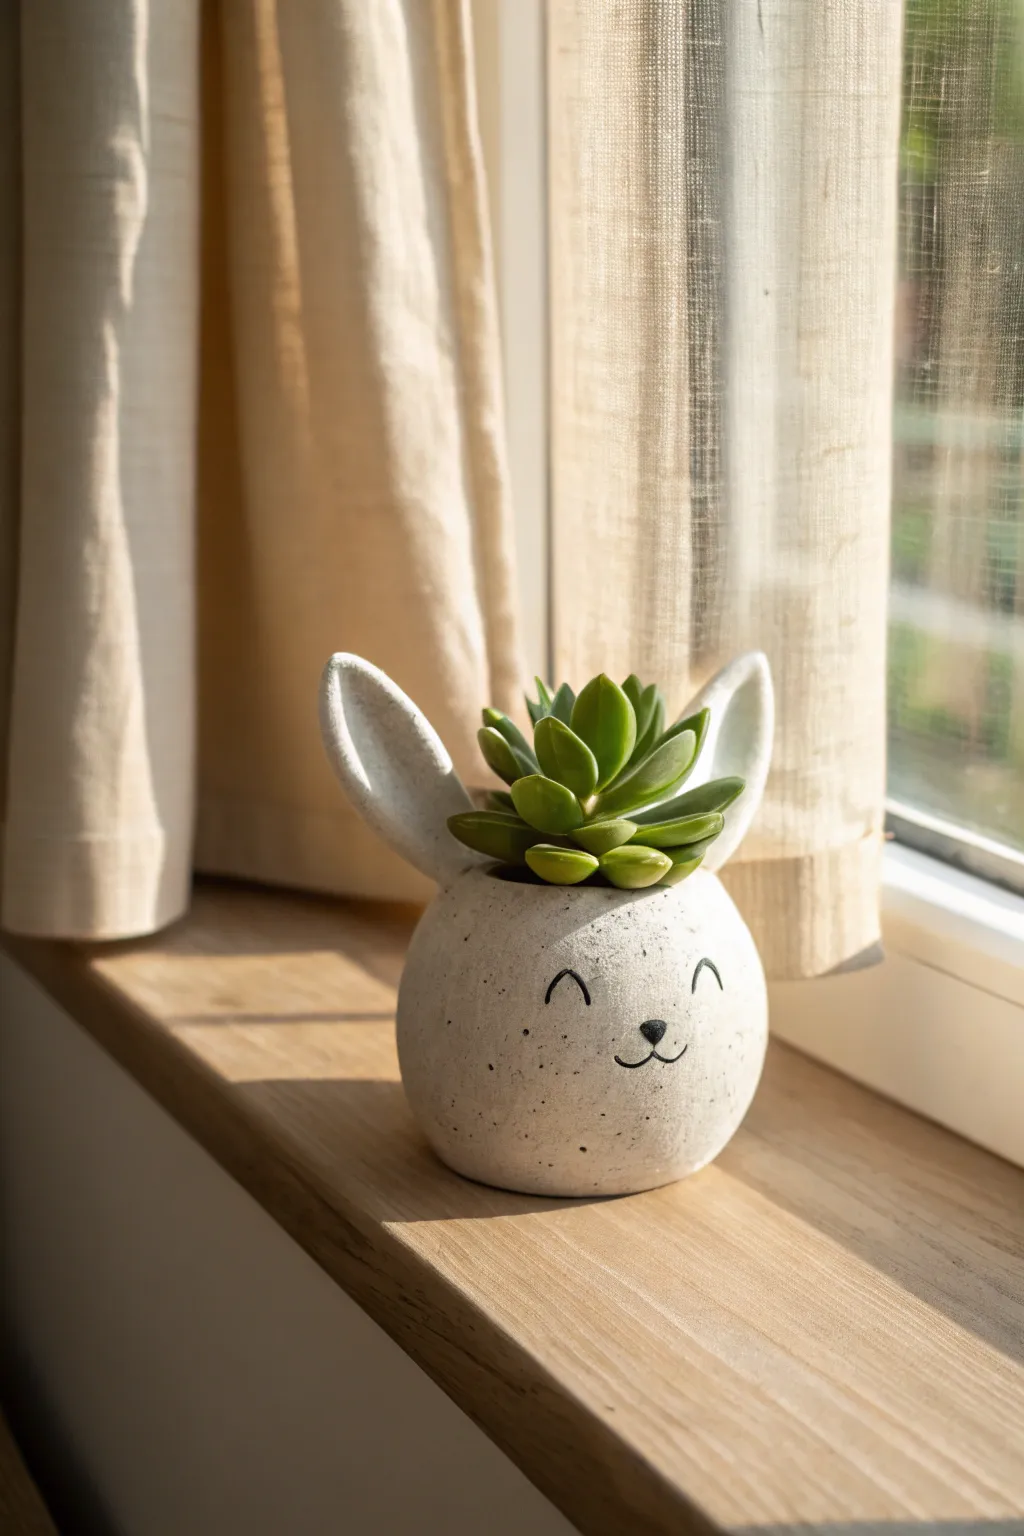
Brighten up any windowsill with this charming bunny planter, designed to give your favorite succulent a whimsical new home. Its simple spherical form, perky ears, and speckled finish mimic the look of trendy concrete décor while being entirely handmade from clay.
Detailed Instructions
Materials
- Air-dry clay or polymer clay (white or light grey)
- Small succulent plant (real or faux)
- Acrylic paints (black for face, diluted black/brown for speckling)
- Rolling pin
- Aluminum foil
- Clay sculpting tools (needle tool, smoothing rib)
- Fine-grit sandpaper
- Old toothbrush
- Matte sealant or varnish
- Small paintbrush
Step 1: Forming the Base
-
Create the core structure:
Begin by crumbling aluminum foil into a tight ball, slightly smaller than you want your finished planter to be. This saves clay and keeps the pot lightweight. -
Roll out the clay:
Roll your clay out into a thick slab, about a quarter-inch thick. You want it substantial enough to hold its shape but not overly heavy. -
Wrap the form:
Drape the clay slab over your foil ball, smoothing it down the sides until the foil is completely encased. Trim away excess clay at the bottom to create a flat, stable base. -
Open the top:
Using a knife or cutting tool, slice off the very top of the sphere to create the opening for the plant. Carefully dig out the foil from inside; if the clay is too soft, let it firm up for 30 minutes first. -
Smooth the interior:
Use a little water on your finger or a sponge to smooth the inside rim and walls where the foil was removed. The inside doesn’t need to be perfect, but the rim should be neat.
Drooping Ears?
If the heavy ears won’t stay upright while the clay is wet, prop them up from behind using small pieces of cardboard or crumpled foil until the clay stiffens enough to hold its own weight.
Step 2: Adding the Details
-
Shape the ears:
Ideally, form two elongated tear-drop shapes from fresh clay. Flatten them slightly and use your thumb to create a gentle depression in the center of each, mimicking the inner ear. -
Attach the ears:
Score the bottom of the ears and the attachment points on the head with a needle tool. Apply a dab of water or liquid clay (slip) and press the ears firmly onto the top sides of the sphere. -
Reinforce the seams:
Roll a very thin snake of clay and wrap it around the base of each ear. Blend this clay downward into the head and upward into the ear with a sculpting tool to ensure a seamless, strong bond. -
Check symmetry:
take a step back and look at the planter from the front. Adjust the tilt of the ears so they look perky and relatively symmetrical. -
Final smoothing:
Go over the entire surface with a slightly damp sponge or smoothing rib to remove fingerprints. Let the piece dry completely according to your clay’s instructions.
Faux Stone Look
For a gritty, realistic stone texture, mix a pinch of dried coffee grounds or fine sand directly into your white clay before you start sculpting the initial sphere.
Step 3: Finishing Touches
-
Sand the surface:
Once fully dry (and baked if using polymer), lightly sand any rough spots or sharp edges with fine-grit sandpaper for a professional finish. -
Paint the face:
Using a fine-tip brush and black acrylic paint, carefully draw two upside-down ‘U’ shapes for smiling eyes. Add a small rounded triangle for the nose and a curved ‘w’ shape for the mouth. -
Create the speckled effect:
Dilute a small amount of black or dark brown paint with water. Dip an old toothbrush into the mixture, then run your thumb across the bristles to flick tiny speckles over the entire white surface. -
Seal the work:
Apply a coat of matte spray varnish or sealant to protect the paint and clay from moisture. -
Add the greenery:
Place your succulent into the opening. If using a real plant without a drainage hole, keep the plant in its original plastic nursery pot so you can remove it for watering.
This little bunny is ready to sit quietly in the sun with its new green hairstyle
Fox or Raccoon Wall Hanger Hooks
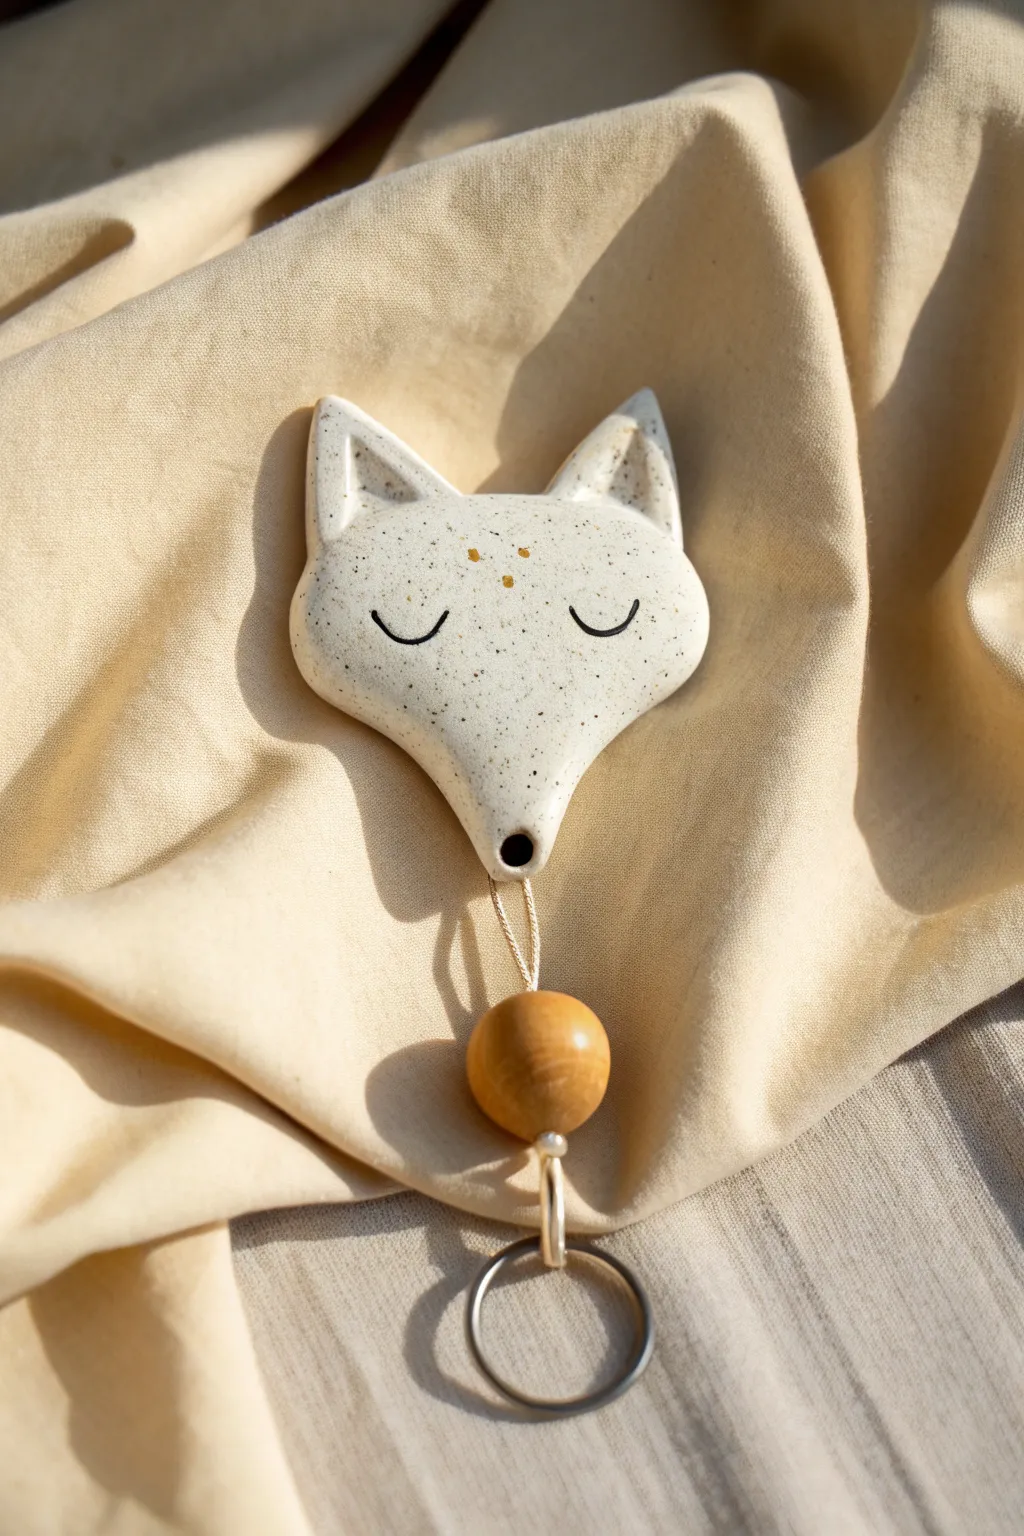
This charming little fox head combines the rustic appeal of speckled clay with modern minimalist design. Perfect as a decorative wall accent or even a unique keychain, its glossy finish and gold accents give it a polished, professional look.
Step-by-Step Guide
Materials
- White polymer clay (cernit or Fimo)
- Speckled clay inclusions (ground black pepper or dried coffee grounds work well)
- Rolling pin or pasta machine
- Fox head template or cardstock
- X-Acto knife or clay blade
- Ball stylus tool
- Sandpaper (fine grit)
- Black acrylic paint
- Gold leaf paint or liquid gold leaf
- Glossy polyurethane glaze or UV resin
- Wooden bead (approx 15mm)
- Waxed cord or twine
- Metal split ring
Step 1: Sculpting the Base Form
-
Prepare the clay:
Begin by conditioning your white polymer clay until it is soft and pliable. To achieve that lovely speckled pottery look without buying special clay, I like to knead in a small pinch of ground black pepper or dried coffee grounds at this stage. -
Roll out the slab:
Roll the clay out to a uniform thickness of about 1/4 inch (6mm). You want it thick enough to be sturdy but not so heavy that it pulls on the hanging cord later. -
Cut the shape:
Sketch a simple triangular fox head shape on cardstock to use as a template. Place this over your clay slab and carefully cut around the outline using your X-Acto knife or blade. Soften the cut edges with your fingertip to remove any sharpness. -
Create the ears:
Using a small ball stylus or the back of a paintbrush, gently press into the triangular ear areas to create indentations. This adds dimension and separates the ears from the rest of the face. -
Add the cord channel:
At the very bottom point of the fox’s chin, use a drinking straw or a larger stylus to create a clean hole. This is where the cord will eventually pass through. -
Bake the clay:
Place your fox on a ceramic tile or parchment-lined baking sheet. Bake according to your specific clay manufacturer’s instructions (usually 275°F/130°C for 15-30 minutes). Let it cool completely before moving to the next phase.
Step 2: Painting and Finishing
-
Sand for smoothness:
Once cool, check for any rough spots or fingerprints. Lightly sand the edges and surface with fine-grit sandpaper under running water to create a silky smooth base for painting. -
Paint the eyes:
Using a very fine detail brush and black acrylic paint, carefully paint two curved lines for the sleeping eyes. It helps to practice the curve on a piece of paper first to get the symmetry right. -
Paint the nose:
Add a small black dot or oval right above the hole at the bottom chin to represent the nose. -
Apply gold accents:
Take a toothpick or dotting tool and dip it into your liquid gold leaf. Add three tiny, delicate dots between the ears on the forehead for a touch of magical detail. -
Seal the piece:
Apply a generous coat of high-gloss polyurethane glaze or UV resin over the entire front surface. This not only protects the paint but gives it that high-end ceramic shine visible in the photo. If using resin, cure under a UV lamp.
Sticky Situation?
If fingerprints are stubborn even after sanding, wipe the unbaked clay with a little baby oil or rubbing alcohol on a soft brush before putting it in the oven.
Step 3: Assembly
-
Prepare the cord:
Cut a length of waxed cord or twine, approximately 8 inches long. Fold it in half to create a loop. -
Thread the nose:
Feed the folded loop end of the cord through the hole in the fox’s chin, going from the back to the front. -
Thread the bead:
Pass the wooden bead onto the loop sticking out of the chin. Slide the bead all the way up so it rests snugly against the bottom of the fox head. -
Secure the ring:
Loop the cord ends around your metal split ring. I prefer a lark’s head knot here for a clean look, or simply tie a sturdy double knot against the ring. -
Final adjustment:
Trim any excess cord tail and add a tiny dot of super glue to the knot to ensure it never slips undone.
Make It Shimmer
For a true faux-ceramic look, apply 2-3 thin coats of the gloss glaze rather than one thick one. This prevents drips and creates a deeper, glass-like shine.
Now you have a serene little fox guardian ready to hold your keys or simply brighten up a wall space
Sea Creature Sculptures (Octopus, Starfish, Seahorse)
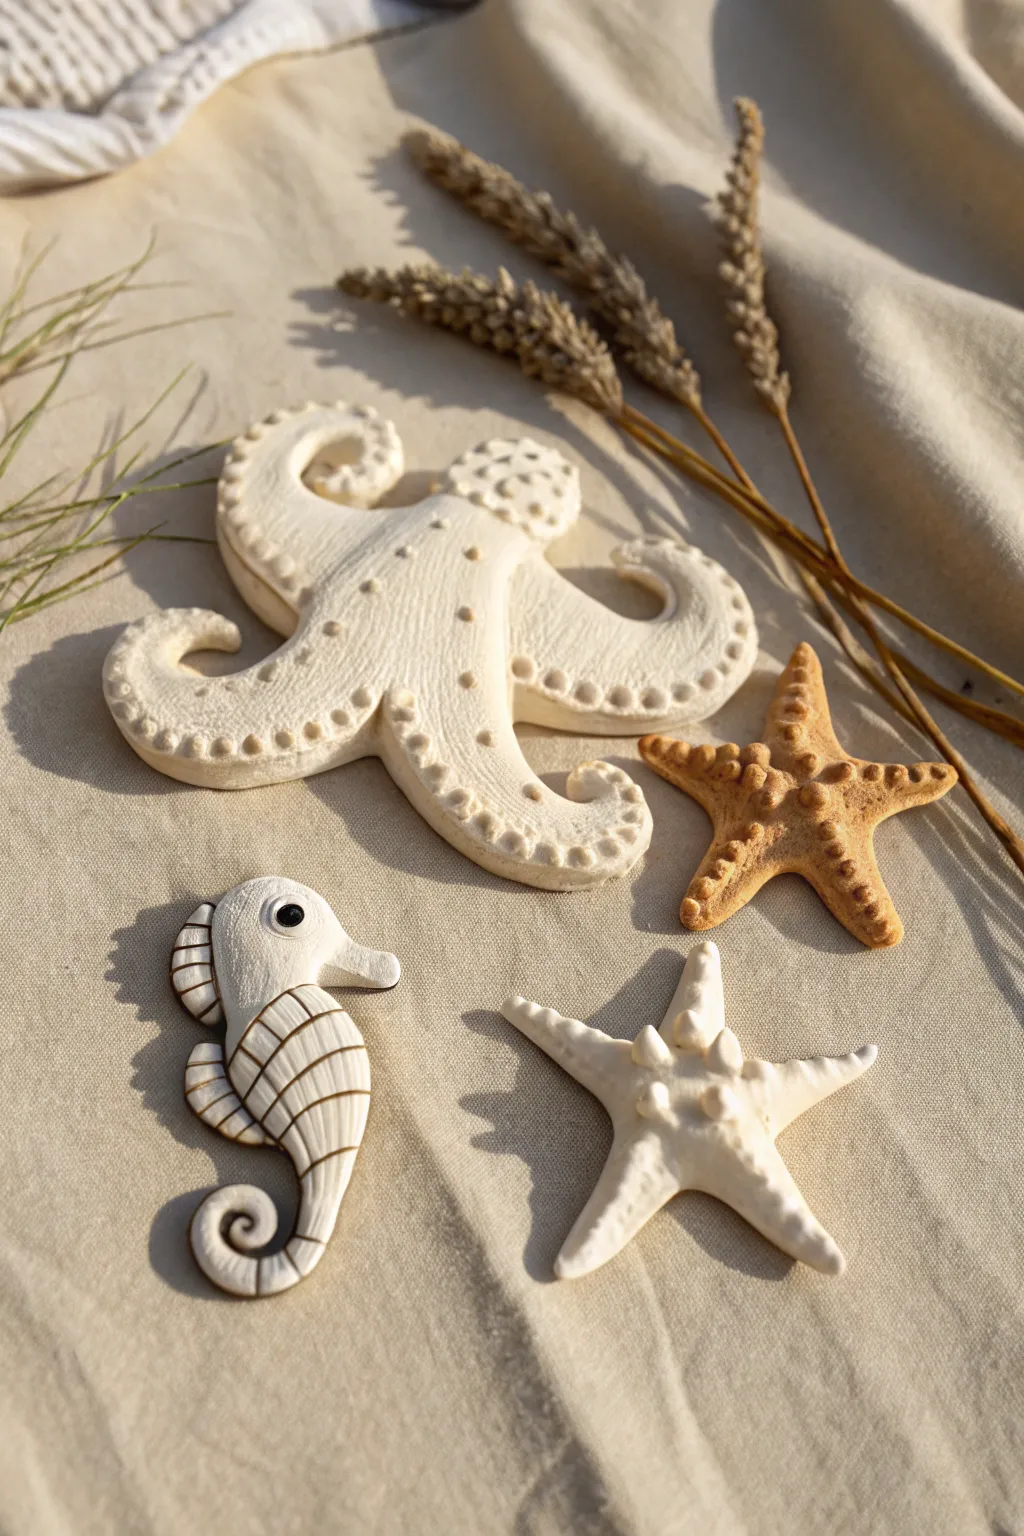
Bring the calming vibes of the ocean into your home with this trio of textured sea creature sculptures. These handcrafted pieces feature a natural, minimalist palette and intricate surface details that are surprisingly easy to achieve.
Step-by-Step Tutorial
Materials
- White polymer clay (or air-dry clay)
- Beige or biscuit-colored polymer clay
- Rolling pin
- Ball stylus tools (various sizes)
- Needle tool or toothpick
- Small craft knife
- Oven (if using polymer clay)
- Brown acrylic paint (optional for detailing)
- Small round black bead (for seahorse eye)
- Sandpaper (fine grit)
Step 1: Sculpting the Octopus
-
Prepare the clay:
Start by conditioning a large block of white clay until it is soft and pliable. Roll it into a smooth ball to remove any air bubbles. -
Form the base:
Flatten the ball into a thick, organic disc shape, gently pulling outwards to create eight thick, tapered arms radiating from a central point. -
Shape the arms:
Curl the ends of the arms in different directions—some twisting up, some down—to give the creature a sense of movement. Smooth any fingerprint marks with a little water or baby oil. -
Texture the head:
Using a small ball tool, press indentations all over the central head area to create a bumpy texture. -
Add the suckers:
Roll tiny spheres of white clay and press them in rows along the arms. Use a smaller ball tool to indent the center of each sphere, turning them into little suction cups. I like to vary the sizes, making them smaller near the tips. -
Final detailing:
Use a needle tool to add tiny pores or dots between the suckers for extra realism.
Step 2: Crafting the Starfish
-
Mix colors:
For the beige starfish, mix a little translucent clay into your beige clay for a more lifelike finish. For the white one, stick to pure white. -
Cut the shape:
Flatten a piece of clay and use a knife to cut a five-pointed star shape. Pinch the arms gently to round off the sharp cut edges. -
Add knobby texture (White Starfish):
Roll small balls of white clay and press them firmly onto the center and down the spine of each arm. Blend the edges of these balls slightly so they look like organic bumps. -
Create pore texture (Beige Starfish):
Use your needle tool to poke a dense pattern of holes all over the surface, imitating the rough skin of a sea star. Add a central ridge by pinching the clay lightly.
Pro Texture Tip
For the beige starfish, try pressing a real piece of coral or coarse sandpaper onto the clay surface before baking to achieve an authentic, sandy texture instantly.
Step 3: Shaping the Seahorse
-
Roll the body:
Roll a snake of white clay that is thicker at one end (head) and tapers to a fine point (tail). -
Form the S-curve:
Curl the tapered end into a tight spiral for the tail. Bend the neck forward and shape the head to look like a horse, pinching the snout slightly. -
Add dorsal detail:
Flatten a small strip of clay and attach it to the back of the neck for a fin. Score lines into it with your knife. -
Deep scoring:
Using a knife or a contour tool, carve deep horizontal lines all down the body to mimic the seahorse’s segmented armor plates. -
Insert the eye:
Press a small black bead into the head for the eye. Ensure it is embedded deep enough not to fall out. -
Accentuate with paint:
Apply a very thin wash of brown acrylic paint into the carved lines of the seahorse. Wipe away the excess on the surface immediately with a damp cloth, leaving the dark color only in the crevices.
Troubleshooting Breaks
If a thin arm cracks after baking, don’t toss it! Use a tiny drop of super glue or liquid polymer clay to reattach it, then sand the seam smooth.
Step 4: Baking and Finishing
-
Bake:
Place all sculptures on a parchment-lined baking sheet. Bake according to your clay package instructions (usually 275°F/135°C for 15-30 minutes). -
Cool and smooth:
Let the pieces cool completely. If there are any rough fingerprints left, gently sand them away with fine-grit sandpaper.
Now you have a serene collection of sea life ready to display on a shelf or turn into beautiful ornaments.
Character Bust Sculptures With Exaggerated Features
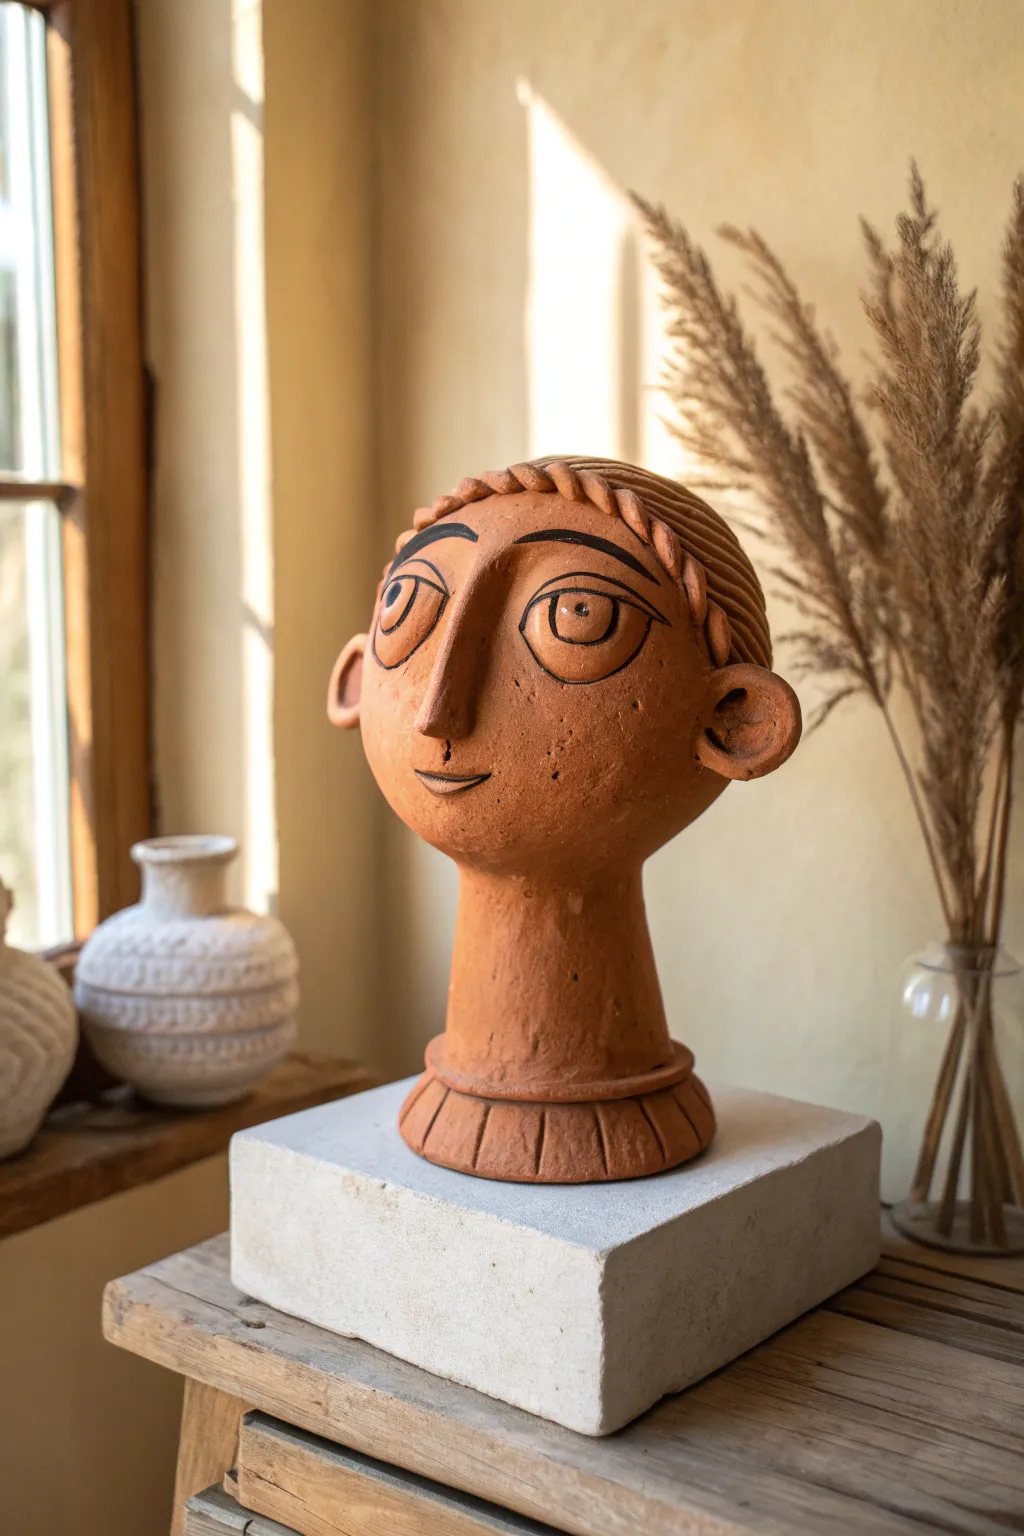
This whimsical sculpture captures the charm of ancient pottery with a modern, stylized twist. Featuring exaggerated eyes, a prominent nose, and delightful braided hair details, this warm terracotta bust makes for a striking conversation piece.
Step-by-Step Tutorial
Materials
- Terracotta air-dry clay or earthenware clay
- Aluminum foil
- Masking tape
- Wooden dowel (approx. 1/2 inch thick)
- Wooden base or armature board
- Sculpting tools (needle tool, loop tool, wooden knife)
- Slip (clay mixed with water)
- Sponge
- Black acrylic paint or underglaze
- Fine detail paintbrush
- Rolling pin
Step 1: Building the Armature
-
Prepare the core:
Begin by crumpling aluminum foil into a large, slightly flattened egg shape for the head. Create a smaller cylinder of foil for the neck to ensure the structure isn’t too heavy. -
Secure the dowel:
Insert your wooden dowel into the base. Slide the foil neck cylinder down the dowel, followed by the head shape. Use masking tape to tightly wrap the foil, securing it firmly to the dowel so it doesn’t spin.
Keep it clean
Wipe your tools often! Clay buildup on wooden modeling tools can drag across the surface and create unwanted texture, ruining the smooth finish of the face.
Step 2: Forming the Base Shape
-
Cover with clay:
Roll out a slab of terracotta clay to about 1/4 inch thickness. Wrap this slab entirely around the foil head and neck, smoothing the seams together with a bit of water. -
Shape the neck and shoulders:
Add extra clay to the bottom of the neck to flare it out slightly where it meets the base. Create a distinct, wide circular base that looks like a collar or pedestal. -
Refine the head:
Using your hands or a flat wooden paddle, smooth the clay on the head to create a uniform, slightly flattened oval face shape. I like to continuously turn the piece while working to ensure symmetry.
Step 3: Sculpting the Features
-
Add the nose:
Roll a long triangular wedge of clay. Score and slip the center of the face, then attach the wedge to form a long, straight nose that connects directly into the forehead line. Smooth the edges down onto the face. -
Attach the ears:
Form two semi-circles of clay. Attach these to the sides of the head, roughly in line with the nose. Use your thumb to impress a hollow inside each ear, giving them a stylized, cup-like appearance. -
Create the eyes:
Roll two small balls of clay and flatten them slightly. Score and slip the area on either side of the nose bridge, then press the eyes onto the face. They should be large and prominent. -
Define the eyelids:
Roll very thin coils of clay to outline the eyes, creating upper and lower lids. Blend the outer edges into the face but leave the inner edges sharp. -
Sculpt the mouth:
Use a needle tool or small knife to carve a simple, smiling line below the nose. Gently press the corners of the mouth to deepen the expression.
Make it ancient
Before painting, lightly dab the surface with a textured sponge dipped in watered-down darker brown paint. Wipe it back immediately to leave residue in the crevices for an aged look.
Step 4: Detailed Texturing
-
Create the hair braid:
Roll two long coils of clay and twist them together to form a rope. Wet the top ridge of the head and press this twisted rope across the forehead like a crown, wrapping around to the back. -
Detail the hair:
Behind the braid, use a modeling tool to carve parallel lines into the clay surface, mimicking combed hair going toward the back of the head. -
Detail the base:
On the flared circular base at the bottom of the neck, use a wooden knife to press vertical indentations all around the ring, creating a ribbed, column-like texture. -
Final smoothing:
Take a slightly damp sponge and gently wipe over the entire sculpture to remove fingerprints and harsh tool marks.
Step 5: Finishing Touches
-
Let it dry:
Allow the clay to dry until it is leather hard. If you are using air-dry clay, wait until it is fully hardened. -
Apply outline details:
Using a fine detail brush and black paint (or underglaze), carefully paint thin outlines around the eyes, the pupils, eyebrows, and the smile line. -
Add the pupil detail:
Paint a large black circle in the center of each eye, leaving a tiny unpainted spot or adding a white dot later for a highlight. -
Final seal (optional):
If using air-dry clay, apply a matte varnish to protect the surface while keeping that natural earthen look.
Place your finished bust near a window to let natural light emphasize those bold sculptural features
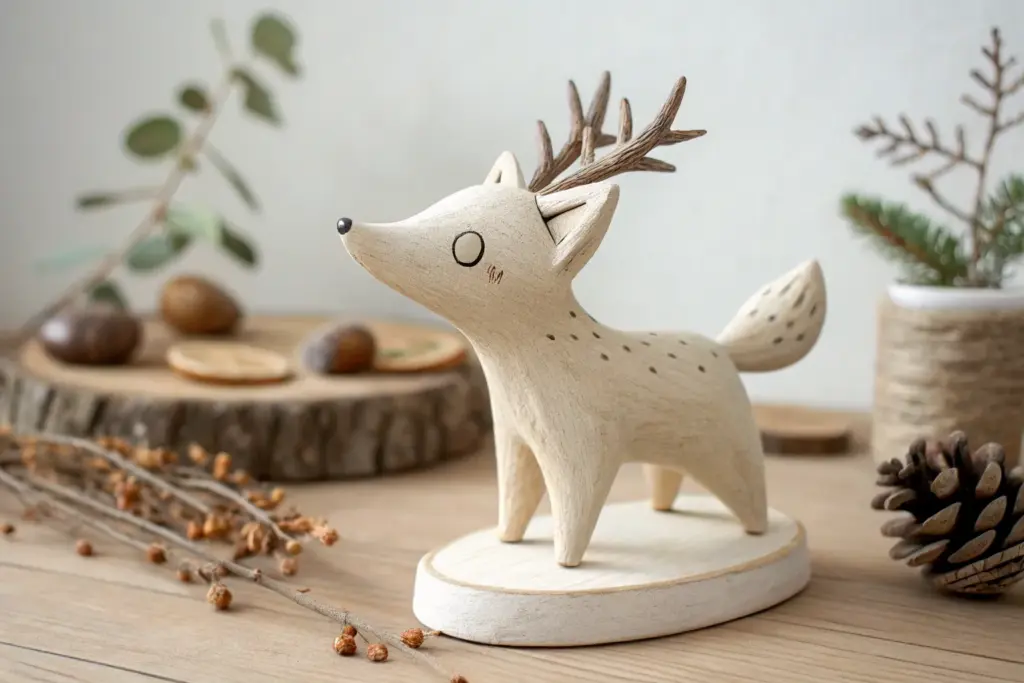
Texture-First Animal Sculptures (Fur, Scales, Feathers)
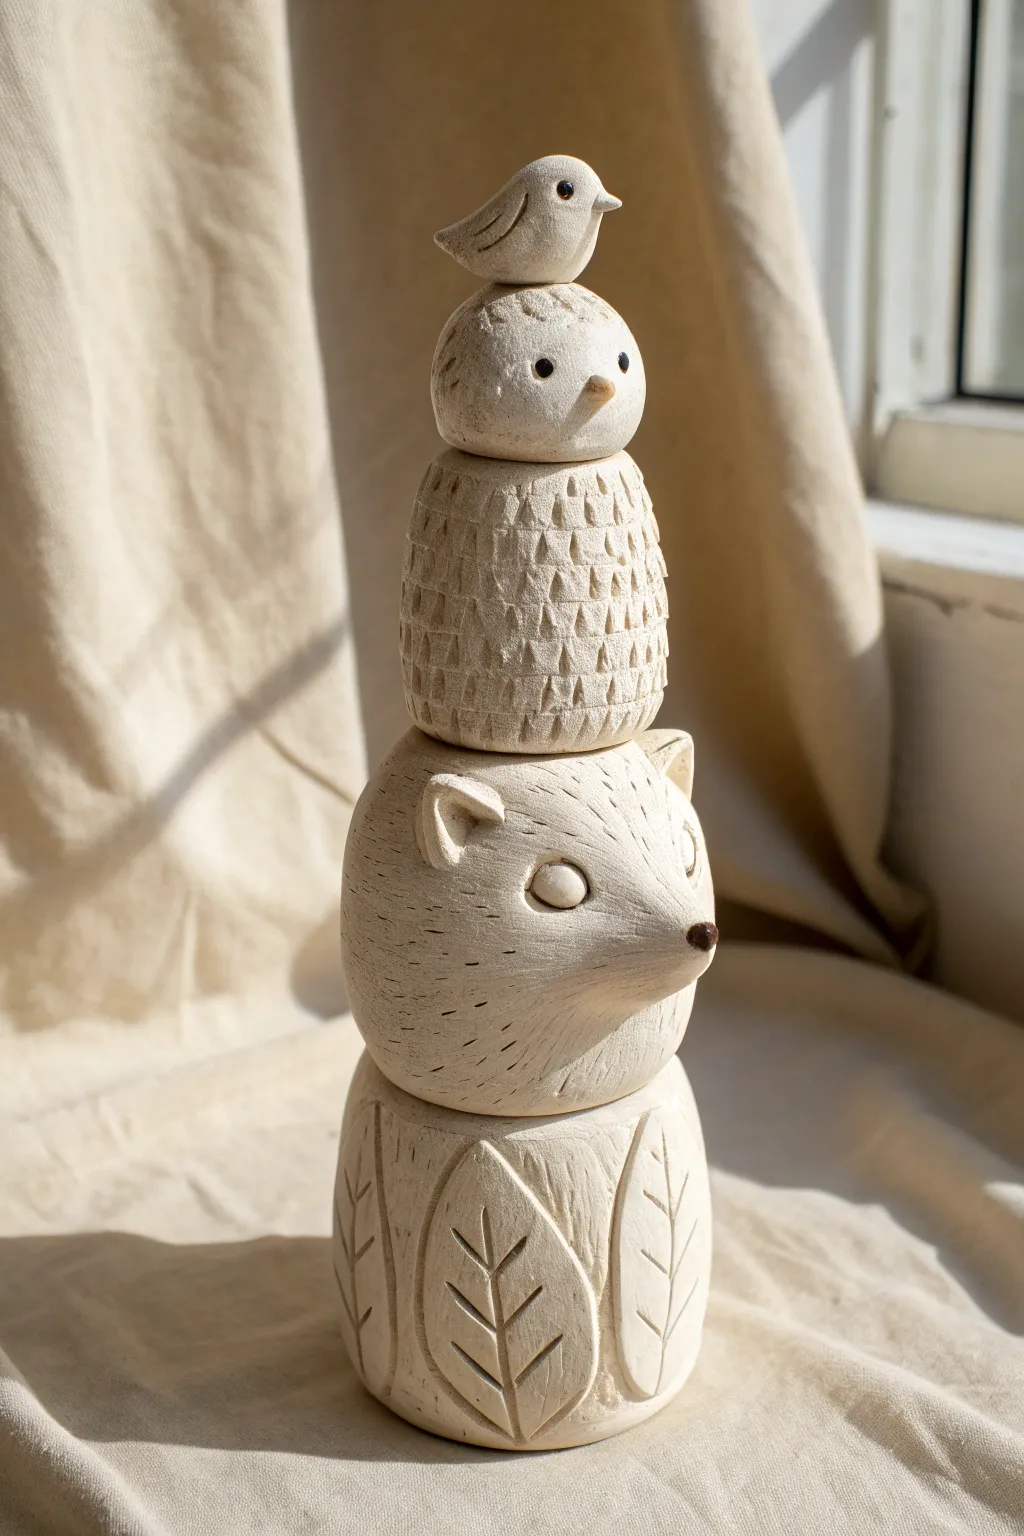
This whimsical vertical sculpture stacks charming woodland creatures into a delightful totem, perfect for exploring different texture techniques. The design features an organic, stone-like finish that highlights the contrast between carved leaves, smooth fur, and geometric feathers.
Step-by-Step
Materials
- White or light stoneware clay (with fine grog)
- Pottery wire cutter
- Internal dowel or support rod (optional, for drying stability)
- Needle tool
- Loop carving tools (small)
- Rib tool (metal or rubber)
- Small sponge
- Black underglaze or slip
- Brown underglaze or slip
- Fine paintbrush
- Wooden modeling tool
Step 1: Sculpting the Components
-
Form the leaf base:
Start with a solid lump of well-wedged clay, rolling it into a cylinder about 3 inches tall and wide. Flatten the top and bottom so it sits securely. -
Shape the fox head:
Create a rounded sphere slightly smaller than your base. Gently pull and pinch the clay on one side to form a pointed snout. -
Add fox ears:
Pinch two small, triangular pieces of clay for the ears. Score and slip the top of the head, then attach the ears firmly, blending the seams with a wooden tool until invisible. -
Create the owl body:
Roll another cylinder, slightly tapered at the top, to serve as the owl’s textured body. This section connects the fox to the birds above. -
Form the owl head:
Roll a small sphere for the owl’s head. Pinch a tiny beak in the center and flatten the bottom so it will rest flush on the body cylinder. -
Sculpt the topper bird:
For the crowning piece, shape a tiny teardrop form for the smallest bird. Refine the beak and tail feathers with your fingertips. -
Plan the stack:
Lightly stack your leather-hard pieces to check balance. If you are building this hollow, now is the time to hollow out each form (except the tiny bird) to an even wall thickness.
Step 2: Texturing and Details
-
Carve the base leaves:
Using a needle tool, draw large oval leaf outlines on the base cylinder. Use a small loop tool to carve away the background clay slightly, leaving the leaves raised. -
Add leaf veins:
Incise the center veins and angled side veins into each leaf using a sharp tool or knife for crisp definition. -
Texture the fox:
Use a needle tool to create short, directional strokes simulating fur. Focus these marks around the cheeks and forehead, leaving the snout smooth for contrast. -
Define fox features:
Preserve smooth, almond-shaped areas for the eyes. I find it helps to tackle the pupils later with glaze, keeping the definition sharp during the sculpting phase. -
Carve owl feathers:
On the owl’s body cylinder, push a small U-shaped loop tool into the clay in repeating rows to create a simplified, geometric feather pattern. -
Texture the owl head:
Add subtle texture to the owl’s head with stippling or very light scratches, keeping it distinct from the deeply carved body feathers.
Keep it Straight
Insert a wooden dowel through the center of all pieces while forming (remove before firing!). This ensures your vertical stack stays perfectly aligned during the sculpting process.
Step 3: Assembly and Finishing
-
Score and slip:
Once all pieces are leather hard, heavily score and apply slip to the contact points between each tier. Press them together firmly with a twisting motion to lock the bond. -
Refine the seams:
Check the connection points. You can blend the clay across the seams for a permanent stack, or leave them as separate stacking pieces if you prefer a modular toy style. -
Smooth the surface:
Use a damp sponge to soften any sharp burrs created by the carving tools, but be careful not to wash away the texture. -
Paint the details:
Using a fine brush, apply a dot of black underglaze to the eyes of the birds and owl. Use a touch of brown underglaze for the fox’s nose. -
Final drying:
Allow the entire totem to dry slowly under plastic to prevent the different thicknesses from cracking. -
Bisque fire:
Fire the piece to cone 04 (or your clay’s bisque temperature). You can leave the raw clay unglazed for a natural look or apply a matte clear glaze.
Change the Texture
Experiment with different textures for each tier. Try pressing lace into the clay or using a comb tool to create variation between the fur, feathers, and leaves.
Once fired, this stackable sculpture brings a calm, earthy presence to any shelf or tabletop.