Mother’s Day is the sweetest excuse to slow down and make something with your hands that says “I love you” without needing the perfect words. These Mother’s Day clay ideas are all about heartfelt keepsakes and useful little treasures that feel personal, even if you’re brand-new to clay.
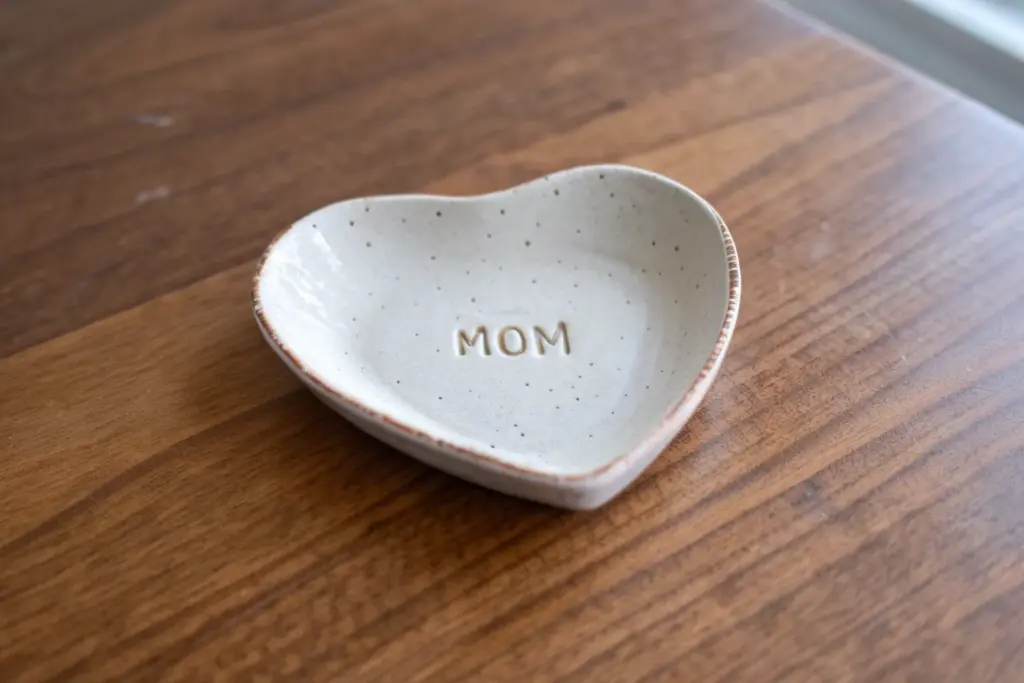
Heart-Shaped Ring Dish With Stamped “Mom”
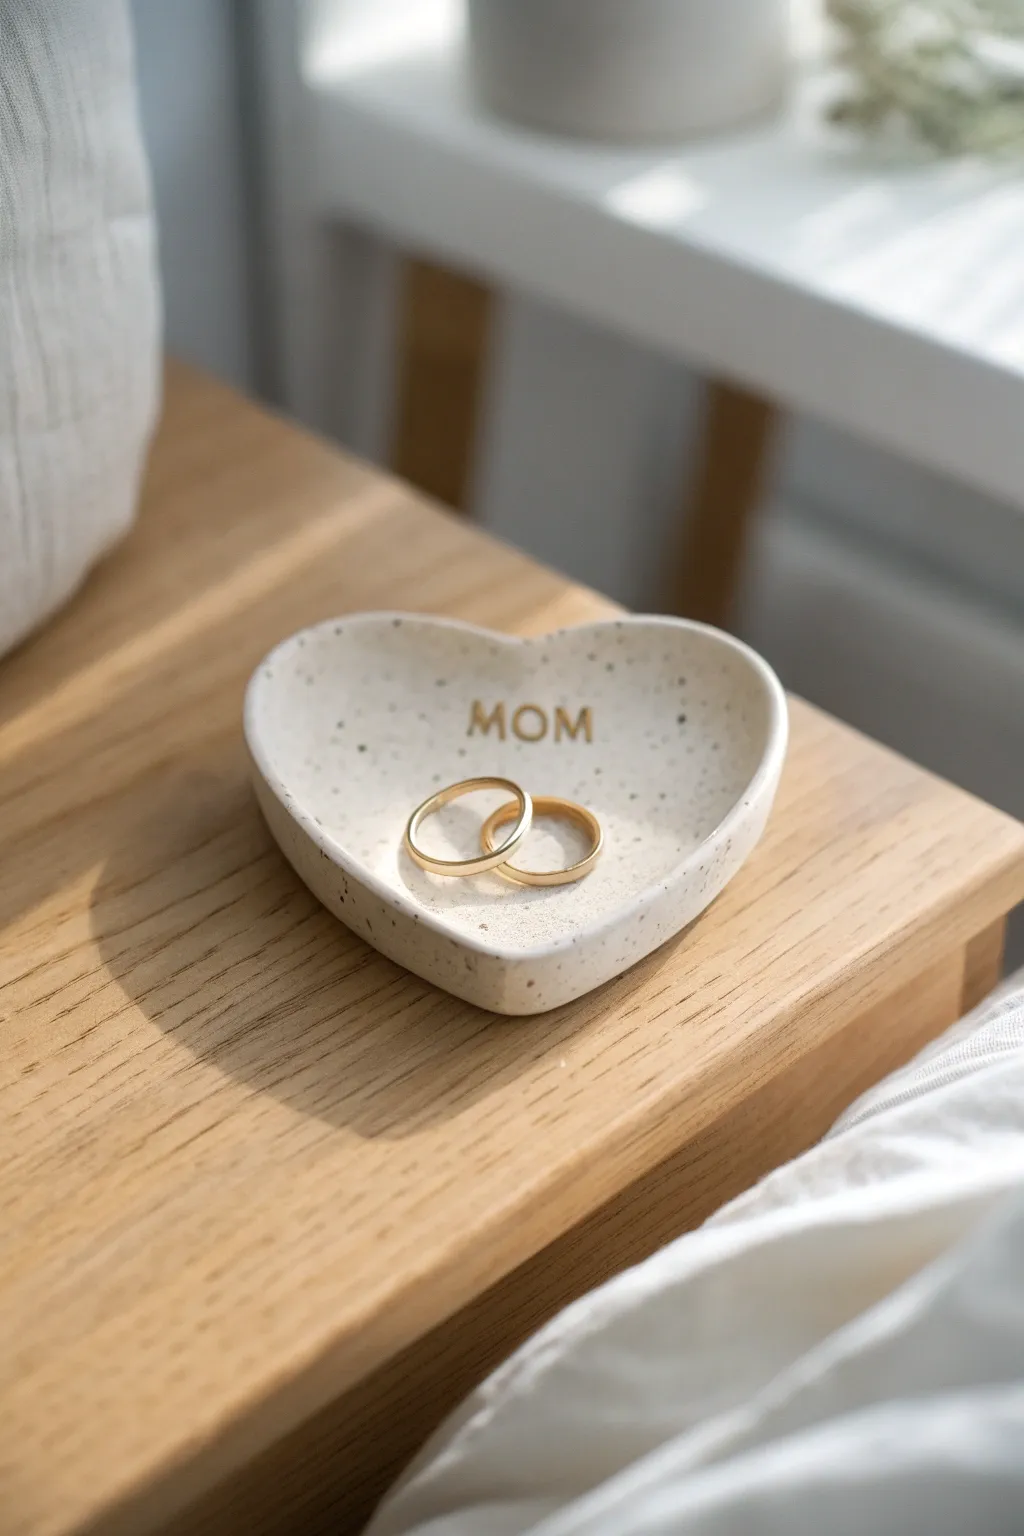
This elegant little ring dish combines a modern speckled finish with a heartfelt sentiment, making it the perfect understated gift for Mother’s Day. The organic, hand-shaped heart form and gold lettering give it a boutique feel without requiring advanced pottery skills.
Step-by-Step Tutorial
Materials
- White polymer clay (approx. 2oz)
- Faux granite/speckle inclusions (black pepper or black embossing powder)
- Small heart-shaped cookie cutter (approx. 3-4 inches)
- Rolling pin or acrylic roller
- Small alphabet stamps
- Gold acrylic paint
- Fine detail paintbrush
- Fine-grit sandpaper (400-600 grit)
- Matte varnish or glaze (optional)
- Small bowl or curved surface for drying
Step 1: Preparation & Shaping
-
Prepare the clay:
Begin by conditioning your white polymer clay in your hands until it is soft and pliable. If you are using pre-speckled clay, you can skip to rolling. If using plain white clay, flatten it out slightly. -
Add the speckles:
Sprinkle a very small pinch of black pepper or black embossing powder onto the flattened clay. Fold the clay over and knead it thoroughly to distribute the speckles evenly. Keep adding tiny amounts until you achieve that natural stone look seen in the photo. -
Roll it out:
Place the clay on a smooth work surface. Use your roller to flatten the clay to a uniform thickness of about 1/4 inch (6mm). Ensure it’s not too thin, or the base will be fragile. -
Cut the shape:
Press your heart-shaped cookie cutter firmly into the clay. Give it a tiny wiggle to ensure a clean cut, then lift the cutter away. Peel away the excess clay from the outside. -
Smooth the edges:
Dip your finger in a little bit of water (or baby oil if the clay is sticky) and gently run it along the cut edge of the heart to soften any sharp angles left by the cutter.
Use Cornstarch
Dust your work surface and cookie cutter lightly with cornstarch before rolling or cutting. This prevents the clay from sticking and distorting when you lift it.
Step 2: Stamping & Forming
-
Stamp the text:
Arrange your alphabet stamps to spell ‘MOM’. Press them gently but firmly into the center of the heart. Be careful not to press so hard that you distort the clay shape, but deep enough to hold paint later. -
Check for imperfections:
Look closely at the surface. If your finger left any prints while stamping, gently buff them out now with a light circular motion. -
Curve the edges:
Lift the clay heart gently. Using your thumbs, slowly push the edges upwards to create a shallow bowl shape. You want a subtle lift, not a steep wall. -
Set the form:
Place the clay heart inside a small, shallow bowl to help it hold its curved shape while baking. Alternatively, you can rest it on a bed of cornstarch or batting to support the curves. -
Bake the piece:
Bake the clay according to the manufacturer’s instructions on your package (usually around 275°F/135°C for 15-30 minutes). Let it cool completely in the oven or on a wire rack.
Gold Leaf Luxury
Instead of gold paint, brush a tiny amount of liquid sizing into the letters and apply real gold leaf for an ultra-shiny, premium metallic finish.
Step 3: Finishing Touches
-
Sand the edges:
Once fully cool, take your fine-grit sandpaper and very gently sand the rim of the dish. This removes any final roughness and gives it that professional, smooth stone texture. -
Wipe it down:
Use a barely damp cloth or paper towel to wipe away any sanding dust. The surface needs to be perfectly clean for the paint to adhere. -
Paint the letters:
Dip your fine brush into the gold acrylic paint. Carefully fill in the stamped ‘MOM’ letters. I find it easier to dab the paint into the depression rather than stroking it. -
Clean up overflow:
If any gold paint got on the surface outside the letters, quickly wipe it away with a damp Q-tip or a baby wipe before it dries. -
Seal the piece:
For durability, apply a thin coat of matte varnish over the entire dish. This seals the specks and protects the white clay from getting dirty over time.
Now you have a chic, modern catch-all dish ready to hold precious trinkets.


Handprint Jewelry Dish Keepsake
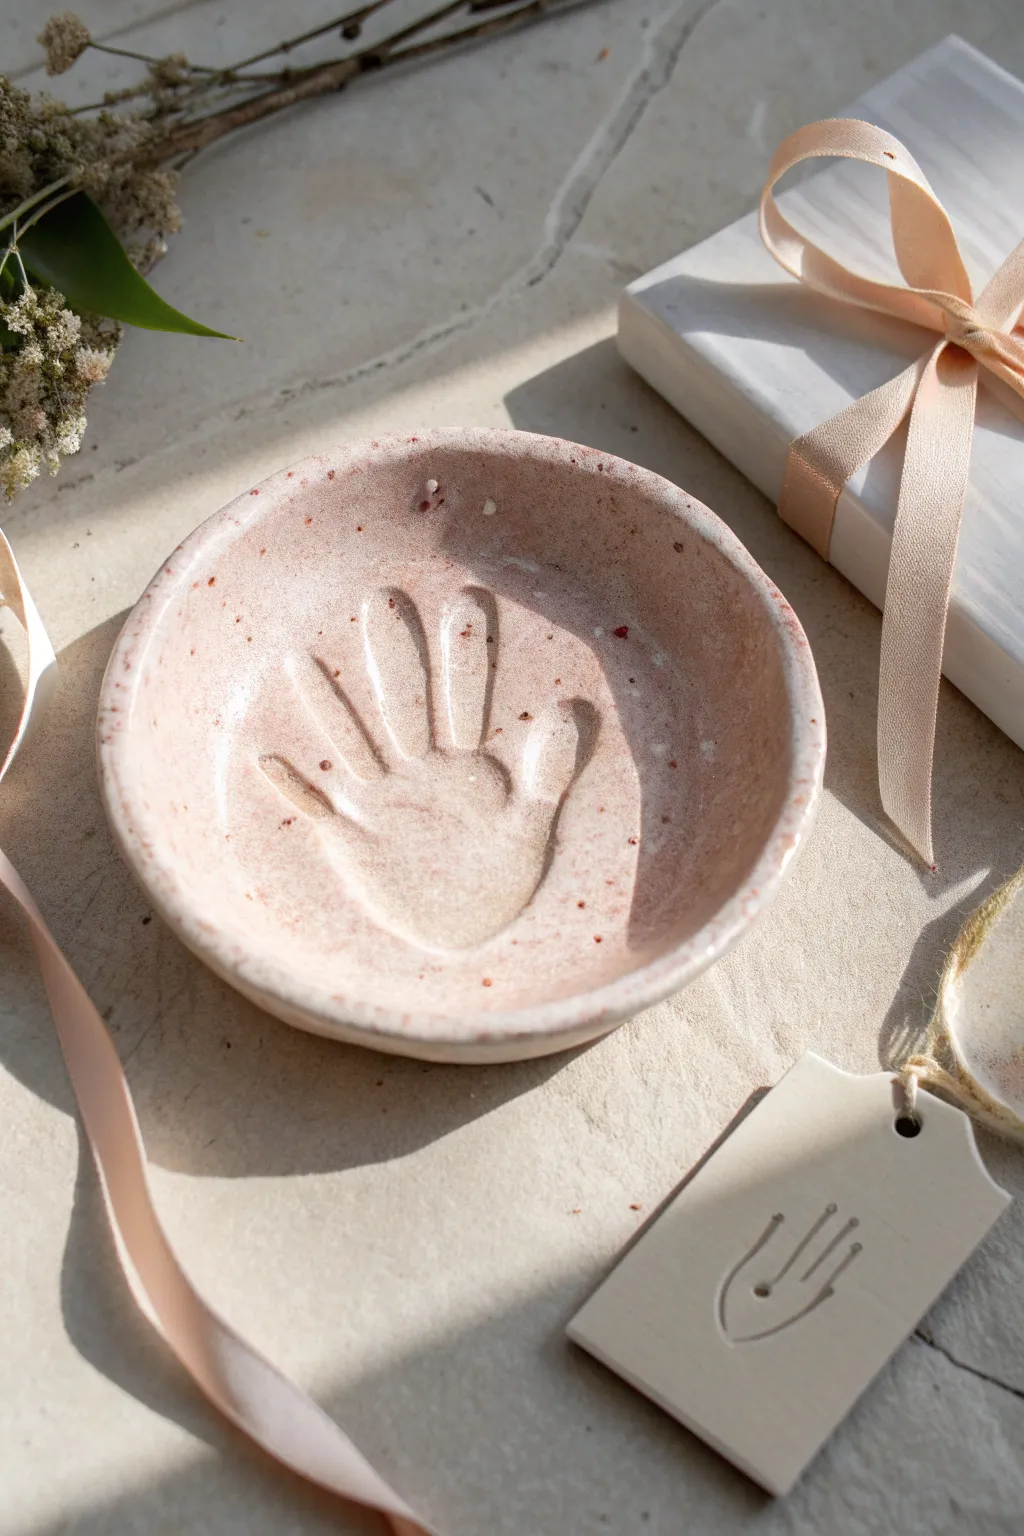
Capture a moment in time with this charming trinket dish featuring a sweet handprint impression. The soft pink speckled finish gives it a polished, stoneware look that Mothers will cherish for years to come.
Step-by-Step Guide
Materials
- White air-dry clay or polymer clay
- Rolling pin
- Circular cookie cutter or bowl (approx. 4-5 inches)
- Small bowl (for shaping)
- Sandpaper (fine grit)
- Acrylic paint (pale pink or blush)
- Acrylic paint (terracotta or reddish-brown)
- Old toothbrush
- Gloss varnish or sealant
- Paintbrush
- Water
- Small toy hand or stamp (optional, if not using a real child’s hand)
Step 1: Shaping the Base
-
Condition the clay:
Start by taking a handful of your white clay and kneading it in your hands until it becomes soft, warm, and pliable. This prevents cracks later on. -
Roll it out:
Place the clay on a smooth, clean surface. Use a rolling pin to flatten it into an even sheet, aiming for a thickness of about 1/4 inch. -
Cut the circle:
Press your circular cookie cutter or use a bowl as a template to cut out a perfect circle from the rolled clay. Remove the excess clay from around the edges. -
Smooth the edges:
Dip your finger in a little water and run it along the cut edge of the circle (the rim) to smooth out any roughness or sharp corners.
Step 2: Creating the Impression
-
Position the hand:
Ideally, have the child press their hand gently but firmly into the center of the clay circle. If the hand is too big for the dish, you can use just the fingertips or a smaller doll hand for a symbolic effect. -
Deepen the print:
Ensure the fingers and palm make a deep enough impression so the shape is clearly visible, but be careful not to push all the way through the clay. -
Form the curve:
carefully lift the clay circle and place it inside a slightly larger bowl. Gently press it down so the clay takes on the curved shape of the bowl, forming a dish. -
Dry completely:
Let the clay dry in the bowl for at least 24-48 hours. I find that rotating it occasionally helps it dry evenly without warping. -
Sand imperfections:
Once fully hard, remove the dish from the drying bowl. Use fine-grit sandpaper to gently smooth the rim and buff away any fingerprints or bumps on the surface.
Clean Edges Trick
Use a damp sponge to smooth clay edges before drying. It eliminates sharp ridges better than sanding later and keeps the shape organic.
Step 3: Painting & Speckling
-
Base coat:
Mix a pale pink or blush color using your acrylic paints. Dilute it slightly with water for a smoother application. -
Apply the color:
Paint the entire dish, front and back, with the pale pink mixture. Let the first coat dry and apply a second coat if you want more opaque coverage. -
Prepare the speckles:
Dilute a small amount of terracotta or reddish-brown paint with water until it has an inky consistency. -
Flick the paint:
Dip an old toothbrush into the dark paint. Hold it over the dish and run your thumb across the bristles to flick tiny speckles onto the surface. Practice on paper first to control the spray. -
Final drying:
Allow the speckles to dry completely, which usually takes about 20-30 minutes. -
Seal the piece:
Apply a coat of gloss varnish to the entire dish. This gives it that ceramic-like shine shown in the photo and protects the paint from chipping.
Cracking Issues?
If small cracks appear while drying, don’t panic. Mix a tiny bit of fresh clay with water to make a paste and fill the cracks, then sand smooth.
Wrap this delicate dish with a soft ribbon for a gift that feels both handmade and high-end


Personalized Trinket Tray With Names and Date

This earthy yet elegant trinket dish features a rich, glossy midnight blue interior contrasting beautifully with unglazed terracotta clay. Simple slab-building techniques create its clean rectangular form, making it a perfect beginner-friendly project with sophisticated results.
Step-by-Step Guide
Materials
- Terracotta air-dry clay or kiln-fire clay
- Rolling pin
- Two wooden guide strips (approx. 1/4 inch thick)
- Fettling knife or craft knife
- Rectangular template or ruler
- Scoring tool or old fork
- Slip (clay mixed with water)
- Small paintbrush for slip
- Dark blue gloss glaze (for kiln firing) or high-gloss acrylic paint and sealant (for air-dry)
- Small tool with a rounded tip (e.g., end of a paintbrush) for texture details
- Sponge
Step 1: Creating the Base Form
-
Prepare the slab:
Begin by wedging your terracotta clay to remove air bubbles. Place your clay between two wooden guide strips on a canvas surface and roll it out until it is perfectly even and smooth. -
Cut the base:
Using a rectangular paper template or a ruler, cut out the bottom of your tray. A size of about 4×6 inches works well for a bedside trinket dish. Keep your knife vertical for clean edges. -
Cut the walls:
From the remaining slab, cut four strips for the walls. These should be about 1 to 1.5 inches tall. Measure the sides of your base carefully to ensure the strips match the lengths of the rectangle’s four sides. -
Score and slip:
Score the top edges of your base rectangle and the bottom edges of your four wall strips. Apply a generous amount of slip to the scored areas. -
Assemble the walls:
Press the walls firmly onto the base. Where the corners meet, score and slip the vertical edges as well. I like to overlap the corners slightly and slice through both layers at a 45-degree angle for a seamless mitered joint. -
Reinforce the seams:
Roll a very thin coil of clay and press it into the interior bottom seam where the wall meets the floor. Smooth this coil out completely so it disappears, strengthening the bond.
Uneven Glaze Lines?
If you struggle to paint a straight line at the rim, apply painter’s tape or wax resist to the top edge before glazing. Peel it off before firing for a crisp edge.
Step 2: Refining and Decorating
-
Smooth the edges:
Use a damp sponge to round over the sharp top lip of the rim. You want a soft, organic feel rather than a sharp, machined edge. -
Clean the exterior:
Ensure the outside walls are smooth. If you see seam lines at the corners, use a rib tool or your thumb to blend the clay until the walls look like one continuous piece. -
Add texture details:
Before the clay hardens, use a small rounded tool to gently impress the small clusters of dots into the floor of the tray. Group them in threes or fours to mimic the subtle pattern seen in the image. -
Slow drying:
Loosely cover the tray with plastic to let it dry slowly. This prevents the corners from warping or cracking. Once bone dry, fire the piece (if using kiln clay) or let it fully cure (if using air-dry).
Step 3: Glazing and Finishing
-
Apply the color:
If using kiln clay, brush three rich coats of a deep indigo or midnight blue gloss glaze onto the interior only. Be careful to stop exactly at the rim’s edge to maintain that crisp contrast. -
Paint alternative:
For air-dry clay, paint the interior with high-gloss dark blue acrylic. Several thin layers look better than one thick one. -
Reveal the texture:
The glaze or paint will naturally pool slightly in the indented dot textures, highlighting them. If you want them to pop more, you can wipe back the surface slightly or add a tiny dot of metallic paint. -
Clean the rim:
Take a damp sponge and wipe any stray glaze or paint off the top rim. The beauty of this piece relies on the clean separation between the blue interior and the raw terracotta exterior. -
Final firing or sealing:
Fire the piece to the glaze’s specific temperature cone. If using air-dry clay, apply a high-gloss varnish to the painted interior to simulate the ceramic look.
Customize It
Instead of dots, impress a special date or name into the soft clay floor using a letter stamp set for personalized Mother’s Day gift.
Once the glaze has fired or the varnish has set, this striking tray is ready to hold jewelry or keys


Clay Flower Magnet Set for the Fridge
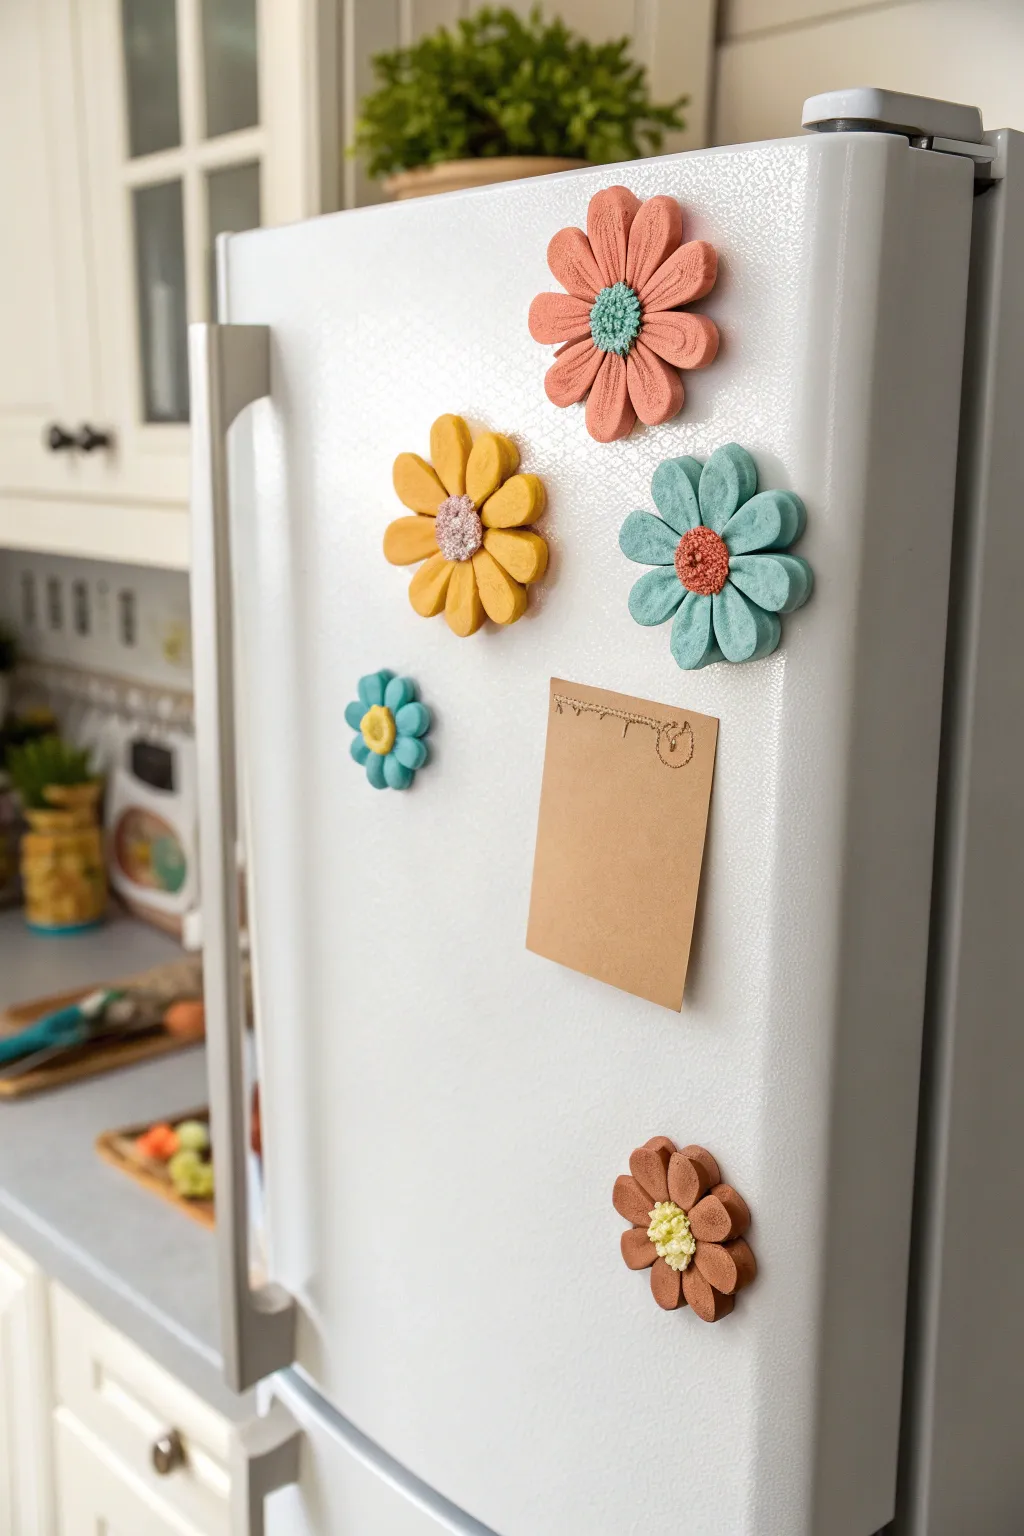
Brighten up the kitchen with these charming, chunky flower magnets that look like they’re straight out of a storybook. Using simple sculpting techniques and colorful polymer clay, you can craft a blooming garden that holds your most important notes and photos.
Detailed Instructions
Materials
- Polymer clay in assorted colors (coral, yellow, teal, blue, brown, white)
- Round disc magnets (strong ceramic or neodymium)
- Clay sculpting tools (needle tool, ball stylus)
- Acrylic roller or pasta machine
- Texturing tool (clean toothbrush, sandpaper, or crumpled foil)
- Small round cutter (for centers)
- Teardrop cutter (optional, for petals)
- Super glue or E6000 adhesive
- Parchment paper or baking tile
- Oven (for baking)
Step 1: Prepping the Petals
-
Condition the clay:
Begin by thoroughly kneading your chosen petal color—let’s start with the large coral flower. Knead until the clay is soft, pliable, and warm to the touch to prevent cracking. -
Create uniform portions:
Roll the conditioned clay into a log about 1/2 inch thick throughout. Slice the log into 8-10 equal segments to ensure all your petals will be roughly the same size. -
Shape the base petals:
Roll each segment into a smooth ball between your palms. Then, gently roll one end of the ball to taper it into a teardrop shape. Flatten the teardrop slightly with your thumb to create a thick petal form. -
Add petal details:
Using a needle tool or the back of a knife, press a central vein line down the middle of each flattened petal. Don’t cut all the way through; just create a gentle indentation for dimension.
Droopy Petals?
If your creative petals are sagging before baking, prop them up with small bits of folded paper or polyester batting. Bake them with these supports in place to freeze that lifted shape.
Step 2: Assembling the Blooms
-
Form the flower base:
Take a small scrap of clay and flatten it into a thin disk about the size of a quarter. This will act as the hidden base to hold your petals together. -
Arrange the petals:
Place your petals onto the base disk in a radial pattern, pointing the tapered ends inward so they touch in the center. Press them gently onto the base to secure them. -
Refine the shape:
Once arranged, you might need to nudge the petals closer together or smooth out any fingerprints. I like to gently lift the tips of the petals upward slightly to give the flower a cupped, natural look rather than laying it perfectly flat.
Step 3: Creating Textured Centers
-
Make the center:
Choose a contrasting color for the flower center (like teal for the coral flower). Roll a ball of clay and flatten it slightly into a thick button shape. -
Add heavy texture:
Before attaching it, texture the center aggressively. Press a clean toothbrush, a ball of crumpled aluminum foil, or a specialized texture tool into the surface repeatedly to create a fuzzy, pollen-like appearance. -
Attach the center:
Place the textured center directly over the point where all the petals meet. Press down firmly to bond it to the petals underneath. If needed, re-texture the top if separating occurred during pressing.
Pro Tip
For ultra-secure magnets, embed the magnet into the clay back *before* baking. Press it in, remove it, add a drop of Bake & Bond, put it back, and smooth clay over the edges.
Step 4: Finish and Bake
-
Repeat for variety:
Repeat the process for the other flowers, varying the sizes and colors. Try a smaller 5-petal version for the blue flower or a classic daisy shape for the yellow one. -
Bake the batch:
Transfer your parchment paper with the flowers onto a baking sheet. Bake according to your polymer clay manufacturer’s instructions (usually around 275°F or 135°C for 15-30 minutes). -
Cool securely:
Allow the flowers to cool completely in the oven with the door slightly ajar. This gradual cooling helps prevent the clay from becoming brittle. -
Attach magnets:
Once fully cool and hard, flip the flowers over. Apply a drop of strong adhesive (E6000 works best) to the back of the clay base and press your magnet firmly into it. -
Final cure:
Let the glue cure for a full 24 hours before sticking them to your fridge to ensure the magnets don’t pop off when you pull them.
Your fridge is now ready to bloom with memories and notes held by these cheerful handcrafted flowers

The Complete Guide to Pottery Troubleshooting
Uncover the most common ceramic mistakes—from cracking clay to failed glazes—and learn how to fix them fast.
Mini Bud Vase for a Mother’s Day Flower
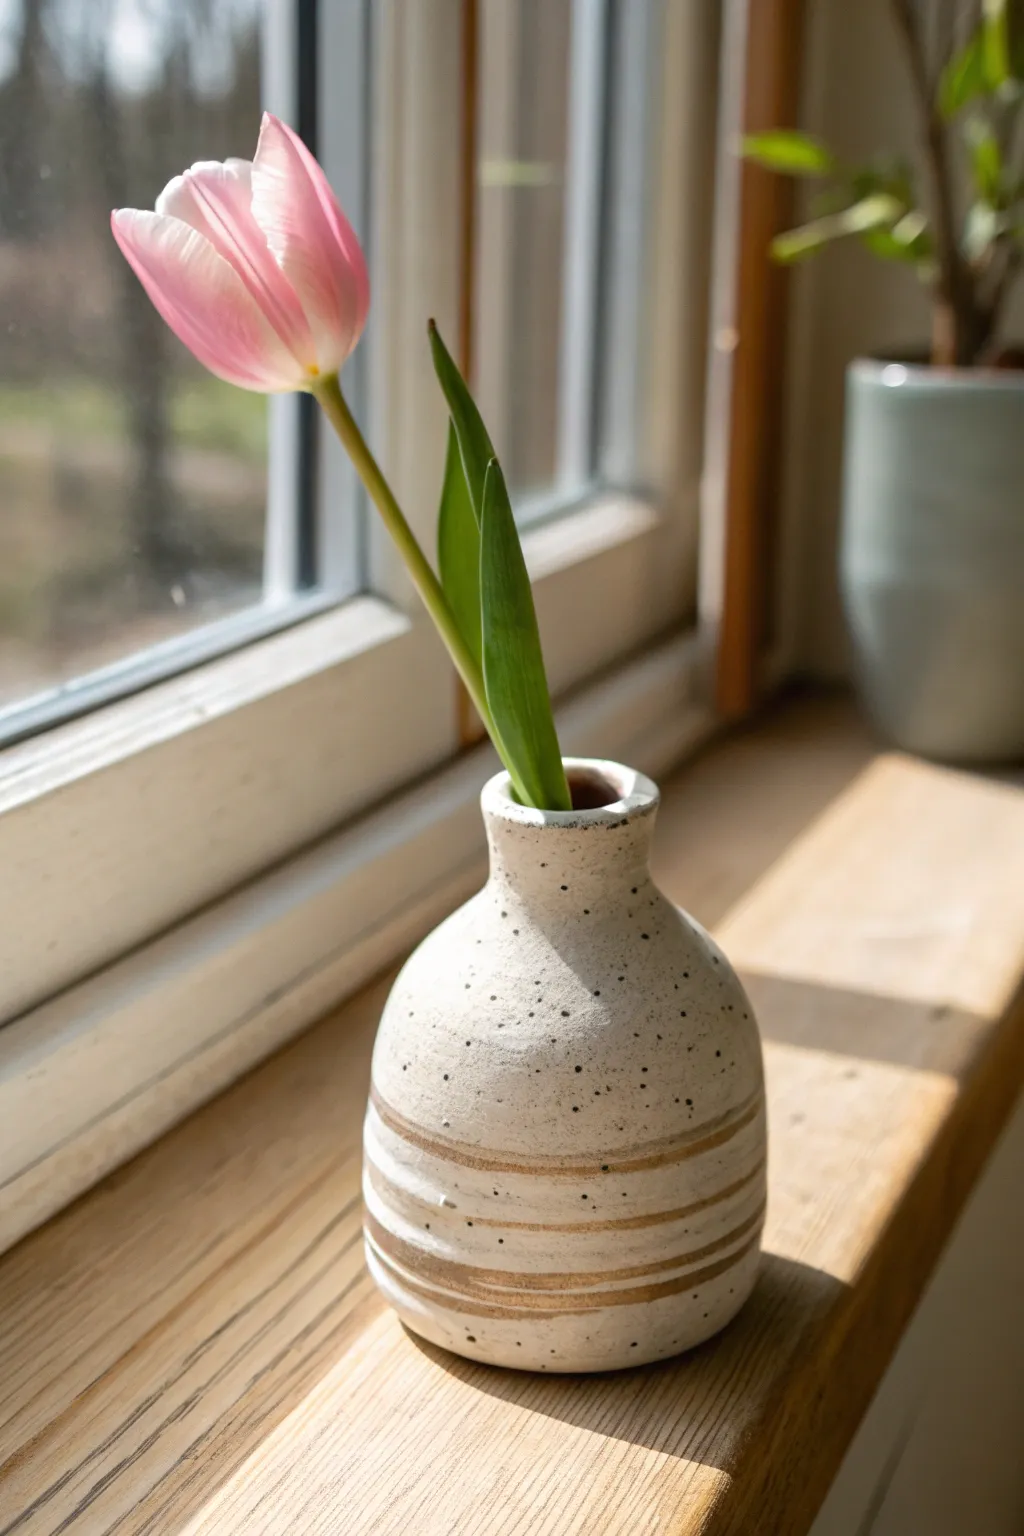
This charming mini vase combines a rustic, speckled finish with simple horizontal bands for a cozy, handmade feel. It is perfectly sized to hold a single special bloom, making it a heartfelt and functional gift for Mother’s Day.
Detailed Instructions
Materials
- Air-dry clay (white or cream) or polymer clay
- Rolling pin
- Clay sculpting tools (specifically a smoothing tool and a needle tool)
- Small jar or tube for form support (optional)
- Acrylic paints (cream/off-white, warm brown, black)
- Old toothbrush or stiff bristle brush
- Fine-grit sandpaper
- Varnish or sealant (matte or satin finish)
- Water and sponge for smoothing
Step 1: Forming the Base Shape
-
Prepare the clay:
Start by conditioning a ball of clay about the size of a tennis ball. Knead it until it’s soft, pliable, and free of cracks. -
Create the pinch pot:
Press your thumb into the center of the ball, leaving about a half-inch of thickness at the bottom. Gently pinch and turn the clay to open up the walls, aiming for an even thickness. -
Shape the belly:
Continue pinching upwards, curving the walls slightly inward as you go higher to create a rounded, bulbous bottom section. Use your fingers to smooth the interior as you work. -
Form the neck:
Gather the clay gently towards the center as you reach the top third of the vase. You might need to gently squeeze the clay inward to create a distinct, narrower neck. -
Refine the rim:
Flatten the top edge slightly with your finger or a flat tool to create a clean, slightly thickened rim. It doesn’t need to be perfectly symmetrical; the organic look is part of the charm. -
Smooth the surface:
Dip your finger or a sponge in a little water and run it over the entire exterior to remove fingerprints and minor bumps. I like to spend extra time here to get a really professional finish.
Cracks happen
If small cracks appear while drying, mix a tiny bit of fresh clay with water to make a paste (slip) and fill them in, then sand smooth once dry.
Step 2: Adding Texture and drying
-
Carve the bands:
Using a needle tool or a blunt modeling tool, gently carve three or four horizontal grooves around the bottom third of the vase. These should be slightly irregular indentations rather than sharp cuts. -
Dry the clay:
Set the vase aside to dry completely. For air-dry clay, this usually takes 24-48 hours depending on humidity. Rotate it occasionally so the bottom dries evenly. -
Sand for smoothness:
Once fully dry and hard, lightly sand any rough spots or sharp edges, particularly around the rim and the carved grooves. Wipe away the dust with a damp cloth.
Faux Ceramic Look
Use a high-gloss varnish instead of matte to mimic glazed pottery perfectly without needing a kiln.
Step 3: Painting and Finishing
-
Apply base color:
Paint the entire vase with a creamy off-white acrylic paint. You may need two coats to get full, opaque coverage. -
Creating the speckles:
Dilute a small amount of black or dark grey paint with water. Dip an old toothbrush into this mixture, aim it at the vase, and run your thumb across the bristles to flick tiny specks onto the surface. -
Control the splatter:
Go lightly at first—you want a subtle speckled look like stoneware ceramic, not heavy splotches. Let the specks dry completely. -
Paint the stripes:
Mix a warm, earthy brown paint with a lot of water to create a wash. Carefully paint this into the horizontal grooves you carved earlier. -
Wipe back:
Immediately after painting the stripes, use a paper towel to gently wipe the surface. This leaves the pigment dark in the recesses but creates a faded, stained look on the raised areas. -
Seal the vase:
Finish with a coat of matte or satin varnish to protect the paint and give it a finished ceramic sheen. -
Waterproofing note:
Remember that air-dry clay is not naturally waterproof. If you plan to use fresh flowers, insert a small glass test tube or plastic vial inside to hold the water.
Now your vase is ready to brighten up a windowsill with a beautiful spring bloom
“Mom’s Keys” Catchall Dish for the Entryway

This stunning catchall bowl features a striking contrast between raw warmth and cool elegance, making it a perfect spot for Mom to drop her keys. The project combines a rich terracotta-colored clay body with a deep, glossy cobalt blue interior glaze that pools beautifully in the center.
Step-by-Step Guide
Materials
- Red earthenware or terracotta clay
- Pottery wheel (or rolling pin/slab roller for hand-building)
- Sponge
- Wire cutter
- Rib tool (wood or rubber)
- Loop tool for trimming
- Cobalt blue high-gloss glaze
- Clear transparent glaze (optional)
- Kiln
- Paintbrush (fan or mop style)
Step 1: Forming the Bowl
-
Prep the clay:
Begin by wedging a pound of red earthenware clay thoroughly to remove any air bubbles. Form it into a smooth, round ball. -
Center on the wheel:
Throw the ball of clay onto the center of your wheel head. Using wet hands and steady pressure, cone the clay up and down until it runs perfectly smooth and centered. -
Open the form:
Press your thumbs into the center to create the opening, leaving about a half-inch of thickness at the bottom for the foot. Pull the floor outward to establish the width of your dish. -
Pull the walls:
Gently pull up the walls, angling them outward to create a shallow, open bowl shape. Aim for a consistent thickness from bottom to rim. -
Refine the curve:
Use a rib tool on the interior to smooth out throwing lines and perfect that gentle, continuous curve. This smooth surface is crucial for the glossy glaze to settle evenly later. -
Finish the rim:
Establish a slightly rounded, substantial rim. You can use a piece of shammy or a wet sponge to compress the lip, ensuring it feels smooth to the touch. -
Wire off and dry:
Run a wire cutter underneath the bowl to release it. Set it aside until it reaches a leather-hard state.
Clean Lines
Use liquid wax resist on the rim and exterior before pouring the interior glaze. This ensures a crisp, professional line between the blue glaze and the raw terracotta.
Step 2: Trimming and Bisque Firing
-
Trim the foot:
Once leather hard, flip the bowl over and center it on the wheel. Use a loop tool to trim away excess clay from the base, creating a clean foot ring that lifts the bowl slightly. -
Smooth the exterior:
Before removing it from the wheel, run a slightly damp sponge over the raw exterior clay to burnish it slightly; this enhances the natural red color. -
Slow drying:
Allow the bowl to dry completely. Cover it loosely with plastic if the air is very dry to prevent warping. -
Bisque fire:
Load the bone-dry bowl into the kiln and bisque fire it according to your clay body’s specifications (usually Cone 04).
Personal Touch
Before the clay dries, stamp a small message or Mom’s initials into the center bottom of the bowl. The blue glaze will pool in the letters, making them darker and readable.
Step 3: Glazing and Final Firing
-
Clean the bisque:
Wipe the fired bowl with a damp sponge to remove any dust, which can prevent the glaze from adhering properly. -
Apply interior glaze:
Pour a generous amount of cobalt blue gloss glaze into the center of the bowl. Swirl it carefully to coat the entire interior surface right up to the rim. -
Refine the edge:
If the glaze dripped over the edge, wipe the exterior rim clean with a sponge. The goal is a sharp transition between the blue interior and the raw red exterior. -
Optional exterior seal:
I like to leave the exterior unglazed for texture, but if you want extra durability, you can brush a very thin coat of clear matte glaze on the outside clay. -
Final fire:
Place the bowl in the kiln for the glaze firing (check your glaze bottle for the specific Cone temperature). Ensure the foot is wiped clean of any glaze so it doesn’t stick to the shelf.
Once cooled, this durable and vibrant dish is ready to organize Mom’s daily essentials


What Really Happens Inside the Kiln
Learn how time and temperature work together inside the kiln to transform clay into durable ceramic.
Clay Ring Cone Holder With a Heart Topper
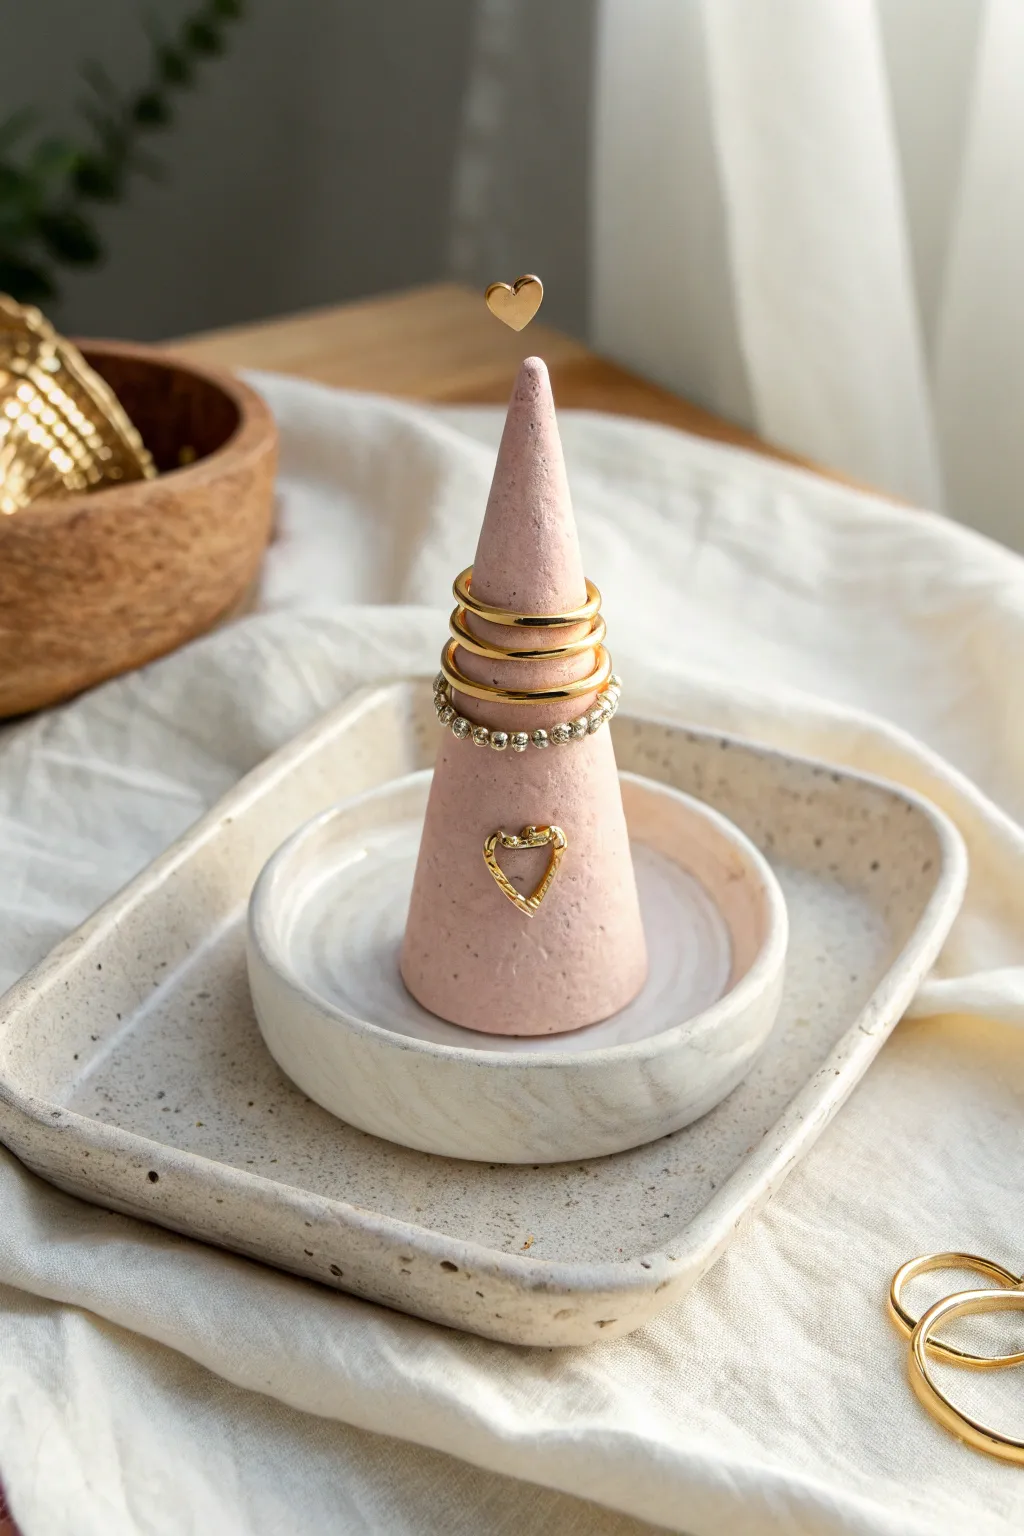
This charming ring holder combines a soft blush pink hue with delicate gold details for a sophisticated Mother’s Day gift. The sleek conical shape is topped with a tiny golden heart, creating a beautiful and functional piece for organizing jewelry.
Detailed Instructions
Materials
- Polymer clay (blush pink or pale terracotta)
- Gold polymer clay or gold jewelry wire (18-20 gauge)
- Clay rolling pin or acrylic roller
- Flexible clay blade or craft knife
- Small heart-shaped cutter (optional) or needle tool
- Liquid clay adhesive (e.g., Bake and Bond)
- Super glue (cyanoacrylate)
- Fine-grit sandpaper (400-600 grit)
- Ceramic tile or glass sheet (for baking surface)
- Gloss glaze or varnish (optional)
Step 1: Shaping the Cone
-
Condition the Clay:
Begin by taking a chunk of your blush pink polymer clay. Knead it thoroughly in your hands until it becomes soft, pliable, and warm. This step is crucial to prevent cracks later on. -
Roll a Ball:
Roll the conditioned clay into a smooth, seamless ball between your palms. Inspect it closely to ensure there are no air bubbles or distinct lines. -
Form the Cone:
Place the ball on your work surface. Using the side of your hand or a flat acrylic block, begin rolling one side of the ball back and forth while applying uneven pressure—heavier on one end and lighter on the other. -
Refine the Shape:
Continue rolling until you have a tapered cone shape. Stand it up to check the silhouette. You want a relatively tall, slender cone to hold multiple rings. -
Flatten the Base:
Tap the wider base of the cone gently but firmly against your work surface to ensure it stands perfectly flat and straight. It shouldn’t wobble. -
Smooth the Surface:
Use your fingertips to gently smooth out any fingerprints. For a flawless finish, I like to lightly brush the clay with a little cornstarch or baby oil before the final smoothing.
Clean Clay Tip
Keep a pack of wet wipes or baby wipes nearby. Clean your hands thoroughly before switching from the gold clay back to the pink to avoid color transfer.
Step 2: Adding the Heart Details
-
Create the Topper:
You have two options here. For a clay topper, roll a tiny piece of gold clay into a small heart. Alternatively, twist a small piece of gold wire into a heart shape leaving a small stem at the bottom. -
Insert the Topper:
If using wire, carefully push the stem into the very tip of the cone. If using clay, use a dab of liquid clay adhesive to attach the gold heart to the peak of the cone. -
Make the Side Heart:
Take a very thin snake of gold clay or a small segment of gold wire. Shape it into an open heart outline. -
Attach Side Detail:
Press this open heart shape gently into the side of the cone, about one-third of the way up from the bottom. Ensure it embeds slightly so it stays secure. -
Prep the Texture:
To mimic the slightly speckled, stone-like texture seen in the photo, you can gently tap the surface with a stiff-bristled toothbrush or a crumpled ball of aluminum foil.
Level Up: Mix It In
Knead roughly ground black pepper or dried used coffee grounds into the pink clay before shaping to recreate the speckled ceramic pottery look authentically.
Step 3: Baking and Finishing
-
Bake:
Place your cone on a ceramic tile or baking sheet. Bake according to the manufacturer’s instructions for your specific brand of clay (usually around 275°F/135°C for 15-30 minutes). -
Cool Down:
Allow the cone to cool completely inside the oven with the door cracked open. This gradual cooling helps prevent thermal shock cracks. -
Sand the Bottom:
Once fully cooled, take your piece of fine-grit sandpaper. Place it on a flat surface and rub the base of the cone against it in a circular motion to ensure it is perfectly level. -
Secure Elements:
If your wire topper feels loose after baking, pull it out, add a tiny drop of super glue to the stem, and reinsert it permanently. -
Final Polish:
Wipe the cone with a damp cloth to remove any sanding dust. If you want a shiny finish, apply a thin coat of gloss glaze, though the matte look is very modern and chic.
Now you have a stunning, handmade display piece ready to hold her favorite treasures
Clay Pendant With “Love You, Mom” Lettering
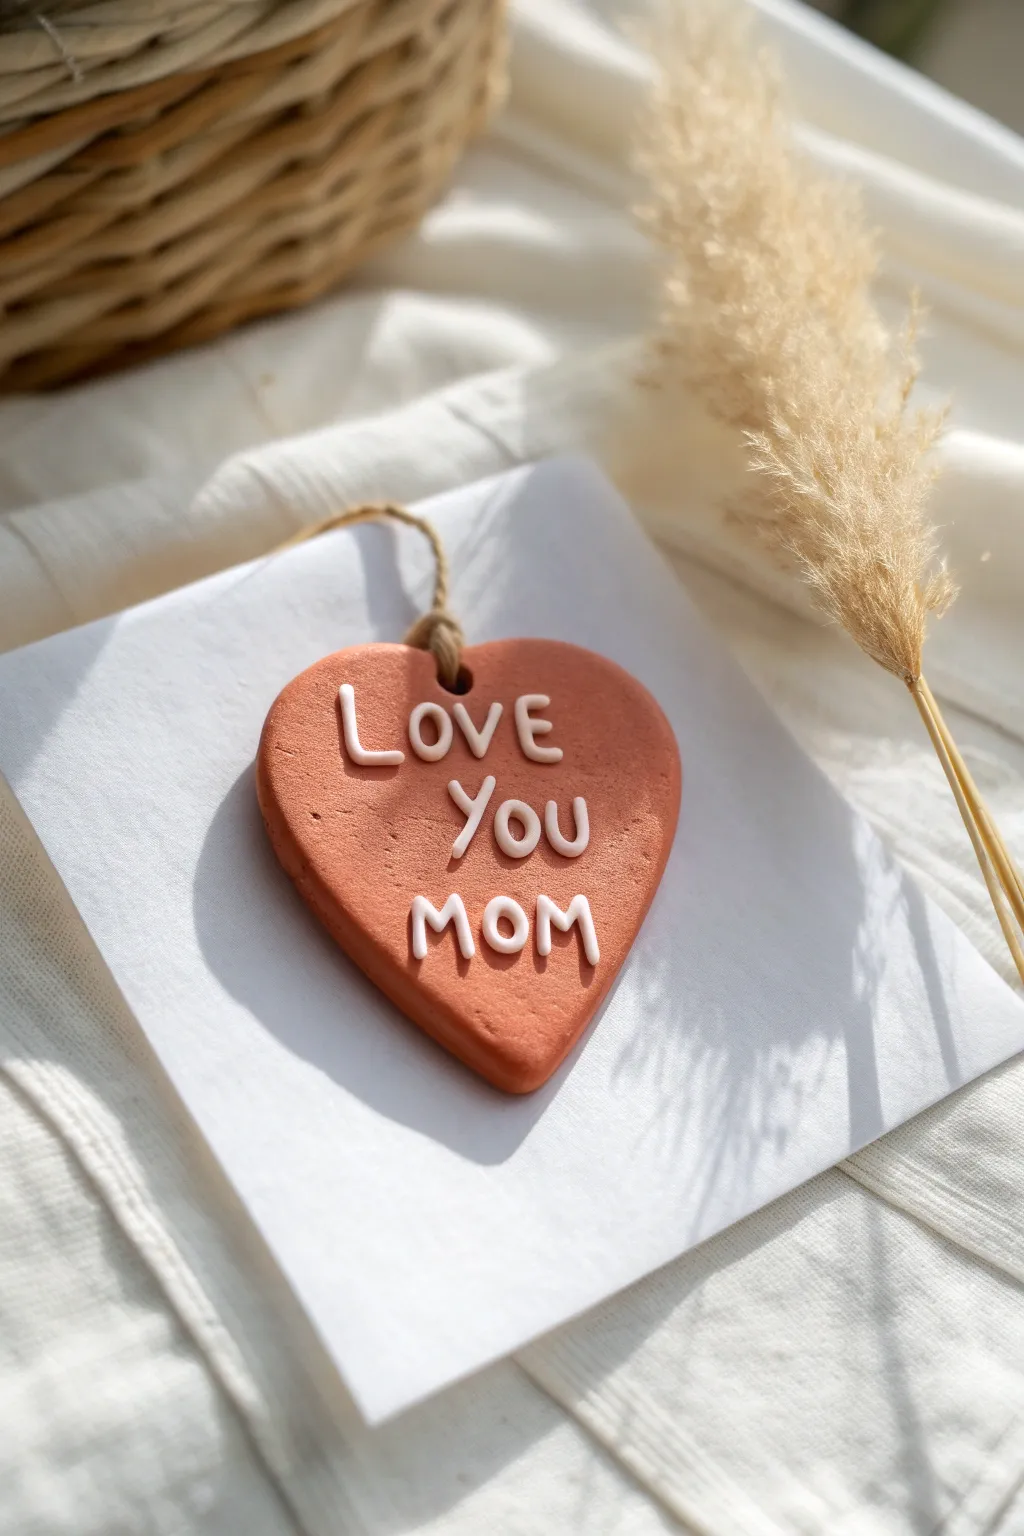
This rustic yet elegant pendant combines the deep warmth of terracotta tones with crisp, white lettering for a pop of modern contrast. It makes for a heartfelt, handmade gift that doubles as a lovely wall hanging or gift tag.
Step-by-Step
Materials
- Terracotta-colored polymer clay (or air-dry clay)
- White polymer clay
- Heart-shaped cookie cutter (medium size)
- Acrylic rolling pin
- Fimo liquid gel or bake-and-bond (if using polymer clay)
- Needle tool or toothpick
- Small straw or large skewer (for the hole)
- Jute twine or hemp cord
- Parchment paper or ceramic tile
Step 1: Shaping the Base
-
Condition the main clay:
Start by taking a chunk of the terracotta-colored clay and kneading it in your hands until it becomes soft, pliable, and warm. -
Roll it out:
Place the clay on your parchment paper or work surface. Use the acrylic rolling pin to flatten it to an even thickness, aiming for about 1/4 inch (6mm) to ensure durability. -
Cut the heart shape:
Position your heart-shaped cookie cutter over the smoothest part of the clay slab and press down firmly. Giving the cutter a little wiggle before lifting helps separate the edges cleanly. -
Smooth the edges:
Remove the excess clay from around the heart. Dip your finger in a tiny bit of water (for air-dry clay) or baby oil (for polymer clay) and gently smooth the cut edges to remove any sharpness or burrs.
Text Won’t Stick?
If the thin letters keep falling off before baking, lightly score or scratch the surface of the heart where the letters go to give the clay more ‘tooth’ to grab onto.
Step 2: Creating the Lettering
-
Prepare the white clay:
Clean your hands thoroughly to avoid transferring red pigment, then condition a small amount of white clay. -
Roll thin coils:
Roll the white clay into very thin, even snakes or coils on your work surface. These should be roughly the thickness of a spaghetti noodle. -
Form the letters:
Cut small segments of the white coil to form the letters. I find it easiest to shape the letters ‘L’, ‘O’, ‘V’, ‘E’, ‘Y’, ‘O’, ‘U’, ‘M’, ‘O’, ‘M’ loosely on the table before committing them to the heart. -
Apply adhesive:
If using polymer clay, dab a tiny amount of liquid clay or bake-and-bond where the letters will sit. For air-dry clay, brush on a tiny bit of water or slip. -
Place the text:
Carefully transfer the white clay coils onto the heart. Arranging them can be fiddly, so use a needle tool to nudge the curves of the ‘O’s and the angles of the ‘M’s into perfect position. -
Secure the letters:
Once you are happy with the alignment, press them down very gently so they bond with the base layer without flattening the rounded profile of the coils.
Step 3: Finishing Touches
-
Create the hanging hole:
Use a straw or a thick skewer to punch a hole at the top center of the heart, between the two lobes. Make sure the hole is wide enough for your twine. -
Bake or dry:
If using polymer clay, bake according to the package instructions (usually around 275°F/130°C for 15-30 minutes). If using air-dry clay, let it sit in a cool, dry place for 24-48 hours. -
Cool down:
Allow the piece to cool completely if baked. The clay is fragile while hot, so resist the urge to move it until it’s room temperature. -
Add the twine:
Cut a length of jute twine, thread it through the hole, and tie a secure knot to create a rustic loop for hanging.
Add Subtle Texture
Before adding letters, gently press a piece of canvas or coarse sandpaper onto the terracotta heart to give it a realistic, stone-like surface texture.
Now you have a charming, timeless keepsake that captures a sweet sentiment in stone

TRACK YOUR CERAMIC JOURNEY
Capture glaze tests, firing details, and creative progress—all in one simple printable. Make your projects easier to repeat and improve.
Tiny Pinch Pot “Mom” Treasure Bowl
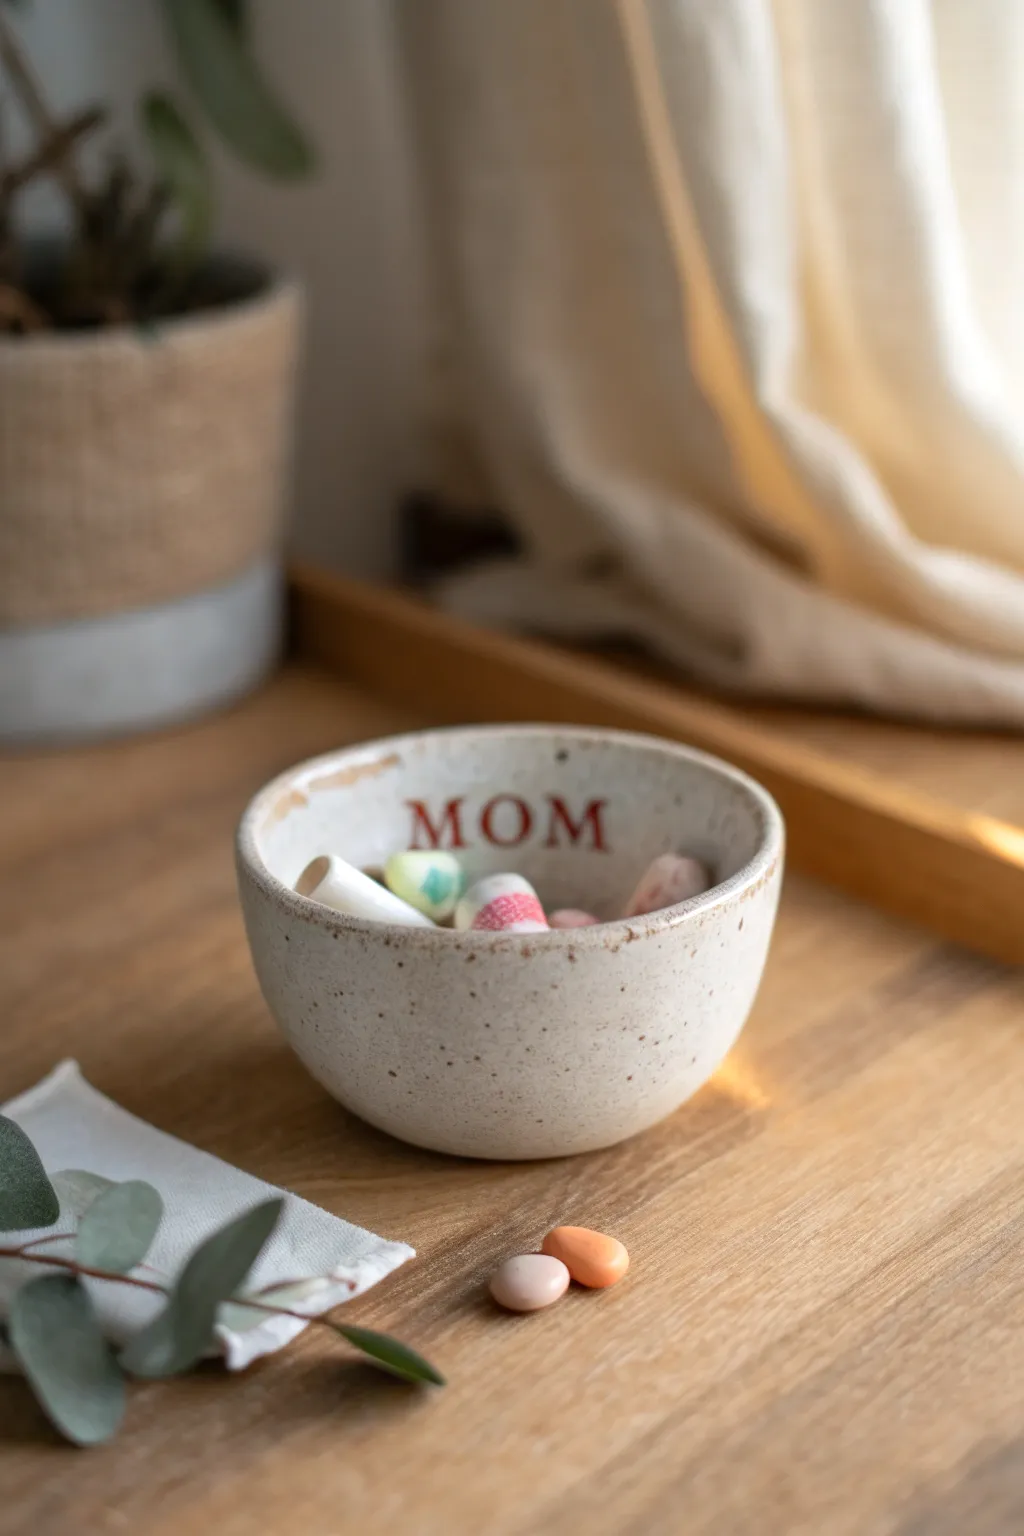
This charming, handmade treasure bowl features a rustic speckled glaze and sweet stamped lettering, making it a heartfelt gift for Mother’s Day. Its imperfect, organic shape adds character while providing the perfect spot for jewelry or small treats.
Step-by-Step Guide
Materials
- White or speckled stoneware clay
- Small alphabet stamp set
- Sponge
- Potter’s needle tool or wooden skewer
- Bowl of water
- Clear or speckled cream ceramic glaze
- Red iron oxide wash or red underglaze
- Fine detail paintbrush
- Fan brush or dipping tongs
Step 1: Forming the Bowl
-
Prepare the Clay:
Start with a ball of clay roughly the size of a tangerine. Wedging it well creates a smooth consistency and removes air bubbles. -
Open the Form:
Hold the clay ball in one hand and press your thumb gently into the center, stopping about a half-inch from the bottom. -
Pinch the Walls:
Using your thumb on the inside and fingers on the outside, begin to pinch the clay walls. Rotate the ball slightly after each pinch to ensure even thickness all around. -
Shape the Curve:
Continue pinching upwards and outwards to create a gentle bowl shape. Aim for a slightly vertical wall rather than a flat plate; you want it deep enough to hold treasures. -
Smooth the Rim:
Dampen your sponge slightly—you don’t want it soaking wet—and run it over the rim to compress the clay and soften any sharp edges. -
Refine the Surface:
Use the sponge or a flexible rib tool to smooth out significant fingerprints on the exterior, though keeping some texture adds to the handmade charm.
Step 2: Stamping and Drying
-
Position the Stamps:
Locate the spot on the interior wall where you want the text. It’s helpful to test your stamps on a scrap piece of clay first to check orientation. -
Impress the Text:
Gently press the ‘M’, ‘O’, and ‘M’ stamps into the clay. Support the outside of the bowl with your other hand so the wall doesn’t collapse under the pressure. -
Clean Up Edges:
If the stamping process pushed up small ridges of clay around the letters, gently tap them down with a fingertip once the clay has stiffened slightly. -
Dry Slowly:
Cover the bowl loosely with plastic for a day to let it dry evenly, then uncover it and let it dry completely to the bone-dry stage before the first firing (bisque fire).
Cracking Up?
If you see cracks forming on the rim while pinching, your clay might be too dry. Dip your fingers in water often or smooth the cracks with a damp sponge immediately.
Step 3: Glazing and Finishing
-
Highlight the Letters:
Once bisque fired, mix a small amount of red iron oxide wash or use red underglaze. Paint this directly into the stamped letters using a fine detail brush. -
Wipe Back Excess:
Take a clean, slightly damp sponge and wipe across the surface of the letters. I prefer to do this lightly so the color stays deep in the recesses but clears off the main surface. -
Prepare the Glaze:
Stir your speckled cream glaze thoroughly to ensure the speckles are suspended evenly throughout the mixture. -
Apply Glaze:
Pour glaze inside the bowl, swirl it quickly to coat, and pour out the excess. For the outside, you can dip the bowl or use a fan brush to apply two even coats. -
Clean the Foot:
Use a sponge to wipe a clean ring around the bottom of the bowl where it will sit on the kiln shelf. -
Final Fire:
Fire the piece again specifically according to your clay and glaze instructions (usually cone 5 or 6 for stoneware).
Make it Shine
Add a luxe touch by painting the rim with a gold luster overglaze after your final firing. You’ll need to do a third, very low-temperature firing to set the gold.
Fill this little vessel with her favorite treats for a presentation she will cherish forever
Mother’s Day Tea Bag Holder Dish
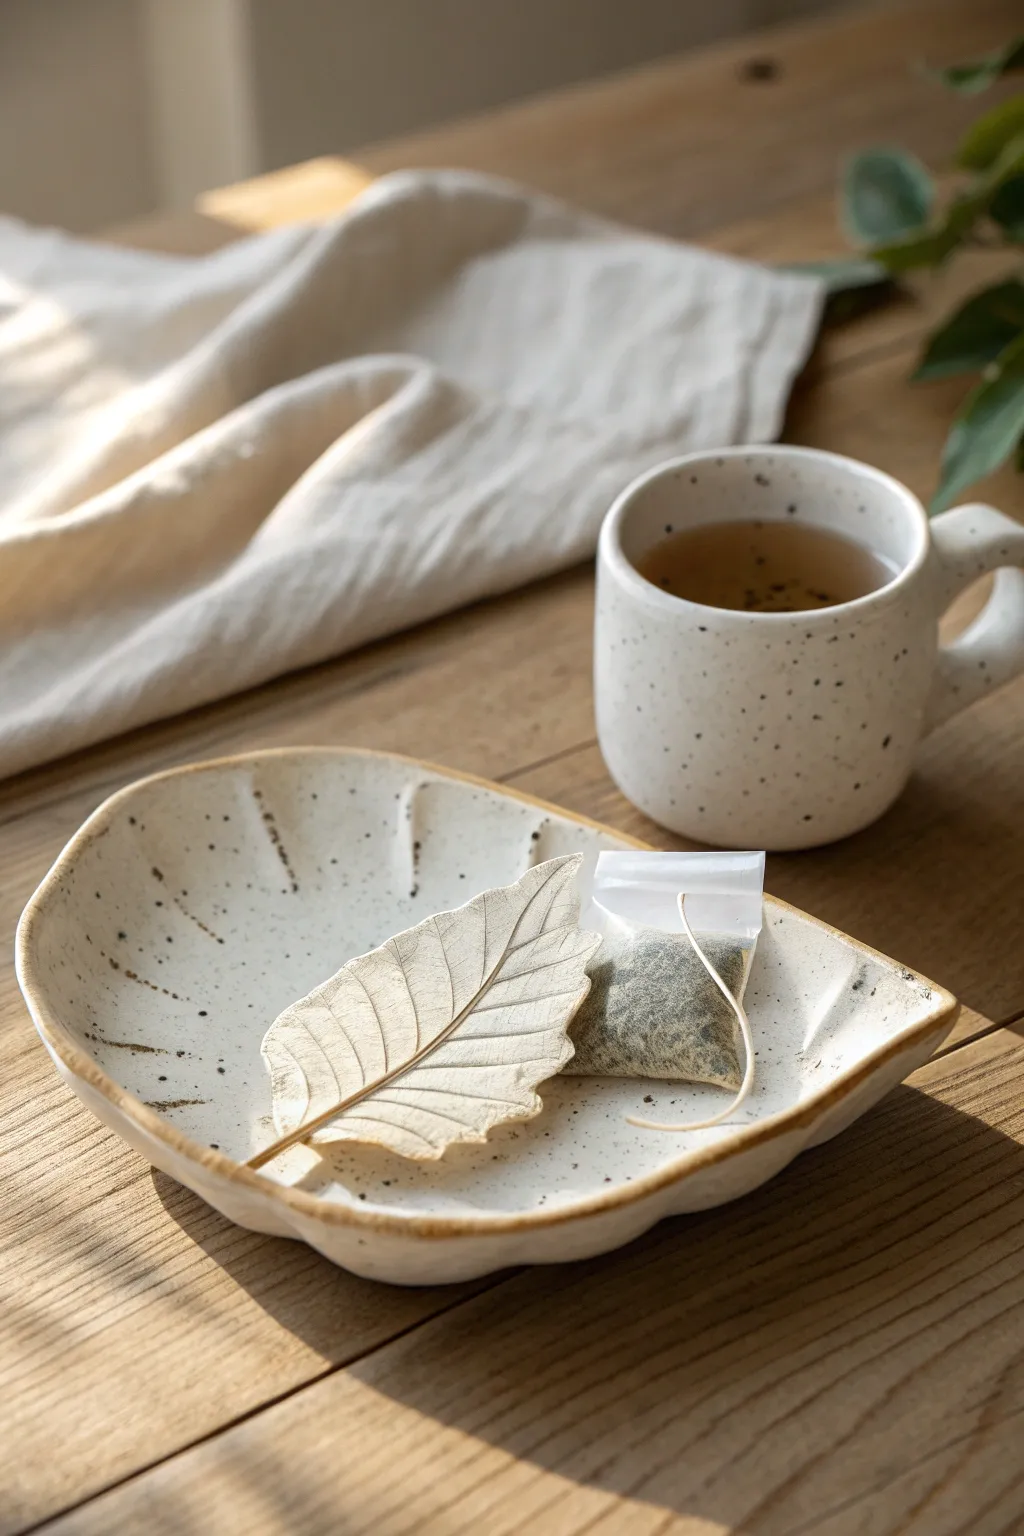
This elegant little tea bag holder combines rustic charm with functionality, making it the perfect heartfelt gift for a tea-loving mom. Created from speckled clay and shaped with a natural leaf, it captures delicate vein details for a truly one-of-a-kind piece.
How-To Guide
Materials
- White or cream speckled stoneware clay
- A real leaf with prominent veins (like hydration or beech)
- Rolling pin
- Canvas or cloth work mat
- Needle tool or X-Acto knife
- Small bowl or sphere mold for shaping
- Sponge
- Clear or transparent white glaze
- Kiln (if using stoneware) or varnish (if adapting for air-dry clay)
Step 1: Preparing the Clay
-
Establish your workspace:
Lay down your canvas or cloth mat. This texture prevents the clay from sticking to your table and adds a subtle texture to the bottom of your dish. -
Wedge the clay:
Take a ball of speckled clay about the size of a tangerine and wedge it thoroughly to remove air bubbles, which ensures the dish won’t crack during firing. -
Roll the slab:
Using your rolling pin, flatten the ball into an even slab. Aim for a thickness of about 1/4 inch—not too thin, or the edges might curl too much. -
Smooth the surface:
Run a damp sponge or rib tool over the top of the slab to create a pristine, smooth canvas for your leaf impression.
Step 2: Creating the Impression
-
Position the botanical:
Select your leaf and place it vein-side down onto the clay slab. The back of the leaf usually has the most prominent veins, which give the best texture. -
Roll in the texture:
Gently roll your pin over the leaf once or twice. apply steady, firm pressure to embed the veins, but be careful not to make the clay too thin. -
Cut the shape:
Using a needle tool, carefully trace around the edge of the leaf. You can follow the leaf’s exact shape or cut a slightly wider, simplified outline for a smoother rim. -
Reveal the details:
Find the stem end of the leaf and very slowly peel it away from the clay to reveal the intricate vein pattern underneath.
Use the Vein Side
Make sure you place the leaf vein-side DOWN. The back of a leaf always has raised veins that create a much deeper, crisper impression than the front.
Step 3: Shaping and Refining
-
Soften the edges:
Dip your finger in a little water and run it along the cut edges of the clay. This smooths out any sharp bits left by the cutting tool. -
Create the curve:
Lift your clay leaf carefully and place it inside a shallow bowl or drape it over a sphere mold. This will give it the slight curve needed to hold the tea bag. -
Add rim character:
I like to gently press the rim with my thumb at irregular intervals to give it that organic, hand-thrown wavy look seen in the photo. -
Dry slowly:
Let the piece dry to a leather-hard state while still on the mold so it retains its curved shape. Cover it loosely with plastic if your room is very dry.
Try Air-Dry Clay
Don’t have a kiln? Use white air-dry clay mixed with used coffee grounds to mimic the speckles, then seal the dried piece with a waterproof varnish.
Step 4: Glazing and Finishing
-
Bisque fire:
Once bone dry, fire the piece in the kiln to bisque temperature (usually Cone 04) to prepare it for glazing. -
Apply the glaze:
Dip the piece into a clear or semi-transparent white glaze. This ensures the natural speckles of the clay body show through. -
Clean the foot:
Wipe away any glaze from the very bottom of the dish with a damp sponge so it doesn’t fuse to the kiln shelf. -
Final firing:
Fire the piece again to the glaze temperature appropriate for your clay (typically Cone 5 or 6 for stoneware). -
Gold accent (optional):
For the look in the photo, paint a rim of gold luster or brown oxide on the edge before the final firing, or use gold leaf paint after the piece is finished.
Pair this lovely dish with a box of her favorite herbal tea for a complete gift she will cherish
“I Love You Mom” Pocket Token
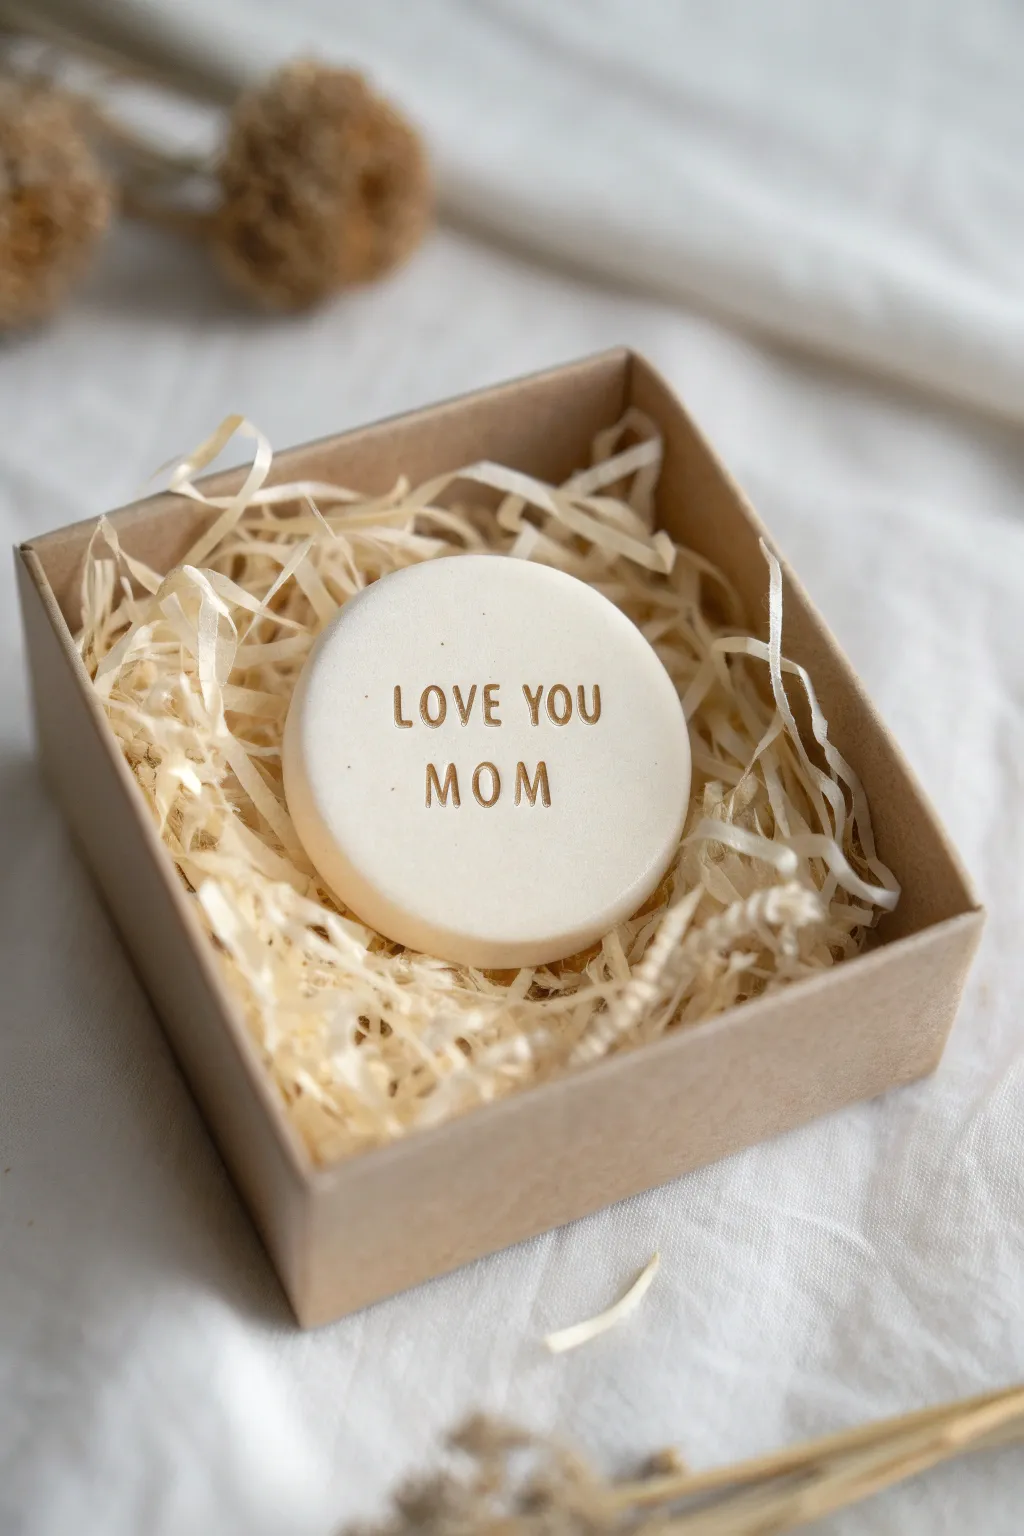
This minimalist clay token is a sweet, tangible reminder of affection that fits right in your palm. With its smooth white finish and shining gold lettering, it makes for a simple yet deeply meaningful gift for Mom.
Detailed Instructions
Materials
- White air-dry clay or polymer clay
- Rolling pin
- Round cookie cutter (approx. 2 inches)
- Small alphabet stamp set
- Fine-grit sandpaper (400-600 grit)
- Gold acrylic paint or gold leaf pen
- Ultra-fine paintbrush
- Clear matte sealant spray (optional)
- Kraft jewelry box
- Wood wool, raffia, or crinkle paper filler
Step 1: Shaping the Clay
-
Condition the clay:
Begin by taking a small handful of white clay and kneading it in your hands until it becomes warm, soft, and pliable. This prevents cracks from forming later. -
Roll it out:
Place the clay on a smooth, clean surface. Use your rolling pin to flatten it into a slab. Aim for a thickness of about 1/4 inch so the token feels substantial and durable. -
Cut the shape:
Press your round cookie cutter firmly into the clay slab. Give it a tiny wiggle to ensure it cuts all the way through, then lift the cutter and remove the excess clay from around the circle. -
Smooth the edges:
Dip your finger in a little bit of water and gently run it around the cut edge of the circle. This softens the sharp angle left by the cutter, creating a more professional, rounded finish.
Clean Stamp Trick
Before stamping your clay, lightly dust the stamp faces with cornstarch or brush them with a tiny bit of baby oil. This prevents the clay from sticking inside the detailed letters.
Step 2: Stamping and Drying
-
Arrange your letters:
Before stamping the clay, I always line up the alphabet stamps on the table to check the spelling and spacing. You need ‘LOVE YOU’ for the top line and ‘MOM’ for the bottom. -
Stamp the first line:
Carefully press the letters for ‘LOVE YOU’ into the upper half of the clay circle. Apply even pressure so the impression is deep enough to hold paint later, but not so deep that it warps the shape. -
Stamp the second line:
Center the word ‘MOM’ below the first line. Take your time to align it visually so it feels balanced within the circle. -
Allow to dry:
Place the clay token on a piece of parchment paper or a drying rack. Follow the package instructions for drying times; air-dry clay usually needs 24-48 hours, while polymer clay will need baking. -
Flip occasionally:
If using air-dry clay, flip the token over every few hours to ensure moisture evaporates evenly from both sides, which prevents curling.
Step 3: Finishing Touches
-
Sand imperfections:
Once the token is completely hard and dry, take your fine-grit sandpaper and very lightly buff the edges and surface. This removes any fingerprints or tiny bumps. -
Paint the letters:
Dip a very fine paintbrush into gold acrylic paint, or use a gold leaf pen. Carefully fill in the impressed letters. Don’t worry if you go slightly outside the lines; we can fix that next. -
Clean up excess paint:
If any gold paint got on the surface, wait until it’s barely tacky, then gently scrape it off with a craft knife or lightly sand that specific spot again for a crisp look. -
Apply sealant:
To protect the white finish and the gold paint, give the token a light coat of clear matte sealant spray. Let this dry completely in a well-ventilated area. -
Prepare the box:
Take your small kraft jewelry box and fill it generously with wood wool or crinkle paper. Fluff up the filler so it creates a nice nest. -
Nestle the token:
Place your finished token gently into the center of the box, pressing it down slightly so it sits securely among the paper strands.
Add a Scent
Turn this into an aromatherapy token by using terra cotta or unsealed air-dry clay on the back. Mom can add a drop of her favorite essential oil to the porous back side.
This simple yet elegant token is now ready to be a cherished reminder of your love
Floral Relief Plaque With a Mother’s Day Quote
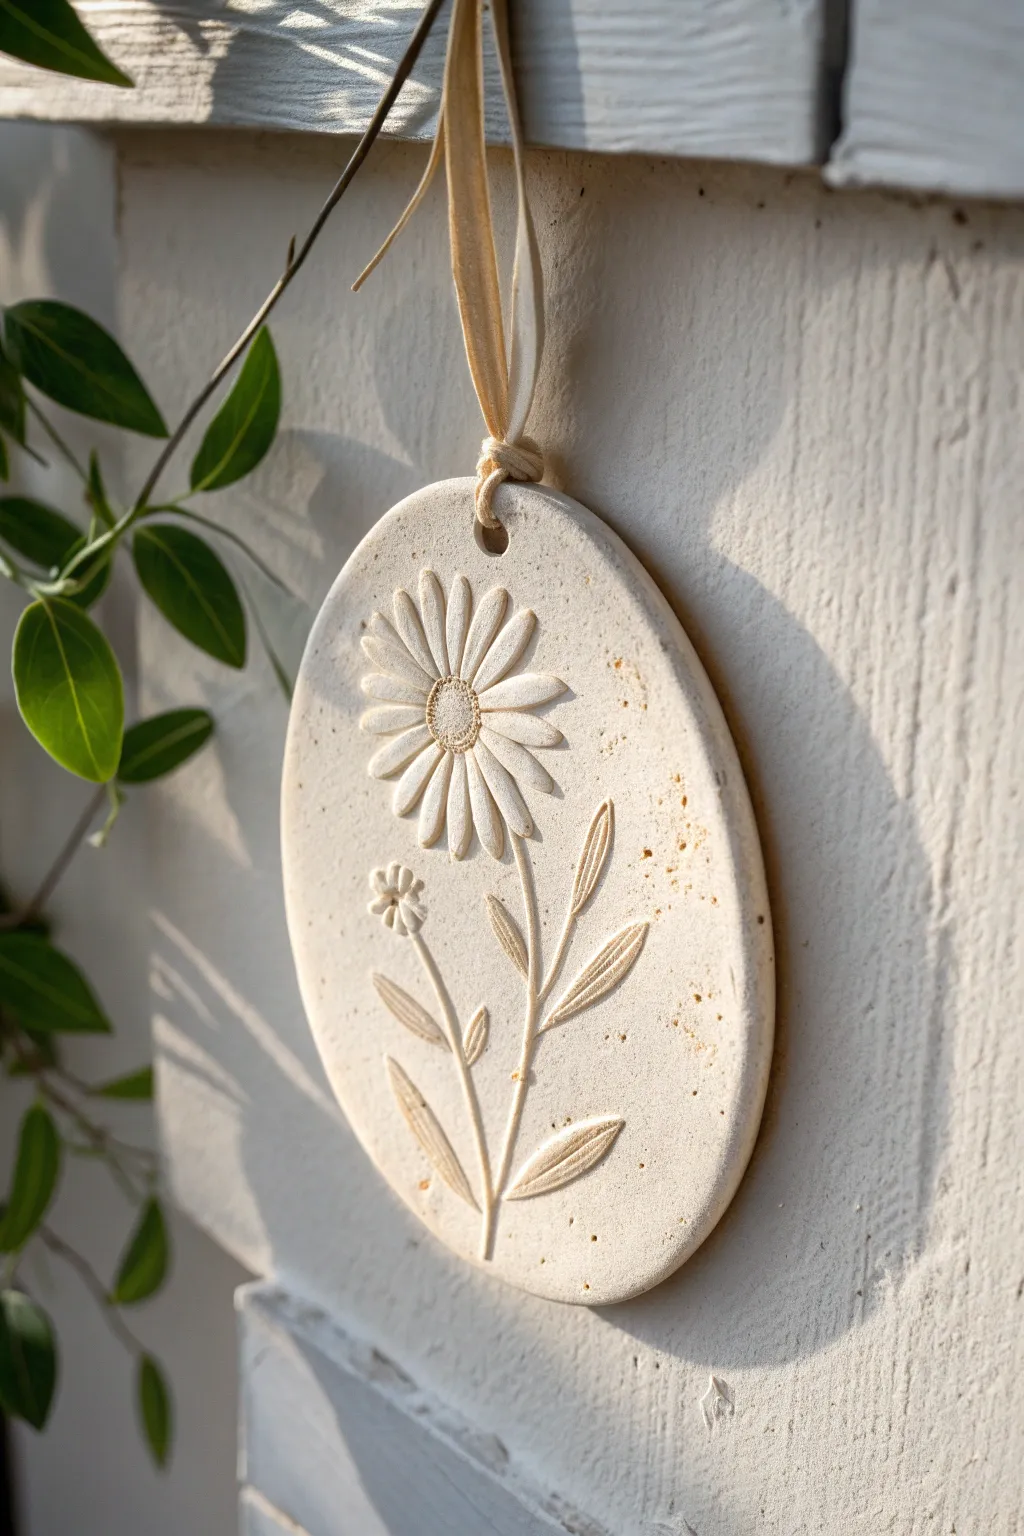
Capture the delicate beauty of spring flowers with this elegant oval relief plaque, featuring deeply impressed daisy motifs. The finished piece has a lovely, organic stone-like texture that makes for a timeless Mother’s Day keepsake.
Step-by-Step Tutorial
Materials
- Air-dry clay (stone or white color)
- Rolling pin
- Oval cookie cutter or oval template with craft knife
- Fresh or artificial daisy flowers (with sturdy stems)
- Clay sculpting tools (needle tool and smoothing tool)
- Straw or cocktail stick
- Fine-grit sandpaper
- Beige or oatmeal-colored silk ribbon
- Acrylic matte varnish (optional)
- Speckled pottery paint or diluted brown acrylic (optional for aging)
Step 1: Preparing the Base
-
Condition the Clay:
Begin by taking a handful of air-dry clay and kneading it thoroughly in your hands until it becomes pliable and warm. This prevents cracking later on. -
Roll the Slab:
Place the clay on a smooth surface or canvas mat. Use your rolling pin to flatten it into an even slab, aiming for a thickness of about 1/4 inch (6mm) to ensure durability. -
Cut the Shape:
Press your oval cutter firmly into the clay. If you don’t have a cutter, place a paper oval template onto the clay and carefully trace around it with a craft knife. -
Smooth the Edges:
Dip your finger in a little water and run it along the cut edge of the oval to smooth out any roughness or sharp debris.
Clean Impressions
Dust your fresh flowers lightly with cornstarch before pressing them into the clay. This acts as a release agent and prevents petals from sticking.
Step 2: Creating the Floral Impression
-
Position the Flower:
Take your fresh or artificial daisy. Lay it gently onto the clay slab to plan your composition, centering the main bloom slightly above the middle point. -
Press the Bloom:
Once satisfied with the placement, press the flower head firmly into the clay. Use the rolling pin gently over the back of the flower if needed to ensure an even, deep impression of the petals. -
Create the Stem and Leaves:
Press the stem into the clay leading downwards. Arrange leaves along the stem and press them in individually. I find using a sculpting tool to deepen the leaf veins afterward adds nice definition. -
Add Smaller Details:
Using a smaller bud or sculpting tool, add the secondary small flower to the left of the main stem for balance. -
Remove the Plant Material:
Carefully lift the flower and leaves away from the clay. Use the tip of a needle tool or tweezers to pick out any petals or plant matter that might have stuck inside the impression. -
Refine the Impressions:
Check the depth of your design. If any lines look too faint, carefully re-carve or deepen them with your needle tool to match the distinct relief style of the reference.
Add a Message
Before the clay dries, use small alphabet stamps to impress a name, date, or ‘Mom’ onto the back or along the bottom curve for a personalized touch.
Step 3: Finishing and Hanging
-
Create the Hole:
Use a straw or a cocktail stick to punch a hole centered at the very top of the oval for the ribbon. Wiggle it slightly to ensure the opening is clean. -
Let it Dry:
Place the plaque on a wire rack to dry completely. This usually takes 24-48 hours depending on humidity. Rotate it occasionally to prevent curling. -
Sand the Surface:
Once bone dry, use fine-grit sandpaper to gently smooth the surface and edges. Be careful not to sand away the fine details of your flower impression. -
Add Texture (Optional):
To mimic the speckled stone look in the photo, dilute a tiny drop of brown acrylic paint with water on a toothbrush and flick the bristles to spatter very fine specks onto the surface. -
Seal the piece:
Apply a coat of matte varnish to protect the clay from moisture, especially if it will hang near a window or outdoors. -
Attach the Ribbon:
Cut a length of beige silk ribbon. Fold it in half, push the loop through the hole from front to back, and pull the tails through the loop to secure it with a lark’s head knot.
Hang this charming floral relief or gift it to show appreciation for nature’s simple beauty
Two-Tone Clay Soap Dish for Mom’s Sink
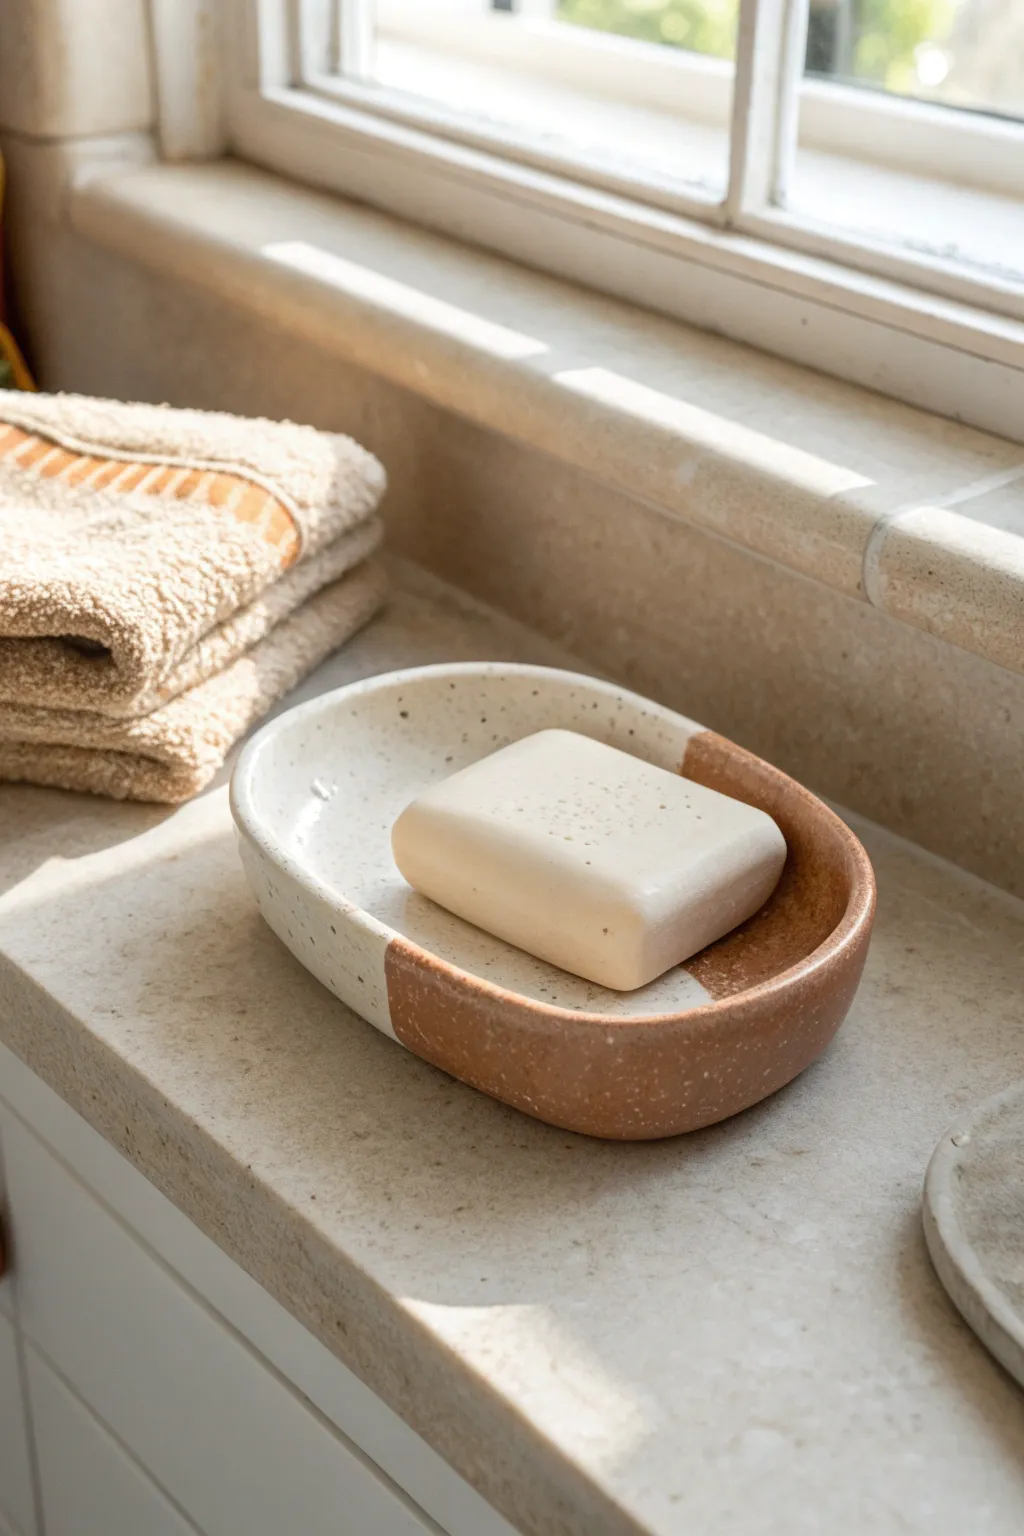
Elevate Mom’s bathroom sink with this modern, minimalist soap dish featuring an organic oval shape and a chic color-blocked design. The speckled texture gives it a high-end ceramic look without needing a pottery wheel.
Step-by-Step Guide
Materials
- White polymer clay (approx. 2oz)
- Terracotta or brown polymer clay (approx. 2oz)
- Black pepper or dried coffee grounds (for speckling)
- White acrylic paint (if speckling brown clay)
- Rolling pin or acrylic roller
- Oval cutter or paper template and craft knife
- Sandpaper (fine grit)
- Glossy polymer clay varnish or glaze
- Soft paintbrush
- Small bowl or curved object (for shaping)
Step 1: Preparing the Clay
-
Condition the white clay:
Start by kneading the white polymer clay in your hands until it becomes soft and pliable. This conditioning step is crucial to prevent cracks later on. -
Add speckles to white clay:
Flatten the white clay slightly and sprinkle a pinch of ground black pepper or dried coffee grounds onto it. Fold the clay over and knead until the specks are evenly distributed throughout the white dough. -
Condition the terracotta clay:
Repeat the conditioning process with the terracotta or brown polymer clay until it is smooth and workable. -
Add speckles to terracotta clay:
For the darker clay, I like to grate a tiny amount of baked white clay into it or mix in coarse white sand to create contrasting light speckles.
Step 2: Shaping the Base
-
Form two logs:
Roll both the prepared white and terracotta clays into thick log shapes of roughly equal diameter. -
Join the colors:
Cut one end of each log cleanly at an angle. Press these cut ends firmly together to join the two colors into a single long piece. -
Roll out the slab:
Place the joined clay on a clean work surface. Using your roller, flatten the log into a slab about 1/4 inch thick. Roll across the seam to help blend the clays together securely. -
Smooth the seam:
If the seam looks rough, gently rub your finger over the line where the colors meet to smooth it out without blurring the distinct separation too much. -
Cut the oval shape:
Place your oval template or cutter over the slab so the color division runs diagonally or straight across, depending on your preference. Cut out the oval shape and remove the excess clay.
Seal Seams Tight
If the two clay colors separate during rolling, apply a tiny bit of liquid polymer clay or ‘Bake & Bond’ to the seam before pressing them back together.
Step 3: Forming and Refining
-
Smooth the edges:
Dip your finger in a little bit of water (or baby oil if the clay is sticky) and run it along the cut edge of the oval to round off any sharp corners. -
Create the curvature:
Gently lift the clay oval and drape it into a shallow, curved bowl. Press it lightly so it takes on the concave shape of the bowl. This will be the dish form. -
Refine the shape:
While it sits in the bowl, ensure the rim is even. You can slightly push the edges upward with your thumb to create a deeper wall for the soap to sit in. -
Bake the dish:
Place the bowl with the clay inside into your oven. Bake according to the manufacturer’s instructions for your specific brand of polymer clay (usually around 275°F for 15-30 minutes). -
Cool down:
Once baked, turn off the oven and let the piece cool completely inside the oven or on a rack before removing it from the mold.
Add Drainage
Before baking, use a straw to punch 2-3 small holes in the center of the dish. This lets water drain out, keeping Mom’s soap dry and lasting longer.
Step 4: Finishing Touches
-
Sand for smoothness:
Use fine-grit sandpaper to gently buff the edges and surface of the dish. This removes any fingerprints or imperfections from the molding process. -
Clean surface:
Wipe the dish down with a damp cloth or rinse it quickly to remove all sanding dust. Let it dry completely. -
Apply varnish:
Using a soft brush, apply a thin coat of glossy polymer clay varnish. This seals the specks and gives the dish that shiny, ceramic-like finish visible in the photo. -
Dry and cure:
Allow the varnish to dry fully according to the bottle instructions. Add a second coat if you want extra durability and shine.
Wrap this speckled beauty in tissue paper for a handmade gift Mom will use every day
“Reasons I Love You, Mom” Clay Note Jar
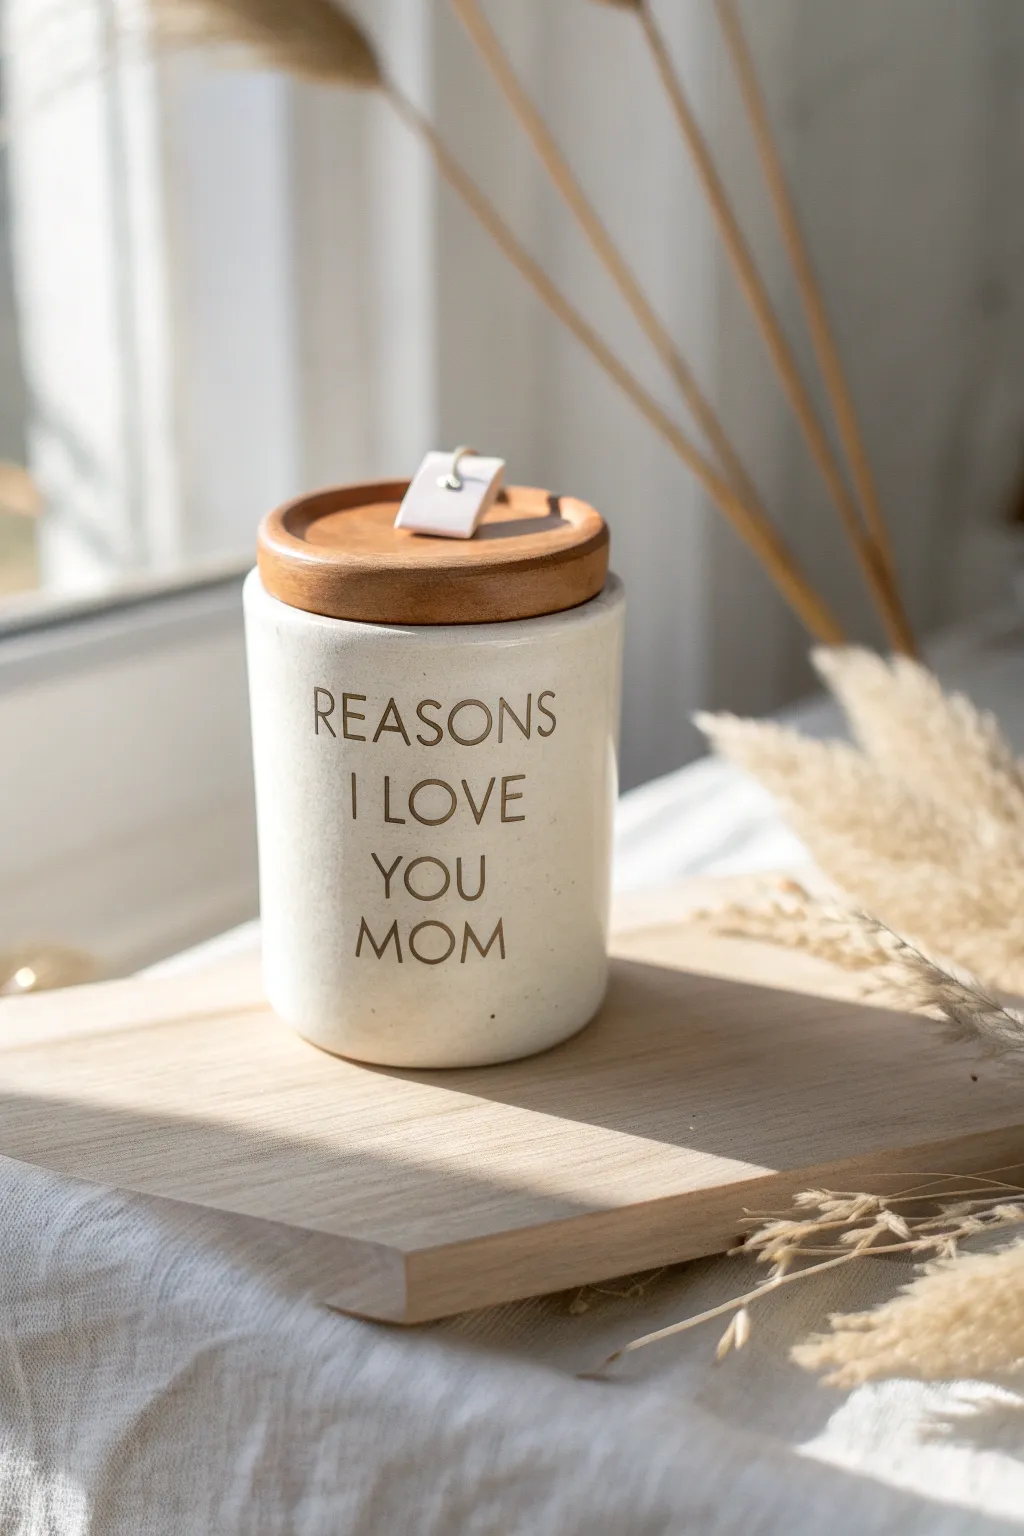
This minimalist sentiment jar is the perfect heartfelt vessel for storing sweet notes of gratitude for Mom. With its clean lines, creamy finish, and stamped lettering, it looks like a high-end boutique find but carries the warmth of a handmade gift.
How-To Guide
Materials
- Air-dry clay (white or porcelain finish)
- Rolling pin
- Cylindrical form (like a jar or can) for shaping
- Clay knife or craft knife
- Letter stamp set
- Small bowl of water
- Sponge
- Sandpaper (fine grit)
- Wooden lid (pre-bought to fit your cylinder size)
- Small leather cord or twine
- Gloss or matte varnish (optional)
- Parchment paper
Step 1: Shaping the Vessel
-
Prepare the workspace:
Lay down a sheet of parchment paper to prevent your clay from sticking. Knead a large ball of clay until it is pliable and smooth. -
Roll the slab:
Roll the clay out into a long rectangular slab, aiming for an even thickness of about 1/4 inch. Lift and rotate the clay occasionally to ensure it isn’t sticking. -
Cut to size:
Measure the height and circumference of your chosen cylindrical mold. Using a ruler and clay knife, cut a clean rectangle relative to those measurements, adding a slight overlap for the seam. -
Create the base:
Roll out a separate small portion of clay and place your cylindrical mold on top. Cut a circle around the base of the mold to create the bottom of your jar. -
Score and slip:
Score (scratch) the edges of the circular base and the bottom edge of your rectangular slab. Apply a little water or liquid clay (slip) to these roughed-up areas. -
Form the cylinder:
Wrap the rectangular slab around your cylindrical mold. Gently press the scored edges of the rectangle together at the seam, smoothing the clay with your finger or a wet sponge so the join becomes invisible. -
Attach the base:
Position the wrapped cylinder onto the scored circular base. Use a modeling tool or your finger to blend the clay from the walls down into the base, ensuring a tight seal.
Clean Lettering Tip
If the clay displace and creates tiny ridges when you stamp, wait 15 minutes for the clay to firm up, then gently rub over the letters with a soft, damp sponge to flatten the surface.
Step 2: Stamping and Detailing
-
Plan your spacing:
Before stamping, lay your letter stamps out on the table to check spelling and spacing. Lightly mark horizontal guidelines on the clay with a ruler if you are worried about keeping the text straight. -
Stamp the message:
While the clay is still on the mold for support, gently press the stamps into the clay to spell ‘REASONS I LOVE YOU MOM’. Apply even pressure so the depth is consistent, but don’t push so hard you distort the wall. -
Smooth the surface:
Dip a sponge in water and wring it out almost completely. Gently wipe over the surface to smooth out any fingerprints or rough texture left from handling. -
Remove the mold:
allow the clay to stiffen slightly for about 30 minutes, then carefully slide the internal mold out. If you leave it in too long while the clay shrinks, the jar might crack. -
Make the lid pull:
Fashion a small, rectangular tab from leftover clay. Poke a hole through it wide enough for your leather cord.
Level Up: Contents
Don’t just give the empty jar! Cut strips of high-quality parchment paper and write 20 distinctive memories or traits you love about your mom, then fill the jar before wrapping.
Step 3: Finishing Touches
-
Let it dry:
Allow the jar and the small clay tab to dry completely in a cool, dry place for 24-48 hours. Turn the jar occasionally to ensure even airflow. -
Sand for perfection:
Once bone dry, use fine-grit sandpaper to gently smooth the top rim and any remaining rough spots on the body of the jar. -
Seal the clay:
Apply a coat of matte or gloss varnish to protect the jar. I prefer a matte finish to keep that natural stone look seen in the photo. -
Assemble the lid:
Using a strong craft glue, attach the wooden lid (if it’s a cap style) or simply place it on top. Thread the leather cord through your small clay tab and attach it to the handle of the lid. -
Highlight the text:
To make the letters pop like the image, mix a tiny bit of brown acrylic paint with water. Paint it into the letters and immediately wipe the surface with a damp cloth, leaving the dark pigment only inside the impressions.
Now you have a timeless keepsake that Mom can cherish on her vanity or desk forever
Family Birth-Flower Charm Set for a Bracelet
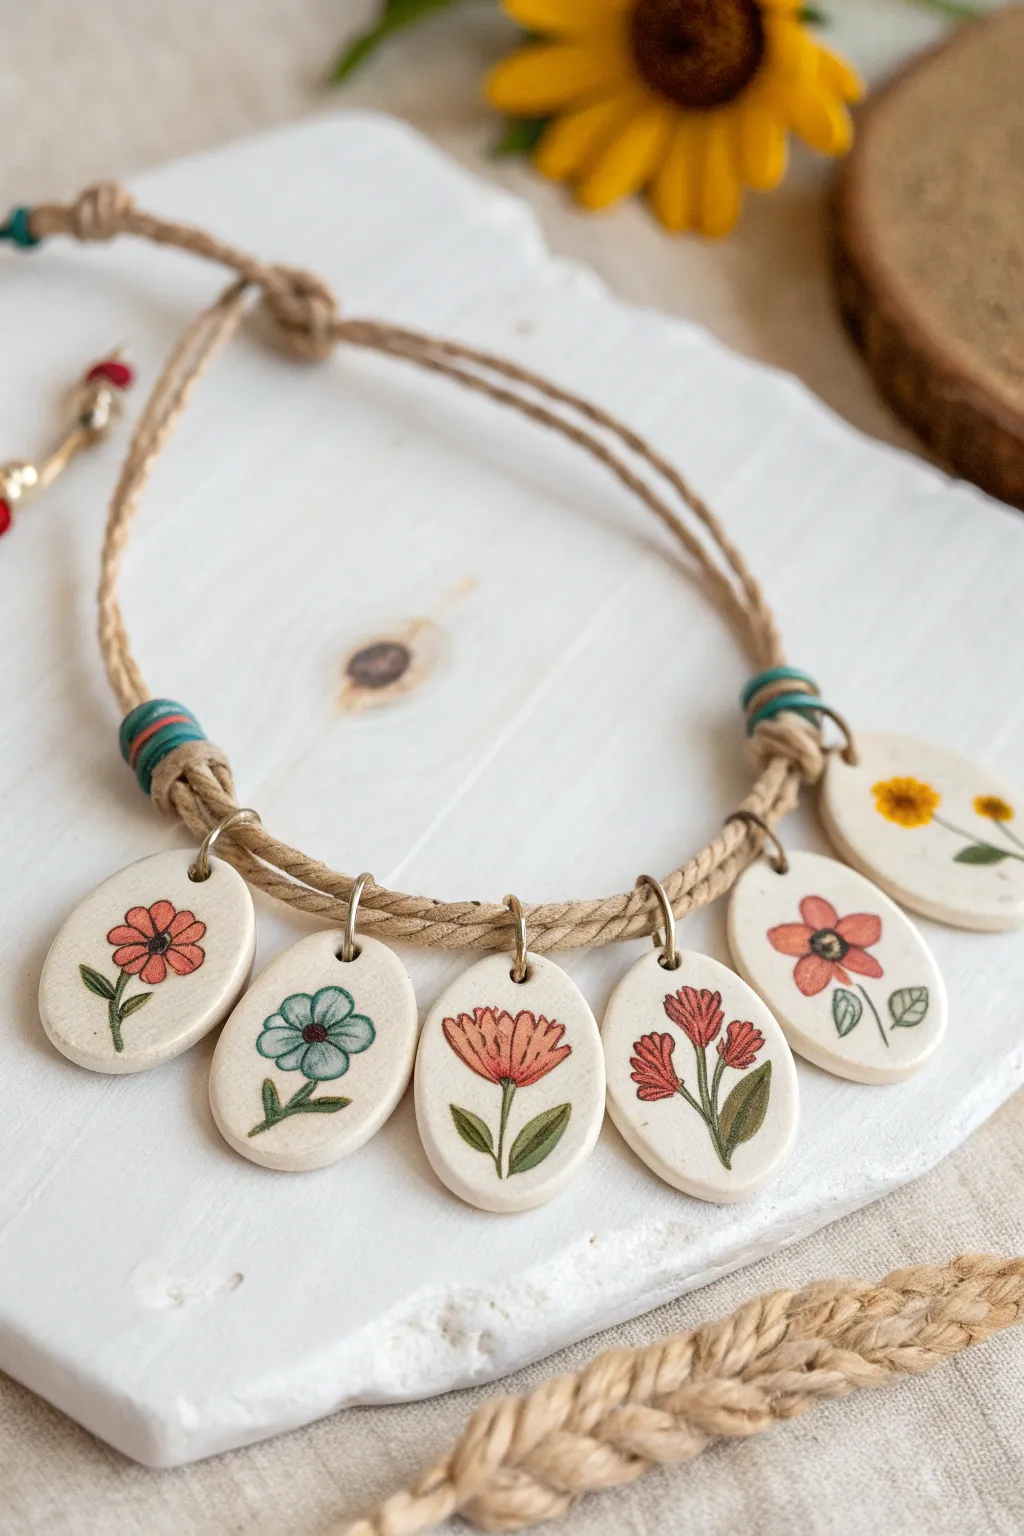
These delicate, personalized charms transform a simple piece of jewelry into a meaningful family heirloom. Using white clay as your canvas, you will create smooth, oval pendants featuring custom birth flowers for each family member, strung on a rustic jute cord.
Step-by-Step Tutorial
Materials
- White polymer clay (or high-quality air-dry clay)
- Small oval clay cutter (approx. 1 inch)
- Acrylic paints (various flower colors + green)
- Fine detail paintbrushes (size 00 or 000)
- Clear gloss varnish or UV resin
- Jump rings (gold or bronze tone)
- Jute twine or hemp cord
- Jewelry pliers
- Rolling pin or clay machine
- Needle tool or small drill bit
- Teal and red embroidery floss or thin yarn (for decorative wrapping)
- Sandpaper (fine grit)
Step 1: Sculpting the Charms
-
Condition the clay:
Start by warming a block of white polymer clay in your hands until it becomes soft and pliable. This conditioning step is crucial to prevent cracks later on. -
Roll out the slab:
Using a rolling pin or a dedicated pasta machine, roll the clay out to a uniform thickness of about 3mm to 4mm. You want it thick enough to be sturdy but light enough to wear comfortably. -
Cut the shapes:
Take your small oval cutter and punch out as many shapes as you have family members. I usually make one or two extra ‘practise’ pieces just in case a painting mistake happens later. -
Smooth the edges:
Gently rub the edges of each oval with your fingertip to remove any sharp burrs left by the cutter. This gives the finished piece a more polished, ceramic-like look. -
Create the hanging holes:
Using a needle tool, carefully pierce a hole near the top center of each oval. Ensure the hole is large enough to accommodate your jump rings. -
Bake or dry:
Follow the manufacturer’s instructions for your specific clay. If using polymer clay, bake on a tile or parchment-lined tray. If using air-dry clay, allow 24-48 hours for complete drying.
Step 2: Painting the Blooms
-
Prepare the surface:
Once hardened and cooled, lightly sand any rough spots. Wipe the surface clean with a damp cloth to ensure the paint adheres perfectly. -
Draft the stems:
Mix a muted olive green acrylic paint. Using your finest brush, paint a slender, slightly curved vertical line on each charm to serve as the flower stem. -
Add leaves:
Add small leaves to the stems. Vary the leaf shapes based on the specific flower type—rounded for some, pointed for others. -
Paint the petals:
Dip your fine brush into your flower colors (pinks, reds, blues, yellows). Paint the distinct petals of each birth flower. For the daisy, use white with a yellow center; for the poppy, use coral red with a dark center. -
Add fine details:
Once the base colors dry, go back in with a darker shade or a fine black liner pen to outline petals or add textured centers to the blooms for definition. -
Seal the artwork:
Protect your painting by applying a coat of clear gloss varnish or a thin layer of UV resin. This mimics the look of fired ceramic glaze and prevents chipping.
Pro Tip: Texture Trick
Before baking, gently dab the surface of the raw clay with a toothbrush or sponge. This adds a subtle pitted texture that looks like organic stone.
Step 3: Assembly
-
Prepare the jump rings:
Using two pairs of jewelry pliers, gently twist open your gold or bronze jump rings. Slide one ring through the hole of each hardened clay charm. -
Braid the cord:
Cut three lengths of jute twine. Create a simple braid for the central section where the charms will hang, or use a thicker twisted rope as the base. -
Attach the charms:
Hook the jump rings onto the braided section of the jute cord. Space them evenly so the charms fan out nicely when worn. -
Create decorative stops:
To keep the charms centered, wrap teal or red embroidery floss tightly around the jute cord on either side of the charm cluster. -
Final secure:
Close the jump rings securely with your pliers. Tie sliding knots at the ends of the jute cord to create an adjustable closure.
Level Up: Double-Sided
Paint the person’s initial or birth date on the back of their respective flower charm for a fully personalized, reversible keepsake.
Now you have a beautiful, rustic piece of jewelry that keeps your loved ones close at hand