If you’ve been itching to make tiny clay characters, you’re in the perfect sweet spot of simple shapes and big personality. I love how a couple of dot eyes and a little smile line can turn any mini sculpture into someone you want to keep on your shelf.
Classic Kawaii Blob Characters
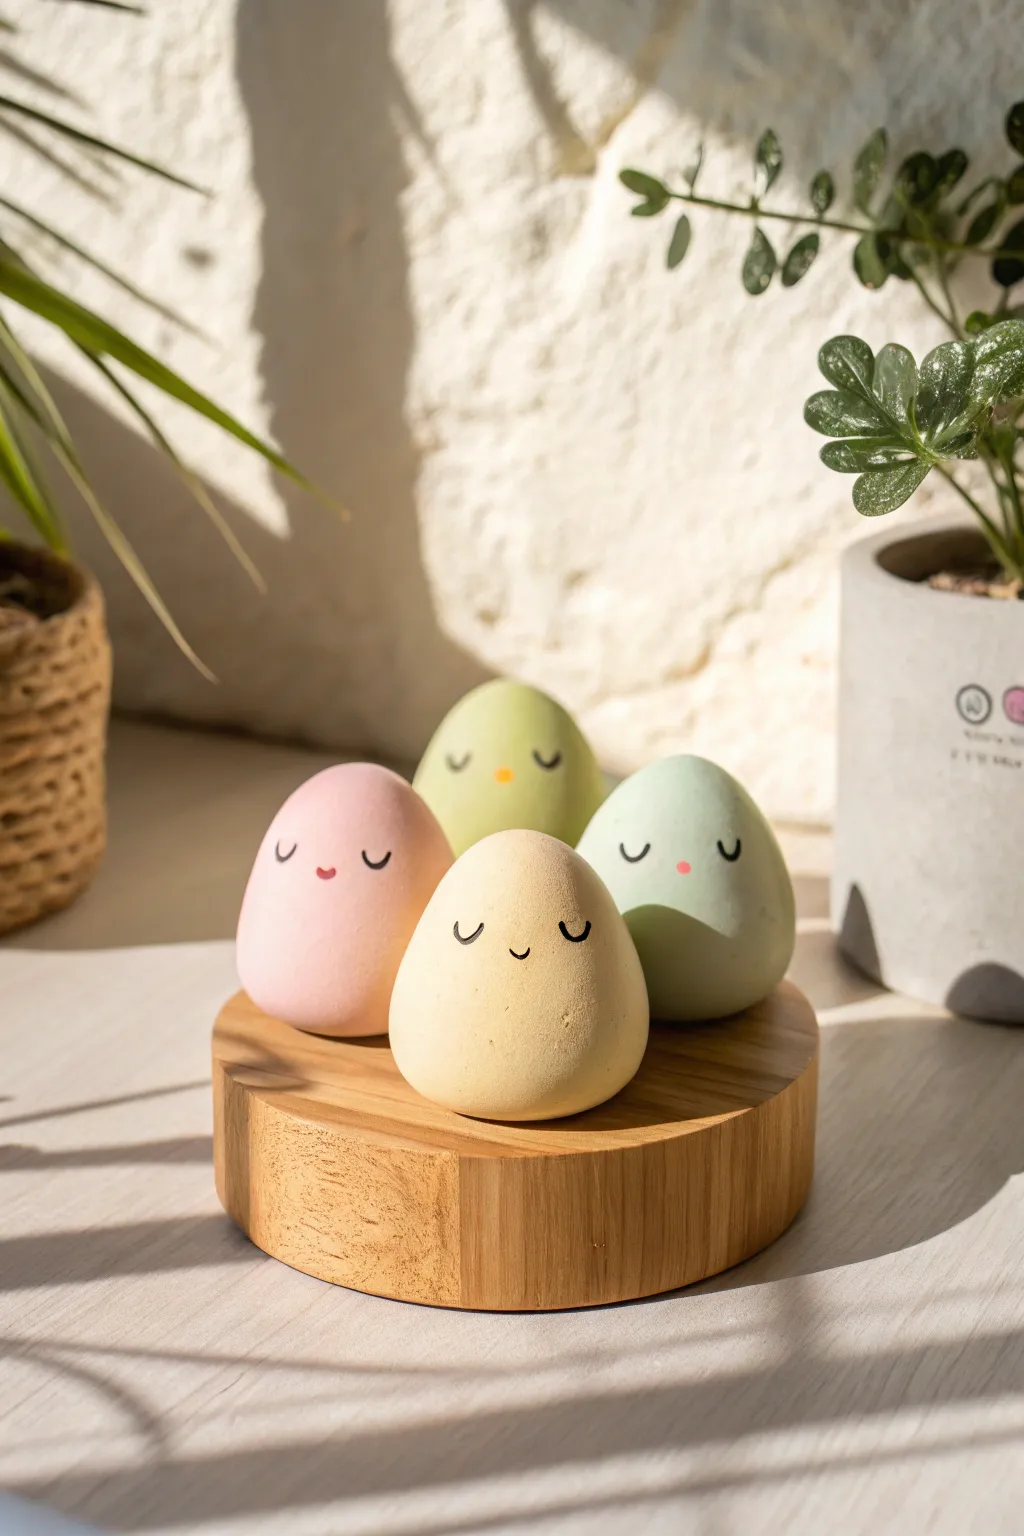
These four adorable egg-shaped mascots capture the essence of kawaii minimalism with their soft pastel hues and serene expressions. Perfect for a desk companion or a gentle decorative accent, this project focuses on smooth forms and delicate facial details.
Step-by-Step Guide
Materials
- Air-dry clay or polymer clay (white base recommended)
- Acrylic paints (Pastel Pink, Creamy Yellow, Mint Green, Sage Green)
- Fine-grit sandpaper (400-600 grit)
- Black ultra-fine tip permanent marker or fine detail brush with black paint
- Small round paintbrush
- Matte sealant or varnish
- A smooth rolling surface
- Water cup (for smoothing)
Step 1: Shaping the Bodies
-
Prepare the Clay:
Start with a chunk of white clay roughly the size of a golf ball for each figure. Knead the clay thoroughly in your hands to warm it up and remove any air bubbles, ensuring the material is pliable and smooth. -
Form the Base Sphere:
Roll the clay between your palms to create a perfect sphere. Spend extra time here; the smoother the ball is now, the easier the final shaping will be. -
Create the Egg Shape:
Gently gently roll one side of the sphere against your palm or work surface, applying slightly more pressure to the top half. You want to taper it into a soft egg shape, keep the bottom wide and stable so it sits flat. -
Tap the Base:
Pick up the egg shape and gently tap the wide bottom against your table. This creates a small flat spot ensuring your character won’t roll away later. -
Smooth Imperfections:
Dip your finger in a tiny bit of water (for air-dry clay) or baby oil (for polymer clay) and gently run it over the surface to erase fingerprints or tiny cracks. -
Repeat for the Group:
Create three more egg shapes. Don’t worry if they are slightly different sizes; accurate variety makes the group look organic and cute.
Clean Lines Tip
If you’re nervous about drawing the face, lightly sketch it with a pencil first. You can gently erase mistakes before committing with the permanent marker or paint.
Step 2: Refining and Painting
-
Dry or Bake:
If using air-dry clay, let the figures sit for 24-48 hours until completely hard. For polymer clay, bake according to the manufacturer’s instructions on the package. -
Sand for Perfection:
Once fully cured, use fine-grit sandpaper to buff away any remaining bumps. Use circular motions to maintain the roundness, aiming for a surface as smooth as a real eggshell. -
Mix Your Pastels:
Prepare your palette with four distinct pastel shades. I like to mix a large amount of white into primary colors to get that soft, milky look seen in the photo. -
Apply Base Color:
Paint each egg a solid color—one pink, one buttery yellow, one light lime, and one muted sage green. Two thin coats are usually better than one thick coat to avoid brush streaks. -
Let the Paint Clean:
Allow the base coats to dry completely. If the finish looks uneven, a third thin coat might be necessary for opacity.
Step 3: Adding the Faces
-
Plan the Expression:
Visualize where the face will sit. The eyes should be placed slightly lower than the midline of the egg to achieve that ‘cute’ proportion. -
Draw the Eyes:
Using your ultra-fine black marker, draw two small ‘U’ shapes for the closed sleepy eyes. Keep them widely spaced for a relaxed look. -
Add the Mouth:
Draw an even smaller, subtle ‘U’ shape right between the eyes for the smile. Keep the lines thin and delicate. -
Add Cheek Details:
For the pink egg, you might want to switch to a tiny dab of darker pink paint for the mouth or cheeks, but keep it minimal to match the reference style. -
Seal the Project:
Once the marker ink is fully dry, coat the entire figure with a matte varnish. Avoid glossy finishes, as the matte texture gives these characters their soft, modern aesthetic.
Seasonal Ideas
Customize these for holidays! Paint little cracks on top for Easter chicks, or add tiny red Santa hats made of clay for a festive Christmas version.
Set your finished clay family on a wooden coaster or near a plant to enjoy their peaceful vibes


Chibi Animal Friends From Basic Shapes
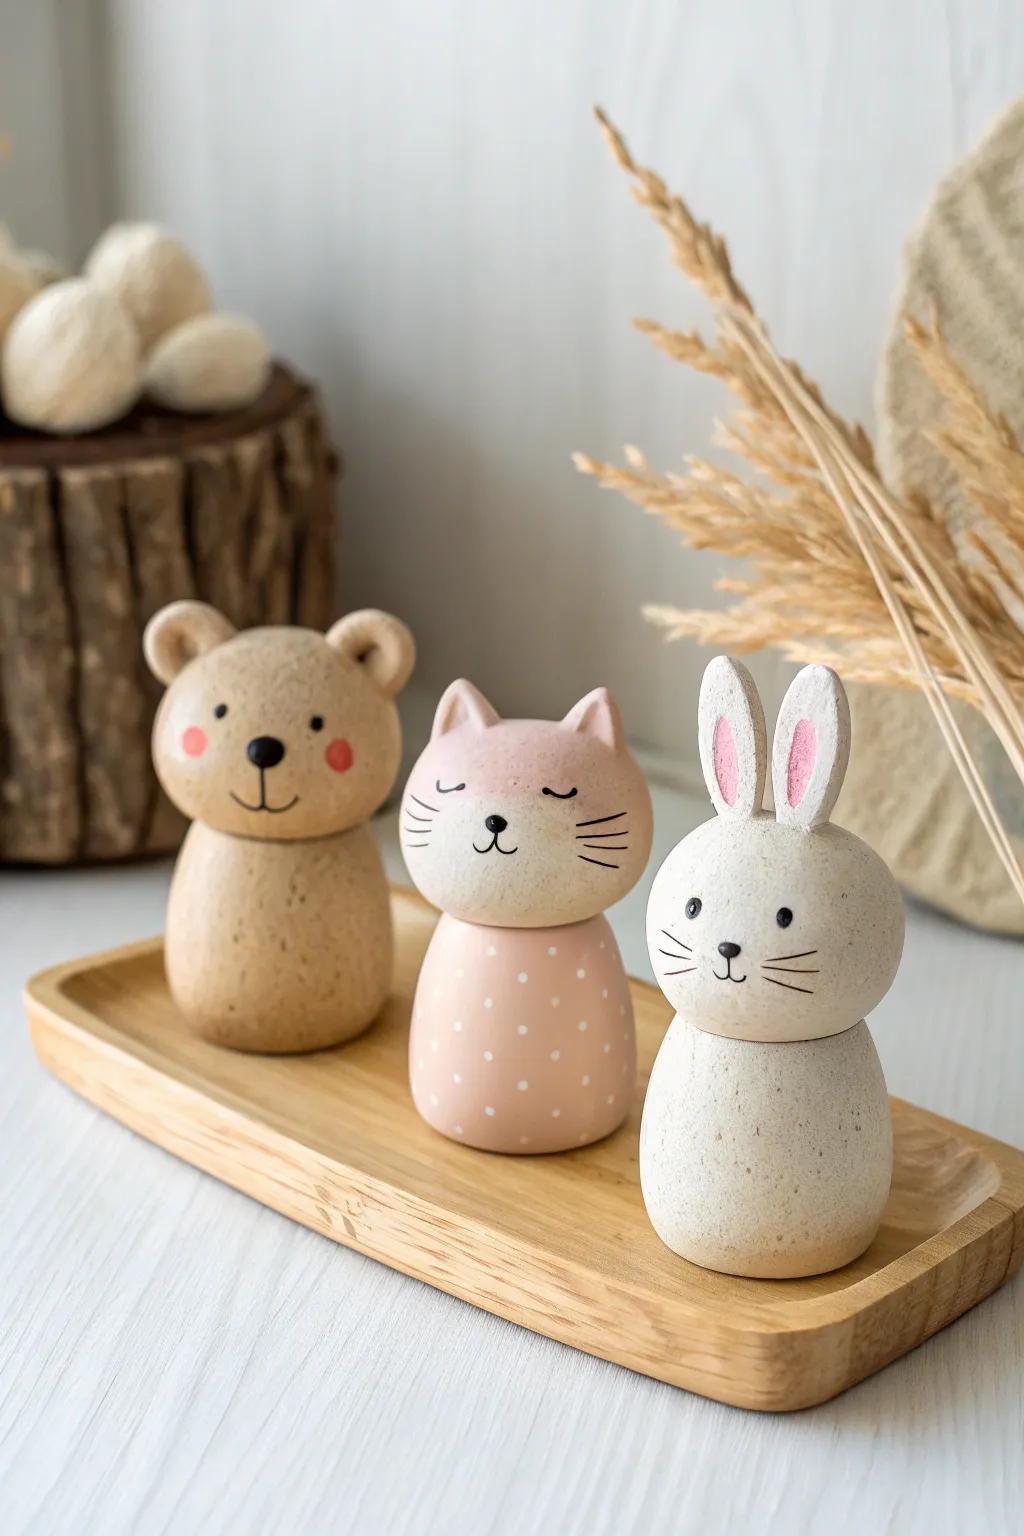
Create a charming set of stylized animal friends using simple geometric forms and a soft, earthy color palette. These bear, cat, and rabbit figures rely on a distinct “head-on-body” construction that makes them sturdy, adorable, and perfect for beginners.
How-To Guide
Materials
- Air-dry clay or polymer clay (white or beige base)
- Acrylic paints (beige, light pink, white, black, brown)
- Fine grit sandpaper
- Detail paintbrushes (sizes 0 and 00)
- Ball stylus tool or toothpick
- Clear matte varnish
- Water cup and palette
Step 1: Shaping the Bodies
-
Roll the bases:
Start by conditioning your clay until it is smooth and pliable. Divide the clay into three equal portions for the bodies. Roll each portion into a smooth ball, then gently roll it back and forth on your work surface to elongate it slightly into a rounded egg or pear shape. These should be sturdy and wide at the bottom so they stand on their own. -
Flatten the bottoms:
Tap the wider end of each body repeatedly against your table to create a flat, stable base. Ensure they stand perfectly upright without wobbling. -
Refine the surface:
Dip your finger in a little water (for air-dry clay) or baby oil (for polymer) and smooth out any fingerprints or tiny cracks on the surface of the bodies.
Stone Effect Secret
To get that speckled ceramic look without painting, mix cracked black pepper or dried tea leaves directly into your clay before sculpting.
Step 2: Creating the Heads
-
Form the head spheres:
Roll three balls of clay for the heads. These should be slightly smaller than the bodies but still substantial to give that cute ‘chibi’ look. Flatten the bottom of each sphere slightly where it will join the neck. -
Sculpt the Bear:
For the bear, pinch two tiny balls of clay and flatten them into discs. Attach these to the top sides of one head sphere. Blend the clay at the seam so the ears sustain a smooth connection with the head. -
Sculpt the Cat:
For the cat, pinch two small triangles of clay. Attach them to the top of the second head sphere, keeping them relatively pointy and close to the sides. -
Sculpt the Rabbit:
For the rabbit, roll two elongated logs, tapering them at the top. Flatten them gently. Attach these vertically to the top of the third head sphere. I like to use a small dab of liquid clay or water here to ensure these taller ears stay secure.
Step 3: Assembly and Surface Prep
-
Connect head to body:
If using air-dry clay, score (scratch) the connecting surfaces of the head and body, add a drop of water, and press them firmly together. For polymer clay, press them together firmly or use a piece of raw pasta as an internal dowel for strength. -
Dry or Bake:
Let your figures dry completely (24-48 hours for air-dry) or bake according to your polymer clay package instructions. Do not paint until fully cured. -
Sand for smoothness:
Once hard, use fine-grit sandpaper to gently sand away any bumps or imperfections, focusing on the connection points and the tops of the heads to get a stone-like finish.
Make It Functional
Before the clay dries, create a vertical hole through the center of the head and body to turn these figurines into adorable pencil holders.
Step 4: Painting and Details
-
Base coat – Bear & Rabbit:
Mix a warm beige or light tan acrylic paint. Paint the entire bear and rabbit figures. They may need two thin coats for opaque coverage. Let dry between layers. -
Base coat – Cat head:
Mix a very pale pink with your beige to create a soft blush tone. Paint the cat’s head with this color. -
Base coat – Cat body:
Paint the cat’s body a slightly darker, contrasting dusty pink. This creates the look of a ‘dress’ or simpler separation. -
Add texture speckles:
To mimic the stone/ceramic look in the photo, dip an old stiff brush or toothbrush into watered-down brown paint. Run your thumb across the bristles to flick tiny speckles onto the dried base coats. Practice on a paper towel first to control the spray. -
Paint the Bear’s face:
Using your smallest brush or a dotting tool, dab two black dots for eyes. Paint a small oval nose in black, and draw a thin ‘anchor’ line down from it for the mouth. Add rosy cheeks with a diluted pink paint. -
Paint the Cat’s face:
Paint thin, curved lines for closed ‘sleeping’ eyes. Add a small triangular nose and a curved mouth. Use a very fine liner brush to add three whiskers on each cheek. Add white polka dots to the body using a ball stylus. -
Paint the Rabbit’s face:
Paint two widely spaced black eyes and use a dotting tool to add a tiny white highlight in each. Draw a small Y-shaped nose and mouth. Paint three horizontal whiskers on each cheek. Paint the inner ears with soft pink. -
Seal the work:
Finish by applying a coat of clear matte varnish to protect the paint and unify the sheen.
Arranging your trio on a small wooden tray creates a heartwarming display for any shelf or desk


Mini Penguin Characters With Color-Block Bodies
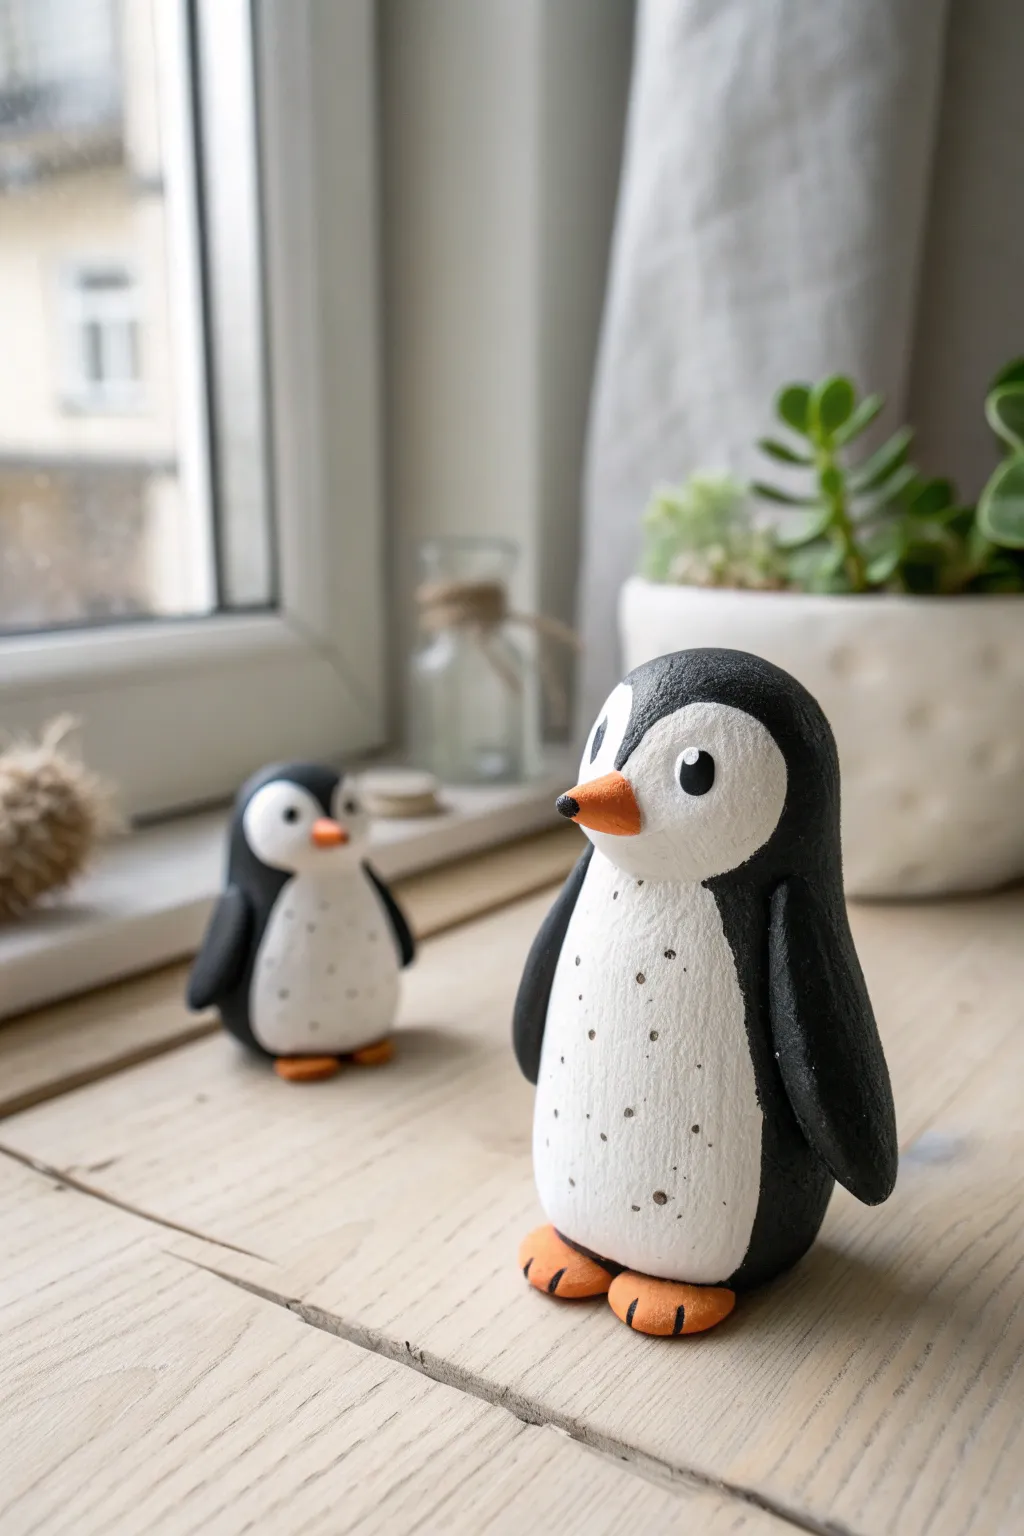
Create a charming duo of flightless friends with these color-blocked clay penguins. Their simple, teardrop-shaped bodies and whimsical speckled bellies make them a delightful beginner-friendly sculpting project.
Step-by-Step Guide
Materials
- White air-dry clay or polymer clay
- Acrylic paints (Carbon Black, Titanium White, Bright Orange)
- Small flat paintbrush
- Fine detail paintbrush or toothpick
- Aluminum foil (for armature core)
- Water bonding cup (for air-dry clay)
- Sculpting tool or plastic knife
- Matte varnish or sealant
- Sandpaper (fine grit)
Step 1: Shaping the Bodies
-
Prepare the core:
Crumple a small amount of aluminum foil into a tight teardrop shape. This saves clay and keeps the figurine lightweight. -
Cover with clay:
Roll out a sheet of white clay about 1/4 inch thick. Wrap it completely around your foil core, trimming off any excess. -
Smooth the form:
Gently roll the clay-covered form in your hands to create a distinct egg-like shape that is slightly narrower at the top for the head and wider at the base. -
Check stability:
Tap the bottom of your shape firmly on your work surface to create a flat base so the penguin stands upright without wobbling. -
Make the wings:
Form two small, flat elongated ovals from fresh clay. Press these firmly onto the sides of the body where the ‘shoulders’ would be, blending the top seam smooth while leaving the tips exciting slightly.
Cracked Clay?
If small cracks appear as your clay dries, don’t panic. Mix a small amount of fresh clay with water to create a slip paste, fill the crack, and smooth it over with your finger.
Step 2: Adding Features
-
Create the beak:
Roll a very tiny cone of clay. Attach this to the face area, ensuring it points slightly downward. -
Form the feet:
Shape two small, flattened triangles for the feet. Use your sculpting tool or knife to press two indentations into the front edge of each foot to create toes. -
Attach the feet:
Secure the feet under the front edge of the body. If using air-dry clay, a dab of water helps them bond better. -
Smooth imperfections:
Use a damp finger to smooth out any fingerprints or cracks on the surface before letting the piece dry completely. -
Dry the sculpture:
Allow your clay to cure fully according to the package instructions. For air-dry clay, this might take 24-48 hours depending on thickness.
Step 3: Painting the Details
-
Sand for finish:
Once fully dry, lightly sand any rough spots to ensure a clean surface for painting. -
Paint the black coat:
Using the black acrylic paint, carefully paint the back, wings, and top of the head. Leave a large, heart-shaped or oval area on the belly and face unpainted (white). -
Refine the face line:
Use a smaller brush to create the crisp ‘widow’s peak’ shape on the forehead where the black feathers meet the white face. -
Add color accents:
Paint the beak and feet with bright orange paint. You may need two coats for opaque coverage. -
Paint the eyes:
Use the back of a paintbrush handle or a dotting tool to stamp two black circles for eyes. Once dry, add a tiny white reflection dot to each for life. -
Speckle the belly:
Dilute a tiny drop of black paint with water. Dip an old toothbrush or stiff brush into it and run your finger across bristles to flick tiny speckles onto the white belly area. -
Define the claws:
Using your finest brush, paint three tiny black lines on the toes of the orange feet to represent claws. -
Seal the work:
Apply a coat of matte varnish to protect your paint job and give the penguins a finished, professional look.
Smoother Paint Lines
For that crisp definition between the black body and white belly, lightly draw your outline with a pencil first. It makes painting the curves much less stressful.
Group your finished penguins near a window or potted plant to give them a cozy little habitat


Cute Dinosaur Characters With Tiny Spikes
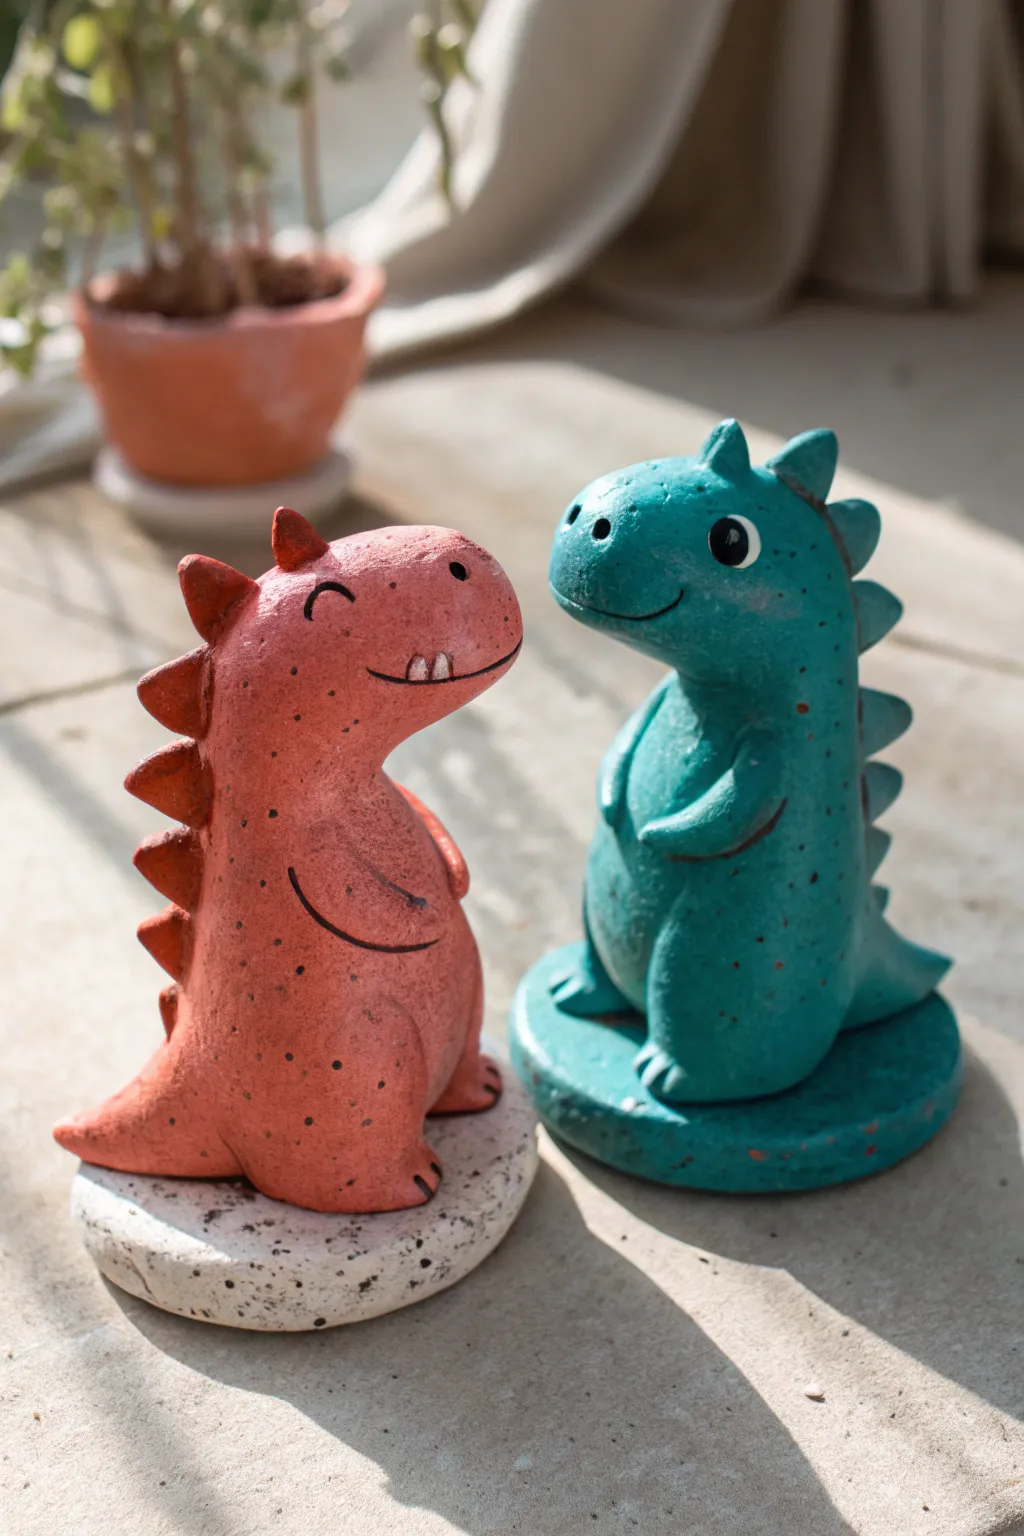
These adorable dinosaur figurines bring a touch of whimsy to any shelf with their rounded bellies, friendly faces, and charmingly chubby proportions. Their textured finish gives them a delightful, stonelike quality that feels both modern and handmade.
How-To Guide
Materials
- Air-dry clay (terracotta color and teal/grey color) or polymer clay
- Acrylic paints (black, white, and dark brown for speckles)
- Sculpting tools (needle tool, small ball tool)
- Old toothbrush or stiff bristle brush (for texturing)
- Water and a small sponge
- Rolling pin
- Circle cutter or jar lid (approx. 3 inches)
- Clear matte varnish/sealer
Step 1: Shaping the Bodies
-
Create the base:
Start by rolling out a thick slab of clay, about half an inch high. Use your circle cutter or a jar lid to stamp out two neat discs. These will serve as the heavy bases that keep your dinos stable. -
Form the main body:
Roll a large ball of clay into a smooth pear shape. The bottom should be wide and heavy for the belly, tapering up slightly towards the neck area. Flatten the bottom so it sits flush against your circular base. -
Sculpt the head:
Take a slightly smaller ball of clay and shape it into a rounded oval. Gently press it onto the tapered neck of your body piece. I find it helpful to blend the clay downwards with my thumb to ensure a seamless connection. -
Add the snout:
For the snout, pinch the front of the head to elongate it slightly. The pink dino needs a more rounded, upward-curving snout, while the teal one has a blunter, shorter nose. -
Smooth the seams:
Dip your finger or a small sponge in water and run it over the entire connection area between the head and body until the join is invisible and the surface is uniform.
Seamless Spikes
Score the back of the dino and the bottom of each spike with a needle tool before attaching. Adding a tiny dab of water or liquid clay (slip) creates a bond that won’t break later.
Step 2: Adding Charming Details
-
Attach the tail:
Roll a cone of clay and attach it to the lower back of the body, blending the clay thoroughly so it looks like it grew naturally from the spine. Allow the tail to rest or curl slightly on the base. -
Sculpt tiny arms:
Create two small sausage shapes for each dinosaur. Press them onto the sides of the belly. Use a sculpting tool to indent a faint line where the arm meets the body to define the curve. -
Create the spikes:
Roll very small balls of clay and pinch them into triangle shapes. Line them up along the spine, starting from the top of the head down to the tail. Press firmly to adhere them. -
Texture the surface:
Before the clay dries, take an old toothbrush and gently tap it all over the surface of the dinosaurs. This creates that lovely organic, stone-like texture seen in the photo. -
Facial features:
Use a needle tool or the back of a small paintbrush to poke shallow holes for nostrils. For the mouth, carve a simple, curved line—giving the pink one a happy grin and the teal one a gentle smile.
Accessory Upgrade
Give them personality by sculpting tiny accessories before baking or drying! A small bowtie, a flower held in the hands, or a tiny party hat can make them even cuter.
Step 3: Finishing Touches
-
Initial drying:
Let your sculpted figures sit for 24 to 48 hours. Ensure they are completely hard before moving to painting. -
Painting the eyes:
Using a fine detail brush and black acrylic paint, create circles for eyes. The pink dino gets a curved line for a squinting, happy eye, while the teal one gets round, open eyes. -
Adding highlights:
Once the black paint is dry, add a tiny white dot to the teal dino’s eyes to bring them to life. Paint small white teeth on the pink dino’s lower jaw. -
Connect the limbs:
If you sculpted the arms separately or want more definition, paint a very thin, dark line underneath the arms to simulate a shadow, making them pop against the belly. -
Speckled effect:
Dilute some dark brown paint with water. Dip your stiff brush in it and flick the bristles with your finger to splatter tiny speckles over the dinosaurs. This simulates natural pottery clay. -
Pattern the base:
For the base under the pink dino, paint it white and add black speckles to mimic a terrazzo stone look. Paint the teal dino’s base a matching teal color. -
Seal the work:
Finish by applying a coat of matte varnish. This will protect the paint and unify the sheen of the clay.
Now you have a pair of prehistoric friends ready to brighten up your desk space

The Complete Guide to Pottery Troubleshooting
Uncover the most common ceramic mistakes—from cracking clay to failed glazes—and learn how to fix them fast.
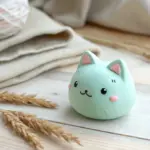
Sleepy Cat Loaf Characters
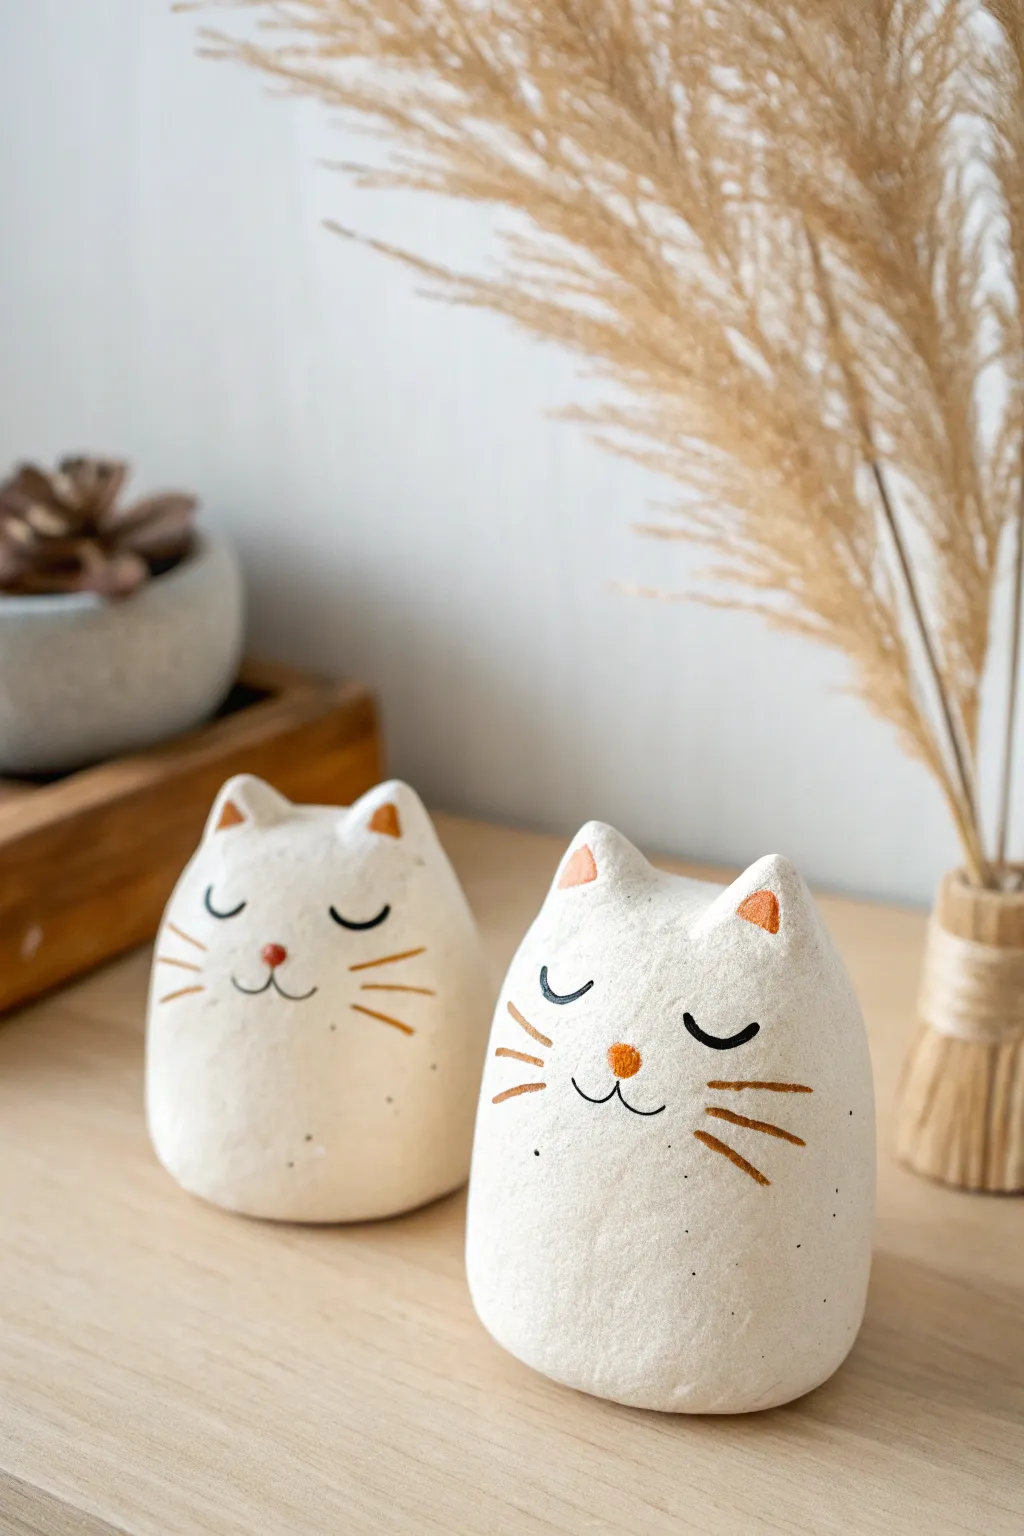
These charming, egg-shaped cat characters bring a touch of serene minimalism to any shelf with their peaceful, sleeping expressions. Crafted with a delightful textured finish and simple painted details, they perfectly capture the cozy essence of a loafing kitty.
Step-by-Step
Materials
- Air-dry clay (stone effect) or paper clay for texture
- Water in a small cup
- Modeling tools (or a toothpick and a smooth spoon)
- Fine grit sandpaper
- Acrylic paints: Black, Terracotta/Orange, White (optional for touch-ups)
- Fine detail paintbrush (size 0 or 00)
- Matte varnish or sealant
Step 1: Shaping the Base Body
-
Condition the Clay:
Begin by taking a handful of clay, roughly the size of a large orange. Knead it thoroughly in your hands until it becomes warm, pliable, and free of any air bubbles. -
Form the Potato Shape:
Roll the clay into a ball first, then gently elongate it while flattening the bottom against your work surface. You want to create a stable, upright oval shape that resembles a distinctive ‘loaf’ or egg. -
Refine the Silhouette:
Smooth out the sides with your thumbs. The shape should taper slightly towards the top where the head will be, but keep the overall form round and chubby for that cute aesthetic.
Use a Water Check
Not sure if the clay is dry? Press it against your cheek. If it feels significantly cold to the touch, there is still moisture in the center and it needs more drying time.
Step 2: Sculpting the Ears
-
Pinch the Ears:
At the very top of your rounded form, use your thumb and forefinger to gently pinch up two small triangles of clay. Space them comfortably apart to frame the face. -
Shape and Smooth:
Refine the triangles into soft points. Dip your finger in a little water and smooth the connection point where the ears meet the head so they look integrated, not stuck on. -
Create Depth:
Use a small rounded tool or the back of a paintbrush to gently press a shallow indentation into the front of each ear triangle, creating the inner ear hollow.
Make it a Set
Create a whole family by making different sizes! Try a tiny kitten version or a taller, thinner cat. You can also vary the ear colors to give each one a unique personality.
Step 3: Refining Surface Texture
-
Add Texture:
Instead of smoothing the surface perfectly, use a slightly damp sponge or a crumpled ball of aluminum foil to gently tap the surface. This mimics the stone-like, organic texture seen in the photo. -
Check Stability:
Tap the bottom of the cat firmly on the table one last time to ensure it sits perfectly flat and won’t wobble. -
Dry Completely:
Place your clay loaves in a dry, airy spot. Depending on the thickness and your climate, this needs to dry for 24-48 hours. I usually flip them gently halfway through so the bottom dries evenly.
Step 4: Adding the Details
-
Sand Imperfections:
Once fully dry, lightly sand any sharp burrs or unintended bumps, but try to preserve that lovely overall texture we created earlier. -
Paint the Ears:
Using your fine brush and terracotta or orange acrylic paint, carefully fill in the small triangles inside the ears. Allow the paint to dry fully. -
Paint the Nose:
With the same orange hue, dab a tiny, rounded triangle or oval in the center of the face for the nose. Placement is key—keep it relatively centered vertically. -
Draw the Mouth:
Switch to black paint and a very fine brush (or a permanent marker if you’re nervous about steadiness). Draw a small ‘w’ shape directly under the nose, connecting to the bottom point of the nose. -
Add Sleeping Eyes:
Paint two widely spaced, downward-curving arcs for the closed eyes. Adding tiny lashes at the outer corners gives them a sweeter expression. -
Paint Whiskers:
Using the terracotta paint again, paint three simple lines on each cheek. Start near the nose area and flick outward. -
Add Speckles (Optional):
To enhance the stoneware look, dip an old toothbrush in watered-down black grey paint and run your thumb across the bristles to flick tiny speckles onto the lower body. -
Seal the Piece:
Finish by applying a coat of matte varnish. This protects the paint and seals the clay without making it look plasticky or shiny.
Now you have a serene little clay companion ready to bring a sense of calm to your workspace
Tiny Ghost Characters With Wavy Hemlines
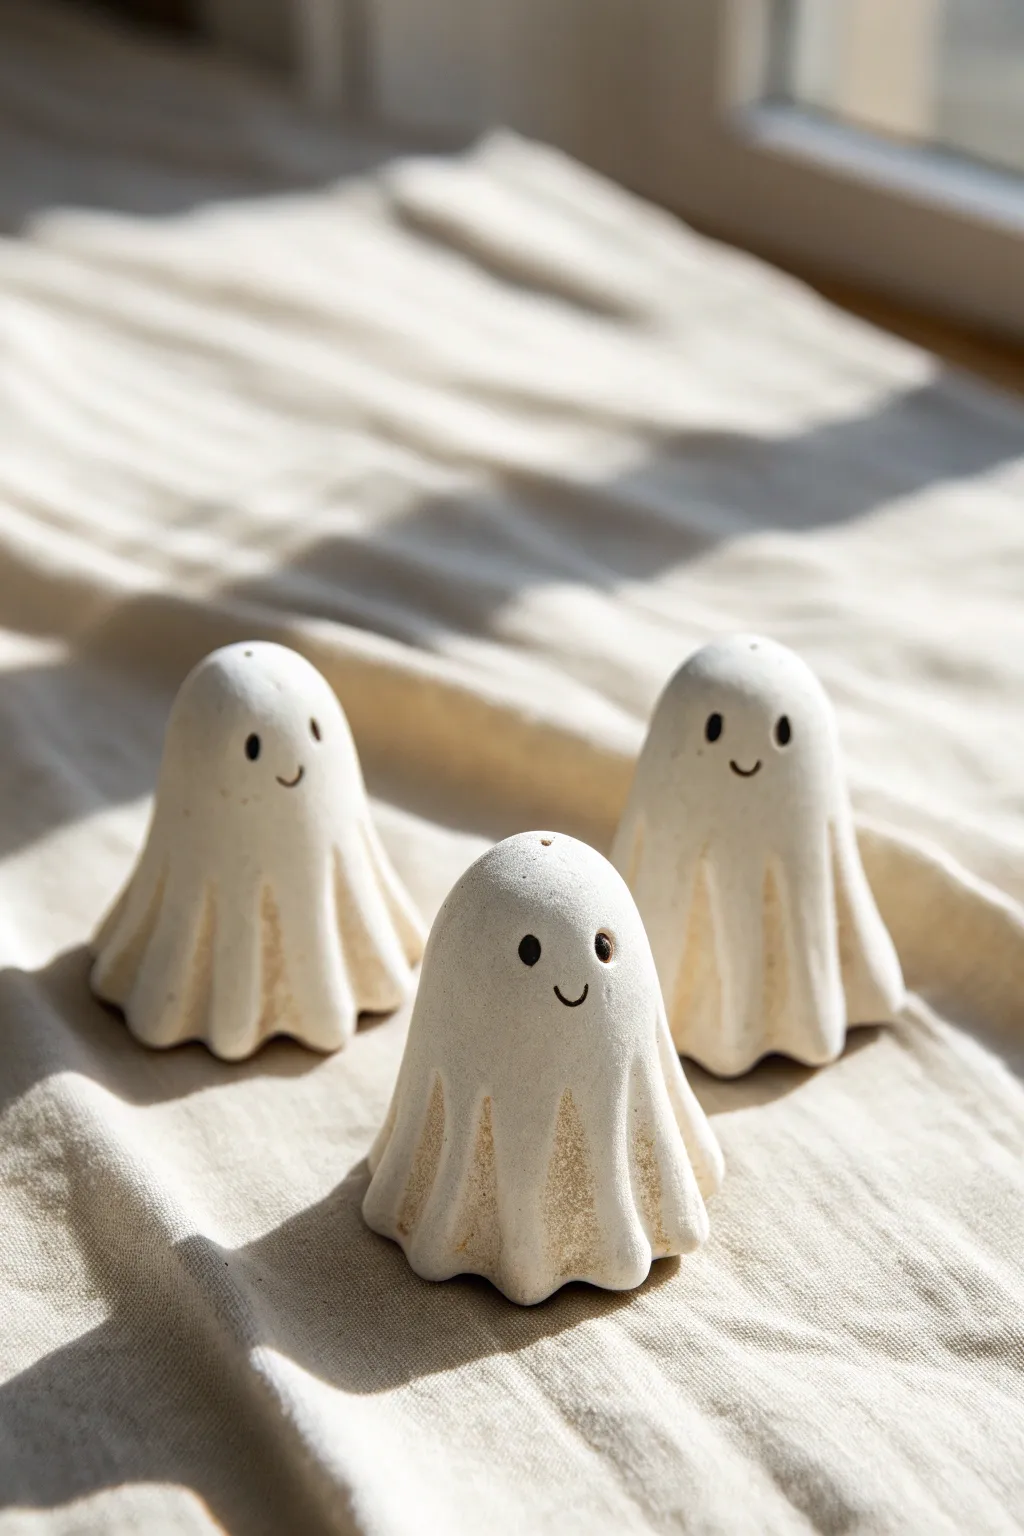
These charming little specters capture the classic look of a sheet ghost with their wavy, draped hemlines and sweet, simple expressions. Their smooth, matte finish and subtle shading give them a cozy, handmade feel perfect for subtle seasonal decor.
How-To Guide
Materials
- White air-dry clay or polymer clay
- Small rolling pin
- Aluminium foil
- Sphere tool or small blending tool
- Fine grit sandpaper packaging
- Black acrylic paint
- Very fine detail paintbrush or toothpick
- Brown antique wax or watered-down brown acrylic paint
- Soft cloth or paper towel
- Matte varnish (optional)
Step 1: Shaping the Ghost
-
Creates the core:
Begin by crumpling a small piece of aluminium foil into a cone-shaped stump. This will act as an armature to support the clay and save material. -
Prepare the clay:
Knead your white clay until it is warm and pliable. Roll a ball of clay roughly the size of a golf ball or slightly larger, depending on your desired ghost size. -
Roll the sheet:
Flatten the ball into a circle using your rolling pin. Aim for a thickness of about 4-5mm—thick enough to hold folds but thin enough to drape naturally. -
Drape the form:
Place the clay circle centered over your foil cone. Gently smooth the top into a rounded dome shape to form the head. -
Form the waves:
Start pinching the bottom edges of the clay gently between your thumb and forefinger to create gentle waves. -
Deepen the folds:
Use the handle of a paintbrush or your finger to push deep vertical indentations up the sides of the ghost, mimicking heavy fabric folds. -
Refine the hem:
Flare the very bottom edges outward slightly so the ghost stands distinctively on its wavy hemline. -
Smooth the surface:
Dip your finger in a tiny bit of water and gently rub away any fingerprints or cracks on the surface of the clay.
Clean Cuts
To prevent the clay from sticking when creating the folds, lightly dust your fingers or tools with cornstarch before shaping.
Step 2: Details & Finishing
-
Cure the clay:
Let the clay dry completely if using air-dry clay (usually 24-48 hours) or bake according to package instructions if using polymer clay. -
Sand for texture:
Once fully hardened, lightly sand the surface with fine-grit sandpaper to give it a stone-like, matte texture. -
Paint the eyes:
Using a very fine detail brush or the tip of a toothpick, dip into black acrylic paint and dab two small oval shapes for eyes. -
Add the smile:
carefully paint a thin, small ‘u’ shape between the eyes for a friendly smile. I find bracing my hand against the table helps keep the line steady. -
Antique the folds:
Mix a tiny drop of brown paint with water (or use antique wax). Brush this into the deep creases and folds of the ‘sheet’. -
Wipe back:
Immediately wipe the high points of the ghost with a soft cloth, leaving the darker color only in the deepest recesses to create shadow and depth. -
Add speckling (optional):
For an aged pottery look, you can gently flick a stiff toothbrush with watered-down brown paint to add tiny speckles. -
Seal the piece:
Finish with a coat of matte varnish to protect the paint while maintaining that natural, unglazed appearance.
Make it Glow
Create a hollow core instead of using foil, then cut a hole in the back to place a battery-operated tea light inside for a glowing decoration.
Group your trio together on a shelf or windowsill to enjoy their cheerful, spooky company


What Really Happens Inside the Kiln
Learn how time and temperature work together inside the kiln to transform clay into durable ceramic.
Simple Robot Buddy Characters With Rounded Limbs
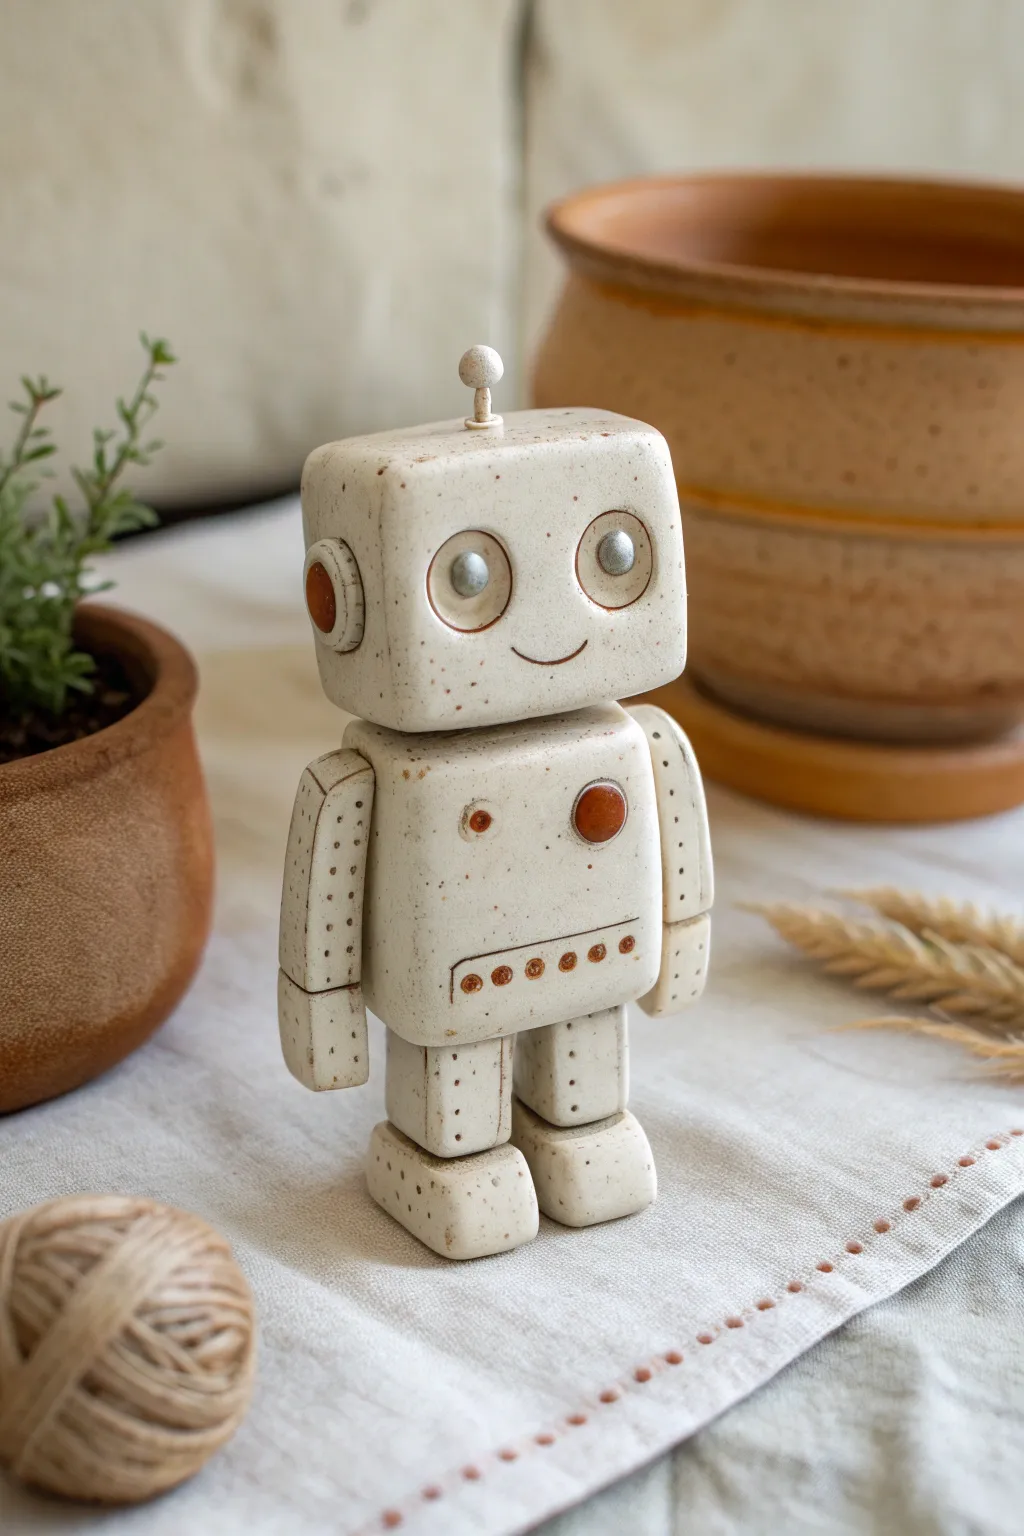
This charming robot, with its vintage speckled finish and rounded blocky limbs, makes for a delightful desk companion or shelf decoration. The design focuses on joining simple geometric clay forms to create a figure that feels both mechanical and lovingly handmade.
Step-by-Step Guide
Materials
- Polymer clay (white or beige granite/speckled effect)
- Acrylic paints (bronze/copper, silver, black)
- Gloss varnish or glaze
- Sculpting tools (blade, needle tool, dotting tool)
- Aluminum foil (optional, for armature)
- Small roller
- Liquid clay or bake-and-bond
- Oven (for curing)
Step 1: Shaping the Head and Body
-
Form the head block:
Start by conditioning your speckled clay until it’s pliable. Roll a smooth ball and then press it against your work surface to form a cube with soft, rounded corners. It should be roughly 1.5 inches wide. -
Sculpt the torso:
Create a second slightly larger and taller rectangular block for the body. Ensure the top and bottom surfaces are flat so the head sits securely and legs attach easily. -
Connect the main parts:
Place the head atop the torso. I like to twist them gently back and forth to meld the clay slightly, or you can use a dab of liquid clay for a stronger bond. -
Add the antenna:
Roll a very tiny stem of clay and a small ball. Attach the stem to the center of the head, and place the ball on top to make a classic antenna.
Step 2: Creating the Limbs
-
Make the arm segments:
Roll a log of clay and cut it into four equal sections. Shape two of these into slightly flattened rectangular tubes for the upper arms. -
Form the hands:
Take the remaining two sections and round them off at the bottom to create the forearms/hands. Gently press a horizontal line near the ‘wrist’ to suggest joint separation. -
Detail the arms:
Using a needle tool, poke three vertical rows of tiny holes down the length of the arms to mimic rivet details. -
Attach the arms:
Press the arms firmly against the sides of the torso. You can angle them slightly for a more dynamic pose. -
Shape the legs and feet:
Create two rectangular blocks for the legs, similar to the arms but sturdier. Make two rounded, squat blocks for the feet. -
Assemble the lower body:
Attach the feet to the bottom of the legs, then attach the legs to the underside of the torso. Press down gently to ensure the robot stands flat.
Clean Joints
Before baking, use a rubber clay shaper or your finger dipped in bit of baby oil to smooth the seams where limbs attach. This creates a seamless, molded look.
Step 3: Facial Features and Details
-
Create the eyes:
Flatten two small discs of clay and press them onto the face. Use a large ball tool to create deep concave indents in the center of these discs. -
Add the pupils:
Roll two tiny balls of clay and press them into the center of the eye sockets. Flatten them slightly so they look like buttons. -
Carve the mouth:
Use a needle tool or a small curved blade to impress a simple, thin smile line below the eyes. -
Add ear details:
Make small discs for the ears and attach them to the sides of the head. Indent the centers just like you did for the eye sockets. -
Detail the chest plate:
Add a small circular button on the upper chest. Below that, attach a thin horizontal strip of clay. Use a dotting tool to press five or six indentations across this strip.
Mix Your Specks
If you can’t find granite-effect clay, mix coarse black pepper or dried used coffee grounds into white clay. It creates a fantastic faux-ceramic texture!
Step 4: Finishing and Painting
-
Bake the figure:
Bake the robot according to your clay package instructions. Let it cool completely before handling. -
Paint metallic accents:
Using a fine brush, paint the insides of the ears, the chest button, and the dots on the chest strip with a bronze or copper acrylic paint. -
Highlight the eyes:
Paint the pupils silver to make them pop against the speckled clay. -
Seal the piece:
Once the paint is dry, coat the entire figure in a high-gloss varnish. This mimics the look of fired ceramic glaze and protects the paint.
Once sealed and shiny, your little robot friend is ready to guard your desk with a smile
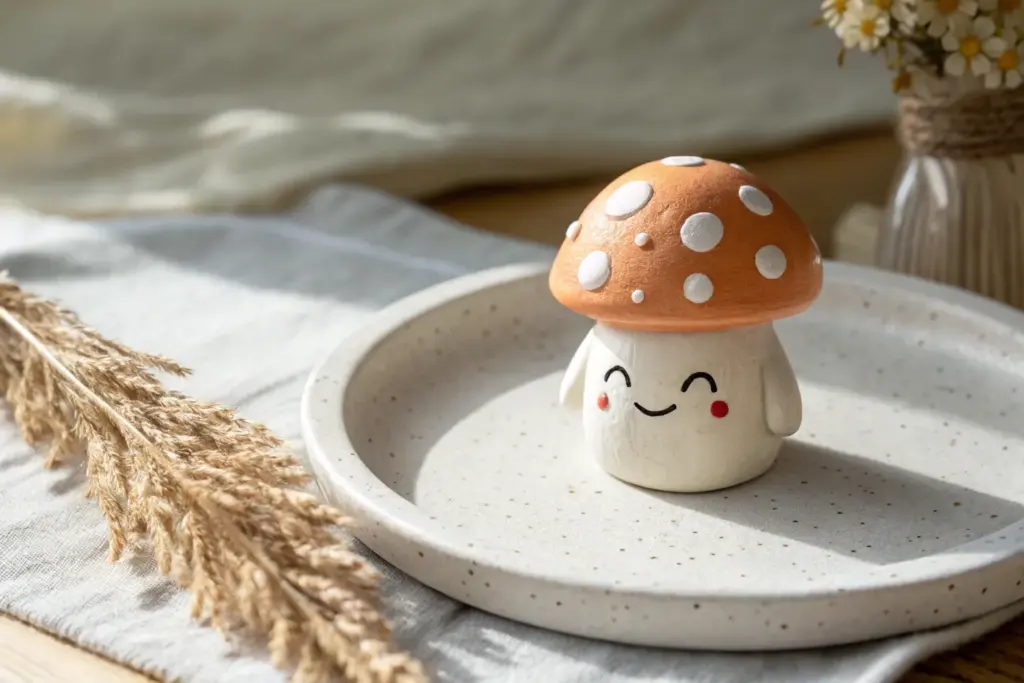
Mushroom Characters With Spotty Caps
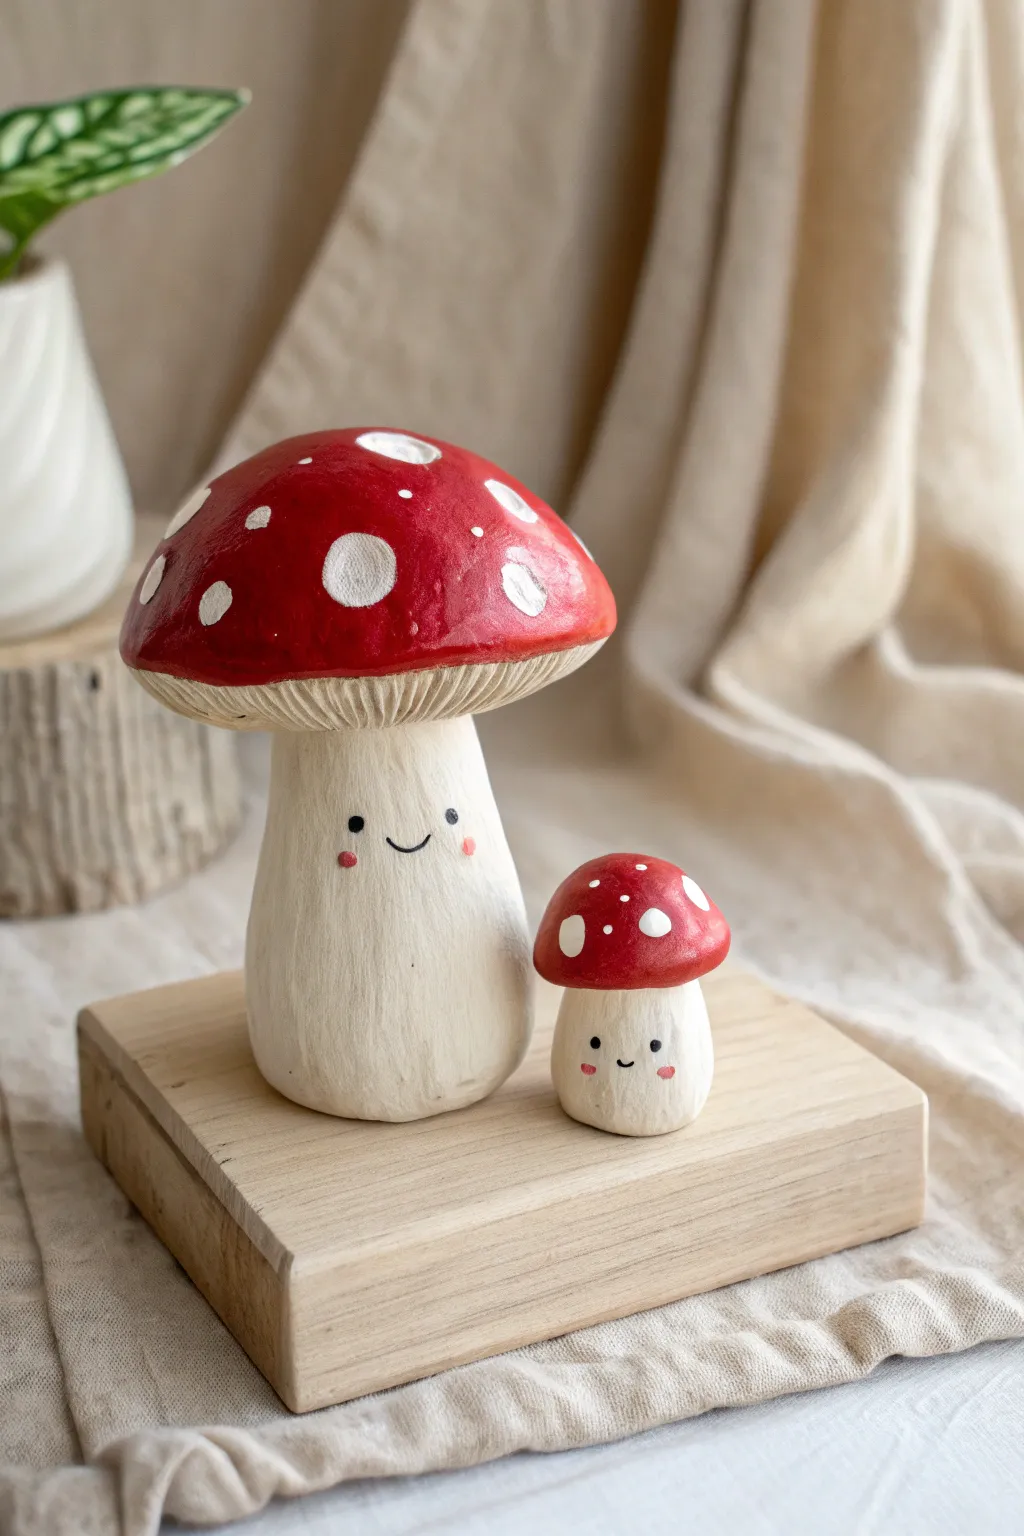
These utterly charming mushroom figurines bring a touch of woodland whimsy to any shelf with their jaunty red caps and sweet, smiling faces. The textured stems and hand-painted details give them a lovely, rustic finish that feels both modern and homemade.
Step-by-Step Guide
Materials
- Air-dry clay (white or natural stone color)
- Acrylic paints (bright red, creamy off-white, black, pink)
- Sculpting tools (needle tool, small ball stylus)
- Foil (for armature)
- Fine grit sandpaper
- Paintbrushes (flat shader, fine detail liner)
- Matte varnish or sealant
- Water cup
Step 1: Sculpting the Base Forms
-
Create the core:
Start by scrunching a small amount of aluminum foil into a gumdrop shape. This will serve as the core for the larger mushroom cap, saving clay and reducing drying time. -
Wrap the cap:
Roll out a sheet of clay to about 1/4 inch thickness. Wrap it completely over your foil dome, smoothing the clay underneath to seal it. Shape it into a classic rounded mushroom cap. -
Form the stem:
Take a solid lump of clay and roll it into a thick cylinder. Taper it slightly so it is wider at the base and narrower at the top where it will meet the cap. Repeat this process for the smaller mushroom, making a tiny, stout cylinder. -
Attach the cap:
Score the top of the stem and the underside of the cap with a needle tool. Apply a little water or slip (liquid clay) to the scored areas and press them firmly together. -
Blend the seams:
Use a modeling tool or your finger to gently smooth the connection point under the cap, but leave a distinct overhang so the cap looks separate from the stem. -
Sculpt the mini mushroom:
Repeat the previous steps for the baby mushroom. Since it’s small, you can make the cap entirely out of solid clay without a foil core. Create a simple rounded button shape and attach it to its stem.
Fixing Cracks
If small cracks appear as the clay dries, don’t panic. Mix a tiny bit of fresh clay with water to make a paste and fill the crack. Smooth it out and let it dry again before sanding.
Step 2: Texturing and Drying
-
Add stem texture:
Using a needle tool, lightly scratch vertical lines up and down the stems of both mushrooms. This mimics the fibrous texture found in nature. -
Create gill details:
Underneath the large mushroom cap, use your tool to press fine, radiating lines from the stem to the edge of the cap to suggest gills. Detailed touches like this really elevate the final look. -
Dry thoroughly:
Set your creations aside in a dry, room-temperature spot. Let them dry for at least 24-48 hours. I find turning them upside down halfway through helps the bottoms dry evenly. -
Sand imperfections:
Once fully hard, inspect your mushrooms. Use fine-grit sandpaper to gently smooth out any fingerprints on the top of the caps, wiping away the dust with a damp cloth.
Step 3: Painting and Finishing
-
Base coat the stems:
Mix a tiny drop of brown or yellow into your white acrylic paint to create a warm cream color. Paint the stems and the underside of the caps fully. Let dry. -
Dry brush the texture:
Take a brush with a very small amount of slightly darker cream paint and lightly brush over the textured stems. This catches the raised areas and highlights the vertical sculpting lines. -
Paint the caps:
Apply a coat of bright red acrylic paint to the tops of the caps. You may need two coats for a solid, opaque finish. Be careful to keep a clean line where the red meets the cream underside. -
Add the spots:
Using a small round brush, paint irregular white circles on the red caps. Vary the sizes—some large, some tiny dots—for a more natural, playful appearance. -
Paint the faces:
Using your finest liner brush or a toothpick, paint two tiny black dots for eyes and a small curved line for a smile on each stem. Position the features low on the stem for maximum cuteness. -
Add rosy cheeks:
Dip a ball stylus or the end of a paintbrush handle into pink paint. Dot it gently just outside the smile lines to give them blushing cheeks. -
Seal the work:
Once the paint is completely dry, brush on a layer of matte varnish to protect the clay and unify the finish without making it too shiny.
Make It A Trio
Make a third mushroom that is tall and skinny to create a visually interesting group. Paint its cap a contrasting color, like mustard yellow or sage green, for variety.
Arranging these two little friends together creates an instant storybook atmosphere on your desk or windowsill

TRACK YOUR CERAMIC JOURNEY
Capture glaze tests, firing details, and creative progress—all in one simple printable. Make your projects easier to repeat and improve.
Frog Characters Sitting Like Little Buddies
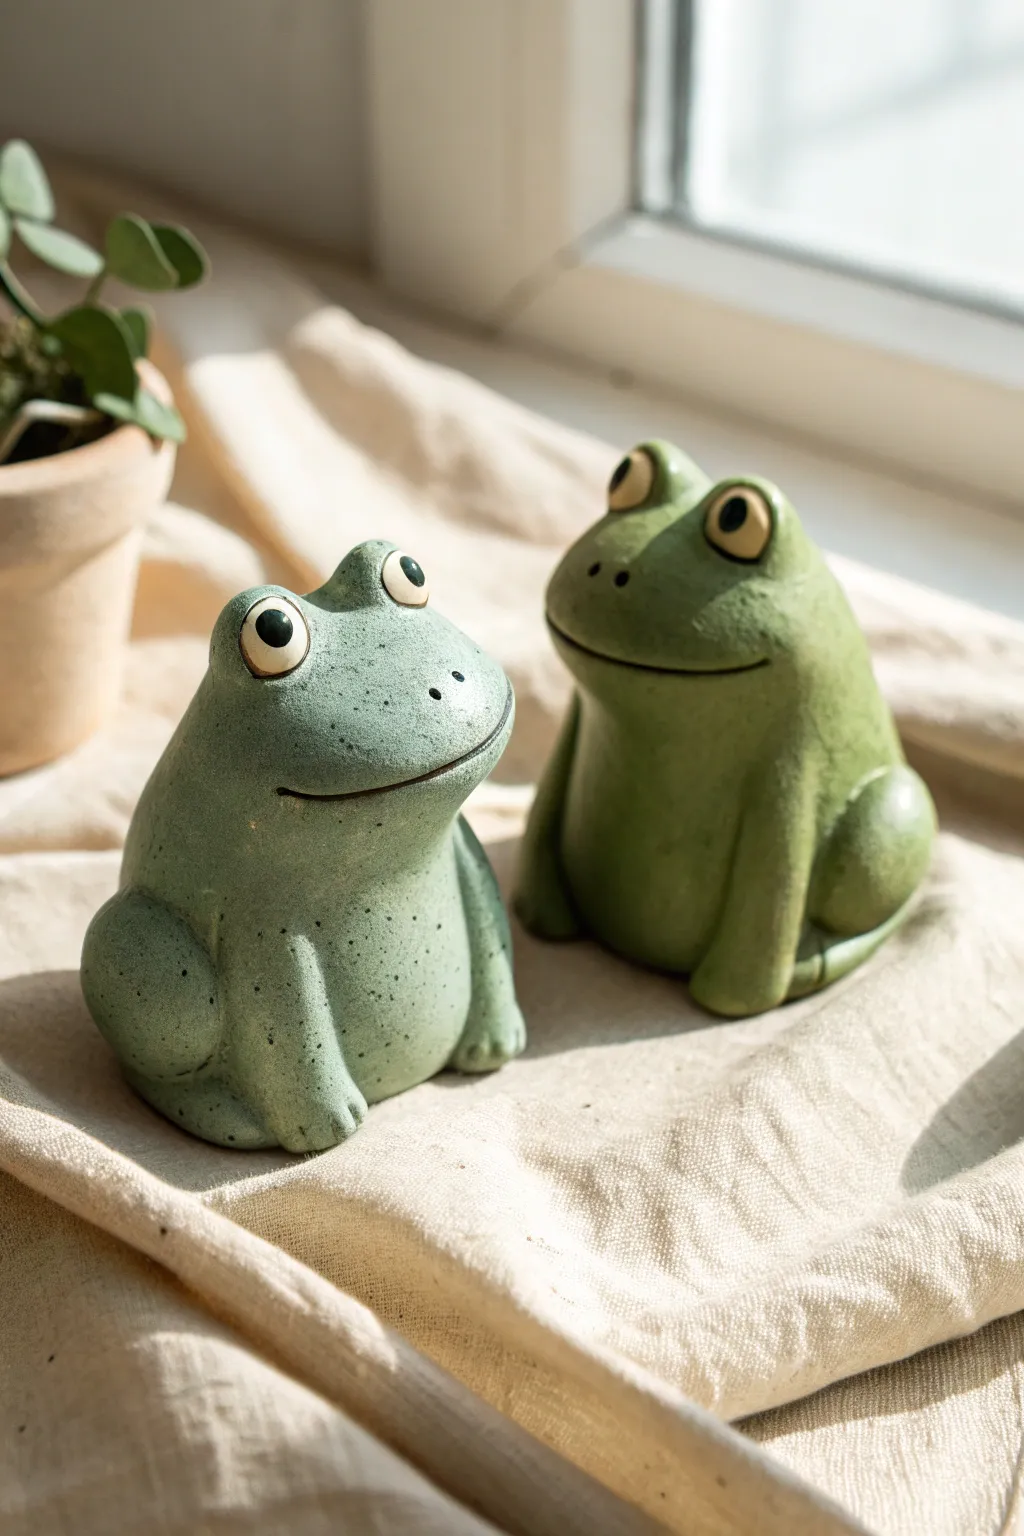
These charming green frog figurines sit with a calm, Buddha-like presence that adds a touch of whimsy to any windowsill or shelf. Their textured, stone-like finish and expressive wide eyes make them feel like friendly garden guardians crafted from earth.
Step-by-Step Tutorial
Materials
- Air-dry clay or polymer clay (white or light grey)
- Acrylic paints (moss green, sage green, cream, white, black)
- Clay sculpting tools (ball stylus, needle tool)
- Found texture tool (old toothbrush or stiff bristle brush)
- Water and small sponge for smoothing
- Matte spray varnish or sealant
- Fine grit sandpaper
Step 1: Sculpting the Base Form
-
Create the body mass:
Start with a lime-sized ball of clay for the main body. Roll it smooth and then gently taper the top half slightly to form a pear shape, flattening the bottom so it sits stable and upright on your work surface. -
Form the head shape:
Instead of adding a separate head, sculpt the head directly from the top of your pear shape. Gently press your thumbs into the sides to distinguish a rounded jawline, keeping the transition from neck to body soft and nearly invisible. -
Add the legs:
Roll two thick, sausage-like coils for the legs. Attach them vertically along the sides of the body, bending them at the bottom to form small feet that rest flat. Blend the clay at the shoulders so the limbs look integrated, not just stuck on. -
Add the thigh muscles:
For that classic sitting frog posture, add rounded, teardrop-shaped pieces of clay to the lower back sides of the body. Blend the edges seamless to create the look of folded hind legs tucked against the torso.
Cracked Clay?
If small cracks appear as your air-dry clay cures, mix a tiny amount of fresh clay with water to make a paste (slip) and fill the cracks, then smooth over.
Step 2: Adding Facial Features
-
Position the eyes:
Roll two small spheres of clay for the eye sockets. Attach them to the very top of the head, spacing them apart slightly. Blend the bottom edges of these spheres into the head so they look like bumps rising from the skull. -
Define the mouth:
Use a needle tool or a thin clay knife to slice a wide, gentle smile across the face. Curve the cut upwards at the ends to give them a happy expression. I find that making the cut slightly deeper than you think is necessary helps the smile remain visible after painting. -
Refine the expression:
Use a smoothing tool or your finger with a little water to soften the sharp edges of the mouth cut, creating a gentle lip line. -
Add nostril details:
Use a small ball stylus or the back of a paintbrush to press two tiny indentations just above the mouth line for the nostrils.
Glazed Look
To make them look like high-fire ceramic, use a high-gloss varnish on just the eyes after your matte sealant dries. The contrast adds life!
Step 3: Texturing and Finishing
-
Create stone texture:
Before the clay hardens, take an old toothbrush or a stiff bristle brush and gently tap it all over the frog’s surface. This stippling creates a porous, stone-like texture that catches the paint beautifully later. -
Smooth the eyes:
Be careful to keep the actual eyeballs smooth. Use a wet finger to polish the rounded protruding parts of the eyes so they contrast with the textured body. -
Dry thoroughly:
Allow your frogs to dry completely according to your clay’s instructions. If using air-dry clay, this may take 24-48 hours. Sand any rough bottom edges if needed once dry.
Step 4: Painting the Frogs
-
Apply base coat:
Paint the entire frog in a solid coat of sage or moss green acrylic paint. You may need two coats to get full opaque coverage. -
Add speckling:
Mix a darker green or brownish-grey paint with a little water. Dip a toothbrush into this mix and flick the bristles with your thumb to spray fine speckles over the frog’s body. This mimics the natural pattern of frog skin and ceramic glaze. -
Paint the eyes:
Paint the protruding eye bumps a creamy off-white. Let this dry completely before adding the pupils. -
Detail the pupils:
Using a fine detail brush or a dotting tool, place a solid black circle in the center of each cream eye. Keeping the pupils large makes them look friendlier and cuter. -
Seal the work:
Once all paint is bone dry, finish with a matte spray varnish to protect the paint and unifoify the sheen, giving it that soft, ceramic appearance.
Set your little green friends near a plant to enjoy their company
Personified Fruit Characters With Tiny Feet

Brighten up your desk or shelf with this adorable troop of personified fruit characters made from polymer clay. Featuring a sweet apple, a plucky strawberry, a sunny lemon, and a tall banana, each figure has its own unique texture and a charming, tiny smile.
Step-by-Step
Materials
- Polymer clay (Red, yellow, pink, pale yellow, brown, green)
- Black clay or acrylic paint for eyes
- Pink soft pastel chalks (for cheeks)
- Needle sculpting tool or toothpick
- Ball stylus tool (small)
- Soft paintbrush
- Foil (for inner armature if desired)
- Matte varnish or glaze
- Oven for baking
Step 1: Shaping the Bases
-
Prep the clay:
Begin by conditioning your clay thoroughly until it’s soft and pliable. For each fruit, roll a smooth ball of clay about the size of a golf ball or a large walnut. -
Form the apple:
Take the red ball and gently tap the bottom on your work surface to flatten it slightly. Press your thumb into the top center to create the dip where the stem will go. -
Shape the strawberry:
Using the pink clay, roll a ball and then pinch the top slightly inward. We want a rounded, squat shape rather than a pointy strawberry to keep it looking cute and chubby. -
Sculpt the banana:
Roll yellow clay into a thick log. Curve it gently into a crescent moon shape. Taper the top end distinctly and flatten the bottom end so it stands upright securely. -
Create the lemon:
With pale yellow clay, form a rounded shape similar to the apple but slightly more oblong. Pinch the top center just a tiny bit to suggest the fruit’s natural anatomy.
Flattening Bottoms?
If your curved fruits (like the banana) keep tipping over, bake them on a bed of baking soda or polyester batting so they hold their shape, then sand the bottom flat after baking.
Step 2: Texturing and Details
-
Texture the apple:
The apple has a subtle speckled texture. Take an old toothbrush or a stiff brush and very lightly tap it over the red surface to break up the smoothness. -
Seed the strawberry:
Using your needle tool or a small stylus, press small, elongated indentations all over the pink strawberry body to simulate seeds. Try to space them evenly. -
Adding banana details:
Add a small cap of brown clay to the very top tip of the banana. Using a needle tool, scratch subtle vertical lines down the sides to mimic the peel’s ridges. -
Dot the banana peel:
Take extremely tiny specks of brown clay and press them randomly onto the banana skin to look like natural ripening spots.
Step 3: Stems and Leaves
-
Make the stems:
Roll thin snakes of brown clay. Cut short segments—about half an inch long—and insert them into the top indentations of the apple, lemon, and strawberry. -
Leaf preparation:
Roll out a small sheet of green clay. Using a craft knife or small cutter, cut out teardrop shapes for the leaves. The apple needs a single leaf, while the strawberry gets a cluster of four. -
Leaf detailing:
Press a central vein into each leaf using a knife edge. Gently curl the tips of the leaves upward for a dynamic, natural look. -
Attach the greenery:
Press the single leaf next to the apple stem. For the strawberry, arrange the four leaves in a star pattern around the central stem.
Adding Texture
For realistic skin texture on the lemon and orange, gently roll the unbaked clay ball over a piece of fine grit sandpaper properly washed. It creates a perfect pithy look.
Step 4: The Kawaii Faces
-
Mark eye sockets:
Decide where the faces will go; keep them low on the fruit body for maximum cuteness. Use a ball tool to press shallow indents for the eyes. -
Insert eyes:
Roll tiny balls of black clay and press them into the sockets. Alternatively, you can bake the figures first and paint the eyes on later. -
Sculpt the smiles:
Use the edge of a small straw or a curved sculpting tool to press a tiny ‘U’ shape between the eyes. Keep the mouth very small. -
Blush application:
Scrape a little pink pastel chalk into a powder. Use a soft, dry brush to gently dust rosy cheeks right under the eyes before baking. -
Baking:
Bake your fruit friends according to your clay manufacturer’s instructions, usually at 275°F (130°C) for about 15-20 minutes depending on thickness. -
Finishing touches:
Once cool, use a white paint pen or a toothpick with white paint to add a tiny reflection dot to the eyes. This brings them to life.
Arranging these little characters on a tray creates an instant conversation piece for your home
Vegetable Characters That Look Like A Mini Gang
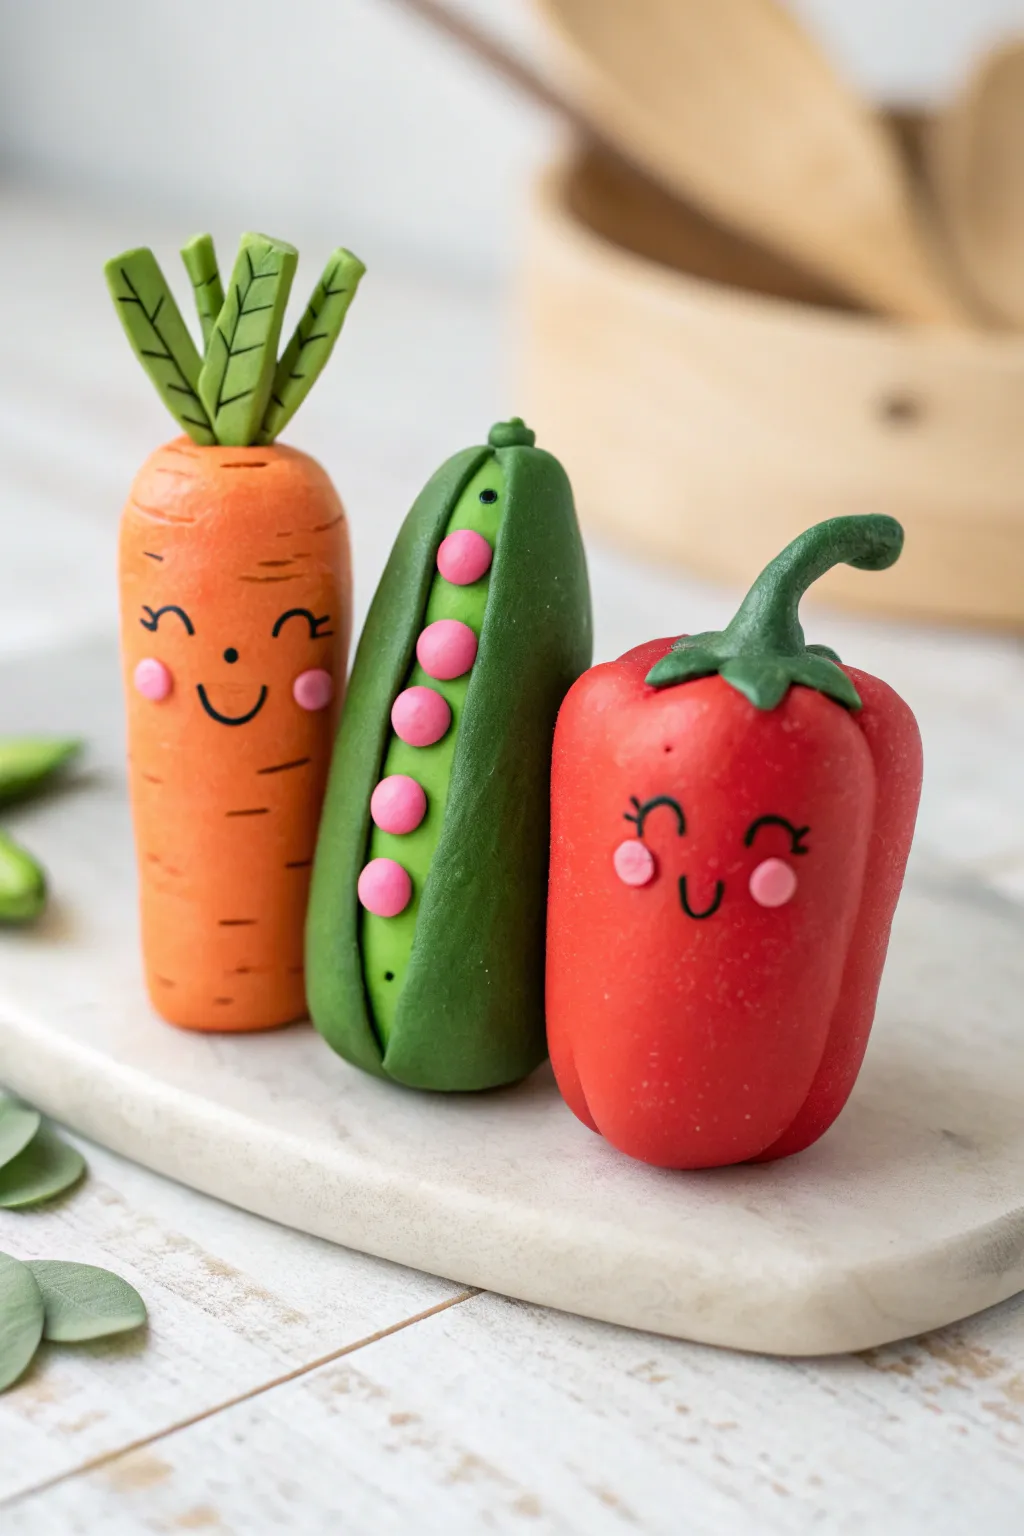
This charming project features three vegetable buddies—a cheerful carrot, a cozy pea pod, and a sweet pepper—that look like they’re ready to start a mini garden club. Their simple shapes and expressive faces make them perfect for beginner sculptors looking to add character to their clay work.
Step-by-Step Tutorial
Materials
- Polymer clay in orange, leaf green, sweet pea green, red, pink, and black
- Basic sculpting tools (needle tool, ball stylus)
- Clay roller or rolling pin
- Blade or craft knife
- Fine-point black permanent marker (optional alternatives for details)
- Oven for baking (if using polymer clay)
Step 1: The Cheerful Carrot
-
Shape the Base:
Start by conditioning a chunk of orange clay until it is soft and pliable. Roll it into a smooth cylinder that is slightly wider at the top and tapers gently toward the bottom to form the classic carrot shape. -
Add Texture:
Using a knife tool or a needle, gently press horizontal lines randomly up and down the carrot’s body to create realistic vegetable ridges. -
Create the Greenery:
Take your lighter leaf green clay and roll out four small, thick logs. Flatten them slightly and use your knife tool to score a central vein and diagonal leaf lines on each one. -
Assemble the Top:
Press the four leaves together at their bases to form a bunch, then firmly attach this cluster to the center of the carrot’s flat top, smoothing the seam with a small blending tool if needed.
Clean Clay Pro-Tip
Use baby wipes or hand sanitizer to clean your hands when switching clay colors. Red and green pigment can easily stain the orange carrot or the light pink cheeks.
Step 2: The Cozy Pea Pod
-
Form the Pod:
Condition dark green clay and roll it into a thick log. Flatten it gently so it becomes an oval shape, then use your fingers to curve the ends inward, creating a canoe-like boat shape. -
Refine the Opening:
Use a modeling tool to deepen the center groove of the pod, ensuring the walls stand up tall enough to ‘hug’ the peas inside. -
Roll the Peas:
Using a lighter, spring-green clay (or mix green with a little white), roll five small, uniform spheres. I find rolling them all at once ensures they are the same size before attaching. -
Fill the Pod:
Place the peas in a vertical row inside the dark green pod, pressing them gently so they adhere to the back wall and to each other. -
Add the Cap:
Create a tiny spherical cap from the dark green clay and attach it to the very top tip of the pod to finish the stem look.
Troubleshooting: Fingerprints
If you notice fingerprints on your smooth veggies before baking, lightly brush them with a tiny amount of baby oil or clay softener to smooth the surface perfectly.
Step 3: The Sweet Pepper and Finishing Touches
-
Sculpt the Pepper Body:
Roll a ball of red clay into a stout, rounded rectangle. Use the side of a tool or your finger to press vertical indentations around the shape to create the lobed sections of a bell pepper. -
Make the Stem:
Fashion a stem from dark green clay by making a small curved hook shape with a flattened base that looks like a star or flower calyx. -
Attach the Stem:
Press the green star-shaped base onto the top of the red pepper, smoothing the edges down so it grips the lobes. -
Add Cheeky Details:
For all three veggies, roll tiny, flat circles of pink clay and press them onto the ‘face’ area to create rosy cheeks. -
Bake:
Bake your clay creations according to the manufacturer’s instructions for your specific brand of polymer clay. Let them cool completely. -
Draw the Faces:
Once cool, use a fine-point black marker or black acrylic paint with a tiny brush to draw on the eyes and smiles. For the pea pod, I like adding two tiny black clay dots for eyes before baking, but drawing them works too.
Now you have a trio of healthy, happy friends to brighten up your desk or shelf
Cactus Characters In Tiny Pots
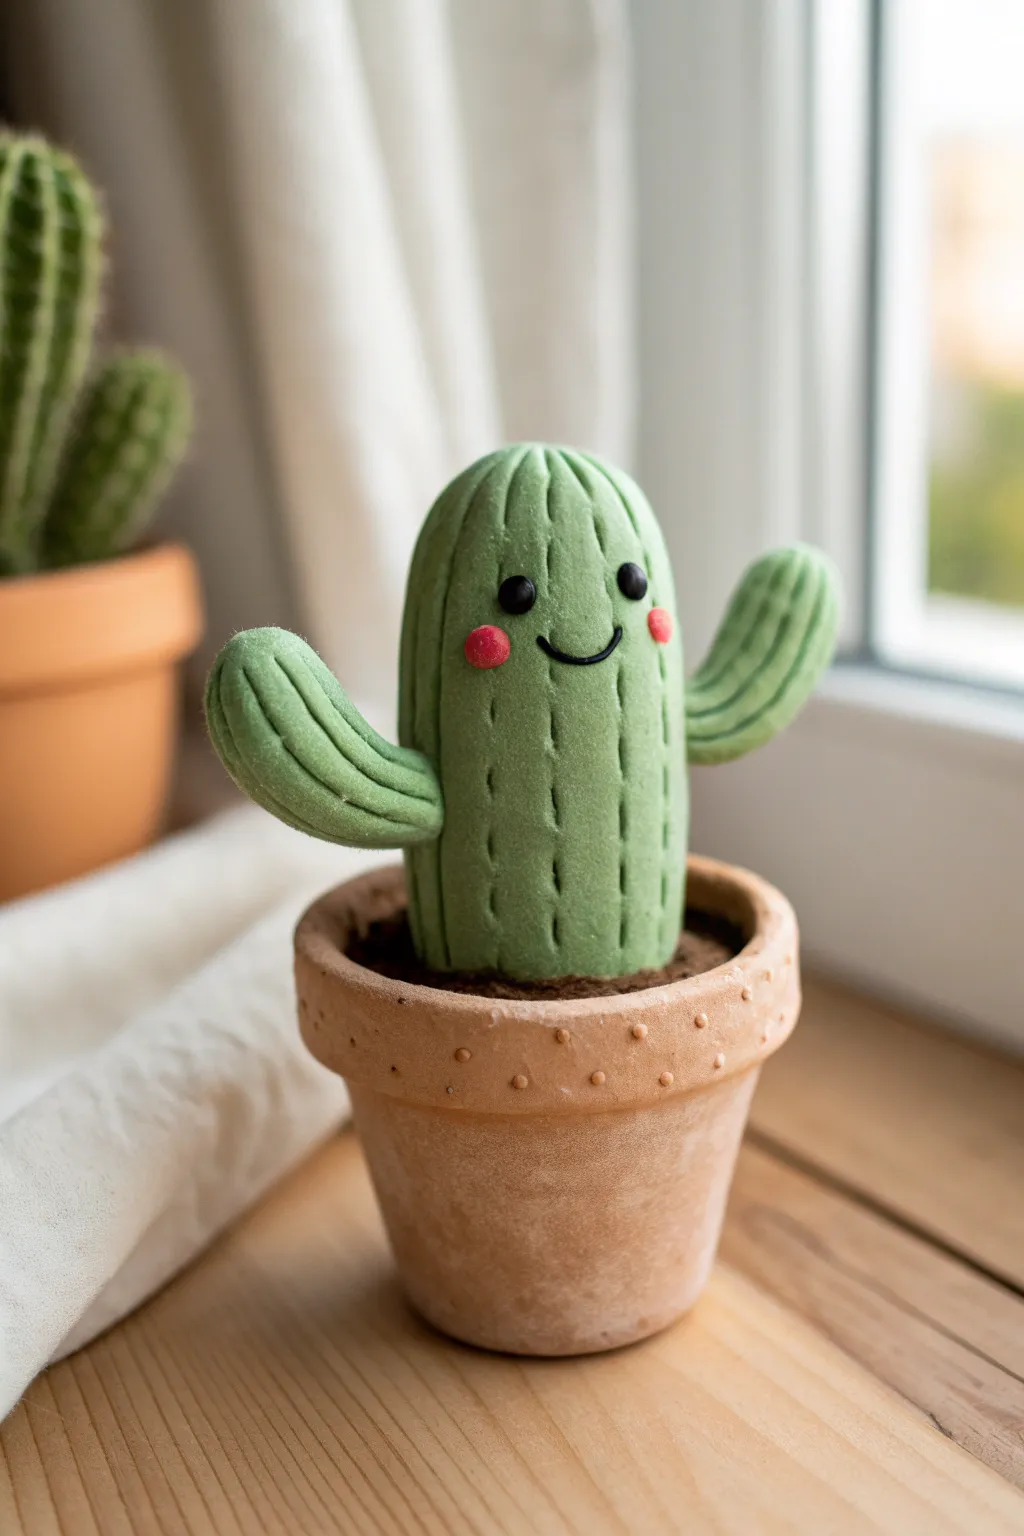
This adorable little cactus friend brings all the desert charm without any of the prickliness. With its happy smile, textured ribs, and miniature terracotta pot, it makes for a perfect desk companion or a thoughtful handmade gift.
How-To Guide
Materials
- Polymer clay (Sage Green, Terra Cotta, Dark Brown)
- Small amounts of Black and Pink clay
- Clay sculpting tools or a simple toothpick
- Craft knife or plastic blade
- Rolling pin or acrylic roller
- Translucent liquid clay or bake-and-bond (optional)
- Texturing tool (stiff brush or toothbrush)
- Oven and baking sheet
Step 1: Sculpting the Pot
-
Form the base:
Start with a ball of terra cotta colored clay roughly the size of a walnut. Flatten the bottom slightly so it sits stable on your work surface, then use your thumb to create a deep indentation in the top, forming a cup shape. -
Shape the rim:
Roll a snake of terra cotta clay, flatten it slightly into a strip, and wrap it around the top edge of your pot. Smooth the seam where the ends meet so it looks like a continuous rim. -
Add rim details:
Using a small dotting tool or the tip of a dull pencil, gently press a row of small indents all around the rim of the pot for a decorative texture. -
Antique the finish:
To get that weathered look shown in the photo, you can lightly dust the raw clay with white chalk pastel powder or cornstarch before handling it too much, which settles into the crevices. -
Fill with soil:
Take your dark brown clay and flatten it into a disk that fits just inside the pot rim. Press it down roughly so it sits a few millimeters below the edge. -
Texture the dirt:
Use a stiff brush, a crumpled ball of foil, or an old toothbrush to tap vigorously against the brown clay, giving it a realistic, loose soil texture.
Pro Tip: Seamless Blending
If your cactus arms keep drooping before baking, prop them up with small balls of aluminum foil or paper towel to hold the pose while they are in the oven.
Step 2: Creating the Cactus Body
-
Roll the main body:
Condition your sage green clay and roll it into a smooth, thick cylinder. Round off the top into a dome shape so it looks like a classic cactus silhouette. -
Create the ribs:
Using a needle tool or the back of a craft knife, press vertical lines running from the very top center down to the bottom. Space them evenly around the cylinder to create the ribbed sections. -
Add stitching texture:
Along each vertical rib line, gently press small, short horizontal marks. This mimics spines without being sharp and gives it a charming ‘stitched’ fabric look. -
Form the arms:
Roll two smaller cylinders of green clay for the arms. Curve them slightly upwards so they look like they are waving. -
Texture the arms:
Just like the body, add vertical lines and the small ‘stitch’ marks to the arms before attaching them. It is much harder to texture them once they are on the body. -
Attach the arms:
Press the arms onto the sides of the main body. I find using a tiny drop of liquid clay here helps them bond securely during baking. Blend the clay slightly at the connection point if needed.
Step 3: Bringing it to Life
-
Place in the pot:
Center your cactus body on top of the brown soil. Press it down firmly to ensure a good connection with the base. -
Make the eyes:
Roll two absolutely tiny balls of black clay. Flatten them slightly and press them onto the upper third of the cactus face. Space them somewhat wide apart for maximum cuteness. -
Sculpt the smile:
Roll an incredibly thin thread of black clay. Curve it into a ‘U’ shape and gently press it onto the face between the eyes using a needle tool. -
Add rosy cheeks:
Take two small bits of pink clay, roll them into balls, and flatten them onto the cactus face just below and to the outside of the eyes. -
Final inspection:
Check your work from all angles. Ensure the arms are lifted evenly and the face is symmetrical before heading to the oven. -
Bake:
Bake the project according to your clay manufacturer’s instructions (usually 275°F/130°C for 15-30 minutes). Let it cool completely before handling.
Troubleshooting: Lint Magnet
Light-colored clay picks up dust easily. Keep a scrap piece of ‘garbage clay’ nearby and roll it in your hands periodically to pull off dust before touching your green clay.
Now you have a perpetual plant pal that never needs watering and stays happy forever.
Cloud And Raindrop Characters As A Matched Set
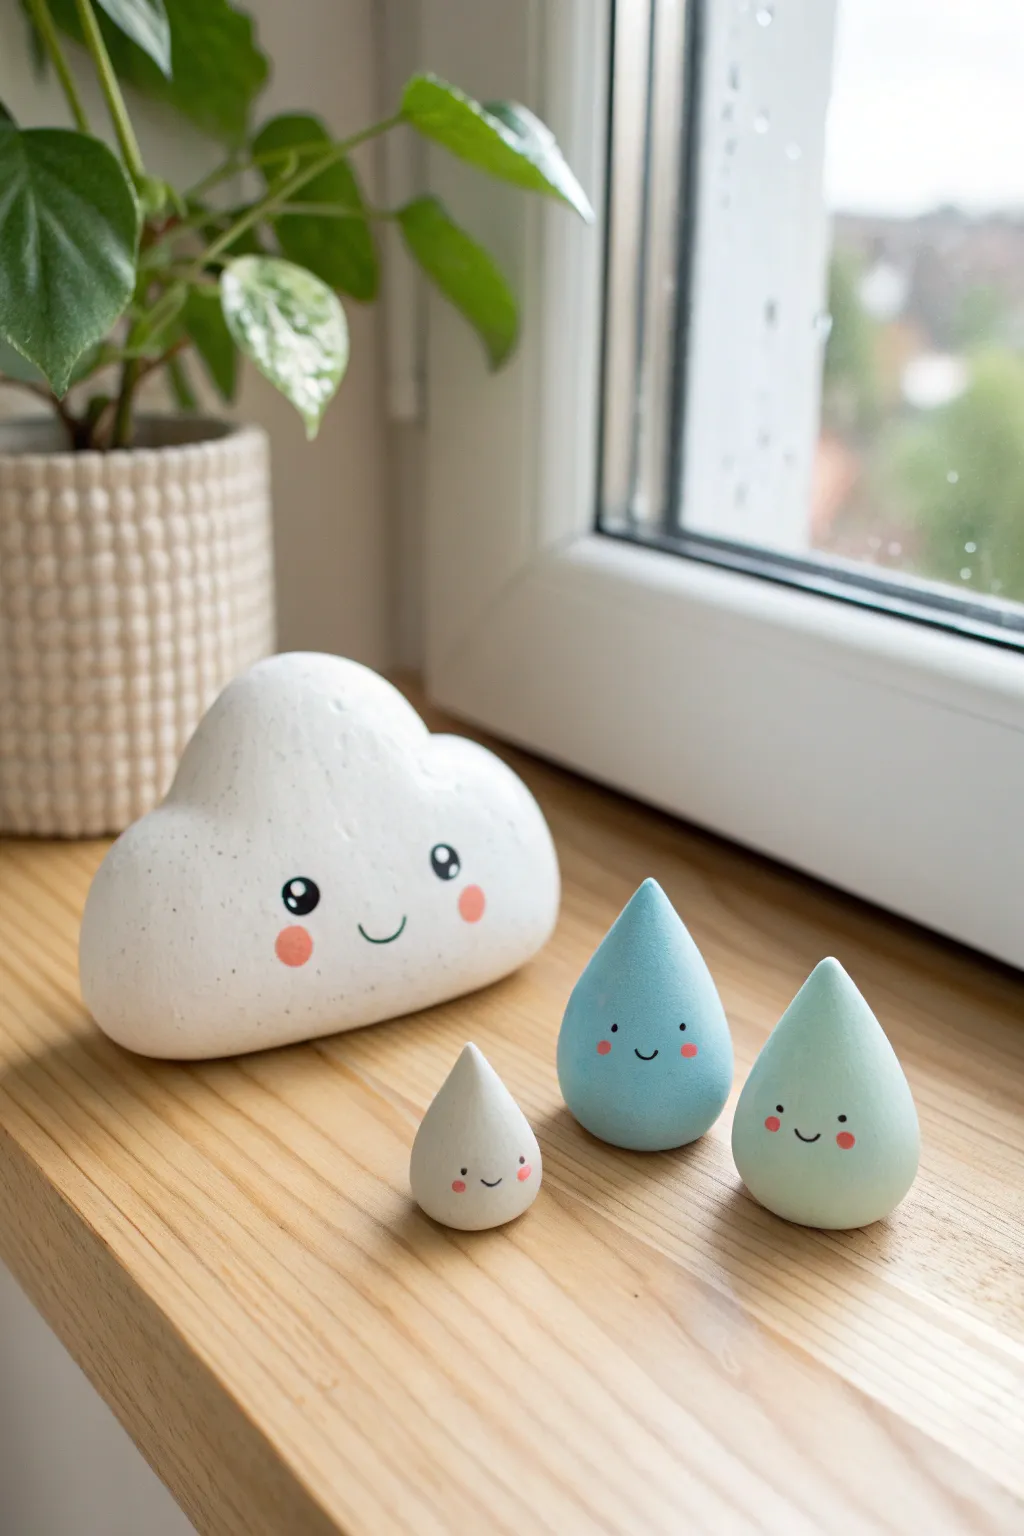
Brighten up any windowsill with this adorable set featuring a friendly fluff-ball cloud and its three colorful raindrop companions. The smooth, matte finish and simple kawaii faces make these easy-to-shape clay characters instantly charming.
Detailed Instructions
Materials
- White air-dry clay or polymer clay
- Acrylic paints (White, Baby Blue, Mint/Teal, Light Grey, Pink, Black)
- Matte sealant or varnish
- Fine grit sandpaper
- Small rolling pin
- Detail paintbrush (0 or 00 size)
- Medium flat paintbrush
- Dotting tool or toothpick
- Cup of water
- Aluminum foil (for armature core)
Step 1: Shaping the Characters
-
Create the cloud core:
Crumple a piece of aluminum foil into a rough cloud shape—a flattened oval with a slight hump on top. This saves clay and keeps the figurine lightweight. -
Cover the cloud:
Roll out a sheet of white clay about 1/4 inch thick. Wrap it entirely around the foil core, smoothing the seams together with a bit of water or blending tool until invisible. -
Refine the puff:
Gently massage the clay to define the cloud’s shape. You want a flat bottom for stability, rounded sides, and three distinct ‘bumps’ on top, with the center one being the largest. -
Form the large raindrop:
Take a walnut-sized ball of clay. Roll it into a smooth sphere between your palms, then taper one end into a point to create the classic tear-drop shape. Tap the bottom gently on your work surface to flatten it so it stands upright. -
Make the smaller drops:
Repeat the tear-drop process to make two more drops in graduating sizes—one slightly smaller than the first, and one tiny baby drop. -
Smooth everything out:
Dip your finger in a tiny bit of water and run it over all surfaces to glaze over any fingerprints or cracks. Let all pieces dry completely (24-48 hours for air-dry clay) or bake according to polymer clay instructions. -
Sand for perfection:
Once fully cured, use fine-grit sandpaper to gently buff the surfaces. This step is crucial for getting that professional, matte ceramic look.
Cracks Appearing?
If air-dry clay cracks while drying, mix a small amount of fresh clay with water to make a paste (slip). Fill the cracks, smooth over, and let dry again.
Step 2: Painting and Details
-
Base coat the cloud:
Paint the entire cloud figurine with matte white acrylic paint. It might need two coats to look solid and crisp. -
Color the raindrops:
Mix three distinct shades for your drops: a soft baby blue, a pale minty teal, and a very light grey (almost white). Paint one drop each color. -
Apply second coats:
Allow the first layer to dry, then apply a second coat to the raindrops to ensure the color is opaque and streak-free. -
Draft the faces:
I like to lightly sketch the facial features with a pencil first to ensure the eyes are symmetrical and placed low on the form for maximum cuteness. -
Paint the eyes:
Using black paint and your smallest detail brush (or the back of a paintbrush handle), create two solid black ovals for eyes. On the cloud, add a tiny white reflection dot in each black oval once dry. -
Add the smiles:
With the finest brush tip and thinned black paint, draw a small, U-shaped smile between the eyes. -
Rosy cheeks:
Dip a dotting tool or a Q-tip into pink paint. Dab modest pink circles just below and slightly outside the eyes on all four characters. -
Seal the work:
Finish by applying a coat of matte varnish over all figures. Avoid glossy finishes, as the soft matte texture is key to their aesthetic.
Smoother Cheeks
For soft, diffused cheeks instead of solid dots, use real powder blush or pastel chalk dust applied with a dry Q-tip before you seal the clay.
Set your little weather family on a shelf and enjoy the cozy atmosphere they bring to the room
Undersea Characters With Big Eyes And Simple Fins
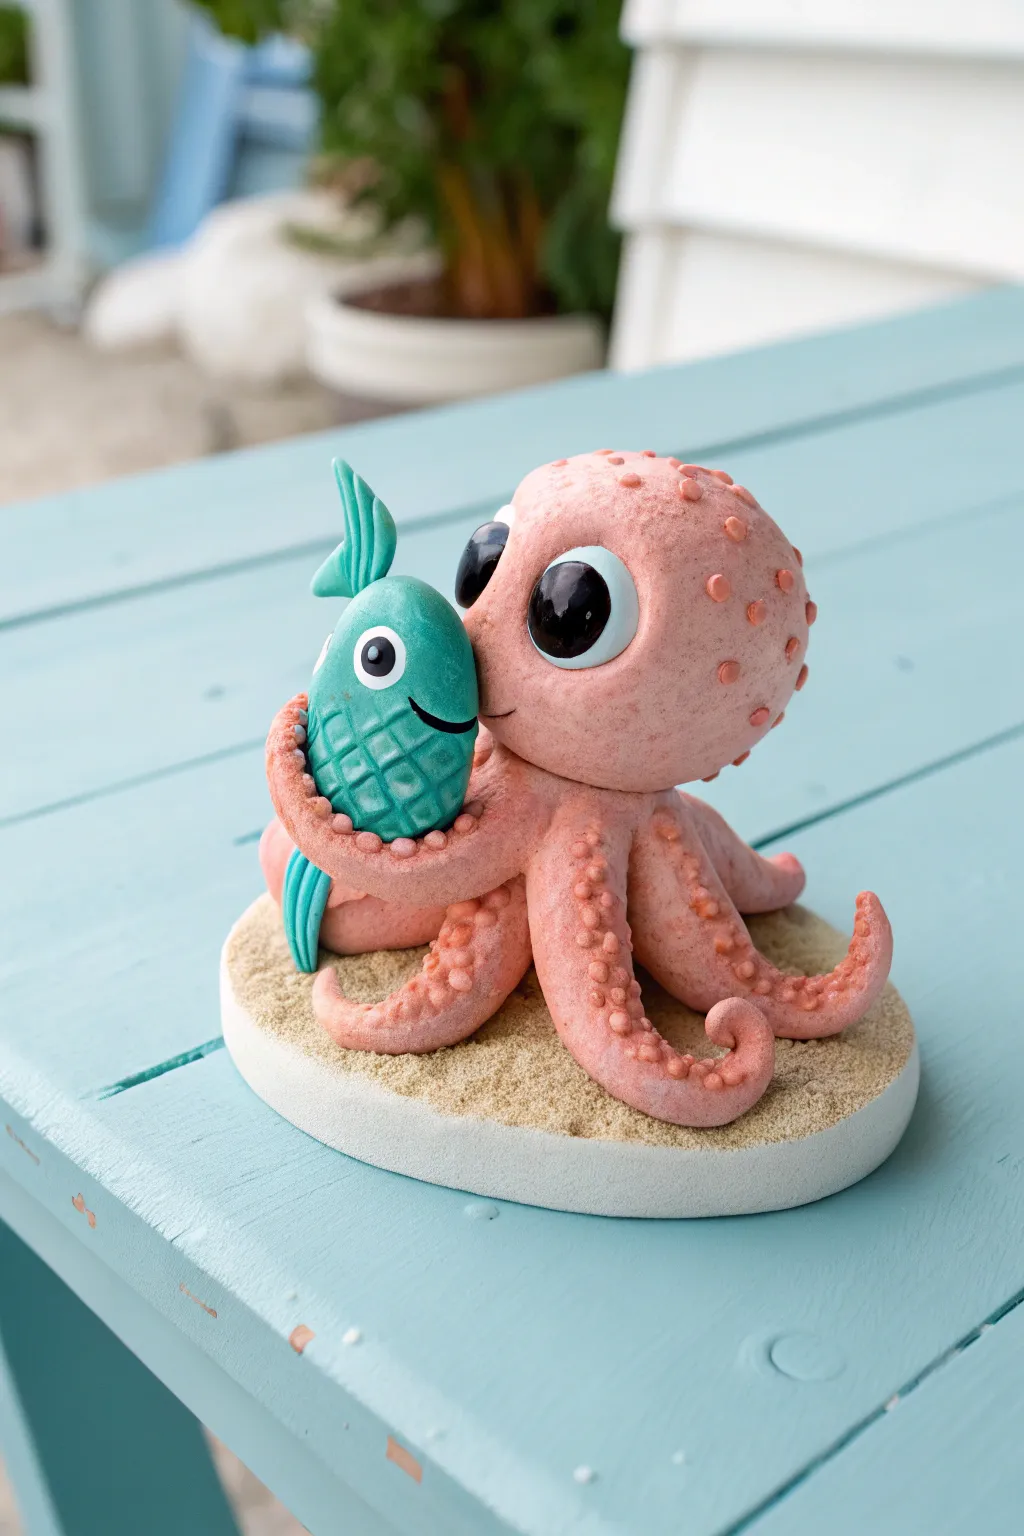
This adorable polymer clay sculpture features a textured pink octopus giving a friendly squeeze to a teal fish, both sporting large, expressive eyes. Set on a sandy-textured base, this project is perfect for capturing the sweeter side of undersea life.
Step-by-Step
Materials
- Polymer clay (Soft pink, teal, white, black, beige)
- Textured sand or fine craft sand
- Liquid polymer clay or bake-and-bond
- Ball stylus tools (various sizes)
- Needle tool
- Scalpel or craft knife
- Acrylic rolling pin
- Gloss glaze (optional)
- Small round or oval cutter (for base)
Step 1: Setting the Scene
-
Form the Base:
Condition your beige clay and roll it out into an oval slab about 1/4 inch thick. Use a cutter or your knife to trim the edges for a clean, rounded shape. -
Add Sandy Texture:
Brush a thin layer of liquid polymer clay onto the top of the base. Sprinkle craft sand generously over the adhesive, pressing it down gently so it sticks, encompassing the area where the figures will sit.
Sticky Situation?
If the heavy octopus head keeps sinking into the tentacles before baking, insert a small crumpled ball of aluminum foil or a toothpick into the center for internal structural support.
Step 2: Sculpting the Octopus
-
Create the Head:
Roll a large ball of pink clay for the head. It should be slightly oval-shaped. Gently texture the surface by tapping it with a stiff toothbrush or crumpled foil to give it that realistic, porous skin look. -
Form the Tentacles:
Roll out six to eight tapered logs of pink clay for the arms. They should be thicker at one end and curl up slightly at the tips. -
Attach Tentacles:
Arrange the tentacles in a radial pattern on the sandy base, pressing them together at the center. I like to pose a few lifting upwards to create movement. -
Add Suckers:
Roll tiny balls of lighter pink clay. Press these onto the undersides of the curling tentacles using a small ball tool to create the sucker indentations. -
Mount the Head:
Place the textured head onto the center of the tentacle cluster. Use a blending tool to smooth the seam at the neck so it looks like one continuous body. -
Add Head Details:
Add small, flattened dots of darker pink clay randomly over the top of the head for extra texture and color variation.
Step 3: Creating the Fish
-
Shape the Body:
Form a teardrop shape from teal clay. Flatten it slightly, but keep it plump. -
Create Scales:
Using the tip of a small drinking straw or a ‘U’ shaped tool, press a scale pattern into the teal clay, starting from the back and moving forward. -
Attach Fins and Tail:
Sculpt a small dorsal fin and a forked tail fin. Attach these to the body, adding simple lines with a needle tool for ribbed texture. -
Position the Friends:
Place the fish vertically against the octopus’s side. Carefully wrap two of the octopus tentacles around the fish to create the hugging gesture.
Ocean Sparkle
Mix a tiny amount of translucent or pearl mica powder into the teal clay before sculpting the fish. This gives the scales a subtle, shimmering effect that mimics real fish scales.
Step 4: Bringing Them to Life
-
Make the Eye Sockets:
Use a large ball tool to press deep sockets into both the octopus and the fish heads. -
Insert Whites:
Fill the sockets with white clay balls, flattening them so they fill the space but remain rounded. -
Add Pupils:
Press smaller black clay flat circles onto the white eyes. Add tiny white specks for ‘catchlights’ to make the expressions cute and lively. -
Final Details:
Use a needle tool or clay shaper to press a simple, curved smile into both characters. -
Bake:
Bake the piece according to your clay manufacturer’s instructions (usually 275°F for 15-30 minutes per 1/4 inch thickness). -
Finish:
Once cooled, you can apply a coat of gloss glaze to the eyes to make them look wet and shiny.
Now you have a charming desktop companion that celebrates undersea friendship
Segmented Body Characters Built Like Stacked Beads
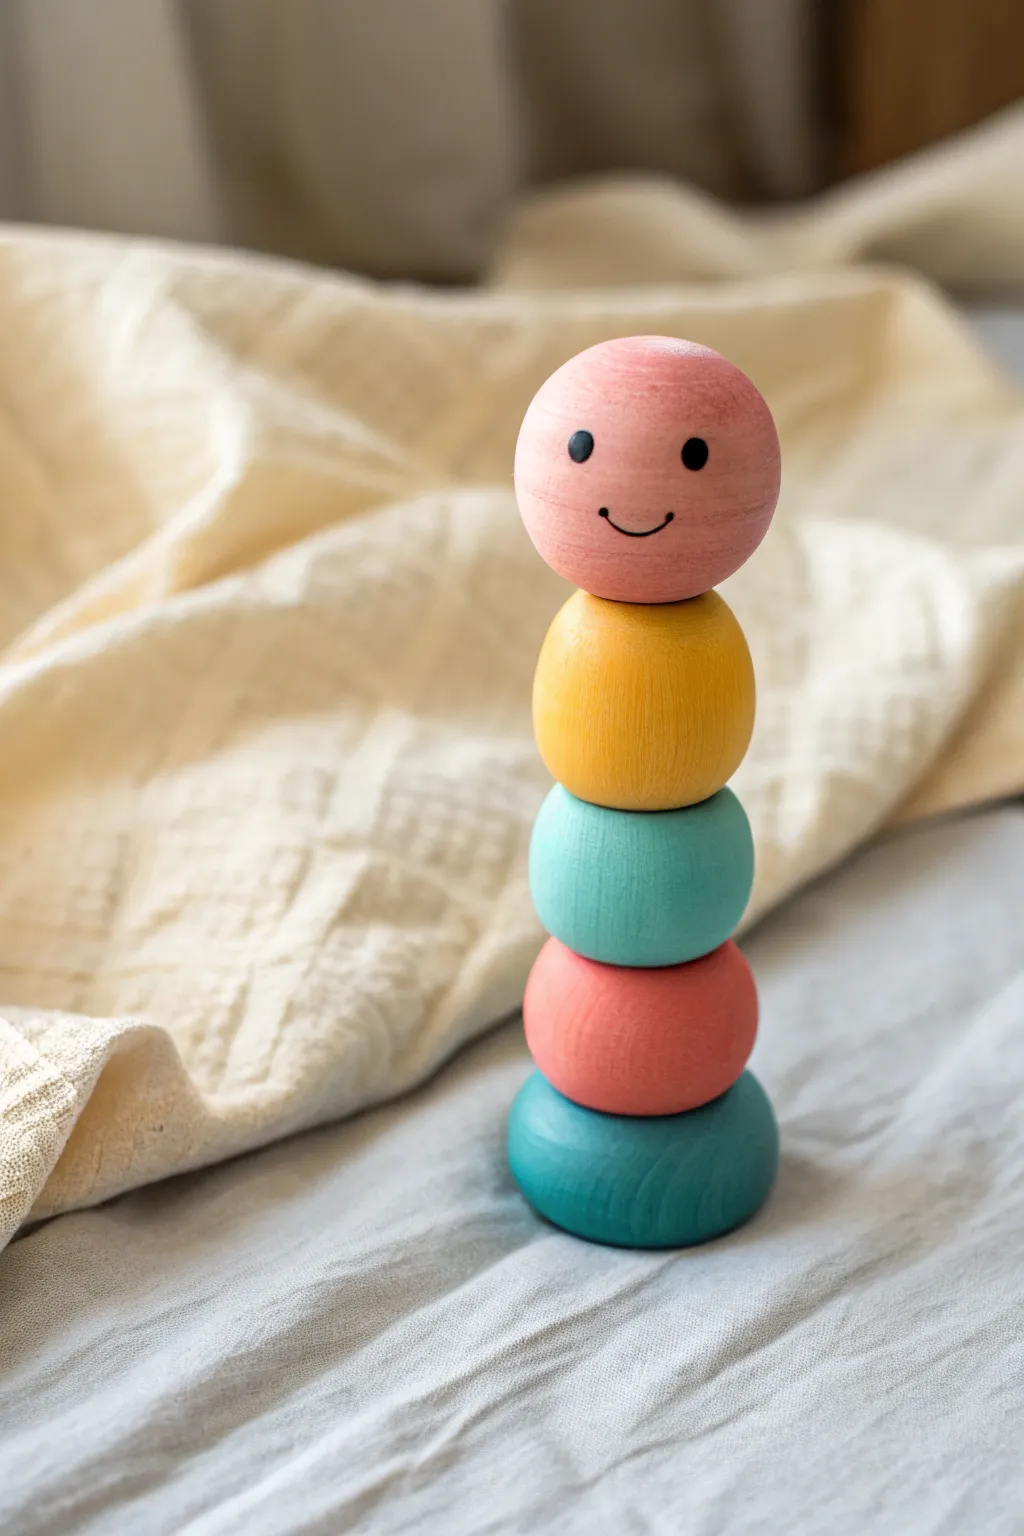
This charming, smiling character is built from a simple stack of colorful, segmented shapes that resemble large beads. Its gentle pastel tones and minimalist painted face make it a perfect, cheerful addition to a nursery shelf or a desk.
Step-by-Step Guide
Materials
- Air-dry clay or polymer clay (white)
- Acrylic paints (Soft pink, mustard yellow, mint green, coral, deep teal)
- Fine grit sandpaper (320-400 grit)
- Small round paintbrush
- Fine-point black permanent marker or detail brush
- Wooden skewer or dowel (optional, for structure)
- Matte varnish or sealant
- Rolling pin or smooth surface
Step 1: Shaping the Segments
-
Prepare your clay:
Start by conditioning your clay until it is soft and pliable. Divide the clay into five roughly equal portions, though you can vary them slightly to create a tapered look. -
Form the base:
Take one portion of clay and roll it into a smooth ball. Gently press it down onto your work surface to flatten it slightly into a thick disc shape; this will be the sturdy base (teal color). -
Create the middle sections:
Roll the next three portions into balls. Unlike the base, keep these mostly spherical, though flattening the top and bottom just a tiny bit helps them stack securely later. -
Shape the head:
Roll the final and smoothest ball for the head. Ensure this one is perfectly round, as it will be the focal point of the character. -
Optional structural support:
If you want extra stability, I find it helpful to carefully pierce a vertical hole through the center of each piece (except the top of the head) using a skewer while the clay is wet. -
Dry the components:
Allow all five pieces to dry completely according to your clay’s instructions. Air-dry clay may take 24-48 hours. -
Sand for smoothness:
Once dry, gently sand any fingerprints or irregularities off the surface of each ball. A smooth surface is key for that polished, wooden-toy look.
Wood Grain Hack
To mimic the wood grain texture seen in the photo, lightly brush stiff bristles through the wet paint or use a dry-brush technique with a slightly darker shade of the base color.
Step 2: Painting and Assembly
-
Paint the base:
Paint the bottom disc-like shape with a deep teal color. Apply thin, even layers to avoid brush strokes, letting each coat dry. -
Paint the second segment:
Paint the next segment up (the fourth one down in the stack) with a warm coral or salmon pink shade. -
Paint the middle segment:
Use a soft mint green or light teal for the middle segment. This creates a nice rhythm with the dark teal base. -
Paint the neck segment:
Paint the segment just below the head with a mustard or warm yellow tone. -
Paint the head:
Coat the top sphere in a very soft, pale pink. You may need an extra coat here to ensure it looks opaque and smooth. -
Draw the face:
Once the pink paint is fully cured, use a fine-point black marker or a very thin brush with black paint to add the features. Place two small dots for eyes wide apart, and a simple, small curved line for a smile. -
Stack and glue:
Apply a strong craft glue or superglue between the segments. Stack them in order: Deep Teal (base), Coral, Mint, Yellow, and finally the Pink head. -
Align the stack:
Before the glue sets, look at the figure from multiple angles to ensure it isn’t leaning too much to one side. -
Seal the project:
Finish by applying a coat of matte varnish over the entire sculpture. This protects the paint and unifies the sheen, making it look professionally finished.
Make it Wobble
Instead of gluing the pieces, string them on a thick elastic cord knotted at the top and bottom. This allows the character to bend and twist like a traditional wooden toy.
Now you have a sweet, colorful companion to brighten up your workspace
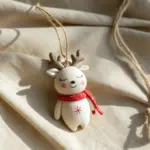
Costumed Animal Characters With Mini Hats
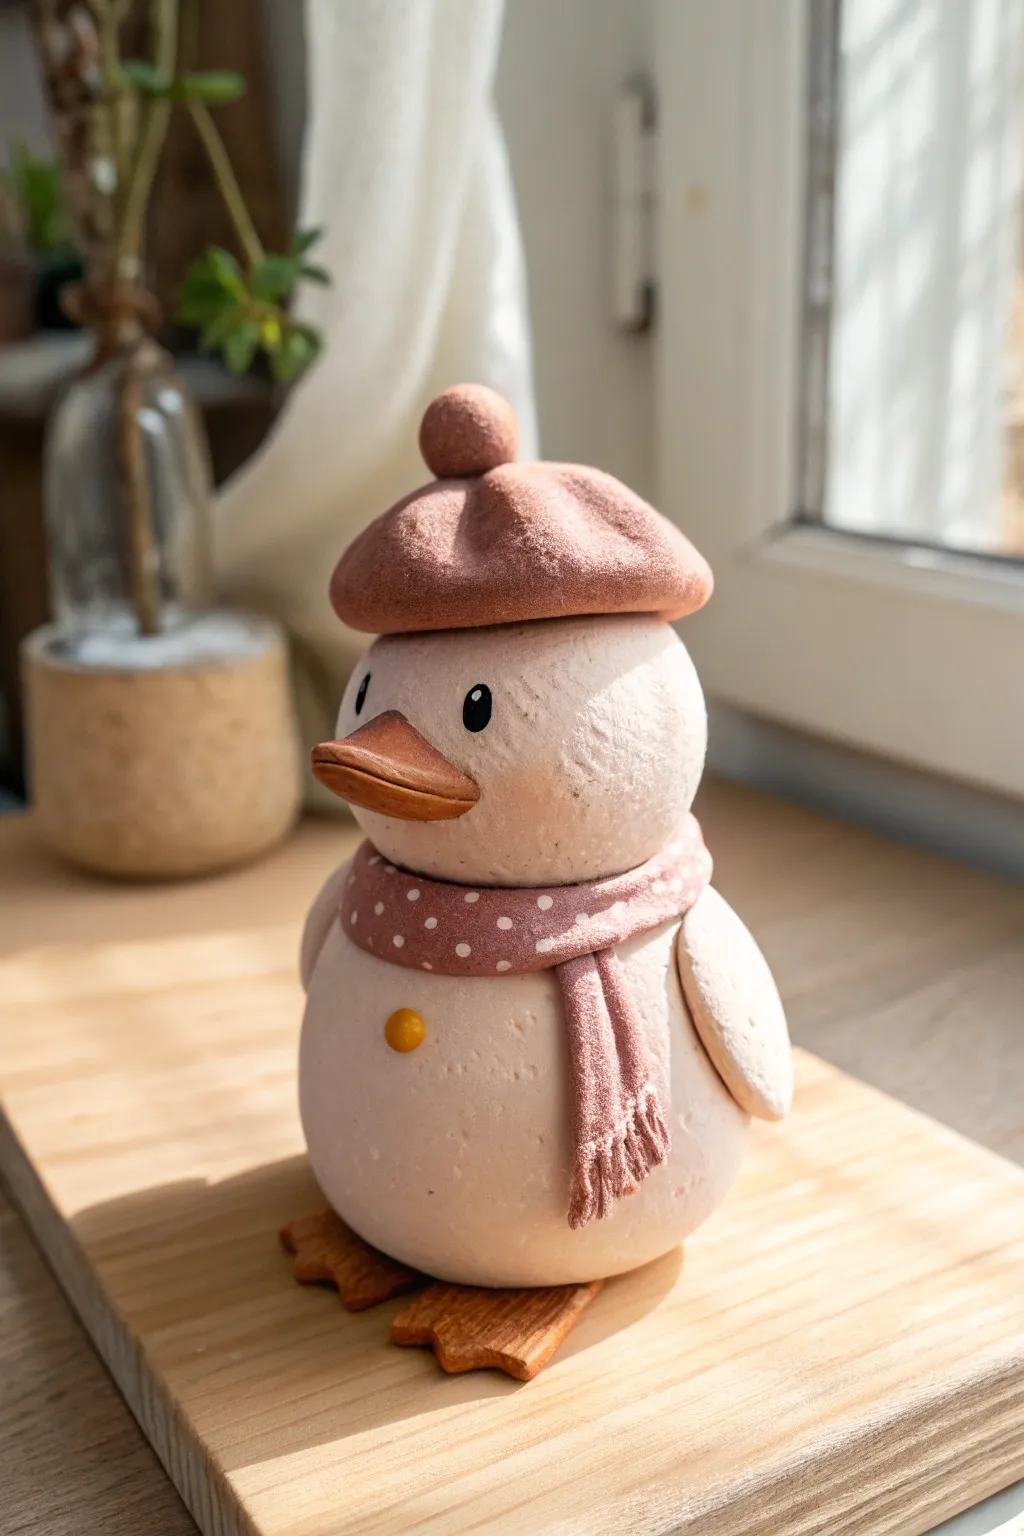
Bring a touch of French flair to your desk with this adorable clay duck character, complete with a cozy beret and polka-dot scarf. Crafted with simple shapes and soft textures, this little friend adds whimsical charm to any corner.
How-To Guide
Materials
- White polymer clay (or air-dry clay)
- Dusty rose or mauve polymer clay
- Terracotta or orange polymer clay
- Yellow clay (tiny amount)
- Black acrylic paint
- White acrylic paint
- Texture tools (toothbrush, needle tool, sculpting knife)
- Small dotting tool or toothpick
- Matte varnish (optional)
- Foil or armature wire (for core support)
Step 1: Sculpting the Body
-
Prepare the core:
Ball up a piece of aluminum foil into a tight sphere roughly the size of a golf ball to serve as the core. This keeps the sculpture lightweight and saves clay. -
Cover the body:
Condition your white clay until soft, then flatten a large piece and wrap it completely around your foil ball. Roll it in your palms until it is perfectly smooth and round. -
Add texture:
Using an old clean toothbrush or a texture sponge, gently tap the entire surface of the white ball to give it a slightly stony, organic texture rather than a shiny plastic look. -
Form the head:
Roll a second, slightly smaller ball of white clay for the head. Texture it to match the body, then gently press it onto the top of the body piece. You can insert a small piece of wire or toothpick between them for stability. -
Attach the wings:
Shape two flattened teardrops from white clay. Press one onto each side of the body, curving them slightly to hug the round form.
Head sliding off?
If the head feels heavy or won’t stay put, insert a toothpick or a crumpled piece of wire into the body, leaving half poking out, then impale the head onto this support.
Step 2: Adding Features
-
Sculpt the beak:
Take the terracotta clay and form a wide, flattened triangle. Use a knife tool to score a horizontal line across the front to separate the upper and lower beak. Round the edges so it looks soft. -
Attach the beak:
Press the beak firmly onto the center of the head face. Smooth the seams where it joins the face slightly with a small modeling tool. -
Make the feet:
Create two flat, webbed foot shapes using the terracotta clay. Place the duck body onto these feet, pressing down gently so it stands securely on its own. -
Add the button:
Roll a magnificent tiny ball of yellow clay and press it onto the center of the chest to create a single button detail.
Step 3: The Hat & Scarf
-
Create the beret base:
Roll a ball of dusty rose clay and flatten it into a thick pancake. Use your thumbs to gently dome the center while keeping the edges rounded. -
Finish the beret:
Place the beret on the duck’s head, tilting it slightly to one side for personality. Add a tiny ball of rose clay to the very top center. -
Texture the hat:
I like to use stiff fabric or a toothbrush to texture the hat, making it look like felted wool. -
Form the scarf strip:
Roll out a long, thin strip of dusty rose clay. Wrap it around the duck’s neck, covering the seam between head and body. -
Add scarf tails:
Cut a shorter strip of rose clay and tuck it under the main neck wrap so it hangs down. Use a knife to cut fringe into the bottom edge. -
Paint the dots:
Using a dotting tool or the tip of a toothpick, apply tiny white acrylic paint dots all over the scarf while the clay is still raw (if baking later) or wait until after baking depending on your paint type.
Natural Texture
To get that specific sandstone-like finish on the white clay, try mixing a tiny pinch of black pepper or dried used coffee grounds into the white clay before rolling.
Step 4: Finishing Touches
-
Paint the eyes:
Dip a medium-sized ball tool into black acrylic paint and stamp two solid black circles for eyes near the beak. -
Add eye highlights:
Once the black paint is dry, add a tiny speck of white paint to the upper right of each eye to bring the character to life. -
Bake or Dry:
If using polymer clay, bake according to the package instructions (usually 275°F/135°C for 15-30 mins). If using air-dry clay, let it sit undisturbed for 24-48 hours. -
Seal:
Finish with a coat of matte varnish to protect the paint and give the surface a unified sheen.
Place your stylish duck near a window or plant to enjoy its cozy company
Emotion Swap Characters With Changeable Face Tiles
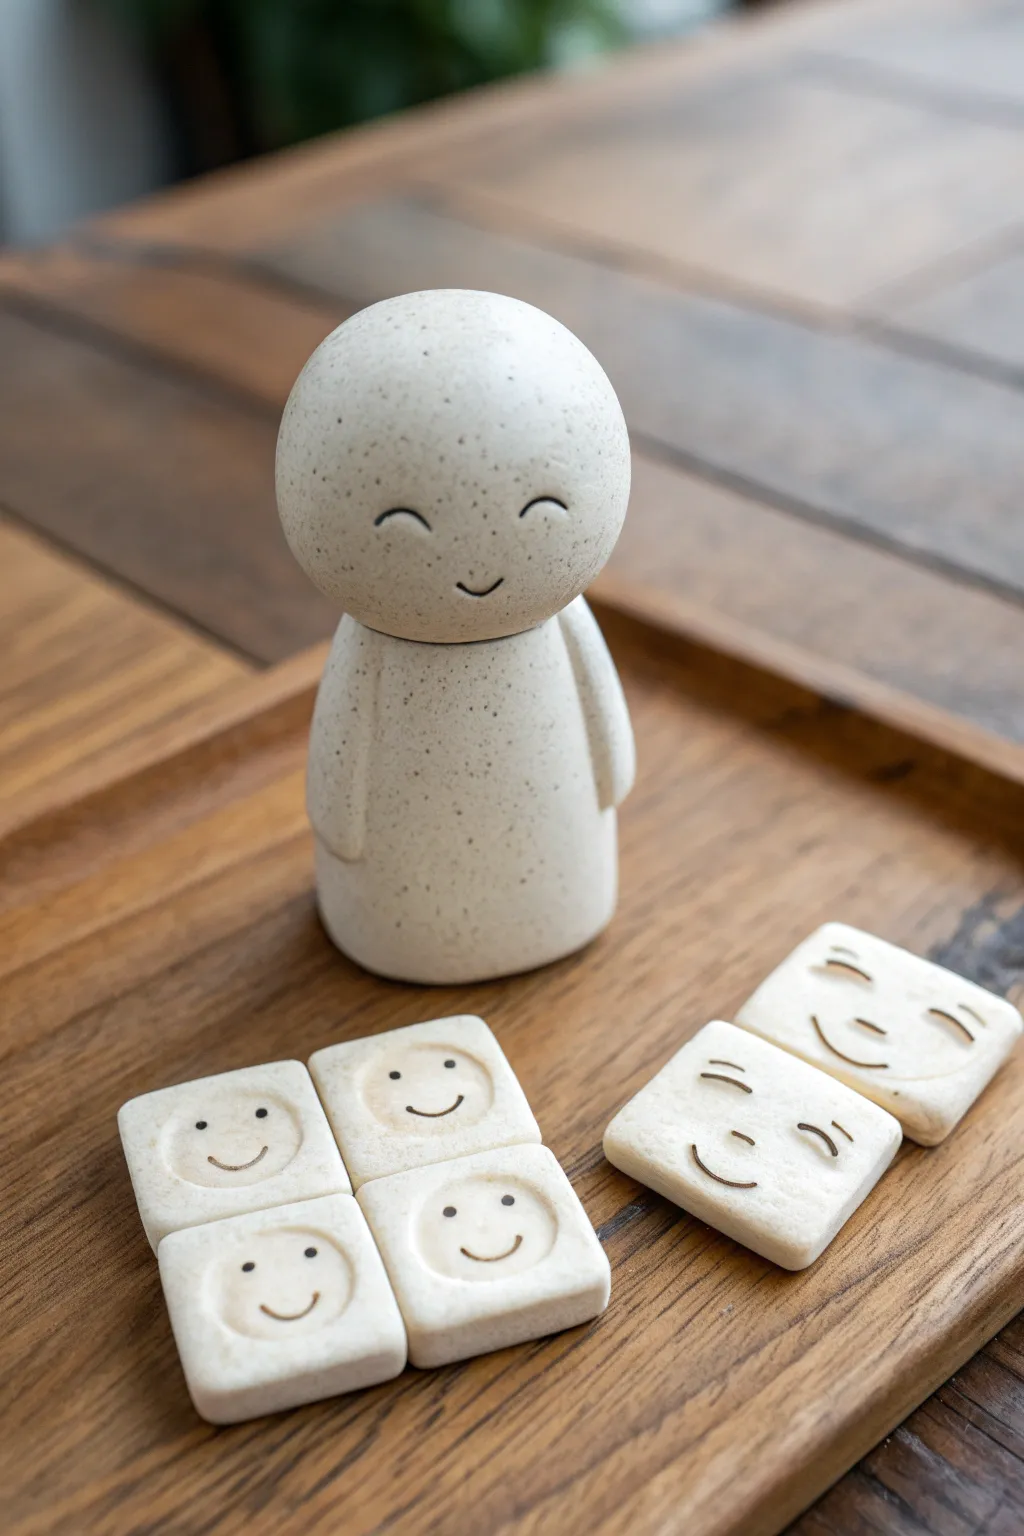
Create a calming, minimal desk figurine with changeable expressions to match your current mood. This speckled clay character features a rounded, interchangeable head system and a set of matching face tiles that add interactivity to a serene art piece.
Step-by-Step Tutorial
Materials
- White polymer clay or air-dry clay
- Speckled clay additive (or finely ground black pepper/dried tea leaves)
- Black acrylic paint
- Fine-grit sandpaper (400-600 grit)
- Needle tool or toothpick
- Small rolling pin
- Square cookie cutter (approx. 1 inch)
- Gloss or matte varnish (optional)
- Fine detail paintbrush
Step 1: Preparing the Clay Body
-
Mix your speckles:
Begin by conditioning your white clay until it is soft and pliable. If you aren’t using pre-speckled clay, knead in a small pinch of speckled additive, ground pepper, or dried tea leaves until the distribution looks even throughout the batch. -
Form the base cylinder:
Take a handful of clay and roll it into a thick, short cylinder. The shape should taper slightly towards the top, resembling a gumdrop or a small bell. -
Flatten the bottom:
Press the bottom of the cylinder firmly against your work surface to ensure the figure stands perfectly upright without wobbling. -
Create the arm grooves:
Using a modeling tool or your thumb, gently press vertical indentations into the sides of the body to suggest arms held close to the sides, keeping the form abstract and minimal. -
Round the shoulders:
Smooth out the top of the body piece so it is rounded but slightly flat at the very apex, creating a stable resting place for the head.
Step 2: Sculpting the Head & Tiles
-
Roll the head sphere:
Roll a ball of clay that is slightly wider than the top of your body piece. It should be a near-perfect sphere to allow it to rotate or sit at different angles. -
Carve the main face:
Use a needle tool to gently carve two crescent moon eyes curving upward and a small, simple smile. Keep the lines clean and relatively shallow. -
Prepare the tile slab:
Roll out the remaining speckled clay into a slab approximately 1/4 inch thick. Try to keep the thickness consistent for a uniform set. -
Cut the face tiles:
Use a small square cutter or a sharp knife to cut out four to six identical squares. Soften the sharp corners by tapping them gently with your fingertip. -
Impress the circle borders:
Find a circular object slightly smaller than the tile width (like a bottle cap) and lightly press it into the center of the square to create a circular frame for the faces. -
Design different emotions:
Carve unique expressions into each tile inside the circle frames. Try a sleeping face, a wide grin, or a surprised look to give yourself variety.
Stone Effect Pro-Tip
For a more realistic granite look, mix in small amounts of translucent clay with your white base before adding the speckles. This adds depth that looks like real stone.
Step 3: Finishing Touches
-
Bake or dry:
Follow the manufacturer’s instructions for your specific clay. If baking, place the head separately from the body to prevent them from fusing together. -
Sand for smoothness:
Once fully cured and cool, use fine-grit sandpaper to buff the surface. I like to focus on the bottom of the tiles and the figurine base to ensure everything feels premium and smooth. -
Paint the inlay:
Dilute black acrylic paint with a drop of water. Paint into the carved grooves of the faces on both the head and the tiles. -
Wipe excess paint:
Immediately wipe the surface with a damp cloth or paper towel. The paint will remain in the carved crevices while cleaning up the surface, creating a crisp, dark line. -
Seal the work:
Apply a very light coat of matte varnish if you want to protect the paint, though leaving the natural stone-like texture often looks best for this style.
Magnetic Personality
Embed a small magnet into the neck of the body and the bottom of different heads so you can swap entire 3D heads instead of just displaying tiles.
Arranging your serene figurine next to its emotion tiles creates a lovely interactive display for your workspace
Story Scene Characters In A Tiny Diorama Box
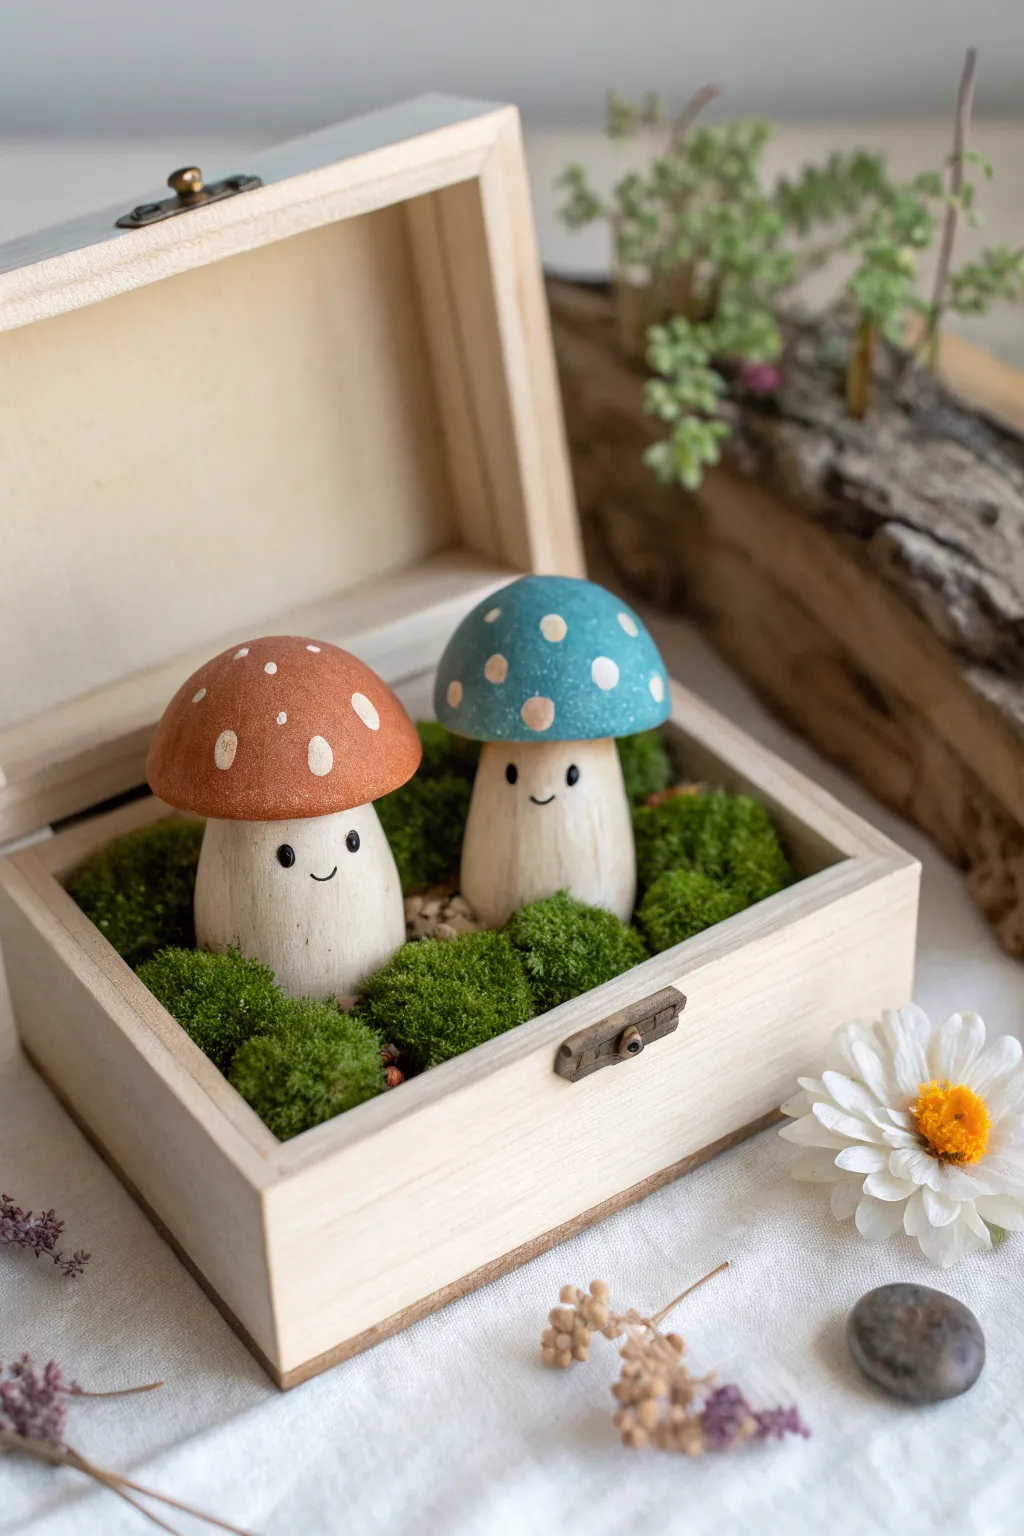
Create a cozy tiny world with these adorable mushroom characters nestled in a bed of moss. This diorama combines painted wooden charm with natural textures for a heartwarming piece of shelf decor.
How-To Guide
Materials
- Small unfinished wooden box with hinged lid
- Air-dry clay (or polymer clay)
- Acrylic paints (rust brown, teal blue, warm white, black)
- Matte mod podge or matte varnish
- Preserved reindeer moss (bright green)
- Small dried flowers or twigs for styling
- Wood glue or hot glue gun
- Fine grit sandpaper
- Detail paintbrushes (size 0 and size 2)
- Sculpting tools or a craft knife
Step 1: Sculpting the Mushrooms
-
Form the stems:
Start by rolling two balls of clay into stout cylinders. Make the base slightly wider than the top for stability, creating a sturdy, rustic stem shape about 1.5 to 2 inches tall. -
Add wood texture:
While the clay is still soft, use a sculpting tool or a toothpick to gently etch vertical lines up and down the stems. This mimics the grain of wood or the texture of a real mushroom stalk. -
Shape the caps:
Roll two separate balls of clay for the caps. Flatten the bottoms and round the tops into domes. One cap should ideally be slightly wider than the other to give them distinct personalities. -
Join the pieces:
Score the top of the stems and the bottom of the caps (make cross-hatch marks). Apply a tiny dab of water or slip, then press the caps firmly onto the stems. I like to smooth the seam gently underneath so they look connected. -
Dry the clay:
Allow your mushrooms to dry completely according to your clay package instructions. This usually takes 24-48 hours for air-dry clay. Ensure they are standing upright so they don’t flatten on one side.
Step 2: Painting the Details
-
Base coat the stems:
Mix a warm white paint with a very tiny drop of brown to create a creamy, natural wood tone. Paint the entire stem area, letting the paint get into the textured grooves. -
Highlight the texture:
Once the base coat is dry, use a technique called dry-brushing with a slightly lighter cream color over the raised areas of the stems to make the wood grain texture pop. -
Paint the caps:
Paint one mushroom cap with rusty brown acrylic and the other with a soft teal blue. Depending on your paint opacity, you might need two coats for a solid, matte finish. -
Add the spots:
Dip the non-furred end of a paintbrush into cream paint to dot spots onto the caps. Vary the sizes—some large, some tiny—to keep it looking organic and playful. -
Face details:
Using your smallest detail brush or a fine-tip paint marker, carefully draw two small black eyes wide apart on the Stem. Add a tiny, upward-curved smile right between them. -
Seal the work:
Once all paint is fully dry, coat the mushrooms with a matte varnish or Mod Podge. This protects the paint and unifies the finish without making them look too shiny and plastic.
Uneven Spots?
If your painted spots look messy or raised, lightly sand them flat after drying, then repaint. Or, use the handle end of a drill bit for perfectly round stamped dots.
Step 3: Assembling the Diorama
-
Prepare the box:
Take your unfinished wooden box and lightly sand any rough edges. You can leave it raw for a natural look shown here, or stain it lightly if you prefer a darker wood tone. -
Create a base layer:
To elevate the moss so you don’t use too much, you can glue a small piece of cardboard or foam at the bottom of the box, or just fill it partially with paper scraps. -
Position the mushrooms:
Apply a strong amount of wood glue or a dollop of hot glue to the bottom of your mushroom figures. Place them inside the box, slightly off-center from each other for a natural composition. -
Add the moss:
Tuck clumps of preserved reindeer moss tightly around the base of the mushrooms. Use a tool to push the moss into the corners so no bottom material shows through. -
Secure the greenery:
Use small drops of glue to tack down the moss if it feels loose, ensuring the ‘ground’ of your diorama stays put even if the box is moved. -
Final touches:
For extra detail, tuck a dried flower bud or a tiny twig into the moss near the mushrooms to complete the forest floor vibe.
Level Up: Secret Message
Paint the inside lid of the box with a starry night sky or write a hidden message called ‘Forest Friends’ using a gold paint pen for a sweet surprise.
Display your little mushroom box on a sunny windowsill where their smiles can greet you every day