Whenever I’m craving a quick, satisfying project, I make little clay figures—they’re small, forgiving, and ridiculously fun to personalize. Here are my go-to beginner-friendly ideas that look adorable whether you’re using air-dry clay or polymer clay.
Tiny Sleeping Cat Figure
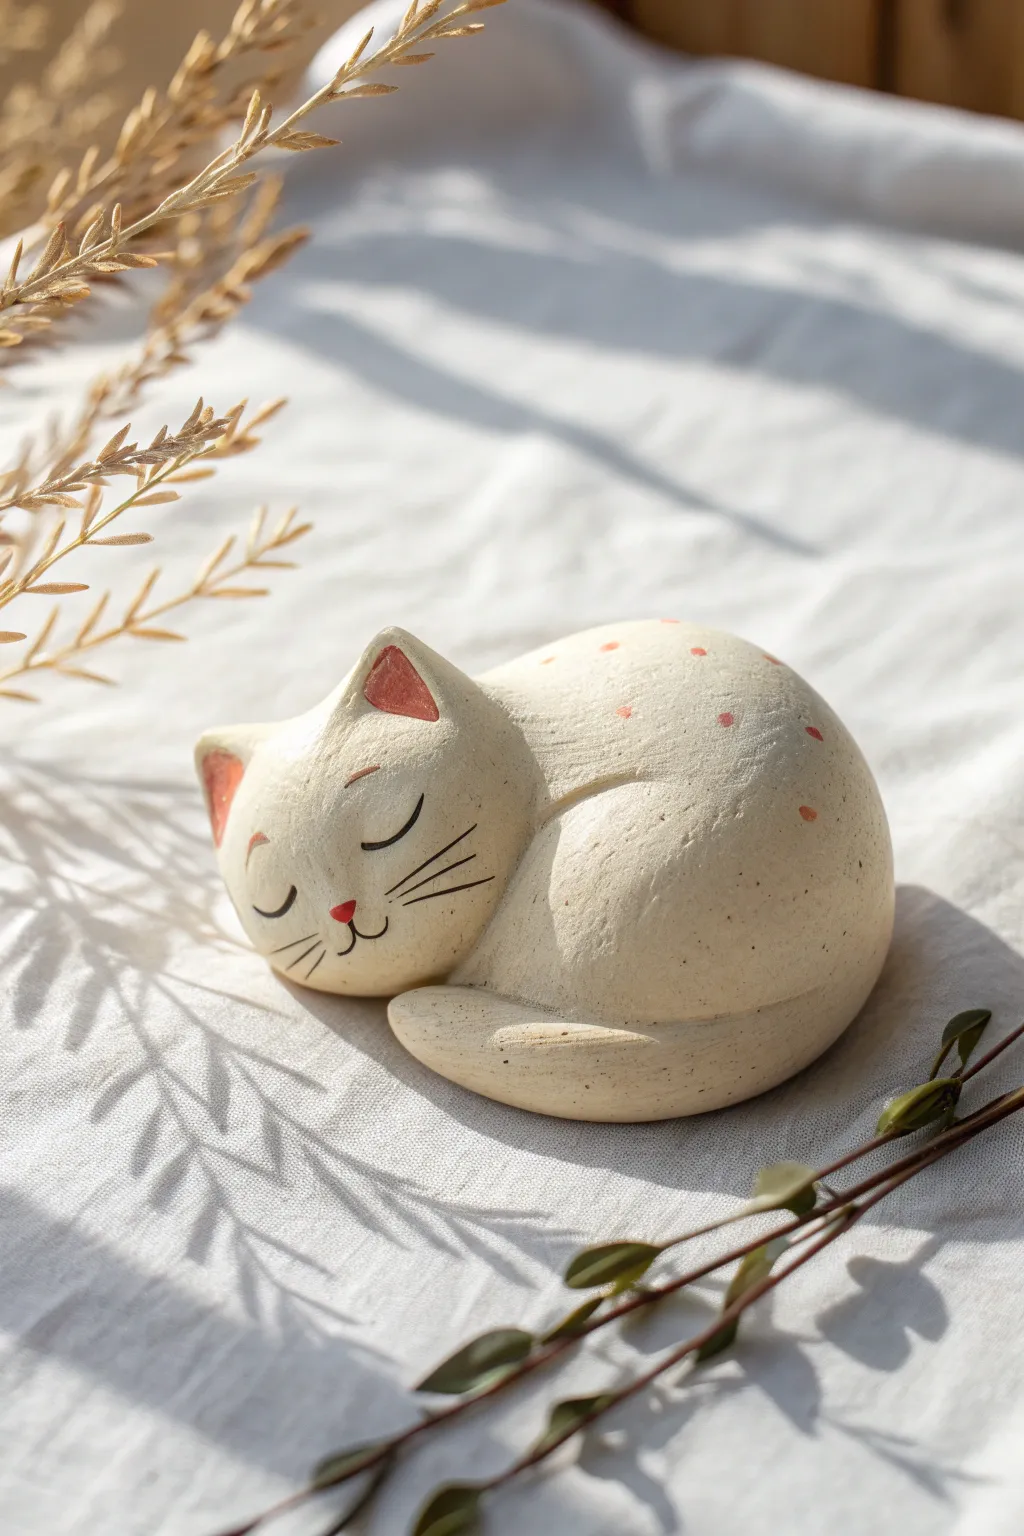
Capture the peaceful essence of a sleeping feline with this smooth, stylized clay figurine. This project features a creamy, speckled finish with gentle carved details and blushing accents for a heartwarming look.
How-To Guide
Materials
- White polymer clay or air-dry clay (preferably with a speckled effect)
- Acrylic paints (pale pink, orange, black)
- Fine grit sandpaper
- Modeling tools (or a toothpick and a dull knife)
- Small stylus tool or needle tool
- Fine detail paintbrush
- Matte varnish
Step 1: Shaping the Body
-
Form the base:
Start with a ball of clay about the size of a tangerine. Gently roll it into a smooth oval shape, slightly flattening the bottom so it sits securely without rolling. -
Define the head:
At one end of the oval, use your thumb to gently press and define a rounded area for the head. You want it to emerge naturally from the body rather than looking like a separate ball attached later. -
Create the curve:
To mimic the curled-up posture, nudge the clay body into a gentle ‘C’ curve. Smooth out any harsh angles with a little water if you’re using air-dry clay, or baby oil for polymer clay. -
Shape the thigh:
Push up a mound of clay on the rear side of the body to represent the cat’s haunch or thigh. This creates that lovely, rounded volume typical of a sleeping cat.
Cracks happen
If you see cracks after drying air-dry clay, don’t panic. Mix a small amount of fresh clay with water to make a paste (slip) and fill the cracks, then sand smooth once dry.
Step 2: Adding Features
-
Carve the separation lines:
Using a modeling tool or dull knife, gently score a deep, smooth line separating the head from the shoulder, and another defining the curve of the rear leg against the body. -
Add the ears:
Form two small, soft triangles from fresh clay. Attach them to the top of the head, blending the clay at the base downwards until the seams disappear completely. Press a small indentation into the front of each ear. -
Form the tail:
Roll a snake of clay that tapers at the end. Attach it to the base of the rear, wrapping it snugly around the front of the body so the tip tucks under the chin. -
Smooth everything:
Go over the entire figure with a damp sponge or finger. The goal is a seamless, stone-like surface. I like to spend extra time here to ensure there are absolutely no fingerprints left behind.
Step 3: Detailing & Finishing
-
Face carving:
Before the clay hardens fully, use a needle tool to lightly scribe the facial features. Draw two closed arches for eyes, a small ‘Y’ shape for the nose and mouth, and whiskers. -
Initial drying or baking:
Follow the instructions for your specific clay. If baking polymer clay, support the head with a bit of polyester batting so it doesn’t droop in the oven. -
Sanding:
Once fully cured or dry, use fine-grit sandpaper to buff the surface. This is key to achieving that soft, stone-carved aesthetic seen in the photo. -
Painting the face:
Dip a fine brush in black acrylic paint. Carefully trace the carved lines for the eyes, whiskers, and mouth. Keep the lines very thin and delicate. -
Adding warmth:
Mix a warm, coral-pink wash. Paint the insides of the ears and add a tiny heart-shaped dab on the nose. Dilute the paint significantly to add soft, blushing spots on the back if you want a patterned cat. -
Speckling (Optional):
If your clay wasn’t pre-speckled, you can flick a toothbrush loaded with watered-down brown paint lightly over the figure for a ceramic texture effect. -
Sealing:
Finish with a coat of matte varnish. Avoid glossy finishes, as the matte look preserves the natural, earthy feel of the sculpture.
Make it a planter friend
Before baking or drying, press a small, shallow indentation into the cat’s back. After finishing, glue in a tiny air plant or faux succulent for a green twist.
Place your sleeping kitty on a sunny shelf or desk for a permanent dose of relaxation


Mini Puppy With Floppy Ears
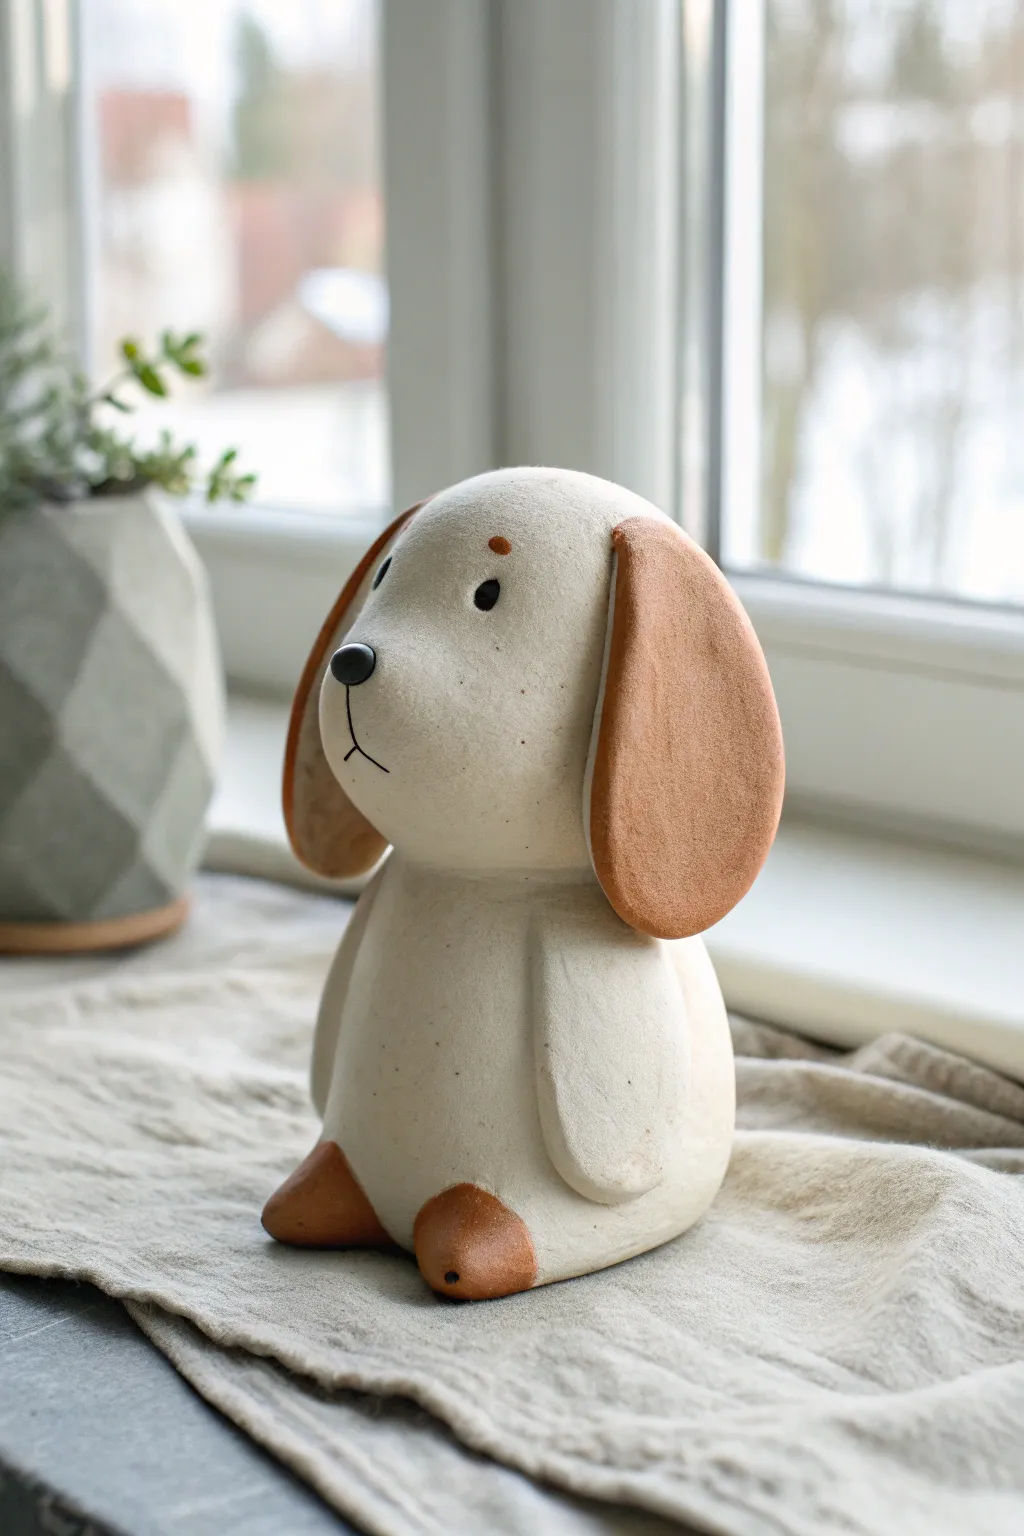
This charming little ceramic figure captures the gentle innocence of a puppy with oversized ears and a simple, rounded form. Its smooth, creamy finish and warm terracotta accents make it a perfect minimalist decoration for a windowsill or shelf.
Step-by-Step
Materials
- White or speckled cream polymer clay (or air-dry clay)
- Terra cotta colored polymer clay
- Sculpting tools (needle tool, smoothing tool)
- Black acrylic paint or clay marker
- Small dotting tool or toothpick
- Aluminum foil (for armature core, optional)
- Rolling pin
- Gloss glaze (optional for nose/eyes)
Step 1: Forming the Body Base
-
Condition the white clay:
Start by warming up your primary white or cream-colored clay in your hands until it is pliable and smooth. Conditioning is crucial to prevent cracks later on. -
Shape the initial torso:
Create a smooth, pear-shaped mound for the body. The bottom should be wide and flat so the figure sits securely, tapering slightly as you go up. -
Form the head sphere:
Roll a second ball of white clay, slightly smaller than the body section. Gently flatten the back side where it will attach to the body. -
Create the muzzle:
Before attaching the head, pinch and pull the front of the head sphere to create a pronounced, rounded muzzle area. It doesn’t need to be sharp; keep it soft and blunt. -
Connect head to body:
Place the head onto the narrower top of the body. You can insert a small piece of toothpick or wire between them for extra stability. -
Blend the seams:
Use a smoothing tool or your finger to gently blend the clay where the neck meets the body, ensuring a seamless transition. The figure should look like one continuous piece rather than a snowman.
Clean Seams
To get that professional ‘dipped’ look on the ears and feet, roll the colored clay separately and press it ONTO the white clay, rather than trying to paint the color on afterward.
Step 2: Adding the Distinctive Features
-
Shape the floppy ears:
Take the terra cotta colored clay and roll two equal-sized oval logs. Flatten them gently with a rolling pin until they are about 3-4mm thick. -
Refine ear shape:
Round off the bottom edges of your flattened ovals to give them that classic teardrop spaniel look. -
Attach the ears:
Press one ear firmly onto each side of the head. I find positioning them slightly lower on the skull makes the puppy look sweeter. Smooth the top edge into the head clay. -
Make the front legs:
Roll two small sausage shapes from the white clay for the front legs. They should be just long enough to reach from the shoulder area to the ground. -
Attach the legs:
Press the legs onto the sides of the body, blending the top shoulder area into the torso so they lay flat against the sides. -
Add the feet:
Using the terra cotta clay again, shape two small, rounded triangles for the feet. Attach these to the bottom front of the body, slightly peeking out. -
Add the tail:
Roll a tiny cone of terra cotta clay and attach it to the lower back of the figure for a cute little tail nub.
Texture Twist
Before baking, gently press a clean piece of coarse linen or canvas against the white clay body. This imitates a lovely handcrafted ceramic texture.
Step 3: Detailing and Finishing
-
Sculpt the nose:
Take a tiny pinch of black clay (or paint it later) and roll it into a small oval. Press it onto the tip of the muzzle. -
Add eyebrows:
Using tiny specs of terra cotta clay, place two small dots just above where the eyes will go. These ‘eyebrows’ add a lot of expression. -
Smooth everything out:
Do a final pass with a damp fingertip or baby oil (if using polymer clay) to remove any fingerprints and ensure the surface is perfectly matte. -
Bake or dry:
Follow the instructions for your specific clay. If baking polymer clay, use an oven thermometer to ensure the correct temperature. -
Paint the face details:
Once cool or dry, use a fine-tip paintbrush or marker to add two small black dots for eyes and a simple inverted ‘Y’ shape starting from the nose for the mouth. -
Optional glazing:
For a bit of life, add a tiny drop of gloss glaze just to the black nose and the eyes.
Now you have a sweet little companion to keep you company on your desk


Round Penguin Buddy
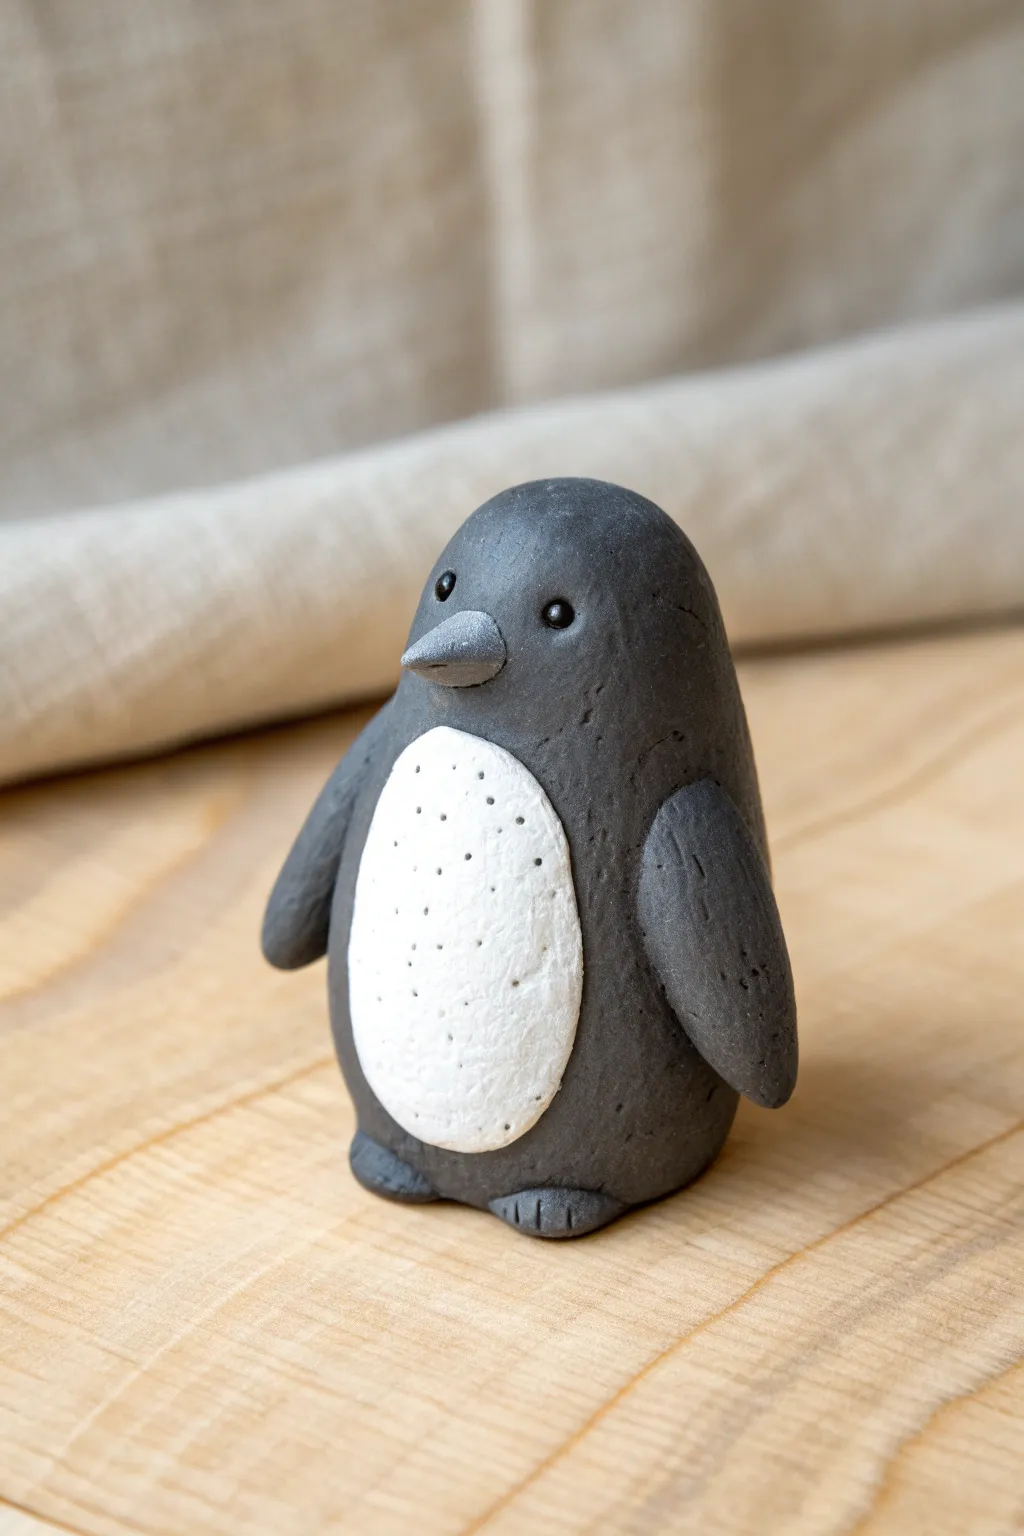
Sculpt a delightfully chubby penguin companion perfect for brightening up your desk or shelf. This project features a smooth, stone-like charcoal finish contrasted with a textured white belly for a touch of tactile charm.
Step-by-Step Guide
Materials
- Black polymer clay
- White polymer clay
- Grey polymer clay
- Pointed sculpting tool or toothpick
- Small ball stylus tool
- Smooth work surface
- Oven for baking (if using polymer clay)
Step 1: Forming the Body
-
Create the base:
Start with a large chunk of black clay roughly the size of a golf ball. Roll it firmly between your palms until you have a smooth, crack-free sphere. -
Shape the teardrop:
Gently roll one side of the sphere to elongate it slightly, creating a fat teardrop or egg shape. The wider bottom will be the penguin’s belly, giving it a stable base to sit on. -
Smooth the surface:
Check the surface for fingerprints. If you find any, lightly buff them away with your thumb or a drop of clay softener.
Step 2: Adding the Belly
-
Flatten the white clay:
Take a smaller piece of white clay and flatten it into a thin oval. It should be proportional to the front of your penguin’s body. -
Attach the patch:
Press the white oval onto the front of the black body. Use your thumb to smooth the edges so the white clay seems to merge seamlessly into the black, rather than just sitting on top. -
Texture the belly:
Using a needle tool or toothpick, gently poke small, shallow holes all over the white area. I like to vary the spacing slightly to give it a natural, fluffy feather appearance.
Lint Magnet Warning
Black clay shows every speck of dust! Keep baby wipes handy to clean your hands frequently, and roll a scrap piece of white clay over your hands first to pull off lint.
Step 3: Face Features
-
Making the beak:
Shape a tiny amount of grey clay into a small cone. Flatten the underside slightly so it isn’t perfectly round. -
Attaching the beak:
Press the beak onto the face area, just above the white belly patch. Ensure it points slightly downward. -
Creating eye sockets:
Use a small ball stylus to make two small indentations on either side of the beak where the eyes will go. -
Adding eyes:
Roll two minuscule balls of black clay. Isolate them carefully, then press them into the sockets you just made. They should be glossy and slightly protruding.
Winter Wear Upgrade
Give your penguin personality by sculpting a tiny scarf or earmuffs out of bright red or blue clay before baking. It adds a pop of color.
Step 4: Limbs and Feet
-
Shape the flippers:
Roll two black clay teardrops and flatten them into paddle shapes. These will be the wings. -
Attach the wings:
Press the wings onto the sides of the body, angling them slightly backwards. Blend the top seam into the shoulder area so they are secure. -
Shape the feet:
Create two small, flat ovals from the black clay for the feet. -
Add toe details:
Using a knife tool or the side of a toothpick, press two lines into the front of each foot to imply toes. -
Final assembly:
Slide the feet under the front of the belly so just the toes are peeking out. -
Adding texture:
For a rustic look, use a crumpled foil ball or a toothbrush to gently tap texture onto the black parts of the body, avoiding the smooth eyes and beak.
Step 5: Finishing
-
Final check:
Inspect your penguin from all angles to ensure symmetry and that no lint is stuck to the clay. -
Bake:
Bake the figure according to your polymer clay manufacturer’s instructions, usually around 275°F (130°C) for 15-30 minutes.
Once cooled, your sturdy little penguin is ready to waddle onto your desk


Chubby Frog With Big Eyes
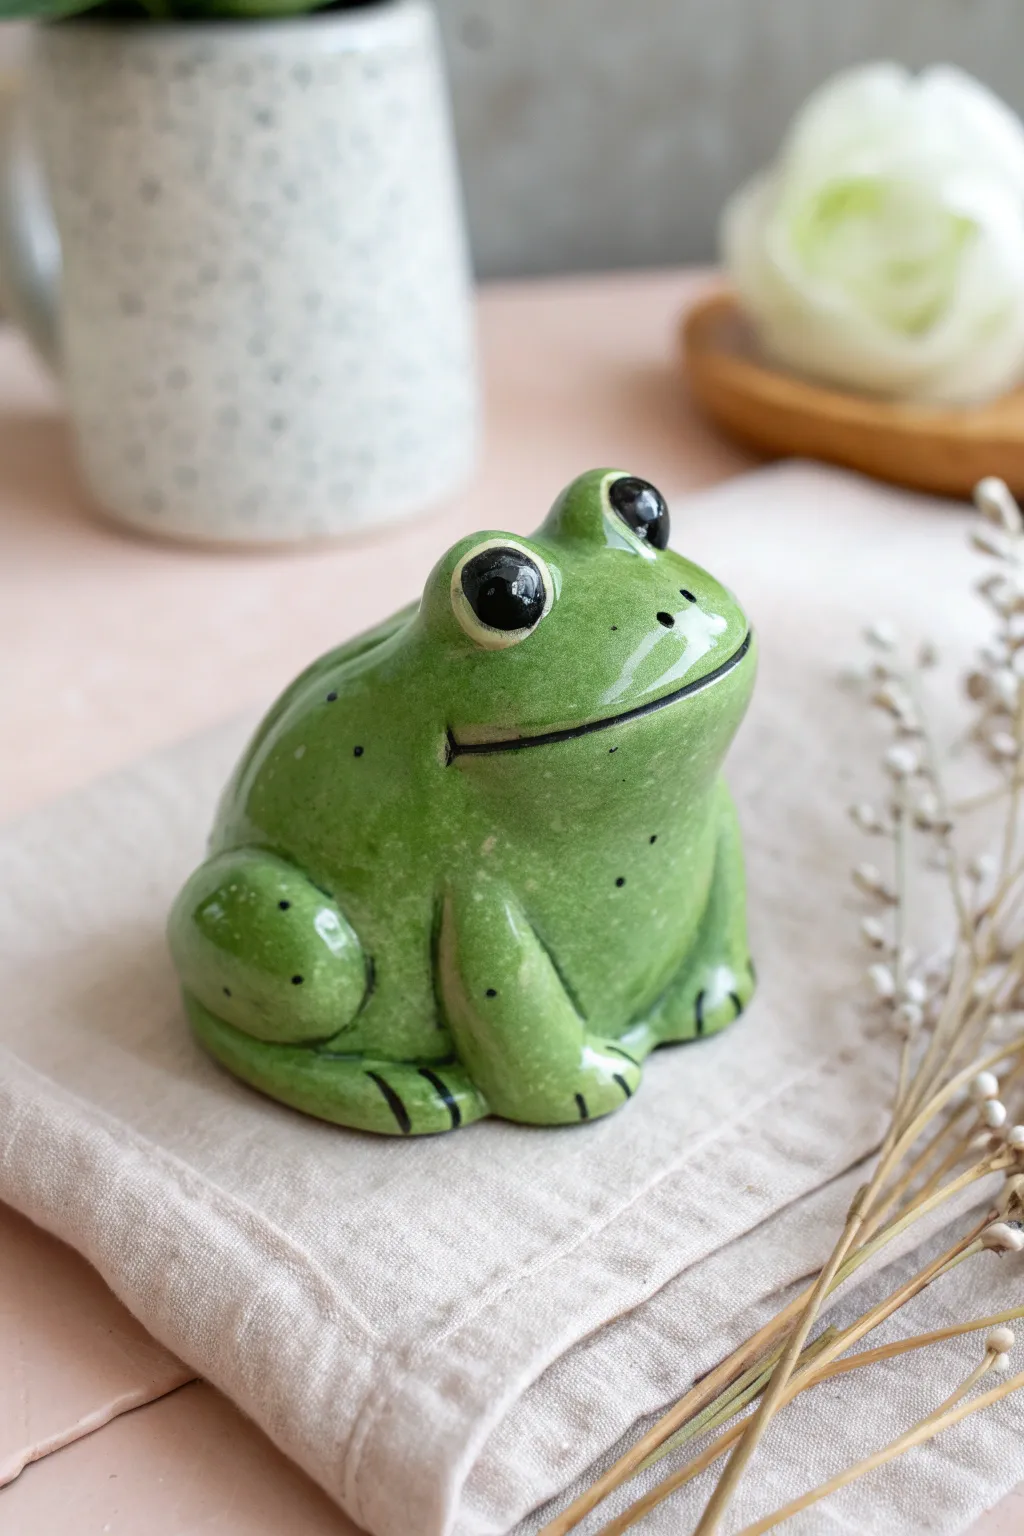
This adorable, chubby frog figurine captures hearts with its high-gloss finish and endearing expression. Perfect for perching on a bookshelf or guarding a potted plant, its simple shape makes it a joyful project for potters of all skill levels.
Step-by-Step Tutorial
Materials
- White earthenware or stoneware clay
- Pottery wire cutter
- Modeling tools (needle tool, rib tool)
- Sponge
- Slip (clay slurry)
- Scoring tool or old fork
- Green underglaze (jungle or grassy shade)
- Black underglaze
- Clear high-gloss glaze
- Soft synthetic brushes
- Kiln access
Step 1: Forming the Body
-
Prepare the clay:
Begin by wedging a baseball-sized amount of white clay thoroughly to remove any air bubbles. -
Shape the base:
Roll the clay into a smooth ball between your palms, then gently tap it on your work surface to create a flat bottom so the frog sits securely. -
Create the taper:
Using your hands, gently elongate the top half of the ball slightly to create a vague pear shape, keeping the bottom very wide and round for that ‘chubby’ look. -
Refine the surface:
Take a slightly damp sponge or a soft rib tool and smooth over the entire surface, erasing any fingerprints or bumps.
Cracking at seams?
If legs pull away during drying, your clay was likely too dry when attaching. Use plenty of slip and wrap the piece in plastic to equalize moisture.
Step 2: Sculpting Features
-
Shape the eye sockets:
Roll two small marble-sized balls of clay. These will be the eye housings. -
Attach the eyes:
Score the top of the head where you want the eyes and apply a dab of slip. Press the clay marbles firmly onto the head, smoothing the seams downward so they merge seamlessly with the main body. -
Form the legs:
Roll two thick sausages of clay for the rear legs. Flatten them slightly and curve them around the sides of the frog’s body. -
Blend the legs:
Score, slip, and attach the rear legs. Use a modeling tool to blend the clay into the body at the back, but leave the front curve defined to show the leg muscle. -
Add front arms:
Roll two smaller, shorter logs for the front arms. Attach them vertically under the chin area, blending the top neatly into the chest. -
Define the mouth:
I like to use a sharp needle tool or thin blade to slice a wide, curved smile right across the front of the face. Deepen the cut slightly at the corners for extra personality.
Hollow it out
For a lighter piece less prone to exploding, hollow out the main body from the bottom once leather hard, leaving walls about 1/4 inch thick.
Step 3: Decorating and Glazing
-
Bisque fire:
Allow your frog to dry slowly and completely (bone dry) before firing it in the kiln to bisque temperature (usually cone 04). -
Apply base color:
Once bisqued, apply 2-3 coats of a vibrant green underglaze to the entire body, avoiding the actual eyeballs if you want them white. -
Paint the eyes:
using a fine detail brush, paint large black circles in the center of the eye mounds. Add a tiny white dot (highlight) to bring the frog to life. -
Detail works:
Use the black underglaze to carefully trace the mouth line you carved. Add small black dots randomly across the back for skin texture, and paint small lines on the feet to suggest toes. -
Clear glaze:
Once the underglaze is dry, apply a coat of clear, high-gloss glaze over the entire piece. -
Final fire:
Fire the piece again to the temperature required by your clear glaze (often cone 05 or 06) to achieve that shiny, wet-look finish.
Your glossy green friend is now ready to add a splash of charm to any corner of your home

The Complete Guide to Pottery Troubleshooting
Uncover the most common ceramic mistakes—from cracking clay to failed glazes—and learn how to fix them fast.
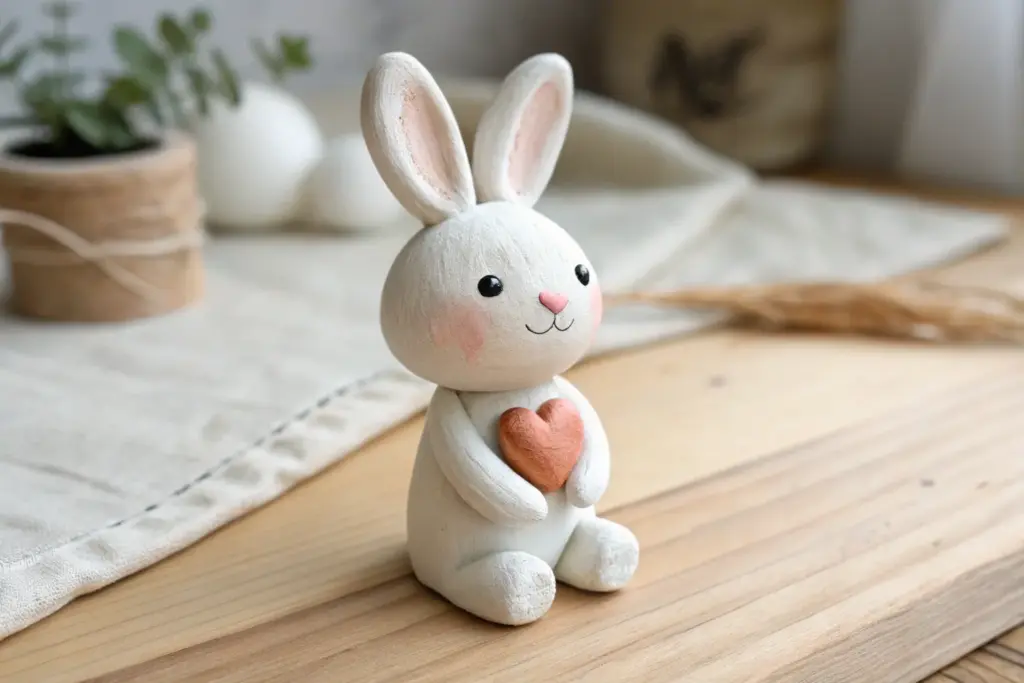
Mini Bunny With Long Ears
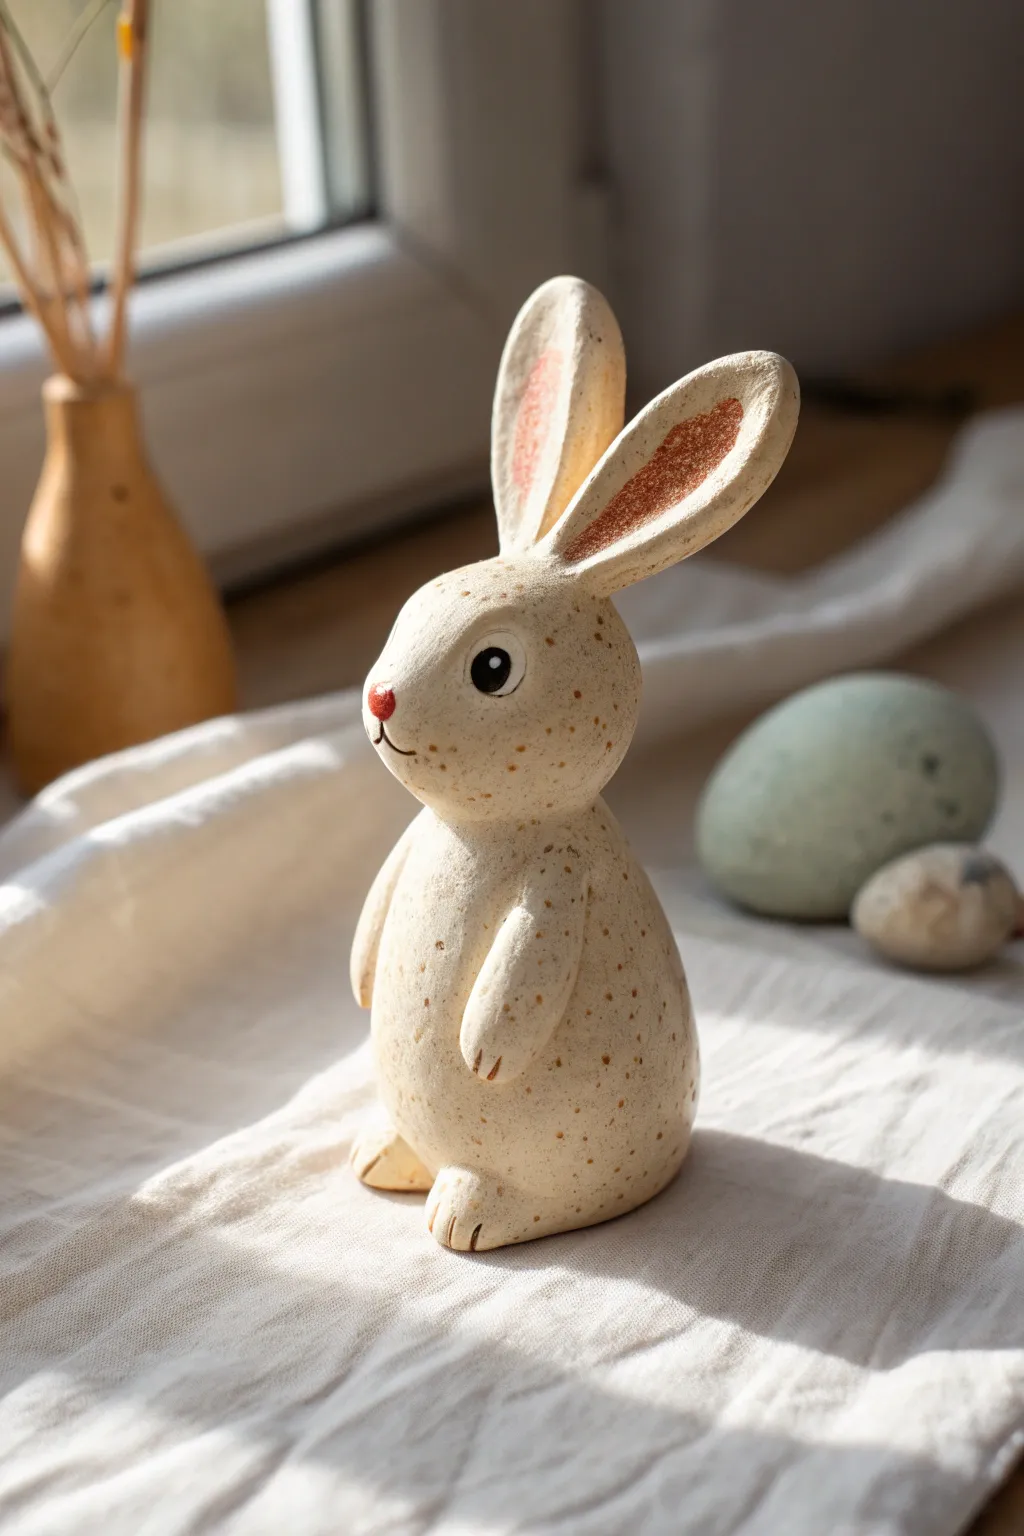
This charming little rabbit figurine features a speckled, organic finish that mimics the look of stoneware pottery without needing a kiln. Its simple, rounded shapes and expressive long ears make it a delightful addition to springtime decor or a sweet handmade gift.
Detailed Instructions
Materials
- Air-dry clay (stone or white color based on preference)
- Acrylic paints (creamy beige, burnt sienna, black, red, white)
- Stiff bristle toothbrush or splatter brush
- Small round sculpting tools or toothpicks
- Fine detail paintbrush
- Bowl of water
- Smooth work surface or mat
- Matte varnish or sealant
Step 1: Sculpting the Form
-
Form the Body Base:
Start with a lump of clay roughly the size of a large egg. Roll it into a smooth ball between your palms, then gently taper the top just slightly to create a pear shape. This will be the main body sitting on the ground. -
Create the Head:
Roll a second, smaller ball of clay for the head, about half the size of the body. Flatten the bottom slightly where it will join the body. -
Join Head and Body:
Score (scratch) both the top of the body and the bottom of the head with a toothpick. Add a dab of water to the scored areas and press them firmly together. Use your finger or a sculpting tool to smooth the seam so the clay merges into one solid piece. -
Shape the Ears:
Take two equal, smaller pieces of clay and roll them into elongated teardrop shapes. Flatten them gently with your thumb to create the ear shape. -
Attach the Ears:
Score the top of the head and the base of ears. Press the ears onto the head, positioning them upright. Use a blending tool to smooth the clay from the base of the ear down onto the head for a secure hold. -
Add Arms:
Roll two small sausage shapes for arms. Attach them to the sides of the body, just below the neck area. Curve them slightly forward so they rest against the bunny’s tummy. -
Mark the Paws:
Use a toothpick or knife tool to press two or three small indents into the bottom of each arm to suggest paws. -
Create Feet:
Form two small ovals for the feet. Attach them to the bottom front of the body so the bunny looks like it is standing securely. Mark toe indents just like you did for the hands. -
Refine the Tail:
Roll a small ball for the tail and attach it to the lower back of the bunny, blending the edges so it doesn’t fall off. -
Dry Completely:
Allow the sculpture to air dry fully. This usually takes 24-48 hours depending on humidity and thickness. Rotate it occasionally so the bottom dries evenly.
Step 2: Painting and Finishing
-
Base Coat:
If you used basic white clay, paint the extensive surface with a creamy beige or warm off-white acrylic paint. If you used stone-colored clay, you might skip this or apply a wash to even the tone. -
Add Speckles:
Dip an old toothbrush into watered-down burnt sienna or brown paint. Run your thumb across the bristles to flick tiny speckles all over the bunny. I find doing a test spray on paper first helps gauge the splatter size. -
Color the Ears:
Mix a warm rusty-brown or terracotta color. Paint the inner recessed part of the ears, leaving a border of the base color around the edges. -
Paint the Face Detail:
Using a very fine detail brush, paint a small red triangle for the nose. Paint a thin distinct line downward from the nose, curving out to create the mouth smile. -
Add the Eyes:
Paint two solid black circles for eyes. Once dry, add a tiny white dot to each eye as a highlight to bring the character to life. -
Highlight the Cheeks:
Lightly dry-brush a tiny amount of pinkish-brown just below the eyes to give the bunny a rosy, wholesome glow. -
Seal the Work:
once all paint is completely dry, apply a coat of matte varnish. This protects the finish and gives it that smooth, ceramic-like sheen without being too glossy.
Drooping Ears?
If the long ears keep flopping over while the wet clay dries, prop them up from behind using toothpicks or crumbled foil until the clay stiffens enough to hold its own weight.
Pro Tip: Texture
Before the clay dries, gently pat the surface with a coarse sponge. This subtle texture grabs the paint wash later and makes the final piece look much more like real stoneware.
Place your finished bunny on a shelf or windowsill to enjoy its sweet presence all year round
Pocket-Size Bear With A Belly Dot
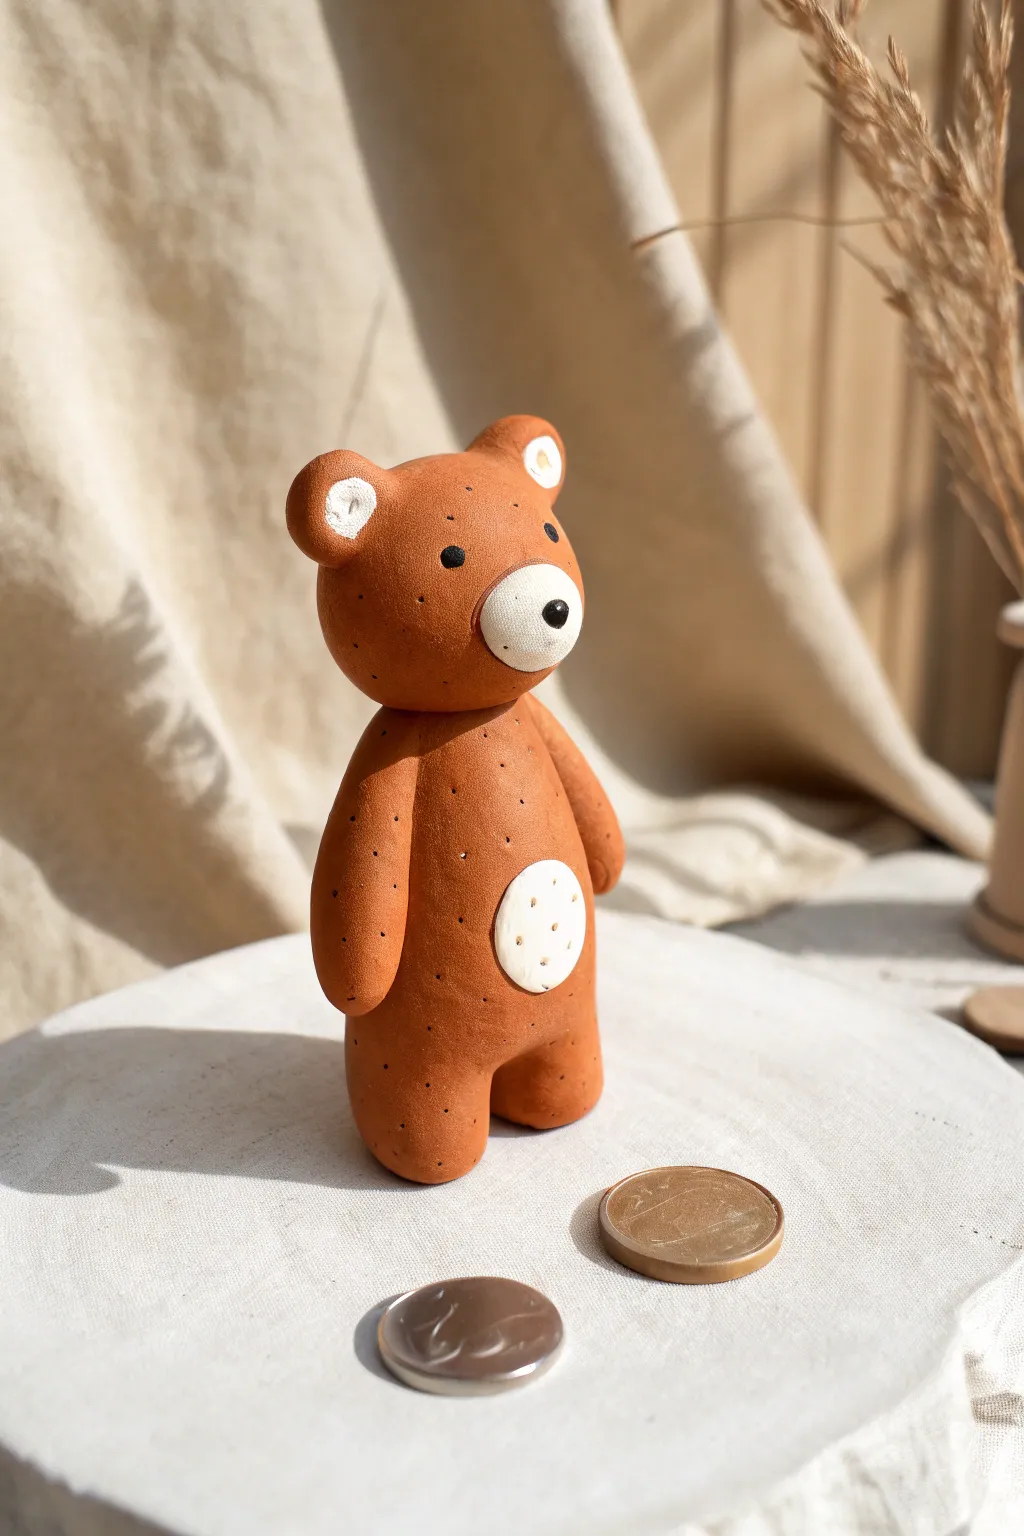
Create this adorable, minimalist bear figurine using warm terracotta-colored clay. This charming little fellow features a distinctive white belly patch and delicate speckling that gives him a rustic, handmade texture.
Step-by-Step Guide
Materials
- Terracotta or rust-colored polymer clay
- White polymer clay
- Black polymer clay
- Modeling tools (or a toothpick)
- Needle tool
- Small ball tool
- Craft knife
- Oven for baking (if using polymer) or sealant (if using air-dry)
Step 1: Shaping the Body
-
Prepare the main clay:
Condition your terracotta-colored clay by kneading it until it is soft and pliable. This prevents cracks later on. -
Create the torso:
Roll a medium-sized ball of clay into a smooth cylinder, slightly wider at the bottom than the top, to form the bear’s main body. -
Form the legs:
Instead of attaching separate legs, make a vertical incision at the bottom center of your body cylinder. Gently smooth and round the two resulting sections to create stubby legs. -
Shape the head:
Roll a second, slightly smaller ball for the head. Flatten the sphere just a tiny bit so it isn’t perfectly round. -
Attach head to body:
Press the head firmly onto the top of the body piece. You can insert a small piece of wire or a toothpick between them for extra stability.
Step 2: Adding Details
-
Make the muzzle:
Take a tiny amount of white clay and roll it into a ball, then flatten it into a small disc. Press this onto the lower center of the face. -
Add the belly patch:
Create a larger flat disc of white clay. Position this on the lower right side of the bear’s tummy for that asymmetrical, whimsical look shown in the photo. -
Form the ears:
Roll two small balls of terracotta clay. Indent the center of each with a ball tool and press a tiny speck of white clay into the depression. Attach these to the top of the head. -
Attach the arms:
Roll two small tapered sausages of terracotta clay. Attach them to the sides of the body, letting them hang down naturally. Blend the seams at the shoulder slightly so they look integrated. -
Create facial features:
Roll three tiny specks of black clay. Place one on the white muzzle for the nose, and the other two above the muzzle for eyes.
Head Won’t Stay On?
If the head keeps wobbling or falling off while you work, cut a small piece of a toothpick or paperclip and insert it into the neck to act as an internal skeleton
Step 3: Texturing and Finishing
-
Add the belly texture:
Using a needle tool or the tip of a toothpick, gently poke small holes around the perimeter of the white belly patch to create a ‘stitched’ look. -
Texture the body:
To mimic the speckled effect in the photo, take your needle tool and gently prick the surface of the brown clay all over. I like to vary the depth slightly for a more organic feel. -
Refine the shape:
Give the bear a final once-over, smoothing out any accidental fingerprints and ensuring the standing posture is stable. -
Bake or dry:
If using polymer clay, bake according to the package instructions (usually 275°F/130°C for 15-30 minutes). If using air-dry clay, leave it in a safe spot for 24-48 hours.
Faux Speckles
If you don’t want to texture the clay with a needle, you can achieve a similar look after baking by flicking a toothbrush loaded with thinned brown paint over the figure
Your tiny bear is now ready to guard your loose change or accompany you on pocket-sized adventures


What Really Happens Inside the Kiln
Learn how time and temperature work together inside the kiln to transform clay into durable ceramic.
Smiling Mushroom Figure
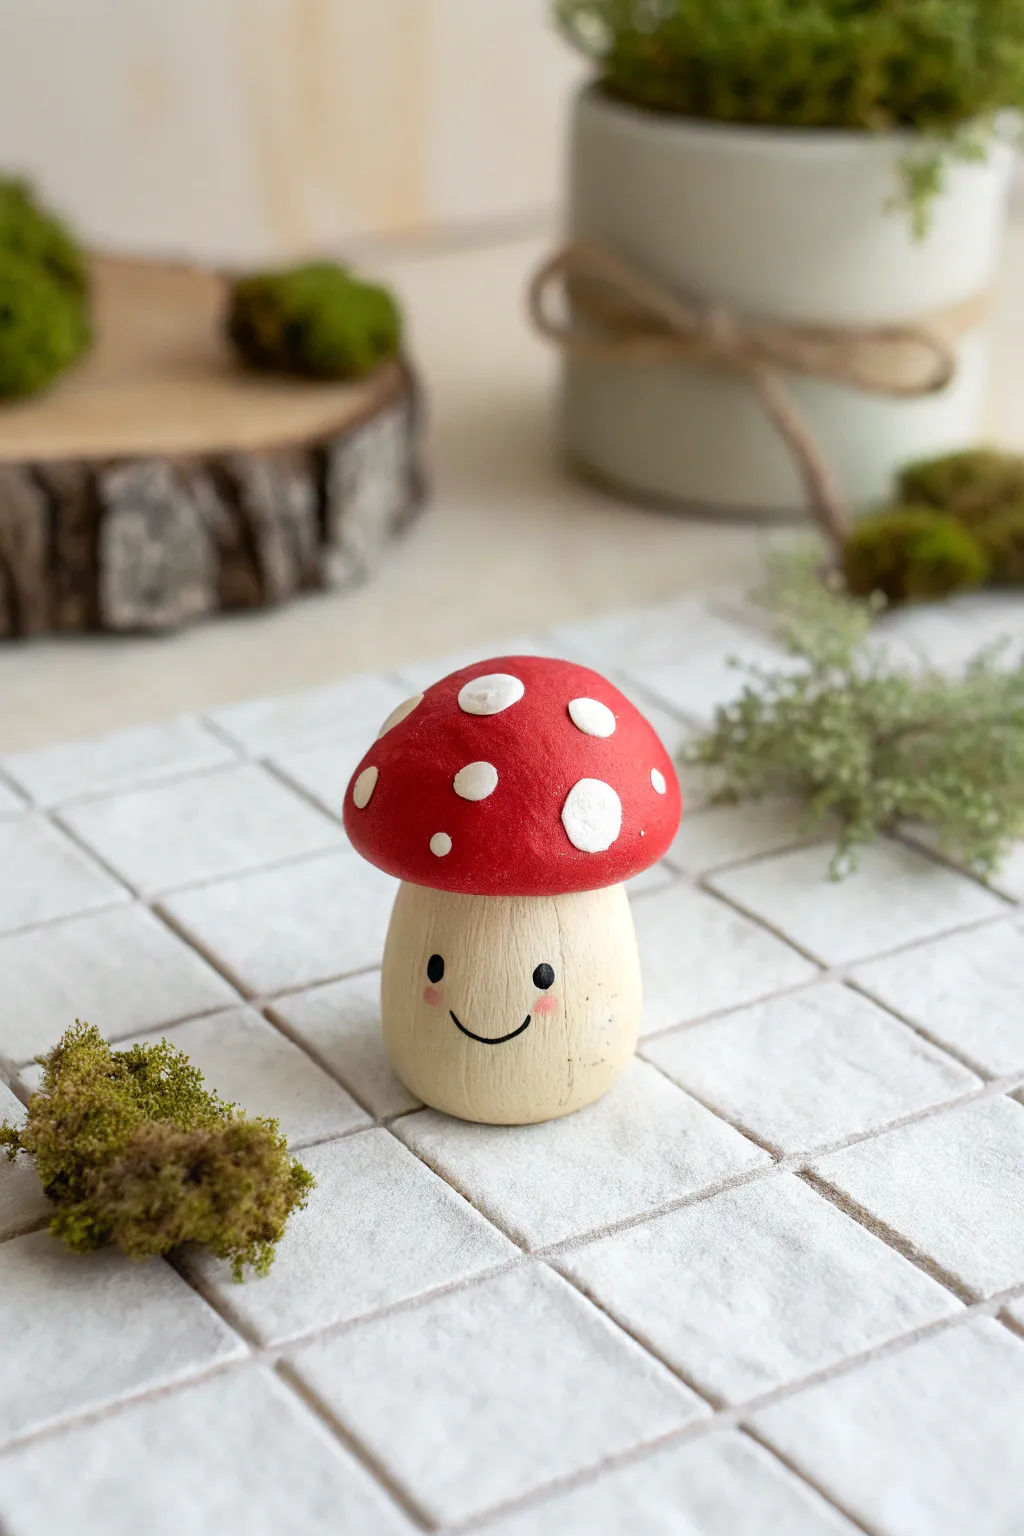
Bring a touch of forest magic to your shelf with this adorable mixed-media mushroom figure. Combining a natural wooden base with a brightly painted clay cap creates a charming texture contrast that makes this little guy truly special.
Detailed Instructions
Materials
- Wooden peg doll body (short/chunky style) or wooden egg cup
- Air-dry clay or polymer clay
- Acrylic paints (Red, White, Black, Pink)
- Fine detail paintbrush
- Medium flat paintbrush
- Sandpaper (fine grit)
- Matte varnish or sealant
- Water cup and paper towels
Step 1: Sculpting the Cap
-
Prepare the base:
Ensure your wooden base is clean and dry. If using a wooden egg cup or a peg doll body, lightly sand the top rounded surface to help the clay adhere better. -
Condition the clay:
Take a walnut-sized amount of clay and knead it until it is soft, pliable, and free of cracks. -
Form the cap shape:
Roll the clay into a ball, then flatten the bottom side against your work surface. Gently press the center of the flat side with your thumb to create an indentation where the wooden stem will fit. -
Fit to the stem:
Press the clay cap onto the top of your wooden stem. I like to gently mold the edges down slightly so it looks like a natural mushroom cap rather than just a hat sitting on top. -
Smooth the surface:
Dip your finger in a tiny bit of water and smooth out any fingerprints or bumps on the dome of the cap to ensure a perfect painting surface later. -
Add texture (optional):
If you want the white dots to be raised, roll tiny balls of clay and flatten them onto the cap now. Alternatively, leave the cap smooth to paint the dots on later. -
Let it cure:
Allow the clay to dry completely according to the package instructions. Air-dry clay usually takes 24 hours, while polymer clay needs baking.
Step 2: Painting & Details
-
Base coat the cap:
Once dry, paint the entire clay cap with a bright, primary red acrylic paint. You may need two thin coats for opaque coverage. -
Paint the dots:
Using a small brush or the back end of a paintbrush handle, dot on varying sizes of white circles across the red cap. Keep them random for a natural look. -
Seal the wood (optional):
If you want to keep the natural wood look for the stem, you can leave it bare or apply a very thin layer of matte varnish to protect it without changing the color. -
Draft the face:
Lightly sketch the position of the eyes and mouth on the wooden stem using a pencil to ensure the expression is centered. -
Paint the eyes:
Using your finest detail brush and black paint, create two small, solid black circles for the eyes. Space them fairly wide apart for maximum cuteness. -
Add the smile:
Paint a thin, U-shaped curved line between the eyes to create the smile. -
Blush the cheeks:
Mix a tiny amount of pink paint with a lot of water to create a glaze, or use dry brushing. Gently dab pink spots just under the eyes for rosy cheeks. -
Add eye highlights:
Dip the very tip of a toothpick into white paint and add a microscopic white dot to the upper corner of the black eyes to bring the character to life. -
Final varnish:
Once all paint is completely dry, apply a coat of matte varnish over the painted areas (especially the clay cap) to protect your work from dust and chipping.
Use a toothpick
For perfectly round white dots, dip the flat end of a brush handle or a cotton swab into paint and stamp it onto the red cap.
Make a Forest Family
Vary the heights of your wooden bases and use different cap colors like purple or orange to create a whole mushroom family.
Now you have a cheerful little forest friend ready to brighten up your desk or nature table
Cute Snail With A Swirl Shell
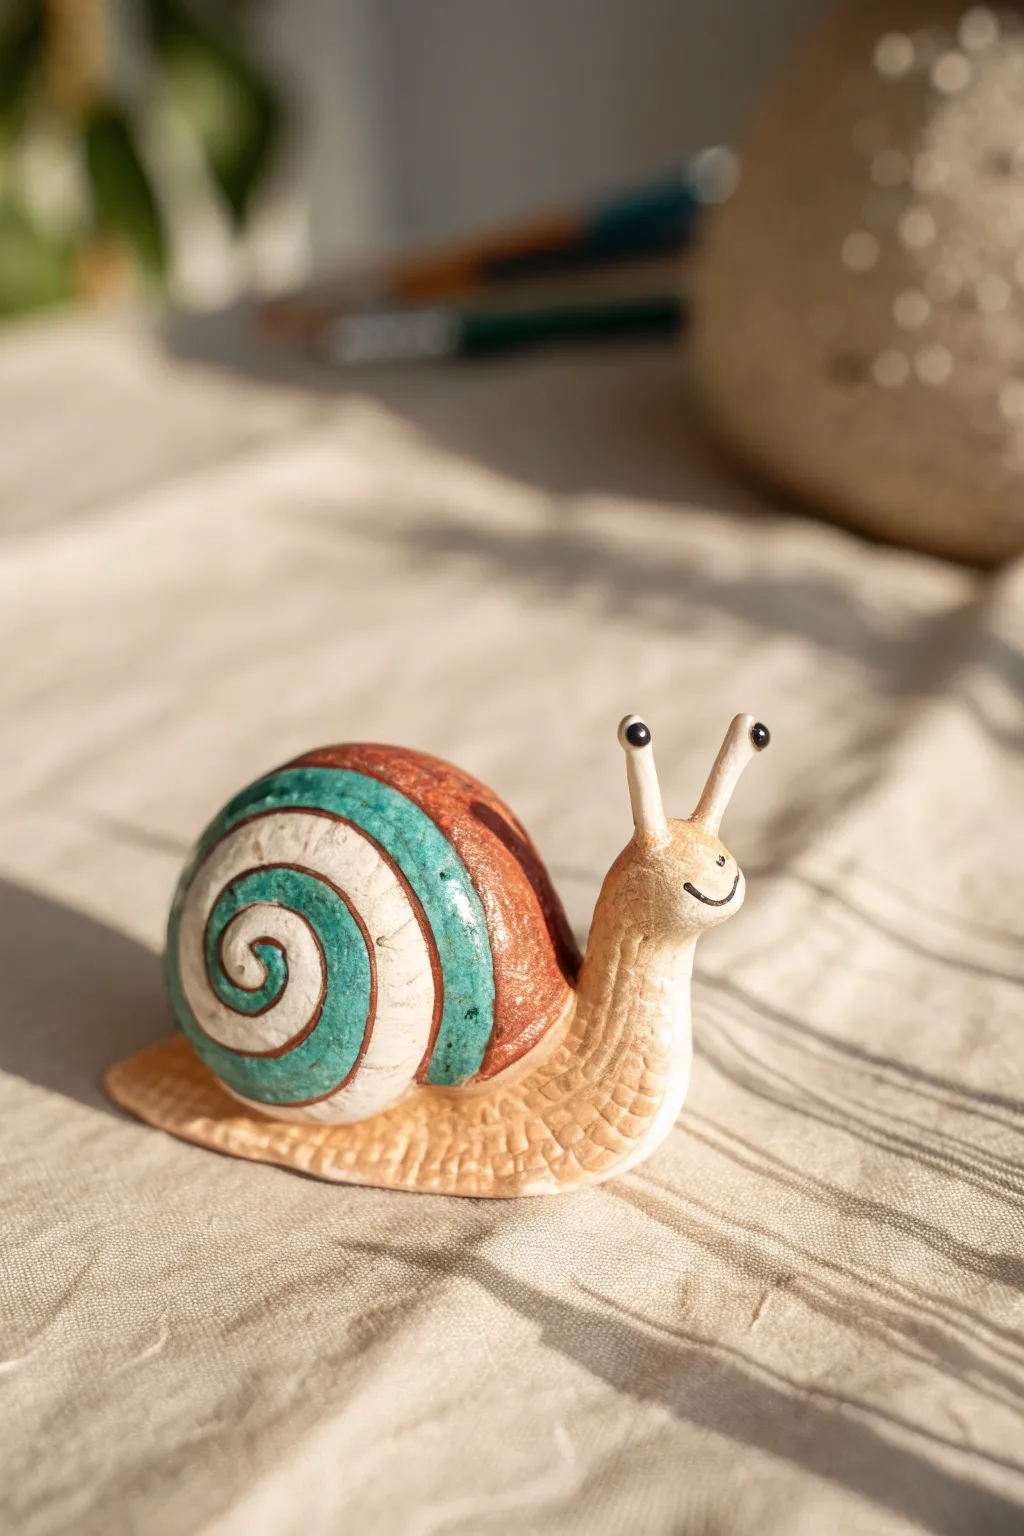
Create a cheerful garden companion with this adorable snail project. Featuring a textured, natural-toned body and a vibrant spiraled shell in teal and brown, this little figurine adds a touch of brightness to any shelf.
Step-by-Step Tutorial
Materials
- Air-dry clay or polymer clay (white or beige base)
- Sculpting tools (needle tool, small ball stylus)
- Acrylic paints (beige/tan, turquoise/teal, warm brown, black, white)
- Fine detail paintbrushes
- Clear gloss varnish or sealant
- Small cup of water
- Texture sheet or rough fabric (optional)
Step 1: Sculpting the Body
-
Form the base:
Start with a medium-sized ball of clay for the body. Roll it into a tapered log shape, thicker at the front (head) and trailing off into a flatter, thinner tail. -
Shape the head:
Gently curve the thicker end upward to create the neck and head. Smooth out any cracks with a little water if you are using air-dry clay. -
Add texture:
Using a needle tool or a small sculpting knife, press a cross-hatch pattern into the lower part of the body and tail to mimic the snail’s rough skin texture. -
Create the stalks:
Roll two small, thin cylinders of clay for the eye stalks. Attach them to the top of the head, blending the clay at the join so they are secure. -
Make the eyes:
Roll two tiny balls of clay and press them gently onto the tips of the stalks. Flatten them slightly so they look like little bulbs. -
Carve the expression:
Using a needle tool or curved blade, carve a simple, upward-curving smile into the side of the face.
Smooth Seams
Use a brush dipped in water (for air-dry clay) or baby oil (polymer clay) to smooth the seam where the shell meets the body for a flawless join.
Step 2: Creating the Shell
-
Roll the coil:
Roll a long, thick snake of clay. Try to keep one end slightly thicker than the other, tapering down gradually. -
Coil the spiral:
Starting from the thinnest end, roll the snake tightly into a spiral disc shape. Keep the coil vertical like a wheel, not flat like a cinnamon roll. -
Refine the shape:
Press the coils gently together so they bind. Smooth the outer surface slightly with your finger or a tool to ensure it looks like a solid shell. -
Attach to body:
Score (scratch) the back of the snail body and the bottom of the shell. Add a dab of water or liquid clay, then firmly press the shell onto the body. -
Dry thoroughly:
Let the sculpture dry completely according to your clay’s instructions before painting.
Metallic Touch
Mix a tiny amount of gold mica powder or metallic paint into the brown shell paint to give it a subtle, shimmering iridescence.
Step 3: Painting and Finishing
-
Base coat the body:
Paint the snail’s body with a beige or light tan acrylic paint. You might want to water it down slightly to get into the textured crevices. -
Highlight the texture:
Once the base is dry, dry-brush a lighter cream color over the raised cross-hatch pattern to make the texture pop. -
Paint the shell base:
Paint the wide outer bands of the shell in a warm brown tone. Leave the inner spiral path unpainted for now. -
Add the teal spiral:
Carefully paint the inner spiral band with a bright turquoise or teal color. I find a small flat brush helps keep the edges crisp here. -
Define the separation:
Paint a thin line of cream or white between the brown and teal sections to help differentiate the spiral pattern. -
Add facial details:
Use a very fine brush or a toothpick to paint the eyes black with white reflection dots. Trace the carved smile with thin black paint. -
Seal the piece:
Finish by applying a coat of glossy varnish to the shell to make it look shiny and moist, while using a matte or satin varnish for the body.
Now you have a charming little snail ready to explore your desk or windowsill

TRACK YOUR CERAMIC JOURNEY
Capture glaze tests, firing details, and creative progress—all in one simple printable. Make your projects easier to repeat and improve.
Mini Turtle With A Textured Shell
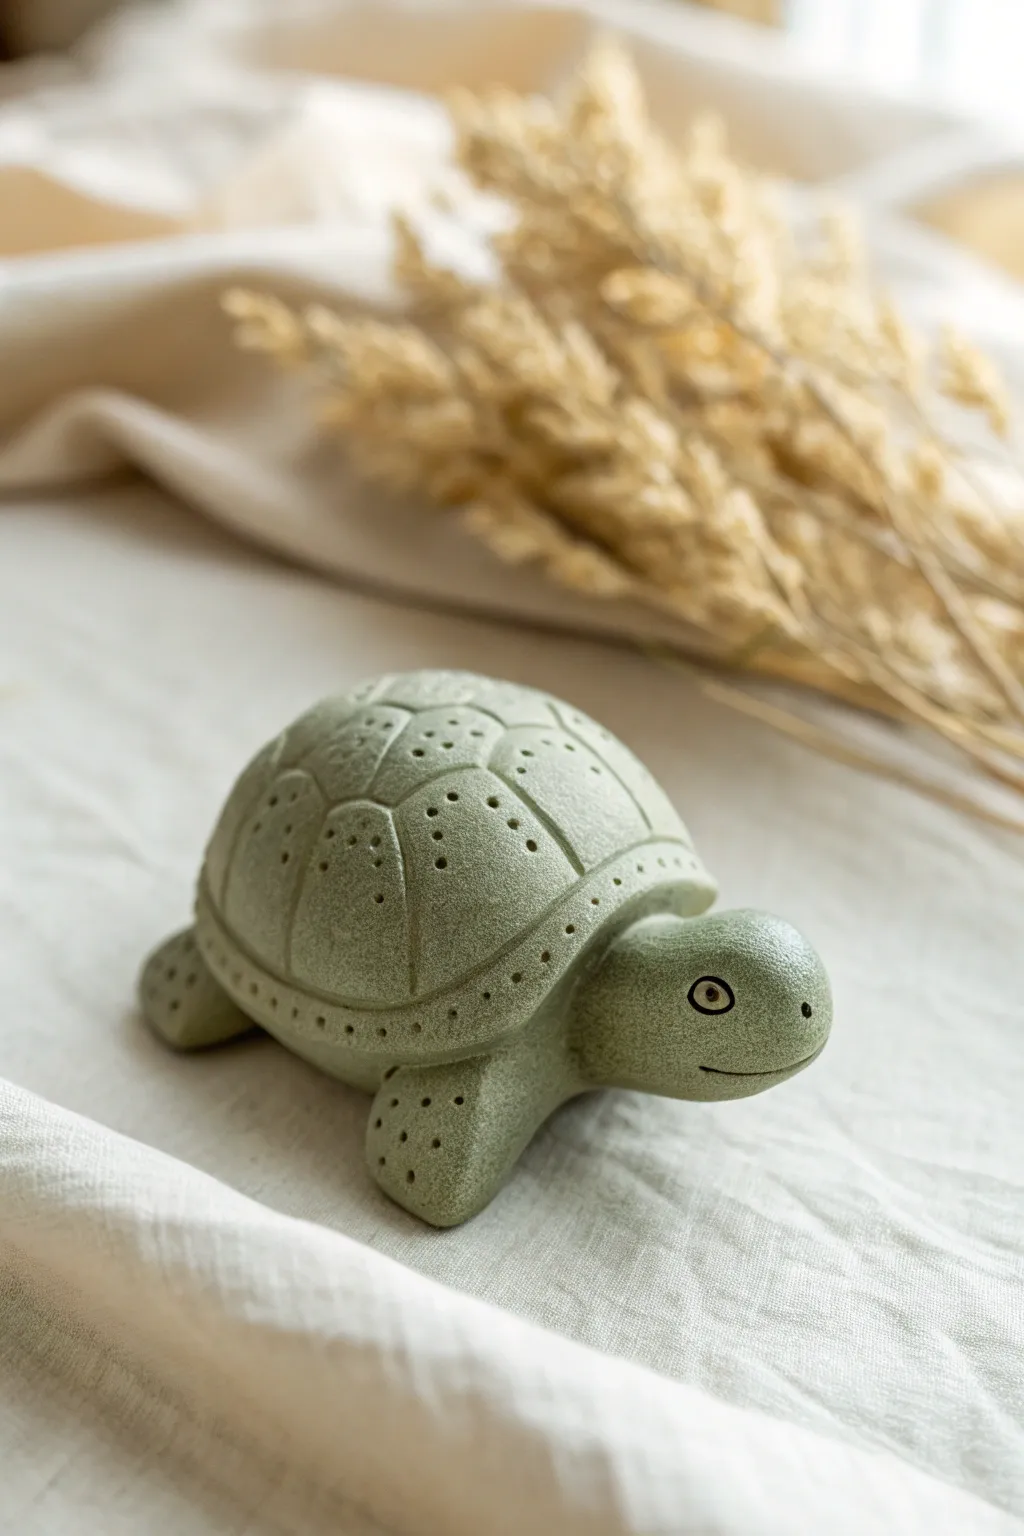
This charming, sage-green turtle features a beautifully segmented shell that mimics the gentle curves of nature. With its soft, porous texture and friendly expression, it makes for a calming desk companion or a sweet potted plant guardian.
How-To Guide
Materials
- Light green or sage colored polymer clay (or air-dry clay)
- Needle tool or toothpick
- Ball stylus tool (small)
- Black acrylic paint
- Fine detail paintbrush
- Smooth work surface
- Optional: Texture sponge or toothbrush
Step 1: Shaping the Base
-
Create the shell:
Start by rolling a large ball of sage-green clay for the main body. Gently flatten the bottom against your work surface while keeping the top rounded to form a perfect dome shape. -
Form the head:
Roll a smaller ball of clay, about one-thirtieth the size of the shell. Slightly elongate it into a rounded teardrop shape. -
Attach the head:
Press the wider end of the teardrop against the front and underside of the shell. Smooth the seam carefully to ensure a strong bond where the neck meets the body. -
Make the flippers:
Create four small, equal-sized balls of clay. Flatten them slightly and shape them into rounded triangles to serve as the flippers. -
Attach the flippers:
Position the flippers under the shell—two near the front and two near the back. Press them firmly into place, ensuring they angle slightly outward so the turtle looks like it’s swimming or walking.
Step 2: Detailing and Texture
-
Texture the surface:
To achieve that stony, matte look, gently tap a clean toothbrush or texture sponge all over the clay surface. This removes fingerprints and adds a realistic, grainy finish. -
Outline the scutes:
Using a needle tool, lightly sketch the pattern of the shell. Start with a central hexagon at the very top of the dome. -
Complete the pattern:
Draw lines radiating out from the corners of your central hexagon to create the surrounding segments (scutes) down the sides of the shell. -
Define the rim:
Carve a distinct line running horizontally around the bottom edge of the shell to create a rim. Segment this rim with small vertical lines spaced evenly apart. -
Deepen the lines:
Go back over your shell lines with the needle tool, pressing slightly deeper to create visible separation between the shell segments. -
Add shell pores:
Using the needle tool, poke tiny clusters of holes inside each shell segment. I find that grouping 3-5 holes together looks more natural than random spacing. -
Texture the flippers:
Add similar tiny poke-holes to the tips of the flippers to match the shell’s texture style. -
Create the eye sockets:
Use a small ball stylus to press indented circles on either side of the head. -
Add the mouth:
Carve a simple, curved line for a smile using the needle tool. Add a tiny dot at the corner of the mouth for a dimple effect.
Uneven Shell Lines?
If your carving lines look jagged, dip your finger in a tiny bit of water (for air dry) or baby oil (for polymer) and gently rub the line to smooth out the burrs.
Step 3: Finishing Touches
-
Bake or dry:
If using polymer clay, bake according to the package directions. If using air-dry clay, allow it to cure completely (usually 24 hours). -
Paint the eyes:
Once hardened, dip a fine detail brush into black acrylic paint. Carefully paint a circle inside the indented eye socket. -
Add the highlight:
For a spark of life, paint a thin ring of white or a lighter green around the black pupil, or simply leave the clay color visible as a border around the black dot.
Make it Organic
Before baking, lightly dust the crevices of the shell with brown chalk pastel powder. This adds an aged, earthy look instantly.
Place your finished turtle on a sunny windowsill to enjoy its peaceful presence
Baby Chick In An Eggshel
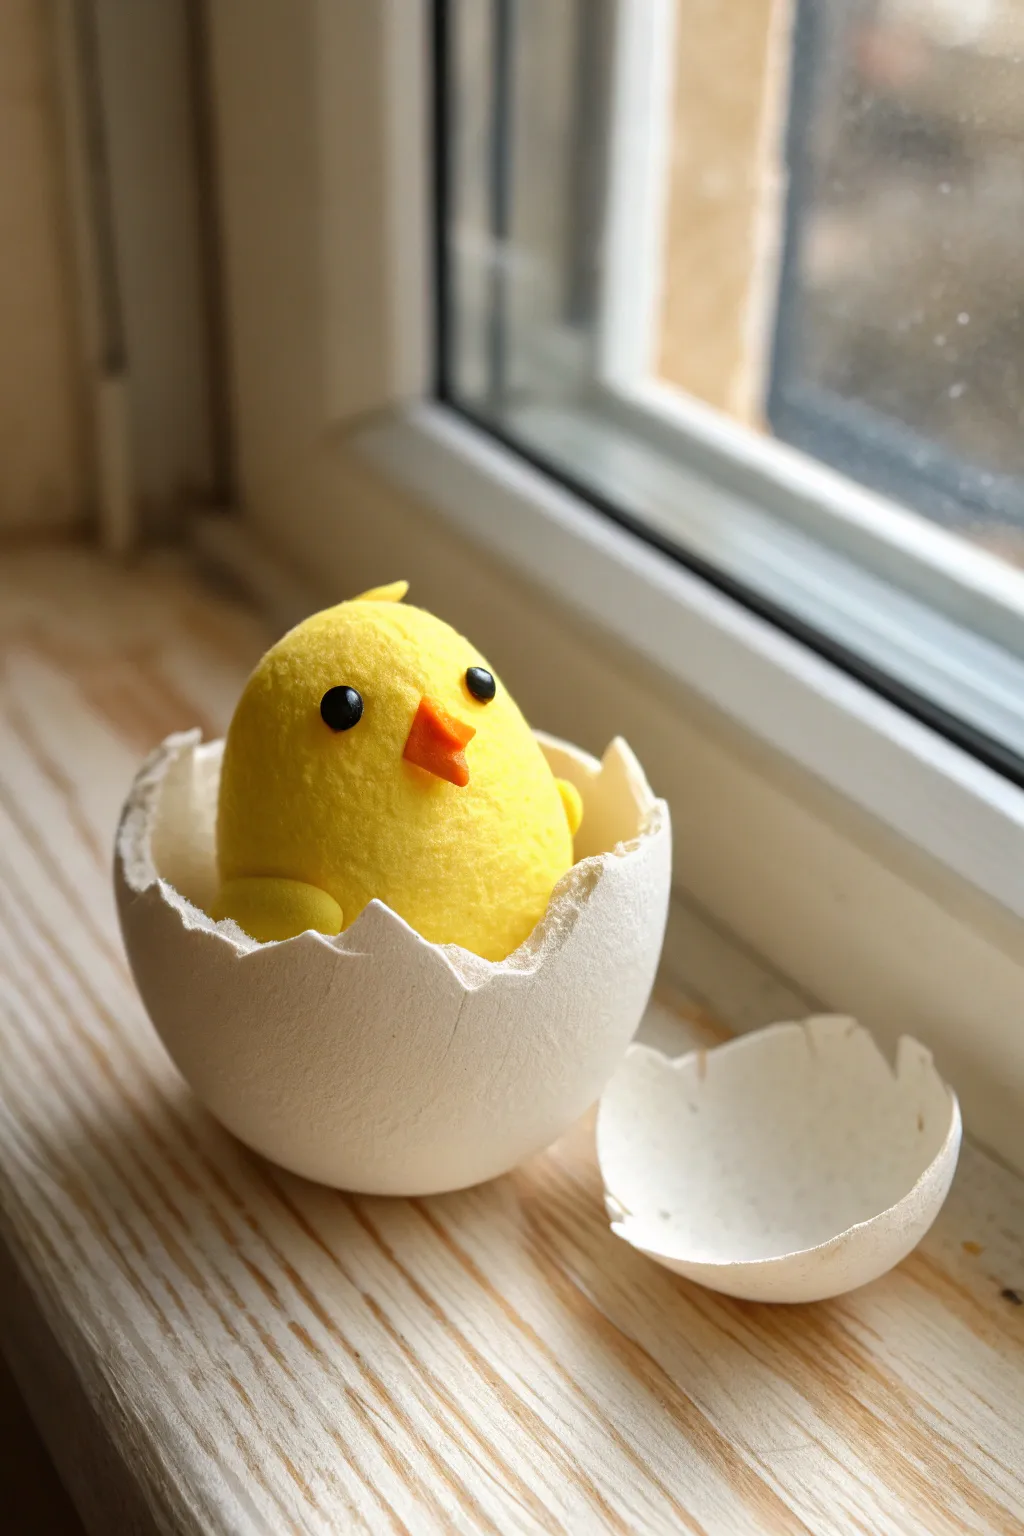
Capture the magic of new beginnings with this adorable clay project featuring a fuzzy little chick peeking out from its white eggshell. The textured finish gives the chick a soft, almost felted appearance that contrasts beautifully with the smooth, broken edges of the shell.
Step-by-Step Guide
Materials
- Yellow polymer clay
- White polymer clay
- Orange polymer clay
- Black glass beads or small balls of black clay (for eyes)
- Texture tool (toothbrush or stiff bristle brush)
- Ball tool
- Needle tool or toothpick
- Craft knife
- Aluminum foil (optional core)
- Baking sheet
Step 1: Creating the Eggshell
-
Prepare the White Clay:
Condition a generous amount of white polymer clay until it is soft and pliable. Roll it into a smooth ball about the size of a golf ball. -
Hollow the Form:
Gently press your thumb into the center of the ball to create an indentation. Use your fingers to pinch and pull the walls upwards, thinning them out to resemble a cup shape. -
Shape the Shell:
Continue thinning the walls until they are about 3-4mm thick. You want it sturdy enough to hold the chick but thin enough to look like a shell. I check the thickness by holding it up to the light occasionally. -
Create the Broken Edge:
Use a craft knife or needle tool to cut jagged, uneven zig-zags along the top rim. Remove the excess clay to reveal a fractured look. -
Add Texture:
Slightly roughen the outside of the shell with a sponge or very light sandpaper texture to mimic a natural egg surface rather than perfectly smooth plastic. -
Separate Piece:
Roll a smaller piece of white clay thin and cut a curved, broken fragment to serve as the discarded shell piece sitting next to the main egg.
Cracked Clay Crisis?
If your shell cracks during baking, don’t panic. Mix a tiny bit of white clay with liquid clay (Bake & Bond) to make a paste, fill the crack, and rebake.
Step 2: Sculpting the Chick
-
Form the Body:
Roll yellow clay into a smooth egg shape that fits comfortably inside your prepared shell base. It should peek out significantly over the jagged edge. -
Texturing the Surface:
This is the secret to the fuzzy look: take an old toothbrush or a stiff bristle brush and firmly tap it all over the yellow surface. Do this repeatedly until the clay looks like soft down feathers. -
Details on the Wings:
Form two small teardrops of yellow clay. Flatten them slightly and apply the same stippled texture. Attach these to the sides of the body. -
Insert the Eyes:
Use a ball tool to make two small indentations on the face area. Press black glass beads or tiny balls of black clay into these sockets. -
Sculpt the Beak:
Take a tiny amount of orange clay and shape it into a small pyramid or diamond. Use a needle tool to gently press a horizontal line for the mouth opening. -
Attach the Beak:
Place the orange beak centrally below the eyes. Press it on gently so you don’t squash the fuzzy texture you created earlier. -
Top Feathers:
Shape a tiny tuft of clay into a curl or spike for the top of the head. Add texture and attach it carefully to the crown.
Step 3: Assembly & Finishing
-
Positioning:
Place the yellow chick body inside the white shell. Press down gently to ensure the bottom of the chick adheres to the inside of the shell. -
Final Adjustments:
Check the viewing angles. Ensure the broken shell edge doesn’t obscure the chick’s cute face or wings. -
Baking:
Place the assembled chick and the separate shell fragment on a baking sheet. Bake according to your polymer clay package instructions (usually around 275°F/135°C for 15-30 minutes). -
Cool and Display:
Let the figure cool completely before handling. Place the small shell fragment next to the main piece on a windowsill or shelf to complete the scene.
Make It Sparkle
Brush a tiny amount of pearlescent mica powder onto the yellow clay before baking to give the chick a magical, shimmering golden glow.
Now you have a charming little herald of spring to brighten up any corner of your home
Mini Ghost Figure With Blush Cheeks
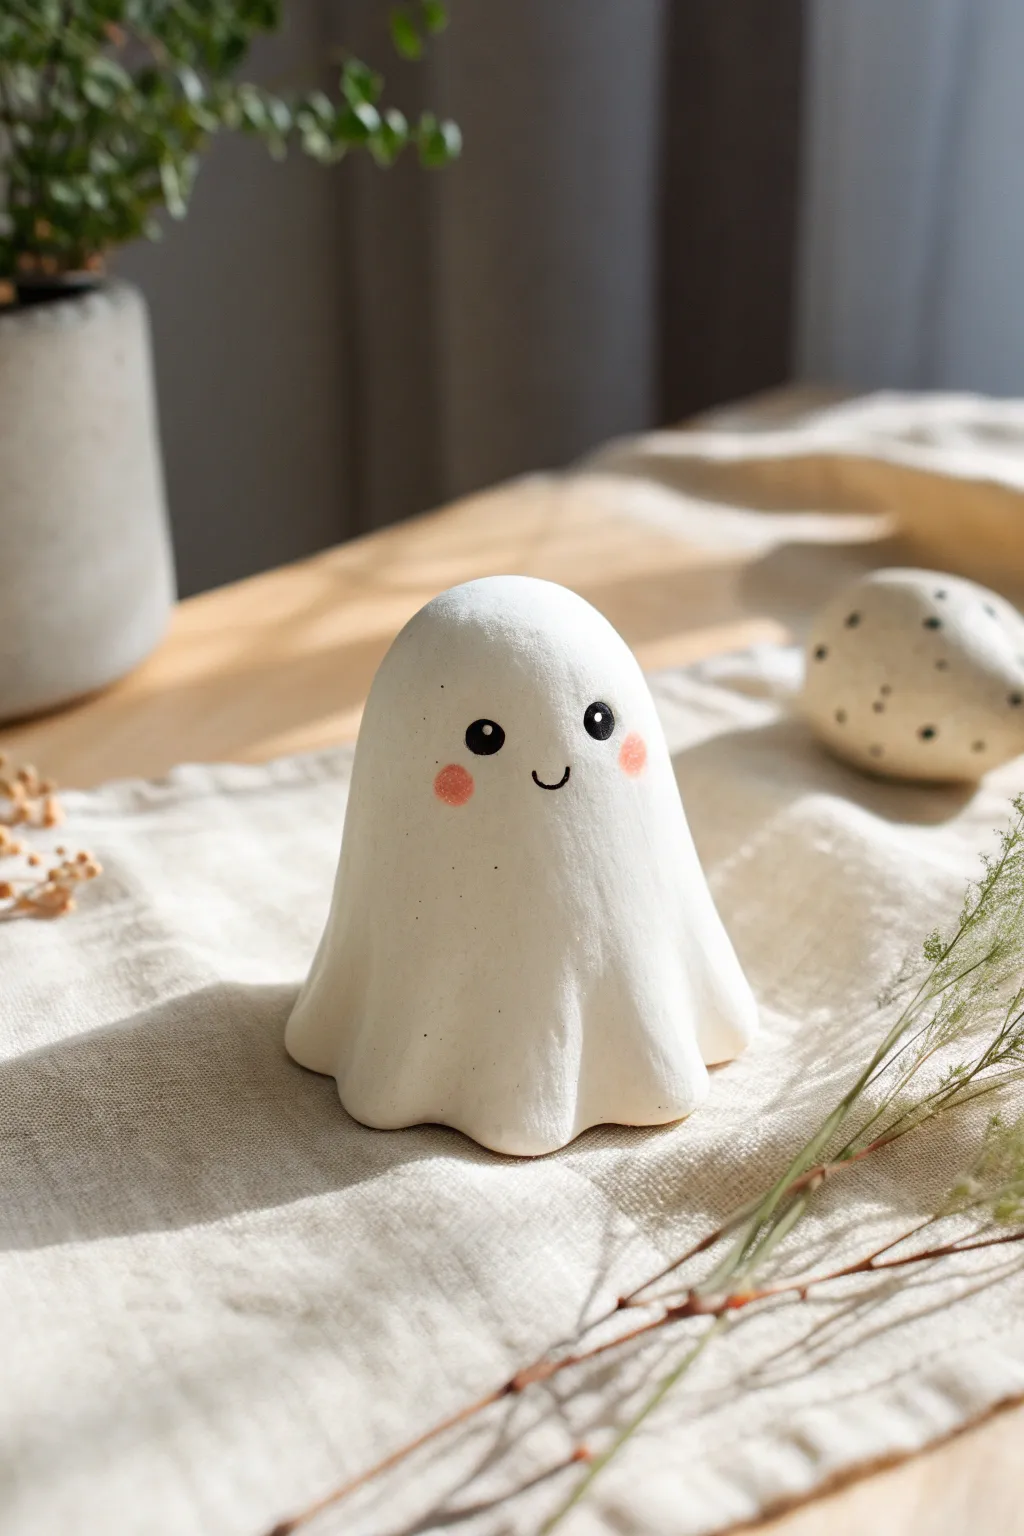
Bring a little spooky sweetness to your shelf with this adorable mini ghost figure. This simple hand-sculpted design features gentle folds, a smooth matte finish, and the charming addition of rosy pink cheeks.
Step-by-Step Tutorial
Materials
- White clay (air-dry or polymer)
- Black acrylic paint
- Pink acrylic paint or soft pastel shavings
- Small fine-point paintbrush
- Ball stylus tool or toothpick
- Damp sponge
- Fine-grit sandpaper (optional)
- Matte varnish
Step 1: Shaping the Base
-
Condition the clay:
Begin by taking a chunk of white clay about the size of a golf ball. Knead it thoroughly in your hands until it becomes warm, soft, and pliable. This prevents cracks later on. -
Form a cylinder:
Roll the clay into a smooth ball first, then gently roll it back and forth on your work surface to elongate it into a thick cylinder shape with a rounded top. -
Hollow the form:
Hold the cylinder in one hand and gently press your thumb into the bottom center. Rotate the clay while pinching the walls to hollow out the inside, creating a bell-like shape. -
Thin the bottom edge:
Continue pinching down towards the bottom rim. You want the clay at the base to be slightly thinner than the rounded head so it can ripple naturally.
Cracked Clay?
If small cracks appear while air-drying, mix a tiny bit of fresh clay with water to make a paste (slip). Fill the cracks, smooth it over, and let it dry again.
Step 2: Adding the Folds
-
Create main drapes:
Place the figure on your table. Using your thumb and forefinger, gently push and pinch the bottom edge to create wavy folds. The idea is to mimic a sheet draping over a form. -
Refine the ripples:
Use the handle of a paintbrush or a rounded tool to press indentations vertically from the bottom rim upward, fading them out about halfway up the body. -
Smooth the surface:
Take a damp sponge or just a wet finger and lightly brush over the entire surface. This blends away fingerprints and softens the transition between the smooth head and the rippled base. -
Check stability:
Gently tap the ghost on the table to ensure the bottom is level and it stands up straight without wobbling. I like to let it sit for a moment to ensure the folds hold their shape. -
Drying:
Allow your ghost to dry deeply. If using air-dry clay, leave it for 24-48 hours. If using polymer clay, bake according to the package instructions.
Softer Blush
Real makeup blush works wonders on clay! Use a q-tip to gently apply your own powder blush to the cheeks before sealing for the most natural fade.
Step 3: Painting the Features
-
Sand imperfections:
Once fully cured or dry, inspect your ghost. If there are any rough bumps, gently buff them away with fine-grit sandpaper for a porcelain-smooth finish. -
Paint the eyes:
Dip the end of a paintbrush handle or a large ball stylus into black acrylic paint. Dot two solid black circles onto the upper half of the face, spacing them wide apart for cuteness. -
Add eye highlights:
Wait for the black paint to dry completely. Then, using a tiny pin or the very tip of a toothpick, add a microscopic white dot to the upper right of each black eye. -
Draw the smile:
Using your finest brush or a fine-tip marker, draw a tiny, shallow U-shape directly between and slightly below the eyes. -
Apply the blush:
Mix a very diluted wash of pink paint, or use a dry brush to pick up shaved pink pastel dust. Dab this gently onto the cheeks just under the eyes for a soft, diffused look. -
Seal the piece:
Protect your paint job by applying a thin coat of matte varnish over the entire figure. This unifies the sheen and keeps the white clay looking clean.
Now you have a charming little companion ready to haunt your desk
Tiny Toast With A Happy Face
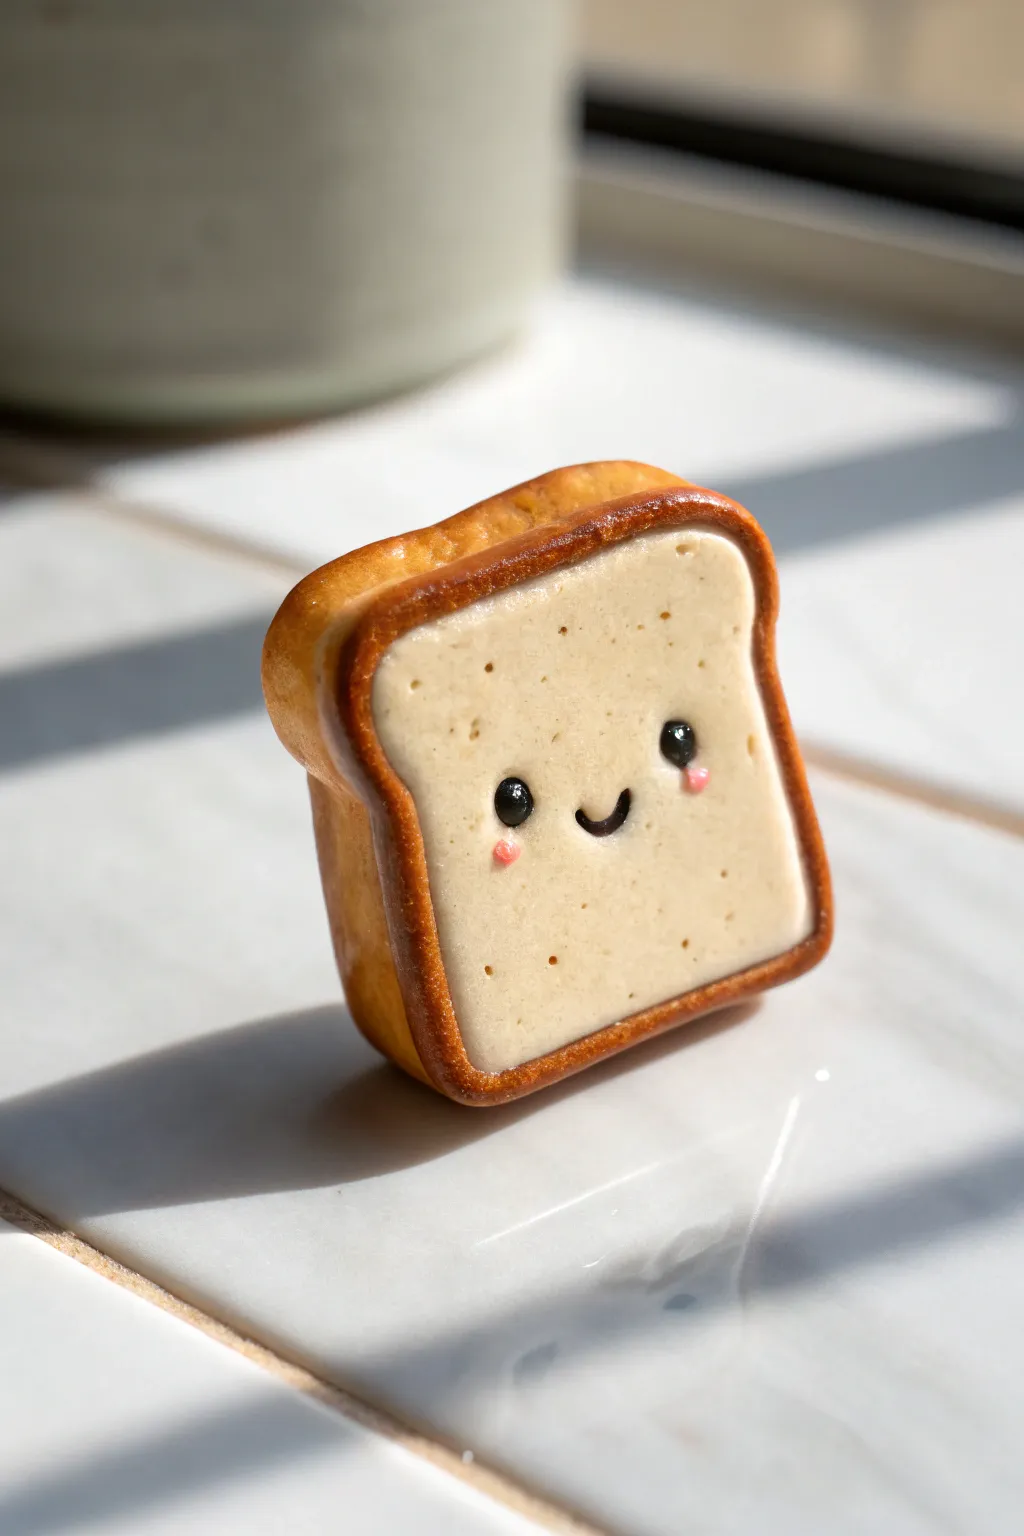
This adorable miniature toast slice brings a cheerful start to any day with its golden crust and charming little smile. Crafted from polymer clay, it features realistic bread texturing and a glossy finish that makes it look almost edible.
Step-by-Step
Materials
- White or translucent polymer clay
- Yellow ochre polymer clay (or chalk pastel)
- Brown polymer clay (for crust)
- Black polymer clay (tiny amount for eyes/mouth)
- Pink polymer clay or chalk pastel (for cheeks)
- Soft chalk pastels (ochre, burnt sienna, dark brown)
- Liquid polymer clay (Fimo liquid or TLS)
- Toothbrush or texturing tool
- Needle tool or toothpick
- Small paintbrush
- Gloss glaze or UV resin
Step 1: Dough and Shape
-
Mix the bread color:
Start by mixing translucent clay with a very small amount of white and a tiny speck of yellow ochre. You want an off-white, creamy color that mimics the inside of white bread. -
Form the base block:
Roll your mixed clay into a thick, smooth ball, then flatten it slightly into a square shape with rounded corners. It should be about 1/2 inch thick to give it that chunky, plush look. -
Indent the top:
Gently press down on the center of the top edge to create the characteristic dip found in a slice of bread. -
Create the crust wrap:
Roll out a strip of brown clay into a thin, flat ribbon. The width should match the thickness of your bread slice perfectly. -
Attach the crust:
Carefully wrap the brown ribbon around the perimeter of your bread shape. Trim any excess at the bottom where the seam will be less visible and smooth the join with a clay tool.
Step 2: Texturing and Shading
-
Texture the bread face:
Using a clean toothbrush or a texture tool, tap firmly all over the front and back cream-colored surfaces. This creates realistic air pockets and crumb texture. -
Shade the edges:
Scrape some ochre and burnt sienna chalk pastel into a fine powder. Using a soft fluffy brush, gently dust the outer edges of the cream face where it meets the crust to make it look toasted. -
Intensify the crust color:
Apply darker brown pastel shading directly onto the brown clay crust, especially on the corners, to give it that perfectly baked, golden-brown appearance. -
Texture the crust:
I like to gently tap the brown crust with crumpled aluminum foil or a stiff brush to remove any fingerprints and make it look baked rather than plastic.
Crust Separation?
If the brown crust keeps peeling away from the white bread while texturing, apply a very thin layer of liquid polymer clay (like TLS) between the layers as a bonding glue before baking.
Step 3: The Happy Face
-
Make eye sockets:
Use a medium-sized ball tool to press two indentations into the center of the bread face where you want the eyes to sit. -
Add the eyes:
Roll two tiny balls of black clay and press them into the sockets. Flatten them slightly so they don’t protrude too much. -
Create the smile:
Roll an incredibly thin snake of black clay. Cut a tiny U-shape segment and gently press it onto the face between the eyes using a needle tool. -
Add rosy cheeks:
Take the tiniest specks of pink clay (or use a dab of pink pastel dust) and apply them just under the outer corners of the eyes. -
Add eye highlights:
For that spark of life, place a microscopic dot of white clay or white acrylic paint (after baking) in the top corner of each black eye.
Make it a Charm
Before baking, insert a small metal eye pin into the top center of the crust. Once baked, you can attach jump rings to turn your happy toast into a necklace, keychain, or zipper pull.
Step 4: Baking and Finishing
-
Bake the piece:
Place your toast on a ceramic tile or baking sheet. Bake according to your clay manufacturer’s instructions, usually around 275°F (130°C) for 15-20 minutes. -
Cool down:
Let the piece cool completely before handling it to ensure the clay hardens fully. -
Glaze the eyes:
Using a fine detail brush, apply a drop of UV resin or gloss varnish only to the black part of the eyes to make them shine. -
Final coat (optional):
If you want a glazed pastry look, you can varnish the crust, but keep the bread face matte for a realistic texture.
Now you have a little baked buddy to keep you company on your desk
Adorable Strawberry Figure With Seeds
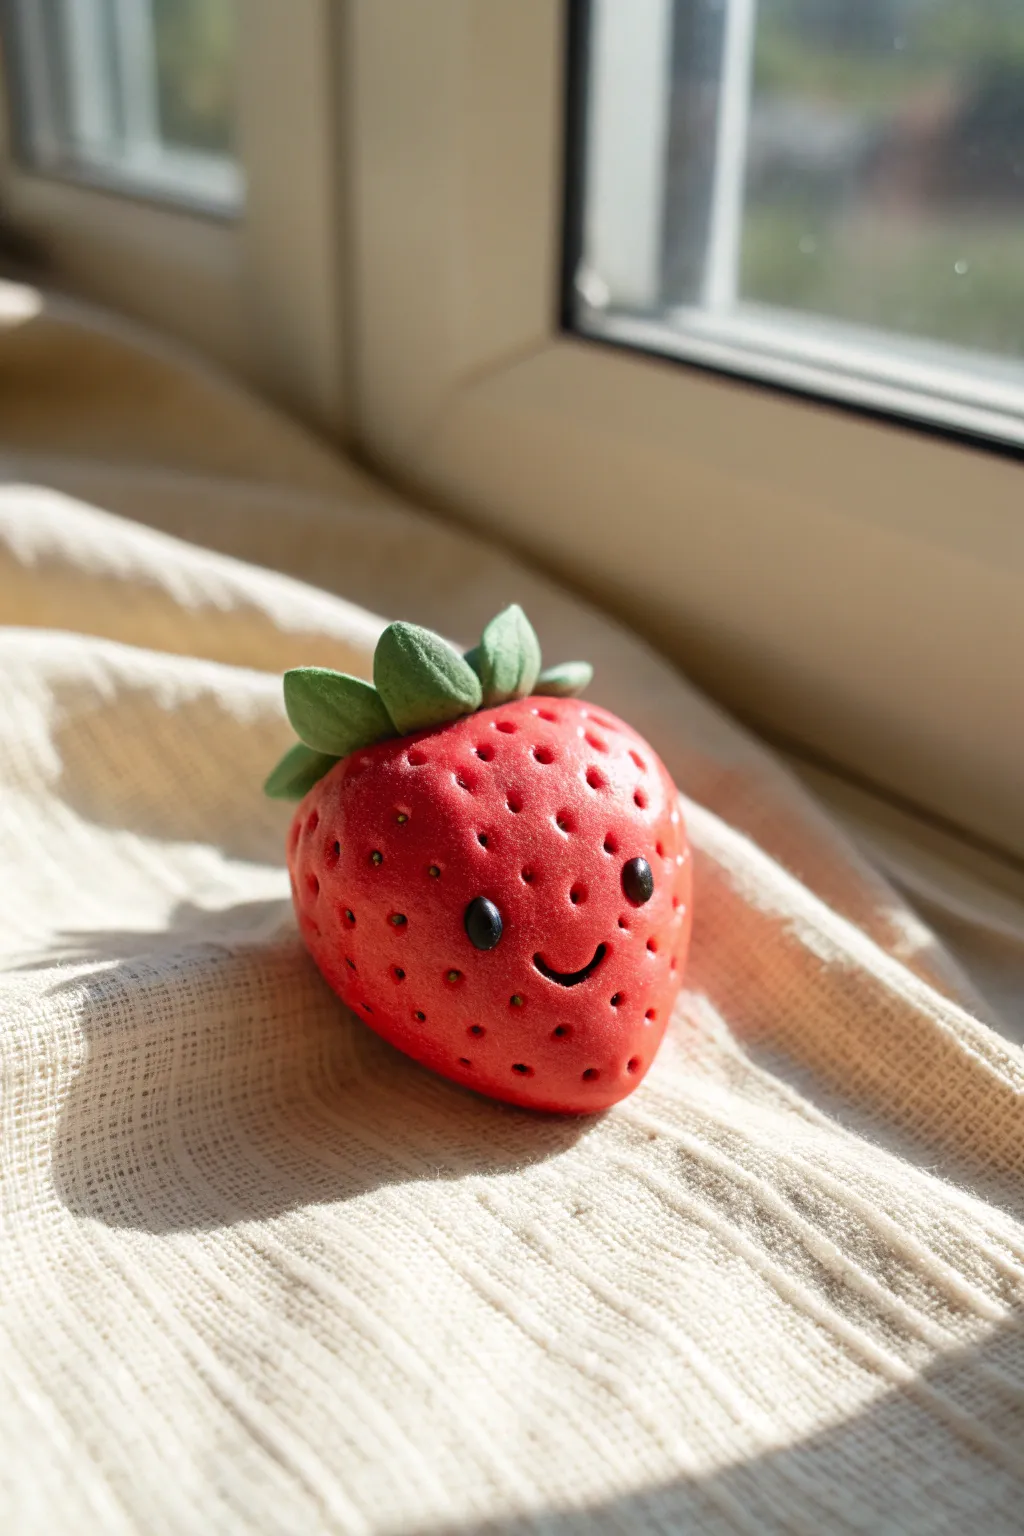
Brighten up your desk or windowsill with this irresistibly cheerful strawberry companion. Featuring adorable button eyes and a textured surface mimicking real fruit, this simple clay project captures the essence of summer sweetness in miniature form.
Step-by-Step
Materials
- Red polymer clay (standard berry red)
- Green polymer clay (leaf green)
- Black polymer clay
- Aluminum foil (optional, for core)
- Needle tool or toothpick
- Ball tool (small)
- Modeling tool or stiff blade
- Gloss glaze (optional)
Step 1: Shaping the Base
-
Condition the clay:
Start by warming up your red polymer clay in your hands until it becomes soft, pliable, and free of cracks. A smooth starting texture is key for a flawless finish. -
Form the strawberry body:
Roll the red clay into a smooth ball about the size of a walnut. If you want to save clay, you can tightly scrunch a small ball of aluminum foil first and cover it with a layer of red clay. -
Refine the shape:
Gently taper one end of the ball to create a rounded cone shape. The bottom shouldn’t be too sharp—aim for a chubby, rounded point that mimics a ripe strawberry. -
Flatten the top:
Press the wider top end slightly against your work surface so it sits flat. This provides a stable base for the leaves later.
Step 2: Adding Texture & Features
-
Create the seed pockets:
Using a needle tool or toothpick, gently press small indentations all over the red surface. Don’t poke straight in; press lightly to create shallow divots rather than deep holes. -
Space the seeds evenly:
Try to keep the spacing somewhat uniform, but random enough to look organic. Leave a clean, smooth area in the center of the ‘face’ where the eyes and mouth will go. -
Mark the eye sockets:
Take a small ball tool and press two indentations into the smooth face area. These should be larger than your seed textures to accommodate the clay eyes. -
Form the eyes:
Roll two tiny, equal-sized balls of black clay. They should be just small enough to fit snugly into the eye sockets you just created. -
Attach the eyes:
Place the black balls into the sockets and gently flatten them with your finger so they adhere well but remain slightly convex. -
Add the smile:
Roll a very thin, short snake of black clay. Carefully curve it into a ‘U’ shape and press it onto the face between and slightly below the eyes. -
Secure the expression:
Use a silicone tool or your finger to gently tap the smile so it bonds with the red clay without smudging the shape.
Seed Depth Trick
For realistic seeds, press your needle tool into the clay and give it a tiny upward flick. This creates a teardrop-shaped divot that catches light beautifully.
Step 3: The Leafy Crown
-
Prepare the green clay:
Condition your green clay and divide it into 5 or 6 small, pea-sized balls. -
Shape the leaves:
Flatten each green ball into a teardrop shape. pinch the pointed end to sharpen it, creating a classic leaf silhouette. -
Add leaf details:
Use a knife tool or toothpick to score a central vein down the middle of each leaf for added realism. -
Arrange the calyx:
Press the wider ends of the leaves onto the flat top of the strawberry, arranging them in a circle so the tips point outward and slightly upward. -
Create the stem:
Roll a small, thick cylinder of green clay and place it right in the center where all the leaves meet, blending the seams gently with a tool. -
Final inspection:
Check your figure from all angles. Smooth out any accidental fingerprints, especially on the face area. -
Bake:
Bake the figure according to your specific polymer clay manufacturer’s instructions (usually around 275°F or 130°C for 15-30 minutes). -
Cool and finish:
Let the strawberry cool completely. You can add a coat of gloss glaze to the eyes to make them sparkle, or glaze the whole fruit for a juicy look.
Dust Magnets?
If you spot dust on your raw clay, dip a Q-tip in rubbing alcohol or baby oil and gently wipe the surface before baking to clean it up instantly.
Now you have a sweet little friend ready to bring a smile to any space
Tiny Pumpkin Pal For Fall
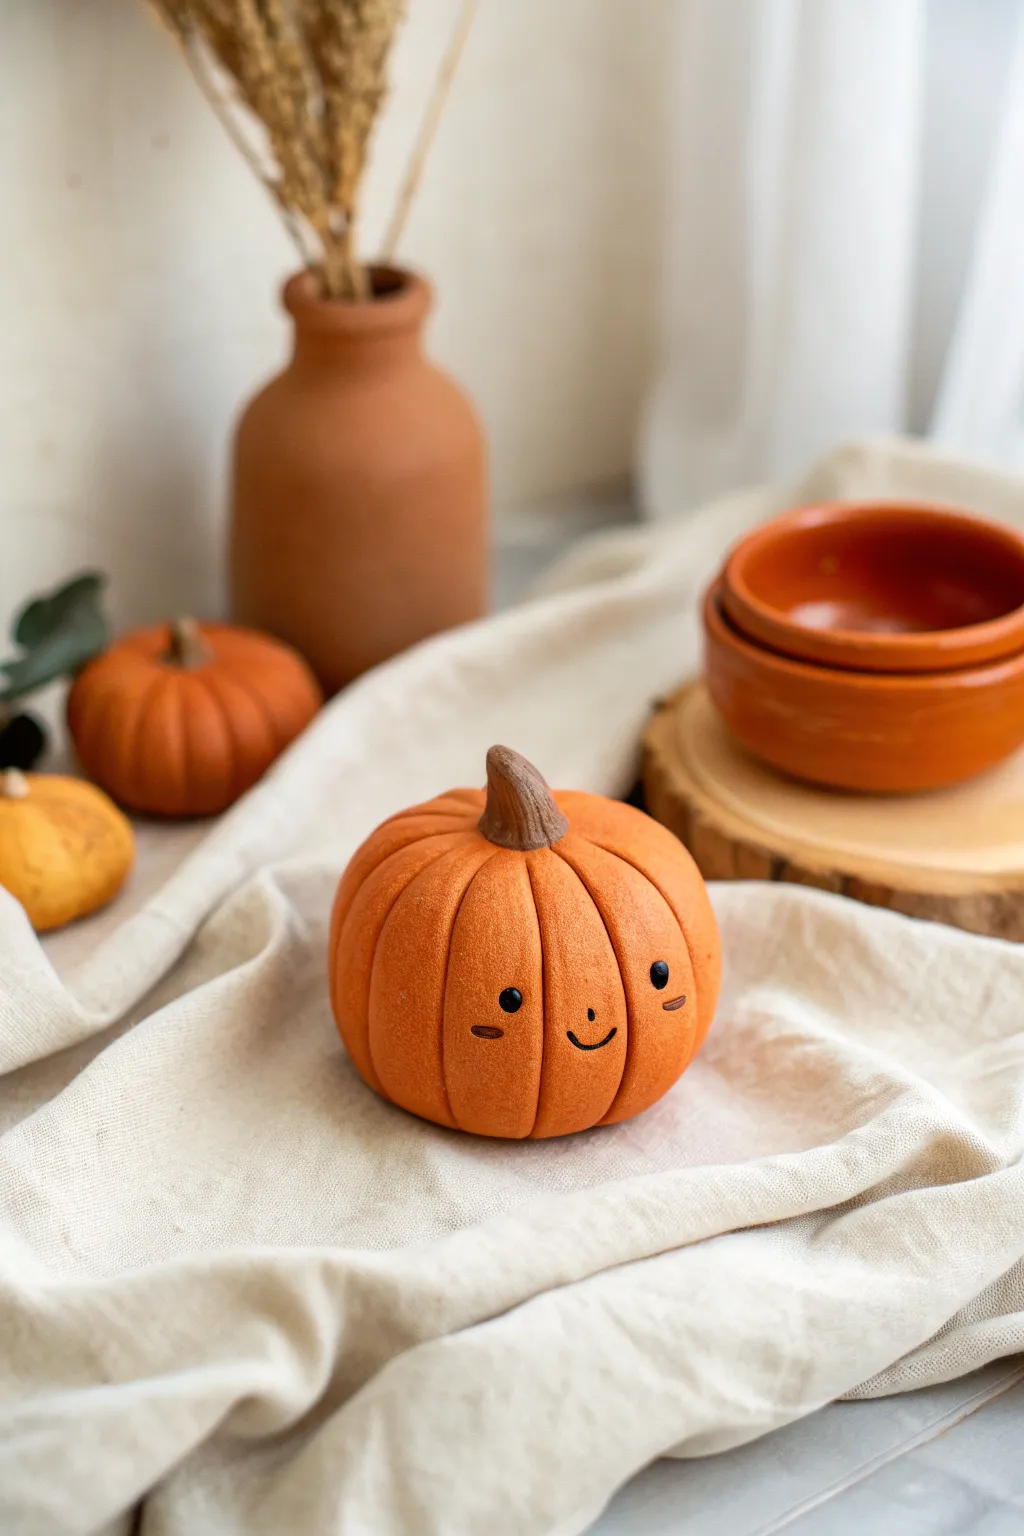
Bring the cozy warmth of autumn to your desk or shelf with this undeniably cute clay pumpkin. Featuring a friendly smiling face and a soft, matte texture, this miniature sculpture is the perfect introductory project for polymer clay beginners.
Step-by-Step
Materials
- Orange polymer clay (terracotta or pumpkin spice shade)
- Brown polymer clay (dark chocolate shade)
- Black acrylic paint or clay
- Sculpting tool (needle tool or toothpick)
- Ball stylus tool
- Soft pastel chalks (orange/red for shading)
- Small paintbrush
- Aluminum foil (for creating a core, optional)
- Baking sheet and oven
Step 1: Forming the Base
-
Prepare the clay:
Begin by conditioning your orange clay in your hands until it is soft and pliable. If the clay feels too stiff, keep rolling and squishing it; warm hands work best. -
Roll the main sphere:
Roll the orange clay into a smooth ball about the size of a tangerine. Ensure there are no cracks on the surface by gently smoothing them out with your thumb. -
Flatten slightly:
Place the ball on your work surface and press down gently on the top to create a slightly squat, pumpkin-like shape rather than a perfect sphere. -
Create the center indent:
Using your thumb or the rounded end of a tool, press a small indentation into the very top center of the shape where the stem will eventually sit.
Step 2: Sculpting the Ribs
-
Mark the sections:
Using a needle tool or the back of a butter knife, lightly score vertical lines from the top center indent down to the bottom center to divide the pumpkin into sections. -
Deepen the creases:
Go back over your guide lines and press deeper to create the distinct ribbed segments. I like to rock the tool gently side-to-side to round off the edges of each segment so they look puffy. -
Shape the segments:
Use your finger to gently smooth the sharp edges created by the tool, ensuring each ‘slice’ of the pumpkin looks rounded and plump. -
Texture the surface:
To mimic the matte, organic look in the photo, take an unlikely tool—like an old toothbrush or a stiff bristle brush—and tap it lightly all over the orange surface to remove fingerprints and add skin texture.
Smudged the face?
If you smudge the tiny black eye details while sculpting, use a cotton swab dipped in a tiny bit of rubbing alcohol or baby oil to spot-clean the orange clay without ruining the texture.
Step 3: Adding the Stem
-
Form the stem:
Take a small pinch of dark brown clay and roll it into a thick, slightly tapered log shape. -
Texture the wood:
Use a needle tool to scratch vertical lines up and down the brown clay log to simulate wood grain. -
Attach the stem:
Press the wider bottom of the stem firmly into the indentation you made earlier on top of the pumpkin. You can use a tiny drop of liquid clay or bake-and-bond if you want extra security. -
Curve the top:
Give the very tip of the stem a slight whimsical twist or bend to one side so it looks natural and less rigid.
Make it a trio
Create a whole patch by making two more pumpkins in varying sizes—one tall and skinny, one wide and flat—to display together as a family.
Step 4: Creating the Face
-
Map out the features:
Decide which side of your pumpkin looks best. Use a needle tool to poke two tiny guide holes for the eyes and a small curve for the mouth. -
Insert the eyes:
Roll two minuscule balls of black clay. Press them gently into the eye guide holes you created. Alternatively, you can bake the pumpkin first and paint the eyes on later. -
Add rosy cheeks:
Using a needle tool, press two tiny horizontal indents just below and outside the eyes to create cute little cheek marks. -
Make the smile:
Gently press a small U-shape into the clay for the mouth. If you want the exact look from the photo, add a tiny dot of black clay or paint to the center of the smile.
Step 5: Shading and Finishing
-
Apply pastel shading:
Scrape a little bit of orange or red pastel chalk into a powder. Use a soft brush to dust this powder into the deep creases between the pumpkin ribs to add depth and dimension. -
Clean up:
Check the sculpture one last time for dust or stray lint. You can use a Q-tip dipped in rubbing alcohol to gently wipe away any unwanted debris. -
Bake carefully:
Place your pumpkin on a baking sheet lined with parchment paper. Bake according to your brand of polymer clay instructions (usually 275°F/135°C for 15-30 minutes per 1/4 inch of thickness). -
Cool down:
Let the pumpkin cool completely in the oven with the door strictly cracked open to prevent cracking from thermal shock.
Enjoy your charming new autumn decoration knowing you made it yourself
Mini Snowman With A Scarf
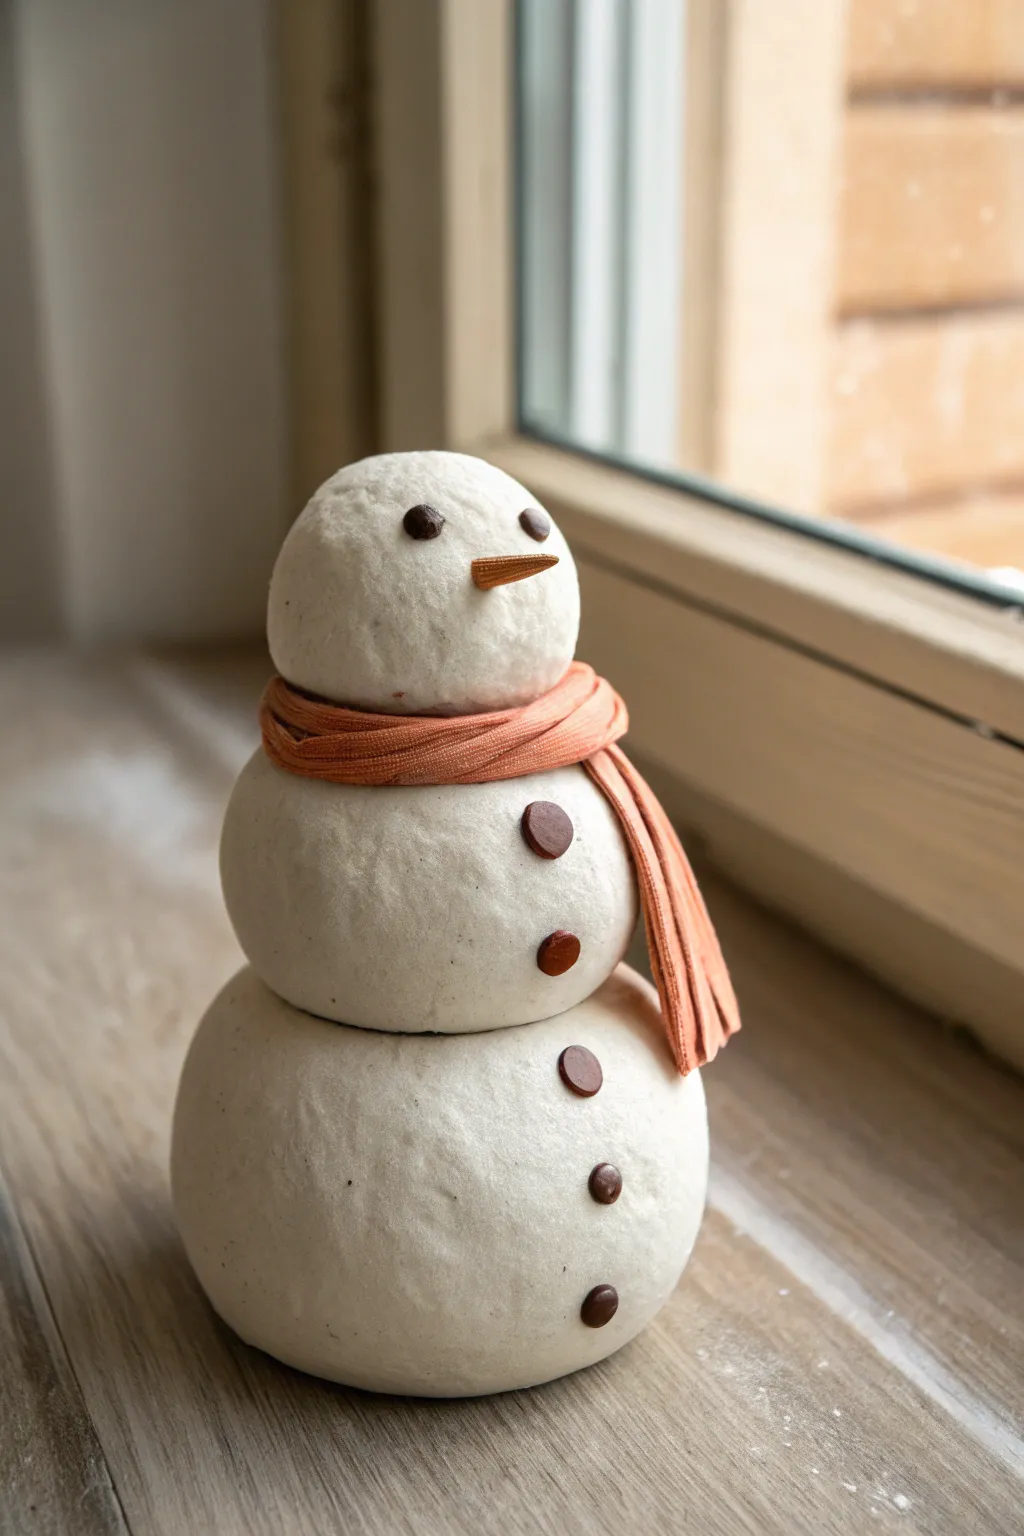
This adorable miniature snowman brings winter charm indoors without the melting mess. Crafted from textured white clay and accessorized with a tiny fabric scarf, he sits perfectly on a windowsill or desk as a festive buddy.
Detailed Instructions
Materials
- White polymer clay or air-dry clay (textured or ‘stone’ effect preferred)
- Dark brown or black polymer clay
- Orange polymer clay
- Peach or salmon-colored jersey fabric scrap
- Basic sculpting tools
- Toothpicks or wire (for structural support)
- Small scissors
- Matte varnish (optional)
Step 1: Forming the Body
-
Prepare the Base:
Begin by conditioning your white clay until it is soft and pliable. Roll a large ball, approximately the size of a golf ball, to serve as the sturdy base of your snowman. -
Create the Middle and Head:
Roll two smaller spheres of white clay. The middle section should be slightly smaller than the base, and the head should be the smallest of the three to create a classic tapered look. -
Texturize the Snow:
Before assembling, lightly tap the surface of each white ball with a stiff-bristled toothbrush or a balled-up piece of aluminum foil. This gives the clay a realistic, compacted snow texture rather than a perfectly smooth finish. -
Stack the Snowballs:
Gently press the largest ball onto your work surface to flatten the bottom so it stands upright. Place the middle ball on top, followed by the head. -
Secure the Structure:
To ensure your snowman doesn’t topple, I often insert a toothpick or a short piece of wire down through the center of all three balls to act as a hidden spine.
Step 2: Adding Frozen Features
-
Sculpt the Buttons:
Roll out a very thin snake of dark brown clay. Slice five small, equal discs to serve as the ‘coal’ buttons. -
Attach the Buttons:
Press two buttons onto the middle snowball and three onto the bottom base. Place them in a vertical line, gently pushing them into the white clay so they adhere well. -
Make the Eyes:
Using the same dark brown clay, roll two tiny spheres for the eyes. Press these gently into the upper third of the head, making sure they are spaced evenly. -
Shape the Carrot Nose:
Take a pinch of orange clay and roll it into a small cone shape. Elongate the tip slightly to look like a carrot. -
Detail the Carrot:
Use a craft knife or a needle tool to scratch tiny horizontal lines across the orange cone to mimic the texture of a real carrot. -
Place the Nose:
Attach the wide end of the carrot nose to the center of the face, just below the eyes.
Loose Scarf?
If the fabric won’t stay put after tying, place a tiny dot of craft glue on the back of the snowman’s neck to tack the scarf permanently in place.
Step 3: Dressing and Finishing
-
Prepare the Scarf Material:
Cut a long, thin strip from your scrap of peach jersey fabric. A width of about half an inch works well for this scale. -
Create the Fringe:
At both ends of the fabric strip, use your small scissors to make several short vertical cuts. This creates the tasseled fringe look typical of a winter scarf. -
Wrap the Scarf:
Gently wrap the fabric strip around the snowman’s neck, right where the head meets the middle section. Loop it so one end hangs down the front and the other side drapes casually. -
Adjust the Draping:
Tuck and position the scarf so it looks natural. The fabric creates a wonderful textural contrast against the clay. -
Bake or Dry:
If using polymer clay, carefully remove the scarf and bake the figure according to the package instructions (usually 275°F for 15-30 minutes). If using air-dry clay, let it sit undisturbed for 24-48 hours until fully hardened. -
Reattach and Protect:
Once the figure is completely cool or dry, re-tie the scarf securely. If desired, apply a coat of matte varnish to the clay parts to protect the finish without making it shiny.
Create a Scene
Build a small base from white clay and add glitter while the clay is wet to create a sparkling snowdrift for your snowman to sit on.
Your frosty little friend is now ready to bring a touch of winter cheer to any corner of your home
Tiny Flower Sprite Figure
This charming figure brings a touch of garden magic indoors with its rustic, speckled finish and warm, earthy tones. The simple shapes and expressive face make it an endearing project that looks like it was plucked straight from a fairytale flowerbed.
How-To Guide
Materials
- Polymer clay (terracotta or warm pink-brown blend)
- Flecking medium or black pepper (for splatter effect)
- Acrylic paint (black, white, blush pink, brown)
- Fine detail paintbrush
- Ball stylus tool or toothpick
- Aluminum foil (for armature core)
- Old toothbrush
- Matte varnish
- Clay sculpting tools (needle tool, small blade)
Step 1: Sculpting the Base
-
Prepare the clay:
Begin by conditioning your clay thoroughly until it is soft and pliable. If you want that stone-like speckled look shown in the photo, knead in a tiny pinch of cracked black pepper or specific ‘granite’ clay inclusions now. -
Create the core:
Ball up a small piece of aluminum foil into a gumdrop shape about 1 inch tall. This saves clay and keeps the figure lightweight. -
Form the body:
Roll out a sheet of your terracotta-colored clay and wrap it around the foil cone. Smooth the seams completely so you have a seamless, bell-shaped mound. -
Shape the arms:
Roll two thin, tapered logs of clay for the arms. Attach them vertically to the sides of the body, blending the top shoulder area into the main form but leaving the bottom hands slightly defined.
Faux-Ceramic Texture
Before baking, gently roll a piece of rough sandpaper or a textured sponge over the clay surface. This removes fingerprints and mimics unglazed pottery.
Step 2: The Flower Collar
-
Roll the face:
Roll a smooth, perfect sphere of lighter peach or beige clay for the face. It should be proportional to nestle inside the flower petals later. -
Make the petals:
Create 7-8 small teardrop shapes from the main body color clay. Flatten them gently with your thumb to create the petals. -
Detail the petals:
Using a needle tool or small knife, score a single line down the center of each petal to mimic leaf veins. -
Assemble the ruff:
Arrange these petals in a circle on top of the body cone, pressing them down securely. Place the head ball into the center of this ring, slightly squashing the petals upward so they cup the face. -
Secure the head:
Gently press the head down to ensure a strong bond with the neck area and the surrounding petals.
Step 3: Texture and Pattern
-
Speckle the surface:
Dip an old toothbrush into watered-down dark brown acrylic paint. Run your thumb over the bristles to flick tiny specks onto the body and petals. I like to practice on paper first to get the spray right. -
Add deep dots:
Take a needle tool and poke sporadic, deeper holes into the ‘dress’ part of the body to create the perforated texture seen in the reference. -
Bake:
Bake the figure according to your specific clay manufacturer’s instructions (usually 275°F/135°C for 15-30 minutes). Let it cool completely.
Garden Variation
Make a whole garden family by changing the petal shapes! Try rounded petals for a daisy sprite or spiky, layered triangles for a succulent sprite.
Step 4: Painting the Face
-
Paint the eyes:
Using a fine detail brush or a ball stylus tool, dot two small circles of dark brown paint for the eyes. -
Add the smile:
With the very tip of your smallest brush, paint a delicate, thin U-shape for the smile between the eyes. -
Apply blush:
Mix a tiny amount of pink paint with water to make a glaze, or use chalk pastels. Dab soft, round rosy cheeks just below the eyes. -
Seal the work:
Once all paint is perfectly dry, apply a coat of matte varnish over the entire piece to protect the paint and give it a finished, ceramic feel.
Place your little sprite near a potted plant where it can watch over your greenery.
Stackable Totem Of Mini Faces
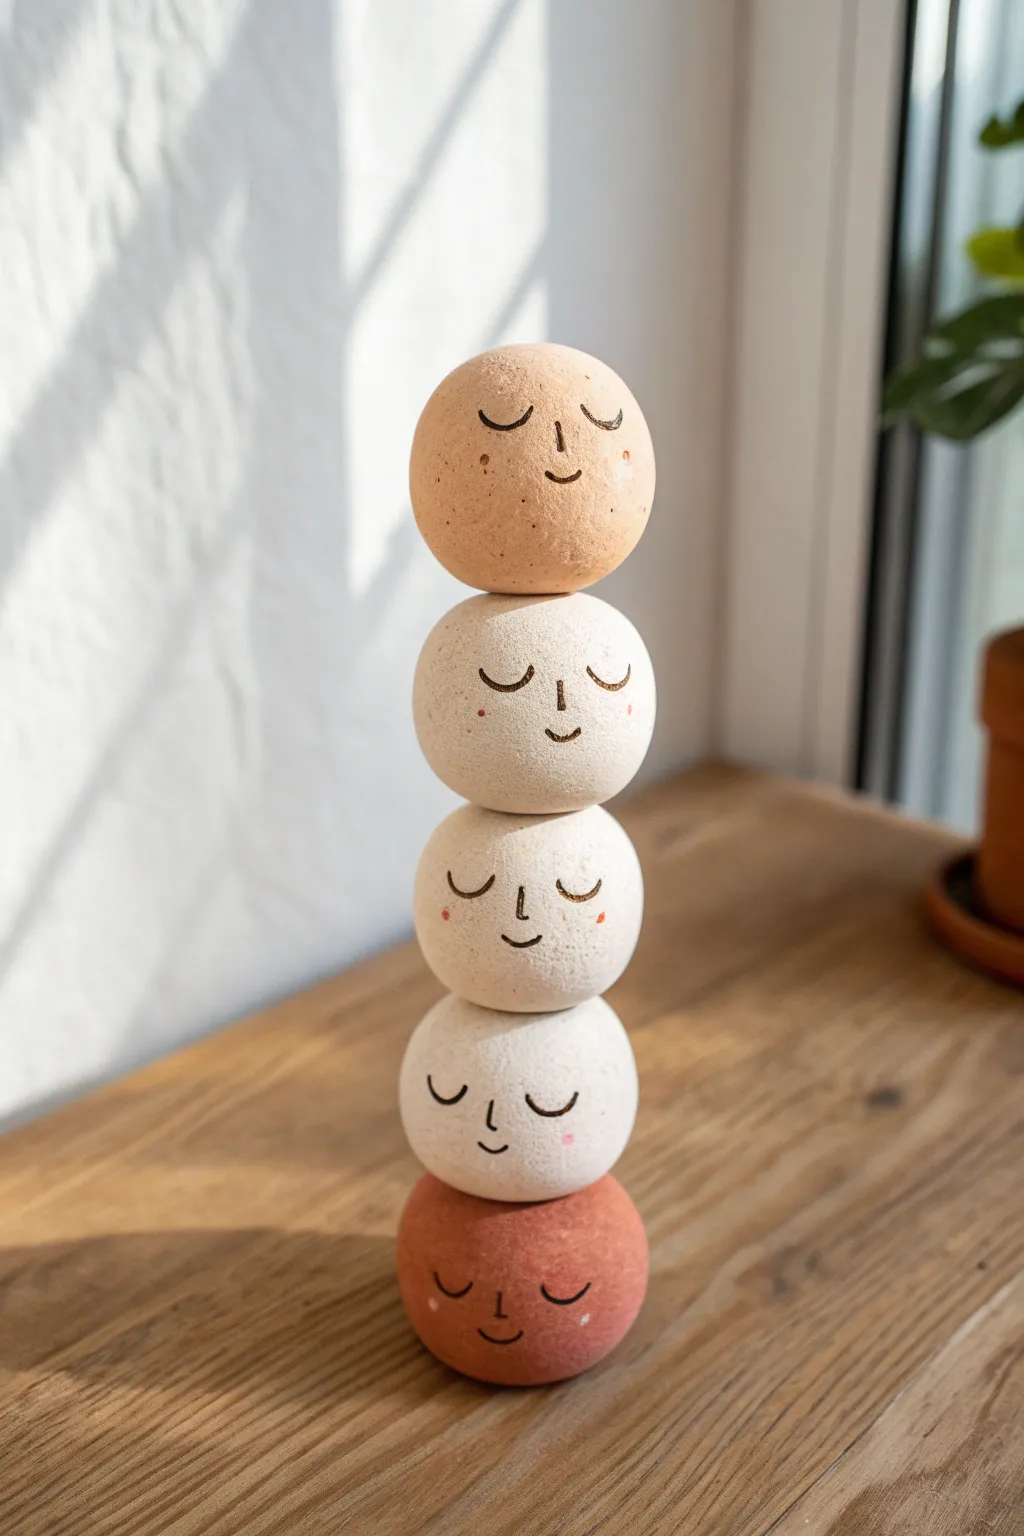
Bring a sense of calm to your desk or shelf with this vertical stack of sleepy-faced spheres. This simple yet striking project relies on natural, earthy clay tones and minimal line work to create a modern decorative totem.
Step-by-Step Tutorial
Materials
- Polymer clay (in beige, speckled white, warm cream, and terracotta)
- Aluminum foil
- Parchment paper
- Needle tool or toothpick
- Fine-point black permanent marker or dark brown acrylic paint
- Detail paintbrush (00 size) if using paint
- Pink soft pastel chalk
- Small soft brush
- Oven for baking
- Strong craft glue or clear epoxy (optional)
Step 1: Shaping the Spheres
-
Prepare the core:
To save clay and reduce weight, tear off five pieces of aluminum foil. Crumple each into a tight ball, roughly 1 inch in diameter. -
Condition the clay:
Start with your first color, perhaps the terracotta for the base. Knead the polymer clay in your hands until it is soft, pliable, and free of cracks. -
Cover the foil:
Flatten the conditioned clay into a pancake shape. Wrap it entirely around one of the foil balls, pinching the seams shut so the foil is completely hidden. -
Roll until smooth:
Place the clay-covered ball between your palms and roll vigorously. Continue rolling until all seams vanish and you have a perfectly smooth sphere. Repeat this process for the remaining four colors: beige, speckled white, and cream. -
Create stability:
Since these are round, you need a way to stack them. Gently press the bottom sphere onto your work surface to create a small flat spot. Then, press the top of that sphere slightly flat to accommodate the next one. -
Stack and flatten:
Repeat the flattening process for the middle three spheres—flattening both top and bottom slightly. For the very top sphere, only flatten the bottom.
Wobbly Stack?
If the dried clay spheres don’t sit flat, use a piece of fine-grit sandpaper to gently grind down the contact points until they sit flush against each other.
Step 2: Adding the Faces
-
Mark the features:
Before full detailing, use your needle tool to very lightly mark where the eyes and nose will go. Aim for the center-lower half of the sphere for a cute look. -
Create the nose:
Take a tiny tiny pinch of clay matching the sphere color. Roll it into a microscopic sausage shape and press it vertically onto the face for the nose bridge. Smooth the edges so it attaches. -
Alternative nose method:
If you prefer a simpler look, you can skip the added clay nose and just draw it later. I find the raised nose adds nice dimension, though. -
Add rosy cheeks:
Scrape a little dust off your pink pastel chalk. Dip a small soft brush into the powder and gently dab it onto the cheek areas of the raw clay. -
Bake the clay:
Arrange your spheres on a parchment-lined baking sheet. Bake according to your specific clay manufacturer’s instructions (usually around 275°F for 15-30 minutes per 1/4 inch of thickness). -
Cool completely:
Let the spheres cool entirely inside the oven with the door cracked, or on a wire rack. Don’t handle them while hot as they can be fragile.
Texture Tip
To mimic the stone look in the photo, mix some coarse black pepper or craft sand into your plain white clay before rolling the spheres.
Step 3: Assembly and Detailing
-
Draw the expression:
Once cool, use a fine-point permanent marker to draw the sleepy ‘U’ shaped eyes. Draw a small vertical line or ‘U’ shape for the nose if you didn’t sculpt one. -
Add freckles:
For extra charm, add three tiny dots on either side of the face for freckles using a lighter brown marker or diluted paint. -
Test the stack:
Stack your spheres to check the balance. Arrange them by color gradient or mix them up as seen in the photo. -
Glue the totem:
Apply a dab of strong glue or epoxy to the flat spots between each sphere. Assemble your tower, pressing firmly but carefully. -
Final drying:
Let the glue cure completely before moving your new artwork. The result is a charming, meditative focal point.
Now you have a serene little sculpture to watch over your workspace
Mix-And-Match Mini Monster Parts
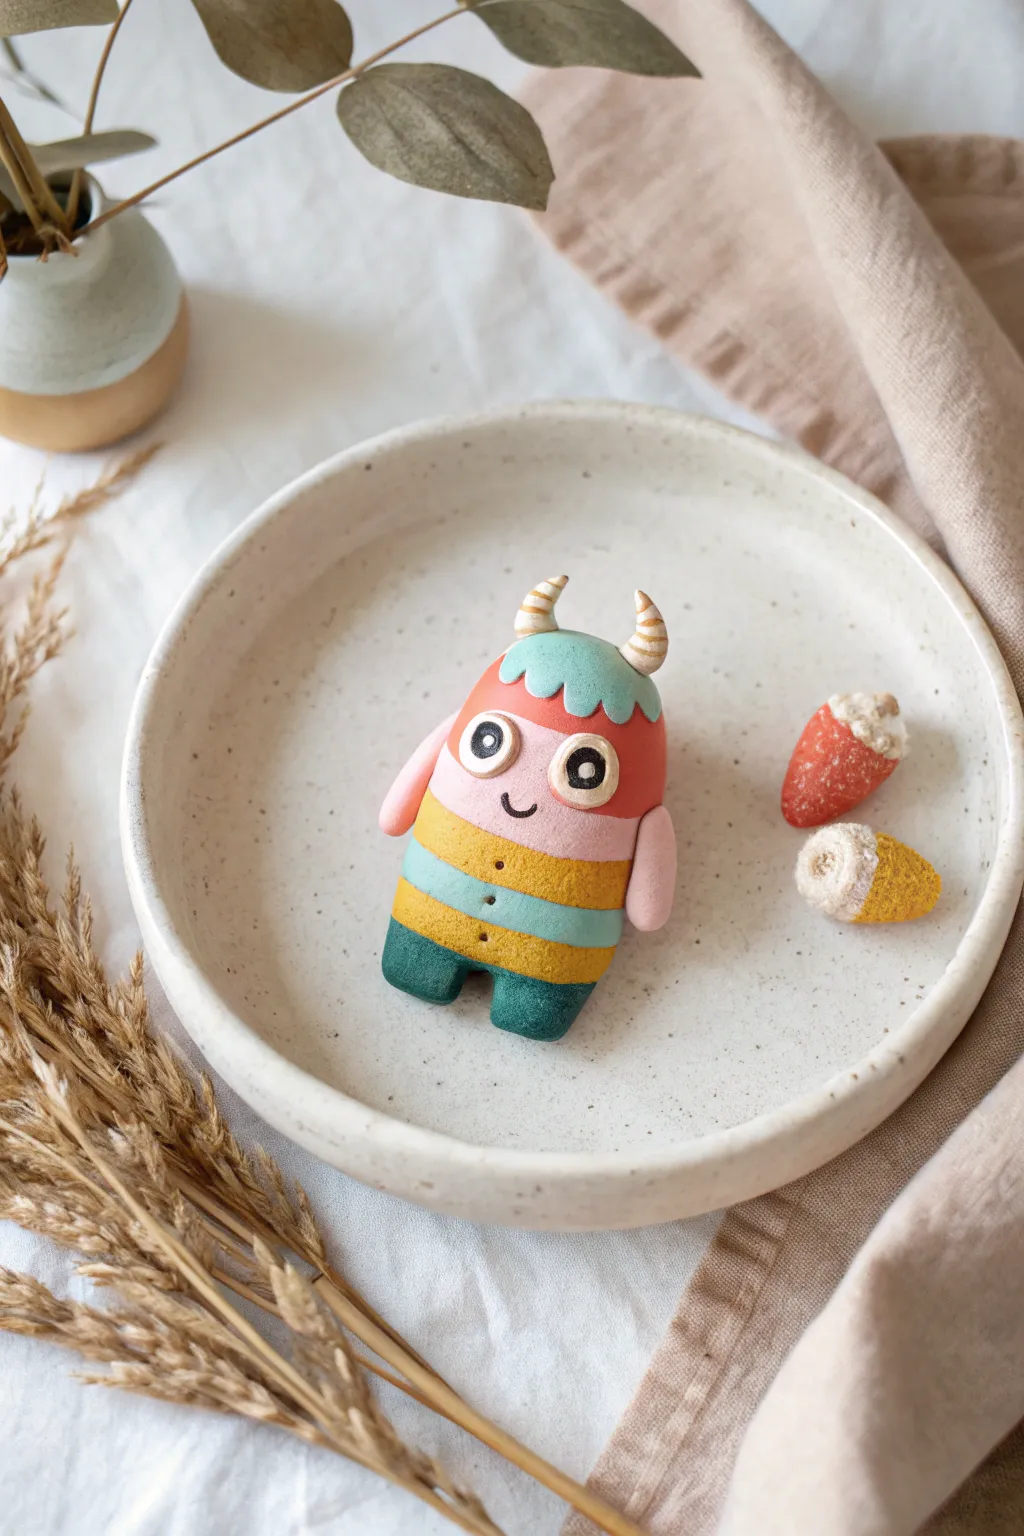
This charming little monster figurine features a vibrant, layered body reminiscent of layered cakes or striped candy. With its endearing wide eyes, tiny horns, and textured finish, it makes a perfect desk companion or a whimsical addition to a miniature scene.
Step-by-Step
Materials
- Polymer clay or air-dry clay (Red, pink, yellow, teal/blue-green, dark green, white, black, beige)
- Clay sculpting tools (needle tool, small ball stylus)
- Rolling pin or pasta machine
- Precision craft knife
- Soft-bristle brush (optional, for texture)
- Matte varnish (optional)
Step 1: Forming the Striped Body
-
Prepare the Colors:
Condition your clay by kneading the red, pink, yellow, teal, and dark green portions until they are soft and pliable. You want consistent textures for smooth stacking. -
Create the Layers:
Roll each color into a thick, flat sheet, aiming for about 5mm (1/4 inch) thickness. -
Stack and Cut:
Stack the clay sheets in the following order from bottom to top: dark green, teal, yellow, pink, red. Press them gently to adhere. -
Shape the Base:
Using a cutter or your knife, trim the stack into a rounded rectangle or capsule shape. Smooth the edges with your finger to round off the corners, creating a continuous, pill-like form. -
Detail the Legs:
At the bottom green layer, make a small inverted ‘U’ cut in the center to separate the legs. Smooth the inner edges so they look like distinct feet.
Step 2: Adding Character Features
-
Add the Scalp:
Take a small piece of teal clay and flatten it into a rough circle. Use your knife to cut a scalloped or wavy edge along the bottom. -
Attach the Hair:
Gently press this ‘hair’ cap onto the top of the red section of the head, smoothing it down so it hugs the curve. -
Create the Eyes:
Roll two small balls of white clay and flatten them into discs. Press these onto the red/pink face area. Add slightly smaller black discs on top for pupils, and tiny white specs for catchlights. -
Face Details:
Roll a very thin snake of black clay for the smile and press it gently under the eyes. Add three tiny black dots down the center of the yellow and teal stripes for buttons. -
Sculpt the Arms:
Create two small sausage shapes from pink clay. Attach one to each side of the body, starting at the pink stripe line and letting them hang down relaxedly.
Smudge Patrol
White clay picks up lint easily. Keep wet wipes handy and clean your hands before rolling the white eyes, or use a bit of rubbing alcohol on a Q-tip to clean the baked clay later.
Step 3: Finishing Touches
-
Make the Horns:
Roll two small cones of beige clay. Take a tiny strand of brown or gold clay and wrap it spirally around each cone to create a striped texture. -
Attach Horns:
Press the horns firmly onto the top of the teal hair cap. You can use a tiny drop of liquid clay or water (if using air-dry) for better adhesion. -
Texture the Surface:
For that matte, stone-like look seen in the photo, gently tap the entire surface of the figure with a stiff brush or a crumpled piece of aluminum foil. I find this hides fingerprints brilliantly. -
Final Bake or Dry:
Follow your clay’s specific instructions to bake or air-dry the figure. If baking, tent with foil to prevent scorching the lighter colors. -
Make the Acorns (Optional):
To make the companion pieces, shape simple cone bases in red and yellow, then add textured beige caps on top to create little fantasy acorns.
Glow Up
Use glow-in-the-dark clay for the eye whites or the light teal stripes. This adds a fun surprise when the lights go out, perfect for a little monster theme.
Once cooled or fully dried, your colorful striped monster is ready to guard your desk.