
Nothing upgrades your morning faster than a funny mug with a witty slogan or a groan-worthy visual pun. In my studio, I treat these like tiny comedy posters you can sip from—here are a bunch of ideas to make your next handmade mug genuinely laugh-out-loud.
Big Bold One-Liner
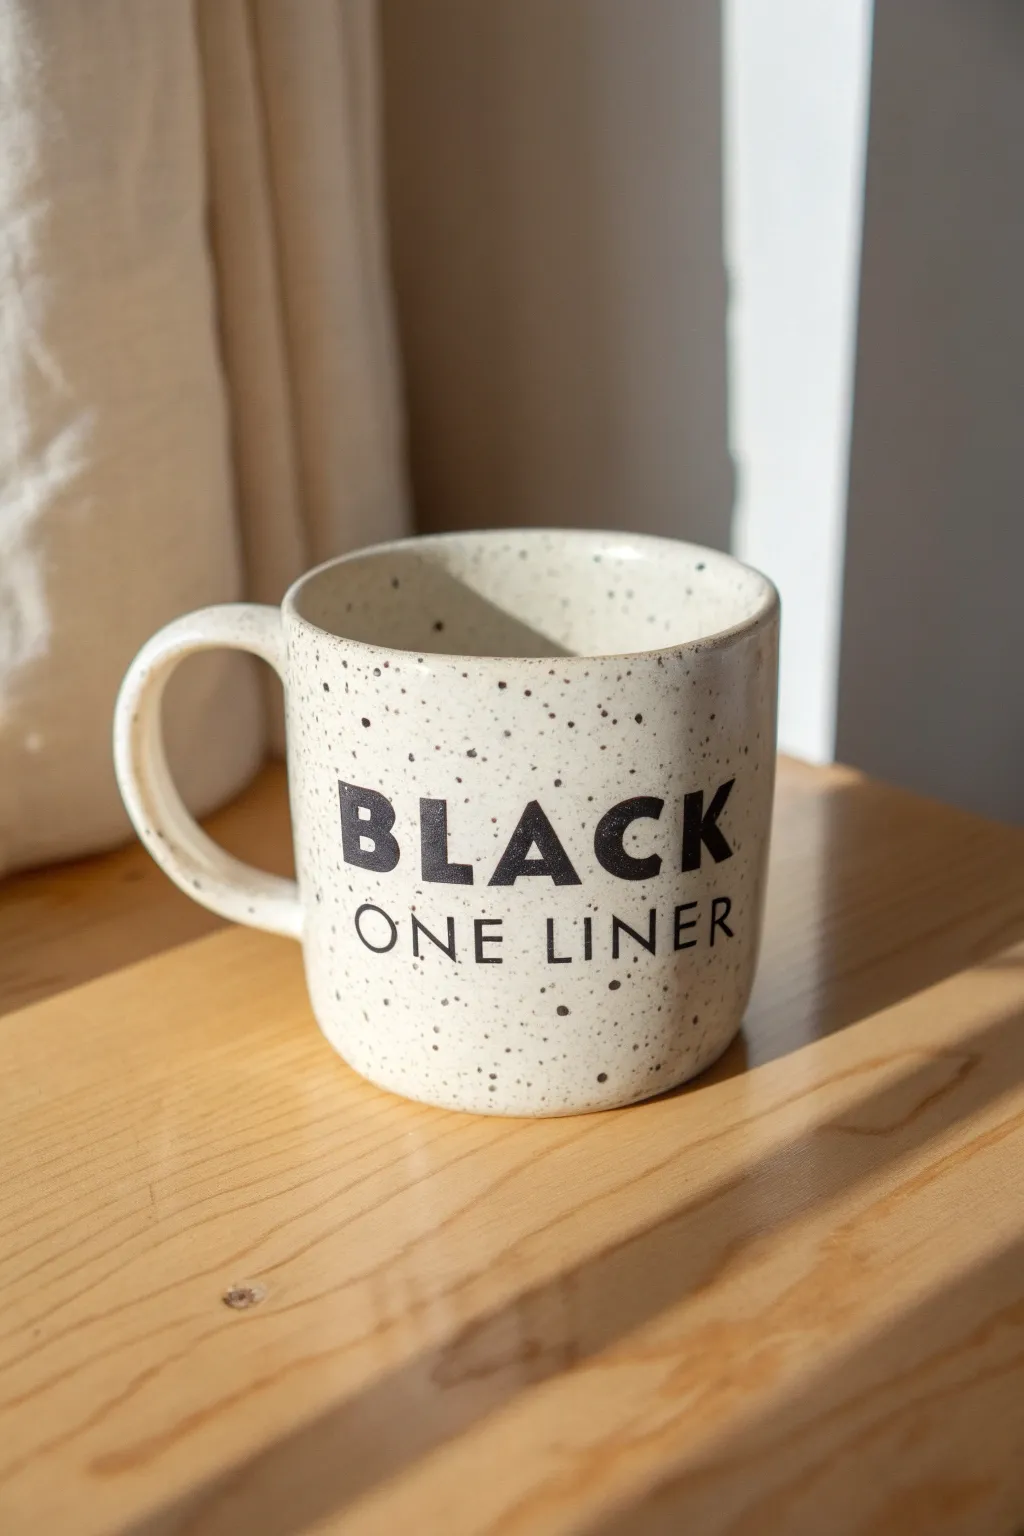
Create a modern, minimalist masterpiece with this speckled mug project that combines clean typography with an artisanal ceramic look. The result is a witty, stylish vessel features bold lettering against a faux-stone finish, perfect for your morning brew or as a personalized gift.
Detailed Instructions
Materials
- White or cream ceramic mug (clean and dry)
- Black adhesive vinyl (permanent or outdoor rated)
- Transfer tape
- Cricut or Silhouette cutting machine
- Weeding tool
- Scraper tool or credit card
- Rubbing alcohol
- Lint-free cloth
- Black gloss ceramic paint or enamel paint (for speckles)
- Stiff bristle toothbrush or fan brush
- Protective sheet or cardboard box
Step 1: Designing and Cutting
-
Prepare the design file:
Open your design software and create a text box. Type the word ‘BLACK’ in a heavy, bold sans-serif font like Impact or Arial Black. This will be the focal point of your design. -
Add the secondary text:
Create a second text box for ‘ONE LINER’. Choose a thinner, wider sans-serif font for this line. Adjust the tracking (letter spacing) so the width of this phrase perfectly matches the width of the word above it. -
Measure the mug:
Using a flexible measuring tape, determine the height and width of the printable area on your mug. Scale your digital design to fit comfortably within this space, leaving at least an inch of margin on the top and bottom. -
Cut the vinyl:
Place your black permanent vinyl onto the cutting mat, shiny side up. Send the design to your machine to cut. I usually double-check my blade depth here to ensure clean cuts through the vinyl but not the backing. -
Weed the design:
Use your weeding tool to carefully remove the excess vinyl around the letters. Don’t forget to pick out the centers of letters like ‘B’, ‘A’, and ‘O’. You should be left with just the text on the backing paper.
Paint Blob Panic
Did a large drip of paint land on your mug? Don’t wipe it! Use a dry Q-tip to lift it straight up, then dab the spot with a tiny bit of alcohol to clean the residue.
Step 2: Creating the Speckled Effect
-
Prep the workspace:
This part gets messy, so place your mug inside a cardboard box or on a large protective sheet to catch overspray. -
Clean surface:
Wipe the mug down thoroughly with rubbing alcohol and a lint-free cloth to remove oils. Let it dry completely. -
Load the brush:
Dip just the tips of a stiff toothbrush or a fan brush into your black ceramic paint. You want a small amount of paint—wipe off any excess on a paper towel. -
Flick the paint:
Hold the brush near the mug and use your thumb to flick the bristles, sending a spray of fine dots onto the ceramic surface. Rotate the mug as you work. -
Vary the density:
Aim for an uneven, natural distribution. Some areas can have denser clusters of dots, while others remain sparse. If you get a blob that’s too big, quickly wipe it away with a damp Q-tip. -
Allow to cure:
Let the paint dry completely. Depending on your paint brand, you may need to bake the mug in the oven according to the manufacturer’s instructions to permanently set the speckles before applying vinyl.
Step 3: Applying the Decal
-
Apply transfer tape:
Cut a piece of transfer tape slightly larger than your weeded text design. Place it over the vinyl and use a scraper tool to burnish it down firmly, ensuring the tape grips the letters. -
Lift the design:
Peel the transfer tape away from the backing paper at a 45-degree angle. The black letters should stick to the clear tape. -
Position on mug:
Hover the transfer tape over the mug to find the center alignment. Start by adhering just the center of the design to the mug first. -
Smooth it out:
Work your way outwards from the center, smoothing the vinyl down with your thumb to prevent bubbles. Because mugs are curved, you may need to make small snips in the transfer tape (not the vinyl) to help it lay flat. -
Remove transfer tape:
Once adhered, slowly peel back the transfer tape. keep it flat against the surface of the mug rather than pulling straight up to avoid lifting the letters. -
Final cure:
Let the vinyl set for at least 72 hours before washing to allow the adhesive to reach maximum strength.
Curved Surface Pro Tip
To help vinyl stick to the curve better, gently warm the applied decal with a hair dryer for 10 seconds immediately after removing the transfer tape, then press firmly.
Enjoy your chic new mug that proves simplicity never goes out of style


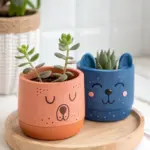
Simple Doodle + Wordplay

Brighten up your morning coffee routine with this adorable speckled mug featuring a charming aloe vera plant doodle. The combination of simple line art and clever wordplay creates a wholesome and witty design that is perfect for plant lovers and pun enthusiasts alike.
Step-by-Step Guide
Materials
- Blank ceramic mug (cream or off-white color)
- Black porcelain marker or ceramic paint pen (fine tip)
- Black porcelain marker or ceramic paint pen (medium tip)
- Rubbing alcohol
- Cotton pads or paper towel
- Pencil (optional)
- Oven (for curing)
- Black ceramic paint (optional, for speckles)
- Old toothbrush (optional, for speckles)
Step 1: Preparation
-
Clean the surface:
Before you start drawing, it is crucial to remove any oils or residue from your mug. Wipe the entire surface down thoroughly with rubbing alcohol and a cotton pad. -
Let it dry:
Allow the alcohol to evaporate completely. This usually takes just a few seconds, but ensure the surface is bone dry before proceeding to ensure the ink adheres properly. -
Plan your placement:
Decide exactly where you want your design to sit. I like to hold the mug as if I’m drinking from it to find the center point that will be most visible.
Ink not flowing?
If your paint pen feels dry or patchy, press the tip down on a piece of scrap paper a few times to pump more ink into the nib before returning to the ceramic surface.
Step 2: Creating the Speckles (Optional)
-
Mix paint:
If your mug isn’t already speckled like the one in the photo, you can add this effect yourself. Use a tiny bit of black ceramic paint thinned slightly with water. -
Flick the paint:
Dip an old toothbrush into the paint, point it at the mug, and run your thumb along the bristles to flick tiny splatters across the surface. Let this dry completely before drawing.
Step 3: Drawing the Doodle
-
Outline the pot:
Using your fine-tipped black porcelain marker, draw a simple U-shape or slightly tapered cup shape for the plant pot near the center of the mug. -
Add the handle:
Draw a tiny ‘c’ shape on the left side of your little pot outline to create a mug handle. Add a small line inside to give it dimension. -
Draw the rim:
Close the top of the pot with a slightly curved horizontal line. This forms the soil line where your plant will grow from. -
Sketch the center leaf:
Draw a tall, pointed leaf shape emerging straight up from the center of the pot. Make the tip sharp like a real aloe vera plant. -
Add side leaves:
Draw two slightly shorter, angled leaves on either side of the center one. Add two more small, wide leaves at the very base to create a full cluster. -
Detail the leaves:
Inside each leaf shape, draw a single vertical line running from the base towards the tip to represent the central vein. -
Give it a face:
On the body of the pot, draw two small ‘u’ shapes for sleeping eyes and a tiny heart or dot between them for a mouth. This gives the character a sweet, peaceful expression.
Add some depth
Use a dark green ceramic marker to fill in the aloe leaves, but leave tiny white stripes along the edges to mimic the plant’s natural texture and shine.
Step 4: Adding the Text
-
Write ‘ALOE’:
Switch to a medium-tip marker if you have one, or carefully thicken your lines with the fine tip. Write the word ‘ALOE’ in capital, sans-serif letters just below the doodle. -
Check alignment:
Pause to make sure your spacing is centered before measuring out the second word. -
Write ‘THERE’:
Directly below ‘ALOE’, write the word ‘THERE’ in the same font style and size. Try to align the width of this word with the word above it for a balanced look. -
Clean up mistakes:
If you smudge a line or misspell a word, quickly wipe it away with a cotton swab dipped in rubbing alcohol while the ink is still wet.
Step 5: Finishing and Curing
-
Dry time:
Let the mug sit undisturbed for at least 24 hours. This allows the paint or ink to set properly before heat curing. -
Load the oven:
Place your mug into a completely cold oven. Do not preheat the oven, as the sudden temperature change could crack the ceramic. -
Bake:
Detailed instructions vary by pen brand, but generally, you will bake at 350°F (175°C) for about 30 minutes. -
Cool down:
Once the timer goes off, turn off the oven but leave the mug inside. Let it cool down gradually with the oven to prevent thermal shock.
Now you have a charming, personalized mug ready for your next relaxing cup of tea


Fake Drip “Oops” Design
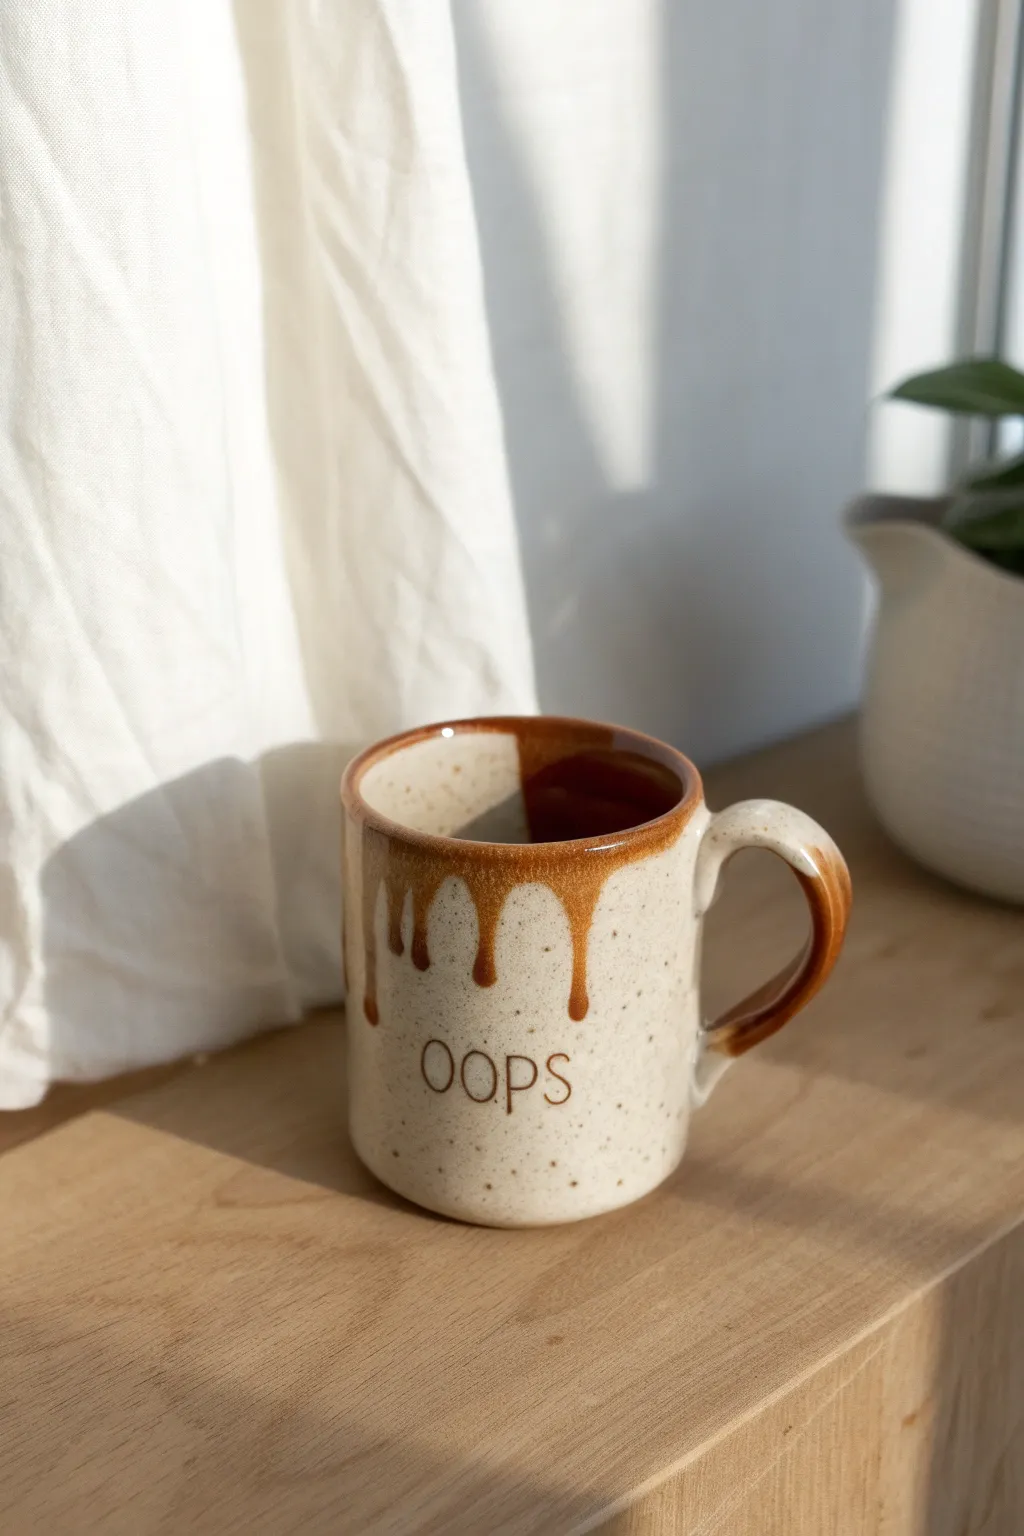
Embrace the beauty of little mistakes with this playful ceramic project that features a deliberate glaze drip design. This speckled mug combines rustic charm with a tongue-in-cheek “OOPS” message, creating a cozy piece that looks like it just had a little spill.
Step-by-Step Tutorial
Materials
- Bisque-fired ceramic mug (speckled clay body preferred)
- Brown/Caramel colored ceramic glaze (food safe)
- Clear transparent glaze (food safe)
- Small round paintbrush (size 2 or 4)
- Glaze trailer bottle or needle tool
- Wax resist
- Alphabet rubber stamps or small stencil
- Underglaze pencil or dark brown underglaze
- Sponge and water
- Kiln access
Step 1: Preparation and Text
-
Prepare the bisque:
Start with a clean, bisque-fired mug. If you threw this on the wheel yourself, specked clay adds a lovely texture that mimics the reference photo perfectly. Wipe it down with a damp sponge to remove any dust. -
Position the text:
Decide where you want your “OOPS” text. Lower on the mug body, centered beneath where a handle would be or opposite it, works best. Lightly mark a guideline with a regular pencil if needed; the graphite will burn off in the kiln. -
Apply the letters:
Using alphabet rubber stamps, dip them lightly into dark brown underglaze. Test the stamp on a scrap piece of paper first to ensure you aren’t overloading it. -
Stamp the mug:
Press the stamps firmly onto the bisque surface to spell “OOPS”. If the impression is faint, you can carefully go over the letters with a fine liner brush and underglaze, but a slightly imperfect stamp adds character. -
Wax over the text:
Once the underglaze text is completely dry, apply a coat of wax resist directly over the letters. This ensures the words remain crisp and aren’t obscured by the clear glaze later.
Step 2: Creating the Drip Effect
-
Apply rim glaze:
Dip just the top rim of the mug into your caramel-colored glaze. You only want to cover the top 1/2 inch initially. Let this base layer dry until it’s chalky and touchable. -
Load the brush:
Now for the fun part. Load a lush amount of the same caramel glaze onto a round brush. You want the brush fully saturated so it releases a lot of fluid. -
Initiate the drips:
Press the loaded brush against the glaze band you just dipped. Press harder to release a bead of glaze and let gravity pull it down the side of the mug. -
Vary the lengths:
Create 4-5 distinct drips around the mug. Make some long (reaching halfway down) and some short bumps. I like to let these naturally pool a bit at the bottom of the drip for a 3D effect. -
Refine the rim:
Use your brush to smooth out the connection points between the dip line and your new drips so it looks like one cohesive spill. -
Glaze the handle:
Paint the handle with the same caramel glaze. For the “dipped” look shown in the image, apply the brown glaze only to the top curve and side of the handle, feathering it out as it goes down.
Glaze Running Too Much?
If your drips are running all the way to the bottom during painting, your glaze is too thin. Let it sit open for an hour to evaporate some water, or apply thinner layers.
Step 3: Finishing and Firing
-
Clear coat application:
Once your brown drip design is bone dry, dip the entire mug into a clear, food-safe glaze. Do this quickly to avoid re-wetting and smearing the brown glaze design. -
Clean the foot:
Use a damp sponge to meticulously wipe any glaze off the very bottom (foot) of the mug. Any glaze left here will fuse your mug to the kiln shelf. -
Final inspection:
Check the “OOPS” text. Since you waxed it, the clear glaze should bead up over the letters. Gently wipe these beads away with your finger or a sponge tip so the raw clay texture shows through the letters if desired, or leave it for a glossy finish. -
Fire the mug:
Load the mug into the kiln and fire it to the temperature recommended for your specific clay and glaze (typically Cone 5 or 6 for stoneware). -
Cooling:
Allow the kiln to cool completely before opening. The thermal shock of opening too early can cause the glaze to craze or crack.
Pro Tip: Gravity Check
Glaze moves in the kiln! Don’t paint your drips lower than the halfway point of the mug. The heat will pull them down further during firing naturally.
Enjoy sipping your morning coffee from a mug that embraces life’s little spills with humor and style