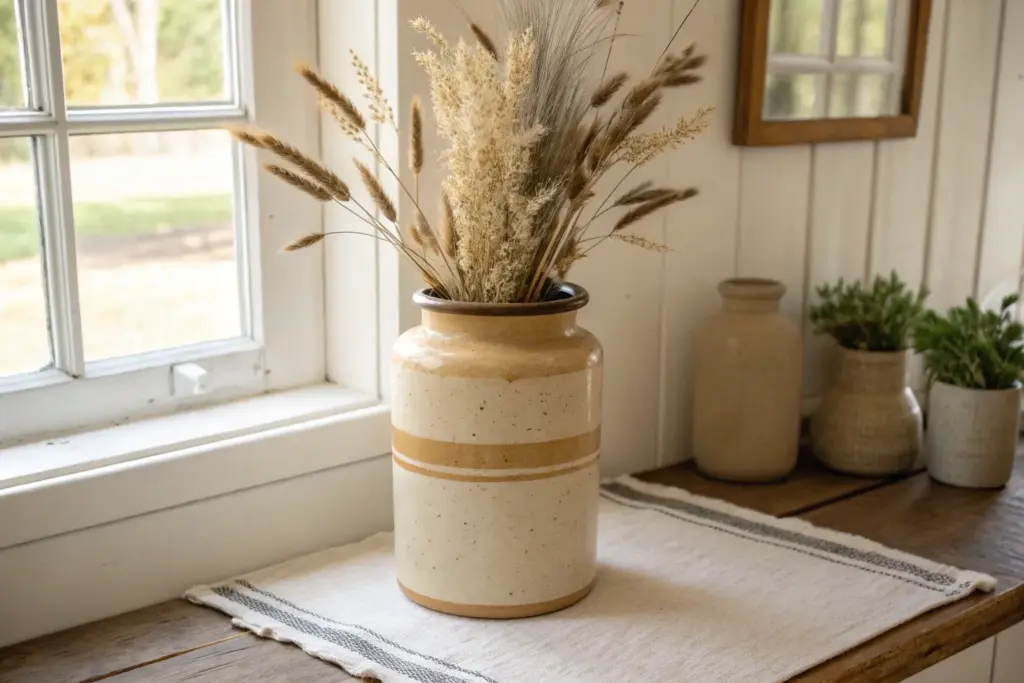
I love how an old crock can go from “dusty shelf find” to the kind of rustic decor that makes a room feel instantly lived-in. These old crock decorating ideas are my go-tos in the studio when I want something simple, charming, and totally doable.
Tulips and Greenery Crock Arrangement
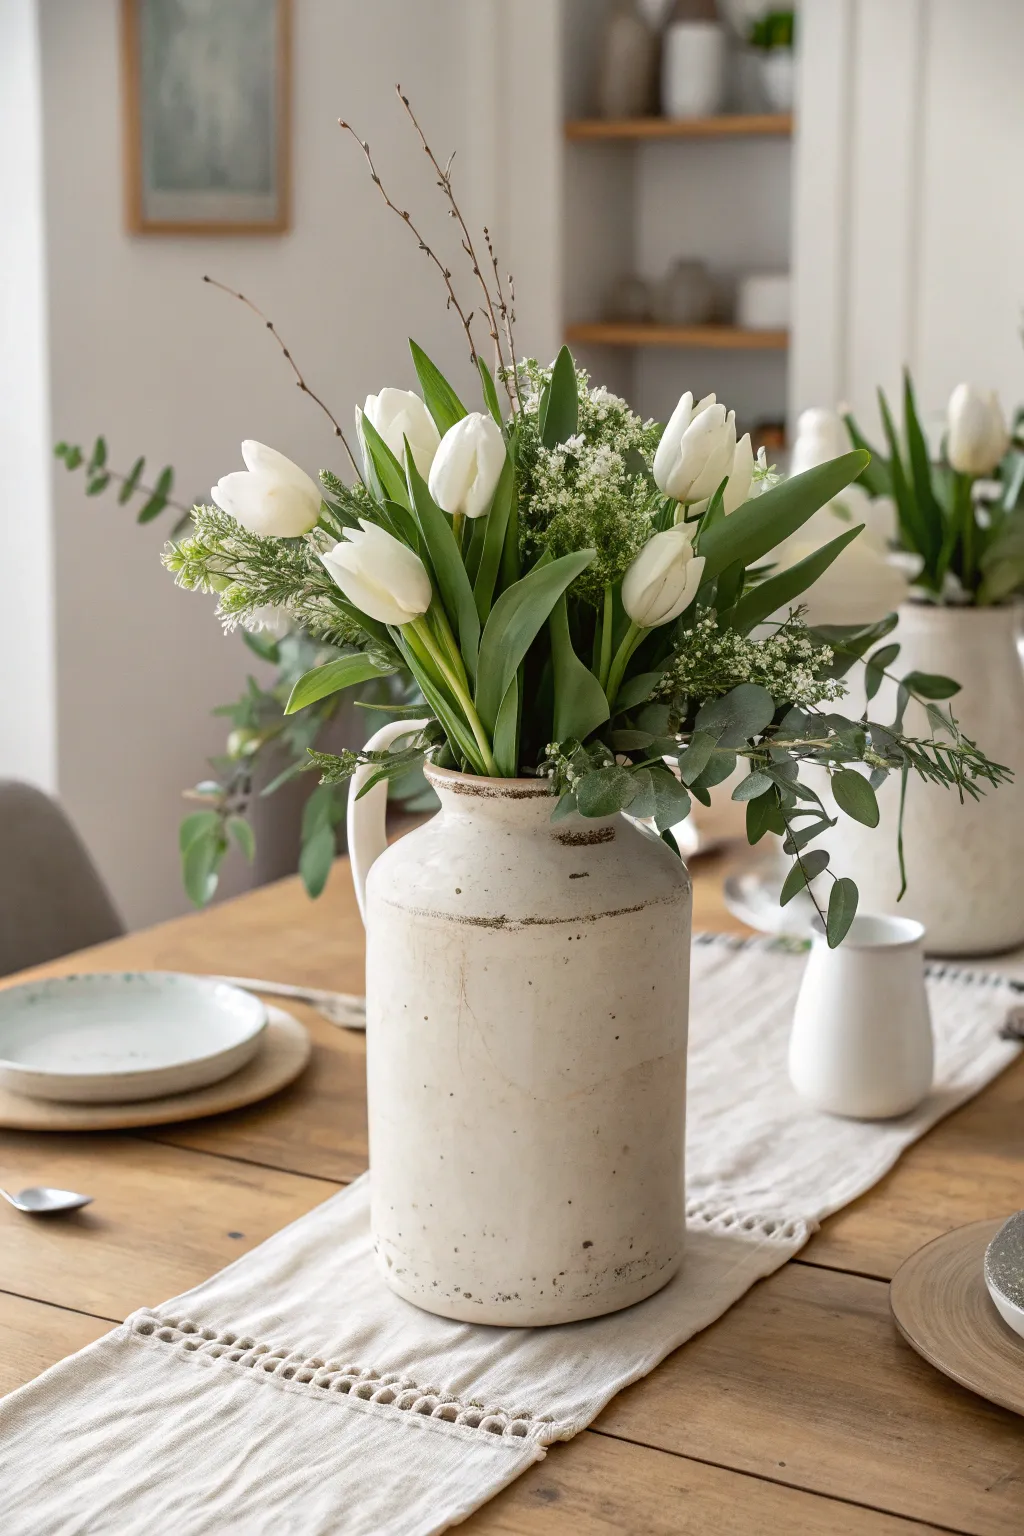
Bring the effortless charm of a French country farmhouse to your table with this stunning floral arrangement. Using a vintage-style crock as your vessel, you will combine crisp white tulips with wild greenery for a look that is both elegant and organic.
How-To Guide
Materials
- Tall, vintage-style white ceramic crock (approx. 10-12 inches tall)
- Chicken wire or floral tape
- Floral shears or sharp scissors
- 15-20 stems of white tulips
- 3-4 branches of curly willow or birch twigs
- 5-7 stems of silver dollar eucalyptus
- 5-7 stems of seeded eucalyptus or mixed greenery
- 3-5 stems of white filler flower (Queen Anne’s lace, baby’s breath, or similar)
- Fresh water
- Flower preservative packet
Step 1: Preparing the Vessel
-
Clean the crock:
Begin by thoroughly cleaning the inside of your ceramic crock to ensure no residue affects the flowers’ lifespan. -
Add water and food:
Fill the crock about halfway with cool, fresh water. Mix in a packet of floral preservative until fully dissolved to keep your blooms perky. -
Create a grid:
Because the mouth of a crock is often wide, it helps to create structure. Cut a small piece of chicken wire and gently ball it up, placing it inside the crock. Alternatively, create a grid across the opening using clear floral tape.
Drooping Tulips?
Tulips continue to grow and move after cutting. If they droop too much, prick the stem just below the head with a pin to release air bubbles, or recut and put in ice water.
Step 2: Building the Green Foundation
-
Insert tall branches:
Start with your height elements. Place the birch or willow twigs into the back and center of the arrangement. They should reach high, extending significantly above where the flowers will sit. -
Add eucalyptus base:
Strip the lower leaves off your silver dollar eucalyptus stems so no foliage sits below the water line. Insert these stems around the rim of the crock, letting them drape naturally over the edges. -
Layer in texture:
Intersperse the seeded eucalyptus or mixed greenery amongst the silver dollar stems. The goal here is to create a lush, messy nest that will support the tulip stems later. -
Check the shape:
Step back and look at the greenery. It should feel asymmetrical and loose, spilling out slightly more on one side for a casual look.
Penny Trick
Drop a copper penny into the bottom of the crock before arranging. Many florists swear the copper acts as a fungicide and helps keep tulips standing straight up longer.
Step 3: Arranging the Tulips
-
Prep the tulips:
Remove most of the lower leaves from your tulip stems. Look for stems that have a natural curve; these add beautiful movement to the final piece. -
Make the first cut:
Hold a tulip against the crock to gauge length. You want the heads to sit just above the greenery, not too high. Cut the stem at a 45-degree angle. -
Place focal flowers:
Insert your first group of 3-5 tulips into the center of the arrangement, angling them slightly outward. These should be the tallest flowers. -
Fill the sides:
Continue adding tulips around the main group, cutting the stems slightly shorter as you move toward the outer rim. This creates a rounded, domed shape rather than a flat top. -
Check for gaps:
Rotate the crock or walk around your table. I always like to ensure the tulips are evenly distributed but not perfectly regimented—let them lean naturally.
Step 4: Adding Detail and Finishing
-
Insert filler flowers:
Take your white filler flowers (like Queen Anne’s lace) and tuck them into the spaces between the tulips. They should look like little clouds floating amongst the blooms. -
Add stray greens:
If you have any small sprigs of greenery left, tuck them near the top to break up the white mass of the tulips. -
Create movement:
Gently pull a few tulip heads forward or push some greenery back. You want the arrangement to feel airy and dynamic, as if it was just gathered from the garden. -
Final water check:
Top off the water level carefully if needed, ensuring all stem ends are submerged. -
Clean up:
Wipe down the outside of the crock to remove any water drips or debris before placing it on your table runner.
Enjoy the fresh, serene atmosphere this beautiful centerpiece brings to your dining space


Dried Hydrangeas for Soft, Rustic Texture
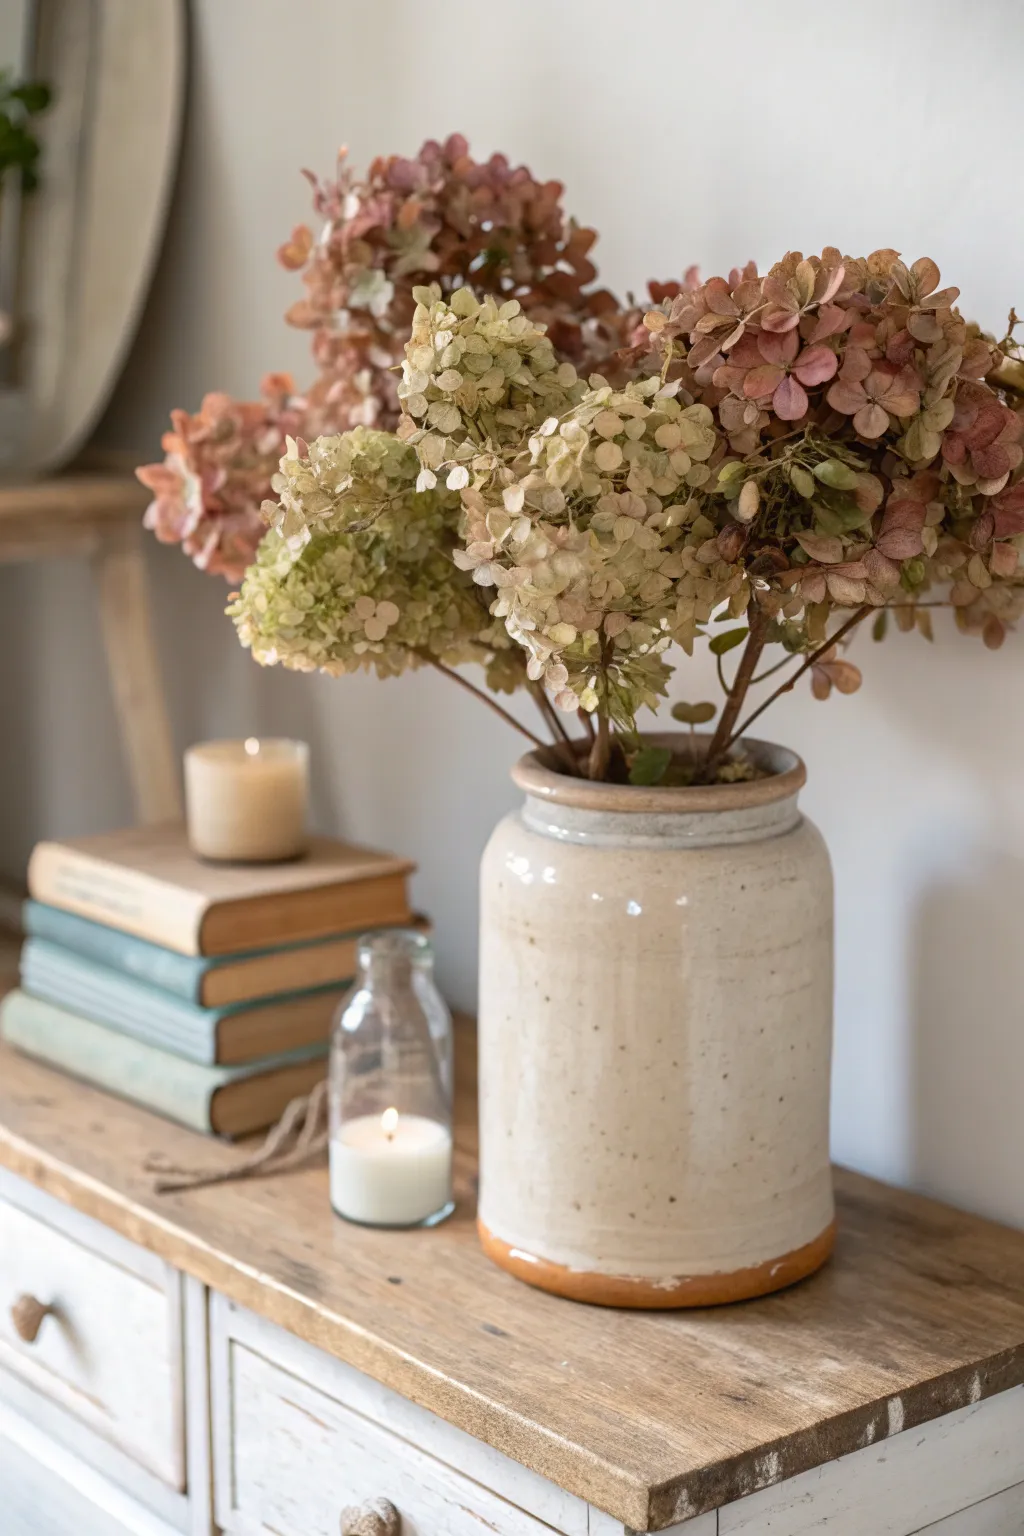
Embrace the understated elegance of rustic farmhouse decor with this simple dried hydrangea arrangement. The soft, papery texture of the blooms contrasts beautifully against the sturdy, glazed surface of an antique stoneware crock, creating a stunning centerpiece.
Detailed Instructions
Materials
- Vintage stoneware crock (two-tone beige/tan)
- Dried hydrangea stems (a mix of pale green and dusty pink)
- Floral foam or chicken wire
- Floral tape
- Pruning shears or heavy-duty scissors
- Vintage books (for styling)
- Glass milk bottle with candle
- Small pillar candle in glass holder
Step 1: Preparing the Vessel
-
Clean and Dry:
Begin by thoroughly cleaning your stoneware crock. Vintage pieces often have dust or grime inside, so give it a good wash with warm soapy water and ensure it is completely dry before beginning. -
Create Structure:
To help the heavy hydrangea heads stand upright, you need an internal structure. Cut a piece of chicken wire and fold it into a loose ball that fits snugly inside the crock. -
Secure the Grid:
Alternatively, if you don’t have chicken wire, create a grid across the mouth of the crock using floral tape. This grid will support the stems and keep them from sliding to one side.
Step 2: Arranging the Hydrangeas
-
Select Your Stems:
Sort through your dried hydrangeas. You want a variety of sizes and color tones—specifically looking for those creamy pale greens and dusty mauves to replicate the look. -
Initial Trimming:
Hold a stem against the crock to gauge the height. You want the blooms to sit just above the rim, creating a dense, overflowing look. Trim the excess stem length at a 45-degree angle. -
Remove Lower Leaves:
Strip away any dried leaves from the lower two-thirds of the stems. This keeps the arrangement looking clean and prevents debris from filling up the inside of the jar. -
Establish the Base Layer:
Start by placing the largest, fullest blooms around the perimeter of the crock first. Angle them slightly outward so they drape over the heavy rim. -
Fill the Center:
Work your way inward, adding stems that are slightly taller than the perimeter blooms. This creates a gentle dome shape. -
Mix the Tones:
As you place the stems, alternate between the greenish heads and the pinkish-brown ones. I prefer to cluster a few similar colors together rather than perfectly alternating them for a more organic feel. -
Check Density:
Step back and look for any gaps where the wire or tape is visible. Tuck smaller, individual florets or shorter stems into these holes to create a solid mass of texture. -
Final Adjustments:
Gently fluff the dried petals with your fingers if they look smashed. Rotate the crock to ensure the arrangement looks balanced from all viewing angles.
Brittle Bloom Fix
If dried hydrangeas are shedding too much, mist them lightly with strong-hold hairspray. This seals the petals and prevents crumbling.
Step 3: Styling the Scene
-
Establish Height with Books:
To complete the vignette, stack three or four vintage hardcover books to the left of the crock. Choose books with spine colors in muted blues, greens, or tans. -
Book Alignment:
Stagger the books slightly so the spines aren’t perfectly aligned, giving a casual, ‘lived-in’ appearance. -
Add Warmth:
Place a beige pillar candle in a simple glass holder on top of the book stack. -
Foreground Detail:
Position a small clear glass bottle—like a vintage milk bottle—in front of the books. Insert a small white votive or taper candle inside. -
Create Connection:
If you have some twine or jute string, loosely drape a small piece near the base of the bottle and books to visually connect the elements. -
Lighting:
Light the candles just before displaying or photographing to cast a warm, inviting glow on the textured pottery and dried petals.
Color Preservation
Keep this arrangement out of direct sunlight. UV rays will quickly fade those subtle pink and green tones into a flat brown.
Enjoy the cozy atmosphere this rustic floral arrangement brings to your home


Kitchen Utensils by the Stove
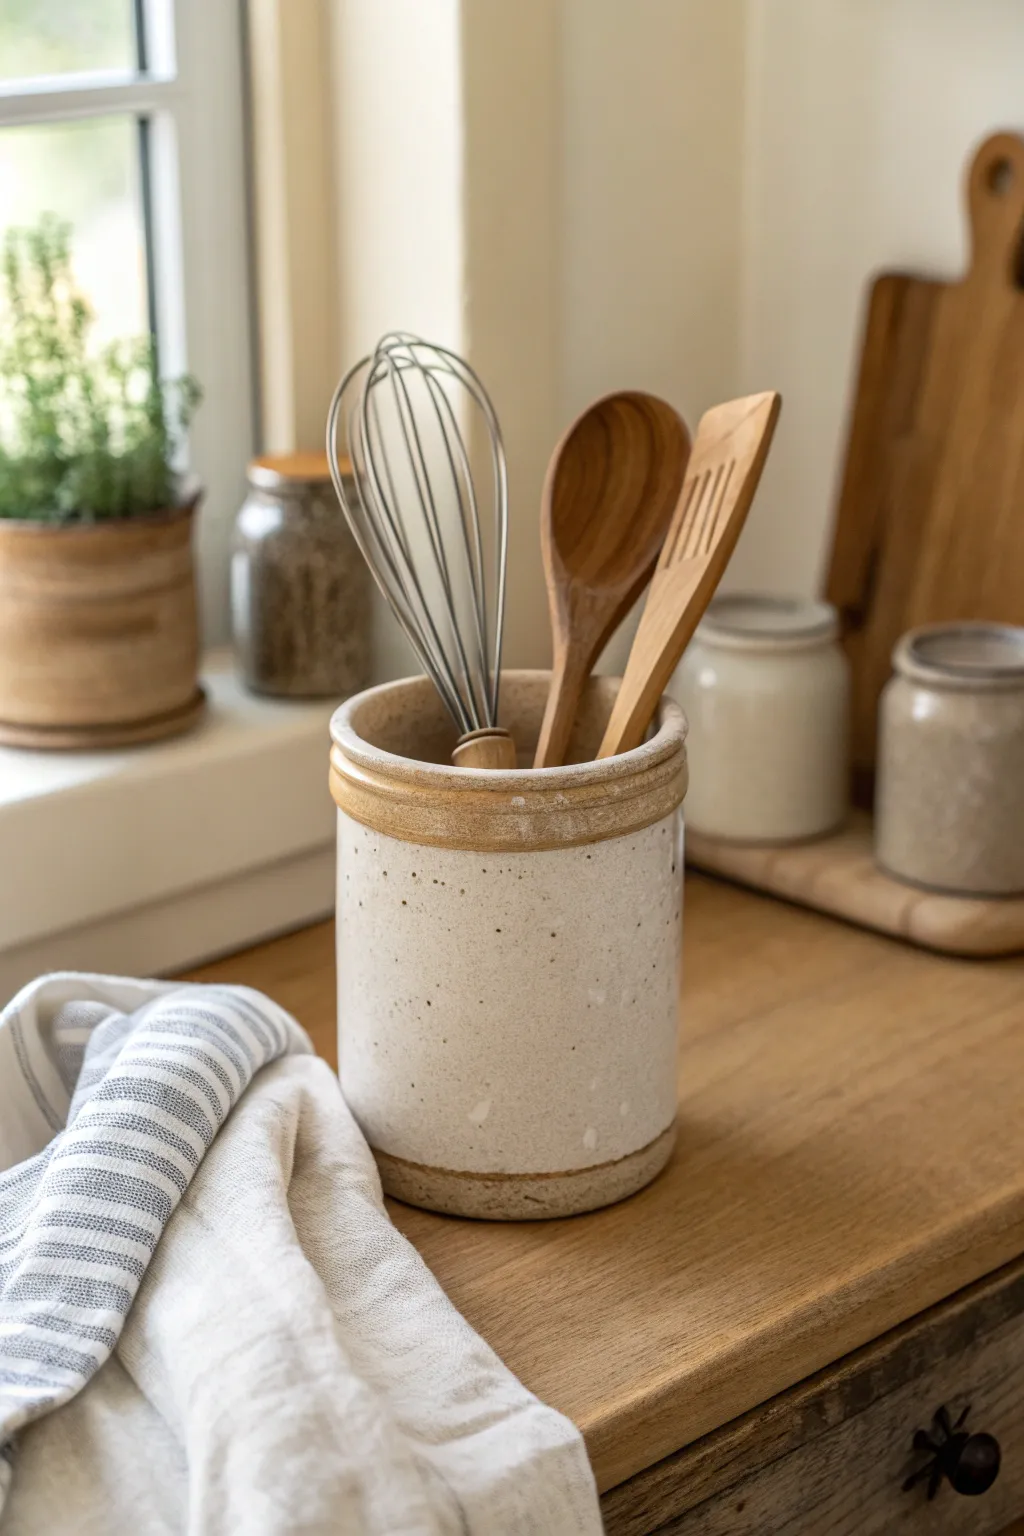
Transform a plain cylinder or an old glazed ceramic container into a charming, antique-style crock perfect for holding your favorite kitchen tools. This project uses texture mediums and careful layering to mimic the look of aged, hand-thrown stoneware with a classic speckled finish.
How-To Guide
Materials
- Heavy terracotta or ceramic cylinder vase (about 6-8 inches tall)
- White or cream chalk paint (matte finish)
- Tan/beige acrylic paint
- Dark brown or espresso acrylic paint
- Baking soda or texture powder additive
- Matte spray sealer
- Medium flat synthetic brush
- Stiff bristle brush or toothbrush (for speckling)
- Small round brush
- Sanding block (medium grit)
- Water cup
- Paper towels
Step 1: Creating the Textured Base
-
Prepare the surface:
Begin by cleaning your ceramic cylinder thoroughly. If the surface is very glossy, scuff it lightly with sandpaper to help the paint adhere better. -
Mix the texture paint:
Pour a generous amount of your white or cream chalk paint into a dish. Gradually stir in baking soda or texture powder until the mixture reaches a consistency similar to thick frosting or gritty yogurt. -
Apply the first coat:
Using a flat brush, apply a thick, uneven layer of the texture mixture to the entire exterior. use dabbing motions rather than long strokes to create a pitted, stone-like surface. -
Dry and repeat:
Allow the first coat to dry completely, which may take an hour or more due to the thickness. Apply a second coat if you can still see the original surface, focusing on building up texture around the rim and base. -
Detail the rim:
To mimic a hand-thrown pot, add an extra thick ridge of the texture paste around the top rim and a matching band around the bottom edge. Smooth these slightly with a damp finger for a rolled effect.
Natural Speckling
Vary the distance of your flicker. Close range creates dense, tiny dots, while standing further back creates larger, sparse spots.
Step 2: Adding the Glazed Look
-
Paint the rim color:
Mix a small amount of tan or beige acrylic paint with a tiny drop of water to thin it. Paint the thickened rim and base band you created earlier. -
Blend the edges:
While the tan paint is still slightly wet, use a clean, damp brush to feather the edges where the tan meets the cream body color. This creates a soft gradient rather than a harsh line. -
Add depth to the banding:
Dip a small round brush into the tan paint and darken the very center of the rim band, leaving the edges slightly lighter to suggest highlights on the curve. -
Let it cure:
Ensure all the base colors are completely dry before moving to the speckling phase, as wet paint will just muddy the effect.
Aged Patina
For a dirtier antique look, apply a diluted brown glaze over the entire dried piece and wipe it back immediately with a damp rag.
Step 3: Speckling and Finishing
-
Prepare the speckle mix:
Thoroughly water down a small amount of dark brown or espresso acrylic paint until it is the consistency of ink. -
Load the tool:
I prefer to use an old toothbrush for this step, but a stiff bristle brush works well too. Dip the tips of the bristles into the watery brown paint. -
Test the spray:
Before hitting your crock, flick the bristles with your thumb over a paper towel to gauge the size of the droplets. You want fine mist and small dots, not large blobs. -
Apply the speckles:
Hold the crock at arm’s length and gently flick the paint across the surface. rotate the crock constantly to ensure even coverage, aiming for a random, organic distribution. -
Distress highlights:
Once the speckles are dry, lightly run a sanding block over the raised texture points on the cream body. This reveals the white core and adds to the worn, vintage aesthetic. -
Seal the piece:
Take the crock outside or to a well-ventilated area and apply two light coats of matte spray sealer to protect the paint and lock in the texture. -
Style and display:
Fill your new old-world crock with your favorite wooden spoons, whisks, and spatulas to complete the farmhouse kitchen vignette.
Your kitchen now has a touch of timeless warmth with this custom stoneware-style storage solution


Rolling Pin Baking Station Display
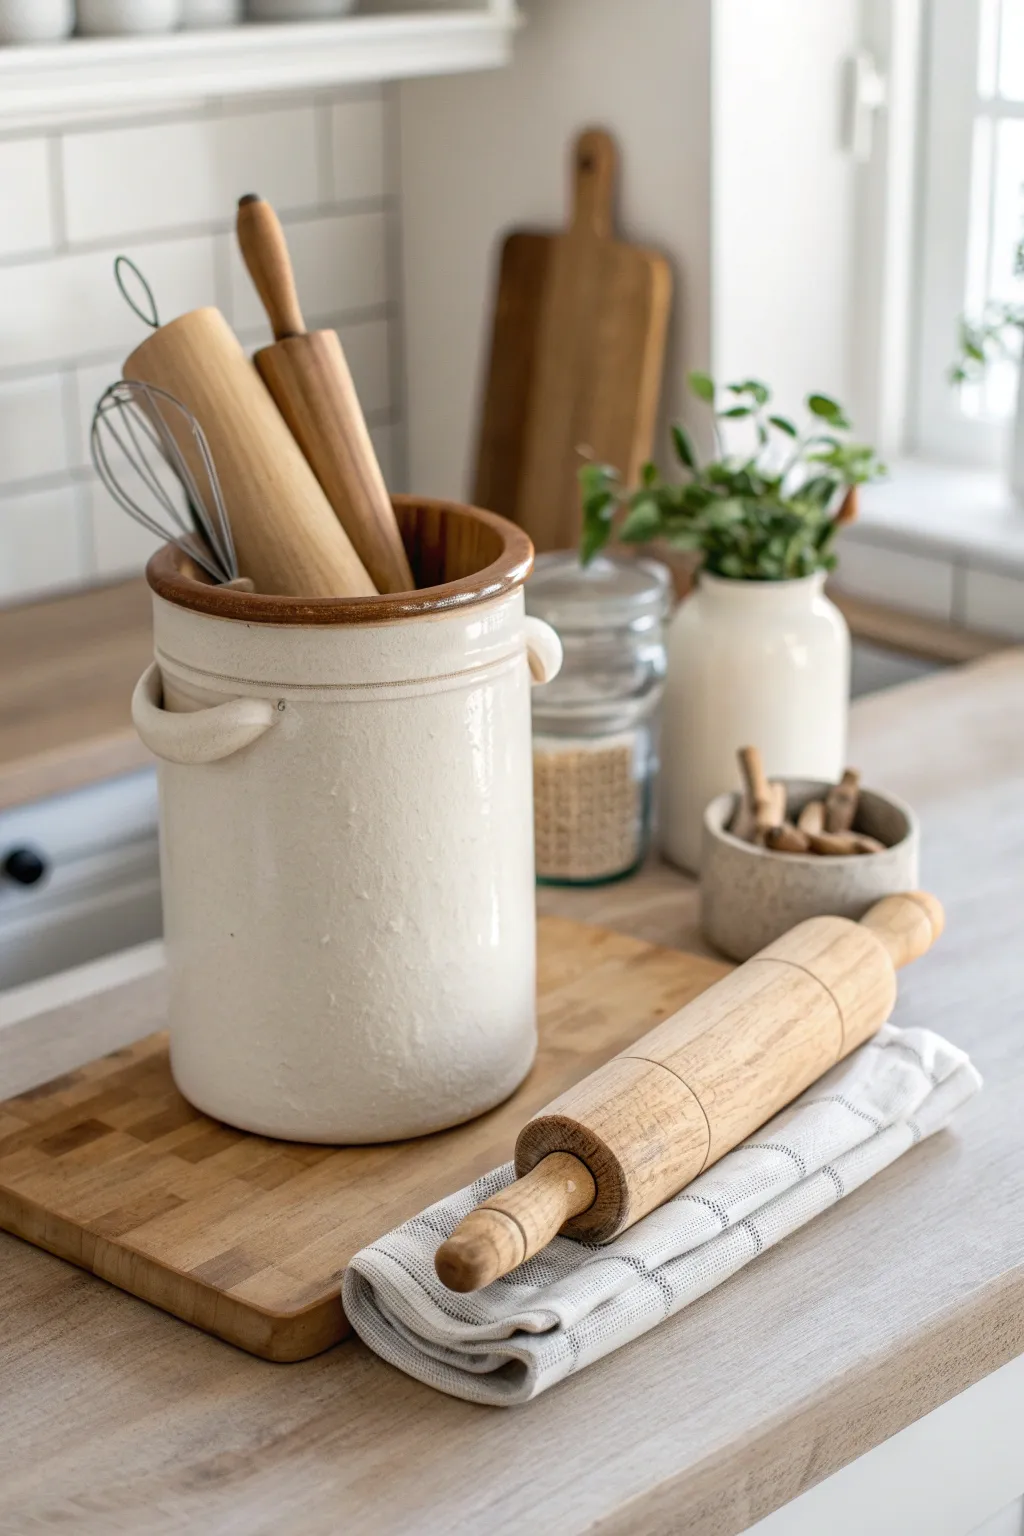
Transform an antique stoneware crock into a functional and charming centerpiece for your kitchen counter. This simple arrangement celebrates the beauty of wooden baking tools while keeping them within easy reach for your next baking adventure.
Step-by-Step Guide
Materials
- Large stoneware crock (vintage or reproduction)
- Assorted wooden rolling pins (various sizes and wood tones)
- Wire whisk (vintage style preferred)
- Wooden cutting board or bread board
- Linen tea towel (neutral or ticking stripe)
- Small bowl or ramekin
- Cinnamon sticks
- Glass jar with grains or flour (optional background prop)
- Small potted herb plant (optional background prop)
Step 1: Setting the Dispaly Base
-
Choose your location:
Select a spot on your kitchen counter or island with good natural light to highlight the textures of the wood and ceramic. -
Place the foundation:
Lay down your large wooden cutting board as the base. This anchors the vignette and protects your countertop surface. -
Clean the crock:
Ensure your stoneware crock is clean and dry. If using a true vintage piece, give it a gentle wash with mild soap to preserve any original patina. -
Position the crock:
Set the crock towards the back left corner of the wooden board, leaving ample space in the foreground for layering other elements.
Step 2: Arranging the Utensils
-
Insert the tallest rolling pins:
Place your longest or thickest wooden rolling pins into the crock first. Lean them slightly against the back rim to create a fan effect. -
Add variety with smaller pins:
Tuck smaller or thinner rolling pins in front of the larger ones. I find that mixing light and dark wood tones adds wonderful visual depth. -
Introduce texture:
Slot a metal wire whisk into the crock among the wooden handles. The cool metal contrasts beautifully with the warm wood tones. -
Adjust the angles:
Step back and adjust the lean of each tool. They shouldn’t look too perfect or uniform; a casual, haphazard arrangement feels more authentic and inviting.
Wobbly utensils?
If your rolling pins keep sliding flat, stuff crumpled kraft paper or a small towel into the bottom of the crock. This adds height and grip to keep items upright.
Step 3: Styling the Foreground
-
Prepare the linen:
Fold your linen tea towel neatly into a long rectangle or a soft square, depending on your space. -
Place the towel:
Lay the folded towel on the wooden board in the foreground, angled slightly to the right of the crock. -
Feature a special pin:
Lay a medium-sized rolling pin directly on top of the towel. This highlights a favorite piece and implies the station is ready for use. -
Position the spice bowl:
Set a small ceramic bowl or ramekin to the right of the crock, slightly behind the towel arrangement. -
Fill the bowl:
Fill the small bowl with whole cinnamon sticks. Their rustic brown color ties in with the wooden handles and adds a subtle, cozy shape.
Seasonal Switch-Up
Swap the cinnamon sticks for dried citrus slices in summer or sprigs of pine in winter. You can also change the tea towel pattern to match current holidays.
Step 4: Adding Background Touches
-
Add height with greenery:
Place a small potted herb or plant in a neutral vase behind the main arrangement to add a pop of life and freshness. -
Include storage jars:
Start settling a glass storage jar filled with oats or flour in the background to reinforce the baking theme without cluttering the focal point. -
Final adjustment:
Do a final check from your main viewing angle. Ensure no single item blocks another completely and that the flow leads the eye comfortably across the display.
Enjoy the warmth this simple, rustic display brings to your kitchen workspace

The Complete Guide to Pottery Troubleshooting
Uncover the most common ceramic mistakes—from cracking clay to failed glazes—and learn how to fix them fast.
Dining Table Centerpiece With Mixed Crock Sizes
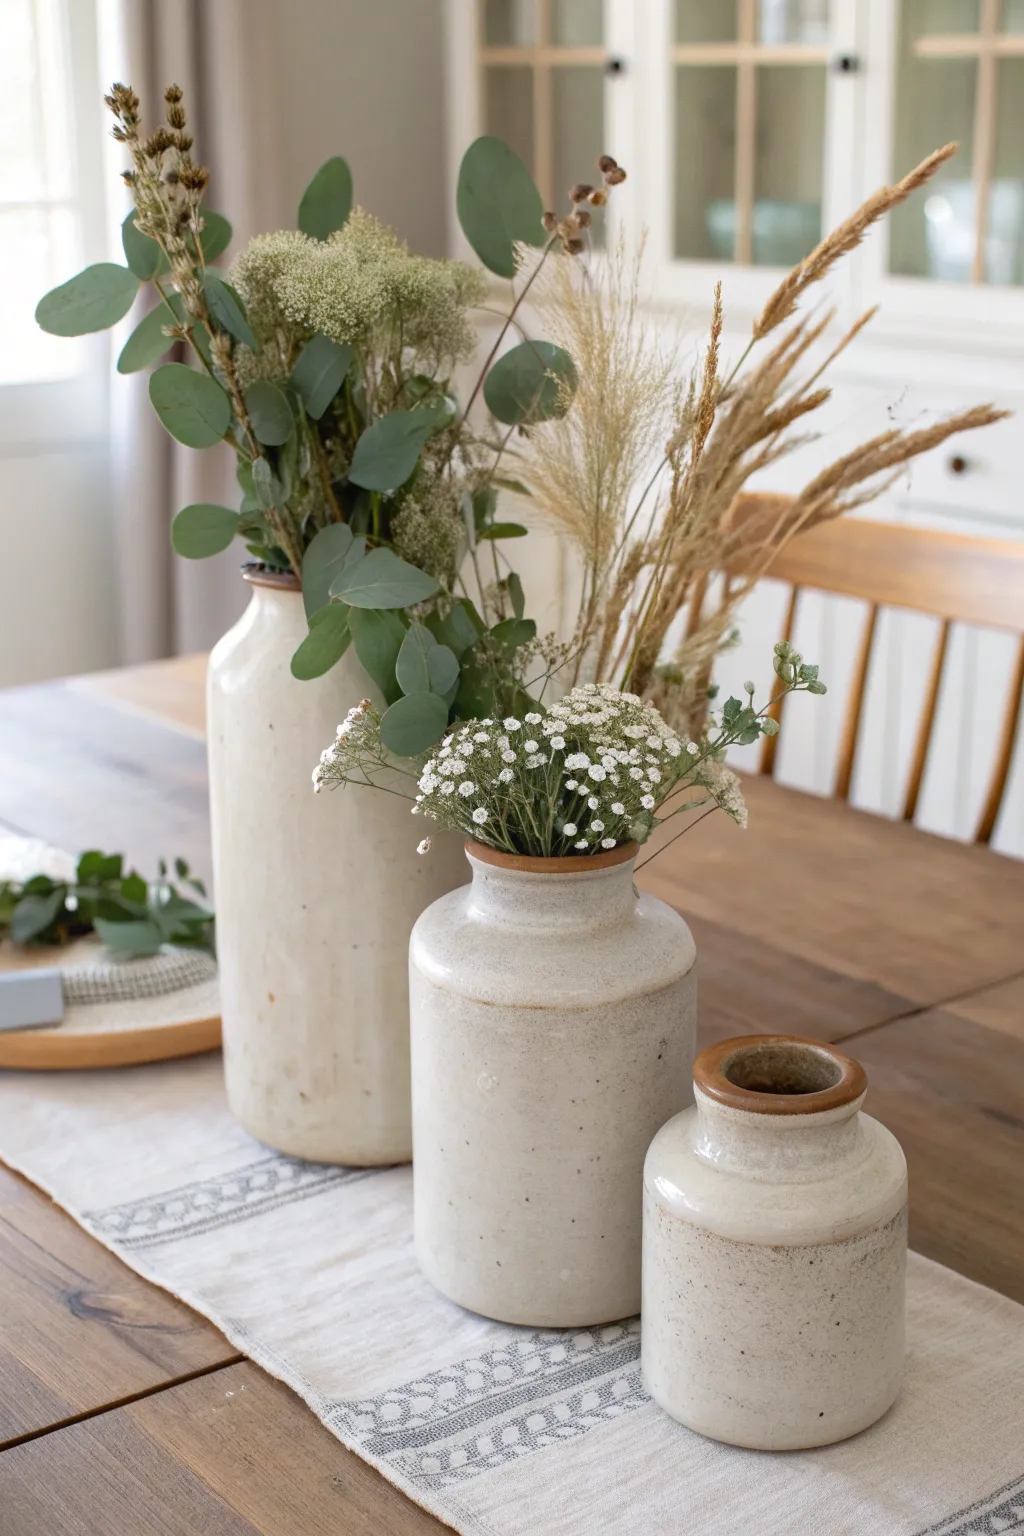
Bring a touch of rustic elegance to your dining room with this simple yet stunning centerpiece arrangement. By grouping mismatched stoneware crocks and mixing fresh greenery with dried textures, you can create a timeless display that feels both curated and effortless.
Detailed Instructions
Materials
- Three stoneware crocks in graduated sizes (large, medium, small)
- Neutral linen table runner with subtle embroidery
- Fresh silver dollar eucalyptus stems
- Dried seeded floral stems (like amaranth or dock)
- Dried beige ornamental grass or wheat stalks
- Fresh baby’s breath (gypsophila)
- Small sprigs of fresh greenery (boxwood or similar)
- Floral shears or sharp scissors
- Water (for fresh stems)
Step 1: Setting the Foundation
-
Prepare the surface:
Begin by clearing your dining table and wiping it clean to ensure a dust-free surface for your runner. -
Lay the runner:
Unroll your linen runner down the center of the table. Smooth out any major creases with your hands, though a slightly relaxed, wrinkled look adds to the rustic charm. -
Clean the vessels:
Wipe down the exterior of your three stoneware crocks with a damp cloth to remove any dust or grime, highlighting the natural speckling of the glaze. -
Arrange the grouping:
Place the three crocks on the runner in a staggered cluster. Position the tallest crock at the back left, the medium one slightly forward and to the right, and the smallest one in the front right foreground. -
Check the spacing:
Adjust the spacing so the vessels are touching or nearly touching; this creates a cohesive unit rather than three separate objects.
Drooping Stems?
If heavy eucalyptus stems flop over too much, create a grid across the crock opening using clear floral tape to hold them upright.
Step 2: Styling the Tall Crock
-
Add water:
Fill the bottom third of the tallest crock with fresh, cool water to keep the eucalyptus hydrated. -
Insert eucalyptus base:
Trim your silver dollar eucalyptus stems to vary their heights. Place the tallest branches first to establish the vertical limit of the arrangement. -
Add volume:
Fill in around the tall stems with slightly shorter eucalyptus branches, allowing the leaves to drape naturally over the rim of the crock. -
Incorporate dried textures:
Insert the dried seeded stems (like amaranth) amongst the eucalyptus. I like to group these slightly to one side to create a focal point of texture amidst the green. -
Add height with grasses:
Place the dried ornamental grasses or wheat stalks into the back of the arrangement. They should tower slightly above the greenery, adding an airy, feathery silhouette.
Make It Last
Change water every 2 days for the fresh stems. The dried grasses need no care, just keep them dry to prevent mold.
Step 3: Styling the Medium Crock
-
Prepare the medium vessel:
Add a small amount of water to the medium-sized crock. -
Bundle baby’s breath:
Take a generous handful of baby’s breath and trim the stems so the flower heads will sit just a few inches above the rim. -
Insert the cloud:
Place the baby’s breath into the crock, flagoning it out slightly so it looks like a soft, white cloud resting on the stoneware rim. -
Add green accents:
Tuck two or three small sprigs of green filler (like boxwood or more eucalyptus tips) into the baby’s breath to tie the color palette back to the larger arrangement. -
Final adjustment:
Turn the arrangement slightly to find its best face, ensuring the flowers don’t visually block the taller crock behind it.
Step 4: Finishing Touches
-
Style the small crock:
Leave the smallest crock empty. Its open mouth adds negative space and emphasizes the beautiful glazed rim detail. -
Review the composition:
Step back from the table. If the arrangement feels too heavy on one side, rotate the crocks slightly or fluff the dried grasses to balance the visual weight. -
Optional accessory:
If you have extra greenery clippings, you can lay a sprig loosely on a nearby plate or napkin for a coordinated table setting look.
Enjoy the peaceful, organic atmosphere this stoneware trio brings to your shared meals
Hearthside Firewood Holder Crock
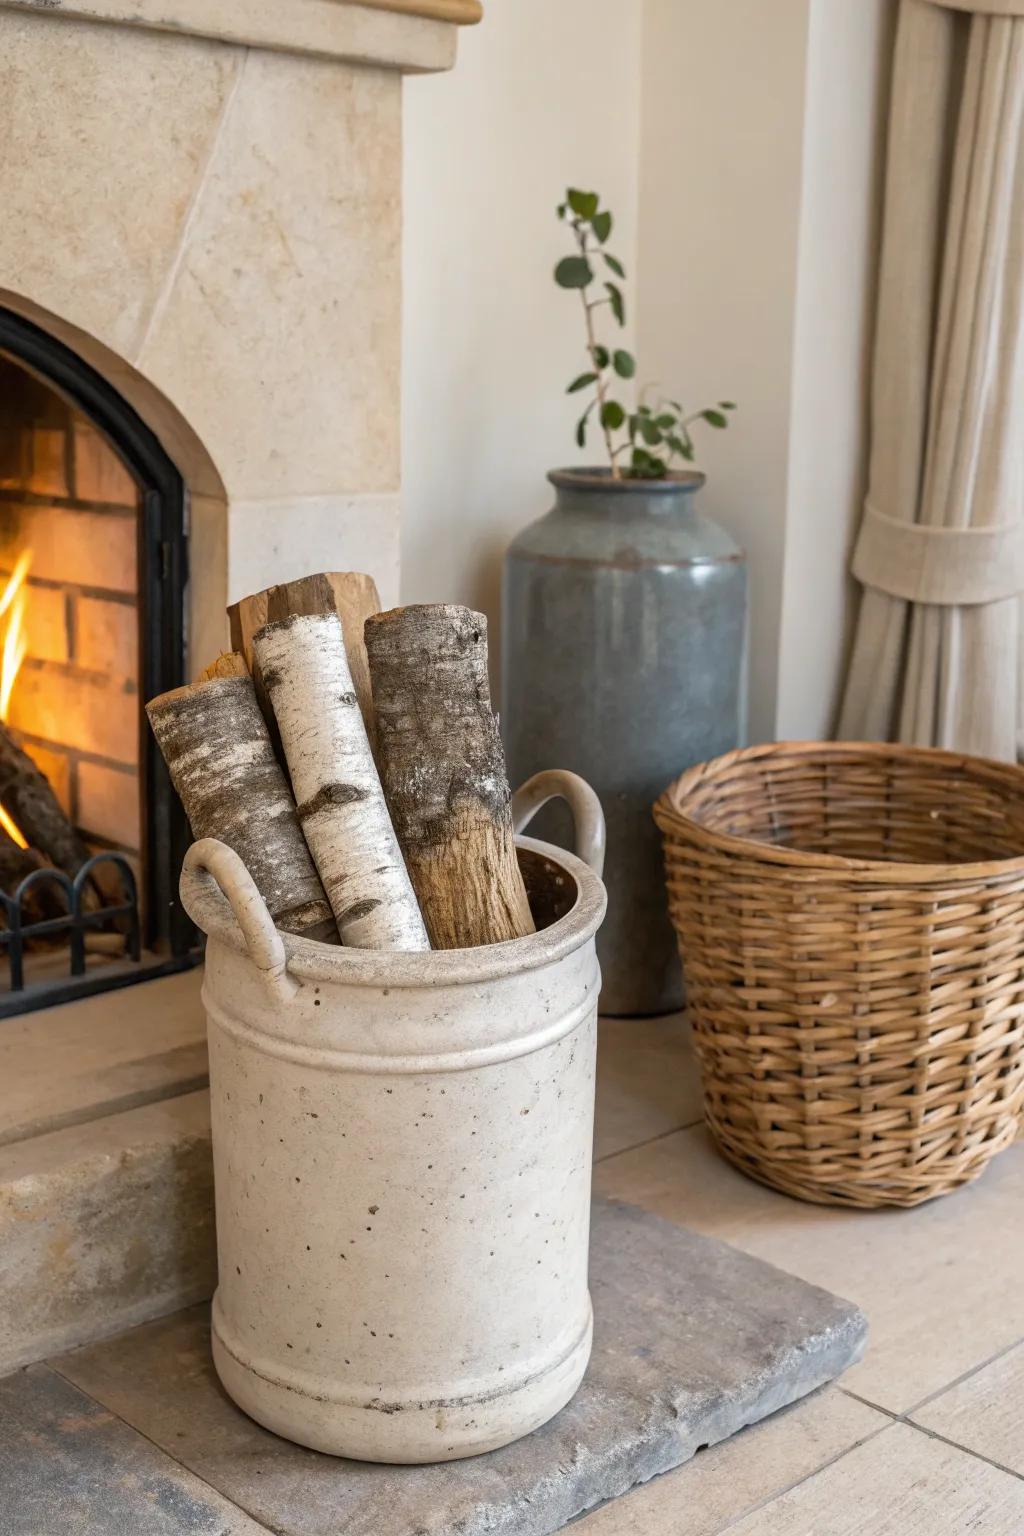
Transform a plain or weathered stoneware crock into a functional and charming fireside accessory. This project captures the warmth of a classic hearth, creating a sturdy storage vessel perfect for displaying beautiful white birch logs.
Detailed Instructions
Materials
- Large stoneware crock (vintage or reproduction, 2-3 gallon size)
- Mild dish soap
- Scrub brush
- Clean rags
- Matte white or light greige chalk paint
- Medium-sized round paintbrush
- Soft wax (clear)
- Lint-free cloth
- Dark antique wax (optional for aging)
- Self-adhesive felt pads
- Birch firewood logs (cut to length)
Step 1: Preparation and Cleaning
-
Assess the crock:
Begin by inspecting your chosen crock for any major structural cracks. Hairline spidering in the glaze is fine and adds character, but deep structural cracks might not hold heavy wood safely. -
Deep clean:
Wash the crock thoroughly inside and out using warm water and mild dish soap. Use a scrub brush to remove years of dust or grime from any crevices or imprinted lettering. -
Dry thoroughly:
Wipe the crock down with a clean rag. I like to let it sit in a warm, dry spot for at least an hour to ensure all moisture has evaporated from the porous clay before applying any finish.
Step 2: Painting and Finishing
-
Apply the first coat:
Dip your round brush into the matte chalk paint. Apply a thin, even layer over the exterior of the crock, working in long, horizontal strokes to mimic the motion of wheel-thrown pottery. -
Handle with care:
Don’t forget to paint the handles. Work the bristles into the curves of the ears to ensure full coverage, but watch for drips pooling underneath them. -
Dry and assess:
Allow the first coat to dry completely, which usually takes about 30 to 60 minutes depending on humidity. You should see a chalky, flat finish. -
Second coat application:
Apply a second coat of paint for solid coverage. If you prefer a more distressed look, you can keep this layer slightly thinner in areas where wear would naturally occur. -
Speckling effect:
To mimic the speckled stoneware look in the photo, dip a stiff toothbrush or a splatter brush into a dark grey or watered-down brown paint. Flick the bristles to send tiny droplets onto the dried white surface. -
Seal the surface:
Once the paint is fully cured, apply a layer of clear soft wax using a lint-free cloth or wax brush. This protects the paint from scuffs when you load firewood. -
Add dimension (Optional):
For an aged patina, work a tiny amount of dark antique wax into the grooves below the rim. Buff it back almost immediately so it just sits in the recesses.
Weight Distribution
Add a layer of sand or small stones in a bag at the very bottom before adding wood. This lowers the center of gravity and prevents the crock from tipping over.
Step 3: Assembly and Styling
-
Protect your floor:
Flip the crock over cautiously and adhere self-adhesive felt pads to the bottom rim. This is crucial for protecting your stone or wood hearth from scratches. -
Measure your wood:
Before loading, measure the height of your crock. You want your birch logs to extend roughly 4-6 inches above the rim for the best visual proportion. -
Arrange the base layer:
Place uglier or split logs at the very bottom of the crock vertically to act as a hidden riser if your decorative logs are too short. -
Insert the birch:
Stand your white birch logs vertically inside the crock. Arrange them snugly so they support each other and don’t lean heavily against the ceramic rim. -
Final adjustment:
Rotate the logs so the most attractive bark features—like peeling layers or dark knots—are facing outward toward the room.
Preventing Cracks
Don’t toss logs into the crock! Even thick stoneware can crack from sudden impact. Always place the wood gently inside to preserve your antique for years.
Enjoy the cozy ambiance your new rustic firewood holder brings to the room


What Really Happens Inside the Kiln
Learn how time and temperature work together inside the kiln to transform clay into durable ceramic.
Porch Planter With a Hidden Pot Inside

Transform a beautiful stoneware crock into a functional porch planter without risking damage to the antique by nesting a hidden pot inside. This technique creates a lush, overflowing look perfect for ferns while preserving the integrity of your vintage vessel.
How-To Guide
Materials
- Large vintage stoneware crock (5-10 gallon size)
- Plastic nursery pot (sized to fit snugly inside the crock’s rim)
- Boston Fern (or similar large, draping fern)
- Empty plastic water bottles or upturned plastic plant saucers (for filler)
- Pea gravel or river rocks (optional)
- Potting soil (if repotting is necessary)
- Gardening gloves
Step 1: Preparing the Crock
-
Clean the Interior:
Begin by thoroughly cleaning the inside of your vintage crock. Remove any old dust, cobwebs, or debris using a damp cloth or a soft-bristled brush to ensure a clean environment. -
Assess the Depth:
Place your plastic nursery pot next to the crock to compare their heights. You want the rim of the plastic pot to sit just below the rim of the crock so it stays invisible. -
Create a False Bottom:
Since most crocks are much deeper than a standard plant pot, you need to raise the floor. Fill the bottom third of the crock with lightweight, non-degradable material. -
Add Filler Material:
I like to use empty, capped plastic water bottles or upside-down plastic plant saucers for this step. Stack them securely to create a stable platform that won’t rot or attract pests like organic fillers might. -
check Height Stability:
Test the height by setting the nursery pot on top of your filler stack. Adjust the bottles or saucers until the plant sits level and hidden just below the crock’s lip.
Step 2: Planting and Styling
-
Prepare the Fern:
Take your Boston Fern and examine its current pot. If the nursery pot it came in fits your crock perfectly, you can keep it in there. If not, repot it into a plastic pot that fits the crock’s opening. -
Create Drainage Space:
If you are repotting, ensure the new plastic pot has drainage holes. Add a thin layer of pea gravel inside the plastic pot before adding soil to assist with water flow. -
Insert the Plant:
Carefully lower the potted fern into the crock, resting it on your hidden platform of bottles. Ensure it feels stable and doesn’t rock back and forth. -
Fluff the Foliage:
Gently tease the fern fronds outward. You want them to spill over the edges of the crock to soften the rim and completely conceal the plastic pot underneath. -
Fill Gaps:
If there is a significant gap between the inner pot and the crock wall, tuck in small pieces of burlap or moss to hide the void, though a full fern usually covers this on its own. -
Check Sunlight:
Position the crock on your porch. Ferns love indirect light and humidity, so a shaded corner away from scorching afternoon sun is ideal. -
Water Carefully:
When watering, remove the inner plastic pot if possible to let it drain elsewhere, or water sparingly to ensure the crock doesn’t fill up with stagnant water at the bottom.
Weight Management
Add a few heavy rocks at the very bottom of the crock before the plastic bottles. This lowers the center of gravity so wind won’t tip the tall planter over.
Step 3: Accenting the Scene
-
Clean the Exterior:
Wipe down the outside of the crock one last time to remove any potting soil smudges, highlighting the beautiful patina of the stoneware. -
Style the Surroundings:
Place the crock on a stone step or porch floor. Add a textured doormat nearby to complement the rustic vibe. -
Add Natural Textures:
Consider placing a smaller terracotta pot or a woven element, like a tassel or dried grass bundle, near the base to create a curated vignette.
Seasonal Swap
Since the pot isn’t permanent, swap the fern for mums in autumn or a miniature spruce tree in winter for year-round porch appeal.
Enjoy the timeless charm this simple arrangement brings to your entryway
Bathroom Rolled Towel Crock
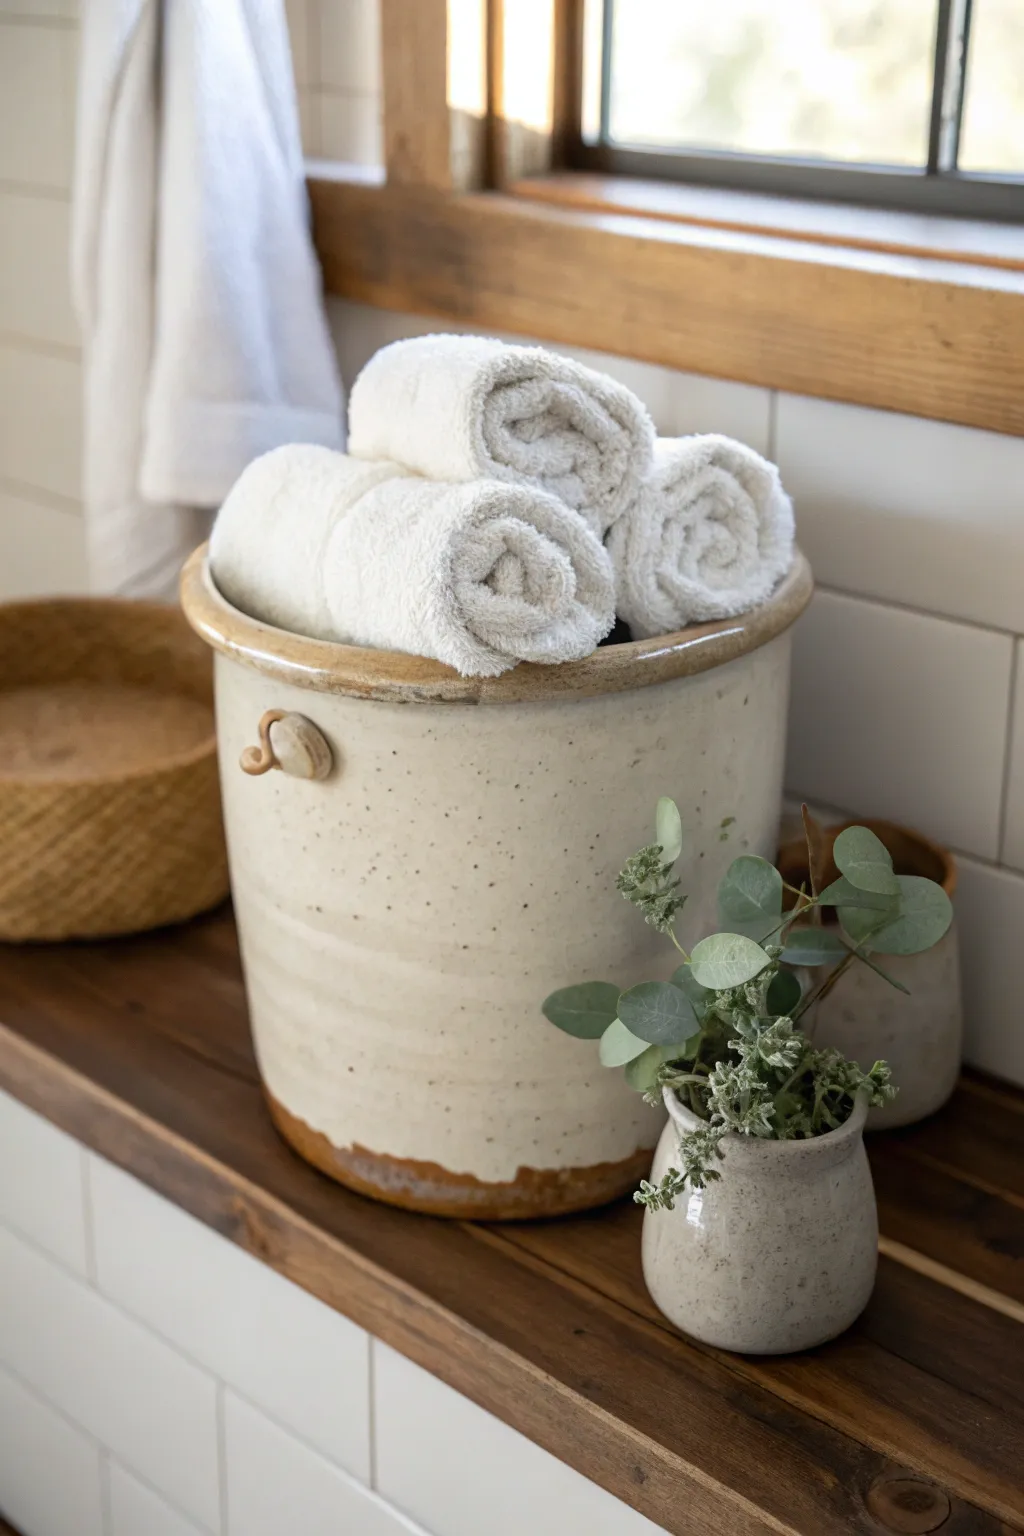
Transform a rustic stoneware crock into functional bathroom storage with this effortless styling project. The heavy, speckled texture of the pottery contrasts beautifully with the softness of plush white towels, creating a spa-like vignette on any wooden shelf.
Step-by-Step
Materials
- Large vintage stoneware crock (approximately 1-2 gallon size)
- 3 plush white hand towels or bath towels
- Small matching pottery vase or mini crock
- Fresh or faux eucalyptus sprigs
- Dried oregano or textured greenery filler
- Wooden shelf or countertop surface
Step 1: Preparing the Crock
-
Clean the vessel:
Since vintage crocks often come from basements or antique barns, give your large crock a thorough scrubbing with warm soapy water. Pay attention to the interior where the towels will rest. -
Dry completely:
Let the stoneware air dry fully for at least a few hours. Any trapped moisture inside the heavy clay could transfer to your clean towels, causing a musty smell. -
Check for rough spots:
Run your hand carefully around the inner rim. If you find any jagged chips in the glaze that might snag the terry cloth, apply a tiny dab of clear nail polish or sand it very lightly to seal it. -
Position the crock:
Place the heavy crock on your wooden shelf first. It’s best to style it in place rather than lifting it fully loaded, especially if you are using a high shelf.
Towels Sinking?
If towels slide down too far, ball up some bubble wrap or use a small upside-down plastic container inside the crock as a false bottom to boost height.
Step 2: Rolling and Arranging Towels
-
Lay out the towel:
Take one of your white towels and lay it flat on a table. Fold it in half lengthwise so it is long and narrow. -
Start the roll:
Beginning at one short end, start rolling the towel tightly. Keep the edges aligned as you go to ensure a neat, cylinder shape. -
Secure the roll:
Once fully rolled, you shouldn’t need to tie it, but keeping a firm grip is key. I like to tuck the loose end underneath when placing it to keep it tidy. -
Create a base:
If your crock is very deep, the towels might sink too low. Place a folded spare towel or even a small block of foam at the bottom of the crock to act as a riser. -
Insert the first towel:
Place the first rolled towel into the crock vertically. Lean it slightly against the back rim. -
Add the second towel:
Nestle the second rolled towel next to the first. Adjust them so they are touching but not squished. -
Complete the trio:
Insert the third rolled towel to fill the remaining gap. A group of three creates a pleasing, balanced composition. -
Fluff the tops:
Gently gently press down on the center of each roll’s spiral top or fluff the edges so they look soft and inviting, rather than stiff.
Scent Boost
Hide a small sachet of dried lavender at the bottom of the crock before adding towels. The fabric will subtly absorb the calming scent for guests.
Step 3: Styling the Greenery Accent
-
Prepare the mini crock:
Take your smaller matching pottery vase. Ensure it is clean and dry just like the larger vessel. -
Arrange eucalyptus base:
Insert 2-3 stems of eucalyptus into the small vase. Let the leaves drape naturally over the side to soften the ceramic edge. -
Add texture:
Tuck small sprigs of dried oregano or a similar textured filler in between the eucalyptus leaves. This adds visual density and a nice color variation. -
Position the accent:
Place the small arranged vase to the right of the large crock. Slightly overlapping the view of the large crock creates a cohesive, layered look. -
Final check:
Step back and adjust the spacing on the shelf to ensure the wood grain is visible around the objects, grounding the scene.
Enjoy the simple, rustic charm this storage solution adds to your daily routine

TRACK YOUR CERAMIC JOURNEY
Capture glaze tests, firing details, and creative progress—all in one simple printable. Make your projects easier to repeat and improve.
Coffee Table Crock With Fresh Clippings
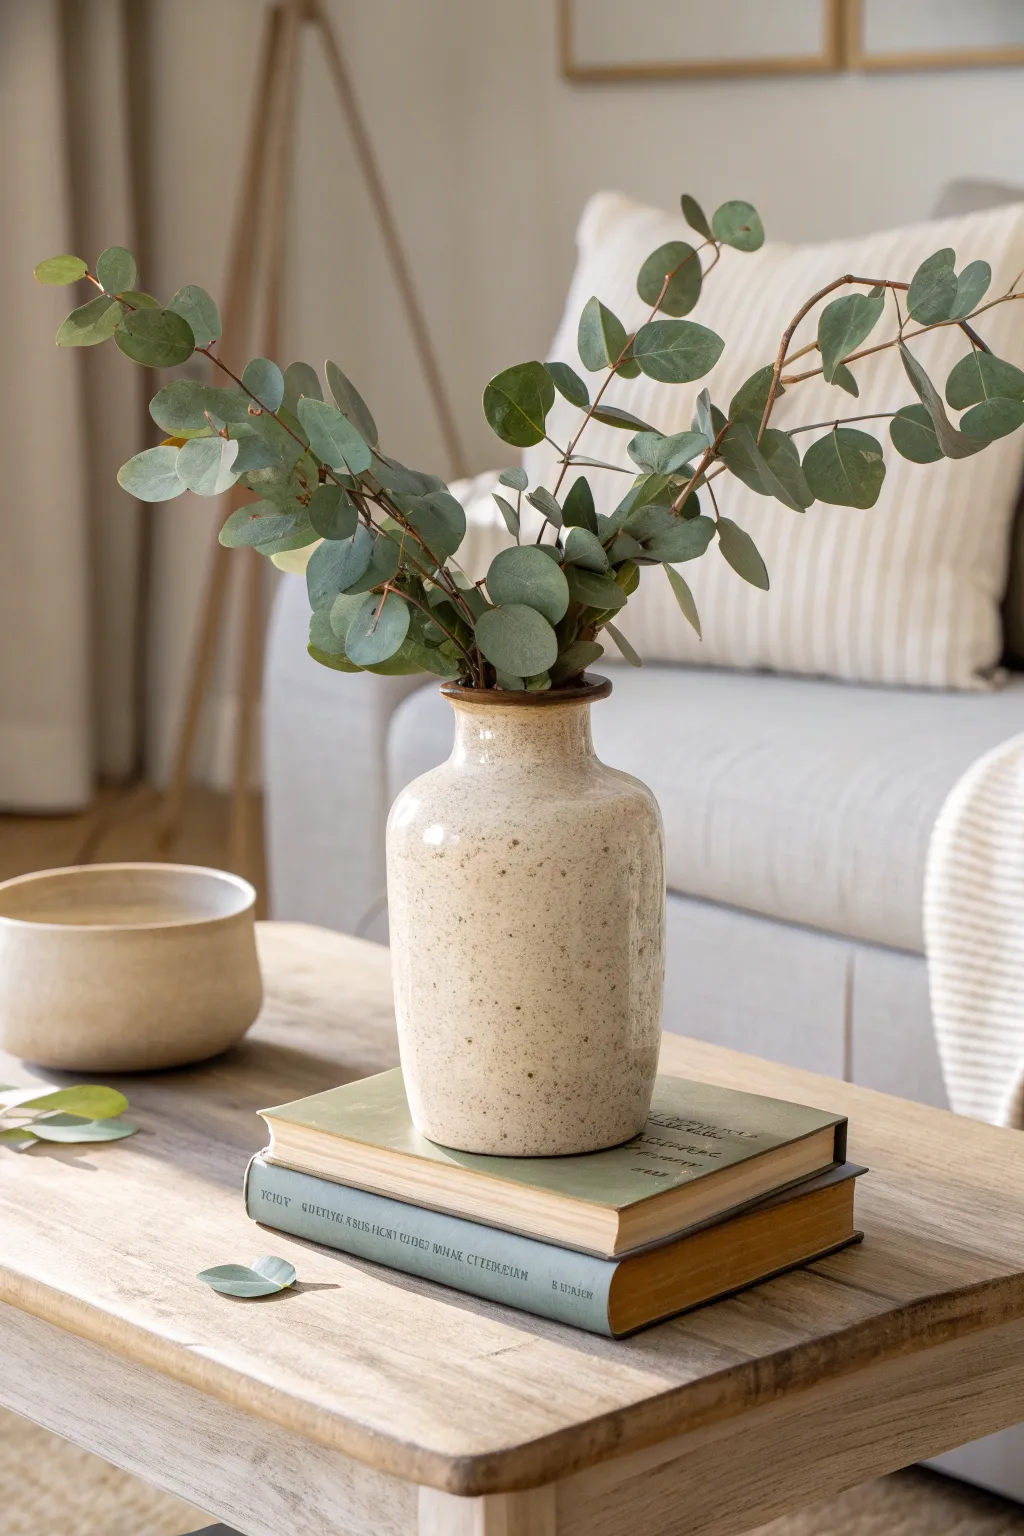
Bring a touch of organic warmth to your living space with this simple yet sophisticated coffee table display. By combining the rustic charm of speckled stoneware with fresh eucalyptus clippings and vintage books, you’ll create a centerpiece that feels both collected and curated.
Detailed Instructions
Materials
- Tall speckled stoneware crock or vase (beige/cream tone)
- Small matching ceramic bowl (optional side element)
- Fresh silver dollar eucalyptus branches
- Two vintage hardback books (green and blue spines preferred)
- Rustic wooden coffee table
- Pruning shears
- Water
Step 1: Setting the Foundation
-
Select the base location:
Clear a central spot on your rustic wooden coffee table. The natural grain of the wood is crucial for tying the earthy tones together, so ensure the surface is clean and dust-free. -
Choose the books:
Select two vintage hardback books to serve as a pedestal. Look for matte covers in muted earth tones—specifically a sage green and a muted teal or slate blue—to harmonize with the eucalyptus leaves later. -
Stack the books:
Place the larger book on the bottom and the slightly smaller one on top. Offset them just slightly so the spines are visible but not perfectly aligned, creating a relaxed, lived-in feel. -
Position the crock:
Center your tall speckled crock on top of the book stack. Ensure it sits stable and flat; if the book covers are slippery, you might place a small felt pad underneath the vase for grip.
Unstable Vase?
If the vintage book covers are slick and the heavy crock feels wobbly, place a small circle of non-slip drawer liner or a dab of museum wax between the vase and the book.
Step 2: Prepping the Greenery
-
Select your branches:
Choose 3-5 stems of fresh silver dollar eucalyptus. Look for branches that have a nice arch and varying leaf sizes to create dynamic movement. -
Measure the height:
Hold the stems against the vase to gauge the height. You want the arrangement to be about 1.5 times the height of the vase itself for visual balance. -
Trim the stems:
Using sharp pruning shears, cut the bottom of the stems at a 45-degree angle. This angle helps the branches absorb water more efficiently and keeps them fresh longer. -
Remove lower leaves:
Strip off any leaves that would fall below the water line inside the vase. Submerged leaves will rot quickly and cloud the water, so I always strip about 4-6 inches from the bottom.
Step 3: Styles the Arrangement
-
Add water:
Fill the crock about halfway with cool, clean water. Be careful not to splash the vintage books underneath. -
Insert the main structure:
Place your tallest, sturdiest branch in the center first. This sets the height and provides a backbone for the other stems to lean against. -
Fill the sides:
Add the remaining branches on either side of the central stem. Rotate them until they curve outward naturally, creating an open, airy shape rather than a tight bundle. -
Adjust strictly for asymmetry:
Pull one branch slightly lower or more to the left to avoid perfect symmetry. The goal is a wild, gathered-from-the-garden look. -
Add the side element:
Place the smaller matching ceramic bowl to the left of the book stack. It shouldn’t touch the books but should be close enough to feel like part of the same vignette. -
Scatter loose leaves:
Take two or three loose eucalyptus leaves and place them casually on the table surface near the books. This small detail bridges the gap between the artwork and the table.
Scent Boost
To release more of that spa-like eucalyptus fragrance, gently crush the submerged ends of the stems with a hammer before placing them in the water.
Step back and enjoy the calming, natural texture this simple arrangement adds to your room
Pantry Corner Crock With Scoops and Linens
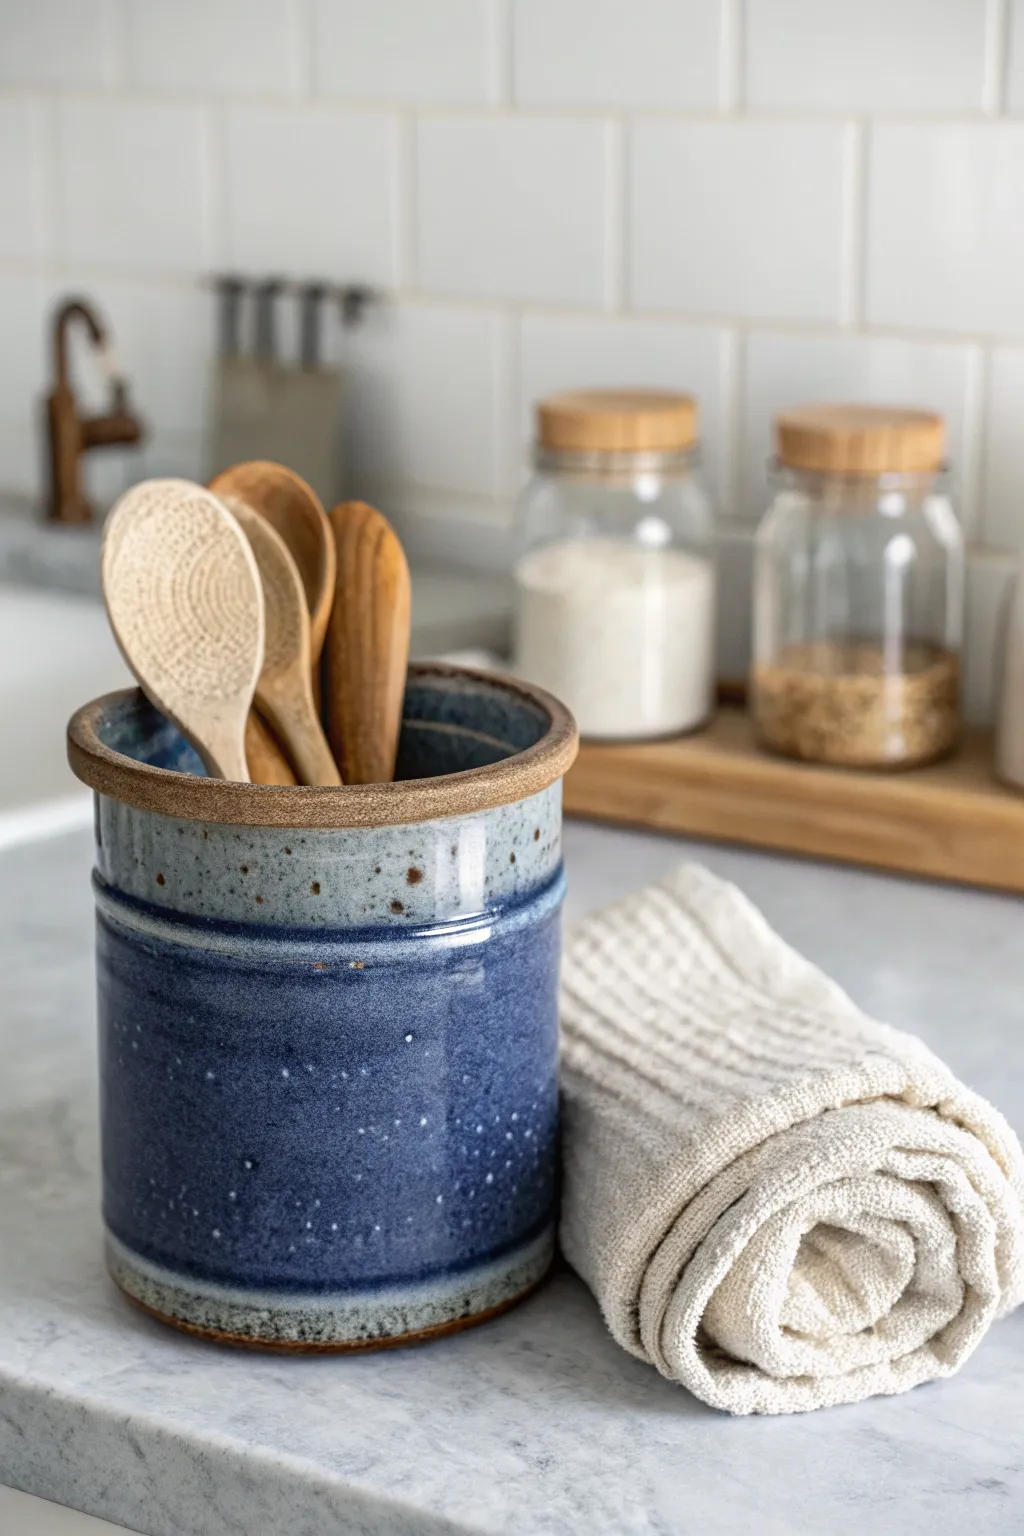
Bring a touch of artisan charm to your kitchen counter with this gorgeous, handcrafted ceramic utensil crock. Featuring a speckled clay body and a deep indigo glaze that transitions beautifully into rustic rims, this functional piece is perfect for organizing your favorite wooden spoons and scoops.
Step-by-Step Tutorial
Materials
- Stoneware clay (speckled or buff)
- Pottery wheel
- Throwing tools (sponge, wire cutter, ribs)
- Trimming tools
- Kiln
- Sponge for smoothing
- Deep blue/indigo dipping glaze
- Clear or transparent glossy glaze (optional)
- Wax resist
- Wide brush for glaze application
Step 1: Throwing the Form
-
Prepare your clay:
Start by thoroughly wedging about 3-4 pounds of speckled stoneware clay to remove any air bubbles. Center the clay firmly on your pottery wheel bat. -
Establish the base:
Open the centered clay and compress the bottom well to prevent cracking later. Aim for a flat interior base about 4-5 inches wide, leaving enough thickness for trimming. -
Pull the walls:
Begin pulling the walls upward into a cylinder shape. Keep your pulls even and steady, maintaining a consistent thickness from bottom to top. For a utensil crock, you want sturdy walls, so don’t make them too thin. -
Shape the cylinder:
Refine the cylinder shape. Unlike a vase, you want fairly straight, vertical sides to hold tools upright. Use a metal rib on the outside while supporting the inside to smooth the surface and compress the clay particles. -
Create the rim detail:
At the very top, thicken the rim slightly by compressing it downwards. Use your finger or a chamois to round it off perfectly. This thickened lip adds visual weight and durability. -
Add the decorative ridge:
About 2 inches down from the rim, use a wooden modeling tool or your finger to press a gentle groove or indentation around the circumference. This creates a subtle separation for your glazing later. -
Refine the texture:
If desired, leave slight throwing rings or use a rib to make it perfectly smooth. I like to leave a little bit of texture so the glaze breaks beautifully over the surface.
Glaze Break Tip
Choose a ‘breaking’ glaze for the best effect. These glazes thin out over edges and ridges, allowing the speckled clay body to show through beautifully.
Step 2: Trimming and Bisque Firing
-
Dry to leather hard:
Allow the piece to dry slowly until it reaches a leather-hard state. It should be firm enough to handle without deforming but still feel cool to the touch. -
Trim the foot:
Flip the crock over and center it on the wheel. Trim a clean, flat foot ring. Remove any excess weight from the bottom walls to ensure the pot isn’t too heavy. -
Smooth rough edges:
Run a damp sponge over any sharp edges created during trimming. Sign the bottom of your pot now if you wish. -
Bone dry:
Let the crock dry completely to the bone-dry stage. This usually takes several days depending on humidity. The clay will turn a lighter color and no longer feel cool. -
Bisque fire:
Place your greenware into the kiln and fire to Bisque temperature (usually Cone 04 or 06). This prepares the ceramic for glazing.
Set the Mood
Make a matching small dish or spoon rest using the same clay and glaze combo. It creates a cohesive, intentional vignette for your countertop pantry corner.
Step 3: Glazing and Final Fire
-
Clean the bisque:
Wipe down the entire bisque-fired piece with a damp sponge to remove any dust, which can cause glaze defects like crawling. -
Wax the bottom:
Apply wax resist to the bottom foot ring and about 1/4 inch up the side. This prevents glaze from sticking to the kiln shelf. -
Wax the rim (optional technique):
To achieve the raw clay look on the rim seen in the photo, careful apply a band of wax resist to the top 1/2 inch of the rim and the very top edge. -
Dip the interior:
Pour your deep blue glaze inside the crock, roll it around to coat the entire interior surface, and pour the excess back out. Wipe any drips off the rim immediately. -
Glaze the exterior:
Using tongs or your hand (if the inside is dry), dip the exterior into the blue glaze. aim to stop the dip right at your wax line on the rim, or simply dip the whole thing if you aren’t waxing the top. -
Create the layered effect:
If you didn’t wax the rim, wipe the glaze off the top 1/2 inch with a damp sponge to expose the raw clay body. For a softer transition, slightly overlap a lighter glaze near the top ridge. -
Clean up:
Check the bottom foot again. Any stray droplets of glaze must be wiped off the waxed area or they will fuse the pot to the shelf. -
Final firing:
Load the kiln and fire to your clay’s maturity temperature (typically Cone 5, 6, or 10 depending on your materials). Allow the kiln to cool naturally before unloading.
Once cooled, fill your new handmade crock with favorite wooden tools and enjoy the rustic elegance it adds to your baking station.
Pet Toy Drop Zone Crock
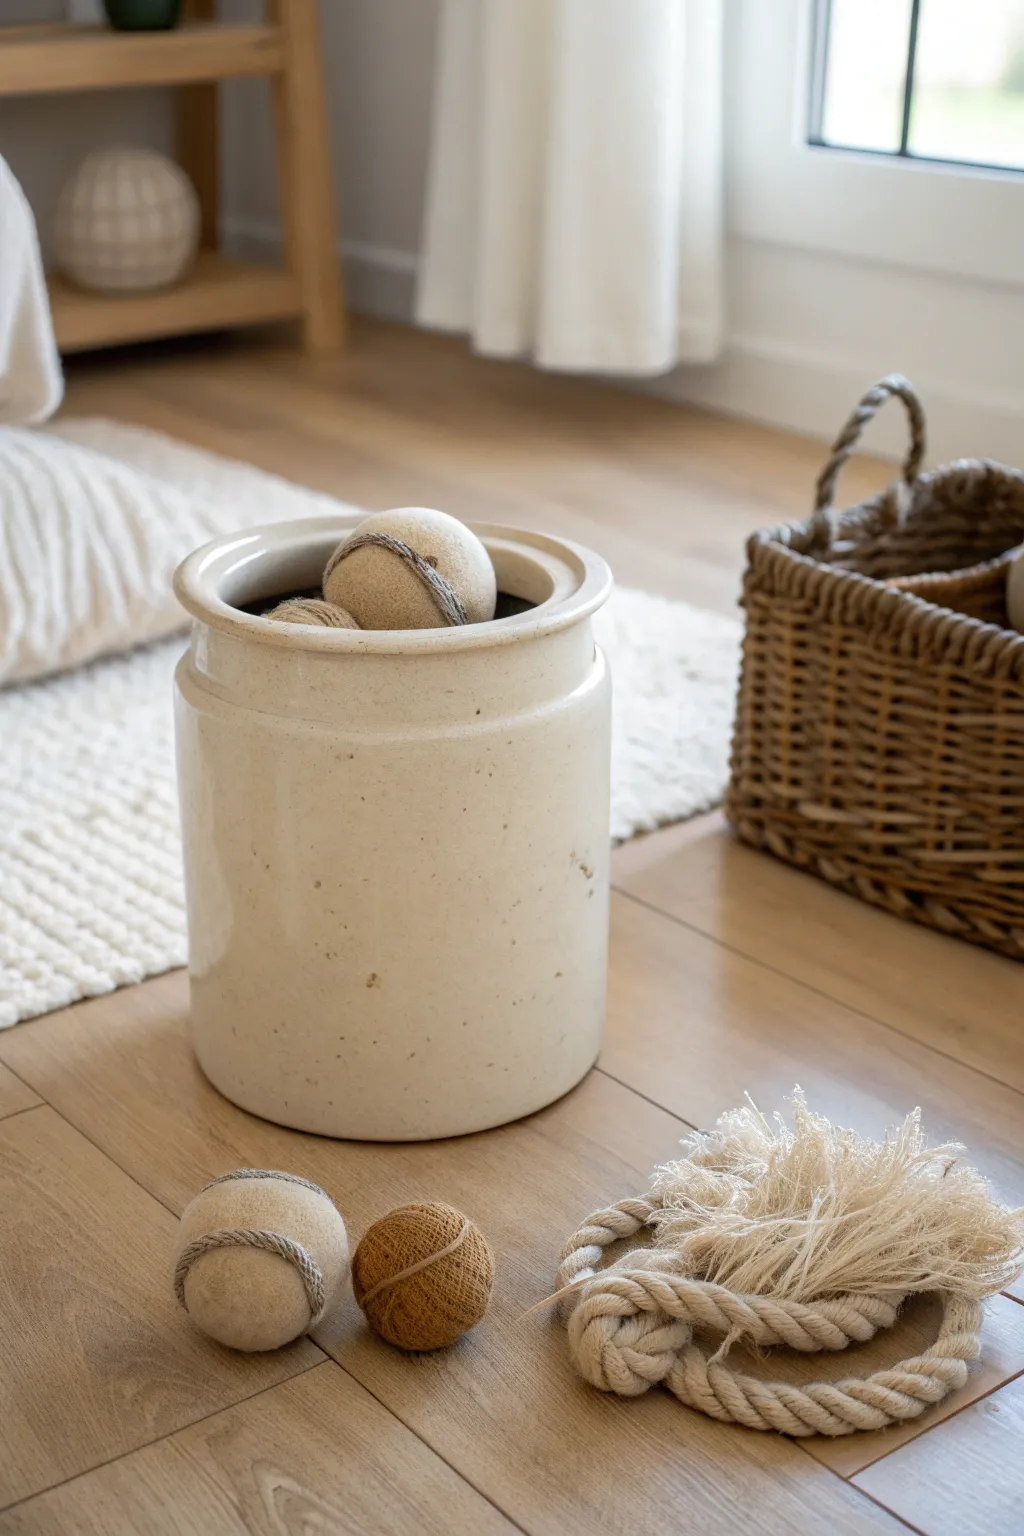
Transform a vintage stoneware crock into a stylish, accessible storage solution for your furry friend’s favorite playthings. This simple project combines rustic charm with functionality, keeping toys tidy while adding a farmhouse touch to your living space.
Detailed Instructions
Materials
- Large stoneware crock (vintage or reproduction)
- Wool roving (white/cream and brown)
- Old tennis balls (clean)
- Cotton rope (1/2 inch to 3/4 inch thick)
- Jute twine
- Pantyhose or nylon stocking leg
- Washer and dryer
- Scissors
- Hot glue gun and glue sticks
Step 1: Prepping the Crock
-
Clean the vessel:
Begin by thoroughly cleaning your stoneware crock. Since these are often flea market finds, wash it inside and out with warm, soapy water to remove any grime. -
Inspect the interior:
Check the inside rim and bottom for any sharp chips or rough glaze patches. If you find any jagged edges that might snag fabric toys, gently sand them down with fine-grit sandpaper until smooth. -
Dry completely:
Wipe the crock dry with a clean cloth and let it air dry completely before placing anything inside to prevent trapped moisture.
Loose Wool?
If the wool hasn’t felted tight enough after one wash, put it back in the pantyhose and wash again on the hottest setting possible. Agitation is key.
Step 2: Crafting Wool Felt Balls
-
Prepare the core:
Take a clean tennis ball as your core. This saves on wool and gives the toy a good bounce. -
Wrap the roving:
Begin wrapping your wool roving tightly around the tennis ball. Cover it completely in one direction, then rotate and wrap in another direction to create even layers. -
Secure the wool:
Continue wrapping until you have a thick, cushioned layer of wool about 1/4 inch thick over the entire ball. The end of the roving should just be tucked under a previous strand. -
Add detail color:
For the darker ball seen in the image, use brown roving instead of white. Or, layer a thin strip of contrasting roving over the top for a decorative line. -
Prepare for felting:
Carefully place your wrapped balls into the leg of a pair of pantyhose. Tie a knot in the hose between each ball to keep them separate. -
Wash and felt:
Run the pantyhose chain through a hot wash cycle in your washing machine with a little detergent. The heat and agitation will felt the wool layers together. -
Dry thoroughly:
Transfer the balls to the dryer on high heat. This tightens the fibers further. You may need to run two cycles to ensure they are completely dry inside. -
Add texture:
Once dry and removed from the hose, take a length of jute twine or braided yarn. Tightly wrap it around the center of the ball and secure it with a small dab of hot glue pressed deep into the fibers.
Scent Sensation
Before placing the finished wool balls in the crock, store them in a sealed bag with a pinch of dried catnip or a dog-safe treat for extra appeal.
Step 3: Creating the Rope Tug
-
Cut the rope:
Cut three equal lengths of thick cotton rope, each about 30 inches long. -
Join the top:
Gather the three strands together at one end. Use a smaller piece of twine to tightly whip (wrap) the ends together about 2 inches down, creating a tassel. -
Start braiding:
Firmly braid the three strands together. Keep the tension high so the toy is durable for play. -
Tie the knot:
Once you reach the end, tie the braided section into a large, simple overhand knot. This acts as the ‘chew’ part of the toy. -
Fray the ends:
Using a comb or your fingers, unravel the individual threads of the remaining rope tail to create a fluffy tassel texture similar to the one shown in the photo.
Step 4: Assembly
-
Layer the bottom:
I like to place a scrap of fabric or a small circular rug pad at the very bottom of the crock to dampen the sound of toys dropping in. -
Arrange the collection:
Place your newly created felt balls and rope toys inside the crock. Let them pile up naturally so they peek over the rim, inviting play.
Your stylish crock is now ready to keep your home tidy and your pets entertained
Winter Evergreens and Pinecones Arrangement
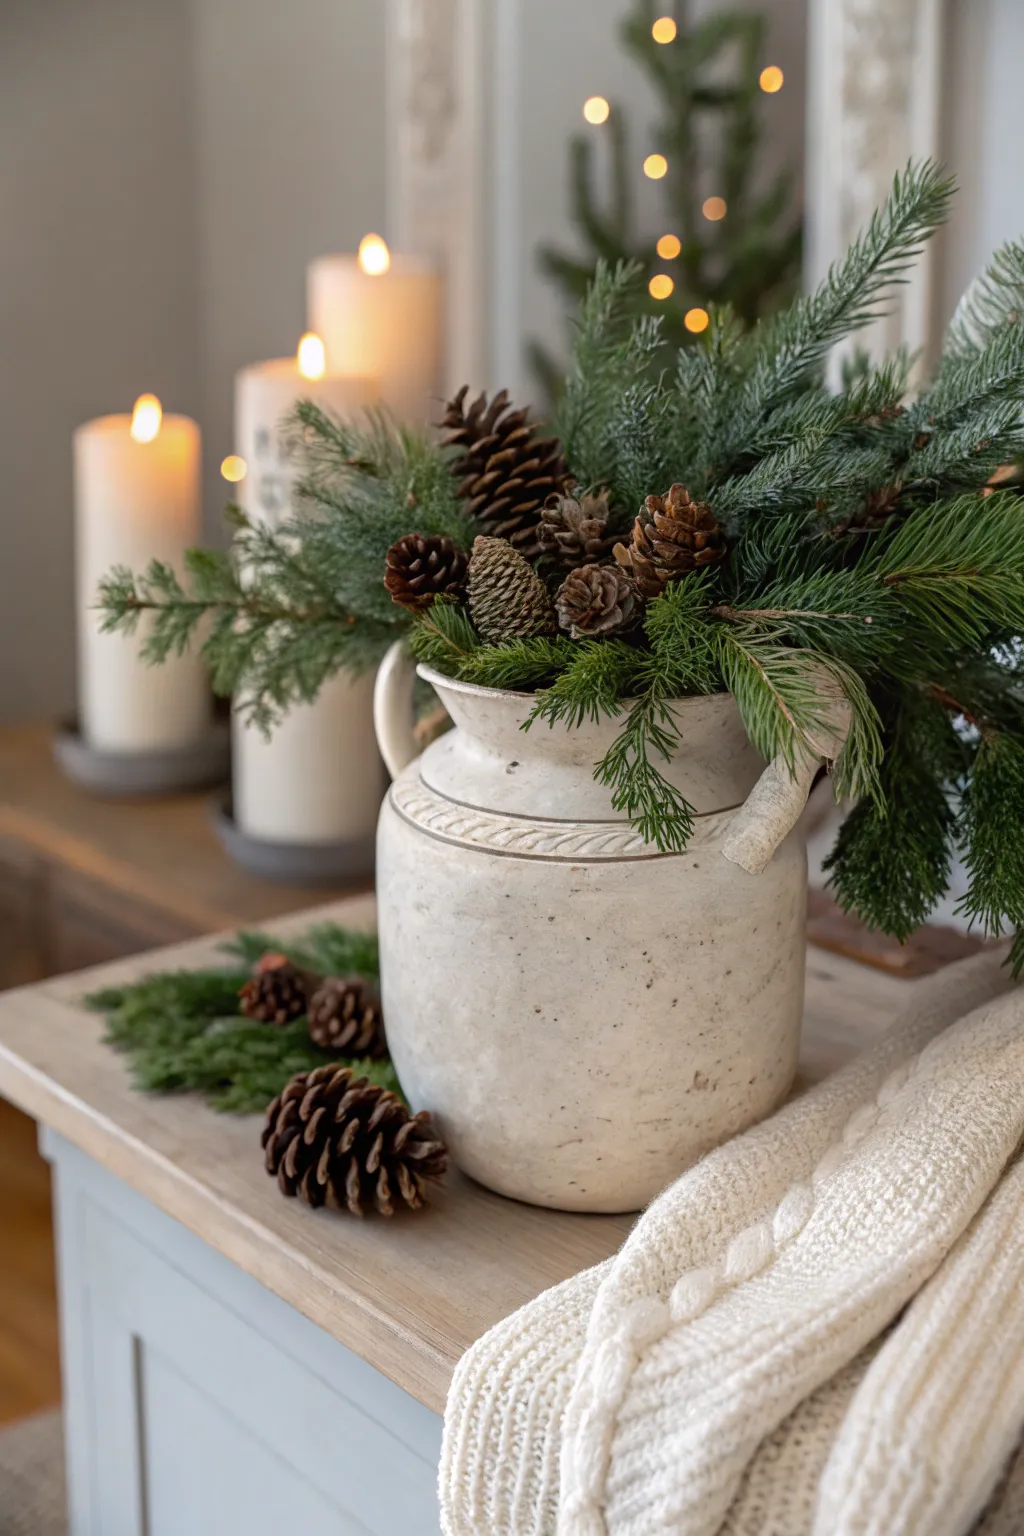
Bring the quiet beauty of a winter forest indoors with this timeless centerpiece arrangement. Using a vintage-style crock as your base creates a sturdy, farmhouse-inspired vessel for overflowing evergreens and textured pinecones.
Step-by-Step Tutorial
Materials
- Vintage or reproduction stoneware crock (white/cream with handles)
- Assorted fresh evergreen branches (pine, fir, cedar)
- Assorted natural pinecones (varying sizes)
- Floral foam blocks (dry foam for faux, wet foam for fresh)
- Checkered floral tape or waterproof tape
- Pruning shears or heavy-duty wire cutters
- Heavy-gauge floral wire
- Chunky knit cream blanket (for styling)
- Distressed wooden surface or tray
Step 1: Preparing the Vessel
-
Clean the crock:
Begin by wiping down your stoneware crock to ensure it is free of dust or grit, paying special attention to the textured rim detailing. -
Prepare the internal structure:
Cut your floral foam block to fit snugly inside the mouth of the crock. It should sit about an inch below the rim so the mechanics remain hidden. -
Secure the foam:
Use a few strips of waterproof tape or floral tape across the top of the opening in a grid pattern to hold the foam securely in place, preventing the arrangement from shifting. -
Hydrate (if using fresh):
If you are using fresh greens, soak your floral foam until completely saturated before placing it in the crock to keep your branches vibrant longer.
Pro Tip: Hidden Wires
For stubborn pinecones that won’t hold wire, use a dab of hot glue on the bottom to secure a wooden floral pick or skewer before inserting it into the arrangement.
Step 2: Building the Greenery Base
-
Select structural branches:
Choose two or three of your stiffest evergreen branches (like fir or spruce) to establish the height and overall shape. -
Insert the main stems:
Insert these main stems into the center-back of the foam, angling them slightly backward to create depth without blocking the view entirely. -
Add side volume:
Cut medium-length branches and insert them angled outward on the left and right sides. I prefer to let these droop slightly over the handles to soften the pottery’s edges. -
Fill the front layer:
Use shorter, softer greens like cedar or white pine for the front. Insert them horizontally near the rim so they spill forward over the crock’s lip. -
Create density:
Continue adding greens into the gaps, varying the textures to create a lush, gathered look that mimics nature.
Step 3: Styling with Pinecones
-
Wire the pinecones:
Take a length of heavy-gauge floral wire and wrap it tightly around the base of your pinecones, hiding the wire within the bottom scales. -
Twist the stems:
Twist the two wire ends together to form a sturdy, pick-like stem that can easily penetrate the foam. -
Cluster the focal point:
Group three large/medium pinecones together near the center-left of the arrangement. Nestling them deep into the greens makes them look as if they are growing on the branch. -
Add accent cones:
Place a few smaller pinecones higher up and towards the right side to balance the visual weight and draw the eye upward. -
Check for gaps:
Step back and look for any bare spots where the foam or tape is visible, tucking in small sprigs of greenery or tiny pinecones to cover them.
Level Up: Scent Boost
Tuck cinnamon sticks bundled with twine into the greens, or add a few drops of balsam fir essential oil to the pinecones for an authentic winter forest scent.
Step 4: Final Styling Touches
-
Arrange the side spill:
Take a reserved handful of short evergreen clippings and a few loose pinecones. -
Place on the table surface:
Lay these clippings on the table surface directly next to the base of the crock, creating a visual connection between the vessel and the table. -
Nestle the loose pinecones:
Place one or two large pinecones on top of the tabletop greenery, angling them outward. -
Drape the textile:
Fold a chunky knit cream blanket or sweater loosely and drape it casually on the right side of the crock, allowing the fabric’s texture to complement the smooth pottery. -
Lighting ambiance:
Though not part of the construction, placing pillar candles in the background completes the cozy vignette shown in the inspiration image.
Enjoy the cozy, woodsy atmosphere your new crock arrangement brings to your winter decor
Fall Pumpkins and Dried Stems Crock Styling
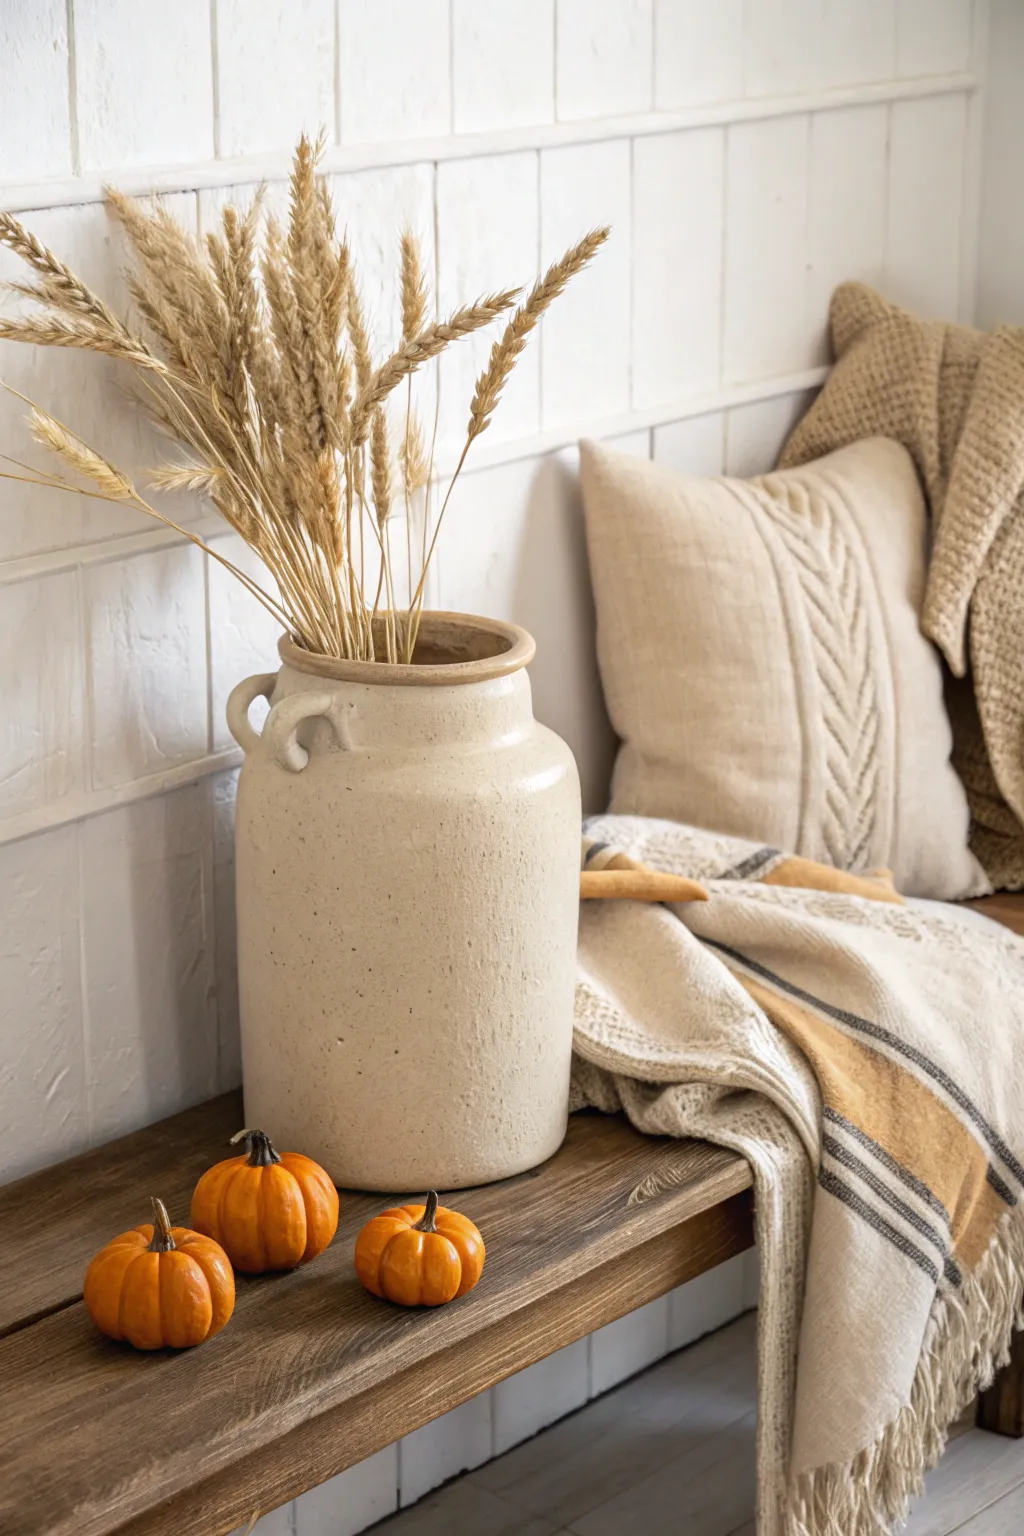
Embrace the warmth of autumn with this effortlessly rustic display that centers around a vintage-style crock. This textured arrangement combines the height of dried wheat stems with the grounded charm of mini pumpkins for a cozy seasonal vignette.
Step-by-Step
Materials
- Large ceramic crock or jug (cream or beige stone finish)
- Dried wheat sheaf or grass stems (approx. 20-30 stems)
- 3 miniature orange pumpkins (real or realistic faux)
- Wooden bench or rustic tabletop surface
- Cable knit throw pillow (cream or oatmeal)
- Striped throw blanket with fringe
- Floral foam or crushed paper (optional, for height inside crock)
Step 1: Setting the Scene
-
Choose the foundation:
Begin by selecting a sturdy wooden bench or a rustic console table as your base. The wood grain adds warmth that complements the pottery and dried florals. -
Layer the textiles:
Drape a striped throw blanket casually over the right side of the bench. Let it puddle slightly and hang down the front to create soft, inviting lines. -
Position the pillow:
Place a cable knit pillow against the back wall or corner, resting it partially on top of the throw blanket. This creates a cozy backdrop that softens the look of the hard ceramics. -
Place the vessel:
Set your large ceramic crock on the left side of the bench. Position it slightly forward so it feels like the main character of the display, but ensure it doesn’t block the view of the cozy textiles behind it.
Stem Stability Tip
Wrap a rubber band loosely around the base of your wheat bunch before inserting it. This keeps the fan shape intact and prevents stems from sliding too far apart.
Step 2: Arranging the Wheat
-
Prep the interior:
If your crock is very deep, I find it helpful to stuff the bottom with crumpled paper or a block of floral foam. This raises the bottom level so your stems don’t disappear inside the jar. -
Separate the stems:
Gently separate your dried wheat or grass stems. Shake them out lightly to fluff up the seed heads, which may have flattened during storage. -
Establish the height:
Place the tallest stems in the center of the crock first. They should stand straight up to establish the maximum height of the arrangement. -
Fan out the sides:
Insert the remaining stems around the central bunch, allowing them to lean naturally against the rim of the crock. Angle them outward to create a full, fan-like shape. -
Adjust the density:
Step back and look for gaps. Add a few more stems where the arrangement looks thin, aiming for an abundance that feels gathered from the field rather than perfectly manicured.
Step 3: Adding the Harvest Details
-
Select your pumpkins:
Choose three miniature pumpkins with distinct ridges and nice stems. Varying slightly in size adds visual interest. -
Place the first pumpkin:
Set the largest of the three pumpkins directly next to the base of the crock, slightly to the left. -
Create a grouping:
Position the second pumpkin next to the first one, tucking it slightly closer to the viewer. -
Finish the trio:
Place the final, smallest pumpkin nearby to complete the cluster. Arranging them in an odd number creates a pleasing, organic balance. -
Check the spacing:
Ensure the pumpkins aren’t in a straight line; staggering them creates depth and makes the styling look casual and lived-in. -
Final fluff:
Give the blanket fringe one last adjustment to ensure it hangs naturally and double-check that the wheat stems are evenly distributed.
Level Up: Scent
Tuck a few cinnamon sticks or dried orange slices inside the crock mouth or among the pumpkins to add a subtle, spicy autumn fragrance to your display.
Now you have a charming, textured autumn corner ready to welcome the season
Candle Cluster Inside an Old Crock
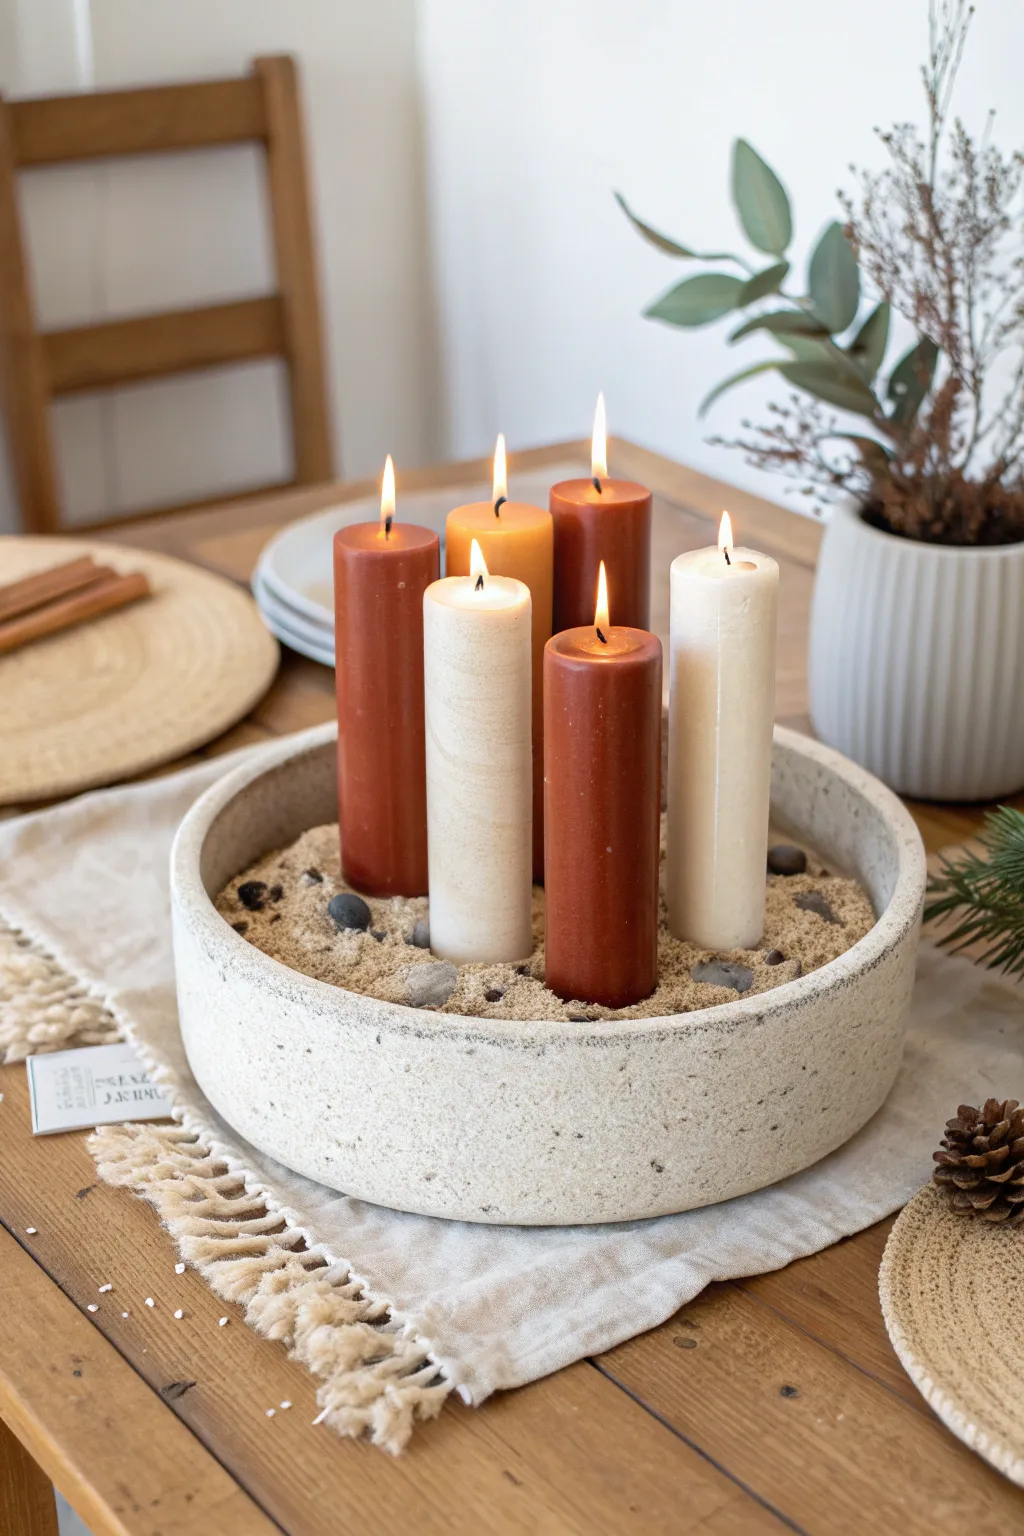
Transform a rustic stoneware crock into a cozy, glowing centerpiece perfect for autumn gatherings. This earthy arrangement combines the warm textures of sand and stone with the soft flicker of pillar candles in rich, contrasting tones.
How-To Guide
Materials
- Shallow Stoneware Crock or Heavy Ceramic Bowl (approx. 10-12 inches diameter)
- Fine-grain Play Sand or Decorative Craft Sand (beige/tan)
- Small River Stones or Pebbles (grey/black mix)
- 5 Pillar Candles (varying heights)
- Candle Colors: 1 Cream/White, 3 Rust/Terracotta, 1 Mustard Yellow
- Lighter or Matches
- Protective Surface (newspaper or drop cloth)
- Small Cup or Scoop (for sand)
Step 1: Preparation & Base
-
Clean the Container:
Begin by thoroughly cleaning your chosen crock or stoneware bowl. Ensure the inside is completely dry before proceeding, as any moisture can cause the sand to clump unpleasantly. -
Select Placement:
Decide where this centerpiece will live before you fill it. Once filled with sand and stones, the crock will become quite heavy and difficult to move without shifting the arrangement. -
Add the First Layer:
Pour a base layer of sand into the bottom of the crock, filling it about one-third of the way up. Shake the bowl gently side-to-side to level the surface.
Step 2: Candle Arrangement
-
Position the Center Candle:
Take your tallest rust-colored candle and place it slightly off-center. Press it firmly into the sand base so it stands straight on its own. -
Add Contrast:
Place the tall cream-colored candle next to the first one. I like to keep them close but not touching, allowing about an inch of breathing room between them. -
Arrange the Trio:
Position the remaining three candles (rust, mustard, and the shorter rust one) in a loose circle around the first two. Vary the heights so no two identical heights are right next to each other. -
Check for Stability:
Wiggle each candle slightly deeper into the base sand layer. Step back and view the arrangement from eye level to ensure all candles are standing perfectly vertical.
Wobbly Candles?
If candles won’t stand straight, melt a few drops of wax onto the bottom of the candle before pressing it into the sand. This creates a small anchor as it hardens.
Step 3: Filling & Texturing
-
Fill with Sand:
Using a small cup or scoop, carefully pour the rest of your sand around the candles. Fill the crock until the sand is about an inch below the rim. -
Smooth the Surface:
Use your fingers or a small spoon to smooth the sand surface, ensuring it covers the base of the candles completely. -
Selection of Stones:
Sort through your river stones and pick out a variety of sizes, focusing on smooth grey and charcoal tones that contrast nicely with the beige sand. -
Place Larger Stones:
Nestle a few of the larger stones into the sand first. Place them randomly near the base of the candles or near the rim of the crock for visual weight. -
Scatter Smaller Pebbles:
Sprinkle the smaller pebbles into the gaps. Don’t overthink this step; a natural, scattered look is better than a perfect pattern. -
Clean the Edges:
If any sand spilled onto the rim of the crock or the tops of the candles, brush it off gently with a soft, dry paintbrush or a clean cloth.
Styling Pro-Tip
For a designer look, stick to an odd number of candles (3, 5, or 7). The asymmetry is more visually pleasing and feels more organic than even numbers.
Step 4: Setting the Scene
-
Prepare the Surface:
Lay down a textured linen runner or cloth on your table. Unravel the fringed edges slightly to enhance the rustic aesthetic. -
Final Placement:
Carefully lift and place your heavy crock onto the linen runner. Ensure it sits flat and doesn’t wobble. -
Light the Wicks:
Light the candles one by one. The heat will eventually create a small melt pool, but initially, just ensure the flames are steady. -
Seasonal Additions:
Optional: Place a few pinecones or a sprig of evergreen nearby on the table (not in the crock) to tie the look together with the season.
Enjoy the warm, grounded atmosphere this flickering stone centerpiece brings to your table
Handmade Clay Insert to Modernize the Look
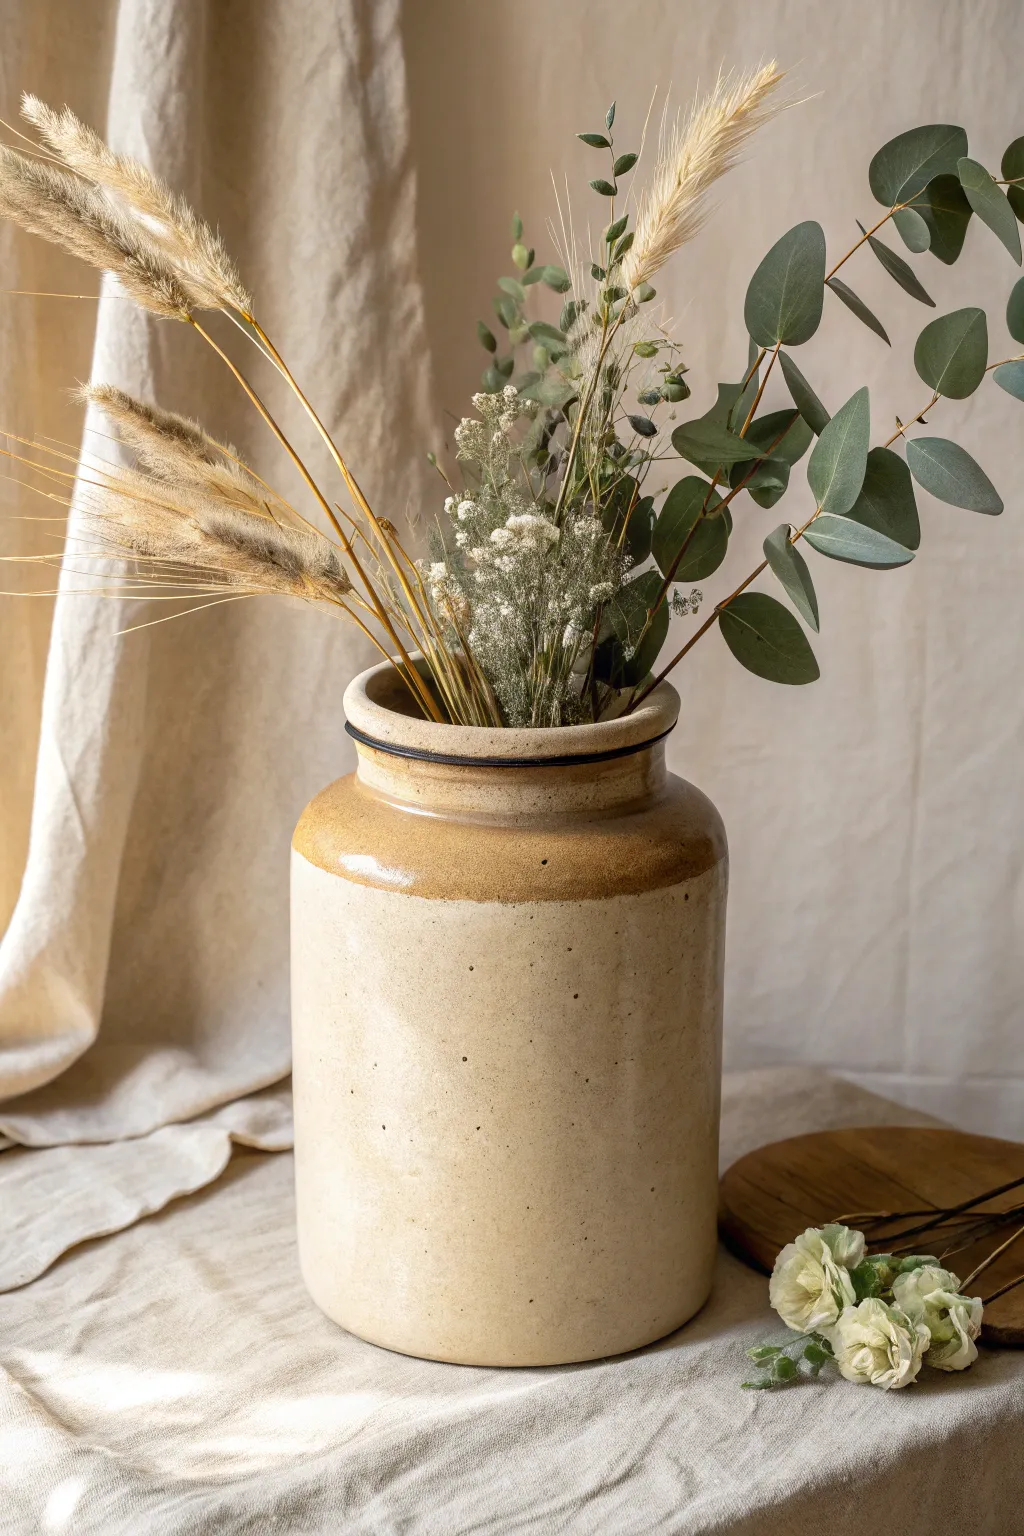
Transform a vintage stoneware crock into a modern minimalist vase with a simple, handmade clay rim insert. This custom-fitted addition softens the rustic edge of antique pottery and creates a cleaner silhouette for your dried floral arrangements.
Detailed Instructions
Materials
- Air-dry clay (white or cream)
- Vintage stoneware crock (approximately 1-gallon size)
- Rolling pin
- Sharp crafting knife or scalpel tool
- Sandpaper (fine grit)
- Small sponge
- Water in a small bowl
- Measuring tape
- Matte sealant or varnish spray
- Dried florals (e.g., wheat grass, eucalyptus, dried baby’s breath)
Step 1: Preparing the Clay Base
-
Clean the crock:
Begin by thoroughly wiping down the rim of your vintage crock to remove any dust or grease. This ensures you get an accurate fit, even though the clay won’t permanently adhere to the stoneware. -
Measure the opening:
Measure the inner diameter of the crock’s mouth and the desired width of the rim overhang. You want the new clay piece to sit snugly just inside the neck. -
Condition the clay:
Take a large handful of air-dry clay and knead it until it’s warm, pliable, and free of cracks. If it feels too dry, mist it lightly with water. -
Roll out a slab:
Roll your clay out on a smooth surface to a thickness of about 1/4 to 1/2 inch. Aim for a consistent thickness so the finished rim looks substantial and high-end. -
Cut the base ring:
Using your measurements, cut a thick ring shape. The outer circle should slightly overlap the crock’s existing lip, while the inner circle creates the new, narrower opening for your stems.
Seamless Fit Tip
Place a layer of cling wrap over the crock rim before molding your wet clay on top. This prevents sticking while allowing you to get a perfect, custom mold of the antique shape.
Step 2: Sculpting the Insert
-
Test the fit:
Carefully lift your clay ring and place it onto the crock’s mouth. I like to do this while the clay is still very soft so it naturally slumps slightly into the groves of the antique pottery. -
Form the collar:
Gently press the clay downward into the neck to create a short internal collar. This ‘stopper’ shape helps the insert stay stable once it dries. -
Smooth the transition:
Using a wet sponge, smooth the top surface of the clay. Feather the outer edges slightly so it doesn’t look like a harsh block sitting on top, but rather a seamless extension of the jar. -
Refine the inner edge:
Pay special attention to the inner circle where the flowers will go. Use a wet finger to round this edge over perfectly, eliminating any sharp cuts from your knife. -
Add texture (optional):
If your original crock has a speckled glaze, you can gently tap the wet clay with a stiff brush to mimic that texture, or leave it perfectly smooth for a modern contrast.
Faux Ceramic Look
Mix a small pinch of coffee grounds or nutmeg into your white clay before rolling. This creates tiny speckles that mimic the iron spots in traditional stoneware glazes.
Step 3: Finishing and Styling
-
Allow to dry:
Let the clay dry completely -
Remove for safety:
For the best drying results, carefully lift the formed ring off the crock after about 2-3 hours (when it holds its shape) and let it finish drying on a rack to ensure airflow underneath. -
Sand imperfections:
Once bone dry, use fine-grit sandpaper to buff away any fingerprints or rough spots on the rim. The goal is a matte, stone-like finish. -
Apply sealant:
Spray the clay piece with a matte varnish. This protects the porous clay from moisture and gives it a finished, ceramic appearance that matches the stoneware’s durability. -
Arrange the stems:
Place your finished insert back onto the crock. Create your arrangement by placing tall reeds and eucalyptus branches through the new, narrower opening, which will now hold them upright much more effectively.
Now you have a refreshed decor piece that blends antique charm with modern design sensibility