
There’s something so satisfying about taking a flat clay slab and turning it into a piece you’ll actually use (or proudly display). These slab-built projects are my go-to for wheel-free pottery days, because you can keep it simple or get wildly creative with the same basic technique.
Easy Slab Plates With Organic Edges
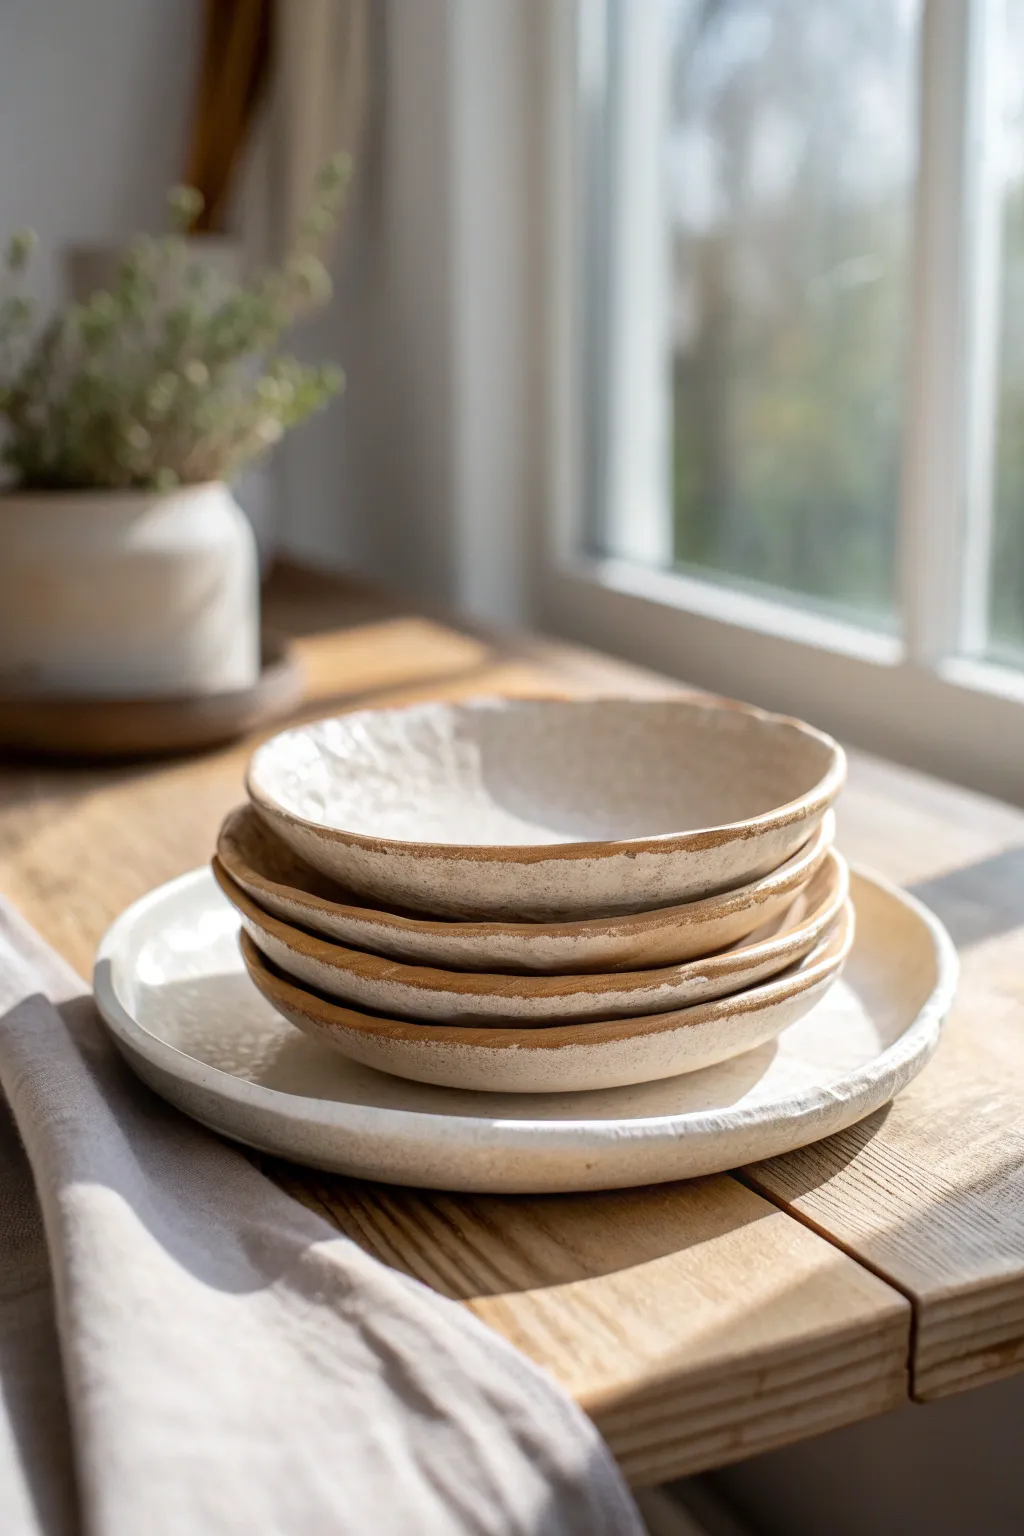
Embrace the beauty of imperfection with these charming slab-built plates that feature organic, uneven rims and a warm, toasted clay body. The contrast between the creamy, textured white glaze and the raw earthy edge creates a stunning minimalist aesthetic perfect for modern farmhouse tables.
Step-by-Step Guide
Materials
- Stoneware clay with grog (buff or speckled brown)
- Rolling pin
- Canvas mat or slab roller
- Guide strips (roughly 1/4 inch thick)
- GR Pottery Forms or plaster slump molds
- Rubber kidney rib
- Metal rib
- Sponge
- Fettling knife or needle tool
- Creamy white matte glaze
- Wax resist (optional)
Step 1: Rolling and Forming the Slab
-
Prepare the Clay:
Begin by wedging your stoneware clay thoroughly to remove air pockets and ensure an even consistency. For this project, a clay body with some grog works best to hold the organic shape without warping. -
Roll out the Slab:
Place your clay on a canvas mat between two 1/4 inch guide strips. Roll the clay out firmly until your rolling pin rests flat on the guides, ensuring a perfectly even thickness across the entire slab. -
Compress the Surface:
Take a rubber kidney rib and firmly draw it across the smooth surface of the clay in multiple directions. This compression step aligns the clay particles, reducing the chance of cracking later. -
Cut the Shape:
Place your slump mold or a circle template lightly onto the clay. Using a needle tool, cut a circle about an inch wider than your mold to allow for the plate’s depth. -
Slump the Clay:
Gently lift your clay circle and drape it over your slump mold or press it into a foam mold. I prefer to carefully drop the slab onto the mold to let gravity do the initial work. -
Define the Form:
Using a slightly damp sponge, gently press the clay to conform to the mold’s curve. Start from the center and spiral outward to avoid trapping air bubbles between the clay and the form.
Warped Plates?
If rims are lifting or warping during drying, lightly weigh down the center with a small sandbag while drying leather-hard to keep the base flat.
Step 2: Refining the Organic Edge
-
Initial Drying:
Let the plates sit on the molds until they reach a soft leather-hard stage. They should hold their shape when touched but still be flexible enough to manipulate the rim. -
Shape the Rim:
Remove the plate from the mold. Using your thumb and forefinger, gently pinch and unevenly compress the rim. Don’t aim for perfection here; slightly varying the thickness and height creates that signature organic look. -
Add Texture:
If the rim looks too sharp or mechanical, tap it lightly with a wooden paddle or the back of a spoon to create small undulations and natural variances. -
Smooth the Surface:
Run a damp sponge over the interior of the plate to smooth out any heavy canvas texture or fingerprints, preparing it for the glaze application later. -
Slow Drying:
Place the finished greenware on a shelf, loosely covered with plastic for the first day to equalize moisture. Then, uncover and allow to dry completely to bone dry state before bisque firing.
Rim Texture Trick
For an even more rustic edge, lightly sponge away the fine clay particles on the rim before firing to expose the gritty sand or grog texture.
Step 3: Glazing and Finishing
-
Bisque Fire:
Fire the bone-dry plates to approximately Cone 04 (or your clay body’s specific bisque temperature) to prepare them for glazing. -
Wax the Rim:
To get that crisp line between the glaze and the raw clay edge, carefully apply wax resist to the very top rim of the plate. You can also leave it unwaxed and wipe it back later, but wax gives a cleaner stop. -
Apply Glaze:
Dip, pour, or brush a creamy white matte glaze onto the interior and exterior of the plate. If brushing, use cross-hatching strokes to build up an opaque layer that mimics the look of dipping. -
Wipe the Edge:
If you didn’t use wax, or if some glaze dripped over, take a damp sponge and meticulously wipe the glaze off the rim. Exposing that strip of raw clay is crucial for framing the piece. -
Check the Bottom:
Ensure the foot or bottom surface of the plate is completely free of glaze so it doesn’t fuse to your kiln’s shelf. -
Glaze Fire:
Load the kiln and fire to the maturity temperature of your clay and glaze combination (likely Cone 5 or 6 for stoneware). Allow the kiln to cool naturally.
Once cooled, these durable plates are ready to bring a touch of handmade warmth to your next dinner gathering


Jewelry Dish Pinch Trays From One Slab
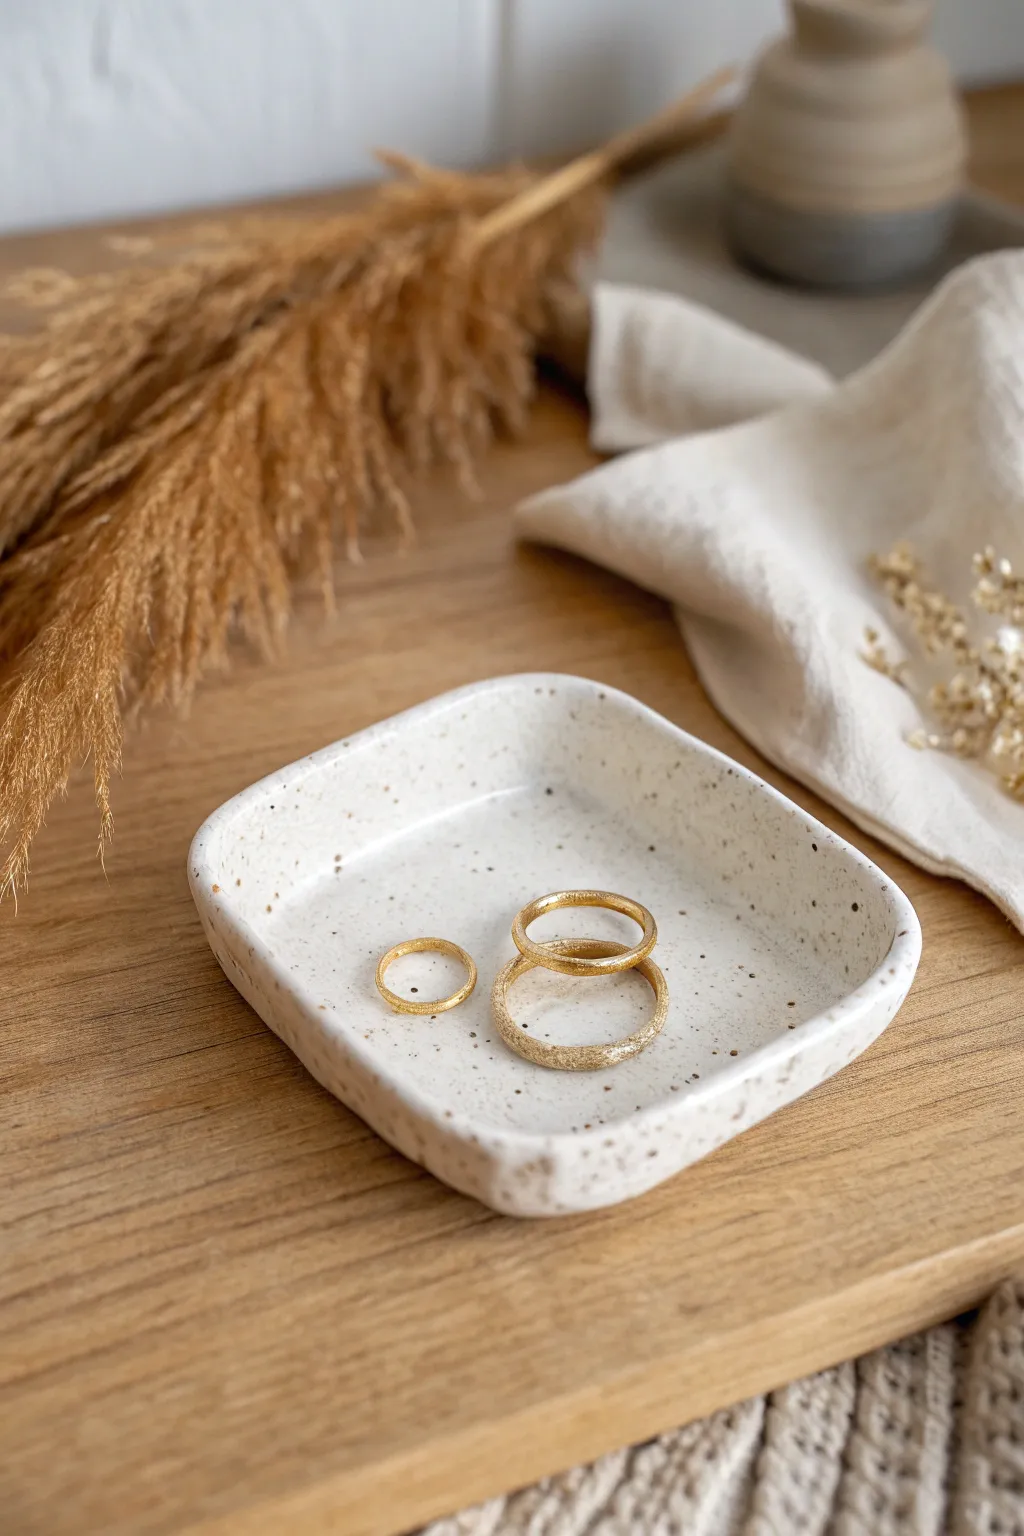
This charming, speckled jewelry dish combines a minimalist aesthetic with organic warmth, perfect for holding your favorite rings. Using a simple slab technique, you’ll create a soft-edged square form that highlights the natural beauty of speckled clay.
Detailed Instructions
Materials
- Speckled stoneware clay (e.g., intense lagoon or buff speckle)
- Rolling pin
- Two guide sticks or slats (approx. 1/4 inch thick)
- Square paper template (approx. 4×4 or 5×5 inches)
- Needle tool or fettling knife
- Small sponge
- Soft rib tool (rubber or silicone)
- Canvas or slab mat to work on
- Clear or transparent white glaze
- Kiln (or access to a firing service)
Step 1: Preparing the Slab
-
Wedge the Clay:
Begin by thoroughly wedging a ball of speckled clay to remove air bubbles and ensure an even consistency. A ball about the size of a large orange should be sufficient for one dish. -
Set Up Guides:
Place your wooden guide sticks on either side of your clay ball on a canvas surface. This ensures your slab will have a perfectly uniform thickness. -
Roll the Slab:
Using your rolling pin, roll the clay out until the pin rests on the guide sticks. Roll in multiple directions to compress the clay platelets, which helps prevent warping later. -
Smooth the Surface:
Take your soft rib tool and gently drag it across the surface of the clay slab. This compresses the clay further and removes any canvas texture, leaving a pristine, smooth finish.
Clean Those Edges
Before firing, wrap a piece of grocery bag plastic around your finger and rub the rim. This burnishes the clay for a super-smooth edge.
Step 2: Refining the Shape
-
Cut the Square:
Place your paper square template onto the smooth slab. Hold it steady and trace around the perimeter with a needle tool or fettling knife to cut out your shape. -
Use a Sponge on Edges:
Dip your small sponge in water and wring it out well. Gently run the sponge along the sharp cut edges to round them over. You want a soft, finished look, not a sharp, mechanical slice. -
Lift the Edges:
Here I like to gently pinch the corners first to verify the shape. Carefully lift the outer rim of the square slab with your fingers to create a shallow curvature. Do not fold it; just urge the clay upward. -
Modeling the Form:
Support the clay in your palm or on a piece of foam. Use your thumbs to gently press the center down while pulling the walls slightly up and out effectively pinching a small rim. -
Refining the Curve:
Work around the perimeter multiple times. Aim for an organic, slightly undulating rim rather than a perfectly straight wall. The charm lies in the handmade unevenness. -
Smoothing the Interior:
Check the interior floor of the dish. If your fingers left indentations, smooth them back out with the damp sponge or the rubber rib for a clean resting place for jewelry.
Step 3: Drying and Firing
-
Slow Drying:
Place the finished dish on a board, loosely covered with plastic. Let it dry slowly for a day or two to prevent the edges from curling up as they dry faster than the center. -
Bisque Fire:
Once bone dry, fire the piece to bisque temperature (usually cone 04 or 06). This prepares the clay for glazing. -
Glazing:
Dip the bisqued dish into a clear or semi-transparent white glaze. A transparent glaze is crucial here because it allows the natural brown speckles of the clay body to show through. -
Clean the Foot:
Wipe away any glaze from the bottom of the dish with a sponge so it won’t stick to the kiln shelf during the final firing. -
Glaze Fire:
Fire the piece again to the maturation temperature of your specific clay body (often cone 5 or 6 for stoneware). The heat will melt the glaze and bring out those lovely speckles.
Warping While Drying?
If the corners start to lift excessively during drying, place a small, light weight (like a bag of rice) in the center to hold it flat.
Now you have a beautifully simple, custom dish ready to organize your treasures on a bedside table or vanity


Slump-Mold Snack Bowls
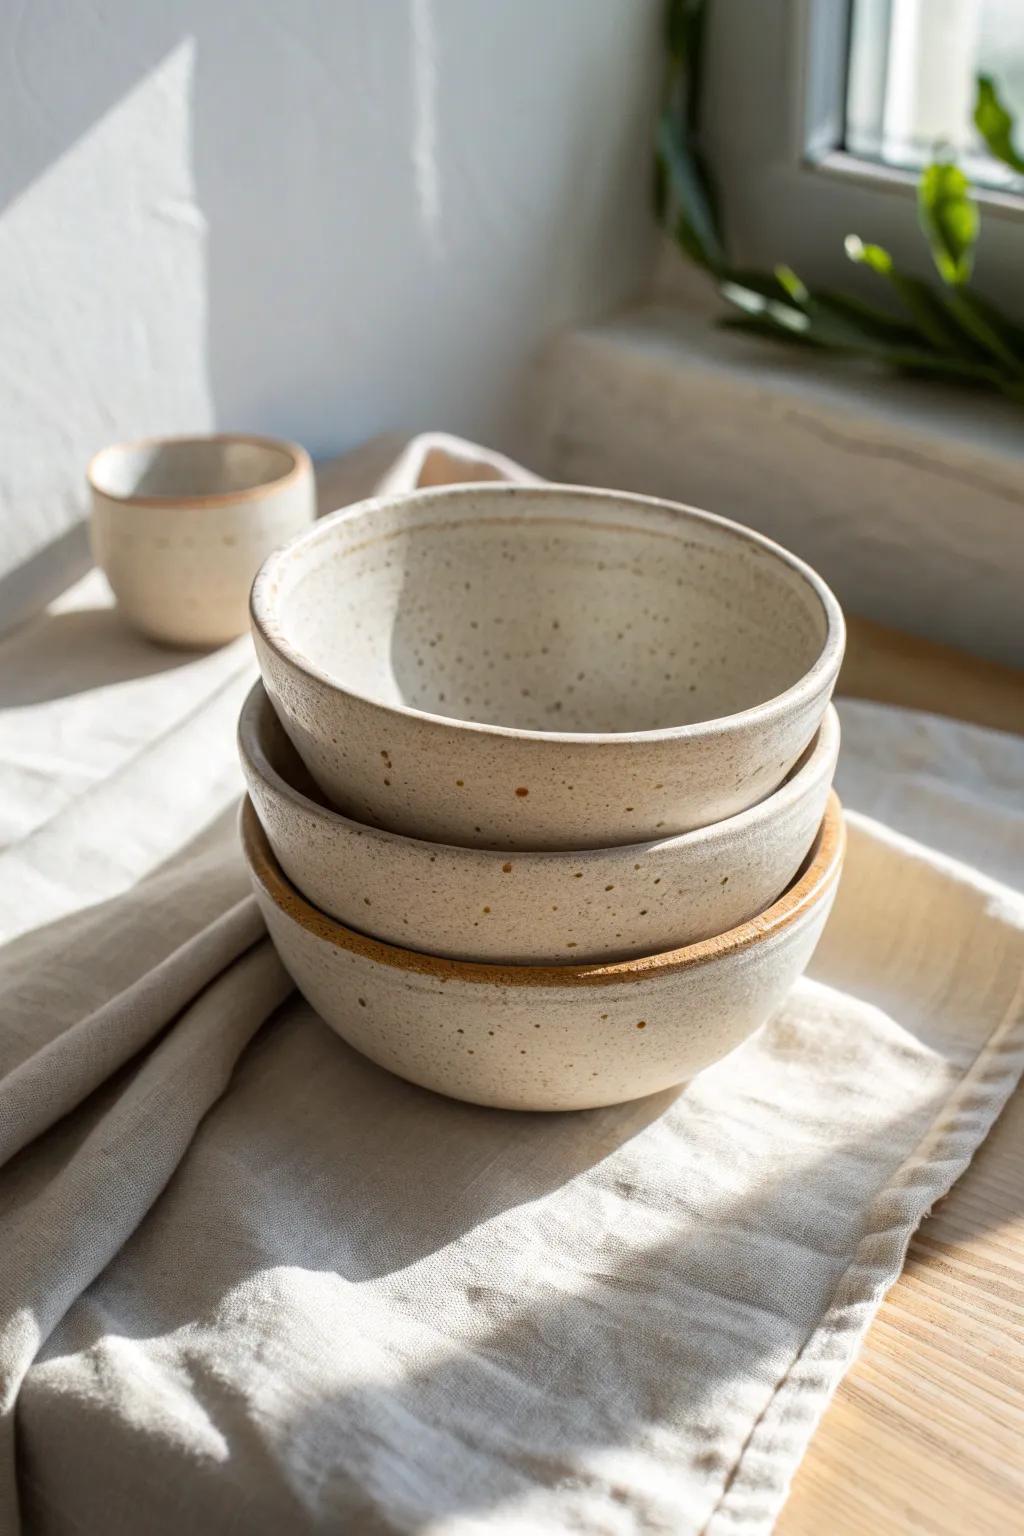
Create a charming set of nesting bowls with a beautifully rustic, speckled finish. These simple forms let the character of the clay shine through, offering a perfect introduction to working with soft slabs and plaster molds.
Step-by-Step
Materials
- Speckled stoneware clay (mid-fire)
- Plaster hump or slump molds (varying sizes)
- Rolling pin
- Canvas mat or cloth
- Wooden guide strips (1/4 inch thick)
- Needle tool
- Flexible metal rib
- Rubber kidney tool
- Sponge
- Matte white glaze
Step 1: Preparing the Slabs
-
Wedge the clay:
Begin by thoroughly wedging your speckled stoneware clay to remove any air bubbles and ensure an even consistency. -
Set up your workspace:
Place your canvas mat on a sturdy table. Position your wooden guide strips on either side of the workspace to ensure a uniform thickness. -
Roll the slab:
Flatten the clay slightly with your palm, then use the rolling pin to roll it out into a slab. Roll from the center outward, rotating the clay occasionally to keep the shape somewhat circular. -
Compress the surface:
Run a flexible metal rib gently over both sides of the slab. This aligns the clay particles, reducing warping later, and creates a smooth starting surface.
Step 2: Forming the Bowls
-
Select your molds:
Choose three plaster molds of graduating sizes to create a nesting effect. Dust them lightly with cornstarch if the clay feels tacky. -
Drape the clay:
Lift your slab carefully and drape it over the first mold. If using a slump mold (concave), gently lower the clay inside. -
Press into shape:
Using a soft sponge or a small sandbag, press the clay firmly against the mold surface. Start from the center and spiral outwards to avoid trapping air pockets. -
Trim the excess:
Use your needle tool to cut away the excess clay at the rim of the mold. Hold the tool perpendicular to the mold edge for a clean cut. -
Refine the rim:
Smooth the cut rim with a damp sponge or your finger to round off the sharp edge. I like to use a chamois cloth here for an ultra-smooth finish. -
Repeat for the set:
Repeat the rolling and molding process for the other two bowl sizes.
Rim Perfection
For a truly organic rim, don’t cut perfectly straight. Allow a slight undulation in your cut line to enhance the handmade aesthetic.
Step 3: Finishing and Firing
-
Let them stiffen:
Allow the bowls to dry on the molds until they are leather-hard. They will pop off easily once they’ve shrunk slightly. -
Clean up the foot:
Once removed from the mold, flip the bowls over. Use a rib to smooth the bottom and ensure it sits flat on the table. -
Bisque fire:
Allow the bowls to dry completely (bone dry) before loading them into the kiln for a bisque firing to roughly cone 04. -
Apply wax resist:
Paint a ring of wax resist on the very bottom of each bowl to keep the foot unglazed. -
Glaze application:
Pour a matte white glaze into the interior, swirl to coat, and pour out. Dip the exterior quickly or brush on the glaze, leaving the rim slightly thinner if you want the clay color to break through. -
Wipe the rim (optional):
To mimic the look in the photo where the rim reveals the raw clay, carefully wipe the very edge of the rim with a damp sponge. -
Final smooth:
Rub out any pinholes in the glaze with a clean finger before the final firing. -
Glaze fire:
Fire the bowls to the temperature appropriate for your clay and glaze combination (likely cone 5 or 6).
Exposed Clay Detail
Use a damp sponge to wipe away glaze 1/4 inch up the exterior base. This ‘bare clay’ foot creates a lovely contrast with the white glaze.
Your new stack of speckled bowls is ready to bring a touch of earthy elegance to your table setting


Simple Soap Dishes With Drainage Holes

This minimalist soap dish combines earthy textures with practical design, featuring a slotted drainage system to extend the life of your favorite soap bars. The speckled clay body and soft matte finish give it a modern, organic feel perfect for any bathroom sink.
Detailed Instructions
Materials
- Speckled stoneware clay (e.g., cone 5/6)
- Rolling pin
- Two wooden guide slats (approx. 1/4 inch thick)
- Rectangular paper template (approx. 4×6 inches)
- Needle tool
- Fettling knife
- Rib tool (yellow or red)
- Scoring tool
- Slip
- Soft sponge
- Wooden sculpting tool or popsicle stick
- Clear matte glaze
Step 1: Preparing the Slab
-
Roll out the clay:
Begin by wedging your speckled stoneware clay to remove air bubbles. Place the clay between two 1/4 inch wooden guide slats and roll it out into a smooth, even slab. Ensure the slab is large enough to cut both the base and the walls. -
Smooth the surface:
Take your rib tool and gently compress the clay surface on both sides. This aligns the clay particles to prevent warping later and creates that professional, smooth finish we want. -
Cut the base:
Place your rectangular paper template onto the slab. Using your needle tool, trace and cut out the main base shape. Don’t discard the excess clay yet; you will need it for the walls and feet. -
Round the corners:
Uses a small jar lid or a coin as a guide to gently round off the four sharp corners of your rectangular base. Use your sponge to soften the cut edges immediately.
Step 2: Creating Drainage Slots
-
Mark the drainage pattern:
Lightly sketch four to six elongated oval shapes in the center of the slab using your needle tool. These will be the drainage slots. I find that spacing them about a half-inch apart provides good structural integrity. -
Cut the slots:
Carefully cut out the marked ovals. Remove the clay plugs and clean up any ragged edges with a damp sponge or a chamois cloth. -
Bevel the edges:
Use a damp finger or a small modeling tool to gently bevel the edges of the cutouts downwards. This helps water flow smoothly through the holes rather than pooling on the surface.
Clean Those Cuts
Wait until the clay is leather hard before doing the final cleanup on the drainage slots. A damp brush works wonders to smooth rough interior edges without distorting the shape.
Step 3: Building the Walls
-
Cut the wall strips:
From your remaining slab, cut a long strip of clay approximately 1 inch tall. The length should be slightly longer than the perimeter of your base to account for overlapping. -
Score and slip:
Score the outer edge of your base piece and one long edge of your wall strip. Apply a generous amount of slip to the scored areas on the base. -
Attach the walls:
Place the wall strip onto the base, pressing firmly to secure the bond. Wrap the strip around the perimeter, following the curved corners carefully. -
Join the seam:
Where the two ends of the wall strip meet, cut them at a 45-degree angle for a cleaner join. Score, slip, and press the ends together, blending the clay with your thumb or a wooden tool until the seam disappears. -
Reinforce the connection:
Roll a very thin coil of clay and press it into the interior corner where the floor meets the wall. Smooth this coil out completely to reinforce the joint and create a seamless transition.
Texture Twist
Before cutting your slab, roll a piece of textured fabric or lace over the clay to imprint a pattern. The glaze will break beautifully over the textures for added depth.
Step 4: Finishing Touches
-
Add feet:
Flip the dish over. Creates two or three small rectangular strips from leftover clay to act as feet. Score and slip them onto the bottom so the dish is elevated, allowing water to drain away freely. -
Dry slowly:
Cover the finished piece loosely with plastic to let it dry very slowly. This prevents the flat bottom from warping or curling up at the edges. -
Bisque fire:
Once bone dry, fire the piece to cone 04 (or your clay’s specific bisque temperature). -
Glaze application:
Apply a clear matte glaze to the entire piece. Using a clear glaze allows the natural speckles of the clay body to remain the star of the show. -
Final wipe:
Wipe the bottom of the feet clean with a damp sponge to prevent them from sticking to the kiln shelf. -
Glaze fire:
Fire the piece to cone 5 or 6, depending on your clay body’s requirements.
Place your favorite handmade soap on top and enjoy the functional beauty every time you wash up

The Complete Guide to Pottery Troubleshooting
Uncover the most common ceramic mistakes—from cracking clay to failed glazes—and learn how to fix them fast.
Slab Mugs With A Strap Handle
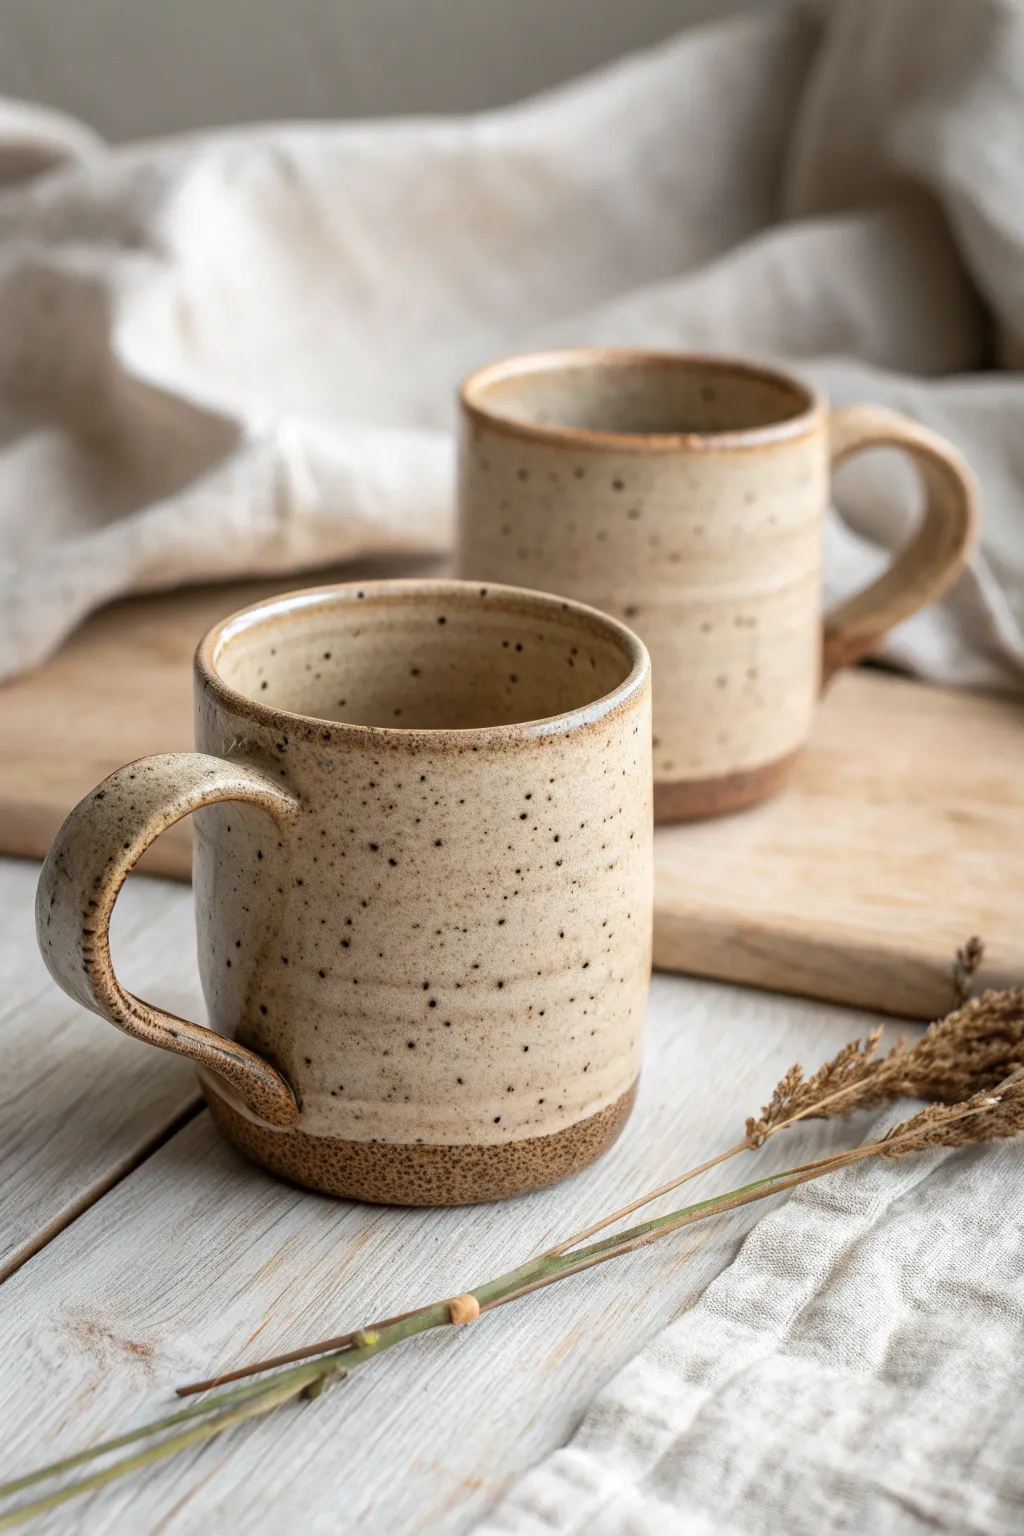
These charming slab-built mugs feature a cozy, rustic aesthetic with their speckled cream glaze and raw clay bases. The classic cylinder shape is given character through subtle horizontal ridges and a comfortable, sturdy strap handle.
Step-by-Step Tutorial
Materials
- Stoneware clay (speckled or tan body)
- Rolling pin
- Canvas or slab mat
- Cylindrical form (PVC pipe or bisque mold, approx 3-inch diameter)
- Needle tool
- Serrated rib or scoring tool
- Slip
- Fettling knife
- Wooden modeling tool
- Sponge
- Speckled cream or oatmeal glaze
- Paintbrush or glaze dipping tongs
Step 1: Forming the Body
-
Roll the main slab:
Begin by wedging your clay to remove air bubbles, then roll out a rectangular slab on your canvas. Aim for a consistent thickness of about 1/4 inch. -
Add texture:
Before cutting, you can run a very smooth rib gently across the surface. While the clay is flat, use a rib or the rolling pin to compress it well, which helps prevent warping later. -
Cut the rectangle:
Measure the height you want for your mug (around 4-5 inches depending on shrinkage) and the circumference of your cylinder form. Cut a clean rectangle using your fettling knife and a straight edge. -
Bevel the edges:
For a seamless join, bevel the short ends of your rectangle at opposite 45-degree angles. This increases the surface area for the connection. -
Score and slip:
Rough up the beveled edges with a serrated rib and apply a generous amount of slip. -
Create the cylinder:
Wrap the slab around your chosen form. Press the beveled edges together firmly to create a seal. Use a wooden tool to blend the seam on the outside, then smooth it with a damp sponge. -
Cut and attach the base:
Roll a small separate slab for the bottom. Place your cylinder on top, trace around it, and cut out the circle. Score and slip both the bottom edge of the cylinder and the base, then press them firmly together.
Compression is Key
Compress both sides of your slab with a rib before cutting. This aligns clay particles and drastically reduces the chance of your mug warping into an oval during the firing.
Step 2: Handle and Details
-
Pull a strap handle:
Instead of rolling a coil, flatten a piece of clay into a thick strip. Pull it gently with water to elongate it into a strap, keeping it slightly wider than a traditional pulled handle. -
Shape the handle:
Curve the strap into a ‘C’ shape or ear shape. I like to let this stiffen up for about 15-20 minutes so it holds its curve without drooping when attached. -
Attach the handle:
Score the mug body and the handle attachment points. Press the handle firmly onto the mug. Use a small coil of clay around the attachment points to reinforce the join and smooth it out with a damp brush. -
Add subtle ridges:
While the mug is on a banding wheel (or spinning it manually), carefully press a modeling tool or finger against the side to create the subtle horizontal indentations seen in the image. -
Refine the rim:
Check the rim for sharpness. Use a piece of chamois or a damp sponge to round it off completely so it feels comfortable against the lips.
Step 3: Finishing and Glazing
-
Bisque fire:
Allow the mug to dry slowly under plastic to ensure the handle and body dry at the same rate. Once bone dry, bisque fire to your clay’s specifications (usually cone 04). -
Wax the base:
Apply wax resist to the bottom inch of the mug’s exterior and the entire underside. This creates the visible raw clay line shown in the photo. -
Apply glaze:
Dip the mug into a speckled cream or oatmeal stoneware glaze. Hold it upside down for a few seconds to let excess drip off. -
Clean up:
Use a damp sponge to wipe away any glaze beads that might have stuck to the waxed area near the bottom. The line should be crisp. -
Glaze fire:
Fire the mug again to the glaze’s maturity temperature (typically cone 5 or 6 for stoneware).
Seams Cracking Open?
If your vertical seam splits during drying, you didn’t score deep enough. Re-wet the area, score aggressively, add fresh slip, and compress the join again firmly.
Now you have a beautiful, durable mug ready for your morning coffee
Coasters Cut Like Mini Tiles
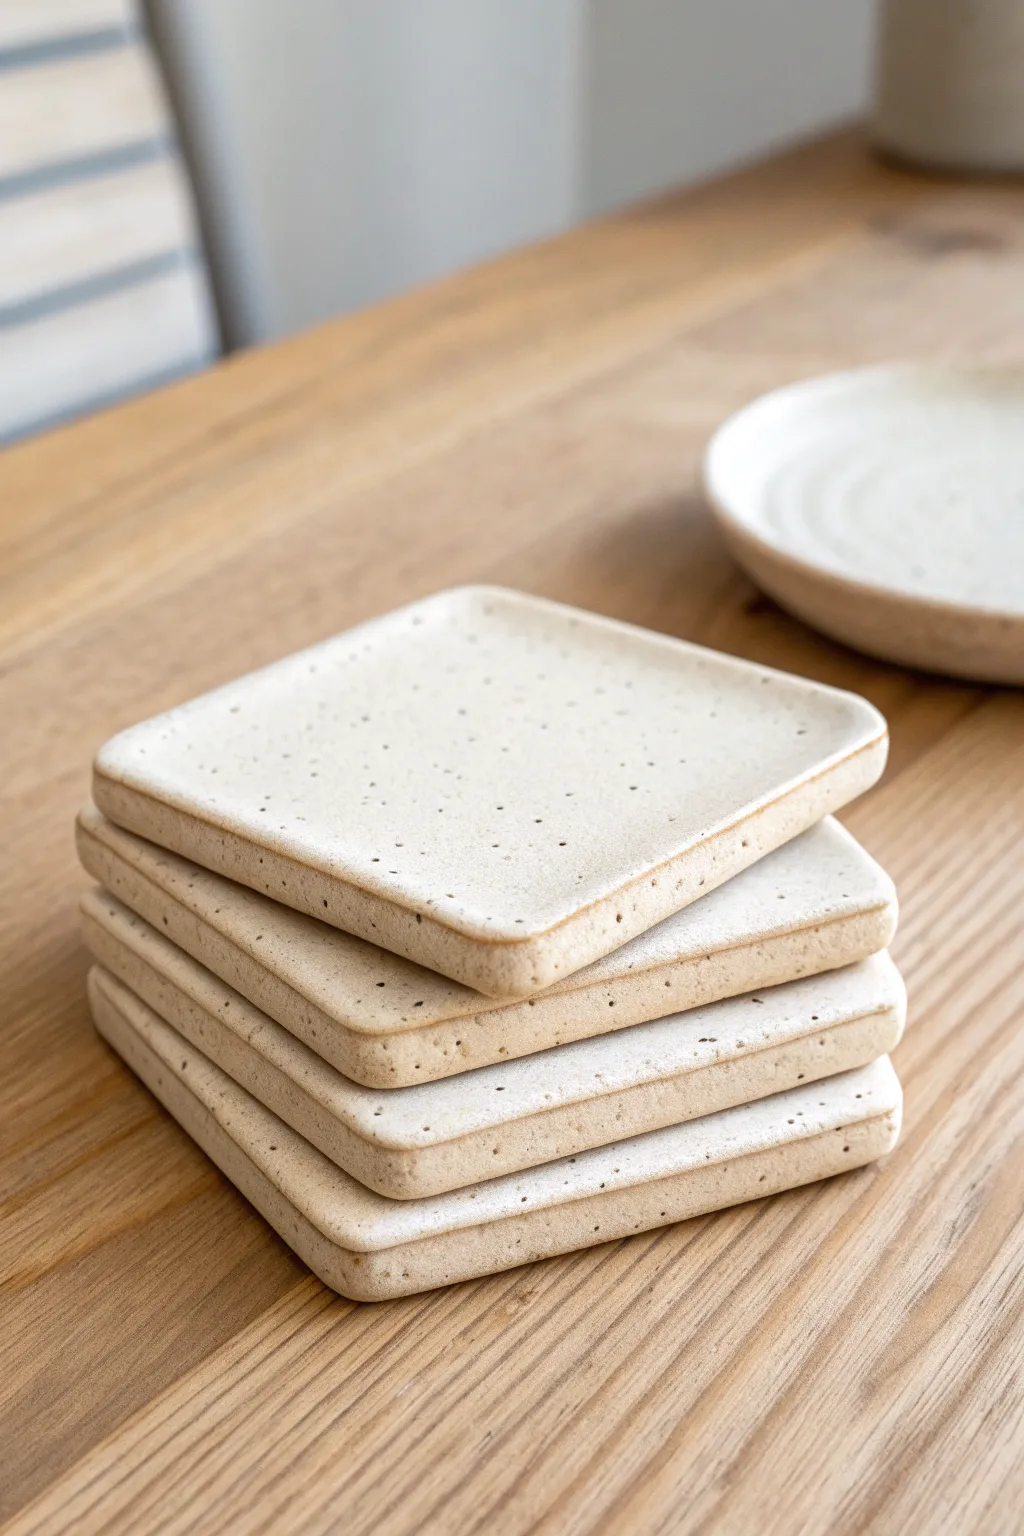
Embrace the understated elegance of raw clay with this set of minimalist speckled coasters, perfect for adding a touch of modern craft to your coffee table. These simple slab-built squares highlight the natural beauty of grogged clay with softly rounded edges and a smooth, stone-like finish.
Step-by-Step
Materials
- Speckled Stoneware Clay (e.g., Speckled Buff or similar)
- Rolling pin
- Wooden guide strips (approx. 1/4 inch thick)
- Canvas or wood board for rolling
- Square cookie cutter (approx. 4×4 inches) or a rigid template and needle tool
- Fettling knife or clay rib to smooth edges
- Sponge
- Clear matte glaze (optional, for functionality)
- Kiln access
Step 1: Preparing the Slab
-
Wedge the Clay:
Begin by thoroughly wedging your speckled clay to remove any air bubbles and ensure an even consistency, which is crucial for preventing warping during the firing process. -
Set Up Your Guides:
Place your wooden guide strips on either side of your work surface. These strips will ensure your slab is a uniform thickness, essential for a professional-looking set of tiles. -
Roll Out the Slab:
Place your ball of clay between the guides and roll it out with the rolling pin. Roll in multiple directions—up and down, then flip the slab and rotate it—to compress the clay particles and create a sturdy sheet.
Double-Sided Drying
To prevent curling corners, flip your tiles over every few hours during the initial drying phase. Even better, dry them between two pieces of drywall to wick moisture evenly from both sides.
Step 2: Shaping the Coasters
-
Smooth the Surface:
Before cutting, take a soft rib tool (rubber or metal) and compress the surface of your slab. Run it smoothly across the clay to remove the canvas texture and bring those beautiful speckles to the surface. -
Cut the Shapes:
Press your square cutter firmly into the slab to create your shapes. If you are using a template, lay it gently on the clay and trace around it cleanly with a needle tool held perpendicular to the surface. -
Release the Tiles:
Peel away the excess clay from around your cut squares first, then carefully slide a flat spatula or wire under the tiles to separate them from the board without distorting their shape.
Step 3: Refining the Details
-
Let Them Stiffen (Leather Hard):
Allow your squares to dry slowly until they reach a leather-hard state. I find that covering them loosely with plastic for a few hours helps them firm up evenly without drying out the edges too fast. -
Round the Corners:
Once firm enough to handle, gently tap each corner of the square against your work surface to blunt the sharp point, creating that soft, rounded look seen in the reference image. -
Smooth the Edges:
Dip a sponge in water and wring it out almost completely. Run it along the cut edges of each coaster to round them off and remove any sharp burrs left by the cutter. -
Check for Flatness:
Place the coasters on a perfectly flat board (like ware board or drywall). Place another weighted board on top if your clay tends to warp memory, keeping them sandwiched while they dry further.
Warped Edges?
If your tiles warp during firing, your clay may have had memory from uneven rolling. Next time, flip and rotate the slab constantly while rolling it out to align the clay particles evenly.
Step 4: Finishing and Firing
-
Bone Dry Stage:
Let the tiles dry completely to the bone-dry stage. This usually takes several days depending on humidity; the clay should feel room temperature and look chalky. -
Bisque Fire:
Load the bone-dry coasters into the kiln for a bisque fire (typically Cone 04). Stack them carefully or place them flat to ensure they remain true. -
Glazing Decision:
For the look in the image, the finish is very matte. You can leave the clay raw if it vitrifies fully (becomes non-porous) at your firing temperature, or apply a thin coat of clear matte glaze to just the top surface for stain resistance. -
Wipe the Bottoms:
If you chose to glaze, use a wax resist on the bottom or meticulously wipe away any glaze from the foot of the coaster to prevent it from sticking to the kiln shelf. -
Glaze Fire:
Fire the coasters a second time to the maturation temperature of your specific clay and glaze (often Cone 5 or 6 for stoneware). This final firing vitrifies the clay, making it durable and waterproof. -
Sand the Bottoms:
After the final firing, inspect the bottoms. Use a piece of wet sandpaper or a sanding block to smooth out any rough grit so the coasters won’t scratch your furniture.
Stack your finished set on the table and enjoy the organic, handmade charm they bring to your tea time


What Really Happens Inside the Kiln
Learn how time and temperature work together inside the kiln to transform clay into durable ceramic.
Spoon Rests With A Soft Curve
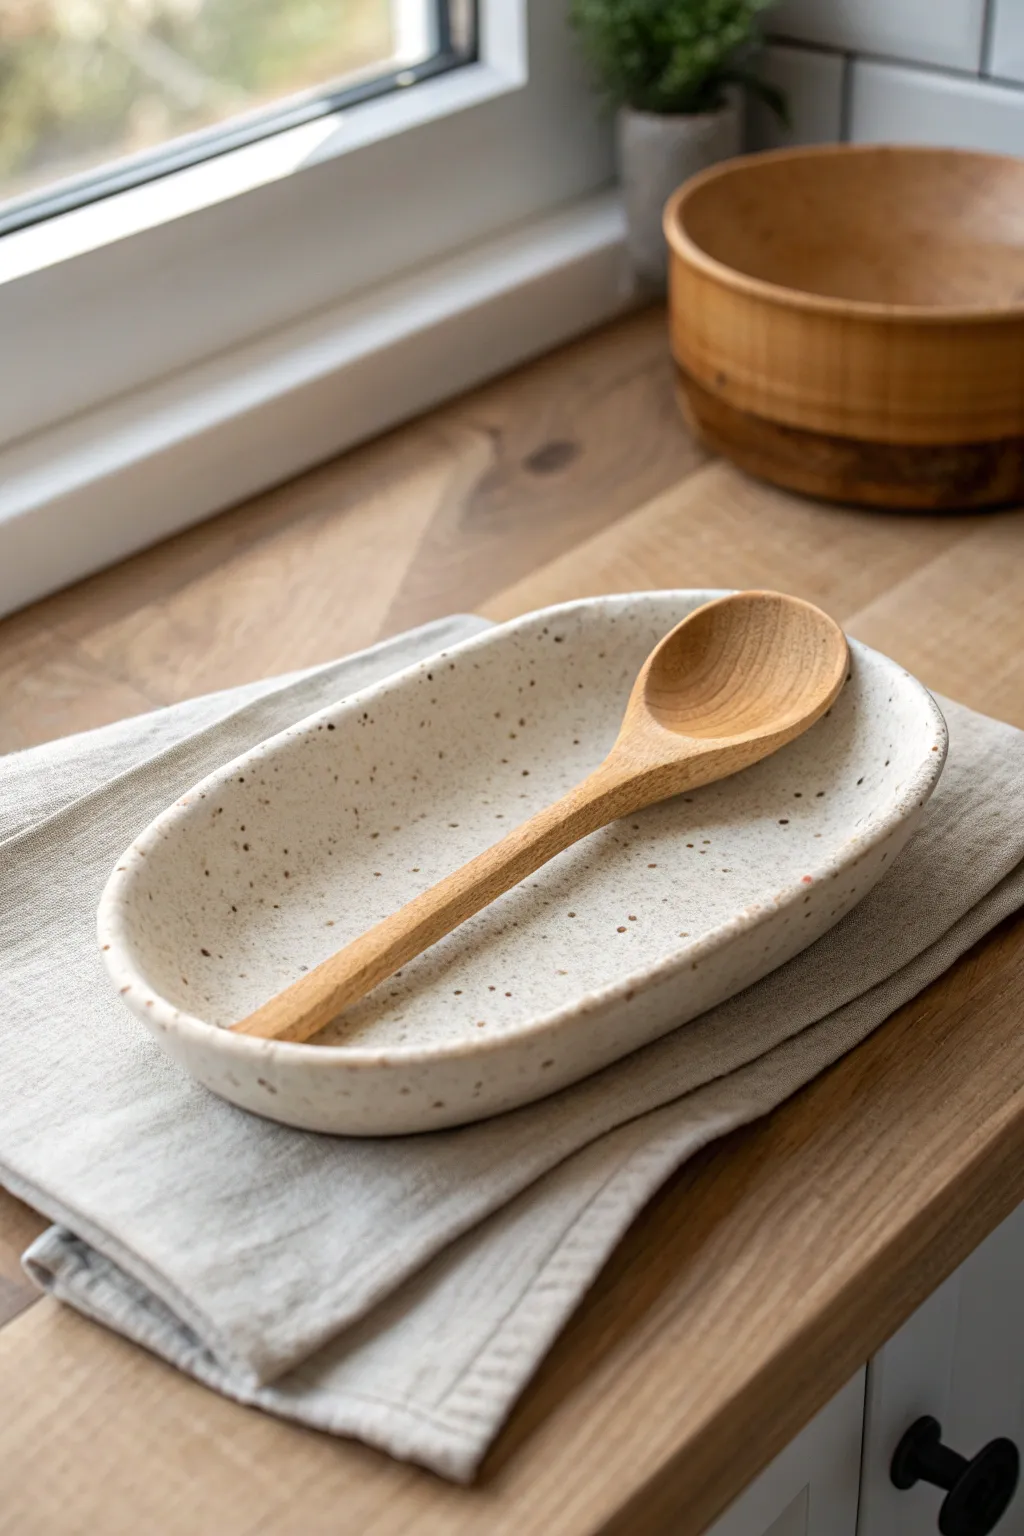
This rustic, elegant spoon rest combines the organic feel of speckled stoneware with a soft, minimalist shape. It’s an ideal beginner slab project that creates a functional piece of art perfect for keeping your countertops clean.
How-To Guide
Materials
- Speckled buff stoneware clay (or white clay with speckles added)
- Rolling pin
- Two guide sticks (approx. 1/4 inch thick)
- Canvas or slab mat
- Pottery rib tool (rubber or wooden)
- Needle tool
- Oval paper template (approx. 8-10 inches long)
- Sponge
- Small bowl of water
- GR Pottery Form (oval) or a makeshift drape mold
- Matte white glaze (transparent or semi-opaque)
Step 1: Slab Preparation
-
Wedge the clay:
Start by thoroughly wedging a ball of speckled clay to remove air bubbles and ensure the moisture is evenly distributed. -
Set up your workspace:
Place your canvas or slab mat on a sturdy table. Position your guide sticks parallel to each other, slightly wider than your intended slab width. -
Roll the slab:
Place the clay ball between the sticks. Using steady pressure on the rolling pin, roll the clay out until the pin rests on the guide sticks, ensuring a consistent 1/4 inch thickness. -
Compress the clay:
Take your rib tool and firmly drag it across the surface of the slab in multiple directions. This aligns the clay particles, preventing warping later, and creates that smooth, professional finish.
Natural Texture Hack
Before cutting your oval shape, lay a textured fabric or linen towel over the slab and roll over it once. This leaves a subtle fabric imprint on the clay.
Step 2: Shaping the Rest
-
Cut the shape:
Lay your oval paper template onto the smooth slab. Trace around it carefully with a needle tool held vertically to get a clean edge. -
Smooth the edges:
Dip your finger or a small sponge in water and gently run it along the cut rim to round off the sharp angle left by the needle tool. -
Lift the slab:
Carefully peeling the slab off the canvas, lift it gently. If you are using a drape mold, place the slab over the mold now. If freestyling, place it on a board. -
Create the curve:
If not using a mold, gently lift the edges of the oval upward with your fingers to create a shallow bowl shape. I find using a small foam pillow under the center allows the rim to naturally curve upward as it dries. -
Refine the rim:
Once the general shape is established, do a final pass on the rim with a damp sponge or chamois cloth to ensure it is perfectly soft and rounded. -
Dry to leather hard:
Cover the piece loosely with plastic and let it dry slowly to the leather-hard stage. This usually takes a day.
Step 3: Finishing Touches
-
Clean the foot:
Flip the leather-hard piece over. Use a slightly damp sponge to smooth the bottom, ensuring it sits flat without wobbling. -
Bisque fire:
Once bone dry, fire the piece in the kiln to cone 04 (or your clay body’s bisque temperature). -
Wax the bottom:
Apply wax resist to the bottom of the spoon rest to prevent glaze from adhering where it touches the kiln shelf. -
Glaze application:
Dip the spoon rest into a matte white glaze. The speckles in the clay will burn through the glaze during firing, creating the signature look. -
Clean the rim:
Check the rim for any glaze drips. Gently tap them down or sponge them off if they look too heavy. -
Glaze fire:
Fire the piece again to the maturity temperature of your clay and glaze (usually cone 5 or 6 for stoneware). -
Sand (optional):
If the bottom feels rough after firing, give it a quick sand with wet-dry sandpaper for a furniture-safe finish.
Warping Woes?
If your slab curls up while drying, weight the center down gently with a small sandbag during the leather-hard stage to keep the bottom perfectly flat.
Enjoy using your beautiful new ceramic rest for your favorite wooden spoons and ladles
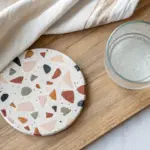
Textured Trays For Keys And Catch-Alls
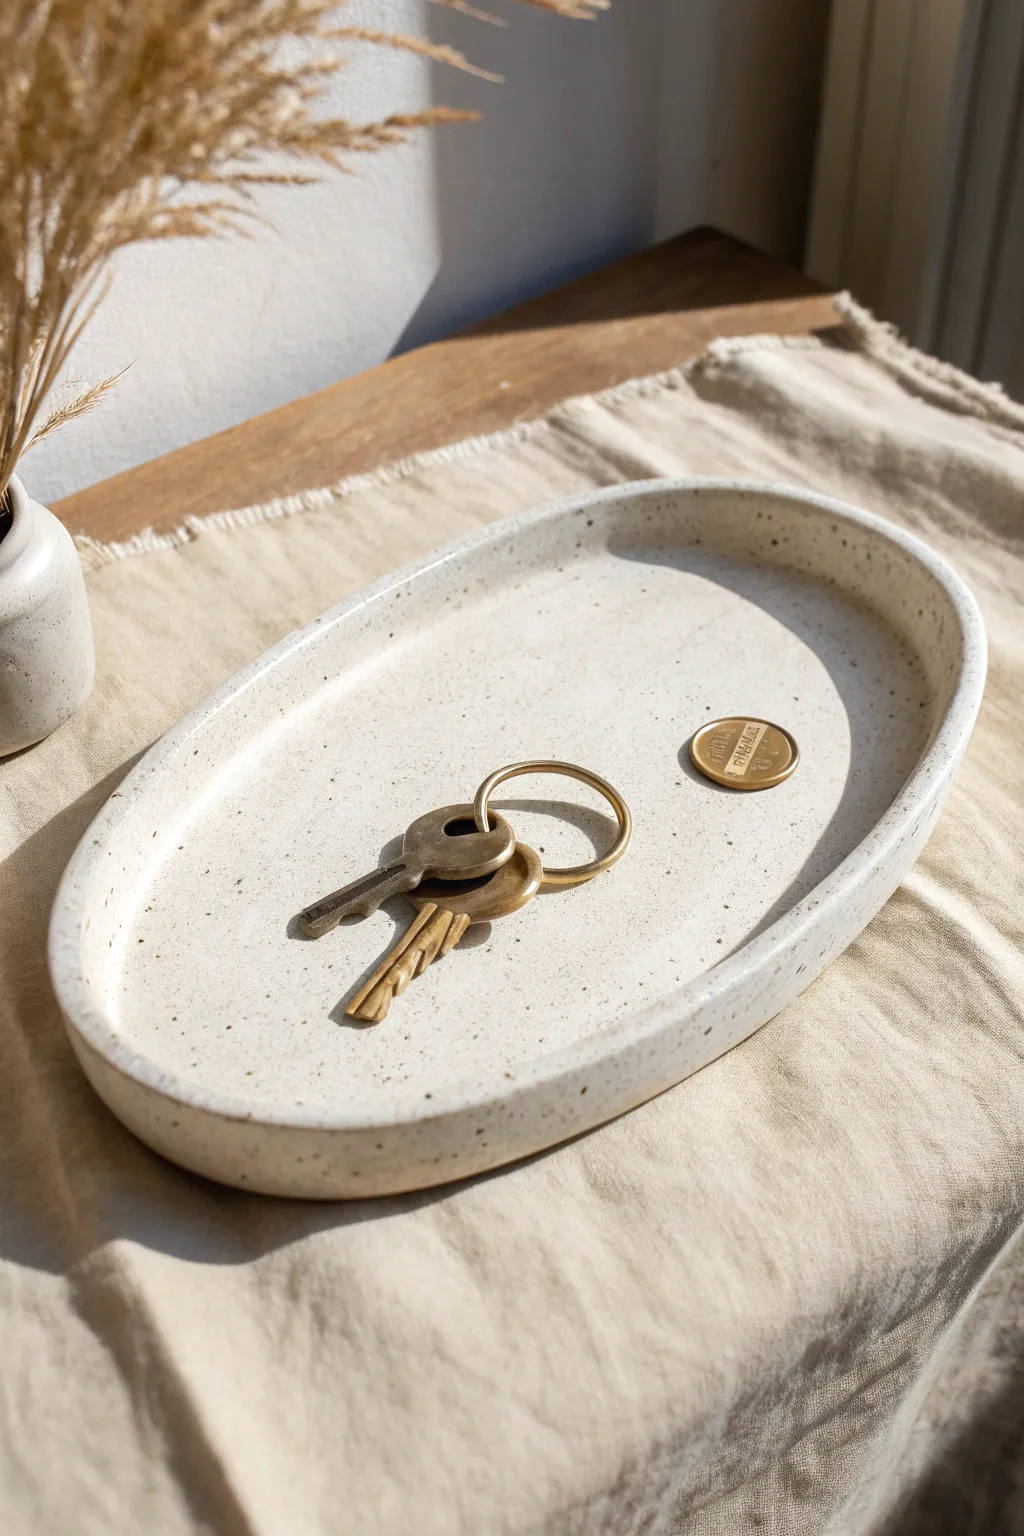
This minimalist, granite-look tray is the perfect elegant home for stray keys and coins. Using speckled clay creates a sophisticated finish that mimics high-end stoneware without needing a pottery wheel.
Step-by-Step
Materials
- Speckled cream polymer clay or air-dry clay (e.g., Fimo Effect Granite or similar)
- Acrylic rolling pin
- Parchment paper or baking mat
- Oval template (printed paper or cookie cutter)
- Craft knife or clay blade
- Sanding sponge (fine grit)
- Small bowl of water
- Matte finish varnish (optional)
- Rolling guides or playing cards (to ensure even thickness)
Step 1: Preparation & Rolling
-
Condition the clay:
Start by warming up your speckled clay in your hands. Knead it thoroughly until it is pliable and soft, ensuring the speckles are distributed evenly. -
Set up your workspace:
Place a sheet of parchment paper down on your work surface to prevent sticking. This makes it easier to lift the delicate slab later. -
Roll the slab:
Place your clay in the center of the paper. Use rolling guides or two stacks of playing cards on either side to keep your rolling pin level. Roll the clay out to a uniform thickness of about 1/4 inch (6mm). -
Smooth the surface:
Inspect the surface for air bubbles or fingerprints. Gently smooth them out with your finger or by lightly rolling over the surface one last time without pressure.
Fixing Cracks
If small cracks appear on the rim while bending the clay upward, apply a tiny drop of baby oil or clay softener to the crack and smooth it over with your finger.
Step 2: Shaping the Tray
-
Cut the oval shape:
Place your paper oval template or cookie cutter onto the slab. Using your craft knife, trace around the shape with a steady hand, keeping the blade vertical for a clean edge. -
Remove excess clay:
Peel away the excess clay from the outside of your cut line. Save these scraps for future projects. -
Create the lip:
This is the most crucial step. Instead of attaching a separate coil, we will turn up the edges of the slab itself. Gently lift the outer rim of the oval with your fingertips. -
Pinch and smooth:
Work your way around the oval, pinching the edge upwards to create a raised wall about 1/2 inch high. Use your thumb on the inside and fingers on the outside to form a gentle curve rather than a sharp angle. -
Refine the rim:
I like to run a slightly damp finger along the top rim to smooth out any small cracks that form during the lifting process. Ensure the wall height is consistent all the way around. -
Level the base:
Press the center of the tray gently flat against the table again to ensure it hasn’t warped while you were working on the edges.
Add a Texture
Before cutting the oval shape, press a piece of coarse linen or canvas into the clay surface. This adds a tactile fabric texture that enhances the organic feel.
Step 3: Finishing Touches
-
Bake or dry:
If using polymer clay, bake according to the package instructions (usually 230°F – 275°F for 15-30 minutes). If using air-dry clay, let it sit undisturbed for 24-48 hours. -
Cool down:
Allow the tray to cool completely in the oven or dry fully before handling it further to prevent cracking. -
Sanding the edges:
Once hardened, take a fine-grit sanding sponge and gently buff the rim and sides. This removes any fingerprints or uneven spots, giving it that professional ceramic look. -
Wipe clean:
Use a damp cloth to wipe away all the sanding dust from the tray. -
Seal the piece:
This step is optional, but for durability, apply a thin coat of matte varnish. This seals the clay and protects the speckled finish from oils on your keys or coins.
Place your new tray on an entryway table for an instant touch of minimalist organization

TRACK YOUR CERAMIC JOURNEY
Capture glaze tests, firing details, and creative progress—all in one simple printable. Make your projects easier to repeat and improve.
Incense Holders That Catch The Ash
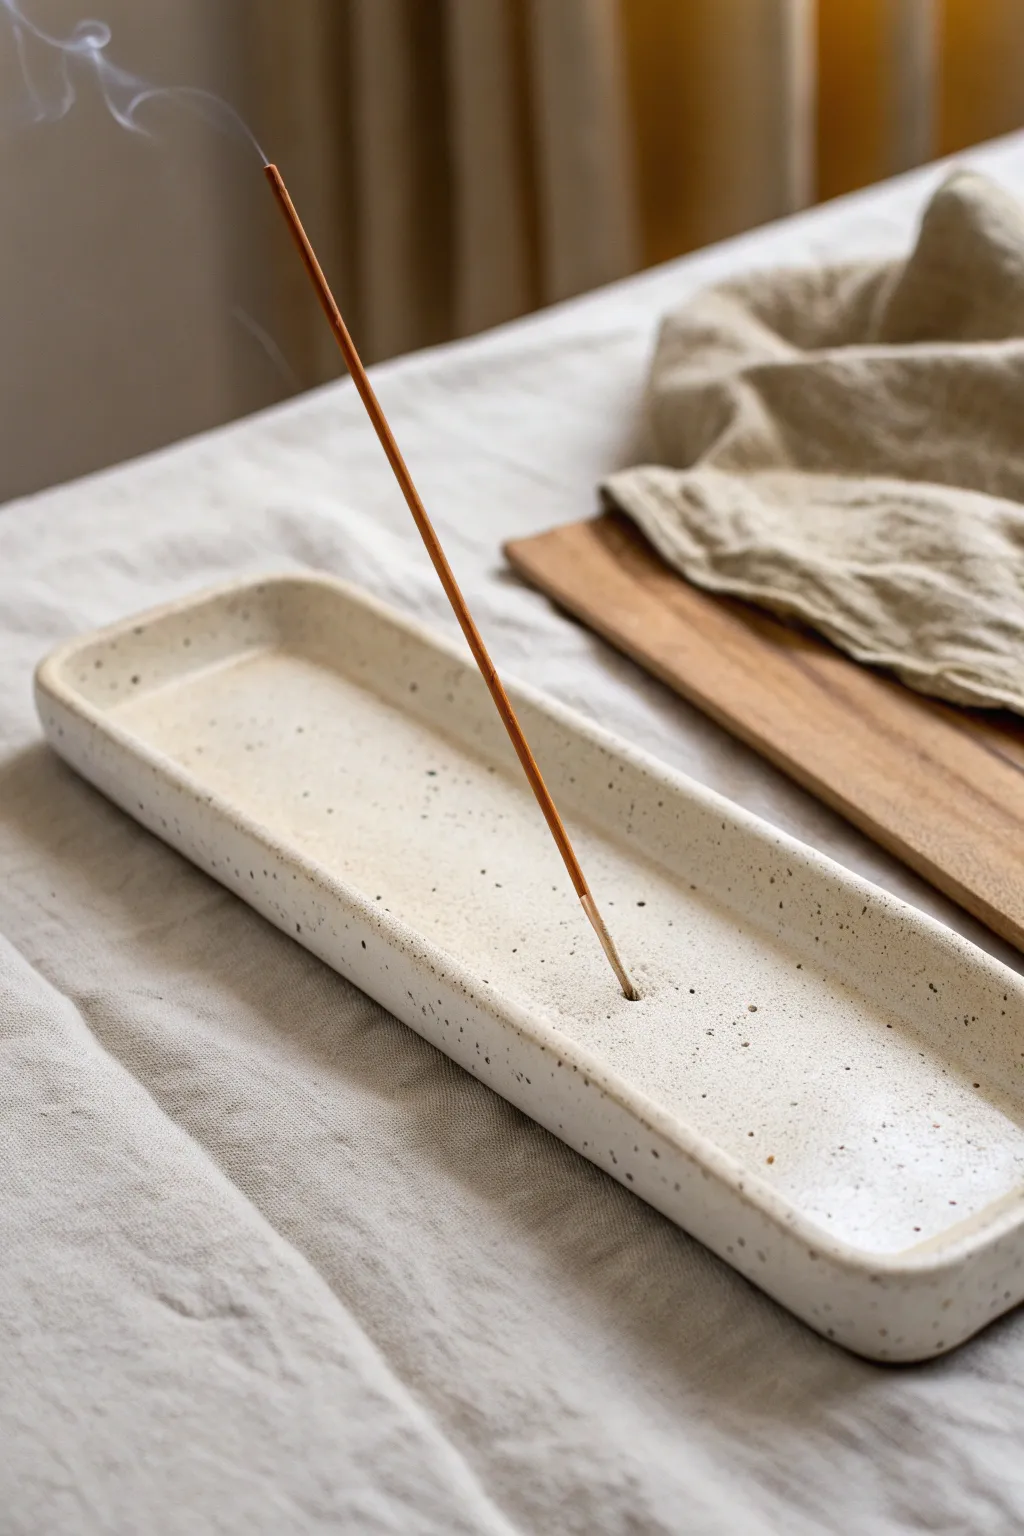
This minimalist incense holder combines a sleek, modern silhouette with the organic warmth of speckled clay. Its elongated shape ensures every bit of ash is caught, making it as practical as it is beautiful.
Step-by-Step Guide
Materials
- Speckled stoneware clay (white or cream base)
- Rolling pin
- Canvas mat or wooden workspace
- Two wooden guide slats (approx. 1/4 inch thick)
- Fettling knife or craft knife
- Rib tool (metal or rubber)
- Ruler
- Needle tool
- Scoring tool or old fork
- Slip (clay mixed with water)
- Incense stick (for sizing the hole)
- Sponge
- Clear or matte white glaze
Step 1: Prepping the Slab
-
Wedge the clay:
Begin by wedging your speckled clay thoroughly to remove any air bubbles. This ensures a smooth, even surface for your tray. -
Set up your guides:
Place your wooden guide slats on either side of the clay ball on your canvas or board. These will help you roll a perfectly even slab. -
Roll out the slab:
Use the rolling pin to flatten the clay until the pin rests on the guide slats. Roll in multiple directions to compress the clay platelets, which helps prevent warping later. -
Smooth the surface:
Take your rubber or metal rib and run it gently over the surface of the slab. This removes the canvas texture and compresses the clay further for a polished finish.
Warping Woes?
If the ends curl up while drying, place a small weighted bag of sand or rice inside the tray (on top of a paper towel) to gently hold the floor flat as it dries.
Step 2: Cutting and Assembling
-
Measure the base:
Use your ruler to mark out a long, narrow rectangle. A good size is approximately 10 inches long by 3 inches wide, but you can adjust this based on your preferred incense length. -
Cut the base:
Using the fettling knife and ruler, make clean, straight cuts along your marked lines to create the base piece. -
Measure the rim strips:
From the remaining slab, measure and cut long strips for the rim. Aim for a height of about 1/2 to 3/4 inch. -
Bevel the edges:
For a seamless join, cut the ends of your rim strips at 45-degree angles where they will meet at the corners of the tray. -
Score the connection points:
Rough up the outer edge of the base slab and the bottom edge of the rim strips using your scoring tool or fork. -
Apply slip:
Dab a generous amount of slip onto the scored areas. This acts as the glue for your clay pieces.
Clean Ash Cleanup
Make the hole slightly angled toward the long end of the tray. This ensures the stick leans over the dish, guaranteeing all the dropping ash lands safely inside.
Step 3: Refining the Form
-
Attach the rim:
Press the rim strips firmly onto the base. I usually start with the long sides first, then fit in the shorter ends to ensure everything squares up nicely. -
Reinforce the seams:
Use a small modeling tool or your finger to blend the clay on the inside seam where the wall meets the floor. This strengthens the bond and creates a smooth curve for easy cleaning. -
Smooth the details:
Take a slightly damp sponge and run it along the top edge of the rim to soften any sharp angles. Smooth the outside connection points so the join lines disappear. -
Shape the corners:
Gently pinch and round the corners of the tray with your fingers to give it that soft, organic look seen in the photo. -
Create the holder hole:
Find the center of the tray or pick a spot slightly off-center for asymmetry. Use a needle tool to pierce a hole straight down, but don’t go all the way through the bottom. Alternatively, create a small mound of clay, attach it to the center, and pierce that. -
Test the fit:
Insert an actual incense stick (the wooden end) into the hole to ensure it fits. Wiggle it slightly to make the hole just a hair larger than the stick, allowing for clay shrinkage during drying.
Step 4: Finishing
-
Dry slowly:
Loosely cover the tray with plastic wrap and let it dry very slowly over several days. Fast drying can cause long, flat pieces like this to warp or curl up at the ends. -
Bisque fire:
Once bone dry, fire the piece to cone 04 (or your clay’s specified bisque temperature). -
Glaze application:
Dip or brush on a clear or translucent milky white glaze. This ensures the natural speckles of the clay body show through. Wipe the bottom clean with a sponge. -
Final firing:
Fire again to cone 6 (or your clay/glaze maturity temperature) to vitrify the piece and seal the surface.
Once fired, place this on your coffee table or nightstand for an instantly calming and stylish atmosphere
Slab Planters With Crisp Corners
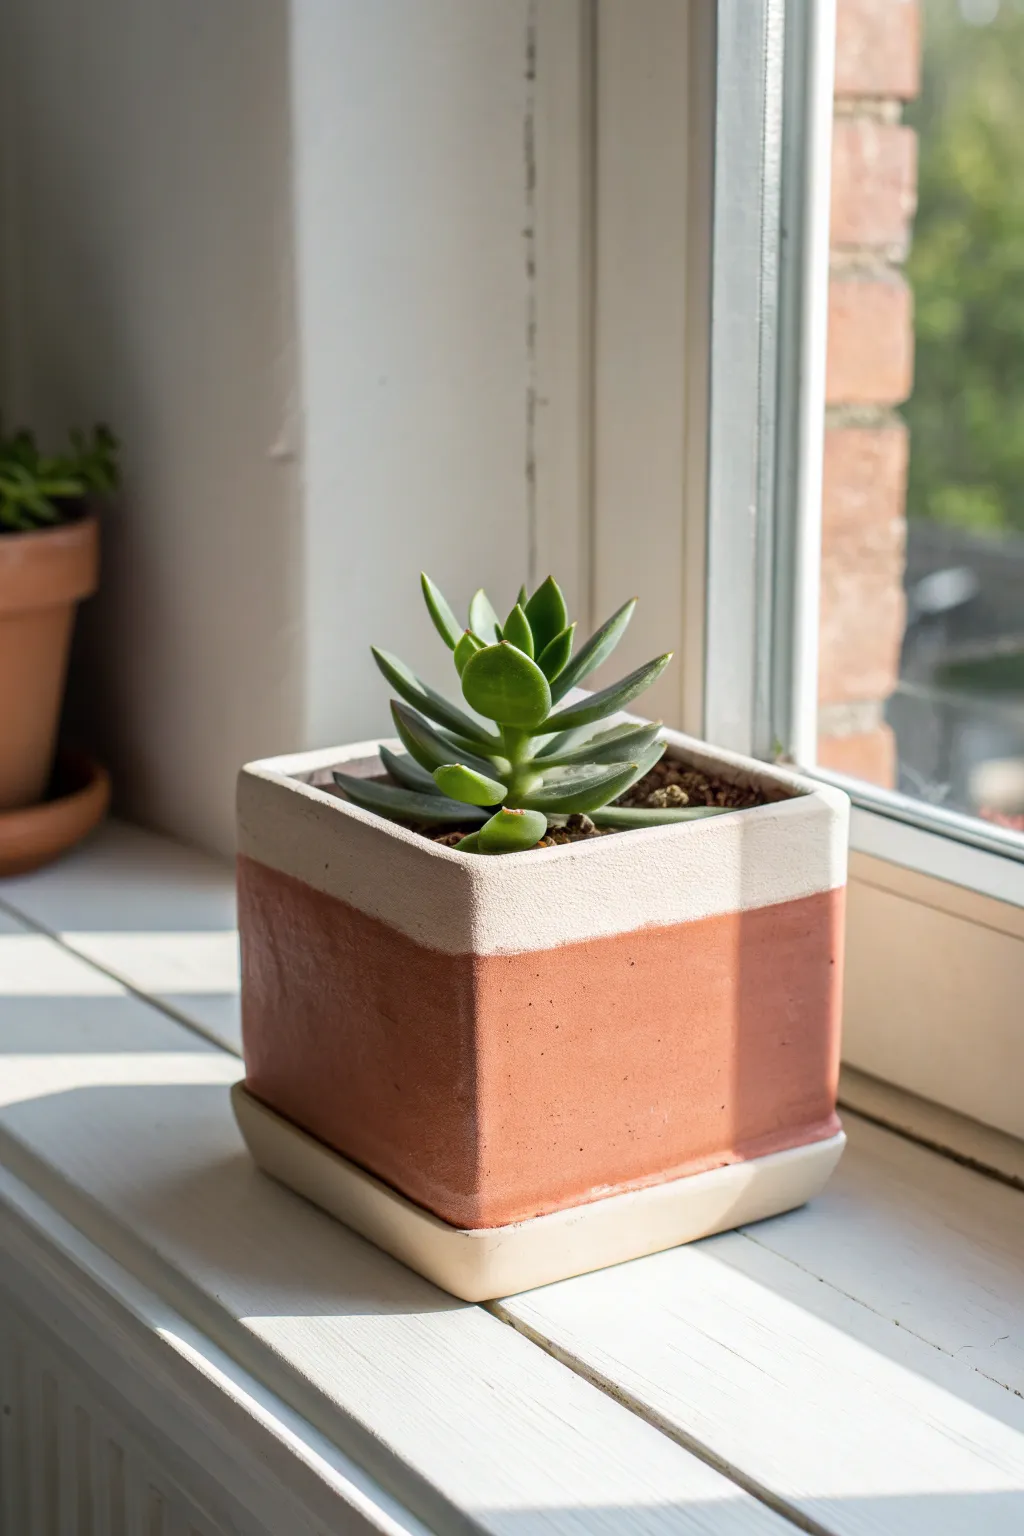
Achieve modern simplicity with this structured square planter, featuring crisp edges and a chic two-tone finish. The combination of exposed red clay and a creamy white upper band creates a striking contrast perfect for showcasing succulents.
Detailed Instructions
Materials
- Red earthenware or terracotta clay body
- Creamy white dipping glaze or underglaze
- Rolling pin
- Guide sticks or slats (approx. 1/4 inch thick)
- Ruler
- Needle tool or fettling knife
- Serrated rib or scoring tool
- Slip (clay mixed with water)
- Wooden paddle
- Sponge
- Kiln
Step 1: Preparing the Slabs
-
Roll the clay:
Begin by wedging your red clay thoroughly to remove air pockets. Place the clay between two guide sticks on a canvas surface and roll it out into a uniform slab approximately 1/4 inch thick. -
Smooth the surface:
Before cutting, take a smooth rib and compress the clay on both sides. This aligns the clay particles, preventing warping later, and ensures a nice canvas for that crisp finish. -
Measure and mark:
Using your ruler, lightly mark out your pieces. You will need one square for the base (e.g., 4×4 inches) and four rectangles for the walls (e.g., 4×3.5 inches). Adjust dimensions based on your desired final size. -
Cut the shapes:
Use a needle tool or fettling knife to cut out your five pieces. For distinct, sharp corners, try to keep the knife completely vertical as you slice through the clay. -
Let them firm up:
Allow the cut slabs to dry to a ‘leather-hard’ state. They should be stiff enough to hold their shape without bending, but still soft enough to be scored and joined.
Step 2: Assembling the Box
-
Bevel the edges:
For the crispest corners, cut a 45-degree bevel on the vertical edges of your wall pieces where they will meet. This creates a miter joint, much like a picture frame. -
Score the clay:
Rough up the beveled edges and the perimeter of the base slab using a serrated rib or scoring tool. Be generous with the texturing to ensure a strong bond. -
Apply slip:
Dab a layer of slip onto the scored areas. It acts as the glue. I like to apply it just seconds before joining so it stays wet and sticky. -
Join the walls:
Press the walls onto the base and against each other. Work one corner at a time, ensuring the beveled edges align perfectly to form a sharp 90-degree angle. -
Reinforce the interior:
Roll a very thin coil of clay and press into the interior seams. Smooth this coil down with your finger or a modeling tool to reinforce the joints without disrupting the outside edges.
Clean Lines Pro-Tip
Use drafting tape to mask off the bottom section before dipping the rim. Peel it off as soon as the glaze stops dripping for a razor-sharp transition line.
Step 3: Refining and Creating the Tray
-
Create the drip tray:
Roll out a small amount of leftover clay. Cut a square slightly larger (about 1/2 inch wider) than your pot’s base. Gently curve up the edges or add a tiny rim to catch water. -
Paddle the form:
Once the main pot is assembled, gently tap the exterior walls with a wooden paddle. This compresses the joints further and sharpens the overall square shape. -
Smooth the exterior:
Use a damp sponge to clean up any excess slip squeezing out of the seams, but be careful not to round over those sharp corners you worked so hard to create. -
Dry and bisque fire:
Let the pot and tray dry slowly under loose plastic to prevent uneven shrinkage. Once bone dry, bisque fire them in the kiln according to your clay body’s specifications.
Level Up: Texture
Before assembling, gently press a piece of canvas or linen into the wet clay slabs. The subtle fabric texture adds amazing depth to the unglazed section.
Step 4: Glazing the Two-Tone Look
-
Prepare for glazing:
After the bisque fire, wipe the pot down with a damp sponge to remove dust. Wax the bottom of the pot and the tray to prevent them from sticking to the kiln shelf. -
Dip the rim:
Holding the pot upside down by its base, dip just the top 1 to 1.5 inches into a bucket of creamy white glaze. Hold it level for a few seconds to get an even line. -
Clean the line:
If the dip line isn’t perfectly straight, you can carefully clean it up with a damp sponge or a razor blade once the glaze is dry to the touch. -
Glaze the tray:
Dip the entire drip tray into the same white glaze to tie the two pieces together visually. -
Final firing:
Fire the pieces a final time to the glaze maturity temperature. The unglazed bottom section will fire to a rich matte terra cotta color.
Now you have a sleek, modern home for your favorite succulent that looks professionally designed
Lidded Trinket Boxes Using Stiff Slabs
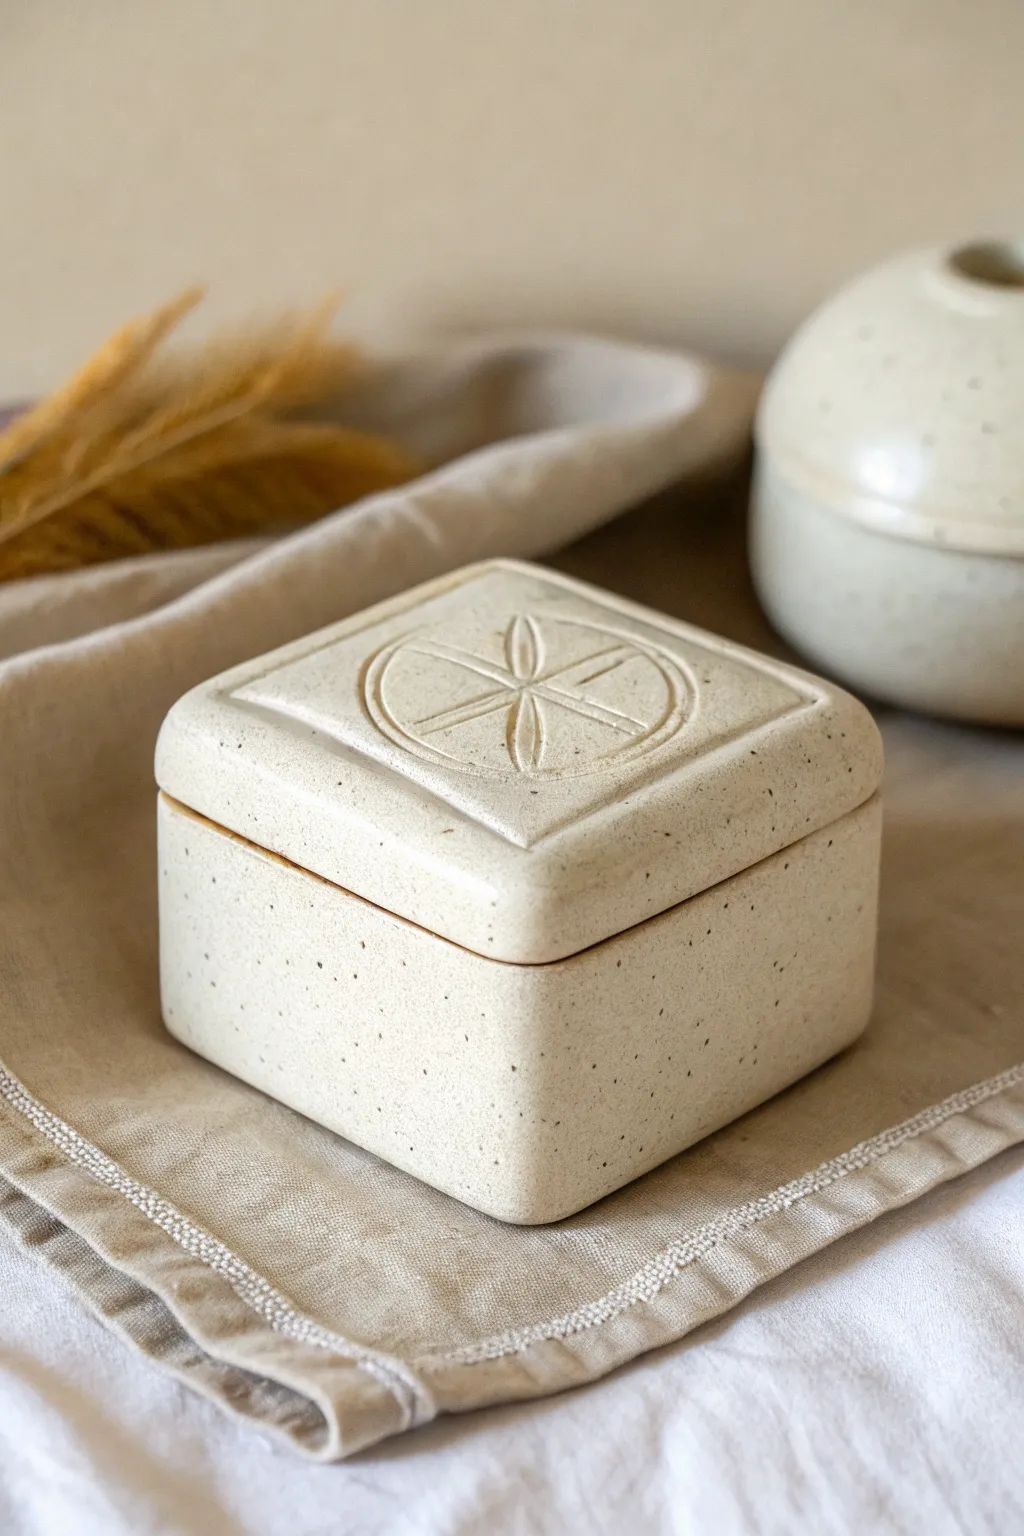
This elegant trinket box features a soft, square form with rounded corners and a delicate carved motif on the lid. The speckled cream glaze highlights the carved relief, giving it a warm, handmade aesthetic perfect for storing small treasures.
Step-by-Step Guide
Materials
- Speckled clay body (stoneware recommended)
- Rolling pin
- Two guide strips (1/4 inch thick) or slat system
- Paper or cardboard templates (for lid and base)
- Pottery knife or needle tool
- Scoring tool or serrated rib
- Slip (clay mixed with water)
- Paddle tool
- Loop tool or small carving tool
- Sponge
- Speckled cream or matte white glaze
Step 1: Slab Preparation & Cutting
-
Roll the Slabs:
Begin by rolling out your speckled clay to an even uniform thickness, using the 1/4-inch guide strips to ensure consistency. You will need enough area for a base, a top, and long strips for the walls. -
Texture Removal:
Use a rib to compress both sides of your slab thoroughly. This removes canvas texture and strengthens the clay particles, which is critical for preventing warping later. -
Let it Firm Up:
Allow the slab to dry to a ‘soft leather hard’ stage. The clay needs to be flexible enough to bend slightly but stiff enough to hold a vertical wall without slumping. -
Cut the Components:
Using your templates, cut out two identical squares for the lid and base. Then, cut a long rectangular strip for the walls; the height depends on your preference, but 2-3 inches is standard for trinket boxes.
Clean Lines
Use a playing card or flexible metal rib to smooth the box walls after paddling. This removes paddle marks while keeping the soft, inflated shape.
Step 2: Construction
-
Bevel the Walls:
If you are making the walls from four separate pieces, miter the edges at 45 degrees. If using one long strip, measure the lengths needed for each side and score where the corners will be, then gently fold. -
Score and Slip the Base:
Rough up the outer edges of your base square and the bottom edge of your wall strip. Apply a generous amount of slip to the scored areas. -
Attach Walls to Base:
Press the walls firmly onto the base. If you see slip oozing out, that’s a good sign of a strong bond. Smooth the connection on the inside using a coil or a wooden tool. -
Shape the Form:
Once the box is assembled, use a paddle to gently tap the walls. This squares up the shape while simultaneously rounding the sharp corners slightly for that soft, pillowy look shown in the image. -
Create the Gallery:
To make the lid stay on, you need a flange or gallery. Roll a small coil or cut a narrow strip of slab and attach it to the underside of the lid piece, inset about 1/4 inch from the edge. Test the fit on the box body.
Step 3: Refining & Design
-
Smooth the Lid:
With the gallery attached, place the lid on the box. Paddle the lid gently so its contours match the softness of the box body. -
Carve the Border:
Using a needle tool or small loop tool, carve a square border on the top of the lid, indented slightly from the outer edge. This frames your central design. -
Grid the Center:
Lightly sketch a circle in the center of the framed square. Divide the circle into six or eight equal sections to guide your petal placement. -
Carve the Petals:
Using a specialized carving tool or a simple loop tool, carve out the negative space to create raised petals. For the specific look in the photo, carve narrow, elongated tear-drop shapes. -
Detail Lines:
Add a single incised line down the center of each raised petal to mimic veins and add depth to the relief. -
Final Smoothing:
Once the carving is complete and the clay is leather hard, run a damp sponge along all rims and corners to soften any sharp edges.
Level Up: Hidden details
Carve a matching pattern or a secret message on the underside of the lid or the interior bottom of the box for a surprise upon opening.
Step 4: Finishing
-
Bisque Fire:
Let the box dry slowly under plastic to prevent warping, then bisque fire according to your clay body’s specifications. -
Glaze Application:
Choose a speckled matte cream or white glaze. Pour glaze into the interior, coat, and pour out. Dip or brush the exterior. -
Break the Glaze:
I like to gently wipe the glaze off the high points of the carved design with a damp sponge. This allows the clay color to peek through and emphasizes the texture. -
Final Fire:
Glaze fire the piece, ensuring the lid and body are fired separately or with kiln wash between them to prevent fusing.
This charming box makes a wonderful addition to a vanity or a thoughtful handmade gift packaging
Wall Hangings Made From Decorated Slabs
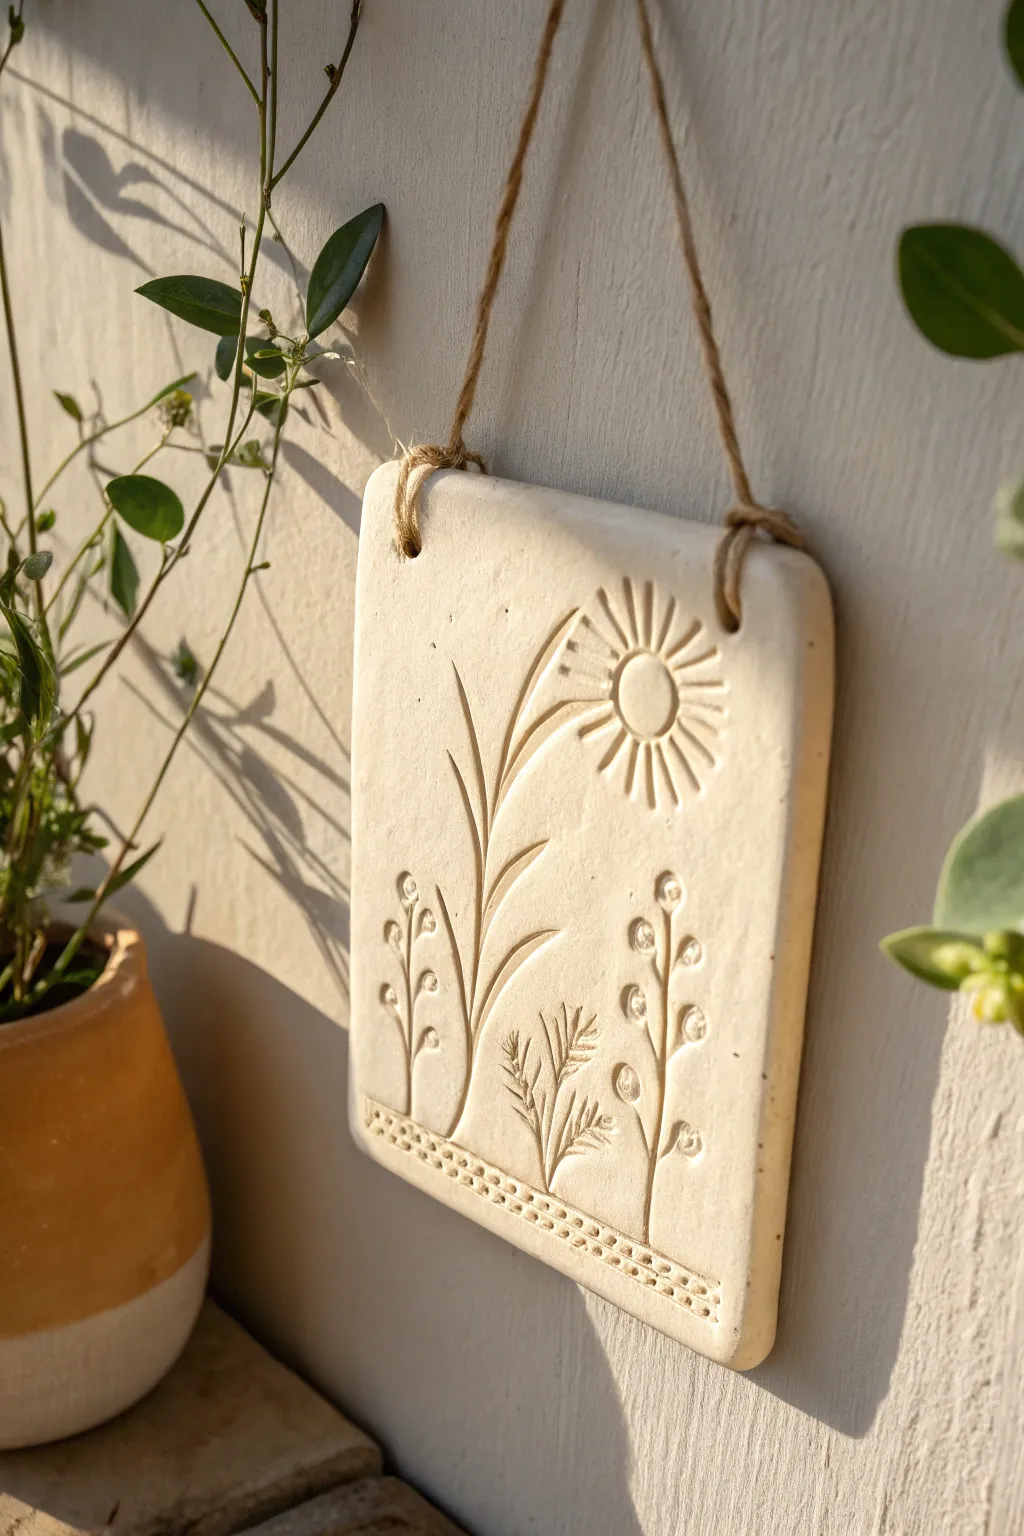
Capture the warmth of a summer afternoon with this charming clay slab wall hanging featuring delicate botanical sgraffito and relief work. The finished piece showcases a sunburst overlooking a field of grasses, preserved in a beautiful, creamy matte finish.
How-To Guide
Materials
- Light-colored stoneware clay or air-dry clay (smooth body)
- Rolling pin
- Two wooden guide slats (approx. 1/4 inch thick)
- Needle tool
- Fettling knife or clay cutter
- Carving tools (loop tool and sgraffito stylus)
- Small circular cutter or bottle cap
- Ruler or straight edge
- Sponge and water
- Wooden skewer or chopstick
- Jute twine
- Sandpaper (fine grit)
Step 1: Preparing the Slab
-
Wedge the Clay:
Begin by wedging your clay thoroughly to remove any air bubbles, creating a smooth, workable consistency. -
Roll the Slab:
Place your clay ball between two wooden guide slats. Roll the clay out until the rolling pin rests evenly on the slats, ensuring a consistent thickness of about 1/4 inch. -
Cut the Shape:
Using a ruler and your needle tool or fettling knife, cut a clean square or slightly rectangular shape. The example here is a soft rectangle with gently rounded corners. -
Smooth the Edges:
Dip a small sponge in water and wring it out almost completely. Gently run the sponge along the cut edges and corners to soften them, giving the piece a refined, hand-molded look. -
Create Hanging Holes:
Before the clay stiffens, use a chopstick or straw to punch two holes near the top corners. Ensure they are evenly spaced and far enough from the edge to prevent cracking.
Clean Lines Trick
When carving the lines for the sun rays and stems, drag your tool towards you rather than pushing away. This gives you more control and prevents jagged clay crumbs.
Step 2: Designing the Scene
-
Sketch the Layout:
Lightly trace your design onto the wet clay with a needle tool. Map out the large sun in the upper right and three distinct plant stems rising from the bottom. -
Carve the Sun:
Press a small circular cutter or bottle cap gently into the clay to form the sun’s center. Don’t cut all the way through; just create an impression. -
Add Sun Rays:
Using a carving tool or the side of a needle tool, carve short, radiating lines extending from the sun. Vary the lengths slightly for a dynamic, glowing effect. -
Sculpt the Main Stem:
Carve the central, largest plant stem. Use a loop tool to remove thin strips of clay for the stalk, then carve upward-curving leaves on alternating sides. -
Detail the Side Flora:
For the plant on the right, press small circles into the clay to mimic berries or buds along a stem. For the smaller center plant, scratch fine, feathery lines to resemble grass or fern fronds. -
Add Texture:
Use a small, blunt tool to impress a row of dots along the very bottom edge of the slab. This decorative border grounds the composition.
Warping Woes?
If your slab starts curling up at the corners while drying, flip it over daily. Drying slowly under a weighted board is the best way to ensure a perfectly flat tile.
Step 3: Drying and Finishing
-
Slow Drying:
Sandwich your slab between two pieces of drywall or place it under a loose plastic sheet. I prefer to weigh down the corners lightly to keep the tile flat as it dries. -
Bisque Firing:
Once bone dry, fire the piece to bisque temperature (usually Cone 04) if using kiln-fire clay. For air-dry clay, simply let it cure completely. -
Sanding:
After the initial firing or curing, lightly sand any sharp burrs or rough spots on the surface and edges with fine-grit sandpaper. -
Final Surface Treatment:
Leave the clay raw for a rustic look, or apply a clear matte glaze and fire again. If using air-dry clay, seal it with a matte varnish to protect the surface. -
Stringing:
Cut a length of jute twine roughly 12 inches long. Feed the ends through the holes from back to front. -
Knotting:
Tie simple overhand knots on the front side of the slab. Pull tight so the knots sit flush against the clay face, creating the rustic loops shown in the image.
Hang your new ceramic artwork near a window to let the changing light play across the carved textures.
Botanical Impression Leaf Dishes
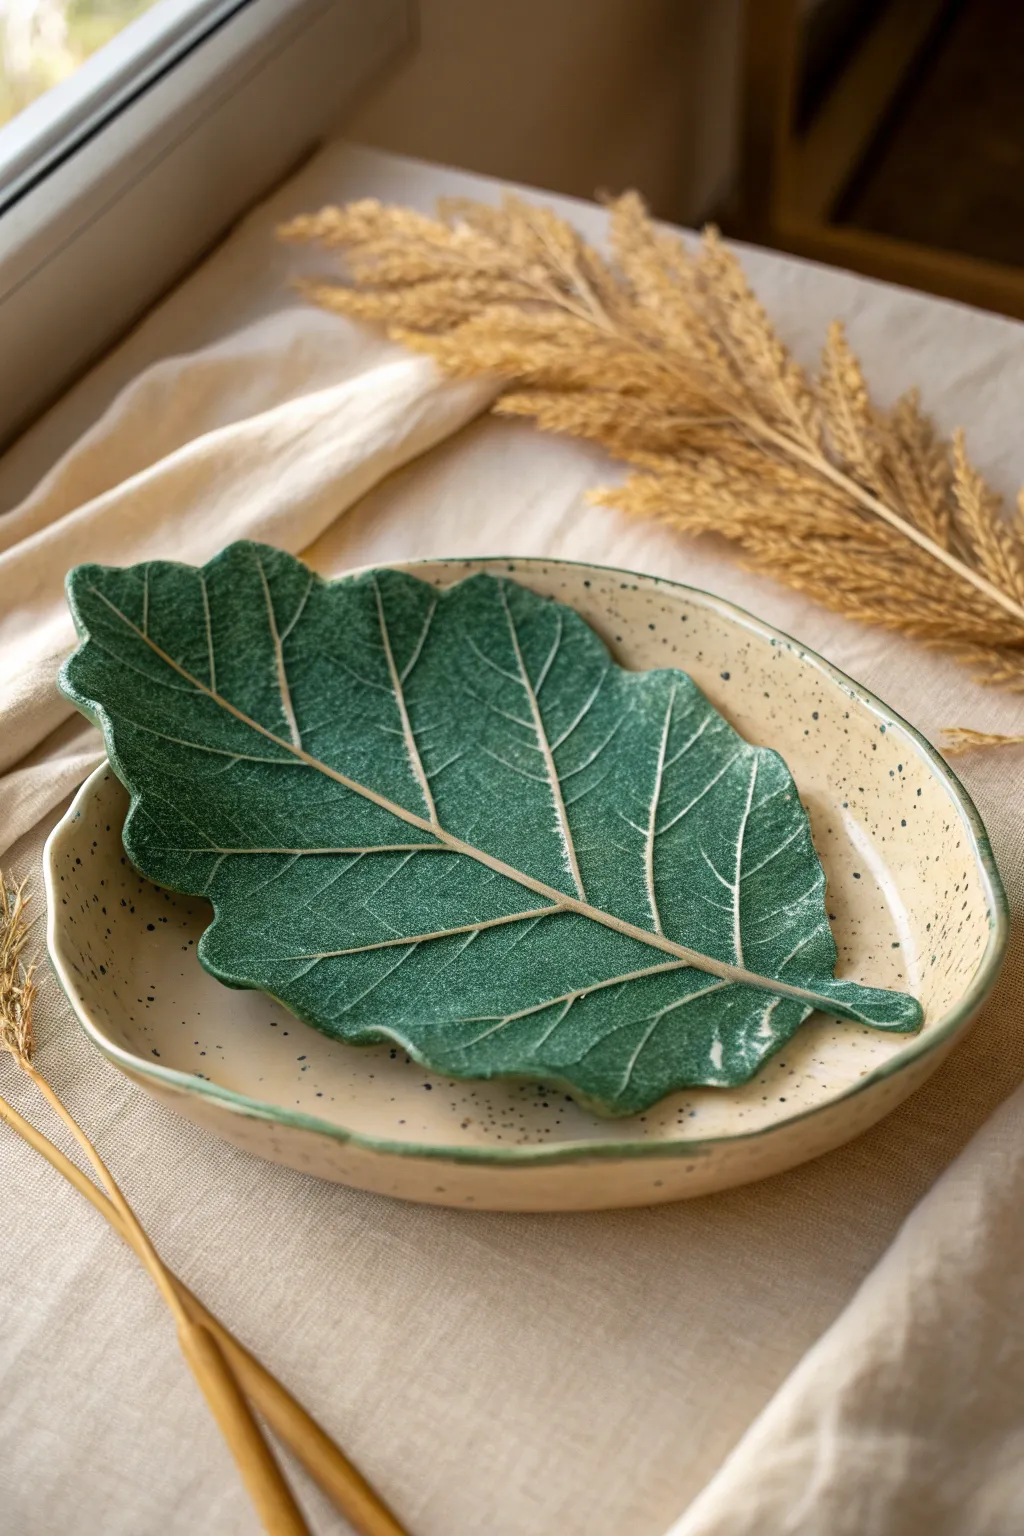
Bring the calming essence of the outdoors into your home with this stunning dual-piece ceramic set. You’ll create a textured, deep-green leaf platter that nests perfectly within a larger, speckled organic bowl, combining botanical realism with rustic charm.
Step-by-Step Guide
Materials
- White stoneware clay body
- Large, fresh leaf with prominent veins (like a fig leaf or large hosta)
- Deep emerald green underglaze
- Clear transparent glaze
- Buff or speckled beige glaze
- Rolling pin
- Guide sticks (approx. 1/4 inch thick)
- Needle tool or fettling knife
- Smooth ribs (wood or rubber)
- Sponge
- Soft bristle brushes
- Large foam cushion or shallow bowl for slumping
Step 1: Creating the Leaf Platter
-
Roll the Slab:
Begin by rolling out a medium slab of white stoneware clay. Use your guide sticks on either side to ensure an even thickness of about 1/4 inch, which provides durability without being too heavy. -
Position the Leaf:
Place your fresh leaf vein-side down onto the clay surface. The underside of the leaf carries the most texture, so this orientation is crucial for a crisp impression. -
Impress the Texture:
Gently roll your rolling pin over the leaf once or twice. Press firmly enough to embed the veins deep into the clay, but avoid rolling it so thin that the clay deforms. -
Cut the Shape:
Using a needle tool held vertically, carefully trace around the perimeter of the leaf. Use a light touch to avoid dragging the clay, lifting away the excess scraps as you go. -
Refine the Edges:
After removing the real leaf, smooth the cut edges of your clay leaf with a slightly damp sponge. This removes sharp burrs and prevents the glaze from retreating from the rim later. -
Shape the Form:
Transfer the clay leaf onto a large piece of foam or drape it into a wide, shallow bowl to dry. Gently lift the edges to give it a natural, cupped shape that mimics a fallen leaf.
Use Fresh Leaves
Always use a fresh, pliable leaf. Dry or brittle leaves will crack when rolled, leaving messy debris in the clay instead of a clean, sharp impression.
Step 2: Crafting the Underplate
-
Prepare the Base Slab:
Roll out a second slab of clay, slightly larger than your leaf dish. This will form the bottom resting bowl shown in the image. -
Create an Organic Oval:
Freehand cut a relaxed, organic oval shape. Just ensure it is wide enough to comfortably hold your leaf platter with a nice margin visible around the edges. -
Form the Rim:
Slump this slab into a large, shallow mold or bowl to create a gentle curve. Smooth the rim with your fingers to give it an undulating, handmade feel rather than a perfectly manufactured circle. -
Drying and Bisque:
Allow both pieces to dry slowly under plastic to prevent warping. Once bone dry, bisque fire them according to your clay body’s specifications.
Create a Set
Make smaller versions of the leaf dish to serve as matching side plates or dipping saucers for a cohesive botanical table setting.
Step 3: Glazing and Finishing
-
Apply Green Underglaze:
On the bisque-fired leaf, apply 2-3 coats of deep emerald green underglaze. I like to let each coat dry fully to ensure the color is rich and opaque. -
Reveal the Veins:
Once the underglaze is dry, gently wipe the surface with a clean, damp sponge. This technique removes some color from the raised veins, revealing the white clay underneath and highlighting the texture. -
Glaze the Leaf:
Coat the entire leaf dish with a clear transparent glaze to seal it and give it a glossy, shimmering finish. -
Glaze the Underplate:
For the bottom bowl, apply a speckled beige or buff glaze. Avoid getting glaze on the foot ring so it doesn’t fuse to the kiln shelf. -
Rim Detail:
Using a small brush, carefully paint a thin, irregular line of diluted green underglaze or oxide along the rim of the beige bowl to tie the two pieces together. -
Final Firing:
Glaze fire both pieces to the maturity temperature of your clay and glazes. Ensure the leaf is not placed inside the bowl during firing unless you use stilts, or they will fuse together.
Now you have a stunning, nature-inspired serving set ready for your next gathering.
Folded Origami-Style Slab Bowls
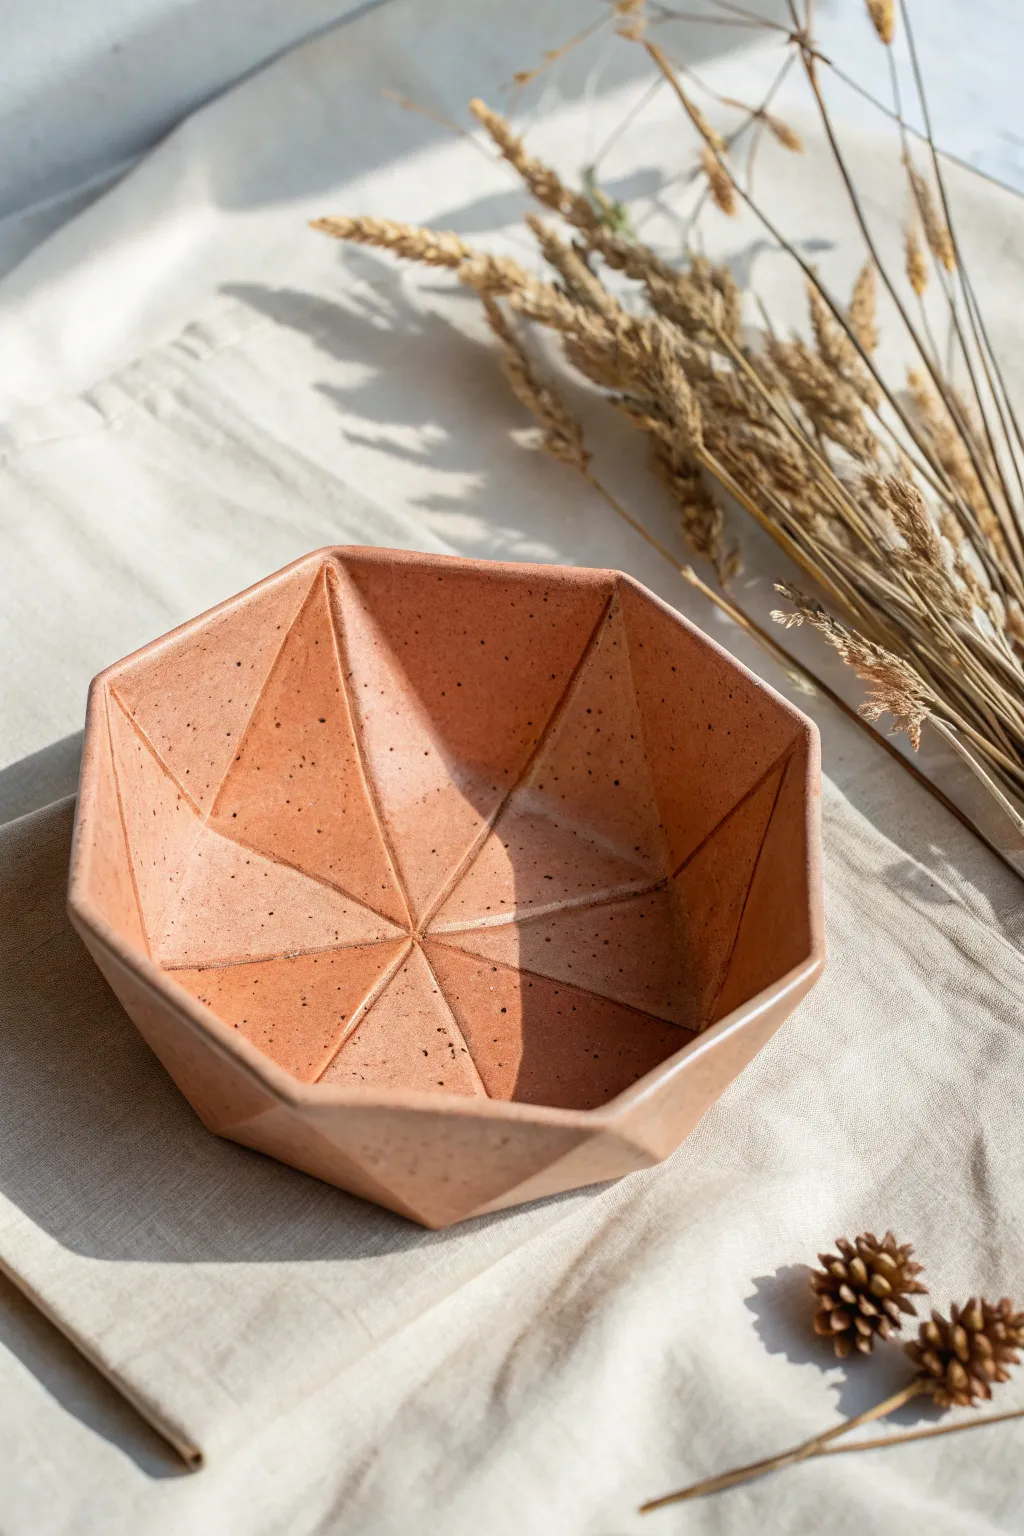
This stunning geometric bowl captures the sharp elegance of origami using the earthy warmth of speckled clay. By combining precise slab cutting with careful folding, you’ll create a functional piece of art that plays beautifully with light and shadow.
Step-by-Step
Materials
- Terracotta or red stoneware clay with speckles
- Rolling pin
- Two long wooden guide strips (approx. 1/4 inch thick)
- Paper
- Ruler and pencil
- Scissors
- Needle tool or X-Acto knife
- Fettling knife
- Scoring tool (serrated rib)
- Slip (clay and water slurry)
- Banding wheel (optional)
- Small smooth sponge
Step 1: Drafting the Template
-
Outline the base:
Begin by drawing a regular octagon on your paper. This will be the rim of your bowl. Determine the size you want; for a cereal bowl size, an 8-inch diameter is a good starting point. -
Define the center:
Find the exact center of your octagon and mark it. Draw straight lines connecting each of the eight corners to this central point, creating eight equal triangles. -
Create the folding lines:
Cut out one of these triangles to use as a master template, or continue drawing on the main sheet if you prefer a single-piece mold. If creating a single-slab bowl, cut a slit from one corner almost to the center to allow for overlapping later, or prepare to cut individual triangles.
Step 2: Preparing the Clay
-
Roll the slab:
Wed your speckled terracotta clay to remove air bubbles. Place it between your two wooden guide strips on a canvas board. -
Flatten and smooth:
Roll the clay out until the rolling pin rides along the guide strips, ensuring an even thickness. Compress the clay on both sides with a rib tool to align the particles and prevent warping. -
Cut the shapes:
Place your paper template onto the clay slab. Using a needle tool or fettling knife, carefully cut out a large octagon. Alternatively, if building by piece, cut out eight identical triangles.
Sharp Lines Secret
When smoothing the interior seams, wrap a credit card or stiff rib in a thin piece of plastic wrap. This lets you burnish the corners without gouging the clay.
Step 3: Assembling the Form
-
Darting the slab:
If using a single octagon slab, you need to remove material to create the lift. Cut narrow diamond-shaped ‘darts’ (wedges) out of the clay radiating from the center, along the lines where the facets will meet. This allows the sides to pull up without bunching. -
Score and slip:
Score the raw edges of your cut darts (or the sides of your individual triangles) thoroughly. Apply a generous amount of slip to these roughened areas. -
Join the facets:
Gently lift the clay sides, bringing the scored edges together to close the gaps. The clay will naturally rise into a bowl shape. Press the seams firmly together. -
Reinforce the seams:
Roll a very thin coil of fresh clay. Press this into the interior seams where the facets meet to reinforce the join, then smooth it completely flat so it’s invisible. -
Shape the rim:
Once the basic bowl structure is formed, check the rim. The octagonal shape might have rounded slightly during handling, so use a flat wooden paddle to gently tap the exterior planes back into sharp, flat facets.
Level Up: Gravity trick
Instead of building upright, press your slab into a pre-made plaster slump mold that already has facets. This guarantees perfectly symmetrical angles every time.
Step 4: Refining and Finish
-
Smooth the interior:
Use a barely damp sponge or chamois to clean up the interior lines. The goal is to keep the geometric ‘fold’ lines crisp, not rounded, so use a light touch. -
Define the exterior:
I like to use a metal rib to scrape the exterior facets while the clay is leather hard. This sharpens the angles and accentuates the origami look. -
Dry slowly:
Cover the bowl loosely with plastic. Because of the seams, uneven drying can cause cracks, so let it dry very slowly over several days. -
Bisque fire:
Once bone dry, bisque fire the piece to cone 04 (or according to your clay body’s instructions). -
Glaze application:
For the look in the photo, apply a clear matte or satin glaze. This seals the clay for food safety while letting the beautiful natural terracotta color and speckles shine through. -
Final firing:
Fire the glazed piece to the clay’s maturity temperature (likely Cone 5 or 6 for stoneware). Check that the foot is clean of glaze before loading the kiln.
Now you have a modern, architectural vessel ready to hold your favorite keepsakes or a warm meal