If you want a clay date that feels sweet, low-pressure, and actually doable in one sitting, I’ve got you. These ideas are all about couple keepsakes—little matching (or complementary) pieces you’ll love seeing around the house long after the clay dries.
Matching Pinch Pot Snack Bowls
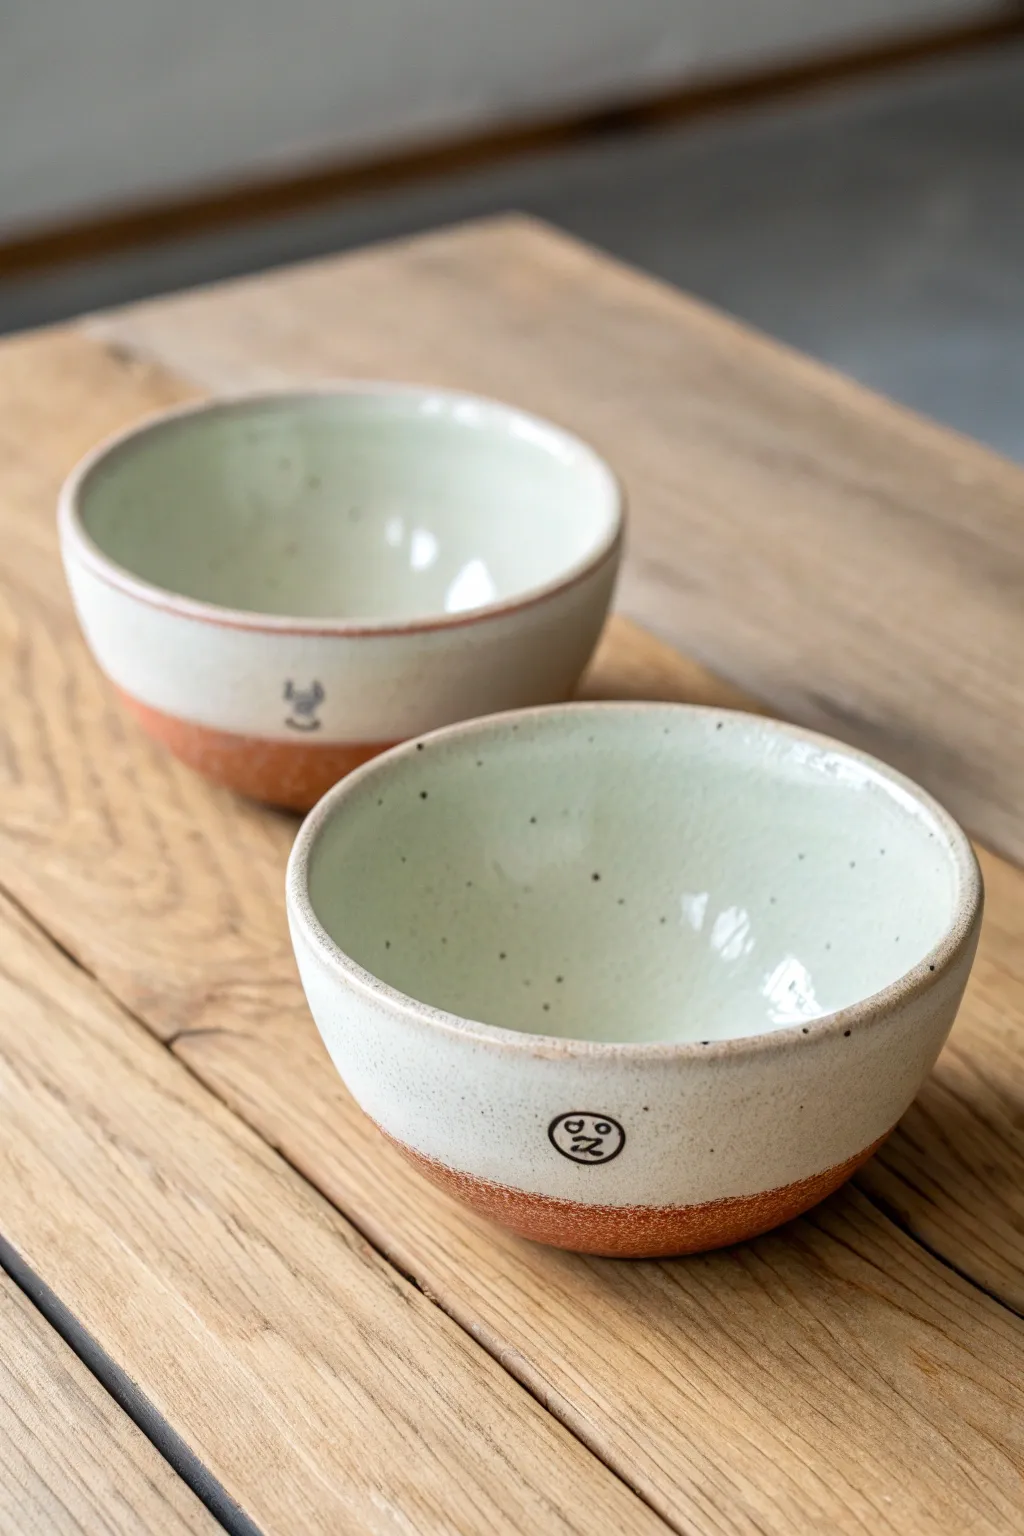
These charming, two-toned snack bowls bring a rustic yet refined energy to your table with their raw clay bases and creamy speckled glaze. Perfect for a cozy clay date, these pinch pots feature sweet little stamped details that make them feel personalized and special.
Step-by-Step Guide
Materials
- Speckled buff stoneware clay (or similar mid-fire clay)
- Pottery wheel (optional) or table surface for hand-building
- Loop tool for trimming
- Metal rib and sponge
- Small black underglaze pencil or fine liner brush with black underglaze
- Matte or satin white glaze (food safe)
- Clear glaze (optional, for over the detail)
- Kiln access (bisque and glaze firing)
Step 1: Forming the Bowls
-
Prepare your clay:
Start with two balls of speckled buff stoneware clay, each roughly the size of a large orange. Wedge them thoroughly to remove air bubbles. -
Open the form:
If hand-building, press your thumb into the center of the ball and pinch the walls evenly while rotating. If throwing, center the clay on the wheel and open it up into a basic bowl shape. -
Shape the curve:
Gently gently pull or pinch the walls upward and slightly outward. Aim for a rounded, hemispherical shape rather than a straight cylinder. The walls should be even, about 1/4 inch thick. -
Refine the rim:
Use a damp sponge or a chamois cloth to smooth the rim. You want a soft, rounded edge, not a sharp one, as this makes the finished bowl much more pleasant to use. -
Let it firm up:
Allow the bowls to dry to a ‘leather hard’ state. They should be firm enough to handle without warping but still cool to the touch.
Clean Lines Pro Tip
For a perfectly straight glaze line, apply masking tape around the bowl’s circumference before dipping. Peel it off immediately after dipping while the glaze is still wet.
Step 2: Trimming and Detailing
-
Trim the base:
Flip the bowls over. If using a wheel, trim away excess clay at the bottom to create a defined foot or a rounded curve. If hand-building, use a loop tool to carve away bulk and smooth the bottom surface. -
Smooth the exterior:
Take a metal rib or a slightly damp sponge and run it over the exterior walls to remove any fingerprints or throwing lines, creating a smooth canvas for the glaze later. -
Add the tiny drawings:
Using a small black underglaze decal or painting freely with a very fine liner brush and black underglaze, add a tiny motif near the bottom third of the bowl. The image shows a small face and a symbol; keep it minimal. -
Dry completely:
Let the bowls dry thoroughly until bone dry. The clay should turn a lighter color and feel room temperature. -
Bisque fire:
Load the bowls into the kiln for a bisque firing (usually Cone 04 or 06). This prepares the clay to accept the glaze without dissolving.
Step 3: Glazing and Finishing
-
Clean the bisque:
Wipe the fired bisque ware with a clean, damp sponge to remove any dust, which can prevent glaze from adhering properly. -
Wax the detail:
Carefully apply a dot of wax resist over your tiny black drawing. This ensures the drawing stays crisp and visible underneath the glaze line, or simply plan to glaze right up to it. -
Dip the bowl:
Prepare your matte white glaze. Holding the bowl by the foot (or using tongs), dip the bowl upside down into the glaze. Stop the dip about 3/4 of the way down the exterior wall. -
Check the line:
Lift the bowl out and hold it steady. You want a straight horizontal glaze line that leaves the bottom raw clay exposed. The glaze should cover the interior completely and the top portion of the exterior. -
Clean and refine:
Once the glaze is dry to the touch, gently sponge off any accidental drips on the raw clay base. If you waxed the drawing, wipe any glaze beads off the wax. -
Glaze fire:
Place the bowls in the kiln for the final glaze firing (match the temperature to your clay and glaze, likely Cone 5 or 6). I prefer to use a cookie (a small slab of clay) under pots just in case the glaze runs. -
Sand the bottom:
After firing and cooling, use high-grit sandpaper to briefly smooth the raw clay foot ring so it doesn’t scratch your table.
Level Up: Speckle hack
If you don’t have speckled clay, mix a small amount of granular ilmenite or manganese into your regular white clay body before forming to get those lovely dark spots.
Now you have a custom set of snack bowls ready for your next movie night or gathering


Couple Mug Set With Simple Texture
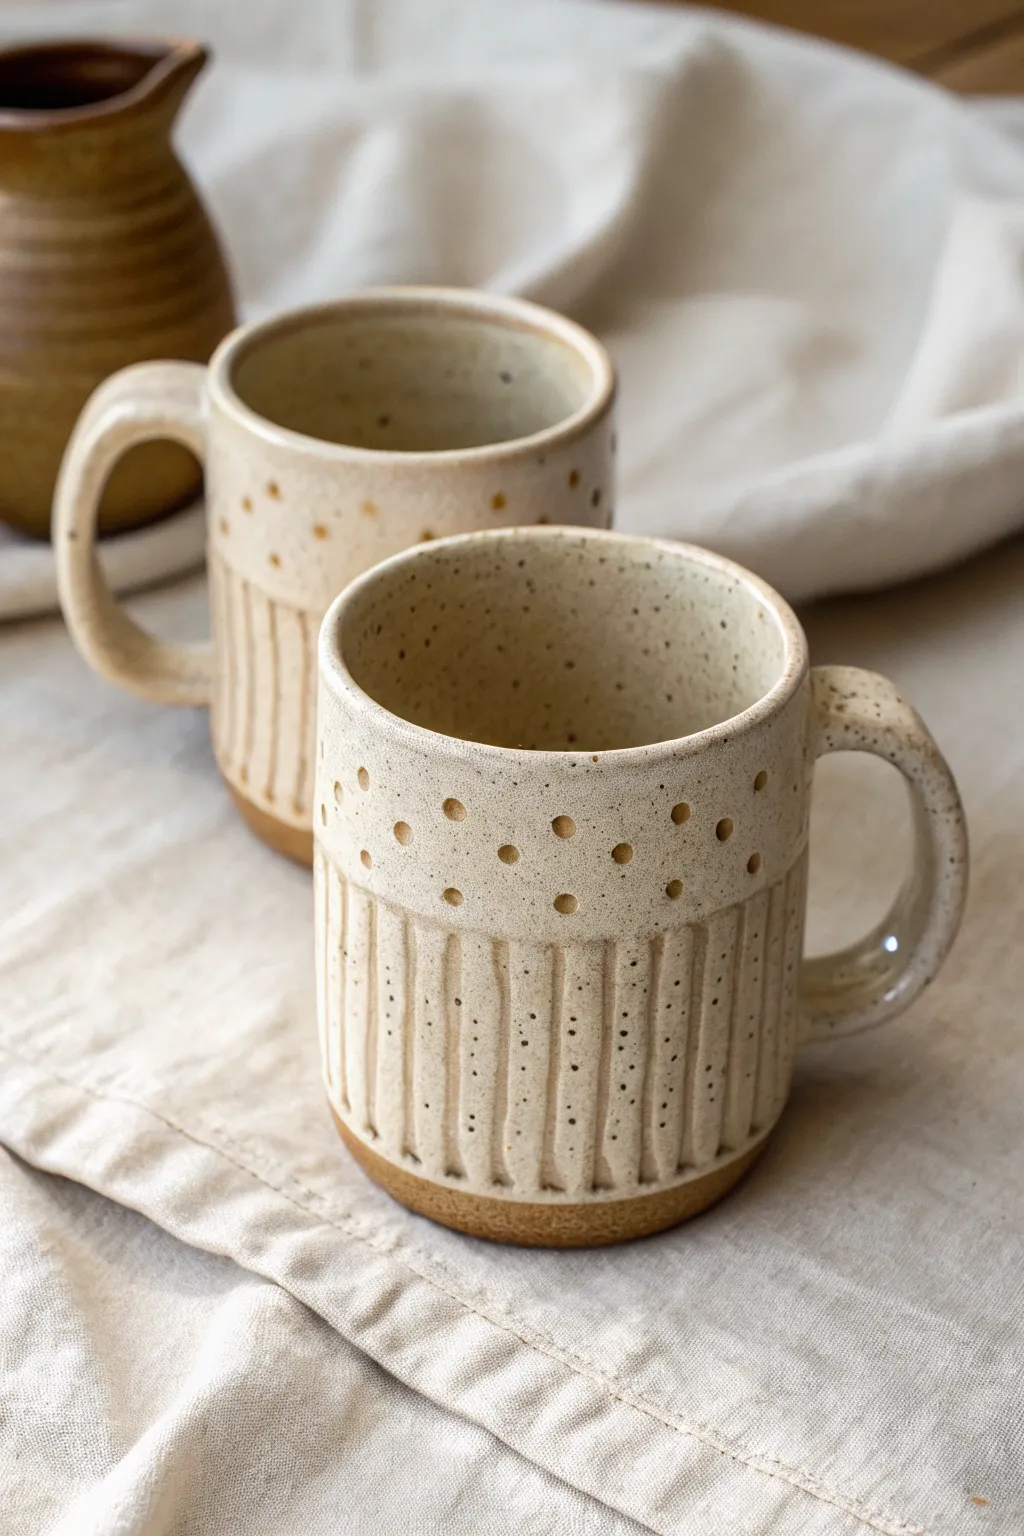
These charming matching mugs feature a lovely contrast between smooth, creamy glaze and raw, textured clay. With vertical fluting and a whimsical band of dots, they are a perfect project for a relaxing clay date.
Step-by-Step Tutorial
Materials
- Speckled stoneware clay (buff or brown)
- Pottery wheel or slab roller/rolling pin
- Throwing tools (sponge, wire cutter, rib)
- Small carving tool or trimming loop tool
- Round end of a paintbrush or a small dowel
- Wax resist
- Creamy white or oatmeal matte glaze
- Kiln for bisque and glaze firing
Step 1: Forming the Body
-
Throw or Build the Cylinder:
Begin with about 1 lb of speckled stoneware clay. Whether you are throwing on the wheel or slab building, aim for a sturdy cylinder about 4–5 inches tall with straight, vertical walls. -
Refine the Shape:
Use a rib to smooth the outside walls, ensuring they are even. A slight taper inward at the very top rim can make drinking more comfortable. -
Dry to Leather Hard:
Let the cylinder dry slowly until it reaches a leather-hard state. The clay should be firm enough to hold its shape when handled but still soft enough to carve into easily. -
Trim the Foot:
If wheel-throwing, center the mug upside down and trim the bottom to create a neat foot ring. This defines the separation between the mug wall and the table.
Clay Too Dry?
If your mug gets too dry while carving, wrap it in a damp paper towel and plastic bag for 3-4 hours to rehydrate the surface slightly.
Step 2: Adding Texture
-
Mark Guidelines:
Lightly sketch a horizontal line around the mug, roughly halfway up. This will be the boundary where your vertical fluting stops. -
Carve Vertical Flutes:
Using a small U-shaped carving tool or a trimming loop tool, carve vertical lines from the bottom of the mug up to your guideline. Keep the spacing consistent, leaving small ridges between each carved channel. -
Smooth the Edges:
Once the fluting is done, gently run a damp sponge or your finger over the carved ridges to remove any sharp clay burrs or crumbs. -
Create the Dotted Border:
Just above the flutings, use the rounded end of a paintbrush or a small dowel to press a row of indentations into the clay. I like to stagger a second row of dots slightly above the first for a more organic look.
Step 3: Handle Attachment
-
Pull a Strap Handle:
Pull a strap of clay or roll a coil that matches the thickness of your mug walls. Shape it into a large ‘C’ or question mark shape. -
Dehydrate the Handle:
Let the handle stiffen up slightly on a board until it matches the moisture content of your mug body. -
Score and Slip:
Score the attachment points on both the mug and the handle ends. Apply slip generously to these areas. -
Attach and Smooth:
Firmly press the handle onto the mug. Smooth the seams with a modeling tool or your thumb, ensuring a strong bond. Check that the handle is straight and comfortable to grip.
Make it Yours
Swap the dots for small stamped flowers or geometric squares to personalize the band above the fluting.
Step 4: Glazing
-
Bisque Fire:
Before glazing, fire the mug in a kiln to a bisque temperature (usually cone 04 or 06) to make it durable and porous. -
Wax the Bottom:
Apply wax resist to the bottom inch of the mug, covering the foot and the very bottom edge of the fluting. This ensures the raw clay remains visible after firing. -
Dip into Glaze:
Dip the mug into a creamy white or oatmeal matte glaze. Hold it for 3-4 seconds to get an even coat. -
Clean the Line:
Use a damp sponge to wipe back any glaze that dripped onto the waxed area, creating a crisp, straight line where the glaze meets the raw clay. -
Glaze Fire:
Finally, fire the mug to its final maturity temperature (typically cone 5, 6, or 10 depending on your clay body).
Enjoy your morning coffee in these wonderfully tactile handmade creations


Heart Trinket Dish Pair
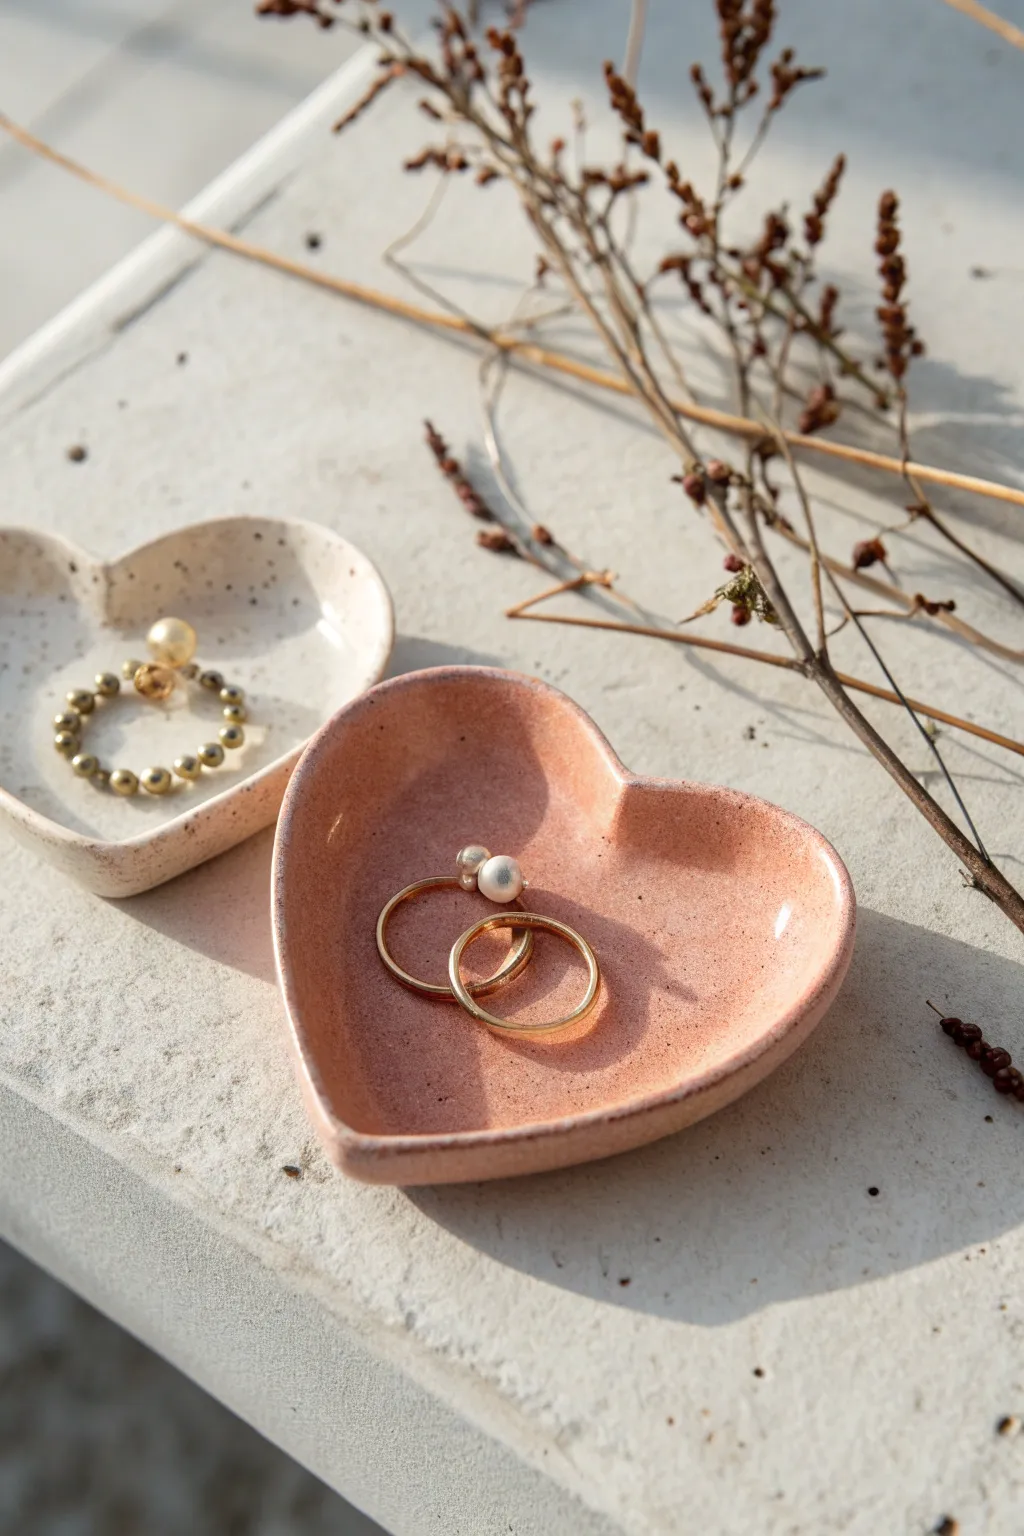
These charming catch-all dishes combine organic, speckled textures with romantic shapes, making them perfect for holding your favorite rings. The set features a larger dusty rose heart and a smaller creamy white heart, both finished with a subtle gloss that highlights their handmade curves.
Detailed Instructions
Materials
- Polymer clay (Dusty Rose or Terracotta)
- Polymer clay (Cream or White)
- Coarse black pepper or dried coffee grounds (for speckling)
- Small rolling pin
- Rolling surface (tile or mat)
- Heart-shaped cookie cutters (two sizes)
- Fingers or damp sponge for smoothing
- Gloss glaze (e.g., polyurethane or clay varnish)
- Soft-bristle brush
- Parchment paper-lined baking sheet
- Oven
Step 1: Preparing the Clay
-
Condition the clay:
Start with your dusty rose clay block. Knead it thoroughly in your hands until it becomes warm, soft, and pliable. Conditioning is crucial to prevent cracks later on. -
Add texture:
To achieve the organic speckled look seen in the photo, flatten your conditioned clay slightly and sprinkle a pinch of black pepper or dried coffee grounds onto it. -
Blend the speckles:
Fold the clay over the speckles and knead again until the particles are evenly distributed throughout the material. Repeat with the cream-colored clay. -
Roll it out:
Using your rolling pin, roll the pink clay out on your work surface until it is about 1/4 inch thick. I prefer to keep it slightly thicker than a standard cookie to give the dish a substantial, high-quality feel.
Step 2: Shaping the Hearts
-
Cut the shapes:
Press the larger heart-shaped cutter firmly into the rolled pink clay. Wiggle it slightly to ensure a clean cut, then lift the cutter. Repeat with the smaller cutter on the cream clay. -
Softening the edges:
Carefully lift your clay hearts. Using your fingertip dipped in a tiny bit of water (or baby oil), gently run it along the cut edge to smooth out any sharp ridges left by the cutter. -
Create the curve:
Place the clay heart in the palm of your hand. Gently press the center of the heart down with your thumb while cupping the edges upwards with your other fingers to create a shallow bowl shape. -
Refine the rim:
Pinch the very edge of the rim slightly to thin it out and give it that delicate, handmade pottery aesthetic seen in the reference image. -
Check the form:
Set the dish down on your work surface to ensure the bottom is flat enough to sit stable. If it wobbles, gently press the center down again.
Sticky Situation?
If your clay sticks to the table after rolling, try dusting the surface with a tiny amount of cornstarch or baking on top of a ceramic tile.
Step 3: Baking and Finishing
-
Prepare for baking:
Place your formed hearts onto a parchment-lined baking sheet. Double-check that the raised edges haven’t slumped; you can prop them up with bits of crumpled foil if needed. -
Bake the clay:
Bake according to your specific clay package instructions (usually 275°F/135°C for 15-30 minutes per 1/4 inch thickness). Do not raise the temperature to speed it up, as this can burn the clay. -
Cool down:
Allow the pieces to cool completely in the oven with the door cracked, or remove them and let them sit undisturbed until room temperature. They are fragile while hot. -
Apply glaze:
Once cool, dip your soft brush into the gloss glaze. Apply a thin, even coat to the inside of the dish to create that shiny, ceramic-like finish. -
Seal the edges:
Carefully paint the rim of the dish. I like to do this slowly to avoid drips running down the matte exterior, though you can glaze the outside too if you prefer a fully glossy look. -
Final cure:
Let the glaze dry completely according to the bottle’s manufacturer instructions. Some glazes require a quick secondary bake to set fully.
Pro Tip: Liquid Clay
Mix a drop of liquid polymer clay into your speckle mix. It helps the pepper or coffee grounds bind better without drying out the main clay body.
Now you have a sweet, custom-made set of dishes perfect for safeguarding your daily jewelry.


Ring Cone Duo for Nightstands
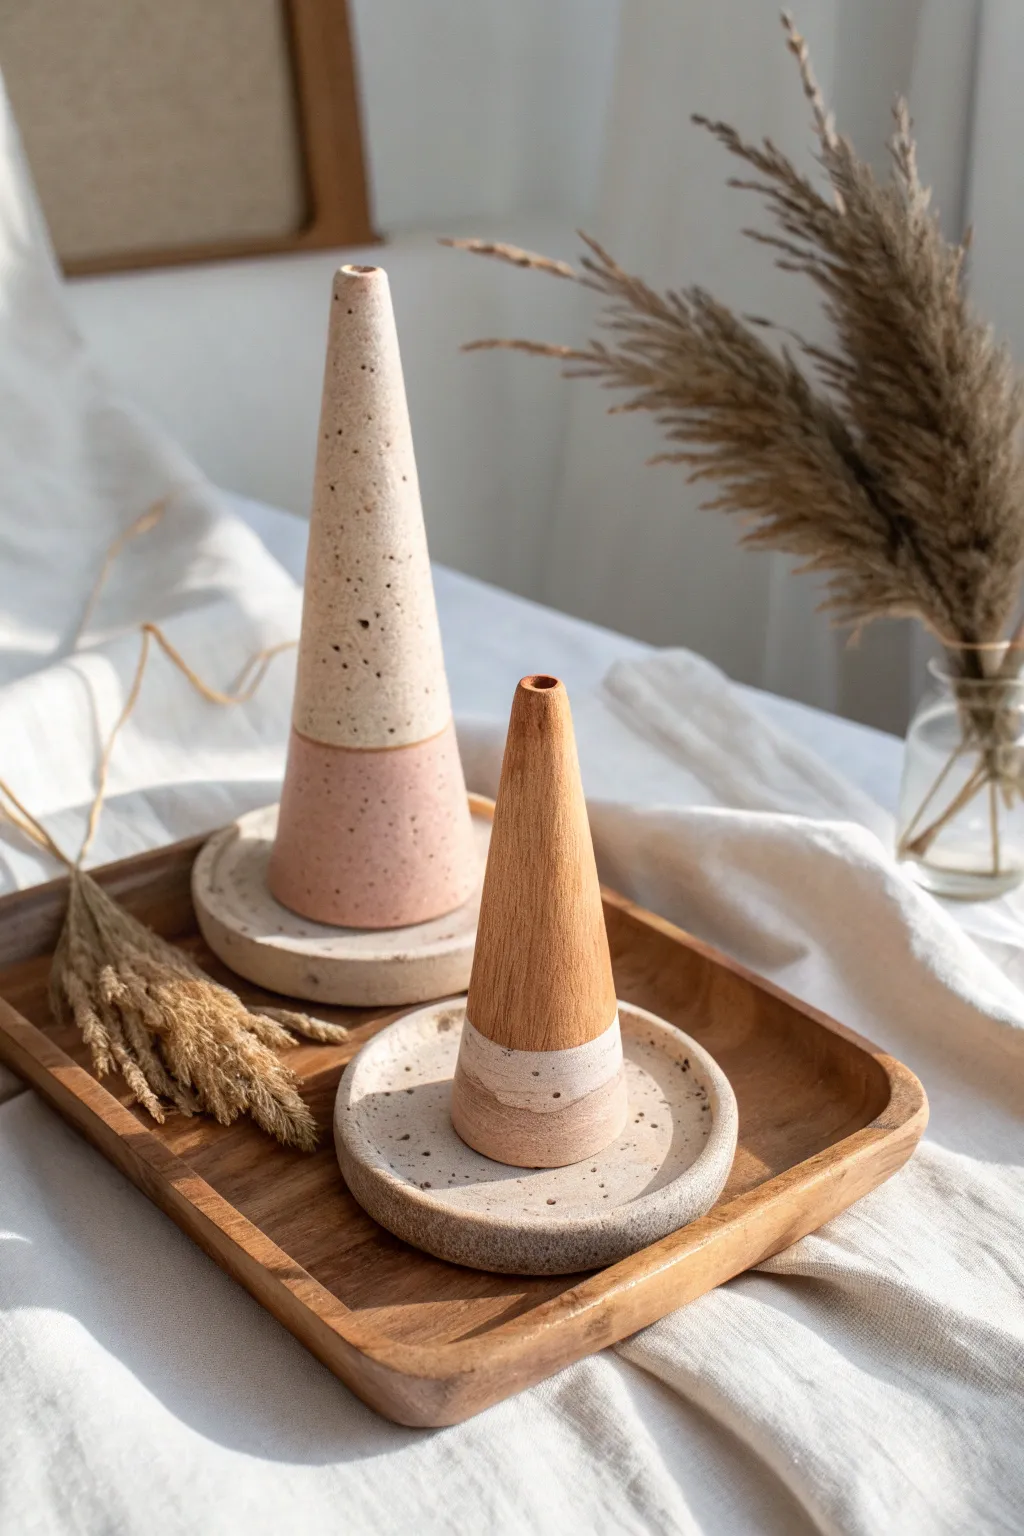
Create a sophisticated and functional piece of decor with this dual-textured ring cone set, perfect for organizing your jewelry in style. This project combines smooth, earthy clay tones with a distinct speckled finish and a chic color-blocked design.
How-To Guide
Materials
- Polymer clay (colors: Terracotta or Burnt Sienna for the small cone, Beige or Ecru for speckled parts, Pale Pink or Peach for the base of the large cone)
- Speckle inclusions: Dried coffee grounds, black pepper, or fine black glitter
- Rolling pin or pasta machine
- Cone form or sturdy paper to make a template
- Circle cutter set (varying sizes)
- Craft knife or tissue blade
- Sandpaper (fine grit: 400 and 600)
- Needle tool
- Oven for baking
- Parchment paper
Step 1: Preparing the Clay Blends
-
Condition the Clay:
Begin by thoroughly conditioning each color of polymer clay separately until they are soft and pliable. Warm clay is much easier to blend and shape without cracking. -
Mix Custom Speckles:
Take your beige or ecru clay and flatten it out. Sprinkle a small amount of dried coffee grounds or black pepper onto the surface to create that organic speckled look. -
Knead in Texture:
Fold the clay over the speckles and knead thoroughly until the particles are evenly distributed throughout the block. Repeat this process if you want a denser speckled effect. -
Create the Pink Base Blend:
For the bottom part of the tall cone, mix your pale pink clay with just a tiny pinch of the speckled beige mixture. This helps tie the two sections together visually.
Step 2: Shaping the Cones
-
Form the Tall Cone Top:
Roll the speckled beige clay into a smooth ball, then begin rolling it on your work surface with the palm of your hand, applying more pressure on one side to create a tapered cone shape. -
Refine the Shape:
Stand the cone up and check its symmetry. Continue rolling gently to elongate it until it reaches roughly 3/4 of your desired total height. -
Form the Tall Cone Base:
Repeat the rolling process with the pink clay, creating a shorter, wider cone shape that matches the diameter of the beige cone’s bottom. -
Join the Sections:
Cut the bottom of the beige cone and the top of the pink cone flat with your tissue blade to ensure a flush connection. Press them firmly together. -
Smooth the Seam:
Gently roll the joined cone on your surface to seal the seam. I usually use my finger to lightly smudge the clay across the line if it separates, then smooth it back out. -
Create the Small Wood-Look Cone:
For the smaller cone, shape your terracotta clay into a long, slender cone. Use a needle tool to scratch very subtle vertical lines if you want to mimic the wood grain texture seen in the inspiration photo. -
Add the Contrast Base:
Roll a small snake of the speckled beige clay, wrap it around the bottom of the terracotta cone, and flatten it into the main shape to create the lighter base section. -
Create the Openings:
Using a small styling tool or the end of a paintbrush, gently press an indentation into the very tip of each cone to create the hollow opening.
Stone Effect Secret
Mix different colors of dried spices like nutmeg or oregano into the clay for granite-like variety. Avoid fresh herbs as they will burn.
Step 3: Making the Dishes & Finishing
-
Roll the Base Slabs:
Roll out the remaining speckled beige clay to a thickness of about 1/4 inch. -
Cut the Circles:
Use a large circle cutter to punch out two bases. One should be slightly larger than the other to create visual hierarchy. -
Create the Raised Rim:
With your thumb, gently press into the center of the circles while pinching the outer edge upward to create a slight lip or rim around the dish. -
Prep for Baking:
Place all four pieces (two cones, two dishes) on a baking sheet lined with parchment paper. -
Bake:
Bake the pieces according to your clay manufacturer’s instructions. Usually, this is around 275°F (130°C) for 30 minutes per 1/4 inch of thickness. -
Cool Down:
Turn off the oven and let the pieces cool completely inside with the door slightly ajar to prevent thermal shock cracks. -
Sand for Pros:
Once cool, dip your 400-grit sandpaper in water and gently sand the surfaces to remove any fingerprints or lint. Follow with 600-grit for a satin-smooth finish. -
Final Assembly:
While you can glue the cones to the dishes, leaving them separate allows for easier cleaning and versatile styling.
Fixing Leaning Towers
If your cone starts drooping while warm, insert a toothpick or crumpled foil core into the center for internal structural support.
Place these charming cones on your nightstand to keep your favorite rings safe and beautifully displayed

The Complete Guide to Pottery Troubleshooting
Uncover the most common ceramic mistakes—from cracking clay to failed glazes—and learn how to fix them fast.
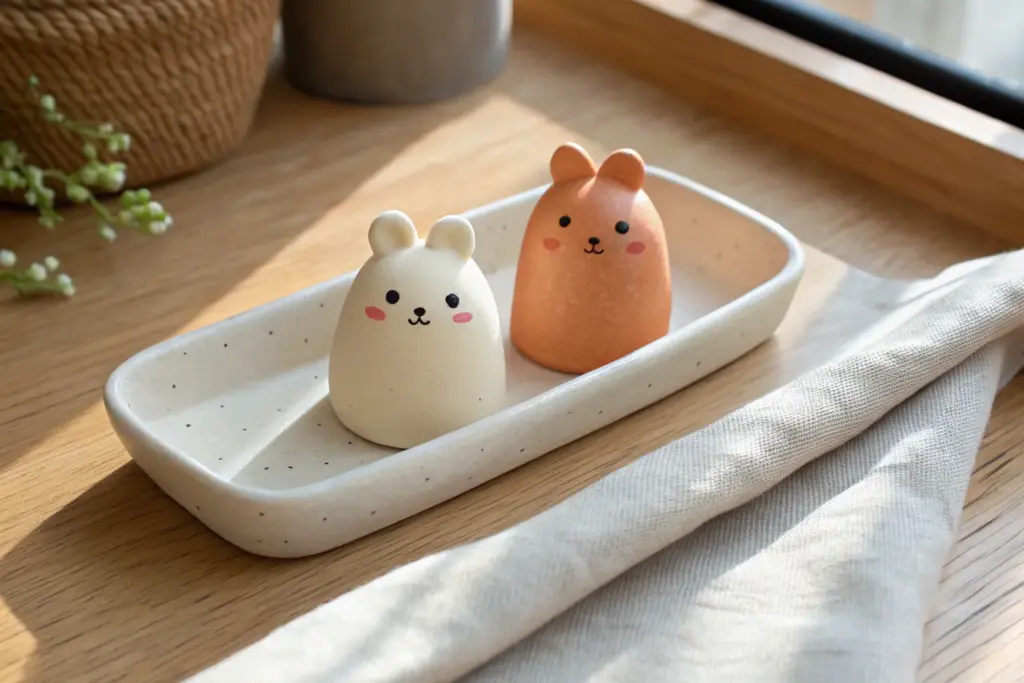
Mini Blob Animal Desk Buddies
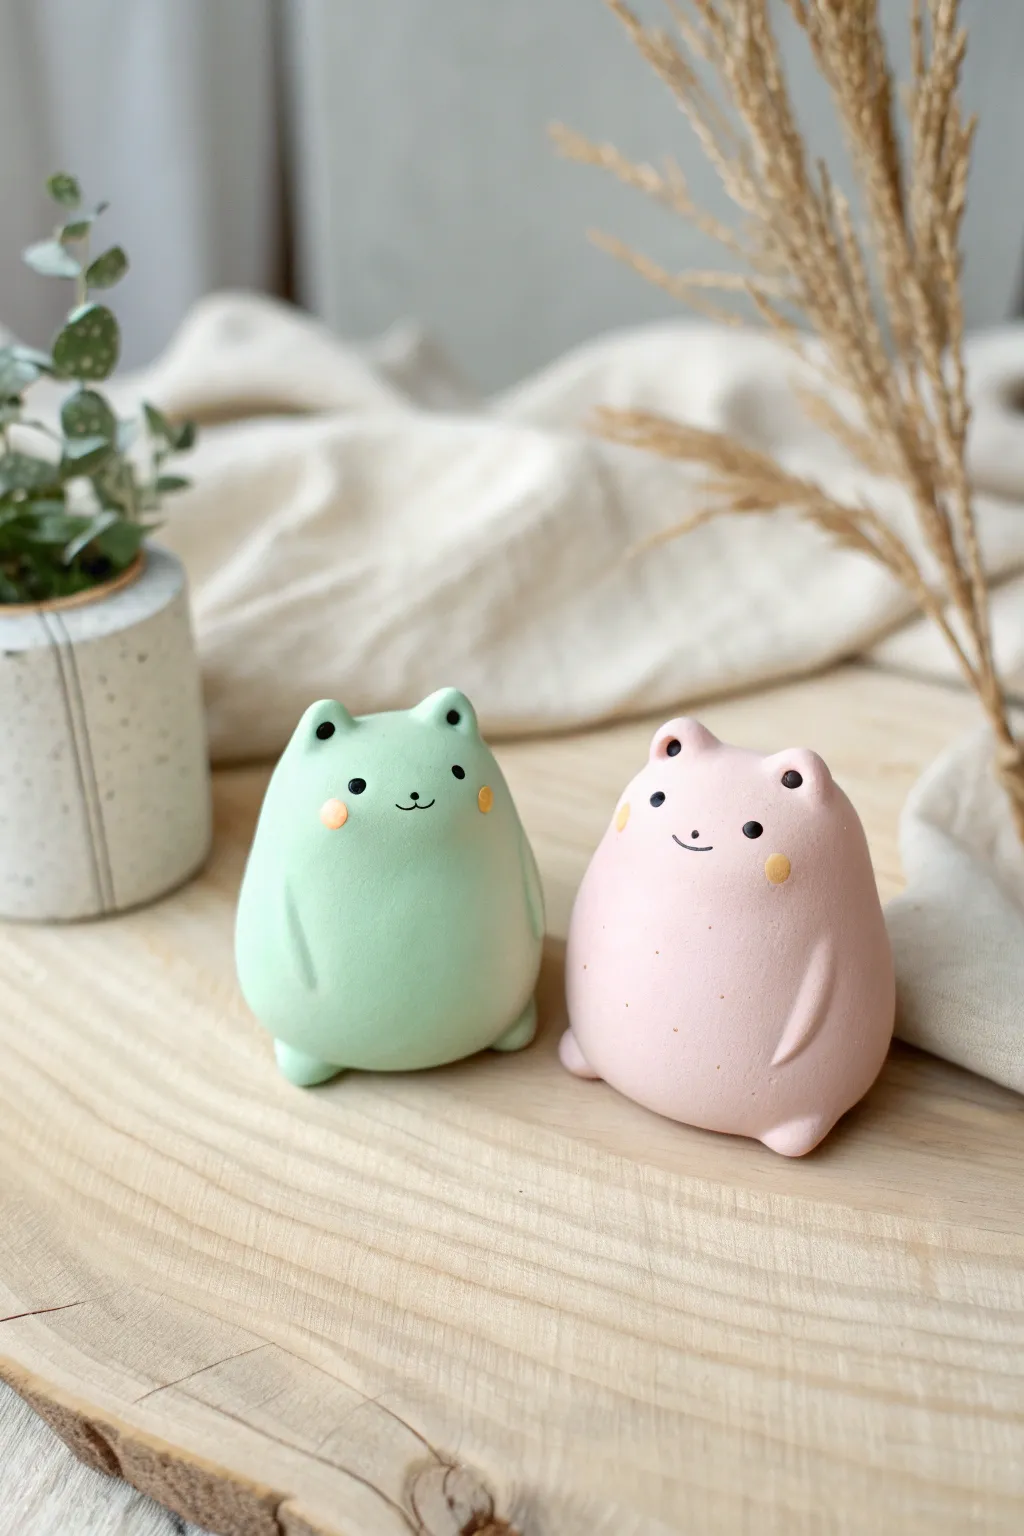
These delightfully rotund desk friends are the definition of cuteness overload, featuring a smooth, matte finish and minimalist faces. Perfect for a cozy crafting date, these “blob animals” prove that simple shapes often make for the most charming sculptures.
Step-by-Step Guide
Materials
- Polymer clay (light mint green and soft baby pink)
- Black acrylic paint
- Yellow or orange acrylic paint
- Fine-point dotting tool or toothpick
- Small paintbrush
- Smooth work surface (ceramic tile or glass)
- Oven (for baking)
- Foil or parchment paper
- Matte varnish (optional)
Step 1: Shaping the Base
-
Condition the clay:
Start by warming the polymer clay in your hands. Knead the green and pink clay separately until they are soft, pliable, and free of cracks. This conditioning step is crucial for a smooth finish later. -
Form the main body:
Roll each color into a smooth ball about the size of a plum. Gently taper the top slightly so it looks like a very stout teardrop or gumdrop shape. -
Flatten the bottom:
Tap the bottom of your clay ball against your work surface. You want it to sit flat and stable without rocking, creating that distinct ‘blob’ silhouette that anchors the figure. -
Create the ears:
For the green froggy friend, pinch two tiny triangles of green clay. Attach them gently to the top of the head, smoothing the seams downward with your thumb until the join is invisible. -
Round the bear ears:
For the pink friend, create two small balls of pink clay instead. Press them onto the top corners of the head and use a modeling tool or your pinky finger to blend the clay into the main body.
Step 2: Adding Details
-
Sculpt the arms:
Roll very thin, short snakes of clay in the matching body color. These should be slender and subtle. -
Attach the arms:
Press these thin rolls vertically against the sides of the body. Blend the top and back edges into the body so they look like slight ridges rather than separate pieces, giving the impression of tiny arms resting against a big belly. -
Make the feet:
Form two tiny spheres for each animal. Place them at the bottom front of the body and press slightly so they bulge out, creating nubby little feet. -
Smoothing:
I like to take a moment here to gently rub the entire surface with a fingertip dipped in a tiny bit of baby oil or cornstarch. This removes fingerprints and ensures that matte, pottery-like texture. -
Check stability:
Give your little buddies a gentle nudge. If they tip over, flatten the base a bit more or adjust the feet to act as stabilizers.
Remove Fingerprints
Before baking, lightly brush your raw clay sculpture with a soft brush dipped in baby powder or cornstarch. This gently buffs away prints for a professional finish.
Step 3: Baking and Painting
-
Bake carefully:
Place your figures on parchment paper or a ceramic tile. Bake according to your clay package instructions (usually 275°F/135°C for 15-30 minutes per 1/4 inch thickness). Let them cool completely before handling. -
Paint the eyes:
Dip a dotting tool or the back of a paintbrush into black acrylic paint. Stamp two wide-set eyes on the upper third of the face. -
Add the nose/mouth:
Using your finest brush or a toothpick, paint a tiny black nose between the eyes and a small, delicate smile curve underneath. -
Rosy cheeks:
Mix a tiny bit of orange or yellow paint with white to get a soft pastel. Using a clean dotting tool, place perfectly round blush circles just outside and below the eyes. -
Final coat:
Once the paint is fully dry, you can brush on a layer of matte varnish to protect the paint without making the animal shiny, preserving that soft ceramic look.
Burned Clay?
If your clay is browning in the oven, create a ‘tent’ of aluminum foil over the sculptures. This protects them from direct heat and prevents scorching.
Now you have a pair of adorable, silent companions ready to cheer you on while you work
Game Night Token Set You Design Together
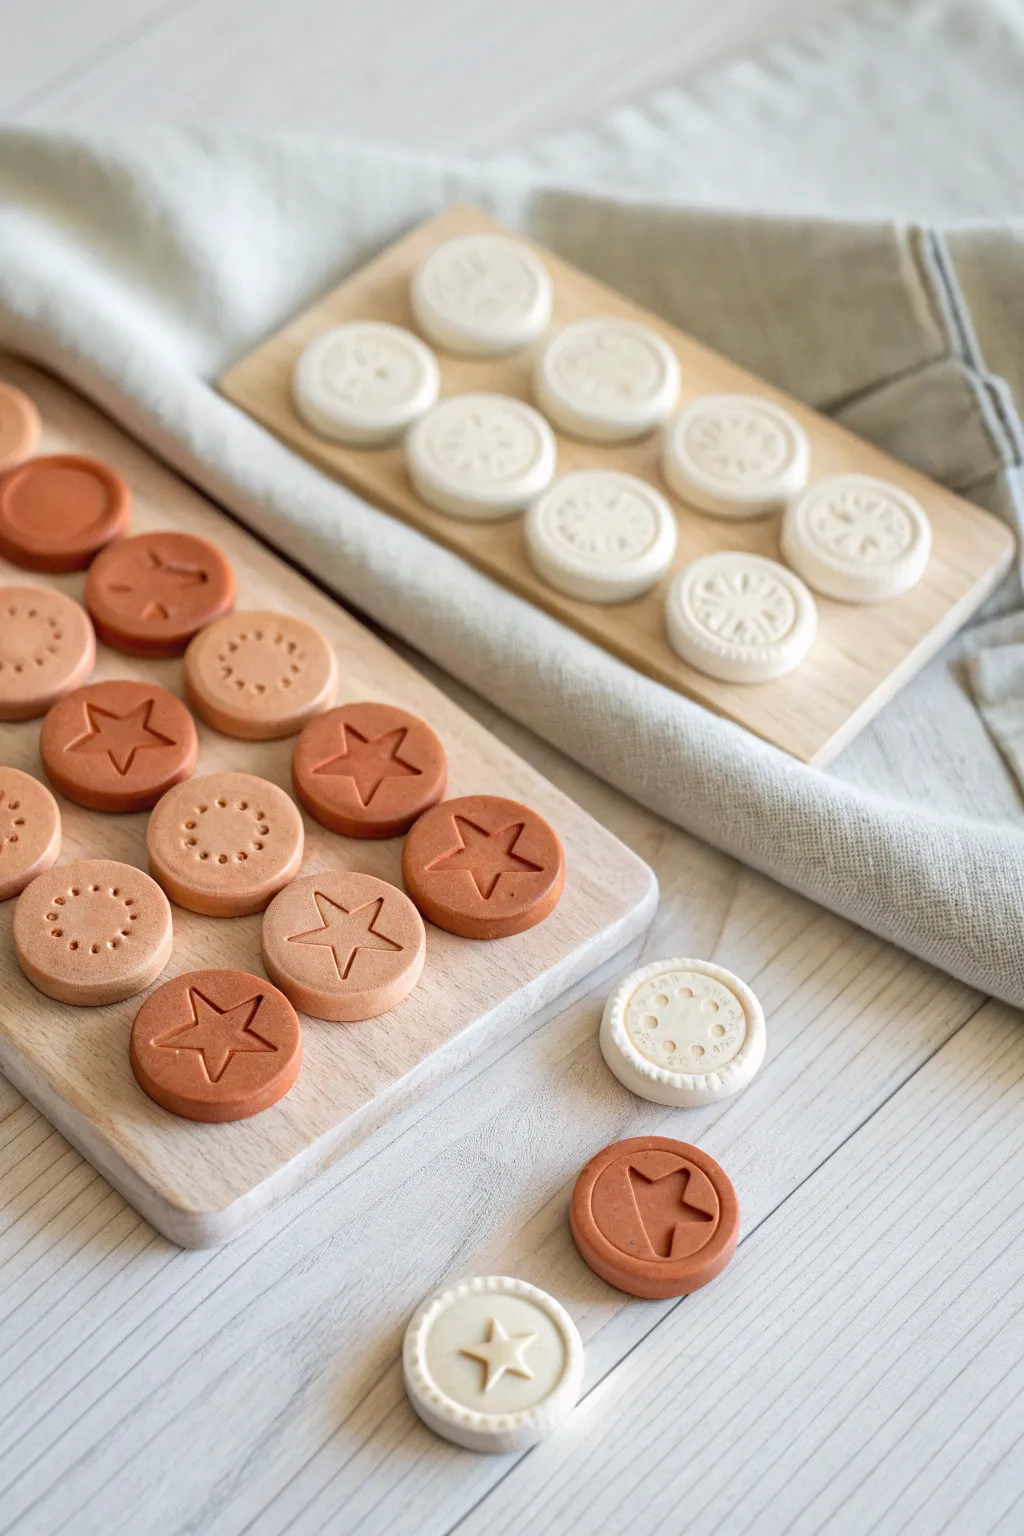
Elevate your favorite board games or create your own with this charming set of handmade clay tokens. Featuring earthen terracotta tones and creamy white finishes, these tactile pieces bring a personalized, artisanal touch to game night.
Detailed Instructions
Materials
- Terracotta-colored polymer clay
- White or cream-colored polymer clay
- Small circular cookie cutters (approx. 1 inch diameter)
- Acrylic rolling pin
- Parchment paper
- Texture tools (star stamps, drinking straws, toothpicks)
- Small fondant stamps (stars, geometric shapes)
- Fine-grit sandpaper (optional)
- Baking sheet
- Oven (if using polymer clay)
Step 1: Preparing the Clay
-
Condition the clay:
Start by warming the terracotta clay in your hands. Knead it thoroughly until it is soft, pliable, and free of cracks. Repeat this process separately for the white clay, ensuring your hands are clean between colors to avoid staining the white. -
Roll it out:
Place the terracotta clay on a sheet of parchment paper to prevent sticking. Using an acrylic rolling pin, roll the clay out to an even thickness of about 1/4 inch (6mm). You want these to feel substantial, like a heavy coin or poker chip. -
Cut the bases:
Press your circular cutter firmly into the clay to create the token shapes. Cut as many circles as you need for your game set. -
Clean the edges:
Gently lift the circles from the parchment. Run your finger lightly around the circumference of each circle to smooth out any rough cut marks or sharp edges. -
Repeat for white clay:
Clean your rolling pin and work surface, then repeat the rolling and cutting process with the white clay to create the opposing team’s tokens.
Clean Stamping Tip
If your novelty stamps are sticking to the clay, lightly dust the stamp surface with cornstarch or baby powder before pressing it down for a crisp release.
Step 2: Designing the Symbols
-
Plan your patterns:
Decide on distinct symbols for different point values or player pieces. The example uses stars as a primary motif and dotted circles as a secondary design. -
Stamp the stars:
Take a star-shaped stamp or a small fondant cutter and press it gently into the center of your terracotta circles. Apply enough pressure to leave a clear indentation without piercing all the way through the token. -
Create dotted details:
For the circular designs, use the blunt end of a small toothpick or a specialized dotting tool. Press a ring of small dots into the clay surface. -
Add radial lines:
On the white tokens, try creating a sunburst effect. Use a knife tool or the edge of a credit card to gently impress lines radiating from the center to the edge. -
Mix and match:
Feel free to experiment with combinations. Some tokens might feature a central star with a dotted border, while others remain simpler. Consistency within ‘suits’ helps gameplay, but variety adds visual interest. -
Smooth imperfections:
After stamping, double-check that the pressure didn’t warp the round shape. Gently nudge them back into perfect circles if necessary.
Gilded Details
For a luxe upgrade, rub a tiny amount of gold mica powder or acrylic paint into the indented star patterns before baking to make the design pop.
Step 3: Baking and Finishing
-
Arrangement:
Transfer your parchment paper with the tokens directly onto a baking sheet. Space them out evenly so they bake consistently. -
Bake:
Bake the tokens according to the specific temperature and time instructions on your package of polymer clay. Terracotta colors can darken if overheated, so I keep a close eye on the oven temperature specifically for this batch. -
Cool down:
Remove the tray from the oven and allow the tokens to cool completely. They will harden fully as they return to room temperature. -
Sand edges:
Once cool, inspect the edges. If there are any sharp bits remaining, lightly buff the rim with fine-grit sandpaper for a professional, smooth hand-feel. -
Seal (optional):
For extra durability during intense gaming sessions, you can apply a very thin layer of matte varnish, though leaving them raw preserves that lovely natural stone look.
Now you have a durable, custom set of tokens ready for your next competitive game night


What Really Happens Inside the Kiln
Learn how time and temperature work together inside the kiln to transform clay into durable ceramic.
Photo Holder Mini Stand Pair
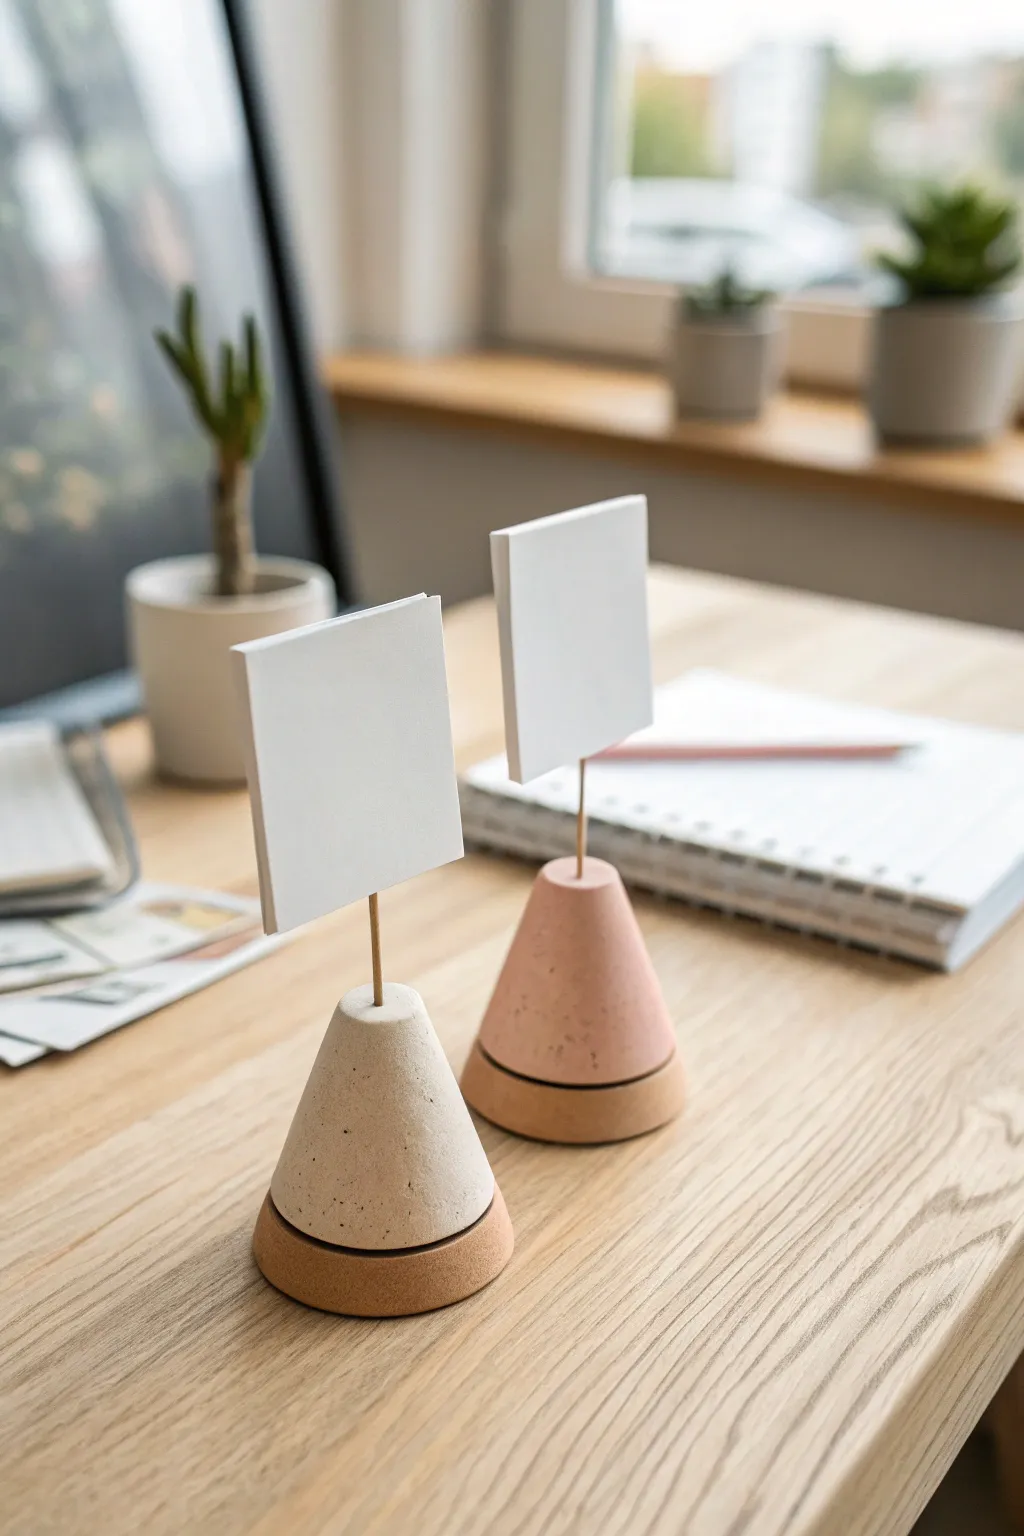
These sleek, conical photo stands bring a touch of modern elegance to your desk, combining a soft, concrete-style finish with a warm cork base. They are perfect for displaying polaroids, seating cards, or motivational quotes.
How-To Guide
Materials
- Polymer clay (white and soft pink granite/speckled effect)
- Thin cork sheet or round cork coaster
- Gold or brass jewelry wire (approx. 18-20 gauge)
- Wire cutters
- Superglue or strong craft adhesive
- Sandpaper (fine grit)
- Rolling pin
- Cone mold (silicone) or DIY paper cone template
- Blade or X-Acto knife
- Cardstock or small photos for display
Step 1: Shaping the Cone Base
-
Condition the polymer clay:
Start by warming up your speckled white and pink polymer clay in your hands until it becomes soft and pliable. This prevents cracks during shaping. -
Form the initial shape:
Roll each color into a smooth ball free of seams. Gently begin to taper one end by rolling it between your palms with uneven pressure to create a teardrop shape. -
Refine the cone shape:
Press the wide end flat against your work surface to create a stable bottom. Roll the sides gently on the table to sharpen the point, ensuring the cone is symmetrical and about 2-3 inches tall. -
Flatten the top:
Instead of a sharp point, gently tap the top of the cone to flatten it slightly. This creates a surface for the wire to enter without cracking the tip. -
Smooth the surface:
Use your fingertips or a smooth tool to buff out any fingerprints. I find that lightly dusting my finger with cornstarch helps glide over the clay without leaving marks. -
Bake the cones:
Place your clay cones on a baking sheet lined with parchment paper. Bake according to the manufacturer’s instructions on your clay package (usually around 275°F/135°C for 15-30 minutes). -
Cool completely:
Let the cones cool down fully before handling them. The clay hardens permanently as it cools.
Clean Lines Only
To get that perfectly flat bottom on your cone, gently freeze the unbaked clay shape for 10 minutes before slicing the base with a sharp blade.
Step 2: Adding the Hardware & Base
-
Prepare the wire stem:
Cut two pieces of brass wire, each about 3 inches long. Use pliers to make sure the wire is perfectly straight. -
Drill the top hole:
Using a small hand drill or twisting the wire firmly, create a small hole in the center of the flattened top of each cone. It should be about half an inch deep. -
Create the card slot:
At the top end of your wire, you can create a simple split. Alternatively, since the image shows a clean invisible hold, simply make a tiny vertical slit in the top of the clay cone itself if preferred, but for this specific wire look, attach a small alligator clip or form a double loop at the top of the wire to slide paper in. -
Secure the wire:
Dip the bottom end of the wire into a small dot of superglue and insert it firmly into the hole you drilled in the cone. -
Cut the cork bases:
Place your cooled clay cone onto the cork sheet and trace around the bottom circle. Cut this circle out carefully with your X-Acto knife. -
Attach the cork:
Apply a thin layer of strong craft adhesive to the bottom of the clay cone. Press the cork circle firmly onto the clay, aligning the edges perfectly. -
Clean up edges:
Once the glue is dry, use fine-grit sandpaper to gently sand the edge where the cork meets the clay for a seamless transition. -
Final wipe down:
Wipe the entire piece with a slightly damp cloth to remove any sanding dust.
Paint Dip Finish
Instead of cork, try dipping the bottom half inch of your baked cone into liquid gold leaf paint for a glamorous metallic accent.
Set your completed holders on your desk and slide in your favorite memory for an instant mood boost
Food With Faces Magnet Set
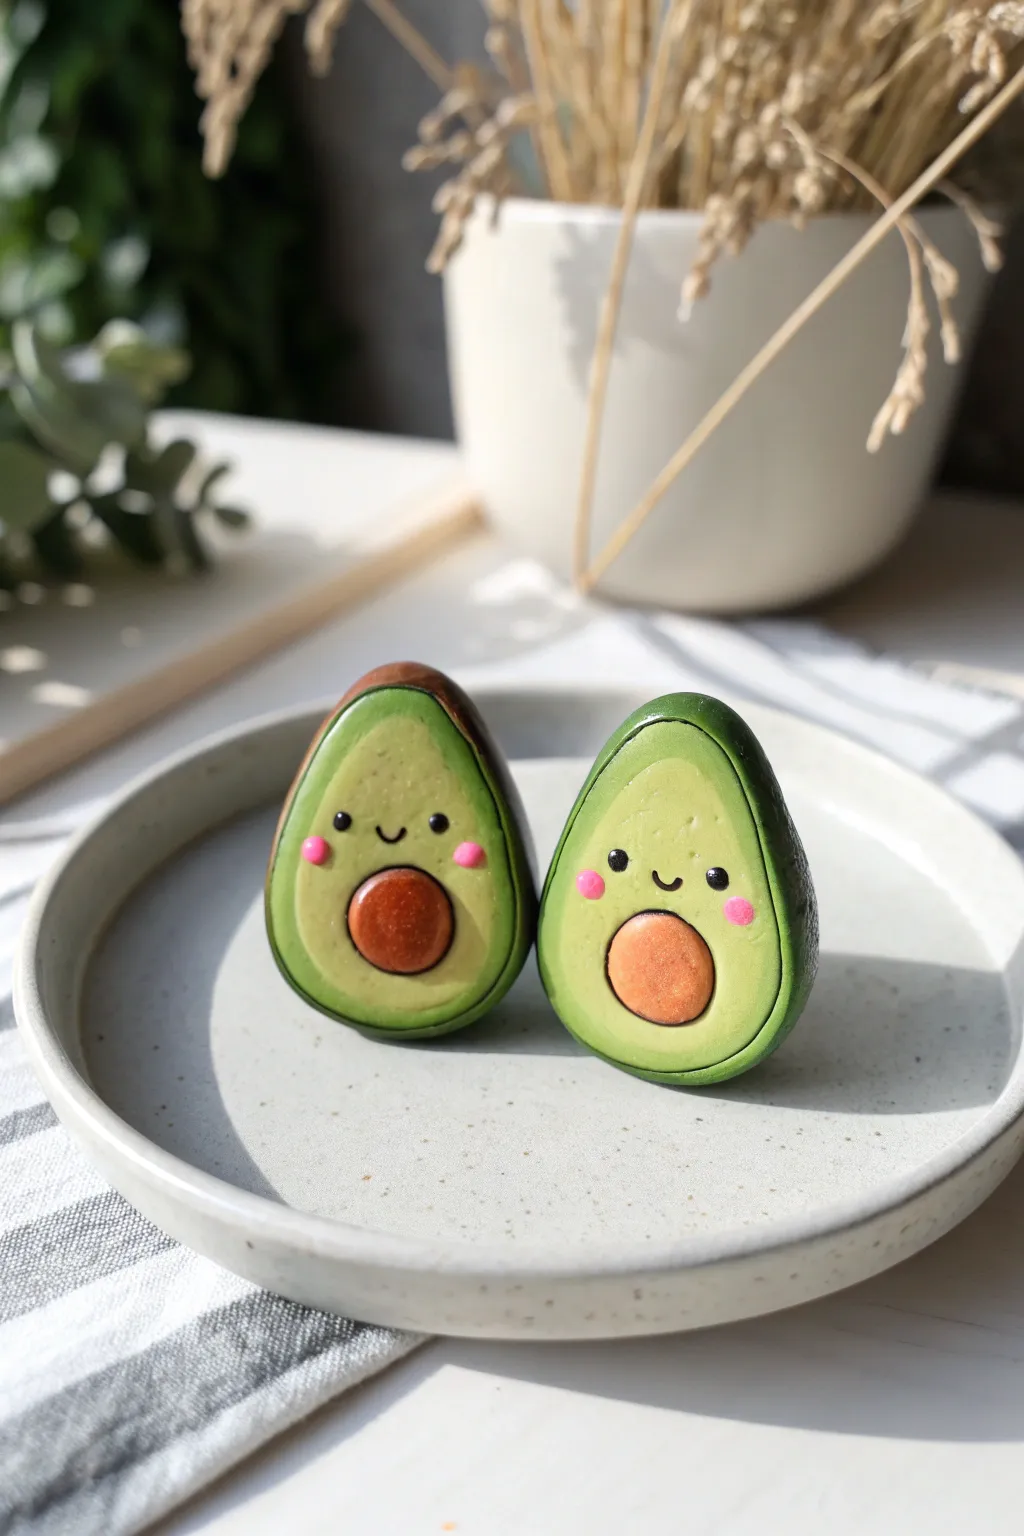
These charming avocado halves bring a dose of cheer to any fridge or magnetic board with their rosy cheeks and friendly smiles. sculpted from polymer clay, they feature a smooth, rounded finish and realistic two-tone green shading that makes them look almost good enough to eat.
Step-by-Step Tutorial
Materials
- Polymer clay (dark green, light yellow-green, brown, black, pink)
- Strong round magnets (neodymium recommended)
- Superglue or heavy-duty craft glue
- Sculpting tools (ball styluses, flexible blade)
- Acrylic roller or pasta machine
- Soft pastel chalks (dark green) for shading
- Soft paintbrush
- Gloss glaze or polyurethane varnish (optional)
Step 1: Sculpting the Base
-
Mix your greens:
Start by conditioning your clay. You’ll need two distinct shades of green: a darker forest green for the ‘skin’ and a very pale, yellowish-green for the ‘flesh.’ If your greens are too bright, mix in a tiny speck of brown to knock back the saturation. -
Form the interior shape:
Take a walnut-sized ball of the pale yellow-green clay and roll it into a smooth teardrop shape. Flatten the back against your work surface so it becomes a half-teardrop, roughly 1.5 inches tall. -
Create the skin layer:
Roll out a thin sheet of the dark green clay, about 2mm thick. Gently wrap this sheet around the curved back and sides of your pale teardrop, trimming away excess from the flat back. -
Blend surface seams:
Use your fingers to smooth the transition where the dark skin meets the pale flesh on the front edge, ensuring the dark green creates a nice, even border around the face.
Clean Clay Pro Tip
White and pale green clay picks up dust easily. Keep a pack of baby wipes nearby and clean your hands and tools thoroughly before handling lighter colors to avoid grey smudges.
Step 2: Adding the Details
-
Make the pit indentation:
Press a larger ball tool or your thumb into the lower center of the avocado to create a rounded hollow where the seed will sit. Make it deep enough to cradle the pit securely. -
Form the pit:
Roll a ball of brown clay that fits snugly into your indentation. For realism, I like to flatten it slightly rather than keeping it perfectly spherical so it doesn’t protrude too far. -
Texture the pit:
Before placing the pit permanently, gently roll it over a piece of sandpaper or tap it with a toothbrush to give it a realistic, slightly rough texture. -
Insert the pit:
Press the brown pit into the hollow. If you aren’t baking immediately, a drop of liquid clay (Bake & Bond) helps secure it. -
Shade the gradient:
Scrape a little dark green soft pastel into a powder. Using a soft dry brush, gently dust the outer edges of the pale green flesh to create a soft, ripe gradient transition towards the skin.
Step 3: Creating the Face
-
Add the eyes:
Roll two minuscule balls of black clay. Position them fairly wide apart on the upper half of the avocado, above the pit. -
Flatten the eyes:
Gently press the black balls flat against the surface so they don’t look like bug eyes. They should be flush with the green clay. -
Carve the mouth:
Use a small needle tool or a very thin curved blade to press a tiny smile into the clay between the eyes. A simple ‘U’ shape works best for that classic kawaii look. -
Add rosy cheeks:
Roll two tiny ovals of pink clay. Press them onto the cheeks, just below and to the outside of the eyes, flattening them well.
Level Up: Accessories!
Give your avocados personality! Before baking, sculpt a tiny clay bow for the top of one, or add microscopic clay glasses made of thin black wire to make a smart avocado.
Step 4: Finishing Up
-
Embed the magnet (Option A):
If you want the magnet hidden, press your magnet into the flat back of the raw clay until it is flush. Be sure your magnet is oven-safe (ceramic magnets are, neodymium usually are not). -
Bake the clay:
Bake the avocados according to your clay manufacturer’s instructions, usually at 275°F (130°C) for about 15-30 minutes depending on thickness. -
Apply the magnet (Option B):
If using strong neodymium magnets (which can lose strength in heat), wait until the clay is fully baked and cooled. Glue the magnet to the flat back using strong superglue. -
Glaze the pit:
For a nice contrast, apply a coat of gloss glaze only to the brown pit and the black eyes. This makes them look wet and shiny while keeping the rest matte. -
Final cure:
Let any glue or varnish dry completely before sticking your new friend to the fridge.
Now your fridge has the cutest produce section in town, ready to hold up your grocery lists.

TRACK YOUR CERAMIC JOURNEY
Capture glaze tests, firing details, and creative progress—all in one simple printable. Make your projects easier to repeat and improve.
Mood Octopus Pair in Two Colors
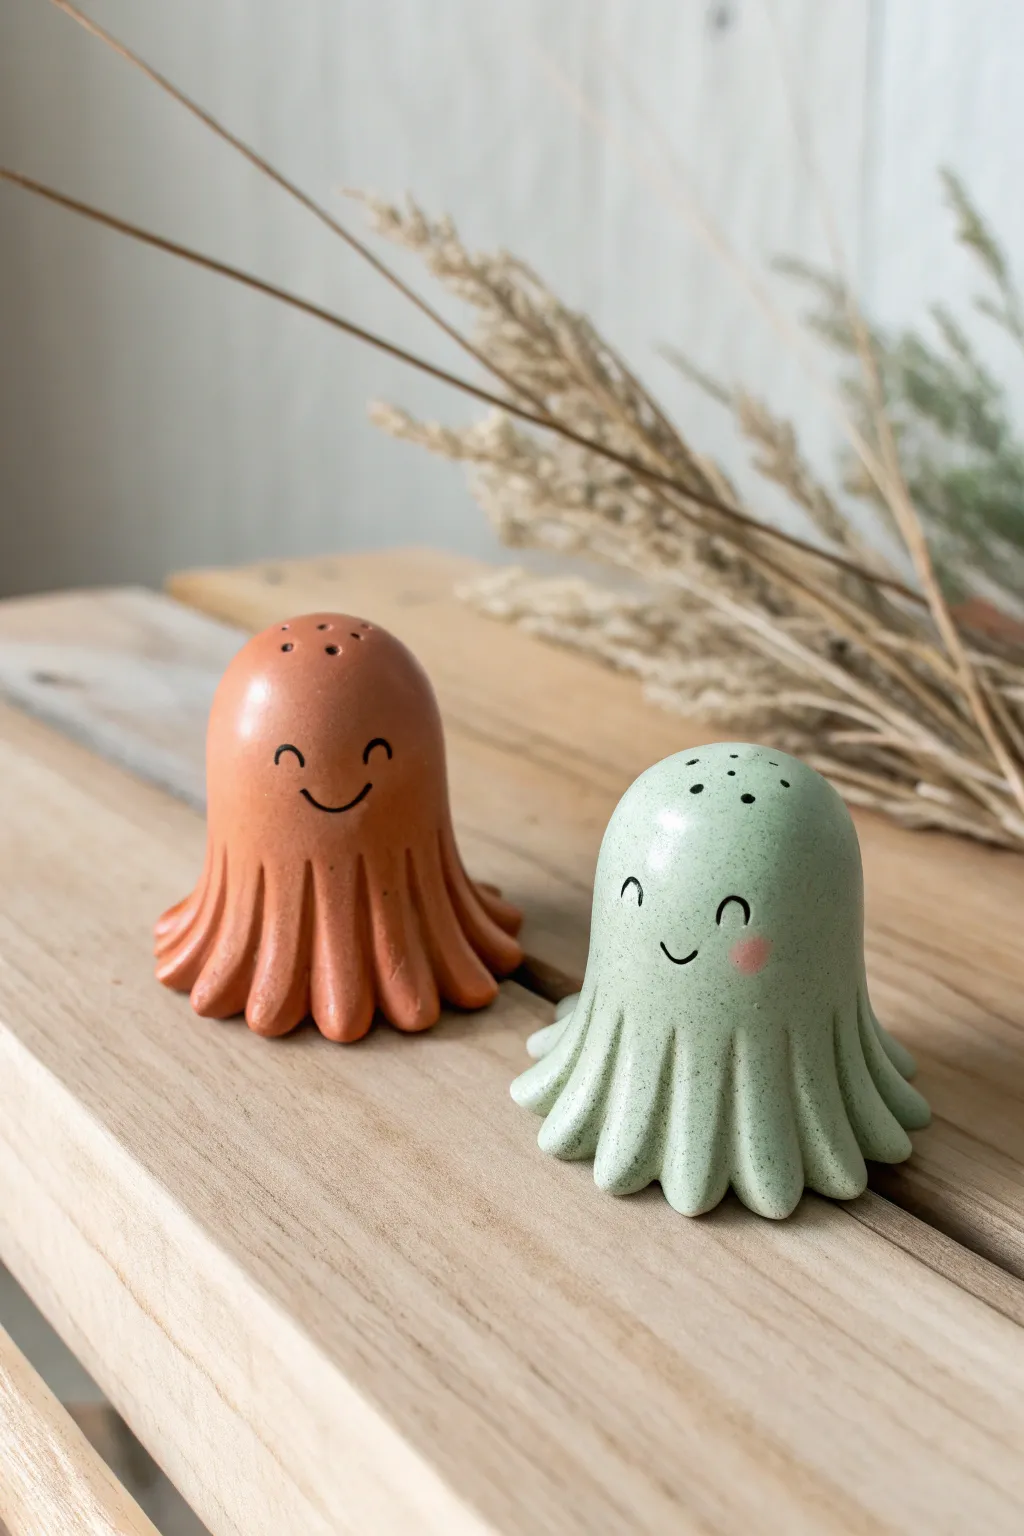
These adorable salt and pepper shakers bring a touch of whimsy to your table with their sweet expressions and soft, earthy tones. Modeled as friendly octopuses, these functional sculptures are perfect for a cozy clay date project.
Detailed Instructions
Materials
- Polymer clay (terracotta or reddish-brown color)
- Polymer clay (speckled sage green)
- Black acrylic paint or fine-point black marker
- Pink chalk pastel or blush (for cheeks)
- Clay sculpting tools (needle tool, small ball stylus)
- Toothpick or large needle (for shaker holes)
- Smooth rolling pin
- Aluminum foil
- Rubber stopper plugs (small size)
- Gloss varnish or resin (optional)
Step 1: Shaping the Bodies
-
Condition the clay:
Start by warming up your terracotta and sage green polymer clay in your hands until it is soft and malleable. This prevents cracking later. -
Form the core:
Crumple a small ball of aluminum foil about the size of a golf ball. This saves clay and keeps the figure lightweight. Make two of these. -
Cover with clay:
Roll your clay into a sheet about 1/4 inch thick. Wrap it smoothly around the foil ball, gently smoothing out seams until you have a seamless egg-like dome shape. -
Create the base:
Flatten the bottom of your shape slightly so it stands upright on your work surface without tipping over. -
Hollow the bottom:
Using a sculpting tool, carefully carve out a hole in the bottom center. This hole needs to be the exact size of your rubber stopper plug, so test the fit frequently.
Cracks Appearing?
If you see tiny cracks while smoothing, dab a drop of baby oil or liquid clay softener on the area and massage it in circular motions to blend.
Step 2: Sculpting Tentacles
-
Draft the tentacles:
Around the bottom edge of your dome, use a tool to lightly mark out 8 equal sections where the legs will go. -
Pull the clay:
Gently pull and pinch the clay downwards at your marked sections to create short, stubby tentacles. -
Refine the shape:
Use your fingers to round off the tips of each tentacle so they look soft and chubby, flaring them slightly outward on the table. -
Define the gaps:
Use a modeling tool to deepen the grooves between each tentacle, ensuring they look distinct but still connected to the main body. -
Smooth the surface:
I like to use a tiny bit of baby oil on my fingertip to smooth away any fingerprints or tool marks on the dome and tentacles before detailing.
Textured Finish
Before baking, gently roll a clean toothbrush or stiff bristle brush over the green octopus to enhance the speckled ‘stone’ effect.
Step 3: Details & Baking
-
Add shaker holes:
Using a toothpick or large needle, poke holes in the top of the head. Create a pattern, such as five holes for salt and three for pepper. -
Clean the holes:
Ensure the holes go all the way through to the foil core (or hollow space). Twirl the tool slightly as you remove it to keep the edges clean. -
Bake the figures:
Bake the clay pieces according to the package instructions (usually 275°F for 15-30 minutes). Let them cool completely before painting.
Step 4: Finishing Touches
-
Draw the face:
Using a very fine paintbrush and black acrylic paint, paint two small arches for closed, happy eyes and a small ‘u’ shape for a smile. -
Add rosy cheeks:
Scrape a little pink chalk pastel into powder. Use a soft brush or cotton swab to gently dab a rosy spot onto the green octopus’s cheek. -
Seal the work:
Apply a thin coat of matte or gloss varnish to protect the paint and give the ceramic a finished look, making sure not to clog the shaker holes. -
Remove the core:
Once fully cured, use tweezers through the bottom hole to carefully pull out the aluminum foil interior so you can fill it with spices. -
Insert stopper:
Fill your new shakers with salt and pepper, pop the rubber stopper into the bottom hole, and they are ready for the table.
Enjoy your charming new dining companions knowing you made them by hand
Constellation Plaque of Your Anniversary
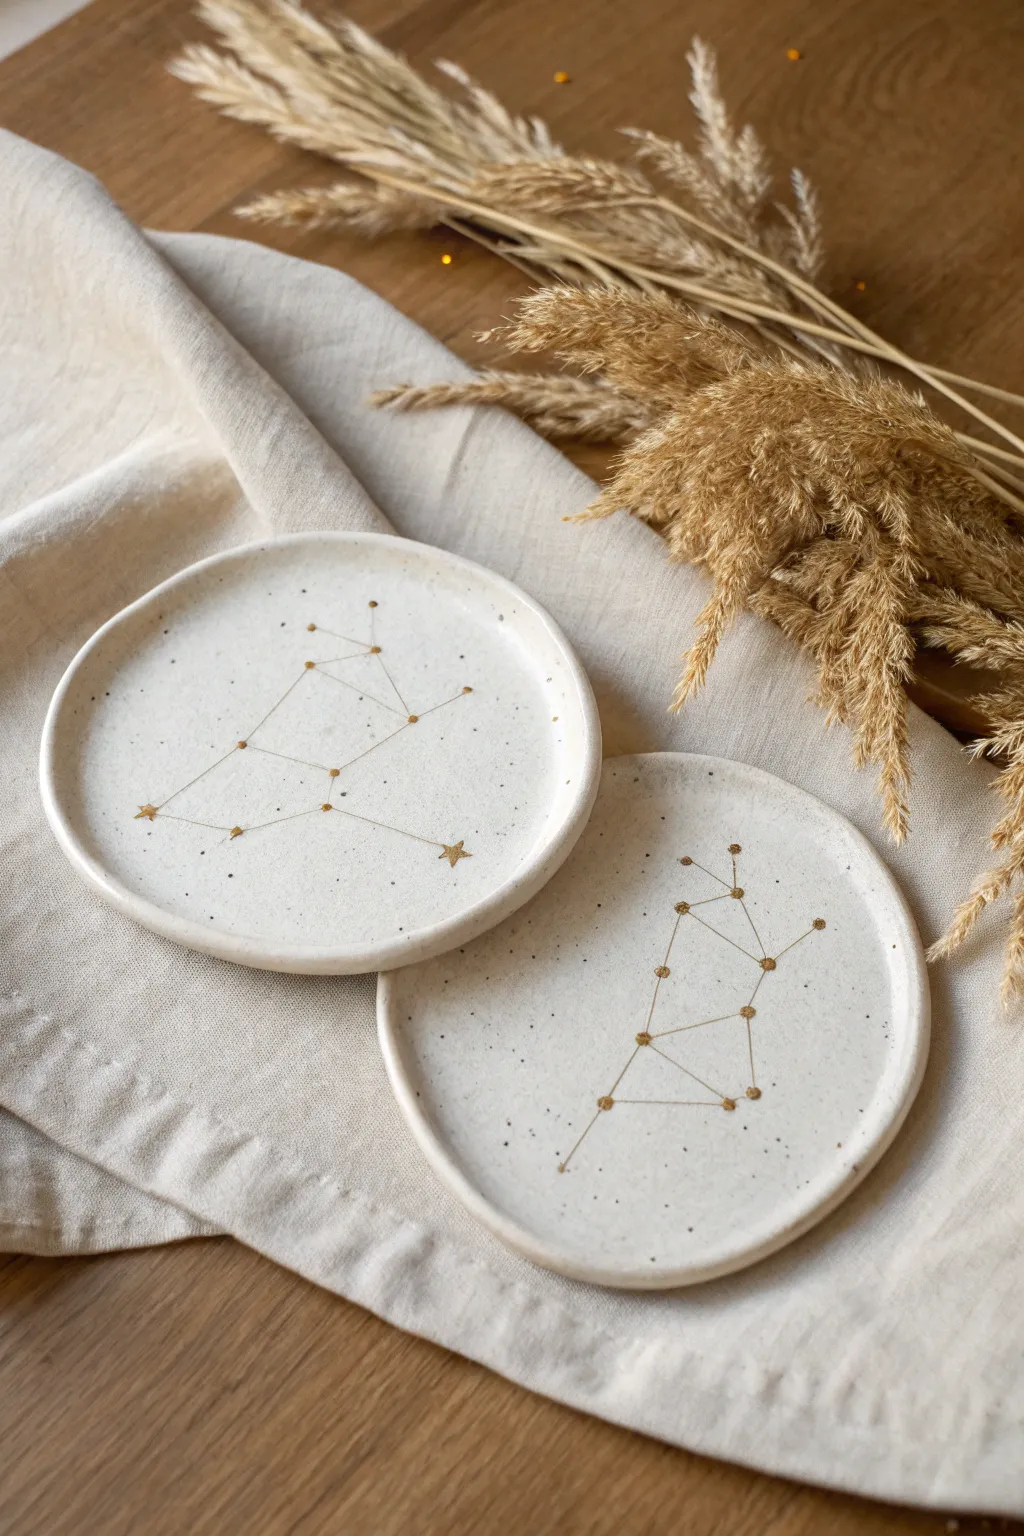
These delicate ceramic plaques serve as a beautiful, personalized memento of a special date or anniversary. Featuring minimalist hand-painted constellations on a speckled cream background, they make for perfect ring dishes, coasters, or wall art.
Detailed Instructions
Materials
- White or speckled stoneware clay (low fire or cone 6)
- Round cookie cutter or bowl (approx. 4-5 inches)
- Rolling pin
- Sponge
- Small needle tool or toothpick
- Fine-point paintbrush
- Gold luster or liquid gold leaf
- Clear glossy glaze (food safe if using for food)
- Kiln (or access to a firing service)
- Sandpaper (fine grit)
- Printed constellation reference
Step 1: Planning & Forming
-
Prepare your template:
Before touching clay, choose the constellation that matches your anniversary date or zodiac sign. Print it out or keep an image handy as a reference. -
Roll the clay:
Take a workable chunk of your stoneware clay and roll it out into an even slab, aiming for about 1/4 inch thickness. I prefer to roll in different directions to ensure the clay particles are compressed well. -
Cut the circles:
Use your round cookie cutter or a bowl turned upside down to cut clean circles from the slab. Make as many as you need, leaving a little extra clay for testing. -
Smooth the edges:
Dip your finger or a small sponge in water and gently run it along the cut rim of the circle to soften the sharp edge. -
Create the lip:
Gently pinch the outer edge of the circle upwards to create a slight rim. This gives it a dish-like shape rather than a flat tile.
Wobbly Lines?
If your hand shakes while painting thin gold lines, rest your pinky finger on the dry part of the plate to stabilize your hand while you work.
Step 2: Decorating & Firing
-
Map the stars:
Using your reference image, lightly mark the position of your stars with a needle tool. Ensure the spacing looks centered before committing to the lines. -
Add texture (optional):
If you want the stars to have a physical indent, press the needle tool a bit deeper at your star points, but be careful not to pierce through the slab. -
Slow drying:
Let the pieces dry slowly under loose plastic for a day or two to prevent warping, then uncover them until bone dry. -
Bisque fire:
Fire the bone-dry pieces in the kiln to bisque temperature (usually Cone 04). This hardens the clay so it’s ready for glazing. -
Apply clear glaze:
Dip or brush a clear, glossy glaze over the entire piece. If you used speckled clay, this is where those lovely dark spots will get ready to pop. -
Glaze fire:
Fire the pieces again to the maturity temperature of your clay and glaze (often Cone 5 or 6). Let them cool completely.
Make It a Set
Create a pair: outline your partner’s zodiac on one plate and yours on the other, or do the night sky visible on your wedding night versus today.
Step 3: Gilding the Stars
-
Prepare the gold:
Once the fired piece is clean and dry, shake your gold luster or liquid gold leaf well. You want a consistent metallic fluid. -
Connect the dots:
Using your finest paintbrush, carefully paint thin gold lines connecting your star points, following the constellation pattern. -
Paint the stars:
At each connection point, paint a small solid circle. For the brightest stars in the constellation, you can paint a tiny five-point star graphic for emphasis. -
Clean up errors:
If you smudge the gold, use a Q-tip with a tiny bit of luster thinner (or acetone if using gold leaf) to wipe it away immediately. -
Final cure:
If using real ceramic gold luster, fire the piece a third time to Cone 018. If using liquid gold leaf for decorative-only items, simply let it air dry for 24 hours.
Place these starry dishes on your bedside table as a daily reminder of your special connection
Inside-Joke Figurine Duo Challenge
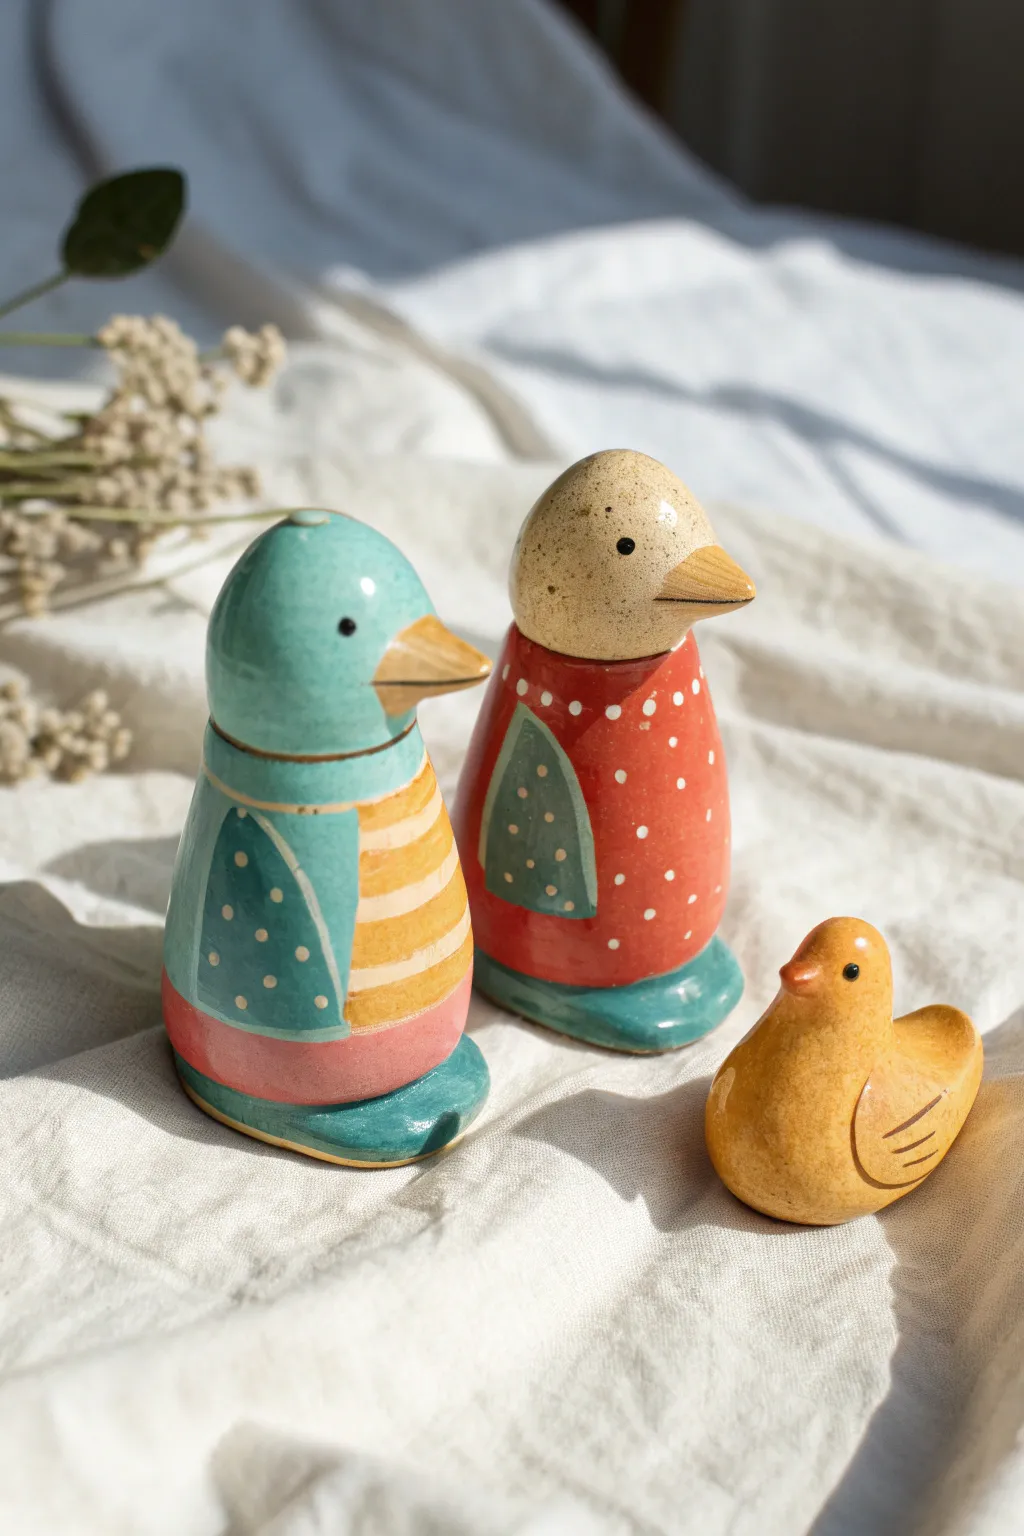
These charming, hand-sculpted birds bring a touch of playful personality to any shelf with their stylized bodies and intricate patterns. The project features two standing characters with colorful, textured “sweaters” and a smaller, simpler yellow duckling to complete the family.
Step-by-Step Guide
Materials
- Air-dry clay or polymer clay (white/neutral)
- Clay sculpting tools (needle tool, modeling tool)
- Small bowl of water (for smoothing)
- Acrylic paints (teal, tomato red, yellow, pink, white, black, beige)
- Fine-grit sandpaper
- Detail paintbrushes (liner, round size 2)
- Gloss varnish or polyurethane sealer
Step 1: Forming the Base Bodies
-
Shape the standing birds:
Start with two balls of clay. Roll them into elongated, rounded cone shapes, tapering slightly towards the top for the heads. Make sure the base is flat so they stand securely. -
Create the head separation:
Using your fingers or a smoothing tool, gently indent a ‘neck’ line about one-third of the way down from the top to distinguish the head from the body without fully separating them. -
Add the beak:
Roll small cones of clay and flatten them slightly. Score and slip (if using air-dry clay) to attach them to the center of the face area, blending the edges at the back of the beak into the head. -
Sculpt the wings:
Form flattened teardrop shapes for the wings. Press these onto the sides of the bodies, smoothing the top curve into the shoulder area while leaving the bottom edge slightly raised for dimension. -
Form the feet:
Create a distinct, flattened oval base separately, then attach the bird body on top of it. This acts as the feet or shoes, giving the figure a sturdy foundation. -
Sculpt the small duck:
For the littlest member, roll a simple oval shape. Pinch one end upwards to form the tail and the other upwards to form the neck and head. Attach a tiny beak and carve wing lines into the sides.
Step 2: Refining and Drying
-
Smooth the surface:
Dip your finger in a little water and gently rub out any fingerprints or cracks. The smoother the clay now, the better your paint job will look later. -
Dry completely:
Let the sculptures dry according to your clay’s instructions. Air-dry clay may take 24-48 hours. I find turning them occasionally helps them dry evenly. -
Sand imperfections:
Once fully cured, use fine-grit sandpaper to gently buff away any remaining rough spots, especially around the beaks and base.
Paint Looking Streaky?
If acrylics look thin or streaky, don’t apply thick blobs. Instead, wait for the first layer to dry completely and apply a second thin coat for opacity.
Step 3: Painting the Details
-
Base coat the heads and beaks:
Paint the beak a warm beige or light brown. For the tall bird on the left, paint the head teal; for the right bird, use a speckled beige (beige mixed with tiny white/brown flecks). -
Paint the body colors:
Block in the main body colors—tomato red for the right bird and a mix of teal/pink strips for the left. Don’t worry about patterns yet, just get solid coverage. -
Paint the wings and bases:
Paint the wings teal on both standing birds. Paint the base ‘shoe’ areas teal as well to unify the set. Paint the small duck a solid, sunny mustard yellow. -
Add the patterns:
Using your finest brush, add polka dots to the red bird’s body and the teal wings. For the left bird, carefully paint yellow horizontal stripes on the belly area. -
Define the face:
Use the handle end of a paintbrush dipped in black paint to dot the eyes. Being careful here is crucial for their cute expression. -
Add texture details:
For the beige-headed bird, I like to spatter a tiny bit of brown paint using an old toothbrush to create a speckled eggshell texture. -
Seal the work:
Finish with a coat of high-gloss varnish to give them that ceramic-glazed shine and protect the paint.
Shiny Eyes Trick
Add a tiny dot of white paint to the upper corner of the black eye pupil. This “catchlight” instantly makes your figurines look alive and friendly.
Place your trio on a sunny windowsill where their glossy finish can catch the light
Two-Halves Interlocking Sculpture Keepsake
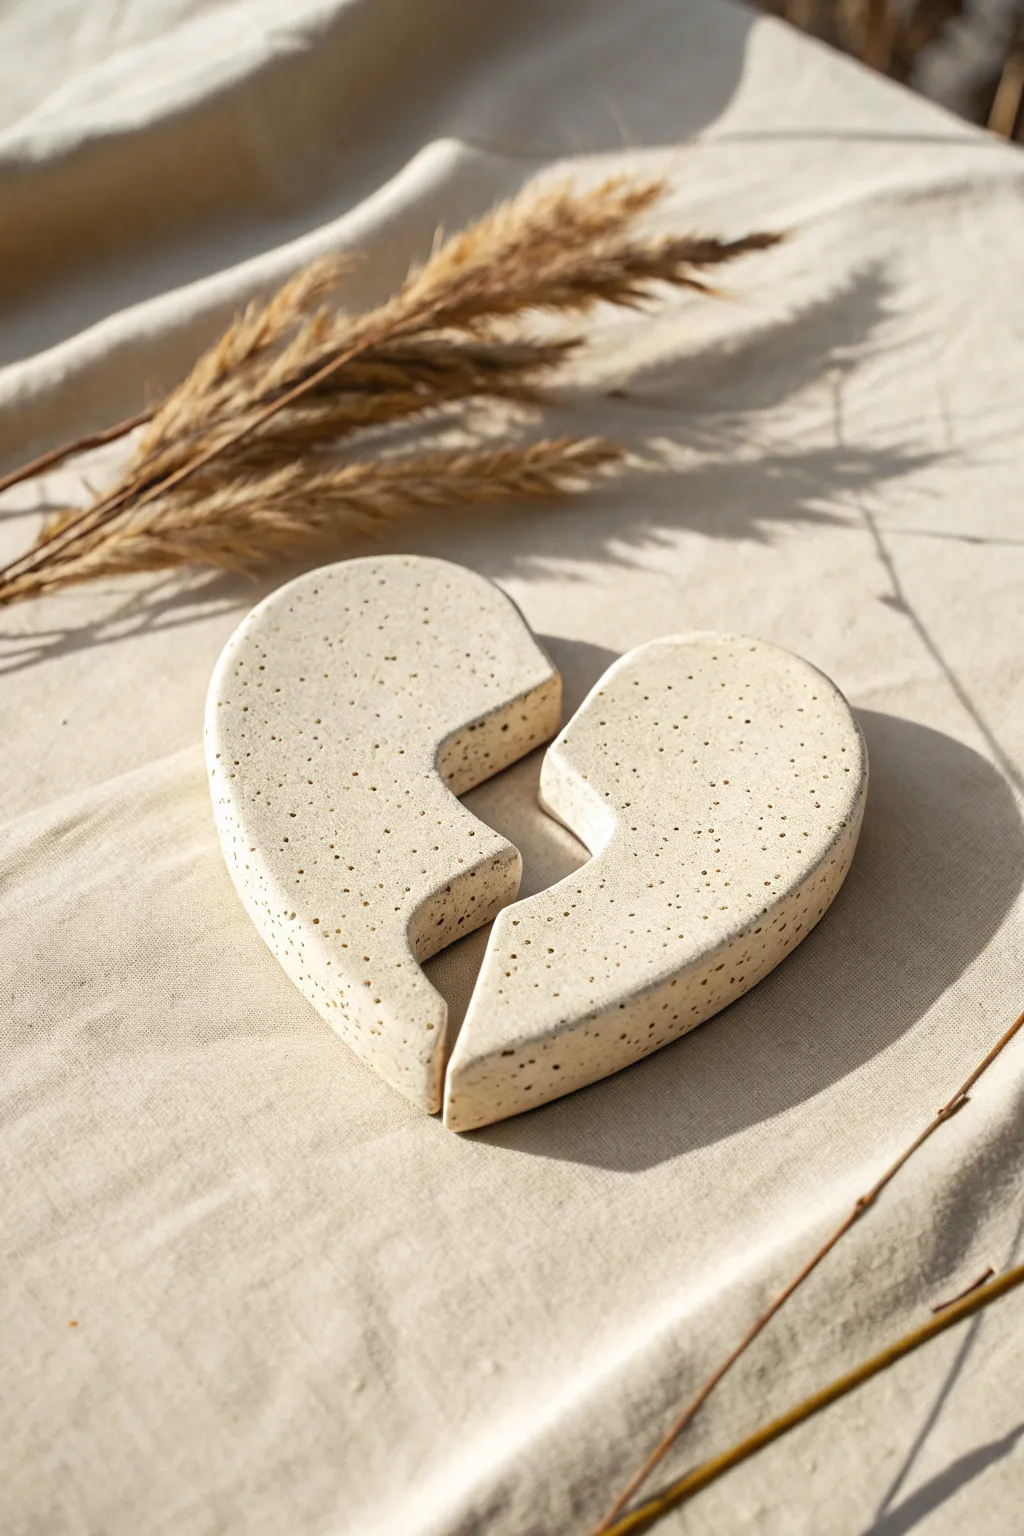
This charming project creates a minimalist heart sculpture that splits perfectly into two interlocking halves, symbolizing connection and partnership. The finish mimics speckled stoneware for an earthy, modern aesthetic that looks beautiful displayed together or kept separately as shared tokens.
How-To Guide
Materials
- Air-dry clay (stone or speckled effect) or polymer clay in a natural sand color
- Rolling pin
- Two 1/4 inch wooden guide strips (optional, for even thickness)
- Heart-shaped paper template (approx. 4-5 inches wide)
- Sharp craft knife or clay needle tool
- Fine-grit sandpaper (200-400 grit)
- Small bowl of water
- Sponge
- Clear matte varnish or sealant
Step 1: Shaping the Foundation
-
Prepare your workspace:
Lay down a smooth work surface or a piece of parchment paper to prevent the clay from sticking. If you are using polymer clay, knead it until it’s soft and pliable. -
Roll the slab:
Take a generous ball of clay and flatten it slightly with your palm. Place your guide strips on either side if you have them, and roll the clay out into a smooth, even slab about 1/4 to 1/2 inch thick. -
Check surface quality:
Inspect the surface for any air bubbles or unwanted textures. I like to run a slightly damp finger over the top to smooth out any tiny cracks before cutting. -
Trace the heart:
Place your heart-shaped paper template gently onto the clay slab. Using your craft knife or needle tool, cut vertically around the perimeter of the heart to create a clean outline. -
Remove excess clay:
Peel away the excess clay from the outside of the heart shape, setting it aside for future projects. Carefully lift the heart if needed to detach it from the surface, then place it back down.
Step 2: Creating the Interlock
-
Plan the dividing line:
Lightly sketch a zig-zag or puzzle-piece line down the center of the heart with your needle tool. Don’t cut all the way through yet; just mark where the separation will be ensuring you have at least one ‘outie’ and one ‘innie’ curve for a secure lock. -
Cut the separation:
Holding the craft knife perfectly vertical, slice along your sketched line. A clean, perpendicular cut is crucial here so the pieces fit back together without gaps. -
Separate gently:
Carefully slide the two halves apart. If the clay drags or sticks, use the knife to gently separate the fibers without deforming the puzzle edges. -
Smooth the edges:
Dip your finger in a little water and run it along the cut edges and the outer rim of the heart. You want to soften the sharp corners slightly to give it that stone-like, tumbled look shown in the photo. -
Add speckles (if needed):
If your clay isn’t pre-speckled, you can flick a toothbrush with diluted brown or black acrylic paint lightly over the wet clay to achieve that natural, gritty texture.
Clean Cuts
Keep your blade wet or lightly oiled when cutting the center line. This reduces drag and helps you get that sharp, puzzle-perfect edge without dragging the clay.
Step 3: Refining and Finish
-
Initial drying:
Let the pieces dry separately on a flat surface. For air-dry clay, turn them over every few hours to prevent warping. Allow at least 24-48 hours for full drying. -
Sanding for fit:
Once fully dry (or baked and cooled for polymer), test the fit. If it’s too tight, use fine-grit sandpaper to gently sand the inner interlocking edges until they slide together comfortably. -
Surface sanding:
Lightly sand the top surface and outer edges to remove any fingerprints or rough spots, wiping away the dust with a slightly damp cloth afterward. -
Sealing the sculpture:
Apply a thin coat of matte varnish or sealant to protect the clay. A matte finish is best to maintain the raw, stone-like aesthetic. -
Final cure:
Let the sealant cure completely before interlocking the pieces for the final time to ensure they don’t stick together.
Make it Magnetic
Embed small neodymium magnets inside the cut edges while the clay is wet. Cover them with a thin layer of clay so they snap together magically when close.
Place your finished interlocking heart on a bedside table or shelf as a beautiful reminder of connection