If you’re brand new to air dry clay, you’re in the perfect spot—this stuff is seriously the quickest way to make something cute and useful without fancy tools. Here are my favorite easy beginner projects that look polished fast, even if your clay skills are basically “can roll a slab.”
Classic Trinket Dish
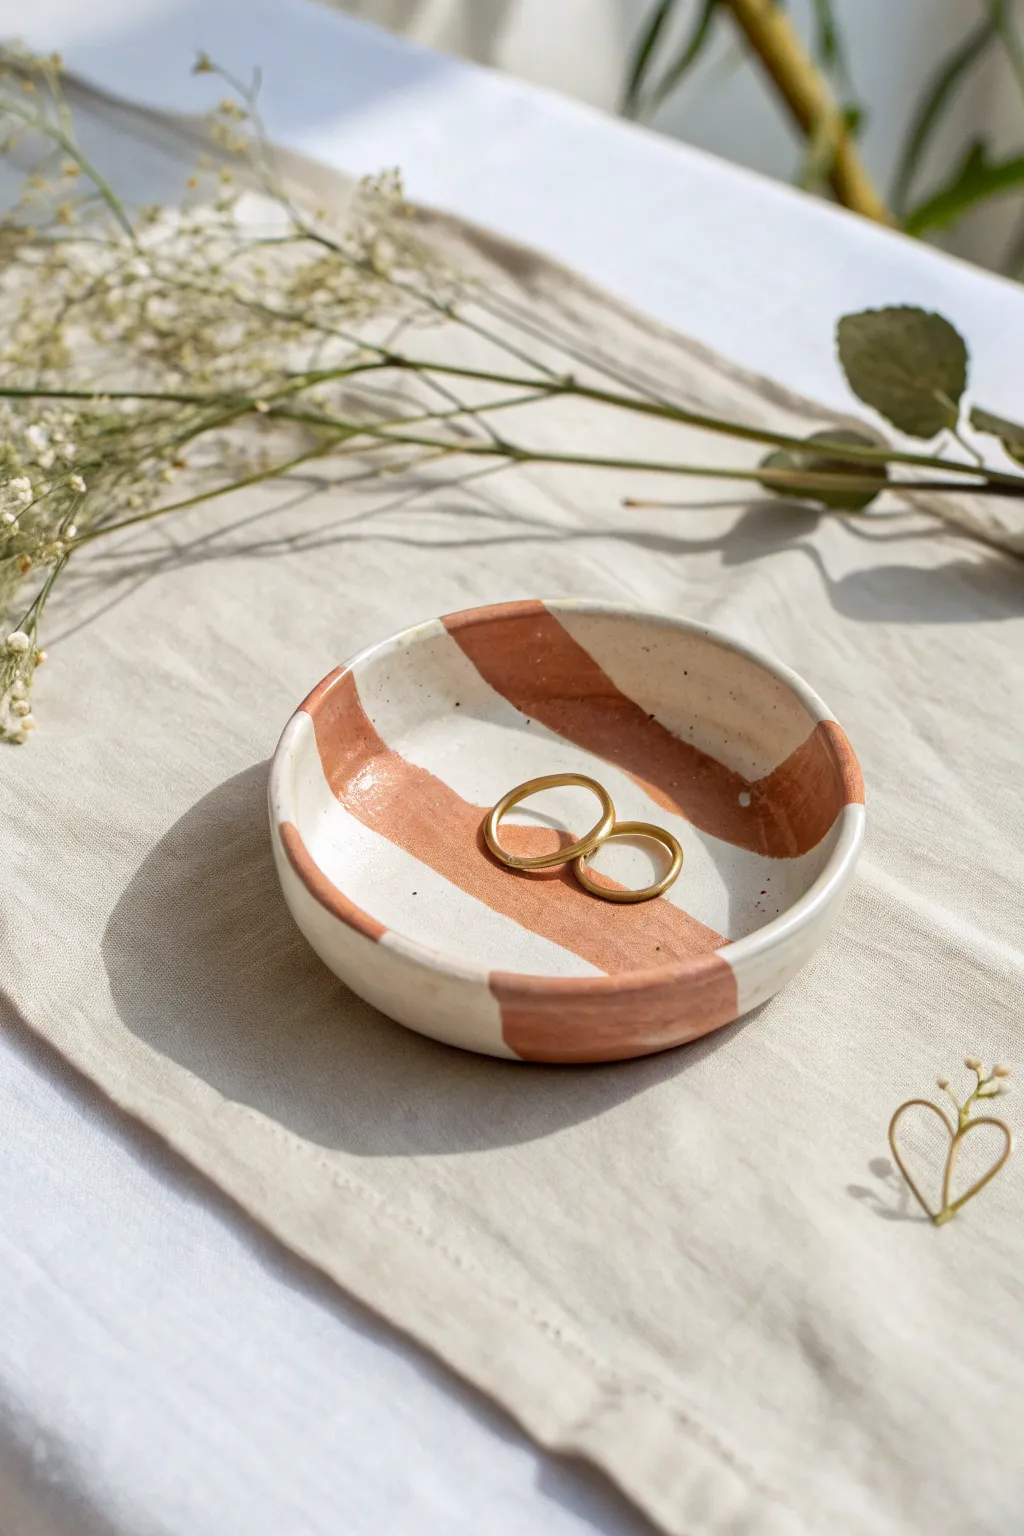
This charming little trinket dish combines a rustic handmade form with bold, modern stripes in earthy tones. It’s the perfect size for holding your favorite rings or earrings and brings a warm, artisanal touch to any bedside table.
Step-by-Step Guide
Materials
- White air dry clay
- Rolling pin
- Circle cutter or small bowl (approx. 4 inches)
- Small sponge
- Water
- Terracotta or rust-colored acrylic paint
- Flat paintbrush (medium width)
- Gloss varnish or sealant
- Fine grit sandpaper
Step 1: Shaping the Clay
-
Roll out the slab:
Begin by taking a handful of white air dry clay and conditioning it in your hands until soft. Roll it out on a flat surface to an even thickness of about 1/4 inch. -
Cut the circle:
Use a circle cutter or place a small bowl upside down on the clay as a template. Cut around it with a knife to create a perfect circle. -
Smooth the edges:
Dip your finger in a little water and run it along the cut edge of the circle to smooth out any roughness or loose bits of clay. -
Lift the edges:
Gently lift the edges of the circle upwards to create a shallow rim. You want to curve the sides up gradually rather than creating a sharp vertical wall. -
Refine the form:
Use a damp sponge to smooth out the interior curve and ensure the rim height is consistent all the way around. I like to continuously rotate the dish while doing this to check for symmetry. -
Dry partially:
Let the dish sit for about 30 minutes to firm up slightly, then do a final smoothing of any fingerprints. -
Full drying:
Allow the dish to dry completely in a safe spot for 24-48 hours. Flip it over halfway through the drying process to ensure the bottom dries evenly.
Cracks happen
If small hairline cracks appear during drying, create a ‘slip’ paste of wet clay and water. Fill the cracks, smooth over, and let dry again.
Step 2: Sanding and Painting
-
Sand for smoothness:
Once fully bone dry, take your fine grit sandpaper and gently sand the rim and surface to remove any imperfections or bumps. -
Clean the dust:
Wipe the entire dish down with a very slightly damp cloth to remove all sanding dust before you start painting. -
Mix your paint:
Prepare your terracotta or rust-colored acrylic paint. If the color feels too bright, mix in a tiny brown to deepen it. -
Paint the first stripe:
Using a flat brush, paint a bold stripe straight across the center of the dish. Aim for a width of about one inch. -
Extend over the rim:
Continue painting the stripe up over the rim and down the outside edge of the dish for a continuous look. -
Add side stripes:
Paint two more parallel stripes on either side of the center one, leaving a gap of white clay showing in between. Again, wrap these over the rim. -
Touch up edges:
If your lines are a bit wobbly, use a clean, damp brush or a cotton swab to gently tidy up the paint edges while they are still wet. -
Seal the piece:
After the paint is completely dry, apply a coat of gloss varnish to the entire dish. This seals the clay and gives it that finished ceramic look.
Add some sparkle
For a luxe touch, paint a thin line of gold leaf or metallic gold paint along the very edge of the rim after the stripes have dried.
Now you have a stylish spot to keep your everyday jewelry safe and organized


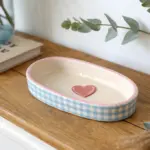

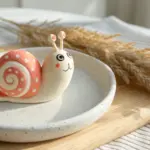
Heart-Shaped Jewelry Tray
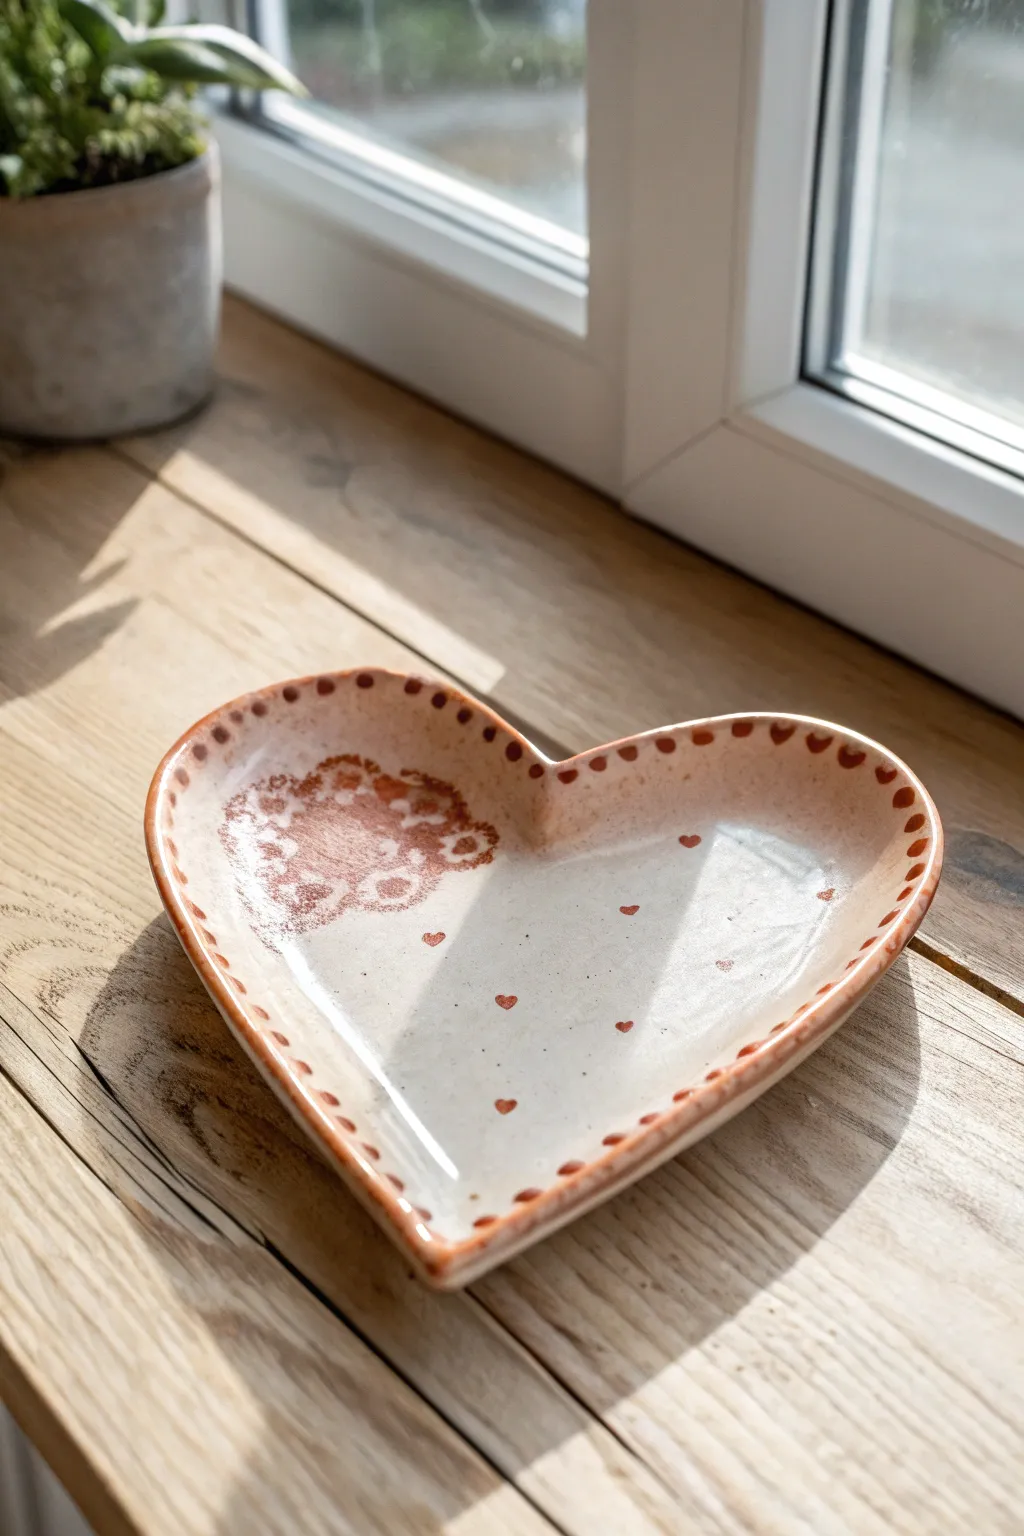
This charming trinket dish combines a rustic, hand-built feel with delicate details like lace impressions and tiny hearts. The creamy, speckled finish gives it a high-end ceramic look without needing a kiln, making it perfect for holding rings or keys.
How-To Guide
Materials
- Air dry clay (white or light grey)
- Roller (acrylic or wooden)
- Heart-shaped cookie cutter (large)
- Small piece of textured lace or doily
- Modeling tools or a dull knife
- Small sponge
- Acrylic paints (cream/off-white, terracotta/red-brown)
- Small detail paintbrush
- High-gloss varnish or generous coat of Mod Podge
Step 1: Shaping the Clay
-
Condition the clay:
Begin by taking a handful of air dry clay and kneading it in your hands until it becomes warm, soft, and pliable. This prevents cracking later. -
Roll it out:
Place the clay on a smooth surface or craft mat. Use your roller to flatten it into an even slab, aiming for a thickness of about 1/4 inch (6mm). -
Add lace texture:
Before cutting, lay your piece of lace or doily onto one section of the clay slab. Press it gently but firmly with the roller to imprint the pattern, then carefully peel it away. -
Cut the shape:
Position your large heart-shaped cookie cutter over the clay, ensuring the lace texture is where you want it (usually off-center looks best). Press down firmly to cut the shape. -
Smooth the edges:
Remove the excess clay. Dip your finger in a little water and run it along the cut edges of the heart to smooth out any roughness or loose bits. -
Form the rim:
To create the dish shape, gently pinch and lift the edges of the heart upwards. I like to curve them up gradually to create a shallow bowl rather than a steep wall.
Fixing Edge Cracks
If small cracks appear on the rim while drying, enhance them! Fill cracks with gold paint later for a ‘kintsugi’ look, or patch with a wet clay slip before painting.
Step 2: Drying and Refining
-
Let it dry completely:
Place your tray on a wire rack or clean paper towel to dry. This typically takes 24-48 hours depending on humidity. Flip it halfway through to ensure the bottom dries evenly. -
Sand for smoothness:
Once fully hard and white, use fine-grit sandpaper to buff the edges and surface. Wipe away all dust with a slightly damp cloth or sponge.
Step 3: Painting and Decoration
-
Apply base color:
Mix a creamy, off-white acrylic paint. Apply two thin coats to the entire dish (front and back), letting the first coat dry before adding the second. -
Create the speckled effect:
Dilute a tiny drop of brown or black paint with water. Dip an old toothbrush or stiff brush into it and flick the bristles to spray fine speckles over the dish for a faux-ceramic look. -
Highlight the lace:
Using a terracotta or burnt orange paint, very lightly dry-brush over the lace imprint. The paint should catch on the raised areas but settle mostly into the textured grooves. -
Paint the rim dots:
Dip the non-brush end of a paintbrush into your terracotta paint. Stamp small dots evenly around the very top edge of the rim. -
Add floating hearts:
With a fine detail brush, paint tiny hearts randomly across the smooth sections of the tray using the same reddish-brown color. -
Protect the finish:
Finish with a thick layer of high-gloss varnish or gloss Mod Podge. This seals the paint and mimics the shine of real glazed pottery.
Stamp It Up
If you don’t have lace, use rubber stamps to press botanical designs or words into the wet clay. Ink the stamp first for a colored impression as you press.
Place your new jewelry dish on your nightstand to admire your handiwork every day


Leaf-Imprint Ring Dish

Capture the delicate beauty of nature with this elegant air-dry clay dish featuring a stunning leaf skeleton imprint. The organic, beige finish and subtle gold accents make it a perfect minimalist holder for your favorite rings.
Step-by-Step
Materials
- White or cream air-dry clay
- Rolling pin
- Leaf skeleton (store-bought or DIY)
- Small bowl (for shaping)
- Craft knife or needle tool
- Fine grit sandpaper
- Gold acrylic paint or gold leaf pen
- Fine detail paintbrush
- Matte varnish or sealant
- Sponge or water for smoothing
Step 1: Preparing the Clay Base
-
Condition the Clay:
Start by taking a handful of air-dry clay and kneading it in your hands until it feels soft, warm, and pliable. This prevents cracks later on. -
Roll it Out:
Place the clay on a smooth surface or canvas mat. Use a rolling pin to flatten it into an even circle, aiming for a thickness of about 1/4 inch. -
Check for Smoothness:
Run your finger over the surface to ensure there are no air bubbles or major bumps. If the clay looks dry, dampen your finger slightly to smooth it.
Clean Lines Tip
If the clay sticks to your rolling pin, place a sheet of parchment paper or wax paper between the pin and the clay/leaf sandwich.
Step 2: Creating the Imprint
-
Position the Leaf:
Take your leaf skeleton and place it gently in the center of the rolled clay. I like to position it slightly off-center for a more organic look. -
Press the Pattern:
Using the rolling pin, roll firmly over the leaf once. Apply enough pressure so the veins embed deeply into the clay, but not so much that the clay becomes paper-thin. -
Remove the Leaf:
carefully lift the edge of the skeleton leaf with a needle tool or the tip of a knife and peel it away to reveal the intricate vein pattern. -
Cut the Shape:
Use a small bowl as a template or freehand a circle around the leaf imprint. Cut away the excess clay with your craft knife. -
Refine the Edges:
Dip your finger in a little water and run it along the cut edge to round it off and remove any sharp angles from cutting.
Rustic Flare
Mix a tiny amount of brown or beige acrylic paint into your white clay before kneading to create a stone-like, earthen color base.
Step 3: Forming and Drying
-
Shape the Curve:
Lift the clay circle and gently place it inside a small bowl to give it a curved form. Press gently so it takes the shape of the bowl bottom. -
Add Texture (Optional):
If you want the textured exterior seen in the photo, gently pat the outside of the clay with a crumpled bright of foil or rough fabric while it’s in the bowl. -
Let it Dry:
Allow the clay to dry completely in a cool, dry place. This usually takes 24-48 hours depending on humidity. Rotate it occasionally for even drying. -
Sand for Perfection:
Once fully hard, use fine-grit sandpaper to smooth out any rough spots on the rim or underside. Wipe away the dust with a barely damp cloth.
Step 4: Finishing Touches
-
Highlight the Veins:
Dip a very fine brush into gold acrylic paint or use a gold paint pen. carefully trace the main central vein of the leaf imprint. -
Add Delicate Details:
Lightly trace a few of the branching veins or the outer edge of the leaf shape with the gold to make the design pop against the pale clay. -
Seal the Dish:
Apply a coat of matte varnish over the entire dish to protect the clay from moisture and seal in the paint.
Place your favorite ring inside and enjoy this little piece of functional art on your nightstand


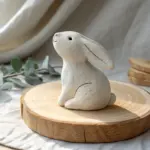
Easy Pinch Pot Bowl
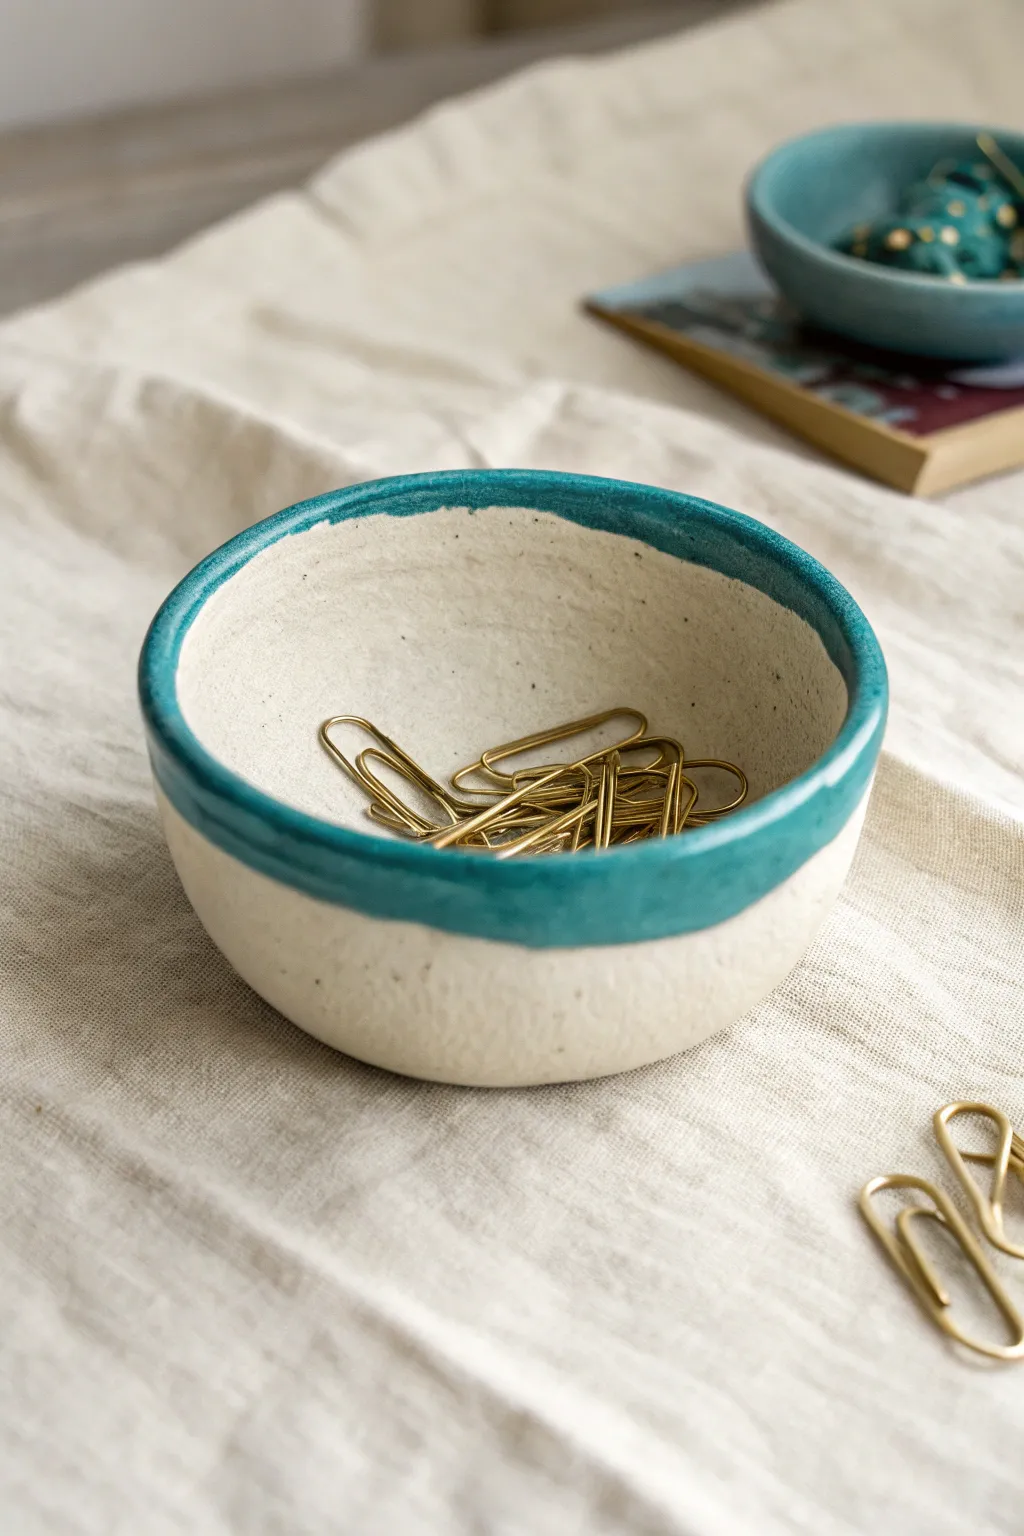
This charming little pinch pot combines the raw, organic texture of white clay with a vibrant pop of teal glaze. Perfectly sized for holding paper clips, rings, or other small treasures, it embraces a wabi-sabi aesthetic where imperfections add character.
How-To Guide
Materials
- White operational air-dry clay (or white earthenware if firing)
- Small bowl of water
- Sponge
- Potter’s needle tool or toothpick
- Teal acrylic paint (or ceramic glaze)
- Clear acrylic sealant (matte or satin finish)
- Small flat paintbrush
- Fine-grit sandpaper (optional)
Step 1: Shaping the Clay
-
Prepare your clay ball:
Start by taking a lump of air-dry clay about the size of a tennis ball. Roll it firmly in your palms to create a smooth sphere, ensuring there are no trapped air bubbles or major cracks. -
Begin the pinch:
Hold the clay ball in your non-dominant hand. Gently press your thumb into the center of the ball, but stop before you push all the way through to the bottom. -
Expand the walls:
Using a pinching motion with your thumb on the inside and fingers on the outside, slowly rotate the ball while gently squeezing the clay walls. Work your way from the bottom up to the rim. -
Refine the thickness:
Aim for an even thickness of about 1/4 inch throughout the bowl. Don’t worry if it’s not perfectly round; the organic shape is part of the appeal. -
Shape the bottom:
Once you are happy with the width, gently tap the bottom of the bowl on your work surface to create a flat base so it sits significantly without wobbling. -
Smooth the surfaces:
Dip your finger or a slightly damp sponge into water and run it over the clay to smooth out any fingerprints or small cracks. I like to leave just a hint of texture to keep that handmade feel. -
Dry the piece:
Set your bowl aside in a cool, dry place. Let it air dry completely for 24-48 hours. The clay will turn white and feel lighter when it is fully dry.
Cracks Appearing?
If small cracks appear while drying, mix a tiny bit of clay with water to make a paste (slip) and fill them in. Smooth over with a finger and let dry again.
Step 2: Finishing and Decorating
-
Sand for perfection:
Once fully dry, check the rim for any sharp or jagged edges. If needed, gently buff the rim with fine-grit sandpaper to soften it. -
Wipe down dust:
Use a barely damp cloth or sponge to wipe away any clay dust from sanding. This ensures your paint will adhere properly. -
Prepare your palette:
Squeeze a small amount of teal acrylic paint onto a palette. You want a consistency that flows easily but isn’t too watery. -
Paint the rim:
Load your flat paintbrush and carefully paint a strip along the top edge of the bowl. Paint about half an inch down on the outside and mirror that width on the inside. -
Create the organic edge:
Don’t try to make a perfect straight line. Allow the paint edge to be slightly wavy and uneven, following the natural contours of your pinch pot. -
Let the paint dry:
Allow the teal paint to dry completely to the touch before moving to the next step. -
Seal the piece:
Apply a coat of clear acrylic sealant over the entire bowl, inside and out. This will protect the clay and give it a finished ceramic look. -
Final cure:
Let the sealant cure according to the manufacturer’s instructions before placing any items inside your new bowl.
Make it a Set
Create three bowls in ascending sizes—small, medium, large. Paint the rims in different shades of the same color family (like teal, navy, and sky blue) for an ombre effect.
Now you have a delightful handmade vessel ready to organize your desk or hold your daily jewelry

The Complete Guide to Pottery Troubleshooting
Uncover the most common ceramic mistakes—from cracking clay to failed glazes—and learn how to fix them fast.
Stamped Clay Coasters
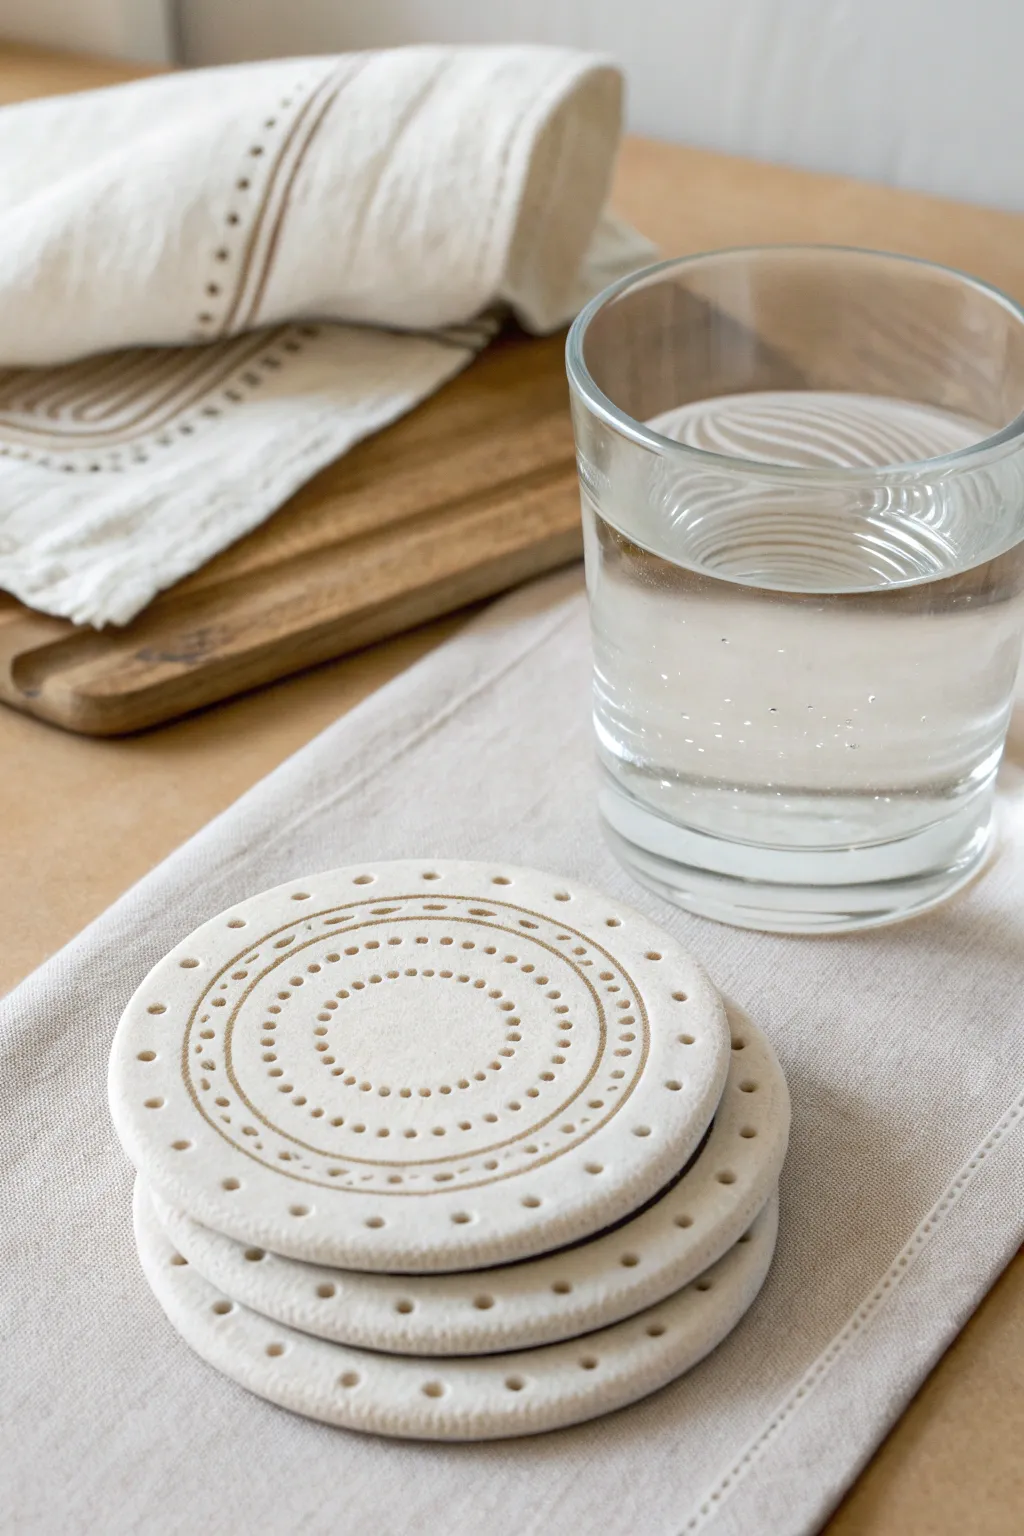
Elevate your coffee table with these elegant, minimalist coasters that look like high-end ceramics but are surprisingly simple to make. Using air dry clay and basic tools, you’ll create a textured, concentric design that feels both modern and handmade.
Detailed Instructions
Materials
- White air dry clay
- Rolling pin
- Circle cookie cutter (approx. 4 inches)
- Parchment paper or canvas mat
- Fine-point stylus tool or a blunt toothpick
- Small round piping tip or straw (optional)
- Small bowl of water
- Fine-grit sandpaper
- Matte or satin waterproof varnish (e.g., Mod Podge or acrylic sealer)
- Felt pads (optional for bottom)
Step 1: Preparing the Base
-
Condition the clay:
Start by grabbing a handful of your air dry clay. Knead it in your hands for a minute or two to warm it up and ensure there are no air bubbles trapped inside. This makes rolling much smoother. -
Roll it out:
Place your clay on a piece of parchment paper or a canvas mat to prevent sticking. Use your rolling pin to flatten the clay into an even slab. Aim for a consistent thickness of about 1/4 inch (6mm) so the coasters feel substantial. -
Cut the circles:
Take your large circle cookie cutter and press firmly into the clay slab. Create as many circles as you need for your set, usually four to six. Peel away the excess clay around the circles and set it aside for later use. -
Smooth the edges:
Dip your finger lightly into the bowl of water. Gently run your damp fingertip around the cut edge of each clay circle perfect the shape. This removes any roughness left by the cutter and gives a professional finish.
Fixing the Curled Edges
If your coasters start curling upward while drying, place a heavy book on top of them (with parchment in between) for the last few hours of drying to force them flat again.
Step 2: Creating the Design
-
Mark the center:
Visually identify the center of your coaster. You don’t need to mark it heavily, just keep an eye on it as your starting point for the expanding pattern. -
Create the inner circle:
Using your stylus tool or a blunt toothpick, gently press a ring of small dots into the clay, about one inch out from the center. Try to keep the spacing between dots consistent, but remember that slight handmade irregularities add charm. -
Add the first line:
Draw or impress a thin, continuous circular line just outside your first ring of dots. If you have a round object of the right size (like a jar lid), you can lightly press it into the clay to make this line perfectly crisp. -
Stamp the outer dots:
Move outward another half-inch and impress a second ring of dots. For visual interest, make these dots slightly larger than the first set if your tool allows, or simply press a bit deeper. -
Add the border line:
Create another continuous circular line near the outer edge of the coaster, framing your dot patterns. This acts as a nice border for the design. -
Finish the detailed edge:
For the final detail seen in the image, use your stylus to press a ring of widely spaced dots right along the very perimeter of the circle. I find this really ties the whole look together.
Step 3: Drying and Sealing
-
Initial drying:
Carefully transfer the parchment paper with the coasters to a flat board. place another sheet of parchment paper lightly on top to slow down the drying process, which helps prevent curling. -
Flip and wait:
After about 12 hours, check the coasters. Carefully flip them over so the bottom side is exposed to the air. This ensures even drying on both sides. -
Complete drying:
Let them dry fully for another 24 to 48 hours. The clay should turn a chalky white and feel hard and room temperature, not cold to the touch. -
Sand the imperfections:
Once fully bone-dry, take your fine-grit sandpaper and very gently buff the edges and surface. Focus on smoothing any sharp ridges raised by the stamping process. -
Wipe clean:
Use a dry cloth or soft brush to remove all the sanding dust from the grooves of your pattern. You want the surface perfectly clean before sealing. -
Apply varnish:
Apply a thin coat of matte or satin waterproof varnish. Since these are coasters, they need protection from condensation. Ensure you get the varnish into the impressed dots. -
Second coat:
Let the first coat dry according to the bottle instructions, then apply a second coat for durability. Don’t forget to seal the bottom and sides as well. -
Optional backing:
If you wish, stick small felt pads or a circle of cork to the bottom of each coaster to protect your tabletops.
Level Up: Color Wash
Mix a tiny drop of brown acrylic paint with water to create a wash. Brush it over the dry texture and wipe it back immediately with a cloth to antique the grooves.
Now you have a stunning set of custom coasters ready to protect your surfaces in style
Scalloped Flower Coasters
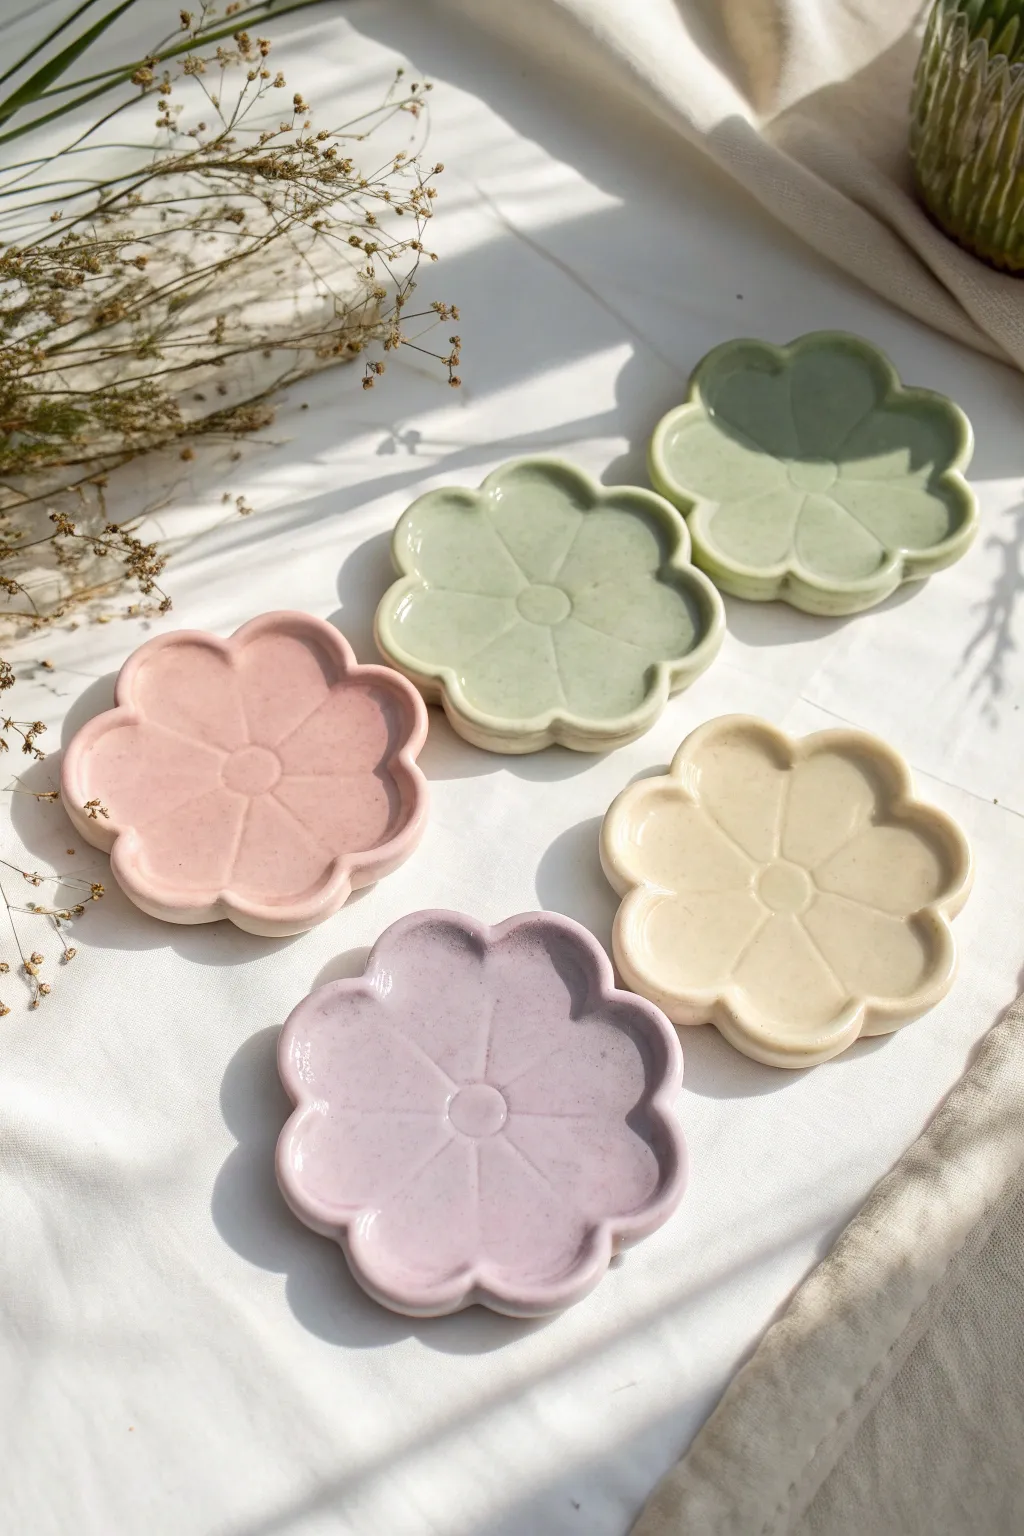
These charming, glossy coasters capture the delicate beauty of spring blossoms with their soft pastel hues and organic shapes. Perfect for holding your morning coffee or favorite jewelry, their scalloped edges and incised details give them a professionally ceramic look without needing a kiln.
Step-by-Step Guide
Materials
- White air-dry clay (smooth texture)
- Acrylic rolling pin
- Flower-shaped or scalloped cookie cutter (approx. 3-4 inches wide)
- Small circle cutter (or bottle cap)
- Clay knife or needle tool
- Sponge and small bowl of water
- Fine-grit sandpaper
- Pastel acrylic paints (pink, sage green, cream, lavender)
- High-gloss varnish or resin (for the ceramic finish)
- Paintbrushes (soft bristle)
- Plastic wrap or parchment paper
Step 1: Shaping the Clay Base
-
Condition the clay:
Begin by kneading a handful of air-dry clay until it is warm, pliable, and free of cracks. This ensures your final coaster will be strong and uniform. -
Roll out the slab:
Place the clay between two guide sticks or simply roll it out on a non-stick surface to an even thickness of about 1/4 inch. -
Cut the flower shape:
Press your large flower-shaped cookie cutter firmly into the clay slab. Wiggle it slightly before lifting to ensure a clean cut. -
Smooth the edges:
Dip your finger in a little water and gently run it along the cut edges of the flower to soften any harsh lines or burrs left by the cutter.
Cracks while drying?
Mix a tiny bit of fresh clay with water to create a ‘slip’ paste. Fill the cracks with this paste, smooth it over with your finger, let it dry again, and then sand it flush.
Step 2: Adding Details and Dimension
-
Mark the center:
Take the small circle cutter or a bottle cap and press it gently into the exact center of the flower. Do not cut all the way through; you just want to create an indented ring. -
Create the petal lines:
Using a blunt knife or needle tool, draw straight lines radiating from the center circle out to the indentation between each petal scallop. Apply gentle pressure to make a distinct groove without slicing the clay. -
Lift the edges:
To give the coaster a slight bowl shape like the reference, gently pinch and lift the outer rim of each petal upward. I like to curve them just enough so any condensation from a glass won’t roll off. -
Define the rim:
Smooth over the lifted edges with a damp sponge to create a rounded, uniform lip around the entire perimeter. -
Refine the surface:
Look over the piece for any fingernail marks or uneven spots. Use a slightly wet finger or a damp artist sponge to buff the clay until it is perfectly smooth.
Step 3: Drying and Refining
-
Let it dry completely:
Place the coasters on a wire rack or leave them on parchment paper, flipping them every 12 hours to prevent warping. Allow 24-48 hours for full drying. -
Sand for smoothness:
Once bone dry, use fine-grit sandpaper to gently buff away any remaining rough spots, paying special attention to the scalloped edges. -
Wipe away dust:
Use a barely damp cloth or a dry brush to remove all sanding dust before you start painting.
Make it speckle!
To mimic stoneware clay, dilute brown or black acrylic paint with water. Dip a toothbrush in it and flick the bristles to spray tiny speckles over the dried base paint before varnishing.
Step 4: Painting and Glazing
-
Apply the base coat:
Choose your pastel acrylic paint. Apply a thin, even layer over the entire top surface, getting into the incised grooves. -
Paint the back and sides:
Once the top is dry to the touch, flip the coaster and paint the bottom and side edges match. -
Add a second coat:
For a truly solid ceramic look, apply a second coat of paint. This ensures the white clay doesn’t show through, especially in the recessed lines. -
Apply the gloss finish:
To achieve that shiny, glazed appearance shown in the photo, apply a thick coat of high-gloss varnish. Alternatively, for a waterproof finish, use a coat of UV resin or two-part epoxy resin. -
Final cure:
Let the varnish or resin cure completely according to the package instructions before placing any cups or jewelry on your new coasters.
Enjoy styling these sweet floral accents on your coffee table or vanity for a touch of handmade elegance


What Really Happens Inside the Kiln
Learn how time and temperature work together inside the kiln to transform clay into durable ceramic.
Easy Statement Pendant Necklace
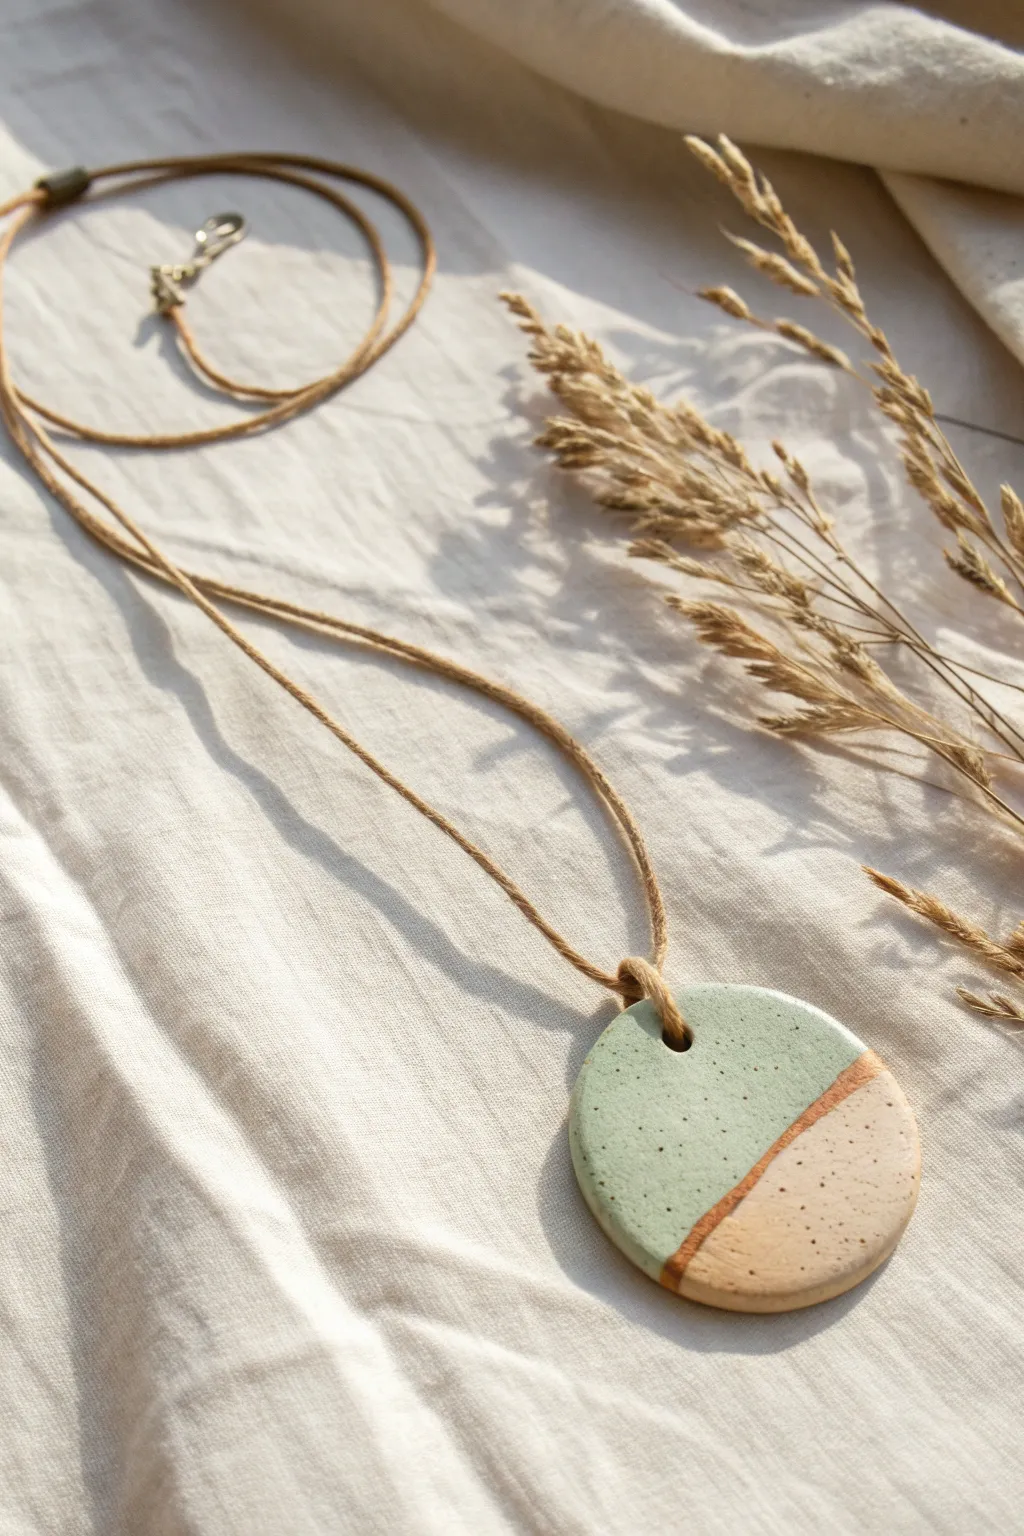
This minimalist pendant necklace combines soft mint and natural clay tones with a flash of metallic gold to create a modern, wearable piece of art. The speckled finish gives it a professional ceramic look without needing a kiln, making it a perfect weekend project.
Step-by-Step Tutorial
Materials
- White or natural air dry clay
- Rolling pin
- Circle cookie cutter (approx. 2 inches)
- Straw or small dowel (for the hole)
- Sandpaper (fine grit)
- Acrylic paint: Sage Green or Mint, Black
- Metallic copper or gold paint pen (extra fine tip)
- Thin stiff bristle brush (e.g., an old toothbrush)
- Small flat paintbrush
- Masking tape or painter’s tape
- Matte varnish or sealant
- Leather or suede cord
- Jump rings and clasp (optional)
Step 1: Shaping the Base
-
Prepare the clay:
Pinch off a small amount of air dry clay and knead it in your hands until it becomes soft, pliable, and free of cracks. -
Roll it out:
Place the clay on a smooth surface or canvas mat. Use your rolling pin to flatten it into an even slab, aiming for a thickness of about 1/4 inch (4-5mm). -
Cut the shape:
Press your circle cookie cutter firmly into the clay slab. Wiggle it slightly to ensure a clean cut, then lift the cutter away. Remove the excess clay from around the circle. -
Smooth the edges:
Dip your finger in a little water and gently run it around the cut edge of the circle to smooth out any roughness or sharp corners left by the cutter. -
Create the hanging hole:
Using a straw or a small dowel, punch a hole near the top edge of the circle. Make sure it’s not too close to the edge—leave at least 4mm of clay above the hole for strength. -
Dry partially:
Let the pendant sit for about 24-48 hours. I like to flip it over halfway through the drying process to prevent it from curling or warping as the moisture evaporates.
Smooth Operator
To get a flawlessly smooth surface before cutting, place your clay between two sheets of parchment paper or plastic wrap while rolling. This prevents roller marks and sticking.
Step 2: Decorating and Finishing
-
Sand for perfection:
Once the clay is completely bone dry and hard, use fine-grit sandpaper to gently smooth the surface and edges. Wipe away the dust with a slightly damp cloth. -
Tape off the design:
Apply a strip of masking tape diagonally across the lower third of the pendant. Press the edge of the tape down firmly to prevent paint from bleeding underneath. -
Paint the top section:
Paint the exposed larger section (the top part) with your sage green or mint acrylic paint. You may need two thin coats for opaque coverage. Let this dry completely before moving on. -
Remove the tape:
Carefully peel back the masking tape to reveal the crisp line between the painted green section and the raw natural clay bottom. -
Add the speckled effect:
Dilute a tiny drop of black acrylic paint with water until it’s very runny. Dip a stiff brush (or old toothbrush) into the mix, test it on paper first, and then flick the bristles to splatter tiny specks across the entire surface of the pendant. -
Draw the metallic line:
Once the splatter is dry, take your copper or gold paint pen and carefully draw a line right along the border where the green paint meets the raw clay. This adds that elegant metallic touch. -
Seal the piece:
Apply a coat of matte varnish over the entire front and back of the pendant. This protects the clay from moisture and prevents the paint from chipping. -
String the pendant:
Cut a length of leather or suede cord to your desired necklace length. Fold the cord in half. -
Attach the cord:
Push the folded loop of the cord through the hole in the pendant from front to back. Then, pull the loose ends of the cord through that loop to create a lark’s head knot, securing the pendant. -
Finish the ends:
Tie the loose ends of the cord in a simple knot, or attach metal crimps and a clasp if you prefer a more adjustable finish.
Warping Woes?
If your circle starts curving up at the edges while drying, place a light book on top of it (sandwich it between parchment paper first) once it’s halfway dry to flatten it out.
Wear your new statement necklace with pride or wrap it up as a thoughtful handmade gift.
Simple Incense Holder Dish
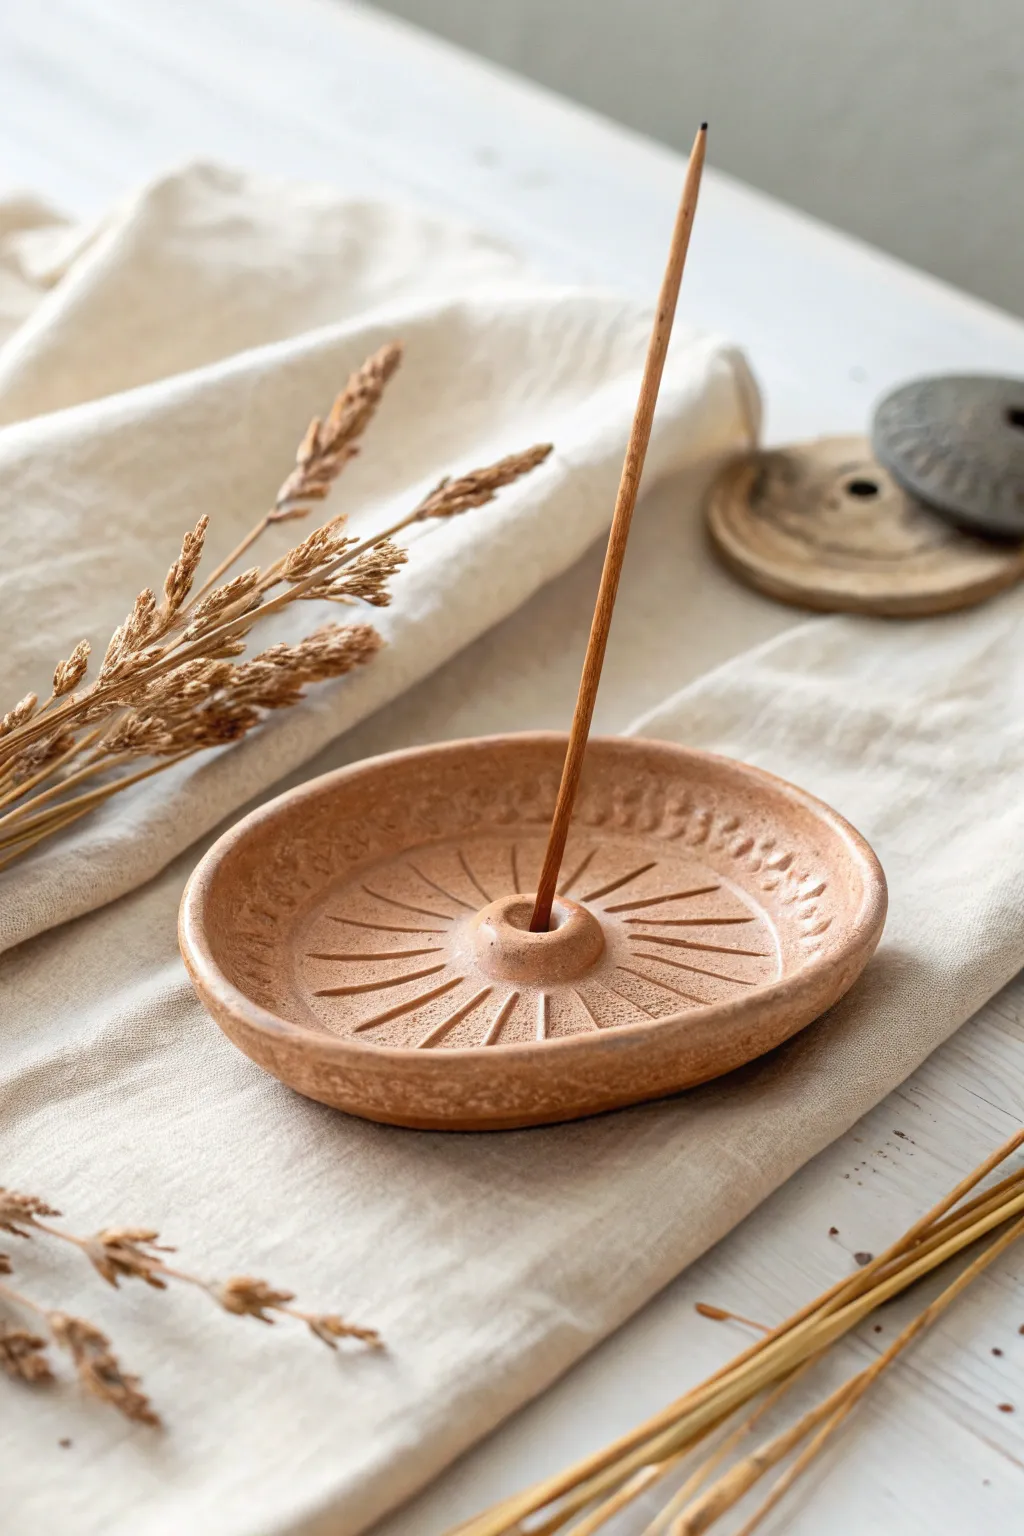
This earthy, sun-inspired incense holder is a perfect project for getting comfortable with texture and form in air dry clay. With its warm terracotta tone and radiating carved patterns, it serves both as a functional home accessory and a beautiful piece of shelf decor.
Step-by-Step
Materials
- Terracotta-colored air dry clay
- Rolling pin
- Small kitchen knife or needle tool
- Small bowl or circle cutter (approx. 4-5 inches)
- Small sponge
- Water in a cup
- Flat stamping tool or back of a paintbrush
- Fine-grit sandpaper
- Clear matte varnish (optional)
Step 1: Shaping the Base
-
Prepare the Clay:
Start with a ball of clay roughly the size of a large orange. Knead it in your hands to warm it up and remove any air bubbles, ensuring the consistency is smooth and pliable. -
Roll the Slab:
Using your rolling pin, flatten the clay ball into an even slab. Aim for a thickness of about 1/4 inch (6mm) to ensure the dish feels substantial but not chunky. -
Cut the Circle:
Place your small bowl or circle cutter onto the slab and press down or trace around it with a knife to cut out a perfect circle. Remove the excess clay scraps. -
Form the Rim:
Gently curve the outer edges of the circle upward with your fingertips to create a shallow dish shape. Smooth out any cracks that appear on the rim with a slightly damp finger. -
Create the Hub:
Take a small scrap of clay and roll it into a ball about the size of a marble. Flatten the bottom slightly. -
attach the Hub:
Score (scratch) the center of your dish and the bottom of the small ball. Add a drop of water to the scratched areas and press the ball firmly into the exact center of the dish. -
Blend the Seams:
Using a modeling tool or your finger, smooth the clay where the ball meets the dish so they become one seamless unit. I like to use a tiny bit of water here to make the transition invisible. -
Pierce the Holder:
Using an incense stick or a skewer that matches the size of your incense, poke a hole straight down into the center of the raised hub. Do not go all the way through the bottom of the dish.
Cracks on the Edge?
If the rim cracks while curving it upwards, dip your finger in water and rub the fissure in a circular motion to generate a ‘slip’ paste that fills the gap.
Step 2: Adding Texture and Finishing
-
Mark the Rays:
Using a needle tool or the back of a knife, gently press straight lines radiating outward from the central hub. These should look like sun rays extending toward the rim but stopping before the edge. -
Deepen the Texture:
Go back over your ray lines to make them distinct. Varying the pressure slightly can give it a more rustic, hand-carved look. -
Create the Border Pattern:
Find a tool with a small rectangular or oval end (like the handle of a specialized tool or a flat chopstick). Press this repeatedly around the inner rim of the dish to create the geometric border shown in the image. -
Sponge Finish:
Take a slightly damp sponge and very gently dab the surface of the clay. This softens any sharp ridges from your carving tools and gives the piece a stone-like texture. -
Verify the Hole:
Double-check that your incense hole hasn’t closed up during the texturing process. Re-insert the stick gently if needed to ensure the opening remains clear. -
Dry Slowly:
Place the dish in a cool, dry spot away from direct sunlight. Let it dry for at least 24-48 hours. Turn it over halfway through the process to ensure the bottom dries evenly. -
Sand and Seal:
Once fully cured and bone dry, use fine-grit sandpaper to smooth any rough edges on the rim. Apply a clear matte varnish if you want to protect the clay from ash stains, though raw clay has a beautiful natural finish.
Pattern Precision
Before carving the sun rays, lightly mark North, South, East, and West points first. This divides the space evenly so your radiating lines don’t get crowded on one side.
Now you have a serene spot to burn your favorite scents and admire your handiwork.

TRACK YOUR CERAMIC JOURNEY
Capture glaze tests, firing details, and creative progress—all in one simple printable. Make your projects easier to repeat and improve.
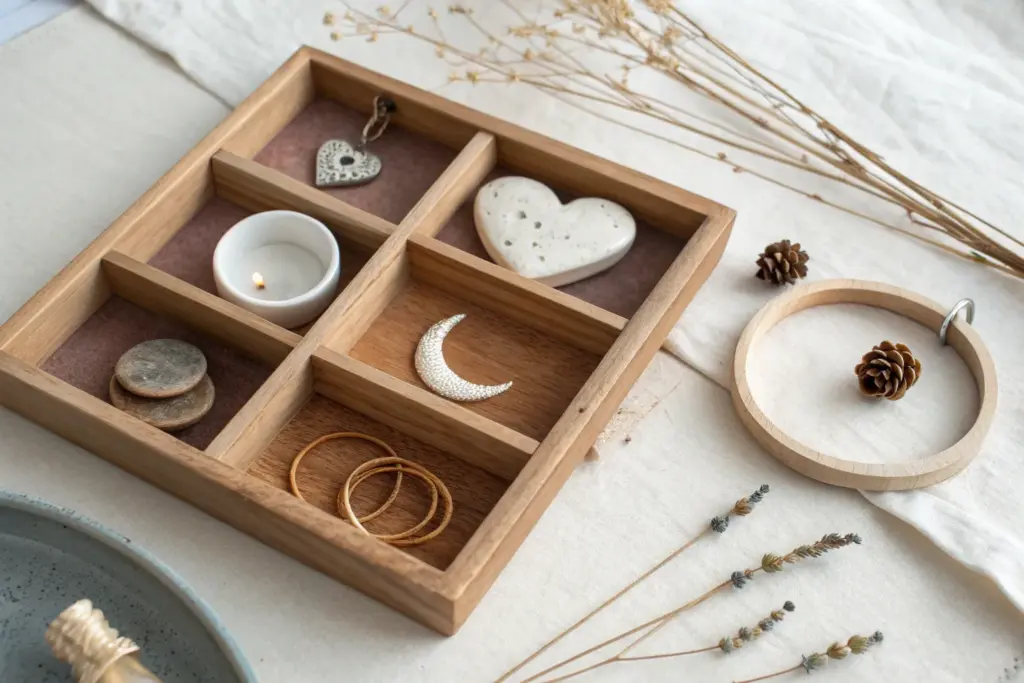
Desk Trinket Catchall Tray
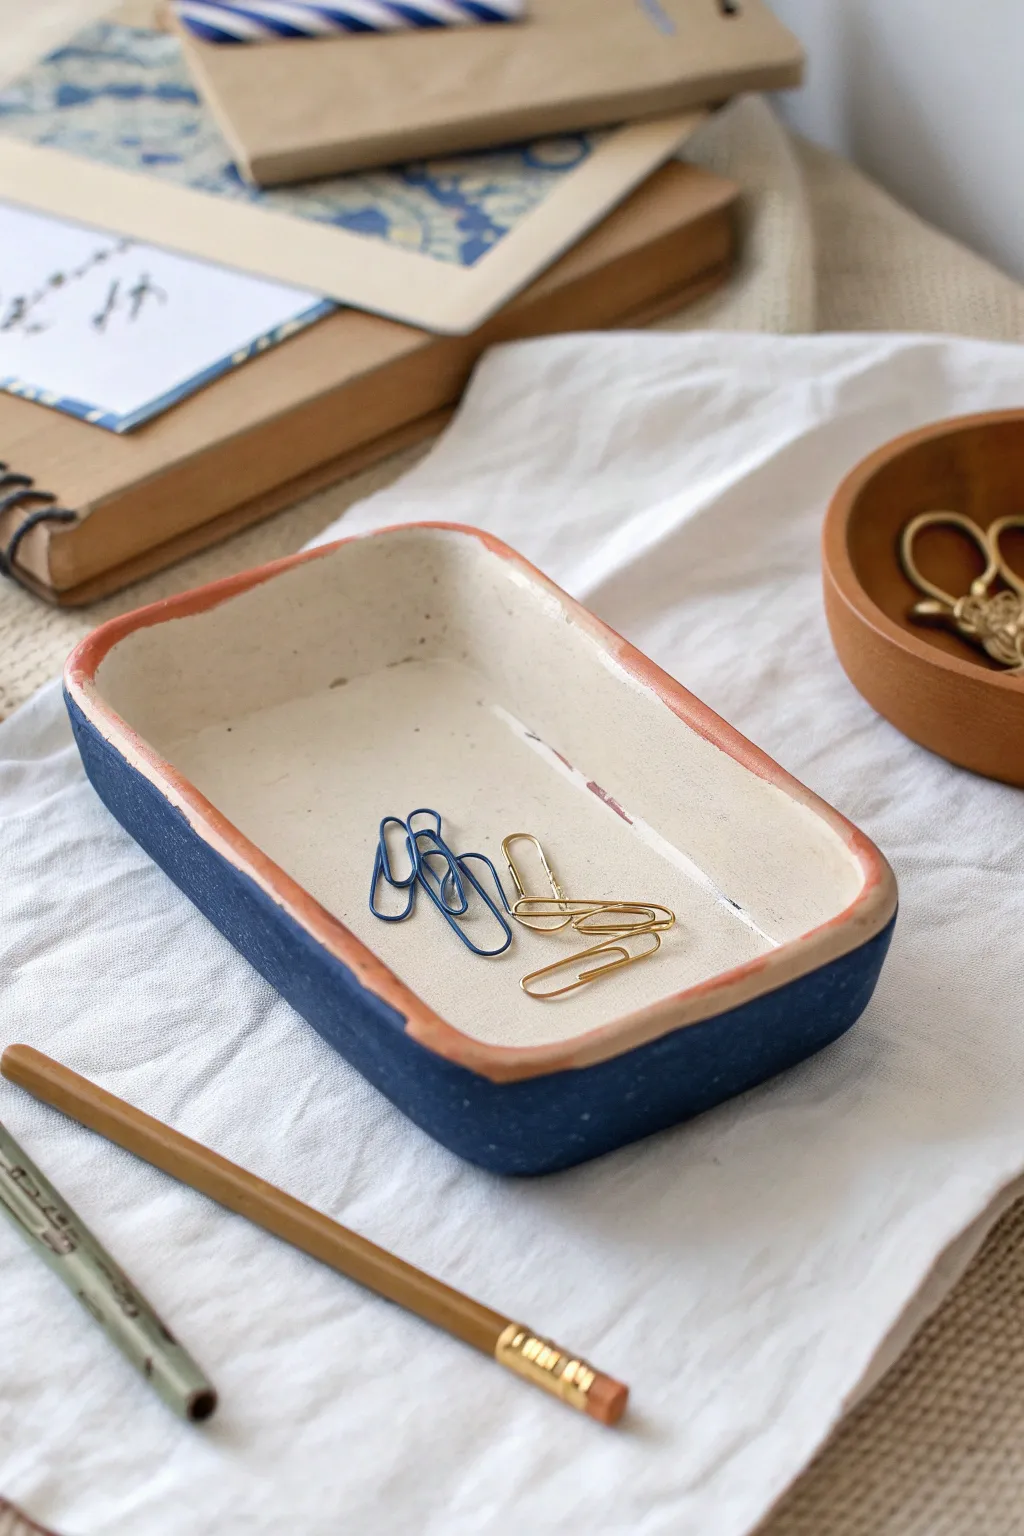
This sleek, rectangular catchall tray combines a rustic, hand-built look with a sophisticated navy and terracotta color palette. It is the perfect size for corraling paperclips, keys, or loose change on your desk while adding a pop of handmade charm.
Step-by-Step Tutorial
Materials
- White cosmetic-grade air dry clay
- Rolling pin
- Sharp clay knife or X-Acto blade
- Rectangle template (cardboard or stiff paper, roughly 4×6 inches)
- Small bowl of water
- Fine-grit sandpaper (220-400 grit)
- Acrylic paint: Navy Blue, Terracotta (or Burnt Orange)
- Flat paintbrushes (medium and small)
- Gloss or satin varnish/sealer
Step 1: Shaping the Base
-
Prepare your clay:
Start by taking a handful of air dry clay and kneading it in your hands until it becomes soft, pliable, and free of cracks. -
Roll out the slab:
Place the clay on a smooth surface or canvas mat. Use your rolling pin to flatten it into an even slab, aiming for a thickness of about 1/4 inch. -
Cut the base:
Lay your cardboard rectangle template onto the clay slab perfectly straight. Using your sharp knife, trace around the template to cut out the base of your tray. -
Prepare the walls:
Gather the excess clay and roll it out again into a long, snake-like coil or a long flat strip. For this specific look, I prefer cutting long strips about 3/4 inch wide to ensure the walls have a consistent height.
Step 2: Assembling the Form
-
Score the edges:
Use your knife or a needle tool to make small scratch marks (scoring) all along the outer edge of your rectangular base. -
Attach the walls:
Dab a little water onto the scored edges. Place your clay strips on top of the base edge, wrapping them around the perimeter to form the tray walls. -
Merge the seams:
Where the clay wall meets the base, use your finger or a modeling tool to smooth the clay downward, blending the two pieces together so they become one solid unit. -
Corner detailing:
Pay special attention to the corners. Gently pinch and smooth them to create a soft, rounded rectangular shape rather than sharp 90-degree angles. -
Smoothing the surface:
Dip your finger in water and run it over the top rim and inside surfaces to remove any fingerprints or roughness. The goal is a smooth, organic finish. -
Drying time:
Set the tray aside in a cool, dry place. Let it dry completely for 24-48 hours, flipping it over halfway through to ensure the bottom dries evenly.
Cracking Up?
If small cracks appear while drying, don’t panic. Make a paste of clay and water (slip) and fill the cracks, let dry, then sand smooth.
Step 3: Painting and Finishing
-
Sand imperfections:
Once fully dry and white, use fine-grit sandpaper to gently smooth out any rough bumps on the rim or the exterior walls. -
Clean dust:
Wipe the entire tray with a slightly damp tack cloth or paper towel to remove all clay dust before painting. -
Paint the exterior:
Load a flat brush with navy blue acrylic paint. Carefully paint the entire outside of the tray, bringing the color right up to the bottom edge of the rim. -
Paint the rim:
Using a smaller brush and your terracotta or burnt orange paint, apply color specifically to the top rim edge. Allow this line to be slightly imperfect and organic for an artisanal feel. -
Interior detail:
Leave the interior of the tray the natural white of the dried clay, or apply a coat of white acrylic paint if you want a brighter, more opaque finish. -
Seal the piece:
Once the paint is thoroughly dry, apply a coat of gloss or satin varnish over the entire piece to protect the paint and give it a finished sheen.
Clean Lines
For a super crisp line between the navy exterior and the terracotta rim, use a strip of washi tape to mask off the area before painting.
Place your new tray on your desk and fill it with your favorite stationery items for instant organization
Clay Wall Hanging Tiles
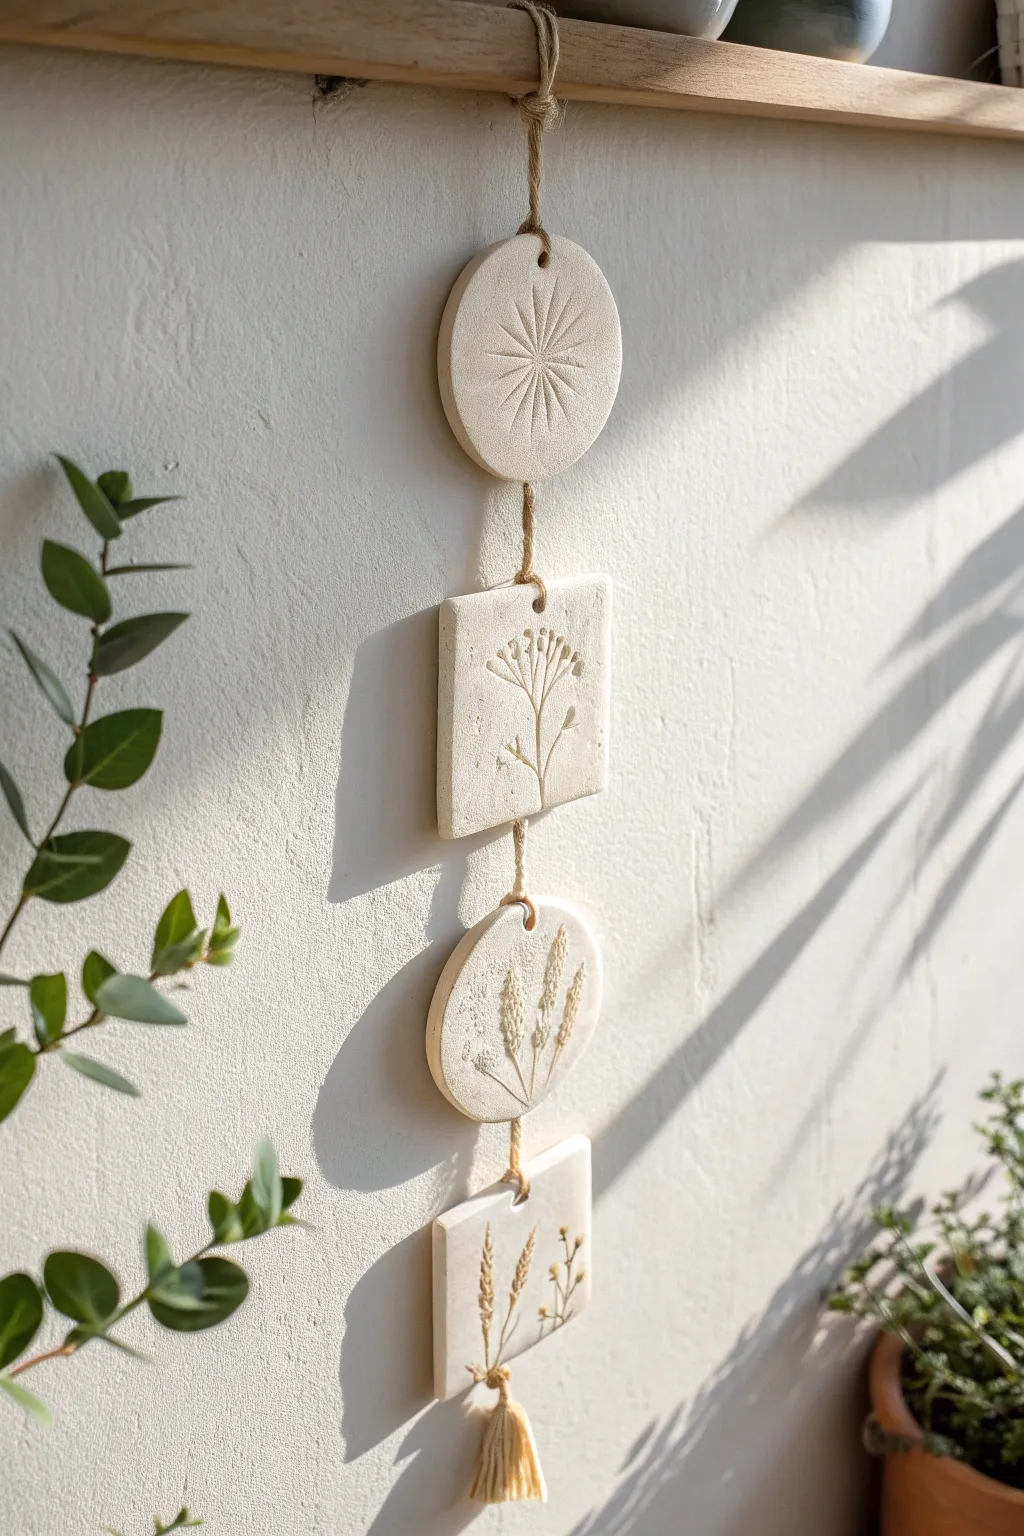
Bring a touch of organic serenity to your walls with this vertical hanging decoration, featuring alternating round and square tiles imprinted with delicate botanicals. The neutral tone of the air-dry clay paired with natural jute twine creates a lovely, minimalist aesthetic perfect for any sunny corner.
Detailed Instructions
Materials
- White air-dry clay
- Rolling pin
- Round cookie cutter (approx. 3-4 inches)
- Square cookie cutter (approx. 3-4 inches)
- Fresh or dried wildflowers (dill, lavender, wheat stalks)
- Clay carving tool or toothpick
- Straw (for poking holes)
- Natural jute twine
- Sandpaper (fine grit)
- Scissors
- Small bowl of water
- Wooden bead (optional)
Step 1: Shaping the Tiles
-
Prepare your workspace:
Lay down a non-stick mat or piece of parchment paper to prevent your clay from sticking to the table. -
Roll the clay slab:
Grab a generous handful of air-dry clay and knead it briefly to remove air bubbles. Roll it out to a uniform thickness of about 1/4 inch. -
Cut the shapes:
Using your cookie cutters, press down firmly to create two circles and two squares. Lift the excess clay away carefully. -
Smooth the edges:
Dip your finger in a little bit of water and run it gently along the cut edges of each shape to soften any sharpness or rough bits.
Step 2: Creating the Designs
-
Carve the sunburst:
For the top circular tile, use a carving tool or toothpick to etch a simple starburst pattern. Draw a center point, then radiate lines outward, varying their lengths for a natural look. -
Make the first impression:
Select a sprig of dill or a similar feathery plant. Lay it gently onto one of the square tiles. -
Roll the impression:
Lightly roll over the plant with your rolling pin once to press it into the clay, ensuring you capture the delicate details of the stems and seeds. -
Remove the botanical:
Carefully peel the plant away to reveal the stamped design. If any bits stick, use tweezers to lift them out. -
Repeat for remaining tiles:
Press wheat stalks or lavender into the second circle and the final square tile, creating a cohesive botanical theme across the pieces.
Clean Impressions
If your plants are sticking to the clay, lightly dust the surface of the clay or the plant itself with cornstarch before pressing it down. It acts as a release agent.
Step 3: Finishing and Assembly
-
Pierce holes for hanging:
Use a straw to punch holes at the top and bottom of the middle two tiles. For the very top tile and very bottom tile, you only need one hole each (bottom of the top tile, top of the bottom tile). -
Wait for drying:
Set your tiles aside on a flat surface to dry completely. This usually takes 24-48 hours depending on humidity. I like to flip them halfway through so the backs dry evenly. -
Sand for perfection:
Once bone dry, take fine-grit sandpaper and lightly buff the edges to make them perfectly smooth. -
Cut the twine:
Cut a long length of jute twine. You will need enough to connect all four pieces with knots in between, plus extra for a hanging loop at the top. -
Start the connections:
Thread the twine through the bottom hole of the top sunburst tile and knot it secure. -
String the middle tiles:
Continue threading the twine through the subsequent tiles, tying knots between them to maintain spacing. Aim for about 1-2 inches of space between each tile. -
Create the tassel:
Wrap twine around your hand about 10-15 times, slip it off, and tie it tight near the top to form a tassel head. Cut the bottom loops. -
Attach the final piece:
Tie your tassel securely to the bottom hole of the lowest square tile. -
Add the top loop:
Using a separate piece of twine, feed it through the very top hole of the sunburst tile and tie a loop for hanging.
Add Subtle Color
Before the clay dries, brush a tiny amount of diluted watercolor paint just into the impressed grooves of the plants to highlight the botanical details.
Hang your beautiful new artwork in a spot with soft light to really show off the texture