If you love the look of heishi clay beads, you’re in for the most satisfying kind of design play: stacking color, shine, and tiny details into a bracelet that feels totally you. These clay bead bracelet ideas are the same kinds of combos I reach for in my studio when I want something easy, wearable, and still a little special.
Classic Rainbow Order
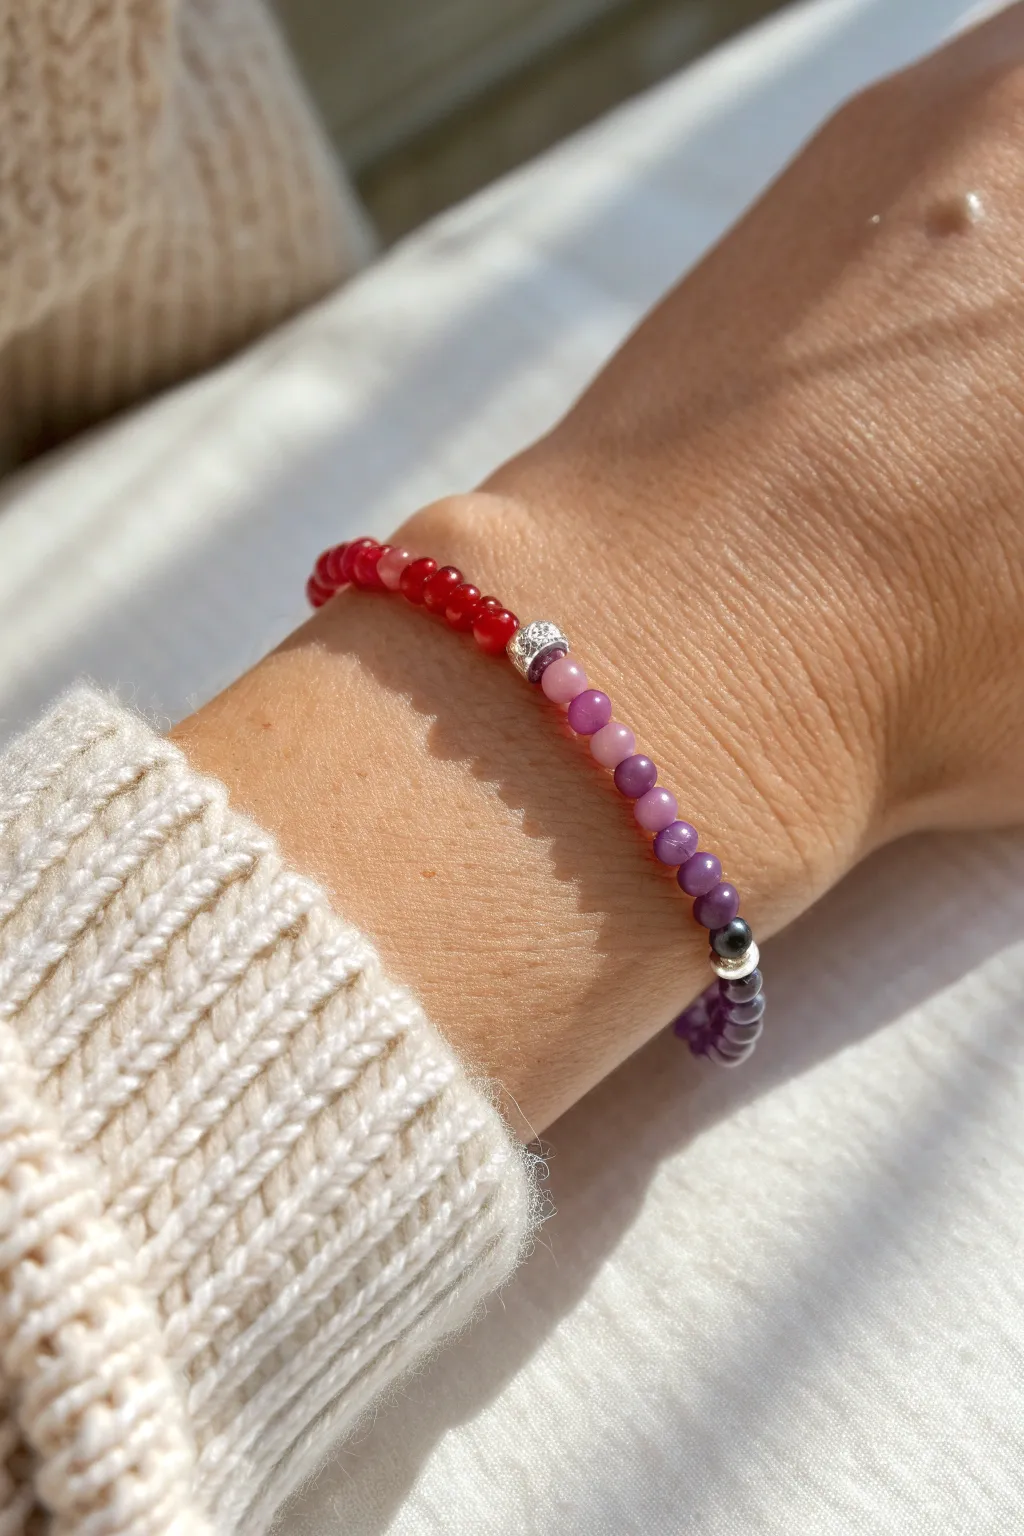
This delicate bracelet features a beautiful ombre transition from cherry reds through dusky pinks to deep violets. Small silver accent beads add a touch of sparkle to break up the smooth color gradient.
How-To Guide
Materials
- 4mm round semi-precious stone or glass beads (Red agate/carnelian, pink jade, amethyst/purple variety)
- Stretch cord (0.5mm or 0.8mm clear elastic)
- Two small textured silver spacer beads (approx 3-4mm)
- One larger silver or metallic focal bead (optional, near the clasp/knot area)
- Scissors
- Bead stopper or tape
- Jewelry glue (GS Hypo Cement recommended)
Step 1: Planning the Gradient
-
Sort your palette:
Begin by laying out your bead strands on a flat surface or bead board. Separate the reds, the varying shades of pink, and the purples to visualize the transition. -
Establish the pattern order:
The design works best when moving from warm to cool tones. Plan a sequence that starts with solid red, transitions into translucent pinks, moves to solid mauves, and finishes with dark purple.
Smooth Transitions
For a smoother ombre effect, mix beads at transition points (e.g., one red, one pink, one red) before switching fully to the new color.
Step 2: Stringing the Beads
-
Prepare the cord:
Cut a piece of stretch cord about 10-12 inches long. This gives you plenty of extra room for tying knots later. Secure one end with a bead stopper or a piece of tape. -
Start with the reds:
Thread approximately 10-12 red beads onto the cord. These should be a vibrant, saturated red to anchor the warm side of the gradient. -
Add a metallic accent:
Slide on one of the textured silver spacer beads. This acts as a visual bookmark between the strong red and the softer pinks coming next. -
Transition to pink:
Add about 4-5 beads of a lighter, perhaps slightly translucent red or dark pink. -
Bridge the colors:
Thread 3-4 beads of a medium pink shade. Notice how the colors are slowly cooling down as you move along the strand. -
Move into purple:
String 4-5 beads of a rich mauve or light purple. I find checking the bracelet against my wrist frequently helps ensure the color blocks aren’t too long or short. -
Deepen the hue:
Add 4-5 beads of a darker, solid purple or amethyst color. -
Complete the gradient:
Finish the main color sequence with your darkest purple beads, mirroring the visual weight of the initial red section. -
Final accent:
Place the second silver spacer bead after the dark purples. If you like, you can add a contrasting bead, like the hematite or dark grey bead seen near the knot in the example.
Step 3: Finishing the Bracelet
-
Check the fit:
Wrap the unfinished strand around your wrist. It should sit comfortably without gaps but not be so loose it slides off. Add or remove red or purple beads at the ends if adjustments are needed. -
Pre-stretch the cord:
Before tying, give the ends of the elastic a few gentle tugs. This pre-stretching prevents the bracelet from loosening up significantly after the first wear. -
Tie the knot:
Remove the bead stopper and tie the ends together using a surgeon’s knot (looping the cord through twice before pulling tight) or a strong square knot. -
Secure with glue:
Apply a tiny dab of jewelry glue specifically to the knot. Let this dry completely according to the glue manufacturer’s instructions. -
Trim appropriate ends:
Once the glue is dry, carefully trim the excess cord ends close to the knot. Be careful not to nick the main knot. -
Hide the knot:
If one of your beads has a larger hole (often the metal spacer or that dark accent bead), gently tug the knot so it slides inside to conceal it.
Texture Play
Swap the round beads for faceted gemstones or matte-finish glass beads to catch the light differently and add tactile interest.
Slip your new gradient bracelet on and enjoy the subtle shift of colors on your wrist


Simple Color-Block Stripes

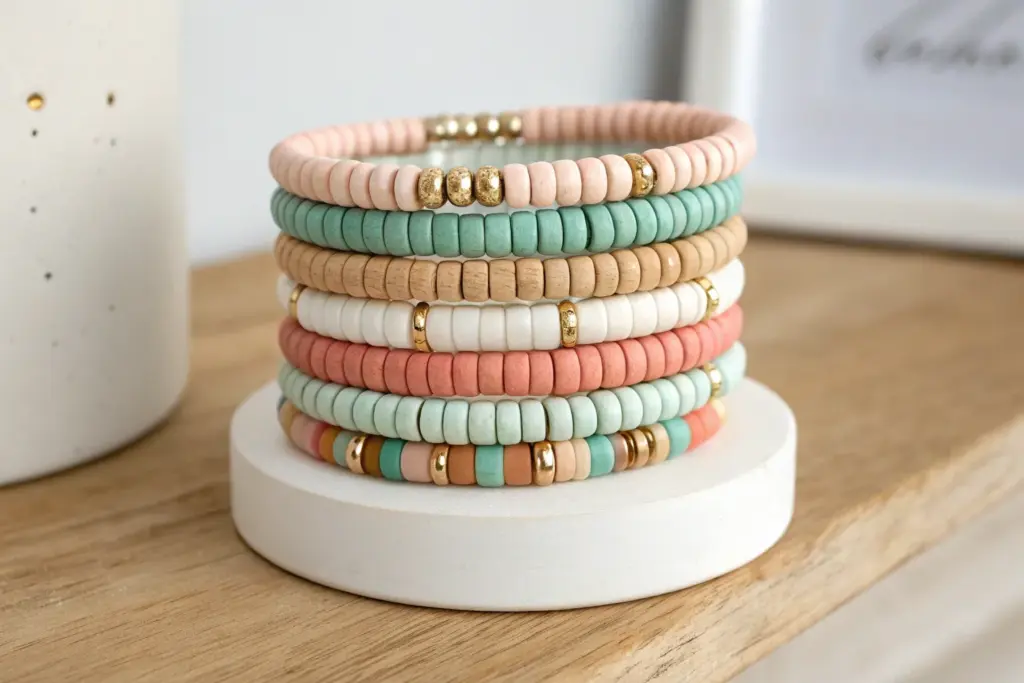
Embrace the soothing palette of sage green, warm coral, and soft peach with this duo of color-blocked heishi bead bracelets. The interspersed gold spacers add just the right amount of shine to elevate this casual, beachy accessory into something chic.
Detailed Instructions
Materials
- 6mm flat polymer clay heishi beads in Sage Green
- 6mm flat polymer clay heishi beads in Salmon/Coral
- 6mm flat polymer clay heishi beads in Light Peach/Blush
- 6mm flat polymer clay heishi beads in Cream/Off-White
- 3mm or 4mm gold spherical spacer beads (metal or acrylic)
- 0.8mm clear elastic stretch cord
- Jewelry glue or clear nail polish
- Scissors
- Bead stopper or masking tape
- Ruler or measuring tape
Step 1: Preparation & Planning
-
Measure your wrist:
Wrap a measuring tape loosely around your wrist to determine your size. Add about 0.5 inches to this measurement for a comfortable fit that isn’t too tight. -
Cut the cord:
Cut a piece of elastic cord about 10-12 inches long. This extra length makes tying the finishing knot much easier. -
Secure the end:
Place a bead stopper or a piece of masking tape folded over one end of the cord to prevent your beads from sliding off while you work. -
Plan your pattern:
Look closely at the photo. The design relies on blocks of color separated by gold accents. You will be making two slightly different bracelets that complement each other.
Knot Slipping?
If your elastic knot feels loose, try pre-stretching the cord before beading. Pull the empty cord firmly a few times to take the ‘slack’ out so it stays tight later.
Step 2: Bracelet 1: The Peach & Green Focus
-
Start the green section:
Thread on approximately 8 to 10 Sage Green heishi beads. This creates your first solid block of color. -
Add first gold accent:
Slide on three gold spherical spacer beads. These act as the dividers between your color blocks. -
Create the peach block:
Thread on about 8 Light Peach beads. Try to keep the length of this block similar to the green one for symmetry. -
Add second gold accent:
Slide on another set of three gold spacer beads. -
Form the coral block:
Add a section of 8 Salmon/Coral beads. The vibrant pinkish tone contrasts beautifully with the softer peach. -
Add third gold accent:
Add three more gold spacer beads to close off the coral section. -
Repeat until full:
Continue this pattern (Green block -> Gold -> Peach block -> Gold -> Coral block -> Gold) or introduce a Cream block occasionally until the bracelet reaches your desired length.
Step 3: Bracelet 2: The Cream & Coral Variation
-
Second cord prep:
Prepare a second piece of elastic cord just like the first one. -
Cream accent block:
Start with a short block of Cream/Off-White beads, maybe 6-8 beads long. -
Gold divider:
Add your signature trio of gold spacer beads. -
Extended coral section:
String on a slightly longer section of Salmon/Coral beads to make this color pop more on the second strand. -
Finish the pattern:
Rotate through Sage Green and Light Peach blocks, separated by gold trios, until the second bracelet matches the length of the first.
Make It Personal
Swap the gold spacer trio for a single letter bead in the center of a color block to add initials or a short word without disrupting the color-block aesthetic.
Step 4: Finishing Touches
-
Check the fit:
Wrap the unfinished bracelet around your wrist to ensure the ends meet comfortably without gaps or stretching. -
Prepare the knot:
Remove the bead stopper or tape. Bring both ends of the cord together. -
Tie the surgeon’s knot:
Tie a standard overhand knot, but loop the end through the circle a second time before pulling tight. This extra loop adds significant security. -
Tighten securely:
Pull the cords firmly. You want the knot to be tight, but be careful not to snap the elastic. I usually pull on the two tail ends, and then gently pull the beaded sections away from the knot to snug it up. -
Secure with glue:
Add a tiny drop of jewelry glue or clear nail polish directly onto the knot. Let it dry completely tailored to the glue’s instructions. -
Hide the knot:
Trim the excess cord ends close to the knot. Gently tug the bracelet so the knot slides inside the hole of a nearby bead, hiding it from view.
Slip on your new stack of bracelets and enjoy the custom pop of color on your wrist


All-White With Gold Pops
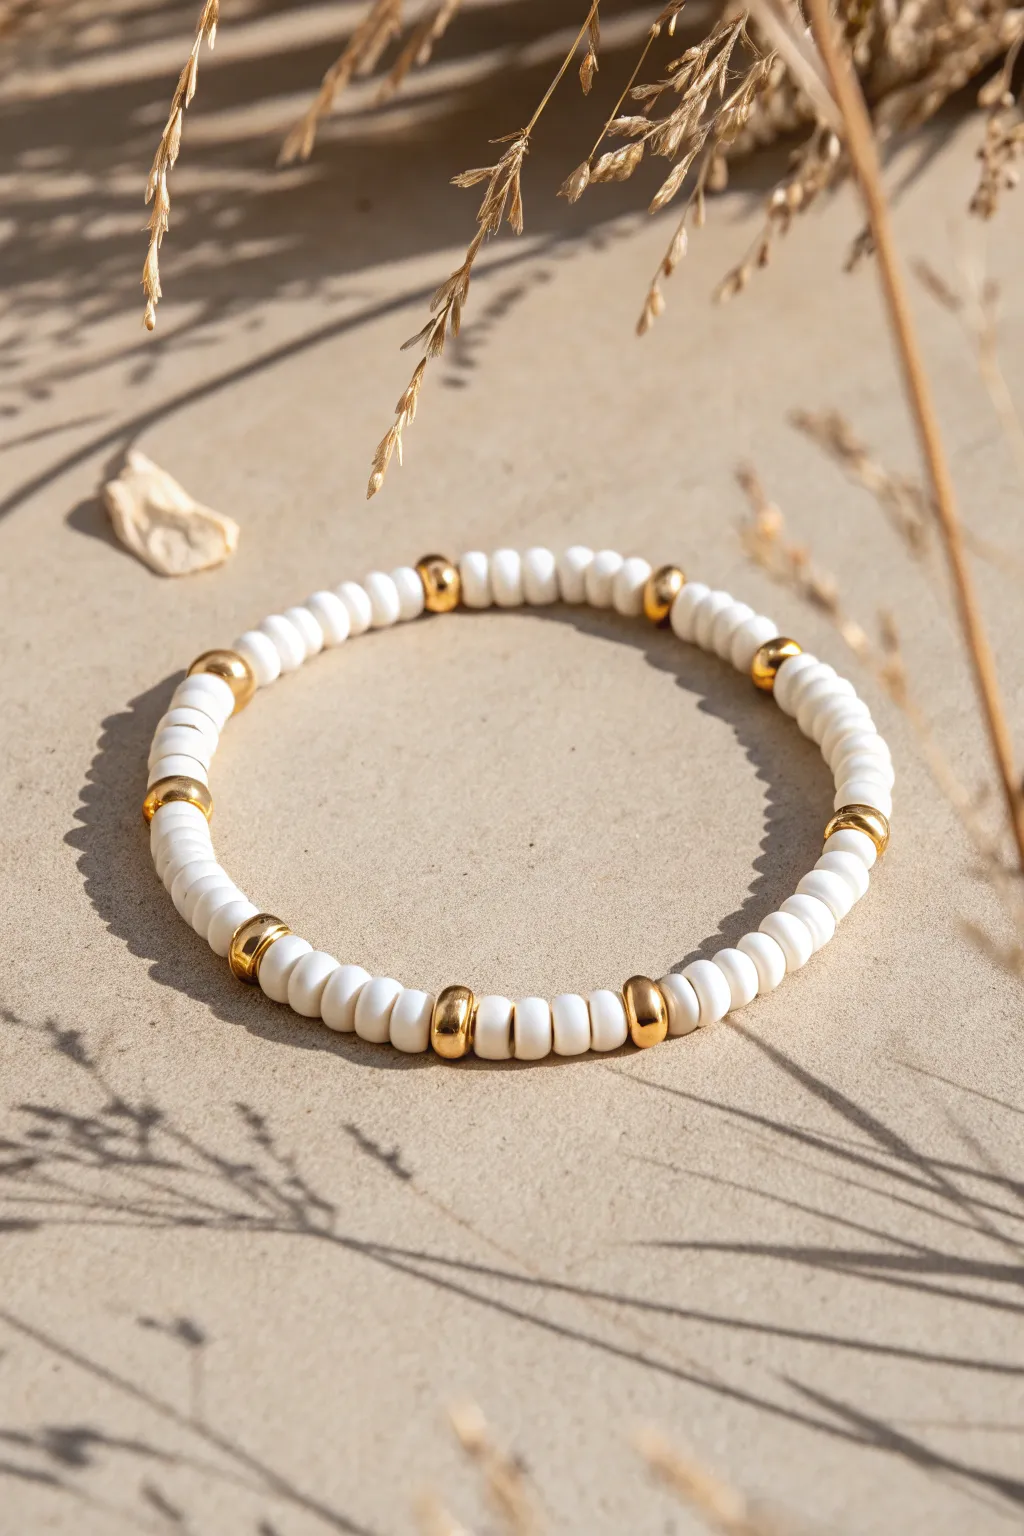
Achieve an effortlessly chic look with this minimalist design that pairs crisp white heishi beads with warm, reflective gold spacers. The pattern relies on symmetry to create a balanced piece that looks equally stunning worn solo or stacked with other bracelets.
Step-by-Step Guide
Materials
- White polymer clay heishi beads (6mm or 4mm)
- Gold stainless steel or brass spacer beads (doughnut or wheel shape)
- Strong elastic cord (0.8mm clear)
- Jewelry glue or clear nail polish
- Scissors
- Bead stopper or tape
- Ruler or measuring tape
Step 1: Preparation & Planning
-
Measure your wrist:
Start by measuring your wrist with a flexible measuring tape. Add about half an inch to your measurement for a comfortable fit that isn’t too tight. -
Cut the cord:
Cut a length of elastic cord about 10-12 inches long. Having this extra length makes the final tying process much less frustrating. -
Pre-stretch the elastic:
Give your elastic cord a few firm tugs before you begin beading. This pre-stretching step helps prevent the bracelet from sagging or expanding after you wear it a few times. -
Secure the end:
Place a bead stopper at one end of the cord, or simply tape it down to your table surface to stop beads from sliding off while you work.
Knot Strength Secret
Pre-stretching your elastic is vital! It prevents the bracelet from loosening later, ensuring your carefully tied knot stays perfectly tight.
Step 2: Creating the Pattern
-
Understand the sequence:
This design uses a repeating pattern: a segment of white beads followed by a single gold accent bead. -
Start the first segment:
Thread approximately 5 to 7 white heishi beads onto the elastic. The exact number depends on how spaced out you want your gold accents to be. -
Verify the count:
Double-check your bead count for this first section. Consistency is key for this specific symmetrical look. -
Add the gold pop:
Slide on one gold spacer bead. Ensure it sits flush against the stack of white clay beads. -
Repeat the white section:
Add another set of white heishi beads, using the exact same number as your first segment. -
Continue the pattern:
Keep repeating this sequence—white stack, gold bead, white stack—until you have nearly reached your desired length. -
Check the fit:
Wrap the unfinished strand around your wrist to check the sizing. I usually aim for the ends to just touch without stretching the cord. -
Adjust length subtly:
If the length is slightly off, add or remove 1-2 white beads from the final segments rather than removing a whole pattern block, so the design stays balanced.
Step 3: Finishing Touches
-
Prepare for the knot:
Remove the bead stopper or tape carefully. Bring both ends of the elastic together. -
Tie the first loop:
Create a standard overhand knot but don’t pull it fully tight yet. -
Secure with a surgeon’s knot:
For the second knot, loop the elastic through twice instead of once. This ‘surgeon’s knot’ creates extra friction to hold slick elastic in place. -
Tighten carefully:
Pull the cords tight slowly. You want the beads to touch snugly, but avoid bunching or buckling the bracelet. -
Apply adhesive:
Dab a tiny drop of jewelry glue or clear nail polish directly onto the knot. This prevents it from slipping over time. -
Hide the knot:
If possible, slide the knot inside the hole of the nearest gold bead since metallic openings are often slightly larger than clay ones. -
Trim the excess:
Once the glue is dry, trim the excess elastic tails close to the knot with sharp scissors.
Upscale Your Design
Swap the plain gold spacers for gold-filled beads or textured stardust beads to add extra sparkle and durability to your piece.
Now you have a timeless accessory ready to complement any outfit with its crisp white and gold contrast


Monochrome Neutrals Stack
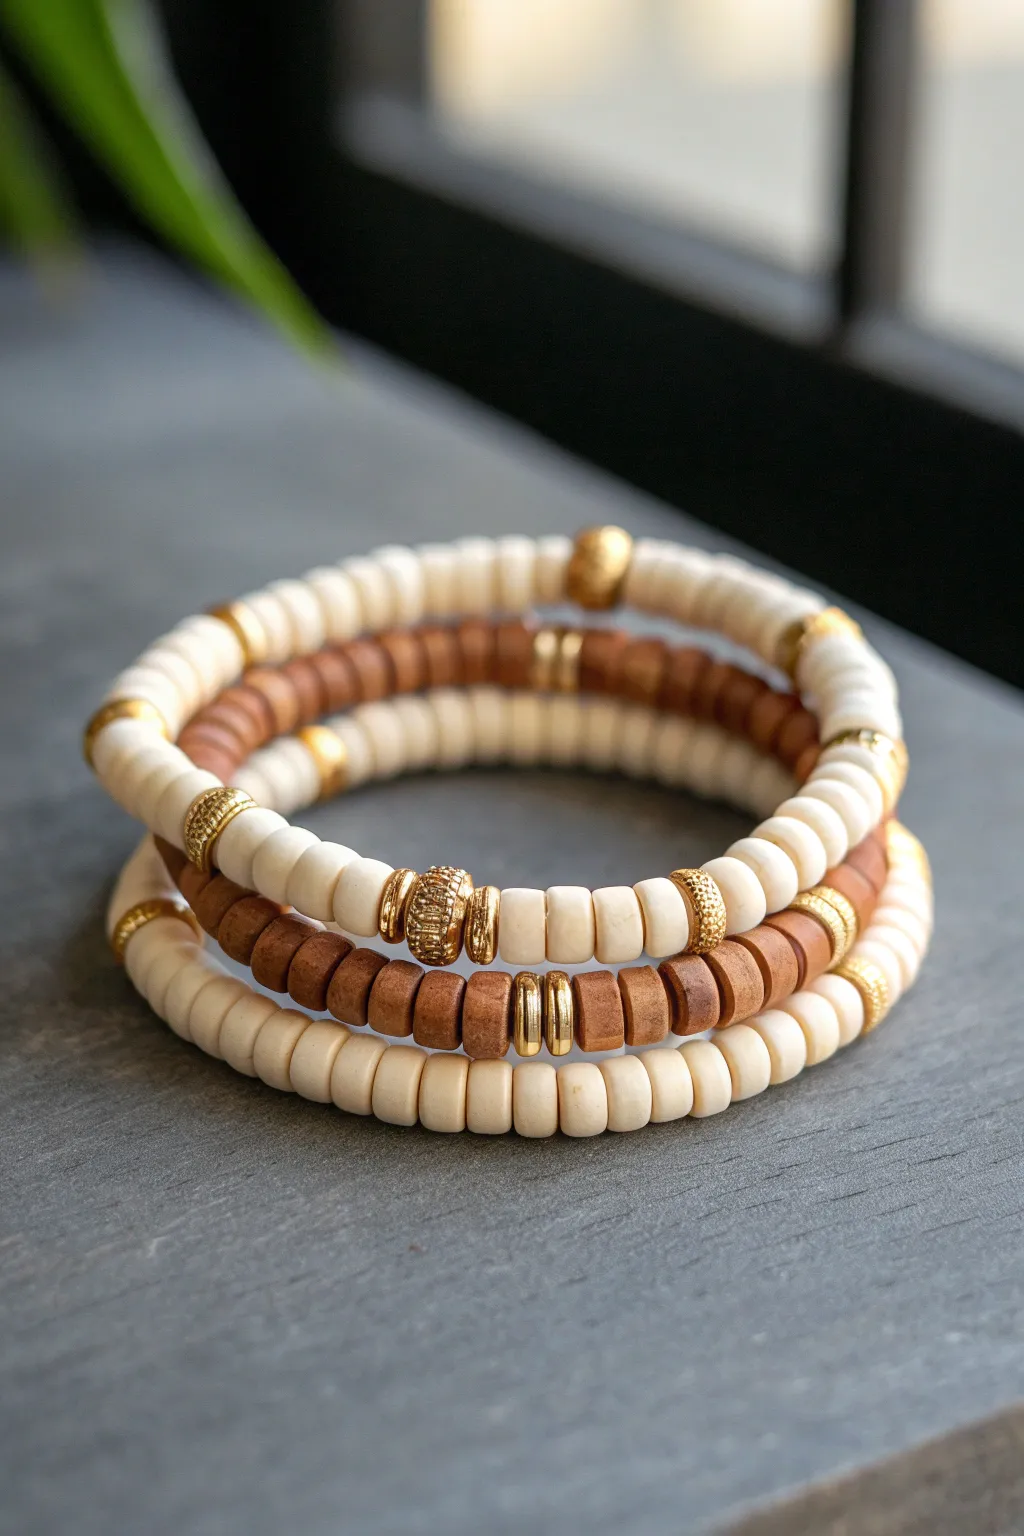
Embrace the effortless elegance of neutral tones with this stunning three-bracelet stack. Combining creamy white heishi discs with warm brown spacers and gleaming gold accents creates a sophisticated, versatile set that goes with everything.
Step-by-Step Tutorial
Materials
- Creamy white polymer clay heishi beads (6mm)
- Light brown wood or coconut shell heishi beads (6mm)
- Gold tone metal spacer beads (thin discs and rounded)
- Textured gold accent beads (barrel or rondelle shape)
- Strong elastic cord (0.8mm clear)
- Super glue or jewelry cement
- Scissors
Step 1: Planning Your Stack
-
Measure your wrist:
Before cutting any cord, wrap a measuring tape around your wrist to find your size. Add about half an inch for a comfortable fit, then cut three strands of elastic cord, each about 10-12 inches long to give yourself plenty of tying room. -
Pre-stretch the cord:
Hold a piece of cut elastic between your hands and give it a few gentle but firm tugs. This crucial step prevents the finished bracelets from stretching out and becoming loose after just a few wears. -
Secure one end:
Attach a bead stopper or simply place a piece of tape on one end of your first elastic strand. This keeps your hard work from sliding right off onto the floor while you bead.
Knot Slipping?
If your elastic knot feels insecure, try a drop of clear nail polish instead of super glue. It remains slightly flexible when dry, preventing the knot from becoming brittle and snapping.
Step 2: Bracelet 1: The Textured Cream
-
Start the base pattern:
Begin threading the cream heishi beads onto the cord. String on about 10-12 cream beads to form a solid section of neutral color. -
Add gold accents:
Slide on a textured gold rondelle bead. I like to frame these with a tiny gold disc spacer on either side to make them pop against the matte clay. -
Create the repeating rhythm:
Continue this pattern—10 to 12 cream beads followed by a gold accent section—until you reach your desired length. Aim for about 5 or 6 gold accent points evenly spaced around the bracelet.
Step 3: Bracelet 2: The Wood & Gold Mix
-
Establish the pattern:
For the middle bracelet, we want more contrast. String 5 brown wood beads, followed by two thin gold disc spacers. -
Incorporate the focal point:
String another 5 brown wood beads. Now, add a larger, decorative gold barrel bead as a center accent. Follow it immediately with two more thin gold discs. -
Alternate colors:
Switch to cream beads for the next section. String 10 cream beads, then repeat the gold spacer sequence. Alternating between brown wood sections and cream clay sections adds depth to the stack.
Level Up The Look
Swap the brown wood beads for tiger’s eye stone chips or matte bronzite beads. This adds a subtle luxurious weight and natural stone texture while keeping the earth-tone palette.
Step 4: Bracelet 3: All-Cream Minimalist
-
Build the foundation:
The final bracelet acts as a unifying piece. Fill the majority of the strand with just the cream heishi beads. -
Insert subtle shimmer:
Every inch or so, interrupt the cream beads with a single, smooth gold sphere or a small stack of three thin gold disc spacers. This keeps it simple but cohesive.
Step 5: Finishing Touches
-
Check the fit:
Wrap each beaded strand around your wrist to ensure they sit comfortably together. Remove or add a few beads if necessary so they aren’t too tight. -
Tie the knots:
Remove the tape or stopper. Bring the two ends of the elastic together and tie a surgeon’s knot—loop the elastic twice before pulling tight, then loop once more to lock it. -
Secure with glue:
Apply a tiny dab of jewelry glue specifically to the knot. Pull the knot tight again and let it dry for a moment. -
Hide the knot:
Trim the excess cord close to the knot, leaving just a tiny tail. Gently pull the elastic so the knot slides inside the hole of a neighboring bead, hiding it from view.
slip on your new stack and enjoy the balance of texture and neutral tones

The Complete Guide to Pottery Troubleshooting
Uncover the most common ceramic mistakes—from cracking clay to failed glazes—and learn how to fix them fast.
Ombre Fade In One Color
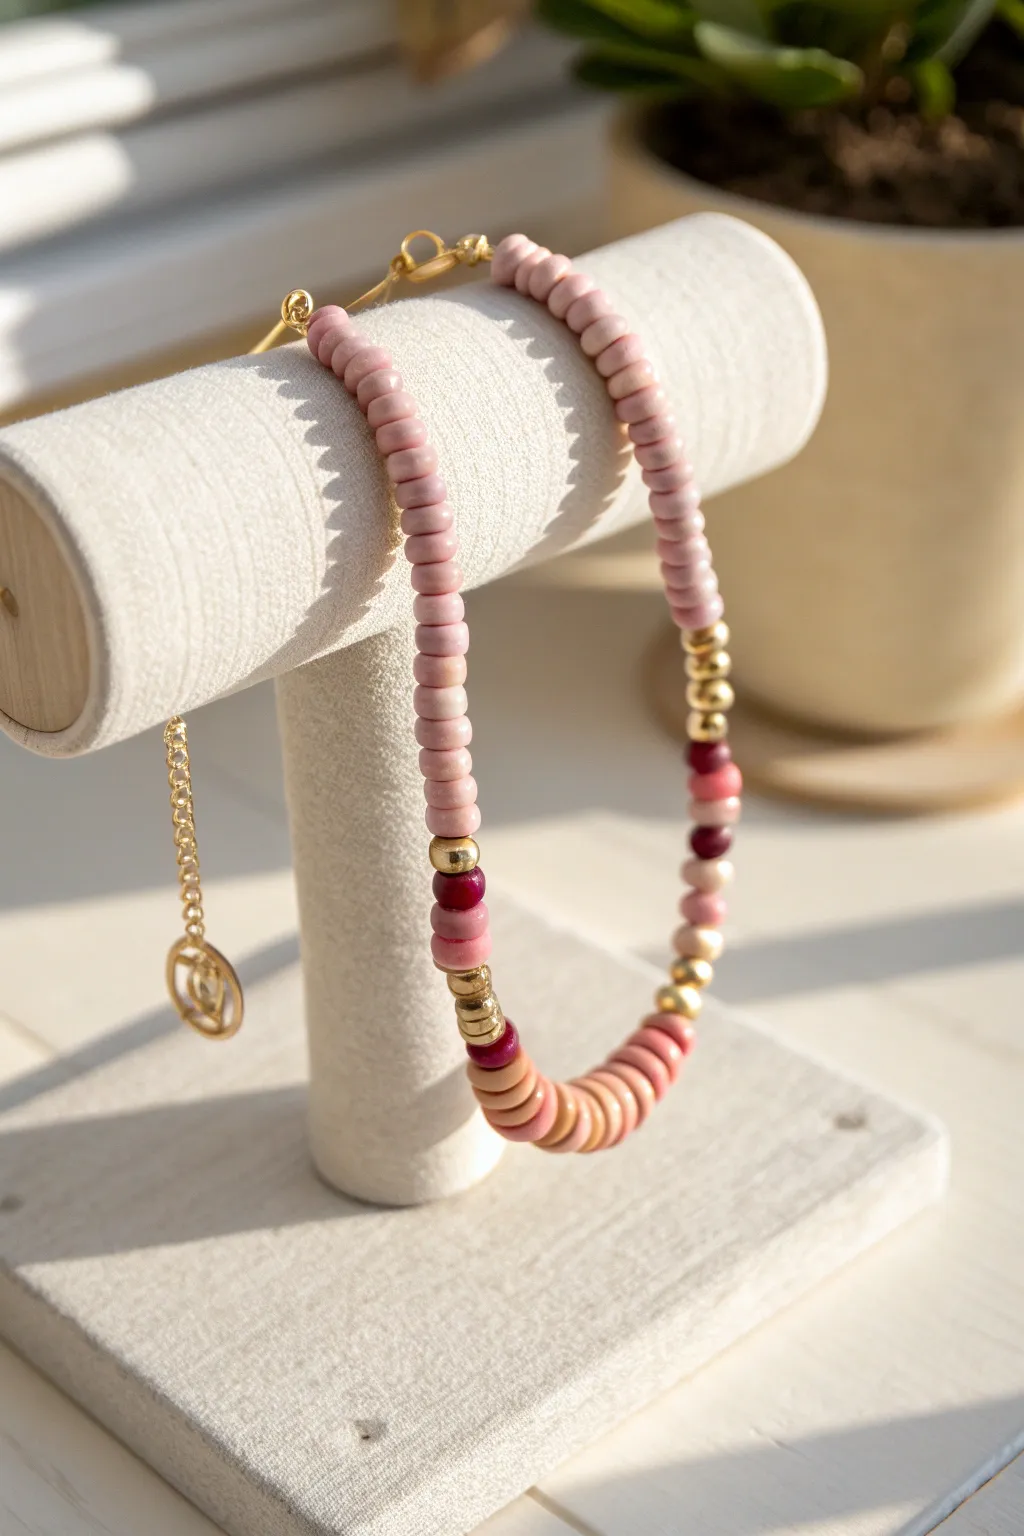
This elegant bracelet design elevates the simple heishi bead trend by combining soft matte textures with flashes of metallic gold. The subtle color transition from blush pink to deep plum creates a sophisticated ombre look perfect for stacking or wearing solo.
Step-by-Step
Materials
- 6mm polymer clay heishi beads (pastel pink, mauve, terracotta, berry/plum)
- 4mm gold spacer beads (round)
- 6mm gold spacer beads (flat disc or heishi style)
- Flexible beading wire or strong elastic cord (0.8mm)
- Gold tone crimp beads
- Gold tone crimp covers
- Gold tone jump rings
- Gold tone lobster clasp
- Gold extension chain with charm (optional)
- Jewelry pliers (flat nose and crimping)
- Wire cutters
- Bead board or measuring tape
Step 1: Planning and Preparation
-
Measure your wrist:
Before cutting any wire, wrap a measuring tape around your wrist to find your size. Add about 0.5 to 1 inch to this measurement to ensure a comfortable fit that isn’t too tight. -
Cut your stringing material:
Cut a length of beading wire or elastic cord that is at least 4-5 inches longer than your final bracelet size. This extra length is crucial for tying knots or securing crimp beads comfortably. -
Secure one end:
If using beading wire, thread a crimp bead and a wire guardian or loop onto one end. Loop the wire back through the crimp bead and use your crimping pliers to flatten it securely. Attach a jump ring and your extension chain here. If using elastic, you can simply use a bead stopper or a piece of tape to prevent beads from sliding off.
Seamless Spacers
Use gold hematite beads instead of plated plastic for spacers. They have a heavier feel, don’t tarnish as quickly, and elevate the perceived value of the piece.
Step 2: Stringing the Ombre Beading
-
Start with the main color:
Begin stringing your primary color—the pastel pink heishi beads. Thread about 2/3 of your total bracelet length with just this single solid color to create a clean, modern base. -
Introduce the first metallic accent:
After your main pink section, slide on one flat gold spacer bead followed by a round gold spacer bead. This creates a visual break before the color transition begins. -
Begin the color shift:
Add a darker accent bead, such as a deep berry or plum heishi bead. Follow this immediately with a round gold spacer to frame the new color. -
Layer the transition colors:
Now, thread three to four beads of a mid-tone shade, like a terracotta or dark mauve. I like to check the pattern against the light here to ensure the colors flow naturally. -
Add the focal section:
String a sequence of about 10-12 beads that shift hues. Start with a few light mauve beads, transition into peachy-terracotta tones, and finish with a pop of darker pink. -
Frame the focal section:
Close this colorful focal section with another sequence of gold spacers. Mirror what you did on the other side: a round gold bead, a deep berry heishi bead, and a flat gold spacer. -
Finish with the main color:
Fill any remaining length needed for the bracelet with the original pastel pink heishi beads until you reach your measured size.
Pattern Play
Swap the single focal section for scattered gold beads every 10 pink beads. This creates a rhythmic, studded look that sparkles from every angle.
Step 3: Finishing Touches
-
Check the fit:
Wrap the unfinished strand around your wrist to verify the size. The beads should sit comfortably without pinching. -
Secure the final end:
Thread a crimp bead onto the wire, followed by the loop of your jump ring or lobster clasp. Thread the wire back down through the crimp bead and pull it taut—but not so tight that the bracelet becomes stiff. -
Crimp and trim:
Use your crimping pliers to secure the crimp bead firmly. Snip off the excess wire with your wire cutters as close to the bead as possible. -
Cover the crimps:
Place a gold crimp cover over the crimped bead. Gently squeeze it closed with your flat nose pliers until it resembles a round gold bead, giving your bracelet a professional finish. -
Attach the clasp:
Open a jump ring by twisting it sideways (never pulling apart). Slide on your lobster clasp and the loop of your wire end, then twist the ring closed securely.
Enjoy styling your new bracelet stack with different textures and metallic finishes
Two-Color Candy Stripe
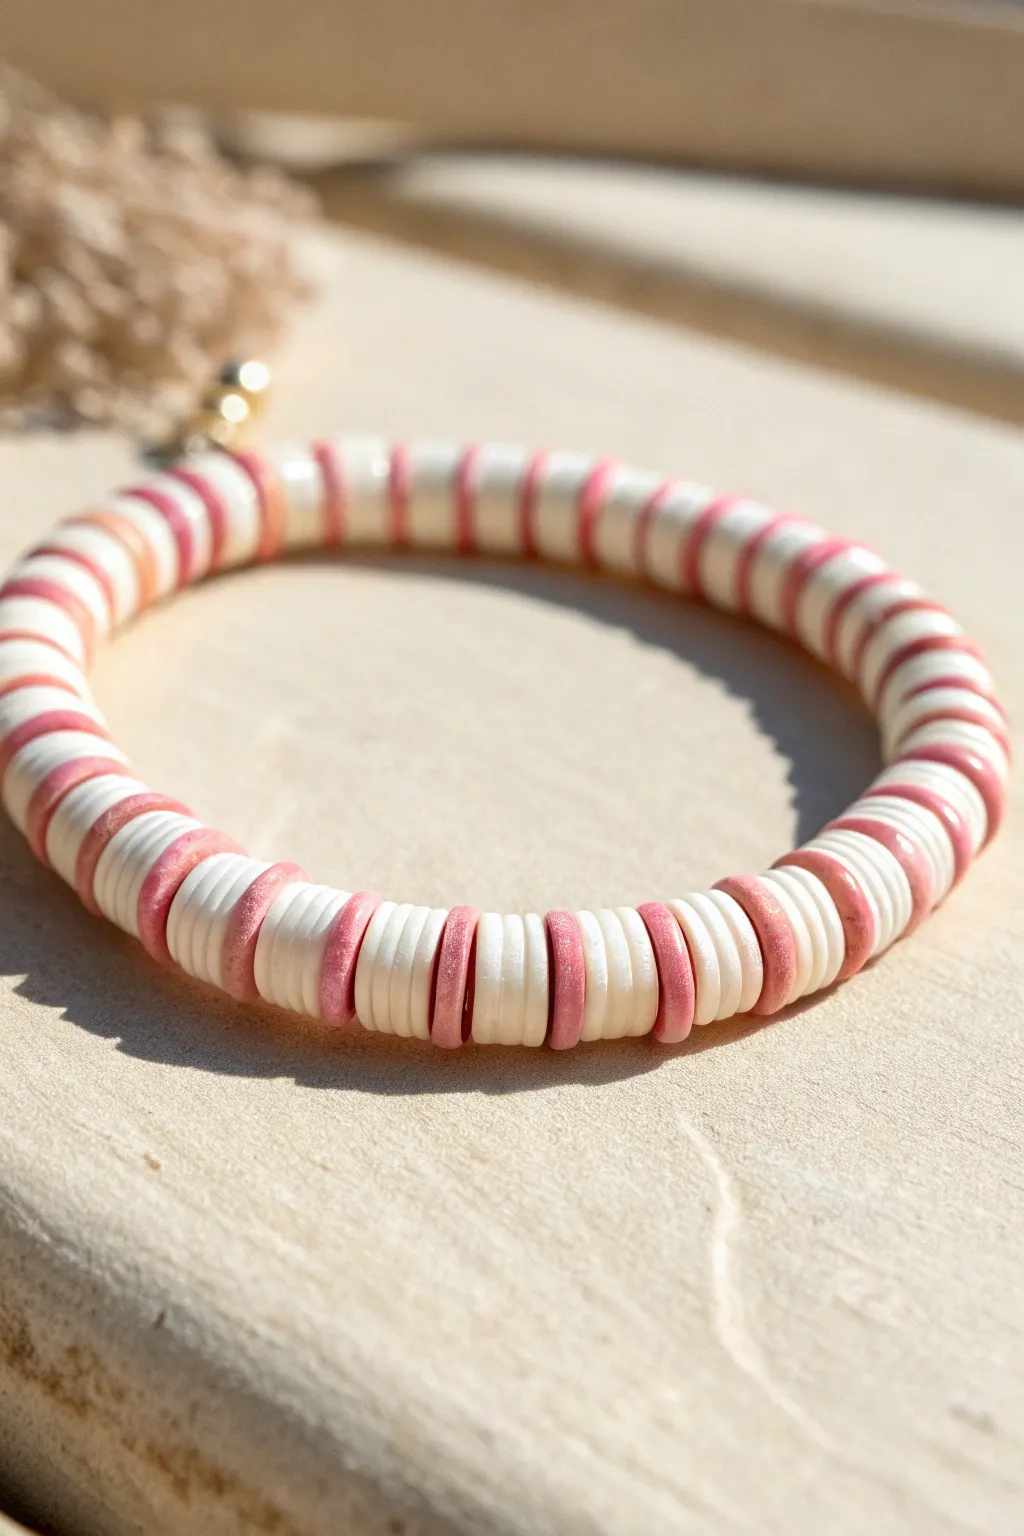
Embrace a sweet, nostalgic vibe with this simple yet striking candy-striped design. Using just two colors in a rhythmic 2-1 pattern creates a clean look perfect for stacking or wearing solo.
Step-by-Step Guide
Materials
- 6mm Heishi polymer clay disk beads (Cream/Off-White)
- 6mm Heishi polymer clay disk beads (Soft Pink/Peach)
- 0.8mm clear elastic stretch cord
- Super glue or jewelry cement
- Scissors
- Bead stopper or tape
- Small gold spacer bead (optional, for hiding the knot)
Step 1: Preparation
-
Measure your wrist:
Wrap a piece of string or a flexible measuring tape around your wrist to find your exact size. -
Calculate cord length:
Add about 3 to 4 inches to your wrist measurement. This extra length is crucial for tying a secure knot later without struggling. -
Cut the cord:
Snip your elastic cord to length using sharp scissors to ensure a clean end that won’t fray. -
Pre-stretch the elastic:
I always give the elastic a few firm tugs before starting. This pre-stretching prevents the bracelet from drooping or loosening up right after you finish making it. -
Secure the end:
Attach a bead stopper to one end of the cord, or simply tape it down to your table so beads don’t slide off while you work.
Use a Sorting Tray
Pour your cream and pink beads into separate sections of a flock-lined sorting tray. This stops them from rolling away and speeds up picking.
Step 2: Beading the Pattern
-
Start the sequence:
Begin by threading two cream-colored heishi beads onto the elastic cord. -
Add the accent color:
Follow the two cream beads with a single pink bead. This establishes the foundational ‘candy stripe’ rhythm. -
Check fit and texture:
Slide the beads down to the stopper. Ensure they sit flush against each other but aren’t squeezed so tight that they buckle. -
Build the length:
Continue repeating the pattern: two cream beads, then one pink bead. -
Maintain consistency:
As you work, occasionally twist the strand to check for any misshapen or broken beads and remove them to keep the cylinder shape uniform. -
Finish the strand:
Stop adding beads when the beaded portion matches your wrist measurement. Since polymer clay beads have some bulk, adding an extra 0.5 inch is often wise for a comfortable fit. -
Symmetry check:
Try to end your pattern so that when the bracelet is joined, the sequence continues unbroken (e.g., if you started with cream, end with pink).
Knot Slipping Out?
If the knot won’t stay hidden detailed inside a bead, use a larger metallic spacer bead or a crimp cover over the knot for a deliberate finish.
Step 3: Finishing Touches
-
Prepare to tie:
Remove the bead stopper or tape carefully, holding both ends of the elastic firmly. -
Tie the first knot:
Cross the ends and wrap one under the other to create a simple overhand knot. Pull it tight to bring the beads together. -
Secure with a colorful knot:
Tie a double surgeon’s knot (loop the end through twice instead of once) for extra security. Pull the elastic taut, but be careful not to snap it. -
Apply adhesive:
Dab a tiny drop of super glue or jewelry cement directly onto the knot. Let it dry for a minute or two. -
Hide the knot:
If the hole of one of your adjacent beads is large enough, gently tug the elastic so the glued knot slides inside the bead, hiding it from view. -
Trim excess:
Once the glue is fully cured, trim the excess tail of the elastic cord close to the knot using your precision scissors.
Slip on your new candy-striped creation and enjoy the subtle pop of color


What Really Happens Inside the Kiln
Learn how time and temperature work together inside the kiln to transform clay into durable ceramic.
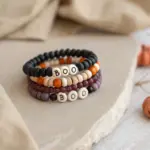
Complementary Color Pop
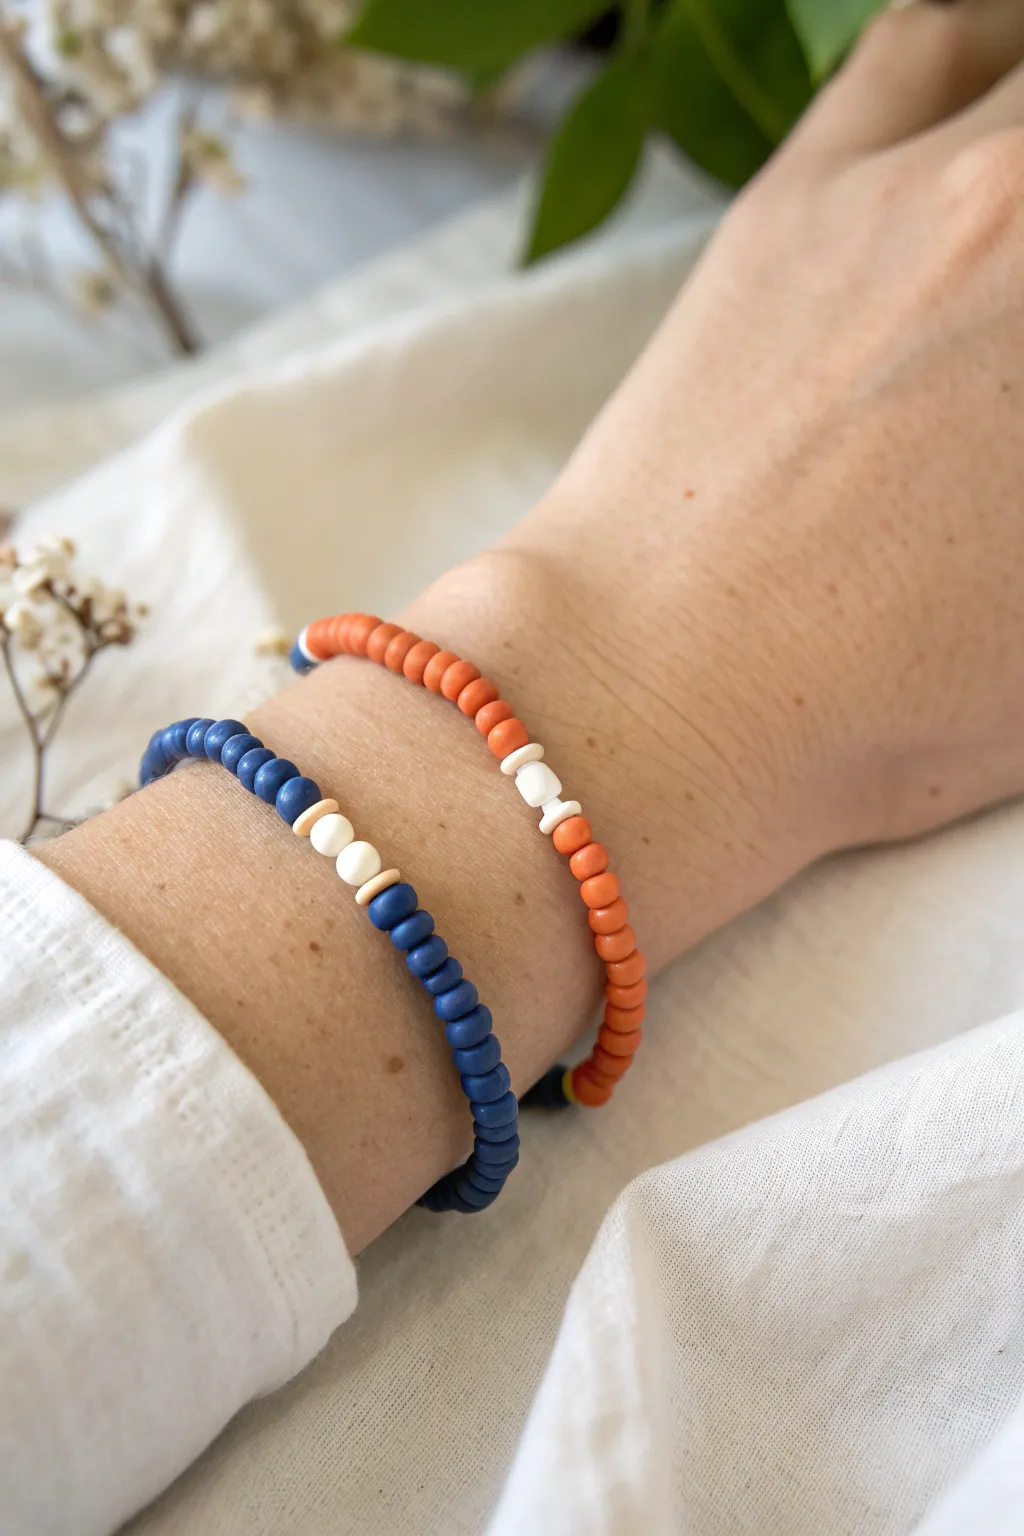
Embrace the power of opposites with this vibrant set of heishi bead bracelets featuring a complementary blue and orange color scheme. The matte finish of the clay beads gives them a modern, earthy texture, while the small interruptions of white and cream add just the right amount of visual breathing room.
How-To Guide
Materials
- Matte heishi clay disc beads (navy blue)
- Matte heishi clay disc beads (burnt orange)
- Matte heishi clay disc beads (white)
- Matte heishi clay disc beads (ivory or cream)
- Elastic cord (0.8mm or 1mm thickness)
- Scissors or jewelry nippers
- Hypo-cement or clear jewelry glue
- Bead stopper or tape
- Ruler or measuring tape
Step 1: Blue Bracelet Set-Up
-
Measure the cord:
Cut a piece of elastic cord about 10-12 inches long. This generous length makes tying the final knot much easier than fighting with short ends. -
Secure the end:
Attach a bead stopper to one end of your cord, or simply tape it down to your workspace so your beads don’t slide off mid-project. -
Start the blue base:
Begin threading your navy blue heishi beads onto the cord. Continue this solid color until you have approximately 2 to 2.5 inches of beading.
Uneven Tension?
If the bracelet twists or gaps, pre-stretch your elastic cord firmly before you start stringing beads. This prevents it from stretching out later.
Step 2: Creating the Blue Focal Point
-
Add first contrast:
String on one single cream-colored heishi bead. -
Add white accent:
Follow the cream bead with two crisp white beads. These should sit snugly against each other. -
Finish the pattern:
Add one more cream bead after the white ones to complete this symmetrical four-bead accent section. -
Complete the blue strand:
Resume threading the navy blue beads until the total beaded length matches your wrist measurement (usually around 6.5 to 7 inches for an average fit).
Pattern Placement
To get the look in the photo, make the orange strand slightly looser or tighter than the blue one so they naturally sit apart on the wrist.
Step 3: Finishing the Blue Bracelet
-
Check the fit:
Wrap the strand around your wrist to ensure it sits comfortably—snug but not tight. -
Tie the knot:
Remove the bead stopper and tie a strong surgeon’s knot (right over left, left over right, and loop through an extra time). -
Secure with glue:
Dab a tiny drop of jewelry glue onto the knot before pulling it tight. I like to let this dry briefly before snipping the excess cord close to the knot.
Step 4: Orange Bracelet Assembly
-
Prepare cord:
Cut another 10-12 inch length of elastic cord and secure the end just as before. -
Begin orange base:
Start threading the burnt orange heishi beads. Aim for about 2.5 to 3 inches of solid color to offset the pattern slightly from the blue bracelet. -
Create the white break:
String on one cream bead, followed by two white beads, and then one final cream bead. This mirrors the pattern on the blue bracelet perfectly. -
Finish orange beading:
Fill the rest of the cord with the burnt orange beads until you reach your desired total length. -
Final knotting:
Tie off the orange bracelet using a surgeon’s knot, apply a dot of glue, and trim the ends once dry. -
Hide the knots:
Gently tug on the bracelets to slide the knots inside one of the bead holes for a seamless, professional finish.
Slide both bracelets on together to enjoy the striking pop of complementary matte colors against your skin
Pastel Sorbet Mix

Capture the sweetness of summer treats with this delightful polymer clay bead bracelet featuring a soft palette of lavender, mint, peach, and cream. The addition of gold spacer beads adds just the right amount of shine, making it an elegant accessory for everyday wear.
Step-by-Step Guide
Materials
- 6mm Heishi polymer clay beads (Lavender)
- 6mm Heishi polymer clay beads (Mint Green)
- 6mm Heishi polymer clay beads (Peach/Soft Coral)
- 6mm Heishi polymer clay beads (Cream or Pale Yellow)
- 6mm Gold disc spacer beads (metal or hematite)
- 0.8mm clear elastic stretch cord
- Jewelry glue or clear nail polish
- Scissors
- Tape or binder clip
- Bead design board (optional)
Step 1: Preparation
-
Measure the cord:
Cut a piece of elastic cord about 10-12 inches long. This generous length gives you plenty of room to tie knots without struggling against tension. -
Strech the cord:
Give the elastic cord a few good tugs before you start beading. This ‘pre-stretching’ helps prevent the bracelet from sagging or loosening up after you wear it a few times. -
Secure the end:
Place a piece of tape or a binder clip on one end of the cord to stop your beads from sliding off while you work.
Knot Security Pro-Tip
Don’t cut the tails flush immediately! Let the glue cure fully (often 24 hours) for maximum strength before the final close trim.
Step 2: Pattern Design
-
Verify your bead counts:
Examine the image to understand the rhythm. Notice how the colors are grouped in small stacks rather than alternating one-by-one. -
Plan the color blocks:
I like to lay my beads out on a board first to visualize the balance. Aim for blocks of 4-6 clay beads of a single color. -
Incorporate the gold:
Plan to insert one gold spacer bead between every few color blocks. You don’t need a gold spacer after *every* change, but aim for roughly 5-6 gold accents spaced evenly around the bracelet.
Step 3: Stringing the Beads
-
Start with lavender:
Thread on a stack of about 5 lavender beads to begin your first section. -
Add a gold accent:
Slide on a single gold disc spacer bead. -
Transition to peach:
Add a block of 5-6 peach or soft coral beads next. -
Continue the pattern:
Follow with a block of mint green beads, then cream/yellow beads. Keep the block sizes relatively consistent, roughly 4mm to 6mm in total length per color. -
Vary the spacers:
Occasionally skip a gold spacer between color changes (like between cream and mint) to keep the look organic and not too rigid. -
Check the length:
Periodically wrap the strand around your wrist. A standard adult bracelet is usually about 7 inches, but adjust for your specific comfort.
Level Up: Texture
Swap the plain gold spacers for gold faceted beads or tiny freshwater pearls to add a different texture while keeping the pastel vibe.
Step 4: Finishing Touches
-
Double check fit:
Ensure the ends meet comfortably without gaps, but aren’t so tight that they pinch your skin. -
Tie the first knot:
Remove the tape or clip. Bring the two ends together and tie a standard overhand knot, pulling it gently tight. -
Tie the surgeon’s knot:
For security, tie a surgeon’s knot next. This is like a regular knot, but you loop the cord through twice before pulling tight. -
Secure with glue:
Place a tiny drop of jewelry glue (GS Hypo Cement works great) or clear nail polish on the knot. Let it dry for a minute. -
Hide the knot:
If the hole of one of your gold spacer beads is large enough, try to gently pull the knot inside it to hide the mechanics. -
Trim excess cord:
Once fully dry, trim the tail ends of the elastic cord close to the knot, leaving about 1mm so it doesn’t slip back through.
Slip on your new pastel creation and enjoy the soft pop of color it brings to your wrist.

TRACK YOUR CERAMIC JOURNEY
Capture glaze tests, firing details, and creative progress—all in one simple printable. Make your projects easier to repeat and improve.
Pearl-and-Heishi Soft Contrast
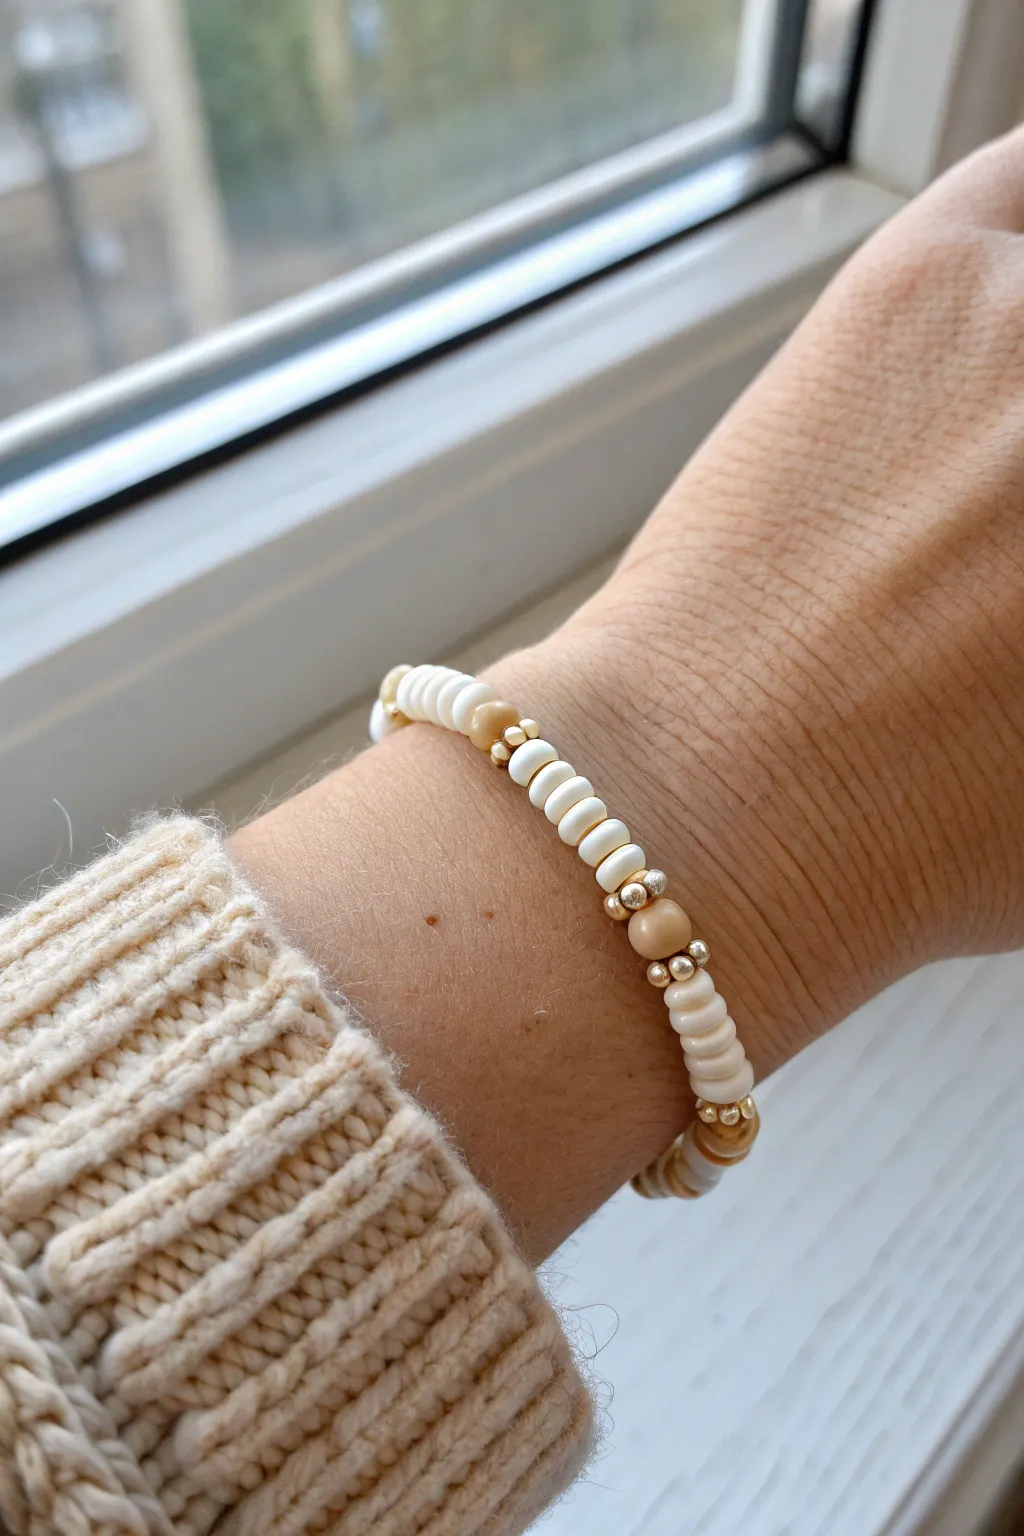
Embrace a timeless aesthetic with this gentle mix of creamy whites, soft tans, and metallic accents. This design balances the flat texture of heishi discs with the roundness of polished stone for a sophisticated, everyday accessory.
Step-by-Step Guide
Materials
- White heishi polymer clay beads (approx. 4-6mm)
- Beige or light caramel round gemstone beads (6mm or 8mm)
- Small gold round spacer beads (2-3mm)
- Elastic stretch cord (0.5mm to 0.8mm)
- Scissors or jewelry snips
- Jewelry glue or clear nail polish
- Bead stopper or tape
- Measuring tape
Step 1: Preparation
-
Measure your wrist:
Wrap a measuring tape comfortably around your wrist where you want the bracelet to sit. Note the measurement. -
Cut the cord:
Cut a piece of elastic cord about 10-12 inches long. This generous length makes tying the knot much easier later. -
Pre-stretch the elastic:
Hold both ends of the cord and give it several gentle tugs. This crucial step prevents the bracelet from sagging or stretching out after you wear it a few times. -
Secure the end:
Place a bead stopper or a piece of tape on one end of the cord to stop beads from sliding off while you design.
Smooth Seams
Make sure your start and end points match up perfectly. If you started with gold, end with heishi so the pattern flows seamlessly when tied.
Step 2: Creating the Pattern
-
Understand the sequence:
Study the pattern shown in the image. It relies on segments of white heishi beads interrupted by focal clusters of gold and beige. -
Start with a white block:
Begin by threading on about 5 to 7 white heishi beads. This establishes the clean, neutral base of the bracelet. -
Add a gold accent:
Slide on one small gold round spacer bead. -
Add the focal bead:
Thread on one larger beige round bead. This size contrast gives the bracelet its appealing texture. -
Complete the cluster:
Finish this focal section by adding another small gold round spacer bead immediately after the beige bead. -
Repeat the heishi section:
Following the gold spacer, add another segment of 5 to 7 white heishi beads. Try to keep this count consistent with your first section for symmetry.
Step 3: Finishing the Design
-
Continue the pattern:
Repeat the sequence—cluster of white heishi, gold spacer, beige bead, gold spacer—until you reach your desired length. -
Check the fit:
Wrap the beaded strand around your wrist to check the size. It should sit comfortably without pinching. -
Adjust length:
If adjustments are needed, add or remove a few white heishi beads from the final segment rather than disrupting a gold/beige cluster.
Metal Mix-up
Swap the polished circular gold spacers for tiny gold heishi disks or faceted geometric spacers for a more modern, textured look.
Step 4: Closing the Bracelet
-
Prepare for tying:
Remove the bead stopper carefully. Bring the two ends of the cord together. -
Tie the first knot:
Cross the ends and loop one under the other to make a simple overhand knot. Pull it tight but gently. -
Secure with a surgeon’s knot:
Make another loop, but pass the cord end through the loop twice before pulling tight. This creates a secure surgeon’s knot. -
Hide the knot:
Apply a tiny dot of jewelry glue to the knot. While the glue is still wet, you can try to slide the knot inside the hole of the nearest large bead if the hole is big enough. -
Trim excess cord:
Once the glue is dry, use your scissors to snip the excess cord ends close to the knot, leaving just a tiny tail.
Slip on your new creation and enjoy the soft textures against your wrist
Shell Focal Beach Vibe
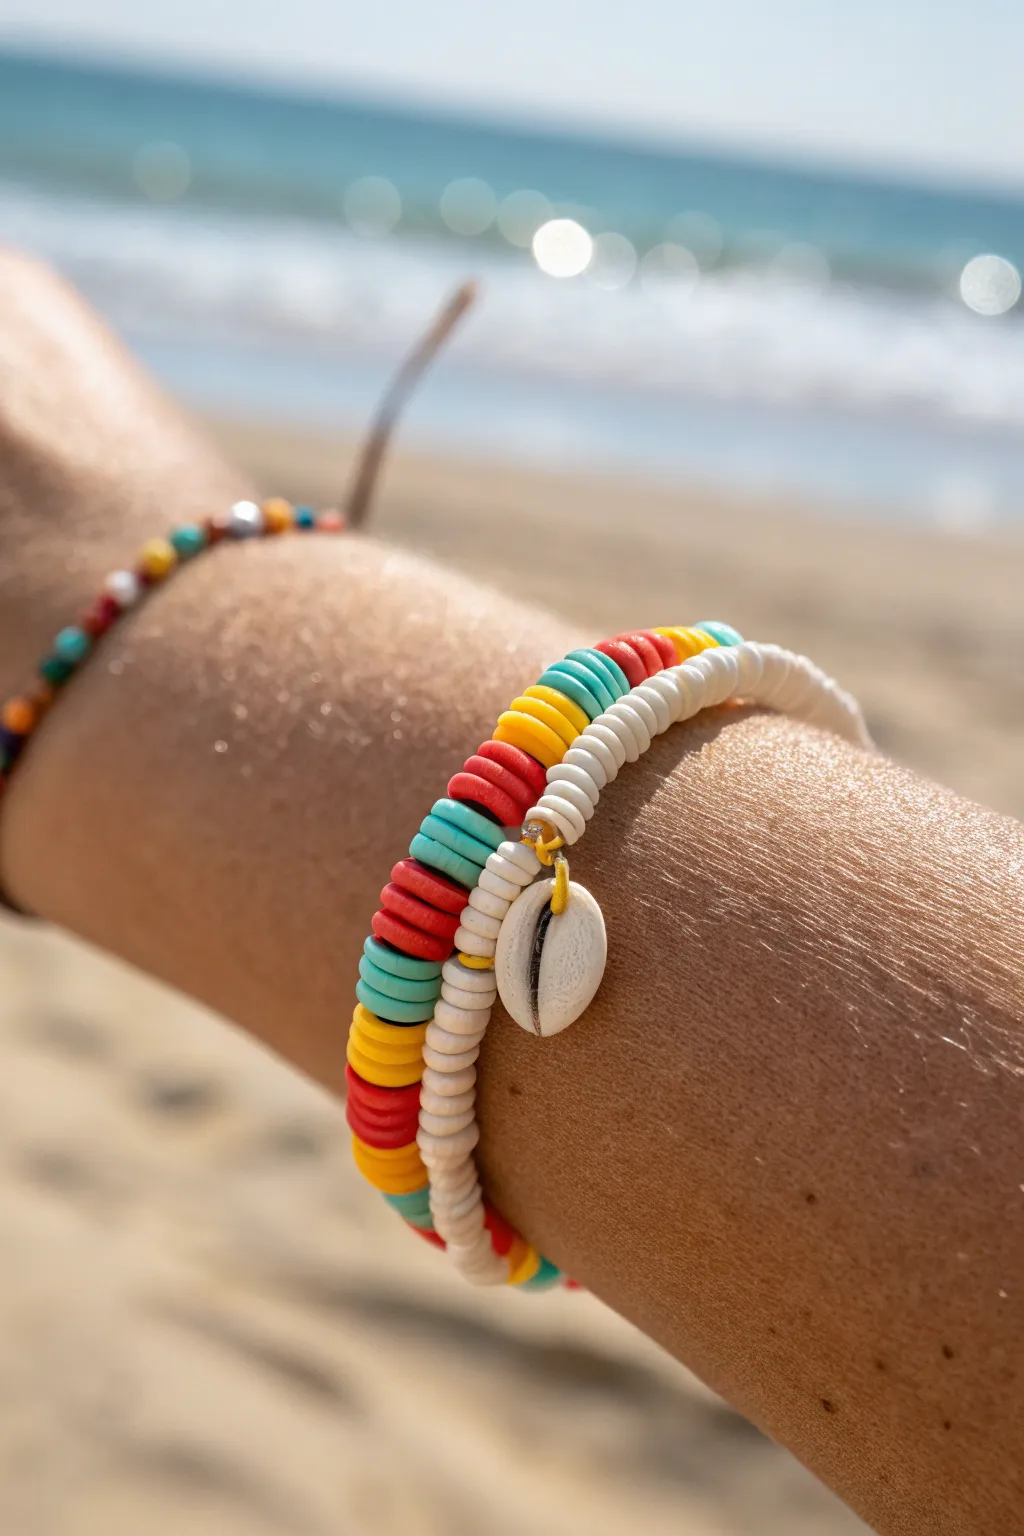
Capture the essence of a sun-soaked holiday with this effortless stacking set featuring a classic cowrie shell dangle. By combining crisp white discs with a vibrant primary color pattern, you get a playful yet chic accessory perfect for seaside adventures.
How-To Guide
Materials
- 6mm White polymer clay heishi beads
- 6mm Polymer clay heishi beads in teal, red, yellow, and orange
- Cowrie shell bead (drilled, with an open back)
- Small gold jump ring (6-8mm)
- Elastic stretch cord (0.7mm or 0.8mm)
- Jewelry crafting glue (like G-S Hypo Cement)
- Scissors
- Flat nose pliers and chain nose pliers
- Bead stopper or binder clip
- Ruler or tape measure
Step 1: Creating the Cowrie Focal
-
Prepare the shell:
Examine your cowrie shell. Ensure the hole drilled through the top is clean and clear of debris so the jump ring can slide through easily. -
Open the jump ring:
Using your two pairs of pliers, grip the jump ring on either side of the split. Twist one hand forward and the other back to open the ring sideways—never pull it apart outwards. -
Attach the shell:
Slide the open jump ring through the hole in the cowrie shell. Don’t close it yet; we will string the bracelet right through this ring.
Knot Slipping?
If the elastic feels slippery while knotting, dab a tiny bit of clear nail polish or glue on the cord *before* tying the final knot for extra grip.
Step 2: Stringing the White Bracelet
-
Cut the cord:
Measure your wrist and add about 3-4 inches to that length. Cut a piece of elastic cord. Pre-stretch the cord by pulling it gently a few times to prevent it from stretching out later. -
Secure the end:
Attach a bead stopper or a binder clip to one end of the cord so your beads don’t slide off while you work. -
Start beading:
Begin threading on the white heishi beads. I usually string about half the required length for my wrist size to start. -
Add the focal:
Take the jump ring with the cowrie shell attached and close the jump ring securely using your pliers (twist it back into place). Then, thread the elastic cord through the center of the jump ring itself. -
Finish the white strand:
Continue adding white heishi beads until the bracelet reaches your desired fit. Wrap it around your wrist to check; it should be snug but comfortable.
Step 3: Creating the Colorful Companion
-
Prepare the second cord:
Cut another length of elastic cord, pre-stretch it, and secure the end just like the first one. -
Establish the pattern:
For this vibrant look, we are using color blocking. Thread on about 5-6 teal beads, followed by 5-6 red beads. -
Complete the cycle:
Follow the red with 5-6 yellow beads. Repeat this three-color repeating pattern (Teal-Red-Yellow) for the entire length of the bracelet. -
Check the fit:
Ensure this colorful strand is essentially the same size as your white one so they stack neatly together.
Level Up: Gold Accents
Add sophistication by placing a small gold spacer bead between every color block change on the vibrant bracelet to match the shell’s jump ring.
Step 4: Finishing Touches
-
Tie the first knot:
Remove the bead stopper from the white bracelet. Bring the two ends together and tie a simple overhand knot, pulling it tight against the beads. -
Secure with a surgeon’s knot:
Tie a second knot, but loop the end through twice before pulling tight. This is a surgeon’s knot and is much more secure for elastic. -
Hide the knot:
Apply a tiny dab of jewelry glue to the knot. While the glue is still tacky, slide a neighboring bead over the knot to hide it inside. -
Trim excess:
Once the glue is fully dry, trim the excess cord ends carefully with sharp scissors, getting as close to the bead as safely possible. -
Repeat for the second bracelet:
Tie, glue, hide, and trim the colorful bracelet in exactly the same way to complete your set.
Wear your new stack to the beach or pool and enjoy the summer vibes all year round
Charm Cluster Statement Center
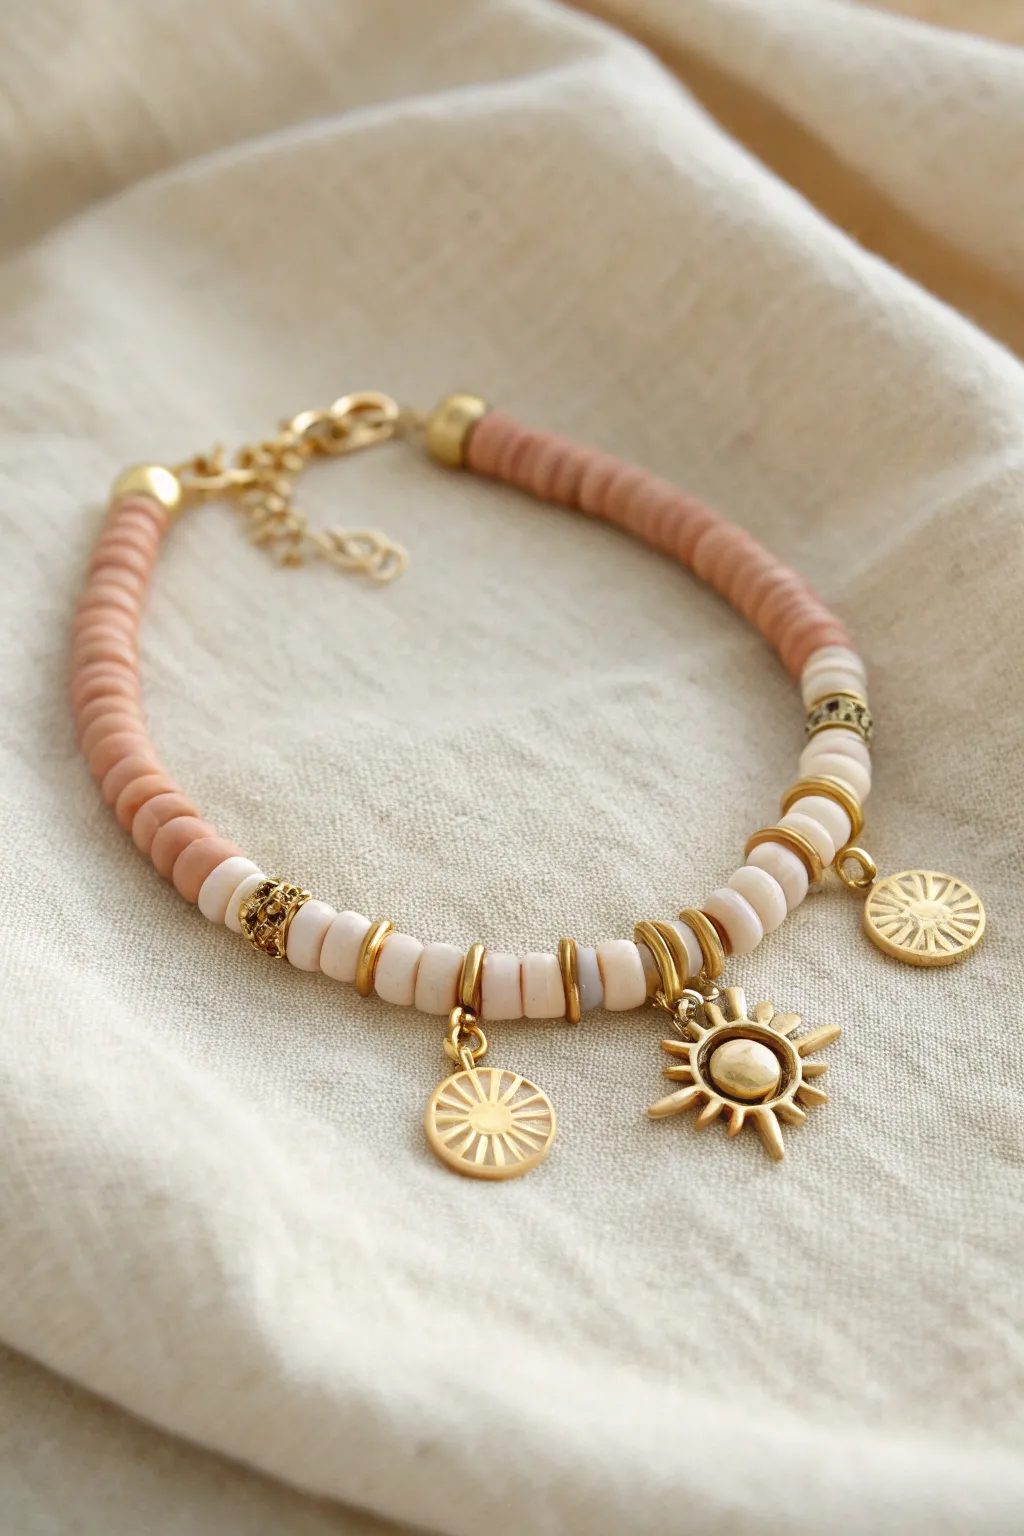
Capture the warmth of golden hour with this stunning heishi bead bracelet featuring a focal charm cluster. The blend of terracotta and cream clay beads creates a soft, earthy backdrop for the gleaming celestial charms that take center stage.
Detailed Instructions
Materials
- 6mm Heishi polymer clay beads (terracotta/dusty peach)
- 6mm Heishi polymer clay beads (cream/off-white)
- Gold-plated or brass sunburst coin charms (2)
- Gold-plated sun face charm (1)
- Gold spacer discs or heishi spacer beads (approx. 8-10)
- Gold decorative spacer bead with texture (2)
- Gold jump rings (6mm)
- Gold lobster clasp and extender chain
- Beading wire (0.38mm or 0.45mm)
- Crimp beads (2)
- Crimp covers (2, matching gold)
- Jewelry pliers (chain nose and flat nose)
- Wire cutters
Step 1: Planning and Preparation
-
Measure your wrist:
Before you begin stringing, measure your wrist and add about 0.5 inches for a comfortable fit. This specific design relies on symmetry, so knowing your total length is crucial. -
Layout the design:
Arrange your beads on a bead board or a soft cloth. Place the charms in the center: the sun face in the middle, flanked by the two sunburst coins. I always lay out the entire pattern first to ensure the color transition happens exactly where I want it. -
Prepare the wire:
Cut a piece of beading wire about 10-12 inches long. This gives you plenty of extra room to work with the clasp ends without struggling. -
Attach the first clasp end:
Thread a crimp bead onto one end of the wire, followed by the jump ring attached to your extender chain or closed jump ring. -
Secure the wire:
Loop the wire back through the crimp bead. Use your flat nose pliers to flatten the crimp bead securely, ensuring the wire doesn’t slip. -
Hide the hardware:
Place a gold crimp cover over the flattened crimp bead and gently close it with pliers to make it look like a smooth gold bead.
Pro Tip: Spacer Stability
Use gold metal washers or flat disk spacers between charms and clay beads. They prevent the soft clay from getting dented by the charm loops.
Step 2: Stringing the Base
-
Start with the main color:
Begin stringing the terracotta (dusty peach) heishi beads. Thread enough to cover about one-third of your total bracelet length. -
Add a gold accent:
Slide on a gold end cap or a small gold round bead to mark the transition point. -
Transition to cream:
Add your first section of cream heishi beads. Start with about 3-4 cream beads. -
Insert texture:
Thread on one of the textured gold decorative spacer beads. This adds a touch of intricate detail before the main event. -
Continue the cream section:
Add another short segment of cream beads (approx. 4-5 beads) leading up to the charm cluster.
Step 3: Creating the Charm Cluster
-
First gold spacer:
Place a flat gold disk spacer bead onto the wire. -
Attach the first charm:
Slide the first sunburst coin charm directly onto the wire using its attached jump ring or loop. Follow it immediately with another gold disk spacer. -
Bridge the charms:
Add 2-3 cream heishi beads to create a small gap between the charms so they don’t overlap too much. -
Add the central focus:
Slide on a gold spacer, then the main sun face charm, and then another gold spacer. -
Bridge again:
Add another 2-3 cream heishi beads to mirror the other side. -
Final charm placement:
Add a gold spacer, the second sunburst coin charm, and a final gold spacer to complete the central feature.
Troubleshooting: Stiff Bracelet
If the bracelet feels rigid, you strung it too tight. Before the final crimp, curve the bracelet into a circle to ensure beads have room to sit comfortably.
Step 4: Finishing the Pattern
-
Mirror the cream section:
Add a small section of cream beads (4-5), followed by the second textured gold bead, and then the remaining 3-4 cream beads. -
Return to terracotta:
Add your transition gold accent bead, then finish stringing the rest of the terracotta beads until the bracelet reaches your desired length. -
Prepare the final closure:
Thread a crimp bead onto the end of the wire, followed by the jump ring attached to your lobster clasp. -
Secure the loop:
Pass the wire back through the crimp bead and through the first few heishi beads to hide the tail. -
Crimp and trim:
Pull the wire tight (but leave a tiny bit of slack so the bracelet moves freely), flatten the crimp bead, cover it with a crimp cover, and trim the excess wire close.
Wear your new sun-kissed accessory alone or stack it with gold bangles for a complete summer look
Half-and-Half Split Palette
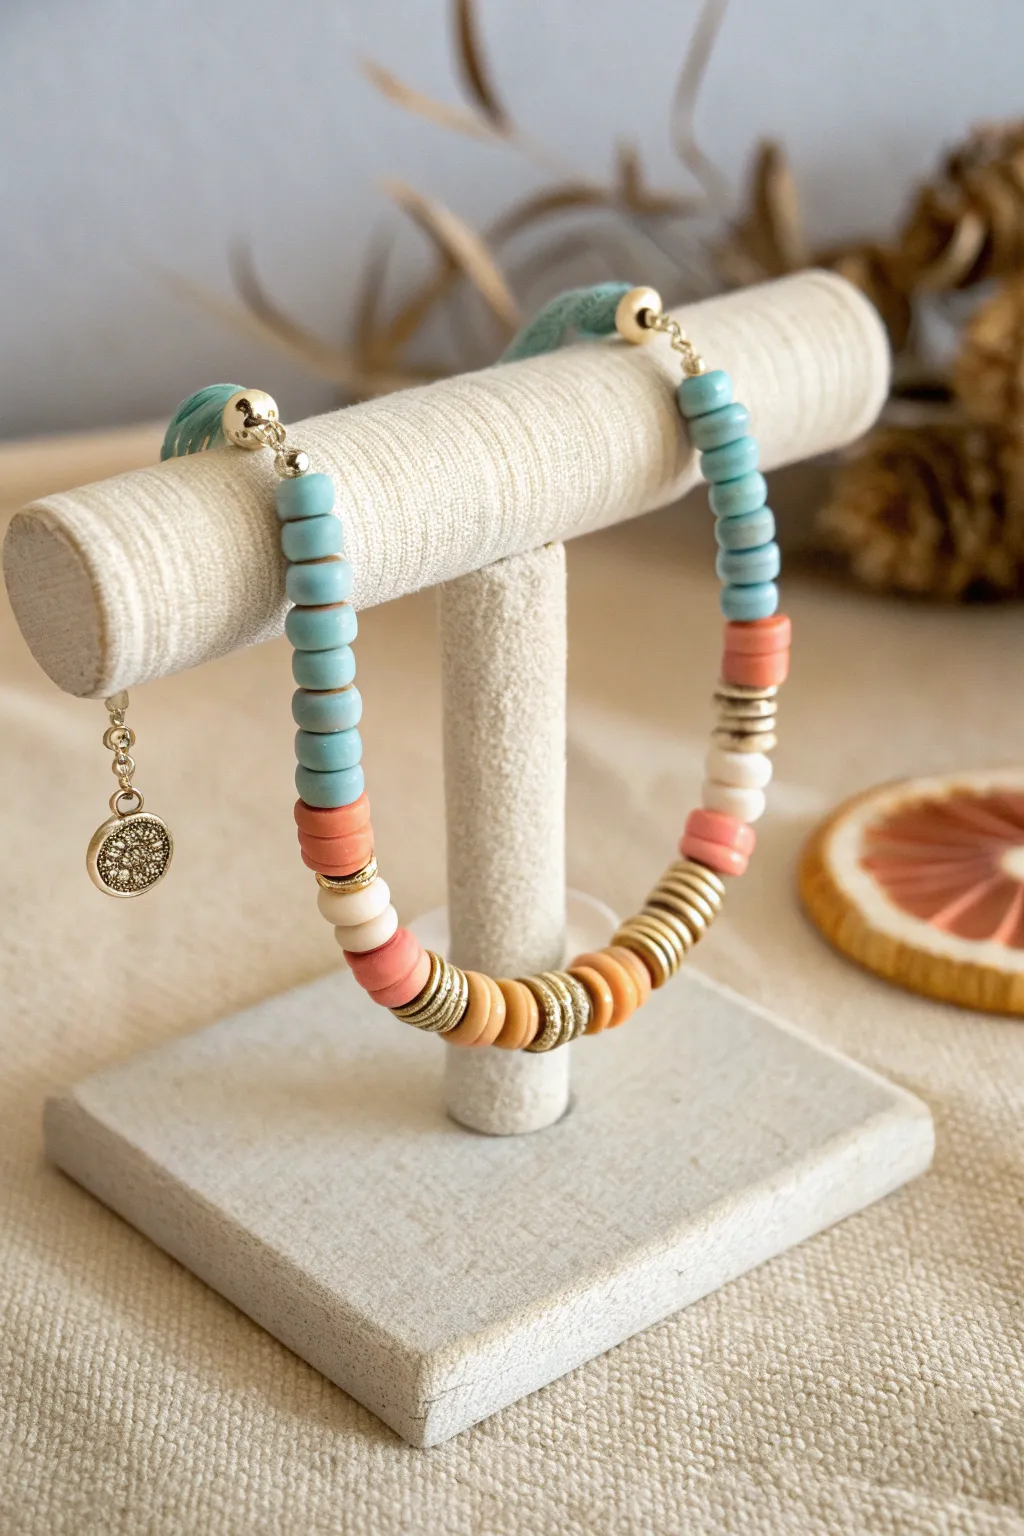
Capture the warmth of a sunset and the cool of the ocean with this charming half-and-half bracelet design. It features a striking split color palette of turquoise and coral, accented by elegant gold spacers and a playful tassel for a sophisticated bohemian look.
How-To Guide
Materials
- 6mm Heishi polymer clay beads in Turquoise/Light Blue
- 6mm Heishi polymer clay beads in Coral/Salmon Pink
- 6mm Heishi polymer clay beads in White/Cream
- Gold disc spacer beads (various textures/thicknesses)
- Gold tone bead stringing wire or strong beading cord
- 2 Gold crimp beads
- 2 Gold crimp covers (optional)
- 2 Gold wire guardians (optional but recommended for durability)
- Extension chain with lobster clasp
- Gold jump rings
- Small metal pendant or charm (mandala style shown)
- Embroidery floss in turquoise (for tassel)
- 2 Gold bead caps or cord ends (to hide tassel knots)
- Jewelry pliers (flat nose and chain nose)
- Scissors or wire cutters
Step 1: Preparation & First Half
-
Measure and Cut:
Cut a length of jewelry wire approximately 10-12 inches long. This gives you plenty of room to work with the ends. -
Secure the End:
Attach one end of your wire to a jump ring or the loop of your extension chain using a crimp bead. If you’re using a wire guardian, thread the wire through it before crimping for extra security. -
String the Blue Section:
Begin stringing your turquoise heishi beads. You’ll want this section to cover slightly less than half of the bracelet’s total length, usually about 2.5 to 3 inches depending on your wrist size. -
Add the First Spacer:
Slide on a single, simple gold bead to mark the transition out of the solid blue block. -
Create the Transition Pattern:
String three coral beads, followed by a textured gold spacer disc. -
Continue the Pattern:
Add three white or cream heishi beads, followed by another coral section of three beads.
Step 2: The Focal Point & Second Half
-
Build the Focal Section:
This center section uses metallic beads heavily. Alternate gold disc spacers with single heishi beads (coral or cream) to create a shimmering, textured look for about one inch. -
Mirror the Transition:
After the focal gold section, reverse your previous pattern: a small block of coral, a gold spacer, a small block of white, and finally a gold spacer. -
Finish the Beading:
Complete the strand with more turquoise beads until the beading reaches your desired length, aiming for symmetry with the starting side unless you prefer an asymmetrical look. -
Close the Loop:
Thread a crimp bead onto the wire, followed by the second jump ring or clasp component. Pass the wire back through the crimp bead and pull tight. -
Secure the Crimp:
Use your flat nose pliers to flatten the crimp bead securely. I like to double-check that the wire doesn’t slip before trimming the excess. -
Add Crimp Covers:
If you are using crimp covers, gently close them over your flattened crimp beads using pliers to make them look like simple gold beads.
Gold Stacking Tip
For the metallic focal section, vary the thickness of your gold spacers. Mixing ultra-thin discs with chunkier washers adds depth and makes the bracelet look more expensive.
Step 3: Final Touches
-
Make the Tassels:
Create two small tassels using turquoise embroidery floss. Wrap floss around two fingers about 10 times, tie off the top, and cut the bottom loops. -
Attach Tassels:
Using jump rings, attach these small tassels near the clasp or extension chain area for that extra boho flair shown in the image. -
Add the Charm:
Open a small jump ring using two pliers (twist, don’t pull apart) and attach your metal mandala charm to the end of the extension chain. -
Final Polish:
Trim any stray threads on your tassels to ensure they are even and neat.
Level Up: Texture Mix
Swap the embroidery floss tassel for a tiny leather or suede tassel. The leather texture contrasts beautifully against the matte clay beads and shiny gold hardware.
Now you have a stunning accessory that brings a touch of summer elegance to any outfit
Two-Color Checkerboard Rhythm
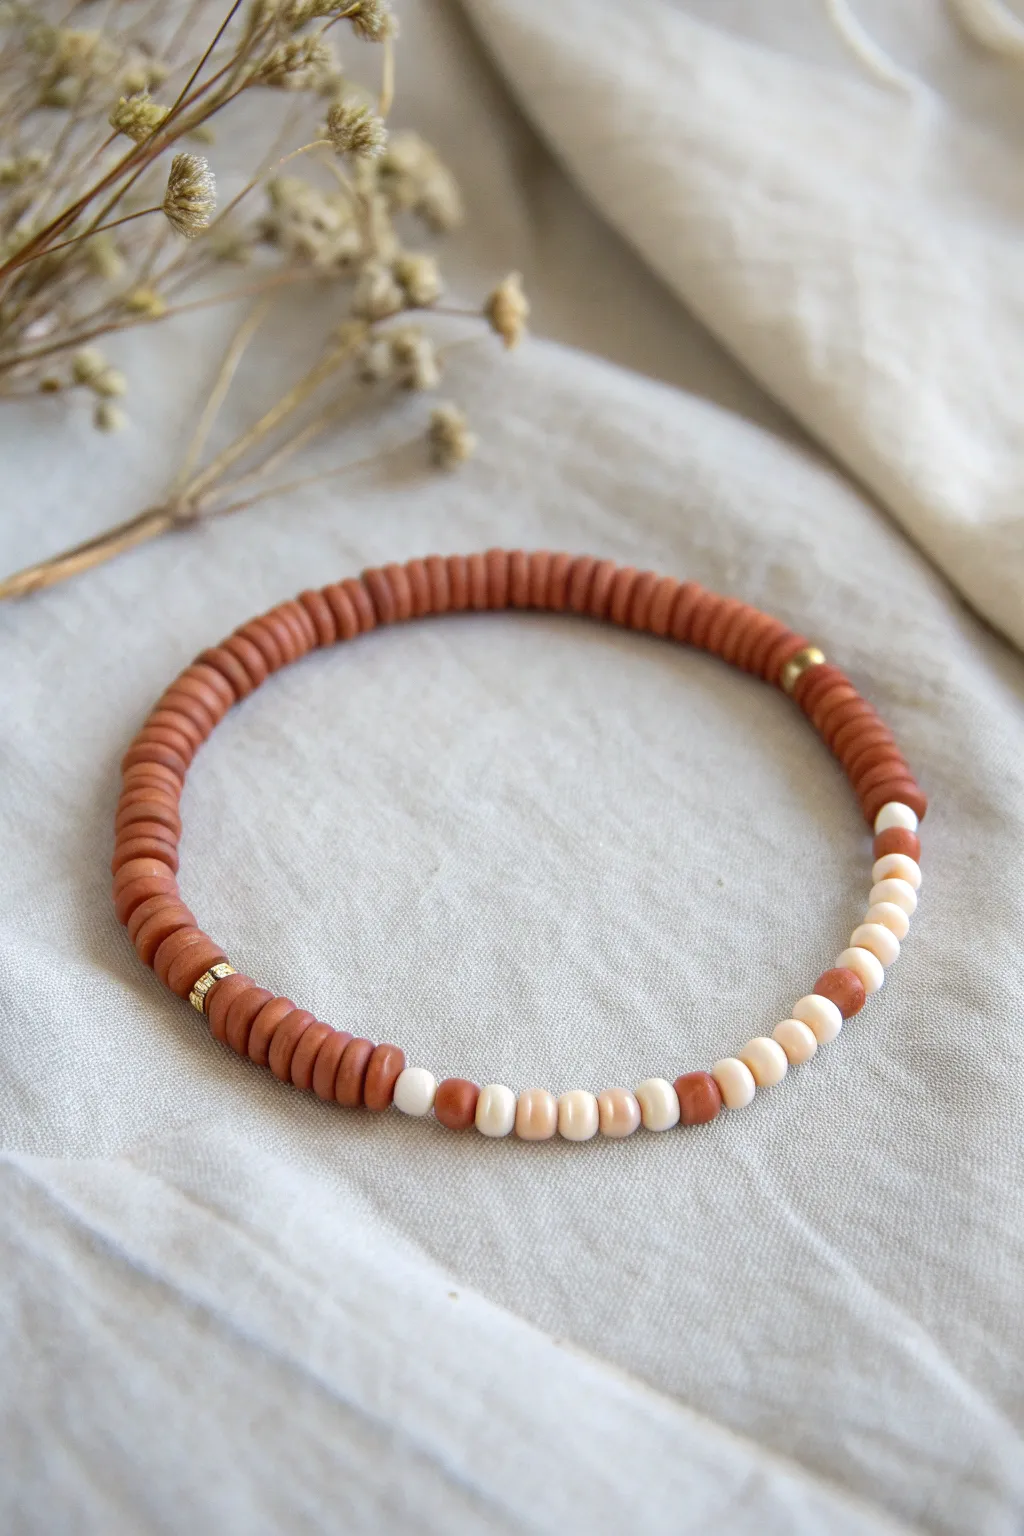
Embrace a natural, grounded aesthetic with this simple yet striking beaded bracelet. Featuring a warm terracotta base interrupted by a rhythmic section of cream and rust hues, it captures the effortless style of modern boho jewelry.
Detailed Instructions
Materials
- Terracotta colored polymer clay heishi beads (approx. 4-6mm)
- Cream or beige glass seed beads (size 6/0 or 8/0)
- Small gold nugget bead or spacer
- Gold crimp bead cover or textured gold accent bead
- Elastic beading cord (0.5mm – 0.8mm clear)
- Jewelry glue or clear nail polish
- Scissors
- Bead stopper or tape
Step 1: Setting the Stage
-
Measure your cord:
Cut a piece of elastic cord about 10-12 inches long. This generous length gives you plenty of room to tie knots without struggling against tension later. -
Pre-stretch the elastic:
Hold both ends of your cut cord and give it a few firm tugs. This pre-stretching step helps prevent the bracelet from sagging or expanding permanently after you wear it the first few times. -
Secure the end:
Attach a bead stopper to one end of the cord, or simply use a piece of masking tape to flag the end. This ensures your beads won’t slide off while you are working.
Step 2: Creating the Pattern
-
Start the main color block:
Begin by threading on your terracotta heishi beads. You want this to form the majority of the bracelet, so string enough to cover about two-thirds of your wrist circumference. -
Add the first gold accent:
Slide on your textured gold accent bead or crimp cover. This piece acts as a sleek separator between the solid block of color and the patterned section. -
Begin the alternating pattern:
Now, threading carefully, add two or three more terracotta heishi beads to transition into the mixed zone. -
Introduce the cream beads:
Add a single cream seed bead, followed by a terracotta heishi bead. Repeat this ‘one cream, one terracotta’ pattern about three or four times. -
Switch the ratio:
Change the pattern slightly to create an organic flow. String two cream seed beads, then one terracotta heishi bead. -
Continue the rhythm:
Repeat this new ‘two cream, one terracotta’ sequence another three times. This subtle shift in spacing makes the design look handcrafted and intentional. -
Add a solid cream section:
Thread on four or five cream seed beads in a row to create a bright highlight in the pattern. -
Mirror the pattern back:
Reverse your steps: string one terracotta heishi bead, followed by two or three cream beads, mirroring the transition you created on the other side. -
Finish the pattern:
End this decorative section with a final small gold nugget bead to balance the metallic accent from the beginning. -
Complete the circle:
Fill the remaining space on your cord with more terracotta heishi beads until the bracelet reaches your desired total length (usually 6.5 to 7 inches for an average wrist).
Knot Security
If the hole of your heishi bead is too small to hide the knot, simply cover the knot with a gold crimp cover bead. It hides the mechanics and adds a chic metallic detail.
Step 3: Finishing Touches
-
Check the fit:
Wrap the unfinished strand around your wrist to check the size. I usually aim for a fit that is snug but not tight, creating a perfect circle without gaps. -
Tie the knot:
Remove the bead stopper and bring the ends together. Tie a surgeon’s knot (right over left, left over right, looping the top strand through twice) and pull it very tight. -
Secure with glue:
Dab a tiny drop of jewelry glue or clear nail polish directly onto the knot. Let it dry for a few minutes to ensure the knot won’t slip undone. -
Hide the knot:
Trim the excess cord ends close to the knot, leaving about 1mm. If possible, gently tug the bracelet so the knot slides inside the hole of the nearest heishi bead to hide it.
Texture Play
Swap the smooth cream seed beads for tiny freshwater pearls or jagged stone chips. The irregular shapes contrast beautifully with the uniform heishi discs.
Now slip on your new accessory and enjoy the warm, earthy vibes it brings to your outfit.
Marbled DIY Heishi Discs
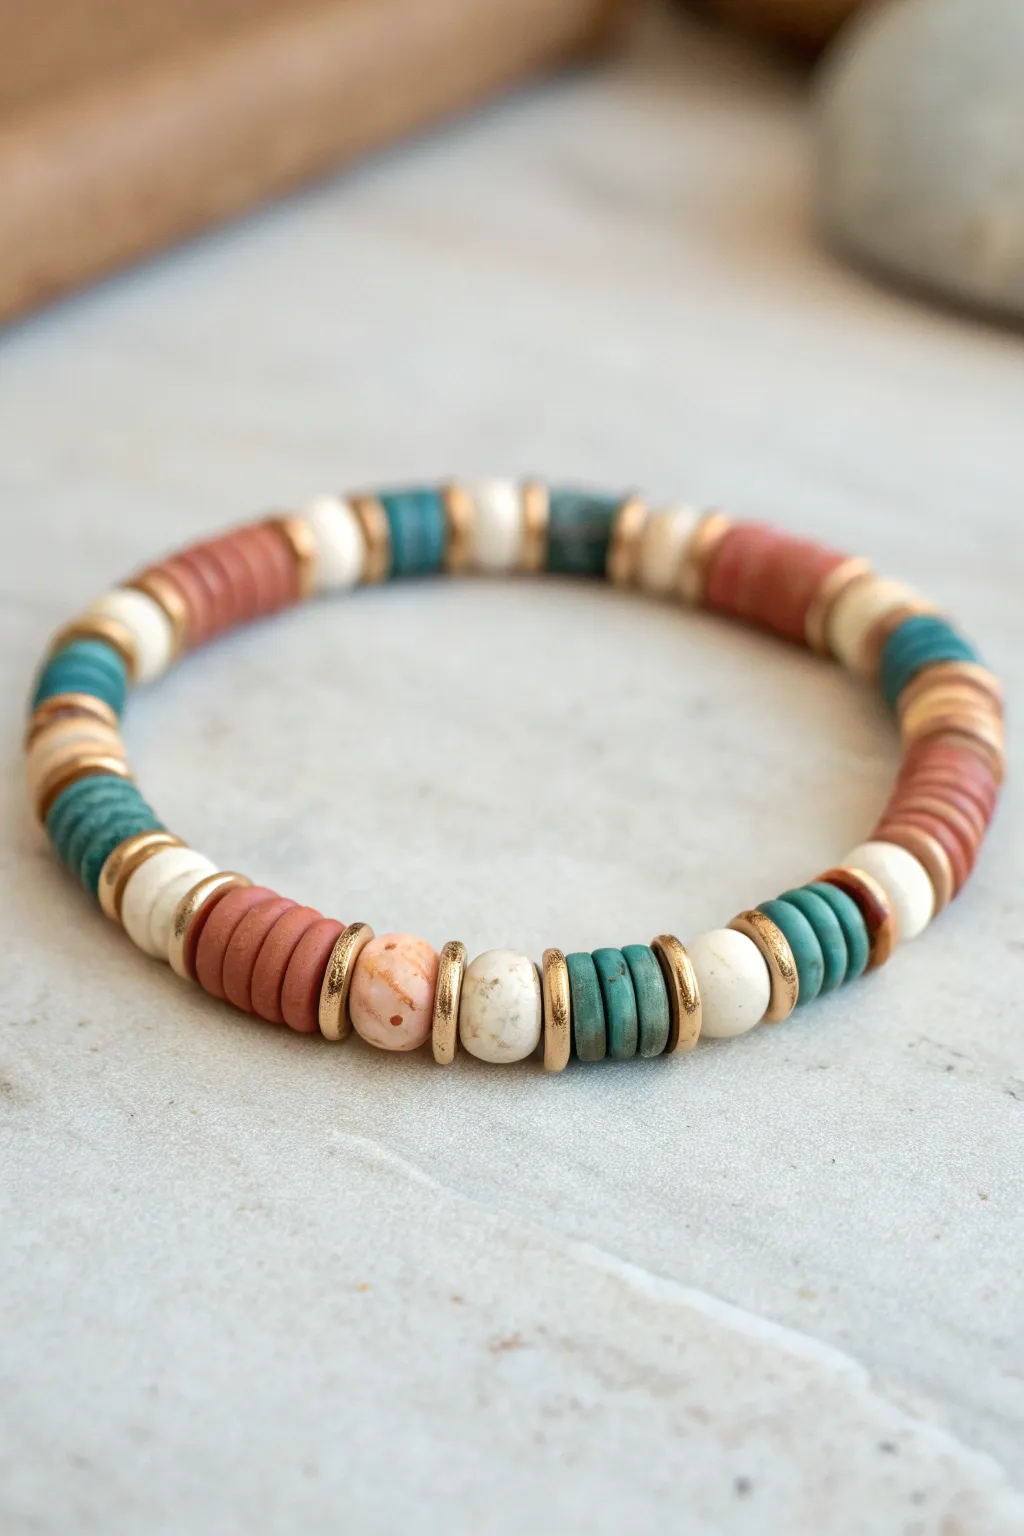
This bracelet balances rustic charm with a touch of elegance by alternating sections of matte clay heishi beads with shimmering gold accents. The mix of terracotta, teal, and marbled cream tones creates a grounded, nature-inspired palette perfect for stacking.
Step-by-Step Tutorial
Materials
- Polymer clay (terracotta, turquoise/teal, white, translucent)
- Small gold spacer discs or heishi beads (approx. 4-6mm)
- Elastic stretch cord (0.7mm or 0.8mm)
- Round marbled gemstone beads (optional, looks like jasper or agate)
- Clay extruder or rolling pin
- Small round clay cutter (approx. 6mm)
- Toothpick or bead piercing pin
- Jewelry glue (GS Hypo Cement or E6000)
- Scissors
Step 1: Creating the Clay Beads
-
Condition the Clay:
Begin by warming and kneading your polymer clay blocks until they are soft and pliable. You will need separate piles for the terracotta, teal, and white. -
Mix the Marble:
To achieve the specific marbled look seen in the cream beads, take a chunk of white clay and mix in very small specks of translucent or light beige clay. Twist them together just enough to create subtle veins, avoiding over-mixing. -
Roll Flat Sheets:
Using a rolling pin or a pasta machine on a medium setting, roll each color of clay into an even, flat sheet. Aim for a thickness of about 2-3mm for chunky heishi discs. -
Cut the Discs:
Use your small round cutter to punch out numerous circles from each color sheet. If you don’t feature a cutter, you can roll a ‘snake’ of clay and slice it into thin discs, though a cutter yields more uniform edges. -
Pierce the Centers:
Gently poke a hole through the exact center of each clay disc using a toothpick or piercing pin. I find giving the pin a little twist as it goes through helps keep the hole clean. -
Bake:
Arrange your raw beads on a parchment-lined baking sheet or a dedicated bead baking rack. Bake according to your polymer clay package instructions (usually 275°F/135°C for 15-30 minutes) and let them cool completely.
Uneven Clay Thickness?
If you don’t have a pasta machine, place playing cards on either side of your clay while rolling. The rolling pin will rest on the cards, creating a perfectly even sheet.
Step 2: Assembling the Bracelet
-
Measure the Cord:
Cut a length of elastic cord about 10-12 inches long. This gives you plenty of slack for tying the knot later. Pre-stretch the cord by pulling it firmly a few times to prevent sagging later. -
Start the Pattern:
Begin stringing your beads. The pattern in the image relies on color blocking. Start with a section of roughly 4-5 teal heishi discs. -
Add Gold Dividers:
Slide on a gold spacer disc. This metallic element acts as a visual boundary between the color sections and adds a professional finish. -
Insert Feature Beads:
For variety, thread on a slightly larger, round marbled stone bead or one of your thicker marbled clay beads, followed by another gold spacer. -
Build the Terracotta Section:
Thread on a block of the terracotta/rust-colored heishi beads. Use about 4 to 6 beads to match the length of the previous teal section. -
Repeat with Cream:
Add a gold spacer, then a block of your white or marbled cream clay beads, followed by another gold spacer. -
Continue the Rhythm:
Repeat this sequence—color block, gold spacer, feature bead (optional), gold spacer—until the bracelet reaches your desired length (usually 6.5 to 7 inches for an average wrist). -
Check the Fit:
Wrap the unfinished strand around your wrist to check the size. Ideally, the ends should meet comfortably without gaps or stretching the cord too tight. -
Tie the Knot:
Tie a surgeon’s knot (a square knot with an extra loop through) to secure the ends. Pull the elastic tight so the knot compresses. -
Secure and Trim:
Dab a tiny drop of jewelry glue onto the knot. Allow it to dry for a moment, then trim the excess cord ends close to the knot. If possible, tuck the knot inside one of the larger beads to hide it.
Texture Twist
Before baking, lightly press a piece of coarse sandpaper or a texture sponge onto your raw clay sheets. This gives the heishi beads a stone-like matte finish.
Slip on your new custom accessory and enjoy the natural, textured look you created from scratch