
If you love building pottery from flat clay slabs, vessels are where the magic really shows up—clean lines, playful curves, and all those satisfying seams. Here are my go-to slab vessel ideas, starting with the classics and drifting into the fun, slightly weird stuff I can’t stop making.
Classic Slab Cylinder Vase
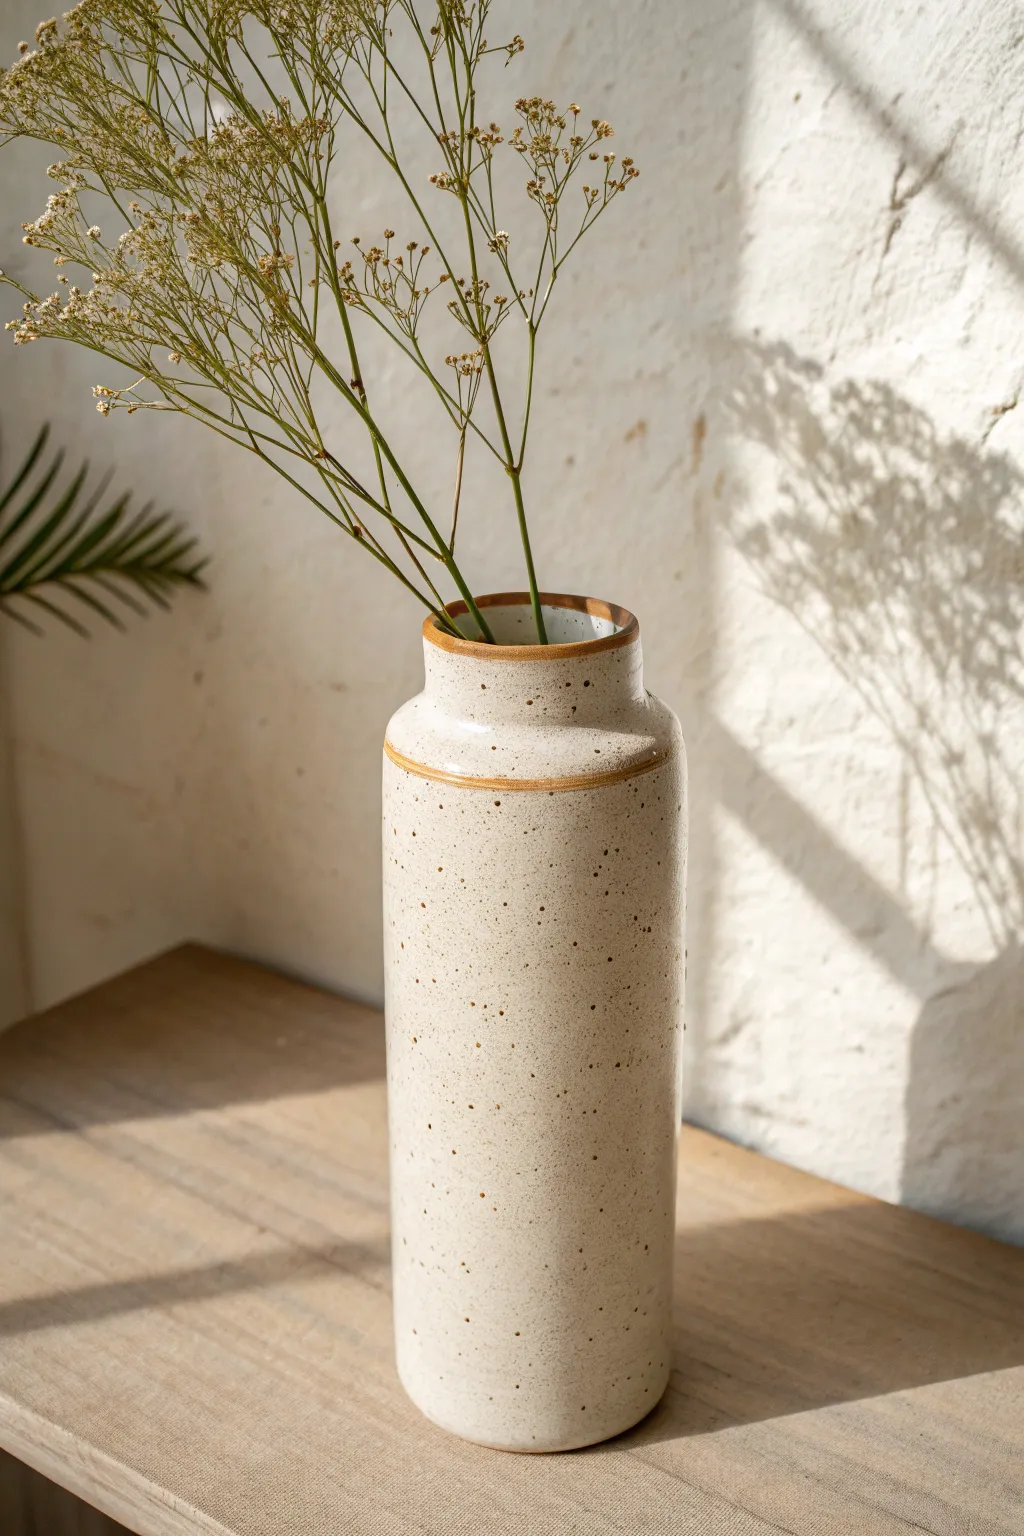
This minimalist, hand-built vessel combines the sturdy elegance of a cylinder with a soft, tapered neck. Its charm lies in the speckled cream glaze contrasted by exposed, raw clay accents that frame the form.
Detailed Instructions
Materials
- Stoneware clay (speckled or buff)
- Rolling pin
- Canvas or slab mat
- Fettling knife
- Needle tool
- Serrated rib or flexible metal rib
- Slip and scoring tool
- Straight edge ruler
- Circular template (cookie cutter or lid)
- Speckled cream or ‘oatmeal’ glaze
- Iron oxide wash (optional, for rims)
- Sponge
Step 1: Creating the Slabs
-
Roll out the clay:
Begin by rolling out a medium-sized slab of stoneware clay to a consistent thickness, around 1/4 inch. If you want a perfectly even wall, use wooden guide sticks on either side of your rolling pin. -
Compress the slab:
Use a flexible rib tool to smooth and compress the clay on both sides. This aligns the clay particles, reducing the chance of warping later and giving you a cleaner surface for the glaze. -
Cut the main body:
Measure a rectangle for the main body of the vase. For a tall cylinder like this, a rectangle approximately 10 inches wide by 8 inches tall works well. Use your straight edge and fettling knife to make clean, vertical cuts. -
Cut the base:
Using a circular template or cookie cutter, cut a circle that matches the diameter you intend for your cylinder. Measure the circumference of this circle to ensure your rectangular slab is long enough to wrap around it plus a tiny overlap.
Clean Seams
Use a wooden paddle to gently tap the seam after joining. This not only strengthens the bond but helps blend the joint so it becomes indistinguishable from the rest of the wall.
Step 2: Assembling the Cylinder
-
Bevel the edges:
On the short sides of your large rectangle, cut 45-degree bevels in opposite directions. This allows the seam to overlap cleanly without adding extra thickness to the wall. -
Score and slip:
Rough up the beveled edges and the edge of your circular base using a scoring tool. Apply a generous amount of slip to these scored areas. -
Form the tube:
Stand the rectangle up and wrap it into a cylinder, pressing the beveled edges together firmly. I like to work from the bottom up to ensure the seam is straight. -
Attach the base:
Place the cylinder onto the scored circular base. Use a modeling tool to smudge the clay from the cylinder onto the base to seal it, then repeat on the inside for a watertight bond. -
Add the neck shoulder:
To create the inward taper at the top, gently dart the rim or simply use your fingers to collar the clay inward slightly, narrowing the opening.
Carve for Contrast
Before glazing, use a carving tool to incise a deeper groove at the neck joint. The glaze will break over the sharp edge, naturally creating a darker line without needing to wipe it manually.
Step 3: Adding the Neck & Refining
-
Cut the neck strip:
Roll a smaller, narrow strip of clay, about 1 inch tall. Measure it to fit the circumference of your narrowed shoulder opening. -
Refine the seam:
Smooth the connection point where the neck meets the shoulder. You can leave a slight indentation or groove here to catch extra glaze, mimicking the defined line in the photo. -
Smooth the surface:
Once the vessel is leather-hard, use a damp sponge or a soft rib to smooth out any handling marks, ensuring the cylindrical shape remains geometric and upright. -
Bisque fire:
Allow the vase to dry slowly under plastic to prevent cracking, then bisque fire it according to your clay body’s specifications.
Step 4: Glazing
-
Wax the bottom:
Apply wax resist to the bottom of the vase and up the side about 1/4 inch to prevent the glaze from adhering to the kiln shelf. -
Apply the main glaze:
Dip or pour a speckled cream or matte white glaze over the entire vessel. The specks in the glaze are crucial for achieving the stone-like texture. -
Wipe the rims:
While the glaze is still damp, carefully wipe the glaze off the very top rim and the seam line where the neck meets the body using a damp sponge. This exposes the raw clay. -
Enhance the rims:
Paint a thin wash of iron oxide or a darker stain onto the exposed clay rims to darken them to that rich terracotta brown color shown in the image. -
Final firing:
Glaze fire the piece to the maturation temperature of your clay and glaze combination.
Fill your new cylinder with dried botanicals or fresh flowers to see how the natural tones complement any arrangement


Square Box Vase With Crisp Corners
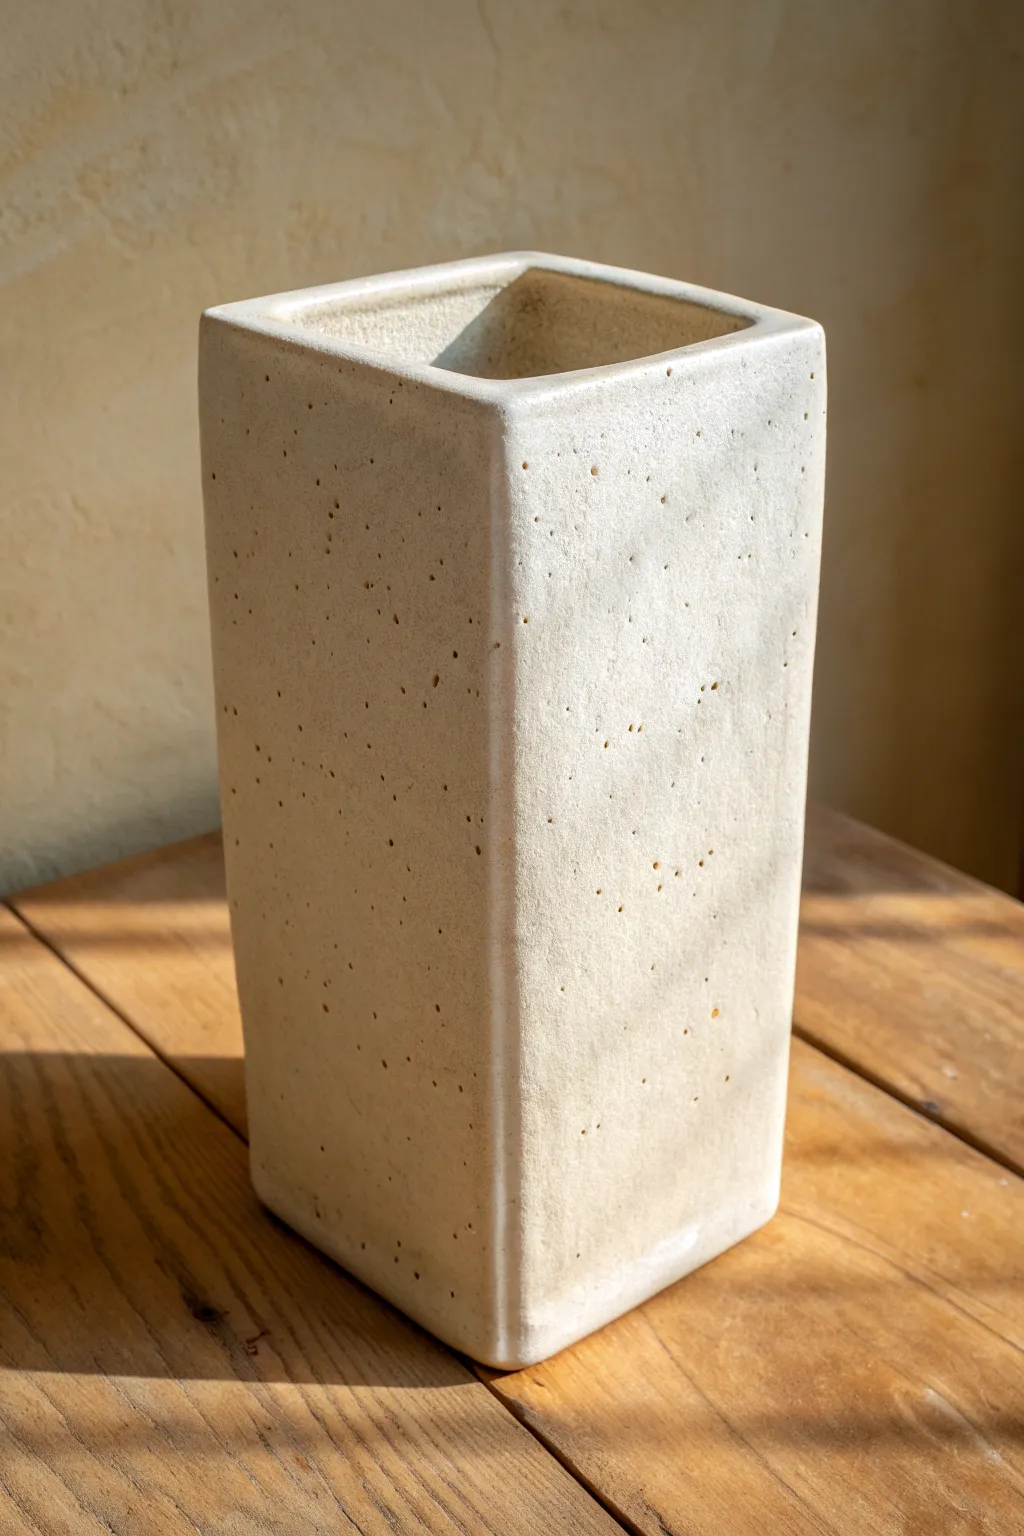
Achieve geometric elegance with this tall, slab-built rectangular vase featuring sharp, defined lines and a raw, speckled finish. The simplicity of the form highlights the natural beauty of a stoneware clay body, making it a perfect minimalist centerpiece.
Step-by-Step Guide
Materials
- Speckled Stoneware Clay (mid-fire)
- Slab Roller or Rolling Pin with Thickness Guides
- Fettling Knife or X-Acto Blade
- Serrated Rib or Scoring Tool
- Slip (clay slurry)
- Miter Cutting Tool (optional but helpful)
- Ruler or Set Square
- Flat Wooden Paddle
- Sponge
- Matte White or Clear Matte Glaze
Step 1: Preparation & Cutting
-
Roll out the slab:
Begin by wedging your speckled clay to remove air bubbles. Roll out a consistent slab approximately 1/4 to 3/8 inch thick. If you want the walls to feel substantial like the example, lean closer to 3/8 inch. -
Smooth the surface:
Before cutting anything, take a rib and compress the slab on both sides. This aligns the clay particles, reducing warping later, and creates that smooth canvas for the speckled texture. -
Measure your templates:
You will need four identical rectangular side panels and one square base. A good size for a vase like this is 10 inches tall by 4 inches wide. Create paper templates first to ensure accuracy. -
Cut the pieces:
Using a sharp fettling knife and a ruler, cut out your four walls and the base. Keep the knife perpendicular to the table for straight cuts. -
Miter the edges:
For those signature crisp corners shown in the image, bevel the vertical edges of your four wall pieces at a 45-degree angle. This allows them to fit together seamlessly without a visible butt joint. -
Dry to leather hard:
Lay the pieces flat on a ware board covered with fabric. Let them dry to a stiff leather-hard stage. They need to be rigid enough to stand up without slumping.
Step 2: Assembly & Refining
-
Score the edges:
Take your serrated rib and thoroughly score the mitered edges of the walls and the edges of the base where they will connect. -
Apply slip:
Generously apply slip to all scored areas. Don’t be shy here; you want a strong bond to prevent cracks during the firing. -
Construct the box:
Stand one wall up on the base, then attach an adjacent wall. Press the mitered corners together firmly. Continue until all four walls are attached to the base and each other. -
Reinforce the interior:
Roll a very thin coil of clay and press it into the interior corners where the walls meet the base. Smooth this coil out to reinforce the bottom seam against leaks. -
Paddle the shape:
Use a flat wooden paddle to gently tap the outside walls. I find this really helps sharpen the corners and ensures the box is perfectly rectilinear. -
Compress the corners:
Run a barely damp sponge or a rounding tool along the sharp outer corners. You want them visually sharp, but smooth enough that they aren’t fragile or dangerous to touch. -
Refine the rim:
Turn the vase upside down gently on a foam bat to level the rim, or use a cheese cutter to trim it even. Smooth the lip with a piece of chamois or plastic.
Miter Magic
If you struggle cutting 45-degree angles by hand, use a dedicated clay miter tool or wire cutter. It guarantees a tighter seam than manual cutting.
Step 3: Finishing
-
Slow drying:
Tent the vase loosely with plastic. Because of the sharp corners, you want to dry this very slowly to prevent tension cracks. Let it dry for several days. -
Bisque fire:
Once bone dry, bisque fire the piece to Cone 04 (or your clay body’s recommendation). -
Wax the bottom:
Apply wax resist to the bottom of the vase and up the side about 1/16th of an inch. -
Glazing:
To achieve the look in the photo, dip the entire vessel into a matte white or semi-transparent matte glaze. This allows the iron speckles in the clay to bleed through the surface. -
Glaze firing:
Fire to the maturity temperature of your clay (likely Cone 5 or 6 for stoneware). Ensure delicate handling as sharp corners are prone to chipping before firing.
Warping Walls?
If walls bow inward while drying, place a piece of soft foam inside the vase. It provides gentle outward pressure to keep the planes flat.
Once fired, the speckled finish will add organic warmth to the sharp, modern geometry of your new vase


Rectangular Planter-Style Vessel
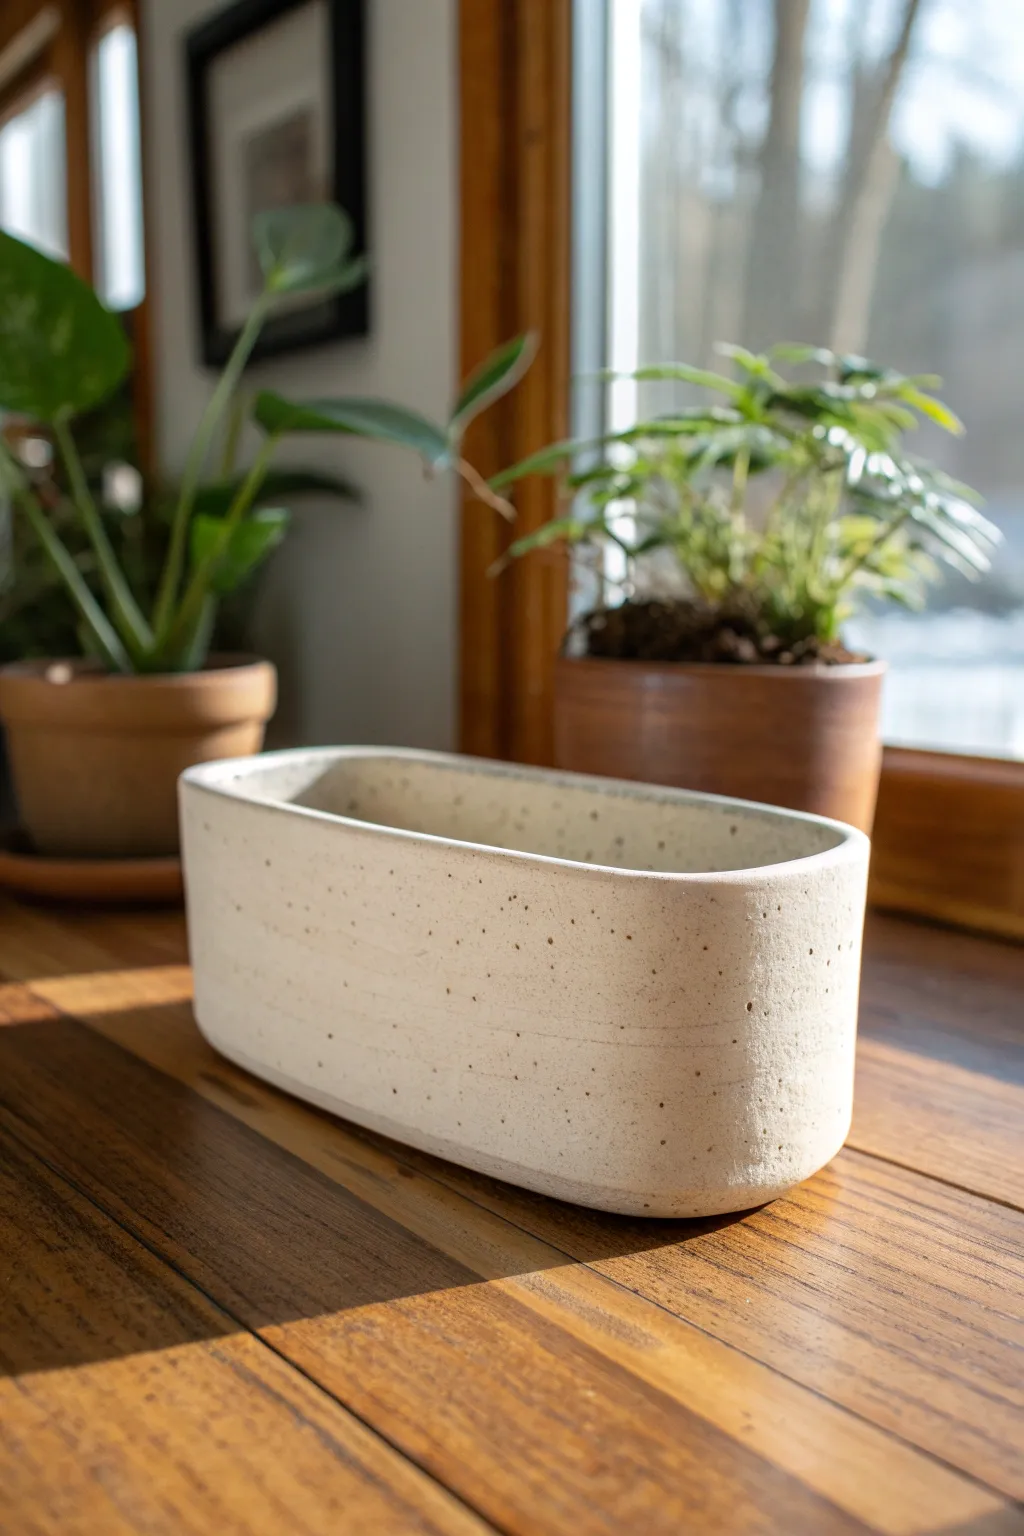
This minimalist rectangular vessel features a creamy, speckled clay body with rounded corners for a soft, modern silhouette. The smooth, matte finish highlights the natural beauty of the clay, making it a perfect, understated home for your favorite houseplants.
Step-by-Step
Materials
- Speckled stoneware clay (mid-fire)
- Canvas-covered work board
- Rolling pin
- Dowel rods or slat guides (1/4 inch thickness)
- Fettling knife or needle tool
- Serrated rib
- Smooth rubber rib
- Slip (made from your clay body)
- Scoring tool or fork
- Paper template (rounded rectangle base)
- Sponge
- Clear matte glaze
Step 1: Preparing the Slabs
-
Wedge the Clay:
Begin with a fresh block of speckled stoneware clay. Wedge it thoroughly to remove air bubbles and ensure the speckles are evenly distributed throughout the body. -
Roll the Base Slab:
Place your clay on the canvas board between two 1/4 inch slat guides. Roll out a slab large enough for the base of your planter, keeping the rolling pin moving in different directions to compress the clay particles. -
Smooth the Surface:
Before cutting, run a smooth rubber rib over the surface of the slab. This compresses the clay further and creates that lovely finished texture visible in the final piece. -
Cut the Base:
Place your rounded-rectangle paper template onto the slab. Using your fettling knife, cut carefully around the template. The rounded corners are key to this specific design. -
Roll the Wall Slab:
Roll out a second, long slab using the same thickness guides. You want this strip to be long enough to wrap around the entire perimeter of your base, plus a little extra for the seam. -
Measure and Trim:
Cut a long rectangular strip from this second slab. For this planter style, a height of about 3 to 4 inches works well. Use a straight edge to ensure the top and bottom cuts are perfectly parallel. -
Soft Leather Hard Stage:
Let both the base and the wall strip sit for about 30-60 minutes. You want them to stiffen slightly so they hold their shape, but they must remain flexible enough to bend around the curves without cracking.
Warping Walls?
If the long walls bow inward while drying, cut a piece of stiff cardboard to the exact width of the interior and place it inside as a brace until the clay is leather hard.
Step 2: Assembly
-
Score the Base:
Take your scoring tool and rough up the entire outer edge of the base slab. Apply a generous amount of slip or vinegar to the scored area. -
Score the Wall:
Score the bottom edge of your long wall strip. Do not apply slip to this piece yet, as it can make handling messy. -
Attach the Wall:
Carefully lift the wall strip and place it onto the base. Start on a long straight side rather than a corner. Press the wall firmly down onto the base as you work your way around. -
Navigate the Curves:
When you reach the rounded corners, I like to gently guide the clay around the bend, ensuring it doesn’t fold or kink. The slight stiffness of the clay helps maintain a consistent curve. -
Create the Seam:
Where the two ends of the wall meet, cut through both layers at a 45-degree angle (a beveled cut). Remove the excess clay, score the new edges, add slip, and press the seam together firmly. -
Reinforce the Interior:
Roll a very thin coil of clay. Place this coil into the interior bottom seam where the wall meets the floor. Smear the coil down into the floor and up into the wall to create a strong, watertight bond.
Step 3: Refining and Finishing
-
Smooth the Connection:
On the outside, use a serrated rib to blend the clay from the wall down onto the base, erasing the join line. Follow up with a smooth rib to polish the surface until the connection is invisible. -
Rounding the Top Rim:
Use a damp sponge or a chamois cloth to compress and round over the top rim. The reference image shows a soft, rounded lip rather than a sharp edge. -
Refining the Shape:
Check the straight sides of the planter. If they are bowing out slightly, gently paddle them with a wooden spatula to straighten the profile. -
Surface Texture:
Once the pot is leather hard, wipe it down one last time with a slightly damp sponge. This exposes the grog or speckles in the clay body, giving it that characteristic stone-like appearance. -
Bisque Fire:
Allow the planter to dry slowly under loose plastic to prevent warping. Once bone dry, bisque fire it to Cone 04 (or your clay’s specific bisque temperature). -
Glaze and Final Fire:
Coat the interior with a liner glaze for waterproofing. For the exterior, apply a very thin coat of clear matte glaze, or leave it unglazed if the clay is vitrified, to maintain the raw texture shown in the photo. Fire to maturity (likely Cone 5 or 6).
Clean Seams
When blending the vertical seam, use a plastic card or rib to compress the join from the inside while supporting the outside with your hand to keep the wall thickness even.
Once fired, pot up your favorite greenery and enjoy the serene, handcrafted vibe this planter brings to your windowsill.


Faceted Vase Made From Panels
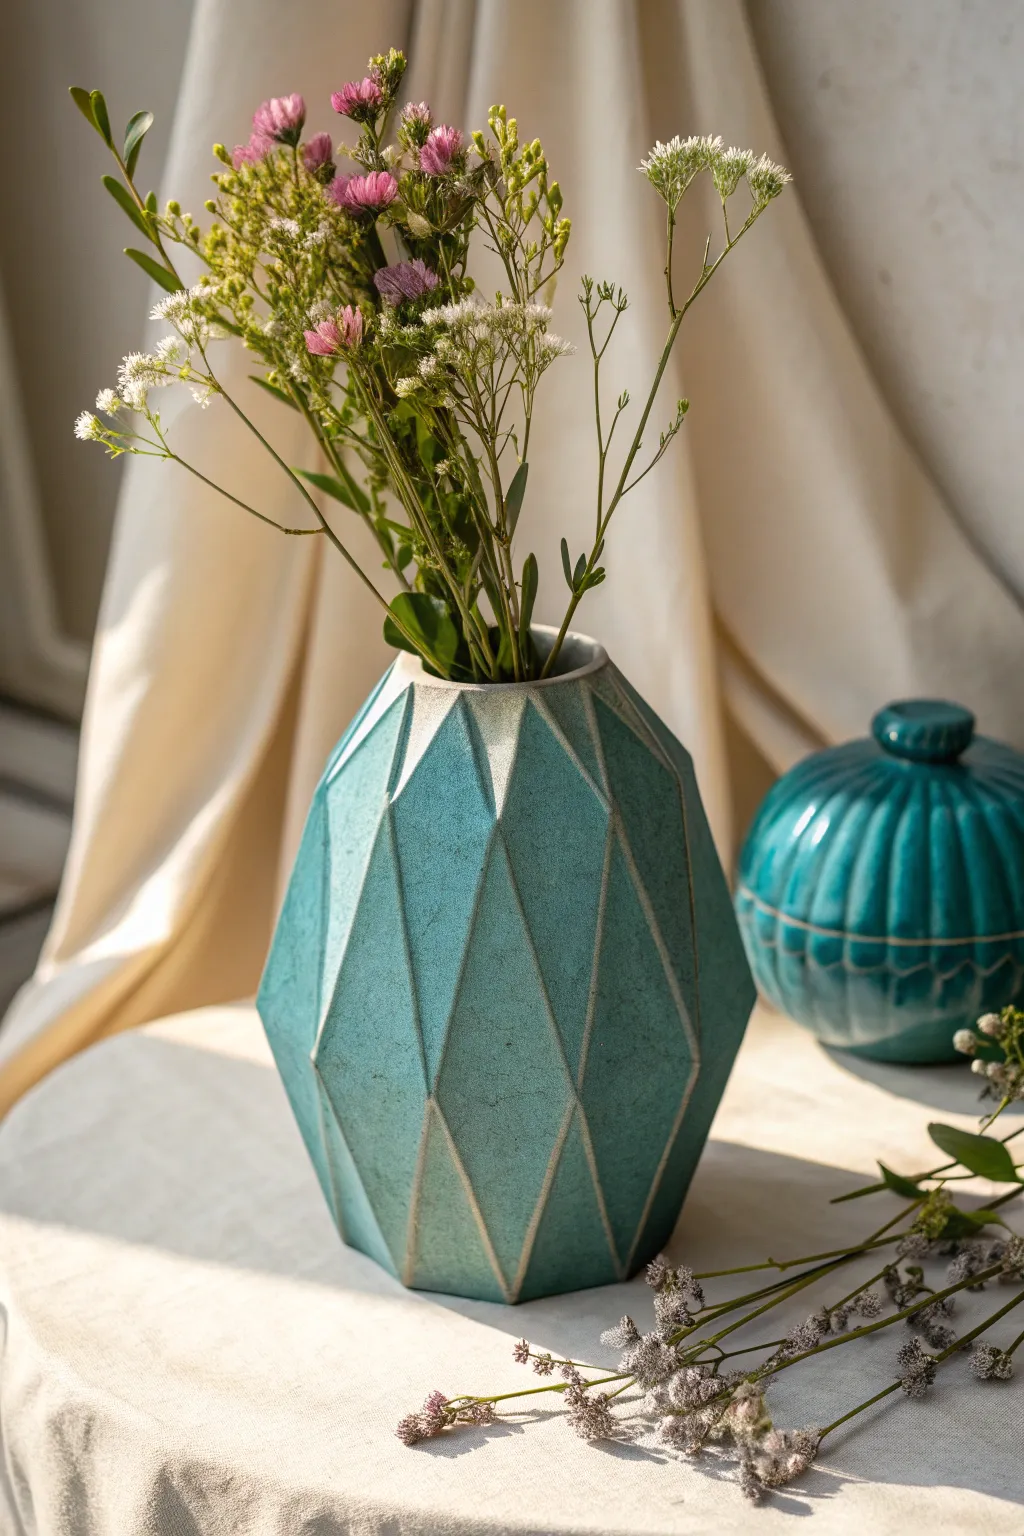
This striking faceted vase combines crisp geometric lines with a soft, organic surface finish. By assembling carefully measured clay slabs, you’ll create a sculptural vessel that looks beautiful both on its own and filled with wildflowers.
Step-by-Step Tutorial
Materials
- Stoneware clay (smooth or with fine grog)
- Durable paper or thin cardboard for templates
- Rolling pin and guides (approx. 1/4 inch thickness)
- Fettling knife or X-Acto blade
- Metal rib and rubber kidney tool
- Slip and scoring tool (serrated rib or needle tool)
- Paddle tool
- Sponge
- Teal matte glaze
- Clear glaze (optional for interior only)
Step 1: Template Design & Slab Prep
-
Drafting the geometry:
Start by drawing your template shapes on cardstock. You will need elongated diamond shapes for the central section and triangular shapes for the top and bottom transitions. Measuring accurately here is crucial for the pieces to fit together. -
Rolling the clay:
Roll out a large slab of clay to a consistent 1/4 inch thickness. Use wooden guides on either side of your rolling pin to ensure the slab is perfectly even, which helps prevent warping later. -
Compressing the slab:
Use a rubber kidney rib to smooth and compress the clay on both sides. This aligns the clay particles, adding strength and erasing the canvas texture from the roiling surface. -
Cutting the panels:
Lay your templates onto the slab and cut out your shapes. You’ll need a repeating set (likely 6 or 8 of each shape, depending on your desired circumference). Cut a matching polygon for the base as well. -
Beveling the edges:
For easier joinery and sharper corners, use your knife to cut a 45-degree angle (miter) along the long edges of your panels. This allows them to fit snugly against each other. -
Leather hard stage:
Let the cut pieces stiffen up to a firm leather-hard stage. They need to be rigid enough to stand up without slumping but soft enough to score and slip.
Step 2: Assembly
-
Scoring joints:
Thoroughly score (scratch) and apply slip to all the beveled edges you are about to join. Don’t skimp on the slip; it acts as the glue. -
Building the ring:
Start by joining the central diamond panels together side-by-side to form a ring. Stand them up and press the seams together firmly from the inside and outside. -
Attaching the base:
Attach the bottom triangular panels to the lower points of your diamond ring, tapering them inward to meet your polygonal base slab. Seal the base seam well. -
Closing the top:
Attach the top triangular panels to the upper points of the diamonds, angling them inward to create the vessel’s neck opening. This completes the enclosed geometric form. -
Reinforcing seams:
Roll thin coils of clay and press them into the interior seams where possible to reinforce the structure.
Panel Panic?
If panels won’t stand, they are too wet. Let the slab dry longer on a porous board. If seams crack while drying, use a vinegar-slip mixture to patch them.
Step 3: Refining & Finishing
-
Refining the planes:
With the form assembled, use a metal rib or a flat paddle to gently tap the outsides of the panels. I find this really helps to flatten the planes and sharpen the geometric angles. -
Cleaning the edges:
Run a slightly damp sponge along the sharp exterior ridges to clean up any excess slip, but be careful not to round over your crisp lines too much. -
Drying:
Loosely cover the vase with plastic to let it dry very slowly. Because of the many seams, uneven drying can cause cracks. -
Bisque firing:
Once bone dry, fire the piece in your kiln to bisque temperature (usually cone 04 or 06). -
Glazing:
Pour a liner glaze inside if you want it watertight. Then, dip or spray the exterior with a matte teal glaze. A glaze that ‘breaks’ over edges is ideal, as it will naturally highlight the geometric ridges. -
Wiping back (optional):
If your glaze is thick, gently wipe the very sharpest edges with a sponge to reveal a hint of the clay body underneath, emphasizing the faceted structure. -
Final firing:
Fire the vase to the final maturity temperature for your clay and glaze combination.
Texture Play
Before cutting shapes, roll a textured fabric or lace into the soft slab. This adds intricate surface detail that pooling glazes will highlight beautifully.
Place your finished vase near a window where the light can play across its many facets and enjoy the shadow patterns it creates.

What Really Happens Inside the Kiln
Learn how time and temperature work together inside the kiln to transform clay into durable ceramic.
Tapered Slab Vessel With Narrow Neck
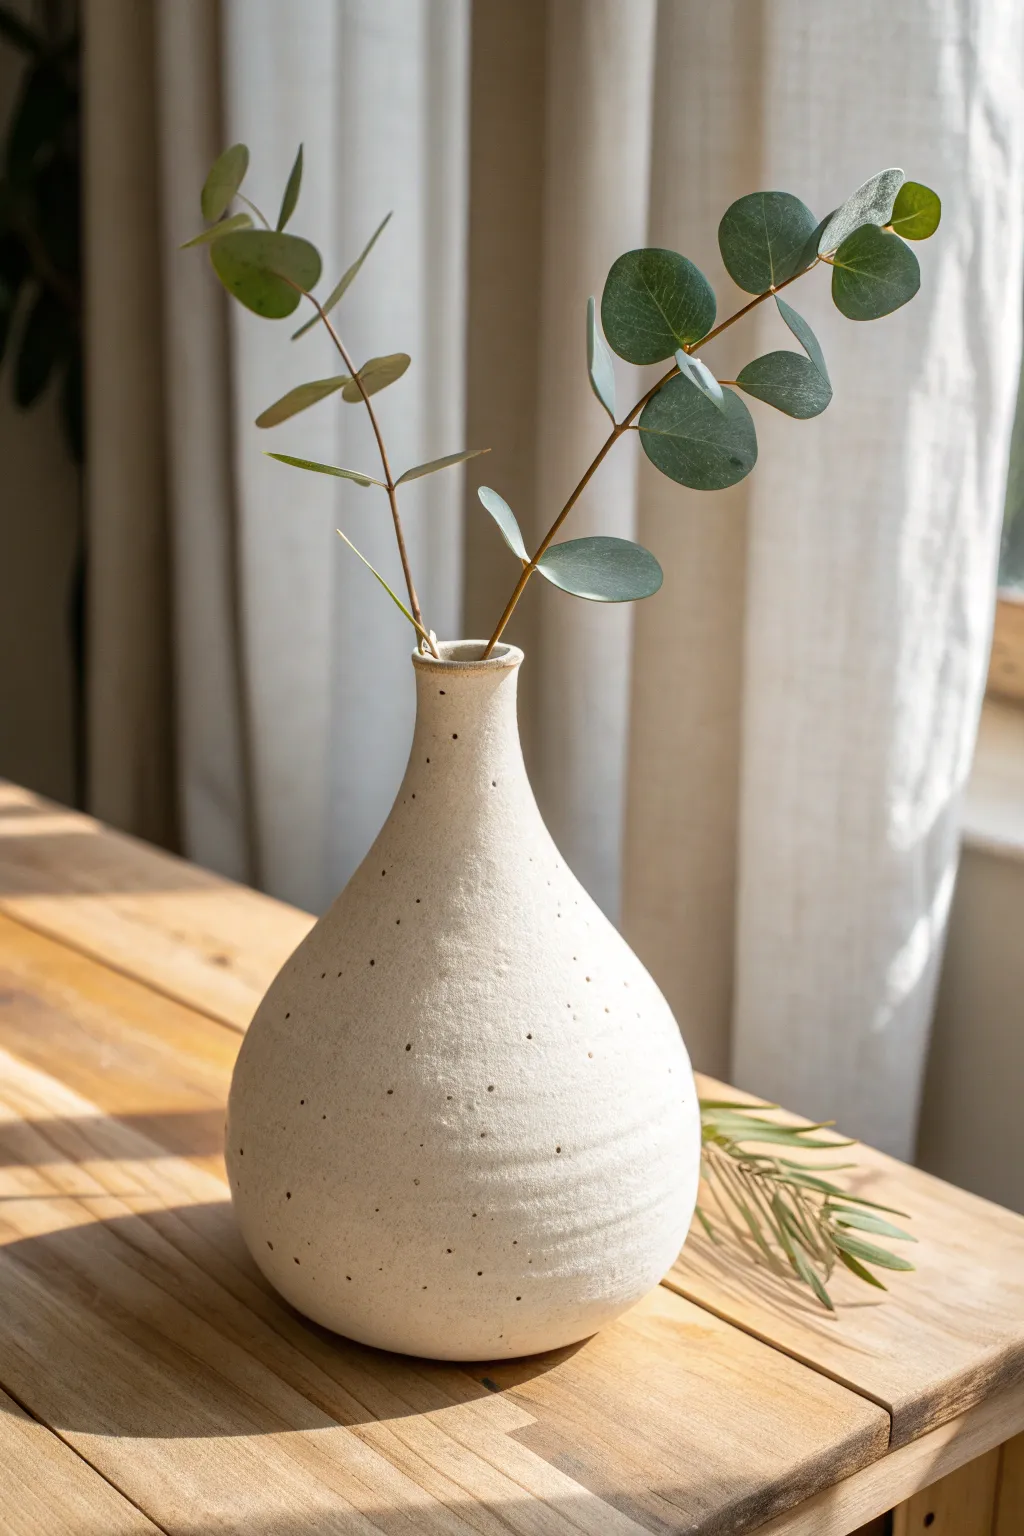
This elegant slab-built vessel features a wide, bulbous base that tapers gracefully into a narrow neck, perfect for displaying minimalist greenery like eucalyptus. The textured, speckled cream glaze and subtle ribbing details give it a modern yet organic feel.
Detailed Instructions
Materials
- Stoneware clay (smooth or lightly grogged)
- Rolling pin
- Canvas mat or slab roller
- Paper templates (one for the body cone, one for the base)
- Serrated rib tool
- Needle tool
- Scoring tool or fork
- Slip (clay mixed with water)
- Sponge
- Paddle
- Speckled cream or ‘oatmeal’ matte glaze
- Kiln
Step 1: Preparing the Slabs
-
Roll the clay:
Begin by rolling out a medium-sized slab of clay to an even thickness of about 1/4 inch. Ensure the slab is large enough to cut your main body template from. -
Smooth the surface:
Use a soft rubber rib to compress the clay slab on both sides. -
Cut the shapes:
Place your paper templates onto the slab. You will need a circular base and a large fan-shape or truncated cone shape for the body. -
Stiffen the slabs:
Let the cut clay pieces sit until they reach a soft leather-hard stage. They need to be flexible enough to bend without cracking but stiff enough to hold their shape upright.
Darting for Shape
To get a truly narrow neck from a slab, cut ‘V’ shaped darts out of the top rim before joining. This allows the clay to overlap inward more dramatically without folding.
Step 2: Assembling the Form
-
Bevel the edges:
Cut the vertical edges of your body slab at a 45-degree angle so they will overlap or join seamlessly when curated into a cylinder/cone. -
Score and slip:
Score the beveled edges thoroughly and apply clay slip. Carefully curve the slab into a cone shape, bringing the edges together. -
Seal the seam:
Press the joined edges firmly together. Use a wooden modeling tool to blend the clay across the seam on both the inside and outside, ensuring the join is invisible. -
Attach the base:
Score vertically around the bottom edge of your cone and the top edge of your circular base. Apply slip and press the body onto the base. -
Reinforce the interior:
Roll a very thin coil of clay and place it inside the vessel where the wall meets the floor. Smooth this coil down to create a strong interior curve.
Fixing Cracking Seams
If the vertical seam starts to open during drying, score it deeply, add fresh soft clay into the gap, and compress firmly. Slow the drying process down immediately.
Step 3: Shaping and Refining
-
Expand the belly:
With one hand inside the vessel supporting the wall, gently paddle the outside of the lower section. This pushes the wall outward to create that rounded, bulbous belly shape. -
Refine the neck:
Gently squeeze and collar the upper section of the vase to emphasize the taper. Keep your hands wet to prevent dragging on the clay. -
Add texture:
While the pot spins on a banding wheel, hold a serrated rib against the surface to create subtle horizontal grooves, especially around the widest part of the belly. -
Smooth the lip:
Use a sponge or chamois to compress and round off the rim of the narrow neck for a professional finish. -
Dry slowly:
Cover the vessel loosely with plastic to dry very slowly, which helps prevent the seams from pulling apart.
Step 4: Glazing and Firing
-
Bisque fire:
Fire the bone-dry piece in the kiln to bisque temperature (usually Cone 04 or 06). -
Apply glaze:
Pour a speckled cream or oatmeal matte glaze inside the vessel, swish it around, and pour it out. Then, dip or spray the exterior with the same glaze. -
Clean the foot:
Wipe the bottom of the vase and about 1/8 inch up the side with a damp sponge to remove any glaze, preventing it from sticking to the kiln shelf. -
Glaze fire:
Fire the vessel to the maturation temperature of your specific clay and glaze (typically Cone 5 or 6 for stoneware).
Once fired and cooled, arrange a few stems of eucalyptus in your vessel to highlight its organic form
Soft-Slab Wrapped Spiral Vase
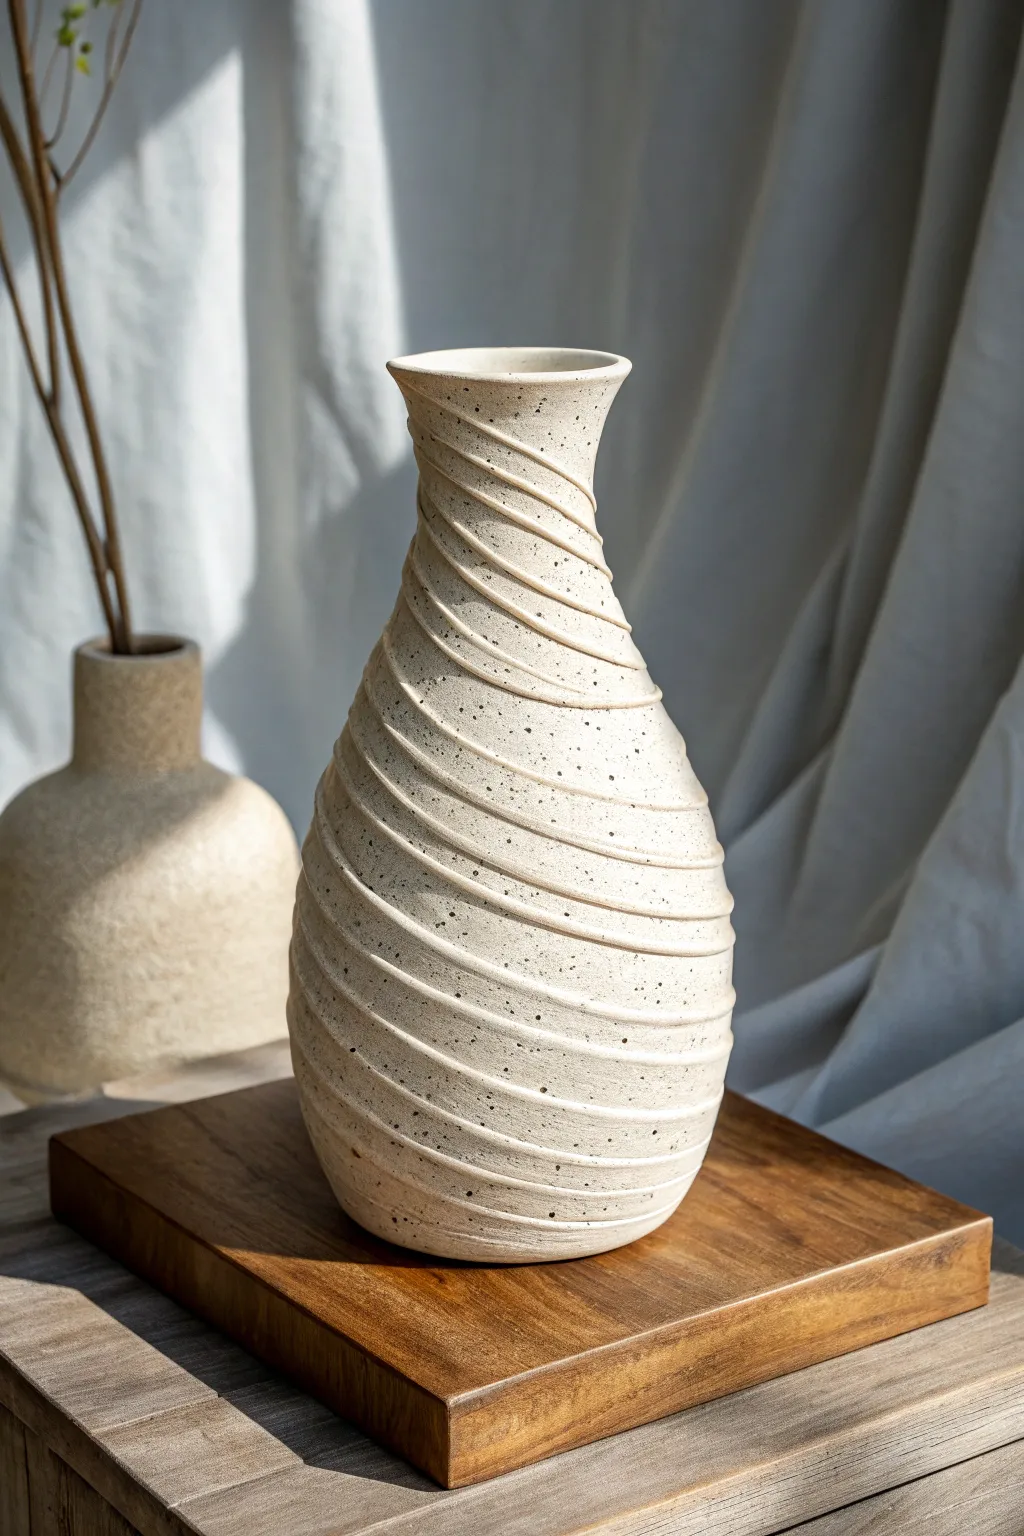
This soft-slab vessel brings elegant texture to your workspace with its gentle, continuous spiral ridge and organic speckled finish. The overlapping clay technique creates a dynamic surface that feels both modern and hand-crafted.
Step-by-Step Tutorial
Materials
- Speckled stoneware clay (e.g., Laguna Speckled Buff or similar)
- Rolling pin
- Canvas working mat or slab roller
- Fettling knife
- Serrated rib and rubber rib
- Slip or vinegar
- Large wooden dowel or a tall, tapered mold (optional support)
- Pony roller or smooth rolling tool
- Sponge
- Clear matte glaze or satin white glaze
Step 1: Slab Preparation
-
Roll the clay:
Begin by rolling out a generous slab of speckled stoneware clay to a thickness of approximately 3/16 to 1/4 inch. Ensure the thickness is consistent throughout to prevent warping during drying. -
Compress the slab:
Use a flexible rubber rib to compress the clay surface on both sides. This aligns the clay particles, reducing the chance of cracks and creating a smoother canvas for your spiral texture. -
Cut long strips:
Using a straight edge and a fettling knife, cut several long, tapered strips of clay. The strips should be roughly 1.5 to 2 inches wide. I find varying the width slightly adds to the organic look. -
Bevel the edges:
Bevel the long edges of your strips at a 45-degree angle. This simple step helps the strips overlap smoothly without creating overly bulky seams.
Seamless Support
Work around a paper-stuffed sock or a balloon inside the vase while building. It offers internal support for the belly shape without getting stuck like a rigid mold.
Step 2: Forming the Spiral Body
-
Create the base:
Cut a circle from your remaining slab for the base of the vase, approximately 4 inches in diameter. Score and slip the outer edge thoroughly. -
Begin the coil:
Take your first strip and attach it to the base, spiraling upward. Unlike a traditional coil pot, you are overlapping the beveled edges slightly to create a continuous spiraling ridge effect. -
Build the bulbous form:
As you wind the slab strips upward, gently push the clay outward from the inside to create the rounded belly of the vase. Maintain the overlap on the outside to preserve that distinctive spiral line. -
Secure the seams:
On the *inside* of the vessel, thoroughly smooth and blend the seams together using your fingers or a wooden modeling tool. The inside should be smooth, while the outside retains the stepped texture. -
Taper the neck:
As you reach the upper third of the vessel, begin angling your clay strips inward to narrow the form. Be gentle here; the clay needs to support the weight beneath it. -
Refine the spiral:
Use a damp sponge or a soft finger to run along the exterior spiral ridges. You want to soften any sharp cutting marks but keep the definition of the overlap distinct.
Raw Edge Variant
Instead of smoothing the spiral ridges, leave the raw cut edge slightly rough or tear the clay strips for a more rustic, wabi-sabi aesthetic.
Step 3: Rim and Finish
-
Flare the top:
For the final few inches, angle the clay strip slightly outward again to create a flared rim. This gives the vessel a classic silhouette and balances the wider bottom. -
Level the rim:
Once you reach the desired height, trim the top edge horizontal. Use a chamois cloth or a wet sponge to compress and round off the lip so it is smooth to the touch. -
Slow drying:
Cover the vase loosely with plastic for the first 24-48 hours. This slow drying process is crucial for preventing cracks at the spiral seams. -
Bisque fire:
Once bone dry, fire the piece to bisque temperature (usually cone 04 or 06, depending on your clay body). -
Glazing:
Apply a thin coat of clear matte or semi-transparent white satin glaze. The goal is to let the natural speckles of the clay shine through while highlighting the spiral texture. -
Final firing:
Glaze fire the piece to the maturity temperature of your clay (typically cone 5/6 or cone 10).
Place your finished vase near a window where the light can catch the spiral ridges and highlight the speckles


The Complete Guide to Pottery Troubleshooting
Uncover the most common ceramic mistakes—from cracking clay to failed glazes—and learn how to fix them fast.
Folded Corner Pinch Vase
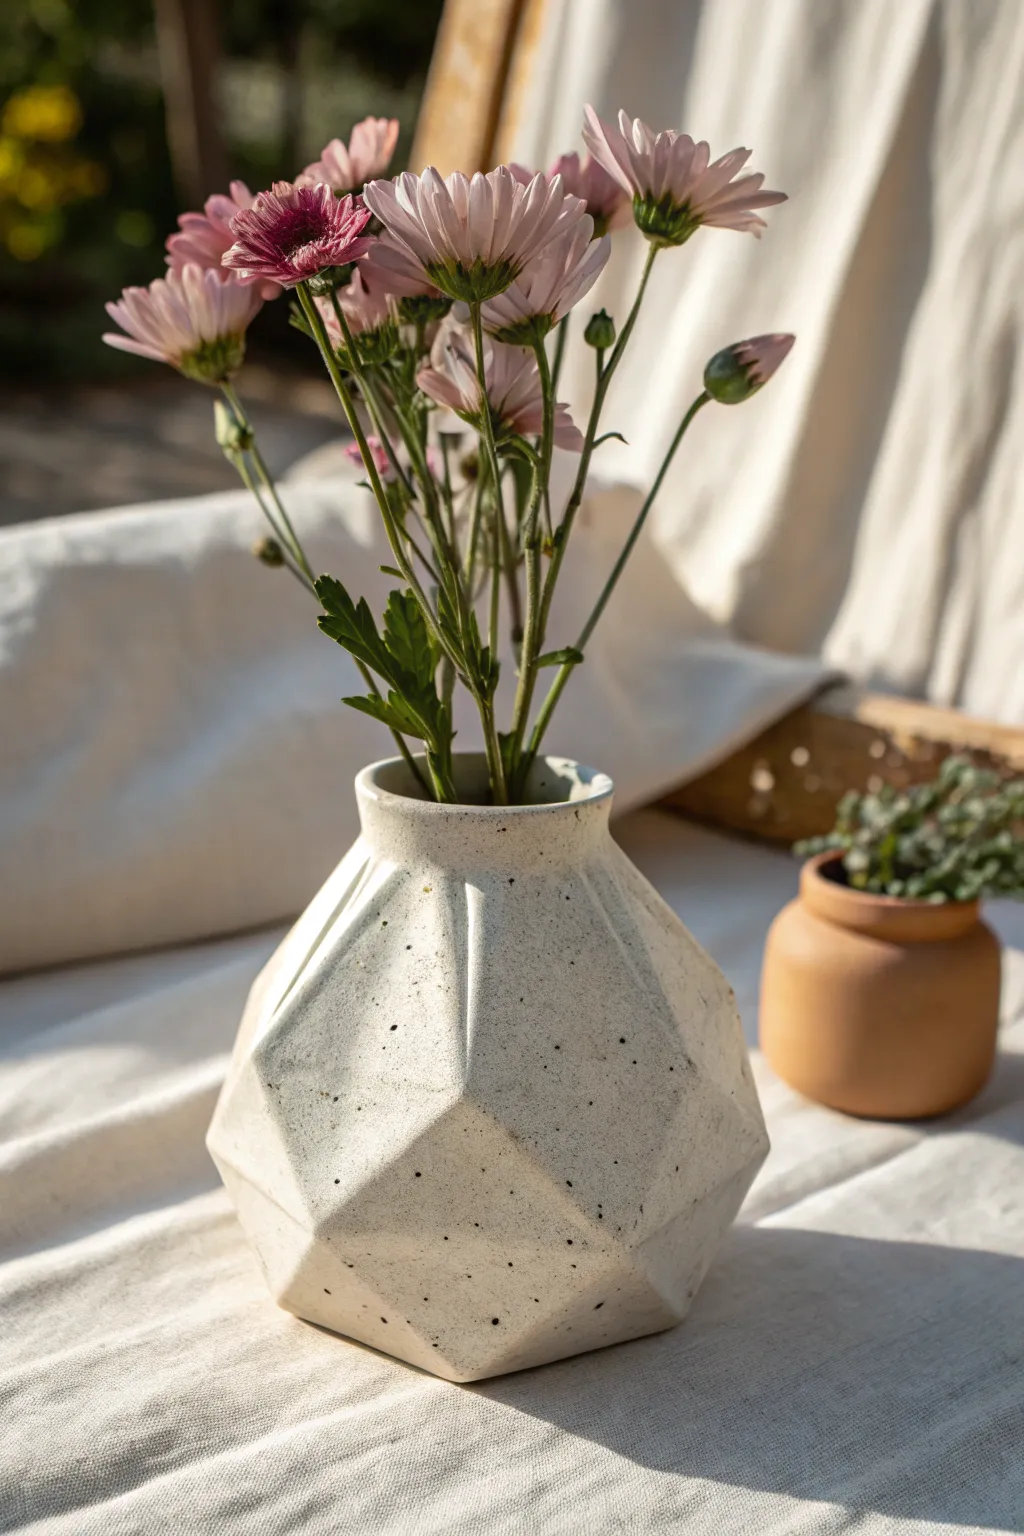
This striking vase combines sharp architectural lines with the soft, organic feel of speckled stoneware. By assembling geometric slabs, you’ll build a vessel that catches light and shadow beautifully across its many faces.
Step-by-Step Guide
Materials
- Speckled stoneware clay (white or light buff)
- Rolling pin
- Guide sticks or slab roller (approx. 1/4 inch thick)
- Paper templates (pentagons and trapezoids)
- Fettling knife or craft knife
- Scoring tool or serrated rib
- Slip (clay mixed with water)
- Paddle tool
- Sponge
- Transparent or white matte glaze
Step 1: Preparation & Cutting
-
Roll the Slabs:
Begin by wedging your speckled stoneware clay thoroughly to remove air bubbles. Roll it out into a large, even slab about 1/4 inch thick using guide sticks to ensure uniform thickness. -
Let it Stiffen:
Allow the slab to dry slightly until it reaches a ‘leather-hard’ state. It should be firm enough to hold its shape without slumping but still flexible enough to be scored and slipped. -
Create Templates:
While the clay stiffens, sketch out your pattern on cardstock. For this shape, you essentially need a pentagonal base, a row of five wide trapezoids for the lower belly, and a row of five narrower, inverted trapezoids for the upper shoulder. -
Cut the Shapes:
Place your templates onto the leather-hard slab. Using a sharp fettling knife, cut out five large lower trapezoids, five upper shoulder trapezoids, and one pentagon for the base. Cut clearly and cleanly. -
Bevel the Edges:
For cleaner geometric seams, I find it helpful to bevel the edges of each piece at a 45-degree angle. This allows the slabs to join flush against each other rather than overlapping.
Seams Splitting?
If seams crack during drying, your clay was likely too dry when joining. Score deeper, use more slip, and wrap the piece in plastic to equalize moisture.
Step 2: Assembly
-
Score and Slip:
Take your base pentagon and the five lower trapezoids. Roughly score the edges you intend to join and apply a generous amount of slip. -
Build the Base Ring:
Attach the bottom edge of each lower trapezoid to the sides of the pentagonal base. Pinch the clay firmly to adhere. -
Raise the Walls:
Lift the side walls up and join the vertical seams of the trapezoids together. You are creating a bowl-like shape. Reinforce the inside seams with a small coil of clay, smoothing it flat. -
Add the Upper Shoulder:
Score and slip the top edge of your current bowl shape. Take the five inverted trapezoids and attach them, angling them inward to close the form. -
Close the Top Seams:
Join the sides of these upper slabs. The opening at the top should be significantly smaller than the widest point of the vase.
Sharpen It Up
After paddling, run a metal rib or a straight edge along the facet lines while the clay is leather hard to make the geometric corners look razor-sharp.
Step 3: Refining & Finishing
-
Shape the Neck:
For the rim, you can either leave the geometric hole or add a small, wheel-thrown or hand-built collar. The example shows a smooth, slightly flared collar added to soften the transition. -
Sharpen the Facets:
Once the form is closed and stable, use a paddle tool to gently tap the flat surfaces. This emphasizes the sharp ‘crease’ lines where the slabs meet. -
Smooth the Surface:
Using a slightly damp sponge, wipe away excess slip from the seams, but be careful not to round over your crisp geometric edges too much. -
Bisque Fire:
Allow the vase to dry slowly and evenly to prevent cracking at the seams. Once bone dry, bisque fire the piece to the appropriate temperature for your clay body. -
Glaze Application:
Pour a white glaze inside to line the vessel. For the exterior, dip or spray a thin layer of matte white or transparent glaze. This allows the natural speckles of the clay to show through. -
Final Firing:
Fire the kiln to the final glaze temperature. The high heat will bring out the iron speckles, creating that lovely dotted texture.
Now you have a modern, sculptural vase ready to hold your favorite blooms
Slumped Oval Vessel With Wavy Rim
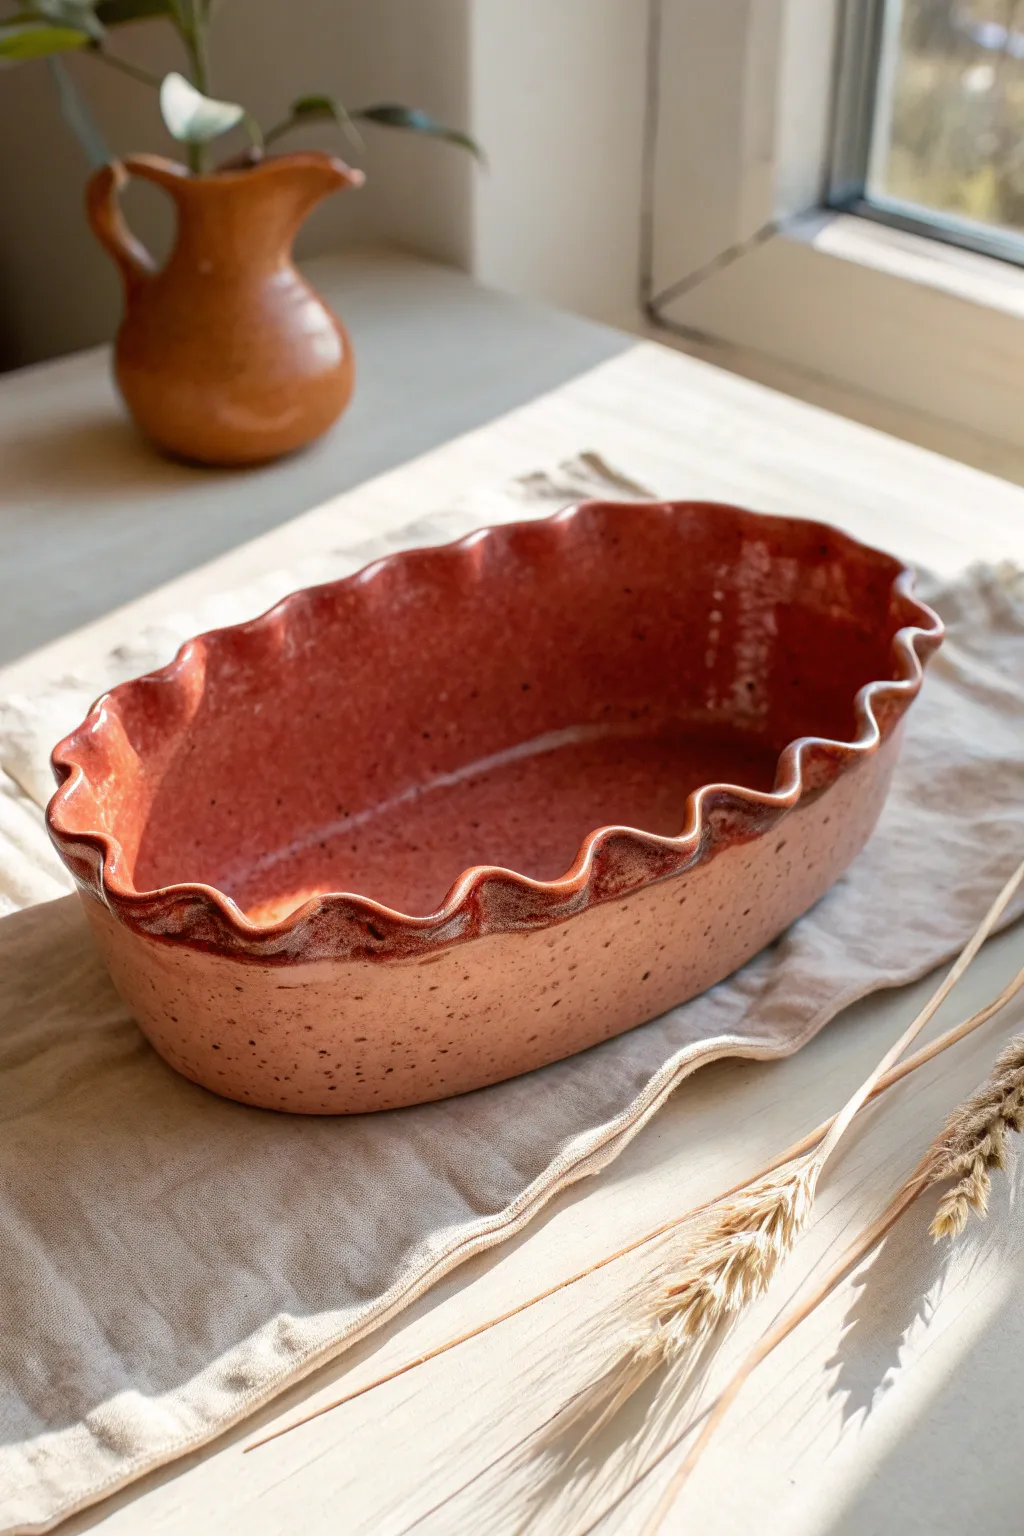
This charming oval vessel combines a smooth, slumped form with a delightfully organic, ruffled edge that catches the glaze beautifully. The warm terracotta hues and speckled finish give it a rustic, farmhouse aesthetic perfect for baking or displaying fruit.
Step-by-Step
Materials
- Mid-range stoneware clay (speckled or red)
- Rolling pin and canvas or slab roller
- Oval hump mold (plaster or bisque)
- Fettling knife or needle tool
- Wooden modeling tool
- Soft rib (rubber or silicone)
- Serrated rib
- Sponge
- Clear or translucent amber glaze
Step 1: Creating the Slab
-
Prepare the Clay:
Wedge about 3-4 pounds of clay thoroughly to remove air pockets and align the particles. A well-wedged ball will prevent warping later. -
Roll out a Slab:
Roll out a slab of clay to an even thickness of approximately 1/4 inch. If you are rolling by hand, lift and flip the clay frequently so it doesn’t stick to your canvas. -
Smooth the Surface:
Compress the slab on both sides using a soft rib. This is crucial for avoiding cracks and creates that smooth, professional surface you see on the finished pot.
Consistent Waves
Use your thumb and forefinger in a ‘pinching’ motion at regular intervals around the rim to create uniform scallops, rather than random waves.
Step 2: Forming and Slumping
-
Position the Mold:
Place your oval hump mold on a banding wheel or a clean work surface. If the mold isn’t porous like plaster, dust it with a little cornstarch to prevent sticking. -
Drape the Clay:
Carefully lift your slab and drape it over the hump mold. Gravity will initiate the shaping, but you’ll need to guide it. -
Shape the Walls:
Gently press the clay against the mold, working from the top (which will be the bottom of the pot) down the sides. Smooth out any wrinkles with your soft rib. -
Trim the Excess:
Using a needle tool or fettling knife, trim the excess clay around the base of the mold to establish an even rim height. Leave a little extra height to account for the waviness.
Prevent Rim Cracks
If the rim dries much faster than the base, it may crack. Mist the rim lightly with water and keep it covered with plastic while the base catches up.
Step 3: Waving the Rim
-
Initial Shaping:
While the clay is still soft on the mold, use your fingers to gently push the rim inward and outward to create an undulating wave pattern. -
Refine the Waves:
Use a wet sponge or chamois to smooth the edge of the rim. I like to support the clay wall from the inside while smoothing to maintain the curve. -
Stiffen the Form:
Allow the clay to dry to a soft leather-hard stage while still on the mold. This ensures it holds its oval shape when you flip it over. -
Release and Flip:
Carefully lift the vessel off the mold. Turn it right-side up and place it on a flat board. -
Refine the Interior:
Smooth the interior seams or marks left by the mold using a rib. This creates a clean, continuous surface for food safety. -
Accentuate the Ruffles:
Go back over the rim with your fingers one last time, deepening the waves if they flattened during handling. The peaks and valleys should be distinct.
Step 4: Finishing and Glazing
-
Slow Dry:
Cover the pot loosely with plastic to let it dry very slowly. Uneven drying in oval shapes can cause warping or cracking at the base. -
Bisque Fire:
Once bone dry, fire the piece to bisque temperature (usually Cone 04 or 06). -
Wax the Foot:
Apply wax resist to the bottom of the pot to keep it glaze-free. -
Apply Glaze:
Dip or pour a translucent amber or clear glaze over the piece. A glaze that breaks over edges is ideal here, as it will highlight the speckled clay body and the peaks of the wavy rim. -
Final Fire:
Fire to the maturity temperature of your clay body (likely Cone 5 or 6). The glaze should pool slightly in the bottom, adding depth to the color.
Now you have a stunning, functional piece of pottery ready to grace your table.

TRACK YOUR CERAMIC JOURNEY
Capture glaze tests, firing details, and creative progress—all in one simple printable. Make your projects easier to repeat and improve.
Scalloped Rim Slab Bowl Vessel
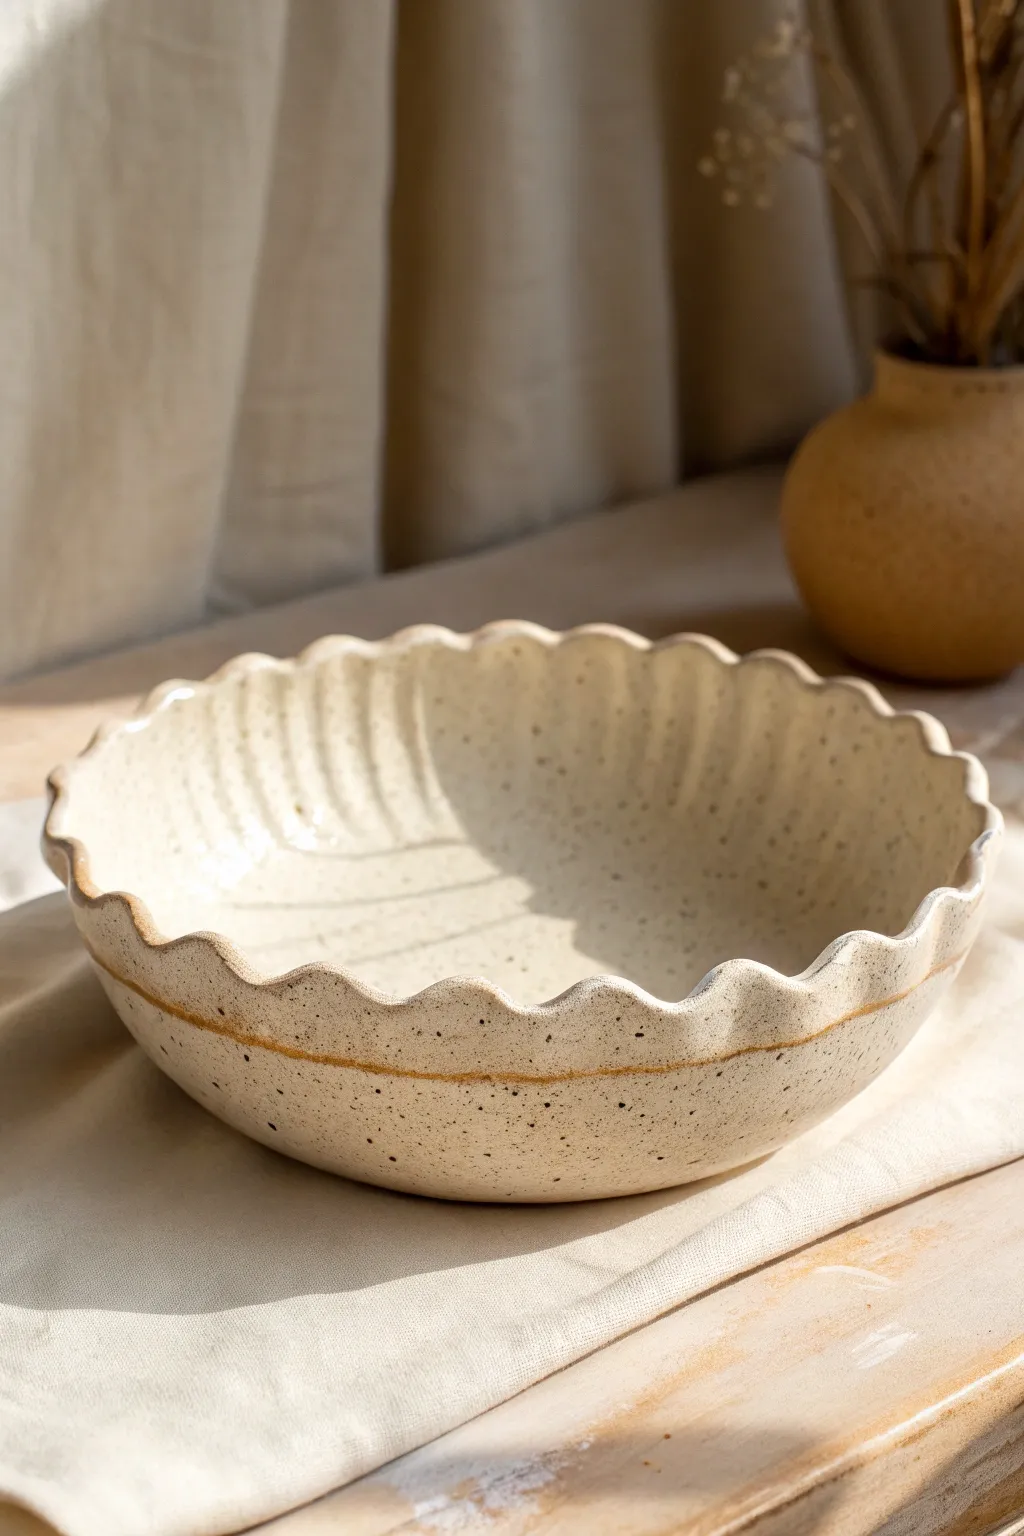
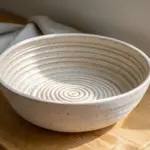
This charming ceramic bowl features a gentle, undulating rim reminiscent of a flower or a pie crust, finished in a warm, speckled cream glaze. It captures a beautiful balance between organic form and structured slab building, making it a perfect centerpiece or serving dish.
How-To Guide
Materials
- Stoneware clay (speckled or buff)
- Rolling pin
- Slab guides (approx. 1/4 inch thickness)
- Canvas work surface
- Large circular template or bowl (for tracing)
- Hump mold (plaster or bisque) or a large bowl to use as a form
- Fettling knife or needle tool
- Rib tool (rubber and metal)
- Sponge
- Creamy white speckled glaze
- Iron oxide wash or dark underglaze pencil (for the line detail)
- Kiln
Step 1: Creating the Slab Base
-
Wedging and flattening:
Begin by thoroughly wedging your stoneware clay to remove air bubbles. Flatten it into a thick pancake shape with your palms on a canvas-covered surface. -
Rolling the slab:
Place your slab guides on either side of the clay. using your rolling pin, roll the clay out until it is an even thickness across the entire slab, rotating the clay occasionally to prevent sticking. -
Smoothing the texture:
Take a rubber rib tool and compress both sides of the slab firmly. This aligns the clay particles to prevent warping and erases the canvas texture from your work surface. -
Cutting the circle:
Place your large circular template onto the slab. Using a needle tool, cut cleanly around the perimeter. Remove the excess clay and set it aside for recycling.
Step 2: Forming the Bowl
-
Draping the contour:
Carefully lift your clay circle and drape it over your hump mold. Gently press the clay downward to conform to the shape of the mold, starting from the center and working outward to avoid trapping air. -
Establishing the foot (optional):
If you want a foot ring, score and slip a small coil or ring of clay onto the center bottom of the bowl while it is inverted on the mold. Smooth it securely into place. -
Marking the scallops:
While the clay is still soft on the mold, use your fingers to gently mark where you want the waves of the rim to be. I like to visualize a clock face to keep the spacing even. -
Sculpting the rim:
Using your thumb and forefinger, gently pinch and push the edge of the slab to create the undulating, scalloped pattern. Alternate pushing in and pulling out to create deep, rhythmic waves. -
Refining the edge:
Smoothing the rim is crucial. Take a damp sponge or a piece of chamois leather and run it along the scalloped edge to soften any sharp angles or burrs left from cutting. -
Adding texture:
While the bowl is still on the mold, verify if you want any subtle fluting on the interior or exterior. You can use a modeling tool to emphasize the vertical lines leading down from the scallops. -
Defining the exterior line:
Use a needle tool or a blunt modeling tool to lightly inscribe a horizontal line around the exterior belly of the bowl, mirroring the curve of the rim. -
Drying to leather hard:
Allow the bowl to stiffen on the hump mold until it reaches a leather-hard state. Check it frequently; if it shrinks too much while on a rigid mold, it may crack.
Even Ripples
To get perfectly spaced scallops, lightly mark the rim at 12, 3, 6, and 9 o’clock first. Then divide those sections in half. This ensures your waves don’t get bunched up at the end.
Step 3: Finishing and Glazing
-
Releasing the form:
Once leather hard, gently lift the bowl off the mold. Turn it right-side up and check the interior for any imperfections, smoothing them out with a rib. -
Bisque firing:
Let the piece dry completely (bone dry) before loading it into the kiln for a bisque fire (typically cone 04 or 06). -
Applying the oxide line:
After the bisque fire, use a small brush to apply an iron oxide wash into the inscribed line on the exterior. Wipe away the excess with a damp sponge, leaving the dark color only in the recess. -
Glazing the piece:
Dip the entire bowl into a creamy white speckled glaze. Ensure an even coat. If you used a wax resist over the oxide line, the glaze will bead off; otherwise, the oxide will bleed through beautifully. -
Wiping the foot:
Use a damp sponge to clean the bottom of the bowl or the foot ring completely so it doesn’t fuse to the kiln shelf. -
Glaze firing:
Fire the bowl to the maturity temperature of your clay and glaze (likely cone 5 or 6 for stoneware). Allow the kiln to cool naturally.
Stuck Clay?
If your clay sticks to the hump mold, place a layer of newspaper or thin plastic between the mold and the slab. This acts as a release barrier and burns off or peels away easily.
Now you have a stunning, food-safe vessel ready to hold fresh fruit or serve warm dishes at your next gathering
Textured Band Slab Vase
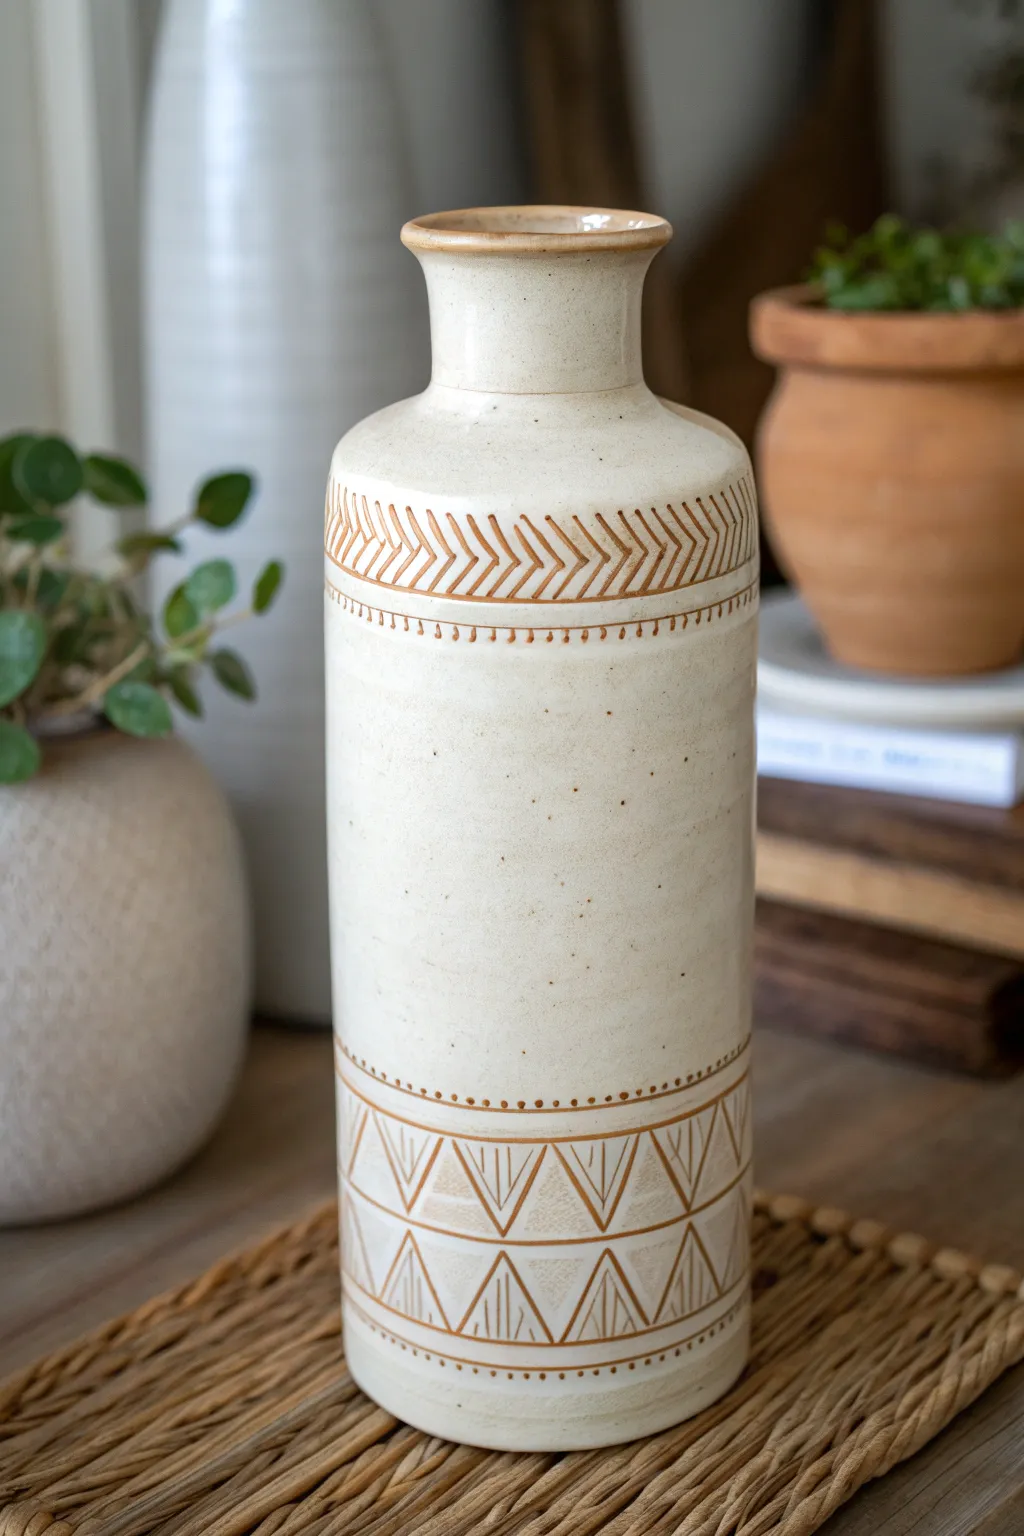
This tall, elegant cylinder vase combines the smooth simplicity of cream-colored stoneware with grounding, earthy geometric details. The incised bands at the top and bottom frame the vessel beautifully, creating a project that looks professionally thrown but is constructed entirely from slab.
Detailed Instructions
Materials
- Stoneware clay (speckled buff recommended)
- Rolling pin
- Canvas mat or slab roller
- Needle tool
- Fettling knife
- Serrated rib or scoring tool
- Slip (clay mixed with water)
- Carving tools (loop tool and sgraffito tool)
- Ruler
- Cylinder mold (like a PVC pipe or mailing tube)
- Newspaper
- Sponge
- Cream or antique white glossy glaze
- Iron oxide wash or underglaze pencil (for the lines)
Step 1: Preparing the Slabs
-
Roll the main body:
Begin by rolling out a large, even slab of clay, aiming for about 1/4 to 3/8 inch thickness. You need a long rectangle large enough to wrap around your chosen cylinder mold with a slight overlap. -
Cut the rectangle:
Using a ruler and fettling knife, cut a precise rectangle. Measure the circumference of your mold form plus one inch for the seam overlap. -
Create the base:
Roll a smaller slab for the bottom and cut a circle slightly larger than the diameter of your form. I like to set this aside on a small ware board so I can build directly on top of it. -
Cut the neck components:
Cut a smaller, shorter rectangular strip for the neck of the vase. This should be narrower than the main body to create that bottleneck shape.
Step 2: Refining the Form
-
Wrap the form:
Wrap your form (PVC pipe or tube) in a layer of newspaper to prevent sticking. Carefully lift your large rectangular slab and wrap it around the form. -
Join the seam:
Score and slip the overlapping edges thoroughly. Press them together firmly, then use a serrated rib to blend the seam until it disappears completely on the outside. -
Attach the base:
Score the bottom edge of your cylinder potential and the outer rim of your circular base. Press the cylinder onto the base, using a coil on the interior for extra reinforcement if you can reach it. -
Form the shoulder:
Gently paddle the top edge of the cylinder inwards to create a curve that will meet the neck. It helps to keep the clay slightly soft here. -
Attach the neck:
Form the smaller rectangle into a tube and attach it to the inward-curving shoulder you just created. Score, slip, and blend the connection point smooth. -
Flare the rim:
Using your fingers and a damp sponge, gently press the top rim outwards to create a flared, rounded lip.
Warping Walls?
If your slab cylinder is slumping or warping while you build, the clay is too wet. Use a heat gun or hair dryer for 2-3 minutes to stiffen the walls before adding the neck.
Step 3: Adding Texture and Finish
-
Slight drying time:
Let the vase stiffen to leather-hard. This is crucial—if the clay is too soft, your carving lines ‘curls’ won’t break away cleanly. -
Mark the bands:
Use a needle tool and a ruler (or steady hand while spinning a banding wheel) to lightly scribe horizontal guide lines for the top and bottom pattern areas. -
Carve the top chevron:
Using a sharp carving tool, etch the herringbone/chevron pattern into the top band. Make swift, confident strokes to remove the clay ribbons. -
Carve the bottom triangles:
For the base, carve outlining triangles. Fill alternating triangles with vertical lines or smaller concentric triangles as seen in the inspiration piece. -
Detail the borders:
Add small dots or dashes along the horizontal guide lines using the point of your needle tool to frame your geometric sections. -
Bisque fire:
Allow the piece to dry slowly and completely before bisque firing to cone 04. -
Apply oxide wash:
paint an iron oxide wash into all the carved lines. Wipe away the excess with a damp sponge, leaving the dark color trapped only in the recesses. -
Glaze and final fire:
Dip or brush the entire vessel with a semi-transparent cream or white glaze. The oxide will show through the glaze after the final cone 6 firing, creating that warm, toasted look.
Mix Up The Motifs
Don’t feel limited to triangles! Try carving organic waveforms, leaf patterns, or vertical fluting in the bands to change the aesthetic while keeping the form.
Place your finished vase near a window where the light can catch the subtle depth of your carvings
Carved Panel Vessel With Sgraffito Lines
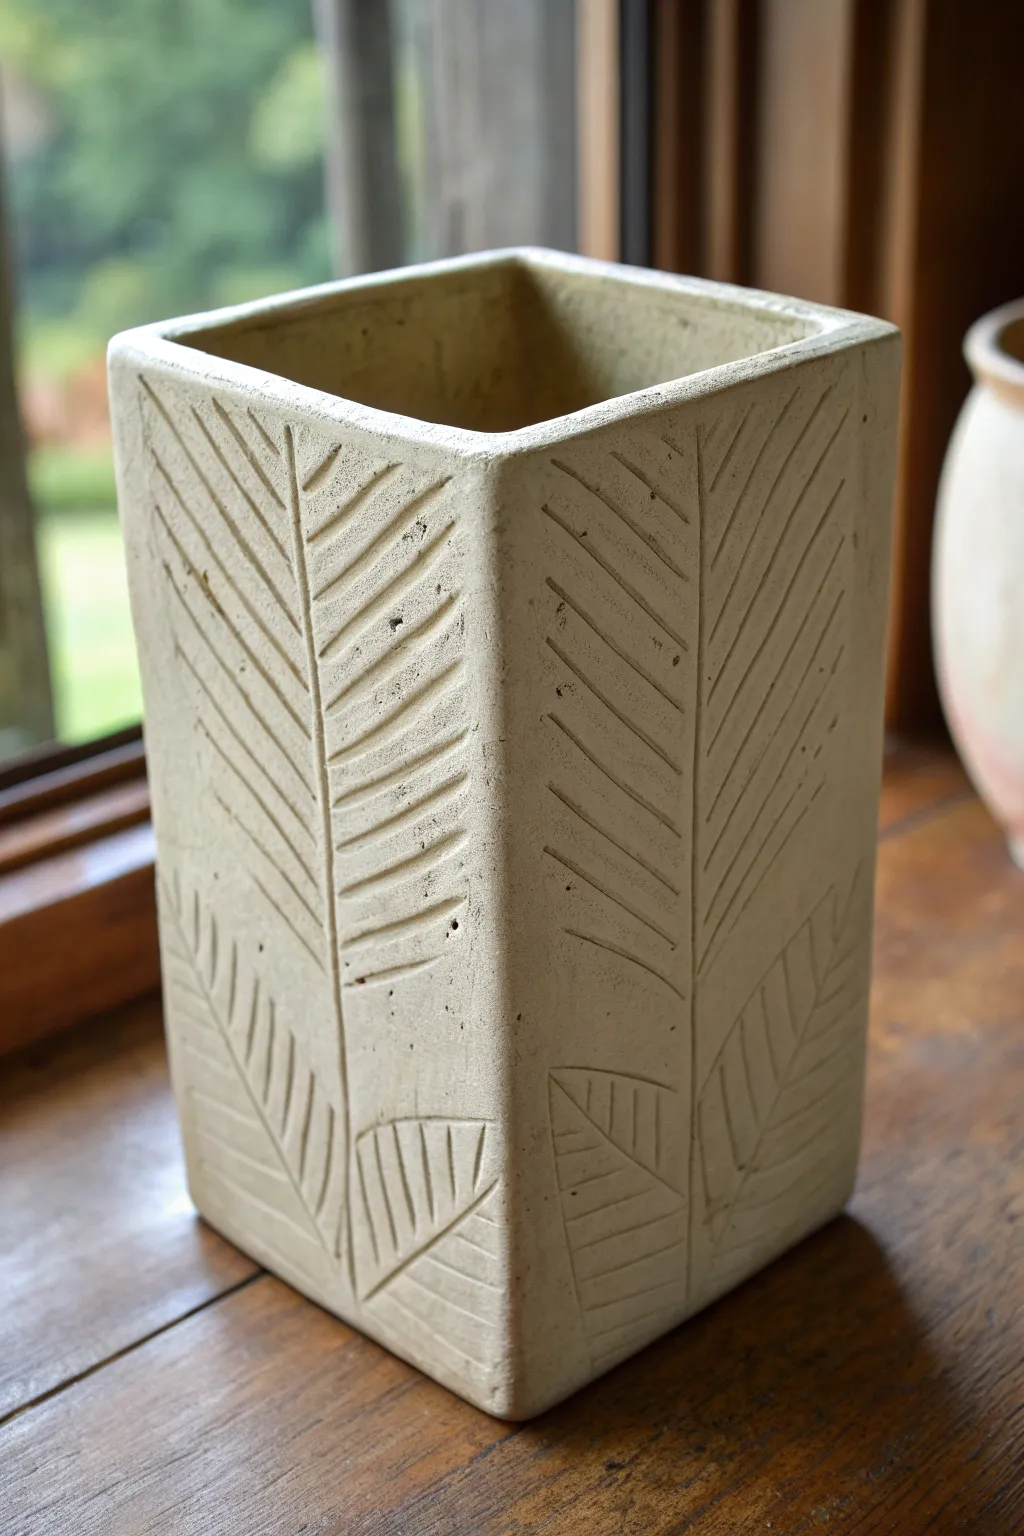
This rectangular vessel combines clean geometric lines with organic, ferns-inspired carvings for a stunning contrast. The natural clay body is left unglazed on the outside to highlight the sgraffito-style texture, creating a piece that feels both ancient and modern.
Step-by-Step Tutorial
Materials
- Stoneware clay (smooth or with fine grog)
- Rolling pin
- Two wooden guide strips (approx. 1/4 inch thick)
- Fettling knife or X-Acto blade
- Ruler or straight edge
- Serrated rib or scoring tool
- Slip (clay mixed with water)
- Carving tool (V-tip or loop tool)
- Needle tool
- Sponge
- Paddle (optional)
Step 1: Creating the Slabs
-
Roll out the clay:
Begin by wedging your clay thoroughly to remove air bubbles. Place the clay between two wooden guide strips on a canvas surface and roll it out with a rolling pin. The strips ensure a consistent thickness, which is crucial for structural integrity. -
Smooth the surface:
Before cutting, take a rubber rib and compress the clay slab on both sides. This aligns the clay particles, preventing warping during drying, and creates a smooth canvas for your carving later. -
Measure your panels:
Using a ruler, lightly map out your five pieces: four identical rectangular walls (e.g., 4×8 inches) and one square base (e.g., 4×4 inches). Remember that two walls will need to overlap the others, so adjust the base width accordingly if doing butt joints, or cut 45-degree bevels for mitered corners. -
Cut the shapes:
Use a fettling knife and a straight edge to cut out your slab pieces cleanly. Keep the knife vertical for straight cuts or angled if you chose mitered joints. -
Leather hard stage:
Let the slabs dry to a stiff leather-hard stage. They need to be firm enough to stand up without slumping but soft enough to score and carve. I like to prop them up against a board to dry evenly.
Warping Walls?
If walls start bowing inward, stuff the vessel lightly with newspaper or soft foam. This supports the shape while it dries to leather-hard.
Step 2: Assembling the Vessel
-
Score the edges:
Take a serrated rib or scoring tool and rough up all edges that will be joined. Do this on the walls and the perimeter of the base slab. Be aggressive here; a good rough surface ensures a strong bond. -
Apply slip:
Generously apply clay slip to the scored areas. It should be the consistency of thick cream. This acts as the glue for your vessel. -
Join the walls:
Attach the first wall to the base, applying firm pressure. Add a second adjacent wall to create a corner, which provides stability. Continue until all four walls are attached to the base and each other. -
Reinforce the seams:
Roll thin coils of soft clay and press them into the interior seams. Smooth these coils down with a modeling tool or your finger to seal the joints completely. -
Paddle into shape:
Once assembled, use a wooden paddle to gently tap the outside walls. This helps square up the form, sharpen the corners, and compress the joined seams from the exterior. -
Clean the rim:
Use a sponge or a chamois cloth to smooth the top rim. It should be level and comfortable to the touch.
Step 3: Carving the Design
-
Sketch the major lines:
Using a needle tool, very lightly sketch the central veins of your leaf design. Draw a vertical line running up the center of each face, allowing it to curve slightly for an organic feel. -
Carve the center vein:
Use a V-tip carving tool to gouge out the central vein line you just sketched. Vary the pressure slightly; a deeper cut at the bottom tapering to a thinner line at the top adds visual weight. -
Add diagonal fronds:
Starting from the bottom, carve diagonal lines radiating upward from the center vein. Keep the spacing roughly consistent but not perfectly mechanical. -
Detail base leaves:
At the bottom of the visible panels, carve smaller, separate leaf shapes that look like new growth. Outline the leaf shape first, then fill it with internal vein lines. -
Clean up burrs:
Carving often leaves little crumbs or ‘burrs’ of clay. Wait until the seemingly dry crumbs are bone dry, then gently brush them off with a stiff brush. Trying to wipe them while damp will smear the lines. -
Final drying and firing:
Allow the finished vessel to dry slowly under loose plastic to prevent uneven shrinkage. Once bone dry, bisque fire the piece. For the look in the image, fire to maturity without glaze on the exterior, or use a matte wash to enhance the texture.
Stain the Grain
Apply a black or dark brown oxide wash after bisque firing, then wipe it back with a sponge. The dark color will remain in the carved grooves.
Enjoy the quiet, tactile beauty of your hand-carved vessel as it finds its place in your home
Color-Blocked Slab Vessel With Clean Planes
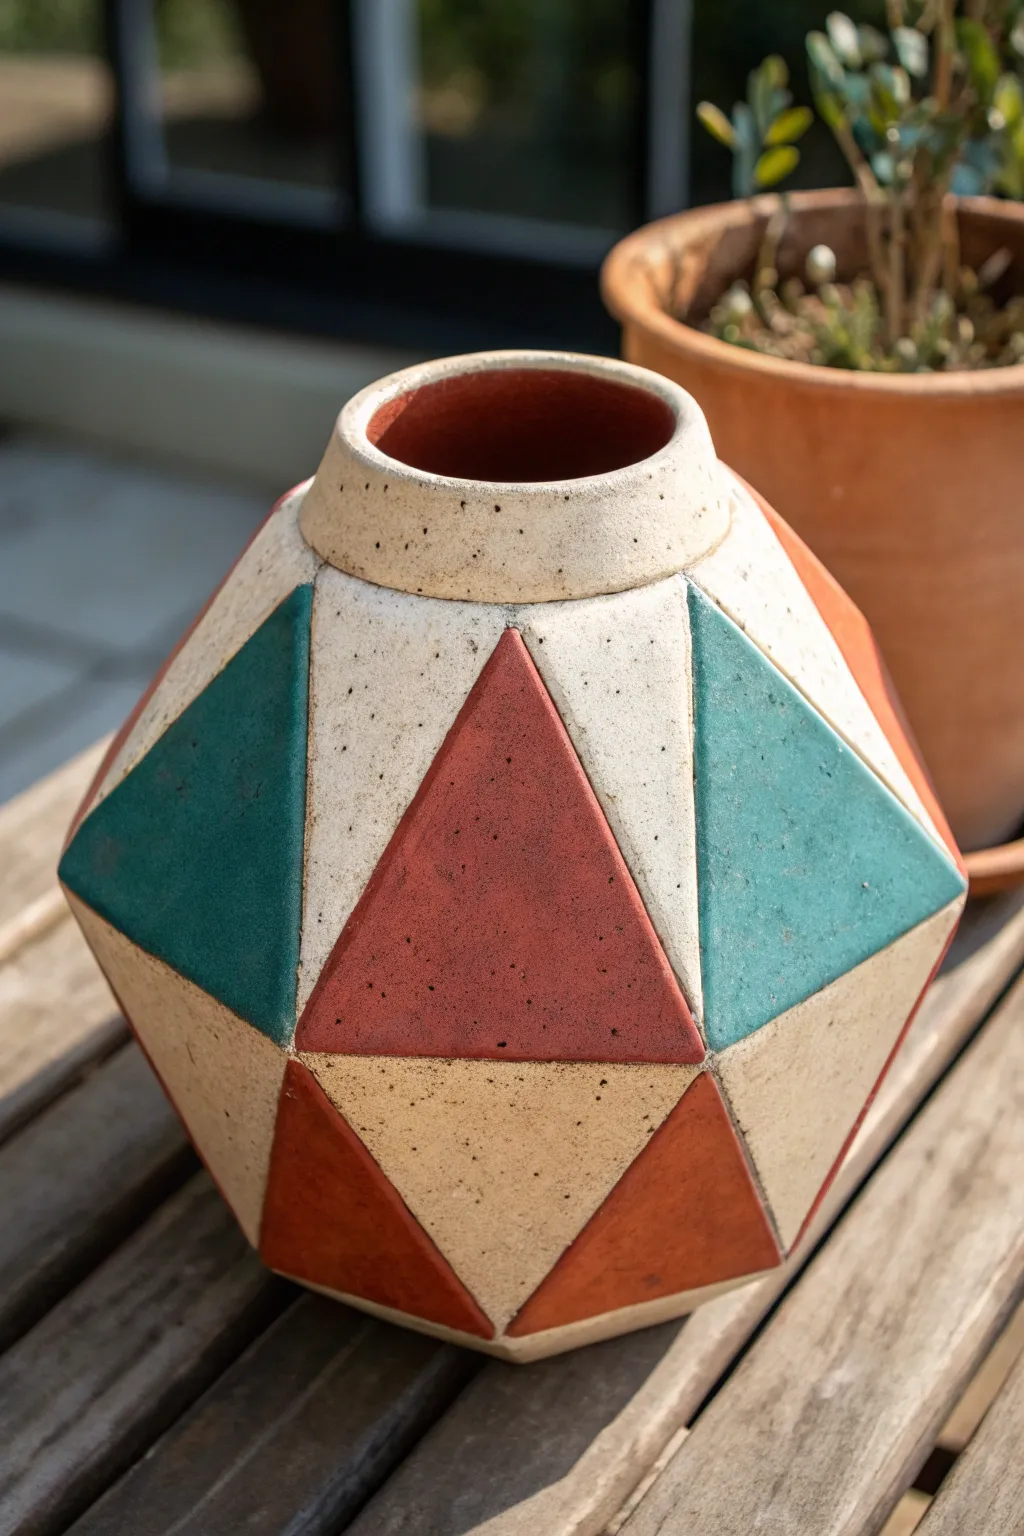
Bring bold geometry into your home with this stunning multi-faceted vase, constructed from precise clay slabs. The interplay of earthy terracotta, teal, and speckled cream glazes highlights the sharp planes and creates a modern yet organic centerpiece.
Step-by-Step Guide
Materials
- Stoneware clay (speckled or buff)
- Rolling pin
- Canvas or slab mat
- Fettling knife or X-Acto knife
- Paper template (equilateral triangles)
- Ruler
- Score and slip tool (serrated rib)
- Clay slip
- Smooth finish sponge
- Underglazes (terracotta/red iron oxide, teal, white/cream)
- Clear matte glaze
- Kiln
Step 1: Preparing the Slabs and Shapes
-
Roll out the clay:
Begin by wedging your clay thoroughly to remove air bubbles. Roll it out into a large, consistent slab about 1/4 inch thick. I find that using guide sticks on either side of the rolling pin helps ensure a perfectly even thickness. -
Smooth the surface:
Before cutting, take a firm rib tool and compress the clay slab on both sides. This aligns the clay particles, preventing warping later, and creates a smooth canvas for your geometric shapes. -
Create your template:
Cut an equilateral triangle template from sturdy cardstock. For the scale shown, a side length of about 3-4 inches works well. You will need roughly 15-20 triangles for the main body depending on your desired height. -
Cut the shapes:
Place your template on the slab and cut out your triangles using a fettling knife. Be precise; clean straight edges are crucial for tight seams. Cut a few extras just in case. -
Bevel the edges:
For the crispest geometric angles, bevel the edges of your triangles at a 45-degree angle. This allows the pieces to fit together snugly without large gaps. -
Let them firm up:
Allow your cut triangles to dry to a ‘soft leather hard’ stage. They need to be stiff enough to hold their shape when standing up, but flexible enough to be joined without cracking.
Sharp Angles
Use a minimal amount of slip at the outer seams. Excess slip that squeezes out can blur your sharp corners and is difficult to clean perfectly once dry.
Step 2: Assembling the Form
-
Build the base ring:
Start by joining five or six triangles in a ring, points alternating up and down. Score and slip every edge thoroughly before pressing them together. -
Reinforce the seams:
On the inside of the vessel, add a very thin coil of clay into each seam and smooth it down with a modeling tool or your finger to reinforce the structure. -
Build upward:
Continue adding a second row of triangles, fitting them into the V-shaped gaps of the first ring. As the form curves inward to create the shoulder, you might need to support the walls gently from the inside. -
Create the collar:
For the neck, roll a thick strip of clay and form it into a ring that fits the top opening. Attach this cleanly to the uppermost edges of your geometric body. -
Refine the exterior:
Once assembled, use a metal rib to scrape and smooth the flat planes. The goal is to make the walls look sharp and flat, removing any bulging from the assembly process. -
Dry slowly:
Cover the vessel loosely with plastic and let it dry very slowly to the bone-dry stage. Uneven drying is the enemy of slab construction. -
Bisque fire:
Fire the piece to cone 04 (or your clay body’s bisque temperature) to prepare it for glazing.
Make it Waterproof
Pour a liner of gloss glaze inside the vessel before working on the outside. This ensures the vase is watertight even if you miss a spot on the complex exterior.
Step 3: Glazing and Finishing
-
Masking tape resist:
Use high-quality automotive masking tape or specific pottery tape to mask off the triangles. You want nice, crisp lines separating the different colors. -
Apply the red zones:
Identify the triangles meant to be red/terracotta. Apply three even coats of your reddish-brown underglaze or slip. Let each coat dry before applying the next. -
Apply the teal zones:
Move to the teal sections. Apply your teal underglaze carefully. If you aren’t using tape, a steady hand and a flat shader brush are your best friends here. -
The speckled cream field:
Leave the remaining triangles unpainted if your clay is naturally speckled cream, or apply a cream underglaze. The natural clay body often provides the best texture for these neutral zones. -
Remove tape and clean:
Peel off any tape before the glaze is 100% bone dry to avoid chipping. Clean up any smudges with a damp detail brush. -
Final clear coat:
Dip or spray the entire interior and exterior with a clear matte glaze to seal the surface while keeping that stony, non-glossy look. -
Final firing:
Glaze fire the piece to the final temperature recommended for your specific clay and glaze combination.
Now you have a striking geometric vessel ready to hold your favorite dry stems or fresh blooms
Twisted Slab Column Vase
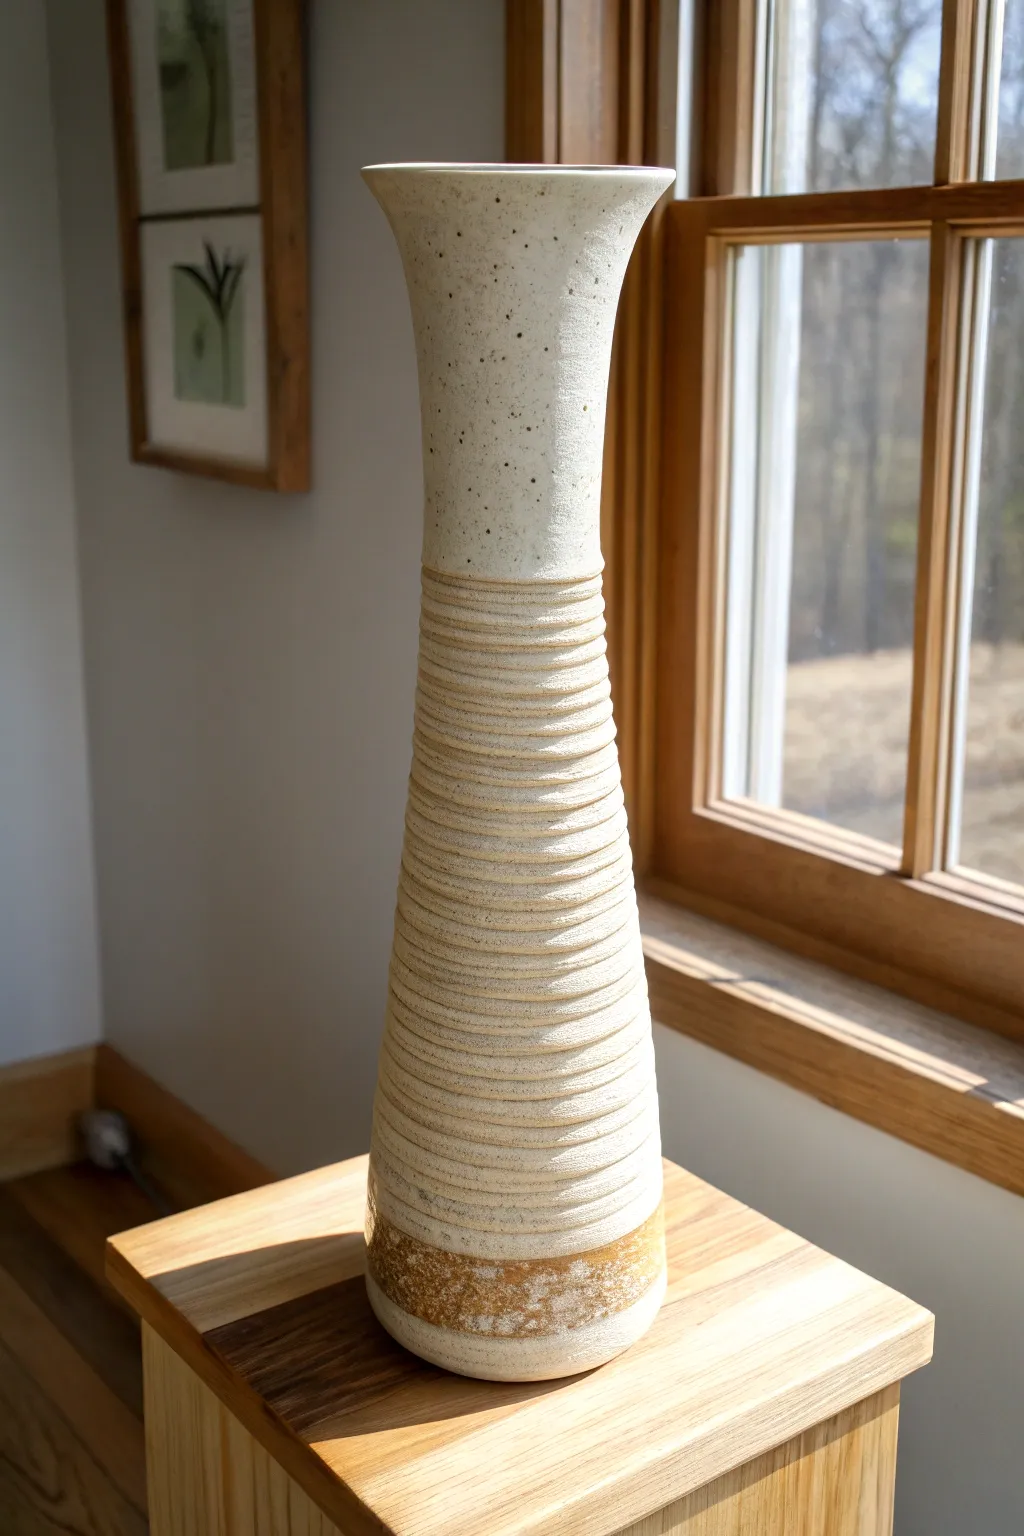
This elegant column vase features a striking contrast between smooth, speckled clay and rugged, rhythmic texture. Its tall, tapered silhouette is built using slab techniques, making it a perfect project for potters looking to refine their hand-building skills.
How-To Guide
Materials
- Stoneware clay (speckled or light body recommended)
- Rolling pin or slab roller
- Canvas work surface
- Needle tool
- Serrated rib tool or scoring tool
- Slip (clay slurry)
- Metal kidney rib (smooth)
- Wooden modeling tool
- Textured paddle or coil tool (for the central section)
- Clear or matte white glaze
- Wax resist
- Potter’s wheel (optional, for banding) or turntable
Step 1: Preparing the Slabs
-
Roll the clay:
Begin by rolling out a medium-sized slab of clay to a consistent thickness of about 1/4 inch. Ensure the clay is evenly compressed to prevent warping later. -
Cut the template shape:
To achieve the tapered column shape, you will need a template that looks like a tall trapezoid. The bottom edge should be wider than the top edge to create the gentle slope seen in the photo. -
Cut the slab:
Place your paper template onto the slab and trace around it with a needle tool. Cut out the shape cleanly. You will also need a circular slab for the base that matches the length of your trapezoid’s bottom edge. -
Bevel the edges:
Carefully cut a 45-degree angle (bevel) on the vertical sides of the slab. This ensures a stronger, cleaner seam when you roll the clay into a cylinder.
Step 2: Assembling the Form
-
Form the cylinder:
Stand the slab upright and gently curve it until the beveled ends meet. It helps to let the slab stiffen slightly to leather-hard before doing this so it supports its own weight. -
Score and slip:
Generously score the beveled edges and the perimeter of the circular base. Apply slip and press the vertical seam of the cylinder firmly together. -
Attach the base:
Place the cylinder onto the scored base. Use a wooden modeling tool to blend the clay from the outside of the wall down onto the base to seal the connection. -
Reinforce the interior:
Roll a very thin coil of soft clay. Place it inside the vase along the bottom seam and smooth it out to ensure the vessel is watertight.
Slumping Slabs?
If your tall slab walls are buckling, stuff the interior with crumpled newspaper or plastic bags. This provides temporary internal support until the clay stiffens.
Step 3: Adding Texture and Detail
-
Smooth the upper neck:
Using a metal rib, smooth the top third of the vase perfectly. The neck flares out slightly at the rim, so gently stretch the clay outwards with your fingers or the rib. -
Create the ribbed texture:
For the middle section, use a serrated rib or a notched tool. While rotating the vase on a banding wheel, drag the tool horizontally across the clay to create deep, parallel grooves. -
Refine the grooves:
Go over the grooves multiple times to deepen them. The texture should look distinct and somewhat rough compared to the smooth neck above. -
Texture the base:
Leave the bottom inch of the vase relatively raw or apply a different, rougher texture to mirror the darker band seen in the reference photo.
Create a Gradient
Apply a thin wash of iron oxide or rutile to the textured middle section before glazing. This will accumulate in the deep grooves, emphasizing the horizontal lines.
Step 4: Dry and Bisque
-
Slow drying:
Tall slab vessels are prone to warping. Cover the piece loosely with plastic and allow it to dry slowly over several days. -
Bisque firing:
Once bone dry, fire the piece to bisque temperature (usually cone 04 or 06). This prepares the clay for glazing.
Step 5: Glazing and Finishing
-
Apply wax resist:
Apply wax resist to the very bottom band and the foot of the vase. This will keep the raw, earthy clay visible at the base. -
Glaze the interior:
Pour a liner glaze inside the vase, roll it around to coat the entire inner surface, and pour out the excess. -
Glaze the exterior:
Dip or brush a matte white or clear glaze onto the exterior. I prefer a glaze that breaks over texture, which highlights the speckles in the smooth upper section and the deep grooves in the middle. -
Final firing:
Fire the vase to the final maturity temperature for your specific clay body (e.g., Cone 6 or Cone 10).
Place your finished vase near a window to let the light play across the beautiful textures.
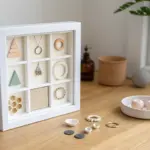
Interlocking Nesting Mini Vessels Set
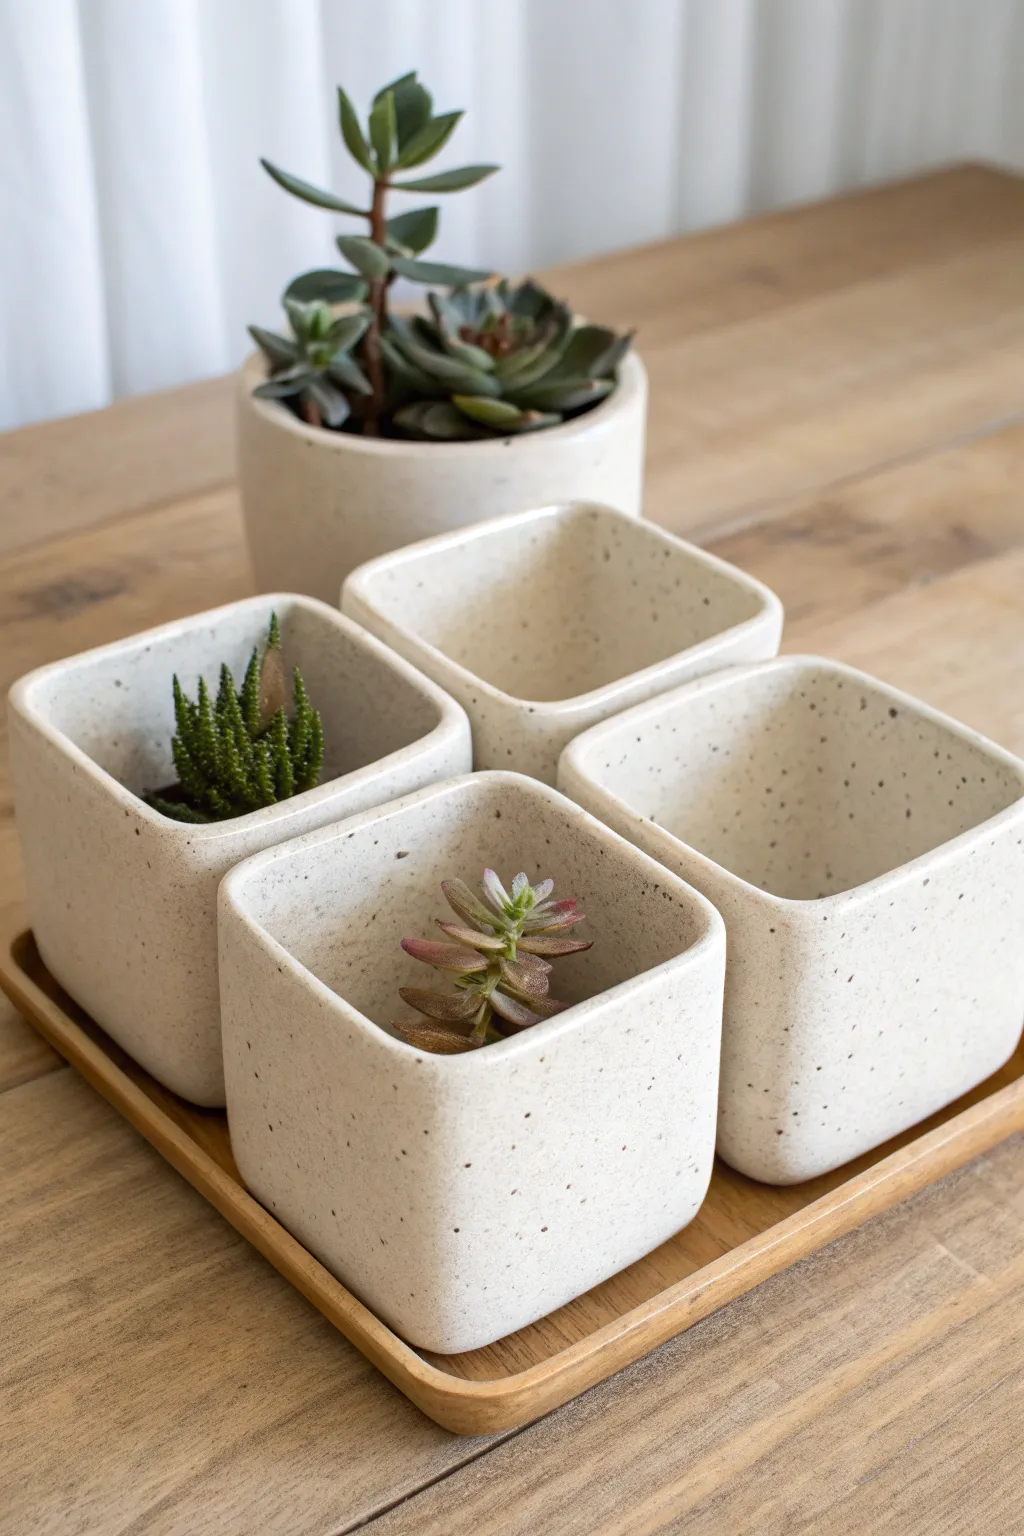
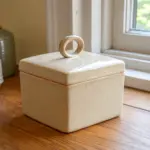
Create a unified set of four soft-square mini planters that fit perfectly together on a matching tray. These minimalist vessels feature a beautiful speckled clay body and rounded corners, giving them a modern yet organic feel perfect for small succulents.
Step-by-Step Tutorial
Materials
- Speckled stoneware clay (white base with dark grog)
- Rolling pin
- Two wooden thickness strips (approx. 1/4 inch or 6mm)
- Needle tool or fettling knife
- Template (3-inch square for base, 3×3.5 inch rectangle for sides)
- Scoring tool (serrated rib or needle tool)
- Slip (clay mixed with water)
- Wooden modeling tool
- Smooth red rib or flexible metal rib
- Sponge
- Clear matte glaze
Step 1: Preparing the Slabs and Components
-
Roll the clay:
Begin by wedging your speckled clay to remove air bubbles. Place it between your wooden thickness strips and roll it out into a large, consistent slab. I usually flip the slab over halfway through rolling to prevent it from sticking to the canvas. -
Compress the slab:
Take your smooth rib and drag it gently across the surface of the clay on both sides. This aligns the clay particles, reducing warping later, and creates that nice smooth finish shown in the photo. -
Cut the bases:
Using your 3-inch square template and needle tool, cut out four identical square bases. Set these aside on a ware board. -
Cut the wall strips:
For the walls, you will need a long strip. Measure the perimeter of your base (3+3+3+3 = 12 inches) and add a tiny bit for overlap. Cut four long strips that are roughly 12.5 inches long and 3.5 inches tall. -
Firm up the clay:
Let all your cut pieces sit until they reach a ‘soft leather hard’ stage. They should be flexible enough to bend without cracking, but sturdy enough to stand up on their own.
Rounded Corners Guide
To get perfectly consistent rounded corners, try forming the clay around a juice carton or a rounded wood block rather than bending it freehand.
Step 2: Assembling the Vessels
-
Bevel the wall edges:
On the two short ends of each long wall strip, cut a 45-degree angle. This allows the two ends to join seamlessly without a bulky overlap. -
Score and slip:
Rough up the perimeter of one square base and the bottom edge of one wall strip. Apply a generous amount of slip to the scored areas. -
Attach the walls:
Wrap the long strip around the square base. Press the wall firmly onto the base. Join the two beveled vertical ends together to close the square loop. -
Reinforce the interior:
Take a tiny coil of soft clay and press it into the bottom interior seam where the wall meets the floor. Smooth this coil out with a wooden tool to ensure a watertight seal. -
Shape the corners:
The pots in the image aren’t sharp boxes; they have soft edges. Gently push the walls outward from the inside while cupping the outside corners with your hand to round them off slightly.
Step 3: Refining and Finishing
-
Smooth the exterior:
Use a flexible rib to remove any canvas texture from the outside. Pay special attention to the vertical seam—blend it until it completely disappears. -
Soften the rim:
Run a damp sponge or a piece of chamois over the top rim to round it off. A sharp rim is distinctively uninviting, so aiming for that fat, rounded lip adds quality. -
Repeat for the set:
Repeat the assembly process for the remaining three vessels. Periodically group them together to make sure they sit nicely next to each other. -
Dry slowly:
Loosely cover the pots with plastic for the first day to equalize moisture, then uncover to dry completely before bisque firing. -
Glaze application:
Once bisqued, dip the vessels into a clear matte glaze. The speckles are part of the clay body, so a clear glaze allows them to show through beautifully.
Make the Tray
Don’t forget the base! Use the grouped finished pots to measure a slightly larger clay slab. Turn up the edges slightly to create the custom tray shown.
Now you have a charming, modular garden set ready to house your favorite succulents
Cutout Window Lantern-Style Vessel

This elegant slab-built lantern evokes the charm of medieval architecture with its arched windows and soft, glowing light. By cutting precise shapes and adding a warm amber glaze, you’ll create a functional yet artistic piece perfect for evening ambience.
Step-by-Step Guide
Materials
- Stoneware clay slab (rolled to 1/4 inch thickness)
- Ruler or carpenter’s square
- Fettling knife
- Circular clay cutters (small and medium)
- Amber or honey-tinted translucent glaze
- Satin matte blue glaze
- Slip and scoring tool
- Clear brush-on glaze
- Wooden paddle
- Tealight candle
- Sponge
Step 1: Preparing the Slabs
-
Roll the slabs:
Begin by rolling out your clay to an even 1/4-inch thickness. Prepare enough surface area for four tall rectangular walls (approximately 4×10 inches each), a square top, and a square base. -
Compress the clay:
Use a rib tool to smooth and compress the clay on both sides. This aligns the clay particles, which significantly reduces the chance of warping during the firing process. -
Cut the walls:
Using a ruler and fettling knife, cut four identical rectangular panels. Let these slabs stiffen to a ‘soft leather-hard’ state; they need to support their own weight but still be workable.
Step 2: Creating the Windows
-
Draft the arches:
Lightly sketch your gothic arch designs onto the leather-hard slabs using a needle tool. Aim for two tall arches on the bottom half of each panel. -
Cut the panes:
Carefully cut out the window shapes. Keep the vertical mullion (the strip of clay between the windows) and the horizontal transom bar relatively thick to maintain structural integrity. -
Add circular details:
Above the arches, use small circular clay cutters to punch out decorative holes. I like to arrange them in a triangular pattern—one larger circle centered above three smaller ones—to mimic cathedral aesthetics. -
Smooth the edges:
Take a damp sponge or your fingertip and gently round off the sharp cut edges of your windows and circles. This gives the piece a refined, professional finish.
Slumping Walls?
If walls buckle during assembly, the clay is too wet. Let slabs dry flat between drywall sheets for 30-60 mins to reach true leather-hard durability.
Step 3: Assembly
-
Bevel the sides:
Cut 45-degree bevels on the long vertical edges of your four wall panels. This miter joint creates a stronger, cleaner corner than a simple butt joint. -
Score and slip:
Aggressively score the beveled edges and apply a generous amount of slip. Stand two panels up and press them together, ensuring a square 90-degree angle. -
Attach remaining walls:
Continue adding the remaining walls until the tube is closed. Reinforce the interior seams with tiny coils of clay, smoothing them down so they disappear. -
Attach the top:
Cut a square slab for the lid that slightly overhangs the walls. Score, slip, and attach it to the top rim. Don’t forget to cut a vent hole in the top to let heat escape. -
Create the base:
Construct a separate, slightly wider base slab. You can add texture to the rim of this base to contrast with the smooth walls of the lantern.
Stained Glass Effect
Place loose chunks of crushed distinctively colored glass frit on the floor of the lantern during final firing for a melty, pooled glass bottom.
Step 4: Glazing and Finishing
-
Bisque fire:
Once bone dry, fire the piece to bisque temperature (usually cone 04/06). -
Apply interior color:
Paint the *inside* of the lantern with a warm, amber-colored glaze. This reflects the candlelight beautifully and makes the interior glow like gold. -
Glaze the exterior:
Apply a satin matte blue glaze to the exterior walls. Be very careful around the window cutouts—wipe away any blue that drips onto the amber interior. -
Highlight the base:
If you textured the separate base, use an iron oxide wash or a contrasting earthy glaze to highlight the details, then wipe back the high points. -
Final firing:
Glaze fire the piece according to your clay body’s specifications (likely cone 5/6 for stoneware).
Once cooled, place a candle inside and enjoy the warm, architectural shadows it casts on your wall