Green clay is one of those colors that instantly turns into something recognizable—plants, little critters, and all kinds of fresh, nature-y vibes. Here are my favorite green clay ideas to use up a whole block in a way that feels cute, doable, and totally display-worthy.
Cactus With a Cute Face

Brighten up your workspace or windowsill with this adorable, maintenance-free succulent made from polymer clay. With its gentle matte texture, rosy cheeks, and friendly smile, this charming cactus brings a touch of whimsy to any pot without needing a single drop of water.
Detailed Instructions
Materials
- Green polymer clay (sage or olive tone)
- Black polymer clay (tiny amount)
- Pink or coral polymer clay (tiny amount)
- White polymer clay (minimal amount)
- Small terracotta pot (approx. 2-inch diameter)
- Aluminum foil
- Sculpting tools (needle tool, ball stylus)
- Rolling pin or pasta machine
- Soft pastel chalks (lighter green or yellow)
- Small fluffy brush
- Liquid clay (optional but helpful)
- Oven for baking
Step 1: Forming the Base
-
Prepare the core:
Since a solid block of clay is heavy and hard to bake evenly, start by scrunching a piece of aluminum foil into a tight cylinder shape. This will act as the core of your cactus body. Make sure it fits comfortably inside your terracotta pot with some room to spare. -
Condition the green clay:
Take your sage green polymer clay and knead it thoroughly until it is soft and pliable. Warm hands make this much easier; conditioning ensures the clay won’t crack later. -
Create a sheet:
Roll the conditioned green clay into a flat sheet, about 1/4 inch thick. You want it substantial enough to cover the foil without ripping, but not overly bulky. -
Cover the core:
Wrap your green clay sheet around the foil cylinder. Use your thumbs to smooth out the seams completely until you have a seamless, pill-shaped cactus body. Roll it gently on your work surface to get it perfectly round. -
Round off the top:
Gently gently press and smooth the top of the cylinder into a nice, soft dome shape. This is the head of your cactus, so keep it smooth.
Smooth Operator
Before baking, use a tiny bit of baby oil or clay softener on your fingertip to lightly rub away any fingerprints. This gives the cactus that professional, velvety-smooth matte finish visible in the photo.
Step 2: Adding Texture and Arms
-
Create the ribs:
Using a blunt sculpting tool or the back of a butter knife, press vertical lines running from the very top center of the dome down to the base. Space these evenly around the entire circumference to mimic cactus ribs. -
Sculpt the arm:
Roll a smaller log of green clay for the cactus arm. Bend it into an ‘L’ shape, curving the corner so it looks natural rather than sharp. -
Texture the arm:
Just like the body, press vertical indentation lines along the length of the arm. These should follow the curve of the bend. -
Attach the arm:
Score the side of the main body and the base of the arm with a needle tool. I like to add a drop of liquid clay here for a stronger bond, then press the arm firmly onto the body, blending the clay at the seam so it looks like one continuous piece.
Step 3: The Cute Details
-
Indent the eye sockets:
Find the ‘front’ of your cactus. Using a large ball stylus, press two small indentations where you want the eyes to sit. This helps the eyes stay put and look embedded rather than stuck on. -
Add the eyes:
Roll two tiny spheres of black clay. Place them into the indentations you just made and press them flat gently so they are flush with the surface. -
Create the smile:
Roll a very thin, tiny snake of black clay. Cut a small U-shape segment and gently press it onto the face between the eyes to create a sweet little smile. -
Rosy cheeks:
Take two small balls of coral or pink clay, flatten them slightly into discs, and press them onto the cheeks, just below and to the outside of the eyes. -
Add the spines:
This step requires patience! Roll tiny, almost microscopic balls of white clay. Press these light dots along the vertical ridges of the cactus body and arm. Spacing them evenly is key to the finished look. -
Highlighting (Optional):
For a soft look like the photo, scrape a little light green or yellow chalk pastel into dust. Use a dry brush to gently dust the vertical ridges. This highlights the texture before baking.
Droopy Arms?
If the clay arm keeps sagging while you work, cut a small piece of toothpick or wire. Insert half into the arm and half into the body to act as an internal skeleton for extra support while baking.
Step 4: Finishing Up
-
Bake the project:
Place your cactus (without the pot) on a baking sheet. Bake according to your clay manufacturer’s instructions—usually around 275°F (135°C) for 15-30 minutes depending on thickness. -
Cool down:
Let the clay cool completely before handling. It is still fragile when warm. -
Plant your buddy:
Crumple a little foil into the bottom of your terracotta pot to raise the height if needed. Glue the cactus into the pot using E6000 or a strong craft glue for a permanent hold.
Enjoy your perpetually happy plant friend who will never judge you for forgetting to water it.


Avocado Half With Pit

Sculpt your very own kawaii avocado pendant featuring a realistic textured skin and an adorable smiling pit. This tiny charm perfectly blends detailed realism with cute character art, making it an ideal gift or personal accessory.
Step-by-Step
Materials
- Polymer clay: translucent green, leaf green, dark green, light brown, dark brown, black, and white
- Rolling pin or pasta machine
- Needle tool
- Ball stylus tool
- Clay scalpel or blade
- Toothbrush or texturing sponge
- Dry pastels (dark green, yellow-green)
- Soft paintbrush
- Liquid polymer clay (Fimo liquid or similar)
- Small eye screw pin (gold)
- Glaze (satin or gloss depending on preference)
- Oven for baking
Step 1: Preparing the Avocado Body
-
Mix the Flesh Tone:
Begin by blending a small amount of translucent green clay with a tiny bit of leaf green and a lot of white clay. You want a very pale, creamy green color that mimics the inner flesh of a real avocado. -
Shape the Base:
Roll your mixed clay into a smooth ball about the size of a large marble, then pinch one side slightly to form a teardrop shape. Flatten it gently with your palm so it looks like an avocado half. -
Create the Pit Indentation:
Using a large ball tool or the tip of your thumb, press a deep, rounded indentation into the wider bottom part of the teardrop where the pit will eventually sit. -
Add Green Gradients:
To create realism, shave some yellow-green and dark green dry pastels into powder. Use a soft brush to dust the outer edges of the pale clay with the green powder, leaving the center pale. This mimics how a real avocado gets greener near the skin. -
Create the Skin:
Roll out a thin sheet of dark green clay. Place your pale avocado shape on top of it and carefully wrap the dark green sheet up around the sides, trimming away excess from the back so the seam is hidden. -
Texture the Skin:
Gently tap the dark green exterior with a toothbrush or a texturing sponge to give it that bumpy, pebbled avocado skin texture.
Uneven Gradients?
If your pastel shading looks blotchy, dip your brush in a tiny bit of cornstarch before picking up the powder. It helps blend the greens smoothly into the pale clay.
Step 2: Sculpting the Pit
-
Form the Pit:
Mix light brown and dark brown clay to get a rich, woody color. Roll a ball that fits snugly into the indentation you made earlier. Press it in gently; I like to use a tiny drop of liquid clay here to ensure a permanent bond. -
Add Facial Features:
For the eyes, roll two microscopic balls of black clay and press them onto the pit. Use a needle tool to add extremely tiny dots of white clay as reflections in the eyes for that ‘kawaii’ sparkle. -
Create the Smile:
Roll a hairline-thin snake of black clay. Cut a tiny u-shape and carefully place it between the eyes to form a smiling mouth.
Step 3: Detaling and Finishing
-
Add Speckles:
Use a needle tool or a very fine brush with diluted brown acrylic paint to add three tiny dots or speckles on the pale green flesh just above the pit for added character. -
Insert Hardware:
Take your gold eye screw pin. Gently twist it into the top center of the avocado shape. If the clay distorts, smooth it back down with your fingers. -
Final Texture Check:
give the pale green flesh a very light stippling with the toothbrush to remove fingerprints, avoiding the face area. -
Bake:
Bake the piece according to your polymer clay manufacturer’s instructions, typically around 230°F to 265°F (110°C – 130°C) for 15-30 minutes. -
Seal:
Once cool, apply a satin glaze to the skin and pit to protect the surface, or leave the flesh matte for a realistic contrast.
Friendship Charms
Make a second half without the pit! Instead, create a flat brown circle where the pit would have been seamlessly removed. Now you have a matching BFF set.
Now you have a charming little fruit friend ready to hang on your favorite necklace chain


Leaf Trinket Dish
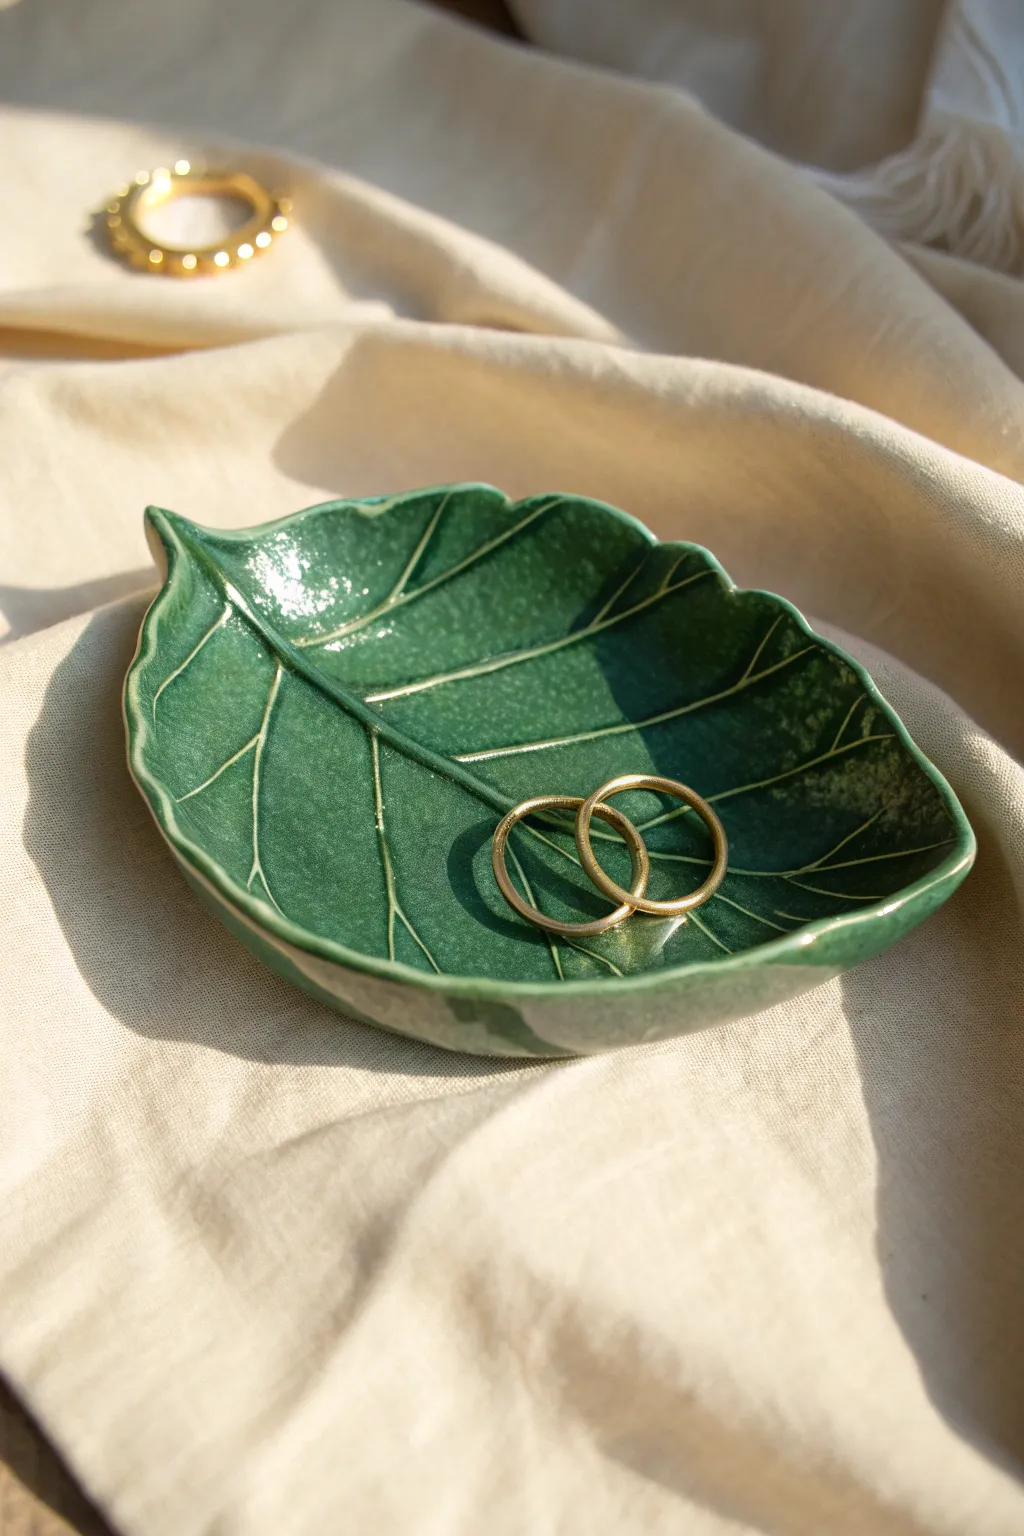
Bring a touch of nature indoors with this elegant leaf-shaped dish, perfect for holding your favorite rings or earrings. The deep emerald glaze pools in the textured veins, creating a stunning contrast that highlights the organic details.
How-To Guide
Materials
- White air-dry clay or low-fire earthenware clay
- Rolling pin
- Fresh leaf with prominent veins (e.g., Hydrangea or Hosta)
- Needle tool or X-Acto knife
- Small bowl (for shaping)
- Plastic wrap
- Sponge
- Deep emerald green glossy glaze (or acrylic paint and gloss varnish)
- Soft glaze brush
- Fine grit sandpaper
Step 1: Shaping the Leaf
-
Roll the slab:
Begin by rolling out a ball of white clay into a smooth slab about 1/4 inch thick. Aim for an even thickness throughout to prevent cracking during drying. -
Select your leaf:
Choose a fresh leaf with a strong, interesting vein structure on the back. Place the leaf vein-side down onto your clay slab. -
Impress the texture:
Gently roll over the leaf with your rolling pin. Apply firm, even pressure to ensure the intricate network of veins transfers clearly into the soft clay. -
Cut the shape:
Using a needle tool or sharp craft knife, carefully cut around the perimeter of the leaf. Hold the knife vertically to get a clean, square edge. -
Remove the leaf:
Carefully peel the real leaf away from the clay to reveal the textured impression underneath. This is always the most satisfying part. -
Refine the edges:
Dip your finger or a small sponge in a little water and smooth out any rough, sharp clay edges created by the cutting tool. -
Create the curve:
Line a small bowl with plastic wrap. Gently lift your clay leaf and set it inside the bowl, allowing it to slump slightly to create a cupped dish shape.
Vein Definition Tip
Use a ball stylus tool to re-trace and deepen the main center vein after removing the real leaf. This ensures the central structure remains visible even after the glaze fills the gaps.
Step 2: Finishing and glazing
-
Dry completely:
Allow the clay to dry fully in the bowl. If using air-dry clay, this may take 24-48 hours; kiln clay needs to be bone dry before the bisque fire. -
Sand imperfections:
Once hardened, remove the dish from the bowl. Lightly sand the rim with fine-grit sandpaper to ensure it’s perfectly smooth to the touch. -
Dust off:
Wipe the piece down with a slightly damp sponge to remove any clay dust before applying color. -
Apply base color:
Apply your deep emerald green glaze focused on the center. If using acrylics, paint the entire surface green, ensuring paint gets into the deep vein crevices. -
Define the veins:
For that highlighted look, I like to gently wipe the raised surfaces with a damp sponge while the glaze or paint is still wet. This leaves darker pigment in the recesses and lighter color on the ridges. -
Highlights (Optional):
If painting, you can dry-brush a lighter green or white very subtly over the highest ridges to mimic the light reflection seen in the photo. -
Seal the surface:
If using air-dry clay, apply two coats of high-gloss varnish to mimic the ceramic look. If using ceramic glaze, fire the piece in the kiln according to the glaze manufacturer’s instructions. -
Gilded edge:
For a subtle finish, you can leave the rim purely green, or run a very thin line of gold paint along just the very top edge of the rim for extra definition.
Make it a Set
Create a nesting set by using three different sizes of the same leaf variety. Use gradually smaller bowls for forming them so they can stack inside one another when not in use.
Now you have a functional piece of art ready to cradle your most precious jewelry


Tiny Green Dino Buddy

This adorable dinosaur buddy brings a prehistoric touch to your desk with its chubby cheeks and gentle smile. Crafted from green clay with a speckled stone finish, it captures a stylized, cartoonish charm perfect for beginners.
Detailed Instructions
Materials
- Green polymer clay (muted/olive tone)
- Brown polymer clay (small amount for spikes)
- White polymer clay
- Black polymer clay
- Acrylic rolling pin
- Sculpting tools (needle tool, ball tool)
- Black acrylic paint (for speckles)
- Old toothbrush or stiff bristle brush
- Gloss glaze (optional for eyes)
- Baking sheet and parchment paper
- Oven (if using polymer clay)
Step 1: Shaping the Base Body
-
Condition the clay:
Begin by kneading your green clay until it is soft and pliable. If you want that speckled look built right in, you can mix in some black pepper or black embossing powder now, though we will also paint speckles later. -
Form the torso:
Roll a large ball of green clay for the body. Gently flatten the bottom so it stands upright, and slightly taper the top into a teardrop shape where the head will attach. -
Sculpt the head:
Roll a slightly smaller ball for the head. Shape it into a rounded oval, making it a bit wider at the cheeks to give him that chubby, friendly look. -
Attach head to body:
Place the head onto the tapered neck of the body. Blend the clay at the seam gently with a sculpting tool or your thumb so the pieces become one solid unit. -
Create the tail:
Roll a thick cone of green clay. Attach the wider end to the lower back of the body, curving the pointed tip slightly upward for a playful pose. Blend the seam thoroughly.
Uneven Seams?
If blending seams ruins the shape, use a tiny amount of baby oil or clay softener on your finger. It helps glide the clay together without needing heavy pressure.
Step 2: Adding Limbs and Features
-
Make the legs:
Roll two small, thick cylinders for legs. Press them firmly against the bottom sides of the body. Use a tool to mark three small toe indentations on the front of each foot. -
Attach the arms:
Create two small teardrop shapes for the arms. Press the wider ends onto the dinosaur’s chest area, leaving the rounded tips free to look like tiny T-Rex hands. -
Sculpt the snout:
Refine the face by pressing gently with your thumb to create a slight indentation for the eye sockets, emphasizing the rounded snout area. -
Add the smile:
Using a needle tool or a small blade, carve a curved, smiling mouth line into the side of the snout. Deepen the corners slightly for extra character. -
Add nostrils:
Poke two very small holes above the mouth smile with a needle tool to serve as nostrils.
Step 3: Detailing and Baking
-
Form the spikes:
Take your brown clay and roll tiny little balls. Flatten them slightly into triangles or cones. Press these in a row running down the back of the head, neck, and tail. -
Create the eyes:
Roll two small balls of white clay and flatten them onto the face. Add tiny black clay pupils, placing them slightly off-center so he looks like he’s glancing backward or sideways. -
Add texture:
I like to use a toothbrush to gently tap all over the green skin. This removes fingerprints and gives the dinosaur a realistic, skin-like texture. -
Speckle the surface:
Dilute a tiny bit of black acrylic paint with water. Load an old toothbrush or stiff brush, and flick the bristles to spatter tiny black dots over the green clay. Avoid the eyes. -
Bake the figurine:
Place your dinosaur on a parchment-lined baking sheet. Bake according to your polymer clay package instructions (usually 275°F/135°C for 15-30 minutes). -
Final touches:
Once cooled, you can add a tiny dot of white paint to the pupils for a highlight, or brush a clear gloss glaze over just the eyes to make them shine.
Prehistoric Pedestal
Make a little flat base shaped like a rock or a patch of grass for him to stand on. This adds stability and makes the figurine look like a professional display piece.
Now you have a charming little dinosaur friend to keep you company on your desk or shelf

The Complete Guide to Pottery Troubleshooting
Uncover the most common ceramic mistakes—from cracking clay to failed glazes—and learn how to fix them fast.
Segmented Caterpillar Figure
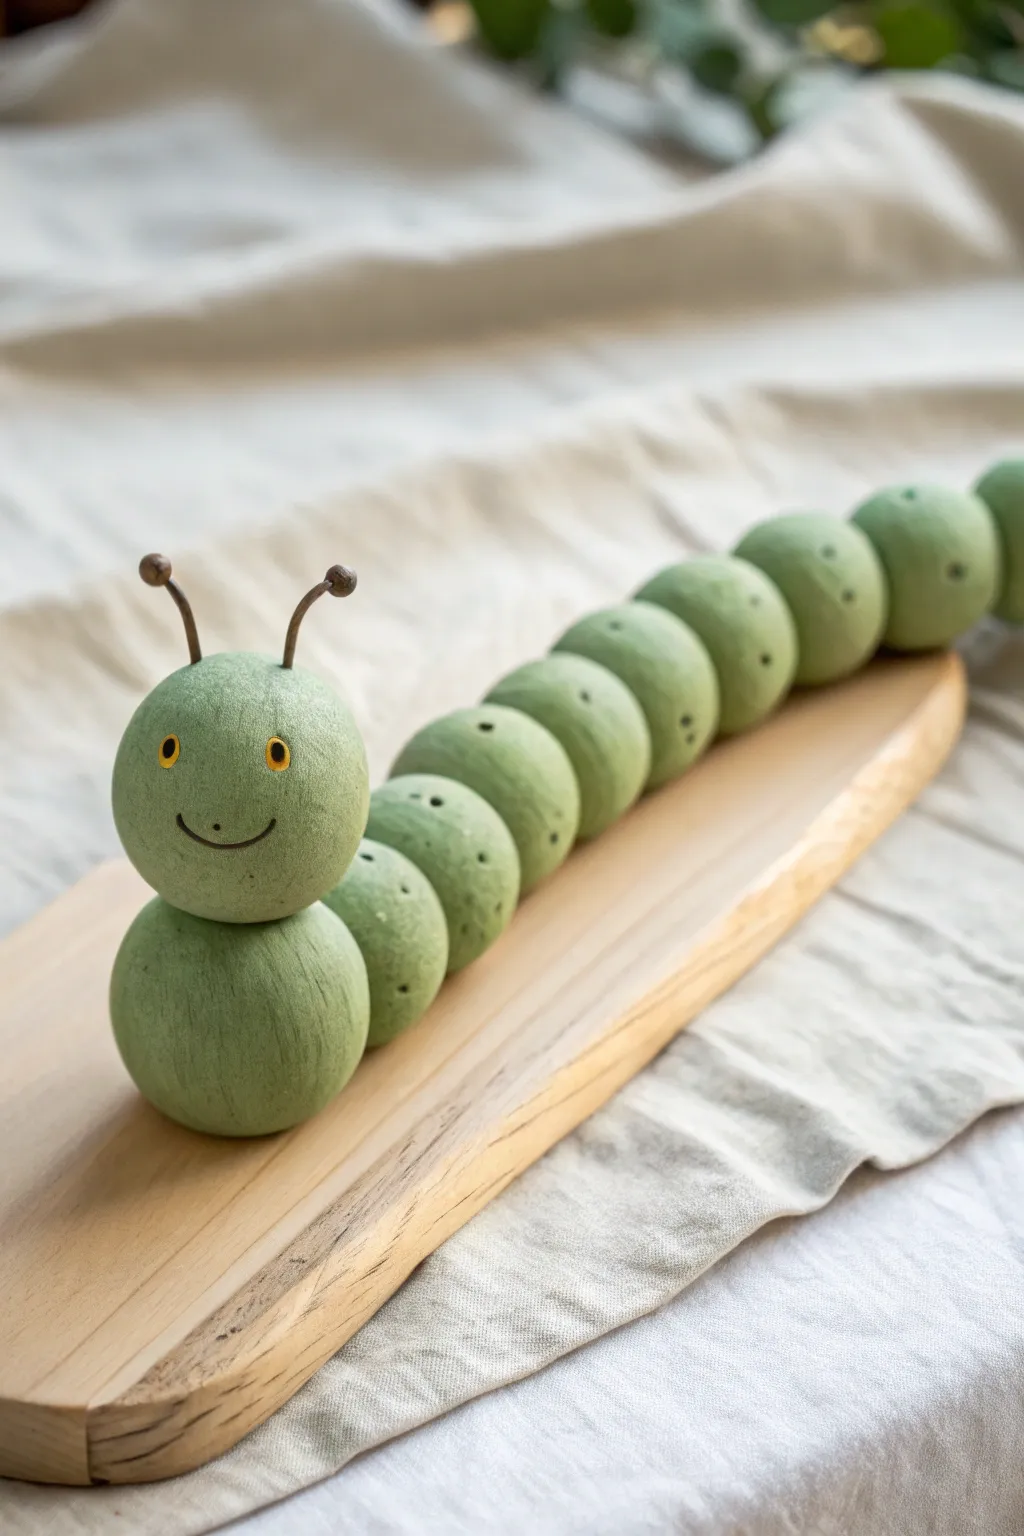
Bring a touch of garden charm indoors with this adorable, multi-segmented caterpillar sculpture. Featuring a series of textured green spheres and a friendly face, this project captures the simple joy of nature in a durable clay form.
Step-by-Step Tutorial
Materials
- Polymer clay or air-dry clay (white or pre-colored green)
- Acrylic paints (moss green, olive green, yellow, black)
- Wire or floral stems (brown or dark bronze)
- Small wooden beads (for antennae tips)
- Texturing tool (stiff bristle brush or toothbrush)
- Bamboo skewer or toothpick
- Strong craft glue or clay adhesive
- Fine detail paintbrush
- Matte varnish (optional)
- Flat wooden board for display
Step 1: Shaping the Segments
-
Prepare variable sizes:
Begin by conditioning your clay until it is soft and pliable. Divide the clay into roughly 10-12 portions. You will need one larger piece for the head, one slightly smaller piece for the neck, and then a series of pieces that gradually taper in size for the tail. -
Roll the spheres:
Roll each portion into a smooth, tight ball between your palms. While perfection isn’t necessary, try to keep them relatively round. Start lining them up on your work surface to check the size progression, ensuring a natural taper. -
Create the signature texture:
The charm of this piece lies in its organic surface. Before the clay hardens, take a stiff bristle brush or an old toothbrush and gently tap the surface of every sphere. This stippling effect mimics a velvet-like skin rather than smooth plastic. -
Add detailing holes:
Using your toothpick or skewer, poke small, shallow holes randomly around the sides of the body segments (but not the head). These little indentations add organic realism to the caterpillar’s skin. -
Form the connection points:
To make assembly easier later, gently press the spheres against each other in your desired order while they are still soft. This creates a small flat spot on each side where the glue will eventually go. Separate them again for drying or baking. -
Cure the clay:
If using polymer clay, bake the spheres according to the manufacturer’s instructions. If using air-dry clay, allow them to dry completely for 24-48 hours, turning them occasionally.
Step 2: Painting and Assembly
-
Apply base color:
Once cured, it’s time to paint. If you didn’t use green clay, mix a soft olive green acrylic paint. Apply a solid coat to every sphere. I like to let this dry briefly before adding a second coat for full opacity. -
Add depth:
To enhance the texture you created earlier, use a dry-brushing technique. Dip a dry brush into a slightly lighter shade of green (moss or lime) and lightly whisk it over the textured surface. The paint will catch the raised areas. -
Paint the face:
Select the largest sphere for the head. Using a fine detail brush and yellow paint, create two small ovals for eyes. Once dry, add tiny black pupils in the center. Paint a simple, thin black curve for the smile. -
Assemble the body:
Arrange your segments on the display surface. Using strong craft glue, attach the segments one by one in a straight or slightly curving line. Hold each connection for a few seconds to ensure it grabs. -
Attach the head:
Glue the head sphere on top of the first body segment (the ‘neck’ piece), rather than in front of it. This gives the caterpillar an alert, upright posture.
Sticky Situation?
If the clay segments won’t bond securely with glue alone, insert a small piece of toothpick or wire between segments as a strengthening dowel during assembly.
Step 3: Finishing Touches
-
Prepare antennae:
Cut two short lengths of brown wire, about 1.5 inches each. Gently curve them with your fingers to create a natural arch. -
Add antenna tips:
Glue a tiny wooden bead or a small ball of brown clay to the top end of each wire piece. -
Install antennae:
Drill two tiny holes into the top of the head using a pin drill or push a sharp tool into the clay (if using air dry clay, do this while soft). Dip the wire ends in glue and insert them firmly into the head. -
Seal the work:
To protect your paint job without making it shiny, apply a coat of matte varnish over the entire figure. This preserves that soft, organic look.
Make It Move
Instead of gluing the segments rigidly, string them together through the center with elastic cord. This allows your caterpillar to wiggle and bend realistically!
Now you have a charming garden friend ready to brighten up any shelf or table
Broccoli With a Smile
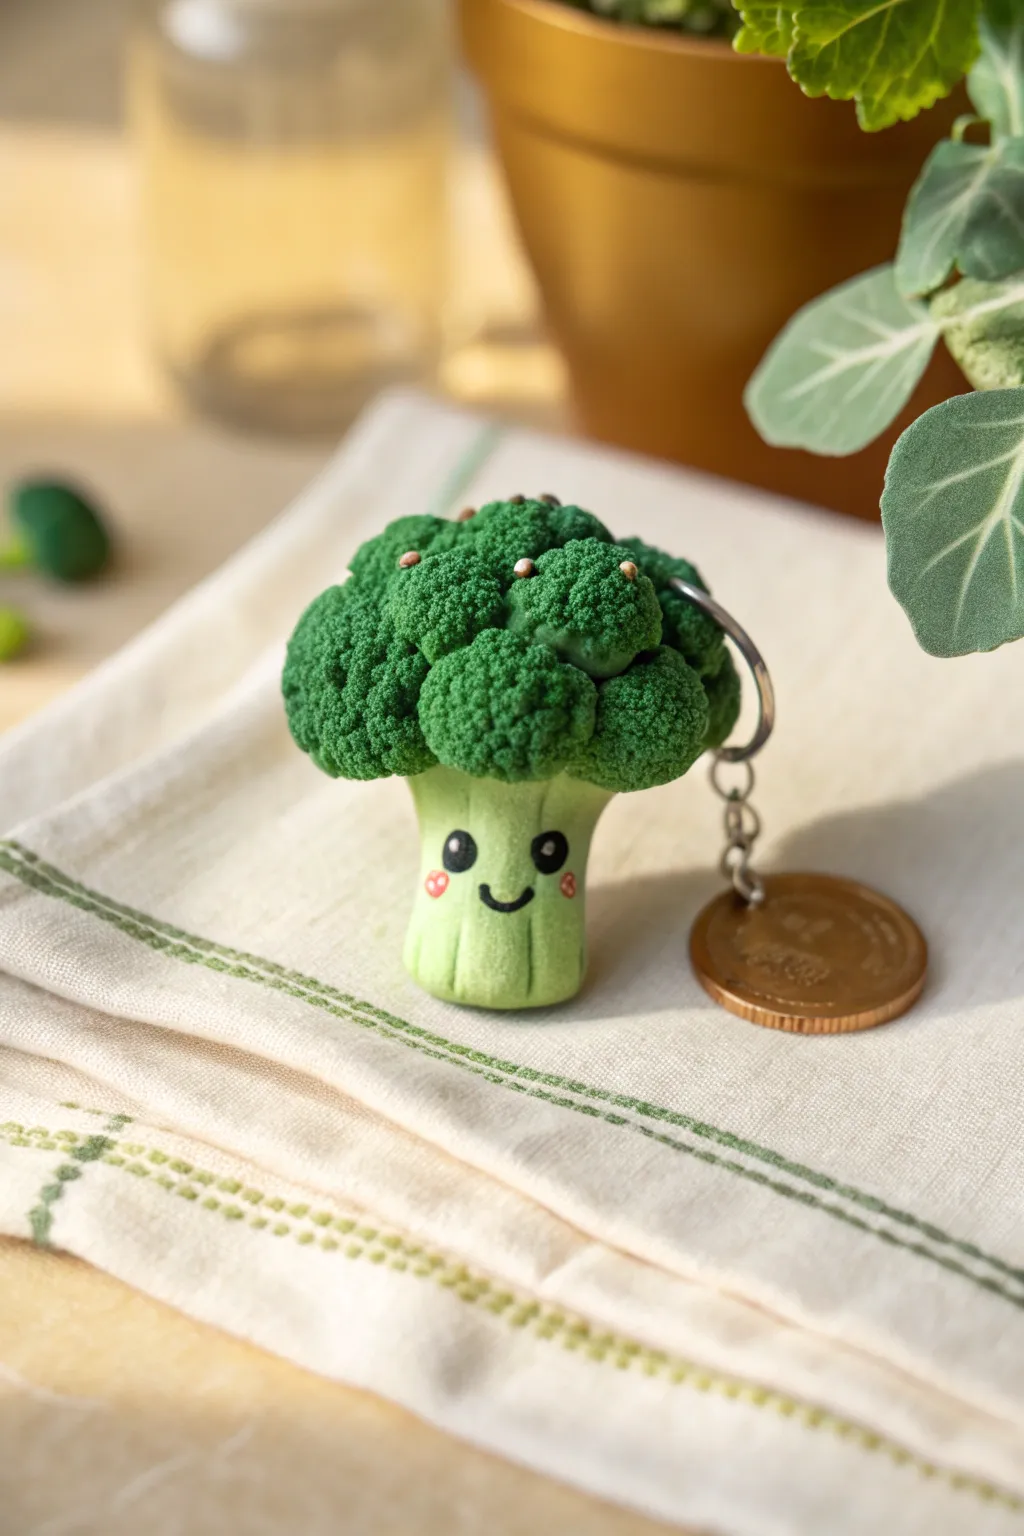
Turn a healthy vegetable into an adorable accessory with this textured broccoli keychain project. With its nubby florets and sweet smile, this little clay charm captures all the fun of miniature food crafting without the need to eat your greens.
Detailed Instructions
Materials
- Green polymer clay (one medium green, one lighter lime green)
- Black polymer clay (tiny amount)
- Pink or coral polymer clay (tiny amount)
- White acrylic paint
- Fine-point detail tool or needle tool
- Toothbrush or crumpled aluminum foil (for texturing)
- Small ball tool
- Clay blade or craft knife
- Metal eyepin
- Keychain hardware with jump rings
- Gloss glaze or polyurethane (optional)
- Adhesive (E6000 or super glue)
- Oven/baking sheet
Step 1: Forming the Base
-
Mix the Stem Color:
Start by conditioning your lighter lime green clay. If you don’t have the perfect shade, mix a bit of white or yellow into a standard green to get that fresh, bright stem color. -
Shape the Stalk:
Roll the lime green clay into a thick cylinder, about the width of your thumb. Slightly taper the bottom so it’s wider at the base, mimicking a real broccoli stalk. -
Create the Floret Base:
Flatten the top of your cylinder slightly to create a platform. This is where we will attach the darker green florets, ensuring the head of the broccoli has a solid foundation.
Step 2: Creating the Florets
-
Prepare the Dark Green Clay:
Condition your medium or dark green clay until it is soft and pliable. This contrasts nicely with the lighter stem. -
Make Small Balls:
Roll roughly 15-20 small balls of the dark green clay. They shouldn’t be perfectly uniform—vary the sizes slightly for a more organic, natural look. -
Cluster the Florets:
Press these green balls onto the top of your light green stem. Start in the center and work your way out, stacking them slightly to create a domed, rounded head of broccoli. -
Initial Shaping:
Gently squeeze the cluster of balls together so they fuse with each other and the stem, but try not to flatten their rounded tops.
Clay Too Soft?
If your broccoli florets are squishing while you texture them, put the clay in the fridge for 10 minutes. The firmer clay holds detail much better.
Step 3: Texturing
-
Texture the florets:
Using a needle tool, poke the surface of every dark green ball repeatedly. You want a dense, stippled texture that mimics the tiny buds of real broccoli. -
Refine the Texture:
For a faster method that still looks great, I sometimes press a clean toothbrush or a ball of crumpled foil firmly over the green balls to create that pebbled surface instantly. -
Texture the Stem:
Use a needle tool to draw vertical lines up the lighter stem. Make these lines faint and slightly uneven to replicate fibrous vegetable skin.
Natural Texture
Combine texturing methods! Use the toothbrush for the overall bumps, then go back with a needle tool to separate defined clumps for deeper realism.
Step 4: Adding the Face
-
Indent Eye Sockets:
About halfway down the stem, use a small ball tool to gently press two concave indents where the eyes will go. -
Place the Eyes:
Roll two tiny balls of black clay and press them firmly into the sockets. Flatten them just enough so they don’t bulge out too much. -
Add Cheeks:
Take extremely tiny specks of pink clay, roll them into balls, and flatten them onto the stem just below and to the outside of the eyes. -
Make the Smile:
Roll a very thin snake of black clay. Cut a small ‘U’ shape and press it onto the clay between the cheeks to create a happy grin.
Step 5: Finishing and Assembly
-
Insert the Eyepin:
Trim a metal eyepin to an appropriate length (about half the height of your broccoli). Dip the end in a tiny bit of liquid clay or glue for security and push it straight down into the center of the broccoli head. -
Bake:
Bake the piece according to your clay manufacturer’s instructions. Usually, this is around 275°F (135°C) for 15-30 minutes, depending on thickness. -
Add Highlights:
Once fully cooled, use a toothpick or fine brush to add a tiny dot of white acrylic paint to the upper right corner of each black eye. This ‘catchlight’ brings the character to life. -
Attach Hardware:
Using pliers, open a jump ring and attach your keychain hardware and any extra charms (like the coin shown) to the eyepin loop.
Now you have a charming little veggie friend ready to keep your keys organized


What Really Happens Inside the Kiln
Learn how time and temperature work together inside the kiln to transform clay into durable ceramic.
Lime Slice Charms
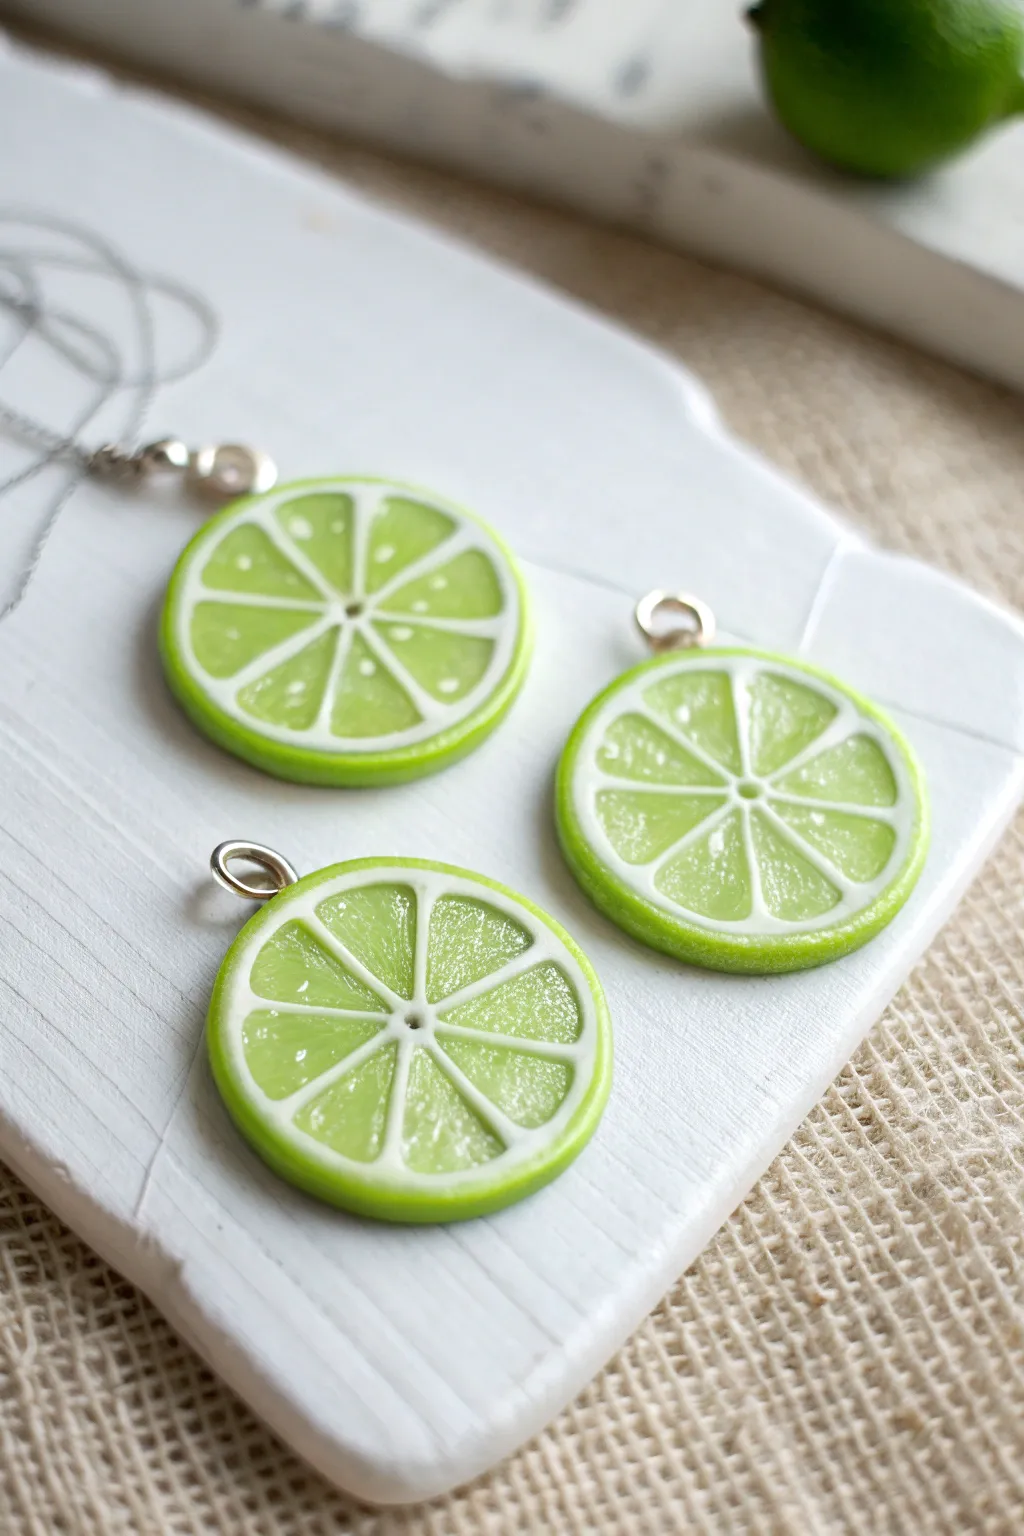
These delightful lime slice charms capture the refreshing burst of citrus with stunning realism, featuring translucent fruit segments and a crisp white pith. Perfect for summer jewelry, each slice showcases intricate detailing that looks good enough to eat but is durable enough to wear.
Step-by-Step Guide
Materials
- Translucent white polymer clay
- Opaque white polymer clay
- Yellow polymer clay
- Green polymer clay (leaf green or similar)
- Liquid polymer clay (translucent)
- Green alcohol ink or chalk pastels
- Cane slicing blade or tissue blade
- Needle tool or toothpick
- Small round cutter (approx. 1 inch)
- Eye pins
- Gloss glaze or UV resin
- Small paintbrush
- Rolling pin or pasta machine
Step 1: Creating the Citrus Cane
-
Mix the fruit color:
Start by mixing translucent white clay with a very small amount of green and a tiny touch of yellow. You want a pale, lime-juice color that remains see-through when baked, so don’t over-saturate it with opaque pigment. -
Form the segments:
Shape this lime-colored translucent mix into a thick log, about 1.5 inches long. This will form the juicy interior of your lime. -
Add the inner pith:
Roll out a thin sheet of opaque white clay. Wrap this sheet around your lime-colored log, smoothing the seam so it disappears. This creates the white separation between the fruit segments. -
Stretch the cane:
Gently squeeze and roll the log to reduce its diameter and lengthen it. Aim for a long, snake-like cane roughly the thickness of a pencil. -
Cut the segments:
Using your blade, cut the long cane into 8 equal lengths. These will become the individual triangular segments of the lime slice. -
Shape the wedges:
Pinch one side of each small log to turn the round shape into a teardrop or wedge shape. The white side should be the outline, and the sharp point will point toward the center.
Clean Cuts Only
Rotate the cane slightly after every slice you make. This prevents the bottom of the cane from getting flat spots and ensures your lime slices stay perfectly round.
Step 2: Assembling the Lime Slice
-
Create the center core:
Roll a very thin snake of opaque white clay. Place your 8 wedge-shaped segments around this central core, creating a flower-like wheel. The points of the teardrops should touch the center snake. -
Fill the gaps:
If there are significant gaps between the outer edges of your wedges, you can insert tiny triangular logs of translucent clay (the same mix from step 1) to fill them, though pressing them together usually suffices. -
Wrap the outer pith:
Roll out another sheet of opaque white clay on a medium setting. Wrap this around the entire assembled circle of wedges to form the main white pith layer. -
Add the green rind:
Roll out your green clay into a sheet slightly thicker than the white layer. Wrap this green sheet around the white layer to create the lime’s skin. Smooth the seam carefully. -
Reduce final cane:
Compress the entire large cane carefully, starting from the center and working out, to ensure all layers are adhered. Roll it gently to reduce it to your desired charm diameter (about 1 inch wide).
Make Lemonade
Switch the color palette! Use translucent yellow clay for the segments to make lemons, or orange and dark pink for blood oranges. The construction method remains exactly the same.
Step 3: Texturing and Finishing
-
Slice the charms:
Let the cane rest in the fridge for 20 minutes to firm up—this prevents distortion. Once cool, use your sharpest blade to slice thin, even coins from the cane. -
Texture the fruit:
Use a needle tool to gently scratch tiny radiating lines and stippling dots into the translucent lime segments. This mimics the fibrous texture of real citrus fruit pulp. -
Insert hardware:
Carefully push a small metal eye pin into the top of the rind (the green edge). You may want to trim the pin so it doesn’t poke into the translucent center. -
Bake:
Bake the pieces according to your clay manufacturer’s instructions (usually 275°F/130°C for 15-30 minutes). I recommend tenting them with foil to prevent the white pith from yellowing. -
Add the juicy shine:
Once cooled, apply a coat of gloss glaze or UV resin. Focus mostly on the fruit segments to make them look wet and juicy, leaving the rind slightly more matte if desired for realism.
Now you have a freshly sliced set of charms ready to be hung on a necklace or bracelet
Mini Watermelon Wedge
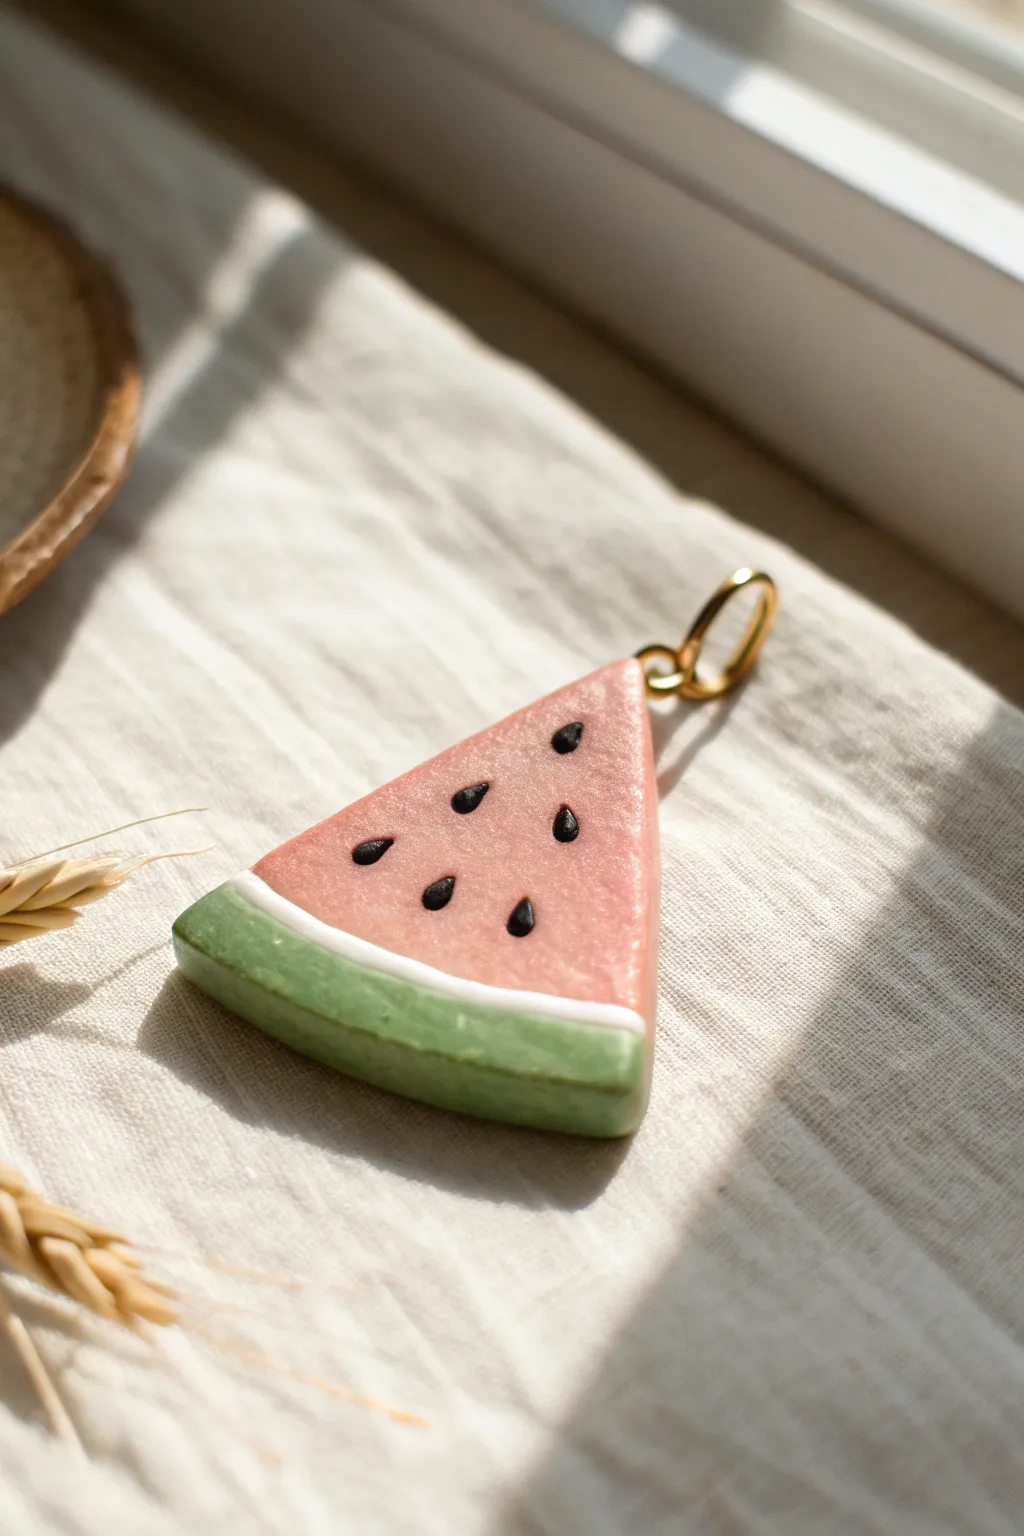
Capture the essence of summer with this adorable, glossy watermelon wedge pendant. Using simple clay techniques, you’ll create a charming accessory that features realistic layers of rind and a sweet pop of pink.
Detailed Instructions
Materials
- Polymer clay in translucent pink (or mix red with translucent)
- Polymer clay in white
- Polymer clay in moss green or leaf green
- Polymer clay in black
- Rolling pin or pasta machine
- Sharp tissue blade or clay knife
- Needle tool or dotting tool
- Clear gloss varnish or UV resin
- Small paintbrush
- Gold jump ring
- Pliers
- Oven for baking
Step 1: Creating the Melon Layers
-
Condition the pink clay:
Start by thoroughly conditioning your pink clay until it is soft and pliable. I prefer mixing a bit of translucent clay into a standard pink or red to give the flesh that juicy, realistic fruit look. -
Form the wedge shape:
Shape the pink clay into a thick triangle. Smooth the edges with your fingers so it resembles a generous slice of watermelon, keeping it about 5-6mm thick. -
Prepare the white rind:
Roll out a thin sheet of white clay. This layer simulates the inner rind, so it shouldn’t be too bulky—aim for about 1-2mm thickness. -
Attach the white layer:
Place the curved bottom edge of your pink triangle onto the white sheet. Trim the excess white clay away so you’re left with a thin strip tracing the bottom curve of the pink flesh. -
Prepare the green rind:
Roll out a sheet of green clay. You want this to be slightly thicker than the white layer to serve as the sturdy outer skin of the melon. -
Attach the green layer:
Press the bottom of the wedge (now covered in white) onto the green sheet. Use your blade to trim the green clay flush with the sides of the triangle. -
Blend the seams:
Gently smooth the sides of the wedge with your finger to ensure the green, white, and pink layers bond together without smearing the colors into each other.
Seed Smear Solutions
If black clay smears onto the pink while embedding seeds, wipe the surface gently with a Q-tip dipped in a tiny bit of rubbing alcohol or acetone before baking.
Step 2: Adding Details and Finishing
-
Make the seeds:
Take a tiny amount of black clay and roll it into a very thin snake. Cut off tiny segments, smaller than a grain of rice. -
Shape the seeds:
Roll each tiny black segment into a ball, then pinch one end to create a teardrop shape. -
Place the seeds:
Position the seeds onto the pink surface of the wedge. Arrange them randomly, but keep them generally pointing inward towards the point of the triangle. -
Embed the seeds:
Using the flat side of your blade or your finger, very gently press the seeds flat so they become flush with the pink surface rather than sticking out. -
Add texture (optional):
If you want extra realism, use a stiff toothbrush or a needle tool to gently texture the pink area around the seeds, mimicking the grainy look of watermelon flesh. -
Insert hardware connection:
Pierce a small hole through the top point of the triangle using a needle tool, or insert a screw-eye pin before baking if you prefer that method. -
Bake:
Bake the piece according to your specific brand of clay’s instructions. Usually, this means around 275°F (130°C) for 15-30 minutes. -
Cool and clean:
Allow the piece to cool completely. If there are any fingerprints, you can lightly sand them away with fine-grit sandpaper, though be careful not to create scratches. -
Glaze:
The secret to the juicy look is the finish. Apply a coat of gloss varnish or UV resin. Cure or let dry until it is hard and glassy. -
Attach the ring:
Open a gold jump ring using two pairs of pliers. Slide it through the hole you made at the top and twist it closed securely.
Bite Mark Upgrade
Before baking, use a small round cutter or a straw to remove a semi-circle from the side or tip of the wedge. This makes it look like someone took a bite out of it
Wear your fresh fruit slice on a simple chain or attach it to a keychain for a daily dose of summer vibes

TRACK YOUR CERAMIC JOURNEY
Capture glaze tests, firing details, and creative progress—all in one simple printable. Make your projects easier to repeat and improve.
Kiwi Slice Studs
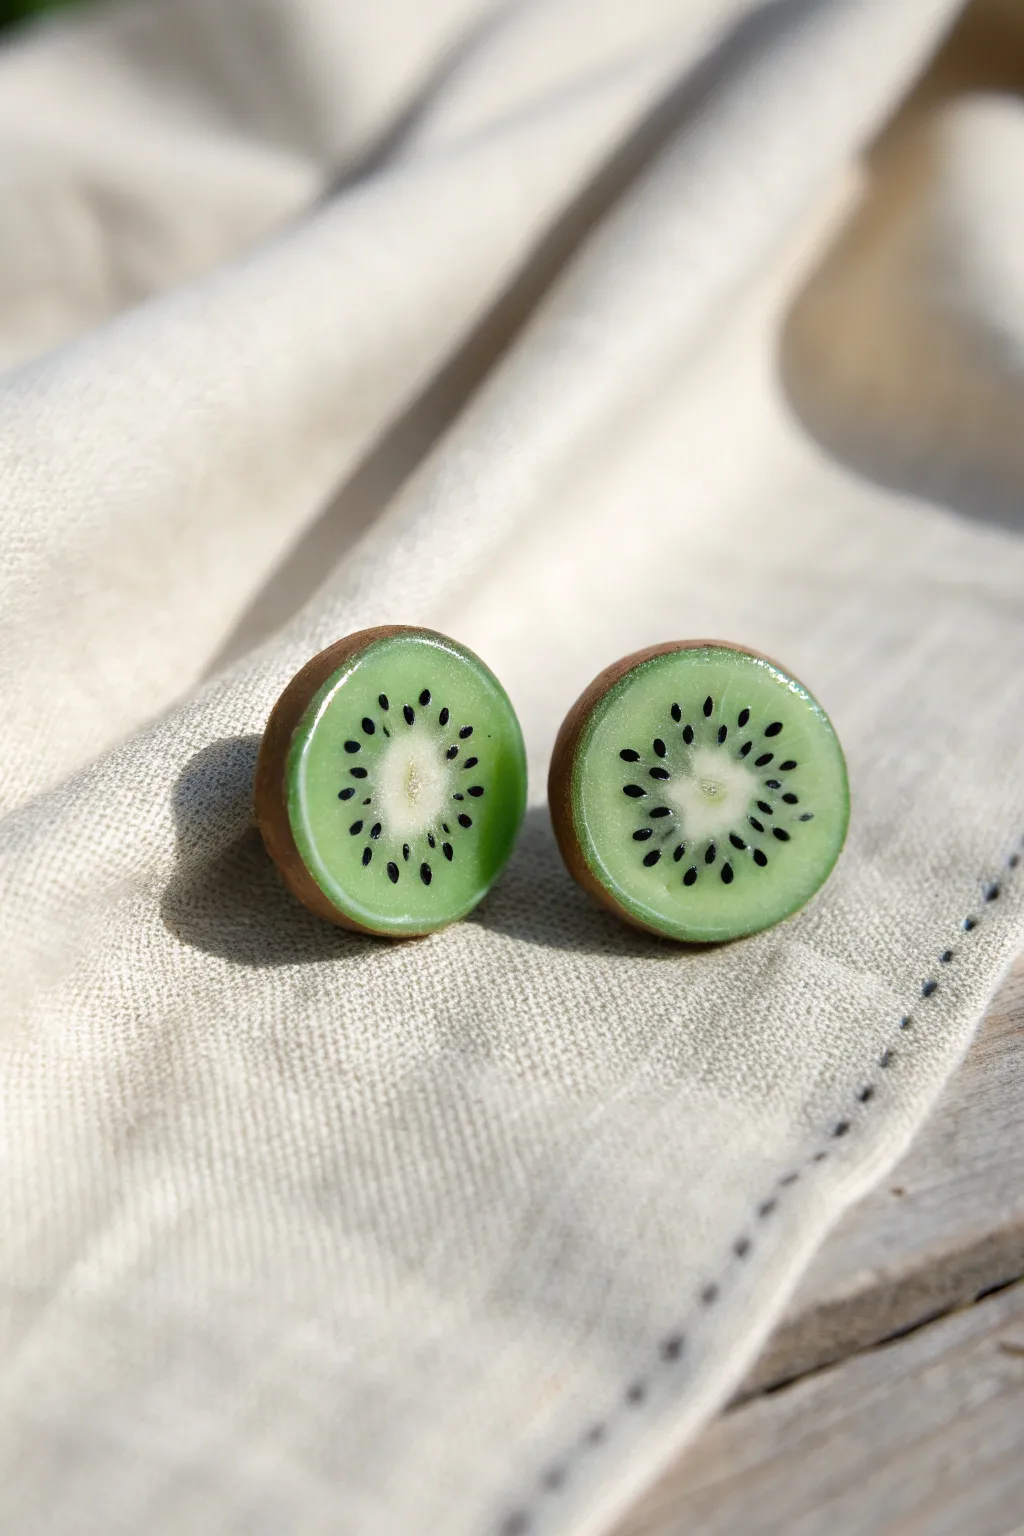
Embrace the freshness of summer all year round with these ultra-realistic kiwi slice studs. By combining translucent clay techniques with fine detailing, you’ll create juicy, miniature fruit slices that look good enough to eat.
Step-by-Step Tutorial
Materials
- Translucent polymer clay
- Green polymer clay (or green alcohol ink)
- White or cream polymer clay
- Brown polymer clay
- Liquid polymer clay (translucent)
- Black acrylic paint
- UV resin and UV lamp (or gloss glaze)
- Earring stud posts
- Super glue
- Precision craft blade
- Fine detail brush or needle tool
- Small round cutter (approx. 1cm)
Step 1: Creating the Kiwi Cane
-
Mix the Flesh Tone:
Start by mixing a small amount of green clay into your translucent clay. You want a ratio of about 1 part green to 10 parts translucent to achieve that realistic, juicy flesh look once baked. Alternatively, tint translucent clay with a drop of green alcohol ink. -
Form the Core:
Roll a small snake of white or cream clay. This will become the central white core of the kiwi slice. Keep it relatively thin, about 3-4mm in diameter. -
Wrap the Core:
Flatten a sheet of your translucent green mix. Wrap this sheet around the white core snake until the total diameter is close to your desired earring size, smoothing the seam so it disappears. -
Add the Seeds:
I find the most realistic method is to paint the seeds later, but we need to create the radiating pattern first. Make shallow, longitudinal cuts down the length of the green cylinder using your blade, stopping before you hit the white core. -
Insert White Veins:
Roll very thin strips or threads of white clay. Gently press these into the cuts you just made. This creates the subtle fibrous rays seen in real kiwis. -
Condense the Cane:
Gently roll the entire log on your work surface to close the gaps and fuse the white veins into the green flesh. Reduce the cane until it is the perfect diameter for stud earrings. -
Add the Skin:
Roll a very thin sheet of brown clay. Wrap this around the outside of your green log to simulate the fuzzy kiwi skin. Smooth the joining seam carefully.
Step 2: Slicing and Detailing
-
Chill the Cane:
Place your clay cane in the refrigerator for about 15-20 minutes. Firm clay slices much more cleanly and prevents the circular shape from distorting under the blade’s pressure. -
Slice the Discs:
Using a sharp tissue blade, slice two equal discs from the cane. Aim for a thickness of about 3mm—thick enough to be durable but light enough for ears. -
Texture the Core:
Use a needle tool to gently texture the white center, giving it a slightly fibrous look rather than a perfectly smooth surface. -
Initial Bake:
Bake the slices according to your clay manufacturer’s instructions (usually 275°F/130°C for 15-30 minutes). Let them cool completely.
Sticky Slices?
If your resin finish feels tacky even after curing under UV light, wipe the surface quickly with a lint-free wipe dipped in rubbing alcohol to remove inhibition layers.
Step 3: Finishing Touches
-
Paint the Seeds:
Using a fine detail brush or the tip of a toothpick, dab tiny teardrop shapes of black acrylic paint in a circle around the white core. Arrange them between the faint white rays you created earlier. -
Seal with Resin:
Once the paint is totally dry, apply a doming layer of UV resin to the front of the slice. This adds dimension and creates that wet, freshly cut fruit shine. -
Cure the Resin:
Cure under a UV lamp for a few minutes until the surface is hard and non-tacky. -
Attach the Posts:
Flip the slices over. Apply a drop of super glue or strong jewelry adhesive to the flat pad of an earring post and press it firmly onto the back of the clay. -
Reinforce the Back:
I prefer to add a tiny dab of translucent liquid clay or resin over the earring post pad (avoiding the stick part) and cure it again. This embeds the post and ensures it never pops off.
Make Them Fuzzy
Before baking, lightly texture the brown outer ring with a toothbrush or stiff bristles. After baking, dust matte brown pastel powder on the edge for a true fuzzy skin look.
Pop in your new fruit studs and enjoy a fun, tropical accessory that you crafted yourself
Shamrock Magnet or Pin
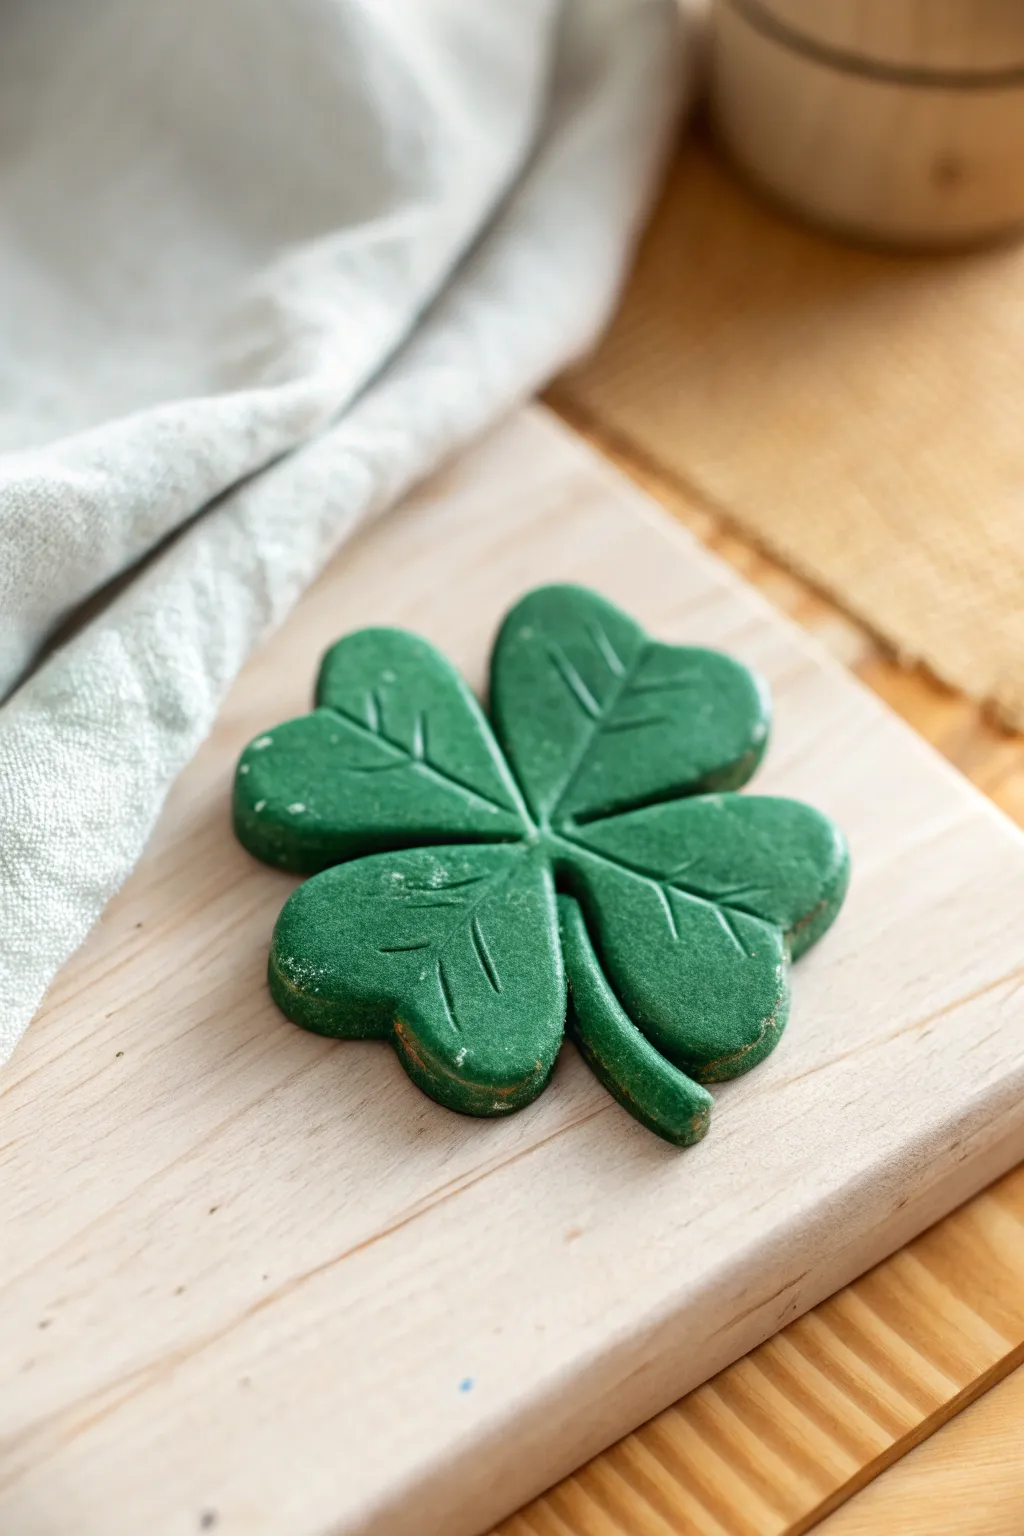
Celebrate luck and nature with this sturdy, hand-shaped clay shamrock that captures the charm of the holidays. Its matte green finish and engraved leaf veins give it a rustic, handmade quality perfect for turning into a festive magnet or pin.
Detailed Instructions
Materials
- Green polymer clay or air-dry clay dyed green
- Rolling pin
- Small heart-shaped cutter (optional)
- Needle tool or toothpick
- Craft knife
- Smooth wooden board or work mat
- Cornstarch or baby powder (for dusting)
- Strong craft glue (E6000)
- Magnet backing or pin back
Step 1: Shaping the Clover Base
-
Condition the Clay:
Begin by taking a chunk of green clay and kneading it thoroughly in your hands until it becomes soft, pliable, and warm to the touch. -
Roll the Base:
Place the clay on your work surface and use a rolling pin to flatten it to a thickness of about 1/4 inch. If the clay is sticky, I like to lightly dust the surface with a tiny bit of cornstarch. -
Identify the Shape Strategy:
You can either use a small heart-shaped cutter to punch out four hearts, or cut a general four-leaf shape freehand with your craft knife. -
Assemble the Hearts:
If using the cutter method, arrange the four heart shapes with their points meeting in the center to form a clover. -
Merge the Seams:
Gently press the center points together where they meet. Use your finger or a modeling tool to smooth the clay at the join so becomes one solid unit rather than four separate pieces. -
Add a Stem:
Roll a small, thin snake of green clay for the stem. Attach it between two of the bottom leaves, blending the top of the stem seamlessly into the underside of the flower. -
Refine the Edges:
Go around the entire perimeter of the shamrock with your finger, gently softening any sharp cut lines to give it that slight rounded, cookie-like appearance seen in the photo.
Step 2: Detailing and Finishing
-
Mark the Center:
Take your needle tool or a toothpick and press a small indentation directly in the center where all four leaves meet to define the axis point. -
Draw the Central Veins:
Starting from that center hole, gently drag your tool outward into the middle of each leaf, stopping about halfway to the edge. This creates the main vein. -
Add Side Veins:
For a realistic look, etch two smaller diagonal lines branching off the main vein on each leaf. Keep the pressure light so you don’t cut all the way through. -
Create Texture:
If you want that slightly dusted, rustic look shown in the example, lightly tap a textured sponge or fabric over the surface, or leave a tiny trace of the cornstarch used earlier. -
Prepare for Drying:
Carefully slide a blade under the clay to loosen it from the board, ensuring it isn’t stuck before you leave it to set. -
Curing or Drying:
If using polymer clay, bake according to the manufacturer’s package instructions (usually around 275°F/135°C). For air-dry clay, leave it in a cool, dry spot for 24-48 hours. -
Adding the Backing:
Once the piece is fully cured and cooled, flip it over to the flat side. -
Glue the Hardware:
Apply a dab of strong craft glue to the back and press your magnet or pin finding firmly into place. -
Final Set:
Let the glue cure completely for several hours before testing the hold.
Fixing Cracks
If tiny cracks appear while drying air-dry clay, mix a small amount of fresh clay with water to make a paste and fill them in.
Sparkle Upgrade
Before baking or drying, brush a light layer of gold mica powder over the veins to make the details pop and add shine.
Your lucky green creation is now ready to bring a touch of charm to your fridge or jacket
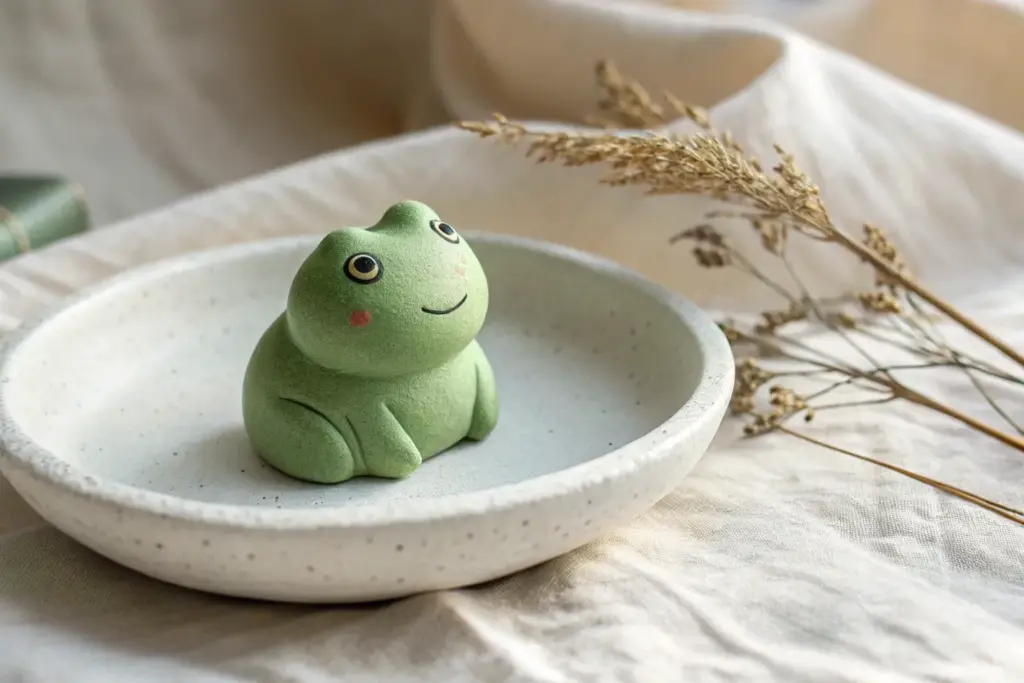
Lilypad Base for Frogs
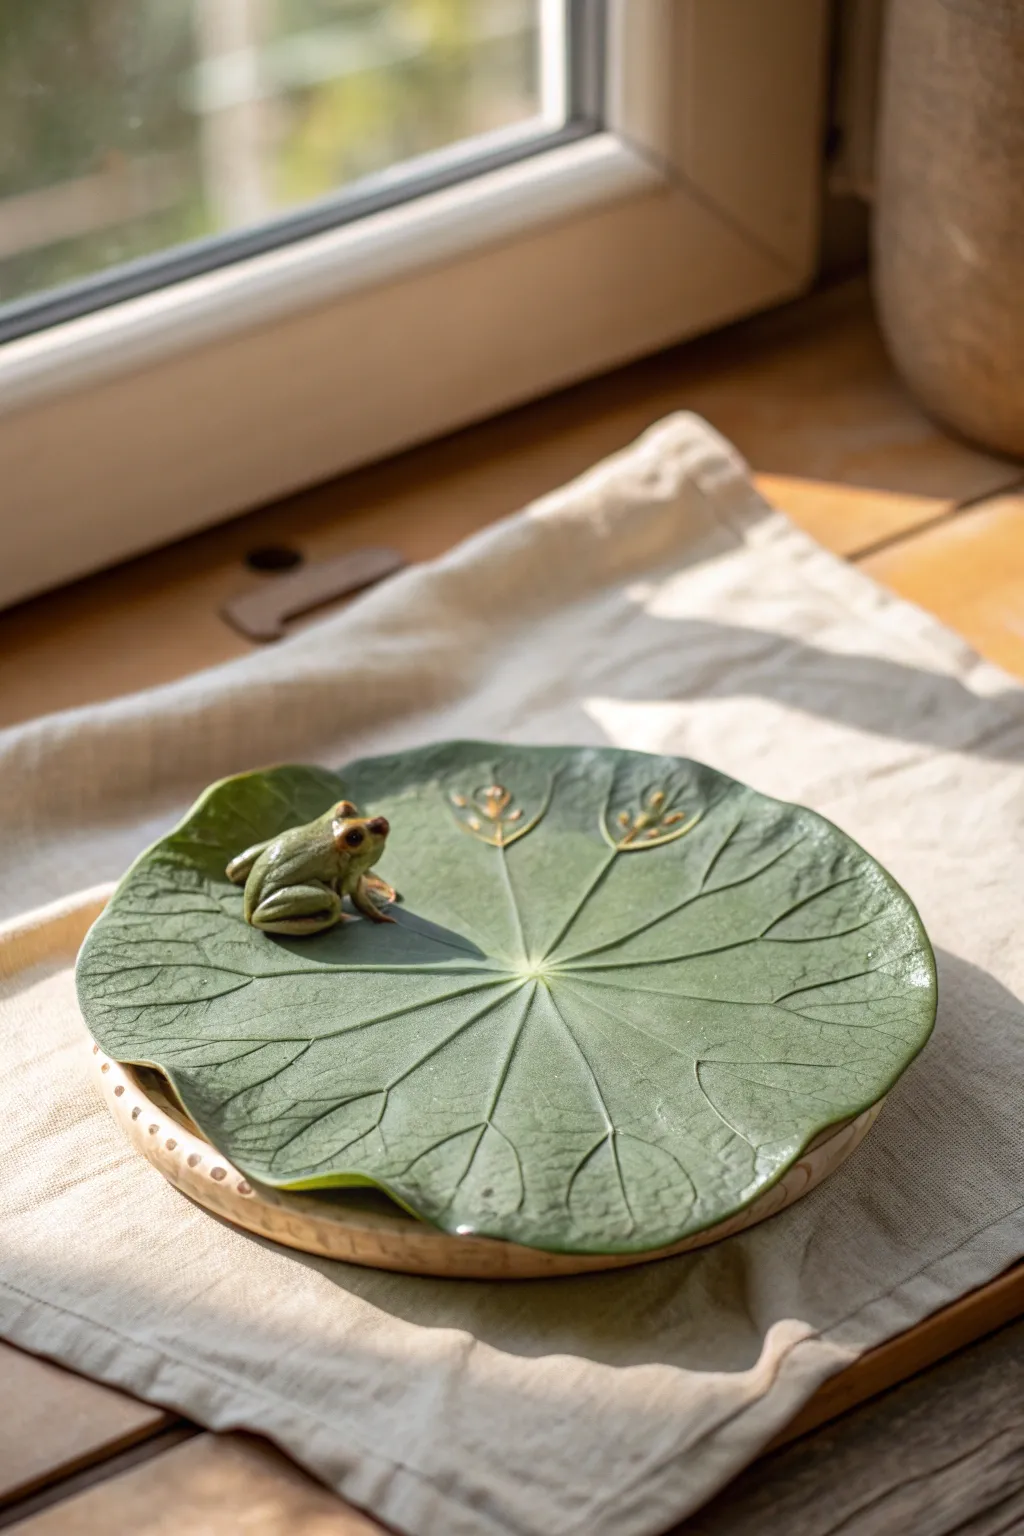
This charming ceramic project features a realistic, broad lily pad leaf that functions as a small tray, complete with a tiny, alert tree frog perched on the edge. The piece combines organic textures with smooth, glossy glazes to capture the serene feeling of a pond garden.
Step-by-Step
Materials
- Green stoneware clay or polymer clay (if not firing)
- Real large leaf (for texture impression) or texture roller
- Modeling tools (needle tool, rib tool, sponge)
- Small rolling pin
- Rolling mat or canvas
- Slip and scoring tool (for ceramic clay)
- Underglazes: Deep forest green, lime green, beige/brown
- Glossy transparent glaze
- Kiln (if using ceramic clay) or Oven (if using polymer)
- Small paintbrush
Step 1: Creating the Lily Pad Base
-
Roll the Slabs:
Begin by wedging your green clay to remove air bubbles, then roll it out into a smooth slab about 1/4 inch thick. I like to flip the slab occasionally while rolling to ensure an even thickness. -
Texture the Surface:
If you have a large garden leaf (like a hosta or squash leaf), press it vein-side down firmly into the clay. Alternatively, gently draw radiating veins from a slightly off-center point using a dull needle tool or modeling stick. -
Cut the Shape:
Using a needle tool, cut a roughly circular shape with a wavy, organic edge. Lily pads aren’t perfect circles, so allow for some natural unevenness in the perimeter. -
Form the Curve:
Gently lift the edges of the slab to create a shallow bowl shape. You can place the clay over a slump mold or simply prop up the edges with small bits of sponge or crumpled newspaper while it firms up. -
Refine the Veins:
Go back over your impressed or drawn veins with a modeling tool to deepen them slightly. Add smaller branching veins that extend toward the wavy edges for extra realism. -
Smooth the Edges:
Run a damp sponge along the cut rim of the lily pad to remove any sharp burrs or rough clay crumbs, creating a smooth, finished lip.
Cracking at the Seams?
If the frog separates during drying, your clay was likely too dry when attaching. Use plenty of slip and wrap the piece in plastic for a day to equalize moisture.
Step 2: Sculpting the Frog
-
Body Form:
Roll a small ball of clay into an oval shape for the frog’s body. Pinch the front slightly to suggest the head area. -
Leg Attachment:
Roll two thin coils for legs. Bend them into a ‘Z’ shape for the back legs and attach them to the sides of the body using slip and scoring. Attach shorter front legs reaching forward. -
Adding Details:
Use a small ball tool to create indentations for eyes, adding tiny balls of clay inside. Sculpt the mouth line and minimal toes. -
Positioning:
Score the spot on the lily pad where the frog will sit. Apply slip to the frog’s underside and press firmly onto the leaf, smoothing the seams so it looks like one cohesive piece.
Pro Tip: Realistic Eyes
Add a tiny dot of glossy black glaze to the frog’s pupils before the final firing. It gives the creature a lifelike shine and focus that painted pupils often lack.
Step 3: Glazing and Finishing
-
Bisque Fire:
Allow the piece to dry slowly and completely. Once bone dry, fire it to the bisque temperature recommended for your specific clay body. -
Base Green Color:
Apply a coat of deep forest green underglaze to the entire leaf surface. Wipe it back slightly with a damp sponge so the color stays darker in the veins but lightens on the raised areas. -
Highlighting:
Dry-brush a lighter lime green over the raised sections between the veins to accentuate the texture. -
Painting the Frog:
Paint the frog with a mix of green and beige underglaze. Use a fine brush to add brown details to the eyes and a faint stripe along the side of the body if desired. -
Adding Accents:
For the decorative golden motifs seen on the leaf, carefully paint small stylized floral designs using a gold or yellow underglaze near the center point. -
Glaze Application:
Once the underglazes are dry, apply a clear, high-gloss glaze over the entire top surface of the leaf and the frog to make them look wet and aquatic. -
Final Fire:
Fire the piece a second time to the glaze temperature. Ensure the bottom is wiped clean of glaze to prevent sticking to the kiln shelf.
Place your finished lily pad near a window to catch the light and enjoy a touch of serene nature indoors
Green Mushroom With Mossy Spots
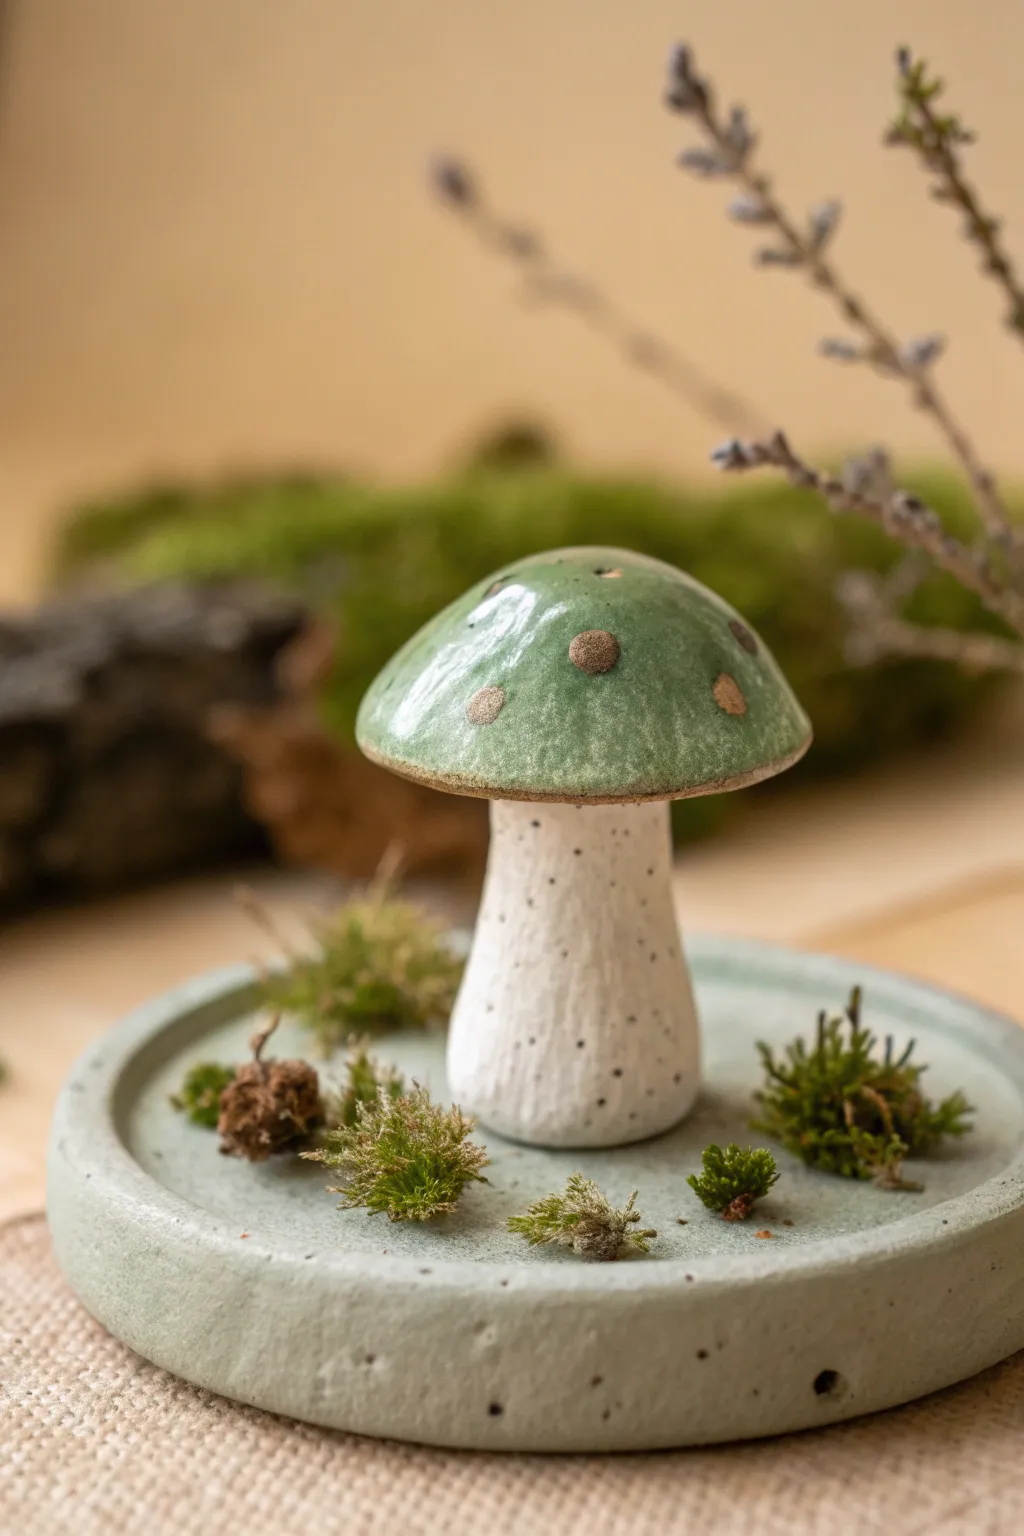
Bring a touch of the forest floor into your home with this charming ceramic mushroom. Featuring a speckled white stem and a glossy green cap adorned with earthy spots, it sits perfectly on a matching textured clay base.
Detailed Instructions
Materials
- White stoneware or polymer clay (oven-bake)
- Ceramic tools (needle tool, sponge, rib tool)
- Small rolling pin
- Slip (liquid clay) and scoring tool
- Green glaze (glossy finish)
- Brown/tan underglaze or oxide wash
- Black speckle glaze or heavy oxide wash (for stem)
- Kiln (if using stoneware) or Oven (if using polymer)
- Paintbrushes
- Clear glaze (if needed)
Step 1: Sculpting the Components
-
Prepare the stem clay:
Begin with a golf-ball-sized piece of white clay. Roll it into a thick cylinder between your palms. -
Shape the stem:
Gently taper the cylinder so it is slightly wider at the base than at the top. It should look sturdy and organic, not perfectly geometric. -
Create the texture:
Use a rough sponge or a crumpled ball of aluminum foil to gently dab the surface of the stem. This gives it a natural, porous look. -
Form the cap:
Take a separate piece of clay and roll it into a ball, then flatten it into a thick disc. Use your thumbs to press the center into a concave dome shape, creating the classic mushroom umbrella. -
Refine the cap edges:
Smooth the edges of the cap with a damp sponge or your finger so they are rounded, not sharp. -
Make the base:
Roll out a slab of clay to about 1/4 inch thickness. Cut out a circle using a cookie cutter or a round template to serve as the display dish. -
Add a rim to the base:
If you want a slight lip like the reference image, gently pinch the edges of the circle upward or attach a thin coil around the perimeter and smooth it down.
Step 2: Assembly and Detailing
-
Join cap and stem:
Score the top of the stem and the underside of the cap. Apply a dab of slip (or liquid clay) and press them firmly together. I like to wiggle it slightly to ensure a tight bond. -
Add the spots:
Take tiny pinches of clay, flatten them into irregular circles, and press them onto the top of the green cap to create the slightly raised spots. -
Final drying (Ceramic only):
If using ceramic clay, allow the piece to dry slowly to the bone-dry stage. If using polymer clay, verify your shape one last time before baking. -
Bisque fire:
Fire the bone-dry piece in a kiln according to your clay body’s instructions (usually Cone 04). Skip this step for polymer clay.
Clean Lines
Wipe the very bottom edge of the mushroom cap with a damp sponge before firing. This reveals a thin line of raw clay that defines the shape beautifully.
Step 3: Glazing and Finishing
-
Glaze the cap:
Apply 2-3 coats of a glossy moss-green glaze to the top of the mushroom cap. Be careful to work around the spots if you want them to remain raw, or glaze over them if you plan to accent them later. -
Color the spots:
Dab a brown oxide wash or matte tan glaze onto the raised spots. This earthy tone contrasts beautifully with the shiny green. -
Speckle the stem:
Using a stiff brush, splatter a black iron oxide wash or specialized speckle glaze lightly onto the white stem to mimic tiny dirt particles. -
Glaze the base:
Coat the circular base with a matte or semi-matte pale green glaze that complements the mushroom cap without overpowering it. -
Final firing:
Fire the piece again to the temperature required by your glazes (often Cone 5 or 6 for stoneware). -
Add natural elements:
Once cool, create a little scene by gluing preserved moss tufts or small dried twigs around the base of the mushroom stem.
Make It Functional
Instead of a solid stem, hollow it out and add holes to turn this sculpture into a whimsical incense burner or a tiny fairy house luminary.
Now you have a permanent piece of the forest to keep on your desk or shelf