
Mother’s Day is basically the perfect excuse to turn clay into something sweet, useful, and ridiculously sentimental in the best way. These Mother’s Day pottery ideas are all about personal touches—names, dates, handprints, and florals—so your gift feels like a keepsake, not just a craft.
Handprint Flower Plate

This charming ceramic project captures the warmth of a garden with its earthy palette and playful mix of solid and outlined florals. The speckled clay body adds a lovely rustic texture that makes the simple flower design feel effortlessly modern and organic.
How-To Guide
Materials
- Bisque-fired ceramic plate (speckled cream clay body recommended)
- Underglazes: Terracotta/Rust, Pale Peach/Blush, Sage Green, Golden Yellow
- Clear transparent glaze (food safe)
- Small round paintbrush (size 2 or 4)
- Fine liner brush (size 00 or 0)
- Pencil for sketching
- Damp sponge
- Palette for mixing paint
- Bowl of water
Step 1: Preparation & Sketching
-
Clean the bisque:
Wipe your bisque-fired plate gently with a damp sponge. This removes any kiln dust or oils from your hands that might resist the glaze. -
Plan the composition:
Lightly sketch your flower placement using a pencil. Pencil marks will burn off in the kiln, so don’t worry about being messy. Aim for an organic flow, positioning two large focal flowers and two secondary outlined flowers. -
Establish the stems:
Draw the main stem lines connecting your flowers down toward a central point near the bottom right. Keep these lines curved and natural rather than stick-straight.
Clean Lines
Use a specialized detail bottle with a fine metal tip to apply the peach outlines if your brushwork feels shaky. It acts like a drawing pen for glaze.
Step 2: Painting the Flowers
-
Paint the solid blooms:
Using your round brush and Terracotta underglaze, paint the petals for the two darker flowers. Start from the center and pull your brush outward to create a slight taper at the petal tips. -
Layer the solid color:
For a rich, opaque finish, apply three coats of the Terracotta underglaze. Wait for the shine to disappear from the wet paint between each coat to ensure even coverage. -
Outline the peach flowers:
Switch to your Pale Peach underglaze and a fine round brush. Instead of filling these petals in, simply paint the outline of each petal. This creates a lovely visual variety. -
Add detail lines:
Inside the peach flower outlines, add a few very thin lines radiating from the center to suggest texture and dimension on the petals. -
Create the heavy stems:
Mix a tiny touch of brown into your Sage Green (or plain Terracotta if you prefer the monochrome look shown) to paint the stems. Use one long, confident stroke for each main stem section.
Step 3: Adding Details & Finishing
-
Paint the leaves:
Using Sage Green and un-mixed Terracotta for the stems (or just Sage Green as seen in variations), paint simple, pointed oval leaves. Attach them along the main stem lines. -
Detail the flower centers:
Dip the very tip of your brush or a toothpick into Golden Yellow underglaze. create a tight cluster of small dots in the center of every flower, both solid and outlined. -
Add speckles (optional):
If your clay body isn’t naturally speckled, you can flick a stiff toothbrush dipped in watered-down brown underglaze over the plate to mimic the effect. -
Double check coverage:
Look closely at your solid flowers. If you see the bare plate showing through the brushstrokes, dab a little more Terracotta on those spots. -
Clear glaze application:
Once the underglaze is bone dry, carefully dip the plate into a clear transparent glaze, or brush on three even coats if you are using a brushing glaze. -
Fire the piece:
Load the kiln and fire to the temperature specific to your clay and glaze (usually cone 5 or 6 for stoneware). Allow the kiln to cool completely before opening.
Texture Play
After painting the solid petals, use a sgraffito tool to gently scratch thin lines back through the underglaze to reveal the clay underneath.
This lovely handmade plate will be a cherished gift that brings a touch of spring to every meal


Heart-Themed Mom Mug
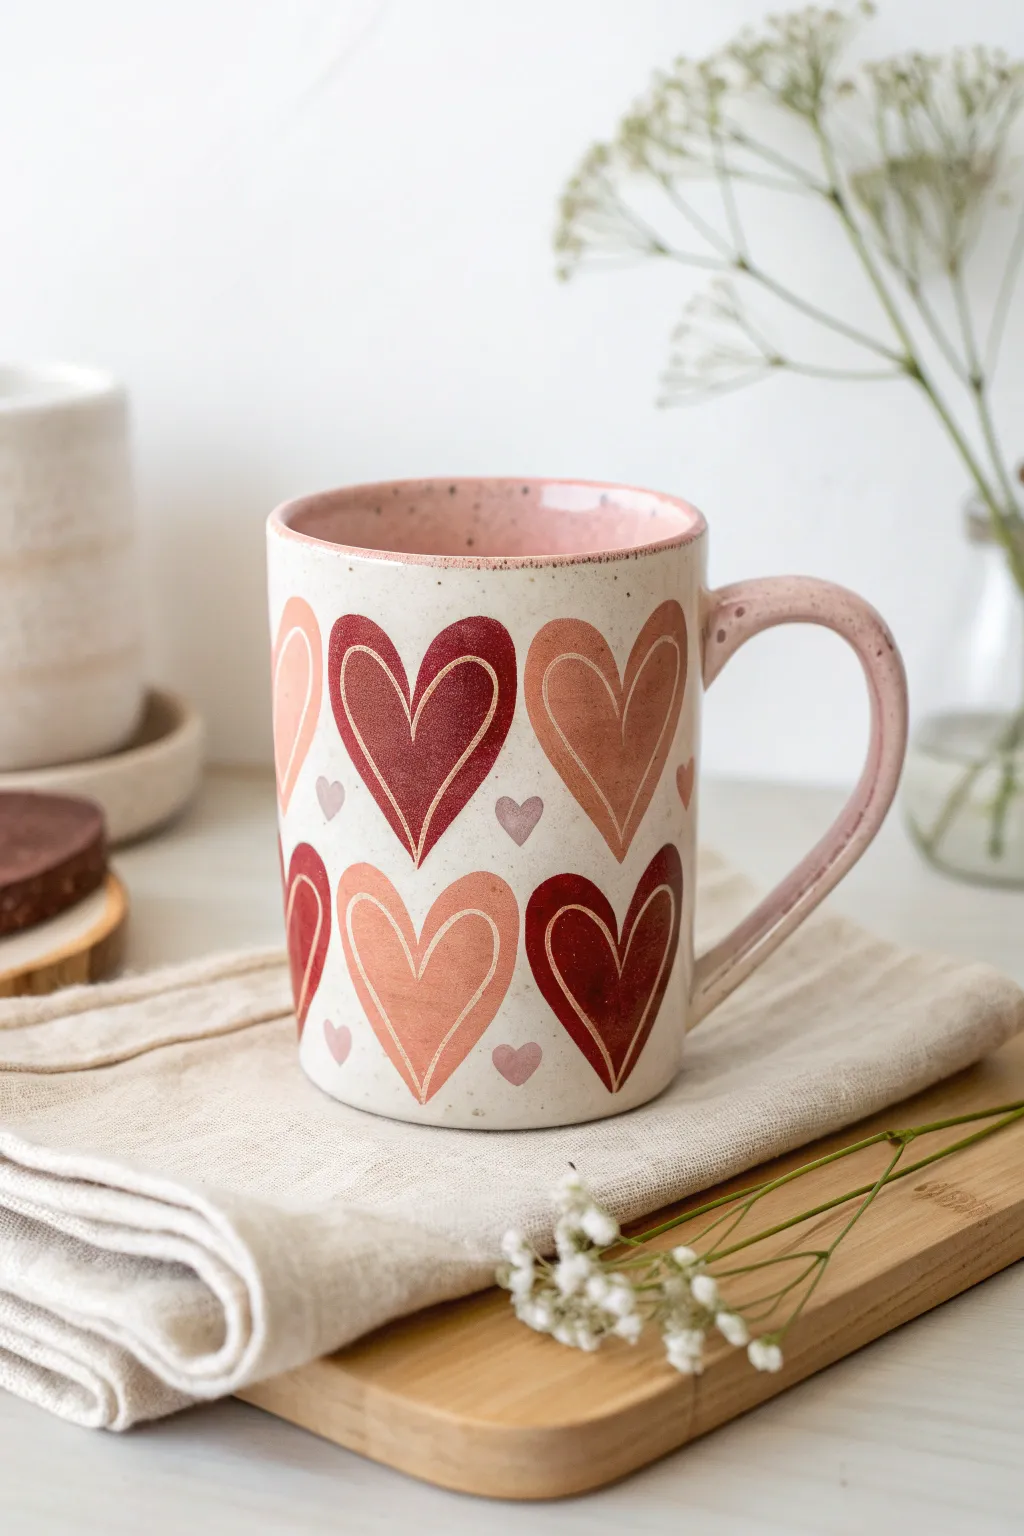
Treat Mom to a heartwarming handmade gift with this charming speckled mug featuring earthy red and pink hearts. The design combines a classic cream base with hand-painted heart motifs, finished with a delightful pink interior glaze for a cozy pop of color.
Detailed Instructions
Materials
- Cone 6 speckle stoneware clay body
- Pottery wheel (or slab roller for hand-building)
- Rib tool (kidney)
- Wire cutter
- Trimming tools
- Underglaze (Deep Red, Terracotta/Burnt Orange, Blush Pink)
- Fine detail brush
- Medium round brush
- Clear transparent glaze
- Pink liner glaze (food safe)
- Wax resist
- Kiln
Step 1: Forming the Mug
-
Throw the cylinder:
Begin by centering about 1 lb of speckled stoneware clay on your wheel. Open the clay and pull the walls up into a straight-sided cylinder, aiming for a consistent thickness of about 1/4 inch. -
Refine the shape:
Use a rib tool to instinctively smooth the outside walls, removing any throwing lines for a clean canvas. Create a slight curve at the bottom if desired, but keep the walls mostly vertical. -
Finish the rim:
Compress the rim with a chamois or your finger to ensure it is smooth and comfortable for drinking. Cut the pot from the wheel using a wire tool and set it aside to dry to leather-hard. -
Pull the handle:
While the body dries, pull a classic strap handle from a lug of clay. Allow it to stiffen slightly into a curve that mimics the letter ‘C’ or a half-heart shape. -
Attach and trim:
Once the mug body is leather-hard, trim the foot ring. Score and slip the handle attachments, pressing it firmly onto the mug body. Smooth the seams with a distracting sponge or modeling tool.
Step 2: Decorating the Surface
-
Bisque fire:
Place your bone-dry greenware mug into the kiln for a bisque firing (usually Cone 04). This prepares the piece for glazing and ensures it is sturdy enough to handle. -
Plan the spacing:
Lightly sketch the heart placement using a dull pencil directly on the bisque. The hearts should alternate directions—some right-side up, others inverted—creating a pleasing rhythm around the mug. -
Paint the large hearts:
Using your medium round brush and underglazes, fill in the large heart shapes. Alternate colors between deep red, terracotta, and blush pink. Apply 2-3 coats for opaque coverage. -
Add the mini hearts:
In the negative spaces between the large hearts, paint tiny floating hearts using a single dab of the brush. I find soft pink works best here to balance the stronger reds. -
Create the outline details:
Once the filled hearts are dry, use a very fine detail brush or a sgraffito tool to create the inner heart outlines. You can either paint a thin line of a lighter contrasting color inside the heart or scratch through the underglaze to reveal the clay body. -
Wax resist application:
Apply wax resist carefully over all the painted hearts. This protects your design when you dip the mug into the main glaze.
Heart Shape Hack
Make a simple paper stencil shaped like a heart. Hold it against the curve of the bisque mug and trace lightly with a pencil to ensure all your main hearts are uniform in size.
Step 3: Glazing and Final Firing
-
Glaze the interior:
Pour a food-safe pink liner glaze into the inside of the mug. Swirl it around to coat the entire interior and pour out the excess. Wipe the rim clean with a damp sponge. -
Glaze the handle:
Carefully brush the same pink glaze onto the handle to match the interior, giving the piece a cohesive look. Be careful not to let it drip onto the body. -
Apply the clear coat:
Dip the entire exterior of the mug into a clear transparent glaze. The wax resist will prevent the clear glaze from adhering thickly to the hearts, but a thin layer is fine. -
Wipe back:
Gently wipe any beads of clear glaze off the waxed heart areas with a sponge. This ensures the underglaze colors remain vibrant and distinct. -
Final fire:
Load the mug into the kiln for the glaze firing (typically Cone 6). Ensure the foot is wiped clean so it doesn’t fuse to the kiln shelf.
Gold Luster Accent
After the final firing, apply real gold luster over the thin interior outlines of the hearts. Fire one last time at Cone 018 for a truly luxurious, shimmering finish.
Once cooled, this mug is ready to be filled with coffee and love for a perfect Mother’s Day morning


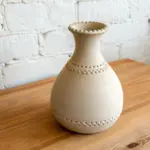
Birth-Flower Vase
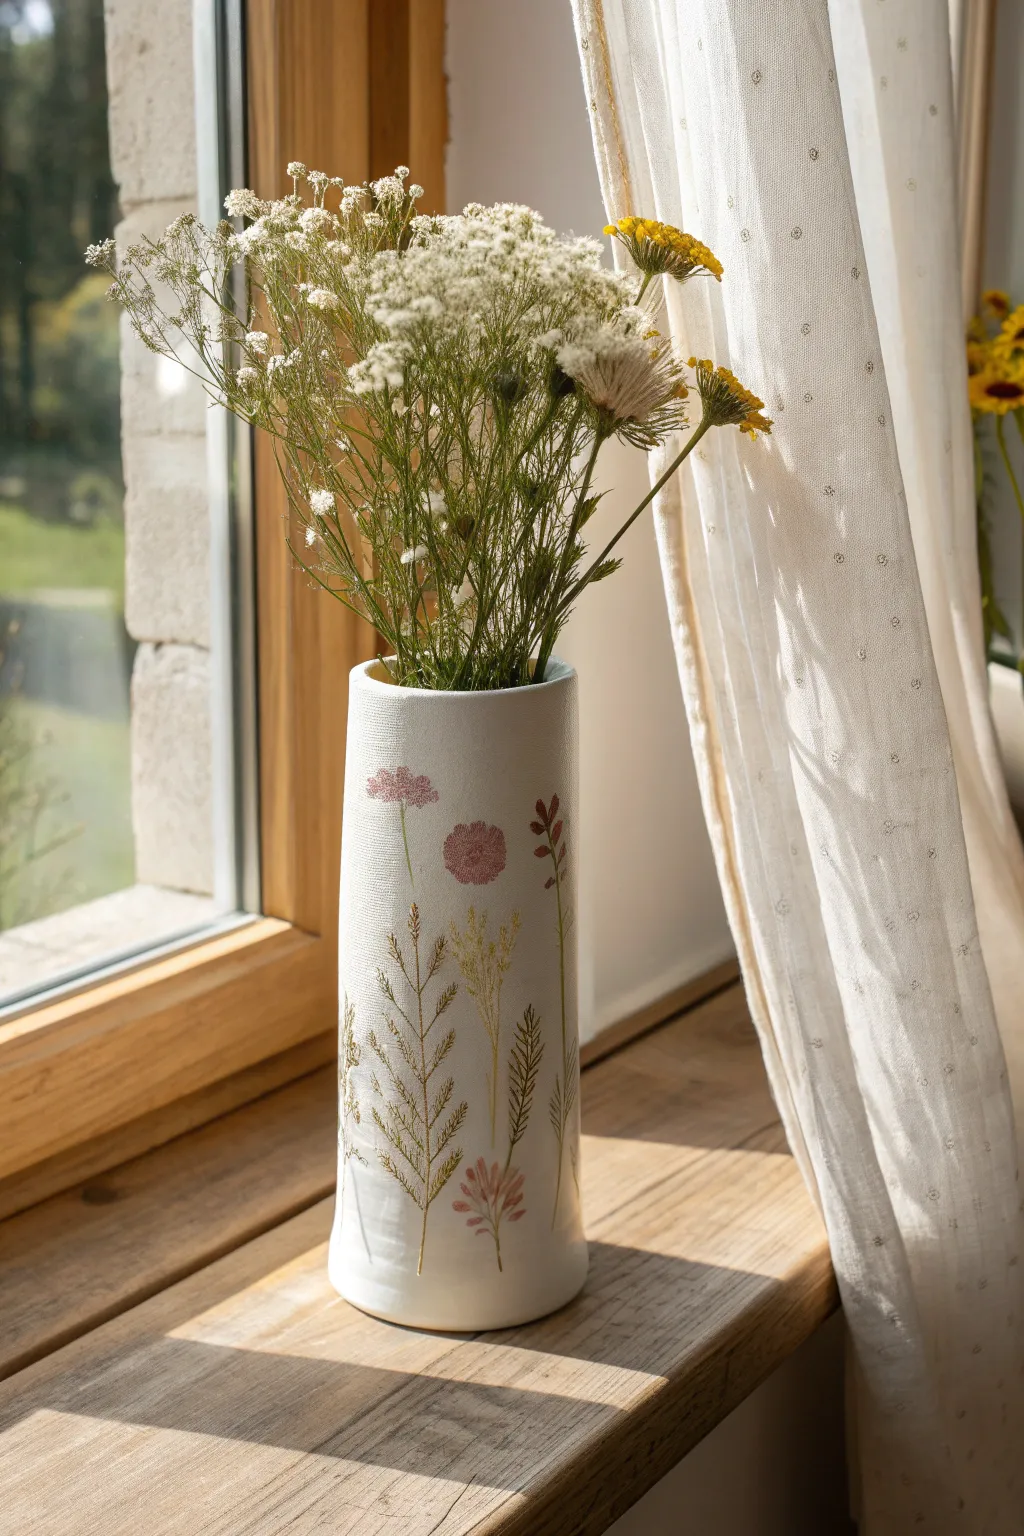
Celebrate Mom’s unique story with this stunning cylindrical slab vase, featuring delicate impressions of her birth flowers. The finished piece has a soft, matte white texture reminiscent of canvas, adorned with subtle, watercolor-style floral transfers that create a vintage botanical look.
Step-by-Step
Materials
- White stoneware clay (mid-fire)
- Rolling pin and guide sticks (approx. 1/4 inch thick)
- Textured linen or canvas fabric
- Underglaze transfers or ceramic decals (wildflower designs)
- Slip and scoring tool
- Fettling knife
- Large cylindrical form (like a PVC pipe or rolling pin) for shaping
- Soft sponge
- Satin or matte clear glaze
- Soft ribs (metal and rubber)
Step 1: Creating the Slab
-
Prepare the Clay:
Begin by wedging your white stoneware clay thoroughly to remove air bubbles. This ensures a smooth surface for your delicate floral designs later. -
Roll the Slab:
Roll out the clay into a long rectangular slab using guide sticks to maintain an even thickness of about 1/4 inch. -
Add Texture:
Before cutting to size, lay a piece of coarse linen or canvas over the slab. Roll over it firmly with your rolling pin to imprint that beautiful woven texture into the clay surface. -
Measure and Cut:
Using a ruler and fettling knife, cut a clean rectangle. Calculate the width based on the circumference of your forming tube, plus a small overlap for the seam.
Pro Tip: Custom Decals
Make your own transfers by painting underglaze onto newsprint, letting it dry to a leather-hard state, and pressing it onto the clay.
Step 2: Forming the Cylinder
-
Form the Body:
Wrap the textured slab carefully around your PVC pipe or cylindrical form. I find it helpful to place a piece of newsprint between the clay and the form to prevent sticking. -
Score and Slip:
Score the edges where the clay meets heavily with a serrated tool. Apply slip generously to both scored areas. -
Seal the Seam:
Press the edges together firmly. Use a wooden modeling tool to blend the seam on the inside of the vase so it disappears. On the outside, you can leave a subtle visible join line for handmade character, or smooth it flush. -
Attach the Base:
Roll a small separate slab for the base. Place your cylinder on top, trace around it, and cut it out. Score and slip the bottom of the cylinder and the edge of the base, then compress them together firmly. -
Smooth the Rim:
Use a damp sponge or chamois to smooth the top rim. It should be rounded and soft, not sharp.
Troubleshooting: Warping
If the cylinder warps while drying, keep the PVC pipe inside for the first few hours of drying to help it hold the circular shape.
Step 3: Decoration and Firing
-
Bisque Fire:
Let the vase dry slowly under plastic to prevent warping. Once bone dry, bisque fire it to Cone 04. -
Apply Underglaze Transfers:
Cut out your floral underglaze transfers. Hold a transfer face-down against the bisque ware and gently brush the back with a damp sponge until the paper slides off, leaving the image behind. -
Alternative Decoration:
If painting by hand, use diluted underglazes in dusty pink, sage green, and ochre to hand-paint delicate stems and blooms directly onto the bisque. -
Glazing:
Dip or brush the entire piece with a satin or matte clear glaze. The matte finish is crucial for preserving that fabric-like texture we created earlier. -
Final Fire:
Glaze fire the piece to the temperature recommended for your specific clay body (typically Cone 5 or 6 for stoneware). -
Arrange the Flowers:
Once cool, fill with dried baby’s breath, yarrow, and wild grasses to complete the rustic, meadow-inspired aesthetic.
This personalized vase is sure to be a cherished centerpiece for years to come


Handwritten Recipe Pie Dish
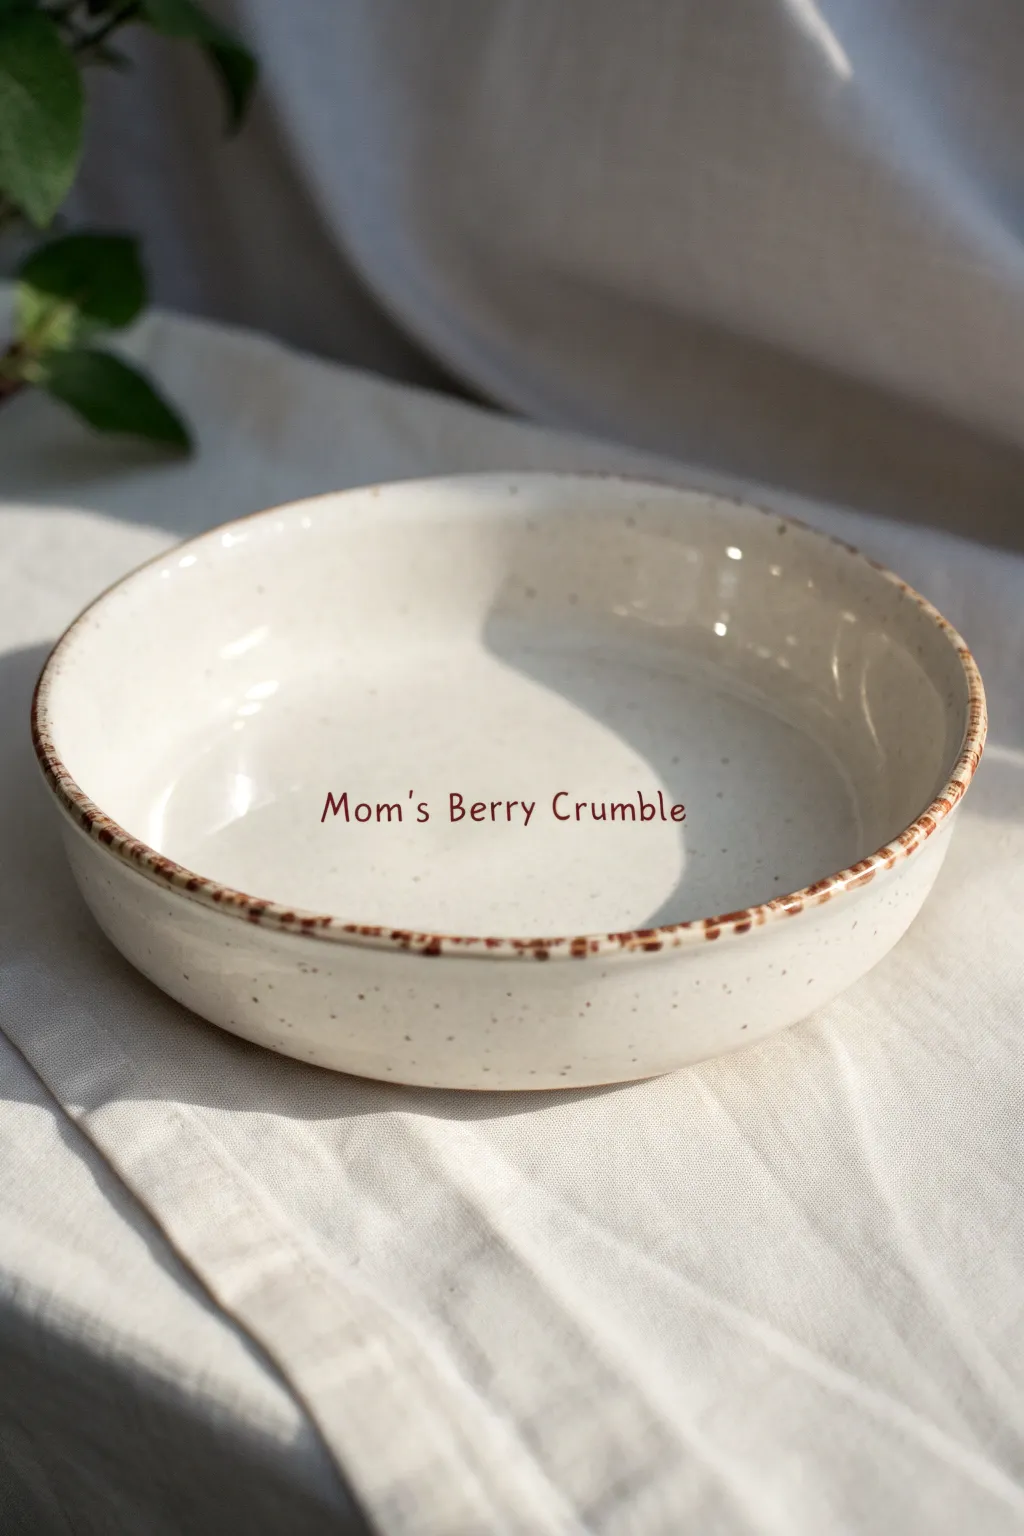
Immortalize a family favorite by inscribing your mother’s signature dish name directly into the clay of a beautiful, specked ceramic pie plate. This shallow baking dish features a rustic, iron-stained rim and a creamy glaze that lets the natural clay speckles shine through.
Detailed Instructions
Materials
- Speckled stoneware clay (approx. 3-4 lbs)
- Potter’s wheel
- Throwing tools (sponge, wire cutter, ribs)
- Trimming tools
- Small letter stamps or needle tool
- Underglaze (Dark Brown or Deep Red-Brown)
- Small detail brush
- Iron oxide wash or dark brown underglaze (for rim)
- Transparent or semi-opaque creamy white glaze
- Kiln
Step 1: Throwing the Form
-
Center the clay:
Start by wedging your speckled stoneware clay thoroughly to remove air bubbles. Slam it onto the wheel head and center it low and wide, similar to a plate but with slightly more mass. -
Open the floor:
Open the clay all the way down to the bat, leaving about a 3/8-inch thickness for the floor. Since this is a baking dish, you want a sturdy bottom. -
Compress the base:
Use a flat wooden rib to compress the floor significantly. Go back and forth several times; this compression is crucial to prevent cracking during firing, especially for flat cookware. -
Pull the walls:
Pull the walls up, keeping them relatively thick (about 1/4 inch). Aim for a height of about 2 to 2.5 inches. -
Shape the dish:
Gently flare the walls outward for a slight curve, creating an open bowl shape suitable for pies or crumbles. Clean up the rim with a chamois. -
Wire off:
Using your wire tool, cut the pot from the bat and set it aside to dry to a leather-hard state.
Pro Tip: Compression
For ovenware, compress the bottom not just while throwing, but again after trimming. A wooden rib pressed firmly against the inside floor helps align clay particles to resist thermal shock.
Step 2: Trimming and Inscribing
-
Trim the foot:
Once leather hard, center the inverted dish on the wheel. Trim a wide, low foot ring that offers plenty of stability for the oven. -
Plan the text:
Turn the dish right-side up. Lightly mark the center or your desired text placement area with a soft pencil (the graphite will burn off later). -
Stamp the name:
Press your small letter stamps gently but firmly into the floor of the pot to spell ‘Mom’s Berry Crumble’. Support the underside with your hand to prevent warping. -
Fill the letters:
Take a tiny detail brush and fill the indented letters with dark brown underglaze. Don’t worry about being perfectly neat inside the lines just yet. -
Clean the text:
Let the underglaze dry slightly, then wipe the surface gently with a damp sponge. This removes the excess surface color while leaving the pigment trapped deep inside the stamped letters. -
Bisque fire:
Allow the piece to dry completely before loading it into the kiln for a bisque firing.
Step 3: Glazing the Rim and Surface
-
Wax resist (optional):
If you want the letters to remain crisp and unclouded by glaze, apply a tiny amount of wax resist over the stamped text. -
Apply the rim oxide:
Dip a sponge or brush into iron oxide wash (or a dark brown stain). Dab it specifically onto the rim of the dish to create that rustic, toasted edge look. -
Wipe the rim back:
I like to wipe the rim slightly with a clean sponge so the oxide stains the clay body rather than sitting on top as a thick layer. -
Glaze the interior:
Pour a transparent or semi-opaque creamy white glaze into the interior. Swirl it to coat the bottom and walls evenly, then pour out the excess. -
Glaze the exterior:
Dip the exterior into the same glaze, or brush it on if you prefer. Ensure the foot ring is wiped clean. -
Final fire:
Load the glazed dish into the kiln for the final glaze firing, usually Cone 6 or 10 depending on your clay body specifications.
Level Up: Handwritten
Skip the stamps! Scan your mom’s actual handwriting from an old recipe card, transfer it to the leather-hard clay using carbon paper, and carve the letters manually for a truly sentimental gift.
Present this custom bakeware with a printed recipe card for a gift she will treasure for years

The Complete Guide to Pottery Troubleshooting
Uncover the most common ceramic mistakes—from cracking clay to failed glazes—and learn how to fix them fast.
Tea Lover Spoon Rest Set
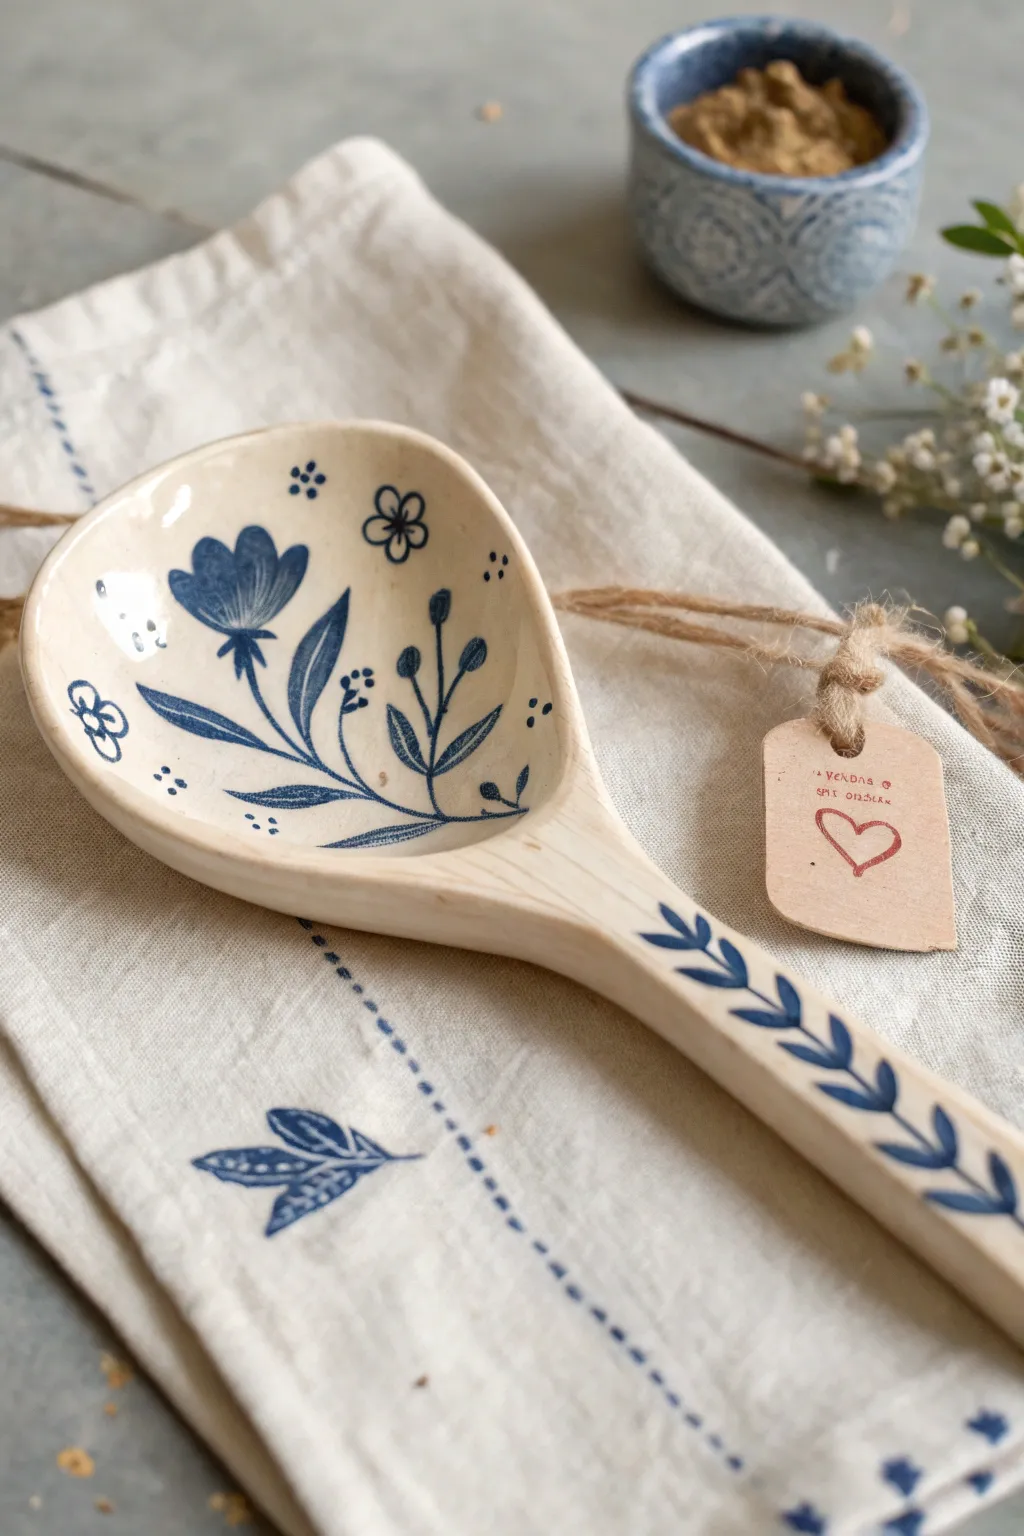
This charming ceramic spoon rest mimics the shape of a classic wooden serving spoon but features delicate cobalt blue floral motifs on a creamy white glaze. It’s a thoughtful, functional piece of art that brings a touch of vintage farmhouse elegance to any tea lover’s kitchen.
Step-by-Step
Materials
- White stoneware clay body
- Rolling pin and guide sticks (1/4 inch)
- Spoon template (cardstock or paper)
- Pottery knife or needle tool
- Rib tool (smooth wood or rubber)
- Sponge
- Large foam mold or balled-up newspaper
- Cobalt blue underglaze
- Fine detail brush (liner brush)
- Clear transparent glaze
- Kiln (or access to a firing service)
Step 1: Shaping the Clay
-
Roll the slab:
Begin by wedging your white stoneware clay to remove air bubbles. Roll it out into a smooth, even slab using 1/4 inch guide sticks to ensure uniform thickness. -
Cut the shape:
Place your spoon template on top of the slab. Using a needle tool or fettling knife, carefully trace around the template to cut out the spoon shape. Remove excess clay. -
Smooth the edges:
Use a damp sponge to soften the sharp cut edges. gently round them over so the finished piece will be pleasant to hold. -
Form the bowl:
Gently press the wide, oval part of the cut slab into a shallow foam mold to create the classic spoon bowl curve. If you don’t have a mold, you can drape it over a small mound of fabric or newspaper. -
Create the handle:
While the bowl is supported, slightly shape the handle. You want it to look sturdy but retain a slight curve that flows naturally from the bowl. -
Refine surfaces:
Run a soft red rib over the surface of the clay to compress it and remove any canvas texture from rolling. A smooth canvas is crucial for painting later. -
Allow to dry:
Cover the piece loosely with plastic and let it dry slowly to the leather-hard stage. This ensures it holds its shape while you paint.
Brush Technique
For crucial fine lines, mix a tiny drop of water into your underglaze on a palette. This improves flow and prevents the brush from dragging on the raw clay.
Step 2: Decoration & Glazing
-
Sketch the design:
Once leather hard, lightly sketch your floral design using a dull pencil. The pencil marks will burn off in the kiln, so don’t worry about mistakes. -
Paint the main flower:
Dip a fine liner brush into cobalt blue underglaze. Paint the large, tulip-like flower in the upper left of the bowl, starting with the outline and gently filling in the petals. -
Add stems and leaves:
Using a steady hand, draw the sweeping curved stem connecting the flower to the base. Add elongated leaves branching off the main stem, varying the pressure on your brush to create thick-to-thin lines. -
Detail accents:
Add small whimsical touches like the four-petal flower on the right, floating dots, and tiny circular clusters near the edges to fill negative space. -
Decorate the handle:
Extend the design down the handle by painting a repeating vine or leaf pattern. Simple V-shaped leaves running down the center created a cohesive look. -
Bisque fire:
Allow the piece to dry completely until it is bone dry. Fire it in the kiln to cone 04 (or your clay’s specific bisque temperature). -
Apply clear glaze:
Wipe the bisqued piece with a damp sponge to remove dust. I prefer to dip the entire spoon into a clear, glossy glaze, but brushing on three even coats works well too. -
Final wipe:
Clean the foot or the underside of the spoon where it will sit on the kiln shelf to prevent it from sticking. -
Glaze fire:
Fire the piece again to the maturity temperature of your clay and glaze (typically cone 5 or 6 for stoneware).
Go Botanical
Instead of painting, impress real herbs (like rosemary or thyme) into the soft clay, remove them, and fill the impression with watered-down underglaze for a fossil look.
Wrap this lovely spoon rest with a matching linen napkin for a gift that will be cherished every tea time
Kids’ Handwriting Planter
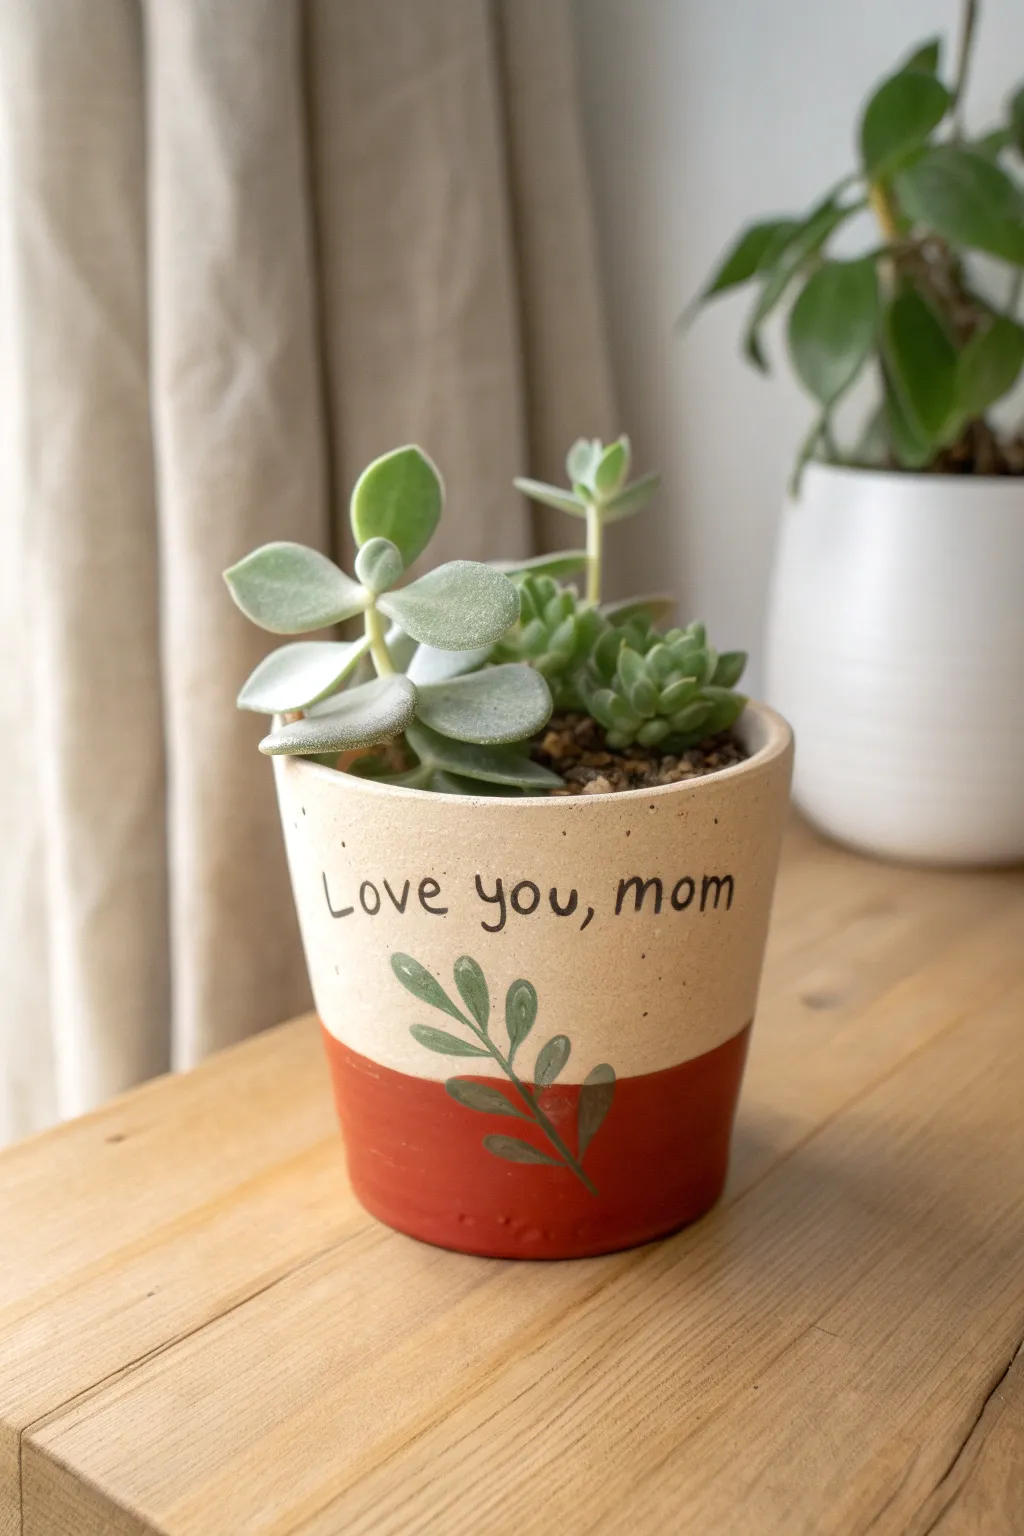
Immortalize a sweet sentiment with this charming two-tone planter featuring simple botanical art and personalized handwriting. The contrast between the speckled cream glaze and the warm terracotta base creates a modern, earthy look that perfectly frames lush succulents.
How-To Guide
Materials
- Bisque-fired ceramic pot (small cylinder shape)
- Glaze tape or masking tape (1/2 inch or thinner)
- Speckled cream or oatmeal ceramic glaze
- Terracotta or rust-orange underglaze
- Dark brown or black underglaze pencil or fine liner bottle
- Sage or olive green underglaze
- Clear transparent glaze (dipping or bushing)
- Soft fan brush
- Small detail brush (round size 2 or 4)
- Sponge
- Water bowl
- Succulents and potting soil (for finishing)
Step 1: Preparation & Masking
-
Clean the bisque:
Start by wiping down your bisque-fired pot with a slightly damp sponge. This removes any kiln dust or oils from handling that might prevent the glaze from adhering properly. -
Mark the horizon line:
Decide where you want the color break to happen. On this pot, it’s about one-third of the way up from the bottom. Lightly mark this height with a pencil if needed. -
Apply the tape:
Run a strip of glaze tape or flexible masking tape around the circumference of the pot at your marked line. Press down firmly, especially at the edges, to ensure a crisp, clean line between the two colors.
Tape Trick
Burnish the edge of your tape with a fingernail or credit card before painting. This seals the gap and prevents the underglaze from bleeding underneath.
Step 2: Base Color Application
-
Paint the bottom section:
Using a soft brush, apply the terracotta or rust-orange underglaze to the exposed bottom section of the pot beneath the tape tape. -
Layer the bottom color:
Apply two to three coats of the rust color to ensure solid, opaque coverage. Let the underglaze dry to the touch—usually just a few minutes—between each coat. -
Apply the top glaze:
Now focus on the upper section. Apply your speckled cream glaze to the area above the tape. Make sure to brush downwards slightly over the tape edge to ensure full coverage right up to the line. -
Repeat top coats:
Apply a total of three coats of the cream glaze. The speckles often only show up well with multiple layers, so don’t skimp here. -
Remove the tape:
Once the final coat is dry to the touch, carefully peel away the tape. You should have a distinct line separating the cream top and rust bottom. If there are jagged edges, gently smooth them with a clean, damp fingertip.
Level Up: Real Handwriting
Have a child write the message on paper first. Transfer it to the pot using carbon paper for an exact replica of their unique handwriting script.
Step 3: Detailing & Lettering
-
Draft the text:
Use a regular graphite pencil to lightly sketch ‘Love you, mom’ on the cream section. Don’t worry about mistakes; the graphite will burn off in the kiln. -
Write the message:
Go over your pencil lines with a dark brown or black underglaze pencil. Alternatively, use a fine liner applicator bottle for a slightly raised texture, keeping your hand steady. -
Sketch the vine stem:
Using a small detail brush loaded with sage green underglaze, paint a thin, curving line starting from the color divide and reaching upwards toward the text. -
Add the leaves:
Paint small, teardrop-shaped leaves extending from the stem. I like to vary the angles slightly to make the plant look more natural. -
Refine the leaves:
If you want a bit of depth, add a second coat of green just to the centers of the leaves, leaving the edges slightly translucent.
Step 4: Finishing & Firing
-
Dry completely:
Allow the entire piece to dry for several hours or overnight to ensure all moisture has evaporated from the underglaze layers. -
Apply clear glaze:
Dip the entire pot into a clear transparent glaze, or brush on two even coats. This seals the underglaze work and gives the finished piece a glossy, durable surface. -
Wipe the foot:
Use a wet sponge to wipe away any glaze from the very bottom of the pot (the footring) to prevent it from sticking to the kiln shelf. -
Fire the piece:
Fire the pot in a kiln according to the clay and glaze specifications (typically Cone 5 or 6 for stoneware). -
Plant:
Once cool, fill with a small amount of potting soil and arrange your clusters of succulents, pressing them gently into place.
This personalized planter is now ready to serve as a daily reminder of love and growth


What Really Happens Inside the Kiln
Learn how time and temperature work together inside the kiln to transform clay into durable ceramic.
Memory Tile Photo Frame
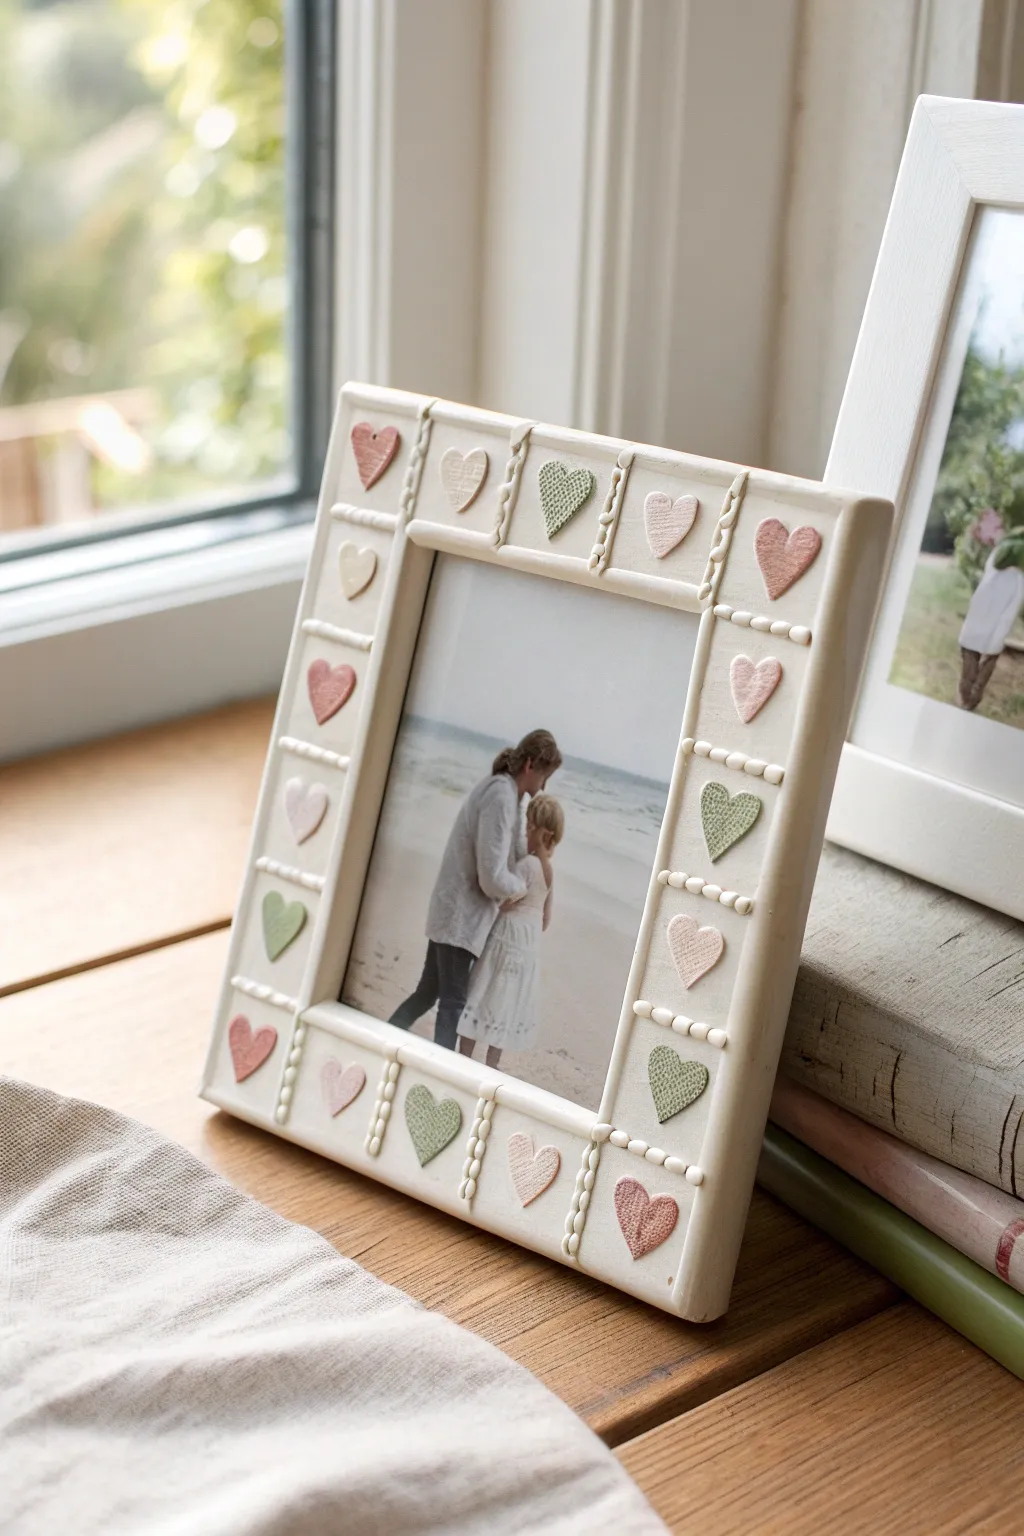
This charming slab-built frame features a perimeter of delicate raised hearts and textured bead dividers, creating a sweet, nostalgic border for a cherished photo. The soft cream glaze paired with pastel heart accents gives it a timeless, handmade warmth perfect for Mother’s Day.
Detailed Instructions
Materials
- White earthenware or stoneware clay slab (approx. 1/4 inch thick)
- Square paper template (approx. 8×8 inches)
- Inner square template for photo opening (4×4 inches)
- Needle tool or fettling knife
- Small heart-shaped cookie cutters or stamps
- Textured fabric or lace (optional for heart texture)
- Slip and scoring tool
- Underglazes in pastel pink, mint green, and cream
- Clear or white satin glaze
- Rolling pin and guide strips
- Sponge and water
- Cardboard or foam board for support while drying
Step 1: Constructing the Base Frame
-
Roll the slab:
Begin by rolling out your clay on a canvas surface to a consistent 1/4 inch thickness using guide strips to ensure it’s perfectly even. -
Cut the outer shape:
Place your larger square paper template onto the slab. Using a needle tool, cut vertically around the edges to create a clean square base. -
Create the window:
Center your smaller square template on the clay slab. Carefully cut out the inner window opening. Save the cutout clay for making the decorative hearts later. -
Smooth the edges:
Using a slightly damp sponge, soften the sharp cut edges of both the outer border and the inner window. Run your finger along the rim to compress the clay particles, which helps prevent future cracking. -
Add a backing ledge (optional):
If you want the glass and photo to sit recessed, attach thin strips of clay to the back of the window opening to create a ‘rabbet’ or ledge, scoring and slipping them securely in place.
Texturing Tip
Press a piece of burlap or linen into the damp hearts before attaching them. The glaze will break over the subtle weave pattern beautifully.
Step 2: Sculpting the Decorations
-
Make the heart tiles:
Roll a thinner piece of clay (about 1/8 inch). If you want texture on the hearts, press a piece of lace or textured fabric into the clay before cutting. Use your small heart cutter to punch out approximately 12-16 hearts. -
Create the dividers:
Roll very thin coils of clay to create the rope-like dividers. You can twist two tiny coils together or simply press a serrated tool into a single coil to create the beaded texture shown in the image. -
Determine spacing:
Lay the hearts and divider coils onto the frame without adhering them yet. Arrange them to ensure equal spacing, adjusting the position until the rhythm looks balanced.
Warping Woes?
Flat frames love to warp. Dry it weighted down: place a sheet of paper on the frame, then a flat board, and a light weight on top.
Step 3: Assembly and Finishing
-
Attach the dividers:
One by one, score the frame surface and the back of the clay coils. Apply a dab of slip and press the vertical dividers down firmly to delineate the square sections. -
Attach the hearts:
Score and slip the back of each heart and press them gently into the center of the framed sections. Be careful not to flatten the texture you added earlier. -
Clean up detail work:
Use a small, dry brush to whisk away any clay crumbs or slip that may have squished out during attachment. Refine the little beaded textures on the coils if they got smudged. -
Slow drying:
Place the frame on a piece of drywall or strictly flat board. Cover it loosely with plastic to let it dry very slowly, which is crucial to keep the flat shape from warping. -
Bisque fire:
Once bone dry, fire the piece to cone 04 (or your clay body’s bisque temperature). -
Apply underglaze:
Paint the hearts with your pastel underglazes—alternating pinks, subdued greens, and creams. I like to use a very small detail brush here to avoid getting color on the main frame. -
Glaze application:
Apply a coat of satin white or clear glaze over the entire piece. If you want the ‘beads’ to pop, wipe the glaze back slightly on the high points with a damp sponge. -
Final firing:
Stilt the frame carefully in the kiln and glaze fire to the appropriate temperature for your materials.
Once fired, simply tape your photo to the back or glue on a backing board and enjoy your beautiful handmade keepsake