Whenever you want something relaxing and creative, simple clay art is my go-to because a few basic shapes can turn into something adorable really fast. Grab whatever you’ve got—air dry clay, polymer clay, or traditional clay—and let’s make some easy little projects you’ll actually want to keep out on display.
Flat Charm Tags With Cute Faces
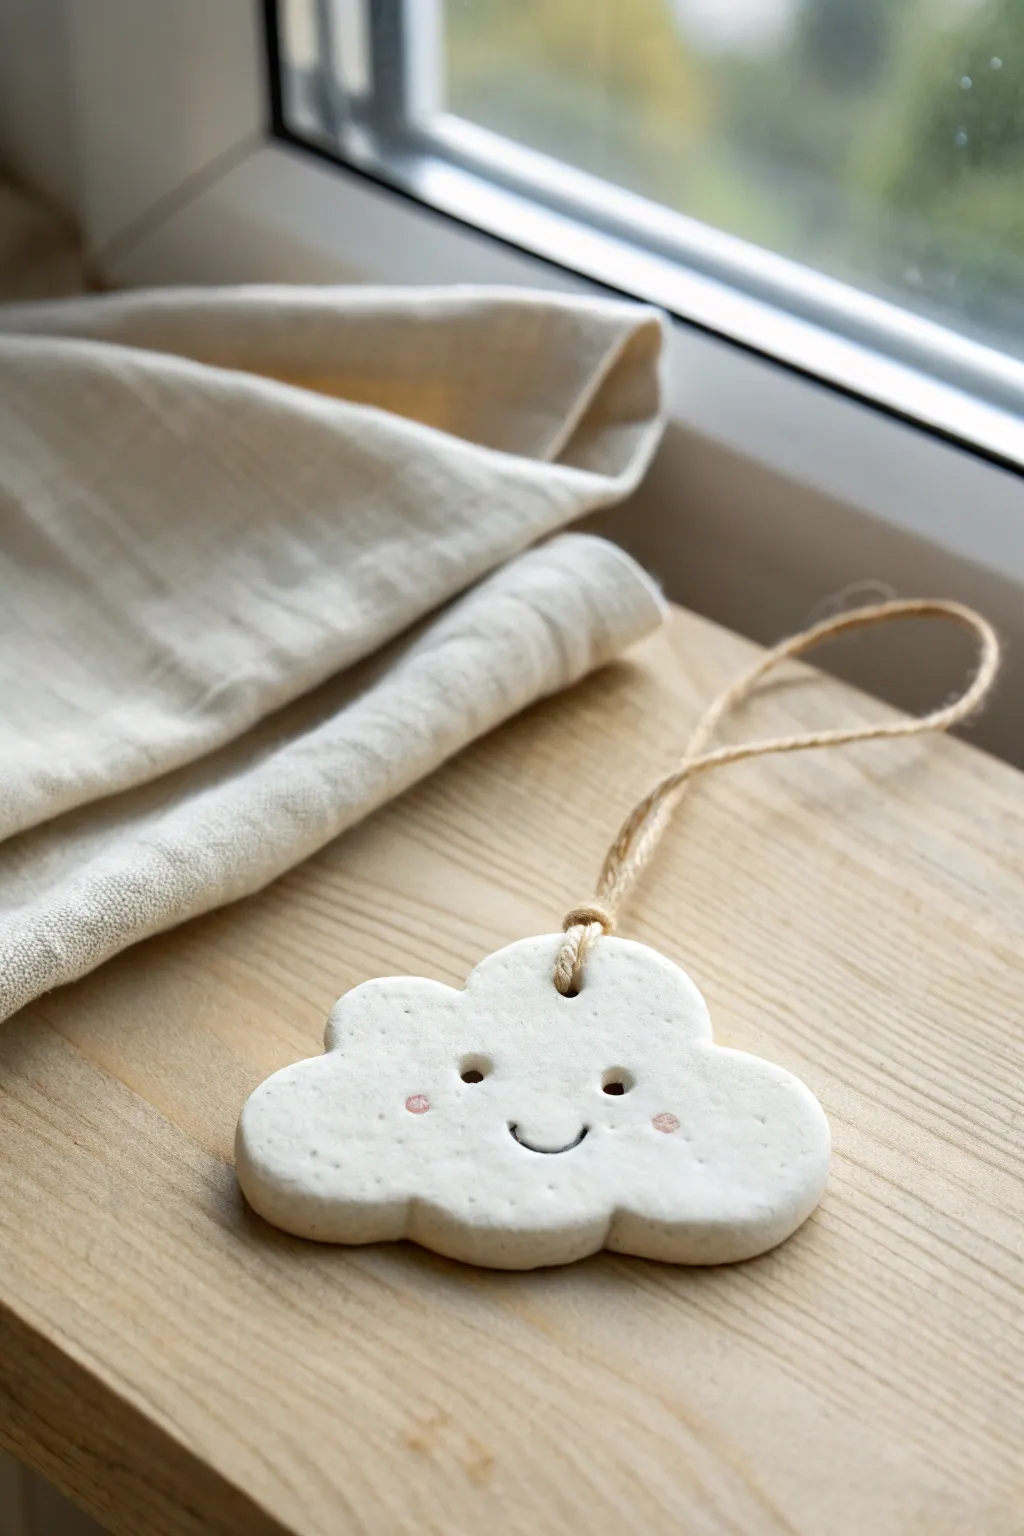
Brighten up any corner or gift package with this adorable, minimalistic cloud charm. Its gentle speckled texture and sweet expression make it a perfect beginner project that radiates cheerful simplicity.
Step-by-Step
Materials
- White air-dry clay (or polymer clay)
- Rolling pin
- Cloud-shaped cookie cutter (approx. 3-4 inches wide)
- Parchment paper or craft mat
- Straw or cocktail stick
- Small round tool or drill bit (for eye holes)
- Fine-point black permanent marker or acrylic paint
- Pink chalk pastel or pink acrylic paint
- Small cotton swab or fine brush
- Jute twine or rustic string
- Fine-grit sandpaper
Step 1: Shaping the Cloud
-
Prep the Clay:
Begin by taking a handful of white air-dry clay. Knead it in your hands for a minute until it feels soft, pliable, and free of cracks. Warm clay is much easier to work with. -
Roll it Out:
Place the clay onto a sheet of parchment paper. Use your rolling pin to flatten the clay to an even thickness of about 1/4 inch (6mm). You want it sturdy but not too heavy. -
Cut the Shape:
Press your cloud-shaped cookie cutter firmly into the rolled clay. Wiggle it slightly to ensure a clean cut, then lift the cutter away. -
Release the Shape:
Peel away the excess clay from around your cloud shape. If the edges look a bit ragged, dip your finger in a tiny bit of water and gently smooth them down.
Step 2: Adding Features & Texture
-
Create the Texture:
To achieve that lovely stone-like speckled look seen in the photo, you can gently tap the surface with a stiff toothbrush or a crumpled ball of aluminum foil. Just a light touch adds great character. -
Punch the Hanging Hole:
Use a straw to punch a clean hole near the top center of the cloud. Twist the straw as you push through to get a neat circle, then push the clay plug out of the straw. -
Make the Eyes:
Using a smaller round tool, like the back of a paintbrush or a large drill bit, press two indentations for the eyes. Don’t go all the way through; just create deep, distinct sockets. -
Dry the Charm:
Let the clay dry according to the package instructions. For air-dry clay, this usually takes 24-48 hours. Flip it over halfway through the drying process to prevent curling. -
Sand the Edges:
Once fully dry and hard, use a piece of fine-grit sandpaper to briefly smooth any sharp or rough edges along the perimeter of the cloud.
Cracking Up?
If small cracks appear while drying, don’t panic. Mix a tiny bit of fresh clay with water to make a paste and smooth it over the cracks with your finger.
Step 3: Bringing it to Life
-
Draw the Smile:
Use a fine-point black permanent marker to draw a small, U-shaped smile between the eyes. Keep the line thin and deliberate. -
Paint the Cheeks:
For the rosy cheeks, I like to use a little trick: scrape some pink chalk pastel into a powder. Pick up the powder with a cotton swab or dry brush. -
Apply the Blush:
Gently dab the pink powder onto the clay cheeks, just outside the smile line. If you don’t have pastels, a tiny dot of watered-down pink acrylic paint works too. -
Seal (Optional):
If this will be handled often, apply a light coat of matte varnish or Mod Podge to protect the marker and pastel. -
Prepare the Hanger:
Cut a piece of jute twine about 8 inches long. Fold it in half to create a loop at one end. -
Attach the twine:
Thread the folded end of the loop through the hole in the cloud from front to back. Pull the loose ends through the loop and tighten gently to create a cow hitch knot. -
Tie it Off:
Knot the two loose ends of the twine together at the top to complete the hanger loop.
Pepper Texture Trick
For a natural speckled look without painting, knead a pinch of ground black pepper or dried tea leaves directly into the wet white clay before rolling.
Hang your cheerful little cloud by a window to catch the light and start your next clay adventure


Happy Little Magnets

Bring a dose of dopamine to your kitchen with these impossibly cute clay magnets. Featuring classic smiley faces, sweet hearts, and twinkling stars in a soft pastel palette, this project is perfect for using up small scraps of air-dry or polymer clay.
How-To Guide
Materials
- Air-dry clay or polymer clay (white)
- Acrylic paints (pastel yellow, mint green, peach, baby pink, soft orange)
- Rolling pin
- Small cookie cutters (circle, heart, star)
- Fine grit sandpaper (optional)
- Fine-tip black permanent marker or black acrylic paint pen
- Strong craft glue (E6000 or similar)
- Small round magnets
- Gloss or matte varnish (optional)
- Wax paper or craft mat
Step 1: Prepping the Shapes
-
Condition the clay:
Begin by taking a chunk of your white clay and kneading it in your hands until it becomes warm, pliable, and free of cracks. If using air-dry clay, keep a small bowl of water nearby to smooth out any dry edges. -
Roll it out:
Place the clay on a sheet of wax paper or a dedicated craft mat. roll it out evenly until it is approximately 1/4 inch thick. You want them thick enough to be durable but not so heavy they slide down the fridge. -
Cut the circles:
Use a small circle cutter (about 1.5 inches in diameter) to punch out several rounds. These will become your classic smiley faces. -
Cut the hearts:
Press your heart-shaped cutter into the clay to create a few romantic shapes. Try to keep the edges clean by lifting the cutter straight up. -
Cut the stars:
Finally, cut out a few star shapes. If the points of the stars get stuck or look ragged, gently smooth them with your fingertip while the clay is still wet. -
Smooth the edges:
Dip your finger in a tiny bit of water (for air-dry) or baby oil (for polymer) and run it along the cut edges of every shape to round them off slightly. This gives that finished, professional look.
Step 2: Color & Character
-
Let them dry or bake:
If using air-dry clay, set the shapes aside in a flat, dry place for 24-48 hours until fully hardened. If using polymer clay, bake according to the manufacturer’s instructions on the package and let them cool completely. -
Sand imperfections:
Once fully cured, inspect your shapes. If there are any rough spots on the edges, lightly sand them with fine-grit sandpaper until smooth. -
Paint the smileys:
Paint the circle shapes in cheerful colors like pastel yellow, mint green, and peach. I like to do two thin coats rather than one thick one to avoid brush strokes. -
Paint the hearts:
Coat the heart shapes in varying shades of pink and red. For the textured look seen in the photo on some hearts, you can dab the wet paint with a crumpled piece of paper towel before it dries. -
Paint the stars:
Finish by painting the stars. A soft orange, muted yellow, or mint green works beautifully here. Let all paint dry completely. -
Draw the faces:
Take your fine-tip black marker or paint pen. On the dry painted circles (and maybe a heart or two), draw two small vertical ovals for eyes and a wide, simple ‘U’ shape for the smile. -
Varnish (Optional):
To protect the paint from chipping, apply a layer of matte or gloss varnish over the front and sides of each shape.
Stamp Before You Bake
For a engraved look, use alphabet stamps to press words like ‘LOVE’ or ‘HI’ into the clay while it is still wet, then fill the impressions with paint later.
Step 3: Assembly
-
Apply adhesive:
Flip all your clay shapes over so the backs are facing up. Squeeze a pea-sized dot of strong craft glue onto the center of each shape. -
Attach magnets:
Press a small round magnet into the glue dot on each piece. Hold it there for a few seconds to ensure it grabs the surface. -
Final cure:
Allow the glue to cure fully (usually 24 hours for maximum strength) before placing them on your refrigerator.
Sparkle Upgrade
Mix a pinch of fine iridescent glitter into your acrylic paint or varnish before applying it to the stars and hearts for a subtle, magical shimmer.
Your fridge is now home to a cheerful gallery that smiles back at you every time you reach for a snack


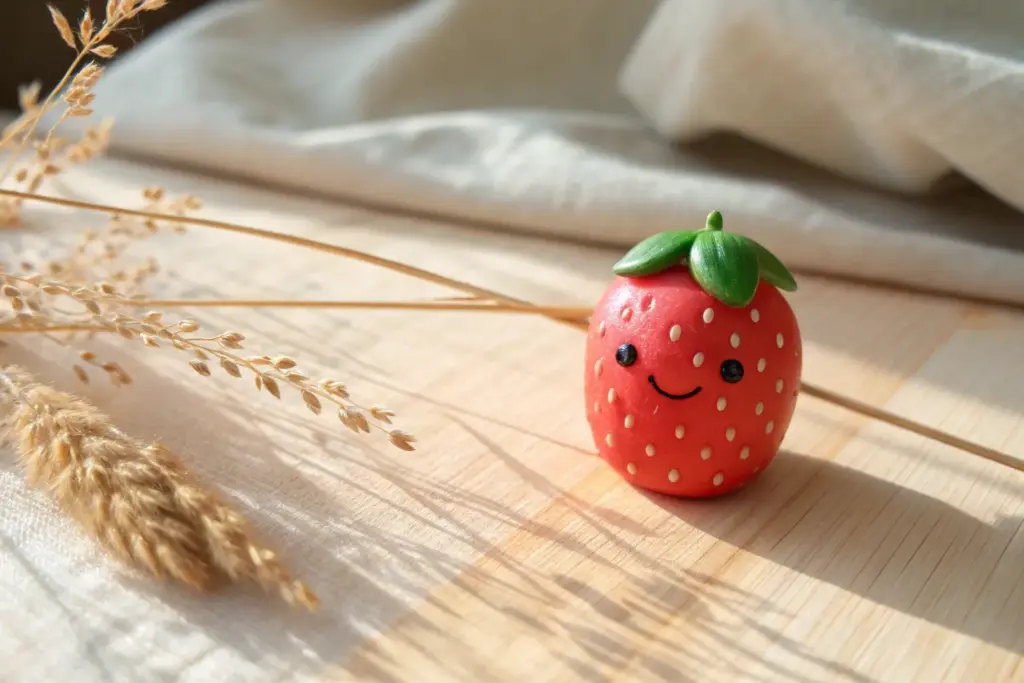
Easy Fruit Minis From Basic Shapes
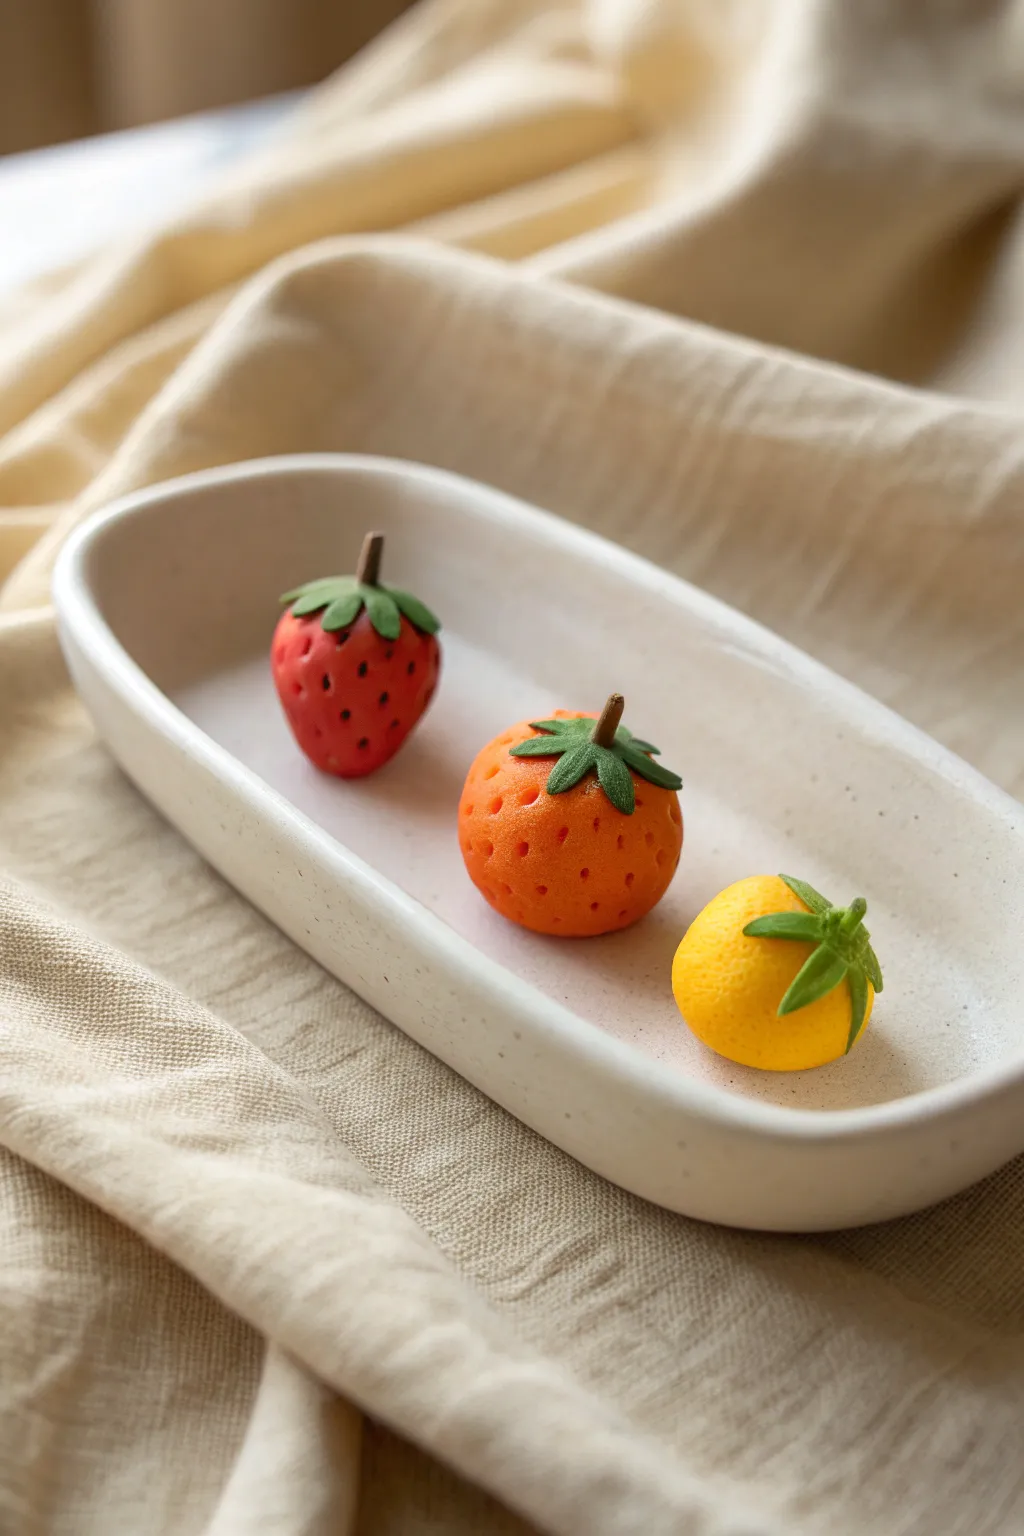
These adorable miniature fruits are crafted from smooth polymer or air-dry clay, featuring a delightful matte texture and realistic pitted details. The set includes a classic strawberry, a vibrant orange, and a sunny lemon, all united by their charmingly simplistic style.
Step-by-Step
Materials
- Polymer clay or air-dry clay (Red, Orange, Yellow, Green, Brown)
- Needle tool or toothpick
- Ball stylus tool (small)
- Small rolling pin
- Craft knife or clay blade
- Clean work surface (ceramic tile or silicone mat)
Step 1: Shaping the Fruit Bodies
-
Prepare the strawberry base:
Start with a marble-sized amount of red clay. Roll it into a smooth ball between your palms, then gently pinch one end to create a tapered, rounded cone shape resembling a plump strawberry. -
Form the orange:
Take a similar amount of orange clay and roll it into a perfect sphere. Gently press it onto your work surface just enough to create a tiny flat spot so it won’t roll away. -
Create the lemon shape:
Using yellow clay, roll another ball equal in size to the others. Roll this one slightly oblong, then gently taper the very top slightly to mimic a lemon’s shape, keeping the bottom round.
Clean Hands, Clean Clay
Baby wipes are your best friend! Clean your hands thoroughly when switching from the red or green clay to the yellow clay to avoid muddying the bright citrus color.
Step 2: Adding Texture Details
-
texture the strawberry:
Using a needle tool or toothpick, gently press small indentations all over the surface of the red cone. Angle the tool slightly upward as you press to create deeper-looking seed pockets. -
Detail the orange skin:
For the orange, you want a pitted citrus texture. Use a small ball stylus or a blunt toothpick to press random, shallow holes all over the surface. I like to vary the pressure here to make the skin look organic. -
Texture the lemon:
Repeat the texturing process on the yellow lemon, using a slightly lighter touch than on the orange so the dimples are subtler.
Step 3: Creating the Leaves & Stems
-
Prepare the green clay:
Roll out a small snake of green clay and flatten it thinly with your rolling pin. Cut out three small star-like shapes using a craft knife or a tiny star cutter if you have one. -
Attach strawberry leaves:
Place one green star shape atop the strawberry. Gently press the points down so they curve over the fruit’s shoulders. -
Attach citrus leaves:
Place the remaining green stars on the orange and lemon. For these, try pinching the tips of the leaves slightly upwards or sideways to give them a bit more life and dimension. -
Refine the connection points:
Use the tip of your tool to press the center of the leaves into the fruit body, ensuring a secure bond. -
Make the stems:
Roll a very thin snake of brown clay. Cut three tiny segments, about 2-3mm long each. -
Attach the stems:
Place a tiny brown stem into the center indentation of the green leaves on the strawberry and the orange. Press gently to secure. -
Create the lemon stem:
For the lemon, use a tiny piece of green clay instead of brown to match the fresher look often seen on lemons, attaching it to the top center of the leaves.
Sticky Fingerprints?
If your fingerprints are showing too much, lightly dust your fingertips with cornstarch before handling the raw clay. It acts as a release agent and smoothes the surface.
Step 4: Finishing Touches
-
Final inspection:
Check your fruits for any fingerprints. If you find any, you can gently buff them out with a tiny bit of baby oil on your finger, or simply embrace the handmade look. -
Flatten the bottoms:
Ensure all three fruits sit flat. If they’ve become misshapen during detailing, gently tap the bottom against your work surface once more. -
Bake or dry:
If using polymer clay, bake according to the package instructions (usually 275°F/135°C for 15-30 minutes). If using air-dry clay, leave them in a cool, dry place for 24-48 hours until hardened.
Now you have a charming set of mini fruits perfect for magnets, dollhouse decor, or just brightening up a shelf


Ball-Shape Animal Figurines
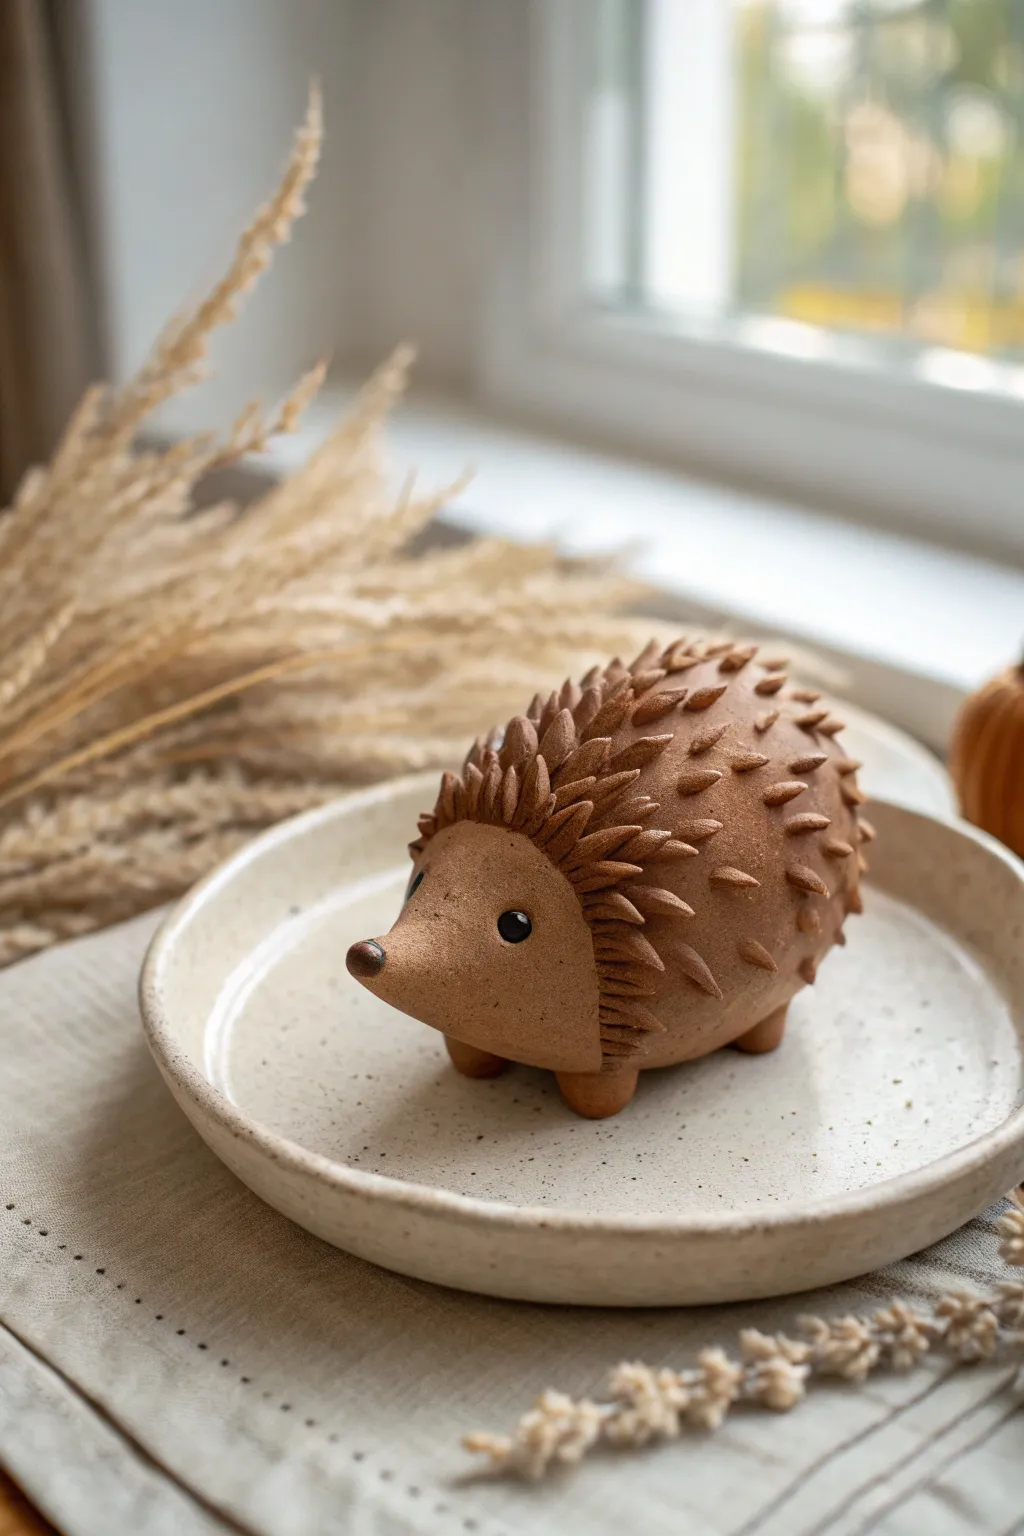
This charming little hedgehog starts as a simple sphere but gains immense personality through its textured spine detail and sweet expression. With its warm, earthen tones and tactile finish, it makes for a delightful desk companion or a cozy fall decoration.
Detailed Instructions
Materials
- Air-dry clay (terracotta or brown colored)
- Clay sculpting tools (needle tool, small spatula)
- Small bowl of water
- Rolling pin
- Black acrylic paint or small black beads (for eyes)
- Dark brown acrylic paint (optional, for shading)
- Matte varnish or sealant
Step 1: Forming the Base
-
Prepare the Clay:
Start by conditioning a fist-sized ball of terracotta-colored clay. Knead it in your hands until it is warm, pliable, and free of any air pockets. -
Shape the Body:
Roll the clay into a smooth, tight sphere. Then, gently roll one side of the sphere against your work surface to elongate it slightly into a fat egg shape. -
Define the Snout:
On the narrower end of the egg shape, gently pinch and pull the clay outward to form a slightly upturned, conical snout. Smooth the transition from the snout to the forehead so it looks natural. -
Create the Legs:
Roll four small, equal-sized balls of clay, each about the size of a marble. Flatten distinct tops onto them to create attachment points. -
Attach the Legs:
Score the underside of the body and the tops of the leg balls with a needle tool. Apply a drop of water (slip) to the scored areas and press the legs firmly onto the body. Smooth the seams with your finger or a tool so the legs look like they grow out of the body.
Loose Spines?
If individual spines keep falling off as you work, your clay might be too dry. Score the surface deeper and use more water or liquid slip to create a stronger ‘glue’ bond.
Step 2: creating the Textures
-
Mark the Face Line:
Using a needle tool, lightly sketch a curved line separating the smooth face area from where the spines will begin. This usually arcs over the forehead and down behind the cheeks. -
Make the Spine Drops:
I usually prepare a large batch of small clay teardrops ahead of time. Roll tiny bits of clay into balls, then pinch one end to make a pointy raindrop shape. You will need dozens of these. -
Start the Spines:
Begin attaching the spines at the very back of the hedgehog. Score and slip the bottom of each teardrop and press it onto the body, ensuring the point faces backward. -
Layer the Spines:
Work your way forward in rows, placing the next row of spines in the gaps between the previous row (like brickwork). This creates a dense, full coat. -
Finish the Hairline:
When you reach the line you sketched earlier around the face, place your final row of spines carefully so they frame the smooth face neatly. -
Shape the Spines:
Once all spines are attached, use a tool or your fingers to gently curve the tips slightly upward or backward to give the coat some movement and variety.
Step 3: Face and Finishing Details
-
Add the Nose:
Roll a very tiny ball of clay for the nose. Attaching it to the very tip of the snout with a bit of water usually creates a cute button effect. You can darken this clay slightly if you have pigment, or paint it later. -
Place the Eyes:
Use the rounded end of a paintbrush handle to make two small indentations for the eyes. If using beads, press them in now. If painting, wait until the clay is dry. -
Smooth the Face:
Dip your finger in a little water and very gently smooth the face area one last time to remove any fingerprints. -
Dry the Piece:
Set the hedgehog aside to dry completely. Depending on the clay thickness, this may take 24 to 48 hours. -
Paint the Details:
Once fully dry, use a fine detail brush to paint the eyes black (add a tiny white dot for a highlight if you wish) and paint the nose a chocolate brown. -
Seal:
Finish the piece with a coat of matte varnish to protect the clay and give it a finished, professional look without making it too shiny.
Ombré Effect
Before attaching spines, mix three slightly different shades of brown clay. Use the darkest at the back and lighter shades near the face for a beautiful gradient effect.
Place your little hedgehog on a shelf or among some seasonal decor to enjoy your handiwork

The Complete Guide to Pottery Troubleshooting
Uncover the most common ceramic mistakes—from cracking clay to failed glazes—and learn how to fix them fast.
Tiny Mushroom Buddies
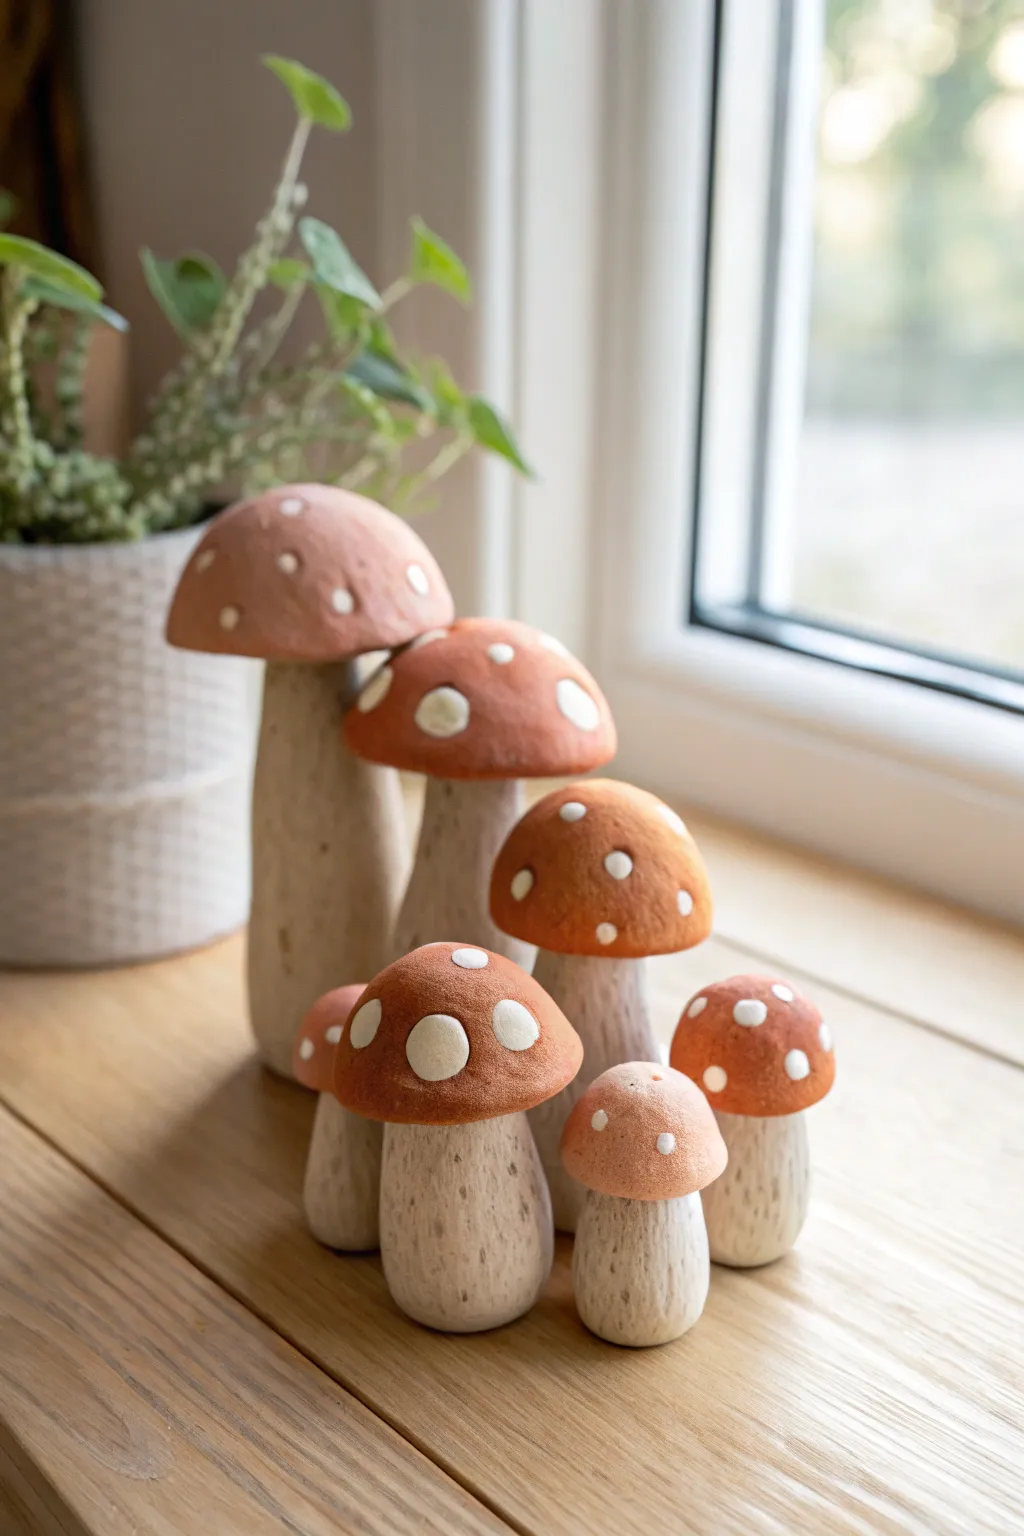
These charming woodland figures feature distinctive textured stems and warm terracotta caps speckled with white dots. Arranged in a family of varied sizes, they bring a cozy, natural touch to any windowsill or shelf display.
Step-by-Step Tutorial
Materials
- Air-dry clay (white or light grey)
- Acrylic paints (terracotta/burnt orange, antique white, dark brown)
- Small flat paintbrush
- Fine detail paintbrush
- Old toothbrush or stiff bristle brush
- Aluminum foil
- Sculpting tool or toothpick
- Matte varnish (optional)
Step 1: Shaping the Core
-
Prepare the foil cores:
Start by crumpling aluminum foil into teardrop shapes for the stems. Create varied sizes, ranging from short and stout to tall and slender. -
Cap armature:
Form separate, smaller discs of foil for the mushroom caps. Dome them slightly on top and keep the bottom flat. -
Clay preparation:
Knead your air-dry clay until it is warm and pliable. This prevents cracks from forming later. -
Covering the stems:
Roll out a sheet of clay about 1/4 inch thick. Wrap it around your foil stems, smoothing the seams together with a bit of water. -
Covering the caps:
Cover the foil cap armatures with a similar layer of clay, ensuring the top is smooth and rounded. -
Connect the parts:
Score the top of the stem and the underside of the cap with a toothpick. Add a drop of water (slip) and press the cap firmly onto the stem to join them.
Don’t Forget the Slip!
Make a ‘clay glue’ by mixing a small lump of clay with water until it’s a paste. Use this ‘slip’ anywhere you join pieces to ensure they don’t pop apart when drying.
Step 2: Texturing and Refining
-
Underside detailing:
Use your toothpick or sculpting tool to gently etch fine lines radiating from the stem on the underside of the cap, mimicking gills. -
Stem texture:
Take a stiff bristle brush or an old toothbrush and drag it vertically up and down the stems. This creates that lovely organic, wood-like texture visible in the photo. -
Check balance:
Stand each mushroom up on a flat surface. Access just the bottom by tapping it gently on the table to ensure they stand upright without tipping. -
Dry completely:
Let the mushrooms dry for at least 24-48 hours. I find turning them on their sides halfway through helps the bottoms dry evenly.
Mossy Makeover
Glue small bits of dried moss or lichen to the very base of the stems after painting to make them look freshly picked from the forest floor.
Step 3: Painting the Finish
-
Base coat the stems:
Paint the stems with an antique white or creamy beige acrylic paint. Let this layer dry fully. -
Enhancing the grain:
Create a ‘wash’ by watering down a small amount of dark brown paint. Brush this over the textured stem. -
Wipe back technique:
Immediately use a paper towel to wipe off the excess brown wash. The dark paint will stay in the vertical grooves, highlighting the texture wonderfully. -
Cap color:
Paint the tops of the caps with a matte terracotta or burnt orange acrylic. This earthy tone gives them that classic toadstool look. -
Adding spots:
Using a fine detail brush or the handle end of a paintbrush, dot on the white spots. Make them irregular sizes and slightly uneven shapes for a natural appearance. -
Final seal:
Once fully dry, apply a coat of matte varnish to protect your work without adding an artificial shine.
Group your finished mushrooms together to see your tiny forest spring to life