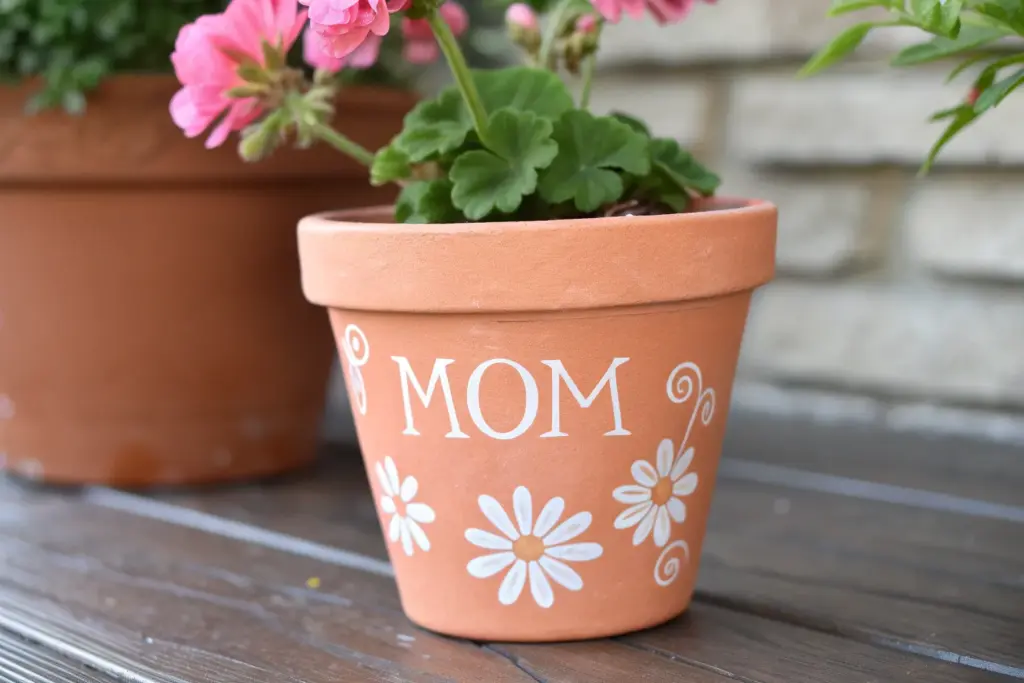
If you want a Mother’s Day gift that feels truly personal, a decorated flower pot is basically a guaranteed tear-jerker in the best way. I love these ideas because they’re sweet, doable, and they turn a simple pot and a plant into a keepsake gift for Mom.
“You Help Me Grow” Message Pot
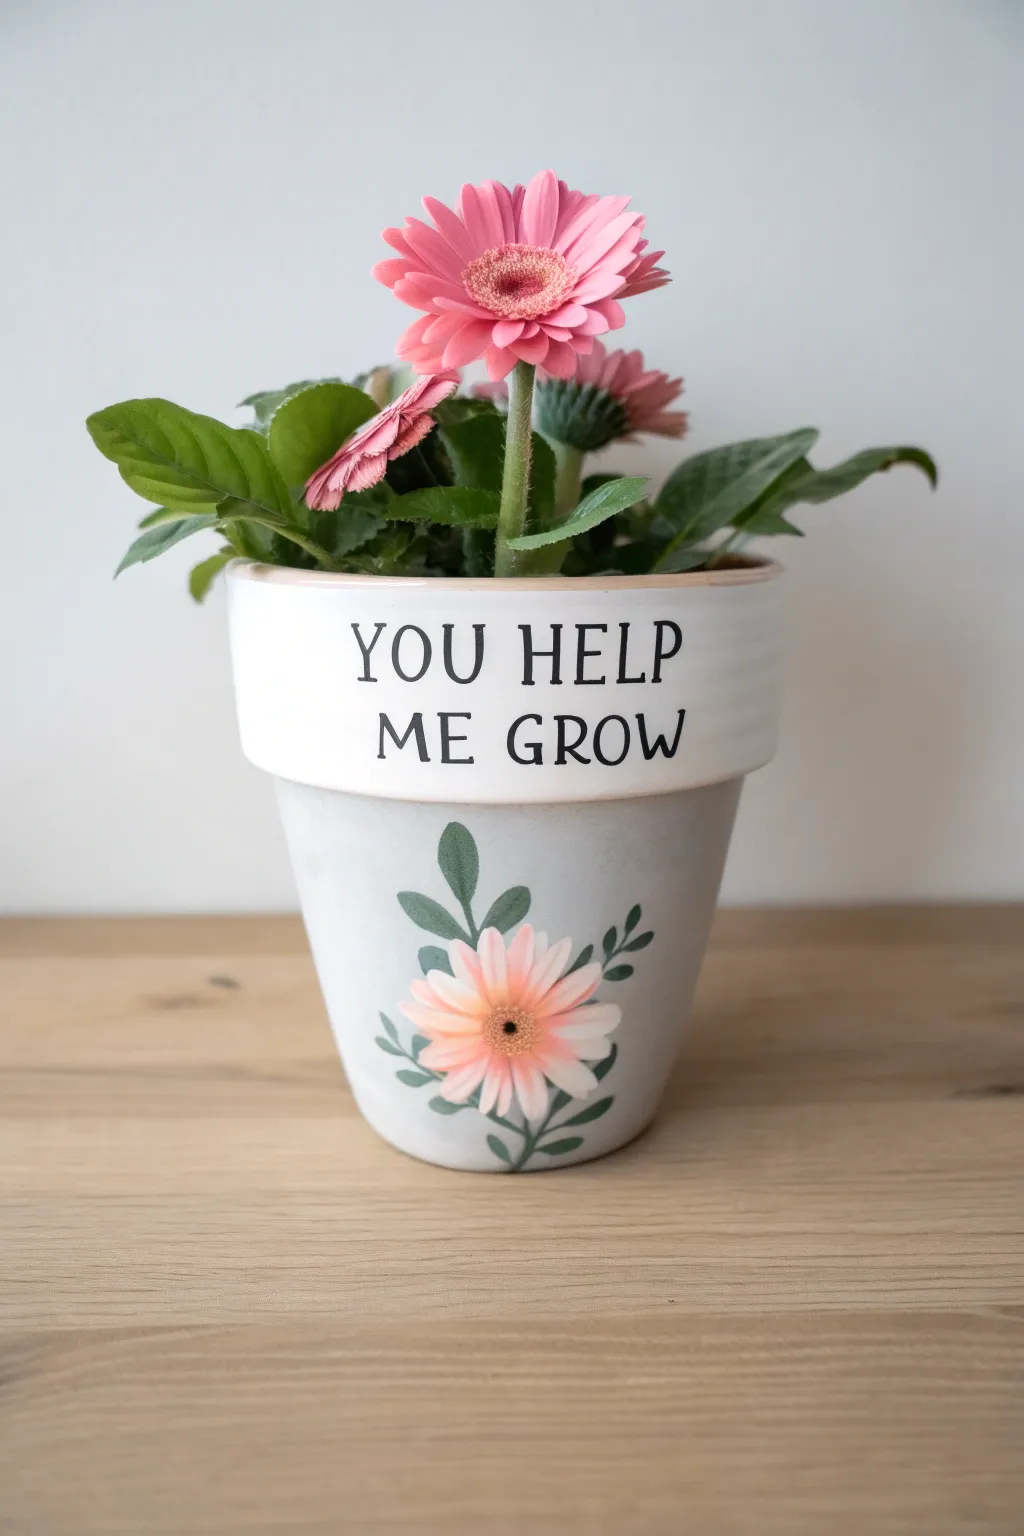
This charming planter combines a heartfelt message with a delicate floral motif, making it a perfect keepsake for Mother’s Day. The design features a crisp white rim contrasting with a soft grey base, adorned with a hand-painted daisy that echoes the real blooms inside.
Step-by-Step Tutorial
Materials
- Small terra cotta pot (approx. 4-5 inches)
- White acrylic paint (matte finish)
- Light grey chalk paint or matte acrylic
- Black acrylic paint
- Pink, orange, and green acrylic paints for the flower
- Alphabet rubber stamps (serif font)
- Fine detail paintbrushes (sizes 0 and 2)
- Flat shader brush (size 1/2 inch)
- Small round sponge dropper or cotton swab
- Matte finish spray sealant
- Pencil
Step 1: Base Preparation
-
Clean the pot:
Before starting, wipe down your terra cotta pot with a damp cloth to remove any dust or manufacturing residue. Let it dry completely so the paint adheres properly. -
Paint the rim:
Using your flat shader brush, apply a coat of white acrylic paint to the wide rim of the pot. Don’t worry about perfect opacity on the first pass; thin, even layers are best to prevent clumping. -
Layer the white:
Allow the first coat on the rim to dry for about 15 minutes. Apply a second and possibly third coat until the terracotta color is completely hidden and the white looks solid and bright. -
Paint the body:
Switch to your light grey paint. Carefully paint the entire body of the pot below the rim. Use a steady hand where the grey meets the white rim to create a crisp horizontal line. -
Smooth the finish:
I find that doing two coats of the grey gives a much smoother, clay-like finish. Let the entire pot dry for at least an hour before moving on to the decorative elements.
Step 2: Adding the Message
-
Plan exact spacing:
Lightly count out your letters for “YOU HELP ME GROW”. Mark the center point of the phrase and align it with the front center of the pot rim to ensure the text is balanced. -
Prepare the stamps:
Squeeze a small amount of black acrylic paint onto a palette or paper plate. Avoid dipping the stamp directly into the blob; instead, use a sponge or brush to dab a thin, even layer of paint onto the letter face. -
Stamp the text:
Press each letter firmly onto the white rim. Rock the stamp extremely gently—just barely—to ensure the edges transfer, but be careful not to smudge. Stamping ‘YOU HELP’ on the top line and ‘ME GROW’ on the bottom line creates a nice visual hierarchy. -
Touch up letters:
Sometimes stamps leave small gaps. Use your smallest detail brush (size 0) with a tiny amount of black paint to fill in any missing parts of the letters for a solid, printed look.
Stamp Clarity Tip
Practice stamping on a scrap piece of paper first. This helps you gauge exactly how much pressure is needed and ensures you haven’t overloaded the stamp with paint.
Step 3: Painting the Flower
-
Sketch the outline:
Using a pencil very lightly, sketch a simple daisy shape on the grey body of the pot, centered below your text. Draw a center circle and varying lengths of petals radiating outward. -
Base the petals:
Mix a soft white with a tiny drop of pink. Fill in the petal shapes using a size 2 round brush. Paint from the tip of the petal inward toward the center. -
Add petal definition:
Once the base petal color is tacky but not fully dry, drag a slightly darker pink shade from the center of the flower halfway up the petals to create depth and shadow. -
Create the center:
Dip the back end of a brush or a cotton swab into orange paint and dot it into the center of the flower. Add a tiny speck of black or dark brown in the very middle for realistic texture. -
Paint the stems:
Using a dark green paint and a fine liner brush, draw a thin, curving stem extending downward from the flower. Keep the line fluid rather than rigid. -
Add the leaves:
Paint small, simple almond-shaped leaves branching off the stem. I like to add a few loose, floating leaves near the top of the flower to fill the negative space nicely. -
Seal the work:
Once all paint is completely bone dry (give it a few hours just to be safe), take the pot to a well-ventilated area and apply a light coat of matte spray sealant to protect your artwork from water damage.
Smudged a Letter?
If a stamp smudges, wait for the black ink to dry completely. Then, carefully paint over the mistake with your white rim color, let it dry, and stamp again.
Fill your new masterpiece with soil and a bright gerbera daisy to complete the sweet sentiment


Kid Scribble Heart Pot
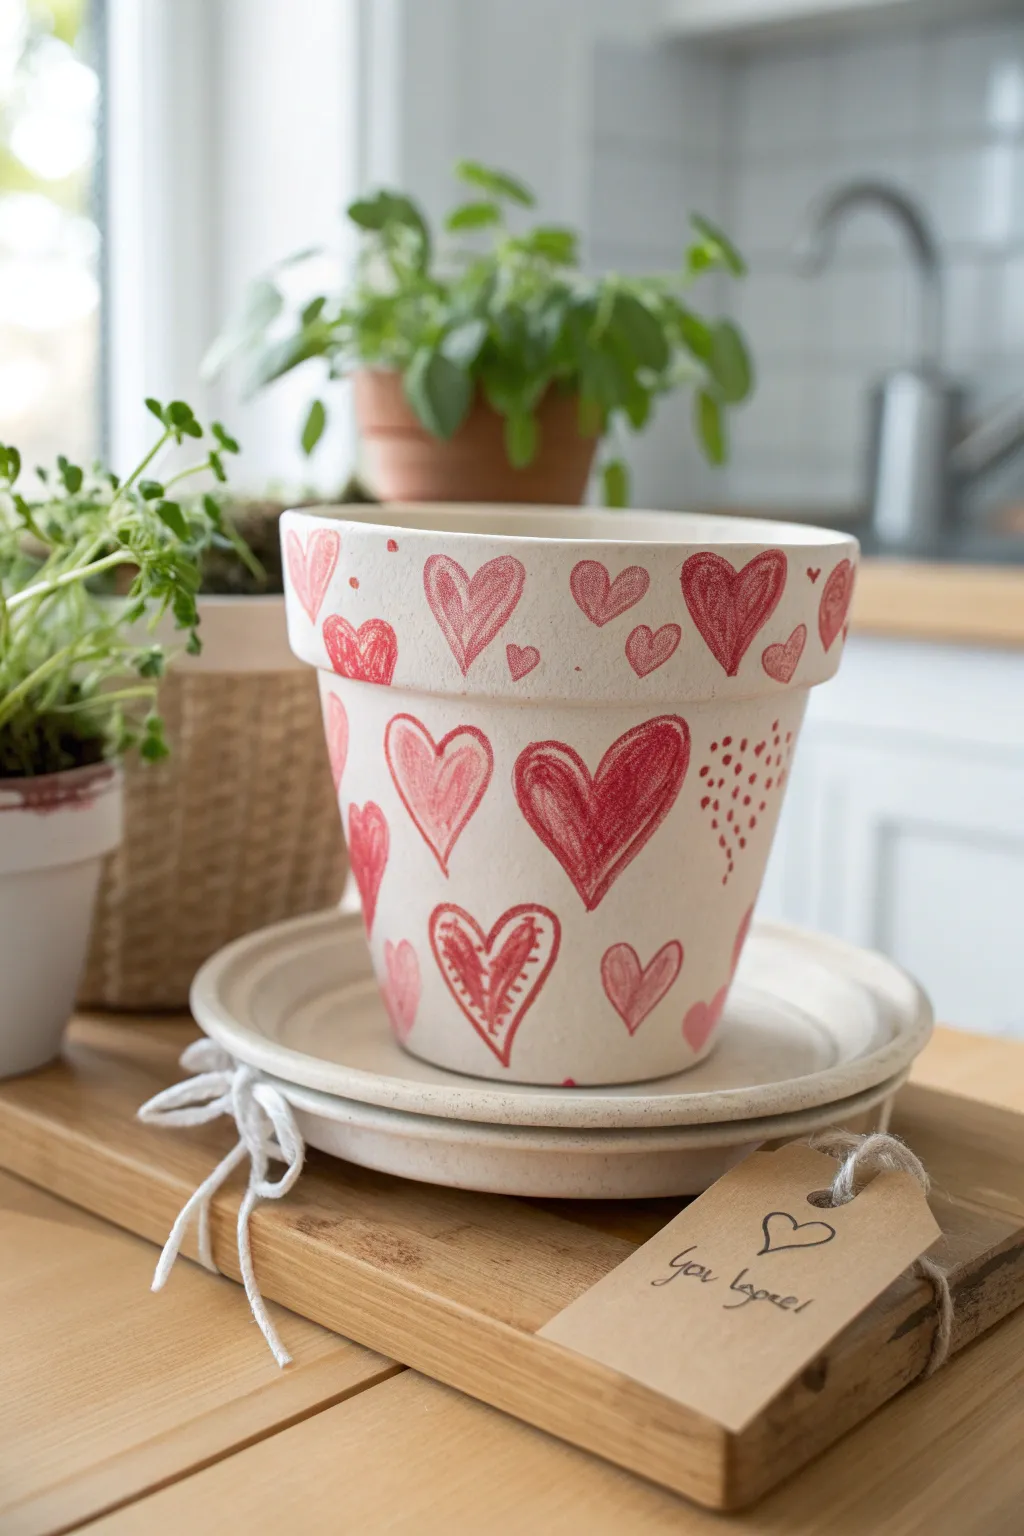
This charming project turns a simple clay pot into a heartfelt masterpiece featuring stylized, hand-drawn hearts. The deliberate scribble texture gives it a sweet, playful look that feels personal and crafted with love.
Step-by-Step Guide
Materials
- Terra cotta pot (standard 6-inch size)
- Terra cotta saucer (matching size)
- White acrylic paint (matte finish)
- Wide flat paintbrush
- Pencil
- Permanent markers or paint pens (Red, Pink, Dark Red)
- Brown kraft gift tag
- White or natural jute twine
- Black fine-tip pen
- Clear acrylic sealer spray (matte)
Step 1: Base Preparation
-
Clean the surface:
Before starting, wipe down your terra cotta pot and saucer with a damp cloth to remove any dust or loose clay particles. Let them dry completely. -
Apply the white base:
Using a wide flat brush, paint the entire exterior of the pot and both sides of the saucer with matte white acrylic paint. Don’t forget to paint the top rim of the pot. -
Second coat:
Allow the first coat to dry for about 20 minutes. Apply a second coat of white paint to ensure full coverage and a smooth, opaque finish. I like to brush in the opposite direction of the first coat to minimize texture. -
Dry thoroughly:
Set the pot aside to dry completely for at least an hour. The surface needs to be perfectly dry so your markers don’t bleed or scratch the paint.
Ink Smearing?
If your markers are smearing on the white paint, the paint is likely too glossy or not dry enough. Use ultra-matte paint and let it cure overnight.
Step 2: Drawing the Hearts
-
Plan the layout:
Lightly sketch the outline of your hearts using a pencil. Vary the sizes, placing larger hearts in the middle section and smaller hearts around the rim and base. -
Outline the main hearts:
Take your primary red paint pen or permanent marker and trace over your pencil outlines. Keep the lines somewhat loose to maintain that hand-drawn feel. -
Fill with scribbles:
Instead of coloring them in solid, use a back-and-forth scribble motion to fill the larger hearts. Vary the density—some areas can be darker, while others show a bit of the white background. -
Add variety with pink:
Switch to a pink marker for several medium-sized hearts. Use the same loose coloring technique to keep the style consistent across the pot. -
Create detailed hearts:
For a few select hearts, draw a heart shape inside the main outline and fill the space between them with little hatch marks or lines for visual interest. -
Fill the gaps:
Look for empty white spaces and add tiny solid hearts or small clusters of dots using the red marker. This makes the design look cohesive and full. -
Decorate the rim:
Add a row of small hearts or simple outlines along the thick top rim of the pot. Alternating the orientation slightly adds a whimsical touch. -
Optional accent dots:
Add tiny dot accents around some of the larger hearts to soften the edges and fill negative space.
Step 3: Finishing Touches
-
Seal the design:
Once the marker ink is fully dry, take the pot and saucer to a well-ventilated area. Spray a light, even coat of matte clear acrylic sealer over the entire surface to protect the artwork from water and fading. -
Prepare the tag:
On a brown kraft gift tag, draw a small heart near the punched hole using a black fine-tip pen. -
Write the message:
Write a sweet message like “You Loved” or “Happy Mother’s Day” in your best handwriting below the drawn heart. -
Attach the twine:
Cut a length of white or natural jute twine. Loop it through the hole in the tag. -
Wrap the saucers:
Stack your painted saucer (or two, if you painted extras) together. Take the twine from the tag and wrap it loosely around the stacked saucers or the base of the pot. -
Final assembly:
Tie the twine in a casual bow, letting the tag hang naturally. Place your favorite herb or flower inside to complete the gift.
Level Up: Hidden Messages
Paint the very bottom of the pot or inside the saucer with a secret hidden message that Mom will only see when she repots the plant
This personalized pot is ready to be filled with fresh basil or bright flowers for a gift that keeps on growing


Pastel Ombre Dip-Look Pot
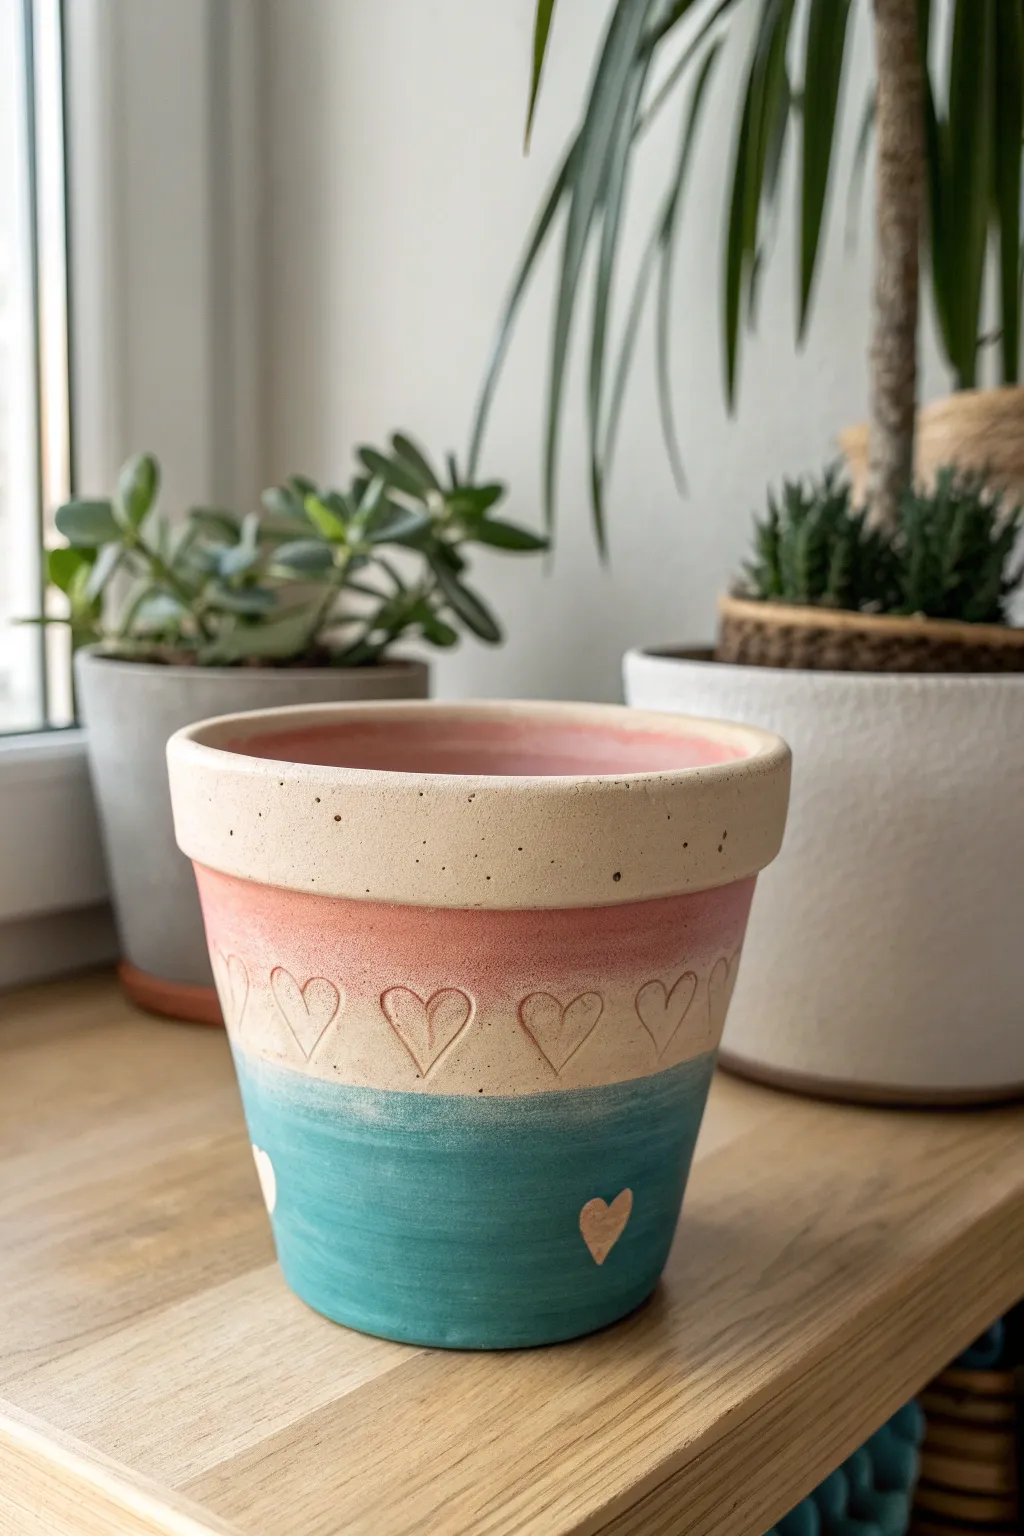
Treat mom to a sweet, handmade gift with this charming terracotta pot featuring a soft gradient and lovely heart details. The combination of exposed clay and gentle pastel glazes creates a dreamy dip-dyed effect that feels both modern and sentimental.
Step-by-Step
Materials
- Terracotta pot (with deep upper rim)
- Acrylic paints (pale pink, coral pink, teal/turquoise, white)
- Matte mod podge or acrylic sealer
- Wide flat paintbrush
- Small round detail brush
- Sponges (optional for blending)
- Painter’s tape
- Pencil
- Paper plate or palette
- Fine-grit sandpaper
Step 1: Preparation and Base
-
Prepare the surface:
Start by wiping down your terracotta pot with a damp cloth to remove any dust or debris. If the pot feels rough, give it a quick pass with fine-grit sandpaper to ensure a smooth painting surface. -
Seal the interior:
Since terracotta is porous, apply a coat of sealer or acrylic medium to the inside of the pot. This prevents moisture from seeping through later and ruining your exterior paint job. -
Prime the top rim:
Mix a small amount of white paint with a drop of beige or yellow ochre to create a ‘natural clay’ cream color. Paint the topmost thick rim of the pot with this shade to give it a clean, finished look that mimics bare ceramic.
Clean Lines Tip
If freehand blending is tricky, use painters tape to section off the band, paint, then remove while wet. Gently tap the edge with a sponge to soften the line.
Step 2: Creating the Ombre Effect
-
Establish the pink band:
Mix a soft coral-pink shade. Using your wide flat brush, paint a horizontal band just below the top rim, covering about the top third of the pot’s body. -
Feather the bottom edge:
While the pink paint is still wet, use a dry brush or sponge to gently dab the bottom edge of your painted line. This creates a softer, less rigid transition area. -
Mix the teal shade:
On your palette, combine turquoise with a little white to get a soft, beachy teal specific to your taste. -
Paint the bottom section:
Apply the teal paint to the bottom third of the pot, brushing horizontally. Ensure you cover down to the very bottom edge. -
Create the middle transition:
For the middle section, I like to mix a very pale beige—lighter than the clay but warmer than plain white. Paint the band between the pink and blue sections. -
Blend the gradients:
Using a slightly damp sponge, lightly dab the areas where the beige meets the pink and where it meets the teal. You aren’t mixing them fully, just removing hard stop-lines for a ‘dip-dye’ aesthetic.
Step 3: Adding Heart Details
-
Sketch the middle hearts:
Once the base paint is fully dry, use a pencil to lightly sketch a row of hearts around the middle beige band. Space them evenly. -
Paint the outline hearts:
Using a very fine detail brush and a slightly darker brown-beige paint (imitating raw clay), carefully paint the outlines of these hearts. Keep the pressure light to make them look delicate, almost like they were stamped into the clay. -
Add lower solid hearts:
In the blue section, randomly place a few small hearts. Paint these solid using a pale pink or metallic copper paint for a cute contrast against the teal. -
Add subtle speckles:
Dilute a tiny bit of brown paint with water. Dip an old toothbrush or stiff brush into it, and flick the bristles with your thumb to mist tiny speckles over the top beige rim. This adds a realistic texture. -
Final coat:
Allow all paint to cure for at least 24 hours. Finish with a coat of matte clear sealer to protect your artwork from water splashes and sunlight fade.
Metallic Magic
Try using liquid gold leaf or metallic rose gold paint for the lower hearts instead of pink. It catches the light beautifully on a windowsill.
Now your custom pot is ready to be filled with mom’s favorite succulent or blooming plant


Watercolor Wash Terracotta Pot
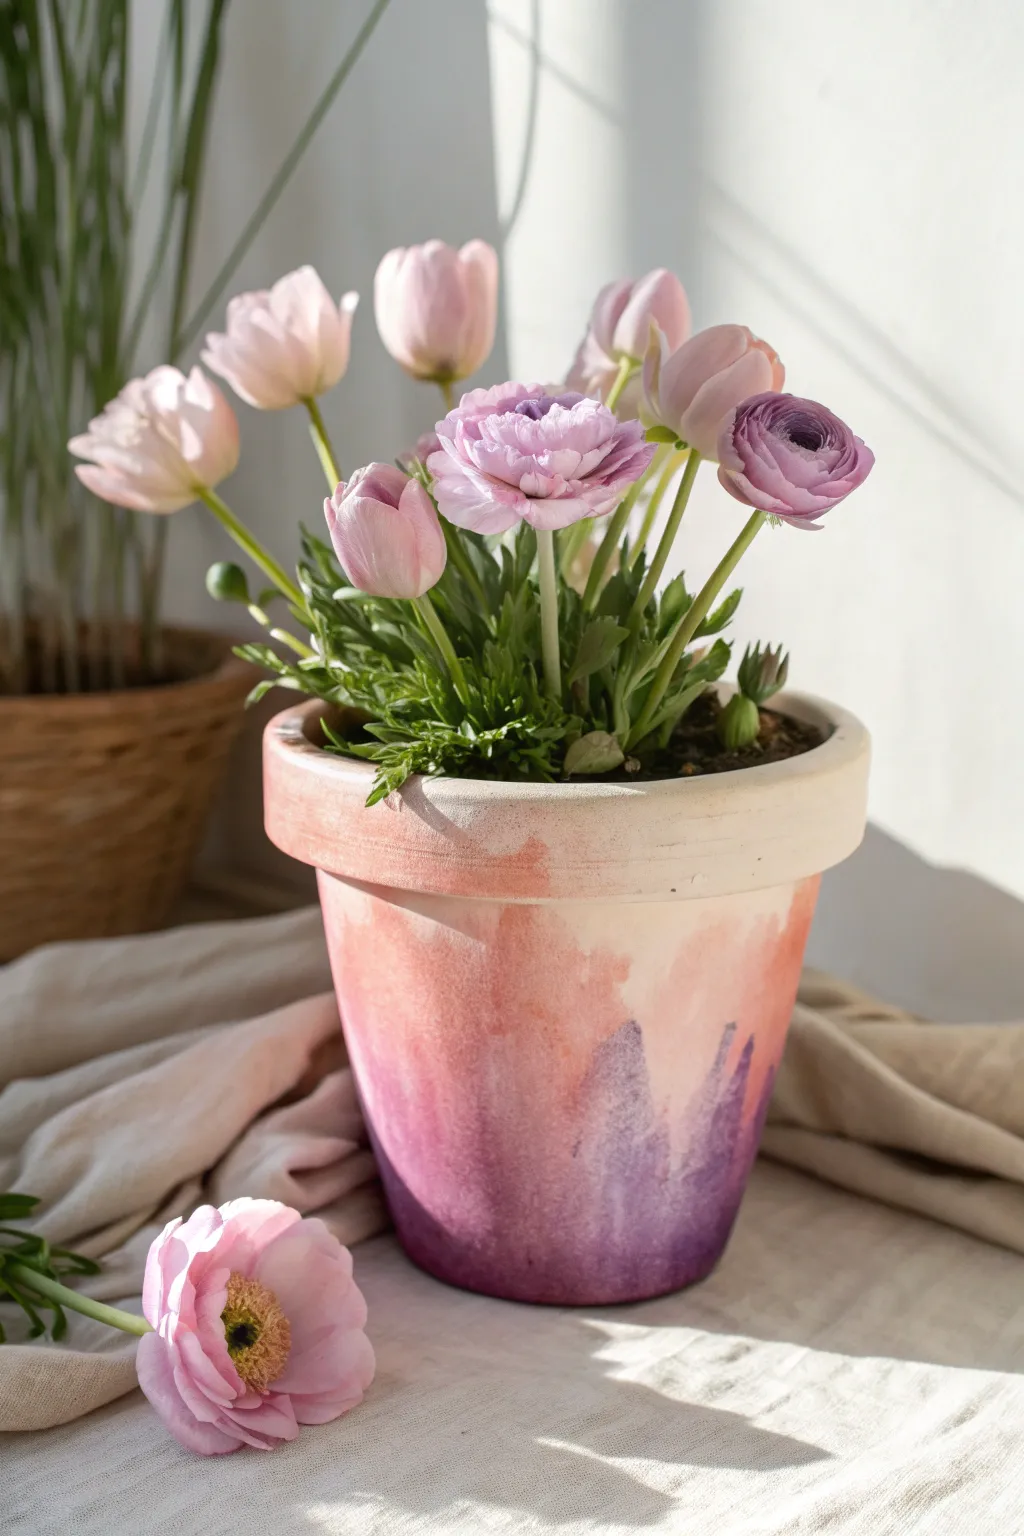
Transform a standard terracotta planter into a soft, romantic vessel using a clever watercolor-style technique. This project layers milky whites, muted pinks, and deep purples to create an ethereal, blended finish that looks like a sunset on ceramic.
How-To Guide
Materials
- Standard terracotta pot (medium size)
- White acrylic paint or gesso
- Acrylic paints (Soft Pink, Peach, Lavender/Purple)
- Water
- Fabric medium (optional but recommended for better blending)
- Wide flat paintbrush (synthetic bristles)
- Medium round paintbrush
- Mixing palette or small disposable cups
- Paper towels
- Clear matte sealant spray
Step 1: Preparation & Base Coat
-
Clean the surface:
Begin by wiping down your terracotta pot with a damp cloth to remove any dust or debris. Let it dry completely so the paint adheres properly. -
Prime the pot:
To make the colors pop and prevent the clay from soaking up all your paint, apply a solid base coat. I like to use white acrylic paint or gesso for this step. -
Check the coverage:
Ensure the base coat is relatively opaque. You may need a second coat of white if the terracotta orange is still showing through strongly. Let this base layer dry fully before moving on.
Wet-on-Wet Magic
Keep a spray bottle of water handy. Lightly mist the pot face before applying paints to help colors bleed and blend more naturally without brush marks.
Step 2: Creating the Paint Washes
-
Dilute your colors:
In your palette or small cups, squeeze out a dollop of each color: Soft Pink, Peach, and Purple. Keep them separate. -
Water down the paint:
Add water to each color. You want a consistency similar to heavy cream or milk—fluid enough to drip slightly, but pigmented enough to show color. A ratio of roughly 1 part paint to 1 part water works well. -
Add fabric medium (optional):
If you have fabric medium, add a few drops to the mixtures. This helps the acrylics behave more like watercolor, staying wet longer and blending smoother.
Gilded Edge Upgrade
Once the watercolor layers are fully dry, paint just the very top lip of the rim with metallic gold leaf or gold paint for a luxurious finish.
Step 3: Applying the Watercolor Effect
-
Start with the rim:
Dip your wide flat brush into the diluted Peach/Soft Pink mixture. Paint the rim of the pot horizontally, but don’t worry about perfect lines. -
Let colors drip down:
While the rim is wet, take your brush and drag some of that color downwards onto the body of the pot. The goal is an uneven, organic start to the gradient. -
Apply the middle tones:
Switch to your Soft Pink wash. Start applying this below the rim area, overlapping slightly with the peach tone while both are still damp to encourage blending. -
Add the darker base:
Using the Purple wash, paint upwards from the bottom of the pot. Use vertical strokes that vary in height, creating peaks that reach up into the pink section. -
Create the peaks:
Look at the project image; notice how the purple isn’t a straight line. Use your round brush to pull distinct ‘mountain peaks’ of purple up into the pink area. -
Blend the transitions:
With a slightly damp, clean brush, gently feather the area where the purple meets the pink. Soften any harsh lines so the colors bleed into each other like true watercolor. -
Layer for depth:
Let the first wash dry for about 5-10 minutes. Go back in with slightly less diluted purple and pink to intensify specific areas, adding richness to the gradient. -
Check for white space:
Leave some areas of the white base showing through faintly, or use very watered-down white paint to add highlights near the top half of the pot for that dreamy effect.
Step 4: Finishing Touches
-
Dry completely:
Allow the pot to sit undisturbed for at least an hour. Since we watered down the paint, it might feel cool to the touch until the water fully evaporates. -
Seal the artwork:
Take the pot to a well-ventilated area. Spray it with a clear matte sealant. This protects the watercolor effect from moisture when you water the plant. -
Plant and style:
Once the sealer is dry, fill your pot with soil and add blooms like ranunculus or tulips that complement the soft color palette.
This soft and artistic pot makes a beautiful centerpiece or a thoughtful, handmade gift for mom

The Complete Guide to Pottery Troubleshooting
Uncover the most common ceramic mistakes—from cracking clay to failed glazes—and learn how to fix them fast.
Clay Tag and Plant Marker Pot
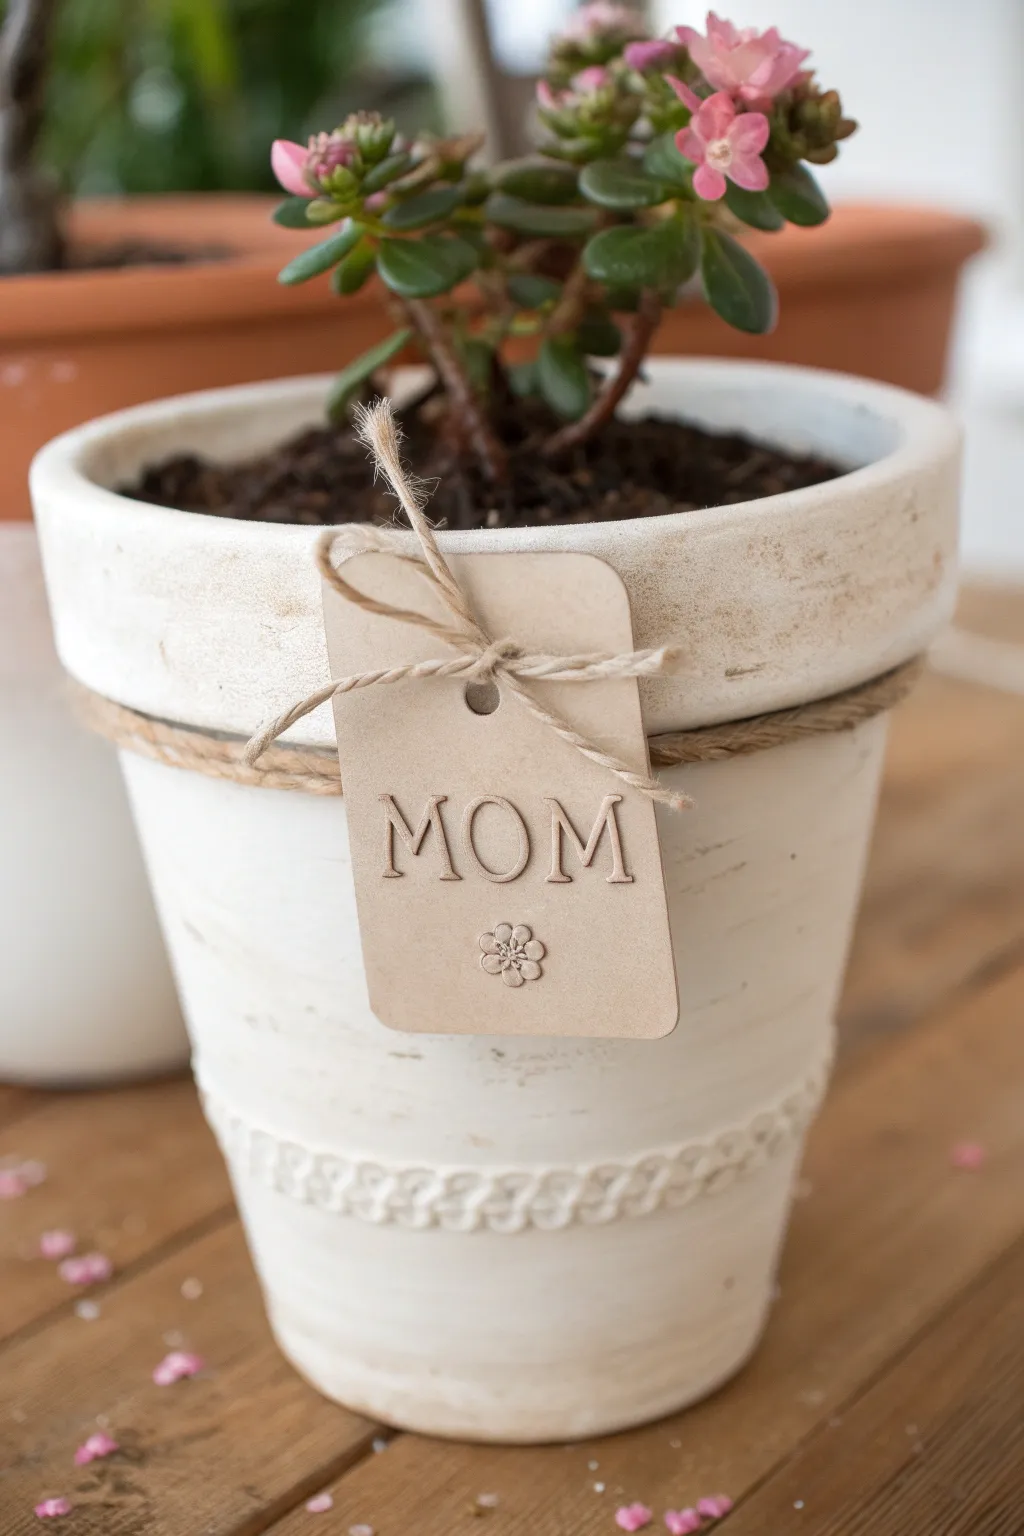
Give Mom a gift that grows with her love using this charming rustic planter customization. By creating a personalized clay tag and pairing it with a weathered-look pot, you achieve a beautifully organic feel perfect for indoor succulents or herbs.
Detailed Instructions
Materials
- Terracotta pot (white-washed or plain)
- White chalk paint or acrylic paint (if pot isn’t pre-finished)
- Clean rag or sponge
- Air-dry clay or polymer clay (neutral beige/tan color)
- Rolling pin
- Rectangular clay cutter or craft knife
- Small alphabet stamps
- Small flower stamp
- Straw or skewer (for poking a hole)
- Jute twine
- Fine-grit sandpaper
- Matte sealant spray (optional)
- Small potted plant (Kalanchoe or similar succulent)
- Potting soil
Step 1: Preparing the Pot
-
Assess your base:
If you already have a white-washed terracotta pot, you can skip to the cleaning step. If starting with standard orange terracotta, wipe it down to remove dust. -
Apply the wash:
Mix white chalk paint with a little water to thin it out. Dip a rag or sponge into the mixture and rub it onto the pot’s surface. -
Create the distressed look:
Before the paint fully dries, wipe away excess paint in random areas to let the natural clay color peek through, focusing on the rim and raised details. -
Detail the rim:
Pay special attention to the rim of the pot; applying a heavier coat here and then sanding it back later gives that authentically aged, garden-shack vibe. -
Sand for texture:
Once the paint is completely dry, use fine-grit sandpaper to scuff up the surface further, smoothing out brush strokes and revealing more terracotta underneath.
Stamp Stuck?
If your stamps are sticking to the clay and pulling it up, lightly dust the stamp surface with cornstarch or baby powder before pressing it down.
Step 2: Crafting the Clay Tag
-
Condition the clay:
Take a small ball of neutral-colored air-dry or polymer clay and knead it in your hands until it is soft and pliable. -
Roll it out:
Use a rolling pin to flatten the clay to about 1/8 inch thickness. Ensure the surface is smooth and free of major cracks. -
Cut the shape:
Use a rectangular cutter or a craft knife to cut a tag shape, roughly 2 inches by 3 inches. I like to gently tap the edges with my finger to soften any sharp corners. -
Punch the hole:
Using a straw or a skewer, punch a hole near the top center of the rectangle. Make sure it’s large enough for your twine to pass through easily. -
Stamp the sentiment:
Press your alphabet stamps firmly into the clay to spell ‘MOM’. Center the text horizontally, leaving room at the bottom for the decorative element. -
Add the floral detail:
Press a small flower stamp directly below the text. If you don’t have a stamp, you can sketch a simple flower using the point of a needle tool. -
Dry or bake:
Follow the instructions for your specific clay. Air-dry clay will need 24-48 hours, while polymer clay needs to be baked in the oven. -
Optional sanding:
Once hardened, lightly sand the edges of the tag if they look too rough or uneven.
Highlight the Text
To make ‘MOM’ pop, dilute brown acrylic paint with water, brush it into the stamped letters, and immediately wipe the surface clean, leaving dark paint in the grooves.
Step 3: Assembly and Planting
-
Wrap the twine:
Cut a long length of jute twine. Wrap it around the neck of the pot just under the rim two or three times to create a textured band. -
Attach the tag:
Thread one end of the twine through the hole in your clay tag. Slide the tag so it rests against the front of the pot. -
Secure the bow:
Tie the two ends of the twine into a simple bow right above the tag hole. Trim the tails so they don’t drag too low. -
Add potting soil:
Fill the bottom third of your pot with high-quality potting soil suitable for your chosen plant type. -
Plant the flowers:
Remove your Kalanchoe or succulent from its nursery pot and gently loosen the roots. Place it into the new pot. -
Top up and finish:
Fill in the gaps around the root ball with more soil, pressing down gently to secure the plant. Brush any stray dirt off the white rim.
Now you have a heartwarming, custom-made vessel ready to brighten up her special day
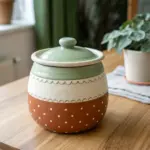
Air-Dry Clay Lace Texture Pot
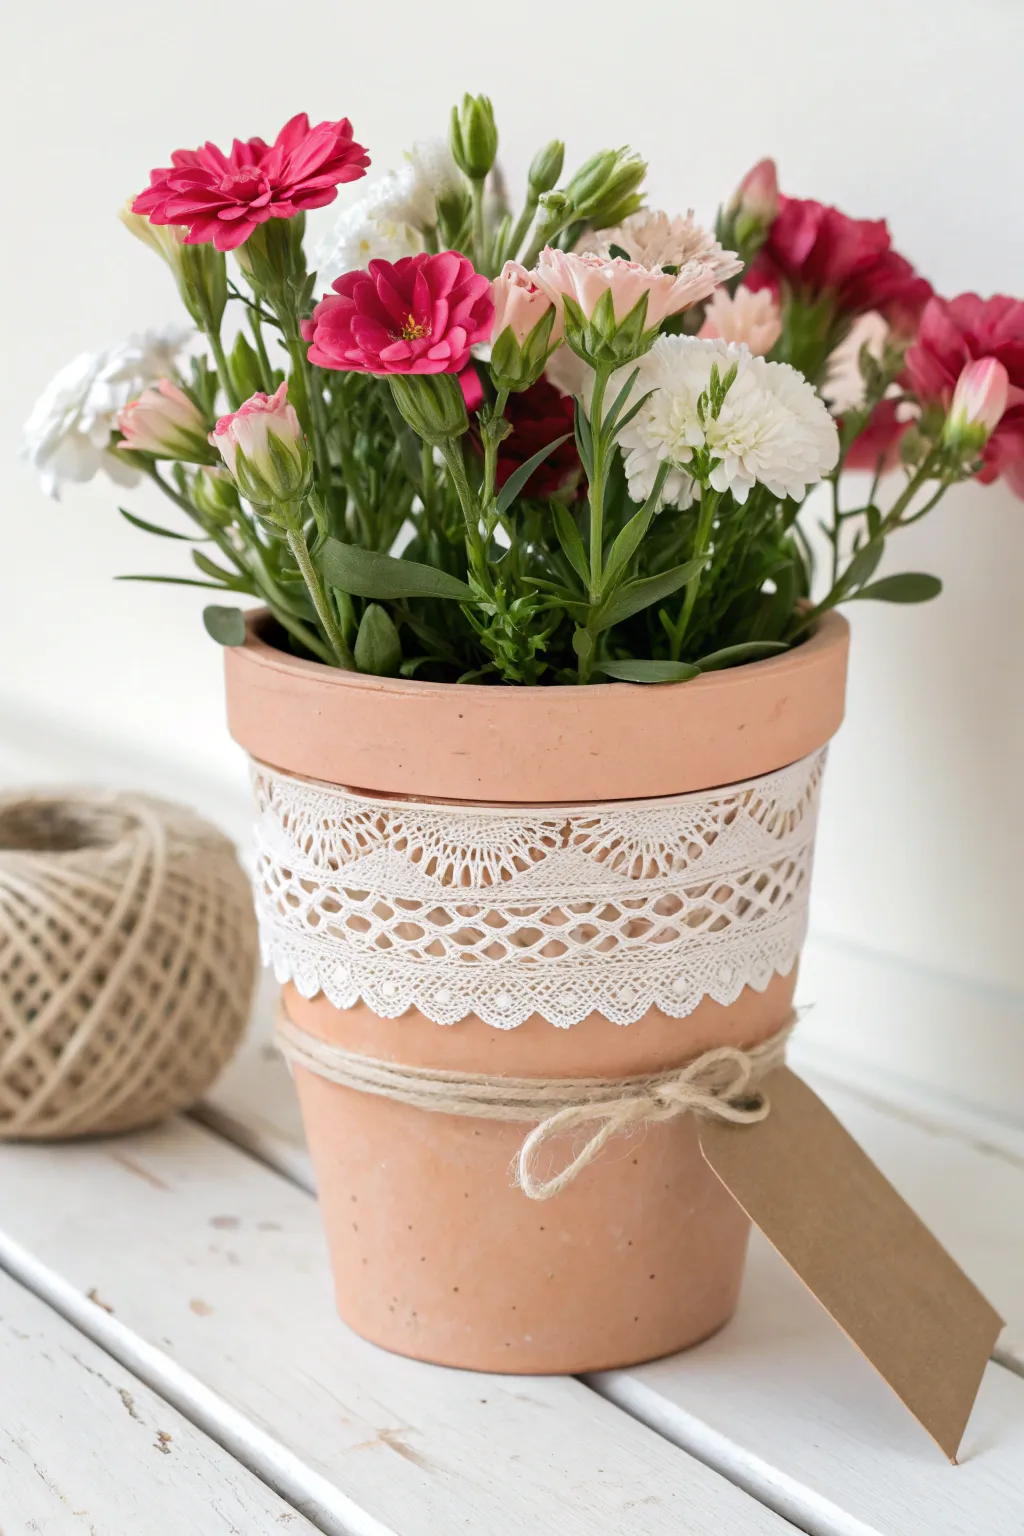
Transform a simple terracotta planter into a vintage-inspired masterpiece using the magic of air-dry clay and lace. This project creates a beautiful, permanent textured band that looks delicate but is durable enough to hold Mom’s favorite blooms.
Step-by-Step Guide
Materials
- Small terracotta pot (clean and dry)
- White air-dry clay
- Rolling pin
- Cotton lace trim (wide strip with a distinct pattern)
- Craft knife or sharp blade
- Strong craft glue or heavy-duty adhesive
- Jute twine
- Kraft paper tag
- Water bowl and sponge
- Optional: Clear matte sealant spray
Step 1: Preparing the Clay Band
-
Condition the clay:
Start by taking a handful of white air-dry clay and kneading it in your hands until it feels soft, pliable, and free of cracks. -
Roll it out:
On a clean, flat surface, roll the clay out into a long, rectangular strip. Aim for a thickness of about 1/8 to 1/4 inch so it’s sturdy but not bulky. -
Check the length:
Wrap the clay strip loosely around your terracotta pot to ensure it’s long enough to encircle the rim with a little overlap. If it’s too short, re-roll it slightly thinner to gain length. -
Apply the lace:
Lay your strip of lace directly on top of the flattened clay. Press it down gently with your fingers to hold it in place. -
Imprint the texture:
Using the rolling pin, roll firmly over the lace. I like to do one confident pass rather than rolling back and forth, which ensures the impression is deep and crisp without shifting the pattern. -
Reveal the pattern:
Carefully peel back the lace to reveal the beautiful raised texture left behind on the clay surface.
Clay Cracking?
If small cracks appear as the clay dries, mix a tiny bit of fresh clay with water to make a paste and smooth it into the cracks with your finger.
Step 2: Attaching and Refining
-
Trim the edges:
Use a craft knife to trim the top and bottom of the clay strip so you have a straight, clean band that mimics the width of your lace. -
Apply adhesive:
Apply a generous amount of strong craft glue to the area of the pot just below the rim where the band will sit. -
Position the band:
Carefully lift the clay strip and wrap it around the pot, pressing it gently into the glue. Be careful not to smudge your fresh lace texture. -
Join the seam:
Where the two ends of the clay meet, cut through both layers simultaneously with your knife for a perfect butt joint, then gently smooth the seam with a damp finger. -
Smooth the edges:
Dip a finger in water and run it along the top and bottom edges of the clay band to seal it to the pot and remove any roughness. -
Let it cure:
Set the pot aside in a dry area. Allow the clay to dry completely according to the package instructions, usually 24 to 48 hours.
Level Up: Antique Look
Once dry, lightly brush brown or grey paint over the texture and wipe it back immediately with a damp cloth to highlight the lace details.
Step 3: Finishing Touches
-
Add a sealant (optional):
If this pot will be outdoors or near water, give the dry clay a light coat of clear matte sealant to protect the texture. -
Wrap the twine:
Cut a long length of jute twine. Wrap it around the pot two or three times, just below the clay lace band. -
Add the tag:
Thread a kraft paper tag onto one end of the twine before you start tying your knot. -
Tie the bow:
Secure the twine with a simple, tight bow on the front of the pot, adjusting the loops until they look neat. -
Plant flowers:
Add potting soil and fresh flowers, like carnations or daisies, to complete the look.
This charming, textured pot makes a gift that feels both handmade and refreshingly professional


What Really Happens Inside the Kiln
Learn how time and temperature work together inside the kiln to transform clay into durable ceramic.
Carved Message Band Handmade Pot
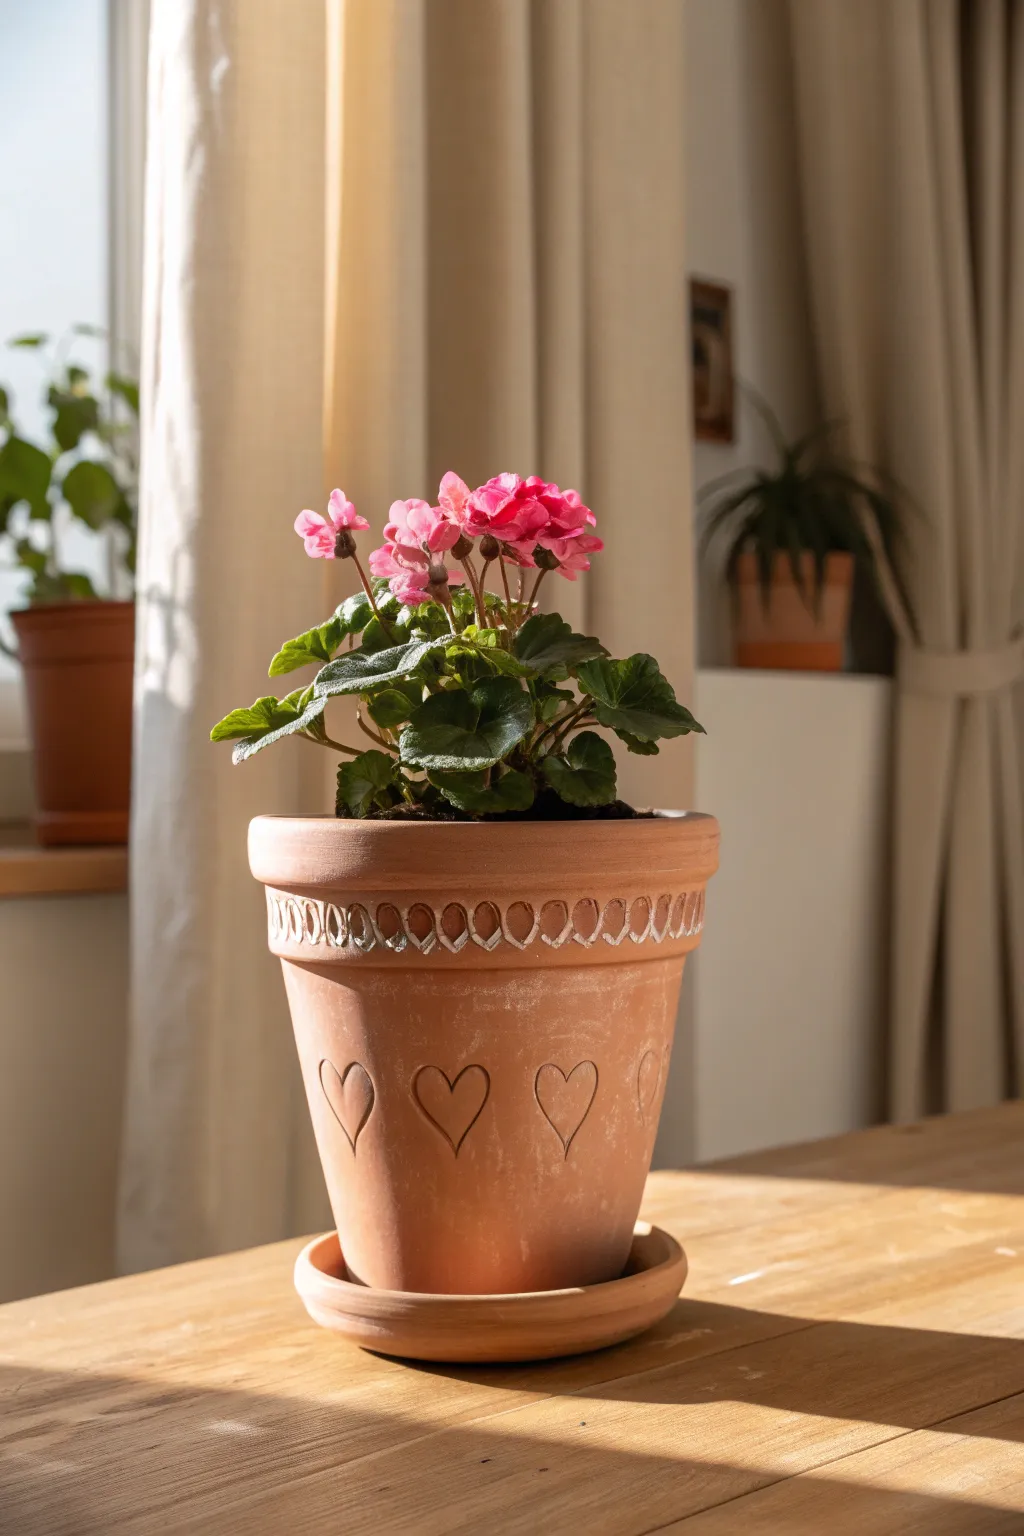
Transform a plain clay pot into a charming, rustic planter perfect for Mom. This project features delicate heart carvings and a decorative rim band that adds a personalized, handmade touch to a classic design.
Step-by-Step
Materials
- Unfired or leather-hard terracotta clay pot (or create your own on a wheel)
- Matching terracotta saucer
- Carving tools (loop tool, needle tool)
- Small carving knife or X-Acto knife
- White clay slip or white acrylic paint (optional for rim)
- Small round detail brush
- Sponge and water
- Potting soil
- Small pink flowering plant (like a geranium or begonia)
Step 1: Preparing the Pot
-
Choosing your base:
For the most authentic carved look, start with a leather-hard clay pot that hasn’t been fired yet. If you are modifying a store-bought fired pot, you will need a rotary tool with a diamond bit instead of standard carving tools. -
Smoothing the surface:
Ensure the exterior of your pot is relatively smooth. If using leather-hard clay, wipe it gently with a slightly damp sponge to remove any major imperfections or grog that might interfere with your carving. -
Planning the layout:
Lightly sketch your design directly onto the clay using a needle tool or a soft pencil. Mark a horizontal line about an inch below the rim for the band, and determine the spacing for your hearts on the lower body.
Oops! Carving Mistakes
If you slip while carving leather-hard clay, simply smooth the area with a wet finger or add a tiny bit of fresh clay to patch it before trying again.
Step 2: Carving the Details
-
Carving the hearts:
Using a needle tool or small carving knife, gently incise the outline of the hearts around the center of the pot. Keep the lines clean and relatively deep so they remain visible after firing or painting. -
Refining the heart shape:
Go over the heart outlines a second time to slightly widen the groove. I like to bevel the edges just a tiny bit to catch the light effectively. -
Creating the rim band:
Carve a series of small, repetitive oval or teardrop shapes around the thickened rim of the pot. These should be closely spaced to create a continuous pattern. -
Adding texture to the band:
Use a small loop tool to hollow out the center of these rim shapes slightly, giving them a three-dimensional feel. -
Detailing the separations:
Carve small vertical lines or dots between the oval shapes on the rim to define the pattern further and simulate a woven or beaded look.
Step 3: Finishing Touches and Planting
-
Highlighting the rim:
Once the carving is complete, you can accentuate the rim pattern. Carefully apply a small amount of white clay slip into the recesses of the rim carving if the clay is still wet. If working with a finished pot, use thinned white acrylic paint instead. -
Cleaning up:
Wipe away any excess slip or paint from the surface of the rim using a damp sponge, leaving the white color only in the carved crevices for a subtle, antiqued effect. -
Drying and firing (if applicable):
If you created this from raw clay, let the pot dry slowly to avoid cracking, then bisque fire it according to your clay’s specifications. If using a pre-made pot, simply let any paint accents dry completely. -
Creating the weathered look:
To mimic the efflorescence seen in the image, you can dry-brush a tiny amount of diluted white paint or lime wash randomly over the body of the pot, focusing on the area around the hearts. -
Preparing for planting:
Place your matching saucer underneath the finished pot. Fill the bottom inch of the pot with potting soil. -
Positioning the plant:
Remove your pink flowering plant from its nursery container. Gently loosen the root ball to encourage growth. -
Planting:
Center the plant in the pot and fill the remaining space with soil, pressing down gently to secure the plant. Ensure the soil level is about half an inch below the rim. -
Final watering:
Give the plant a thorough watering until you see moisture appearing in the saucer, settling the soil around the roots.
Level Up: Hidden Messages
Carve a short, secret message or the date on the very bottom of the pot or inside the saucer as a sentimental discovery for Mom later.
Now you have a beautifully personalized planter ready to brighten Mom’s windowsill
Mosaic Rim Flower Pot
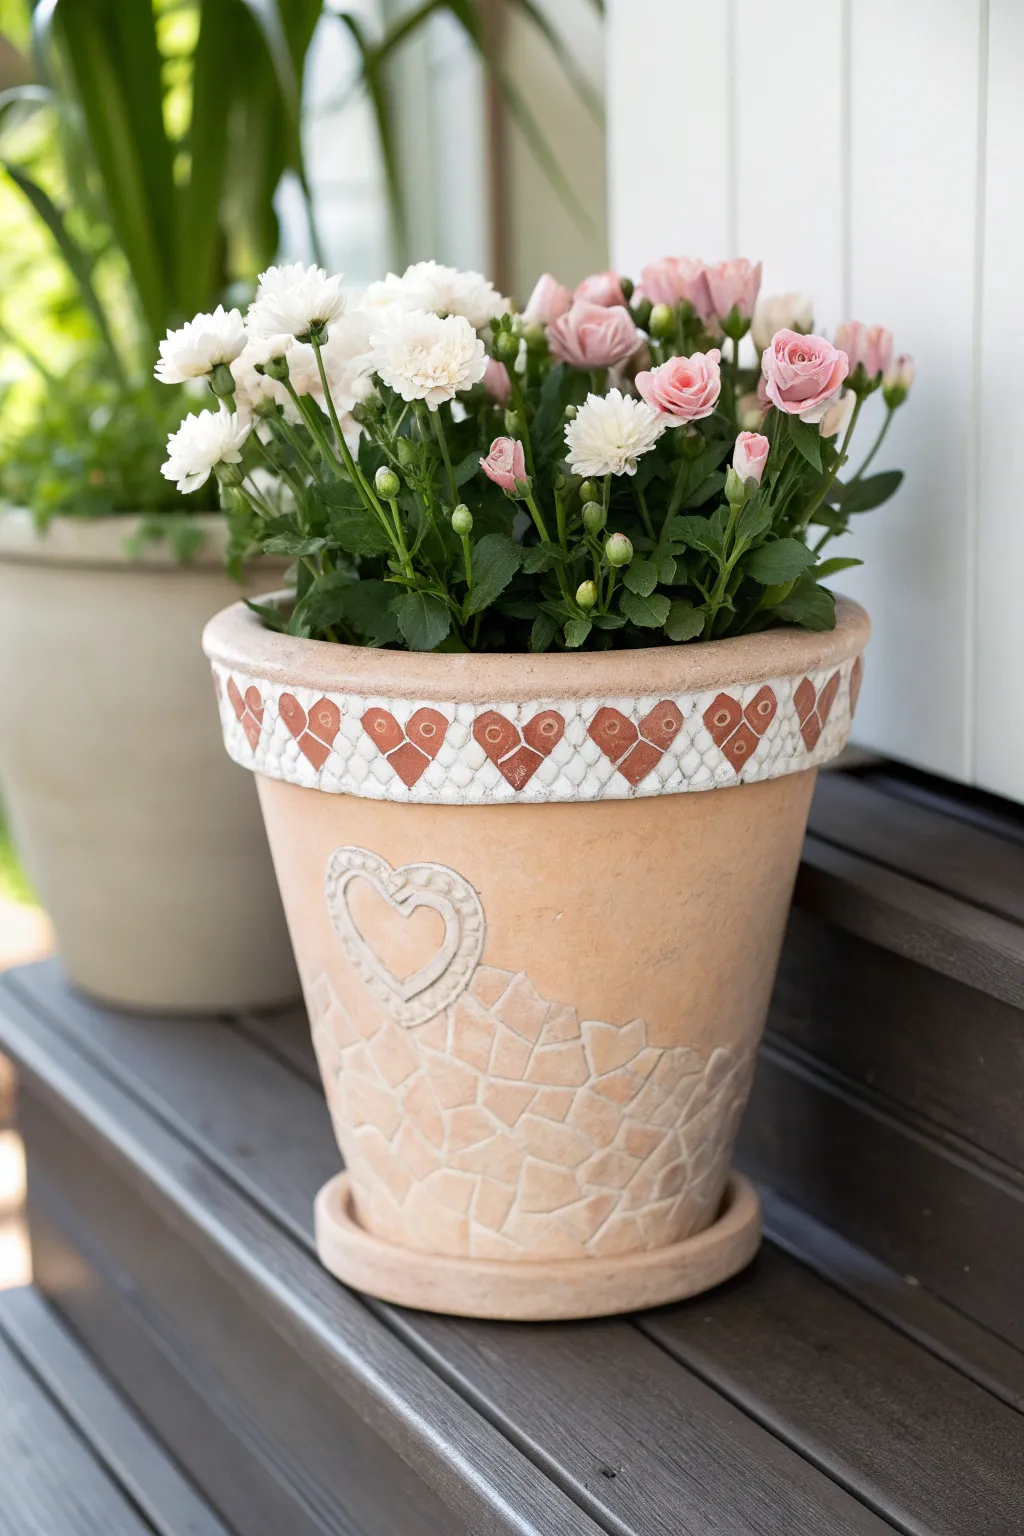
Transform a plain terracotta pot into a heartfelt Mother’s Day gift featuring a charming mosaic rim and textured stoneware details. This design combines rustic earthenware tones with delicate white and red tesserae for a look that is both timeless and sweet.
Step-by-Step Guide
Materials
- Standard terracotta pot (8-10 inch recommended)
- Matching terracotta saucer
- Small heart-shaped red ceramic tiles or glass gems (flat-backed)
- White or cream mini square mosaic tiles (tesserae)
- Air-dry clay or polymer clay (stone or beige color)
- Mosaic adhesive or clear waterproof silicone glue
- Premixed grout (white or light beige)
- Grout sponge and soft cloth
- Sculpting tool or toothpick
- Sandpaper (medium grit)
- Sponge brush
- Sealer (matte or satin finish)
Step 1: Preparation & Clay Relief
-
Prep the pot:
Begin by wiping down your terracotta pot with a damp cloth to remove any dust or manufacturing residue. Let it dry completely. -
Sand the surface:
Lightly sand perfectly smooth areas where you plan to attach clay elements to give the adhesive more grip. -
Roll out clay:
Take a small portion of your stone-colored clay and roll it into a thin strand, about the thickness of a pencil lead. -
Form the heart:
Shape the clay strand into a heart outline on the lower half of the pot’s body. Press it gently so it adheres but retains its raised profile. -
Add faux mosaic texture:
Roll out a flat, thin sheet of clay and press it onto the lower section of the pot, below your heart shape. Use a sculpting tool to carve irregular geometric lines, mimicking the look of chipped stone mosaic without using actual tiles. -
Refine the details:
Inside the clay heart, add a smaller, inner heart outline for extra dimension. Smooth any rough edges with a tiny bit of water on your finger. -
Allow to cure:
Let the clay work air dry completely according to the package instructions—usually 24 hours—before moving to the rim.
Keep Tiles Level
Ensure your heart tiles and square tiles are similar thickness. If the hearts are thinner, build up the glue behind them slightly so the surface stays flush.
Step 2: Creating the Mosaic Rim
-
Dry run your pattern:
Before gluing, arrange your red heart tiles and white square tiles on a flat surface to plan the spacing. Aim for uniformly spaced hearts separated by rows of 2 or 3 white squares. -
Apply adhesive:
Apply a thin layer of mosaic adhesive to the back of a red heart tile. -
Set the anchor tiles:
Press the red heart tiles onto the center of the pot’s rim lip, spacing them evenly around the circumference. I find it helpful to place four ‘compass point’ hearts first to ensure symmetry. -
Fill with white tiles:
Once the hearts are stable, start gluing the small white square tiles in the gaps between the hearts. -
Manage the rows:
Create two rows of white tiles—one above and one below the midline of the hearts—filling the space completely. You may need to use tile nippers if your spacing gets tight. -
Let the glue set:
Allow the adhesive to cure for at least 4-6 hours so tiles won’t shift during grouting.
Step 3: Grouting & Finishing
-
Prepare the grout:
If using powder, mix your light beige grout with water until it reaches a peanut butter consistency. -
Apply grout:
Scoop grout onto the mosaic rim. Use a gloved hand or a spatula to press the grout firmly into all the crevices between the tiles. -
Wipe the excess:
After about 15 minutes, when the grout begins to haze, use a damp (not soaking) sponge to wipe away the excess grout from the tile surfaces. -
Buff to shine:
Once dry, use a soft cloth to buff the tiles until they sparkle against the matte grout lines. -
Seal the pot:
Brush a coat of waterproof sealer over the entire exterior, paying special attention to the clay relief area to protect it from moisture.
A Pop of Color
Paint the faux-mosaic clay section at the bottom with watered-down white acrylic paint for a whitewashed look that contrasts with the terracotta.
Fill your new creation with pink roses and white mums for a stunning display mom will cherish

TRACK YOUR CERAMIC JOURNEY
Capture glaze tests, firing details, and creative progress—all in one simple printable. Make your projects easier to repeat and improve.
Stacked Mini Pot Flower Tower Gift
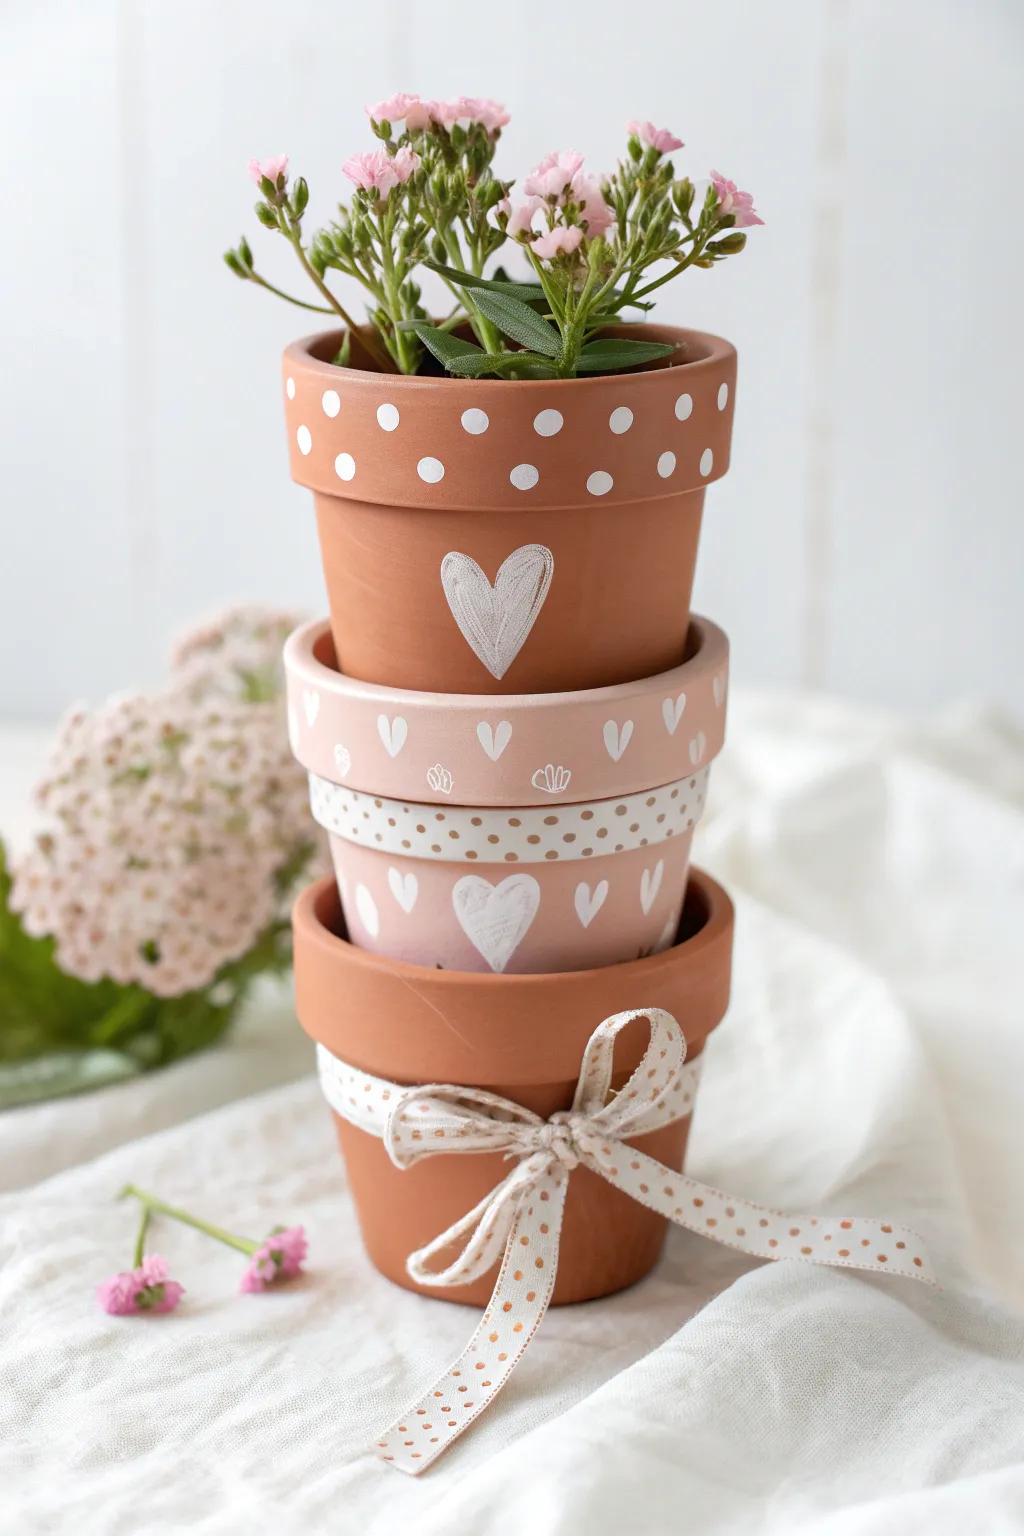
Create a charming vertical garden display by stacking three unique terracotta pots adorned with delicate hand-painted hearts and dots. This thoughtful Mother’s Day gift combines rustic simplicity with sweet details, perfect for holding small succulents or kalanchoe blooms.
Detailed Instructions
Materials
- 3 small terracotta pots (approx. 2.5-3 inches diameter, nesting size)
- Small kalanchoe plant or succulent
- Potting soil
- Acrylic paint: White
- Acrylic paint: Light pink (or mix white with a tiny dot of red)
- Fine detail paintbrush (size 0 or 00)
- Small sponge brush or foam pouncer
- Cotton or linen ribbon with polka dots (light beige/white/gold scheme)
- Washi tape or masking tape (optional)
- Clear matte sealant spray (optional)
- Hot glue gun and glue sticks
Step 1: Painting the Top Tier
-
Clean the Surface:
Begin by wiping down all three pots with a damp cloth to remove any pottery dust or debris. Let them dry completely before applying any paint. -
Paint the Rim:
For the top pot, leave the terracotta natural but decorate the rim. Dip the handle end of a paintbrush or a small dotting tool into white acrylic paint. -
Create the Dots:
Stamp a pattern of polka dots around the rim. I like to alternate the placement—one high, one low—to create a playful, staggered look. -
Add the Central Heart:
Using your fine detail brush, paint a slightly rustic, open-center heart in the middle of the pot’s body using white paint. Use quick, sketchy strokes rather than filling it in solid to simulate a chalk-drawn effect.
Step 2: Designing the Middle Tier
-
Base Coat:
Paint the entire exterior of the second pot with the light pink acrylic paint. Apply two thin coats for even coverage, allowing the first coat to dry for about 15 minutes before adding the second. -
Paint the Rim Hearts:
Once the pink base is fully dry, take your fine brush and white paint to create a row of tiny, solid hearts all along the rim. -
Add Decorative Details:
Between the hearts on the rim or just below them, add tiny decorative doodles like small scallops or vertical dashes to add variety. -
Create the Main Hearts:
Paint a row of larger hearts around the main body of this pink pot. Mix up the styles—some can be solid white, while the central one should match the rustic, sketchy style of the top pot. -
Add the Polka Dot Band:
Just below the rim of this middle pot, apply a strip of patterned washi tape. If you don’t have tape, you can paint a creamy white horizontal band and add gold or brown dots with a toothpick.
Paint Slipping?
If acrylic paint beads up on the terracotta, the pot might be sealed or oily. Lightly sand the surface with fine-grit sandpaper to give the paint some ‘tooth’ to grab onto.
Step 3: Assembling the Tower
-
Prepare the Bottom Pot:
Leave the largest (bottom) pot largely unpainted to ground the design. Tie your polka-dot ribbon around the middle of the pot. -
Secure the Bow:
Tie a neat bow at the front. Use a small dot of hot glue behind the knot to ensure it stays perfectly in place and doesn’t slide down the tapered sides. -
Stack the Pots:
Place the bottom pot on your surface. If you want a permanent structure, run a bead of hot glue around the bottom edge of the middle pot and press it firmly into the bottom pot. Repeat for the top pot. -
Partial Filling:
If you aren’t gluing them, fill the bottom two pots with soil or small stones to provide stability and height for the pots sitting inside them. -
Planting:
Plant your kalanchoe or succulent into the very top pot, pressing the soil firmly around the roots. -
Seal (Optional):
If these will be outdoors, give the painted areas a quick spray with a matte sealant to protect your artwork from moisture.
Clean Lines Hack
For perfect hearts every time, cut a small heart shape out of the sticky part of a post-it note and use the negative space as a stencil for your white paint.
Now you have a lovely, tiered centerpiece ready to brighten up any windowsill this Mother’s Day