When kids want to make something cute right now, air dry clay is my go-to because it’s simple, low-mess, and doesn’t need a kiln. Here are my favorite simple clay crafts for kids that use easy shapes and quick decorating tricks for big payoff.
Googly-Eyed Clay Critters
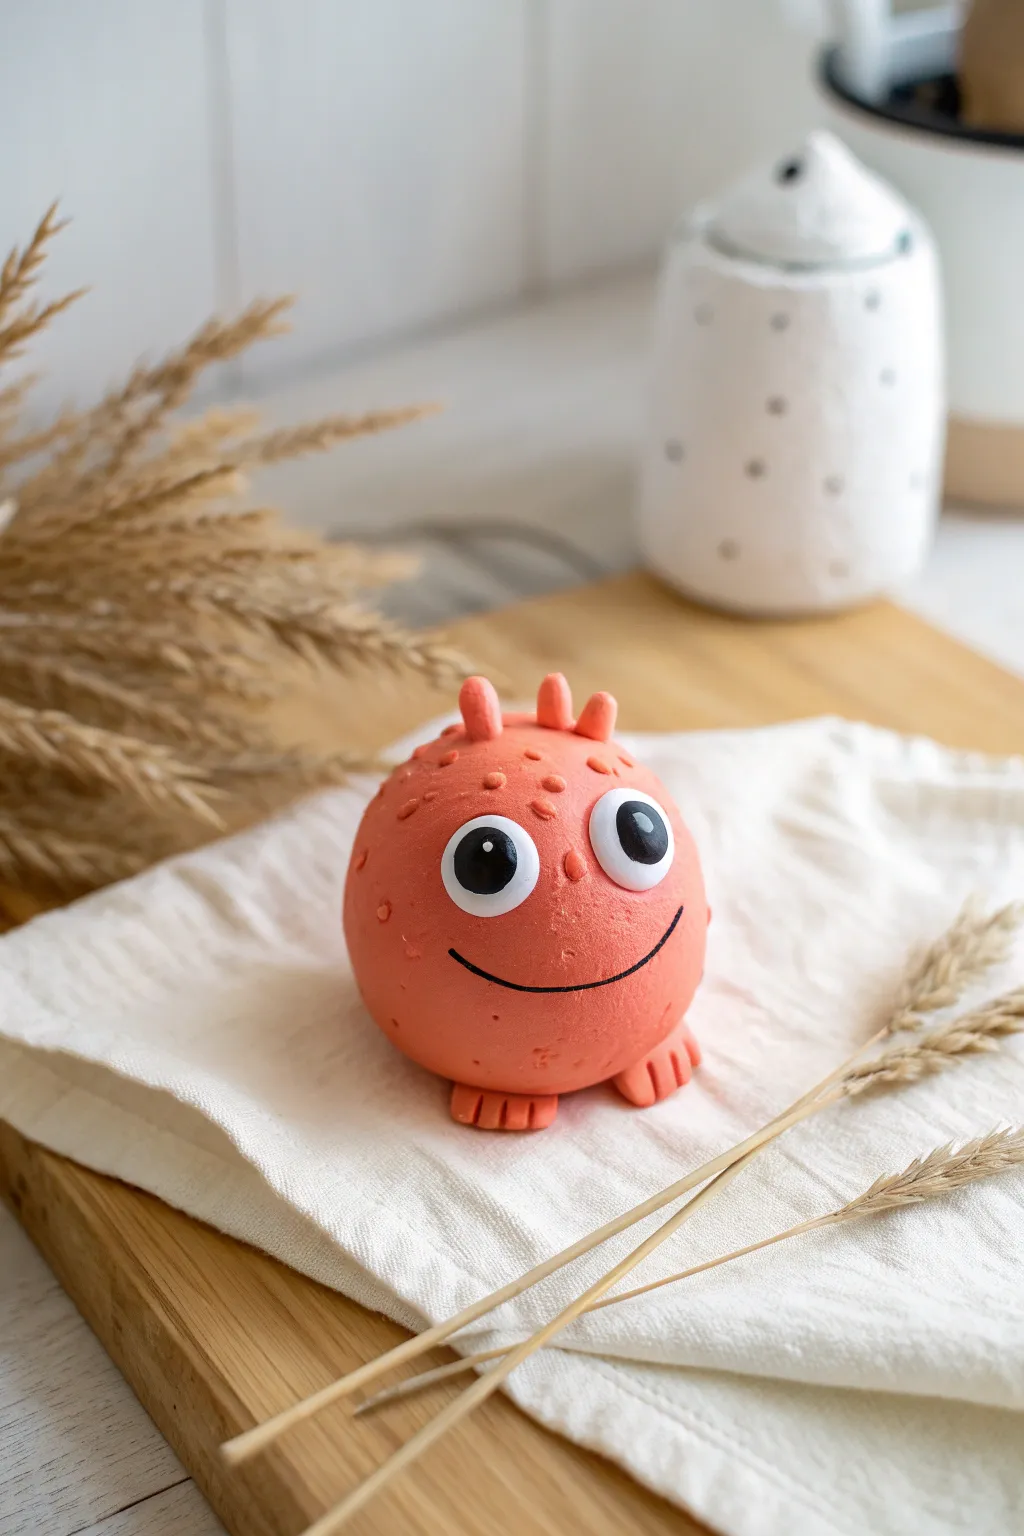
Create a charming little desk buddy using simple shapes and bright colors. This round, orange critter features fun spikes, playful feet, and big, expressive eyes that are sure to bring a smile to anyone’s face.
Step-by-Step Guide
Materials
- Orange air dry clay
- White air dry clay
- Black air dry clay (or black acrylic paint)
- Small clay sculpting tool or toothpick
- Rolling pin (optional)
- Water in a small cup
- Fine-grit sandpaper (optional)
Step 1: Shaping the Body
-
Roll the main sphere:
Start by taking a generous amount of orange clay and rolling it between your palms. Aim for a smooth, spherical shape about the size of a tangerine. -
Smooth the surface:
Inspect the ball for any cracks or seams. Dip your finger in a tiny bit of water and gently rub these areas to smooth the clay perfectly. -
Form the feet:
Pinch off two small, equal-sized pieces of orange clay. Roll them into small ovals and then flatten them slightly to create stable bases for the feet. -
Add toe details:
Using a small sculpting tool or the side of a toothpick, gently press three indentations into the front of each foot to define the toes. Attach these feet to the bottom of your sphere, blending the clay at the seam so they stick.
Smooth Seams
If the clay isn’t sticking well, score both surfaces (scratch them up) with a toothpick and add a drop of water to make a ‘slip’ before joining.
Step 2: Adding Personality
-
Create the spikes:
Roll three tiny cylinders of orange clay. Round off the tops so they look like little nubs rather than sharp horns. -
Attach the hair:
Place the three spikes on the very top of the head in a row. Press them down firmly and use a tool to smooth the join so they don’t fall off later. -
Texture the skin:
To give the skin a bumpy, monster-like texture, use a toothpick to poke shallow, random divots all over the top half of the sphere, around the spikes. -
Add skin bumps:
For extra detail, roll extremely tiny balls of orange clay and press them flat onto the surface among the textured divots, creating raised warts or bumps. -
Carve the smile:
Use your sculpting tool to carve a wide, U-shaped mouth into the clay. Make the groove deep enough to hold paint later, or simply press in a thin snake of black clay if you prefer.
Step 3: The Eyes and Finish
-
Make the whites of the eyes:
Take two pieces of white clay and roll them into balls, making one slightly larger than the other for a goofy look. Flatten them into discs. -
Attach the eyes:
Press the white discs onto the face, positioning them somewhat close together above the smile. Smooth the edges slightly so they conform to the curve of the body. -
Add the pupils:
Roll two small balls of black clay. Flatten them and press them onto the white discs. Placing them slightly off-center or cross-eyed adds a lot of character. -
Define the mouth:
If you carved the mouth earlier, roll a very thin thread of black clay and press it into the groove to create a distinct, smiling line. -
Double-check connections:
Give the feet and spikes one last gentle wiggle to ensure they are securely attached before setting the piece aside. -
Let it dry:
Place your critter on a piece of parchment paper in a cool, dry place. Allow it to air dry for 24-48 hours until it feels hard and lightweight.
Make it Shine
Once fully dry, coat the eyes with clear nail polish or a gloss varnish. It makes them look wet and alive compared to the matte body.
Once fully dry, your little orange friend is ready to guard your desk or bookshelf


Smiley Face Fridge Magnets
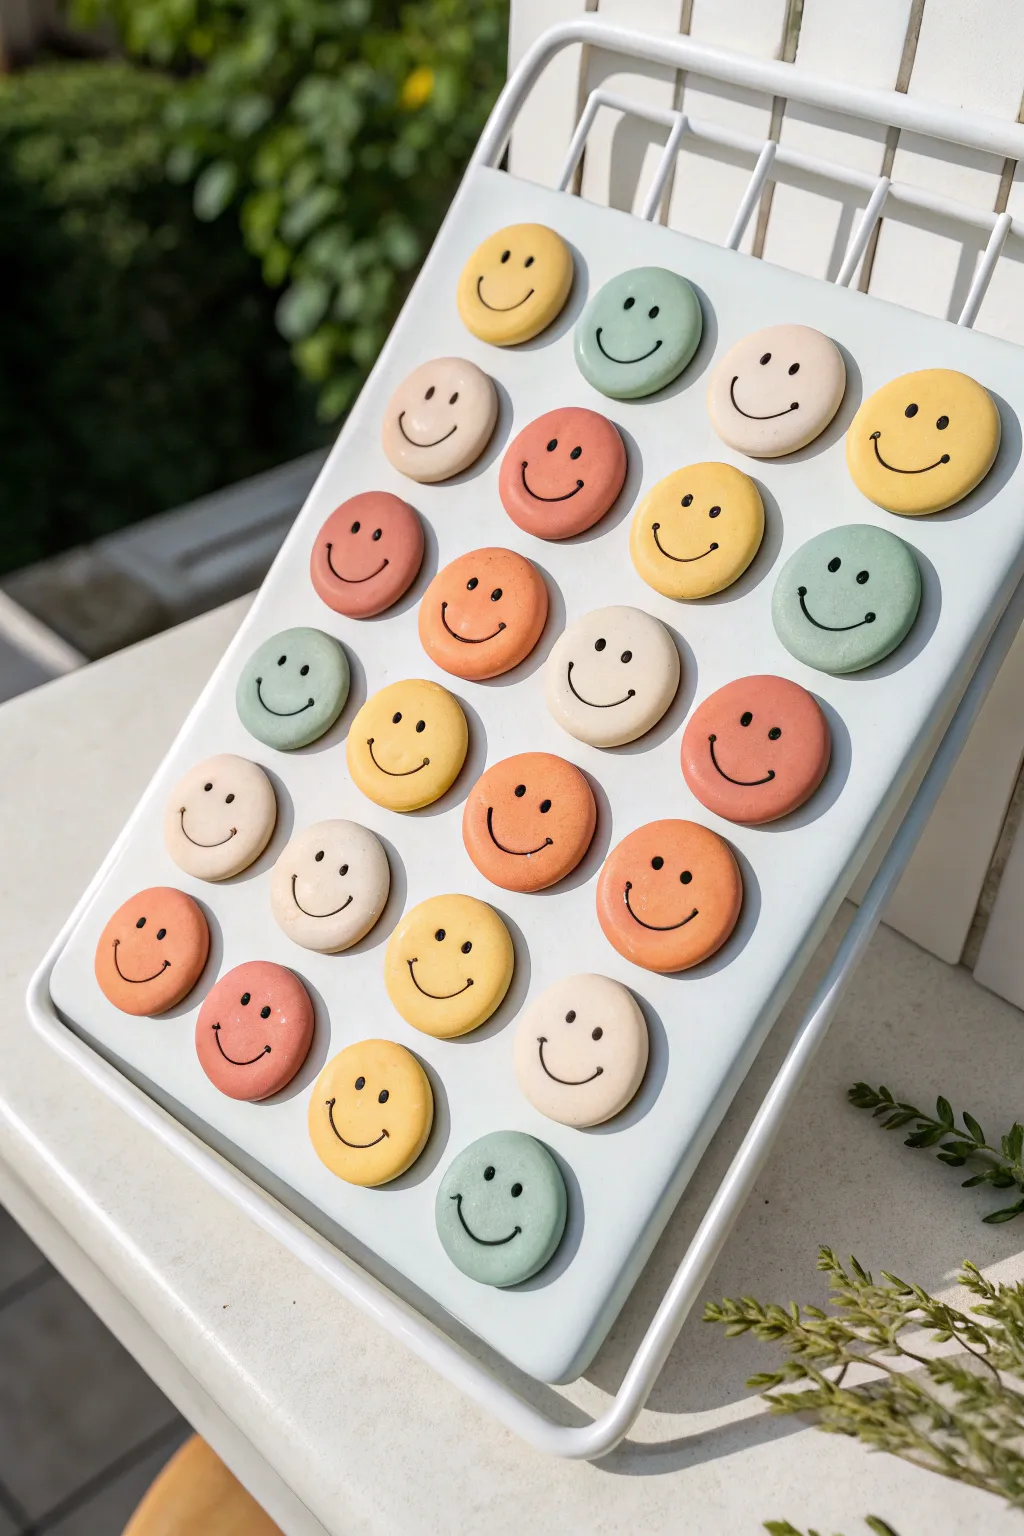
Brighten up your kitchen with this cheerful army of muted pastel smiley faces. These simple air-dry clay magnets are incredibly easy to make and the soft, earthy color palette gives them a modern, trendy look that fits perfectly in any home.
How-To Guide
Materials
- White air-dry clay
- Acrylic paints (muted yellow, peach, terracotta, sage green, cream, beige)
- Black acrylic paint or black fine-tip paint pen
- Rolling pin
- Small round cookie cutter (approx. 1.5 inches)
- Fine grit sandpaper
- Strong round magnets
- Super glue or strong craft glue
- Parchment paper or silicone mat
- Small detail paintbrush
- Gloss or matte varnish (optional)
Step 1: Shaping the Clay
-
Prepare your workspace:
Lay down a sheet of parchment paper or a silicone mat to prevent the clay from sticking to your table. -
Condition the clay:
Take a handful of white air-dry clay and knead it well in your hands until it becomes soft, pliable, and free of cracks. -
Roll it out:
Use a rolling pin to flatten the clay to an even thickness of about 1/4 inch (5-6mm). Try to keep the thickness consistent so all your magnets look uniform. -
Cut the shapes:
Press your round cookie cutter firmly into the clay to cut out multiple circles. Remove the excess clay from around the circles. -
Smooth the edges:
Dip your finger in a tiny bit of water and gently run it around the edge of each circle to smooth out any rough cuts or burrs. This small step makes the final finish much more professional. -
Let them dry:
Place the circles on a flat surface to dry completely. This usually takes 24-48 hours depending on humidity. Flip them over halfway through the drying process to ensure the bottoms dry evenly and stay flat.
Step 2: Adding Color & Personality
-
Sand for smoothness:
Once fully dry, lightly sand the edges and surface with fine-grit sandpaper if there are still any rough spots. -
Mix your palette:
You’ll want a variety of soft, muted colors. Use white paint to tone down bright primary colors—mix orange with white and brown for terracotta, or yellow with a touch of brown for a muted mustard. -
Apply the base coat:
Paint the top and sides of each clay circle. You might need two thin coats for full coverage, letting the first coat dry completely before adding the second. -
Let the base dry:
Ensure the colored base coats are bone dry before attempting to draw the faces, otherwise the black ink might bleed. -
Paint the faces:
Using a very fine detail brush and black acrylic paint, or a black paint pen, carefully add two small dots for eyes. -
Draw the smiles:
Isolate the smile by painting a simple, thin ‘U’ shape below the eyes. Vary the width slightly or the placement to give each magnet a unique expression. -
Seal the deal:
I prefer to brush a layer of matte or gloss varnish over the front once the face detail is totally dry. This protects the paint from chipping and gives them a finished look.
Fixing Warped Discs
If your clay circles curl up while drying, gently dampen the concave side with a wet finger and place them under a heavy book overnight to flatten them back out.
Step 3: Assembly
-
Prepare the backs:
Flip all your finished faces over so the unpainted clay side is facing up. -
Apply glue:
Place a small dot of super glue or strong craft adhesive in the center of the back of each clay circle. -
Attach the magnets:
Press a round magnet firmly onto the glue dot. Hold it in place for a few seconds to ensure a good bond. -
Final cure:
Let the glue cure completely according to the manufacturer’s instructions before sticking them to your fridge.
Add Some Dimension
Before the clay dries, create indented eyes and mouths using a toothpick or clay tool. After painting, fill these indents with black paint for a textured look.
Now you have a charming set of custom magnets ready to hold up your most important notes and photos


Rainbow Arch Desk Decor
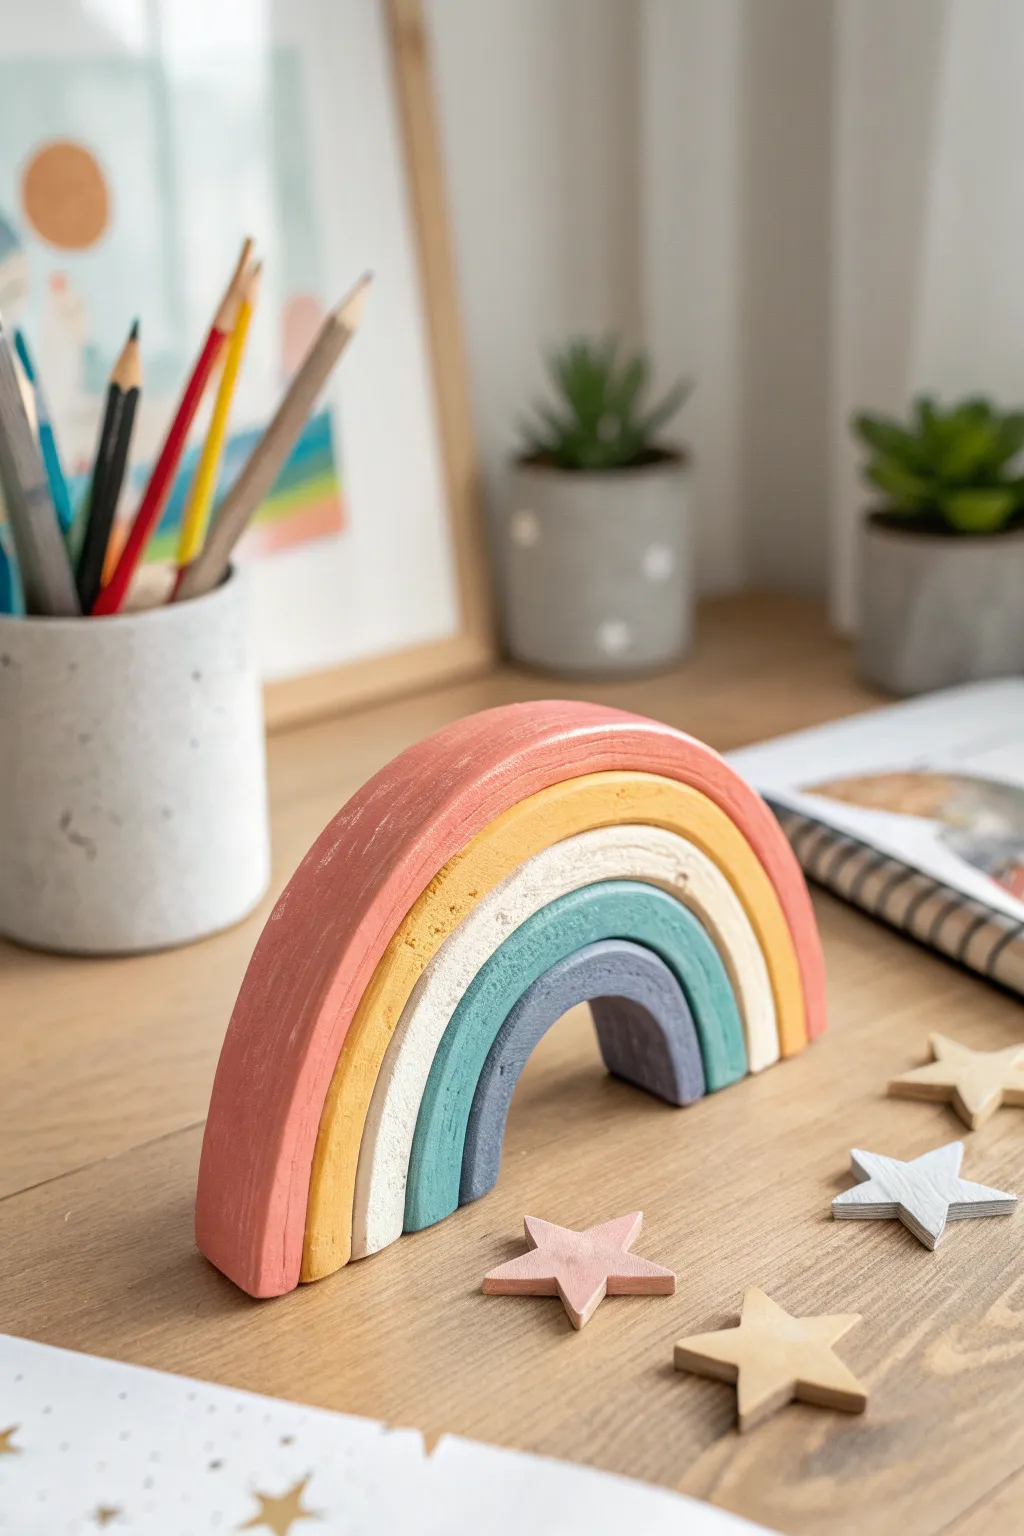
Brighten up any study nook with this charming set of nesting arches that doubles as a fun puzzle. The smooth, matte finish and muted color palette give it a modern, trendy look that fits perfectly on a desk or bookshelf.
Step-by-Step Guide
Materials
- Air dry clay (white or terracotta)
- Non-stick rolling pin
- Sharp craft knife or clay slicing tool
- Ruler
- Sandpaper (fine grit)
- Acrylic paints (muted pink, mustard yellow, cream, teal, slate blue)
- Flat paintbrushes
- Matte sealant or varnish
- Template (paper and pencil)
Step 1: Planning and Cutting
-
Draft your template:
Before touching any clay, draw your largest arch on a piece of paper to determine the size. Draw slightly smaller nesting arches inside it, leaving about 1.5 cm of space between each line to account for the clay’s thickness. -
Cut out the paper guides:
Carefully cut out each individual paper arch shape with scissors so you have separate templates for every layer of your rainbow. -
Roll the slab:
Take a large chunk of air dry clay and roll it out into a uniform slab. You want it quite thick so the arches can stand up on their own—aim for at least 1.5 cm to 2 cm thickness. -
Slice the first arch:
Place your largest paper template on the slab. Using a sharp craft knife held vertically, trace around the paper to cut out the clay shape. Keep your hand steady for a clean edge. -
Repeat for all layers:
Continue this process for the remaining four arches. If you run out of slab space, gather the scraps, re-roll the clay, and cut the next sizes. -
Smooth the edges:
Dip your finger in a little bit of water and run it along the cut edges of each arch to soften any sharp corners or drag marks from the knife.
Step 2: Drying and Refining
-
Initial drying phase:
Lay the arches flat on a clean board or drying rack. Let them dry for 24 hours. I usually flip them over halfway through this period to ensure both sides dry evenly and prevent warping. -
Full cure:
Depending on humidity and thickness, it might take 48 to 72 hours for the clay to fully harden and turn white (or light gray). Be patient here; painting wet clay creates cracks. -
Sanding for smoothness:
Once bone dry, take fine-grit sandpaper and gently buff the surfaces. Focus on the curved tops and the flat bottoms so they sit perfectly flush on a table. -
Dust off:
Wipe every piece down with a slightly damp cloth or a dry paintbrush to remove all the sanding dust before you start painting.
Warped Arches?
If arches curl while drying, slightly dampen the concave side and weigh it down with a heavy book (use wax paper!) until it flattens out again.
Step 3: Painting and Finishing
-
Mix your palette:
Prepare your acrylics. For that earthy look, mix primary colors with a touch of white or a tiny drop of brown to desaturate them. You’ll need a muted pink, mustard, cream, teal, and slate blue. -
Paint the largest arch:
Start with the biggest arch using the muted pink. Apply thin, even coats. Two thin layers are always better than one thick, gloopy layer. -
Paint the middle layers:
Move inward: paint the second arch mustard yellow, the third cream, and the fourth teal. Let them dry slightly between handling. -
Paint the smallest arch:
Finish the center piece with a slate blue shade. Ensure you get into the corners and cover the back side as well. -
Seal the project:
To protect the paint and give it that professional finished look, apply a coat of matte varnish or sealant over each arch. -
Final assembly:
Once the varnish is completely dry, stack your arches together on your desk to see your beautiful gradient come to life.
Make it Sparkle
For a magical twist, mix fine biodegradable glitter into the white paint layer or paint tiny star constellations on the darker blue arch.
Now you have a handmade piece of decor that looks like it came straight from a boutique design shop


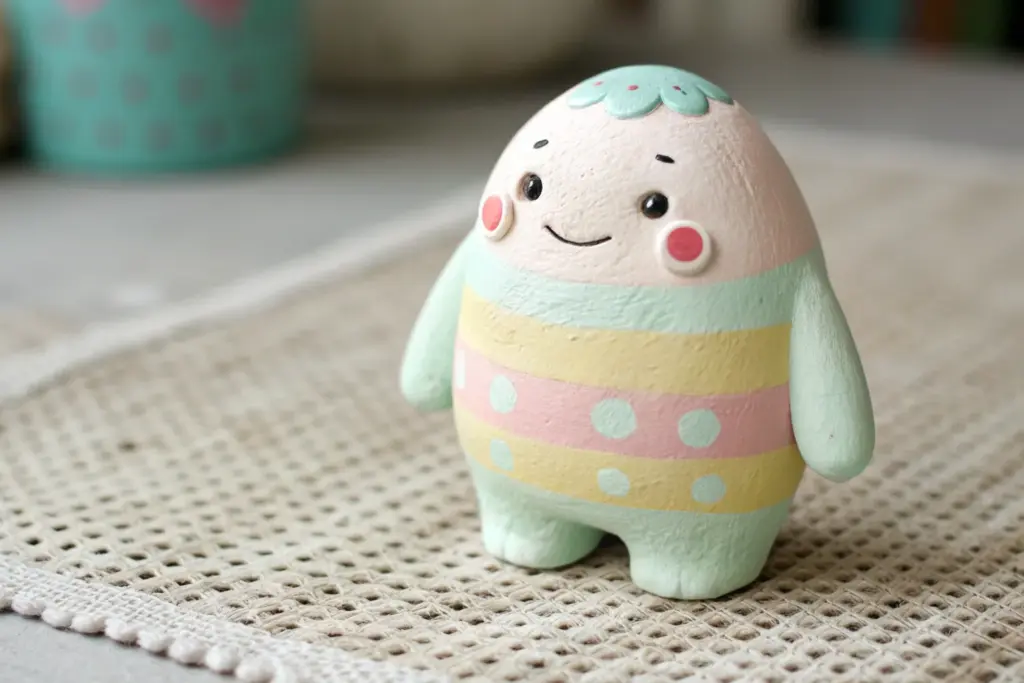
Mushroom Buddy Figurines
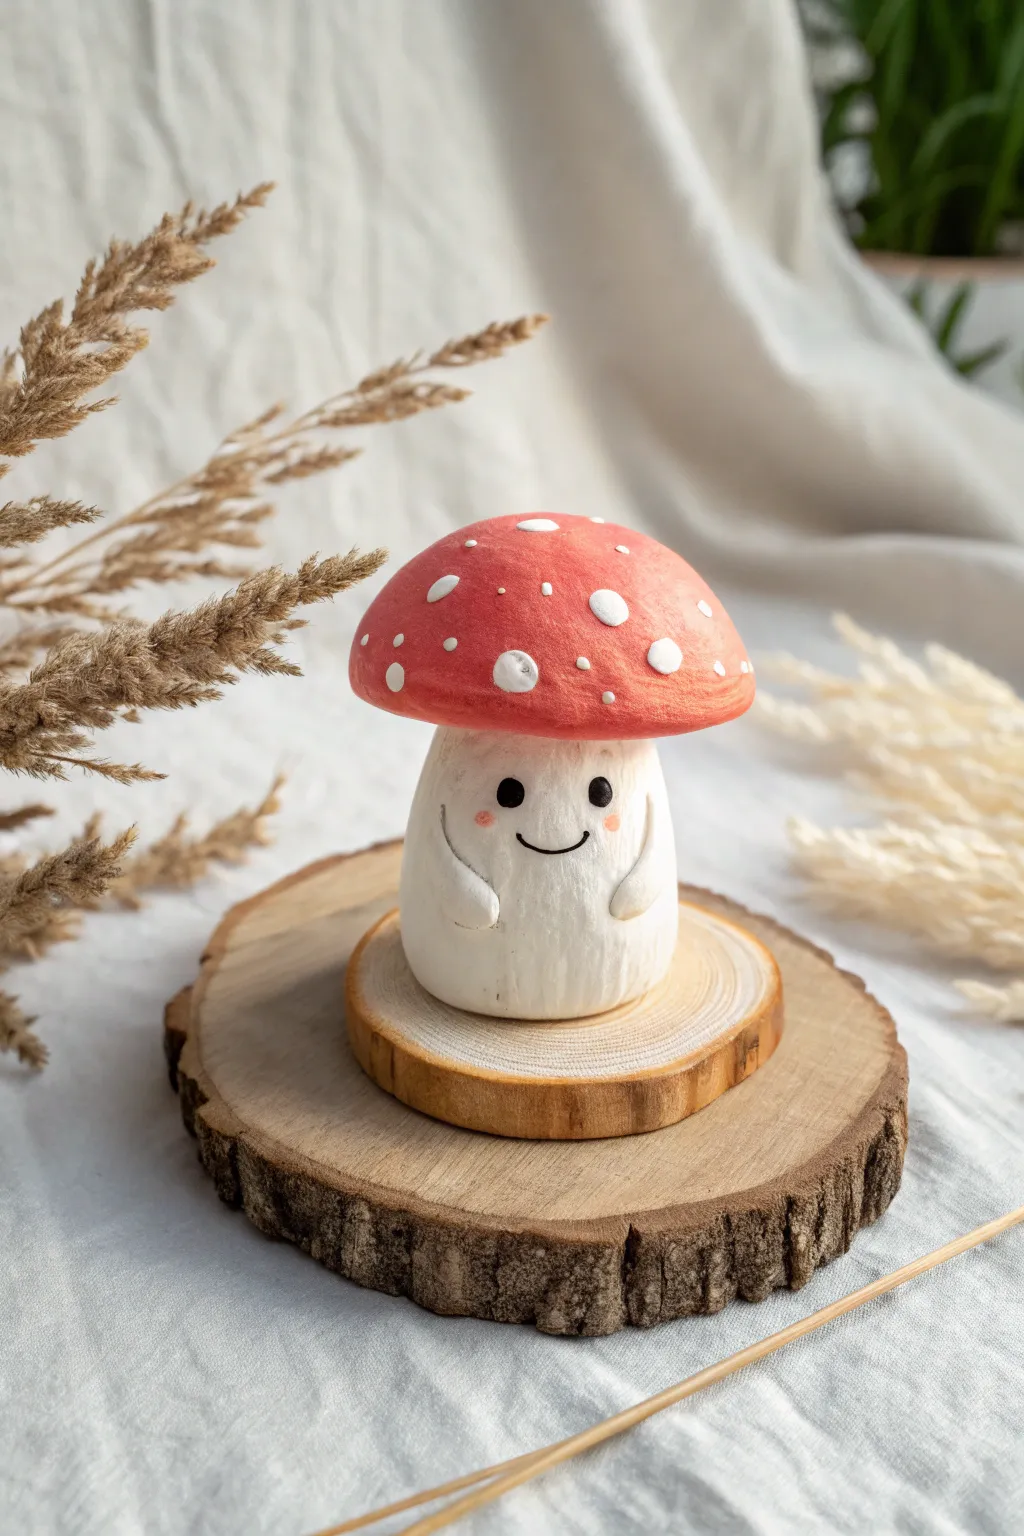
Create a woodland friend with this adorable air-dry clay mushroom project that sits happily on any shelf. This cheerful figurine features a classic red cap dotted with white and a sweet, smiling face that brings the whole piece to life.
Detailed Instructions
Materials
- White air-dry clay
- Acrylic paints (Red, Black, White, Pink)
- Small paintbrushes (detail and medium flat)
- Cup of water
- Sculpting tool or toothpick
- Aluminum foil
- Small wooden display slice (optional)
Step 1: Sculpting the Base
-
Form the body:
Start with a lump of white clay about the size of a golf ball. Roll it into a smooth ball first to remove cracks, then gently roll it into a short, thick cylinder shape that is slightly wider at the bottom for stability. -
Smooth the surface:
Dip your finger in a tiny bit of water and rub it over the cylinder to smooth out any fingerprints or imperfections. The body should look like a stout marshmallow. -
Create the arms:
Pinch off two very small, pea-sized pieces of clay. Roll them into tiny snakes or teardrop shapes. -
Attach the arms:
Score (scratch) the sides of the body slightly where the arms will go. Press the arms gently against the body, curving them slightly upward as if the mushroom is holding its belly. Use a wet sculpting tool or finger to blend the seams where the arms meet the body so they don’t fall off.
Stay Smooth
Keep a small bowl of water nearby while sculpting. Wetting your fingertips slightly will help erase cracks and fingerprints instantly.
Step 2: Creating the Cap
-
Prepare the core:
To keep the cap light, I like to crumple a small ball of aluminum foil first. This saves clay and prevents the top from being too heavy. -
Shape the clay cap:
Flatten a larger ball of clay into a pancake, then drape it over your foil ball (or just shape a solid dome if you skipped the foil). Smooth it into a classic mushroom cap shape—rounded on top and flat underneath. -
Texture the underside:
Before attaching, use a toothpick or clay tool to draw fine lines radiating from the center of the flat underside to the edge, mimicking mushroom gills. -
Join the parts:
Score the top of the stalk and the center of the cap’s underside. Add a drop of water or clay slip (clay mixed with water) and press the cap firmly onto the stalk. Smooth the connection slightly underneath to secure it. -
Final smooth and dry:
Give the whole figure one last smoothing with a damp finger. Set it aside in a safe, dry place for 24-48 hours until it is completely hard and white.
Step 3: Painting the Details
-
Paint the cap red:
Once fully dry, use a medium brush to paint the entire top of the mushroom cap with bright red acrylic paint. You may need two coats for opaque coverage. -
Paint the stalk:
Even though the clay is white, painting the body with white acrylic paint gives it a uniform, finished look and seals the clay. Paint carefully around the red cap. -
Add the spots:
Dip the handle end of a paintbrush into white paint to create perfect polka dots on the red cap. Vary the pressure to make some dots large and some small. -
Draw the face:
Using your smallest detail brush and black paint, paint two small vertical ovals for eyes and a wide U-shape for the smile. -
Add gentle blush:
Mix a tiny bit of red with white to make soft pink. Dab two little cheek spots underneath the eyes to give him a rosy glow. -
Highlight the eyes:
This is the secret step: add a tiny speck of white paint inside the black eye ovals. This ‘catchlight’ makes the character look alive and friendly.
Cracks happen?
If small cracks appear as the clay dries, mix a tiny bit of fresh clay with water to make a paste and fill them in like spackle.
Place your happy mushroom on a sunny windowsill or a wooden slice to bring a bit of nature indoors