If you’ve been craving cute little organizers you can actually make in an afternoon, air dry clay trays are the sweet spot. I love them because they’re beginner-friendly, endlessly customizable, and they instantly make your nightstand or desk feel more intentional.
Classic Round Trinket Tray
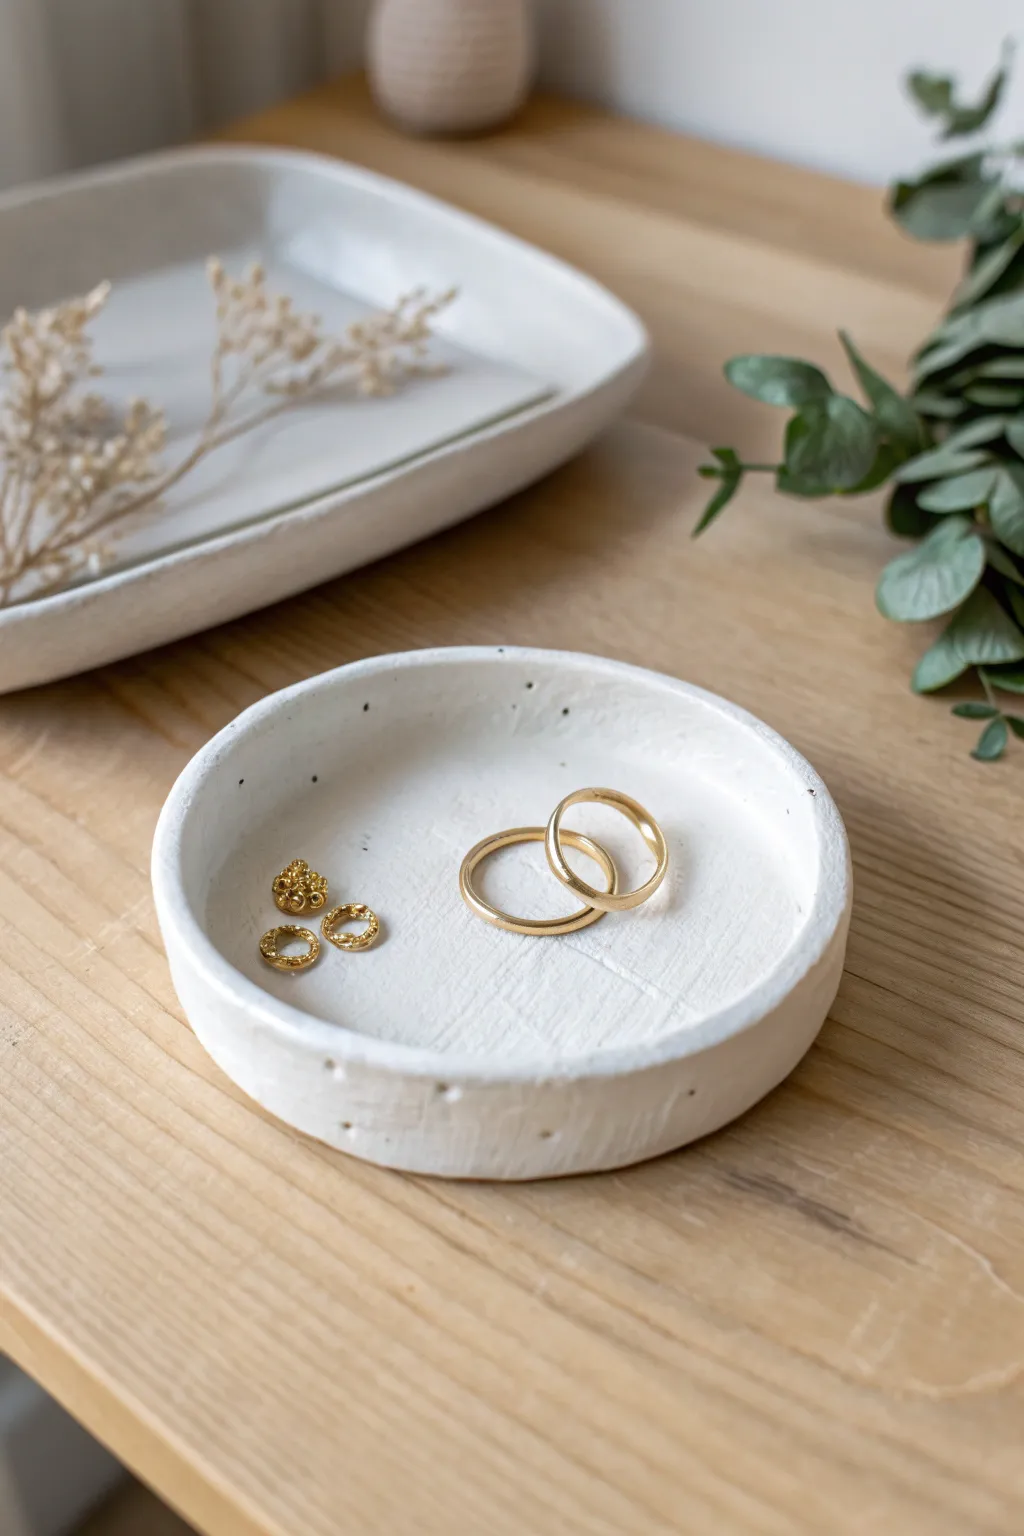
Embrace the beauty of imperfection with this lovely textured trinket dish, perfect for keeping your everyday gold bands and studs safe. The rustic, handcrafted finish combined with delicate black speckles gives it a high-end ceramic look without needing a kiln.
Detailed Instructions
Materials
- White classic air dry clay
- Rolling pin (acrylic or wooden)
- Round cookie cutter or a bowl (approx. 4-5 inches)
- Craft knife
- Small bowl of water
- Sponge or fingers for smoothing
- Fine grit sandpaper
- White acrylic paint (matte finish)
- Black acrylic paint
- Old toothbrush or stiff paintbrush
- Matte varnish or sealant
- Canvas or parchment paper (work surface)
Step 1: Shaping the Base
-
Prepare the Clay:
Start by taking a handful of white air dry clay. Knead it in your hands for a minute or two to warm it up and make it pliable, ensuring there are no air bubbles trapped inside. -
Roll it Out:
Place the clay on your canvas or parchment paper. Use your rolling pin to flatten it into an even slab, aiming for a thickness of about 1/4 inch (approx. 6mm). Don’t go too thin, or the base might crack. -
Cut the Circle:
Press your round cookie cutter or place a small bowl upside down onto the clay slab. Use the craft knife to cut around the guide if using a bowl, creating a clean circular base. -
Keep the Scraps:
Gather the excess clay you just trimmed away. We will use this to create the raised rim of the dish.
Uneven is Better
Don’t stress about a perfectly round circle. Slightly warping the rim or creating gentle ‘waves’ with your fingers enhances the wabi-sabi aesthetic.
Step 2: Building the Rim
-
Create a Coil:
Roll the scrap clay into a long, even snake or coil. It should be long enough to wrap around the entire circumference of your base, with a thickness similar to the base itself. -
Score the Edges:
Use your craft knife or a needle tool to make small hash marks (scoring) along the outer edge of the circular base and along one side of your clay coil. This rough texture helps the pieces bond. -
Apply Water:
Dab a little water onto the scored areas to act as ‘glue’. It should become slightly tacky or muddy. -
Attach the Coil:
Gently press the coil onto the edge of the base circle. Cut off any excess length and blend the two ends of the coil together so the seam disappears. -
Blend the Seams:
Use your thumb or a modeling tool to drag the clay from the coil down onto the base, both on the inside and outside. I find using a downward smearing motion works best to fuse them into a single piece.
Step 3: Refining and Drying
-
Create Texture:
Instead of smoothing it perfectly, use your fingers to leave subtle impressions or ‘dents’ along the outside rim. This gives it that handmade, organic pottery feel seen in the photo. -
Level the Rim:
Place the tray upside down gently on your table for a moment to ensure the top rim is relatively level, then flip it back over. -
Final Smooth:
Dip your finger or a sponge in water and gently wipe the inside surface to remove harsh tool marks, but remember to keep the outside rustic. -
Let it Dry:
Place the tray in a cool, dry spot away from direct sunlight. Let it dry for 24-48 hours. Carefully flip it over halfway through the drying process to ensure the bottom dries evenly. -
Sand Roughly:
Once fully dry and hard, use fine-grit sandpaper to smooth any sharp edges on the rim, but avoid over-sanding the textured exterior.
Add a Gold Rim
For a luxe touch, carefully paint just the very top edge of the rim with gold liquid leaf or metallic acrylic paint after the speckling step is dry.
Step 4: Painting and Speckling
-
Base Coat:
Apply two coats of matte white acrylic paint to the entire dish, allowing it to dry completely between layers. This creates a clean, ceramic-like canvas. -
Prepare the Splatter:
Mix a tiny amount of black acrylic paint with a few drops of water. You want it to be the consistency of ink or thin cream so it splatters easily. -
Flick the Paint:
Dip an old toothbrush into the watered-down black paint. Hold it over the tray and maintain a distance of about 6-8 inches. Run your thumb across the bristles to flick tiny specks onto the dish. -
Control the Speckles:
Practice on a piece of paper first to get the density right. The goal is a light dusting of tiny dots, not large blobs. -
Seal the Tray:
Once the paint is totally dry, apply a coat of matte varnish. This protects the clay from moisture and gives it a finished, professional feel.
Now you have a chic, modern spot to rest your favorite jewelry pieces


Oval Vanity Catchall Tray
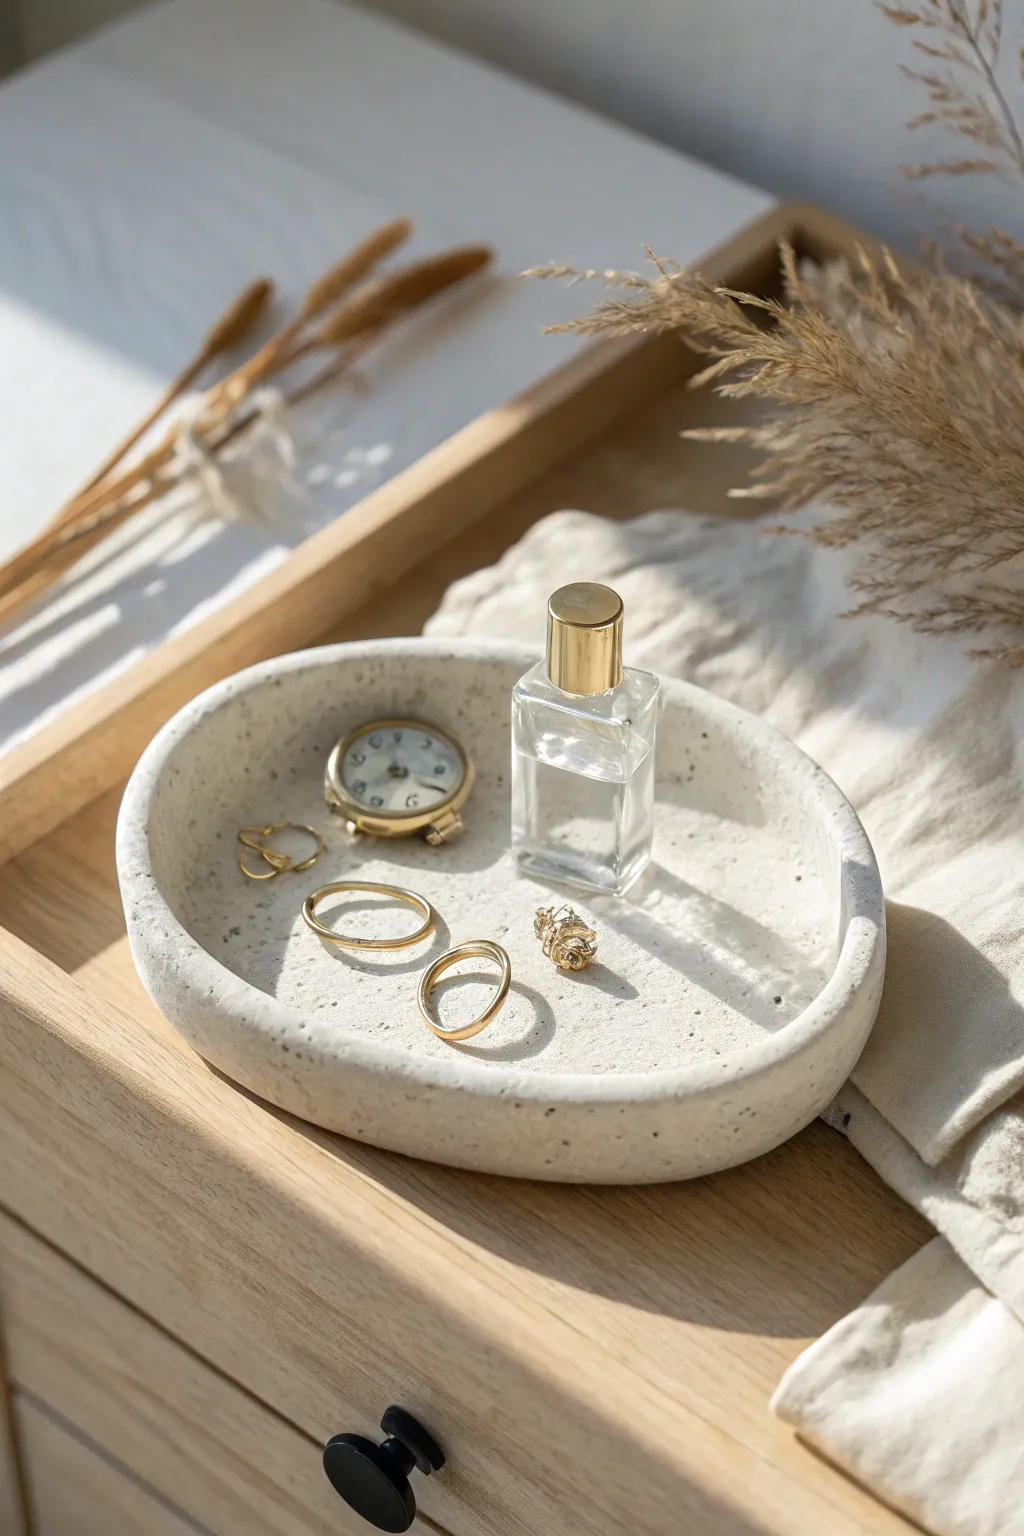
Bring a touch of minimalist elegance to your dresser with this simple yet sophisticated oval catchall. Its organic shape and unique peppered texture make it the perfect resting place for your daily jewelry and perfumes.
How-To Guide
Materials
- White air-dry clay (approx. 300g)
- Acrylic rolling pin
- Rolling guides or two pencils (approx. 5-7mm thick)
- Craft knife or scalpel
- Small bowl of water
- Oval paper template (approx. 6×9 inches)
- Sanding sponge (fine and medium grit)
- Used coffee grounds or black pepper (dried)
- Gloss or satin acrylic varnish
- Soft paintbrush
Step 1: Preparation & Mixing
-
Condition the Clay:
Begin by kneading your white air-dry clay thoroughly. The warmth of your hands will make it pliable and easier to work with, reducing potential cracking later. -
Create the Speckled Texture:
Flatten the clay slightly and sprinkle a pinch of dried coffee grounds or coarse black pepper onto the surface. -
Incorporate the Specs:
Fold the clay over the speckles and knead again until the granules are evenly distributed throughout the lump. Add more if you want a denser pattern, but keep it subtle for that elegant stone look. -
Roll It Out:
Place your clay on a smooth surface or canvas mat. Use rolling guides (or two pencils) on either side of the clay to ensure an even thickness of about 5-7mm as you roll it flat with your acrylic pin.
Cracking Up?
If small cracks appear while drying, don’t panic. Make a paste of clay and water (slip) and fill the cracks, let it dry, then sand smooth.
Step 2: Shaping the Base
-
Cut the Shape:
Place your oval paper template lightly onto the rolled clay slab. Using your craft knife, trace around the template with a steady hand to cut out the base shape. -
Prepare the Coil:
Take the excess clay scraps and roll them into a long, even ‘snake’ or coil. This should be about the thickness of your pinky finger and long enough to circle the entire perimeter of your oval base. -
Score and Slip:
Use a needle tool or knife to make small hatch marks (scoring) around the top edge of your oval base and along one side of your long coil. Dab a little water (slip) onto the scored areas to act as glue.
Step 3: Assembly & Refining
-
Attach the Rim:
Gently press the coil onto the edge of the base, matching up the scored sections. Cut off any excess coil and join the two ends together seamlessly by smoothing the clay across the join. -
Blend the Clay:
Here is where patience pays off; use your thumb or a modeling tool to drag clay from the coil down onto the base on the *inside* of the tray. Repeat this on the *outside*, blending the coil down into the base edge. -
Smooth the Seams:
Once the clay is dragged down, wet your finger slightly and run it over the seams until the transition is invisible and the wall feels like one solid piece with the base. -
Level the Rim:
Check the top rim of your tray. If it’s uneven, gently tap it with a flat tool or paddle to level it out, giving it that modern, flat-top aesthetic seen in the photo. -
Final Smoothing:
Using a slightly damp sponge, wipe down the entire piece to remove fingerprints and minor imperfections before setting it aside.
Pro Tip: Stone Effect
For a more realistic stone look, use a matte varnish instead of gloss. It hides imperfections better and feels more organic to the touch.
Step 4: Finishing Touches
-
Let it Dry:
Place the tray in a cool, dry area away from direct sunlight. Allow it to dry for 24-48 hours, flipping it gently halfway through to let the bottom breathe. -
Sanding:
Once bone dry, use your medium grit sanding sponge to even out the rim and any bumps. Follow up with the fine grit sponge for a silky smooth finish. Wear a mask during this step to avoid inhaling dust. -
Reveal the Speckles:
Sanding will help expose more of the coffee or pepper speckles that might have been hidden under a thin layer of clay. -
Dust Off:
Wipe the tray thoroughly with a dry cloth or soft brush to remove all sanding dust. Any leftover dust will ruin the varnish finish. -
Seal and Protect:
Apply a thin coat of satin or gloss varnish to seal the clay. This protects it from moisture and gives it a finished ceramic look. I usually do two thin coats rather than one thick one for durability.
Now you have a stunning, stone-effect tray ready to display your favorite treasures


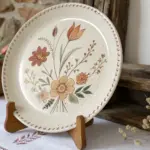
Scalloped Edge Jewelry Tray
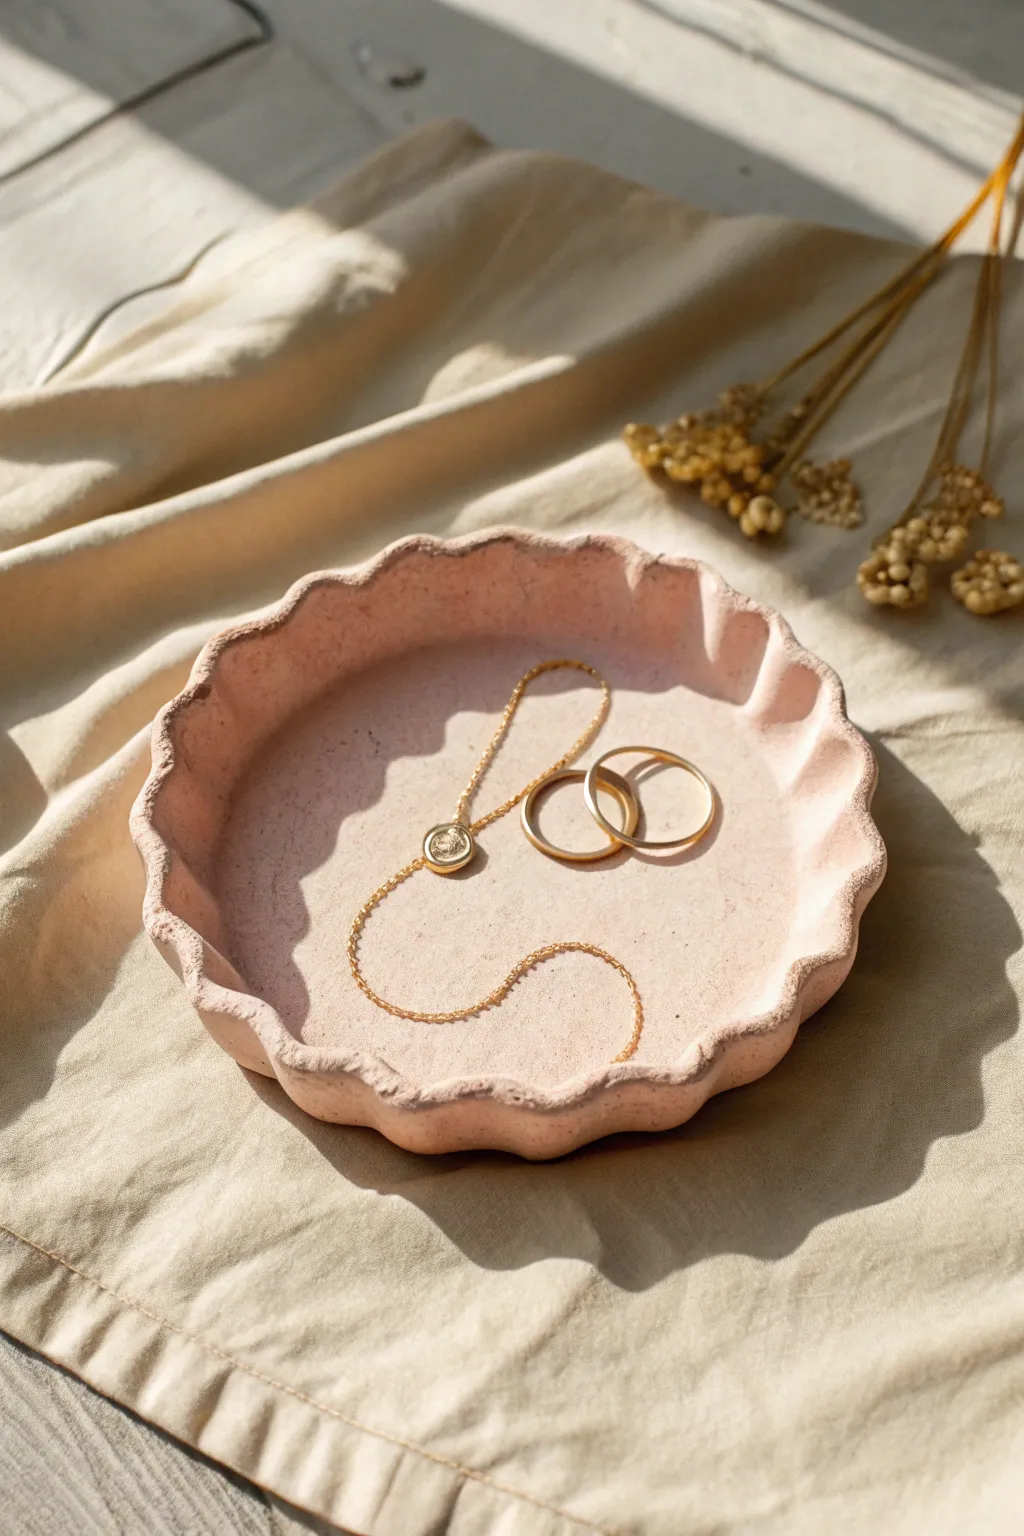
Recreate this delicate and functional jewelry organizer that features a soft, textured finish in a dreamy dusty pink hue. The charming scalloped edges give it a vintage feel, making it the perfect catch-all for your favorite gold rings and bracelets.
Detailed Instructions
Materials
- Air dry clay (white or terracotta)
- Acrylic paint (Dusty Pink or mix Red + White + drop of Brown)
- Baking soda (for texture)
- Rolling pin
- Parchment paper or canvas mat
- Round bowl or cookie cutter (approx. 4-5 inches diameter)
- Craft knife or needle tool
- Bowl of water
- Sponge or soft paintbrush
- Fine-grit sandpaper
- Matte sealant or varnish
Step 1: Shaping the Base
-
Condition the Clay:
Cut off a generous chunk of air dry clay and warm it up in your hands. Knead it thoroughly for a few minutes until it feels pliable and free of cracks. -
Roll it Out:
Place the clay between two sheets of parchment paper or directly on your canvas mat. Roll it out evenly until you have a slab that is about 1/4 inch thick. Aim for consistency so the drying process is even. -
Cut the Circle:
Place your round bowl or cookie cutter onto the slab. Using your craft knife or needle tool, trace around the object to cut out a perfect circle. Remove the excess clay and set it aside. -
Smooth the Edges:
Dip your finger in a little bit of water and run it along the cut edge of your circle to smooth out any roughness or sharp corners left by the knife.
Step 2: Creating the Scalloped Wall
-
Prepare the Coil:
Using the excess clay, roll out a long snake or coil. It should be long enough to wrap around the circumference of your circle base and roughly the thickness of a pencil. -
Attach the Coil:
Score the outer edge of your base circle (scratch cross-hatch marks) and dab it with a wet finger. Place the coil on top of the scored edge, pressing down gently to adhere it. -
Blend the Seams:
Using a modeling tool or your thumb, drag the clay from the inside of the coil down onto the base to merge them seamlessly. Do the same on the outside. The join should be invisible. -
Pinch the Scallops:
To create the scalloped effect, use your thumb and forefinger to gently pinch the rim at regular intervals. I like to use the handle of a paintbrush to press inward between the pinches to accentuate the curves. -
Refine the Form:
Go around the rim once more, smoothing the tops of the scallops with a damp sponge so they look soft rather than sharp.
Smooth Seams Trick
If you struggle to blend the coil to the base using just water, mix a tiny bit of clay with water to make a ‘slip’ paste. Use this glue to bond the pieces securely.
Step 3: Drying and Texturing
-
Let it Cure:
Place your tray in a safe, dry spot away from direct sunlight. Allow it to dry for 24-48 hours. Carefully flip it over halfway through the process to ensure the bottom dries completely. -
Sand for Smoothness:
Once fully hard, inspect the tray for any unwanted bumps. Use fine-grit sandpaper to gently sand down rough patches, especially around the scalloped rim. -
Mix Textured Paint:
In a small container, mix your acrylic paint to achieve that dusty pink color. Add a teaspoon of baking soda to the paint and mix well. This creates a fluffy, chalky texture similar to plaster or terracotta. -
Apply Base Coat:
Paint the entire surface of the tray, inside and out. The baking soda mixture will be thicker than normal paint, so dab it into crevices to ensure coverage. -
Add a Second Coat:
Let the first layer dry for about 20 minutes, then apply a second coat to build up that matte, stony texture seen in the photo. -
Seal (Optional):
If you plan to use this near water or want extra durability, apply a clear matte sealant spray once the paint is completely bone dry.
Speckled Stone Look
To mimic the natural stone look in the image, use an old toothbrush to flick tiny specks of white or dark brown paint onto the pink surface before sealing.
Place your finished tray on your nightstand to beautifully display your daily accessories


Pinched Rim Organic Tray
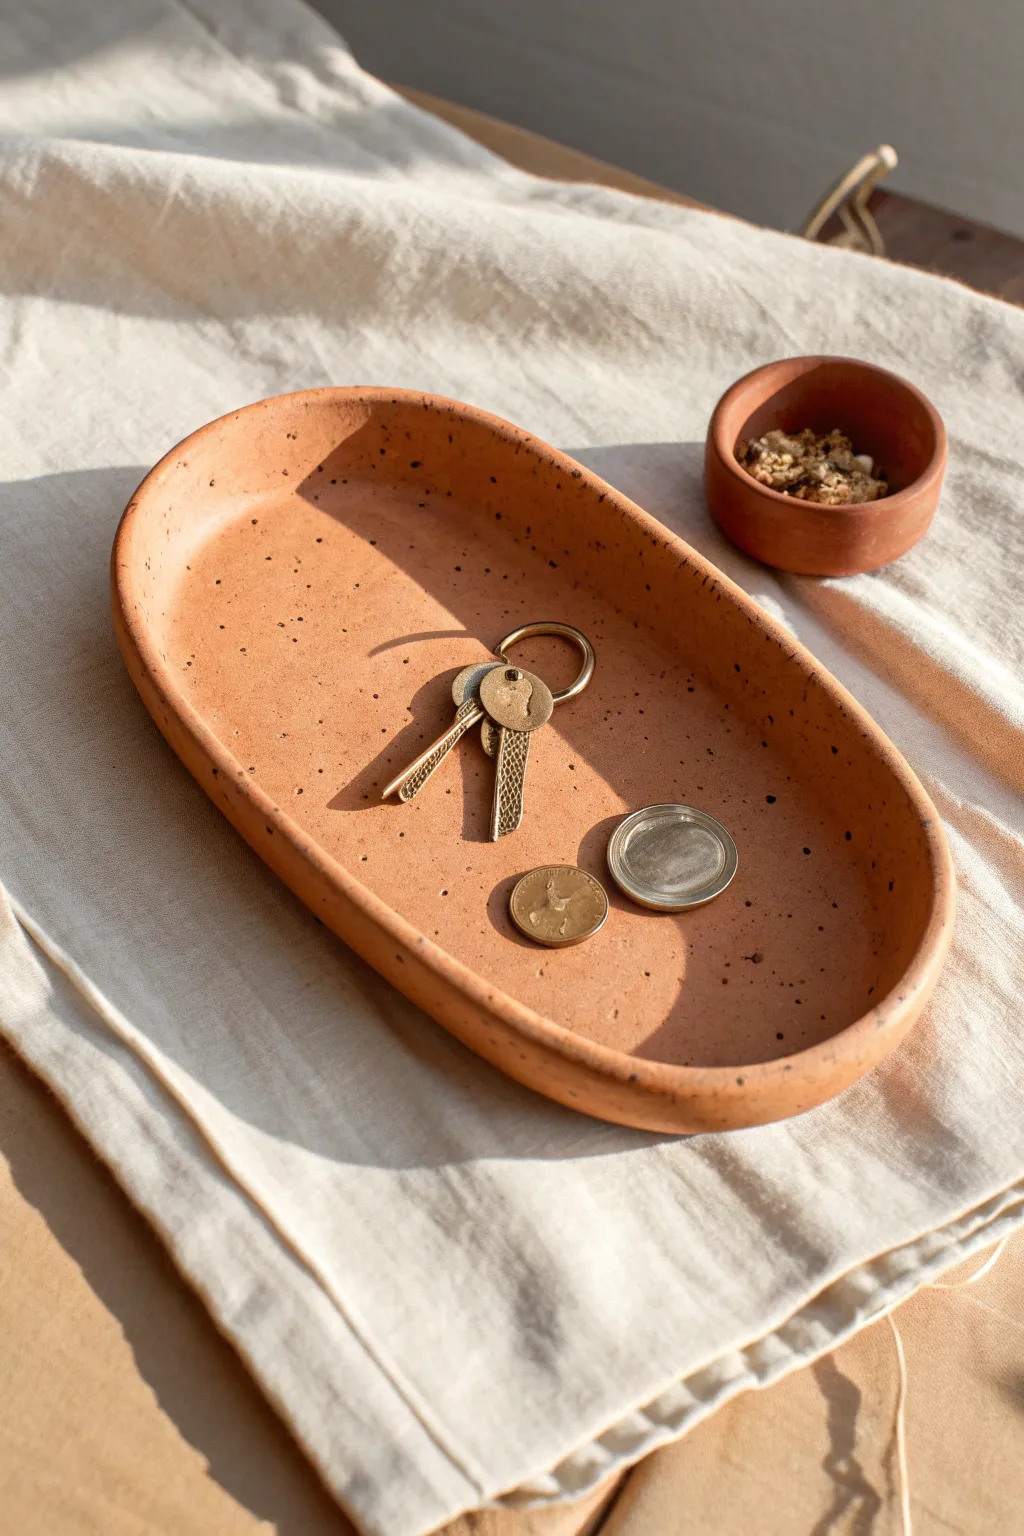
This minimalist, pill-shaped tray features a warm terracotta tone and a gentle, organic rim that feels wonderfully handmade. The scattered speckles add depth and texture, making it the perfect landing spot for keys and coins.
Step-by-Step Guide
Materials
- Terracotta colored air-dry clay (or white clay + acrylic paint)
- Black or dark brown acrylic paint (for speckles)
- Rolling pin
- Sharp craft knife or clay tool
- Sponge
- Small bowl of water
- Old toothbrush
- Sandpaper (fine grit)
- Matte varnish or sealant
- Canvas or parchment paper (work surface)
Step 1: Shaping the Base
-
Prepare your workspace:
Lay down a piece of canvas or parchment paper to prevent sticking. Take a generous handful of terracotta air-dry clay and knead it until it’s pliable and smooth. -
Roll out the slab:
Use your rolling pin to flatten the clay into an even slab. Aim for a thickness of about 1/4 inch (6mm) to ensure the tray is sturdy but not clunky. -
Create a template:
To get that elongated pill shape, sketch a long oval on a piece of paper first. Cut it out and place it gently on top of your rolled clay as a guide. -
Cut the shape:
Using a sharp craft knife, trace around your paper template. Hold the knife vertically to keep the edges clean and straight. -
Smooth the edges:
Dip your finger in a little water and run it along the cut edge to soften any sharpness left by the knife. I find doing this now saves a lot of sanding time later.
Step 2: Forming the Rim
-
Create a coil:
Roll a long snake of clay about half the thickness of your pinky finger. Ensure it’s long enough to go around the entire perimeter of your oval base. -
Score and slip:
Use a tool to scratch up the outer edge of your base and one side of your coil. Dab a little water (slip) onto the scratched areas to act as glue. -
Attach the coil:
Place the coil on top of the base’s edge. Press it down firmly but gently to adhere it. -
Blend the inside seam:
Using your thumb or a modeling tool, drag the clay from the coil down onto the base on the inside of the tray. Smooth it out until the join is invisible. -
Blend the outside seam:
Repeat the blending process on the outside edge, merging the coil and the base so it looks like one solid piece. -
Refine the rim:
Pinch the rim gently between your thumb and forefinger to shape it. The goal is a slightly organic, vertical wall, roughly 1/2 inch high. Use a damp sponge to smooth out fingerprints. -
Dry partially:
Let the tray sit for about 24-48 hours. Turn it over gently halfway through so the bottom dries evenly.
Fixing Cracks
If small cracks appear while drying, don’t panic. Mix a tiny bit of fresh clay with water to make a paste, fill the crack, and smooth it over with a damp finger.
Step 3: Finishing Touches
-
Sand for smoothness:
Once bone dry, use fine-grit sandpaper to buff away any rough spots or uneven ridges on the rim and surface. -
Create the speckle mix:
Dilute a small drop of dark brown or black acrylic paint with water until it’s quite runny. -
Apply the splatter:
Dip an old toothbrush into the watery paint. Hold it over the tray and run your thumb across the bristles to flick tiny speckles across the surface. Test on paper first to control the density. -
Let the paint dry:
Wait for the speckles to dry completely, which should only take a few minutes. -
Seal the piece:
Apply two coats of matte varnish to protect the clay from moisture and scratches. Let the first coat dry before adding the second.
Level Up
Before drying, stamp a small initial or symbol into the center or bottom of the tray for a personalized, custom touch.
Now you have a stylish, custom tray ready to organize your everyday essentials

What Really Happens Inside the Kiln
Learn how time and temperature work together inside the kiln to transform clay into durable ceramic.
Minimal Ring Slot Tray
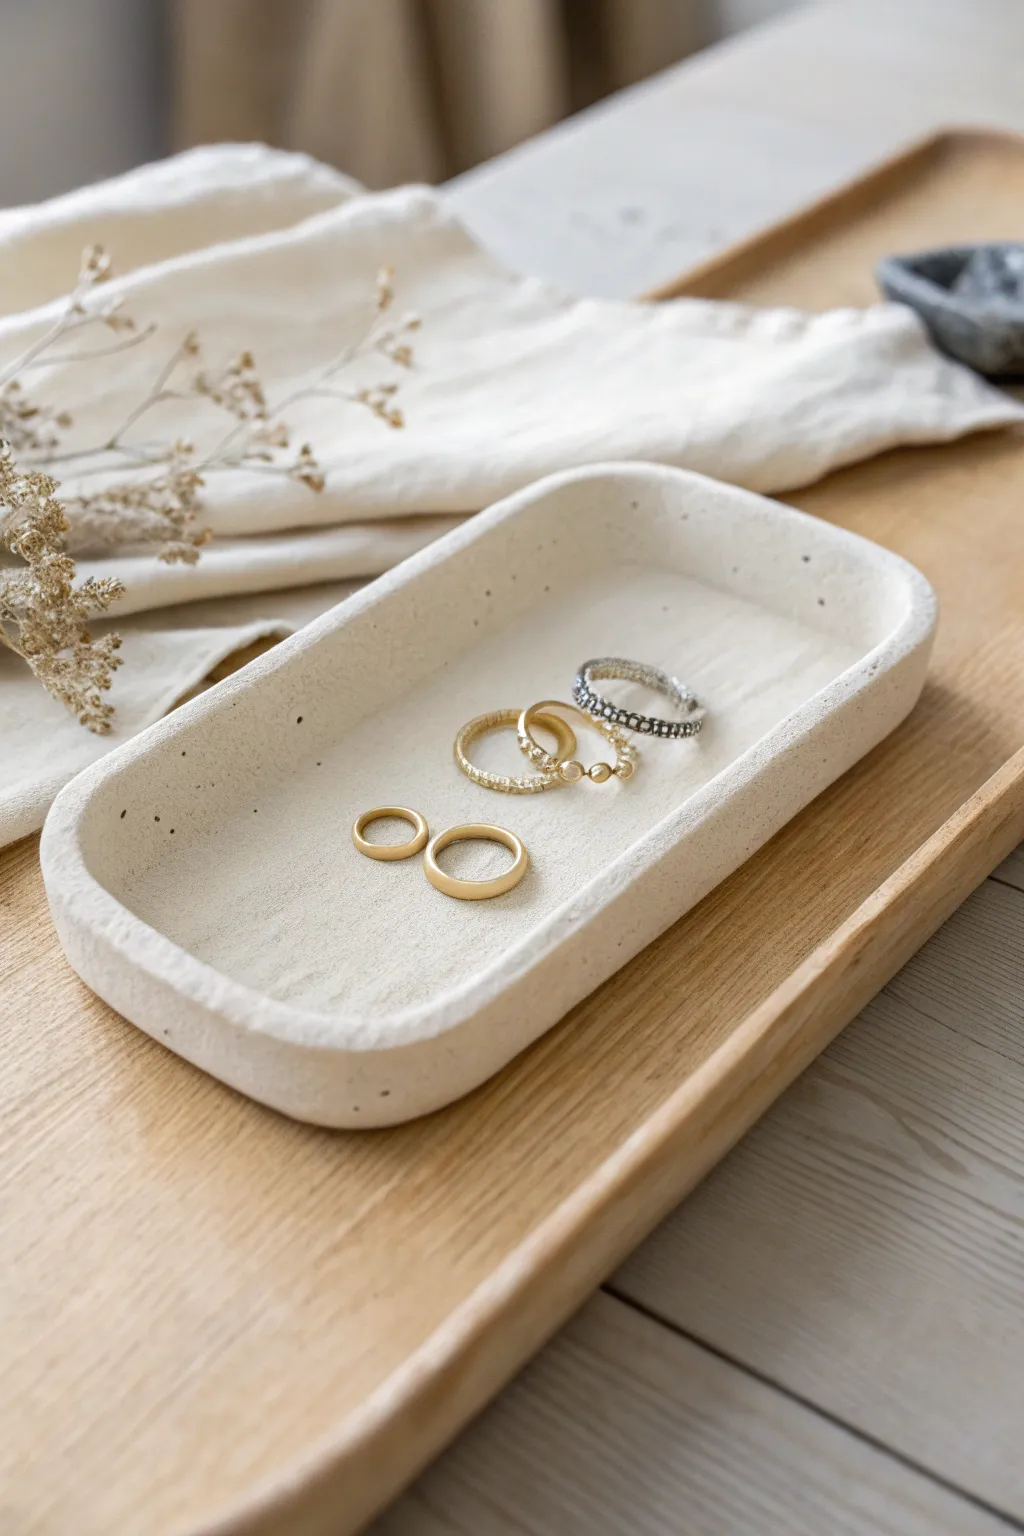
Achieve the high-end look of cast concrete or limestone without the heavy lifting using standard air dry clay. This shallow rectangular tray features a beautifully textured, speckled finish that serves as a calm, neutral backdrop for your favorite jewelry pieces.
Step-by-Step Tutorial
Materials
- White air dry clay
- Rolling pin
- sharp craft knife or clay blade
- Small bowl of water
- Sponge
- Sandpaper (medium and fine grit)
- Acrylic paint (Light beige/cream, white, black, dark brown)
- Old toothbrush
- Matte varnish or sealant
- Ruler
Step 1: Shaping the Tray
-
Condition the Clay:
Start by grabbing a handful of air dry clay and kneading it in your hands until it feels warm and pliable. This helps prevent cracking later on. -
Roll out the Slab:
Roll the clay out onto a flat surface to a thickness of about 1/4 inch. Aim for an even thickness throughout the slab for a professional look. -
Cut the Base:
Using a ruler and your craft knife, cut out a rectangle with rounded corners. Based on the photo, a size of roughly 4 inches by 7 inches works well. -
Create the Walls:
Take the excess clay and roll a long snake or coil, approximately the thickness of a pencil. This will form the raised rim of the tray. -
Attach the Coil:
Score the outer edge of your rectangular base and the bottom of your coil with the craft knife. Dab a little water on the scored areas to act as glue. -
Blend the Seams:
Place the coil around the perimeter of the base. Using your thumb or a modeling tool, firmly smudge the clay from the coil down into the base on both the inside and outside to merge them completely. -
Refine the Shape:
Once the coil is blended, use your fingers to smooth the walls upward. I like to keep the walls quite low and slightly rounded at the top to match the minimal aesthetic seen in the photo. -
Smooth the Surface:
Dip a sponge in a tiny bit of water and run it over the entire piece to remove fingerprints and minor bumps. Don’t use too much water, or the clay will get slimy. -
Initial Drying:
Let the tray dry for 24-48 hours. Flip it over halfway through the process to ensure the bottom dries evenly.
Clean Edges Trick
Use a damp finger to run along the rim just before drying. This burnshes the clay, reducing the amount of sanding you’ll need to do later.
Step 2: Sanding and Texture
-
Sand for Evenness:
Once fully dry, use medium-grit sandpaper to level out any uneven spots on the rim. Follow up with fine-grit sandpaper for a smooth-to-the-touch finish. -
Clean the Dust:
Wipe away all clay dust with a slightly damp cloth or a dry brush before moving on to painting.
Make it Functional
Before the clay dries, press a real ring into the wet base to create custom indents, ensuring your jewelry sits perfectly in place.
Step 3: Faux Stone Finish
-
Base Coat:
Mix white acrylic paint with a tiny drop of beige or cream to create an off-white, limestone color. Paint the entire tray, including the bottom. -
Apply Second Coat:
If the first coat looks streaky, apply a second coat once the first is dry to ensure solid, opaque coverage. -
Prepare Speckle Paint:
Dilute a small amount of black or dark brown paint with water until it is very runny and ink-like. -
Splatter Technique:
Dip an old toothbrush into the runny dark paint. Hold it over the tray and flick the bristles with your thumb to spray tiny speckles onto the surface. -
Control the Texture:
Practice on a piece of paper first to control the spray pattern. You want a very fine mist of dots to mimic natural stone, not large blobs. -
Layering Speckles:
Repeat the splatter process with a slightly lighter grey or brown if you want more depth to the stone effect. -
Seal the Tray:
Once the paint is completely dry, apply a matte varnish. This protects the ‘stone’ finish and gives it that realistic, non-shiny texture.
Place your delicate new tray on a wooden dresser or bedside table for an instant touch of minimalist elegance
Marbled Swirl Color Tray
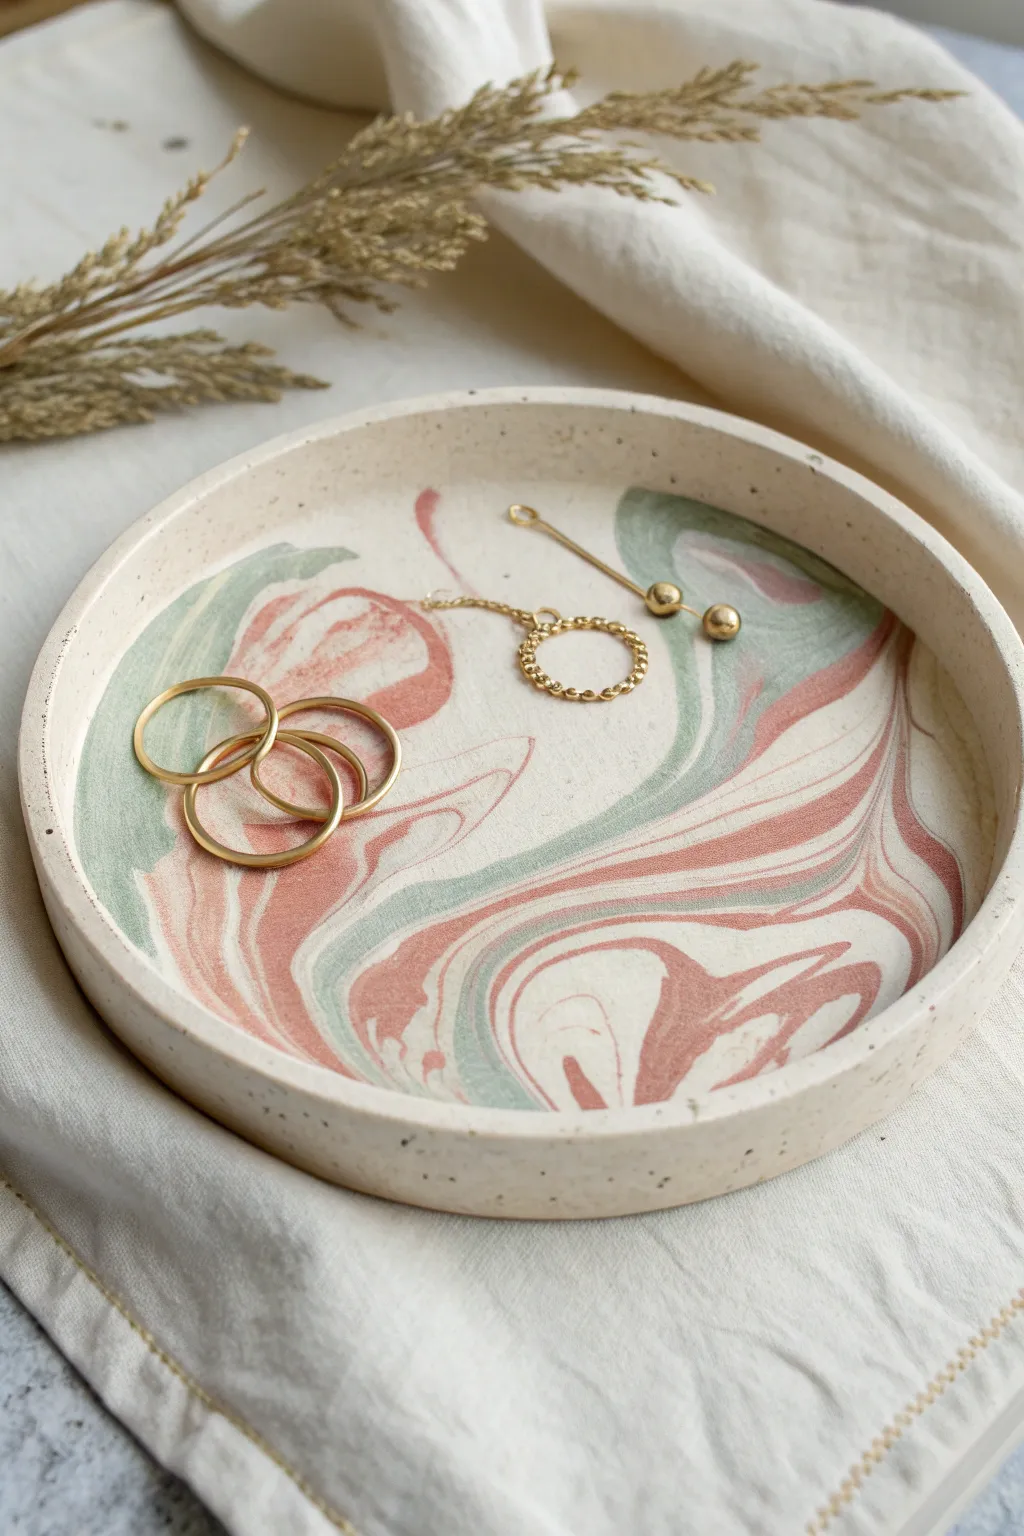
Achieve a sophisticated, high-end look with this marbled jewelry dish that features soft swirls of dusty rose and sage green against a speckled cream background. The organic patterns make every single piece unique, offering a perfect resting place for your favorite gold accessories.
Step-by-Step Guide
Materials
- Air dry clay (white or cream)
- Acrylic paint (Dusty Rose, Sage Green, and a speckled cream/sand color)
- Rolling pin
- Circle cutter or a bowl to trace
- Sharp craft knife
- Small bowl of water
- Fine grit sandpaper (220-400 grit)
- Gloss or satin varnish/sealer
- Paintbrushes
- Palette or wax paper for mixing
Step 1: Preparing the Clay Base
-
Condition the Clay:
Begin by grabbing a handful of air dry clay. Knead it thoroughly in your hands until it becomes warm, soft, and pliable. This prevents cracks later on. -
Create the Color Batches:
Separate your clay into three uneven balls. The largest ball (about 70%) creates the base color. The two smaller balls (about 15% each) will be your accent colors. -
Tint the Clay:
Add a small drop of speckled cream paint to the large ball and knead until uniform. Do the same with the smaller balls, adding pink to one and green to the other. You want the color integrated into the clay itself, not just painted on top, for a true marble effect. -
Form Snakes:
Roll each of the three colored clay balls into long, thin snake-like shapes on your work surface. -
Twist and Combine:
Hold the three snakes together and twist them into a single, large rope. Fold the rope in half and twist again. Repeat this folding and twisting motion 3-4 times—but don’t overdo it, or the colors will blend into a muddy grey instead of distinct swirls.
Pro Tip: Marbling
Stop mixing sooner than you think! Under-mixing keeps the color veins distinct. If you over-knead, the distinct pink and green lines will disappear into the cream.
Step 2: Shaping the Tray
-
Roll Out the Slab:
Ball up your twisted clay and place it on a smooth surface. Use a rolling pin to flatten it into a slab about 1/4 inch thick. You should see the beautiful marbling emerge. -
Cut the Circle:
Place a bowl or round template onto the slab to determine the size of your tray. Use a sharp craft knife to cut closely around the edge for a clean circle. -
Form the Lip:
Gently lift the edges of the circle. You can either mold it by hand to create a raised rim or place the clay circle inside a shallow bowl to dry in a curved shape. I prefer molding by hand for a more organic, handmade feel. -
Smooth the Edges:
Dip your finger in a little bit of water and run it along the rim of the tray to smooth out any rough cuts or cracks. Smooth the interior surface gently as well.
Level Up: Gold Rim
For an extra touch of luxury, paint just the very top edge of the rim with liquid gold leaf or metallic gold acrylic paint after the clay has dried.
Step 3: Finishing Touches
-
Let it Dry:
Place the tray in a cool, dry place away from direct sunlight. Allow it to dry completely for 24-48 hours. The color will lighten slightly as the moisture evaporates. -
Sand for Smoothness:
Once fully cured, take your fine-grit sandpaper and gently sand the rim and any rough spots on the surface. Wipe away the dust with a slightly damp cloth. -
Add Speckles (Optional):
To enhance the stone look shown in the image, mix a tiny bit of dark grey or black paint with water. Flick the bristles of a toothbrush or stiff brush to spatter tiny speckles over the dried dish. -
Seal the Tray:
Apply a coat of gloss or satin varnish to the entire piece. This protects the clay from moisture and gives it a finished ceramic look. -
Second Coat:
After the first coat is dry to the touch, apply a second thin layer of varnish for extra durability.
Now you have a chic, modern catch-all dish ready to display your treasures


The Complete Guide to Pottery Troubleshooting
Uncover the most common ceramic mistakes—from cracking clay to failed glazes—and learn how to fix them fast.
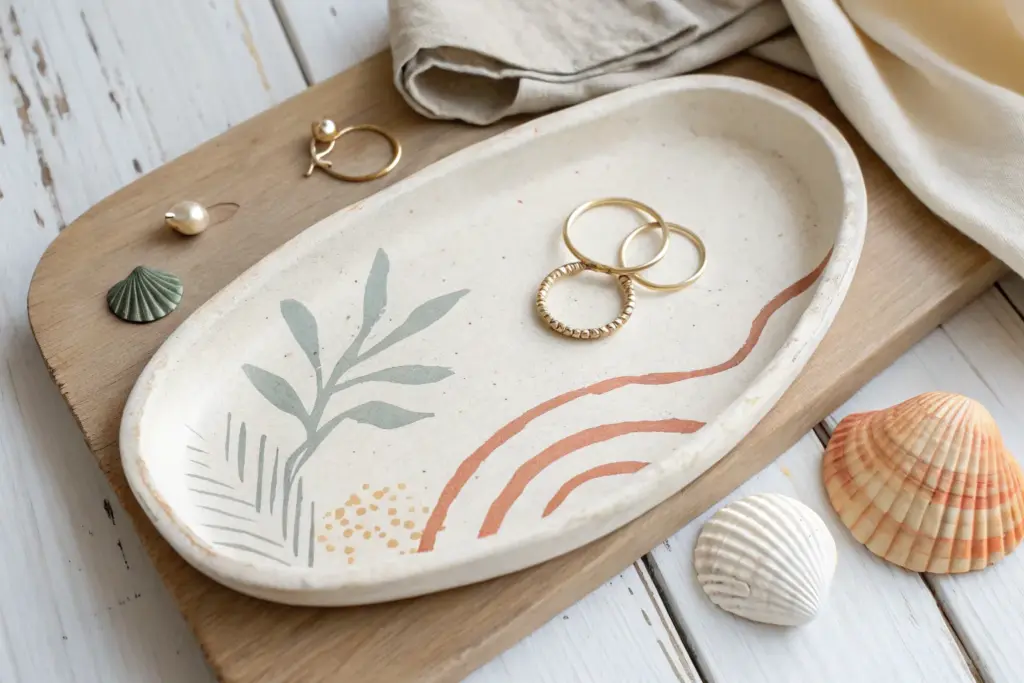
Terrazzo Speckled Trinket Tray

Embrace the trendy, polished look of terrazzo without the heavy concrete or resin often required. This elegant oval tray uses simple air-dry clay and a clever inlay technique to create beautiful, burnt orange and black speckles that look effortlessly chic.
How-To Guide
Materials
- White or cream air-dry clay (approx. 200g)
- Acrylic paints (burnt orange, black, mustard yellow)
- Rolling pin or smooth glass jar
- Craft knife or clay cutting tool
- Fine-grit sandpaper (400-600 grit)
- Small bowl of water
- Gloss or matte varnish (sealant)
- Parchment paper or silicone mat
- Paintbrush
Step 1: Preparing the Terrazzo Chips
-
Mix your colors:
Pinch off three very small marble-sized pieces of white clay. Mix a drop of burnt orange acrylic paint into one, black into the second, and a mustard yellow into the third. Knead each until the color is solid and uniform. -
Flatten the colored clay:
Roll out these colored clay pieces as thin as possible, almost like paper. The thinner they are, the easier they will blend later. -
Create the chips:
Let these thin colored sheets dry for about 10-15 minutes so they are less sticky, then tear or cut them into random, tiny angular debris. Vary the sizes from tiny specks to small chunks for a natural stone look.
Terrazzo Troubleshooting
If colored chips smear during sanding, the clay wasn’t fully dry. Wait another 12 hours. If smearing happens during rolling, let the colored bits dry longer before embedding.
Step 2: Forming the Base
-
Roll the main slab:
Take your large ball of white clay and roll it out on parchment paper to a thickness of about 5-6mm. Aim for a rough oval shape slightly larger than your desired final tray. -
Scatter the chips:
Generously sprinkle your prepared colored chips over the surface of the wet white clay slab. I like to concentrate a few larger pieces near the edges for visual interest. -
Embed the pattern:
Gently roll over the slab again with your rolling pin. Press firmly enough to sink the chips flush with the white clay surface, creating a smooth, unified sheet. Don’t make the slab too thin—aim for a final thickness of 4mm.
Level Up: Gold Accents
For a luxe touch, mix gold leaf flakes in with your colored clay chips before rolling. The metallic flecks will shine brilliantly once the piece is sanded and glazed.
Step 3: Shaping and Refining
-
Cut the oval:
Use a paper template or freehand an oval shape with your craft knife. Cut cleanly through the clay slab to define the tray’s perimeter. -
Create the rim:
Instead of adding a separate coil, gently curl the edges of your oval slab upwards with your fingers. Use a little water to smooth out any tiny cracks that appear as you bend the clay. -
Smooth the transition:
Dip your finger in water and run it along the inside curve where the floor meets the wall to ensure a seamless, gentle slope rather than a sharp angle. -
Refine the lip:
Smooth the top edge of the rim with a damp sponge or finger to round it off. Ensure the terrazzo chips on the edge are fully incorporated and not sticking out sharply.
Step 4: Finishing Touches
-
Dry thoroughly:
Let the tray dry completely for 24-48 hours. Turn it over gently halfway through the drying process to ensure the bottom dries evenly and doesn’t warp. -
Sand for clarity:
Once bone dry, the white clay might have formed a hazy film over your colored chips. Lightly sand the entire surface with fine-grit sandpaper to remove this film and make the colored specks pop vividly. -
Dust off:
Wipe the tray down with a slightly damp cloth or dry brush to remove all sanding dust. -
Seal:
Apply two coats of gloss or matte varnish to seal the clay and give it a finished, ceramic-like sheen. This also protects the clay from moisture.
Place your favorite rings or trinkets inside to enjoy your handmade piece of modern decor
Stamped Texture Pattern Tray
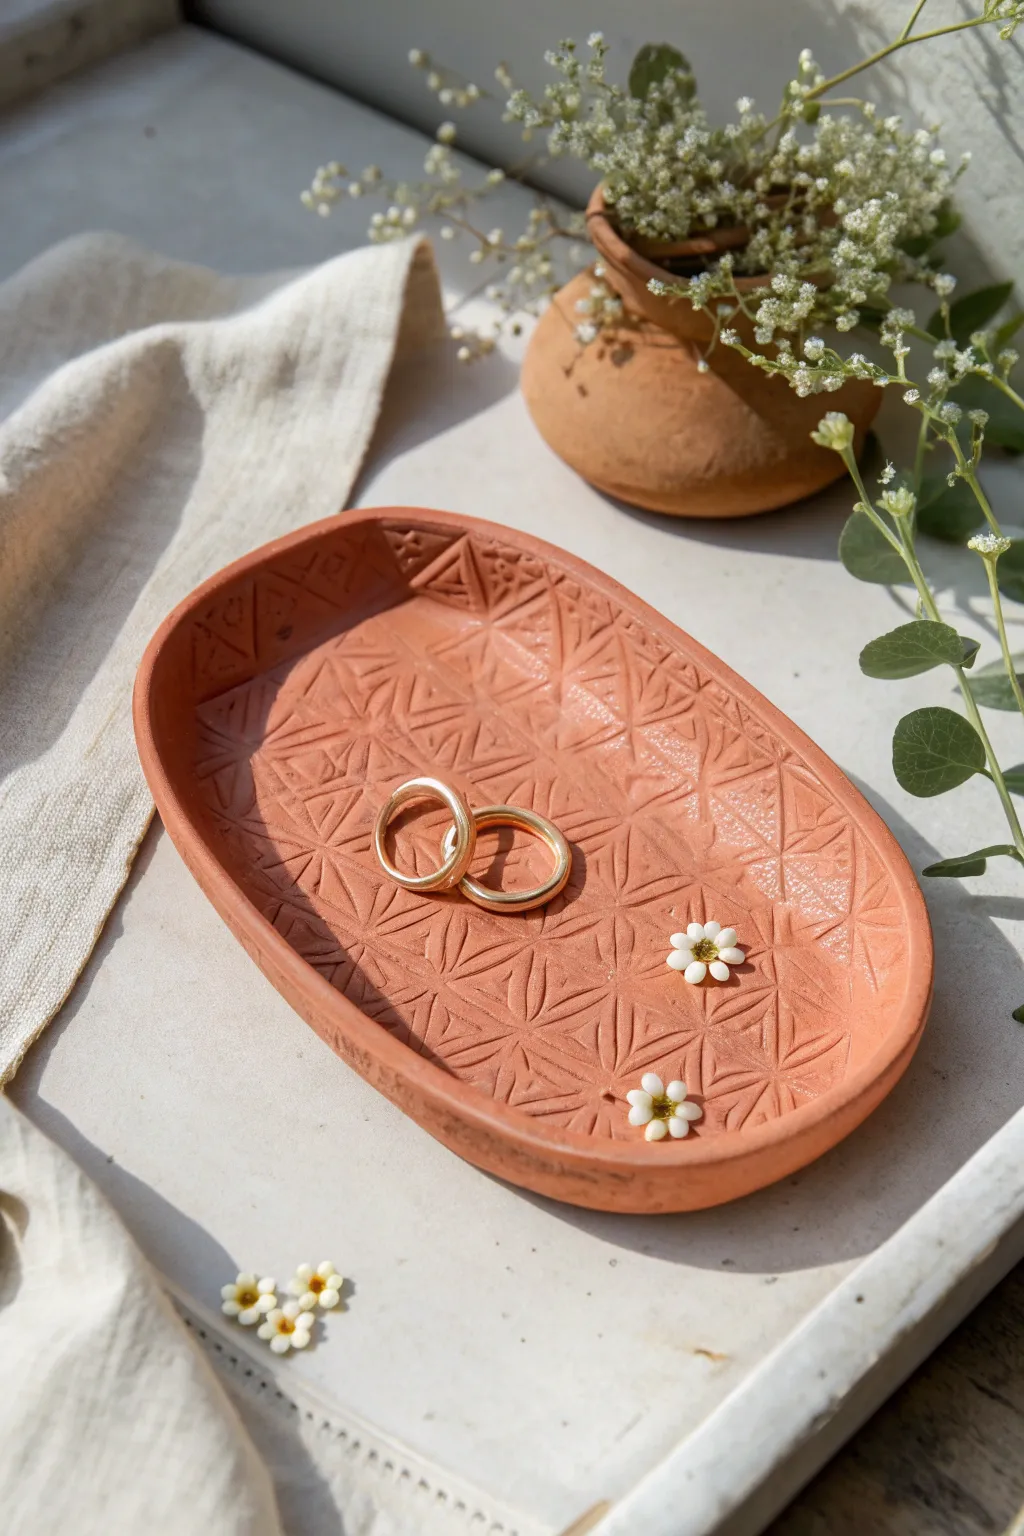
Embrace the warmth of natural textures with this beautifully patterned terracotta trinket tray. The repeating stamped design adds depth and sophistication to a simple oval shape, making it the perfect spot to catch your favorite jewelry pieces.
Step-by-Step Guide
Materials
- Terracotta-colored air dry clay
- Rolling pin
- Parchment paper or canvas mat
- Deep geometric rubber stamp or texture mat
- Sharp craft knife or clay blade
- Oval template (paper or cardstock)
- Small bowl of water
- Sponge
- Fine grit sandpaper
- Matte spray varnish (optional)
Step 1: Preparation and Shaping
-
Preparing the workspace:
Begin by securing a piece of parchment paper or a canvas mat to your work surface. This prevents sticking and makes it easier to lift the clay later. -
Conditioning the clay:
Take a generous handful of terracotta air dry clay. Knead it thoroughly in your warm hands for several minutes until it becomes soft, pliable, and free of cracks. -
Rolling out the slab:
Place the conditioned clay on your mat. Use your rolling pin to create a smooth, even slab. Aim for a distinct thickness, roughly 1/4 inch (about 6mm), to ensure the tray feels substantial and sturdy. -
Adding the texture:
Select your geometric texturing tool. Press the stamp firmly and evenly into the wet clay slab. If using a smaller stamp, align it carefully side-by-side to create a continuous, repeating pattern across the entire surface. -
Checking the impression:
Lift the stamp carefully to ensure the pattern is deep and clear. If the impression is too faint, I sometimes lightly mist the clay with water and re-stamp for better definition before cutting.
Clean Release Tip
If your stamp is sticking to the fresh clay, lightly dust the rubber stamp surface with cornstarch or baby powder before pressing it down. This ensures a crisp pattern release.
Step 2: Cutting and Forming
-
Placing the template:
Gently lay your paper oval template on top of the textured clay. Try to position it so the pattern is pleasingly centered or aligned within the oval shape. -
Cutting the shape:
Using a sharp craft knife or clay blade, trace around the template with a smooth, continuous motion. Hold the blade vertical to get a clean edge. -
Removing excess:
Peel away the excess clay from the outside of the oval. Save these scraps in an airtight bag for future projects. -
Smoothing edges:
Dip your finger in a little water and run it gently along the cut edge of the oval to remove any sharp burrs or dragging marks. -
Creating the rim:
Carefully lift up the edges of the oval to create a shallow rim. You want to pinch the clay upwards slightly, curving the outer perimeter so it holds its shape. -
Refining the lip:
Work your way around the tray, smoothing the vertical rim you just created. Ensure the height is consistent all the way around—about half an inch tall is ideal for this style. -
Adding texture to the inner rim:
If your original texture got smudged while forming the rim, you can gently press a smaller section of your stamp against the interior walls to re-establish the pattern.
Step 3: Finishing Touches
-
The crucial drying phase:
Place the tray in a cool, dry spot away from direct sunlight. Let it dry slowly for 24-48 hours. Turning it over halfway through helps the bottom dry evenly. -
Sanding imperfections:
Once fully dry and hard, take fine-grit sandpaper and very gently buff the top rim and outer edge to make them buttery smooth. avoid sanding the textured interior. -
Cleaning up dust:
Wipe the piece down with a slightly damp sponge or cloth to remove all clay dust. -
Sealing the piece:
To protect the raw clay look while making it durable, apply a light coat of matte spray varnish. This mimics the unglazed pottery aesthetic seen in the inspiration image. -
Final cure:
Allow the varnish to cure completely according to the can’s instructions before placing your jewelry inside.
Vintage Wash Effect
For an aged look, mix a tiny bit of white acrylic paint with water. Brush it over the texture and immediately wipe it off, leaving white residue only in the deep crevices.
This earthy, stamped tray brings a touch of artisanal charm to any dresser or bedside table

TRACK YOUR CERAMIC JOURNEY
Capture glaze tests, firing details, and creative progress—all in one simple printable. Make your projects easier to repeat and improve.
Fabric-Imprint Linen Tray
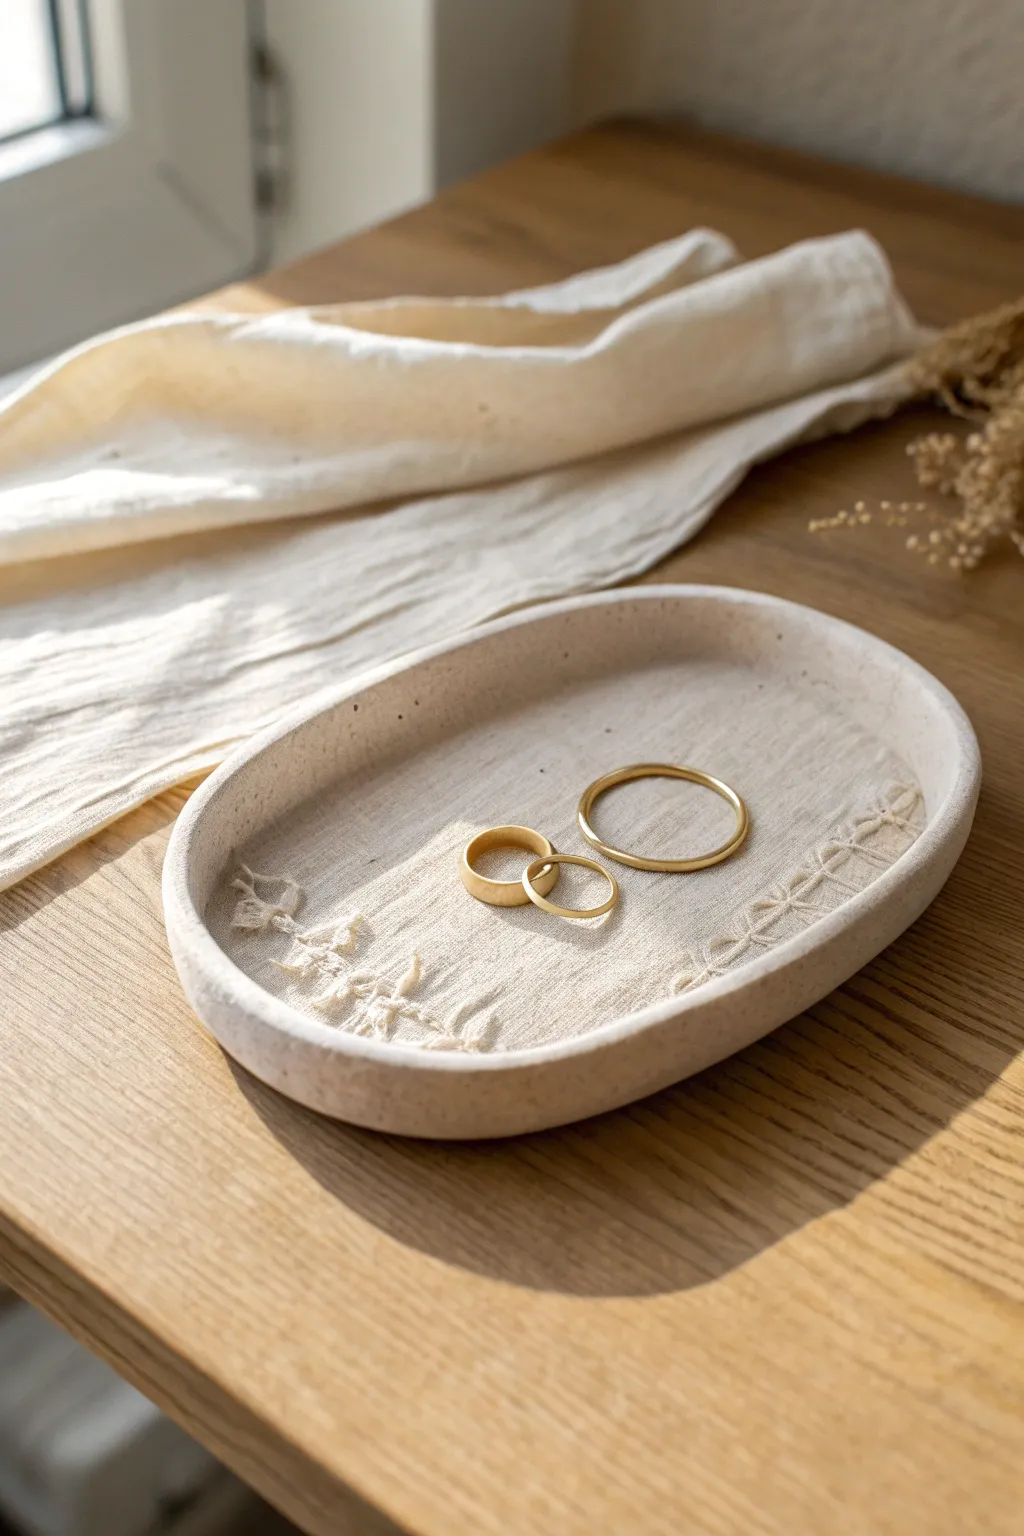
This elegant oval tray captures the rustic beauty of raw linen fabric imprinted directly into clay, creating a permanent, delicate texture. The natural speckled finish gives it a sophisticated stoneware look without needing a kiln, making it the perfect catch-all for your favorite rings.
How-To Guide
Materials
- White or stone-colored air dry clay
- Rolling pin
- Piece of coarse linen or burlap fabric (with embroidery or thick weave)
- Craft knife or clay cutting tool
- Small bowl of water
- Oval paper template (approx. 6 inches long)
- Fine grit sandpaper
- Matte acrylic varnish
- Optional: Ground black pepper or dried coffee grounds (for speckled effect)
- Sponge
Step 1: Preparation and Rolling
-
Prep the clay body:
Begin by conditioning your air dry clay. If you want that lovely speckled stoneware look shown in the photo, knead a pinch of ground black pepper or dried coffee grounds into white clay until it is evenly distributed. -
Roll out the base:
Roll your clay out on a smooth, non-stick surface until it is about 1/4 inch thick. Aim for an even thickness to prevent warping later. -
Prepare the texture:
Take your piece of linen fabric. Look for a section with interesting details, like a selvage edge or some chunky embroidery, as this will create the deep impressions seen in the finished tray.
Clean Imprints
Does the fabric stick to the clay? Lightly mist the fabric with water or dust the clay surface with cornstarch before rolling to ensure a clean release.
Step 2: Texturing and Cutting
-
Imprint the fabric:
Place the fabric over your rolled clay slab. Using your rolling pin, press down firmly and roll over the fabric one time. Avoid rolling back and forth, as this might create a double image or ‘ghost’ texture. -
Reveal the pattern:
Carefully peel back the fabric to reveal the imprinted texture. Check that the impression is deep enough to be visible after sealing. -
Place the template:
Lay your oval paper template over the textured clay. Position it so the most interesting fabric details—like that embroidered edge—run through a pleasing part of the shape. -
Cut the shape:
Use your craft knife to cut around the template. Hold the knife vertically to ensure a clean, straight edge. -
Smooth the edges:
Dip your finger in a little water and gently run it along the cut edge to soften any sharpness, being careful not to smudge your beautiful linen texture.
Vintage Detail
Instead of plain linen, try pressing a piece of vintage lace or a doily into one corner for a romantic, antique aesthetic.
Step 3: Shaping and Drying
-
Lift the rim:
To create the shallow dish shape, gently lift the edges of the oval upwards with your fingertips. You are aiming for a slight curve, not a steep wall. -
Refine the curve:
Once the edges are lifted, smooth the transition between the base and the wall inside using a damp sponge or finger. I like to work slowly here to ensure the curve feels organic. -
Support the shape:
If the clay is drooping, prop up the edges with small pieces of foam or crumpled paper towels to hold the curve while it begins to set. -
Initial drying:
Let the tray dry for 24-48 hours. Flip it over gently halfway through the drying process to ensure the bottom dries evenly, which helps prevent curling.
Step 4: Finishing Touches
-
Sand for perfection:
Once fully dry and hard, take your fine-grit sandpaper and lightly sand the rim and the underside of the tray. This gives it that professional, polished feel. -
Clean off dust:
Wipe the tray with a barely damp cloth or a dry soft brush to remove all fine clay dust from the sanding process. -
Seal the piece:
Apply a thin layer of matte acrylic varnish to the entire piece. This protects the clay from moisture and preserves the natural look. -
Final cure:
Allow the varnish to dry completely according to the manufacturer’s instructions before placing any jewelry on the tray.
Place your favorite gold rings in the center and enjoy the serene, natural vibe this handmade piece brings to your dresser
Pressed Leaf Botanical Tray
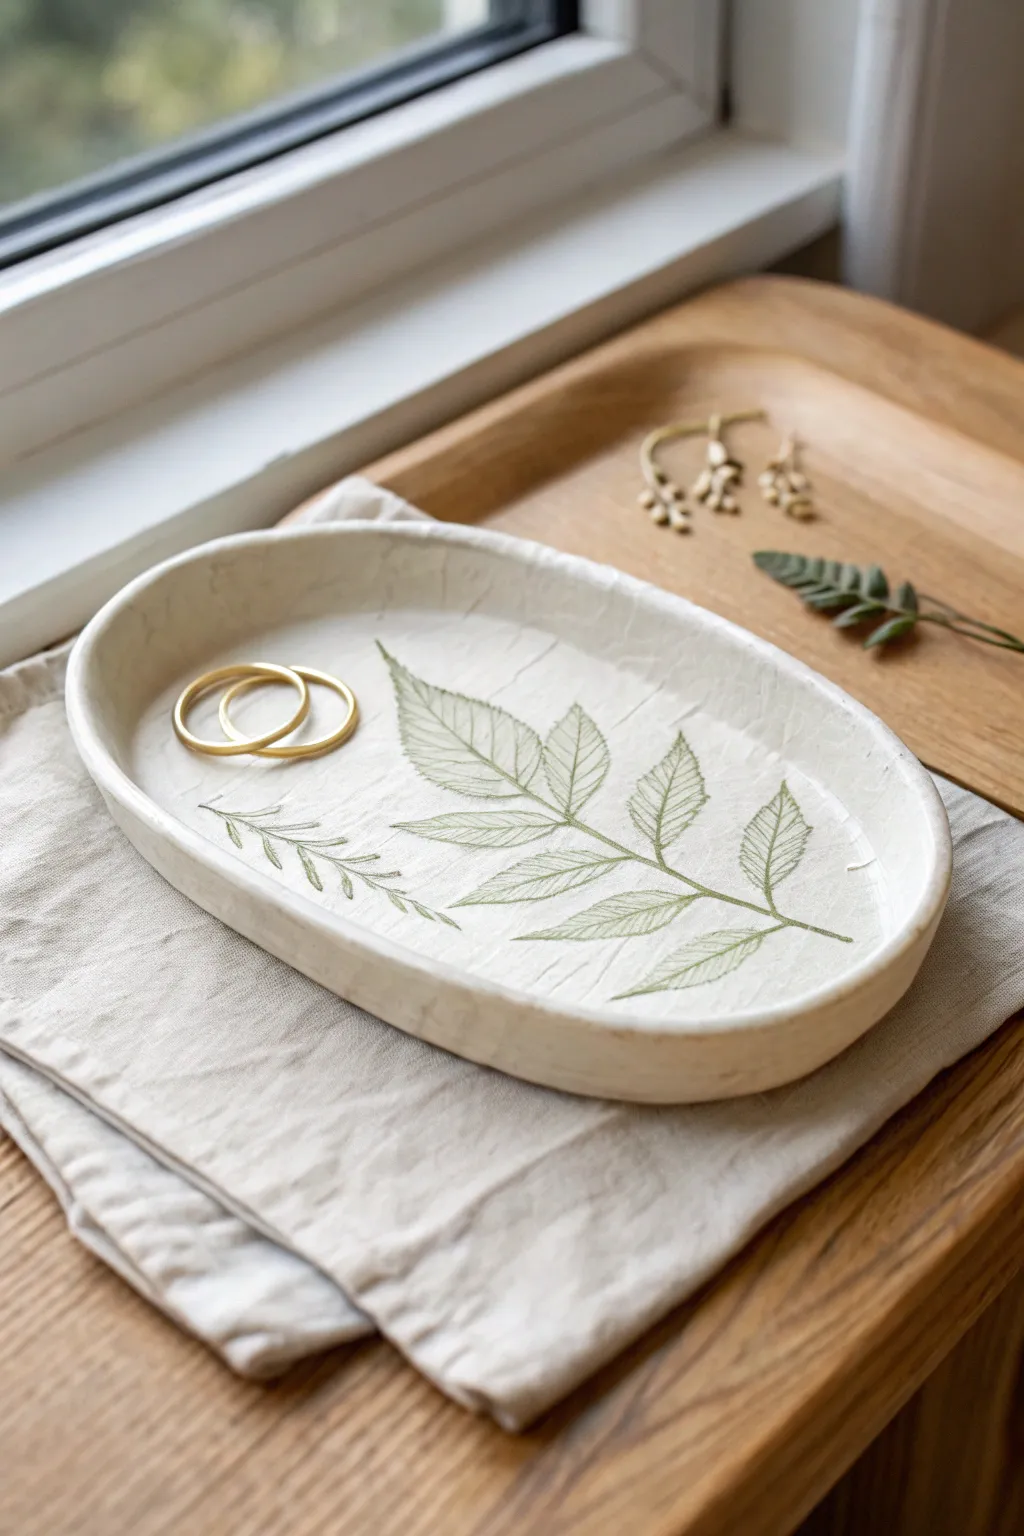
Bring a touch of nature indoors with this rustic, oval trinket dish featuring delicate botanical impressions. The natural texture and simple green line work create a serene, handcrafted piece perfect for holding rings or small treasures.
Step-by-Step Guide
Materials
- Air dry clay (white)
- Small rolling pin
- Oval template (paper or cardstock)
- Craft knife or clay tool
- Fresh leaves with prominent veins (e.g., ash, walnut, or fern)
- Small bowl or sponge for water
- Fine grit sandpaper
- Fine tip paintbrush
- Acrylic paint (moss green and olive green)
- Matte varnish or sealant
Step 1: Shaping the Clay
-
Condition the clay:
Begin by taking a handful of white air dry clay and kneading it in your hands until it feels soft, pliable, and free of cracks. -
Roll it out:
Place the clay on a smooth surface or canvas mat. Roll it out to an even thickness of about 1/4 inch (6mm), ensuring the surface is level. -
Cut the shape:
Lay your oval paper template gently on top of the slab. Use a craft knife to trace around the edge, cutting away the excess clay to reveal your base oval shape. -
Smooth the edges:
Dip your finger in a little water and run it along the cut edges to smooth out any roughness or sharp corners from the knife.
Cracking Edges?
If the rim starts to crack while you’re shaping it, dip your finger in water and smooth a ‘slurry’ of wet clay over the crack to bond it back together instantly.
Step 2: Creating the Impressions
-
Arrange the botanicals:
Place your fresh leaf directly onto the center of the clay oval. Make sure the vein side is facing down into the clay for the best texture transfer. -
Press the leaf:
Gently roll over the leaf with your rolling pin once or twice. Apply enough pressure to embed the veins, but not so much that you distort the oval shape. -
Add detail sprigs:
If you want the smaller sprig design seen on the left side, press a smaller leaf or stem section there now, repeating the rolling process. -
Remove the greenery:
Carefully peel the leaves away from the clay using the tip of your knife or tweezers to avoid gouging the surface. You should see a clear, recessed impression. -
Raise the rim:
Gently lift the edges of the oval upward using your thumbs and fingers to create a shallow lip about half an inch high. I like to pinch the rim slightly to give it that organic, handmade look.
Use Fresh Leaves
Use fresh, flexible leaves rather than dry, brittle ones. Dry leaves tend to crumble into the moist clay and leave behind debris that is difficult to pick out.
Step 3: Finishing and Painting
-
Dry completely:
Set the tray aside in a dry, room-temperature spot. Let it cure for 24-48 hours until it turns a chalky white and feels hard to the touch. -
Sand for smoothness:
Once bone dry, take fine-grit sandpaper and lightly buff the rim and underside to remove any imperfections. Wipe away the dust with a barely damp cloth. -
Mix your colors:
Mix a small amount of moss green text acrylic paint with a drop of water to create an ink-like consistency that flows easily. -
Paint the veins:
Using your finest brush, carefully paint inside the impressed lines of the main leaf. The watery paint should naturally settle into the deep vein grooves. -
Add surface texture:
For the cross-hatching effect seen on the leaves, use very light, short brushstrokes to draw tiny grid lines across the leaf shapes, mimicking a sketched style. -
Paint the sprig:
Repeat the painting process for the smaller sprig on the side, keeping the lines delicate and thin. -
Seal the piece:
After the paint is fully dry, apply a coat of matte varnish over the entire top surface to protect the clay and the design from moisture.
Place your new botanical tray on a bedside table to hold your favorite jewelry pieces safely
Geometric Hexagon Desk Tray
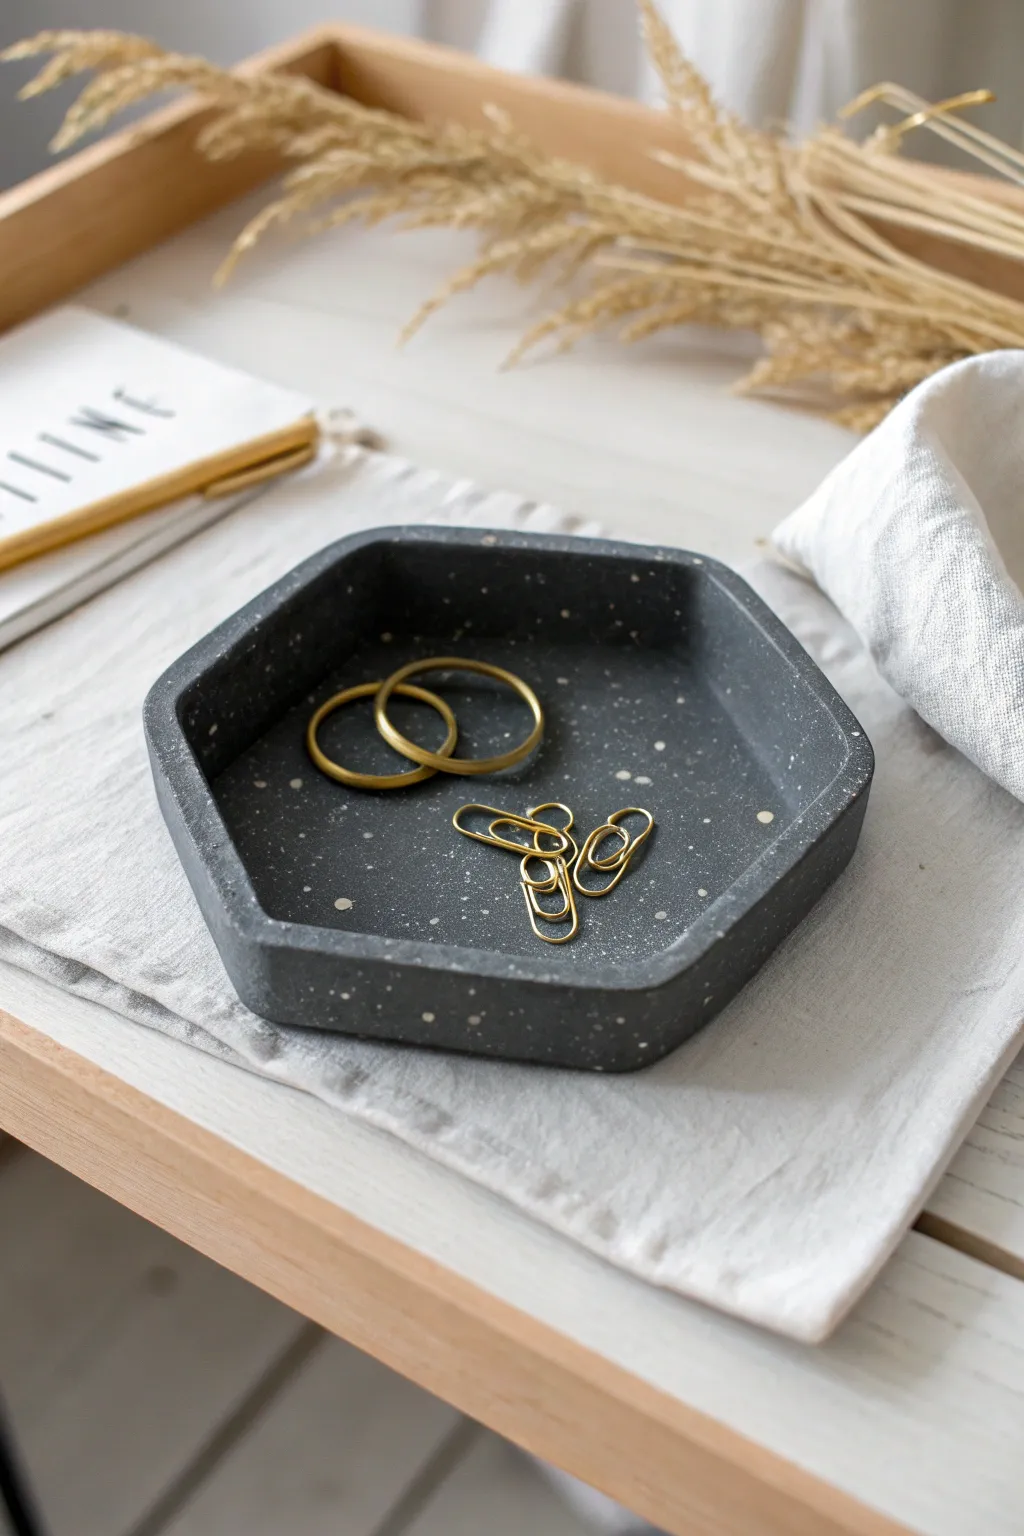
This sophisticated catch-all combines a modern geometric shape with a moody, dark stone aesthetic. The subtle speckled finish mimics the high-end look of terrazzo or granite, making it perfect for organizing jewelry or desk essentials.
Detailed Instructions
Materials
- Black air dry clay (or white clay + black acrylic paint)
- White acrylic paint
- Rolling pin
- Hexagon template (printed paper or cookie cutter)
- Craft knife or clay tool
- Old toothbrush or stiff bristle brush
- Water bowl and sponge
- Sandpaper (fine grit)
- Matte varnish or sealant
Step 1: Shaping the Base
-
Prepare the Clay:
Begin by conditioning your black air dry clay. Knead it in your hands for a few minutes until it is warm, pliable, and free of cracks. If you are using white clay, you can knead in black acrylic paint now, though starting with pre-colored clay yields a more uniform dark gray. -
Roll the Slab:
Place the clay on a smooth surface or a silicone mat. Roll it out to an even thickness of about 1/4 inch (6mm). Try to roll from the center outwards to maintain a consistent density. -
Cut the Hexagon:
Place your hexagon paper template or cutter onto the rolled slab. Using a sharp craft knife, cut vertically straight down around the perimeter to create a clean, sharp-edged hexagon base. Set aside the excess clay.
Splatter Control
Practice your flicking technique on a scrap piece of paper first. This helps you gauge the paint consistency and avoid big, accidental blobs.
Step 2: Building the Walls
-
Create Strips:
Gather your leftover clay and roll it into a long snake. Flatten this slightly with your rolling pin so it becomes a long, rectangular strip, roughly equal in width to the height you want your tray walls to be (about 0.5 to 0.75 inches). -
Trim Strips:
Using a ruler and knife, cut the strip so it has straight, parallel edges top and bottom. This ensures your tray walls will be perfectly level. -
Score and Slip:
Using a needle tool or toothpick, scratch up the outer edges of your hexagon base and the bottom edge of your clay strip. Dab a little water (slip) onto these roughed-up areas to act as glue. -
Attach the Walls:
Wrap the clay strip around the perimeter of the hexagon base. When you reach a corner, gently pinch the clay to create a sharp point rather than a curve. -
Seam the Join:
Where the two ends of the wall strip meet, cut through both layers at an angle for a clean join. Smooth the clay over the seam so it disappears completely. -
Reinforce the Interior:
Roll a very thin ‘snake’ of clay and press it into the bottom interior corner where the wall meets the floor. Smooth this out with a modeling tool or your finger to ensure a strong, watertight bond.
Warping Walls?
If the flat sides of your hexagon start bowing inward while drying, place small cardboard scraps inside the tray to brace walls against each other.
Step 3: Refining and Decorating
-
Smooth the Surfaces:
Dip your finger or a slightly damp sponge into water and run it over all surfaces. Focus on smoothing out fingerprints and sharpening the top rim of the hexagon. -
Sharpen Corners:
For that precise geometric look, use flat items like two rulers or blocks of wood to press against the outside walls on either side of a corner, pinching the clay into a sharp vertex. -
Initial Drying:
Let the tray dry for about 24-48 hours. I usually flip it over halfway through the drying process to ensure the bottom gets air exposure and dries evenly. -
Sanding:
Once fully dry and hard, use fine-grit sandpaper to buff away any remaining unevenness or rough textures on the rim and sides. Wipe away the dust with a damp cloth. -
Prepare the Splatter:
Squeeze a small amount of white acrylic paint onto a palette. Dilute it slightly with a few drops of water until it has a fluid, milky consistency. -
Apply the Speckles:
Dip an old toothbrush into the watered-down white paint. Hold the brush over the tray and run your thumb across the bristles to flick tiny speckles onto the dark surface. Vying the distance changes the dot size. -
Final Seal:
Allow the paint speckles to dry completely. Finish the piece by applying two thin coats of matte varnish or sealant to protect the clay and deepen the dark gray color.
Place this stylish tray on your desk or dresser to instantly elevate your organization game
Decoupage-Lined Pattern Tray
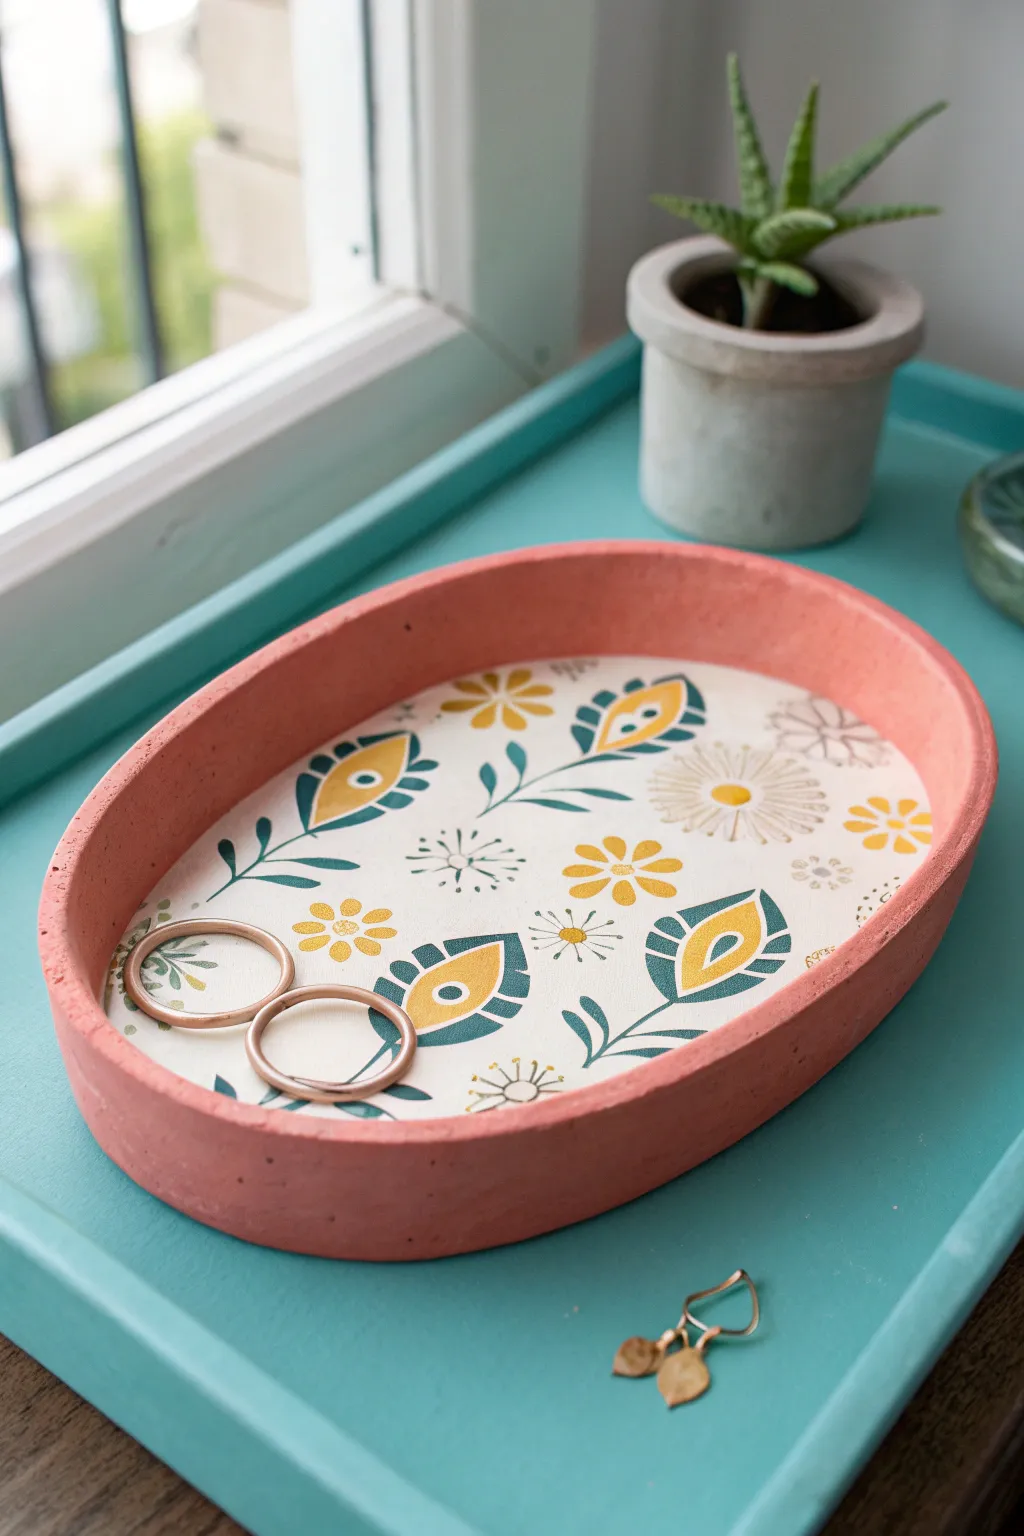
Elevate a simple oval dish by combining the rustic charm of stone-textured clay with a vibrant, patterned inlay. This project uses decoupage techniques to seamlessly bond a beautiful paper design to your handmade clay tray, creating a stunning catch-all for jewelry.
How-To Guide
Materials
- Air dry clay (white or terra cotta)
- Acrylic rolling pin
- Oval template (paper or cardboard)
- Craft knife or clay tool
- Sandpaper (fine grit)
- Acrylic paint (matte terracotta/coral color)
- Baking soda (to add texture to paint)
- Patterned napkin or decorative tissue paper (floral/folk art design)
- Mod Podge (Matte or Satin)
- Soft flat paintbrush
- Scissors
- Clear matte varnish (optional)
Step 1: Shaping the Base
-
Prepare the Clay:
Begin by kneading a substantial chunk of air dry clay until it is warm, pliable, and free of cracks. -
Roll out the Slab:
Use an acrylic rolling pin to flatten the clay into a smooth slab, aiming for an even thickness of about 1/4 inch. -
Cut the Shape:
Place your oval template onto the clay slab and trace around it with a craft knife or clay tool to cut out the base shape. -
Create the Coil:
Roll a long snake or coil of clay that is long enough to go around the entire perimeter of your oval base. -
Attach the Walls:
Score the edges of the base and the underside of the coil, apply a little water, and press the coil firmly onto the rim of the base. -
Blend the Seams:
Using your thumb or a modeling tool, blend the clay coil downward into the base on both the inside and outside to create a seamless transition. -
Smooth the Form:
Dip your finger in a little water to smooth out any fingerprints or rough spots, ensuring the walls are vertical and even. -
Dry Completely:
Set the tray aside in a cool, dry place for 24-48 hours until the clay is fully hard and turns white or light grey.
Wrinkle Rescue
If the paper wrinkles while wet, don’t pull it! Gently dab it down with a damp brush or finger. Slight texture can actually add to the handmade, vintage appeal of the piece.
Step 2: Decorating and Finishing
-
Sand Imperfections:
Once dry, gently sand any rough edges or bumps, particularly along the rim, to ensure a professional finish. -
Mix Textured Paint:
Mix a small amount of baking soda into your terracotta or coral acrylic paint; this creates a faux-stone texture resembling concrete. -
Paint the Tray:
Apply the textured paint to the entire tray—inside, outside, and bottom. I usually do two coats for full opacity. -
Prepare the Decoupage Paper:
Take your patterned napkin and separate the layers, keeping only the single top printed layer. -
Cut the Insert:
Cut the napkin into an oval shape that is slightly smaller than the interior floor of your tray. -
Apply Glue Base:
Brush a thin, even layer of Mod Podge onto the flat inside bottom of the painted tray. -
Place the Pattern:
Carefully lay the tissue paper onto the wet glue, starting from the center and gently smoothing it outwards to avoid wrinkles. -
Seal the Design:
Apply another layer of Mod Podge directly over the top of the paper to seal it, extending slightly onto the painted clay edge for a seamless look. -
Final Coat:
Allow the decoupage to dry fully, then finish with a coat of clear matte varnish if you want extra durability against moisture.
Gilded Edges
For a luxe touch, run a gold leaf pen or a brush with metallic gold paint along the very top rim of the tray to frame your decoupled artwork beautifully.
Now you have a chic, custom-patterned tray perfect for keeping your rings safe and adding a pop of color to your windowsill
Metallic Rim Color-Block Tray
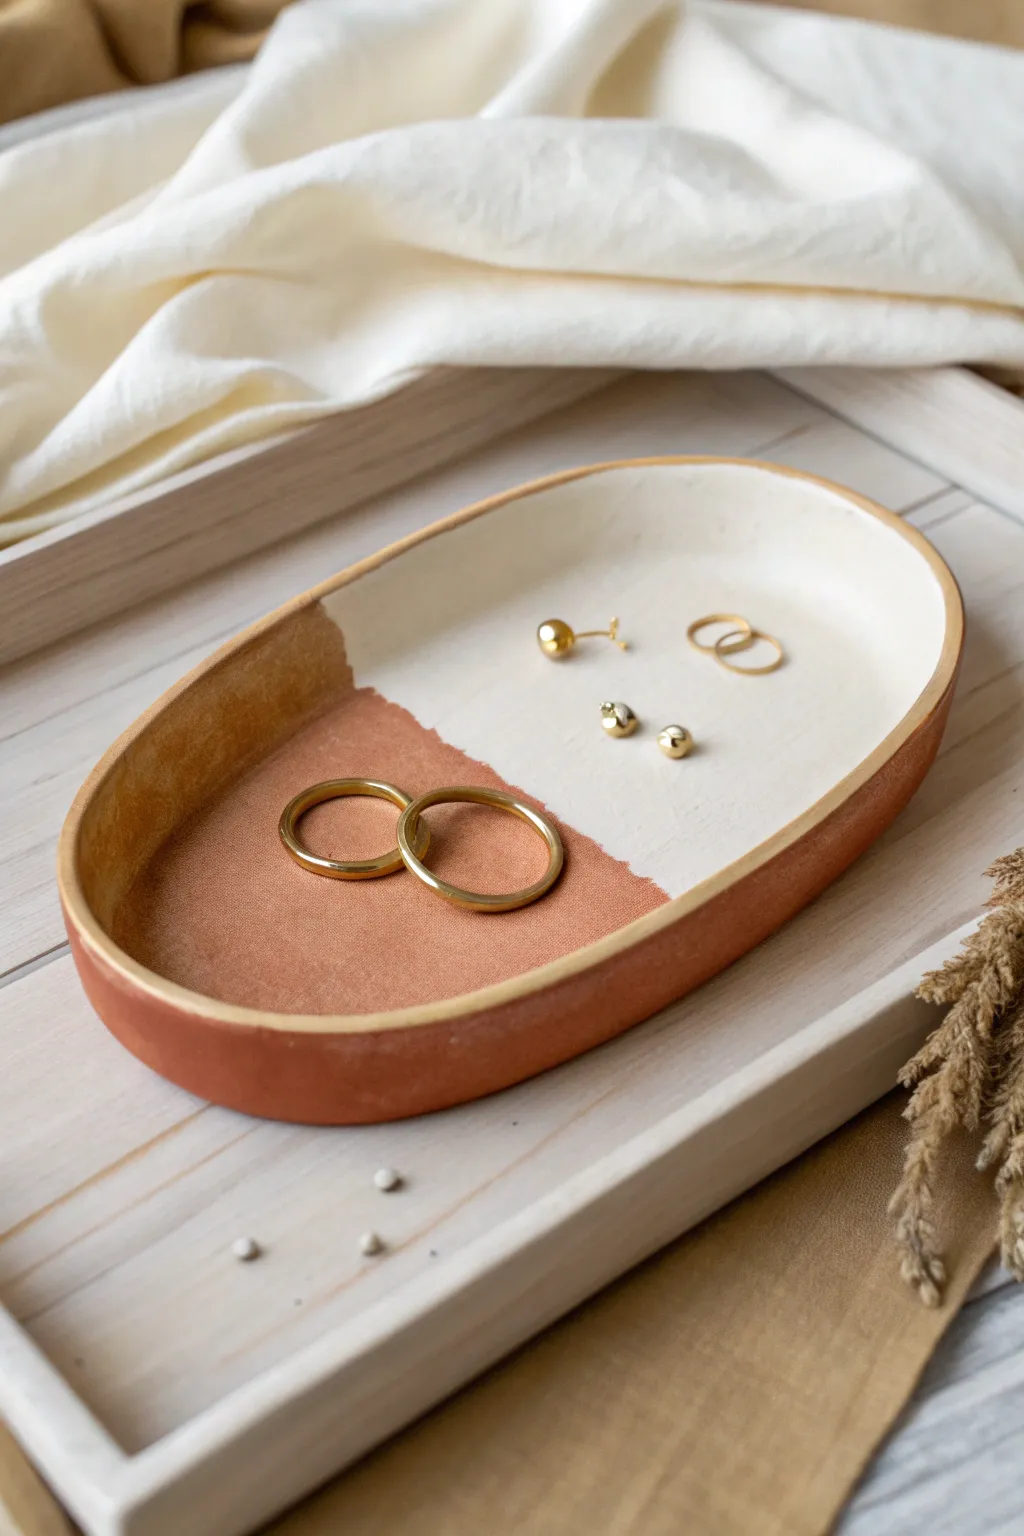
Embrace earthy warmth and minimalist chic with this stunning two-tone jewelry tray. By combining the natural reddish hue of terracotta-style clay with a crisp cream dip-dye effect, you create a sophisticated resting place for your favorite rings and studs.
Step-by-Step Guide
Materials
- Terracotta colored air-dry clay
- Rolling pin
- Oval template (paper or cardstock)
- Craft knife or clay tool
- Small bowl of water
- Sponge or fine-grit sandpaper
- Cream or off-white acrylic paint
- Flat paintbrush
- Metallic gold paint (for the rim)
- Fine detail brush
- Matte varnish or sealant
Step 1: Shaping the Base
-
Prepare the workspace:
Lay down a smooth work surface like parchment paper or a silicone mat to prevent the clay from sticking. Tape down the corners if necessary so it doesn’t shift while you work. -
Roll out the clay:
Take a generous handful of terracotta air-dry clay and knead it briefly to warm it up. Roll it out to an even thickness of about 1/4 inch, ensuring there are no air bubbles trapped inside. -
Cut the oval shape:
Place your oval paper template onto the rolled clay. Using a craft knife, carefully trace around the template to cut out your base shape, then peel away the excess clay. -
Prepare the rim coil:
Roll a long, thin snake of clay about the thickness of a pencil. It needs to be long enough to go around the entire circumference of your oval base. -
Score and slip:
Use a needle tool or toothpick to scratch rough hatch marks around the top edge of the base and along one side of your clay coil. dab a little water on the scored areas to act as glue. -
Attach the rim:
Gently press the coil onto the edge of the base, working your way around the oval. Overlap the ends slightly, cut through both layers at an angle, and press them together for a seamless join.
Smoother Transitions
To blend the coil seamlessly without dents, use the back of a spoon. The convex shape helps smooth the clay curve perfectly.
Step 2: Refining and Drying
-
Blend the seams:
Using your thumb or a modeling tool, drag the clay from the coil down onto the base on the inside, and from the base up onto the coil on the outside. The goal is to make the coil and base look like one solid piece. -
Smooth the surface:
Dip your finger in water and run it over the entire tray to smooth out any fingerprints or tool marks. Pay special attention to the rim to ensure it is rounded and level. -
Let it dry:
Place the tray in a safe spot away from direct heat. Let it dry for 24-48 hours until it turns a lighter, chalky color and feels hard to the touch. -
Sand for perfection:
Once fully dry, use fine-grit sandpaper to gently buff away any remaining bumps or roughness on the rim and surface. Wipe away the dust with a barely damp cloth.
Step 3: Painting and Finishing
-
Mark the dividing line:
Decide where you want the color change to happen—a diagonal line often looks best. Lightly mark this line with a pencil or apply a strip of painter’s mask tape for a super crisp edge. -
Apply the cream base:
Using a flat brush, paint one half of the tray with cream acrylic paint. I usually apply two to three thin coats rather than one thick one to avoid brushstrokes. -
Paint the gilded rim:
Dip a fine detail brush into metallic gold paint. carefully trace the very top edge of the rim. You can extend the gold over the entire rim or just keep it on the painted half for an asymmetrical look. -
Remove tape and touch up:
If you used tape, peel it off gently while the paint is still slightly tacky to prevent chipping. Use a small damp brush to clean up the line if any paint bled onto the terracotta side. -
Seal the piece:
Finish by applying a coat of matte varnish over the entire tray, or just the painted section if you prefer the raw clay texture on the other half. This protects it from moisture and wear.
Curling Edges?
If the edges lift while drying, gently weigh down the center with a small bag of rice or sand during the first few hours of drying.
Your finished tray is now ready to organize your treasures with a touch of modern elegance
Cloud-Shaped Trinket Tray
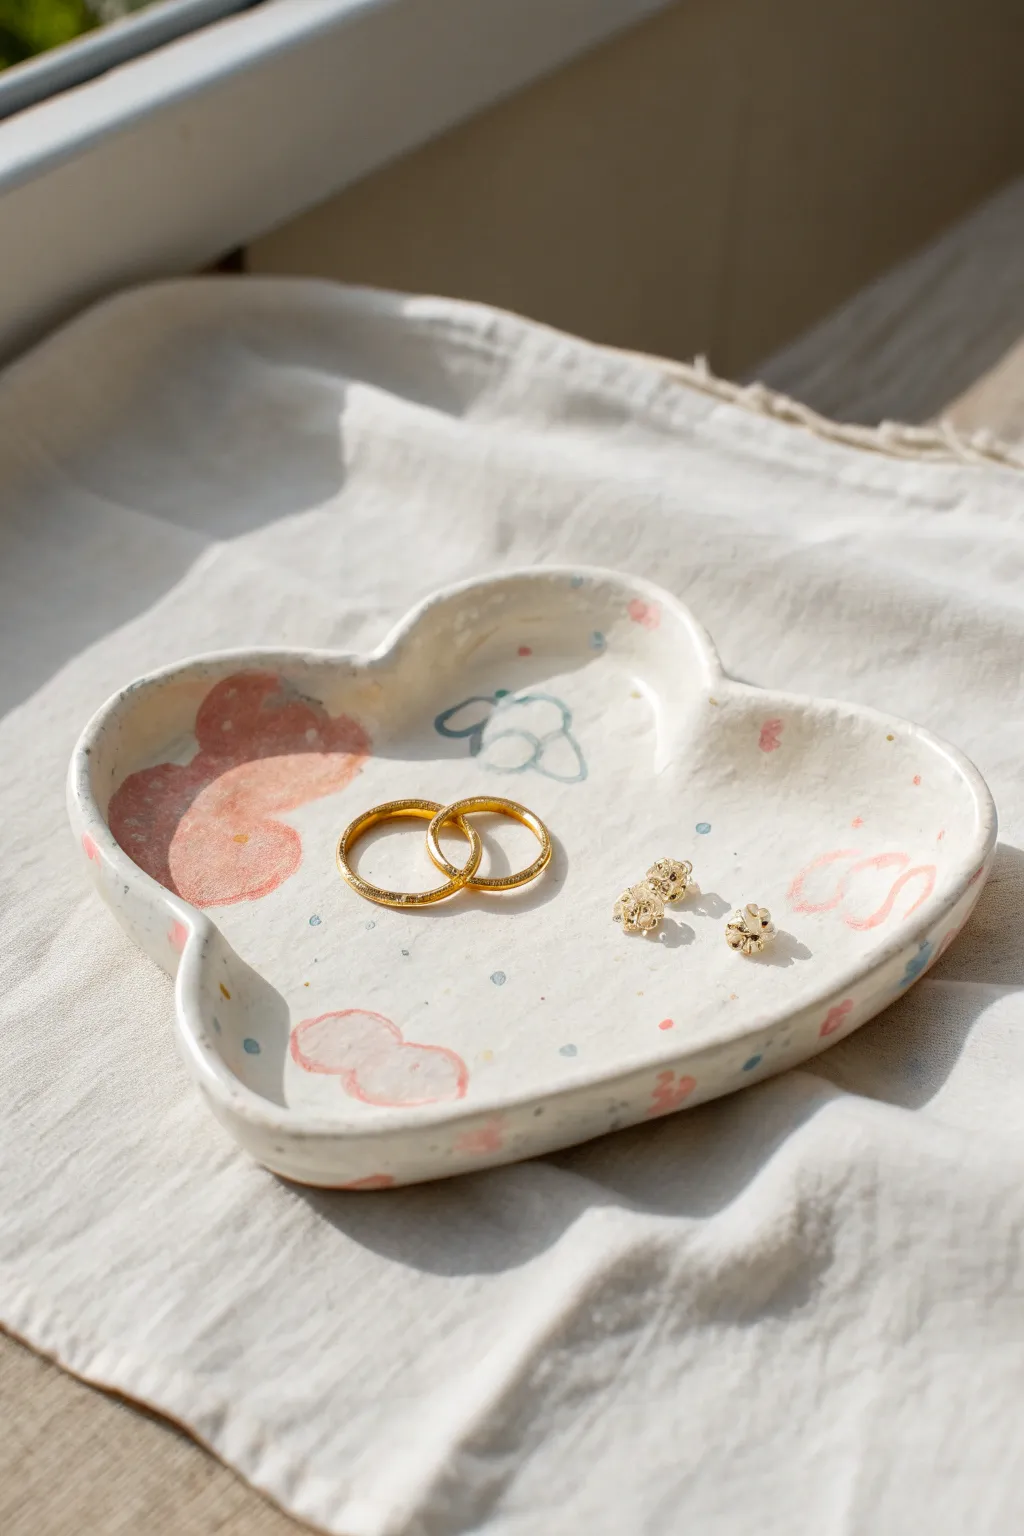
Capture the dreamy essence of the sky with this charming cloud-shaped trinket tray. Featuring soft pastel accents and a glossy finish, it’s the perfect spot to rest your favorite rings and studs.
Step-by-Step
Materials
- White air dry clay
- Rolling pin
- Cloud template (printed or hand-drawn on paper)
- Craft knife or scalpel
- Small bowl of water
- Acrylic paints (pastel pink, soft blue, white)
- Fine detail paintbrush
- Glossy varnish or sealant
- Sandpaper (fine grit)
- Sponge or paper towel
Step 1: Shaping the Cloud
-
Prepare your clay:
Start by taking a generous amount of white air dry clay and kneading it in your hands until it is pliable and warm. If it feels too dry, dip your fingers in water and work it in. -
Roll it out:
Place the clay on a smooth surface or a mat. Use your rolling pin to flatten the clay to a uniform thickness, aiming for about 1/4 inch (approx. 5-6mm). -
Cut the shape:
Lay your cloud template gently on top of the rolled clay. Using your craft knife, carefully trace around the edges of the template to cut out the cloud shape. Remove the excess clay. -
Smooth the edges:
Dip your finger into your water bowl and run it along the cut edges of the cloud. This softens any sharp cuts and removes loose clay bits. -
Create the rim:
Gently curb up the edges of the cloud with your fingertips to create a raised rim. You want the sides to be slightly elevated (about half an inch) to hold jewelry securely. -
Refine the form:
Go around the perimeter again, pinching and smoothing the raised rim to ensure it is even and connects seamlessly to the base. I like to smooth the transition between the floor and the wall so there are no cracks. -
Dry thoroughly:
Place the tray on a wire rack or a piece of parchment paper to dry. Let it sit for 24-48 hours, flipping it over halfway through so the bottom dries evenly.
Step 2: Painting & Decoration
-
Sand imperfections:
Once fully dry, use fine-grit sandpaper to gently buff away any rough spots on the rim or surface. Wipe away the dust with a slightly damp sponge. -
Apply base coat:
Paint the entire tray with a creamy off-white acrylic paint. This creates a uniform canvas and hides any grayish tones from the raw dry clay. Let this layer dry completely. -
Paint pastel clouds:
Mix a soft, uneven wash of pastel pink paint. Use a round brush to dab on abstract, cloud-like blobs. Keep the paint slightly translucent for a watercolor effect. -
Add detail lines:
Using a very fine detail brush and light blue paint, draw a simple, thin line-art cloud doodle in the center or off to the side. -
Add confetti speckles:
Dip a toothpick or the very tip of a small brush into pink and blue paint. Dot tiny speckles randomly across the surface to mimic confetti. -
Seal the deal:
Once all paint is dry, apply a coat of glossy varnish. This gives the tray a ceramic look and protects it from scratches. -
Final cure:
Allow the varnish to cure according to the manufacturer’s instructions before placing any jewelry inside.
Cracking Up?
If small cracks appear while drying, mix a tiny bit of fresh clay with water to make a paste (slip) and fill them in before sanding.
Make it Luxe
Paint the very top edge of the rim with gold leaf paint or a metallic gold marker for an elegant, gilded finish.
Now you have a serene little cloud to keep your treasures safe and organized
Crescent Moon Celestial Tray
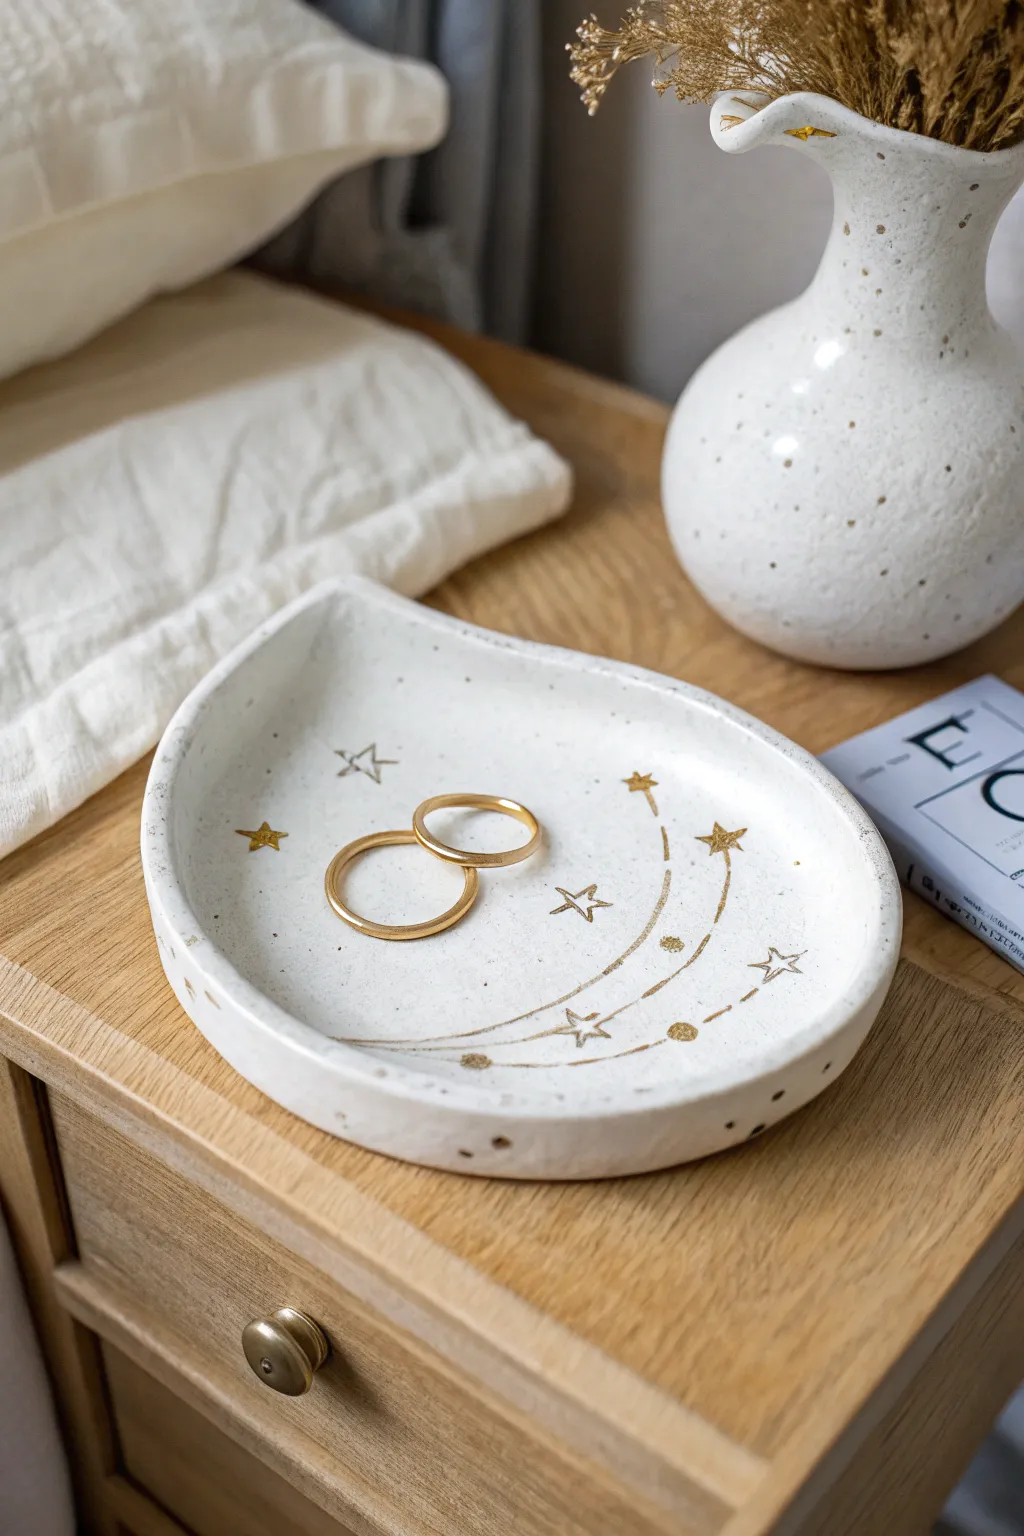
Capture the magic of the night sky with this elegant teardrop-shaped tray, perfect for holding your favorite rings or small treasures. Its speckled white finish and delicate gold star motifs give it a dreamy, boutique-style aesthetic that looks lovely on any bedside table.
Step-by-Step Guide
Materials
- White polymer clay or air-dry clay (preferably with a ‘granite’ or speckled effect)
- Rolling pin or acrylic roller
- Craft knife or scalpel
- Cardstock or paper for template
- Sandpaper (fine grit)
- Small bowl of water
- Gold metallic paint or gold leaf pen
- Fine detail paintbrush (size 0 or 00)
- Gloss varnish or sealant (optional)
- Parchment paper
Step 1: Shaping the Base
-
Create your template:
Sketch a symmetrical teardrop shape onto a piece of cardstock. Aim for about 5-6 inches in length and 4 inches at the widest point to match the scale of the photo. Cut this shape out to use as your guide. -
Condition the clay:
Take a generous handful of your white speckled clay and knead it until it’s soft and pliable. If you are using standard white clay, you can mix in a tiny pinch of black pepper or dried tea leaves to achieve that organic speckled look seen in the image. -
Roll out the slab:
Place your clay on parchment paper and roll it out to an even thickness of about 1/4 inch. Try to keep the surface smooth and free of air bubbles. -
Cut the shape:
Lay your cardstock template gently on top of the clay slab. Using your craft knife, carefully trace around the edge to cut out your teardrop shape. Peel away the excess clay. -
Smooth the edges:
Dip your finger in a little bit of water and run it along the cut edges of the clay to smooth out any sharpness or roughness from the knife.
Step 2: Forming the Rim
-
Lift and pinch:
Gently lift the edges of the clay teardrop upwards. Use your thumb and forefinger to pinch the perimeter, creating a raised rim about 1/2 inch high. -
Refine the curve:
Work your way around the dish, smoothing the transition between the base and the wall. You want a soft, organic curve rather than a sharp 90-degree angle. -
Check symmetry:
Look at the tray from above and adjust the walls to ensure the teardrop shape remains distinct. The point should be slightly sharper, and the bottom round and full. -
Dry or bake:
If using air-dry clay, set it aside in a cool, dry place for 24-48 hours. If using polymer clay, bake according to the manufacturer’s instructions on the package. -
Sand for perfection:
Once fully cured, use fine-grit sandpaper to buff out any fingerprints or uneven spots on the rim and surface.
Fixing Cracks
If hairline cracks appear while air-drying, mix a small amount of fresh clay with water to make a paste (slip) and fill the cracks. Smooth over and let dry again.
Step 3: Painting the Celestial Design
-
Sketch the design:
Lightly trace your design with a pencil. Draw three sweeping curved lines near the bottom wide edge to mimic planetary rings or shooting stars. -
Add the stars:
Draw three or four 5-point stars scattered across the dish. Vary their sizes slightly for visual interest, placing one near the top point and others near the curved lines. -
Paint the gold lines:
Shake your gold metallic paint well. Using your finest brush, carefully paint over the curved pencil lines. Keep your hand steady to maintain a thin, delicate stroke. -
Fill the stars:
Paint the stars gold. I like to start from the center of the star and pull the brush outward to the points to keep them sharp. -
Add detail dots:
Dip the very tip of your brush handle (or a toothpick) into the gold paint. Dot it along the curved lines and sporadically around the stars to create distant stardust or planets. -
Rim accents:
For a thoughtful detail, add tiny, sparse gold dots along the outer rim of the tray to tie the design together. -
Seal (Optional):
Once the paint is completely dry, apply a thin coat of matte or satin varnish to protect the gold design and give the tray a finished feel.
Level Up: Cosmic Texture
Before drying, gently press a piece of rough fabric or sandpaper into the clay surface to give it a stone-like texture that catches the gold paint beautifully.
Place this on your nightstand to keep your jewelry safe under the stars