
There’s something about a tiny baby handprint that stops time for a second—like you can feel that sweet little stage forever. I’m sharing my favorite clay-friendly ways to turn that print into a polished keepsake you’ll actually want to display.
Round Handprint Keepsake Disc
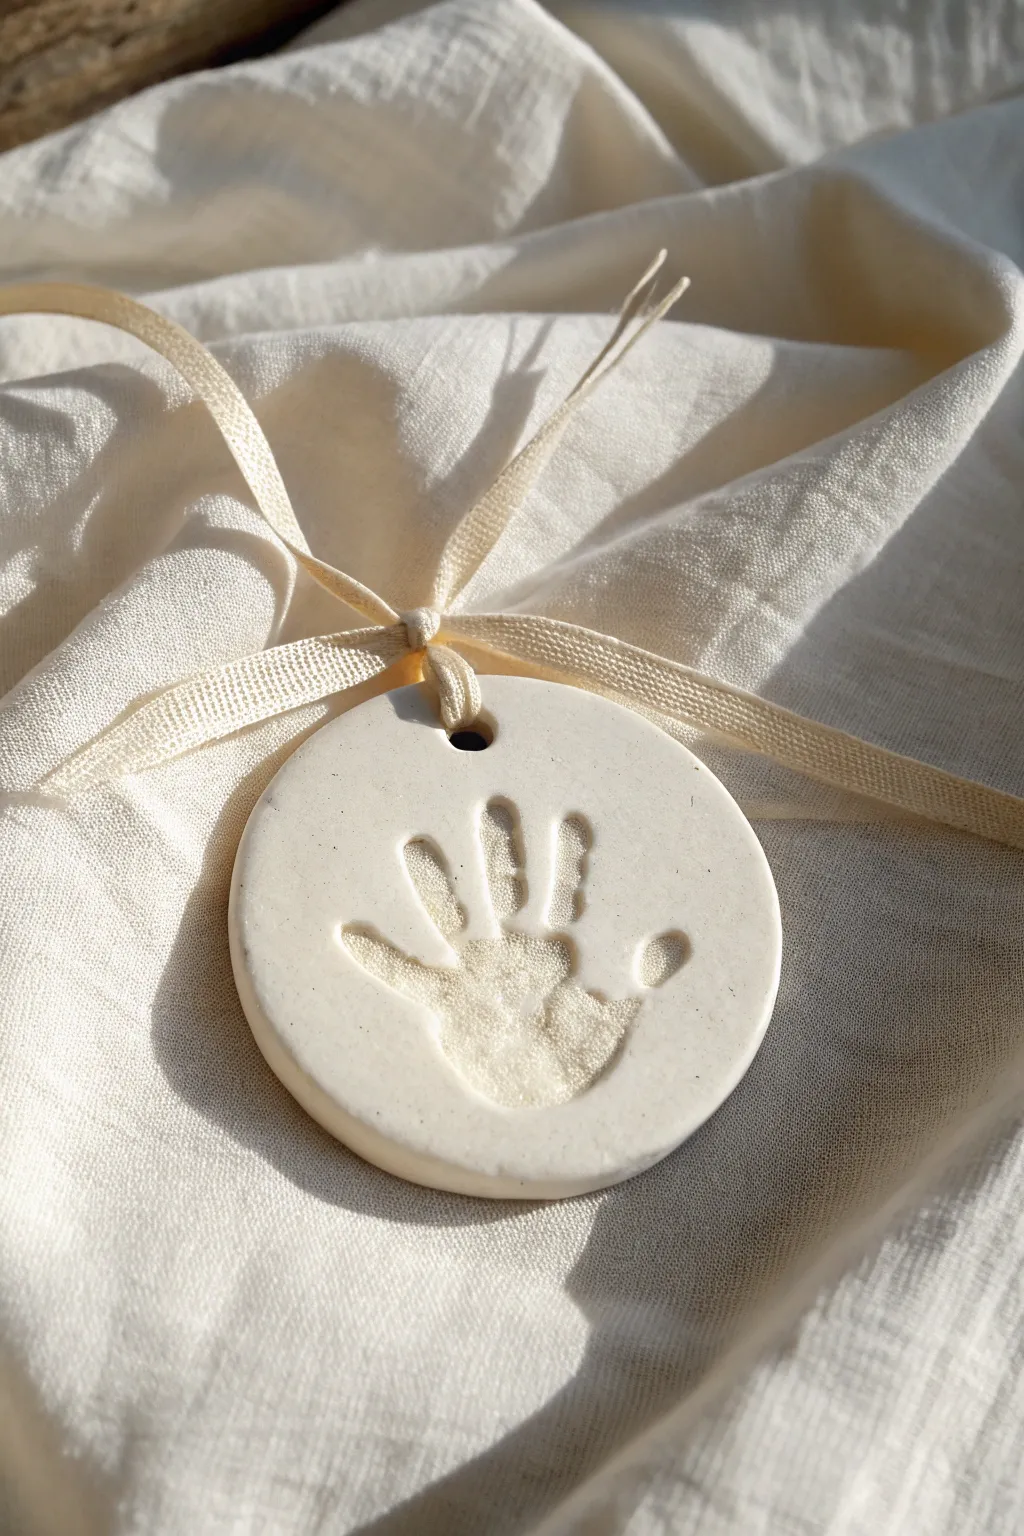
Capture the fleeting tininess of your little one’s hand with this elegant, minimalist keepsake. This round clay disc features a simple, deep impression and hangs from a soft, cream-colored ribbon, making it a timeless addition to your nursery or holiday tree.
Detailed Instructions
Materials
- Air-dry clay (white) or polymer clay
- Rolling pin
- Round cookie cutter (approx. 4-5 inches diameter)
- Drinking straw or small circular cutter
- Fine-grit sandpaper (220 grit)
- Cream or ivory silk ribbon (1/4 inch width)
- Parchment paper or silicone mat
- Small bowl of water
- Acrylic sealant (matte, optional)
Step 1: Preparing the Clay Base
-
Condition the clay:
Begin by taking a handful of your white clay. Knead it thoroughly in your hands to warm it up and remove any air bubbles, ensuring the texture is smooth and pliable. -
Roll out the slab:
Place the clay on a sheet of parchment paper or a silicone mat to prevent sticking. Use your rolling pin to flatten the clay into an even slab, aiming for a consistent thickness of about 1/4 inch to ensure durability. -
Cut the circle:
Press your round cookie cutter firmly into the center of the rolled clay. Give it a slight wiggle before lifting to ensure a clean cut, then carefully peel away the excess clay from the outside of the ring. -
Smooth the edges:
Dip your finger into a small bowl of water and run it gently around the circumference of the clay disc. This rounds off the sharp cut edge and creates a more polished, professional finish.
Cracked Clay?
If small cracks appear while drying, don’t panic. Make a paste of clay and water (slip) and fill the cracks, then sand smooth once dry.
Step 2: Capturing the Print
-
Position the hand:
Bring your little one over to the workspace. Gently guide their hand to the center of the clay disc, helping them spread their fingers slightly so the print doesn’t look cramped. -
Make the impression:
Press down firmly but gently on the palm and each individual finger. I find it helpful to press straight down on the knuckles to get a deep, clear definition without sliding the hand. -
Add the hanging hole:
Use a drinking straw to punch a hole near the top edge of the disc. Make sure it is centered above the handprint and not too close to the edge to prevent cracking later. -
Final smooth:
Inspect the clay for any accidental fingernail marks or rough spots. Use a tiny bit of water on your finger to buff these out while the clay is still wet.
Date It
Before the clay dries, use a toothpick or small letter stamps to gently impress the year or the baby’s age on the back of the disc.
Step 3: Finishing Touches
-
Drying phase:
Allow the clay to dry according to the package instructions. For air-dry clay, this usually takes 24-48 hours. Turn the disc over halfway through the drying process to prevent curling. -
Sand for perfection:
Once fully cured and hard, take your fine-grit sandpaper and very gently sand the outer rim of the disc to remove any remaining jagged bits. -
Seal the surface:
Apply a thin layer of matte acrylic sealant if you wish to protect the keepsake from moisture and dust over the years. Let this coat dry completely. -
Thread the ribbon:
Cut a length of the cream silk ribbon, approximately 12 inches long. Fold it in half and push the loop through the hole from the front to the back. -
Secure the loop:
Pull the loose ends of the ribbon through the loop you just created and tighten it gently against the top of the ornament. -
Tie the ends:
Finish by tying the two loose ends of the ribbon together in a simple knot at the top, creating a loop for hanging.
Now you have a beautifully simple memento of exactly how small they once were.


Air-Dry Clay Handprint Ornament
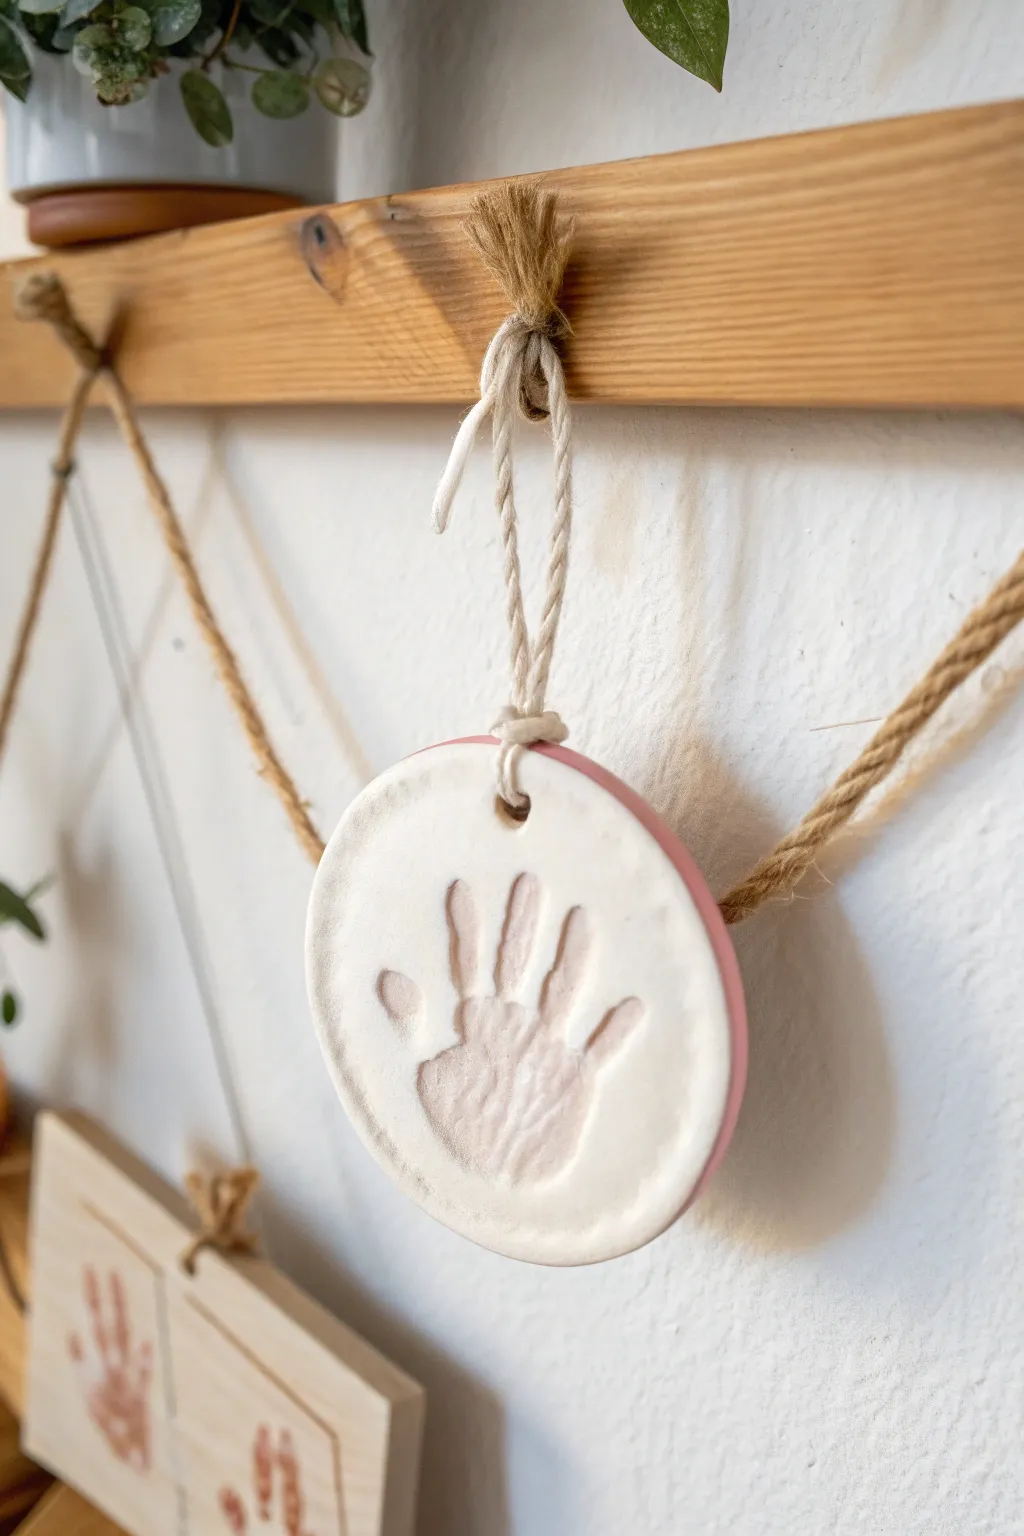
Capture the fleeting tininess of your little one’s hand with this minimalist air-dry clay keepsake. The smooth white finish with a delicate pink edge creates a timeless decoration perfect for hanging on a nursery wall or holiday tree.
Step-by-Step Tutorial
Materials
- White polymer air-dry clay (smooth texture)
- Round cookie cutter (approx. 4-5 inches)
- Rolling pin
- Parchment paper or non-stick craft mat
- Straw or stirring stick (for creating the hole)
- Fine-grit sandpaper (180-220 grit)
- Pink acrylic paint (soft blush or rose shade)
- Small flat paintbrush
- Natural jute twine or cotton cord
- Matte finish sealant (optional)
Step 1: Prepping and Impressions
-
Knead the clay:
Start with a handful of air-dry clay and knead it in your hands until it becomes soft, pliable, and free of any air pockets. Warm clay is much less likely to crack as it dries. -
Roll it out:
Place the clay on a sheet of parchment paper. Use a rolling pin to flatten it into an even slab, aiming for a thickness of about 1/4 inch to 1/3 inch. Don’t go too thin, or the impression might breakthrough. -
Cut the shape:
Position your round cookie cutter over the smoothest section of the clay. Press down firmly to cut a clean circle, then carefully peel away the excess clay from the outside. -
Smooth the edges:
Dip your finger in a tiny bit of water and run it gently around the cut edge of the circle to smooth out any roughness or sharp bits left by the cutter. -
Create the hanging hole:
Using a plastic straw or a stirring stick, poke a hole near the top edge of the circle. Make sure it isn’t too close to the rim so the weight of the ornament doesn’t tear through later. -
Capture the handprint:
This is the tricky part! Place the clay circle on a flat surface. Gently guide your baby’s open hand onto the center of the clay. Press firmly on the palm and each individual finger to ensure a deep impression. -
Lift and inspect:
Carefully lift baby’s hand straight up to avoid smudging the clay. Check the print; if it isn’t deep enough or looks messy, simply ball the clay up, roll it out, and try again.
Cracks happen
If you spot tiny cracks as it dries, don’t panic. Mix a tiny bit of fresh clay with water to make a paste and smooth it into the cracks with your finger.
Step 2: Finishing Touches
-
Dry partially:
Leave the ornament on the parchment paper in a safe spot. Let it air dry for about 24 hours. I like to flip it over halfway through this period so the bottom dries evenly with the top. -
Check for flatness:
As it dries, the edges might curl slightly. If you notice this happening, you can place a light book on top (sandwich the clay between parchment paper first) to keep it flat. -
Wait for full cure:
Allow the clay to dry completely, which usually takes 48 to 72 hours depending on humidity. The clay will turn from a cool grey-white to a bright, chalky white when fully dry. -
Sand imperfections:
Take a piece of fine-grit sandpaper and very gently buff the edges and surface of the ornament. Focus on the rim to make it perfectly round and smooth. -
Paint the rim:
Dip a small flat brush into the pink acrylic paint. Carefully paint just the outer edge of the circle, creating a defined colored rim that frames the white clay beautifully. -
Let paint dry:
Set the ornament on its back and allow the painted rim to dry completely to the touch. -
Seal (optional):
If you want extra protection, apply a thin coat of matte spray sealant over the entire piece. This prevents the unfinished clay from absorbing dust or moisture over time. -
Add the string:
Cut a length of natural jute twine, about 8 inches long. Fold it in half to create a loop at one end. -
Tie the knot:
Thread the looped end through the hole from front to back. Pass the loose ends through the loop and pull tight to secure it (a lark’s head knot). Tie the loose ends together at the top to form the hanger.
Make it dated
Before the clay dries, use a toothpick or small letter stamps to add the year or baby’s name on the back or bottom front for a true time-capsule effect.
You now have a precious, tangible memory of just how small those hands once were


Handprint Impression Tile
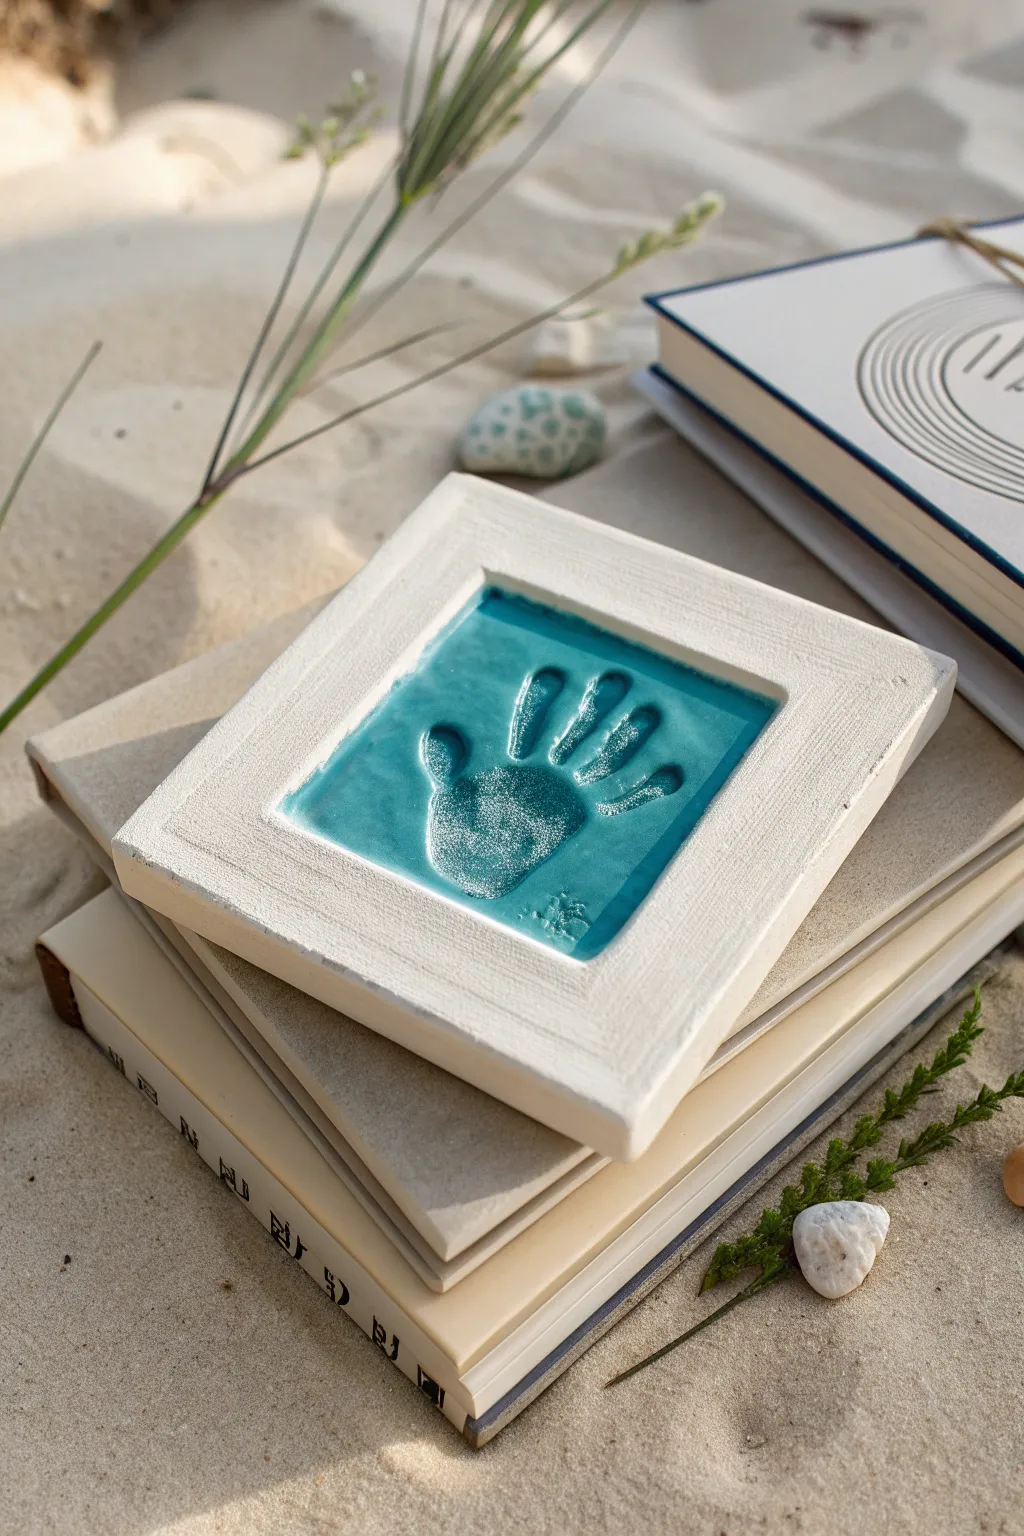
Capture a tiny moment in time with this elegant ceramic-style impression tile. Featuring a creamy, textured frame and a vibrant turquoise glaze that pools beautifully in the handprint, this keepsake feels like a treasure found by the sea.
How-To Guide
Materials
- Air-dry clay (white or stone color)
- Square cookie cutter or sharp knife
- Rolling pin
- Smooth work surface (canvas or parchment paper)
- Sandpaper (fine grit)
- Turquoise glossy acrylic paint or ceramic glaze effect paint
- Clear high-gloss varnish or resin
- Small flat paintbrush
- Matte white acrylic paint (optional, for frame)
- Ruler
Step 1: Shaping the Clay Base
-
Prepare the workspace:
Set up a clean, flat surface covered with canvas or parchment paper to prevent sticking. Take a large ball of air-dry clay and knead it briefly until it is warm and pliable. -
Roll the slab:
Roll out the clay to a uniform thickness of about 3/4 inch. You want a substantial thickness so the impression can be deep without breaking the tile. -
Cut the square:
Using a large square cookie cutter or a ruler and sharp knife, cut a clean square shape. A 6×6 inch square usually works well for a baby’s hand. -
Create the frame border:
Using a ruler, lightly press a square indentation about 1 inch from the outer edge. Do not cut through; just create a depressed line to define the central area versus the frame. -
Refine the edges:
Dip your finger in a little water and smooth out any rough cutting marks on the outer sides of the square.
Step 2: Making the Impression
-
Position the hand:
Gently place the baby’s hand in the center of the inner square. Ensure the fingers are spread comfortably. -
Press evenly:
Press down firmly on the palm and each individual finger. You need a deep impression for the glaze to pool correctly later. -
Lift and inspect:
Carefully lift the hand straight up. Check for clarity—if it’s smudged, you can gently re-roll the center and try again while the clay is still wet. -
Add signature (optional):
If desired, use a small stamp or a toothpick to add a tiny date or initial in the corner near the palm.
Clean Lines
Use painter’s tape to mask off the outer frame before pouring the colored glaze into the center. This ensures a crisp, professional separation between the textured frame and smooth center.
Step 3: Drying and Finishing
-
Let it cure:
Allow the tile to dry completely. This usually takes 24-48 hours depending on humidity. Flip it over halfway through to ensure the bottom dries evenly and prevents warping. -
Sand the surface:
Once bone dry, use fine-grit sandpaper to smooth the flat surfaces of the frame and the top ridges of the print, removing any sharp clay burrs. -
Prime the center:
Paint the inner square (where the handprint is) with a thin coat of white acrylic paint if your clay isn’t already bright white. This helps the turquoise color pop. -
Apply the color:
I prefer to use a turquoise glaze-effect paint here. Apply a generous coat into the recessed central square and the handprint itself. Let the paint pool slightly in the deepest parts of the print for that dark-to-light effect. -
Paint the frame:
Paint the outer border with a matte white or cream acrylic paint. Use a dry-brush technique to give it a slightly rough, stone-like texture. -
The glossy finish:
Once the color is dry, pour a thin layer of high-gloss varnish or resin only into the center square. This mimics looks of fired ceramic glass. -
Final dry:
Let the tile sit undisturbed in a dust-free area until the varnish is hard and non-tacky.
Seaside Texture
Before the clay dries, gently press a piece of coarse linen or cheesecloth into the outer frame border to give the white clay a woven, sandy texture that contrasts with the smooth center.
Display your finished tile on a bookshelf or desk as a permanent reminder of how small those hands once were


Butterfly Wings With Two Handprints
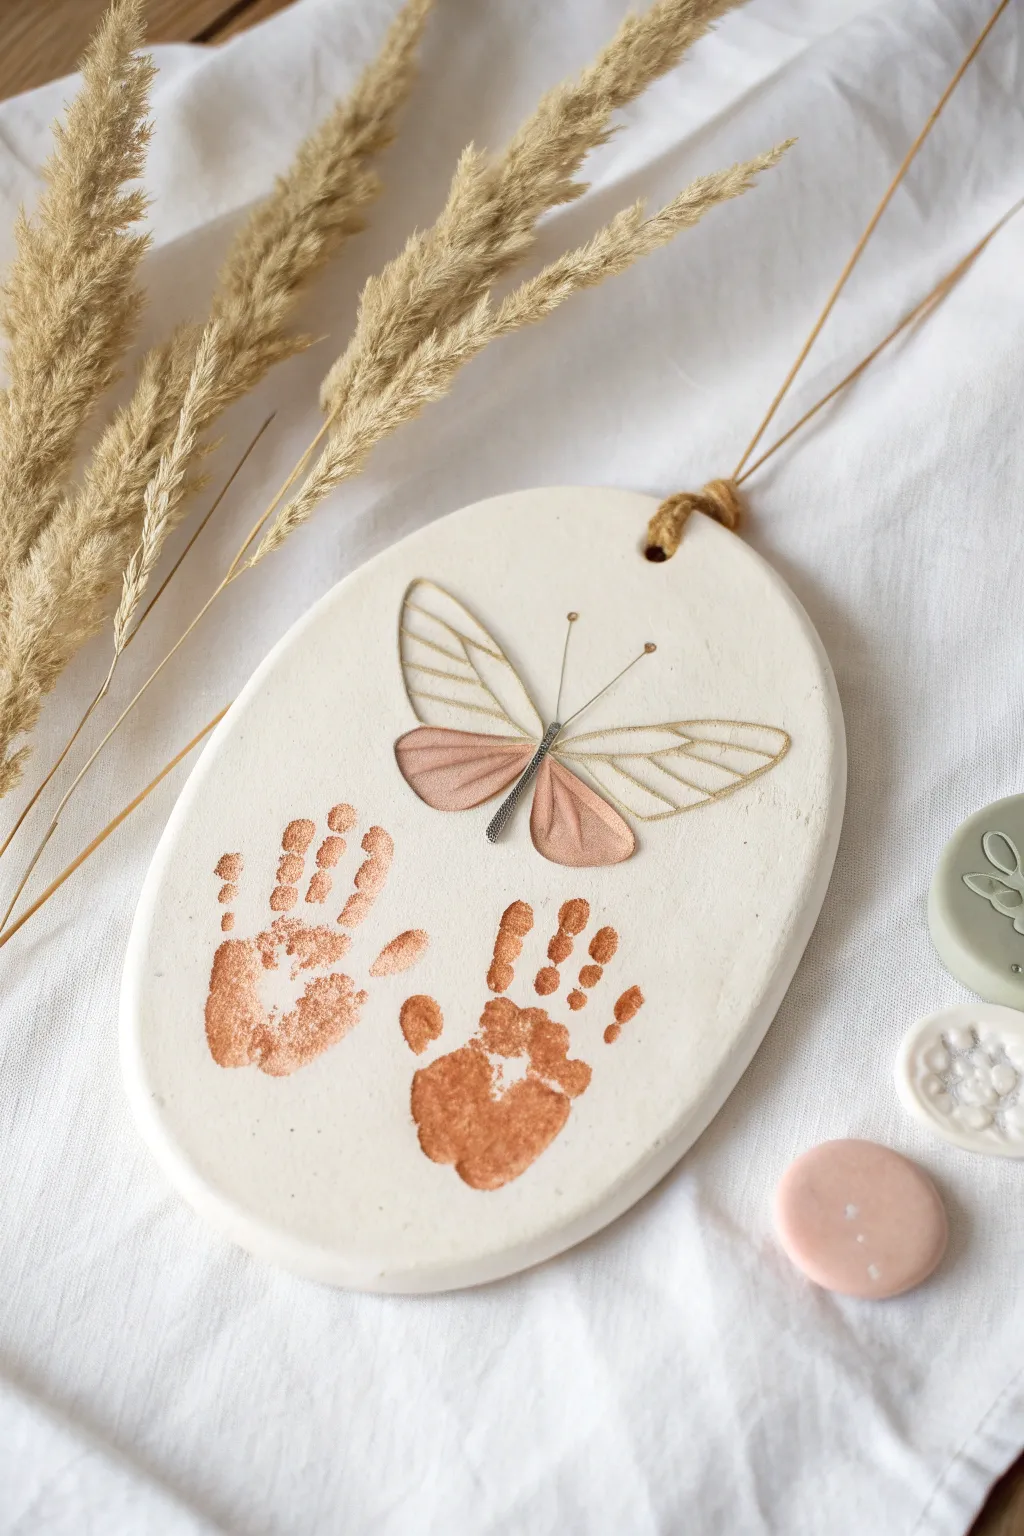
Transform tiny handprints into a delicate work of art with this elegant clay hanging ornament. The soft white clay provides a perfect backdrop for shimmering copper prints and fine gold wiring, creating a sophisticated nursery decoration.
Detailed Instructions
Materials
- Air-dry clay or white polymer clay
- Rolling pin
- Oval cookie cutter or knife template
- Copper or rose gold metallic acrylic paint
- Fine gold craft wire (approx. 24-26 gauge)
- Small paintbrush
- Thin sewing needle or toothpick
- Straw or skewer (for hole punching)
- Sanding sponge or fine sandpaper
- Twine or leather cord for hanging
- Super glue or heavy-duty craft glue
Step 1: Shaping the Base
-
Prepare the Clay:
Begin by kneading a generous portion of white air-dry clay until it is smooth and pliable. This warms the material and prevents cracks from forming later. -
Roll It Out:
Roll the clay out on a flat, clean surface to an even thickness of about 1/4 inch. If you want a perfectly smooth surface, you can roll it out on baking paper to prevent sticking. -
Cut the Oval:
Use a large oval cookie cutter to stamp out your shape. If you don’t have one, lightly trace an oval shape onto the clay with a toothpick and carefully cut it out with a craft knife. -
Smooth the Edges:
Dip your finger in a little bit of water and gently run it along the cut edges of the oval to smooth out any roughness or sharp corners. -
Create the Hanging Hole:
Use a straw or a wooden skewer to poke a hole near the top center of the oval. Make sure it goes all the way through and is wide enough for your hanging cord.
Smudged Print Rescue
If a print smudges while the clay is wet, simply wipe the paint off gently with a damp wipe or lightly scrape the top layer of clay, smooth with water, and try again immediately.
Step 2: Capturing the Prints
-
Paint the Hands:
Squeeze a small amount of copper or rose gold metallic paint onto a palette. Using a soft brush, coat your baby’s hand generously but evenly. Avoid thick globs that might smudge details. -
Position the Prints:
Guide the hand onto the lower half of the clay oval. You want the palms to face slightly inward toward each other to mimic the shape of butterfly wings. -
Press and Lift:
Gently press down on the palm and each finger to ensure good contact with the clay, then lift the hand straight up to avoid smearing the paint. -
Repeat for Second Wing:
Wash the first hand, then repeat the painting and printing process with the other hand, placing it next to the first one to complete the lower wing set. -
Dry the Base:
Allow the clay piece to dry completely according to the package instructions. This usually takes 24-48 hours. Turn it over halfway through to ensure even drying.
Step 3: Constructing the Butterfly
-
Sand for Smoothness:
Once fully dry and hard, use a sanding sponge to gently buff the surface and edges of the clay, removing any stray fibers or bumps. -
Form the Upper Wings:
Cut a length of gold wire. Bend it into a loop shape that resembles the top wing of a butterfly. You’ll need two of these wire loops, roughly symmetrical. -
Add Inner Details:
Create the delicate veins inside the wings by cutting shorter pieces of wire and gluing them across the main wing loops, or simply twisting thinner wire around the frame. -
Create the Body:
Twist a small piece of thicker wire (or braided thin wire) into a straight line to serve as the butterfly’s body. Paint this segment dark silver or grey for contrast if you like. -
Attach the Wire Elements:
Arrange your wire wings above the handprints. Use tiny dabs of strong super glue to secure the wire wings and the central body directly onto the clay surface. -
Add Antennae:
Glue two very fine, short pieces of wire extending from the top of the body for antennae. Add a tiny dot of gold paint at the tips for a finished look. -
Assemble the Hanging Cord:
Thread a piece of natural twine or leather cord through the hole at the top. Tie a decorative knot at the base of the loop to secure it.
Add a Glossy Finish
For extra durability and shine, apply a coat of clear gloss varnish over the dried handprints and clay before gluing the wire. This makes the copper pop beautifully against the matte clay.
Hang this precious keepsake in a spot where the light can catch the metallic details

The Complete Guide to Pottery Troubleshooting
Uncover the most common ceramic mistakes—from cracking clay to failed glazes—and learn how to fix them fast.
Handprint Reindeer Antlers Plaque
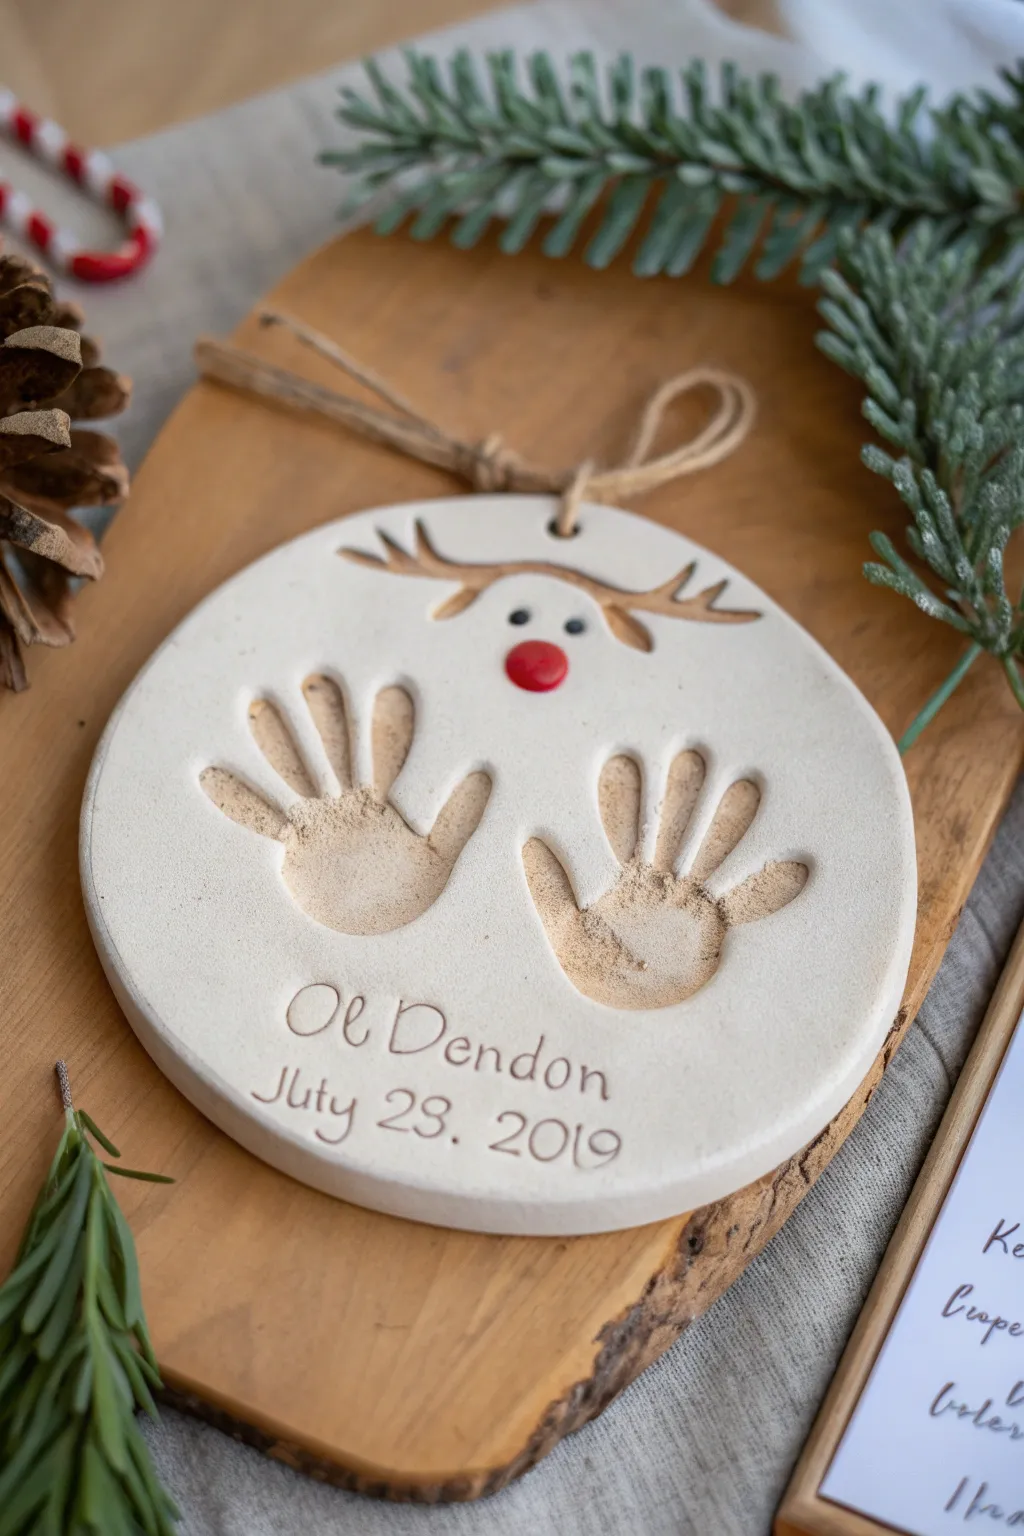
Capture a moment in time with this adorable ceramic-style ornament featuring your little one’s handprints. Using simple air-dry clay, you can create a festive reindeer face that preserves those tiny fingers forever.
Step-by-Step Guide
Materials
- White air-dry clay (or salt dough)
- Rolling pin
- Round cookie cutter or bowl (approx. 6-8 inches)
- Parchment paper
- Carving tool or toothpick
- Small straw or skewer (for the hanging hole)
- Fine-grit sandpaper
- Brown paint or marker
- Red paint
- Black paint or marker
- Small paintbrush
- Clear sealant (matte or glossy)
- Twine or ribbon
Step 1: Shaping the Base
-
Prepare your workspace:
Lay down a sheet of parchment paper on a flat surface. This prevents sticking and makes it easier to move the clay later without warping it. -
Roll out the clay:
Take a large ball of white air-dry clay and knead it slightly to soften. Use your rolling pin to flatten it into an even slab, aiming for about 1/4 to 1/2 inch thickness. If it’s too thin, the handprints might crack; too thick, and it will take forever to dry. -
Cut the circle:
Place your large round cutter or a kitchen bowl over the clay. Press down firmly to cut a perfect circle, then peel away the excess clay from the edges. -
Smooth the edges:
Dip your finger in a little water and run it along the cut edge of the circle to smooth out any roughness or loose bits of clay.
Step 2: Creating the Impressions
-
Position the hands:
Gently guide your child’s hands. You want the left hand on the left and the right hand on the right, fingers pointing slightly upward and outward. Leave enough space at the top for the reindeer face. -
Press firmly:
Press each hand down securely into the clay. Make sure to apply gentle pressure to each finger and the palm to get a deep, clear impression. Lift the hands straight up to avoid smudging the print. -
Carve the antlers:
Using a carving tool or a simple toothpick, verify the space above the handprints. Gently carve two antlers extending outward towards the rim. I find it helps to lightly sketch the lines first before carving deeper grooves. -
Add face details:
Between the antlers, use a small tool or the end of a paintbrush handle to create small indentations for the eyes. -
Make the nose:
Roll a small, separate ball of clay and attach it firmly below the eyes for the nose. Use a tiny dab of water as ‘glue’ to ensure it sticks. Alternatively, you can just paint this later, but the 3D element adds charm. -
Create the hanging hole:
Use a straw or skewer to poke a clean hole near the very top of the circle. This is where your twine will go later. -
Add personal details:
Using your toothpick or a letter stamp set, inscribe the child’s name and the date at the bottom of the ornament while the clay is still soft.
Clean Prints Tip
Does the clay surface look cracked after pressing? Dip your finger in water and smooth the edges of the handprint while the clay is still wet for a polished look.
Step 3: Finishing Touches
-
Let it dry:
Allow the ornament to dry completely according to your clay package’s instructions. This usually takes 24-48 hours. Flip it over halfway through the drying process to ensure the bottom dries evenly. -
Sand smooth:
Once fully hard, check the edges. If there are any sharp spots or rough texture, gently buff them away with fine-grit sandpaper. -
Paint the antlers:
Use a fine paintbrush and brown acrylic paint to fill in the carved antler grooves. You can wipe away excess paint on the surface with a damp cloth for a stained look. -
Paint the face:
Paint the nose bright red and use black paint or a marker to fill in the eye indentations. -
Highlight the text:
Paint inside the carved letters of the name and date with brown paint, then wipe the surface gently so the paint stays only in the crevices. -
Seal the ornament:
Apply a coat of clear matte or glossy sealant over the entire front and back. This protects the clay from moisture and gives it a finished look. -
Add the hanger:
Cut a length of natural twine or festive ribbon. Thread it through the top hole and tie a secure knot or bow to complete your keepsake.
Make it Sparkle
Mix a tiny pinch of red glitter into the paint for the reindeer nose, or brush a layer of pearl-finish acrylic over the ‘snowy’ white parts of the clay.
Hang your new reindeer keepsake on the tree and enjoy revisiting those tiny handprints year after year
Handprint Christmas Tree Shape
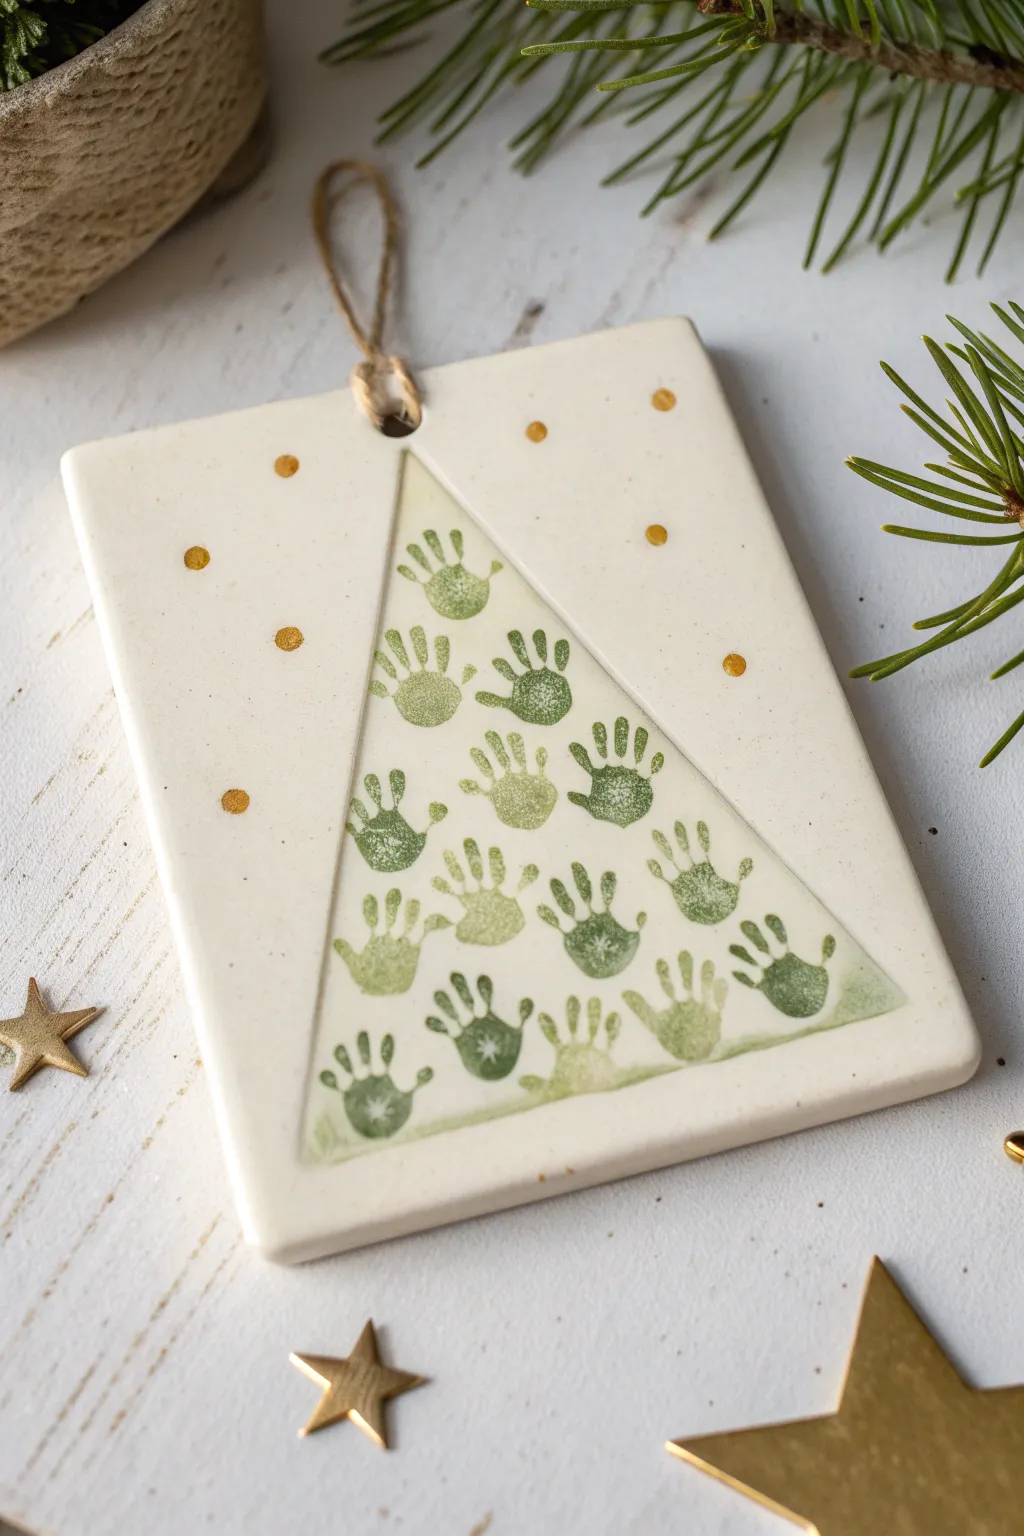
This keepsake ornament features a forest of tiny handprints arranged in a Christmas tree shape, pressed into a sleek ceramic-style rectangle. The minimalist design is accented with festive gold dots and hangs from rustic twine.
How-To Guide
Materials
- White air-dry clay or polymer clay
- Rolling pin
- Rectangular cookie cutter or knife
- Green ink pad or acrylic paint (various shades)
- Small sponge brush (if using paint)
- Gold paint pen or metallic sharpie
- Straw or skewer (for the hole)
- Twine or ribbon
- Fine-grit sandpaper
- Matte sealant or varnish (optional)
Step 1: Shaping the Base
-
Condition the clay:
Start by taking a handful of white air-dry clay or polymer clay. Knead it in your hands until it becomes soft, pliable, and free of cracks. -
Roll it out:
Using a rolling pin, flatten the clay to a consistent thickness of about 1/4 inch. If you want a super smooth surface, try rolling it on a smooth silicone mat. -
Cut the rectangle:
Use a rectangular cookie cutter or a sharp knife and ruler to cut out a clean rectangle shape. The size depends on how many prints you want to fit, but 3×5 inches works well. -
Create the hanger hole:
Before the clay hardens, use a straw or a skewer to poke a hole centered near the top edge. Ensure the hole goes all the way through cleanly. -
Smooth the edges:
Dip your finger in a little bit of water and run it gently along the cut edges of the rectangle to smooth out any roughness or stray clay bits. -
Dry the base:
Let the clay dry completely according to the package instructions. For air-dry clay, flip it occasionally so it dries evenly without warping. This might take 24-48 hours.
Step 2: Adding the Design
-
Outline the tree:
Once the base is fully hardenened and dry, use a pencil lightly to mark a faint triangle shape in the center. This will be your guide for where the prints go. -
Prepare the printing medium:
Squeeze out a few shades of green acrylic paint onto a palette, or use a green ink pad. I find using two slightly different greens adds nice depth. -
Test the size:
Since these handprints are miniaturized in the illustration, you can either stamp a baby’s actual thumbprint to create ‘leaves’ or use a tiny handprint stamp if you are making this for decoration rather than a direct record. -
Start from the bottom:
Begin stamping your prints at the bottom of the pencil triangle. Press firmly but gently. If using paint, apply a thin layer to the stamp or finger with a sponge to avoid smudging. -
Fill the tree shape:
Work your way up the triangle, narrowing the arrangement as you go. Rotate the prints slightly left and right to make the tree look full and natural. -
Add the topper:
Place one final print at the very peak of the triangle to complete the tree shape.
Smudgy Prints?
If a print smudges on the dried clay, wipe it away immediately with a damp paper towel or baby wipe before it sets, then dry the area and try again.
Step 3: Finishing Touches
-
Add gold accents:
Take your gold paint pen and carefully add small dots around the outside of the tree on the white background. Vary the spacing for a whimsical look. -
Seal the ornament:
To protect the prints, especially if you used water-based ink, brush a thin layer of matte varnish or sealant over the entire front surface once the paint is dry. -
Attach the twine:
Cut a length of natural jute twine or ribbon. Fold it in half, push the loop through the hole, and pull the ends through the loop to secure it. -
Final check:
Tie a knot at the top of the twine loop, trim any excess, and your keepsake is ready to hang.
Make it Sparkle
While the paint is still wet on the tree, sprinkle a tiny pinch of super-fine iridescent glitter over the green prints to mimic snow or tinsel.
Now you have a timeless handmade decoration to cherish for years to come


What Really Happens Inside the Kiln
Learn how time and temperature work together inside the kiln to transform clay into durable ceramic.
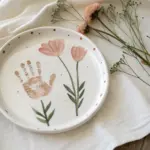
Handprint Pumpkin Patch Tile
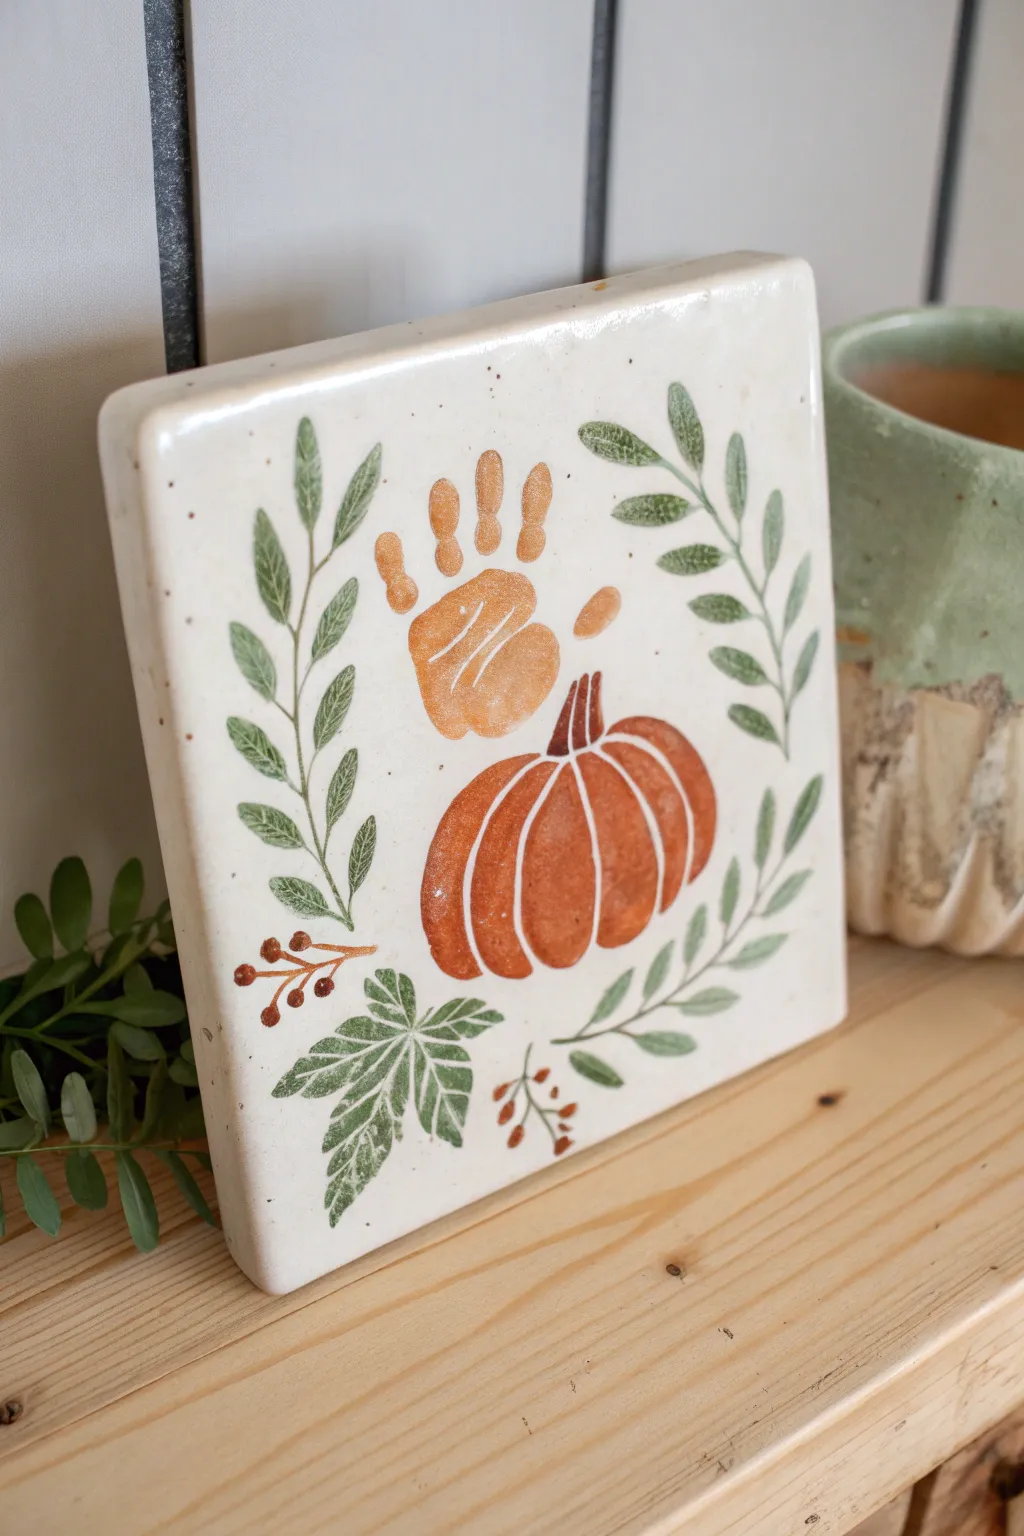
Capture the sweetness of your little one’s autumn days with this elegant ceramic keepsake. By transforming a tiny handprint into a whimsical pumpkin stem, this project creates a sophisticated piece of seasonal decor that you’ll treasure for years.
Step-by-Step Guide
Materials
- Square white ceramic bisque tile (approx. 6×6 inches)
- Non-toxic acrylic paints (terracotta orange, deep rust, moss green, olive green, brown)
- Wide foam brush
- Fine liner brush
- Small round detail brush
- Baby wipes
- Clear acrylic sealant spray (matte or satin finish)
- Palette or paper plate
Step 1: Creating the Handprint
-
Prepare the workspace:
Set up a comfortable area where you can easily reach your baby’s hand. I find it helpful to have the paint poured and the foam brush ready before bringing the baby over, as speed is key. -
Apply paint to hand:
Using a wide foam brush, apply a generous, even coat of the terracotta orange paint to your baby’s hand. Ensure the palm and fingers are fully covered but not dripping. -
Position the print:
Ideally, aim for the upper center area of the tile to leave room for the pumpkin body below. Gently press the hand down firmly, ensuring the fingers are spread slightly apart. -
Clean up instantly:
Lift the hand straight up to avoid smearing and immediately use baby wipes to clean the little one’s hand before the paint begins to dry. -
Allow to dry:
Let the handprint dry completely before moving on to the painting phase. This prevents any accidental smudging while you work on the details.
Step 2: Painting the Pumpkin
-
Outline the shape:
Using a small round brush and the deep rust paint, lightly sketch a rounded, squat pumpkin shape directly beneath the palm area of the handprint. The palm acts as the top of the pumpkin. -
Fill in the color:
Fill the pumpkin shape with the deep rust color. You can add a little water to your brush for a slightly translucent, watercolor-like effect on the ceramic. -
Add dimension:
While the paint is still slightly damp, mix a tiny bit of white or a lighter orange into your rust color and paint vertical curved strokes to suggest the pumpkin’s ribs. -
Paint the stem:
Using a fine liner brush and dark brown paint, draw a small, slightly curved stem connecting the top of your painted pumpkin to the bottom of the handprint palm. -
Refine the lines:
Use white paint on a very fine brush to add thin highlight lines along the pumpkin ridges. This separates the segments and gives the pumpkin volume.
Little Wigglers Tip
If your baby tends to clench their fist, gently tickle the back of their hand right before pressing it onto the tile. This reflex usually causes fingers to flare open perfectly.
Step 3: Adding Foliage Borders
-
Start the vines:
With your fine liner brush and olive green paint, draw two main curved lines ascending up the left and right sides of the tile. Keep the lines thin and flowing. -
Paint small leaves:
Switch to the moss green paint on a small round brush. Press down and lift up along the vine stems to create small, almond-shaped leaves. -
Detail the leaves:
Once the green leaves dry, use your finest brush to add tiny central veins in a slightly darker green or grey tone for realistic texture. -
Create the bottom leaf:
At the bottom left corner, paint a larger, maple-style leaf. Use short, feathery strokes of green to build the shape rather than filling in a solid block of color. -
Add berry accents:
Using a dotting tool or the back end of a paintbrush handle, dip into reddish-brown paint and add small clusters of berries near the bottom left vines. -
Connect the elements:
Draw very fine brown stems to connect your berry clusters to the main leafy branches. -
Final speckling:
To mimic the speckled stoneware look, dip an old toothbrush in watered-down brown paint and flick the bristles to create a fine mist of speckles across the white background. -
Seal the piece:
Once all paint is thoroughly dry (give it at least 24 hours), spray the entire tile with a clear acrylic sealant to protect the artwork from fading or scratching.
Make it a Gift
Write the year and baby’s age in gold paint pen on the back of the tile. Glue a sawtooth hanger or strong ribbon to the back to turn this keepsake into ready-to-hang wall art.
Now you have a timeless autumn decoration that preserves that tiny hand forever
Handprint Crab Summer Sign
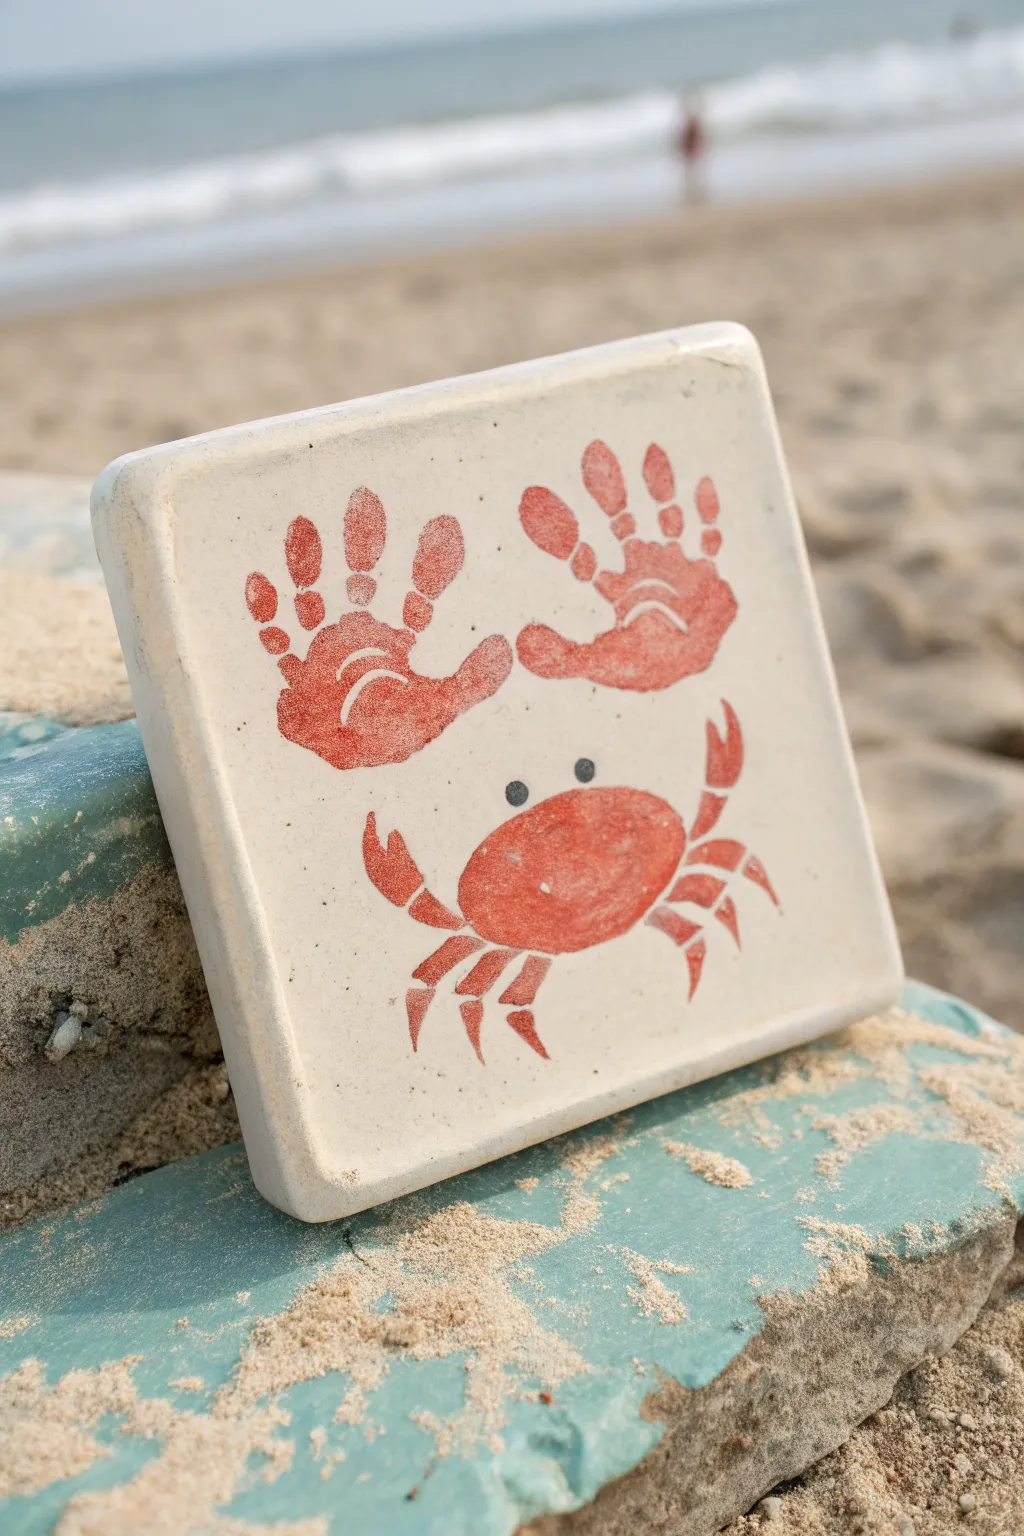
Capture the magic of summer and tiny hands with this adorable ceramic keepsake. Using bright red paint and your little one’s helping hands, you’ll create a playful crab scene perfect for displaying on a shelf or giving as a grandparent gift.
Step-by-Step
Materials
- Square ceramic tile or stone coaster (approx. 4×4 or 6×6 inches)
- Red acrylic paint (non-toxic)
- Black acrylic paint or fine-tip permanent marker
- Paint sponge or large paintbrush
- Small detail paintbrush
- Disposable plate or palette
- Baby wipes or damp paper towels (a must for cleanup)
- Clear acrylic sealant spray (matte or satin finish)
Step 1: Preparing the Prints
-
Surface Prep:
Begin by wiping down your ceramic tile or stone coaster with a damp cloth to remove any dust or oils. Let it dry completely so the paint adheres properly. -
Paint Setup:
Squeeze a generous amount of red acrylic paint onto your disposable plate. You want enough to cover a hand, but not a huge puddle. -
Testing Consistency:
The paint should be creamy but not dripping. If it’s too thick, add a tiny drop of water; too thin, and the print will look smudged. -
Applying Paint to Hand:
Using the sponge or large brush, gently coat your child’s left hand with the red paint. Ensure even coverage on the palm and fingers, but avoid globs of paint in the creases. -
First Print (Left Claw):
Position your child’s left hand in the upper-left quadrant of the tile. Guide their fingers to spread slightly and press down firmly. This handprint will serve as the left ‘floating’ claw above the crab. -
Second Print (Right Claw):
Clean the first hand quickly with wipes. Now, repeat the process with the right hand, pressing it into the upper-right quadrant. Angle the hands slightly towards each other for a natural look. -
Drying Time:
Set the tile aside for 15-20 minutes until the handprints are dry to the touch. I usually take this time to clean up the little one’s hands thoroughly.
Step 2: Painting the Crab Body
-
Sketching the Oval:
Below the two handprints, use your small detail brush to paint a horizontal oval shape in the same red color. This will be the main body of the crab. -
Connecting the Claws:
Paint a thin, curved line extending from the top left of the oval body up towards the left handprint, and mirror this on the right side. These don’t need to touch the handprints directly; doing so implies the connection. -
Adding Legs:
On the bottom left side of the oval, paint three small segmented legs curving downward. Use short strokes to give them that jointed crustacean look. -
Mirroring Legs:
Repeat the leg painting on the bottom right side of the oval body, ensuring they curve roughly symmetrically. -
Adding Pincers:
Paint tiny ‘secondary’ pincers at the end of the connecting arms you drew in step 2. These little forks make the transition from the drawn body to the handprint ‘claws’ clearer. -
Full Dry:
Allow the red paint of the crab body to dry completely. If you paint the eyes too soon, the black might bleed into the wet red.
Smudged Prints?
If a hand slides and smears, wipe the tile immediately with a very wet baby wipe or run it under water. Ceramic is forgiving while the paint is wet, so you can retry until it’s perfect.
Step 3: Finishing Details
-
Painting Eyes:
Dip the back end of your paintbrush (or a stylus) into black paint. Dot two small eyes near the top center of the red oval body. -
Adding Eye Stalks:
Carefully draw tiny black lines connecting the black eye dots to the red body, giving the crab its characteristic eye stalks. -
Final Seal:
Once absolutely everything is bone dry (wait at least an hour), spray the entire tile with a clear acrylic sealant. This protects the print from scratches and fading over time.
Beach Vibes
Before sealing, apply a thin layer of glue to the bottom edge of the coaster and sprinkle real sand over it. This adds a textured beach floor for your crab to sit on.
Now you have a permanent memory of those fleeting little fingers to cherish for summers to come

TRACK YOUR CERAMIC JOURNEY
Capture glaze tests, firing details, and creative progress—all in one simple printable. Make your projects easier to repeat and improve.
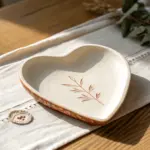
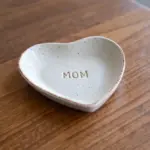
Handprint Trinket Dish Keepsake
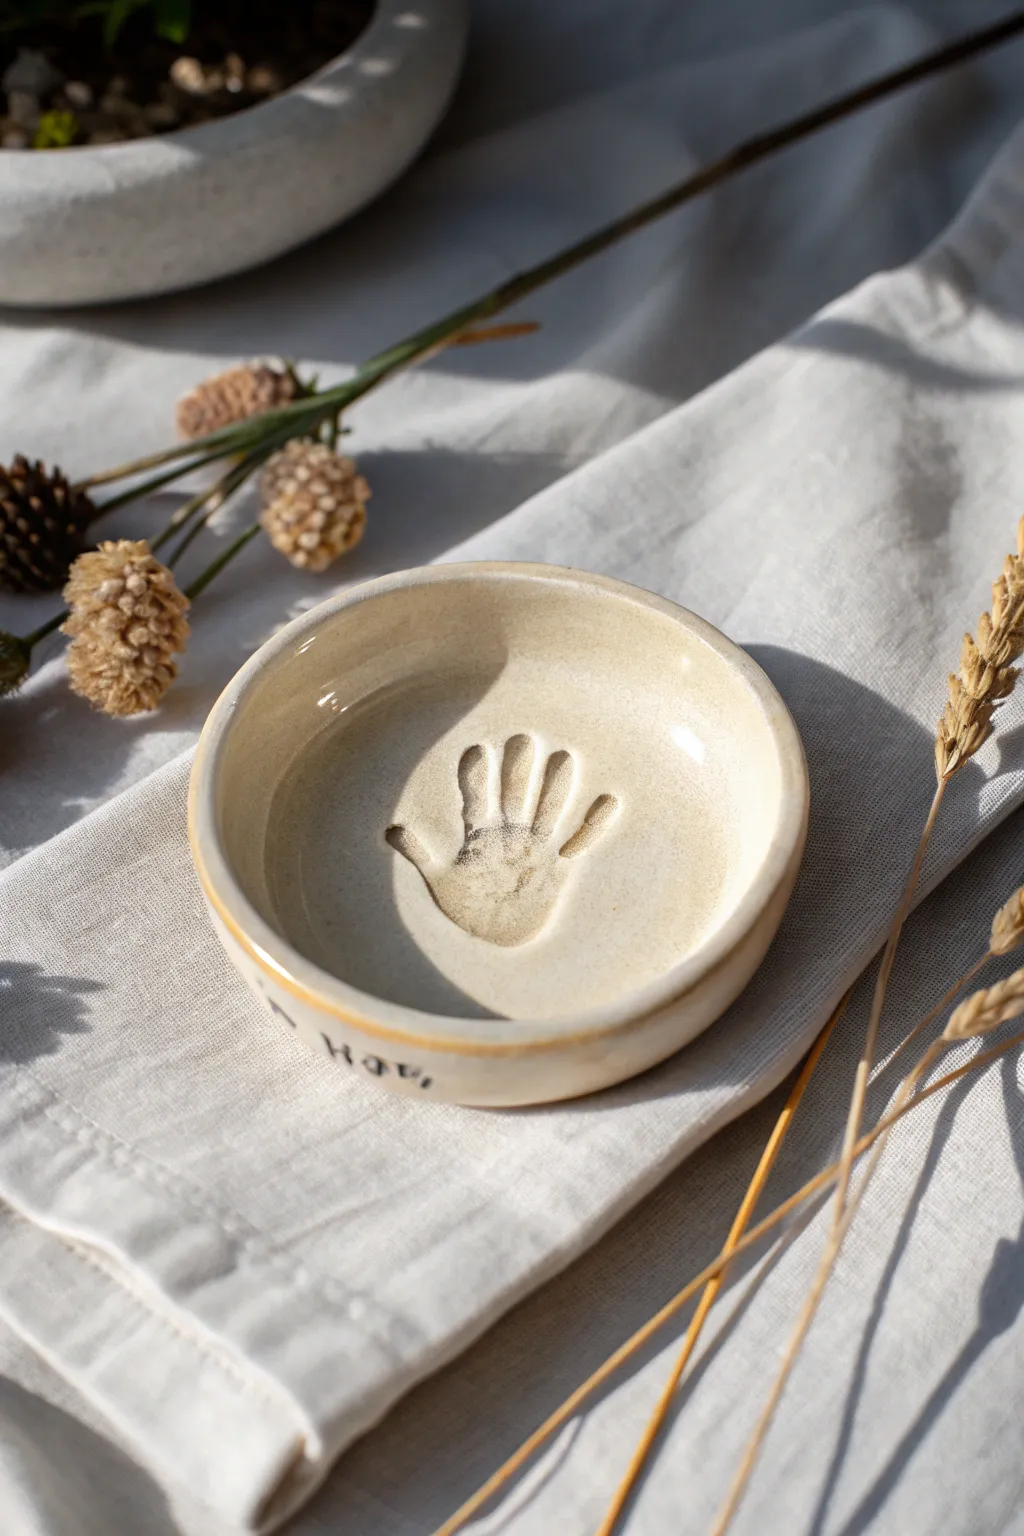
Immortalize your little one’s tiny fingers with this beautiful and functional ceramic-style trinket dish. Using air-dry clay, you’ll create a personalized keepsake that captures a fleeting moment in time, perfect for holding rings or small treasures.
Step-by-Step Guide
Materials
- White specialized air-dry clay (e.g., Das or Crayola Air Dry)
- Rolling pin
- Small bowl (approx. 5-6 inches diameter) to use as a mold
- Sharp knife or clay cutting tool
- Fine grit sandpaper
- Water in a small cup
- Acrylic paints (creamy beige/off-white for the base, dark grey/black for text)
- High-gloss varnish or sealant
- Paintbrushes (medium flat brush and fine detail brush)
- Sponge
Step 1: Shaping the Clay
-
Prepare the workspace:
Lay down a smooth mat or piece of parchment paper to work on so the clay doesn’t stick to your table. -
Roll out the clay:
Take a large handful of air-dry clay and knead it slightly to warm it up. Roll it out evenly until it is about 1/4 to 1/2 inch thick. -
Cut the circle:
Place your bowl upside down on the rolled clay to use as a template. Trace around the rim with a knife to cut out a perfect circle. -
Make the impression:
Gently press your baby’s hand into the center of the clay circle. Apply firm, even pressure on the palm and each finger to ensure a deep, clear print. -
Form the dish shape:
Lift the clay circle and gently place it inside your bowl mold. Press it lightly against the bottom and sides so the clay takes on the curved dish shape. -
smooth the edges:
Dip your finger in a little water and run it along the rim of the clay to smooth out any rough cutting marks or cracks. -
Initial drying:
Leave the clay inside the bowl to dry for about 24 hours. This helps it hold its curved shape while the structure sets.
Step 2: Refining and Painting
-
Remove and dry completely:
Carefully pop the clay dish out of the mold. Flip it over and let it air dry for another 24-48 hours until it is bone dry and chalky white. -
Sand imperfections:
Using fine-grit sandpaper, gently sand the rim and the surface to remove any bumps or fingerprints you don’t want to keep. -
Base coat painting:
Mix a creamy, off-white acrylic paint to mimic the look of natural stoneware. Apply two thin coats to the entire dish, letting it dry between layers. -
Highlight the print:
I like to water down a tiny bit of darker beige paint and wash it over the handprint, then wipe the excess off with a sponge; this settles into the crevices and makes the details pop. -
Add personalized text:
Using your finest detail brush and dark grey or black paint, carefully write a name, date, or word like ‘Hope’ on the outer rim or side of the dish. -
Seal the piece:
Once all paint is fully dry, apply a high-gloss varnish. This protects the clay and gives it that professional, kiln-fired ceramic look.
Cracking Clay?
If small cracks appear while drying, mix a tiny amount of fresh clay with water to make a paste (slip) and fill them in before painting.
Gold Rim Upgrade
For an elegant touch, paint the very top edge of the rim with liquid gold leaf or metallic gold acrylic paint before sealing.
Place this sweet little dish on your dresser as a daily reminder of how small they once were
Handprint Garden Stepping Stone
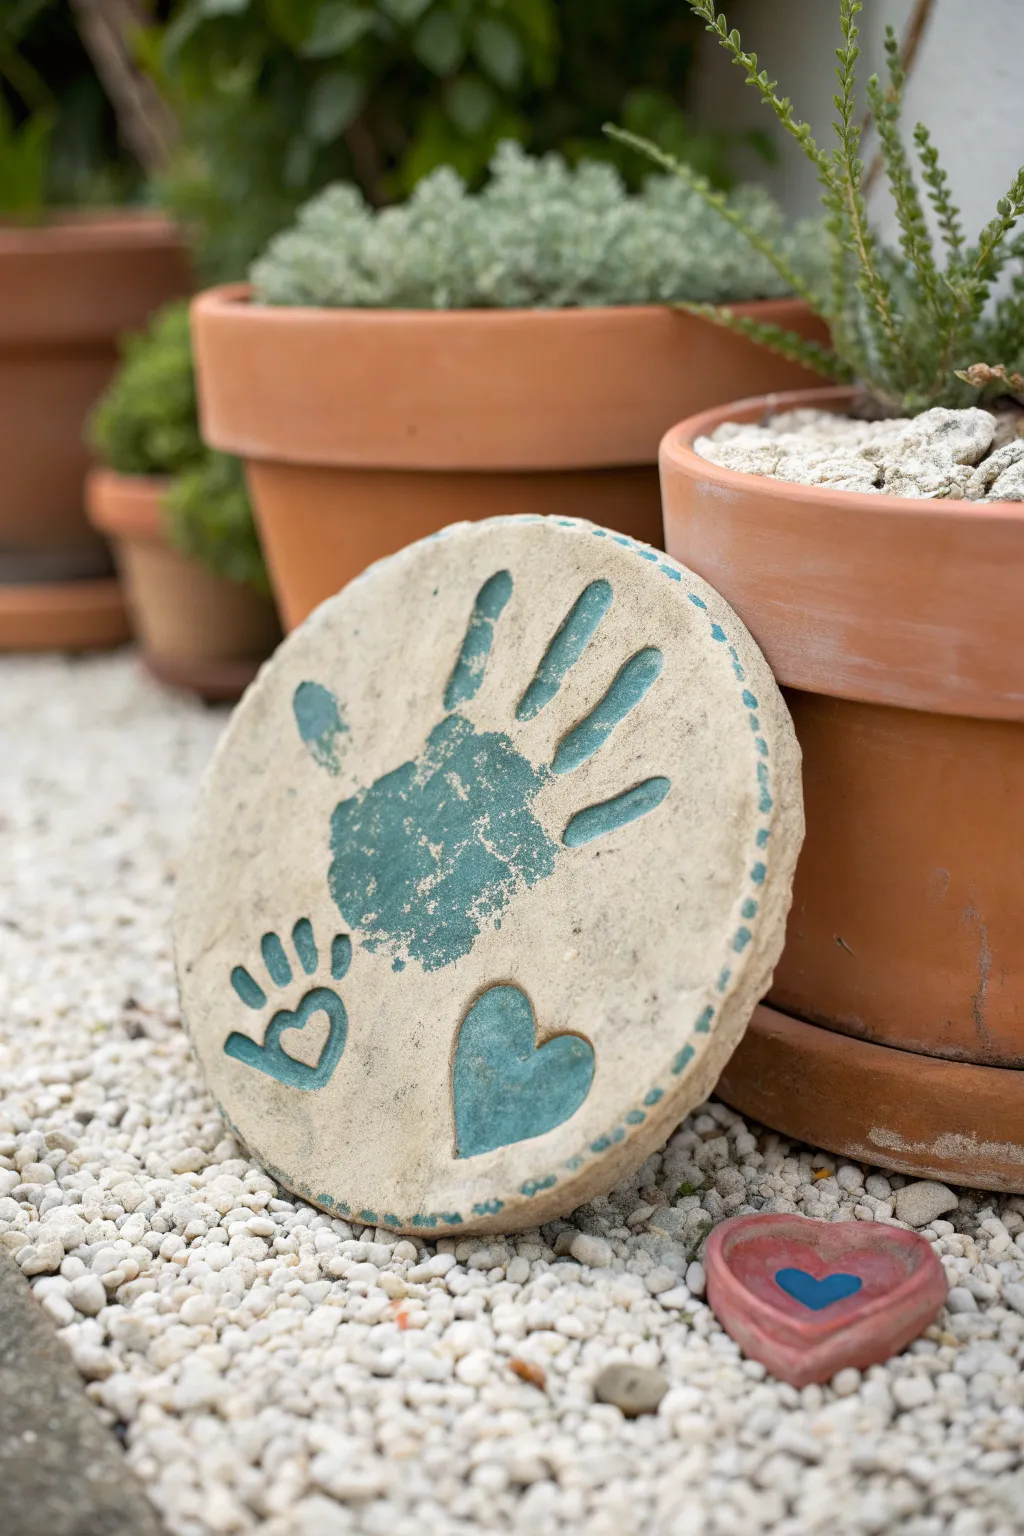
Immortalize those tiny fingers with a rustic, handmade garden stone that captures the fleeting magic of childhood. This durable concrete disc features a charming teal handprint and heart accents, making it a perfect, weather-resistant addition to your flower beds or walkway.
Step-by-Step Tutorial
Materials
- Quick-setting concrete mix or stepping stone mix
- Round stepping stone mold (approx. 8-10 inches diameter)
- Water
- Mixing bucket and stir stick
- Petroleum jelly or mold release spray
- Teal acrylic outdoor craft paint
- Small paintbrush (for details)
- Medium paintbrush (for hand)
- Clear outdoor sealant spray (matte or satin finish)
- Sandpaper (fine grit, optional)
Step 1: Casting the Stone
-
Prepare the Mold:
Begin by cleaning your round mold thoroughly to ensure no debris is left inside. Coat the entire inner surface lightly with petroleum jelly or a mold release spray; this crucial step ensures your finished stone pops out easily without cracking the edges. -
Mix the Concrete:
Pour your dry concrete mix into a bucket. Add water gradually according to the package directions, stirring constantly until you achieve a consistency similar to thick brownie batter or oatmeal—it should be pourable but not runny. -
Pour and Tap:
Pour the concrete mixture into your prepared mold until it’s nearly full. Gently tap the sides of the mold and lift it slightly to drop it onto your work surface a few times; this helps release trapped air bubbles and levels the top surface. -
Initial Setting:
Let the concrete sit undisturbed for about 15 to 20 minutes. You want the surface to become slightly firm but still soft enough to take an impression, similar to modeling clay.
Step 2: Creating the Impressions
-
Position the Hand:
If you are pressing a hand directly into the wet cement, gently press the child’s palm into the center of the stone now. However, for the painted look in the photo, allow the stone to dry completely smooth first. -
Dry and Cure:
Allow the stone to cure in the mold for at least 24 to 48 hours. I find it’s best to keep it in a cool, dry place away from direct sunlight to prevent cracking while it hardens. -
De-mold the Stone:
Once fully hard, turn the mold upside down and gently tap or flex it to release the stone. Let it cure outside the mold for another 2-3 days to ensure all moisture has evaporated before decorating.
Clean Edges?
If the concrete has rough, sharp edges after de-molding, rub the stone edges with a piece of scrap concrete or a sanding block while wearing gloves to smooth it out perfectly
Step 3: Decoration and Detailing
-
Prepare the Surface:
If there are any rough ridges on the edges or face of the stone, lightly sand them down with fine-grit sandpaper. Wipe away all dust with a damp cloth and let it dry. -
Paint the Handprint:
Coat your child’s hand generously with the teal outdoor craft paint. Guide their hand firmly onto the center of the stone, pressing down on the palm and each finger to ensure a solid transfer, then lift straight up. -
Touch Ups:
Use a small brush to fill in any areas of the handprint that look too faint, but keep the textured, stamped look for authenticity. -
Paint the Heart:
Dip your medium brush into the teal paint and freehand a simple heart shape near the bottom of the stone. Fill it in completely for a bold block of color. -
Add Line Art:
Using a finer brush, paint a stylized heart outline with little radiating lines or ‘toes’ to the left of the main heart, mimicking a cute paw print or sun-heart doodle. -
Create the Border:
Dip the handle end of a paintbrush into the teal paint to use as a dotting tool. Stamp a series of small dots around the outer rim of the stone, reloading paint frequently to keep the size consistent. -
Final Drying:
Allow all the paint to dry completely, which usually takes about an hour depending on humidity.
Mosaic Magic
Before the concrete sets completely, press colorful sea glass, marbles, or broken ceramic pieces into the empty spaces around the handprint for added sparkle and texture
Step 4: Sealing and Protecting
-
Apply Sealer:
Take the stone to a well-ventilated area. Spray a thin, even coat of clear outdoor sealant over the entire top surface. -
Second Coat:
Wait for the first coat to dry (check can instructions), then apply a second coat to ensure maximum weatherproofing. -
Placement:
Once the sealer is fully cured (usually 24 hours), place your beautiful new keepsake in a special spot in the garden.
This charming stepping stone will serve as a permanent reminder of how small their hands once were as your garden grows around it