Air-dry clay coasters are my favorite quick project when you want that handmade pottery feel without any fancy equipment. I pulled together these air dry clay coaster ideas so you can go classic, modern, or a little weird in the best way—and still end up with something actually useful.
Classic Round Air-Dry Clay Coasters
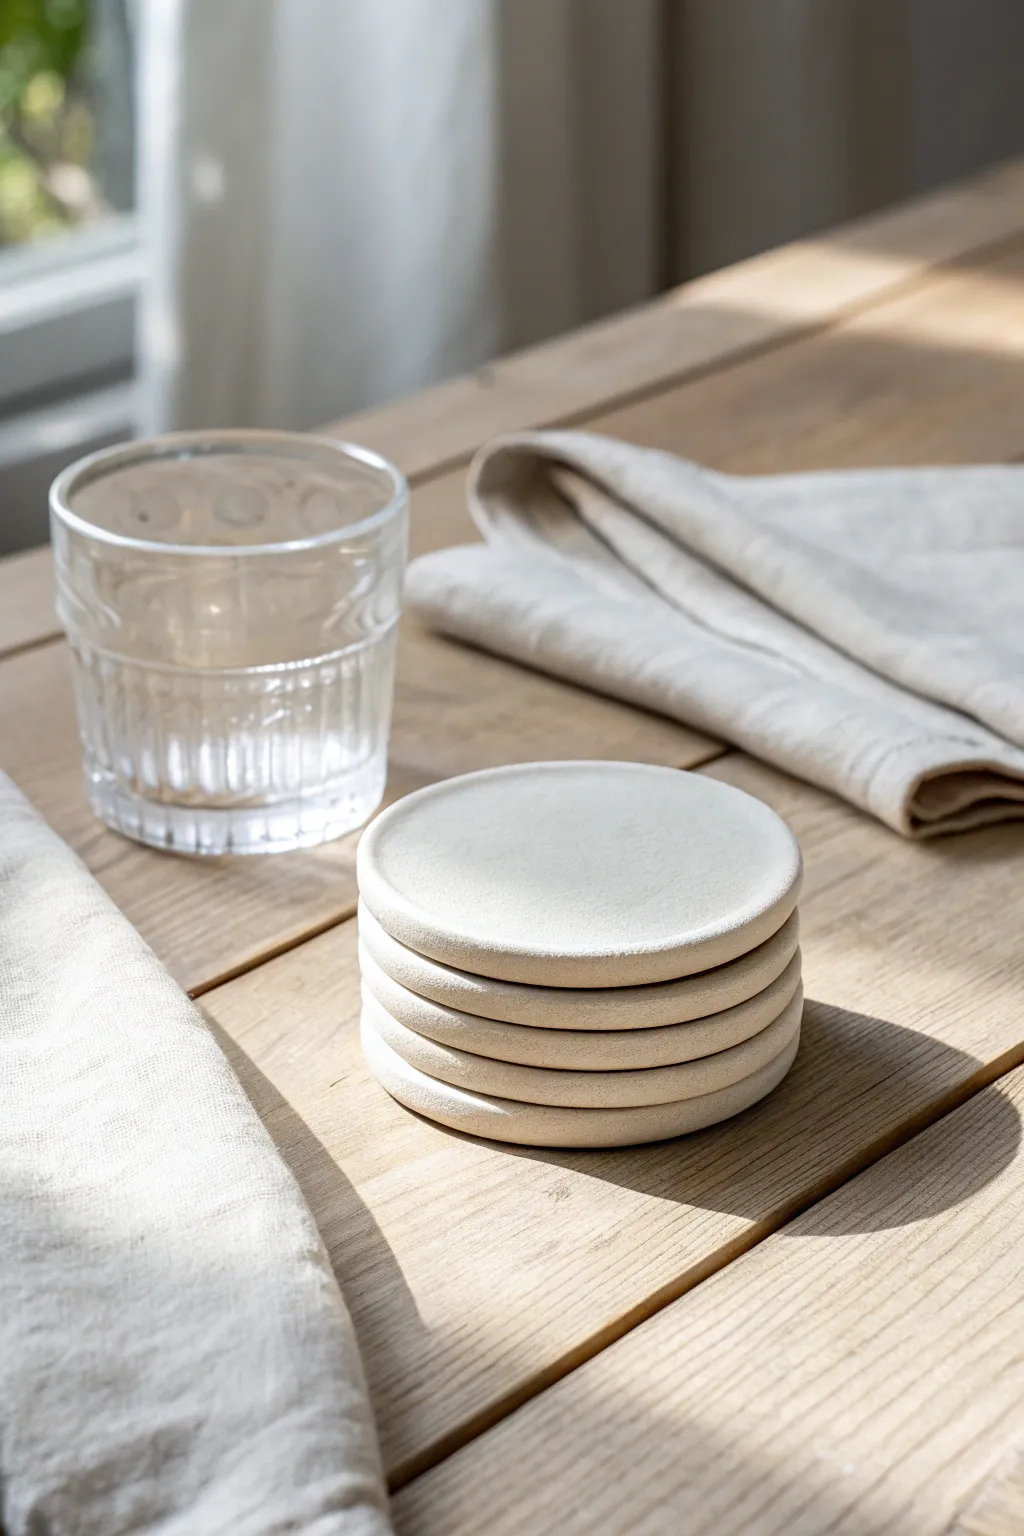
These elegant, understated coasters feature a subtle raised rim and a natural, matte finish that mimics the look of smooth limestone. Their clean lines and neutral tone make them a versatile addition to any table setting, perfect for protecting surfaces with style.
Step-by-Step Tutorial
Materials
- White or stone-colored air-dry clay
- Rolling pin
- Circle cookie cutter (approx. 4-inch diameter)
- Parchment paper or canvas mat
- Small bowl relative to cutter size (or a slightly smaller circle cutter)
- Sandpaper (medium and fine grit)
- Cup of water
- Sponge
- Matter acrylic varnish or sealant
Step 1: Shaping the Base
-
Prepare the Clay:
Begin by wedging your clay to remove any air bubbles. Take a handful of clay and knead it until it’s pliable and smooth, which prevents cracking later on. -
Roll Out the Slab:
Place the clay between two sheets of parchment paper or on a canvas mat. Use your rolling pin to roll it out to an even thickness of about 1/4 inch. -
Cut the Circles:
Using your large circle cutter, press firmly into the slab to cut out your coaster shapes. Create as many as you need, usually a set of four or six. -
Smooth the Edges:
Dip your finger in a little water and run it gently around the cut edge of each circle to smooth out any roughness left by the cutter.
Step 2: Creating the Rim
-
Mark the Inner Circle:
To create that distinctive raised lip, lightly press a slightly smaller circle cutter or the bottom of a bowl into the surface. Don’t cut through; just make an indentation about 1/4 inch from the edge. -
Depress the Center:
Using your thumbs, gently press down on the clay inside the marked circle. Work your way around, compressing the center to make it slightly thinner than the outer rim. -
Refine the Lip:
I like to use a damp sponge to smooth the transition between the sunken center and the raised rim, ensuring it looks like a soft slope rather than a sharp step. -
Final Smoothing:
Run a damp sponge over the entire surface to remove fingerprints. Check the rim to ensure it is uniform in height all the way around.
Weighted Drying
To guarantee perfectly flat coasters, place a heavy book on top of them (with parchment paper in between) during the final stages of drying.
Step 3: Drying and Finishing
-
Initial Drying:
Place the coasters on a wire rack or a clean sheet of parchment paper. Let them dry away from direct sunlight. -
Flipping Phase:
After about 6-8 hours, gently flip the coasters over. This helps them dry evenly and prevents the edges from curling upward. -
Full Cure:
Allow the coasters to dry completely for at least 24 to 48 hours. The clay should feel room temperature to the touch, not cool. -
First Sanding:
Use medium-grit sandpaper to remove any major bumps or uneven edges on the rim. Work in circular motions for a consistent finish. -
Fine Sanding:
Switch to fine-grit sandpaper to buff the surface until it feels incredibly smooth, almost like a polished stone. -
Dust Clean:
Wipe away all the sanding dust with a slightly damp cloth or a dry brush. Ensure no dust remains in the crevices near the rim. -
Seal the Coasters:
Apply a thin coat of matte acrylic varnish. This is crucial for protecting the clay from moisture condensation on cold drinks. -
Second Coat:
Once the first coat is dry, apply a second coat of sealant for extra durability, paying special attention to the central area.
Natural Speckle
For a granite look, mix used dried coffee grounds or black pepper into the wet clay before rolling. It adds organic texture without painting.
Enjoy using your sleek handmade coasters for your next morning coffee or evening gathering.


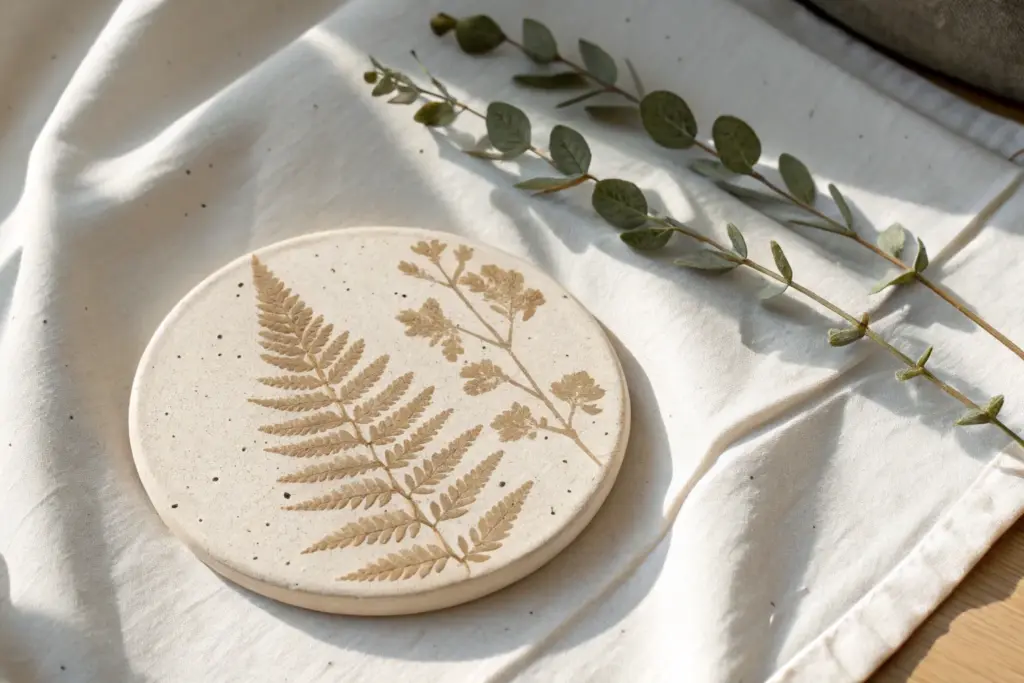
Botanical Imprint Air-Dry Clay Coasters
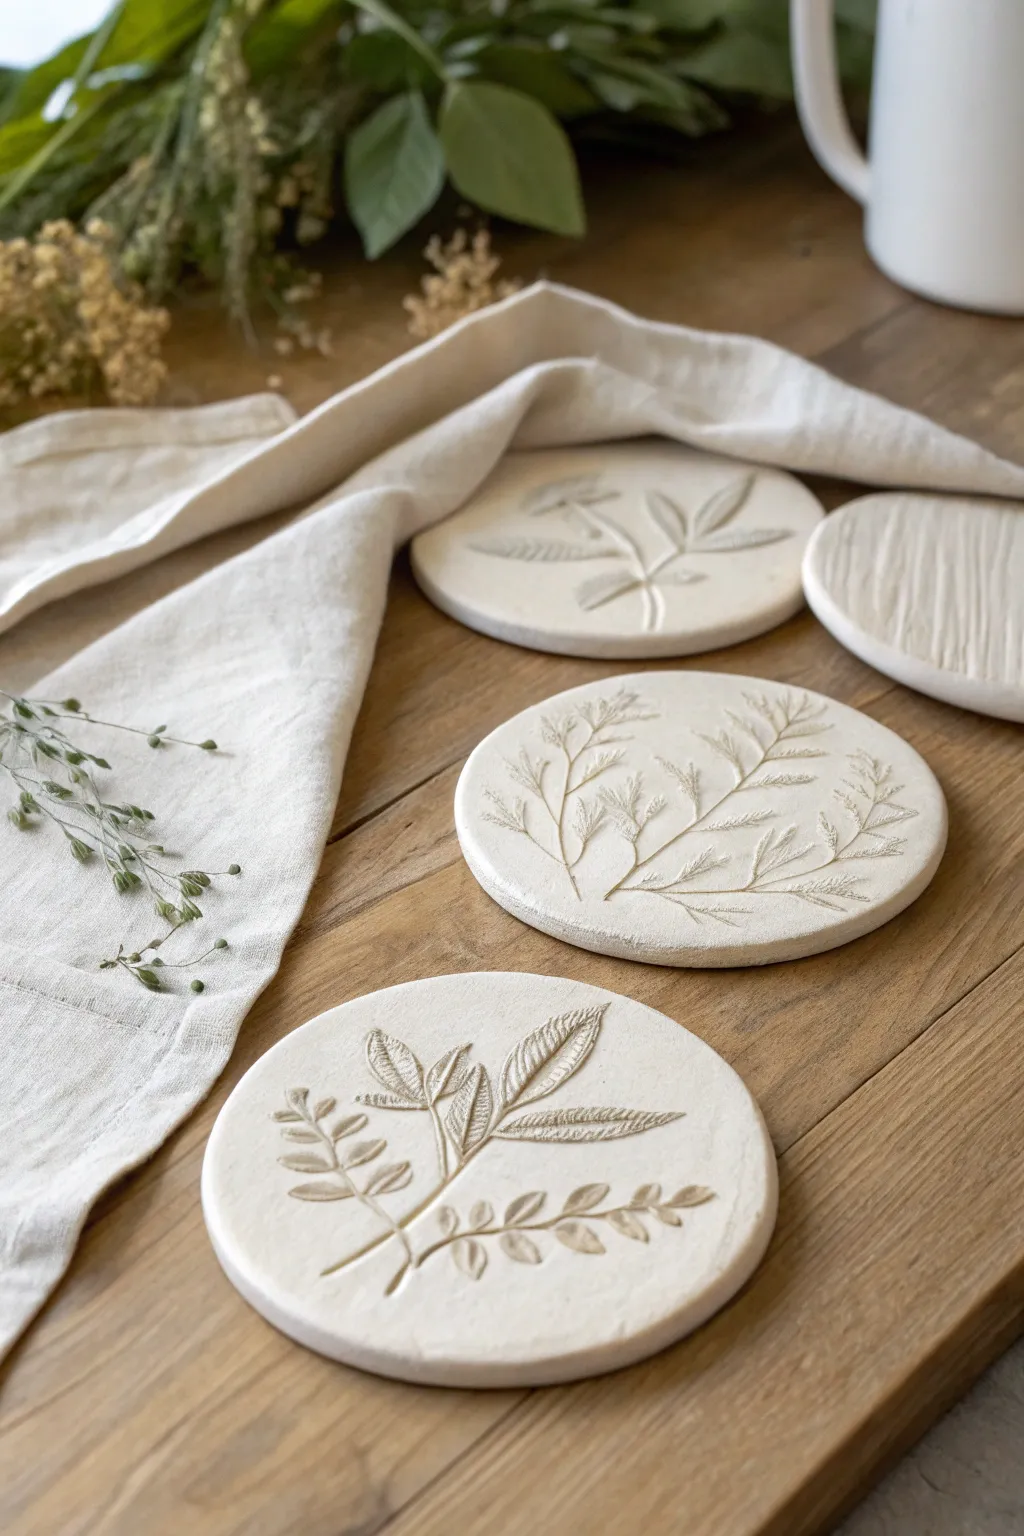
Capture the delicate beauty of nature with these minimalist air-dry clay coasters featuring elegant botanical relief designs. The subtle textures and creamy white finish make them a sophisticated addition to any coffee table setting.
Step-by-Step Guide
Materials
- White air-dry clay (smooth texture)
- Rolling pin or acrylic roller
- Round cookie cutter (approx. 4 inches) or a bowl to trace around
- Fresh or sturdy dried plant clippings (leaves, ferns, wildflowers)
- Parchment paper or a silicone mat
- Craft knife or needle tool (if tracing)
- Sponge and water
- Find sandpaper (320 grit)
- Matte acrylic varnish or sealant for clay
Step 1: Preparation & Rolling
-
Prepare your workspace:
Lay down a sheet of parchment paper or a silicone mat on a flat surface to prevent the clay from sticking. -
Condition the clay:
Take a handful of white air-dry clay and knead it well in your hands until it becomes warm, soft, and pliable. This helps prevent cracks later. -
Roll the slab:
Place the clay on your mat and use the rolling pin to roll it out into an even slab. Aim for a thickness of about 1/4 inch (6-7mm) to ensure the coasters are sturdy. -
Smooth the surface:
If you see any textures or fingerprints, dip your finger slightly in water and gently glide it over the clay surface to smooth it out completely.
Clean Impressions
If your leaves are sticking to the roller, place a piece of plastic wrap or parchment paper over the leaf before rolling to keep everything clean.
Step 2: Imprinting the Botanicals
-
Select your foliage:
Choose your plant clippings. Ferns, sage leaves, or rosemary sprigs work beautifully because they have distinct veins and sturdy structures. -
Arrange the composition:
Gently place your chosen leaf or sprig onto the rolled clay slab. Plan the placement so it fits within the area where you’ll cut your circle. -
Roll to imprint:
Using your rolling pin, roll firmly over the plant material once. Use steady, even pressure so the leaf presses deep into the clay without distorting the slab’s thickness too much. -
Remove the botanical:
Carefully lift and peel away the plant material to reveal the intricate impression left behind in the clay. Use a needle tool to pick out any tiny stuck bits if necessary.
Antique Wash
To make the veins pop, apply a watered-down brown acrylic paint wash over the imprint and wipe the surface immediately, leaving color only in the grooves.
Step 3: Cutting & Refining
-
Cut the shape:
Position your round cookie cutter over the imprint to frame it perfectly. Press down straight and firmly to cut the circle. -
Release the shape:
Remove the excess clay from around the circle first, then gently lift your coaster. If it sticks, slide a blade or spatula underneath. -
Smooth the edges:
Dip your finger in a little water again and run it along the cut edge of the coaster to round it off and remove any sharpness or burrs. -
Alternative texture:
For variety, like the coaster in the background, you can gently drag a comb or fork through the clay surface before cutting to create linear textures.
Step 4: Drying & Finishing
-
Initial drying:
Place the coasters on a clean sheet of parchment paper on a wire rack to allow air circulation. Let them dry for 24-48 hours depending on humidity. -
Flip for flatness:
I find it helpful to flip the coasters over halfway through the drying process to prevent the edges from curling upward. -
Sand imperfections:
Once fully dry and hard (the clay will turn white and chalky), take your fine-grit sandpaper and lightly sand the edges or surface if there are any rough spots. -
Clean dust:
Wipe the coasters with a slightly damp cloth or a dry soft brush to remove all sanding dust before sealing. -
Seal the coaster:
Apply a coat of matte varnish or acrylic sealant. This protects the clay from moisture, which is crucial for a drink coaster. -
Second coat:
Allow the first coat to dry, then apply a second coat for extra durability, ensuring you get into the deep crevices of the leaf impression.
Enjoy using your custom botanical coasters or wrap them in twine for a thoughtful handmade gift


Fern Frond Air-Dry Clay Coasters
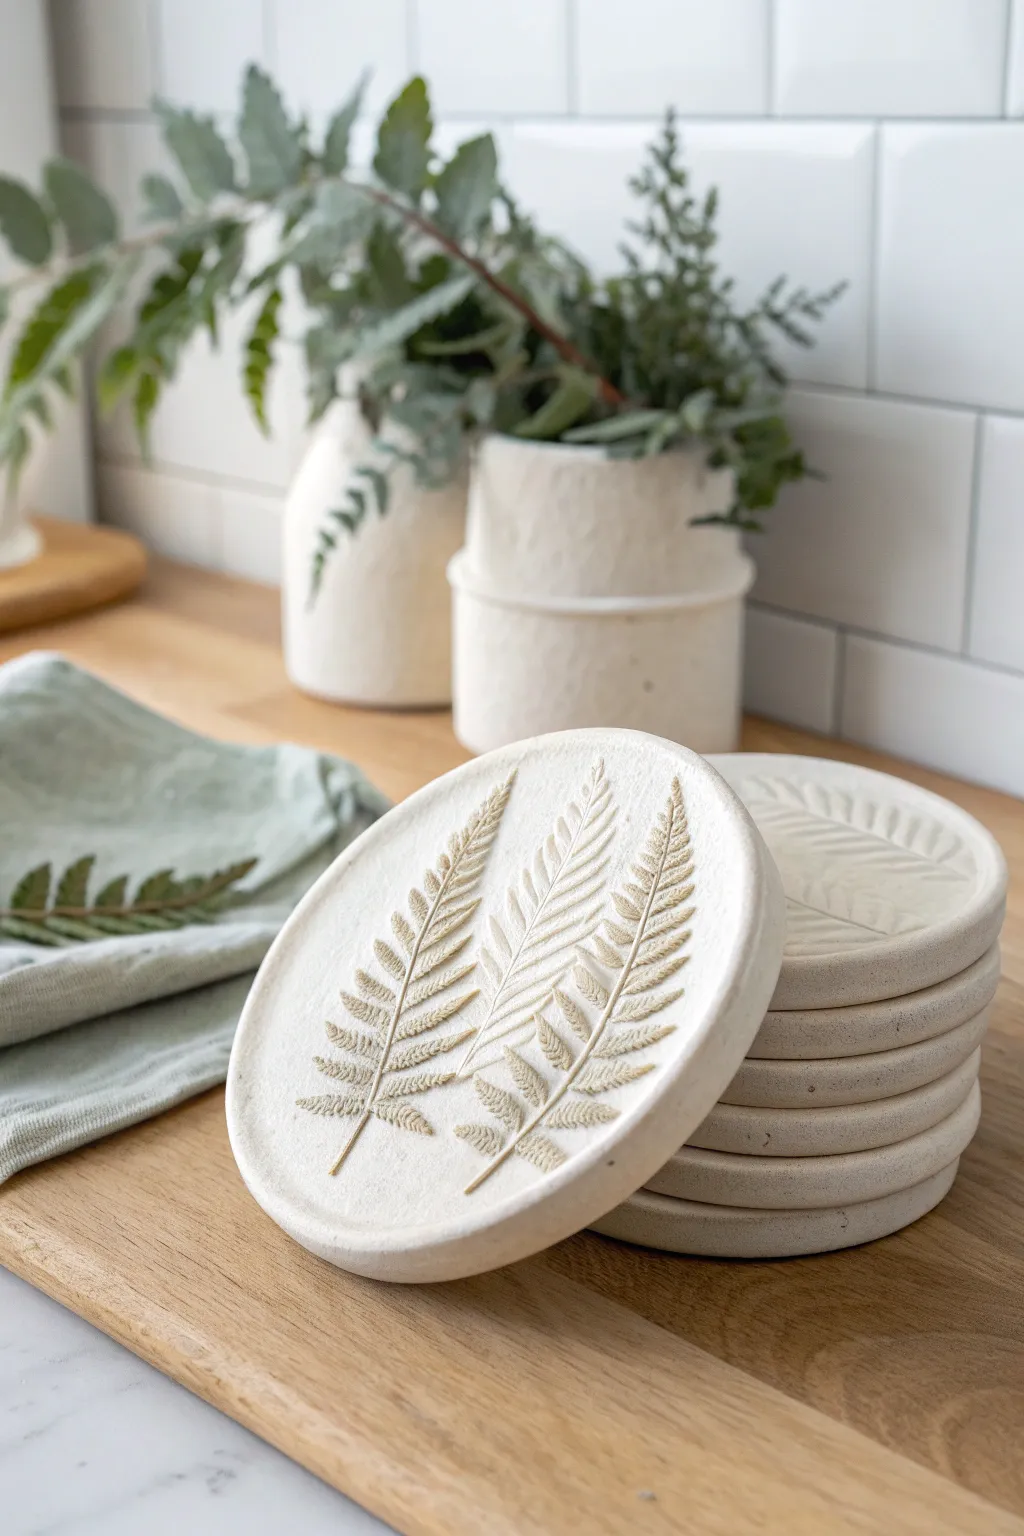
Capture the delicate beauty of nature with these textured stoneware-style coasters. By pressing real fern fronds into air-dry clay, you can create a gorgeous, organic set of home decor that permanently preserves the intricate details of your favorite foliage.
Step-by-Step
Materials
- White AIR-DRY CLAY (DAS or Crayola brands work well)
- Fresh fern fronds (or similar flat leaves with strong veins)
- Circular cookie cutter (approx. 4 inches) or a bowl to trace
- Rolling pin
- Parchment paper or wax paper
- Small bowl of water
- Fine-grit sandpaper (220 grit)
- Matte acrylic varnish or sealant (essential for water resistance)
- Sharp craft knife
Step 1: Preparation & Rolling
-
Prepare your workspace:
Lay down a sheet of parchment paper on a flat, hard surface. This prevents the clay from sticking and makes it easy to move the coasters later without warping them. -
Condition the clay:
Take a large handful of air-dry clay from the package. Knead it in your hands for a few minutes until it feels warm, pliable, and free of any large air bubbles. -
Roll the slab:
Place the clay ball on the parchment and flatten it slightly with your palm. Use your rolling pin to roll it out into an even slab. -
Check thickness:
Aim for a thickness of about 1/4 inch (approx. 6mm). If it’s too thin, the coasters might crack; too thick, and they will take forever to dry. I find using two wooden dowels on either side as depth guides helps keep everything perfectly level.
Step 2: Imprinting Nature
-
Select your foliage:
Choose fresh fern fronds that are flat and not too dry. If they are crunchy, they will crumble into the clay rather than leaving a clean impression. -
Arrange the composition:
Gently lay the fern fronds onto the rolled clay slab. You can place single leaves or overlap two or three for a more dynamic, organic look like the example photo. -
Press the leaves:
Using your rolling pin, roll firmly over the leaves once. Press hard enough to embed the veins into the clay, but be careful not to distort the leaves excessively. -
Remove the greenery:
Carefully find the stem of the fern and lift it upwards. Peel the leaf away slowly to reveal the detailed fossil-like impression left behind.
Vein Definition Tip
Place the fern “vein-side down” (the bumpier back of the leaf) against the clay. This side always creates a much deeper, sharper impression than the smoother front side.
Step 3: Cutting & Shaping
-
Position the cutter:
Place your circular cutter over the imprint, framing the fern design exactly how you want it to appear on the final coaster. -
Cut the shape:
Press down firmly to cut through the clay. If you are using a bowl as a template, trace around it carefully with a sharp craft knife. -
Remove excess clay:
Peel away the scrap clay from outside the circle. You can ball this up and store it in an airtight bag for future projects. -
Smooth the edges:
Dip your finger into a small bowl of water. Gently run your wet finger around the rim of the coaster to smooth out any rough cutting marks or sharp edges.
Rustic Wash Effect
After drying but before sealing, water down some brown acrylic paint. Brush it into the fern grooves and wipe the surface immediately with a rag to highlight perfectly aged details.
Step 4: Drying & Finishing
-
Initial drying:
Leave the coasters on the parchment paper in a cool, dry place. Let them air dry for at least 24 hours. Don’t place them in direct sunlight, or they may curl. -
Flip for even drying:
After the top feels dry to the touch (usually after the first day), carefully flip the coasters over so the bottom can dry evenly. This helps prevent warping. -
Wait for full cure:
Allow another 24-48 hours for the clay to fully cure. The clay will turn from a cool grey-white to a bright, chalky white when completely dry. -
Create the refined edge:
Once fully hard, take your fine-grit sandpaper and lightly sand the edges. You can also very lightly sand the surface if you want a smoother feel, but avoid sanding the fern texture itself. -
Dust off:
Wipe the coaster with a dry cloth or a soft brush to remove all fine clay dust before sealing. -
Apply the sealant:
Apply a coat of matte acrylic varnish or waterproof sealant. This step is crucial because raw air-dry clay will dissolve if your cold drink sweats on it. -
Final coat:
Let the first coat dry, then apply a second thin layer of sealant to ensure durability. Allow this to cure fully according to the bottle instructions before using.
Stack your set of botanical coasters on the coffee table and enjoy the timeless, fossilized elegance they bring to your space


Wildflower Press Air-Dry Clay Coasters
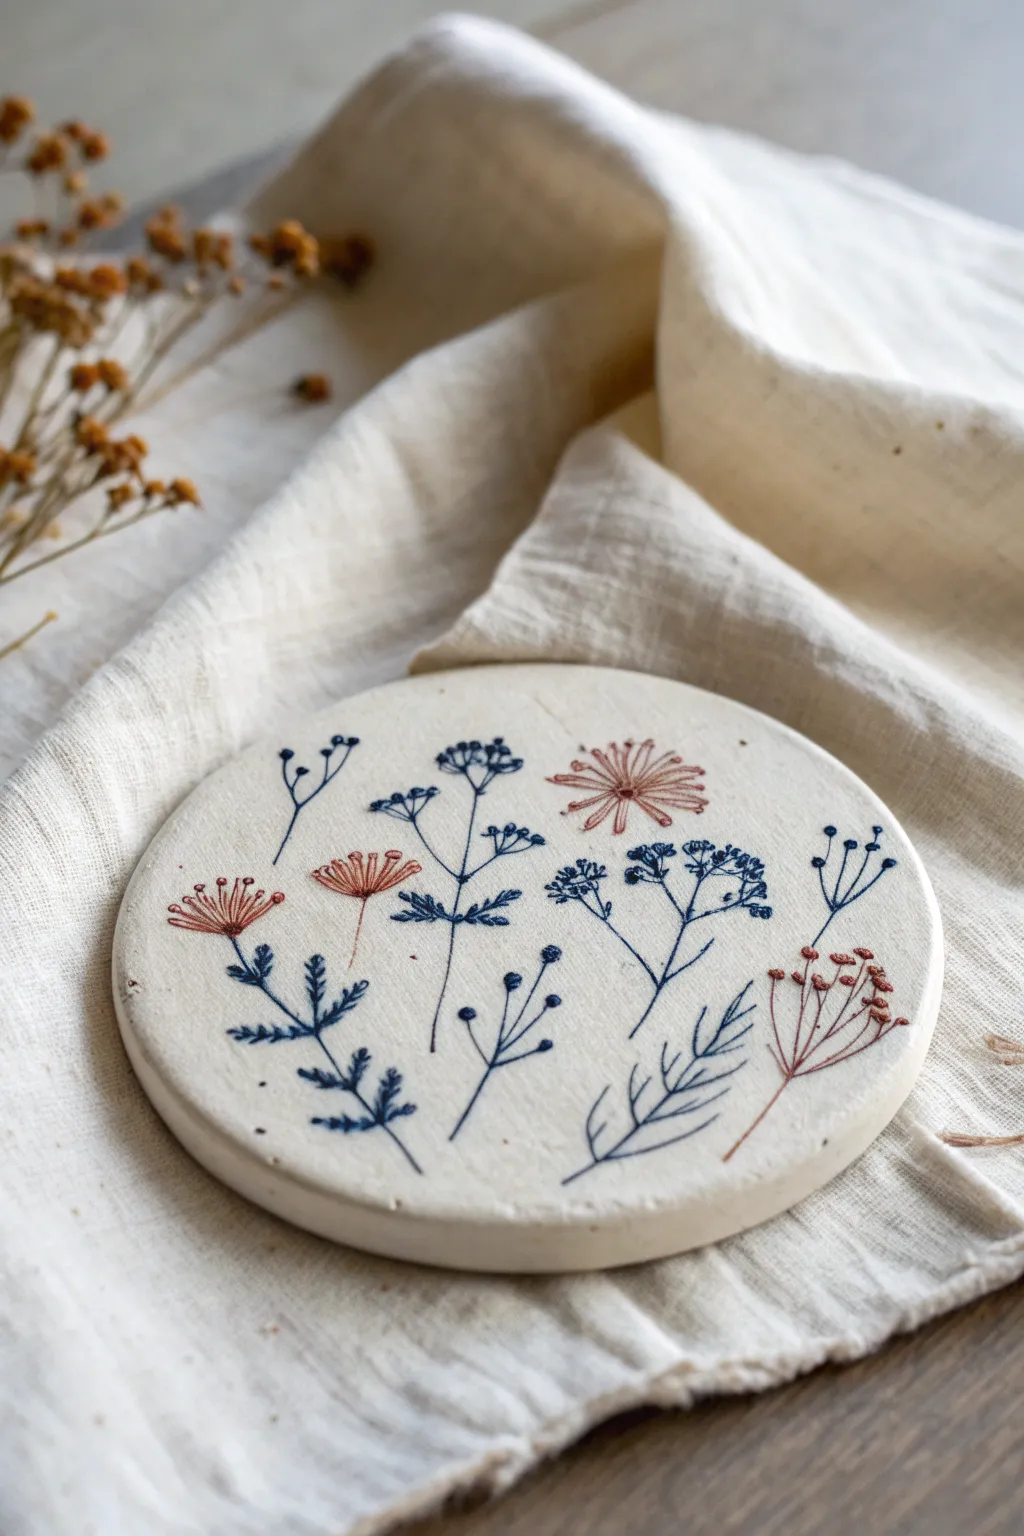
Capture the delicate beauty of a meadow with these minimalist air-dry clay coasters, featuring imprinted wildflower motifs accentuated with fine paintwork. The resulting piece feels clean and organic, combining the stark white of the clay with deep navy and rust tones for a modern botanical look.
Step-by-Step Tutorial
Materials
- White stone air-dry clay (or high-quality modeling clay)
- Small rolling pin
- Circle cookie cutter (approx. 4 inches) or a bowl to trace
- Fine-grit sandpaper (220 to 400 grit)
- Fine-point awl, needle tool, or a sharp toothpick
- Acrylic paints (Navy Blue, Rust/Burnt Orange)
- 000 or 10/0 detail paintbrush
- Clear matte varnish or sealant (spray preferred)
- Parchment paper or a silicone mat
- Small cup of water
Step 1: Shaping the Base
-
Condition the clay:
Begin by taking a handful of white air-dry clay and kneading it in your hands until it is smooth, pliable, and free of cracks. If it feels too dry, dip your fingers in water and work the moisture in. -
Roll the slab:
Place the clay on a sheet of parchment paper or a silicone mat to prevent sticking. Use your rolling pin to flatten the clay into an even slab, aiming for a thickness of about 1/4 inch (6-7mm). -
Smooth the surface:
Before cutting, take a moment to gently smooth the surface with a slightly damp finger or a sponge to remove any texture from the rolling pin or canvas. -
Cut the circle:
Press your circle cutter firmly into the clay. If you don’t have a cutter, place a small bowl upside down and trace around it with a knife. Lift away the excess clay carefully. -
Refine the edges:
Dip your finger in water and run it along the cut edge of the circle. Create a smooth, slightly rounded rim so the finished coaster won’t have sharp, uncomfortable edges.
Warping Woes?
If the edges curl up while drying, place a lightweight book on the coaster once it’s ‘leather hard’ (dry to touch but still cool). This keeps it perfectly flat.
Step 2: Creating the Design
-
Sketch lightly:
Using your needle tool or awl, very lightly scratch the stem lines of your wildflowers into the clay. This acts as a guide. Aim for variety: some stems straight, some branching, creating a scattered, organic pattern. -
Engrave the stems:
Go back over your guide lines with slightly more pressure to deepen the grooves for the stems. You want the indentation to be clear enough to hold paint later, but not so deep it weakens the coaster. -
Add detail elements:
For the leaves and flower heads, use the point of your tool to scratch short, deliberate dashes. For the fern-like leaves, make small V-shapes along the stem lines. -
Create texture:
For the seed pods or rounder flower heads, gently poke small dots rather than scratching lines. Varing your pressure here adds a lovely tactile dimension. -
Clean up debris:
As you engrave, tiny crumbs of clay will accumulate. Use a soft, dry brush to sweep these away immediately so they don’t get pressed back into the surface. -
Let it cure:
Allow the coaster to dry completely on a flat surface. Depending on humidity, this can take 24 to 48 hours. Carefully flip it halfway through the drying process to ensure the bottom dries evenly and prevents warping.
Step 3: Painting and Finishing
-
Sand for perfection:
Once bone dry, take your fine-grit sandpaper and gently buff the edges and surface. Avoid sanding too aggressively over your etched design, but smooth out any burrs created during the engraving process. -
Prepare your palette:
Squeeze out small amounts of navy blue and rust orange acrylic paint. I find thinning the paint slightly with a tiny drop of water helps it flow into the engraved lines better. -
Paint the foliage:
Using your finest detail brush, carefully fill in the engraved stems and leaves with navy blue. Let the brush glide through the grooves you created—the indentation acts as a guide to keep lines neat. -
Add floral accents:
Switch to the rust orange color for specific flower heads. Use short, flicking brush strokes for the petals or small dabs for the seed pods to mimic the texture of the carving. -
Clean mistakes:
If paint gets on the flat surface outside the grooves, wait for it to dry for a few seconds, then verify gently scrape it away with a clean needle tool or wipe with a barely damp cotton swab. -
Seal the piece:
Once the paint is fully cured, apply a clear matte varnish. A spray sealant is ideal here to avoid smearing the fine paint lines. Apply 2-3 thin coats, letting each dry in between.
Clean Lines Hack
Use a damp sponge to wipe the entire surface after painting. The paint stays trapped in the deep engraved lines while wiping off the top perfectly.
Place your favorite mug on your new botanical creation and enjoy the natural elegance it brings to your table

The Complete Guide to Pottery Troubleshooting
Uncover the most common ceramic mistakes—from cracking clay to failed glazes—and learn how to fix them fast.
Minimal Stamp Pattern Air-Dry Clay Coasters
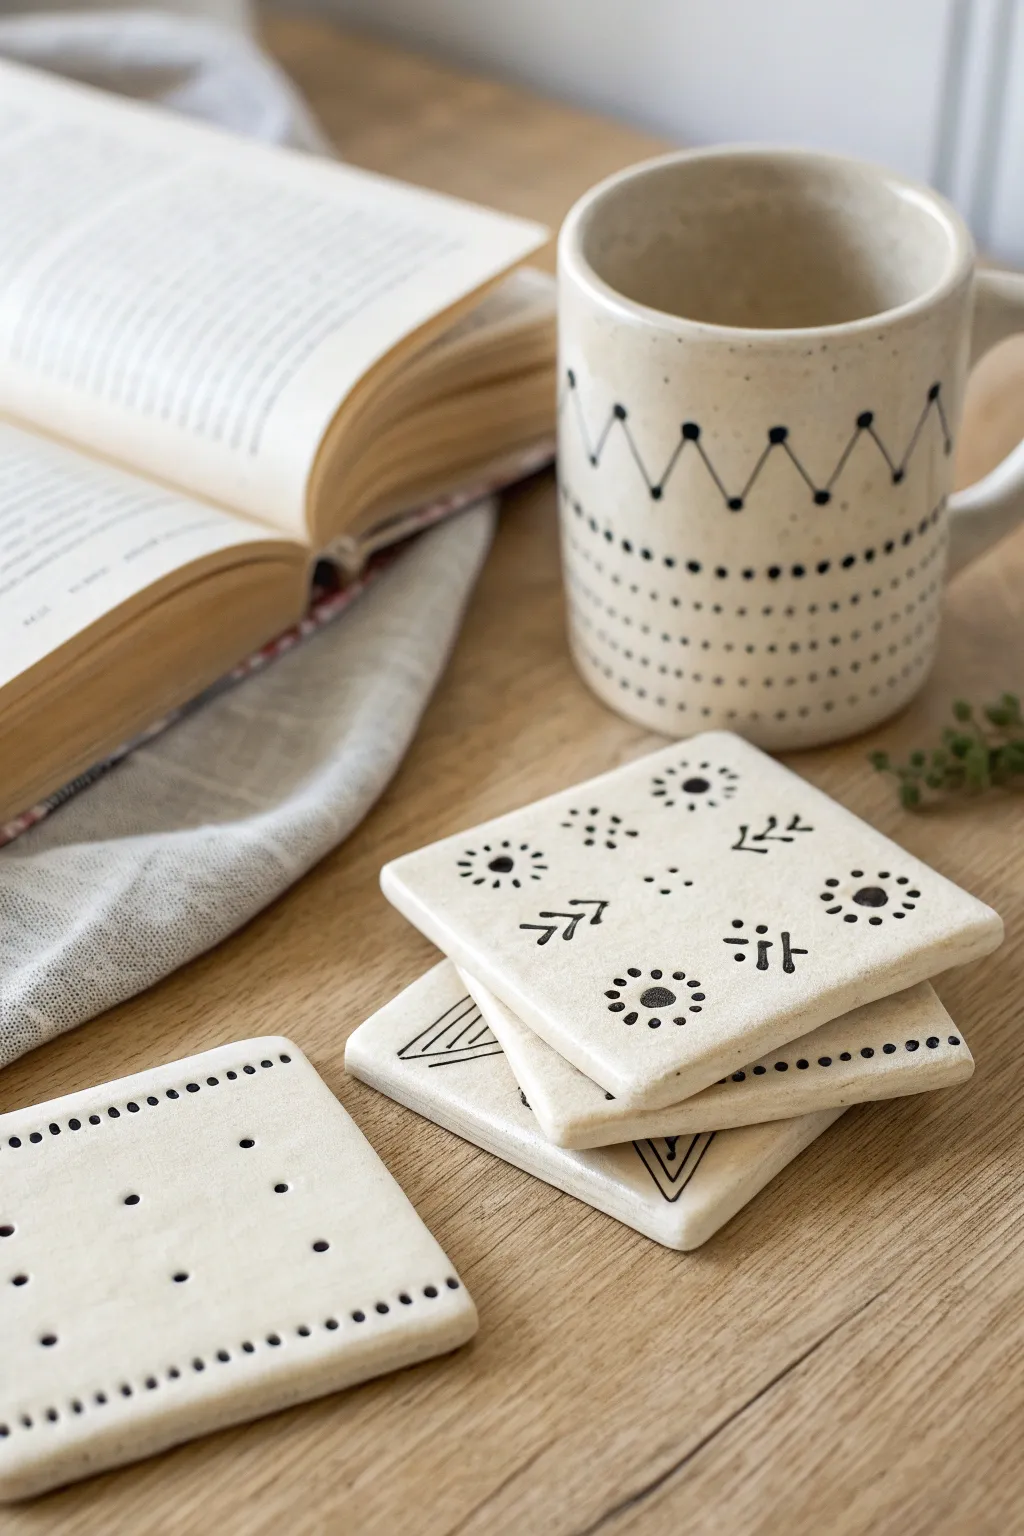
Capture the essence of modern boho decor with these beautifully simple air-dry clay coasters. Featuring crisp black geometric patterns on a creamy base, they offer a perfect balance of handmade charm and sleek design.
Step-by-Step Guide
Materials
- White or cream air-dry clay
- Rolling pin
- Square cookie cutter (approx. 4×4 inches) or ruler and knife
- Fine-grit sandpaper
- Small bowl of water
- Acrylic paint (black)
- Fine-point paintbrush or black paint marker
- Clear acrylic sealant (matte or satin)
- Parchment paper or canvas mat
- Optional: stamping tools
Step 1: Shaping the Base
-
Prepare your workspace:
Lay down a sheet of parchment paper or a canvas mat to prevent the clay from sticking to your table. Take a handful of air-dry clay and knead it briefly in your hands to warm it up and ensure it’s pliable. -
Roll out the slab:
Place the clay on your surface and use a rolling pin to flatten it. Aim for an even thickness of about 1/4 inch (6mm). If you want perfect uniformity, place two magazines or guide sticks of equal thickness on either side of the clay as you roll. -
Cut the shapes:
Using a square cookie cutter or a ruler and craft knife, cut out your coaster squares. For a standard mug, a 4×4 inch square is ideal, but you can adjust based on your preference. -
Soften the edges:
Dip your finger into a small bowl of water and gently run it along the cut edges of the clay. This smooths out any sharpness and gives the coaster a refined, finished look. I like to gently tap the corners to round them slightly, preventing them from being too sharp. -
Let them cure:
Place your clay squares on a flat surface to dry. Allow them to dry for at least 24-48 hours. Carefully flip them over halfway through the drying process to ensure even drying and prevent warping. -
Sand for smoothness:
Once fully dry and hard, take a piece of fine-grit sandpaper and lightly buff the surface and edges. This removes any final imperfections or fingerprints left during the shaping process.
Warp Watch
To prevent curling edges, dry your coasters on a wire rack for airflow, or place a light book onto the clay (with parchment in between) once it’s leather-hard.
Step 2: Painting the Design
-
Plan your pattern:
Look at the inspiration image for pattern ideas. Notice the mix of dotted borders, sunbursts, chevrons, and small arrow shapes. You might want to sketch your layout lightly with a pencil directly on the dried clay. -
Paint the dots:
For the dotted patterns, dip the handle end of a paintbrush into black acrylic paint. Press it gently onto the clay to create uniform circles. -
Draw the fine lines:
Switch to your finest detail brush or a black paint marker. Carefully paint the thin lines, chevrons, or arrow shapes. Keep your hand steady and use light pressure to maintain consistent line width. -
Create the sunbursts:
Combine dots and lines to make the sunburst motifs. Start with a central dot using the brush handle method, then paint small dashes radiating outward. -
Allow paint to set:
Give the paint plenty of time to dry completely. Acrylics dry fast, but wait at least an hour to be safe before sealing.
Step 3: Finishing Touches
-
Apply the sealant:
To make the coasters water-resistant, apply a coat of clear acrylic sealant. A matte finish looks most like natural pottery, while satin adds a slight sheen. -
Seal the reverse side:
Once the top is dry, flip the coasters and seal the bottom as well. This prevents moisture from seeping into the clay from below if there’s a spill on the table. -
Add protective pads:
Optional: Stick small felt or cork pads to the four corners of the bottom. this adds stability and protects your furniture from scratches.
Fixing Smudges
If you smudge a paint line, don’t panic. Let it dry completely, then gently scrape the error off with an X-Acto knife or sandpaper before repainting.
Now you have a stylish set of custom coasters ready to protect your surfaces.
Geometric Cutter Air-Dry Clay Coasters
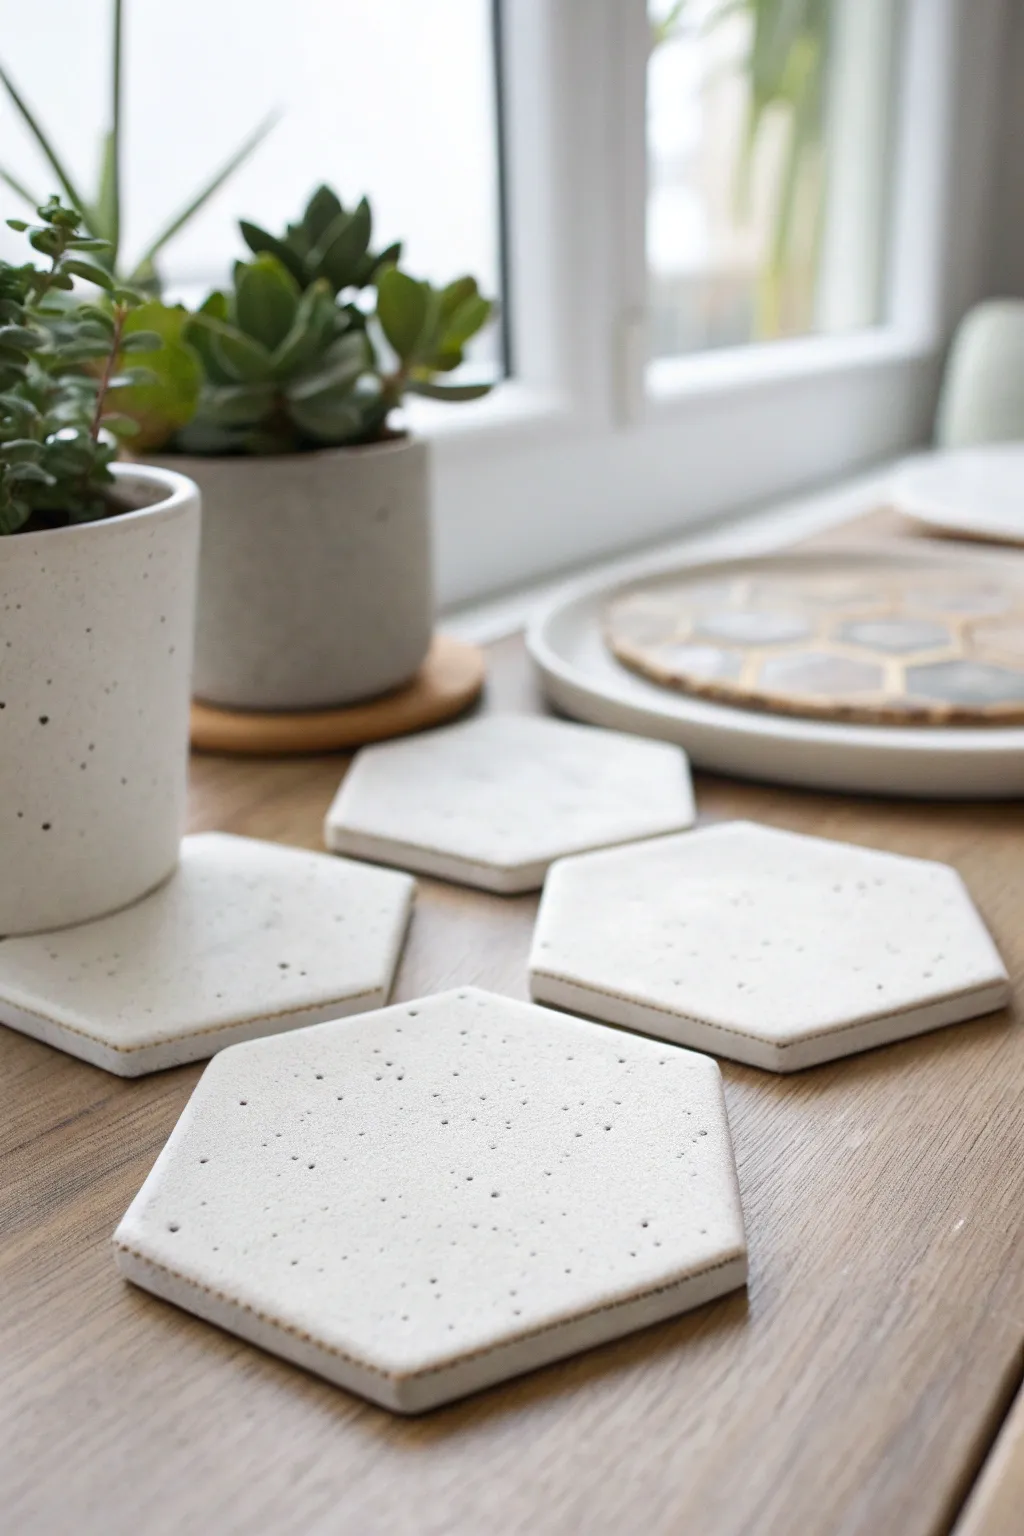
Achieve a trendy, modern look with these minimalist hexagonal coasters that mimic the appearance of speckled ceramic or stone. Their clean geometric shape and subtle texture make them a sophisticated addition to any coffee table.
Step-by-Step Tutorial
Materials
- White smooth air-dry clay (approx. 500g)
- Acrylic rolling pin
- Hexagon cookie cutter (approx. 4 inches / 10cm)
- Parchment paper or non-stick craft mat
- Coarse black pepper or dried coffee grounds
- Sandpaper (fine grit, 220-400)
- Small bowl of water
- Sponge or soft cloth
- Matte spray varnish or Mod Podge for sealing
- Optional: two wooden slats/depth guides (5mm thick)
Step 1: Preparation & Mixing
-
Condition the clay:
Start by taking a substantial chunk of air-dry clay and kneading it in your hands until it becomes warm, soft, and pliable. This helps prevent cracks later on. -
Create the speckled effect:
Flatten the clay slightly and sprinkle a pinch of coarse black pepper or dry coffee grounds onto the surface. Fold the clay over itself to trap the speckles inside. -
Knead in the texture:
Continue kneading the clay thoroughly to distribute the speckles evenly throughout the mixture. Add more pepper gradually until you achieve your desired density of speckles.
Pro Tip: Weighted Drying
To ensure your coasters stay perfectly flat, sandwich them between two pieces of parchment paper and place a heavy book on top during the final day of drying.
Step 2: Shaping & Cutting
-
Prepare your surface:
Lay down a sheet of parchment paper or a non-stick silicone mat to prevent the clay from sticking to your work surface. -
Roll out the slab:
Place the clay on the mat. If using depth guides, place them on either side of the clay. Roll the clay out into a smooth, even slab that is about 5mm (1/4 inch) thick. -
Check surface quality:
Inspect the surface for air bubbles. If you see any, gently pop them with a needle and smooth over the hole with your finger. -
Cut the shapes:
Press the hexagon cutter firmly into the clay slab. Wiggle it very slightly to ensure a clean cut all the way through, then lift the cutter straight up. -
Remove excess clay:
Carefully peel away the excess clay from around your hexagon shapes. Save the scraps in an airtight bag for future use. -
Smooth the edges:
Dip your finger in a little water and run it along the cut edges of the hexagons to smooth out any sharpness or roughness left by the cutter.
Troubleshooting: Curling Edges
If edges start curling up while drying, flip the coaster immediately. You can also lightly mist the dry side with water to rebalance the moisture levels.
Step 3: Drying & Finishing
-
Initial drying:
Let the coasters sit undisturbed on the parchment paper for about 24 hours in a dry, room-temperature area away from direct sunlight. -
Flip for uneven drying:
After the first day, gently flip the coasters over. This crucial step helps prevent them from curling up at the edges as moisture evaporates from the bottom. -
Complete drying:
Allow them to dry for another 24-48 hours until the clay turns bright white and feels bone dry to the touch. -
Sand for perfection:
Once fully dry, take your fine-grit sandpaper and gently sand the edges and surface in a circular motion to remove any remaining bumps or fingerprints. -
Wipe clean:
Use a slightly damp sponge or cloth to wipe away all the sanding dust. It’s important to get the surface completely clean before sealing. -
Apply sealer:
In a well-ventilated area, spray a coat of matte varnish over the top and sides. Let it dry according to the can’s instructions. -
Seal the reverse:
Flip the coasters and seal the bottom side as well to ensure they are fully water-resistant. -
Final coat:
I prefer to add a second coat to the top surface for extra durability against condensation from cold drinks.
Enjoy styling your table with these chic, handmade geometric accents


What Really Happens Inside the Kiln
Learn how time and temperature work together inside the kiln to transform clay into durable ceramic.
Organic Edge Air-Dry Clay Coasters
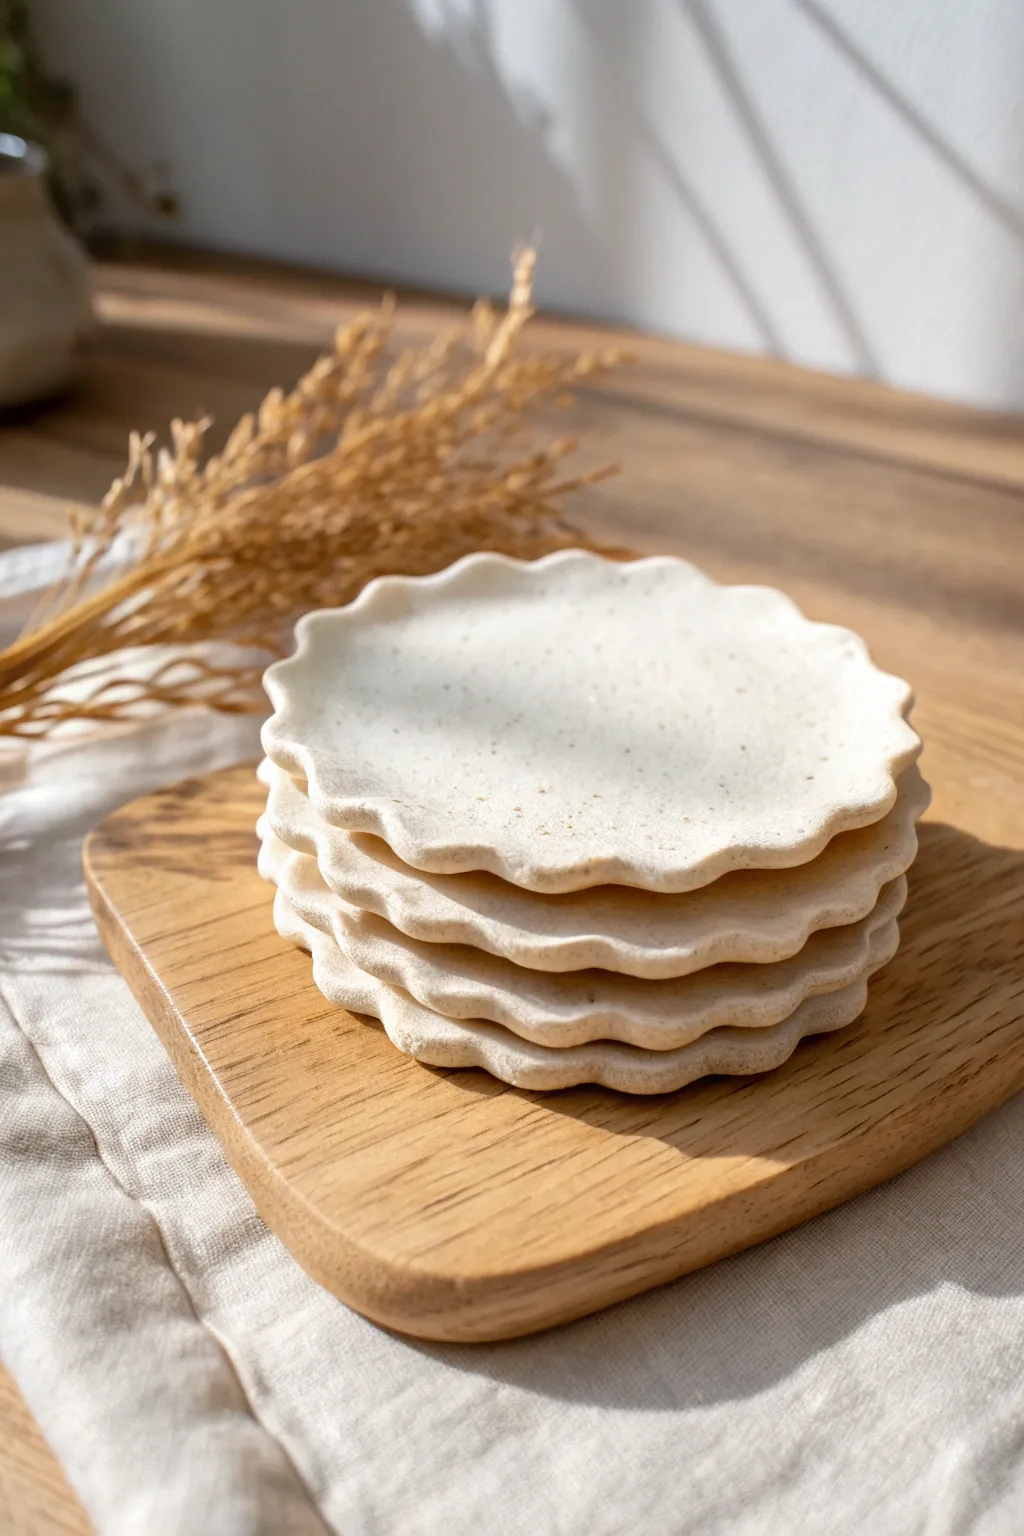
These charming coasters feature a gentle, organic ruffled edge and a lovely speckled finish that mimics high-end stoneware. They add a soft, natural touch to your coffee table while being surprisingly simple to craft at home using air-dry clay.
Detailed Instructions
Materials
- White air-dry clay (preferably a stone or granite effect variety)
- Rolling pin
- Parchment paper or canvas mat
- Round cookie cutter (approx. 3.5 – 4 inches)
- Small round sculpting tool or the end of a paintbrush
- Small bowl of water
- Fine-grit sandpaper (220-400 grit)
- Matte acrylic varnish or sealant
- Sponge or soft brush for sealing
Step 1: Shaping the Base
-
Prepare your workspace:
Lay down a sheet of parchment paper or a canvas mat to prevent the clay from sticking to your table. Take a handful of air-dry clay and knead it briefly until it is pliable and smooth. -
Roll out the slab:
Place the clay on your mat and roll it out evenly. Aim for a thickness of about 1/4 inch (6mm). If you want perfectly even coasters, place guide sticks of that thickness on either side of the clay while rolling. -
Cut the circles:
Press your round cookie cutter firmly into the clay slab to cut out your coaster shapes. Create as many circles as you need, re-rolling the scraps if necessary. -
Smoothing edges:
Dip your finger lightly in the water bowl and run it around the raw cut edge of each circle to remove any sharp burrs or roughness left by the cutter.
Preventing Curling
Is the clay warping as it dries? Place a light board or a heavy book on top of the coasters (sandwiched in parchment paper) during the first 12 hours of drying to force them flat.
Step 2: Creating the Ruffled Edge
-
Mark spacing (optional):
If you’re nervous about spacing, you can lightly mark dividing points around the edge, but for this organic look, eyeballing it usually works best. -
Technique setup:
Hold the clay disc gently in your non-dominant hand or leave it flat on the parchment paper so it doesn’t warp while you work. -
Form the scallops:
Using the side of a small round sculpting tool (or a pencil shaft), press gently into the edge of the circle at regular intervals. I like to push slightly inward to create that indented curve. -
Refining the shape:
Between each indentation you just made, use your thumb and forefinger to gently pinch and pull the clay outward slightly. This enhances the ‘wave’ effect, making the peaks sharper and the valleys deeper. -
Adjusting the flow:
Go around the entire circumference, ensuring the wave pattern looks fluid. If one scallop looks too stiff, dampen your finger and smooth the transition. -
Final smooth:
Run a damp finger over the top rim of your new scalloped edge to soften it, ensuring it looks like the soft ceramic style in the photo rather than sharp, raw clay.
Step 3: Drying and Finishing
-
Initial drying:
Place your coasters on a clean, flat surface to air dry. A wire cooling rack is ideal as it allows air to circulate underneath. -
Flip for flatness:
After about 4-6 hours, flip the coasters over. This helps prevent the edges from curling upward as the top dries faster than the bottom. -
Wait for full cure:
Allow the clay to dry completely for 24-48 hours. The clay will turn a lighter matte white and feel hard to the touch when ready. -
Sanding imperfections:
Using fine-grit sandpaper, very gently sand the edges and the top surface. Focus on smoothing out any fingerprints or rough transition points in the ruffles. -
Wipe down:
Use a slightly damp cloth or a dry tack cloth to remove all the sanding dust from the surface before sealing. -
Applying sealant:
Apply a thin, even coat of matte acrylic varnish to the top and sides. This protects the clay from moisture, which is crucial for coasters. -
Second coat:
Once the first coat is dry, apply a second coat for extra durability. Don’t forget to seal the bottom as well once the top is dry. -
Optional speckling:
If your clay wasn’t pre-speckled granite style, you can flick a toothbrush with watered-down brown acrylic paint over the dry coasters before the final varnish step to achieve that earthy look.
Faking the Stoneware Look
Mix dried tea leaves or used coffee grounds directly into plain white clay before rolling it out. This creates a stunning, natural speckled texture without needing special paint later.
Stack your new coasters on the coffee table and enjoy the satisfaction of using something beautiful you made with your own hands
Color-Blocked Air-Dry Clay Coasters
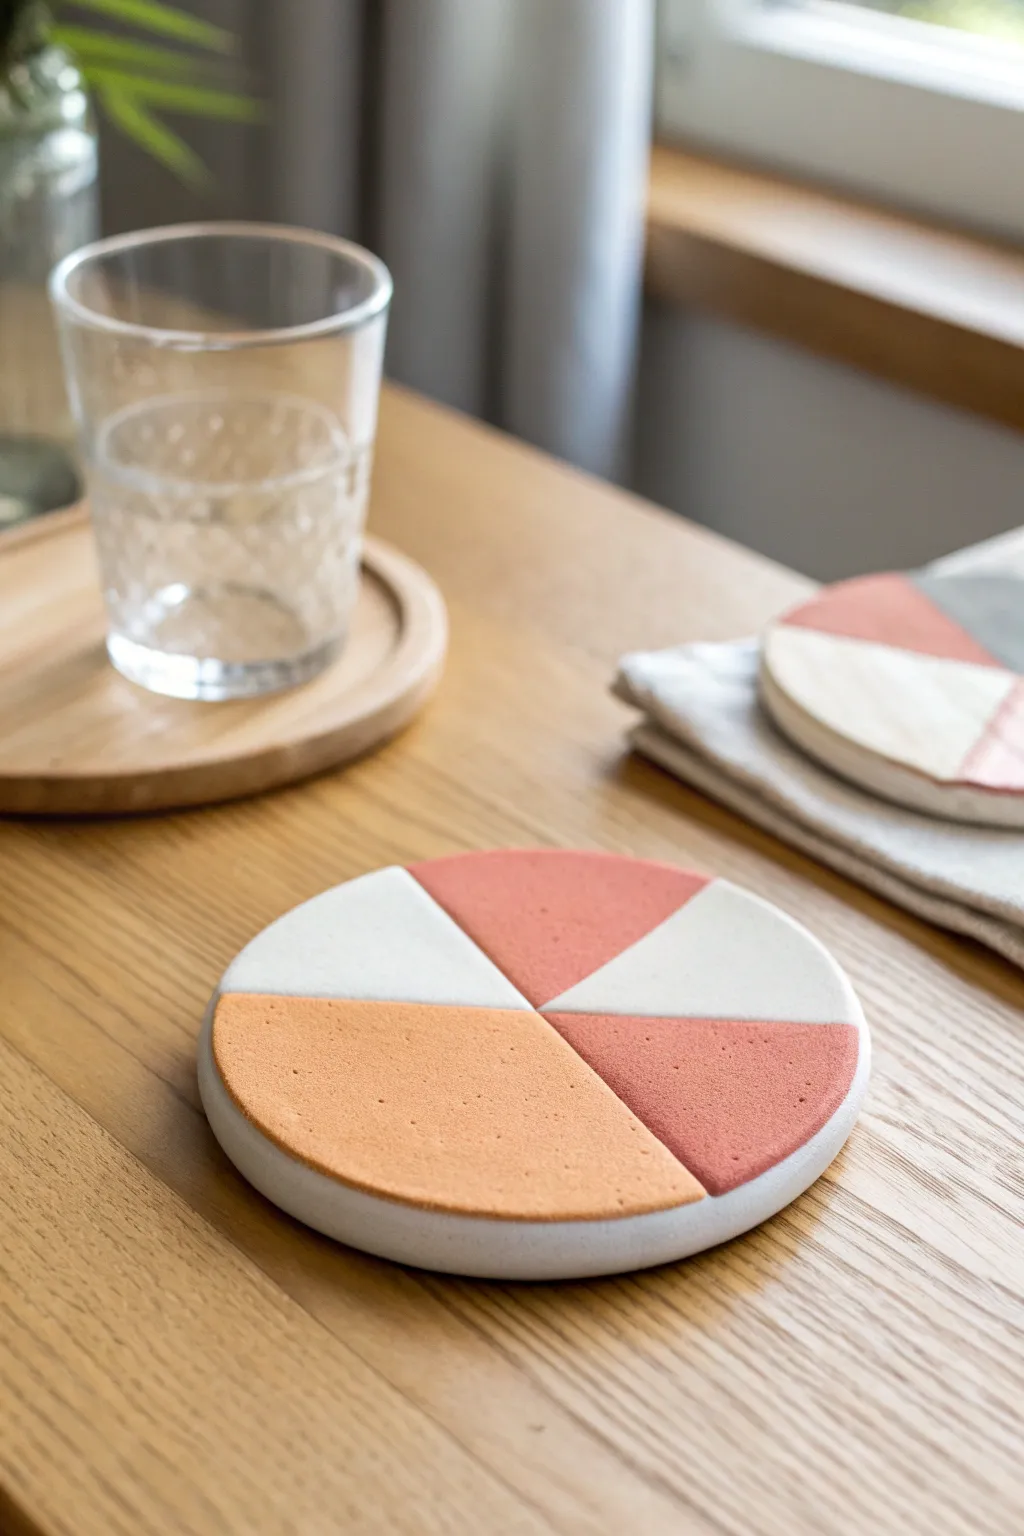
Bring a touch of modern art to your coffee table with these stunning color-blocked coasters. Featuring warm terracotta and soft peach tones contrasted against clean white, these segmented designs look high-end but are surprisingly simple to assemble.
Step-by-Step
Materials
- White air-dry clay
- Terracotta air-dry clay (or pre-colored orange/brown clay)
- Acrylic paints (terracotta, peach, white) if using only white clay
- Rolling pin
- Circular cookie cutter (approx. 4 inches)
- Sharp craft knife or scalpel
- Sandpaper (fine grit)
- Clear matte acrylic varnish or sealant
- Ruler or straight edge
- Small bowl of water
- Parchment paper or silicone mat
Step 1: Preparing the Clay
-
Condition the clay:
Start by kneading your white air-dry clay in your hands until it becomes soft, pliable, and free of any cracks. -
Roll out the base slab:
Place the clay on a sheet of parchment paper. Use a rolling pin to flatten it into an even slab, aiming for a thickness of about 1/4 inch (6mm) to ensure durability. -
Cut the primary circles:
Using your large circular cookie cutter, press firmly into the rolled slab to cut out perfectly round shapes. These will become the base canvas for your geometric design.
Step 2: Creating the Geometric Pattern
-
Plan your segments:
Visualize a simple pie chart on your circle. The design in the photo uses a mix of large and small triangular wedges radiating from the center. -
Roll colored clay:
Now, roll out your terracotta or secondary colored clay to the exact same thickness as your white circles. Uniform thickness is crucial for a flat surface. -
Cut matching wedges:
Use the same circular cutter to cut a round from the colored clay. Then, use a sharp craft knife and ruler to slice this colored circle into wedges (slices of pie). -
Slice the white base:
Take your white base circle and carefully cut out wedges corresponding to where you want the color to go. Remove these white sections. -
Insert colored segments:
Take the colored wedges you prepared earlier and fit them like puzzle pieces into the empty spaces of your white circle.
Clean Lines Hack
Work on a piece of parchment paper you can rotate. This keeps you from having to lift the delicate wet clay while cutting angles.
Step 3: Joining and Smoothing
-
Score the edges:
Before pressing them together permanently, gently scratch the touching edges of both the white and colored clay with your knife to create texture. -
Apply slip:
Dab a tiny amount of water on the scored edges to create a ‘slip’ that acts as glue. -
Press together:
Push the colored segments firmly against the white clay segments on your work surface until they bond. -
Blend the seams:
Using your finger or a clay modeling tool, gently stroke across the seam line to blend the clays together. I find a little water on my fingertip helps smooth this transition seamlessly. -
Refine the shape:
Once the pieces are joined, if the circle has warped slightly, use the cookie cutter one last time to gently re-shape the outer edge. -
Smooth the surface:
Run the rolling pin lightly over the entire joined coaster one final time to ensure the top surface is perfectly level across all color segments.
Gapping Seams?
If gaps appear as the clay dries and shrinks, fill them with a paste made of water and fresh clay, let dry, and sand smooth.
Step 4: Finishing Touches
-
Let it dry:
Allow the coasters to air dry completely for 24-48 hours. Turn them over halfway through the process to prevent curling. -
Sand for perfection:
Once bone dry, take fine-grit sandpaper and gently sand the edges and the top surface to remove any fingerprints or uneven seams. -
Clean dust:
Wipe the coaster down with a slightly damp cloth or dry brush to remove all sanding dust. -
Apply protection:
Finish by applying 2-3 coats of clear matte acrylic varnish. This protects the clay from moisture and stains, which is essential for a functional coaster.
Now you have a chic, custom set of coasters ready to protect your tabletops in style

TRACK YOUR CERAMIC JOURNEY
Capture glaze tests, firing details, and creative progress—all in one simple printable. Make your projects easier to repeat and improve.
Marbled Swirl Air-Dry Clay Coasters
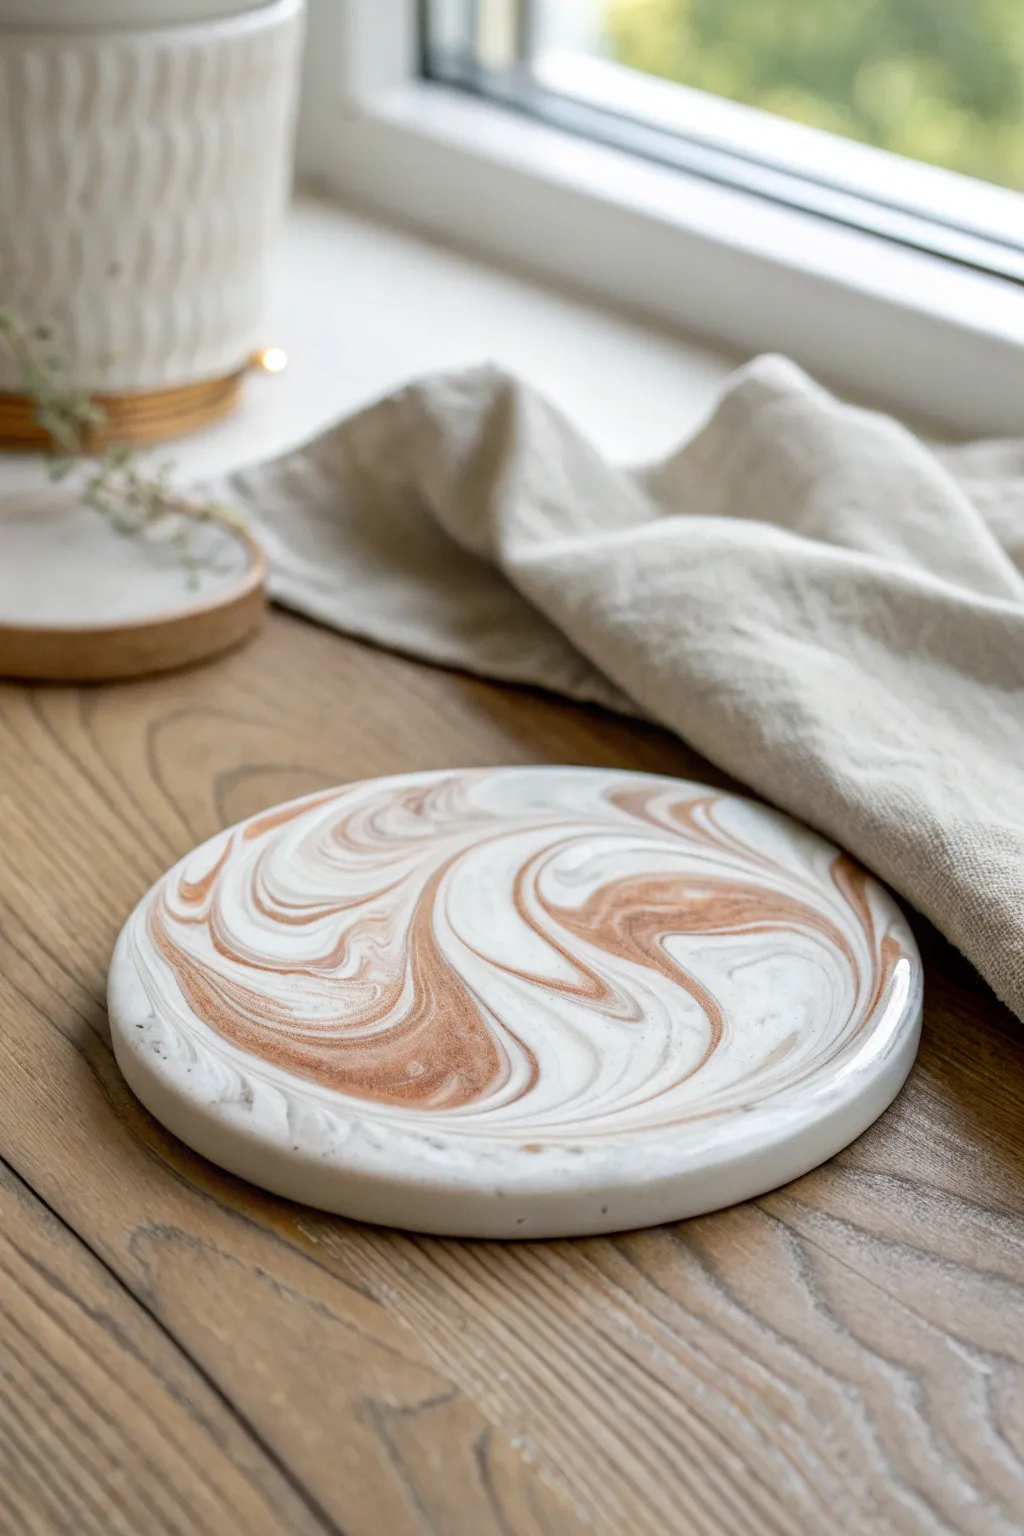
Elevate your coffee table with these sophisticated coasters featuring a mesmerizing dance of white and iridescent copper. The organic marble effect, created by twisting two clays together, ensures that every single piece is a unique work of art.
Step-by-Step Guide
Materials
- White classic air-dry clay
- Metallic copper or bronze acrylic paint
- Rolling pin (acrylic roller is best)
- Round cookie cutter (approx. 4 inches) or a bowl and craft knife
- Sandpaper (fine grit, 220-400)
- High-gloss varnish or resin
- Soft paintbrush
- Plastic wrap or parchment paper
- Water in a small cup
- Small sponge for smoothing
Step 1: Prepping and coloring the clay
-
Divide the clay:
Start by taking a chunk of white air-dry clay roughly the size of a tennis ball. Divide this unevenly—keep about two-thirds pure white and set aside the remaining third for coloring. -
Color the accent clay:
Flatten the smaller piece of clay slightly and create a depression in the center. Squeeze a generous amount of metallic copper acrylic paint into the well. Fold the clay over the paint to encase it. -
Knead in the color:
Knead the painted clay thoroughly. It will be messy at first! Keep working the clay until the copper color is fully integrated and consistent. If the clay feels too sticky from the paint, let it sit for five minutes to firm up slightly.
Step 2: Creating the marble effect
-
Create snakes:
Roll both the white clay and the new copper-colored clay into long, thick ropes (snakes) of equal length. They should be roughly the thickness of your thumb. -
Twist them together:
Lay the two ropes side-by-side and twist them around each other tightly, like a candy cane. Then, fold this twisted rope in half and twist it again. -
Ball it up:
Once twisted, roll the entire mass into a smooth ball. Don’t over-knead at this stage, or you will muddy the colors into a single light brown shade instead of distinct swirls. -
Roll out the slab:
Place your marbled ball on a sheet of parchment paper. Using your rolling pin, flatten the clay to an even thickness of about 1/4 inch. Roll in different directions to stretch the swirl pattern nicely.
Sticky Situation
If the clay sticks to your roller, place a sheet of plastic wrap or wax paper on top of the clay ball before rolling. This keeps the surface smooth and your tools clean.
Step 3: Shaping and refining
-
Cut the shape:
Position your round cutter (or bowl guide) over the section of clay with the most pleasing swirl pattern. Press down firmly to cut out your coaster circle. -
Smooth the edges:
Dip your finger or a small sponge into a little water and gently run it around the circumference of the cut circle. Smoothing these rough edges now saves a lot of sanding time later. -
Flatten for drying:
Carefully transfer the circle to a clean, flat drying surface. I usually place a heavy book on top of the parchment paper (not touching the wet clay directly, but lightly pressing if needed) to discourage curling, or flip the coaster every few hours. -
Allow to dry:
Let the coaster dry completely for 24 to 48 hours. The color will lighten slightly as the moisture evaporates.
Gold Leaf Accents
For extra luxury, press small flakes of gold or copper leaf onto the clay surface immediately after rolling it flat, then roll once more gently to embed them before cutting.
Step 4: Finishing touches
-
Sand for perfection:
Once fully dry and hard, use fine-grit sandpaper to buff the edges and surface. Focus on smoothing out any fingerprints or uneven texture on the rim. -
Clean off dust:
Wipe the coaster thoroughly with a slightly damp cloth or tack cloth to remove all sanding dust. The surface needs to be pristine for the varnish. -
Apply the first coat of gloss:
Using a soft brush, apply a layer of high-gloss varnish or sealant. This step is crucial: it not only protects the clay from moisture but also makes that metallic copper pop and shine. -
Seal the bottom:
After the top is dry to the touch, flip the coaster and coat the bottom as well to ensure the clay is completely sealed from humidity. -
Final coat:
Apply a second, generous coat of varnish to the top surface for that glass-like finish seen in the photo. Let it cure fully according to your product instructions before using.
Now you have a stunning, polished piece of functional decor ready to impress your guests
Faux Agate Air-Dry Clay Coasters
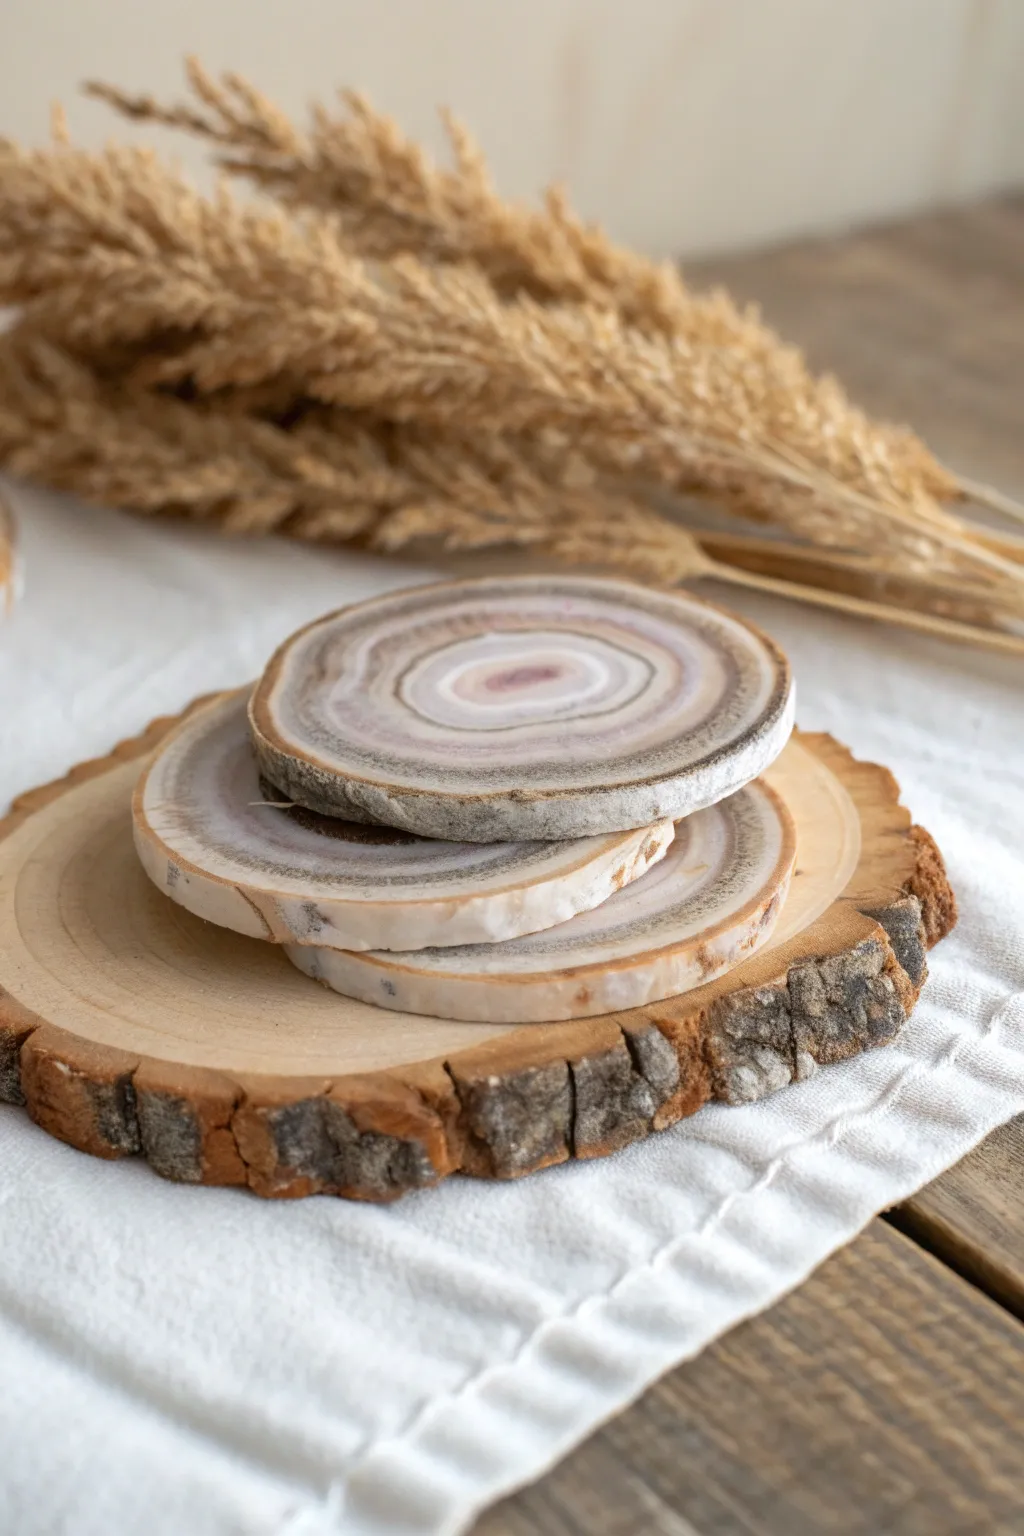
These stunning coasters mimic the organic beauty of agate slices with soft, concentric rings of mauve, taupe, and cream. Using a simple marbling and layering technique, you can transform basic air-dry clay into sophisticated home decor that looks far more expensive than it actually is.
Step-by-Step
Materials
- White air-dry clay
- Acrylic paints (mauve, taupe/brown, grey, white)
- Rolling pin
- Clay knife or craft knife
- Round cookie cutter or jar lid (approx. 3-4 inches)
- Small bowl of water
- Non-stick work surface or parchment paper
- Sandpaper (fine grit)
- Matte or satin sealant/varnish
- Paintbrush (for sealing)
Step 1: Preparing the Clay Palette
-
Divide the clay:
Start by separating your large block of white air-dry clay into four smaller, equal-sized portions. -
Tint the clay:
Leave one portion pure white. For the others, add a small drop of acrylic paint into the center of each ball: one mauve, one taupe, and one light grey. -
Knead the color:
Fold and knead each colored ball thoroughly until the pigment is evenly distributed and you have solid, uniform colors. If the clay feels sticky from the paint, let it sit for a few minutes or dust with a tiny bit of cornstarch.
Step 2: Building the Agate Layers
-
Create logs:
Roll each color into a long, thin snake or log shape. They don’t need to be perfectly even, as organic variation helps the final look. -
Bundle the colors:
Twist the four logs together into one large, thick rope. Fold this rope in half and twist it again gently to begin merging the colors without completely blending them. -
Roll into a slab:
Using your rolling pin, flatten the twisted rope into a slab about 1/4 inch thick. This will act as your base marbled layer. -
Constructing the bulls-eye:
To get the specific concentric look shown in the photo, we need a deliberate center. Take small scraps of your tinted clay and roll them into very thin snakes. -
Wrap the center:
Start with a small ball of mauve for the center ‘seed.’ Wrap a thin snake of white around it, followed by a snake of grey, then taupe. Continue wrapping these thin coils outward until the disk is roughly 2 inches wide. -
Integrate the slab:
Place your coiled ‘bulls-eye’ center onto the marbled slab you created earlier. This combines the structured rings with an organic outer edge. -
Final roll out:
Gently roll over the entire assembly again to flatten the coils into the slab, ensuring the top surface is level and the layers bond together tightly.
Clean Cuts Only
Clean your cutting tool or knife blade between every single slice. Residue build-up can drag colors across the face of your coaster, muddying the crisp lines of your agate rings.
Step 3: Shaping and Finishing
-
Cut the shape:
Place your round cutter or jar lid over the most interesting part of the pattern, ensuring the concentric rings are somewhat centered but slightly offset for natural realism. Press down firmly to cut. -
Soften the edges:
Dip your finger in a little water and run it along the cut edge of the coaster to smooth out any roughness or sharp debris from the cutting process. -
Add texture:
To mimic the rough exterior of a geode stone, I like to take a toothbrush or a crumpled piece of foil and gently tap the very outer edge of the rim to give it a porous texture. -
Initial drying:
Transfer the coasters to a drying rack or a sheet of parchment paper. Let them dry undisturbed for 24-48 hours. Flip them halfway through so the bottom dries evenly. -
Sanding:
Once fully cured and hard, use fine-grit sandpaper to buff out any fingerprints or surface bumps, focusing on the top face to ensure a flat spot for mugs. -
Enhancing the rim:
Mix a watery wash of dark brown or grey paint. Lightly brush this onto the textured rim you created, then wipe it back immediately with a paper towel. This leaves dark pigment in the crevices, highlighting the ‘stone’ edge. -
Sealing:
Finish by applying 1-2 thin coats of matte or satin varnish to protect the clay from moisture and stains.
Gilded Edge Upgrade
For a luxe touch, paint the textured outer rim with liquid gold leaf or metallic gold acrylic paint instead of the dark wash. This creates a stunning contrast against the matte stone look.
Once sealed, these sophisticated coasters are ready to protect your tabletops with organic style.
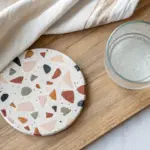
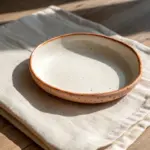
Terrazzo Speckle Air-Dry Clay Coasters
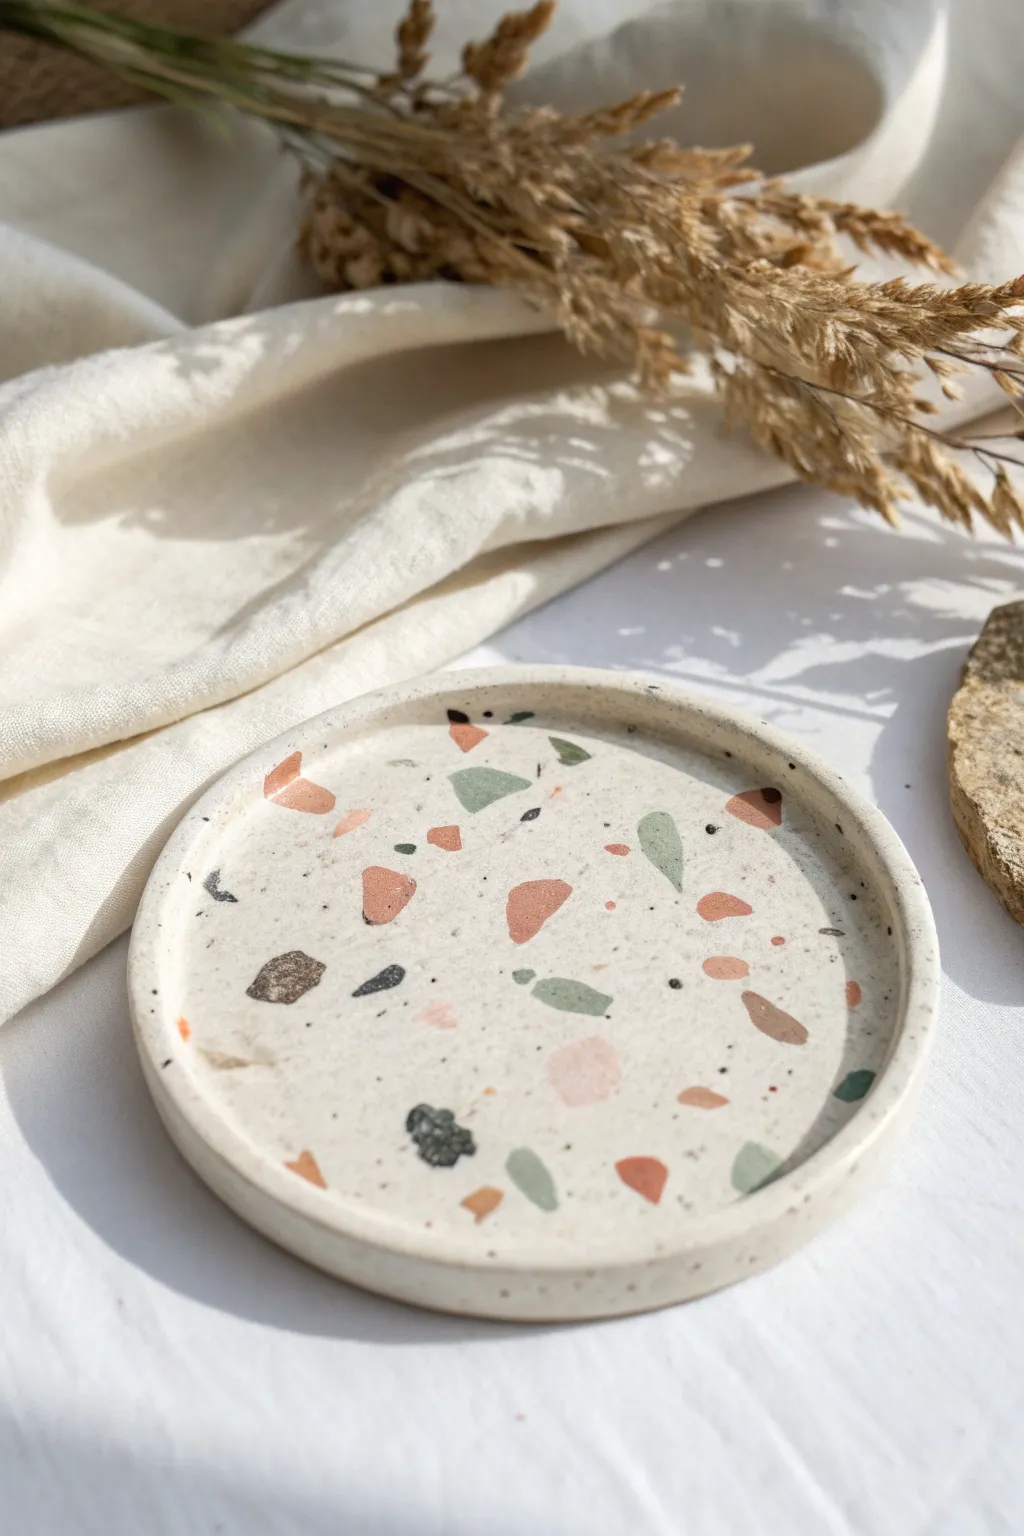
Capture the chic, speckled aesthetic of polished flooring in miniature form with this elegant air-dry clay project. By embedding colored clay chips into a neutral base, you create a sophisticated surface that looks remarkably like real stone.
How-To Guide
Materials
- White or cream air-dry clay
- Acrylic paints (terracotta, sage green, blush pink, black, grey)
- Rolling pin
- Craft knife or scissors
- Small round bowl or cutter (approx. 4-5 inches)
- Sandpaper (fine grit)
- Small bowl of water
- Cardboard or parchment paper
- Matte or sealant varnish
Step 1: Creating the Chips
-
Tint small batches:
Pinch off four or five small balls of white clay, roughly the size of large grapes. Knead a small drop of acrylic paint into each ball to create your chip colors: terracotta, sage, blush, grey, and black. Wear gloves to keep your hands clean. -
Flatten the colored clay:
Roll each colored ball out very thinly onto a piece of parchment paper. You want these ‘sheets’ to be about 1-2mm thick so they integrate well later. -
Dry partially:
Let these thin colored sheets sit for about 20-30 minutes. You want them to firm up slightly so they are easier to handle, but they should not be bone dry. -
Create the shards:
Once firm, tear or cut the colored clay into small, irregular geometric shapes. Aim for a variety of sizes, from tiny specks to larger triangles, mimicking real stone chips.
Chips falling out?
If chips pop out while sanding, the base was too dry when you embedded them. Fix it by mixing a tiny bit of white clay with water to make a ‘glue’ paste and reattaching the chip.
Step 2: Forming the Base
-
Prepare the main slab:
Take a large chunk of white clay and roll it out into a smooth slab about 1/4 inch thick. Ensure the surface is even and free of major cracks. -
Apply the chips:
Scatter your colored clay chips onto the white slab. Arrange them randomly, placing some close together and leaving open spaces elsewhere for a natural look. Save a handful of chips for later. -
Embed the pattern:
Gently use your rolling pin to press the chips into the white base. Roll over the surface firmly until the chips are flush with the white clay and the surface is smooth again. -
Cut the shape:
Place your round bowl or cutter onto the clay and press down to cut out a perfect circle. Remove the excess clay from around the edges. -
Shape the rim:
With wet fingertips, gently curl up the edges of the circle to create a shallow lip. This transforms it from a flat coaster into a shallow dish that can hold items. -
Smooth the edges:
Dip your finger in a little water and run it along the rim to smooth out any cracks or roughness created during the shaping process.
Step 3: Finishing Touches
-
Add surface texture:
If I notice any large empty spots, I like to press a few remaining colored chips into the surface while the clay is still damp, smoothing them down with a wet finger. -
Dry thoroughly:
Let the dish dry completely for 24-48 hours. Turn it over halfway through the drying process to ensure the bottom receives airflow and dries evenly. -
Sand for clarity:
Once bone dry, take fine-grit sandpaper and sand the surface. This is the magic step that scrapes away the top layer of white clay to fully reveal the crisp edges of your colored chips. -
Remove dust:
Wipe the dish down thoroughly with a slightly damp cloth or a dry brush to remove all the fine clay dust generated by sanding. -
Seal the piece:
Apply a coat of matte varnish or sealant. This brings out the richness of the colors and protects the clay from moisture, giving it that finished ceramic look.
Make it Luxe
Add gold leaf flakes into the mix along with your colored clay chips before rolling. The metallic glimmer adds a gorgeous, high-end contrast to the matte stone texture.
Place this stylish dish on your bedside table or entryway console for a modern pop of color
Lace Texture Air-Dry Clay Coasters
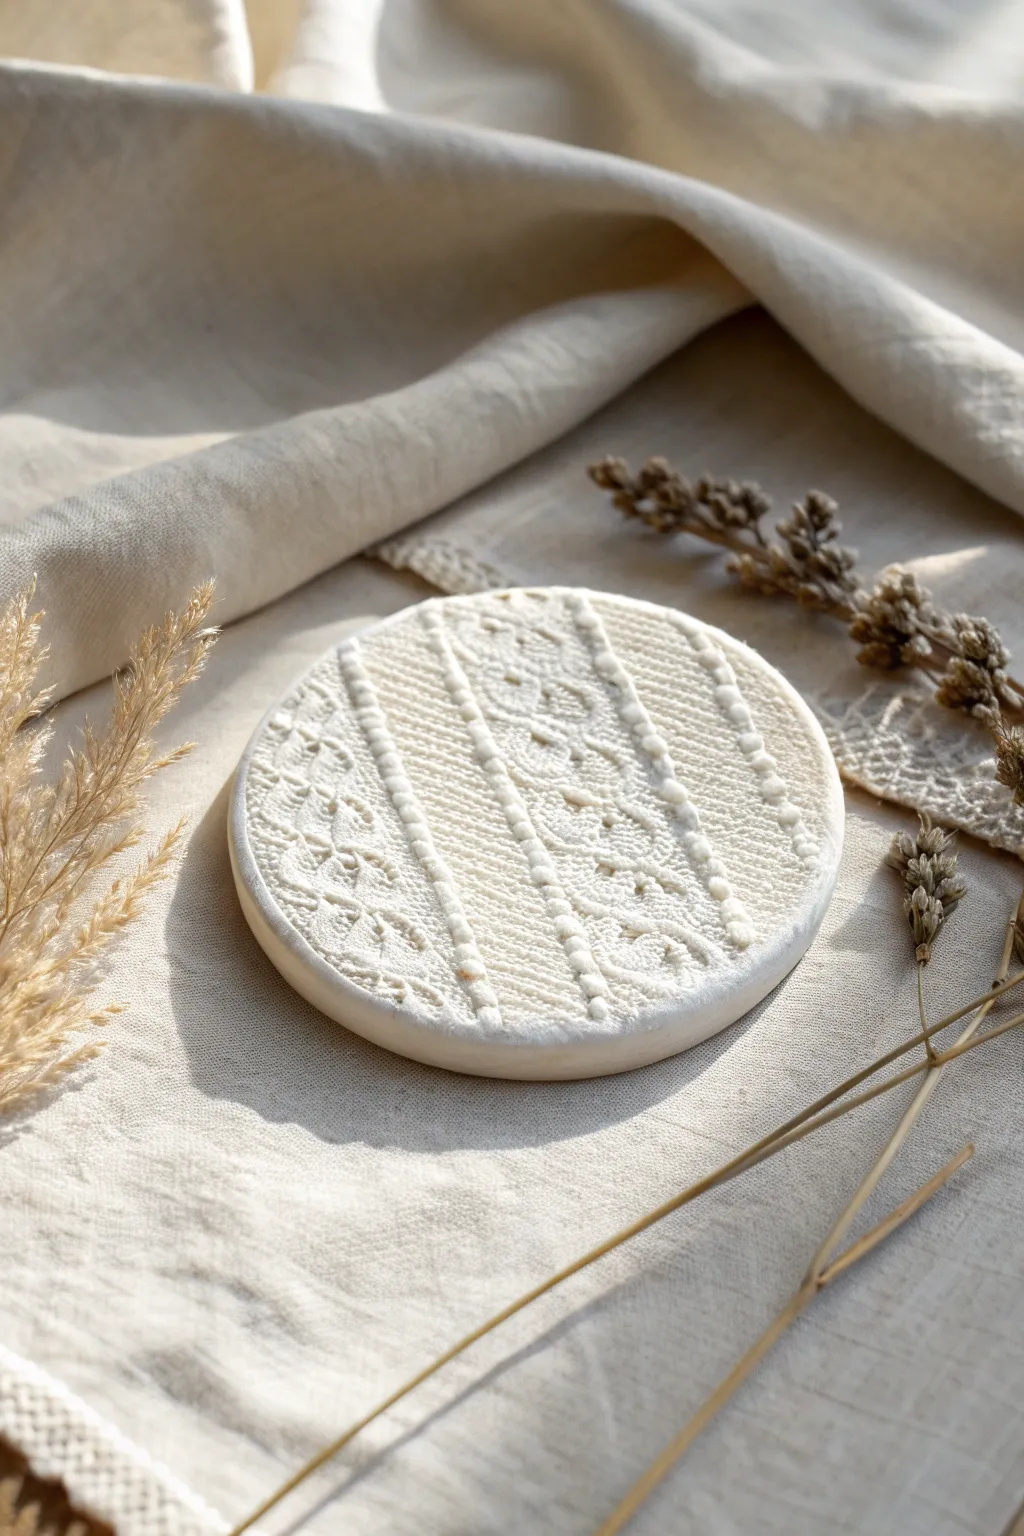
Capture the cozy warmth of winter textiles in a solid, functional piece of home decor with this textured coaster project. By pressing fabric directly into clay, you’ll create a beautifully intricate surface that looks deceptively difficult to achieve.
Step-by-Step Tutorial
Materials
- Air-dry clay (white)
- Rolling pin
- Round cookie cutter (approx. 4 inches) or a bowl to trace
- Textured knit fabric, lace doily, or a piece of an old sweater
- Parchment paper or a silicone mat
- Sandpaper (fine grit)
- Bowl of water
- Acrylic sealant or varnish (matte or satin finish)
- Felt backing (optional)
Step 1: Preparation & Rolling
-
Prepare your workspace:
Lay down your parchment paper or silicone mat on a flat, stable surface. This prevents the clay from sticking and makes it easier to move later without distorting the shape. -
Condition the clay:
Take a handful of air-dry clay and knead it in your hands for a minute or two. The goal is to make it warm, pliable, and free of air bubbles. -
Form a slab:
Place the clay ball onto your mat and flatten it slightly with your palm. Using the rolling pin, roll the clay out evenly. -
Check thickness:
Aim for a thickness of about 1/4 inch to 3/8 inch. You want it substantial enough to be durable, but not so thick that it takes forever to dry.
Step 2: Texturing
-
Select your texture:
Choose your fabric. A chunky cable-knit swatch or a heavy lace doily works best for the deep, defined impressions seen in the example photo. -
Position the fabric:
Lay the fabric directly on top of your rolled-out clay slab. Ensure the most textured side is facing down against the clay. -
Roll the impression:
Take your rolling pin and roll firmly over the fabric once. Avoid rolling back and forth, as this can create a ‘ghost’ image; one firm, confident pass is best. -
Reveal the pattern:
Carefully peel back the fabric from one corner to reveal the imprinted design. This is naturally my favorite part of the process, seeing that intricate detail transfer so perfectly.
Cracked edges?
If small cracks appear while drying, mix a tiny bit of fresh clay with water to make a paste (slip) and fill them in before sealing.
Step 3: Cutting & Refining
-
Cut the shape:
Position your round cookie cutter or bowl over the most interesting part of the textured area. Press down firmly to cut the circle. -
Remove excess:
Peel away the excess clay from around the circle. Save these scraps in an airtight bag for future projects. -
Smooth the edges:
Dip your finger into a little water and gently run it around the cut edge of the coaster to smooth out any sharpness or burrs. -
Dry properly:
Transfer the coaster (still on its parchment paper) to a safe spot. To prevent curling, I recommend placing a light book or a flat board on top once the surface is dry to the touch. -
Flip occasionally:
Let it dry for 24-48 hours. Flip the coaster over halfway through the drying process to ensure the bottom dries evenly with the top.
Add some color
After the clay dries but before sealing, gently brush a diluted wash of brown or beige acrylic paint into the grooves to antique the texture.
Step 4: Finishing Touches
-
Sand edges:
Once completely bone dry, use fine-grit sandpaper to lightly buff the edges for a professional, polished feel. -
Apply sealant:
Apply a coat of matte or satin varnish to the top and sides. This seals the clay against moisture from cups. Let it dry according to the bottle’s instructions. -
Add a second coat:
For extra durability, apply a second thin layer of sealant. -
Add backing (optional):
Glue a circle of felt to the bottom of the coaster to protect your table surfaces from scratches.
Enjoy your beautiful new handmade decor pieces throughout the season
Woodgrain Texture Air-Dry Clay Coasters
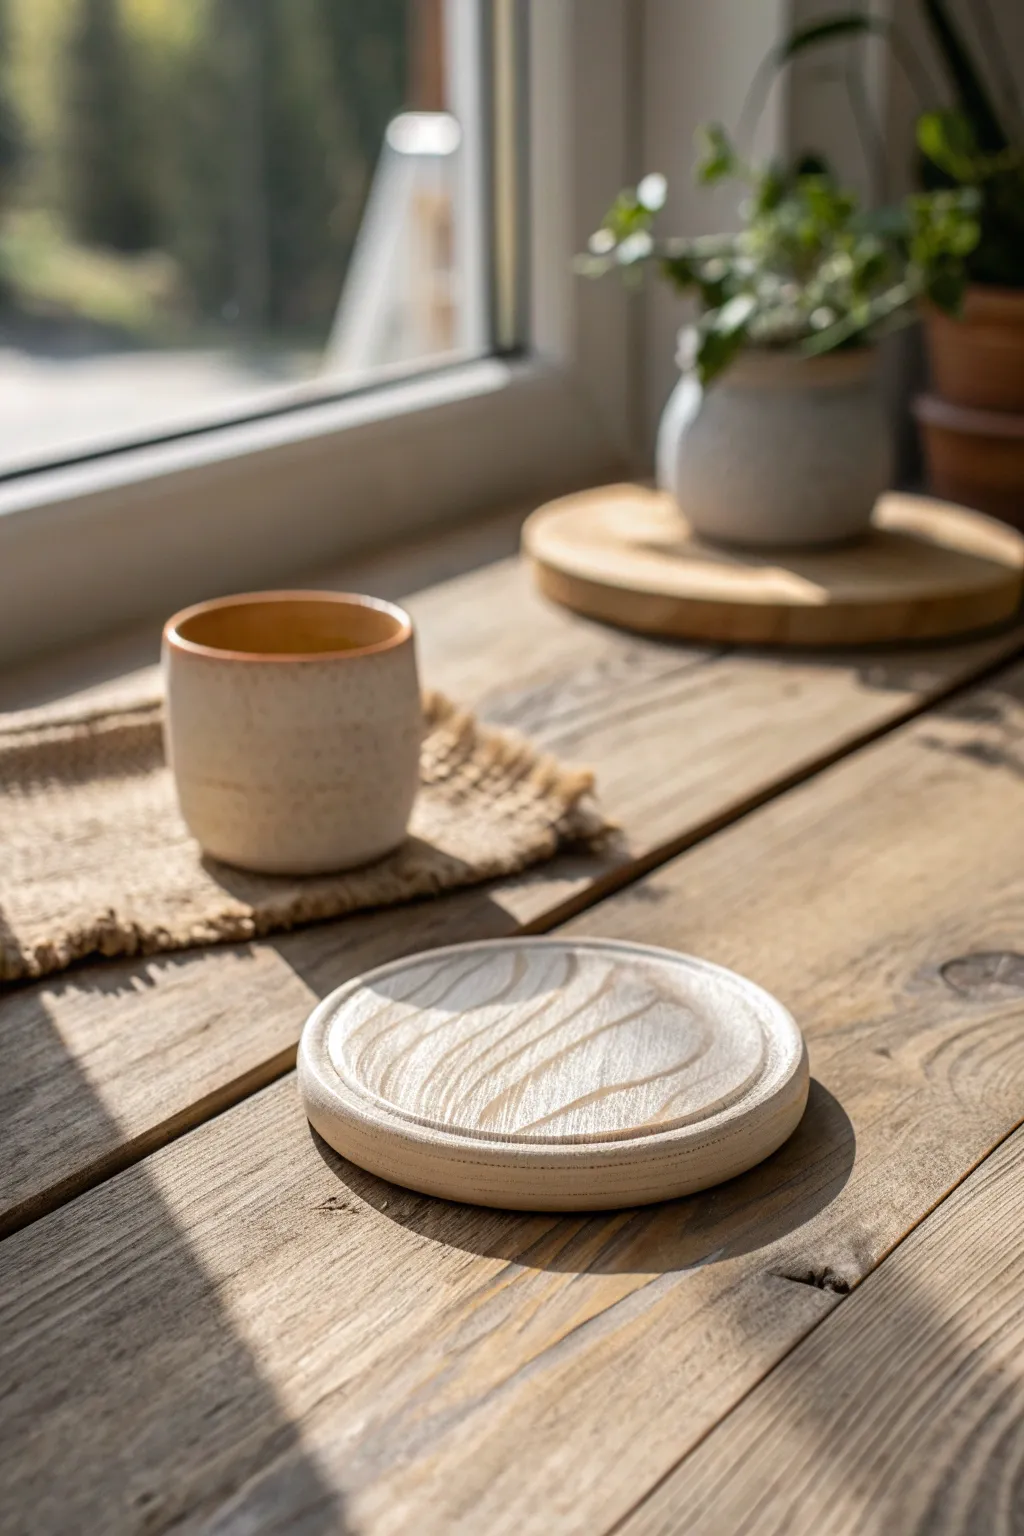
Bring a touch of organic warmth to your table with these deceptively simple air-dry clay coasters. By mimicking the natural flow of woodgrain, you’ll create a minimalist piece that looks like light-stained timber but has the smooth durability of clay.
Step-by-Step Guide
Materials
- White or cream-colored air-dry clay
- Rolling pin
- Circle cutter or a round template (approx. 4 inches)
- Craft knife
- Potter’s needle tool or a dull toothpick
- Fine-grit sandpaper (220 and 400 grit)
- Acrylic paint (light beige/tan)
- Acrylic glazing medium or water
- Detail paintbrush
- Matte varnish or sealant
- Sponge or soft cloth
- Water cups
Step 1: Shaping the Base
-
Condition the clay:
Begin by taking a handful of air-dry clay and kneading it thoroughly in your hands. You want it to be warm and pliable to prevent internal air bubbles, which can cause cracking later. -
Roll out a slab:
Place the clay on a clean, non-stick surface or canvas mat. Use your rolling pin to flatten it into an even slab, aiming for a thickness of about 1/4 to 3/8 of an inch. Thickness is key for durability. -
Cut the circle:
Using a large circle cutter or a bowl as a template, press down firmly to cut your coaster shape. If using a template, trace around it carefully with your craft knife for a clean edge. -
Smooth the edges:
Dip your finger in a little water and run it along the cut edge of the circle. Gently round off the sharp corners so the rim looks soft and finished rather than sharp and mechanical. -
Create a slight lip (optional):
To mimic the recessed look in the photo, gently press the center of the coaster with the base of a flat glass or jar, leaving a slightly raised rim around the very edge.
Step 2: Texturing the Woodgrain
-
Plan the grain direction:
Look at the coaster and decide which way the grain will flow. I like to curve the lines slightly, rather than making them perfectly straight, to achieve that organic driftwood feel. -
Carve primary lines:
Using a needle tool or a dull toothpick, drag slow, wavy lines across the surface. Press lightly for some and slightly deeper for others to create variation in the ‘wood’ depths. -
Add grain details:
In between your main wavy lines, add shorter, finer scratches. You can occasionally merge two lines together to create the look of a knot or a natural variation in the timber growth. -
Soften the texture:
Once the carving is done, lightly brush a damp sponge over the surface. This removes the little clay crumbs (burrs) created by the tool and makes the woodgrain look worn and weathered rather than freshly scratched. -
Allow to dry:
Place the coaster on a wire rack to ensure even airflow. Let it dry completely for 24-48 hours. Flip it occasionally to prevent the edges from curling upward.
Smooth Moves
To fix small cracks while sculpting, mix a tiny bit of clay with water to make a ‘slip’ paste. Paint this into the crack and smooth it over.
Step 3: Finishing and Sealing
-
Initial sand:
Once bone dry, take your 220-grit sandpaper and gently sand the rim and bottom. Do not over-sand the top surface, or you will lose your beautiful woodgrain texture. -
Prepare a wash:
Mix a small amount of light beige acrylic paint with a generous amount of water or glazing medium. You want a very translucent wash, not an opaque paint. -
Apply the wash:
Brush the wash over the entire top surface. The liquid should settle darker into the carved crevices while remaining light on the raised areas, effectively highlighting the grain pattern. -
Wipe back excess:
Immediately after applying the wash, take a slightly damp cloth and wipe across the surface. This removes paint from the high points, leaving the ‘grain’ lines clearly defined. -
Dry and refine:
Let the paint wash dry completely. If the surface feels rough, do a very light pass with 400-grit sandpaper to make it silky smooth to the touch. -
Seal the coaster:
Apply a coat of matte varnish to protect the clay from moisture. Since this is a coaster, apply a second coat after the first has dried to ensure it is water-resistant. -
Add bottom protection:
Stick a small circle of felt or cork to the bottom of the coaster. This prevents the clay from scratching your wooden tables.
Faux Knot Effect
Use the rounded end of a paintbrush handle to press a small indentation into the clay, then curve your grain lines around it to simulate a wood knot.
Enjoy the calming, natural aesthetic these handmade coasters bring to your coffee breaks
Painted Rim Air-Dry Clay Coasters
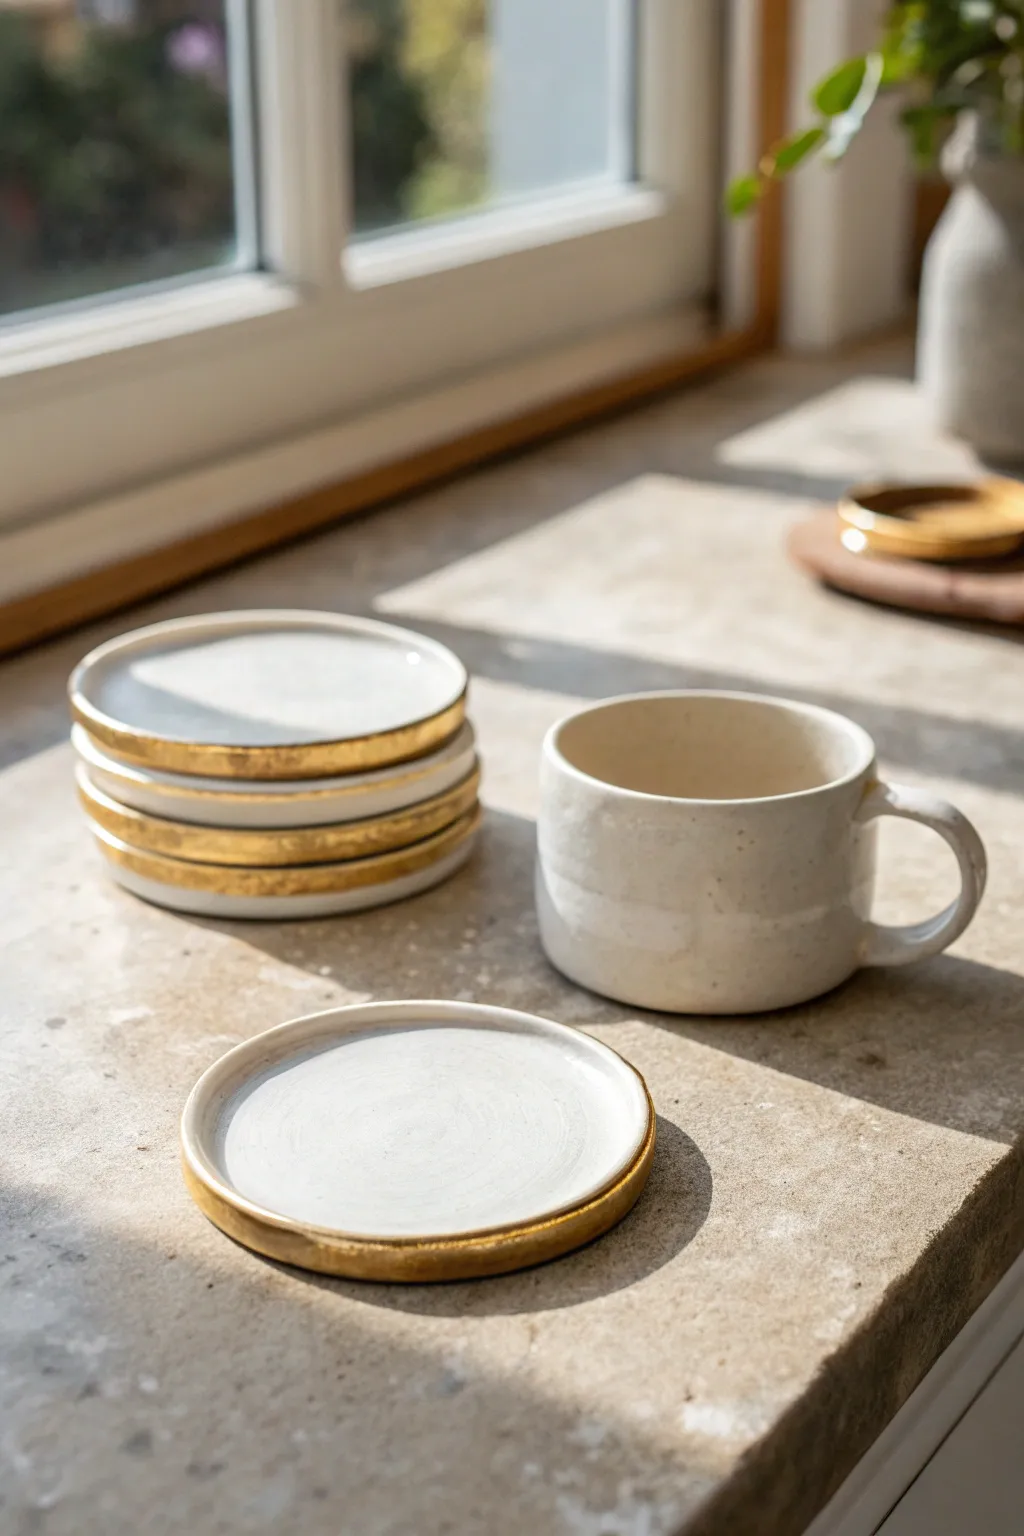
These elegant coasters mimic the look of high-end stoneware with its organic, slightly imperfect shape and luxurious gold detailing. Using simple air-dry clay, you can achieve this sophisticated, minimalist aesthetic that looks beautiful stacked on any coffee table.
Detailed Instructions
Materials
- White air-dry clay (approx. 500g)
- Rolling pin
- Circle cutter or a round bowl (approx. 3.5 – 4 inch diameter)
- Small bowl of water
- Sponge or finishing tool
- Sandpaper (fine grit)
- Glossy white acrylic paint or white ceramic glaze effect medium
- Liquid gold leaf or metallic gold enamel paint
- Flat paintbrush for white base
- Small, fine-tip paintbrush for gold rim
- Sealant (glossy or satin varnish for clay)
Step 1: Shaping the Coasters
-
Prepare the Clay:
Begin by kneading your white air-dry clay until it is soft, pliable, and free of air bubbles. This conditioning step prevents cracks from appearing later. -
Roll it Out:
Flatten the clay on a smooth surface or canvas mat using a rolling pin. Aim for an even thickness of about 1/4 inch (6mm) to ensure durability. -
Cut the Circles:
Use your circle cutter or place a bowl upside down on the clay and trace around it with a knife to cut out your coaster shapes. Create 4-6 circles for a complete set. -
Create the Lip:
To get that specific tray-like shape shown in the photo, gently press your thumb into the center of the circle and work outwards, leaving a slightly raised rim around the very edge. -
Smooth Imperfections:
Dip your finger or a small sponge into water and run it over the surface and edges. Smooth out any fingerprints or rough cuts, but don’t worry about making it machine-perfect; the hand-formed look adds charm. -
Drying Time:
Place the coasters on a wire rack or a piece of parchment paper to dry. Let them sit for 24-48 hours, flipping them occasionally to ensure even drying and prevent warping.
Keep it Flat
To prevent warping while your clay dries, place a light book or flat board on top of the coasters once they are partially dry (leather hard stage).
Step 2: Refining and Sealing
-
Sanding:
Once the clay is bone dry and chalky white, take your fine-grit sandpaper and gently sand the edges and surface. Focus on smoothing the rim where the gold will eventually go. -
White Base Coat:
Paint the entire top surface and rim with a glossy white acrylic paint. This mimics the look of glazed ceramic. Apply 2-3 thin coats for full opacity. -
Let Paint Cure:
Allow the white paint to dry completely between layers. I find that thin layers dry faster and result in a smoother finish than one thick globs. -
Painting the Gold Rim:
Shake your liquid gold leaf or metallic enamel well. Load a small brush and carefully paint the raised rim of the coaster. -
Adding Texture:
When painting the gold, allow the brush to slip slightly down the outer edge in a few spots. This creates that organic, dipped effect rather than a perfect, straight line. -
Sealing the Project:
Finish by applying a waterproof sealant or varnish over the entire coaster, especially if using them for cold drinks with condensation. -
Final Cure:
Let the sealant cure fully according to the bottle instructions before stacking them or placing a mug on top.
Faux Ceramic Look
For a speckled pottery look, dilute slightly darker beige paint with water and flick it onto the white base using an old toothbrush before sealing.
Now you have a stunning set of faux-ceramic coasters ready for your morning coffee
Metallic Fleck Air-Dry Clay Coasters
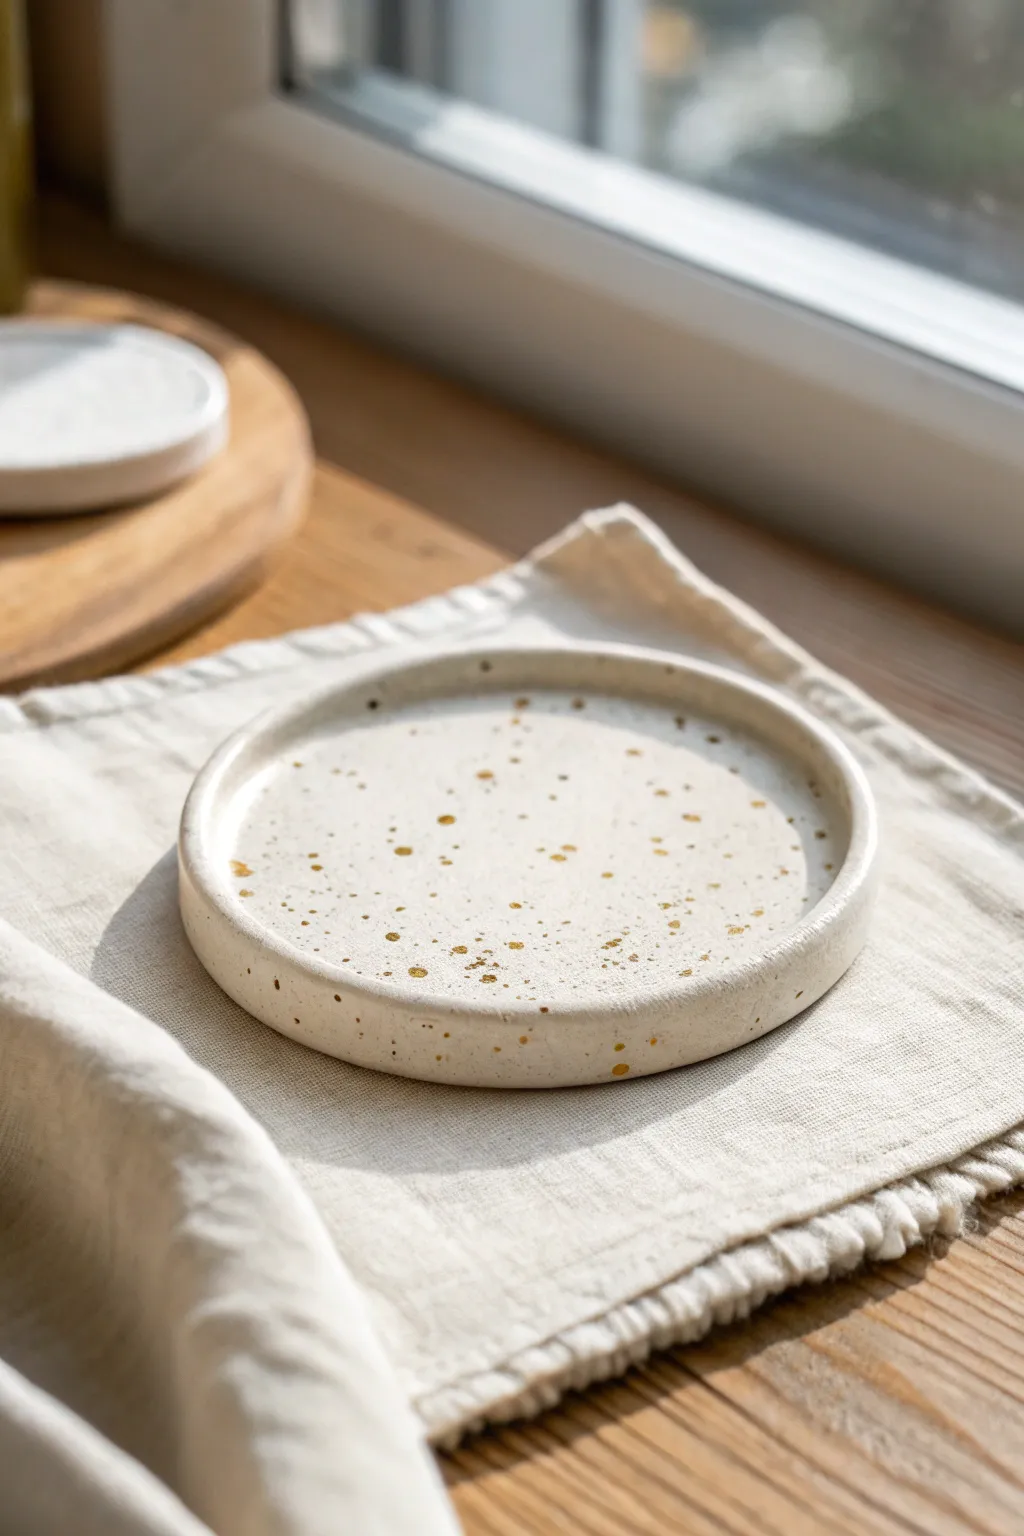
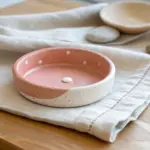
Elevate your coffee table with this minimalist air-dry clay coaster that features a chic raised rim and artistic metallic detailing. The creamy white finish paired with scattered gold flecks creates a sophisticated, modern ceramic look without needing a kiln.
Step-by-Step Guide
Materials
- White smooth air-dry clay
- Rolling pin
- Clay knife or craft knife
- Round cookie cutter or jar lid (approx. 4-5 inches)
- Small bowl of water
- Fine grit sandpaper
- Gold metallic paint (acrylic or liquid leaf)
- Stiff bristle paintbrush (like an old toothbrush or hog bristle brush)
- Clear acrylic sealant (matte or satin finish)
- Canvas or parchment paper (work surface)
Step 1: Shaping the Base
-
Condition the clay:
Begin by taking a handful of air-dry clay and kneading it in your hands until it becomes soft, pliable, and free of cracks. -
Roll it out:
Place the clay on your parchment paper or canvas work surface. Use a rolling pin to flatten it into an even slab, aiming for a thickness of about 1/4 inch. -
Cut the circle:
Press your round cookie cutter or jar lid firmly into the clay to create a perfect circle. Peel away the excess clay from the outside and set it aside for future use. -
Smooth the edges:
Dip your finger slightly in water and run it along the cut edge of the circle to smooth out any roughness or sharp debris.
Splatter Control
To avoid getting gold paint everywhere, place your coaster inside a deep cardboard box before flicking the paint bristles. This contains the mess perfectly.
Step 2: Forming the Rim
-
Create a coil:
Take a small portion of the leftover clay and roll it into a long, thin snake or coil. Try to keep the thickness consistent, roughly the width of a pencil. -
Score the connection points:
Use your craft knife or a needle tool to gently scratch hatched lines (‘scoring’) along the top outer edge of your clay circle base. Do the same to one side of your clay coil. -
Apply slip:
Dab a tiny amount of water (or a clay-water mix called ‘slip’) onto the scored areas of the base to act as glue. -
Attach the coil:
Carefully place the coil onto the edge of the base, pressing down gently to adhere it. Cut off any excess coil where the ends meet and blend them together seamlessly. -
Blend the seams:
This is crucial for durability: use a modeling tool or your finger to smooth the clay coil downward into the base on both the inside and outside. You want the rim and base to become one solid piece, not just two pieces stuck together. -
Refine the shape:
Once blended, wet your fingers slightly and smooth the rim to ensure it is even and rounded. I prefer to rotate the piece slowly while running a wet sponge around the edge for a professional finish.
Make it a Set
Create a matching set by varying the metallic colors. Try rose gold or silver flecks on different coasters for a mixed-metal modern collection.
Step 3: Drying and Finishing
-
Let it dry:
Place your coaster in a cool, dry spot away from direct sunlight. Let it dry for 24-48 hours. Turn it over halfway through the process to ensure the bottom dries evenly and prevents warping. -
Sand for smoothness:
Once fully cured and bone dry, take fine-grit sandpaper and gently buff the entire surface. Pay special attention to the rim and any bumps on the flat surface to get that smooth ceramic feel. -
Clean the dust:
Wipe the coaster down with a slightly damp cloth or a dry soft brush to remove all sanding dust before painting.
Step 4: The Splatter Technique
-
Prepare the paint:
Pour a small amount of gold metallic paint onto a palette. If the paint is very thick, thin it with a drop or two of water so it flows easily. -
Load the brush:
Dip the tips of a stiff bristle brush or an old toothbrush into the gold paint. You don’t need too much paint; just coat the bristles. -
Flick the paint:
Hold the brush about 6 inches above the coaster. Run your thumb across the bristles to flick tiny specks of paint onto the clay. Practice on a piece of paper first to gauge the spray pattern. -
Vary the density:
Move your hand around the coaster to create a random, organic pattern. Add a few larger manual dots with a fine brush if you want more variation in the speckle sizes. -
Seal the piece:
Allow the paint to dry completely. Finally, apply 1-2 thin coats of clear acrylic sealant (matte or satin) to protect the clay from moisture and prevent the gold from tarnishing.
Enjoy styling your new handmade dish on your desk or coffee table for a touch of artisan charm
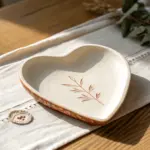
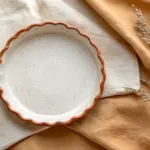
Monogram Air-Dry Clay Coasters

These charming, personalized coasters strike the perfect balance between rustic and refined with their textured edges and crisp typography. The speckled clay adds a lovely warmth, while the monogram detail makes them an ideal meaningful gift or custom home accessory.
How-To Guide
Materials
- White or speckled air-dry clay (e.g., DAS stone effect or standard white mixed with speckles)
- Round cookie cutter (approx. 3.5-4 inches diameter)
- Rolling pin
- Parchment paper or craft mat
- Small bowl of water
- Sanding block or fine-grit sandpaper
- Red-orange acrylic paint (terracotta shade)
- Printable monogram template/stencil or white alphabet stickers
- Medium flat paintbrush
- Mod Podge or clear acrylic sealant (matte or satin finish)
- Jute twine for packaging
Step 1: Shaping the Base
-
Preparing the clay:
Begin by kneading a handful of air-dry clay until it becomes pliable and warm. If you are using plain white clay and want that speckle effect, you can knead in some dried tea leaves or black pepper for texture. -
Rolling it out:
Place your clay on a sheet of parchment paper to prevent sticking. Roll it out to an even thickness of about 1/4 inch. I find using guide sticks on either side helps keep the height perfectly consistent. -
Cutting the rounds:
Press your round cookie cutter firmly into the clay. Give it a tiny wiggle to separate the edges before lifting it away. -
Smoothing the edges:
Dip your finger in a little bit of water and run it along the cut edge of the circle. This softens the harsh cut line and creates that slightly rounded, handmade feel. -
Adding subtle texture:
For the specific look in the photo, you might want to gently press the sides slightly to give it a less manufactured appearance. The imperfections are part of the charm. -
Drying time:
Transfer your clay rounds to a wire rack or leave them on fresh parchment paper. Let them dry for 24-48 hours, flipping them halfway through to ensure even drying and prevent curling.
Smooth Surface Trick
Before drying, dip your finger in water and polish the surface like you are burnishing pottery. This closes clay pores and makes painting much smoother later.
Step 2: Adding the Design
-
Sanding:
Once fully dry and hard, lightly sand the edges and the top surface to remove any sharp bits or uneven bumps. Wipe away the dust with a damp cloth. -
Planning the center:
These coasters feature a center colored circle with a white border. Lightly trace a smaller circle in the middle of your coaster using a pencil or a smaller jar lid as a guide. -
Applying the monogram:
There are two ways to achieve the white letter ‘C’. My preferred method is to place a vinyl stencil of the letter in the center of your traced circle. -
Alternative lettering:
If you don’t have a stencil, you can carefully hand-paint the letter later with white paint, or use a sticker to mask the area. -
Painting the color block:
Using your terracotta or red-orange acrylic paint, fill in the inner circle, painting right over your stencil or masked letter. Leave the outer rim of the clay unpainted. -
Creating the speckled look:
While painting, you can dab the brush to create a slight texture rather than a perfectly smooth plastic look. -
Revealing the letter:
While the paint is tacky but not fully dry, carefully peel away your stencil or sticker to reveal the crisp white clay underneath. Use a needle tool to lift the edge if needed. -
Touch-ups:
If any paint bled under the stencil, simply scrape it away gently with a craft knife or paint over it with a tiny bit of white paint.
Stamp It In
Make an impressed monogram instead of a painted one! Press a rubber letter stamp into the wet clay, then fill the indentation with white paint after drying.
Step 3: Sealing and Finishing
-
Sealing:
Protect your work from moisture—essential for coasters! Apply 2-3 coats of Mod Podge or clear acrylic sealant over the entire top and sides, allowing drying time between coats. -
Side details:
Looking closely at the image, you’ll see tiny red flecks on the side edges. You can flick a stiff toothbrush with red paint against the sides, or dab tiny dots randomly with a fine brush. -
Adding feet (optional):
For extra protection for your table, stick small felt or cork pads to the bottom of the coaster. -
Bundling:
To recreate the presentation in the photo, stack four coasters and tie them together with rustic jute twine in a simple bow.
Stack your finished set and tie them with twine for a beautiful, handcrafted gift ready to be shared
Watercolor Fill Air-Dry Clay Coasters
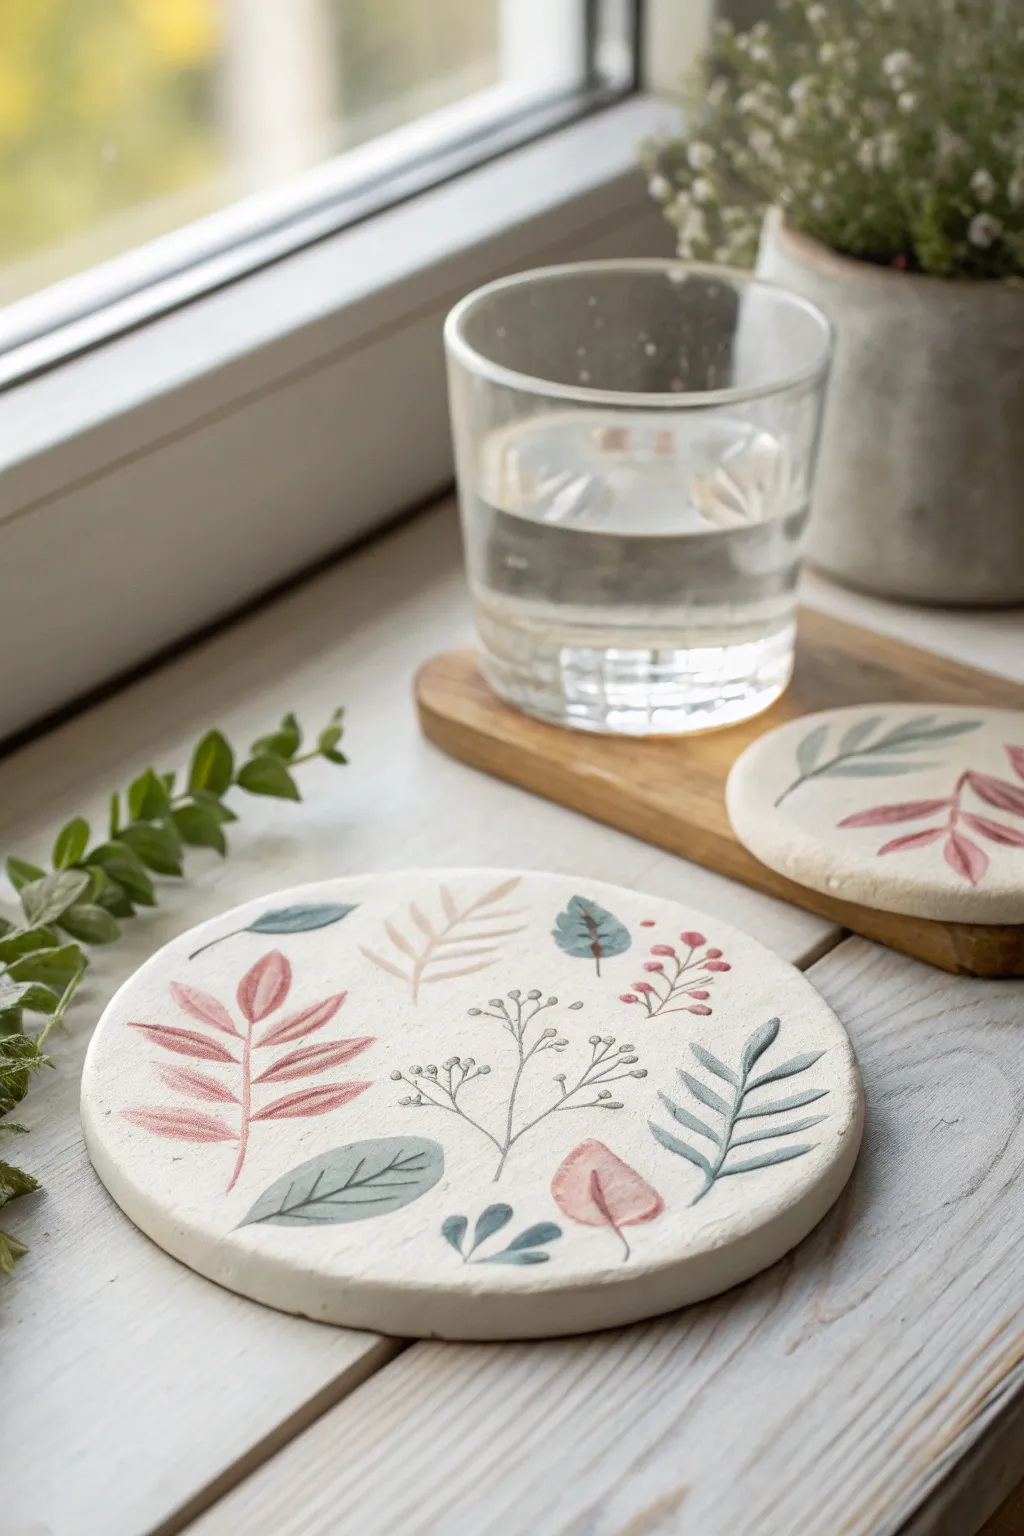
Bring the calming influence of nature indoors with these delicate air-dry clay coasters. Featuring gentle botanical imprints and soft, muted watercolor washes, this project perfectly mimics the look of high-end ceramic serveware without the need for a kiln.
Step-by-Step
Materials
- White or sandstone air-dry clay
- Rolling pin
- Circle cookie cutter (approx. 4 inches) or a round bowl
- Smooth sandpaper (fineness 220 or higher)
- Pencil or clay needle tool
- Small carving tool or toothpick
- Watercolor paints (tube or pan)
- Fine round paintbrush (size 0 or 2)
- Matte spray varnish or Mod Podge sealant
- Small jar of water
- Parchment paper or cutting mat
Step 1: Shaping the Clay Base
-
Condition the clay:
Begin by taking a handful of air-dry clay and kneading it in your hands until it feels soft, pliable, and free of cracks. If it feels too stiff, dip your fingers in water and work the moisture in. -
Roll it out:
Place the clay on a sheet of parchment paper to prevent sticking. Use a rolling pin to flatten the clay to a uniform thickness of about 1/4 inch. Try to keep the surface relatively smooth. -
Cut the circles:
Press your circle cutter or an overturned bowl firmly into the clay to cut out your coaster shapes. Create as many circles as you have clay for. -
Smooth the edges:
Dip your index finger in a little water and run it along the raw cut edge of each circle to smooth out any roughness or sharp corners creates by the cutter.
Fixing Warped Coasters
If the edges curl up while drying, slightly dampen the concave side and place a heavy book on top for a few hours to flatten it back out.
Step 2: Carving the Botanical Design
-
Sketch the layout:
Before the clay dries, use a pencil to very lightly sketch your botanical design directly onto the clay surface. Plan for a mix of large leaves, small sprigs, and berries to create a balanced composition. -
Incise the stems:
Using a needle tool or the sharp point of a toothpick, trace over your sketch lines with deeper pressure. Start with the main stems to establish the structure of the plant. -
Carve the leaves:
Outline the leaf shapes. For a slightly embossed look like the example, press the tool a bit deeper at the edges of the leaves. -
Add details:
Gently scratch in the veins within the larger leaves. Add small dots for berries or seed pods at the ends of the finer stems. -
Let it dry completely:
Set the coasters aside in a dry, room-temperature spot. Allow them to air dry for at least 24-48 hours. I usually flip them over halfway through the drying process to ensure both sides dry evenly and prevent warping. -
Sand for smoothness:
Once fully hard and white, use fine-grit sandpaper to gently smooth the top surface and the rim. Wipe away the dust with a barely damp cloth.
Step 3: Applying the Watercolor Washes
-
Prepare your palette:
Mix your watercolor paints. You aim for a muted, earthy palette: dilute a dusty pink, a sage green, and a slate blue with plenty of water to keep the pigment transparent. -
Paint the large leaves:
Load your fine brush with the dusty pink wash. Carefully fill in the larger, fern-like leaves. The paint will naturally pool slightly in the carved indentations, creating beautiful depth. -
Add the green foliage:
Switch to your sage green/grey-blue mix. Paint the single, broader leaves scattered around the perimeter. Allow the carved outline to help guide your brush. -
Detail the accents:
Use a darker, less diluted version of the pink or a reddish-brown for the small berries or flower buds. Keep these strokes small and precise. -
Define stems if needed:
If the carved lines for the stems are hard to see, you can run a very thin line of diluted grey paint through them, but often the shadow of the craving is enough. -
Let the paint set:
Allow the watercolor to dry completely on the porous clay surface. This usually happens quite quickly.
Clean Lines Tip
Don’t worry if paint bleeds slightly outside the carved lines; it adds to the organic, hand-painted charm. You can sand away major mistakes lightly.
Step 4: Sealing and Finishing
-
Seal the surface:
Because watercolor is water-soluble, you must seal these coasters to use them. Spray them with a matte varnish in a well-ventilated area. Apply 2-3 light coats rather than one heavy one. -
Add cork backing (optional):
To protect your furniture, you can glue a circle of cork or felt to the bottom of the hardened coaster.
Enjoy your beautiful, nature-inspired coasters with your next refreshing drink
Condensation Groove Air-Dry Clay Coasters
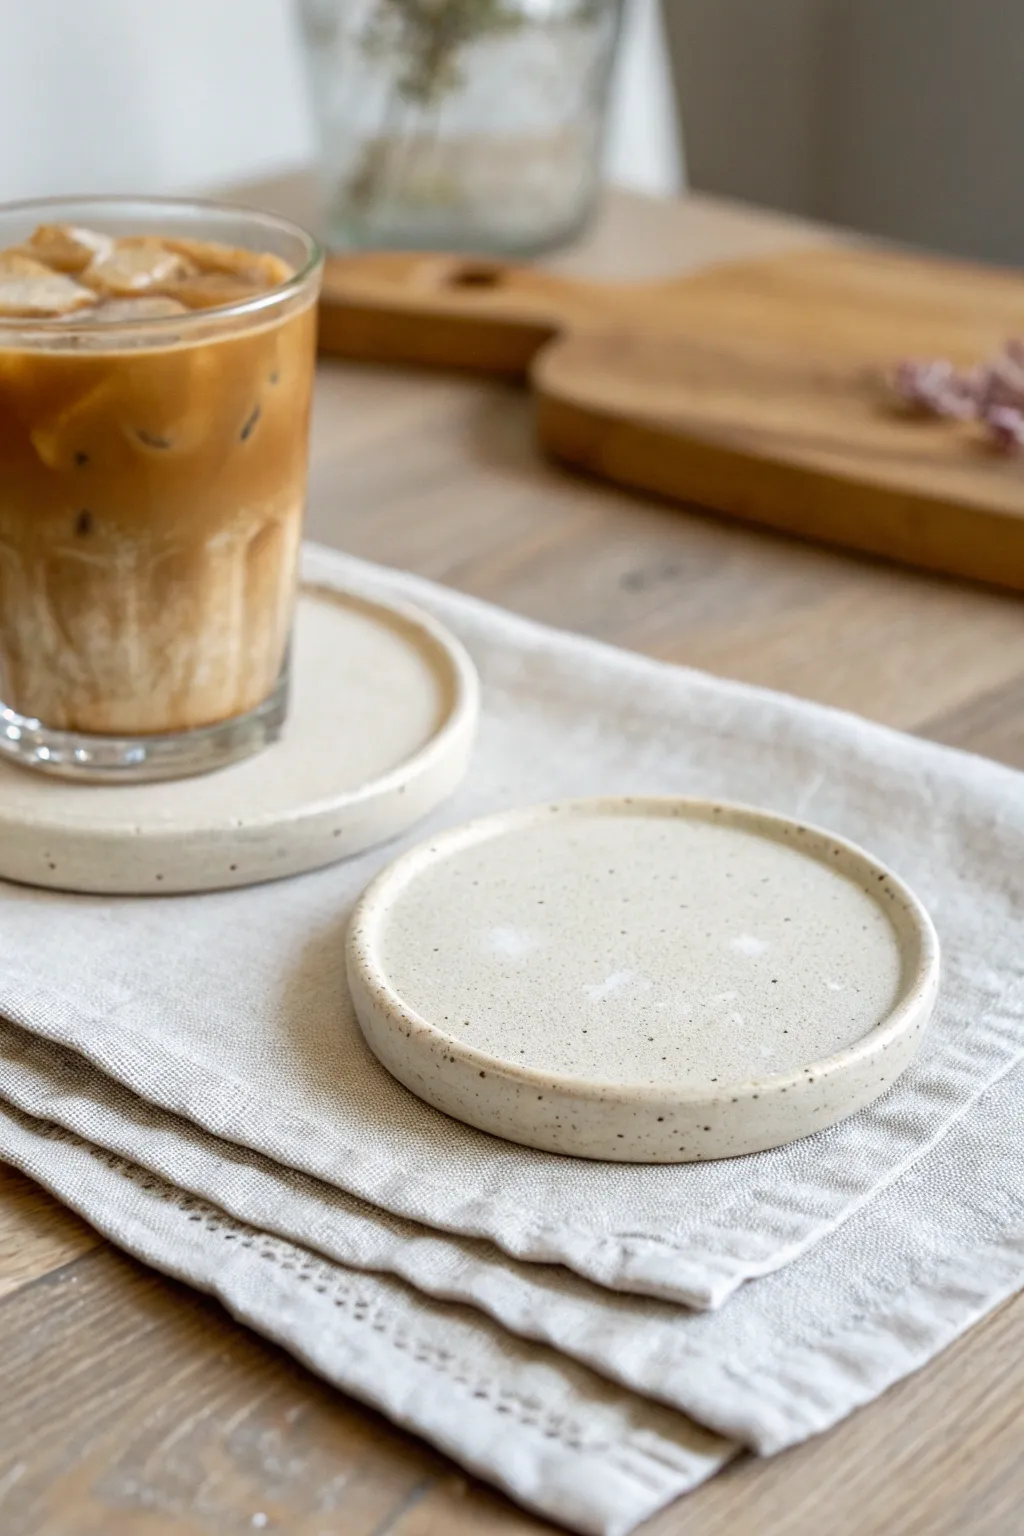
Bring a touch of modern cafe aesthetic into your home with these minimalist rimmed coasters that look just like high-end speckled stoneware. This simple project is perfect for beginners, resulting in sturdy, functional pieces that protect your surfaces from condensation in style.
How-To Guide
Materials
- White air-dry clay
- Rolling pin
- Round cookie cutter (approx. 4 inches) or a bowl to trace
- Ground coffee or black pepper (for speckling)
- Small cup of water
- Sponge or soft paintbrush
- Fine-grit sandpaper
- Matte or satin waterproof varnish (polyurethane or acrylic sealer)
- Palette knife or clay rib (optional for smoothing)
Step 1: Preparing the Clay
-
Speckle the clay:
Start by taking a handful of white air-dry clay and flattening it slightly. Sprinkle a pinch of ground coffee or coarse black pepper onto the surface to create that faux-ceramic speckled look. -
Knead thoroughly:
Fold the clay over the speckles and knead it well. Keep folding and kneading until the distinct particles are evenly distributed throughout the entire ball of clay. -
Roll it out:
Place your clay on a smooth surface or a canvas mat. Using a rolling pin, roll the clay out to an even thickness of about 1/4 inch. Try to keep the thickness consistent to prevent warping later. -
Cut the shape:
Use your round cookie cutter or trace around a small bowl with a knife to cut out your coaster circle. Peel away the excess clay.
Step 2: Creating the Rim
-
Define the edge:
Dip your finger in a little water. Run your finger along the very edge of the circle to smooth out any rough cuts from the cutter. -
Create the indentation:
Take a smaller flat-bottomed object (like a glass or a jar that is slightly smaller than your coaster) and press it gently into the center of the clay circle. -
Refine the lip:
Alternatively, if you want a more organic feel, use your thumbs to gently press down the center of the coaster while leaving a raised rim around the outside edge. -
Smooth the transition:
Use a damp sponge or your finger to smooth the transition between the flat center and the raised rim. You want a subtle curve rather than a sharp 90-degree angle. -
Level the rim:
Check that the standing rim is even in height all the way around. Gently tap the top of the rim with a flat ruler or paddle to level it if necessary. -
Water smoothing:
Give the entire piece a final smoothing with a tiny amount of water on your finger to erase any fingerprints or cracks. I find this step crucial for that professional, polished look.
Rim Cracking?
If the rim develops small cracks while drying, mix a tiny bit of fresh clay with water to make a paste (slip) and fill the cracks, then sand smooth once dry.
Step 3: Drying and Finishing
-
Initial drying:
Place the coasters on a wire rack or a piece of parchment paper. Let them air dry for at least 24 hours away from direct sunlight or heat sources. -
Flip for even drying:
Halfway through the drying process, carefully flip the coasters over to allow the bottom to dry evenly. This helps prevent the edges from curling upward. -
Sand for perfection:
Once fully dry and hard (usually 48-72 hours), use fine-grit sandpaper to gently buff the edges and surface. Remove any sharp bits on the rim or bumps in the center. -
Dust off:
Wipe the coaster down with a slightly damp cloth or a dry brush to remove all sanding dust before sealing. -
Apply first coat:
Apply a thin, even layer of waterproof varnish or sealer. Make sure to get into the corner where the rim meets the base. -
Seal the bottom:
Once the top is dry to the touch, flip the coaster and coat the bottom to completely seal the clay against moisture. -
Final coat:
Apply a second or third coat of varnish to the top surface for extra durability against condensation and spills.
Add Color
Paint the rim a contrasting color like gold or navy blue before varnishing for a chic, two-tone look that highlights the shape.
Now you have a set of stylish, custom-made coasters ready to hold your morning brew.