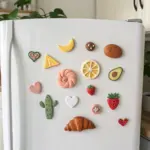
If you’ve got a little clay and a little time, you can make the cutest DIY clay magnets that instantly make your kitchen feel more you. I love these projects because they’re quick, beginner-friendly, and perfect for trying out tiny textures, bold color, and glossy finishes.
Mini Pizza Slice Magnets
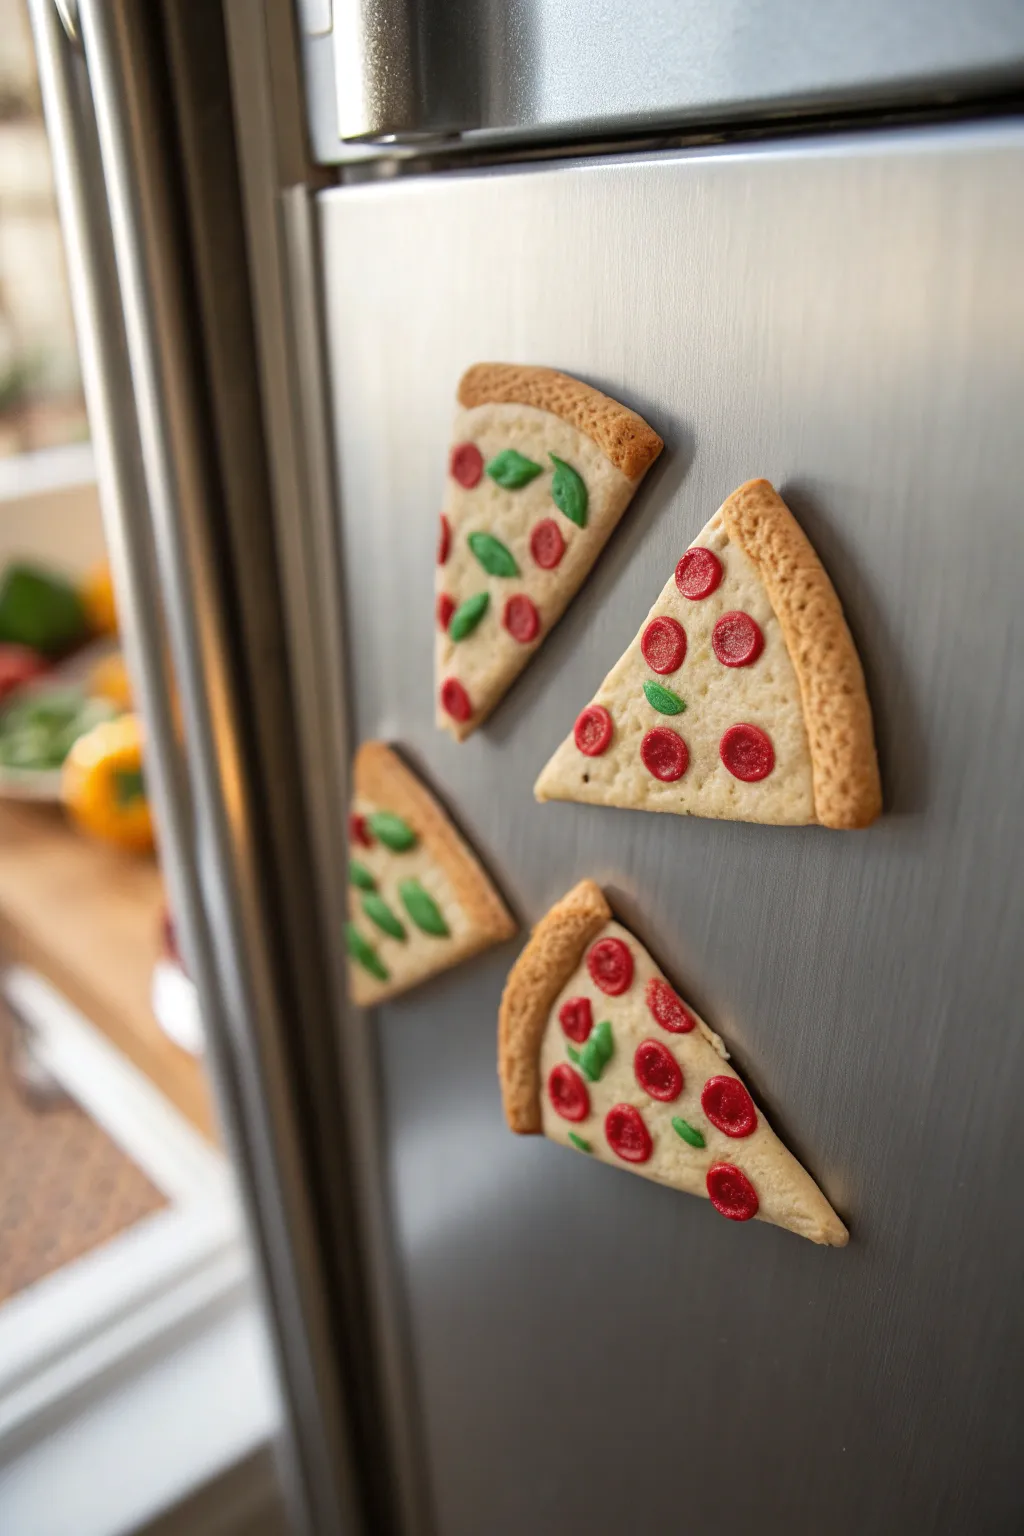
These adorable little pizza slices look good enough to eat but function as charming refrigerator magnets instead. Sculpted with simple clay techniques to mimic textures like bubbly cheese and crispy crust, they add a fun pop of culinary flair to your kitchen decor.
Step-by-Step
Materials
- Polymer clay (beige/tan for crust, off-white/cream for cheese, red for pepperoni, green for basil)
- Small round magnets (choose strong neodymium ones for best hold)
- Craft knife or clay blade
- Needle tool or toothpick
- Old toothbrush or textured sponge (for texturing)
- Small ball tool
- Chalk pastels (orange/brown for shading)
- Soft paintbrush
- Liquid polymer clay or bake-and-bond (optional)
- Oven and baking sheet
- Super glue or E6000 adhesive
Step 1: Forming the Crust Base
-
Mix your dough color:
Start by conditioning the beige or tan polymer clay. You want a color that resembles unbaked pizza dough—think warm biscuit tones. -
Shape the triangle:
Roll a small ball of clay and flatten it into a triangle about 2 inches long. Keep it slightly thick, around 1/4 inch, to act as a sturdy base for the magnet. -
Define the crust edge:
Roll a separate snake or rope of the same tan clay. Attach this along the wider, top edge of your triangle. -
Blend the seams:
Using your finger or a clay tool, gently smooth the underside seam where the crust rope meets the triangle base so it becomes one solid piece. -
Texture the crust:
Take an old toothbrush or a stiff textured sponge and firmly tap it all over the raised crust edge. This creates that realistic, baked-bread porosity.
Sticky Situation?
If your clay gets too soft and sticky from hand warmth, place it in the fridge for 10 minutes to firm it up before continuing to sculpt.
Step 2: Adding Toppings and Details
-
Apply the cheese layer:
Condition some off-white or cream clay. Flatten it into a thin sheet and cut a triangle slightly smaller than your base. -
Melt the cheese:
Place the cream triangle onto the base, pushing it right up against the crust rim. Use your finger to gently smear the edges down so it looks like melted mozzarella. -
Texture the cheese surface:
Use a needle tool or toothpick to prick tiny, shallow holes across the cheese surface. This mimics the bubbling texture of hot cheese. -
Create pepperoni slices:
Roll out a very thin snake of red clay. Slice off tiny discs using your clay blade. I like to press the center of each disc slightly with a small ball tool to make them cup upwards like real baked pepperoni. -
Make the basil leaves:
Take tiny amounts of green clay and shape them into small teardrops or ovals. Flatten them slightly to resemble fresh basil leaves. -
Arrange your toppings:
Place your pepperoni and basil onto the cheese slices. Press them down gently so they adhere well. Vary the placement on each slice for a natural look; you can even have a pepperoni piece ‘falling’ off the edge.
Make It Glossy
For an extra greasy, delicious look, brush a thin layer of gloss glaze or polyurethane varnish over just the pepperoni and cheese after baking.
Step 3: Shading and Finishing
-
Pre-shading preparation:
Scrape some orange and brown chalk pastels into a fine powder. -
Apply the bake effect:
Using a soft dry brush, gently dust the brown pastel powder onto the raised crust edge. Focus on the high points to simulate browning in the oven. -
Enhance the cheese:
Lightly dust a bit of orange pastel over the cheese area, specifically around the pepperoni edges, to recreate that savory grease look. -
Bake the clay:
Place your pizza slices on a baking sheet lined with parchment paper. Bake according to your specific brand of clay’s instructions (usually around 275°F for 15-30 minutes). -
Cool down:
Allow the clay pieces to cool completely before handling them. They remain slightly soft while hot and harden as they cool. -
Attach the magnet:
Flip the cooled pizza slice over. Apply a drop of strong super glue or E6000 to the back and press your round magnet firmly into place. -
Final cure:
Let the glue cure fully for 24 hours to ensure the magnet won’t pop off when you stick it to the fridge.
Once the glue is dry, your kitchen will have a permanent delivery of the cutest pizza slices imaginable


Cute Taco Magnets
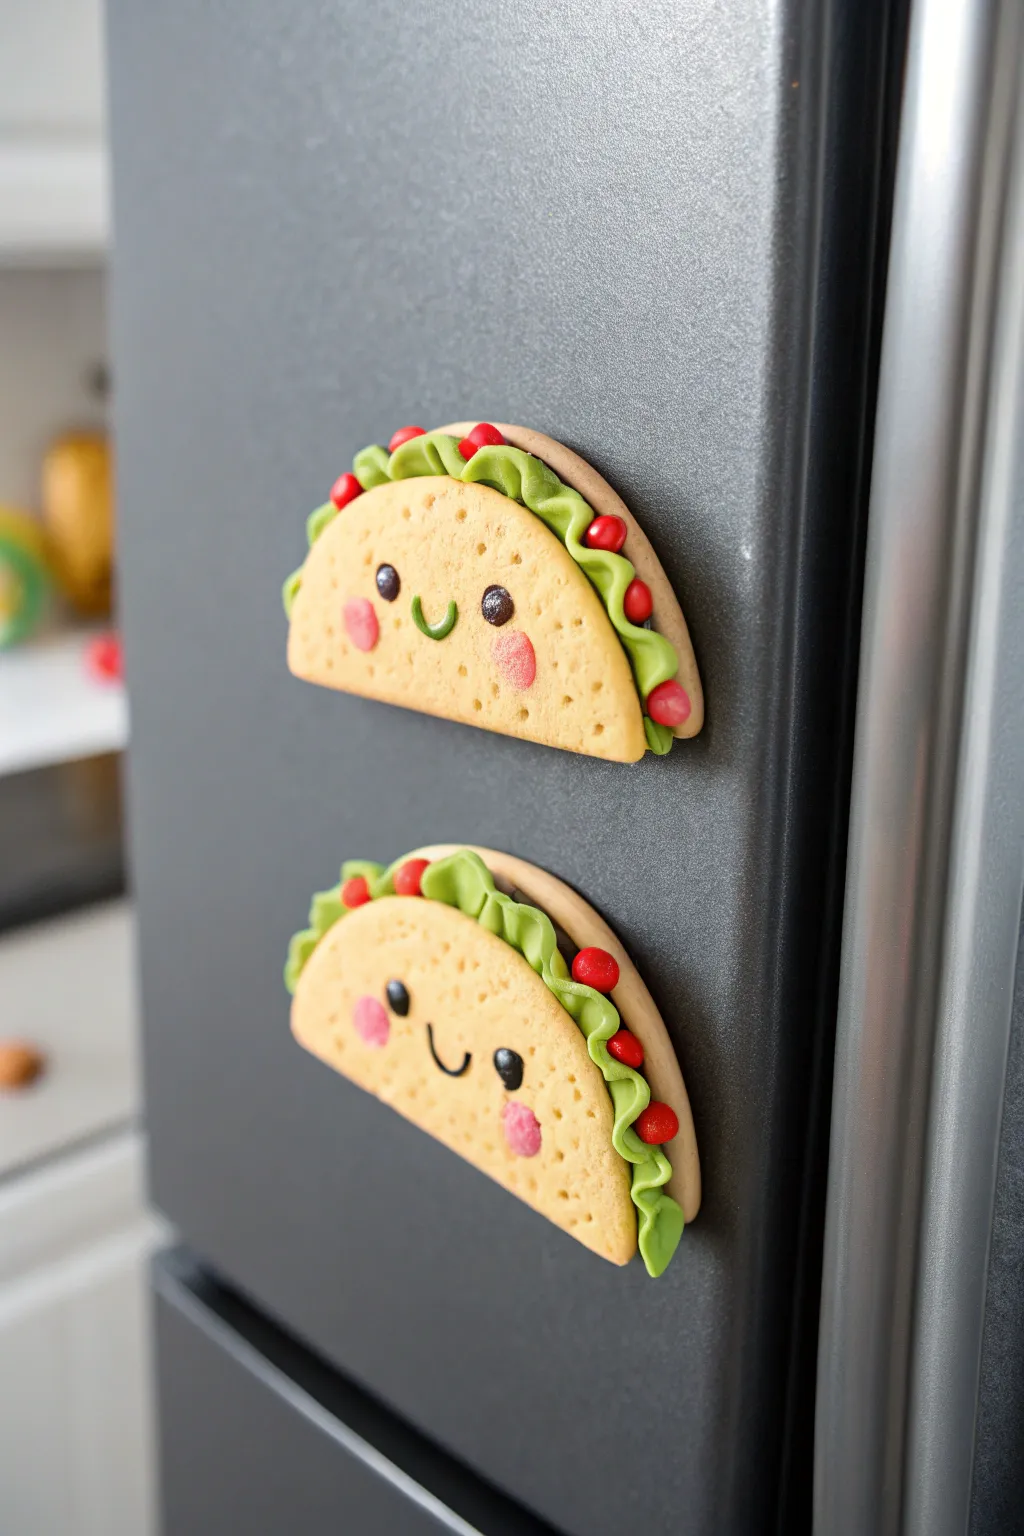
These adorable taco magnets bring a smile with their rosy cheeks and rippled lettuce details. Made from polymer clay, they feature a realistic biscuit texture on the shell and vibrant fillings that pop against any fridge surface.
Step-by-Step Tutorial
Materials
- Polymer clay (tan/beige, bright green, red, black, pink)
- Circular cookie cutter (approx. 2-3 inches)
- Clay roller or pasta machine
- Pointed sculpting tool or toothpick
- Ball stylus tool
- Texture sponge or stiff toothbrush
- Craft knife
- Strong neodymium magnets
- E6000 or super glue
- Gloss glaze (optional)
Step 1: Forming the Shell
-
Mix the perfect shell color:
Start by conditioning your tan polymer clay. If it’s too pale, mix in a tiny speck of orange or brown to achieve a warm, baked taco shell shade. -
Roll and cut:
Roll the tan clay out to a medium thickness, about 1/8th of an inch. Use your circular cookie cutter to punch out a clean circle. -
Texture the surface:
Before folding, gently press a texture sponge or a stiff toothbrush over the entire surface of the circle. This mimics the porous texture of a hard corn tortilla. -
Add spot details:
With a needle tool or toothpick, gently poke random shallow holes across the surface to enhance that baked cracker look.
Shell Cracking on Fold?
If the clay creates fissures when you fold the taco, it wasn’t conditioned enough. Warm the clay longer in your hands or add a drop of clay softener before rolling.
Step 2: Creating the Fillings
-
Prepare the lettuce:
Roll out a thin strip of bright green clay. You don’t need a cutter here; just cut a rough strip that is slightly longer than the diameter of your shell. -
Add the ripple:
Using your fingers or a sculpting tool, gently pinch and fold the edges of the green strip to create a wavy, ruffles effect, simulating fresh lettuce leaves. -
Make the meat filling:
Roll a snake of dark brown clay. Flatten it slightly so it will sit comfortably inside the taco without bulking it out too much. -
Assemble the insides:
Place the brown strip across the center line of your textured circle, then layer the ruffled green lettuce on top of the brown. -
Fold the taco:
Gently lift one side of the tan circle and fold it over the fillings, sandwiching them but leaving the ruffled green edge visible. Do not press the shell completely flat; keep a rounded shape.
Level Up: Glossy Eyes
Make the face pop by adding a tiny dot of white paint to the black eyes for a highlight, then seal just the eyes and tomatoes with gloss glaze for a wet look.
Step 3: Adding the Face & Finish
-
Shape the eyes:
Roll two tiny balls of black clay. Press them onto the front of the taco shell, spacing them comfortably apart. -
Add the smile:
Roll an extremely thin thread of black clay. Cut a small U-shape and gently press it into the clay between the eyes to create a happy mouth. -
Apply blush:
Take two small balls of pink clay and flatten them into ovals. Press these onto the ‘cheeks’ just below the eyes for a kawaii effect. -
Prep the tomatoes:
Roll several tiny balls of red clay. These will be your diced tomatoes. -
Place the tomatoes:
Tuck the red balls into the waves of the green lettuce, pressing gently so they bond with the green clay. -
Backing preparation:
Flip the taco over and slightly flatten the back side against your work surface. This ensures the magnet will have a measurable surface area to grip. -
Bake the clay:
Bake your creations according to the manufacturer’s instructions on your clay package. Monitor the oven so the light tan shell doesn’t scorch. -
Cool and glue:
Allow the tacos to cool completely. Apply a dab of strong glue to the back and press your magnet firmly into place. I like to let this cure overnight for maximum hold.
Once the glue is fully set, your cheerful taco magnets are ready to hold up your grocery lists in style


Sushi Roll Magnet Set
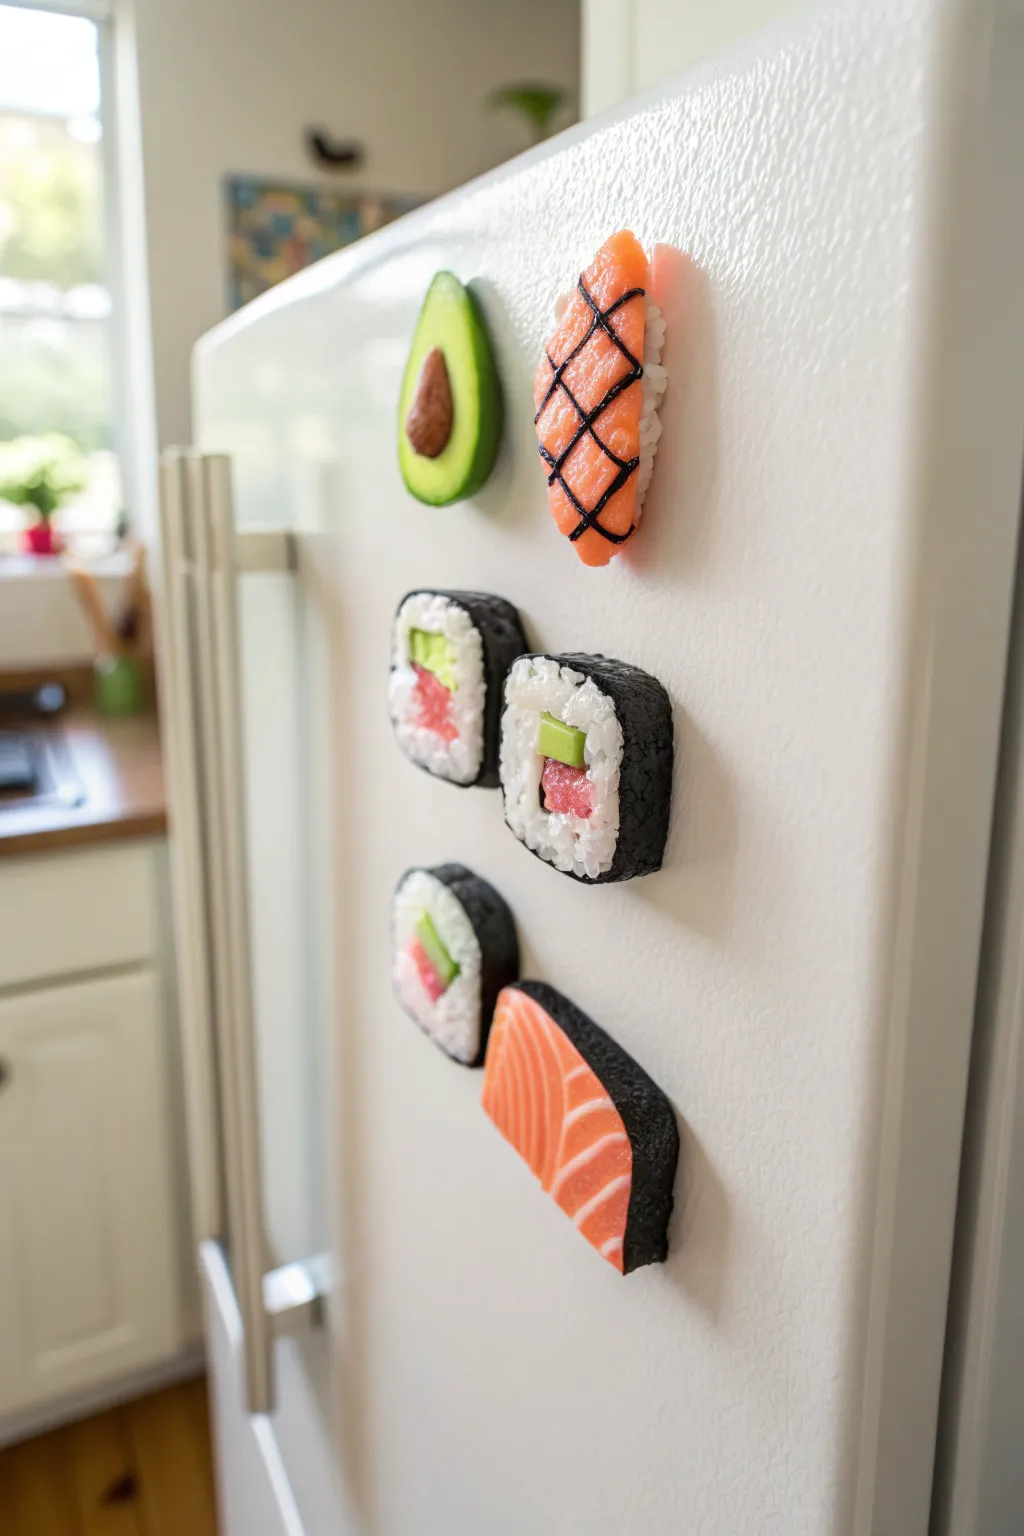
Turn your fridge into a gourmet display with these hyper-realistic sushi clay magnets. This set captures the distinctive textures of rice grains, creamy avocado, and fresh salmon, all rendered in polymer clay for a fun and functional kitchen accent.
Step-by-Step Guide
Materials
- Polymer clay (white, orange, translucent, dark green, black, yellow, pink)
- Strong round magnets
- Superglue or heavy-duty craft adhesive
- Detail needle tool or toothpick
- Toothbrush (for texturing)
- Small rolling pin or acrylic roller
- Clay blade or craft knife
- Gloss glaze (optional)
Step 1: Prepping the Ingredients
-
Mix Custom Colors:
Start by creating your ‘salmon’ color. Mix orange clay with a good amount of translucent clay and a tiny pinch of pink to get that raw fish look. For the avocado, mix dark green with yellow and white to create a gradient of light lime to dark peel. -
Create the Rice Texture:
Condition a large block of white clay mixed with a hint of translucent. To simulate individual rice grains, you can either chop the clay into tiny bits and reform a rough log, or use a toothbrush to vigorously stipple the surface of your shapes later. -
Roll Nori Sheets:
Roll out black clay as thinly as possible. This will serve as the seaweed wrapping (nori) for your rolls and the backing for certain pieces.
Sticky Situation?
If your white clay gets dirty from the black clay (a common issue!), clean your hands and tools with baby wipes between colors, or use rubbing alcohol on a Q-tip to clean the raw white clay.
Step 2: Sculpting the Avocado half
-
Form the Avocado Body:
Shape light green clay into a pear-like teardrop. Flatten the back against your work surface so it sits flush. -
Add the Peel and Pit:
Wrap a thin strip of dark green clay around the outer edge for the skin. Press a small indentation in the lower center and insert a ball of brown clay for the pit, texturing it slightly with a needle tool.
Step 3: Crafting the Salmon Nigiri
-
Shape the Rice Mound:
Form a rectangular mound of white clay with rounded corners. Texture the sides heavily with a needle tool or toothbrush to look like sticky rice. -
Layer the Salmon:
Cut a slice of your salmon-colored clay. Gently press it over the top of the rice mound, smoothing the edges downward. -
Add Grill Marks:
Roll extremely thin threads of black clay. Lay them in a cross-hatch or diamond pattern over the salmon to mimic grill marks or a decorative nori binding. Press gently to adhere.
Level Up: Texture
Instead of just stippling, chop translucent white clay into tiny ‘grains’ and press them onto the surface of your shaped rice logs for ultra-realistic 3D texture.
Step 4: Assembling the Sushi Rolls
-
Build the Center Fillings:
For the square rolls, create small rectangular logs of pink (tuna), light green (avocado or cucumber), and yellow (egg or veggie). Stack them together into a central core. -
Wrap with Rice:
Wrap your stacked fillings in a thick layer of the white rice-textured clay. Shape this log into a square facing. -
Apply the Nori:
Wrap the entire square log with your thin sheet of black clay. Trim the excess so the seam is invisible. -
Slice the Rolls:
Using a very sharp blade, slice the log into thick segments. If the shape distorts, gently press the sides back into a square. Re-texture the white rice areas with a needle tool if they got smudged during cutting.
Step 5: Making the Sashimi Slice
-
Create the Sashimi Base:
Cut a thick, rectangular slab of black clay to act as a serving board or nori bed. -
Form the Fish Slice:
Shape a piece of salmon clay into a rectangle. Use a needle tool to score curved white lines across the top surface to mimic the fatty veins of the fish. -
Combine and Texture:
Place the salmon slice onto the black base. Texture the black clay slightly to look rougher than the smooth fish.
Step 6: Finishing Up
-
Bake:
Bake all pieces according to your polymer clay package instructions (usually 275°F/135°C for 15-30 minutes). Let them cool completely. -
Glaze (Optional):
For a fresh, wet look, brush a coat of gloss glaze over the salmon and avocado pit areas. Leave the rice and nori matte. -
Attach Magnets:
Apply a drop of strong adhesive to the back of each piece and press a magnet firmly into place. I like to let these cure overnight to ensure a permanent bond.
Pop these onto your fridge and enjoy your zero-calorie sushi feast every time you reach for a snack

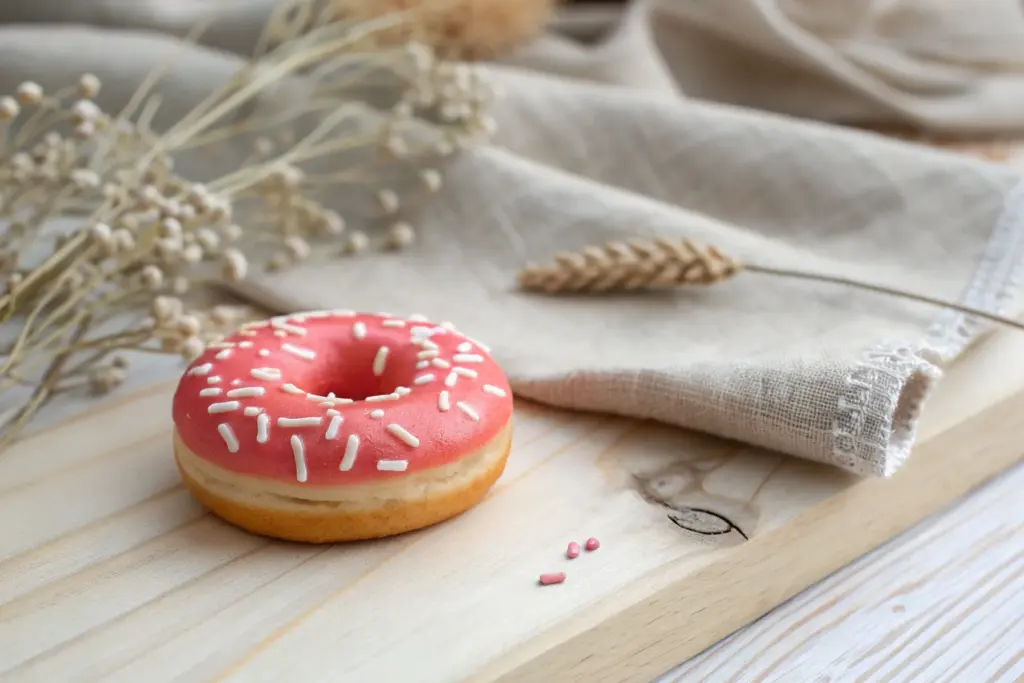
Donut With Sprinkles Magnets
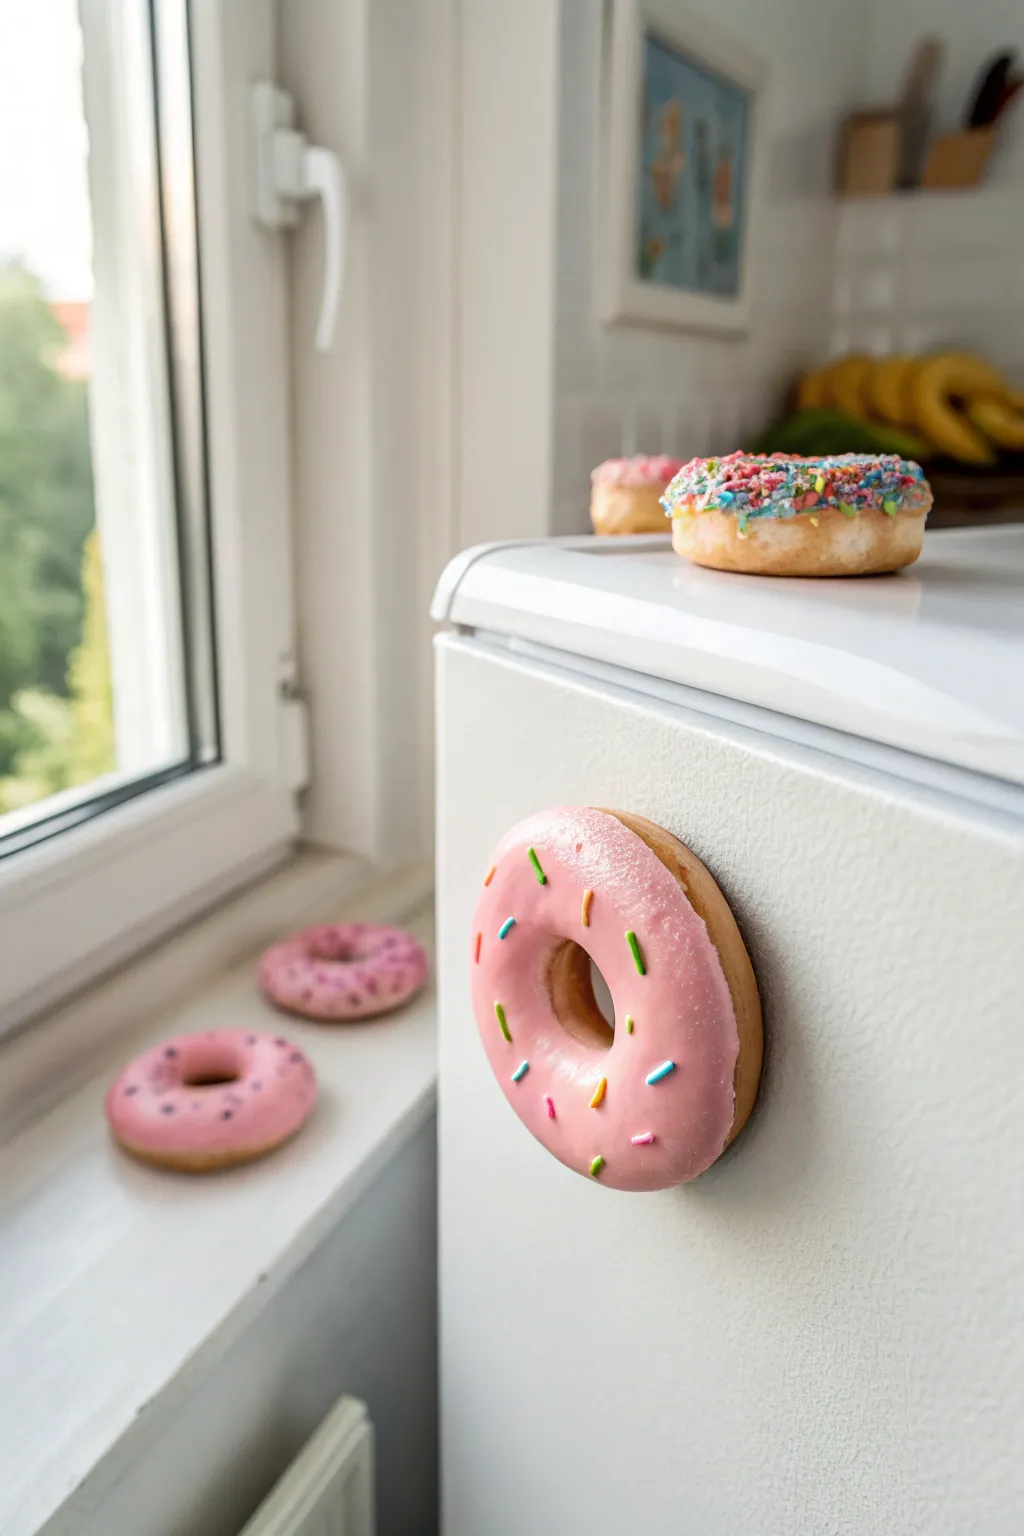
These charming polymer clay magnets bring a slice of bakery sweetness right to your refrigerator door without any of the calories. With their realistic golden-brown dough, glossy pink icing, and colorful sprinkles, they look good enough to eat—but make sure you don’t.
Detailed Instructions
Materials
- Tan or beige polymer clay (for the dough)
- Pink polymer clay (for the icing)
- Various colored polymer clay scraps (for sprinkles)
- Strong round craft magnets (ceramic or neodymium)
- E6000 or super glue
- Soft pastel chalks in brown and orange
- Paintbrush (soft bristle)
- Liquid polymer clay (optional, for gloss)
- Gloss glaze or polyurethane varnish
- Needle tool or toothpick
- Old toothbrush (for texturing)
- Rolling pin or acrylic roller
Step 1: Shaping the Dough Base
-
Conditioning the clay:
Begin by taking a chunk of your tan or beige polymer clay and kneading it thoroughly in your hands until it becomes soft, warm, and pliable. This prevents cracks later on. -
Forming the ring:
Roll the conditioned clay into a smooth ball about the size of a walnut, then gently flatten it into a thick disc shape about half an inch high. -
Creating the hole:
Use your thumb or the back of a paintbrush to press directly into the center of the disc to create a hole. Gently widen the hole by rotating the tool, smoothing the edges so they look like fried dough rather than a sharp cutout. -
Adding texture:
Take an old toothbrush and tap it repeatedly all over the surface of the donut ring. This creates a realistic, porous texture that mimics fried cake donut dough. -
Shading for realism:
Scrape a bit of brown and orange soft pastel chalk into a powder. Using a soft dry brush, dust this powder gently around the outer edges and the inside of the hole to give the dough a baked, golden-brown appearance.
Chef’s Kiss Texture
Mix liquid clay with the pink solid clay to make a sticky ‘frosting’ paste. Apply with a toothpick for ultra-realistic drips.
Step 2: Icing and Decoration
-
Preparing the icing:
Condition a piece of pink clay and roll it out into a thin sheet. It needs to be thinner than the dough but thick enough to satisfy. -
Cutting the icing shape:
Use a round cutter slightly smaller than your donut, or freehand a wavy, uneven circle shape. Irregular edges look more natural, like dripped glaze. -
Creating the center hole:
Poke a hole in the center of the pink sheet that matches the size of your donut’s hole. -
Applying the glaze:
Place the pink clay on top of your textured donut base. Gently press the edges down over the curves of the donut, smoothing them so they look like they are melting slightly downward. -
Making the sprinkles:
Take tiny scraps of yellow, blue, green, and orange clay. Roll them into exceptionally thin snakes, as thin as a thread. -
Applying sprinkles:
Cut very small sections off these thin snakes directly onto the pink icing. Press them down very lightly so they adhere but don’t squish flat. -
Baking firmly:
Place your creation on a parchment-lined baking sheet and bake according to the specific instructions on your polymer clay package (usually around 275°F or 135°C for 15-30 minutes). Let it cool completely.
Flavor Variations
Swap pink clay for dark brown to make chocolate glaze, or white clay for vanilla. Use micro-beads instead of clay for crunchy sprinkles.
Step 3: Finishing Touches
-
Glazing the icing:
Once cool, apply a coat of gloss glaze or polyurethane varnish specifically to the pink icing and sprinkles. I find this contrast between the shiny icing and matte dough really sells the illusion. -
Checking the back:
Ensure the back of the donut is flat enough to hold a magnet. If it’s slightly uneven, you can sand it down a bit. -
Attaching the magnet:
Apply a dab of strong adhesive like E6000 to the center of the back of the donut. -
Setting the bond:
Press your round magnet firmly into the glue and let it sit undisturbed for at least 24 hours to ensure a permanent bond.
Now you have a sweet little piece of art ready to hold up your grocery lists and photos

The Complete Guide to Pottery Troubleshooting
Uncover the most common ceramic mistakes—from cracking clay to failed glazes—and learn how to fix them fast.
Fruit Slice Clay Magnets
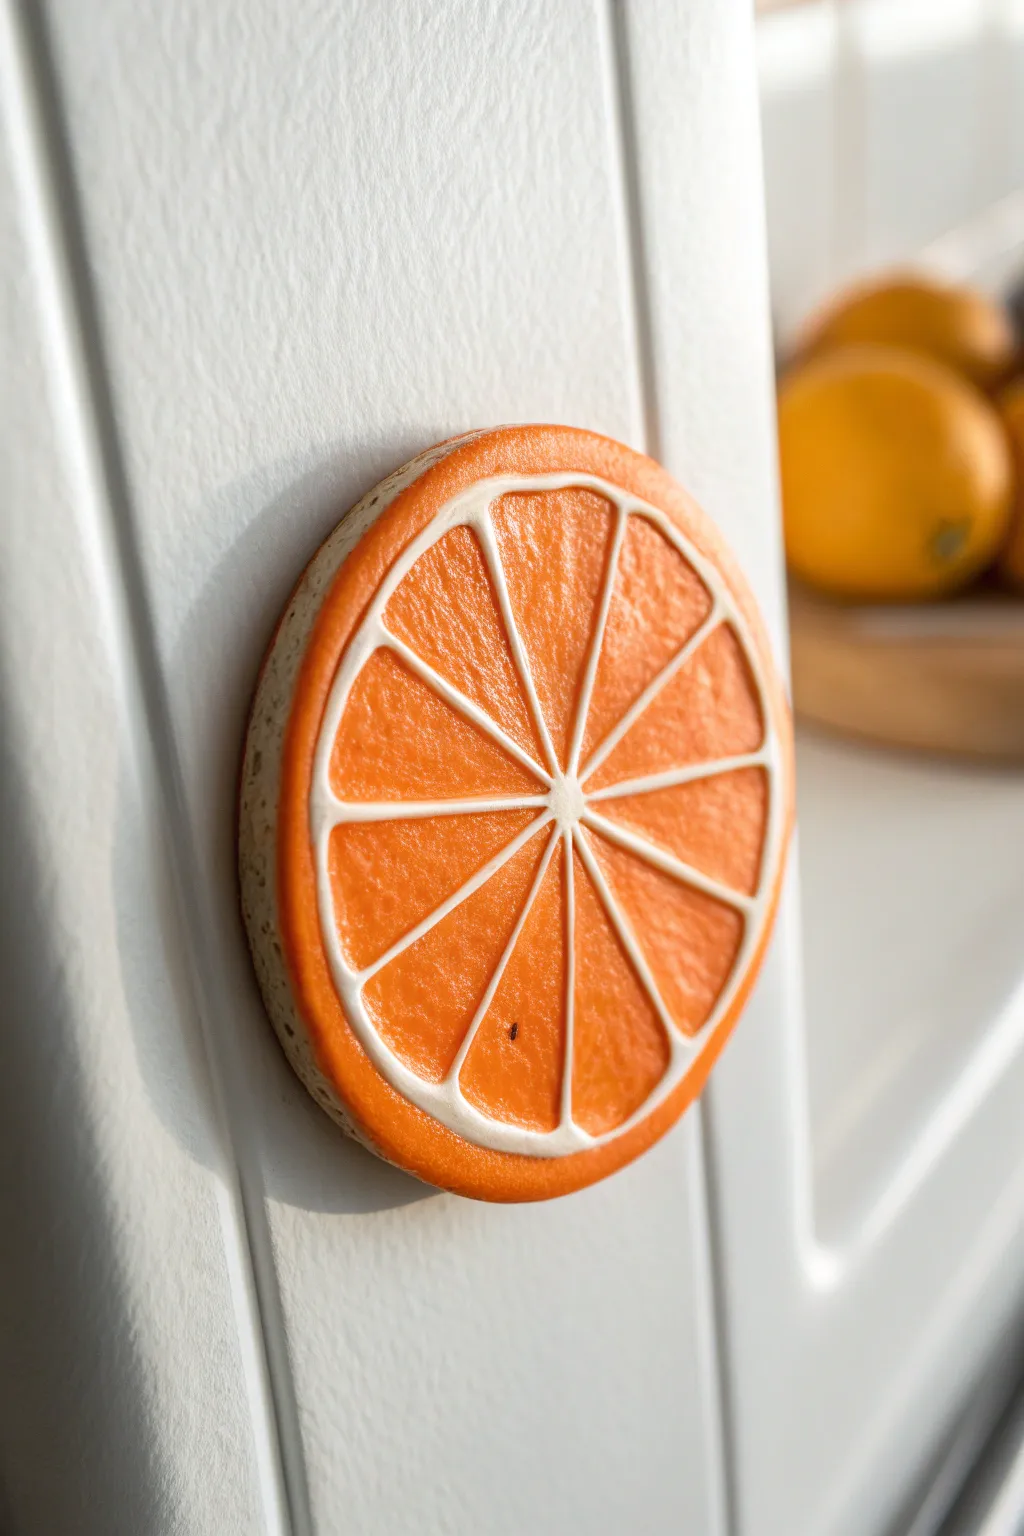
Brighten up your fridge with this juicy-looking citrus slice that brings a pop of freshness to your kitchen decor. The realistic bumpy texture and clean white pith lines give this clay creation a professional finish that looks good enough to squeeze.
How-To Guide
Materials
- Polymer clay (Orange and White)
- Round cookie cutter (approx. 2-3 inches)
- Small rolling pin
- Craft knife or scalpel blade
- Needle tool or toothpick
- Texture sponge or piece of sandpaper
- Strong round magnet
- Super glue or E6000
- Gloss varnish (optional, for a juicy look)
Step 1: Creating the Base
-
Condition the clay:
Start by kneading your orange polymer clay until it is soft and pliable. Do the same with a smaller amount of white clay. -
Roll out the orange:
Roll the orange clay into a flat slab, approximately 1/4 inch thick. This needs to be sturdy enough to hold the magnet later. -
Cut the main circle:
Use your round cookie cutter to punch out a perfect circle from the orange slab. Set aside the excess clay. -
Create the white pith layer:
Roll out your white clay very thinly, much thinner than the orange base. Cut a circle the same size as your orange base. -
Stack and trim:
Place the thin white circle on top of the orange base. Gently press them together. If the white layer overlaps, trim the edges so you see a clean orange rim from the side.
Clean Cuts
Chill your rolled clay in the fridge for 10 minutes before cutting. This firms it up and prevents the clay from dragging or distorting when you slice your wedges.
Step 2: Detailing the Fruit
-
Add the top orange layer:
Roll out another piece of orange clay, slightly thinner than your base. Cut a circle slightly smaller than the white layer so a thin ring of white remains visible at the edge. -
Mark the segments:
Place this smaller orange circle on top. Using the back of your knife blade, gently impress lines to divide the circle into eight equal wedges, like slicing a pizza. Don’t cut all the way through yet. -
Cut the wedges:
Carefully cut along your marked lines to separate the orange wedges. Lift them off one by one. -
Smooth the wedges:
Take each orange wedge and gently tap the cut edges to round them slightly. This makes them look more natural and less sharp. -
Texture the fruit flesh:
Before placing them back, press a texture sponge or coarse sandpaper onto the surface of each orange wedge to create that dimpled citrus texture. I find this step crucial for realism. -
Reassemble the slice:
Place the textured orange wedges back onto the white base, leaving a small gap between each one to simulate the white pith lines separating the segments. -
Secure the segments:
Press the wedges down firmly so they bond with the white layer beneath. You can re-texture slightly if you flattened any areas. -
Texture the rind:
Use a toothbrush or your needle tool to gently tap texture all around the outer orange edge (the rind) of the magnet.
Flavor Variations
Change the colors to make a whole citrus set! Use yellow for lemons, green for limes, or a ruby-pink for grapefruits. Group them together for a vibrant display.
Step 3: Finishing Up
-
Bake the clay:
Bake your piece according to the polymer clay package instructions. Usually, this is around 275°F (135°C) for 15-30 minutes. -
Cool down:
Let the clay cool completely before handling. It will harden as it cools. -
Attach the magnet:
Flip the slice over. Apply a strong dab of super glue or E6000 to the back center and press your round magnet firmly into place. -
Add a glossy finish:
For a ‘freshly cut’ wet look, brush a coat of gloss varnish over just the orange segments, keeping the white pith matte.
Now you have a refreshing piece of art ready to hold up your notes and photos
Fried Egg Toast Magnets
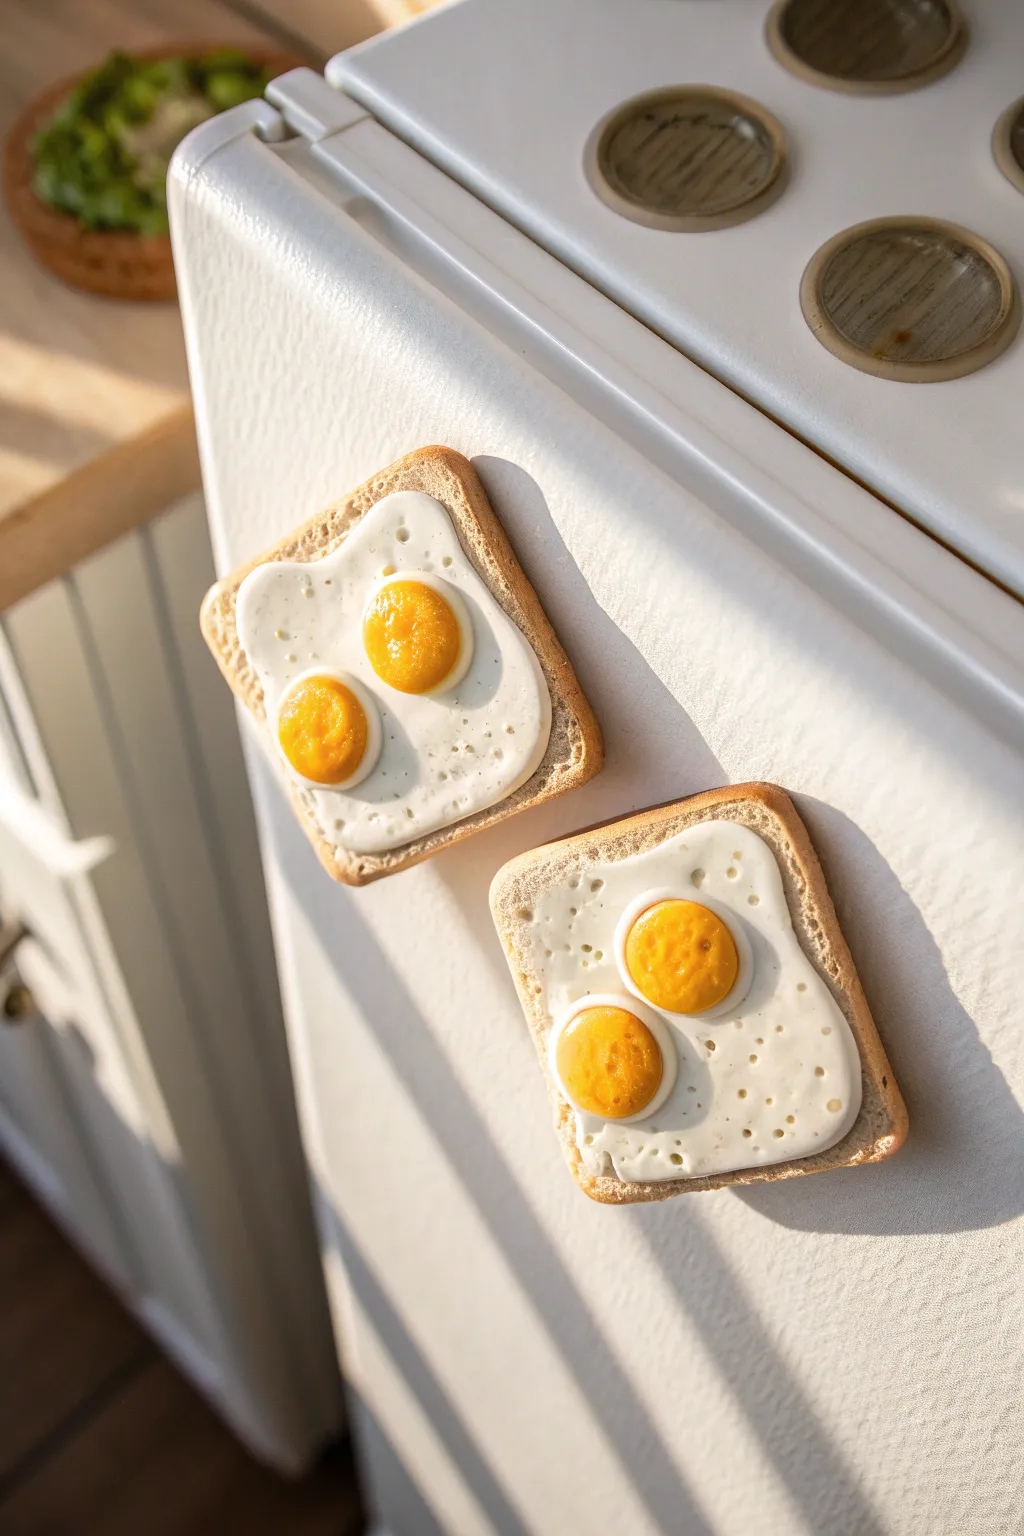
Brighten up your fridge door with these irresistibly realistic fried egg on toast magnets. Made from polymer clay, they capture the perfect texture of toasted bread and the glossy sheen of a double-yolk breakfast.
Step-by-Step Tutorial
Materials
- Polymer clay (tans, white, yellow, orange)
- Liquid polymer clay (translucent)
- Square cookie cutter (approx. 2 inch)
- Texture tools: Toothbrush, needle tool, aluminum foil ball
- Soft pastels (various browns, yellow ochre)
- Paintbrush
- Gloss glaze or UV resin
- Strong round magnets
- Strong craft glue or E6000
- Oven for baking
Step 1: Baking the Bread Base
-
Mix the Dough Color:
Start by mixing white polymer clay with a small amount of tan or ecru to achieve a pale, uncooked dough color. You want a consistent, creamy beige. -
Shape the Slice:
Roll out the clay to a thick slab, about 1/4 inch thick. Use your square cutter to punch out a shape, or cut a square freehand with a blade. -
Create the Crust:
Use your fingers to gently round off the sharp corners. Press the top edge slightly inwards to create the characteristic dip often seen in sandwich bread loaves. -
Texturize the Bread:
Take a ball of crumpled aluminum foil or a clean stiff-bristled toothbrush and press it repeatedly all over the surface of the clay. Don’t forget the sides—this stippling mimics the aerated texture of bread. -
Shade the Crust:
Scrape some brown and yellow ochre soft pastels into a powder. Use a soft brush to dust the darker brown heavily around the outer edges (the crust) and lightly across the face for a toasted look. -
Initial Bake:
I like to bake the bread base now for a short time (about 10 minutes) so it stays firm while I work on the toppings. Let it cool completely before moving on.
Uneven Toast Texture?
If your bread texture looks too uniform, tear a small piece of a cosmetic sponge and use the rough, torn side to dab the clay. It creates larger, deeper pores.
Step 2: Frying the Eggs
-
Form the Egg Whites:
Roll out white polymer clay very thinly. Tear off rough, organic shapes rather than cutting them perfectly; fried eggs naturally have uneven, wavy edges. -
Attach the Whites:
Press the white clay onto your baked toast base. Gently smooth the edges down onto the bread, leaving some areas slightly raised for dimension. -
Add Bubbles:
Using a small ball tool or the end of a paintbrush, create shallow indents and tiny holes in the egg white to simulate the bubbling that happens during frying. -
Mix the Yolks:
Mix yellow clay with a tiny touch of orange to get a rich, sunny yolk color. -
Place the Yolks:
Roll two small balls of the yellow mixture. Press them gently onto the egg white, flattening them slightly so they look nestled in rather than just sitting on top. -
Blend the Yolks:
Use a silicone tool or your finger to smooth the very bottom seam of the yolk where it meets the white, making it look like a cohesive liquid structure. -
Create Yolk Texture:
Use a needle tool or an old toothbrush to lightly tap the surface of the yolks. Real yolks aren’t perfectly smooth plastic spheres; they have minute imperfections.
Step 3: Finishing Touches
-
Pre-Glaze Prep:
If you want extra realism, mix a tiny bit of yellow pastel dust into translucent liquid polymer clay and dab it thinly around the base of the yolks. -
Final Bake:
Bake the entire piece again according to your clay manufacturer’s instructions (usually 275°F for 15-30 minutes). Let it cool completely. -
Glazing:
Apply a coat of gloss glaze or UV resin specifically to the egg yolks and whites. Leave the bread matte to maintain the contrast between the dry toast and the wet egg. -
Attach Magnet:
Flip the toast over. Apply a dab of strong adhesive, like E6000, to the center of the back. -
Secure and Dry:
Press your round magnet firmly into the glue. Allow the glue to cure fully (often 24 hours) before sticking it to your fridge.
Glossy Yolk Tip
For the wettest looking yolks, use UV resin instead of varnish. Cure it under a UV lamp for 60 seconds for an instantly hard, glass-like finish.
Now your kitchen has a permanent breakfast serving that looks good enough to eat


What Really Happens Inside the Kiln
Learn how time and temperature work together inside the kiln to transform clay into durable ceramic.
Macaron Stack Magnets
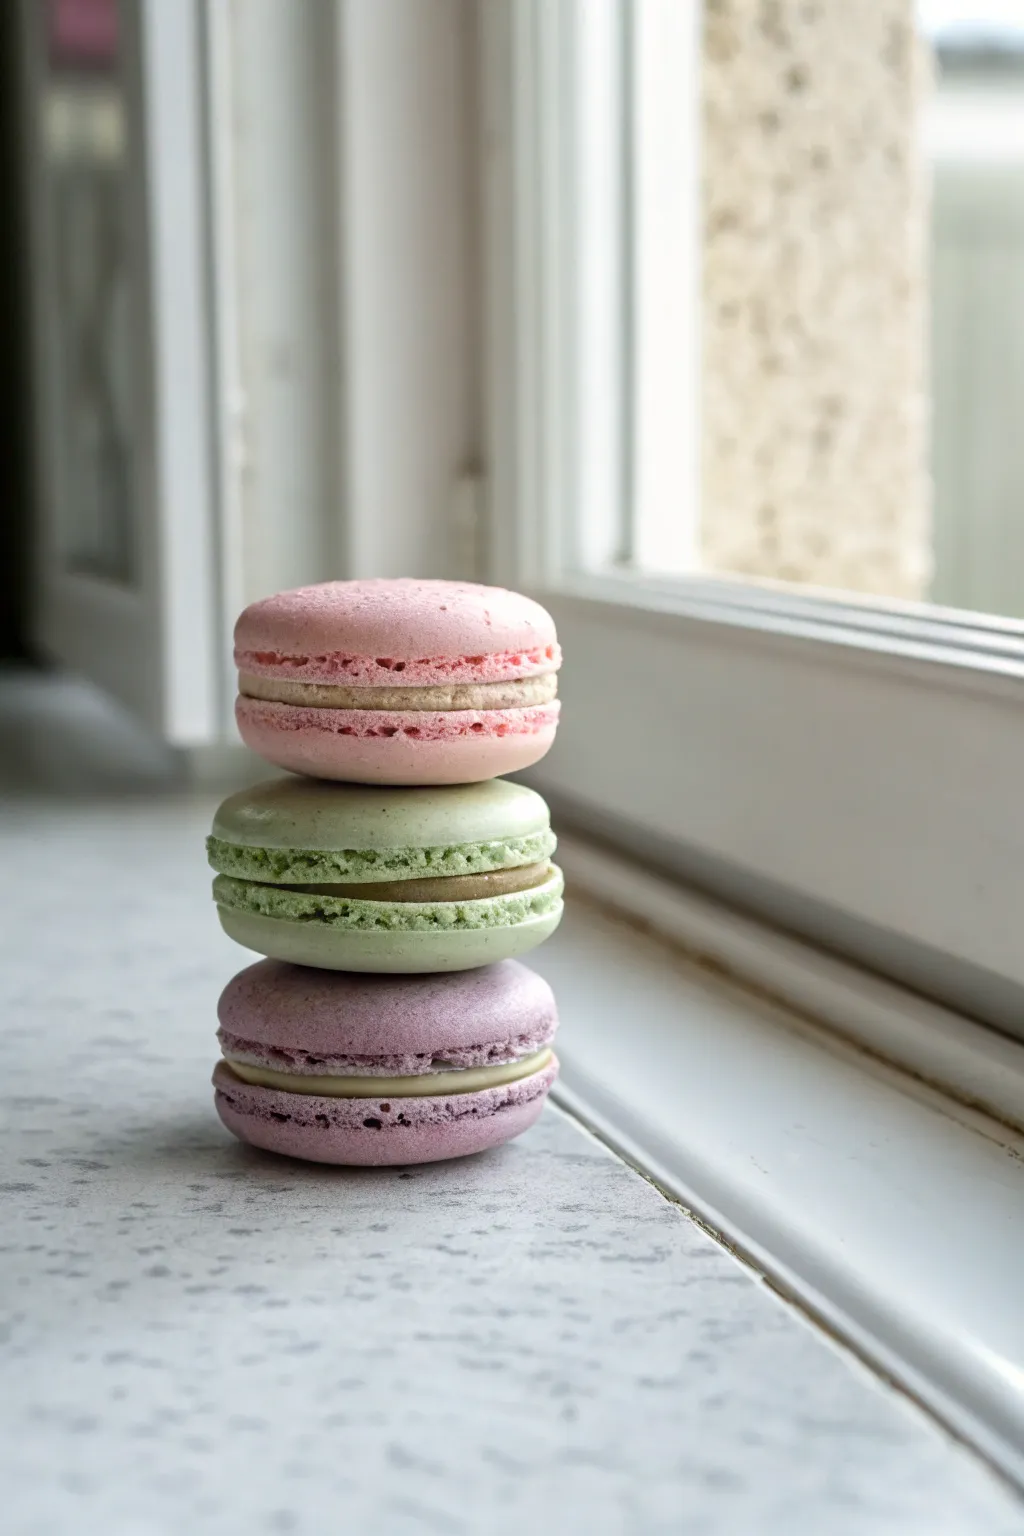
These hyper-realistic macaron magnets look good enough to eat and add a touch of patisserie charm to your fridge. You’ll layer soft polymer clays to mimic the delicate texture of the famous French cookie, complete with creamy filling and those signature crinkled feet.
Detailed Instructions
Materials
- Polymer clay (pale pink, pistachio green, lavender, beige, white)
- Circle layout cutter or small round cookie cutter (approx. 1.5 inch)
- Magnets (strong neodymium recommended)
- Needle tool or toothpick
- Ball stylus tool
- Translucent liquid clay (optional)
- Gloss glaze (optional)
- Parchment paper
- Rolling pin or pasta machine
Step 1: Shaping the Shells
-
Conditioning the clay:
Start by thoroughly conditioning your pink, green, and lavender clay until it is soft and pliable. This prevents cracks later on. -
Creating the domes:
Roll the pink clay into a thick slab, about 1/4 inch thick. Use your circle cutter to punch out two identical circles. -
Smoothing the tops:
Gently press your thumb over the top edges of the circles to round them off, creating that classic smooth, domed macaron shape. -
Repeat for colors:
Repeat this process with the green and lavender clays until you have three pairs of shells.
Flat Feet?
If you smash the texture while handling the shells, stick the clay in the fridge for 10 minutes. The firmer clay holds detail much better while you work.
Step 2: Texturing the Feet
-
Defining the foot line:
Use a needle tool or toothpick to score a line around the bottom edge of each shell, about 1/8 inch from the bottom flat surface. -
Teasing the texture:
Hold the shell gently. Below the score line you just made, use the needle tool to pick and tease the clay outwards and downwards. -
Creating the crumb:
Use a ball stylus or the tip of your toothpick to poke small holes and irregularities into that teased area. Macaron feet should look airy and crumbly, not uniform.
Step 3: Adding the Filling
-
Mixing filling colors:
For the fillings, mix a little white or beige clay with tiny amounts of the shell color to create a lighter, creamy tone for each flavor. -
Cutting the filling:
Roll your filling clay into a slightly thinner sheet than the shells and cut out a circle for each macaron using the same cutter. -
Assembling the sandwich:
Place the filling disk between two matching textured shells. Press them together gently so the filling just barely visible at the edges. -
Texturing the filling:
Run your needle tool lightly along the exposed edge of the filling to roughen it up slightly, making it look like ganache or buttercream.
Flavor Variations
Mix simulated powdered sugar (white chalk pastel shavings) into the unbaked clay surface for a dusted look, or glaze the filling for a jammy finish.
Step 4: Assembly and Baking
-
Pre-stack check:
Before attaching them permanently, stack your pink, green, and lavender macarons to ensure they balance well. -
Adding magnets:
You can embed a magnet into the back of the bottom lavender macaron now by pressing it into the raw clay, or wait to glue it on after baking. -
Joining the stack:
Apply a thin layer of translucent liquid clay between the macarons to bond the stack securely. Press them firmly together. -
Baking:
Bake the stacked sculpture according to your polymer clay manufacturer’s instructions, usually around 275°F (135°C) for 30 minutes. -
Cooling:
Let the stack cool completely in the oven before moving it to prevent thermal shock cracking. -
Final touches:
If you didn’t embed the magnet earlier, glue a strong magnet to the back or bottom now using super glue or strong epoxy.
Stick your delicious-looking creation on the fridge and enjoy your zero-calorie treat every day
Smiley Face Clay Magnets
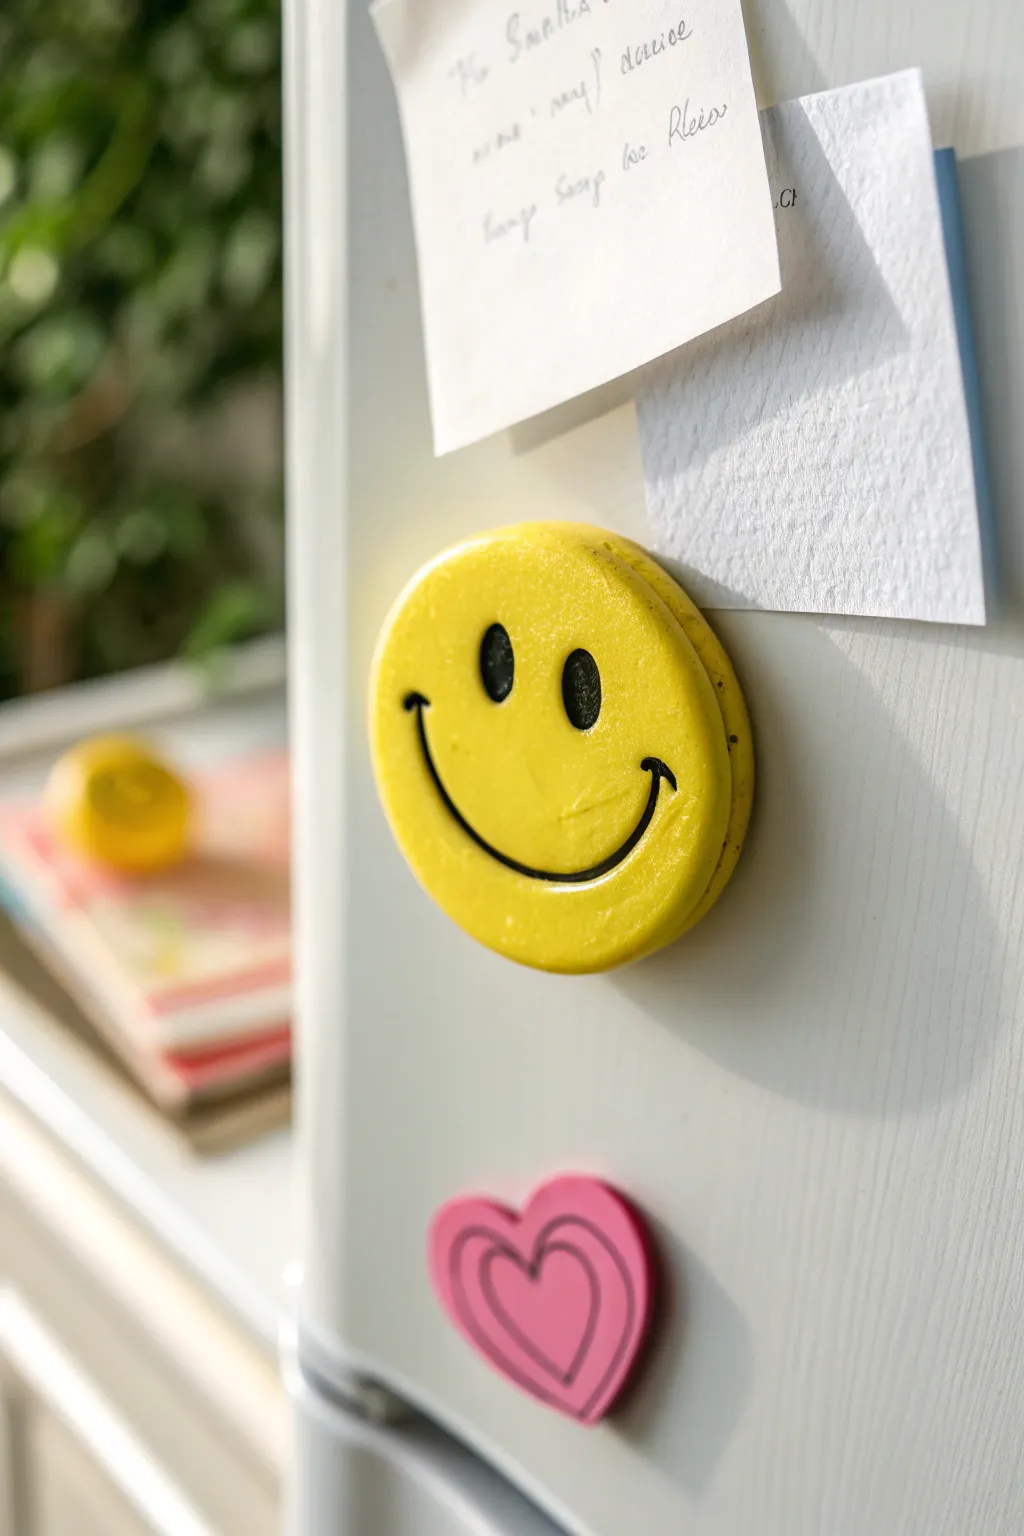
Bring a burst of retro happiness to your fridge with this chunky, oversized smiley face magnet. Its intentionally imperfect texture and bright yellow finish give it a charming, handmade quality that feels friendly and welcoming.
Step-by-Step Guide
Materials
- Air-dry clay or polymer clay (white)
- Circle cookie cutter (approx. 2-3 inches)
- Acrylic paint (bright yellow and black)
- Rolling pin
- Parchment paper or craft mat
- Sculpting tools (ball styluses of varying sizes)
- Fine-grit sandpaper
- Matte or satin varnish
- Strong craft glue (E6000)
- Round ceramic or neodymium magnet
- Paintbrushes (flat shader and fine liner)
Step 1: Sculpting the Base
-
Condition the clay:
Start by kneading a generous amount of white clay until it is soft, pliable, and free of cracks. -
Roll it out:
Roll the clay onto parchment paper to a thickness of about 1/4 inch or slightly thicker. You want this magnet to have a nice, chunky profile rather than being flimsy. -
Cut the shape:
Use your circle cookie cutter to punch out a clean round shape. If the edges are a bit jagged, gently smooth them with your finger and a dab of water.
Clean Lines Pro Tip
Messy smile painting? Instead of a brush, use a black ultra-fine tip permanent marker or paint pen to color inside the indented mouth and eye grooves.
Step 2: Adding the Features
-
Mark the eyes:
Take a larger ball stylus tool or the rounded end of a paintbrush handle. Press firmly into the upper half of the circle to create two deep, oval-shaped indentations for the eyes. -
Define the eye shape:
Wiggle the tool slightly vertically to elongate the eye sockets so they look like tall ovals rather than perfect circles. -
Carve the smile:
Use a smaller sculpting tool or a dull knife to lightly sketch the curve of the smile first to ensure symmetry. -
Deepen the smile line:
Once happy with the placement, press the tool deeper into the clay to create a clean, recessed channel for the mouth. Add small tick marks at the ends of the smile for extra character. -
Dry the clay:
Let the clay dry completely according to package instructions. For air-dry clay of this thickness, I prefer to let it sit for at least 24 to 48 hours, flipping it occasionally.
Step 3: Painting and Finishing
-
Sand imperfections:
Once fully cured, use fine-grit sandpaper to smooth out any rough edges on the rim or surface bumps. -
Base coat:
Paint the entire front and sides with bright yellow acrylic paint. You will likely need 2-3 coats for full opacity, allowing paint to dry between layers. -
Fill the eyes:
Using a fine liner brush and black acrylic paint, carefully fill in the indented eye sockets. -
Paint the smile:
Switch to black paint again and trace the recessed smile line. If you make a mistake, wait for it to dry and touch it up with yellow. -
Seal the piece:
Apply a coat of satin or matte varnish to protect the paint and give it a finished sheen. -
Attach the magnet:
Flip the smiley face over. Use a strong adhesive like E6000 to glue the magnet to the center of the back. -
Final cure:
Allow the glue to cure fully—usually overnight—before sticking your new happy face to the refrigerator.
Level Up: Double Stack
Cut a second, slightly larger circle from a contrasting clay color. Glue your finished smiley face onto it before adding the magnet for a framed, 3D pop art look.
Now your fridge has a cheerful guardian ready to hold up your most important notes and photos

TRACK YOUR CERAMIC JOURNEY
Capture glaze tests, firing details, and creative progress—all in one simple printable. Make your projects easier to repeat and improve.
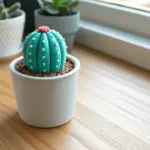
Tiny Mushroom Magnets
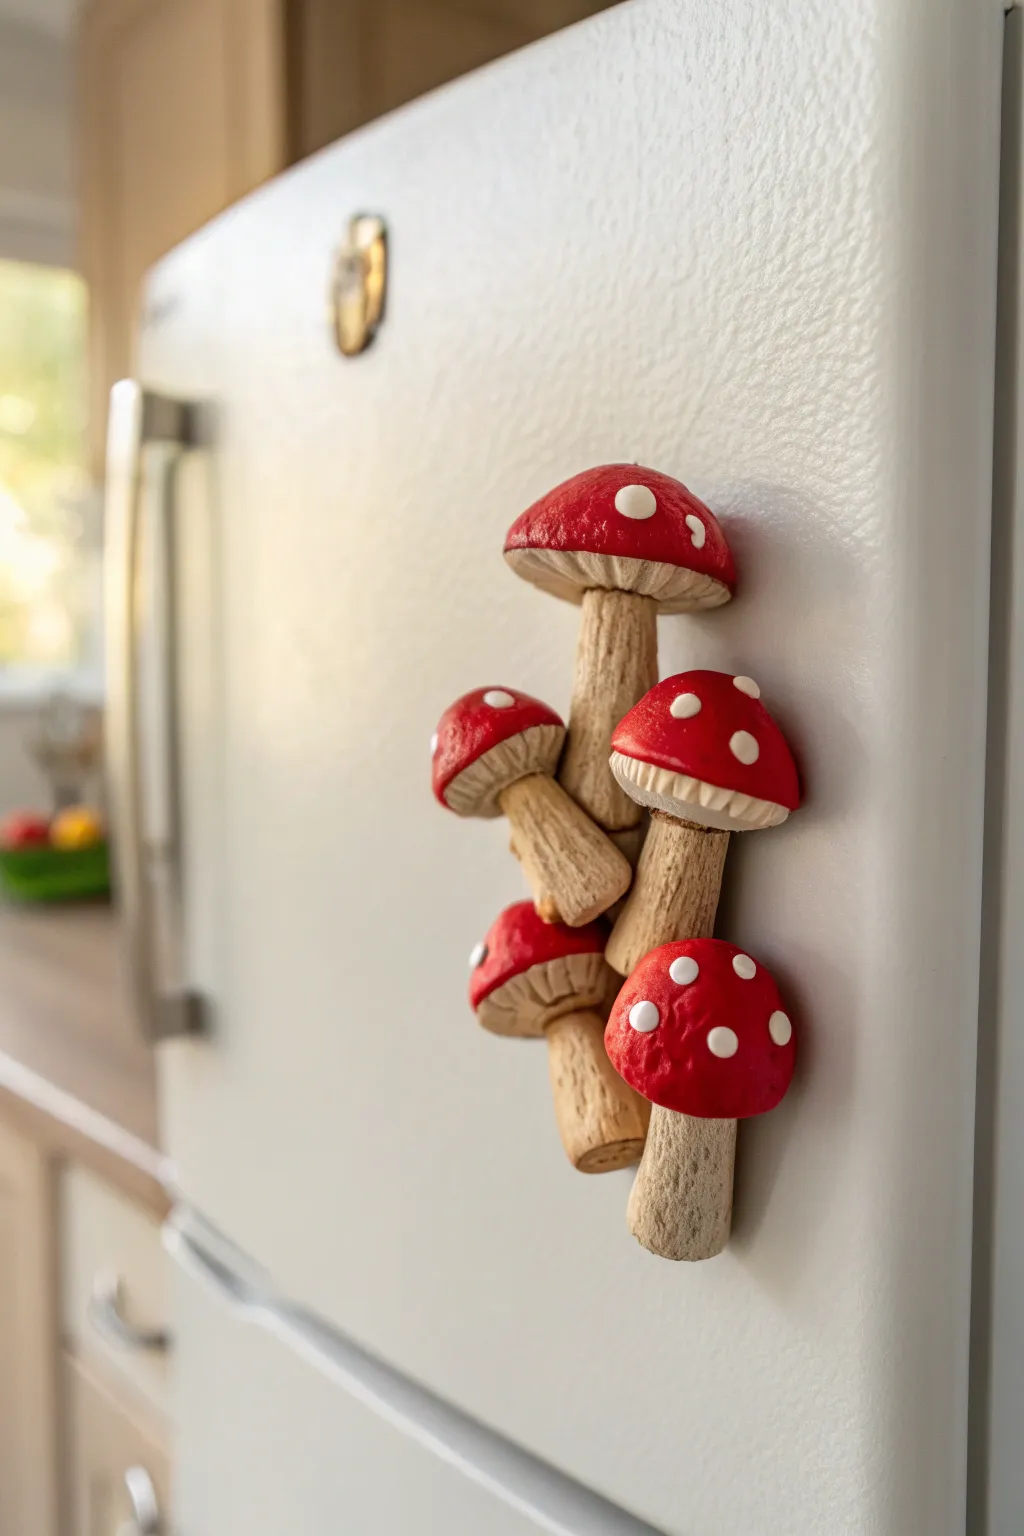
Bring a touch of the forest into your kitchen with these charming textured mushroom magnets. Modeled after classic toadstools, this cluster features detailed stems and bright red caps speckled with iconic white dots.
Detailed Instructions
Materials
- Polymer clay (Red, White, and Beige/Tan)
- Strong craft magnets (neodymium recommended)
- Texture tool or needle tool
- Liquid polymer clay or bake-and-bond
- Small ball tool
- Toothbrush or crumpled foil (for texturing)
- Craft knife
- Gloss glaze (optional)
Step 1: Sculpting the Stems
-
Prepare the clay:
Start by conditioning your beige or tan polymer clay until it is soft and pliable. If the color is too dark, mix in a little white clay to achieve a natural wood-like tone. -
Shape the stalks:
Roll five cylinders of varying lengths and thicknesses. You want a variety of sizes to make the cluster look organic, so keep some short and stout while making others tall and slender. -
Add texture:
Using a needle tool or a stiff-bristled toothbrush, scratch vertical lines up and down the length of each stem. This mimics the fibrous texture of a real mushroom stalk. -
Curve the bases:
Gently gently press the bottom of each stem to flatten it slightly, and subtly curve the stalks so they will nestle together nicely when grouped.
Natural Texture Hack
Gently roll the clay stems over a piece of coarse sandpaper before attaching the caps. This creates an instant, realistic pitted texture without needing to draw every line individually.
Step 2: Creating the Caps
-
Form the cap base:
Roll five balls of beige clay corresponding to your stem sizes. Flatten them into thick discs to form the underside of the mushroom caps. -
Detail the gills:
Use a needle tool or craft knife to score fine lines radiating from the center of each disc to the outer edge, creating the gill texture. -
Add the red tops:
Condition your red clay and roll five balls. Flatten them into domes and gently press them onto the beige gill discs. Smooth the edges so the red cap slightly curls over the beige underside. -
Attach caps to stems:
Place a tiny drop of liquid clay or bake-and-bond on top of each stem. Press the caps firmly onto their corresponding stalks, tilting them at jaunty angles for personality.
Drooping Caps?
If the heavy red caps are causing the stems to slump before baking, prop the mushrooms up using crumpled aluminum foil or cornstarch bedding to support their weight in the oven.
Step 3: Assembly and Detailing
-
Group the mushrooms:
Arrange the five loose mushrooms into a tight, aesthetically pleasing cluster. I like to dry-fit them first to see which arrangement looks best before committing. -
Bond the cluster:
Where the stems or caps touch each other, apply a small amount of liquid, bakeable clay to fuse them together into a single solid unit. -
Add the iconic dots:
Roll tiny specks of white clay into minuscule balls. Press these randomly onto the red caps, flattening them slightly to create the classic toadstool look. -
Embed the magnet:
Flip the entire cluster over carefully. Press your magnet firmly into the back of the central or largest stems so it sits flush with the clay surface. -
Secure the magnet:
Smear a thin layer of liquid clay over the back of the magnet or gently blend the surrounding clay over the magnet’s edges to lock it in place. -
Texture check:
Do a final pass over your piece. If you smoothed out any stem texture during handling, redefine those vertical lines now with your needle tool.
Step 4: Baking and Finishing
-
Bake carefully:
Place the cluster on a baking sheet lined with parchment paper. Bake according to your clay manufacturer’s instructions (usually 275°F/135°C for 15-30 minutes). -
Cool down:
Let the piece cool completely in the oven or on the counter before handling. Polymer clay is still slightly soft when hot and hardens as it cools. -
Strengthen bond (optional):
If your magnet feels loose after baking, pop it out and superglue it back into the indentation for a permanent hold. -
Varnish:
For a dewy look, brush a coat of gloss glaze over just the red parts of the caps, leaving the stems matte for contrast.
Now your charming fungi are ready to hold up your grocery lists and photos with woodland style
Daisy Bloom Magnets
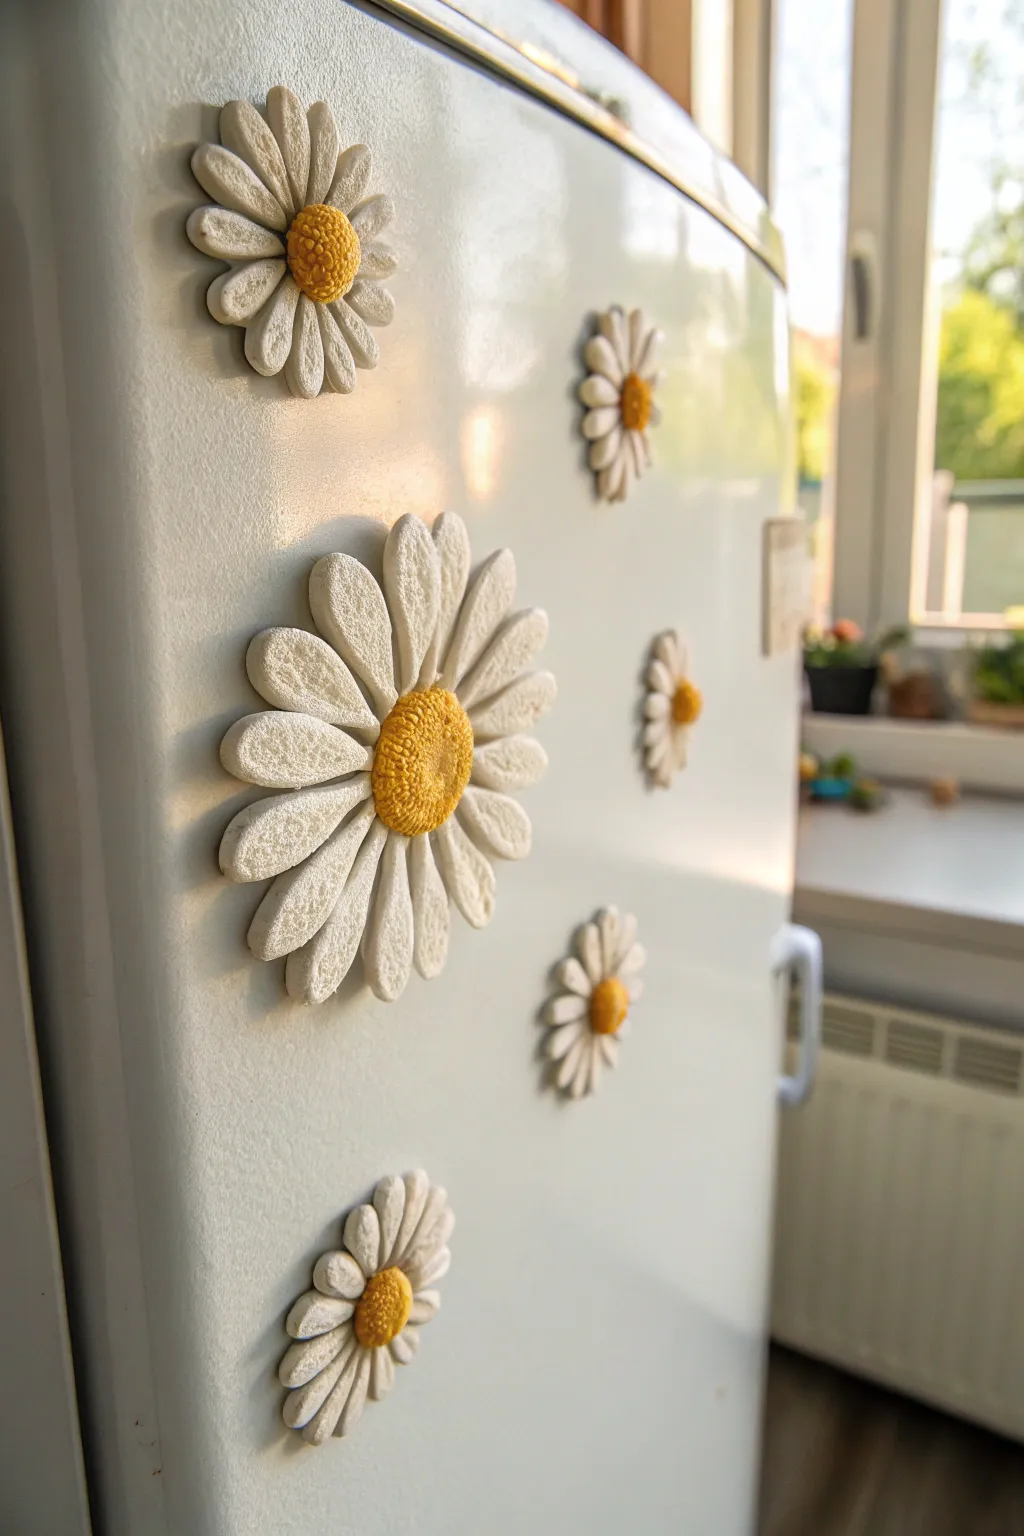
Brighten up your kitchen with these charming, textured daisy magnets that look as if they bloomed right on your fridge. Their matte finish and raised petals give them a lovely, high-end ceramic feel without the need for a kiln.
Step-by-Step
Materials
- White polymer clay or air-dry modeling clay
- Yellow polymer clay (or yellow acrylic paint)
- Round disc magnets (strong neodymium recommended)
- Strong adhesive (like E6000 or superglue gel)
- Texturing tool (old toothbrush, sponge, or sandpaper)
- Small sculpting tools or a toothpick
- Rolling pin
- Parchment paper or silicone mat
- Circle cutter (optional)
Step 1: Forming the Petals
-
Prepare your clay:
Start by conditioning your white clay until it is soft and pliable. If using polymer clay, warm it in your hands; for air-dry clay, ensure it’s moist but not sticky. -
Create petal teardrops:
Roll small balls of white clay, roughly the size of a pea. For a medium-sized daisy, you will need about 12-15 of these balls. -
Shape the petals:
Take one ball and roll it into a slight teardrop or cone shape. Flatten it gently with your thumb on your work surface to create the basic petal form. -
Add surface texture:
The charm of these magnets is their stone-like texture. Before assembling, gently press a clean sponge, sandpaper, or even an old toothbrush onto the surface of each petal to get that matte, pitted look. -
Refine the edges:
Using a sculpting tool or just your fingertips, smooth the outer edges of the petal so they are rounded and soft, not sharp. -
Repeat the process:
Continue flattening and texturing all your white clay balls until you have enough petals for your desired flower size.
Step 2: Assembling the Daisy
-
Create a base:
Flatten a small leftover piece of clay into a thin disc about the size of a dime. This will serve as the anchor for your petals. -
Arrange the first layer:
Press the pointed ends of your teardrop petals onto the base disc, arranging them in a circle. They should touch or slightly overlap near the center. -
Adjust the flow:
I find it helpful to gently lift the tips of a few petals or curve them slightly to one side. This makes the flower look organic and alive rather than rigid. -
Add the center:
Roll a ball of yellow clay (or white clay if you plan to paint later) for the flower center. Flatten it into a thick button shape. -
Texture the pollen:
Place the yellow button in the center of the petals. Use a needle tool, toothpick, or a stippling brush to poke many tiny holes into the yellow clay to mimic the texture of pollen. -
Secure the bond:
Gently press the yellow center down to ensure it bonds securely to the petals beneath it.
Natural Texture Hack
Gently press a piece of real worn denim onto the raw clay petals. It leaves a subtle, fabric-like weave that mimics the veining found in real flower petals.
Step 3: Finishing Touches
-
Harden the clay:
If using polymer clay, bake according to the manufacturer’s instructions (usually around 275°F/135°C for 15-30 minutes). If using air-dry clay, allow it to dry completely for 24-48 hours. -
Cool down:
Let the flowers cool completely before handling. If you used white clay for the center, this is the time to paint that central button with yellow acrylic paint. -
Seal the surface (optional):
For durability, you can apply a matte varnish. Avoid glossy finishes if you want to maintain that natural, stone-like aesthetic shown in the photo. -
Prepare the back:
Flip the flower over. If the back is uneven, you can lightly sand it flat to ensure a good connection with the magnet. -
Attach the magnet:
Apply a dab of strong adhesive to the back of the flower and press your magnet firmly into place. -
Final dry:
Let the glue cure fully according to the package directions before placing your new garden on the fridge.
Make It a Bouquet
Vary your flower sizes! Make some daisies with two layers of smaller petals, and bend some petals backward to mimic a flower that is fully open and blooming.
Enjoy arranging your everlasting bouquet every time you reach for a snack
Rainbow Arch Magnets
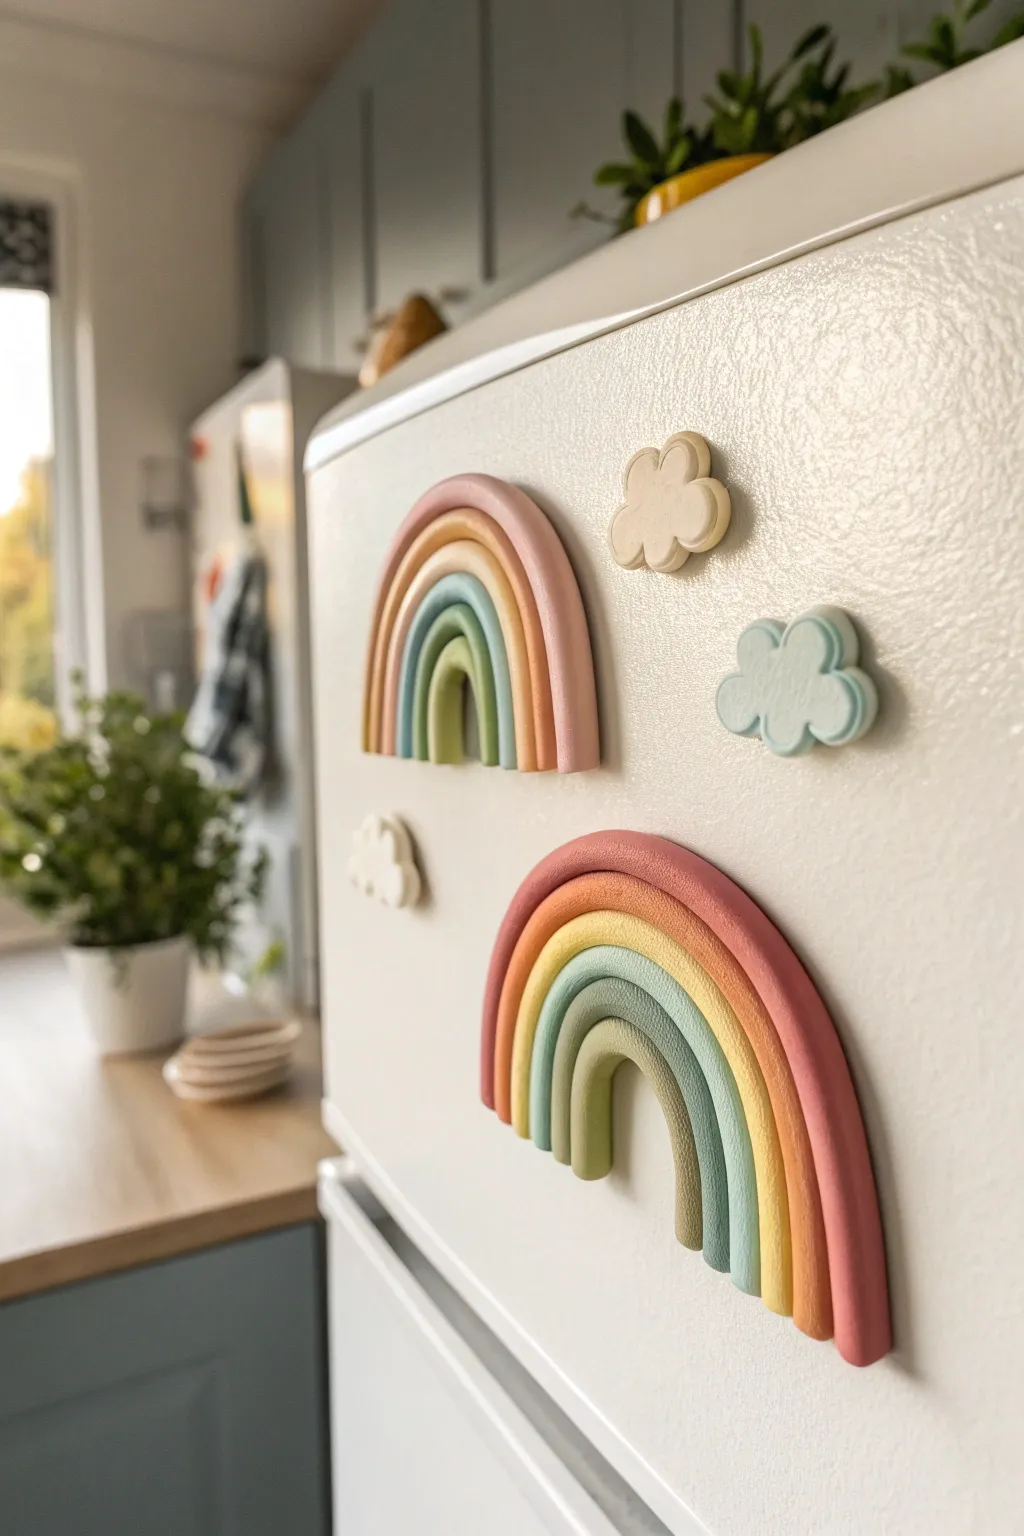
Bring a touch of whimsical charm to your kitchen with these easy-to-make rainbow and cloud magnets. Using muted, earthy pastels and simple hand-rolling techniques, you’ll create a textured, matte finish that looks lovely against any appliance surface.
Step-by-Step Tutorial
Materials
- Polymer clay in various colors (muted pink, terracotta, mustard yellow, sage green, dusty blue, cream)
- White or translucent liquid clay (Bake & Bond)
- Acrylic rolling pin
- Tissue blade or sharp craft knife
- Parchment paper or ceramic tile (for baking)
- Round neodymium magnets (strong)
- Super glue (cyanoacrylate)
- Fine-grit sandpaper (optional)
- Oven
Step 1: Prepping the Clay
-
Choose your palette:
Select five colors for your main rainbow. The image features a gradient of muted pink, terracotta, mustard, sage green, and light olive. If your clay colors are too bright, mix in a tiny bit of white or beige to soften them. -
Condition the clay:
Take a chunk of your first color (the innermost arch color, here a light olive green) and knead it in your hands until it becomes soft and pliable. Warm clay prevents cracking later. -
Roll the first snake:
Place the conditioned clay on your work surface and roll it into a long, even snake using the palm of your hand. Aim for a thickness of about 1/4 inch (6mm). -
Repeat for all colors:
Repeat the conditioning and rolling process for the remaining four colors. Try to keep the thickness consistent across all strands, though slight variations add to the handmade charm.
Seamless Snake Rolling
Use a clear acrylic block or flat dedicated tool to roll your clay logs instead of your fingers. This prevents lumpy, uneven snakes.
Step 2: Forming the Rainbow
-
Start the arch:
Take your innermost color snake and bend it into a tight ‘U’ shape on your parchment paper or tile. This forms the center of your rainbow. -
Apply bonding agent:
Dab a very thin line of liquid clay or Bake & Bond along the outer edge of this first arch. This acts as a glue to hold the strands together during baking. -
Add the second layer:
Take the next color (sage green) and gently press it against the outer edge of the first arch. Smooth it carefully so they adhere without smashing the round profile of the snakes. -
Build the remaining layers:
Continue this process—applying a touch of liquid clay and wrapping the next color—until all five strands are attached. Your outer layer should be the muted pink or terracotta color. -
Trim the bottom:
Once your arch creates the shape you want, take your rigid tissue blade. Press straight down across the bottom of the rainbow legs to create a clean, flat cut. -
Texture the surface (optional):
To mimic the slightly grainy, matte look in the photo, you can gently pat the surface with a piece of denim fabric or a toothbrush before baking. I find this removes fingerprints beautifully.
Step 3: Creating the clouds
-
Roll a sheet:
Condition some cream or pastel blue clay. Roll it out into a flat sheet about 1/4 inch thick using your acrylic roller. -
Cut cloud shapes:
Using small cloud-shaped cookie cutters is easiest, but you can also freehand cut the bubbly shapes using your craft knife. Make a few different sizes. -
Smooth the edges:
Use your fingertip to gently round off the sharp cut edges of the clouds so they look puffy and soft rather than angular.
Removing Fingerprints
Before baking, lightly brush your clay with a tiny amount of baby oil or cornstarch to smooth out any accidental fingerprint marks.
Step 4: Baking and Assembly
-
Bake the clay:
Place your tile or parchment paper with the rainbows and clouds into the oven. Follow your specific clay manufacturer’s instructions for temperature and time (usually 275°F/130°C for 15-30 minutes). -
Cool completely:
Let the pieces cool down fully inside the oven with the door slightly ajar to prevent them from becoming brittle due to thermal shock. -
Sand the back (optional):
If the back of your rainbow isn’t perfectly flat, briefly rub it on fine-grit sandpaper. A flat surface ensures a better bond with the magnet. -
Attach the magnets:
Apply a drop of super glue to the back of your clay pieces. Press a strong neodymium magnet into the glue. For the large rainbow, use two magnets (one on each leg) to prevent it from sliding down. -
Final cure:
Let the glue dry undisturbed for at least an hour before placing your new art on the fridge.
Now you can arrange your little sky scene on the fridge to brighten up your kitchen space
Cow Print Blob Magnets
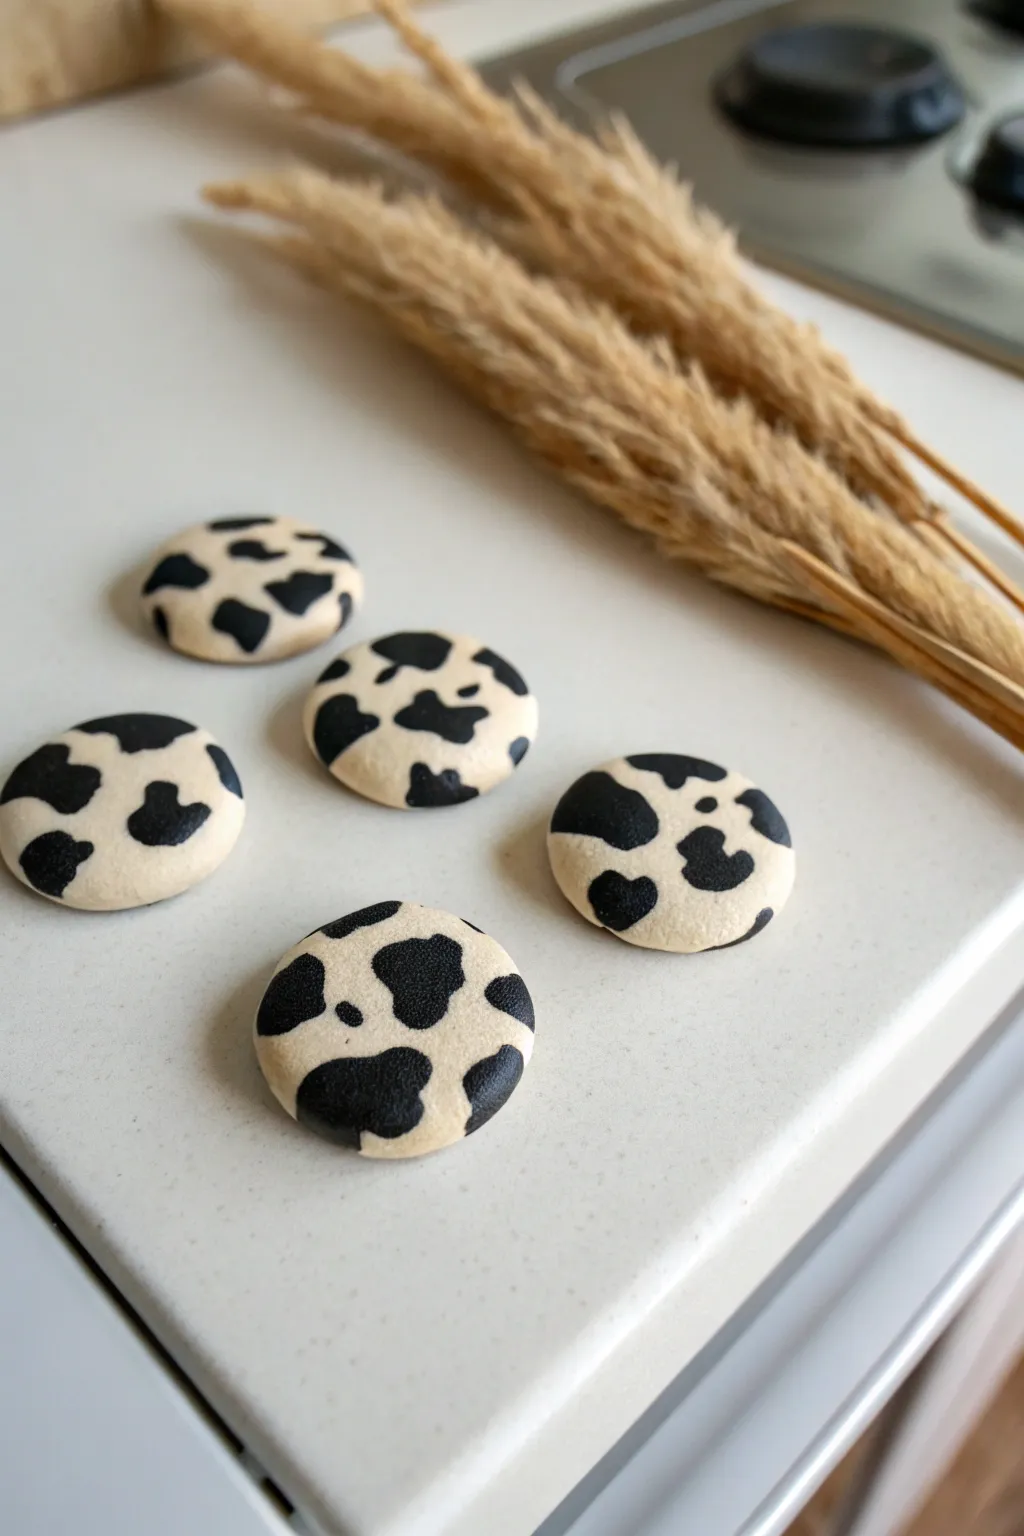
Embrace the blob aesthetic with these simple yet striking cow print magnets. These chunky, irregular circles feature a classic black-on-cream splotchy pattern that brings a playful farmhouse vibe to your fridge.
Step-by-Step Guide
Materials
- Polymer clay (cream/white and black)
- Small round magnets (choose strong neodymium for best hold)
- Super glue or E6000
- Rolling pin or acrylic roller
- Small circle cutter (approx. 1.5 inch) or a small glass
- Parchment paper or silicone mat
- Clay sculpting tool or toothpick
- Oven and baking tray
Step 1: Creating the Base
-
Condition the clay:
Start by taking a block of your cream or off-white polymer clay. Knead it thoroughly in your hands until it becomes soft, pliable, and warm to the touch. -
Roll the sheet:
Place the conditioned clay on your parchment paper or silicone mat. Using the acrylic roller, roll it out into a flat sheet, aiming for a thickness of about 1/4 inch (6mm) so the magnets feel substantial. -
Cut the shapes:
Press your circle cutter firmly into the clay sheet to create your base rounds. If you don’t have a cutter, you can trace a small glass and cut carefully with a clay blade. -
Add irregularity:
Remove the excess clay from around your circles. I find that gently pressing the edges with my thumb gives them a softer, more organic ‘blob’ look rather than a perfect factory-cut circle.
Smudgy Spots?
If black clay smears onto the white while rolling, wipe the surface gently with a Q-tip dipped in rubbing alcohol or acetone before baking to clean it up.
Step 2: Adding the Cow Print
-
Prep the black clay:
Condition a small amount of black polymer clay until soft. Pinch off tiny, random amounts—some smaller than a pea, some slightly larger. -
Form the spots:
Roll these tiny black pieces into irregular balls and ovals. Keep them varied in size to mimic a natural animal hide pattern. -
Placement strategy:
Place the black blobs onto your cream circles. Arrange them randomly, ensuring some sit right on the edge of the circle (we wrap these later for a continuous look). -
Flatten the pattern:
Once you are happy with the arrangement, take your roller and very gently roll over the tops of the magnets again. The goal is to press the black spots *into* the cream clay so the surface becomes flush and smooth. -
Check the edges:
Inspect the sides of your magnets. If any black spots were placed near the perimeter, gently smooth them down over the curve of the edge so the pattern doesn’t abruptly stop.
Step 3: Baking and Assembly
-
Final smooth:
Run your finger lightly over the surface to remove any fingerprints. If the roller distorted the circle shape too much, gently nudge the edges back into a rounder form. -
Bake carefully:
Transfer the parchment paper with your clay rounds onto a baking sheet. Bake according to your specific clay brand’s instructions (usually around 275°F or 135°C for 15-30 minutes). -
Cool down:
Remove the tray from the oven and let the clay pieces cool completely. They must be at room temperature before you attempt to glue anything to them. -
Prepare the magnets:
Flip your clay pieces over so the undecorated side is facing up. Take your small round magnets and ensure they are clean and free of dust. -
Apply adhesive:
Squeeze a small dot of strong adhesive (like E6000 or super glue gel) onto the center of the clay back. -
Attach and set:
Press the magnet firmly into the glue. Hold it for 10-15 seconds to ensure initial contact, then leave them undisturbed for the full cure time listed on your glue bottle.
Make it Matte
For a velvety texture, lightly sand the baked surface with very fine grit sandpaper (1000+) under water. This removes shine and enhances the cow-hide feel.
Pop these onto your fridge and enjoy your herd of adorable custom magnets
Letter Monogram Magnets
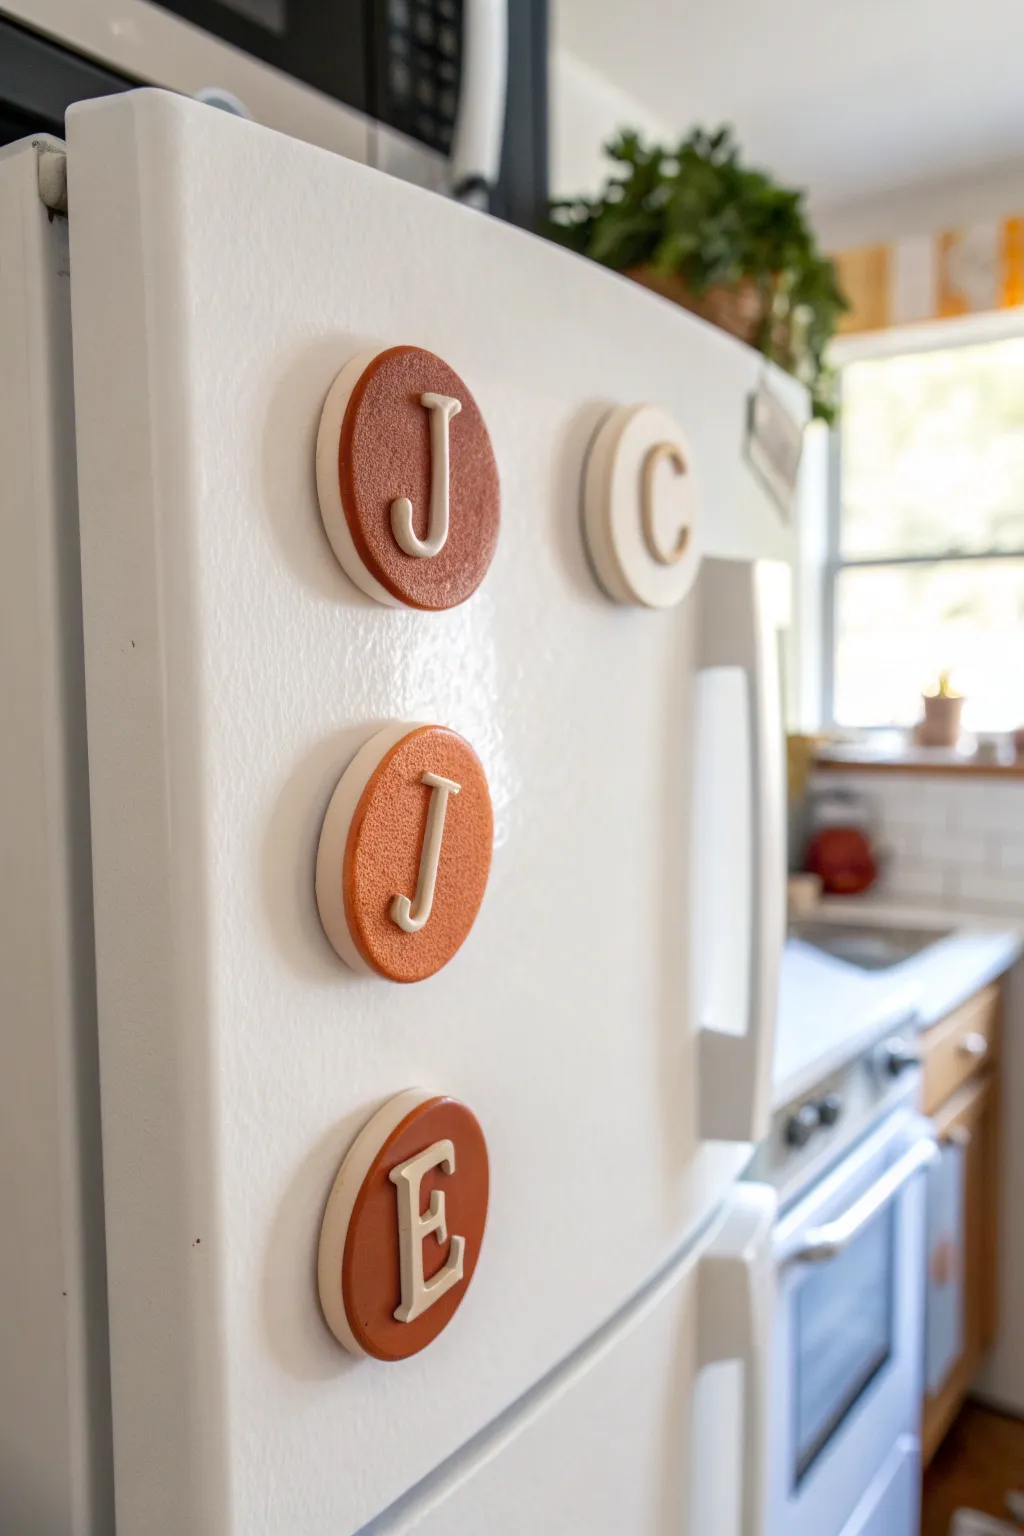
Personalize your kitchen space with these sophisticated monogram magnets that look like high-end ceramcis. Featuring a layered design with textured colored clay and crisp white initials, they add a perfect touch of custom charm to any refrigerator.
How-To Guide
Materials
- White polymer clay
- Terracotta or rust-colored polymer clay
- Cream or beige polymer clay (optional, for variety)
- Round cookie cutters (two sizes: approximately 2-inch and 1.75-inch)
- Small alphabet letter cutters or silicone letter mold
- Rolling pin or pasta machine
- Parchment paper or baking mat
- Texture sponge or sandpaper
- Super glue or E6000 adhesive
- Strong round craft magnets
- Baking sheet
- Oven
Step 1: Prepping the Clay Base
-
Condition the white clay:
Start by warming the white polymer clay in your hands, kneading it until it is soft, pliable, and free of any cracks. -
Roll out the base layer:
Roll the white clay out on parchment paper to a significant thickness, roughly 1/4 inch thick. You want a chunky, substantial look for the bottom layer. -
Cut the base circles:
Using the larger round cookie cutter, press firmly into the white clay to cut out your base circles. Gently release them and smooth the edges with your fingertip to remove any sharp ridges. -
Pre-bake the bases (optional):
I prefer to bake these base circles for about 10-15 minutes at the clay manufacturer’s recommended temperature (usually 275°F) just to set them so they don’t deform during assembly, though you can also leave them raw.
Uneven Texture?
If the texture makes the letter sit unevenly, smooth just the tiny center spot of the colored clay with your finger before placing the letter down.
Step 2: Creating the Textured Color Layer
-
Condition the colored clay:
Take your terracotta or rust-colored clay and condition it thoroughly until smooth. -
Roll and texture:
Roll this colored clay out slightly thinner than the base, about 1/8 inch thick. Before cutting, gently press a coarse sponge or a sheet of sandpaper onto the surface to stamp it with a stone-like texture. -
Cut the colored circles:
Use the smaller round cutter to create the colored discs. The goal is for this circle to sit inside the white base with a nice white border showing around the edge. -
Attach layers:
If your base is raw, press the colored circle directly onto the center of the white circle. If you pre-baked the base, use a tiny dab of liquid clay or bake-and-bond to secure the raw colored circle to the baked white base.
Step 3: Adding the Monogram
-
create the letters:
Roll out a thin sheet of white clay (or use the beige for contrast like the ‘C’ magnet). Use your small alphabet cutters to punch out the initials you need. -
Refine the letters:
Carefully poke the letters out of the cutters. Use a craft knife or needle tool to clean up any ragged edges so the font looks crisp. -
Place the letters:
Center the letter on top of the textured colored circle. Press it down very gently so it adheres but doesn’t squash or lose its shape.
Level Up: Faux Stone
Mix black pepper or dried tea leaves into the white base clay before rolling. This creates a realistic speckled ceramic or granite effect.
Step 4: Baking and Finishing
-
Final Bake:
Place your assembled clay stacks on a parchment-lined baking sheet. Bake according to the package directions (typically 275°F for 15-30 minutes per 1/4 inch of thickness). -
Cool down:
Remove from the oven and allow the pieces to cool completely. The clay hardens as it cools. -
Check adhesion:
Once cool, check that the layers are secure. If any part popped off during baking, a drop of super glue will fix it instantly. -
Attach the magnet:
Flip the finished clay piece over. Apply a generous dab of strong adhesive (E6000 is great for longevity) to the back of a round magnet. -
Secure and dry:
Press the magnet firmly onto the center of the white back. Let the glue cure fully (usually 24 hours) before sticking them to your fridge.
Enjoy arranging your new custom monograms to spell out family initials or short words on your fridge
Tiny Quote Tile Magnets
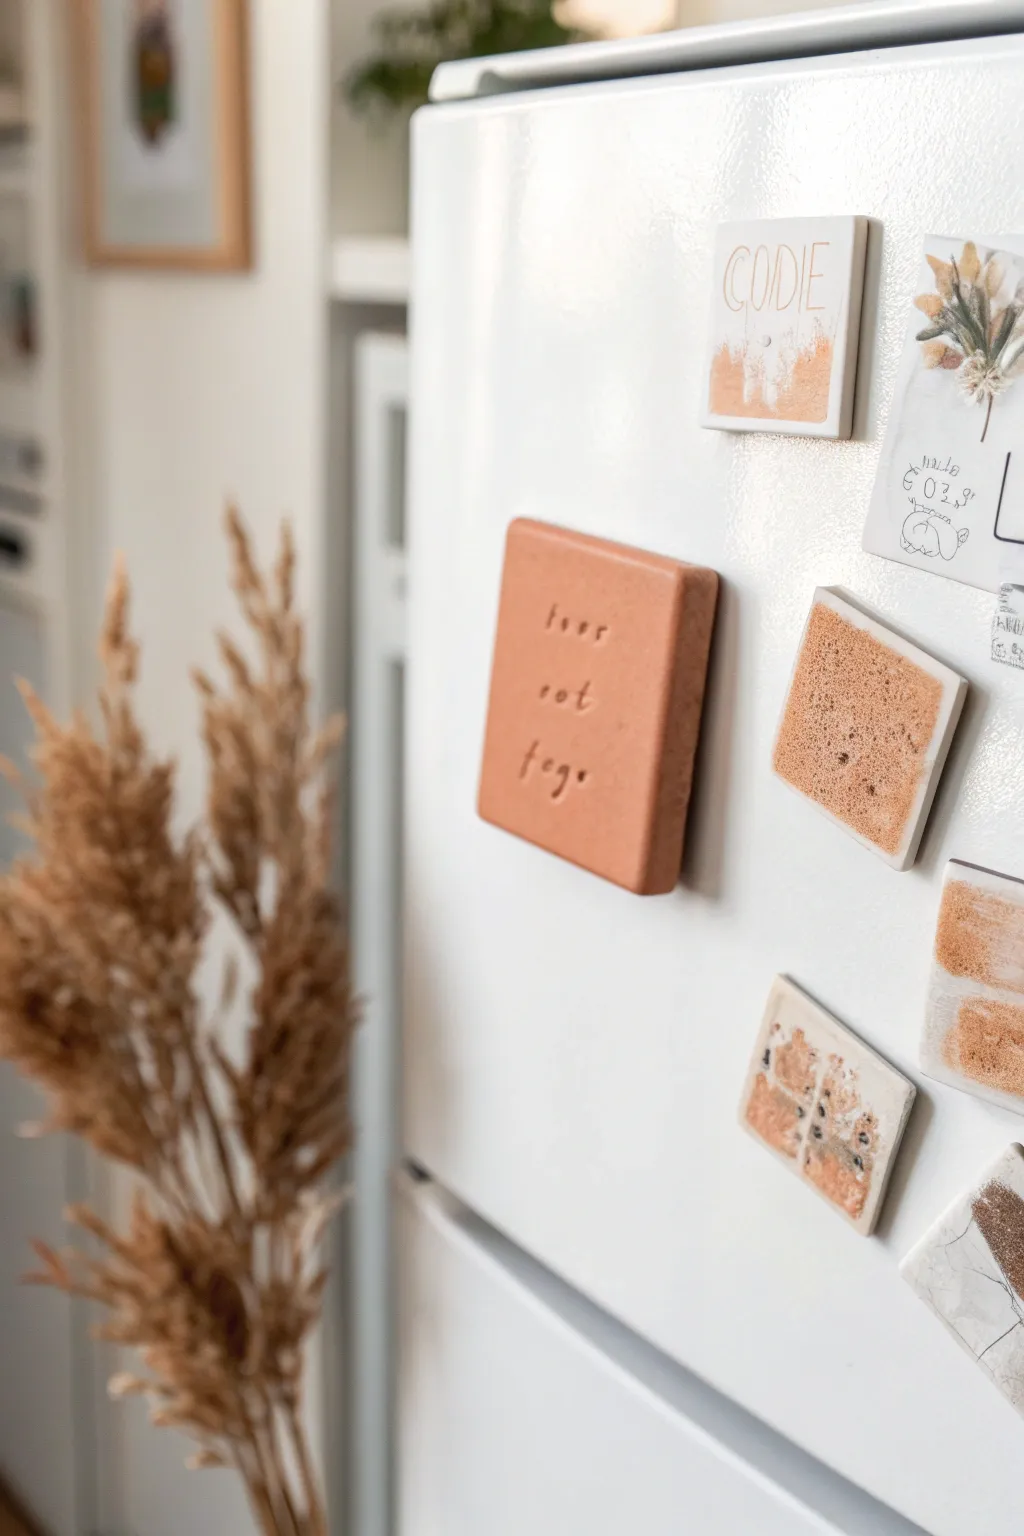
Transform ordinary oven-bake clay into meaningful, minimalist decor with these stamped tile magnets. Their earthy terracotta tones and sweet, impressed messages add a warm, personalized touch to any magnetic surface.
Step-by-Step Guide
Materials
- Terracotta or brown polymer clay (e.g., Sculpey or Fimo)
- White or speckled white polymer clay
- Small letter stamp set (specifically a serif font for this look)
- Acrylic rolling pin or straight-sided glass jar
- Square cookie cutter (approx. 2-inch) or craft knife and ruler
- Heavy-duty round magnets
- Super glue (E6000 or strong cyanoacrylate)
- Parchment paper or silicone baking mat
- Baking sheet
- Fine-grit sandpaper (optional)
Step 1: Shaping the Canvas
-
Condition the clay:
Begin by breaking off a chunk of your terracotta-colored polymer clay. Work it firmly between your hands, kneading and rolling it until it is warm, soft, and pliable. This conditioning step prevents cracks later. -
Roll out a slab:
Place the ball of clay onto parchment paper or a silicone mat. Using an acrylic roller, flatten the clay into an even slab. Aim for a thickness of about 1/4 inch so the magnet feels substantial but not too heavy. -
Cut the square:
Press your square cutter firmly into the clay slab to create a clean shape. If you don’t have a cutter, measure a precise square with a ruler and slice carefully with a craft knife. -
Smooth the edges:
Gently run your finger along the cut edges of the square to soften any sharp corners or ragged bits left by the cutter. The goal is a clean, modern look. -
Repeat for variety:
Roll out some white or speckled clay to make additional tiles if desired. The image shows a mix of solid earthy tiles and white tiles with textured square centers.
Clean Stamp Trick
Dust your rubber stamps lightly with cornstarch or baby powder before pressing them into the clay. This acts as a release agent and prevents the stamps from pulling up chunks of clay.
Step 2: Stamping the Message
-
Plan your spacing:
Before pressing anything into the clay, lay your letter stamps out on the table to check the spelling and spacing. For a stacked quote like the one shown, visualize three lines of text centered on the tile. -
Stamp the first line:
Starting with the middle letter of the first word to ensure centering, press the stamp gently but firmly into the clay. Don’t push all the way through; you just want a clear impression. -
Finish the quote:
Continue stamping the rest of your letters. If the clay distorts slightly from the pressure, gently push the edges of the square back into shape with your fingers or the flat side of a knife. -
Create texture (optional):
For the two-tone effect seen on the other magnets, press a smaller square of rough material (like sandpaper or a textured sponge) into the center of a white clay tile before baking.
Step 3: Baking and Assembly
-
Bake the tiles:
Transfer the parchment paper with the clay tiles onto a baking sheet. Bake according to your specific clay brand’s package instructions—usually around 275°F (135°C) for 15-30 minutes depending on thickness. -
Cool completely:
Remove the tray from the oven and let the tiles cool down completely. Do not handle them while hot, as polymer clay is still slightly soft until it fully cools and hardens. -
Sand imperfections:
Once cool, inspect the edges. I find that a quick rub with fine-grit sandpaper gives the final piece a much more professional, finished feel. -
Attach the magnet:
Flip the tile over. Apply a small dot of strong super glue or E6000 to the center of the back. -
Press and hold:
Press the round magnet into the glue. Hold it in place for 30 seconds to ensure a good initial bond. -
Let it cure:
Allow the glue to dry for the full time recommended on the bottle (usually 24 hours for maximum hold) before sticking it to your fridge.
Uneven Impressions?
If your letters are pressing deeper on one side, try rocking the stamp very slightly left and right as you press down, ensuring even pressure across the whole letter face.
Now you have a set of personalized magnets ready to hold up your grocery lists and favorite photos
Pet Paw Print Magnets
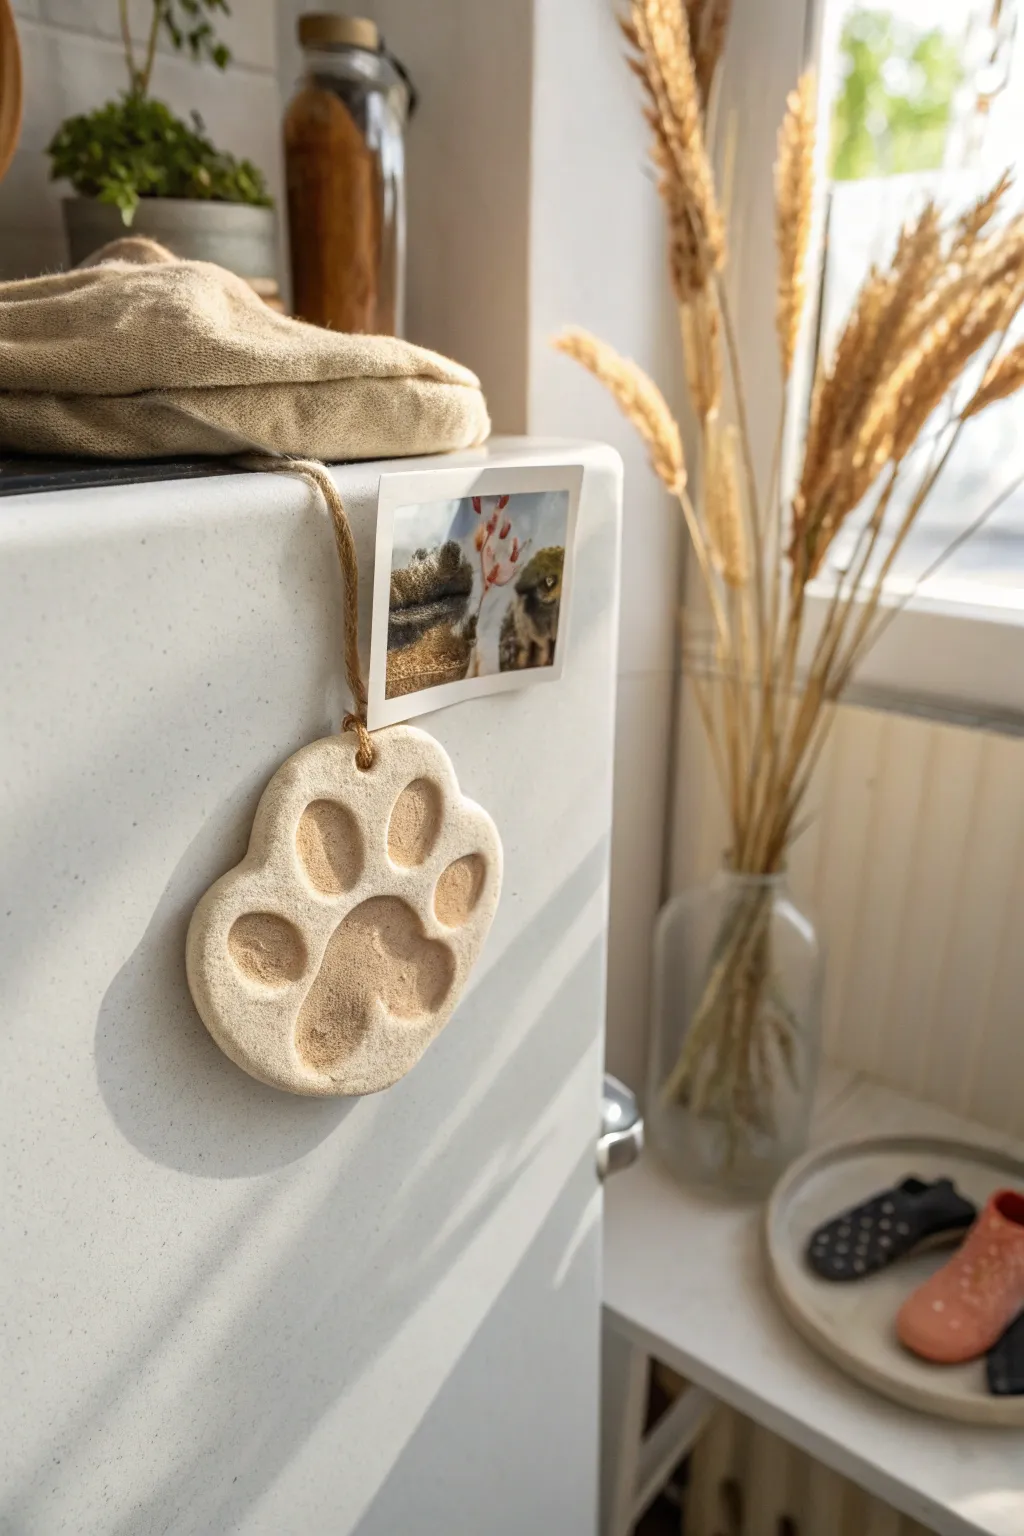
Capture a moment in time with this rustic, textured pet paw print magnet that perfectly blends sentimentality with handmade charm. Using simple air-dry clay or salt dough, this project creates a beige, stone-like relief of your furry friend’s paw, suspended by natural twine for a casual, bohemian look.
Step-by-Step Tutorial
Materials
- White or natural air-dry clay (or homemade salt dough)
- Small rolling pin
- Parchment paper
- Jute twine
- A straw or skewer (for making the hole)
- Fine-grit sandpaper
- Strong craft magnet or magnetic tape
- Glue gun or E6000 adhesive
- Optional: Brown acrylic paint for an antique wash
Step 1: Preparation & Impression
-
Prepare the workspace:
Lay down a sheet of parchment paper on a flat surface to prevent the clay from sticking. Clean your pet’s paw with a damp cloth to ensure no dirt gets into the clay. -
Condition the clay:
Take a handful of air-dry clay and knead it in your hands until it becomes soft, pliable, and free of cracks. If it feels too dry, add a tiny drop of water. -
Roll out the slab:
Place the ball of clay on the parchment and use a small rolling pin to flatten it. Aim for a thickness of about 1/2 inch to ensure the print has enough depth without being too heavy. -
Shape the outline:
Instead of a perfect circle, hand-shape the edges into an organic, rounded form that mimics the general shape of a paw or a soft cloud. Smooth any rough edges with a moistened fingertip. -
Take the impression:
Gently but firmly press the clay onto your pet’s paw (or press the paw into the clay if your pet is cooperative). Ensure you get the central pad and the toe beans clearly indented.
Paw Impression Trick
If your pet is skittish, place the clay inside a ziplock bag before pressing their paw. This keeps paws clean, though you’ll need to smooth the texture slightly afterward.
Step 2: Refining & Texturing
-
Create the hanging mechanism:
While the clay is still wet, use a straw or a wooden skewer to poke a hole near the top center of the shape. Make sure the hole is wide enough for your twine to pass through later. -
Enhance the definition:
Sometimes the impression can be a bit shallow. I like to use a modeling tool or the back of a small spoon to gently deepen the paw print indentations, smoothing out the bottom of the wells. -
Add surface texture:
To achieve the stone-like finish seen in the photo, gently tap the surface of the clay (avoiding the inside of the print) with a clean toothbrush or crumpled foil. -
Drying process:
Allow the clay to dry completely according to the package instructions. This usually takes 24-48 hours. Flip the piece over halfway through to ensure even drying and prevent warping.
Fixing Cracks
Small cracks appearing as it dries? Mix a tiny amount of fresh clay with water to make a paste (slip) and fill in the cracks, then smooth with your finger.
Step 3: Finishing Touches
-
Sand imperfections:
Once fully dry and hard, use fine-grit sandpaper to smooth any sharp ridges around the edges or the hole. Wipe away the dust with a dry cloth. -
Optional antique wash:
If your clay is stark white and you want the sandy beige look from the image, dilute a drop of brown paint with water and brush it on. Wipe it off immediately with a paper towel, leaving pigment only in the textures. -
Attach the twine:
Cut a short length of jute twine. Thread one end through the hole you created and tie a simple loop knot at the top. -
Secure the knot:
To keep the twine looking neat like the example, pull the knot tight against the top edge of the clay so the loop stands up stiffly. -
Attach the photo:
If replicating the specific look, tape a small photograph or polaroid to the magnet backing area or glue the end of the twine to the back of a photo. -
Add the magnet:
Apply a strong adhesive to the back of the clay piece (or the photo it hangs from) and press your magnet firmly in place. Let the glue cure completely before placing it on the fridge.
Now you have a timeless, tactile reminder of your furry companion ready to display
Mini Charcuterie Board Magnets
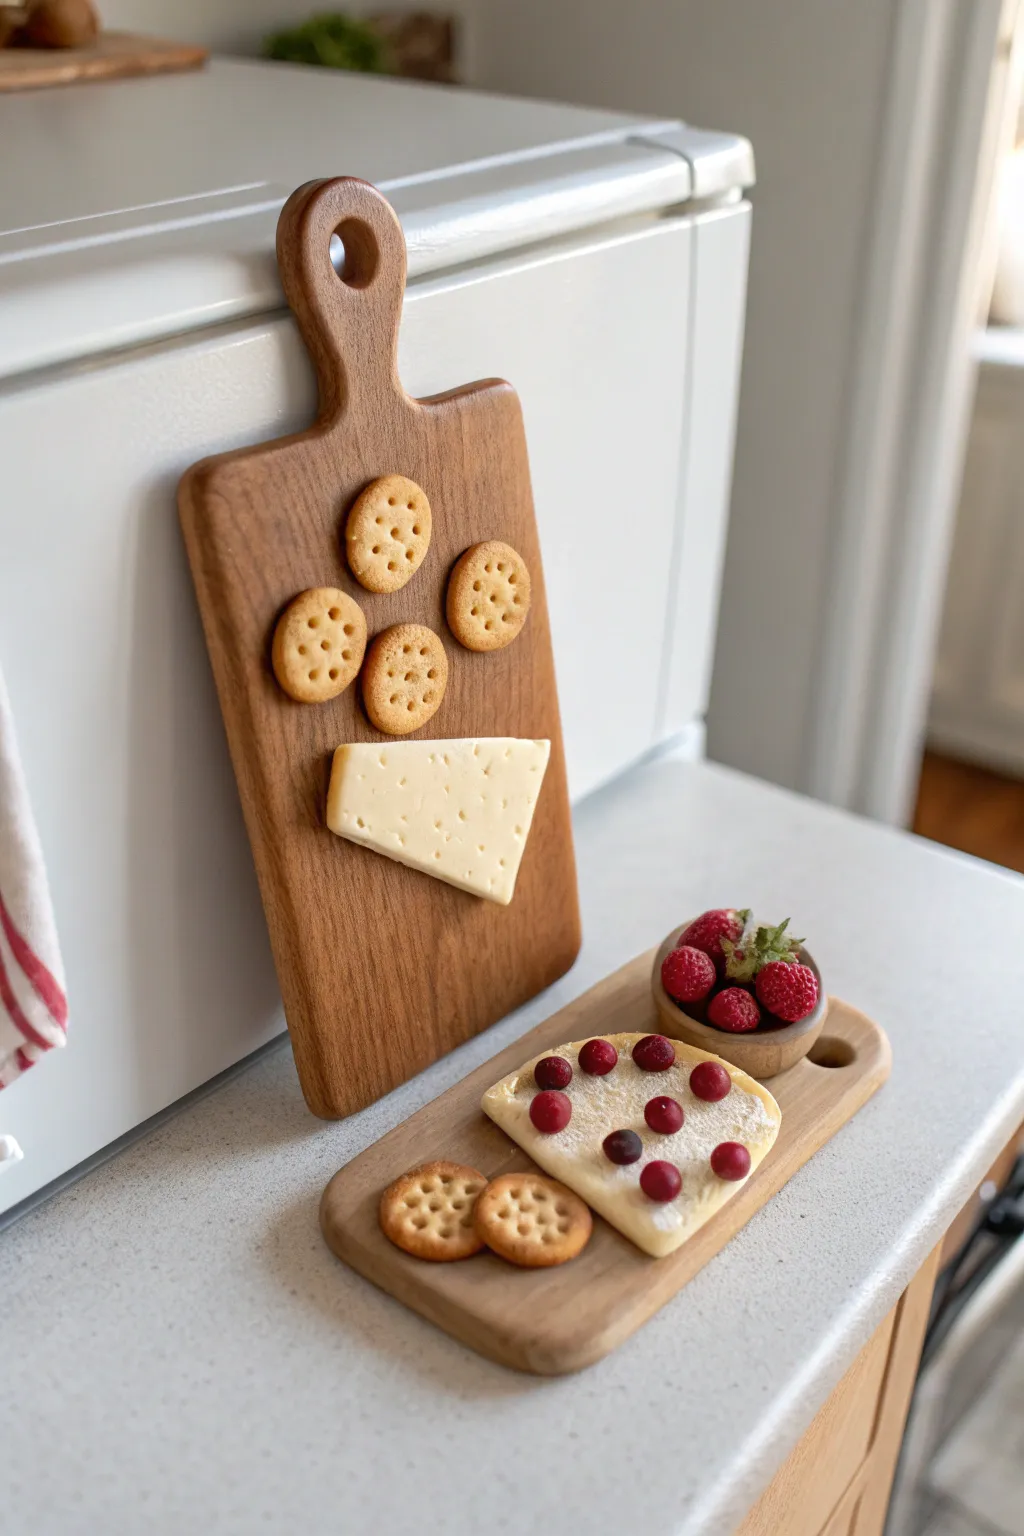
These adorable refrigerator magnets mimic the rustic charm of wooden serving platters loaded with snacks. Using polymer clay, you’ll sculpt tiny realistic foods and faux-wood boards to create a delightful kitchen accent.
Detailed Instructions
Materials
- Polymer clay (shades of brown, yellow, cream, tan, and red)
- Liquid polymer clay (translucent or white)
- Clay roller or pasta machine
- Modeling tools (needle tool, dotting tool)
- Sandpaper or a stiff bristle brush (for texture)
- Chalk pastels (brown, orange, yellow)
- Soft paintbrush
- Craft knife or scalpel
- Strong round magnets
- Strong craft glue or E6000
- Gloss glaze (optional, for fruit)
Step 1: Crafting the Boards
-
Mix wood tones:
Start by mixing different shades of brown clay together. Don’t blend them completely; leaving streaks will help simulate natural wood grain. -
Shape the boards:
Roll out your marbled brown clay to about 1/4 inch thickness. Use a craft knife to cut out two shapes: a rectangular paddle shape with a handle (for the vertical magnet) and a simple rounded rectangle (for the horizontal tray). -
Refine the edges:
Smooth the cut edges with your fingertips to soften the sharp angles. For the paddle handle, use a straw or small round cutter to punch a hole near the top. -
Texture the wood:
Gently drag a piece of coarse sandpaper or a stiff wire brush lengthwise across the clay surface. This creates fine grooves resembling wood texture. -
Shading:
Scrape some brown chalk pastel into a powder. Dust it over the textured boards, concentrating on the edges and the handle area to add depth and an aged look.
Natural Wood Grain
Brush baby oil lightly over the raw clay before sanding. This softens the clay slightly, allowing the sandpaper to create deeper, more realistic wood grooves.
Step 2: Sculpting the Cheese & Crackers
-
Make the cheese wedge:
Form a small triangle from cream-colored clay. Use a needle tool to poke various sized holes on the surface and sides to mimic Swiss cheese texture. -
Create the brie wheel:
For the second board, shape a pale yellow triangle with slightly rounded edges to look like a wedge of brie or soft cheese. -
Form the crackers:
Roll out tan clay very thinly. Use a small round cutter (a pen cap works well) to cut out several circles. -
Detail the crackers:
Use a needle tool to poke a pattern of tiny holes into each cracker. Lightly dust the tops with orange and brown chalk pastel to make them look baked and golden. -
Attach to boards:
Arrange the raw cheese and crackers onto your raw clay boards. Press them down gently so they bond. I like to let them overlap slightly for a casual look.
Step 3: Adding the Fruit Details
-
Sculpt cranberries:
Roll tiny balls of deep red clay for cranberries. Press some onto the soft cheese wedge. -
Create the berry bowl:
Make a tiny pinch pot from the brown wood-tone clay. Fill it with small red spheres to represent raspberries or strawberries. -
Detail the berries:
Texture the berries by gently poking them with a needle tool to create a bumpy surface. Add tiny green clay leaves if desired. -
Dusting effect:
For a powdered sugar look on the brie, lightly dab white liquid clay or dry white pastel powder over the top of the cheese and cranberries.
Go Bigger
Instead of magnets, attach these to ring blanks or brooch pins to create quirky, foodie-themed jewelry pieces for friends.
Step 4: Baking and Assembly
-
Bake:
Place your creations on a baking sheet lined with parchment paper. Bake according to your polymer clay package instructions (usually 275°F for 15-30 minutes). -
Cool down:
Allow the pieces to cool completely before handling so the clay hardens fully. -
Glaze:
If you want the fruit to look fresh and juicy, apply a tiny drop of gloss glaze to the cranberries and berries. -
Attach magnets:
Flip the boards over. Apply a strong dab of glue to the back of each board and press a round magnet firmly into place. -
Final dry:
Let the glue cure for 24 hours to ensure the magnets stay secure when you stick them to the fridge.
Now your fridge has a touch of gourmet style that looks good enough to eat
Moon and Star Magnet Set
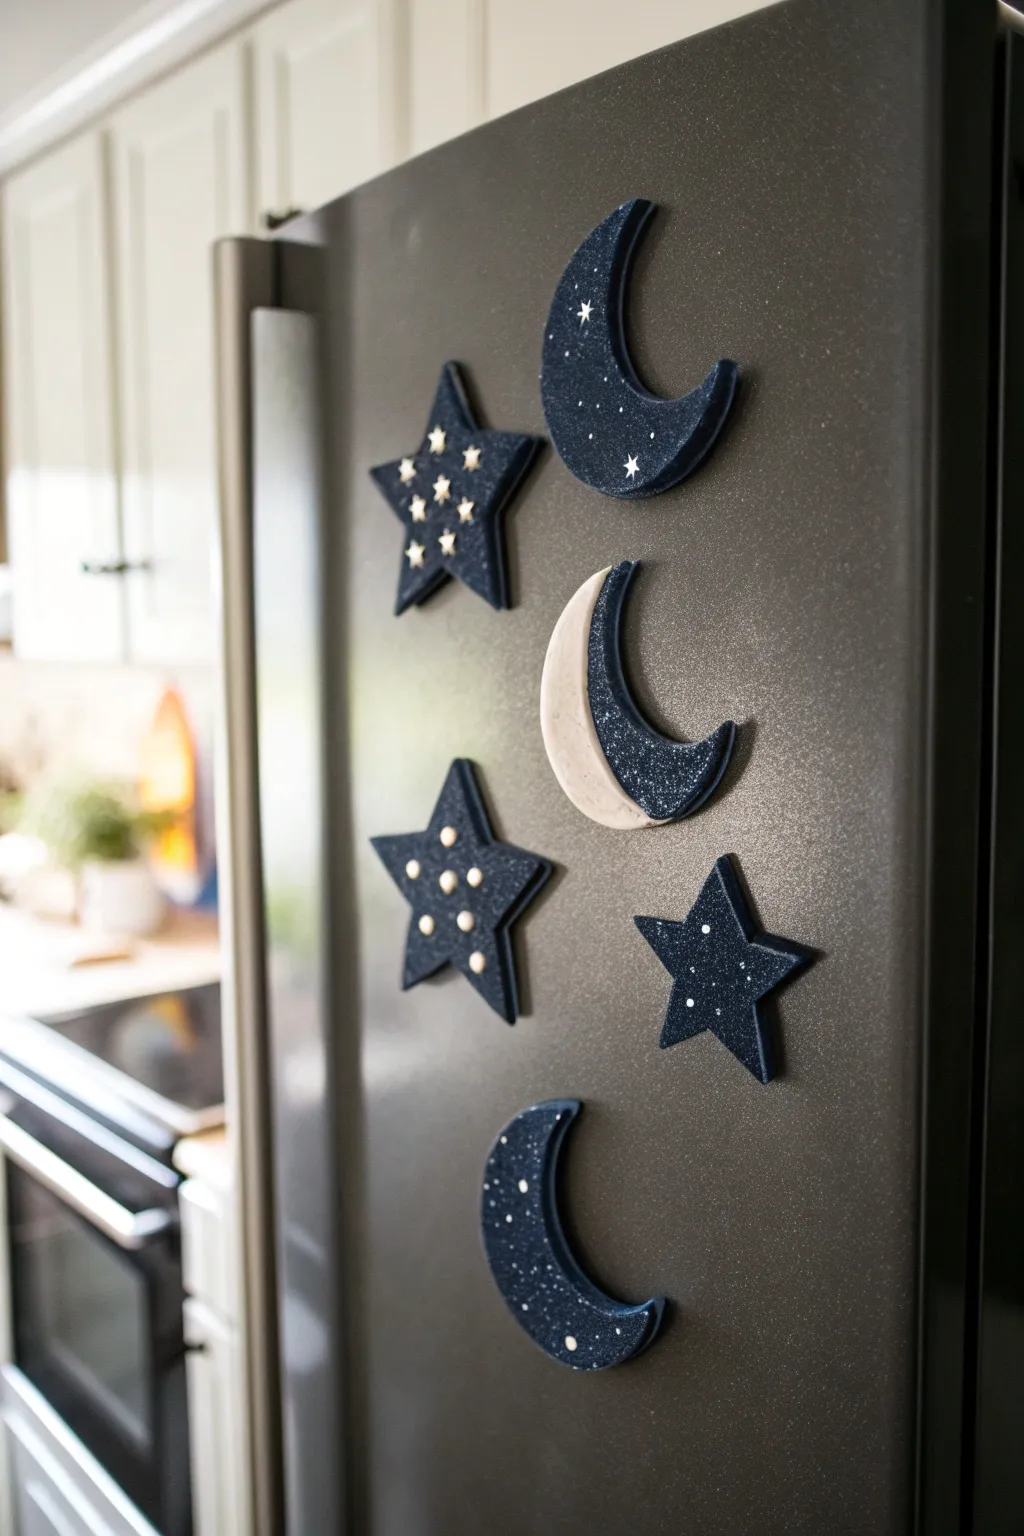
Bring the night sky into your kitchen with these textured, deep blue moon and star magnets. Featuring a unique blend of chunky clay layers and subtle glitter, this set combines celestial charm with practical organization.
Step-by-Step Guide
Materials
- Polymer clay (midnight blue, white/beige)
- Small star-shaped cookie cutters (assorted sizes)
- Round cookie cutters or drinking glass (for moons)
- Rolling pin or pasta machine
- Fimo gloss glaze or polyurethane varnish
- Dark blue glitter (fine)
- Silver glitter (chunky)
- Small adhesive gems or rhinestones
- Strong craft glue (E6000)
- Neodymium magnets
- Parchment paper
- Baking sheet
- Craft knife
- White acrylic paint
- Fine detail paintbrush
Step 1: Shaping the Clay Base
-
Condition the Clay:
Begin by kneading your midnight blue clay until it is soft and pliable. If the clay feels too stiff, warm it between your hands for a few extra minutes to prevent cracking later. -
Roll the Sheets:
Roll your conditioned blue clay out to a thickness of about 1/4 inch. You want these magnets to have a substantial, chunky profile rather than being wafer-thin. -
Cut the Stars:
Press your star-shaped cutters into the clay. Create a variety of sizes—at least one large star and one smaller star to create visual interest in your set. -
Shape the Moons:
To make the crescent moons, use a round cutter to punch a circle. Then, offset the same cutter slightly and punch again to slice away a crescent shape. -
Create the Two-Tone Moon:
For the special two-tone moon, roll out a small amount of beige or white clay. Cut a thin crescent shape from it that matches the inner curve of one of your blue moons. -
Attach the Accent:
Gently press the beige crescent onto the inner curve of the blue moon base. Smooth the seam lightly with your finger so they bond together during baking. -
Smooth the Edges:
Use your fingertip, dipped slightly in cornstarch or water, to gently round off any sharp or rough edges left by the cutters on all your shapes.
Step 2: Adding Texture and Detail
-
Dust with Glitter:
While the clay is still raw, lightly sprinkle your fine dark blue glitter over the surface. Press it gently into the clay so it embeds rather than just sitting on top. -
Add Star Texture:
Take a very small amount of white paint and a fine brush. Dot tiny specks onto the blue clay to mimic distant stars. Do this before baking if you want the paint to bake into the surface, or wait until after. -
Embed Rhinestones:
For the larger stars, press small rhinestones or gems into the clay surface. Push them deep enough that the clay grips the edges, ensuring they won’t pop out later. -
Create the Beveled Look:
If you want the layered look seen in the photo, cut a slightly smaller star or moon shape and stack it on top of a larger base piece, pressing them firmly together. -
Bake the Pieces:
Place all your shapes on a parchment-lined baking sheet. Bake according to your clay package instructions (usually 275°F for 15-30 minutes, depending on thickness). -
Cool Down:
Allow the pieces to cool completely on the baking sheet. Moving them while warm can warp the shapes.
Fixing Magnet Globs
If glue oozes out when pressing the magnet, don’t wipe it while wet! Let it dry completely, then carefully slice the excess away with a craft knife for a clean finish.
Step 3: Finishing Touches
-
Seal the Surface:
Apply a coat of gloss glaze to the blue sections of your magnets. This makes the glitter pop and gives the dark clay a deep, galaxy-like finish. -
Highlight the Edge:
I like to leave the distinct layered edges matte to contrast with the glossy top, but you can glaze the sides too if you prefer a fully polished look. -
Paint Extra Details:
If you didn’t paint stars earlier, use a toothpick or fine brush to add tiny white constellations or dots now, directly over the dried glaze. -
Apply Adhesives:
Flip the cured clay pieces over. Apply a dab of strong craft glue like E6000 to the center of the back. -
Secure the Magnets:
Press a neodymium magnet into the glue. Let the glue cure undisturbed for at least 24 hours to ensure a permanent bond.
Glow Up Idea
Mix glow-in-the-dark powder into your white paint for the tiny star specks. During the day they look normal, but at night your fridge will have a faint, magical glow.
Once the glue is fully cured, these starry beauties are ready to hold up your most important notes and photos
Faux Stained Glass Magnets
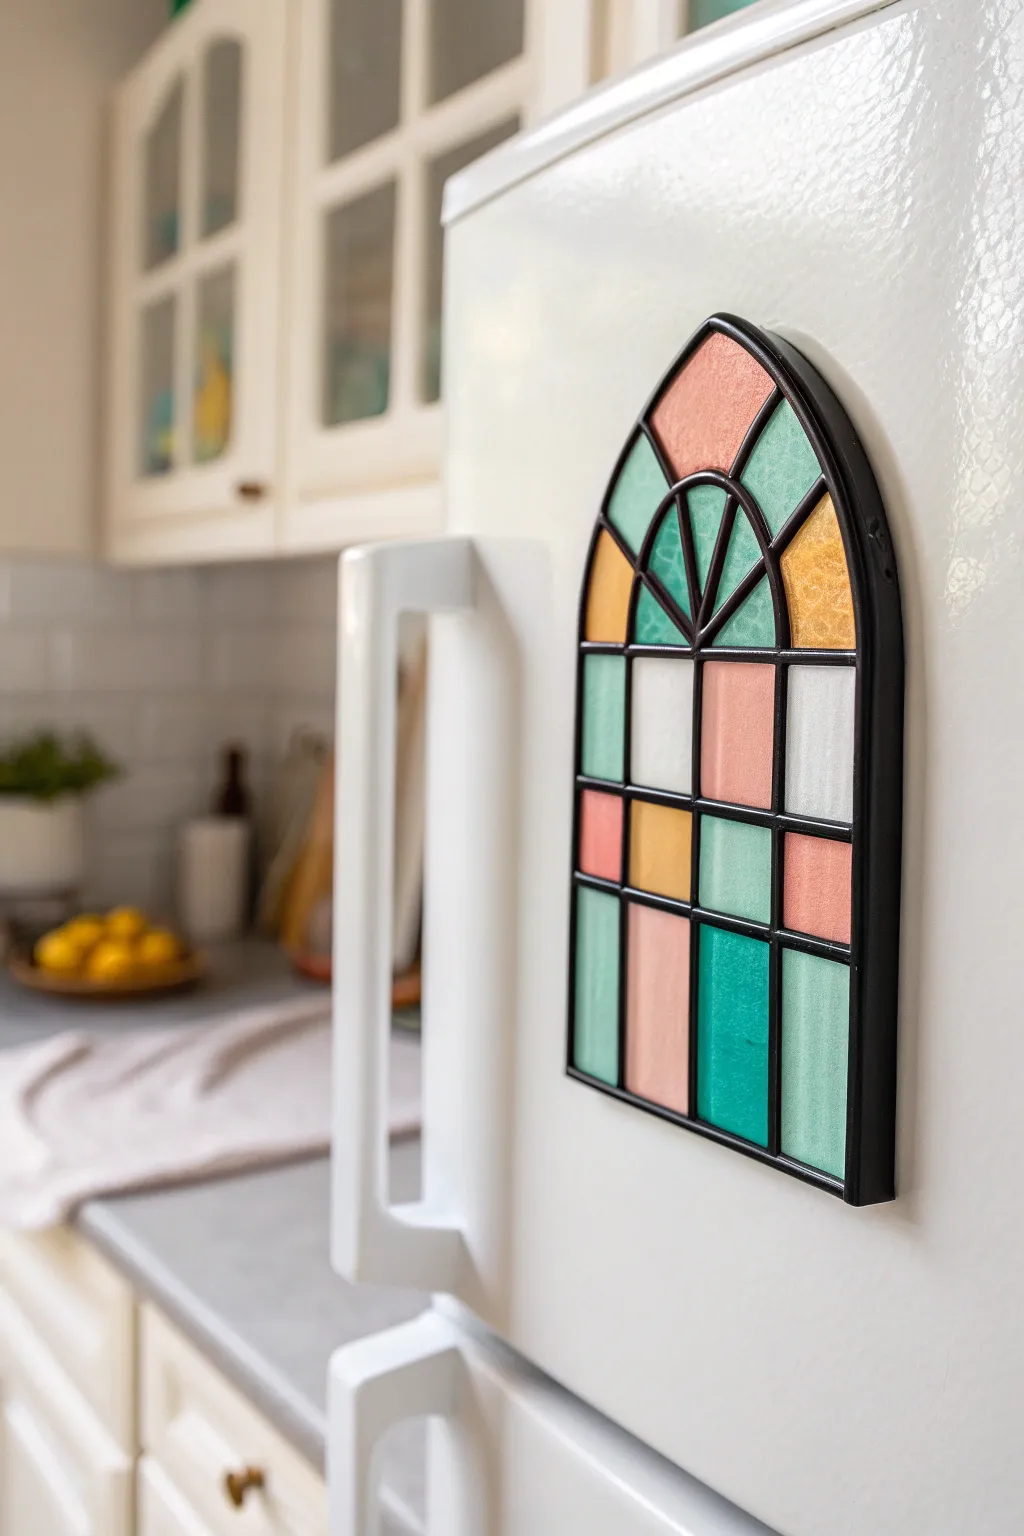
Bring a touch of Gothic architecture to your kitchen with these charming faux stained glass magnets. Using polymer clay for the ‘lead’ framework and liquid clay or resin for the glass, you can create a beautiful light-catching effect that looks surprisingly realistic.
Step-by-Step
Materials
- Black polymer clay
- Liquid polymer clay (translucent)
- Alcohol inks (teal, peach, amber/yellow)
- Small rolling pin or clay machine
- Craft knife or scalpel blade
- Ruler
- Paper template of an arched window
- Glossy ceramic tile or glass work surface
- Strong round magnets
- Super glue or E6000
- Toothpicks or needle tool
- Oven (for baking clay)
Step 1: Designing the Frame
-
Prepare the template:
Begin by sketching or printing a small arched window shape on paper to use as your guide. The design should have clean lines for the ‘lead’ cames; keep the internal sections large enough to fill easily later. -
Condition the clay:
Take your black polymer clay and condition it in your hands until it is soft and pliable. This warmth prevents cracking during the rolling process. -
Roll out strands:
Roll the black clay into long, very thin snakes or use a clay extruder with a small round disc for perfect uniformity. You want these to be about 2-3mm thick to mimic lead caming. -
Create the outline:
Place your paper template under a clean glass panel or ceramic tile. Lay the clay snake along the outer perimeter of your arched design, pressing down very gently so it adheres to the glass surface. -
Build the grid:
Cut smaller segments of your clay snake to create the horizontal and vertical bars of the window. I find using a sharp blade helps make clean, perpendicular cuts where the lines meet. -
Form the arch details:
For the top curved section, carefully bend short clay segments to create the radiating sunburst pattern inside the arch. Butt the ends against the main frame and smooth the seams slightly with a rubber tool or toothpick. -
Secure the joints:
Take a needle tool and gently press at every intersection where clay meets clay. This ensures the frame is one solid unit and won’t fall apart once baked. -
Initial bake:
Bake the black frame on the tile according to your clay package instructions (usually 275°F/135°C for 15-30 minutes). Let it cool completely before moving to the next phase.
Clean Lines Tip
If you struggle with messy clay seams, pre-bake the outer arch first to make it rigid, then add the inner ‘lead’ lines. It stops the frame from distorting as you work.
Step 2: Adding the ‘Glass’
-
Mix your colors:
Pour small amounts of translucent liquid polymer clay into separate small cups. Add a tiny drop of alcohol ink to each cup (teal, peach, and amber) and stir gently to avoid bubbles. -
Fill the cells:
Carefully pour or drip the colored liquid clay into the open spaces of your baked black frame. Do not remove the frame from the tile; the tile acts as the backing for the liquid. -
Distribute evenly:
Use a toothpick to drag the liquid clay into the corners of each section, ensuring it touches the black frame borders on all sides for a watertight seal. -
Alternative texture:
For the white/clear sections, you can use plain translucent liquid clay. If you want a frosted look, stir in a tiny pinch of white mica powder or white pastel shavings. -
Pop bubbles:
Let the piece sit for 10 minutes so air bubbles can rise to the surface. Pop any visible bubbles with a needle tool or pass a lighter quickly over the surface. -
Second bake:
Bake the entire piece again on the tile. The liquid clay needs high heat to clarify, so follow the manufacturer’s specific instructions for liquid mediums, often baking for 15-20 minutes.
Step 3: Finishing Touches
-
Cool and peel:
Allow the tile to cool completely. Once cool, carefully slide a razor blade under the edge of the magnet to pop it off the tile. The back should be smooth and flat. -
Attach the magnet:
Apply a drop of strong adhesive like E6000 or super glue to the back of the clay frame. Avoid putting glue on the translucent parts if possible to keep them clear. -
Set firmly:
Press a strong round magnet into the glue and let it cure fully before placing it on your fridge.
Level Up: Texture
Before baking the liquid clay, sprinkle a tiny bit of clear embossing powder or glitter into the wet mix. It mimics the texture of antique hammered cathedral glass.
Now you have a miniature piece of art that catches the light every time you open the fridge