If you’ve ever flipped a pot over and thought, “Okay, but what should the bottom look like?” you’re in the right mindset. I love how a well-designed pottery foot can give a piece instant lift, personality, and that satisfying finished feel.
Narrow Tall Foot for Extra Lift
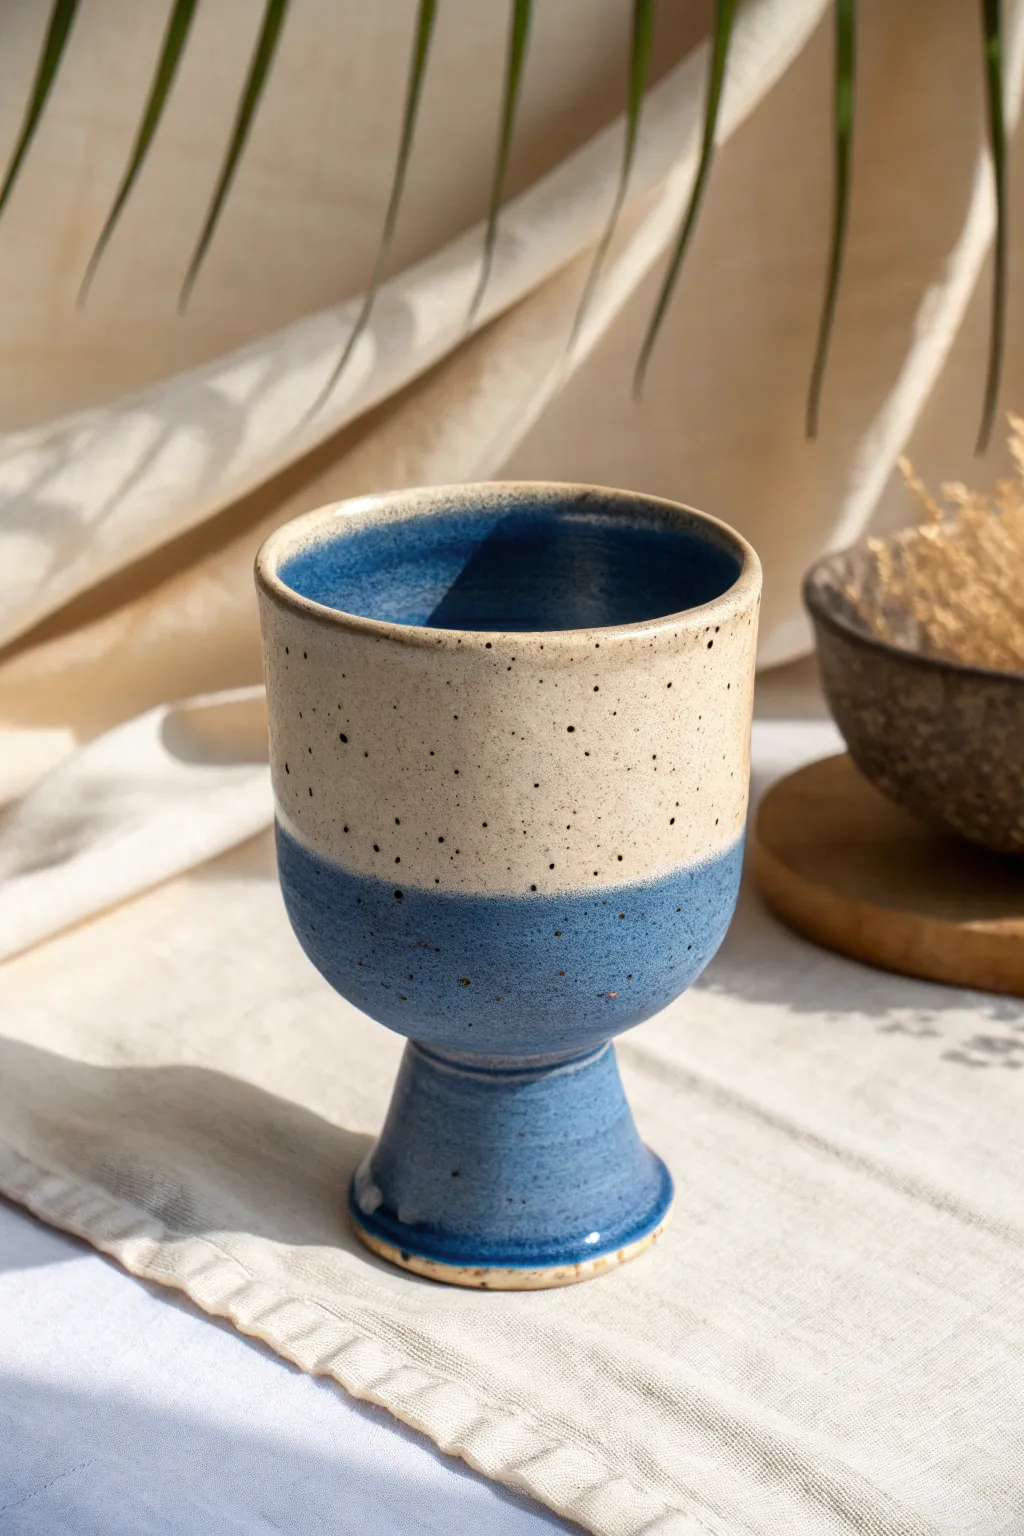
This project features a stunning ceramic chalice with a dramatic, narrow pedestal foot that adds height and elegance. The two-tone glaze application, contrasting a speckled cream body with a deep blue interior and base, creates a striking visual balance.
Step-by-Step Guide
Materials
- Speckled Stoneware Clay (approx. 1.5 – 2 lbs)
- Pottery Wheel
- Pin Tool
- Wire Tool
- Wooden Rib
- Metal Knife or Fettling Knife
- Trimming Tools (Loop tool)
- Sponge
- Calipers (optional but helpful)
- Ceramic Glaze: Speckled Cream/Oatmeal
- Ceramic Glaze: Deep Denim Blue
Step 1: Throwing the Bowl
-
Center the Clay:
Start with about 1 lb of clay for the bowl. Center it firmly on the wheel head, ensuring a wide enough base to support the eventual height. -
Open and Pull:
Open the clay and pull up the walls to create a deep, U-shaped cup. Unlike a mug, you want the bottom to be slightly rounded inside rather than flat. -
Shape the Profile:
Use a rib to smooth the outside, creating a gentle curve that tapers slightly inward at the rim. Keep the rim smooth and rounded. -
Cut and Set Aside:
Undercut the base with your wooden tool, wire it off the wheel, and set it aside on a ware board to stiffen to leather hard.
Step 2: Throwing the Pedestal Foot
-
Center a Small Lump:
Take a smaller amount of clay (approx. 0.5 – 0.75 lb) and center it into a tall, narrow cone shape. -
Open the Top:
Instead of opening all the way down, open just the top section of your cone to create a small cup shape. This will be the connection point. -
Pull the Stems:
Pull the clay upward to create a tall stem. Ensure the walls are thick enough to support the bowl but elegant enough to look lifted. -
Flare the Base:
At the bottom of the stem, gently press outward to create a flared foot. This provides crucial stability for the finished piece. -
Measure and Refine:
Check the diameter of the top opening of your stem; it needs to roughly match the base of your bowl. Wire off and let dry to leather hard.
Wobble Worries?
If the goblet leans during assembly, use a bubble level on the rim immediately after attaching. Adjust while the slip is still wet.
Step 3: Assembly and Trimming
-
Trimming the Bowl:
Once leather hard, center the bowl upside down on the wheel. Trim the bottom into a smooth curve so it will sit neatly on the stem. -
Score and Slip:
Score the bottom of the bowl and the top rim of the pedestal foot aggressively. Apply a generous amount of slip to both surfaces. -
Attach the Parts:
Press the pieces together firmly. Center the entire form on the wheel gently if needed to ensure alignment. -
Smooth the Connection:
While rotating the wheel slowly, use a modeling tool or your finger to smooth the seam where the bowl meets the foot. I like to add a tiny coil here sometimes to reinforce the joint. -
Trim the Foot Ring:
Clean up the bottom of the flared foot, ensuring a sharp, clean edge that sits flat on the table.
Texture Twist
Carve vertical flutes into the stem before attaching the bowl to add visual height and tactile interest to the handle area.
Step 4: Glazing
-
Bisque Fire:
Once fully dry, bisque fire your piece to Cone 04 (or your clay body’s specifications). -
Glaze the Interior:
Pour the Deep Denim Blue glaze into the cup, swirl to coat the entire interior, and pour out the excess. Wipe the rim clean immediately. -
Dip the Top Exterior:
Hold the cup by the foot and dip the top half (the bowl section) into the Speckled Cream glaze. Stop just below the halfway point of the bowl. -
Dip the Bottom:
Once the top is dry to the touch, hold the cup by the rim and dip the foot and lower bowl into the Deep Denim Blue glaze. Overlap the cream glaze slightly if you want a reaction line, or leave a small gap. -
Final Fire:
Clean the very bottom of the foot where it touches the kiln shelf and fire to maturity (usually Cone 6 for stoneware).
Enjoy using your elevated vessel for special occasions or as a standout display piece


Pedestal Footed Bowl Base
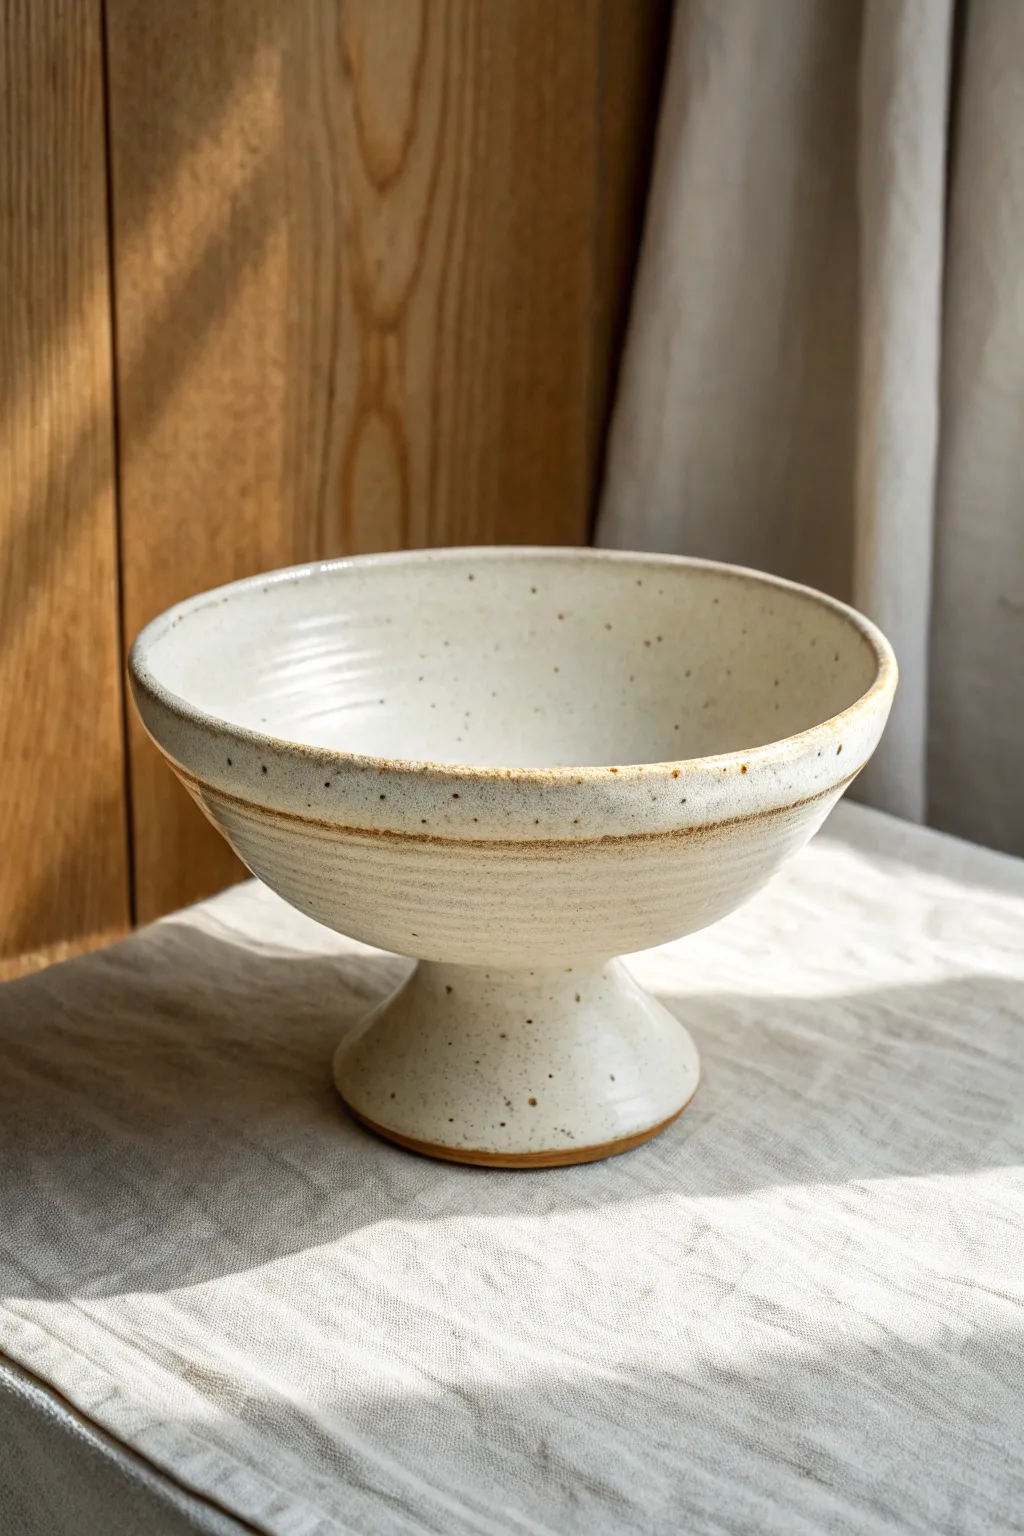
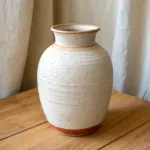
Elevate your table setting literally and figuratively with this speckled, pedestal-footed bowl. The height adds distinct elegance while the creamy, speckled glaze keeps the piece grounded and approachable.
Step-by-Step Tutorial
Materials
- 2-3 lbs speckled stoneware clay
- Potter’s wheel
- Throwing tools (sponge, rib, wooden knife, metal needle tool)
- Wire cutter
- Trimming tools
- Glossy vanilla or cream speckled glaze
- Kiln
Step 1: Throwing the Bowl Section
-
Center the main body:
Begin by wedging roughly 1.5 lbs of clay. Center it on the wheel head, ensuring it is wide and low rather than tall. -
Open the clay:
Open the form gently, pulling the floor out until it’s about 5 inches wide. Leave the floor slightly thicker than a standard mug to support the eventual joining process. -
Pull the walls:
Pull the walls upward and outward into a classic open V-shape. Don’t worry about smoothing the inside perfectly; the visible spiral throwing lines are a key aesthetic feature of this piece. -
Define the rim:
Compress the rim with your chamois or sponge. Allow it to be slightly rounded and organic rather than sharp and mechanical. -
Wire off:
Cut the bowl from the bat with your wire tool and set it aside to stiffen to a leather-hard state.
Wobbly Pedestal?
If the bowl feels top-heavy during assembly, your pedestal base is likely too narrow. Remake the pedestal with a wider flaring ‘skirt’ at the bottom for better stability.
Step 2: Throwing the Pedestal Base
-
Center the base clay:
Take the remaining pound of clay and center it strictly in the middle of the wheel. This needs to be a narrow, tall cylindric mount. -
Open the pedestal:
Open the cylinder all the way down to the wheel head (as if making a bottomless ring). This ensures the foot isn’t solid and heavy. -
Shape the hourglass:
Collar the clay inward about an inch from the bottom to create a ‘waist,’ flaring the top outward wider than the bottom. It should look like an inverted trumpet. -
Measure for fit:
Use calipers to measure the width of the pedestal’s top rim. It needs to match the width of the bowl’s bottom you threw earlier. -
Dry carefully:
Cut the pedestal from the wheel. Let both the bowl and pedestal dry until they are distinctively leather-hard—this is crucial for the join.
Step 3: Assembly and Finishing
-
Score the connection points:
Flip the bowl upside down. Score the bottom center of the bowl and the top rim of the pedestal aggressively with a serrated rib or needle tool. -
Apply slip:
Apply a generous amount of slip (liquid clay) to both scored areas. -
Join the pieces:
Press the pedestal firmly onto the bottom of the inverted bowl. Give it a slight wiggle to lock the clay particles together. -
Smooth the seam:
I prefer to put the entire assembled piece back on the wheel slowly to clean up the join with a wooden tool, compressing the seam so it becomes invisible. -
Final drying:
Wrap the connection point loosely in plastic to slow down drying, ensuring the thick join doesn’t crack while the thinner rim dries. -
Bisque fire:
Once bone dry, fire the piece to bisque temperature (usually Cone 04).
Rim Distinction
To get that lovely brown rim seen in the photo, wipe a very damp sponge gently over just the rim edge after glazing to thin the application there, allowing the clay body to show.
Step 4: Glazing
-
Wax the foot ring:
Apply wax resist to the very bottom ring of the pedestal foot so it doesn’t stick to the kiln shelf. -
Pour the interior:
Pour a glossy cream glaze into the bowl, swirl it to coat the entire interior, and pour out the excess. -
Dip the exterior:
Hold the proper foot and dip the exterior of the bowl into the glaze bucket. To replicate the image, ensure the glaze breaks slightly brown over the rim and texture lines. -
Final fire:
Fire the piece to maturity (Cone 5 or 6 depending on your clay body). The speckled clay will bleed through the cream glaze to create the spotted effect.
Place your finished piece in the center of a table and enjoy the timeless silhouette you have created


Tripod Three-Point Feet
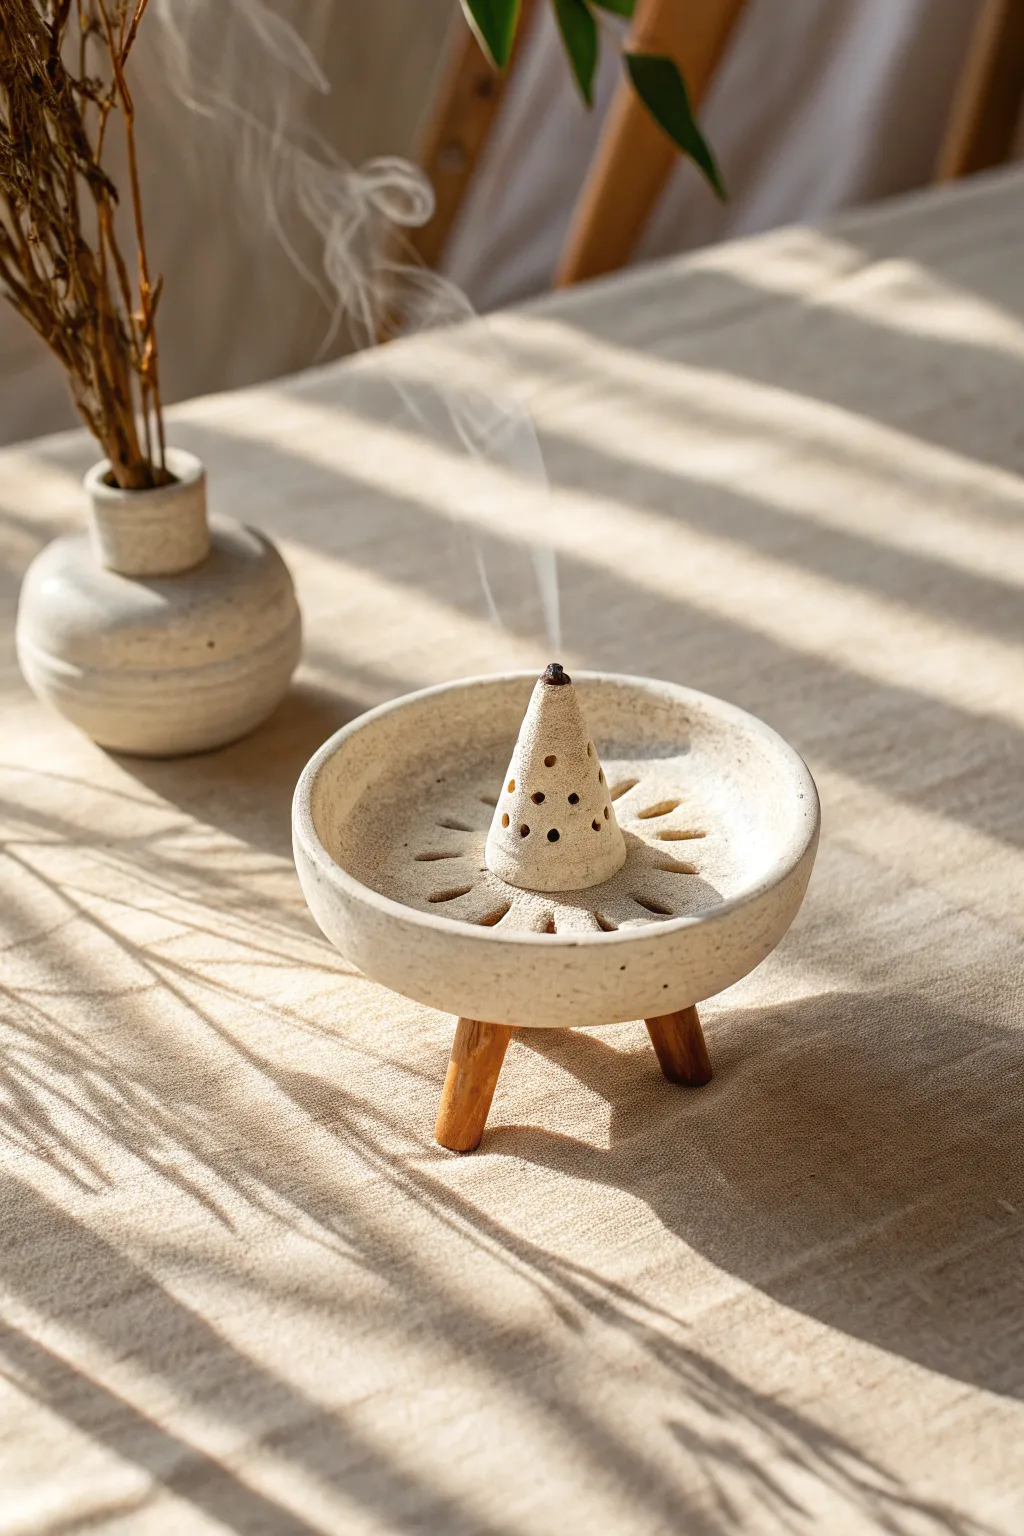
This elegant incense burner combines rustic ceramic textures with mid-century modern wooden legs for a unique silhouette. The shallow bowl features a central perforated cone for holding cone incense, surrounded by a radiant sunburst design that catches the ash beautifully.
Detailed Instructions
Materials
- Speckled stoneware clay (cream or beige)
- Wooden dowel (approx. 1/2 inch diameter) or pre-cut wooden feet
- Strong epoxy glue suitable for ceramics and wood
- Rolling pin and guide sticks
- Small bowl mold or hump mold
- Needle tool
- Hole cutter or drinking straw
- Rib tool
- Sponge
- Sanding paper (high grit)
- Matte white or clear glaze
Step 1: Forming the Bowl
-
Prepare the Clay:
Begin by wedging your speckled stoneware clay thoroughly to remove air bubbles. This clay body is essential for achieving that natural, earthy look shown in the image. -
Roll the Slab:
Roll out a slab of clay approximately 1/4 inch thick. Use guide sticks on either side of your rolling pin to ensure an even thickness across the entire piece. -
Cut the Circle:
Place your bowl mold or a circular template onto the slab. Using a needle tool, cut a clean circle roughly 5 to 6 inches in diameter. -
Shape the Dish:
Gently press the clay circle into your slump mold or drape it over a hump mold. We want a shallow curve, not a deep bowl, so don’t press too aggressively. Smooth the rim with a damp sponge.
Step 2: Creating the Central Feature
-
Form the Cone:
While the bowl stiffens slightly, hand-build a small cone shape from leftover clay. This should be about 1.5 to 2 inches tall with a base wide enough to feel stable. -
Hollow the Cone:
Carefully hollow out the underside of the cone slightly to ensure it dries evenly and doesn’t explode in the kiln. You can use a small loop tool for this. -
Pierce the Vents:
Using a small hole cutter or a needle tool, poke several ventilation holes into the sides of the cone. This decorative touch also helps airflow locally. -
Attach the Cone:
Score and slip the center of your bowl and the base of your cone. Press the cone firmly into the center of the dish, smoothing the seam so it looks like one continuous piece.
Level Check
Before the glue sets, flip the burner onto a flat surface to ensure it sits perfectly level. If it wobbles, sand the bottom of the longest wooden leg slightly.
Step 3: Adding the Sunburst Detail
-
Mark the Rays:
Visualize rays radiating from the central cone. Using a modeling tool or the back of a knife, gently mark where you want your cutouts to go. -
Carve the Radiance:
I like to use a small ribbon tool to carve shallow grooves radiating outward. Alternatively, you can cut small, long ovals all the way through the clay for better airflow, as seen in the inspiration piece. -
Clean the Edges:
Once the clay is leather hard, go back over your cutouts with a slightly damp sponge or brush to soften any sharp jagged edges created during carving.
Make it Match
Create a matching bud vase using the pinch pot method from the same speckled clay. Glaze them together for a cohesive vanity set.
Step 4: Firing and Assembly
-
Bisque Fire:
Allow the ceramic dish to dry slowly and completely before bisque firing it to cone 04 (or your clay’s specific recommendation). -
Glazing:
Apply a matte white or clear glaze. If you used speckled clay, a transparent matte glaze is perfect to let those beautiful iron spots shine through. Fire again to the clay’s maturity temperature. -
Prepare the Legs:
Cut three pieces of wooden dowel to roughly 1.5 inches in length. Sand the ends smooth. You can stain the wood darker if you prefer a higher contrast look. -
Attach the Tripod:
Flip the fired ceramic dish upside down. Mark three equidistant points for the legs to ensure stability. -
Glue the Feet:
Mix your high-strength epoxy. Apply a dab to the end of each wooden leg and press them onto the marked spots on the ceramic base. Let the glue cure fully according to the package instructions before flipping it back over.
Now you have a serene, handcrafted burner ready to fill your space with your favorite scent


Attached Lug or Button Feet
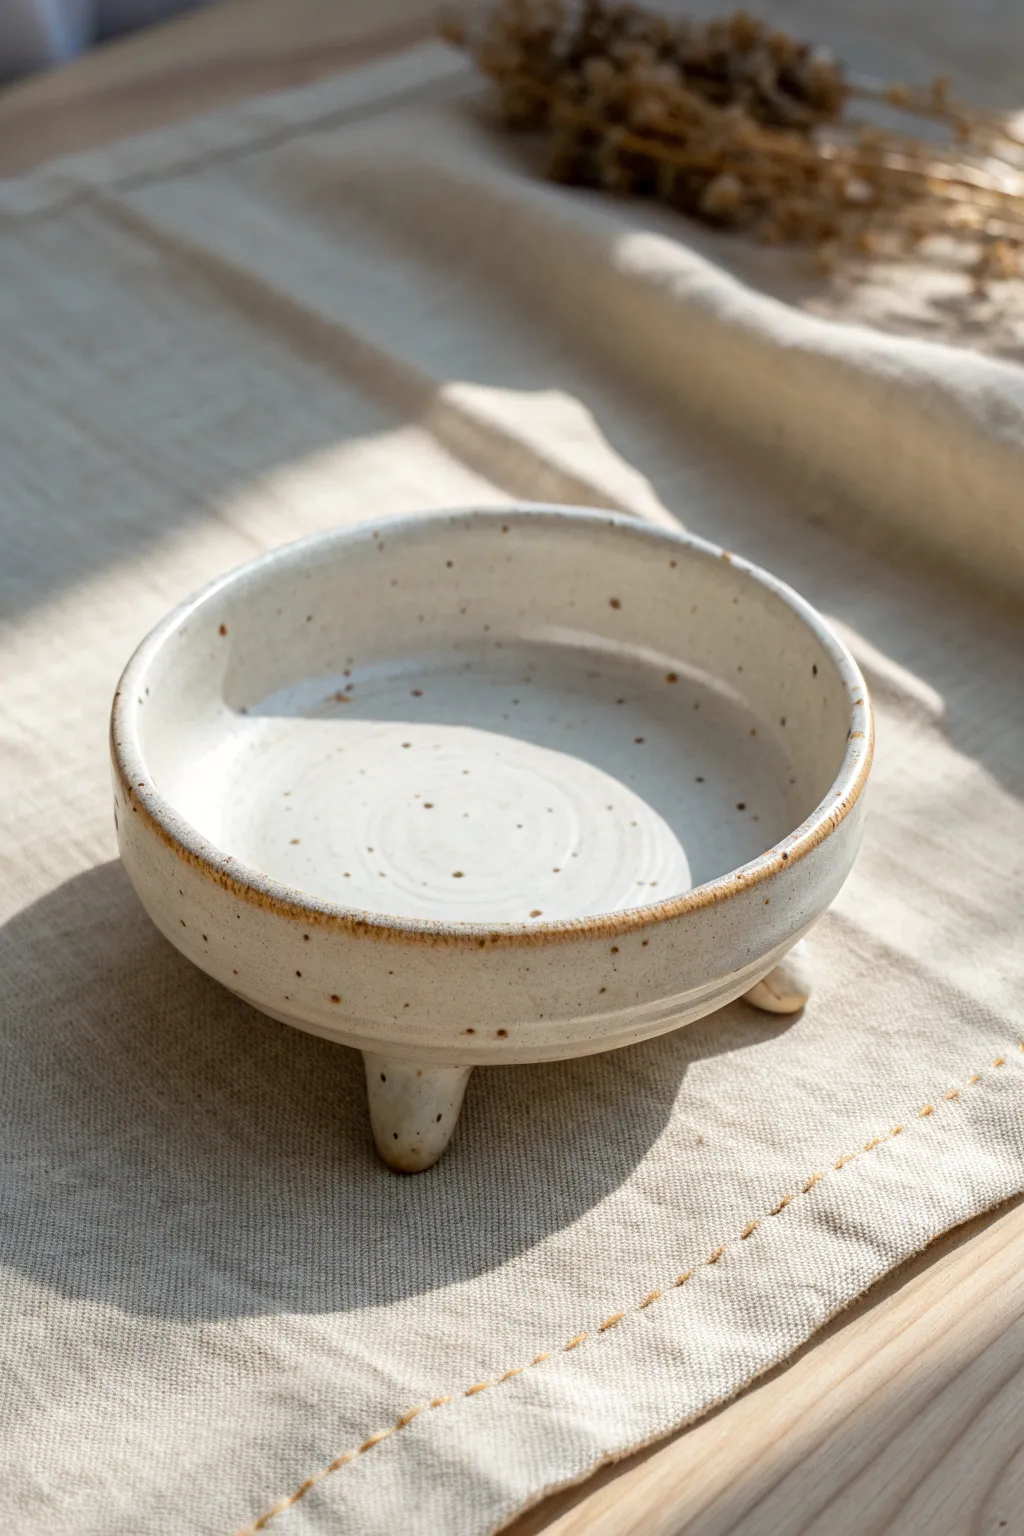
This charming handmade bowl features a rustic, speckled cream finish and sits perched on three small, rounded lug feet. The design balances a sturdy, wide form with the delicate elevation of the attached button-style legs, perfect for adding height to a table setting.
Step-by-Step Guide
Materials
- Speckled stoneware clay body (e.g., Laguna Speckled Buff)
- Pottery wheel
- Throwing tools (sponge, wooden knife, wire tool)
- Ribs (metal and rubber)
- Needle tool
- Trimming tools
- Scoring tool or serrated rib
- Slip (made from the same clay body)
- Cream or antique white glaze
- Kiln
Step 1: Throwing the Form
-
Prepare the Clay:
Wedge about 1.5 to 2 pounds of speckled stoneware clay thoroughly to remove air pockets and ensure an even consistency. -
Center on the Wheel:
Secure the clay to the wheel head and center it using firm pressure. Flatten the mound into a puck shape rather than a tall cone, setting the foundation for a wider bowl. -
Open the Form:
Open the centered clay, leaving the floor slightly thicker than usual (about 1/2 inch) to provide stability before adding feet later. -
Pull the Walls:
Pull the walls outward and upward to create a low, wide curve. Aim for a vertical rim that transitions smoothly from the curved interior. -
Refine the Profile:
Use a metal rib on the exterior and a rubber rib on the interior to compress the clay and smooth out throwing lines. I like to leave a faint spiral in the center floor for texture. -
Clean the Rim:
Chamois the rim while the wheel is spinning slowly to ensure it is rounded and comfortable to the touch. -
Cut and Dry:
Undercut the base with a wooden tool, then slice through with a wire tool. Leave the bowl on a bat to dry until it reaches a sturdy leather-hard state.
Pro Tip: Drying Evenly
Since the feet are much thicker than the walls, wrap them specifically with small strips of damp paper towel under the plastic to slow their drying speed.
Step 2: Creating and Attaching Feet
-
Trim the Base:
Once leather hard, center the bowl upside down on the wheel. Trim the bottom to a smooth curve, removing excess weight but leaving the surface rounded rather than carving a traditional foot ring. -
Roll the Lugs:
Take three small balls of fresh clay, roughly the size of large marbles or grapes. Roll them partially into short, fat tear-drop shapes. -
Mark Placement:
While the bowl is upside down, gently mark three equidistant points on the bottom curve. Use a template or visually divide the circle into thirds. -
Score Surfaces:
Thoroughly score the marked spots on the bowl and the wider, flat side of your clay lugs. Apply a generous dab of slip to both surfaces. -
Attach the Feet:
Press the feet firmly onto the scored areas. Wiggle them slightly to create suction and ensure no air is trapped between the foot and the bowl. -
Blend and Smooth:
Use a modeling tool or your finger to blend the clay from the foot onto the bowl body. Smooth the transition so it looks seamless, then reshape the foot into a soft, rounded nub. -
Level Check:
Flip the bowl right-side up gently. Place it on a flat board and press down lightly on the rim to ensure all three feet touch the surface evenly and the bowl sits level. -
Dry Slowly:
Cover the bowl loosely with plastic to let the moisture in the feet equalize with the drier bowl body. This prevents the heavy feet from cracking off.
Level Up: Mix & Match
Try carving simple geometric facets onto the outside of the lug feet before attaching them for a more angular, modern variation on this style.
Step 3: Glazing and Firing
-
Bisque Fire:
Once fully bone dry, load the piece into the kiln for a bisque fire (typically Cone 04 or 06). -
Wax Resist:
Apply wax resist to the very bottom of the feet and a thin line around the rim if you want highlight the clay body’s toasted color. -
Apply Glaze:
Dip or brush a cream-colored glaze over the entire piece. The iron speckles in the clay will bleed through during firing, creating the spotted effect. -
Wipe Feet:
Double-check the feet bottoms are clean of glaze to prevent them fusing to the kiln shelf. -
Final Fire:
Glaze fire to maturity (likely Cone 5 or 6, depending on your clay). The heat will interact with the rim and feet edges to create that beautiful toasted brown transition.
Now you have a sturdy, elevated vessel ready to display fruit or serve side dishes with rustic elegance

What Really Happens Inside the Kiln
Learn how time and temperature work together inside the kiln to transform clay into durable ceramic.
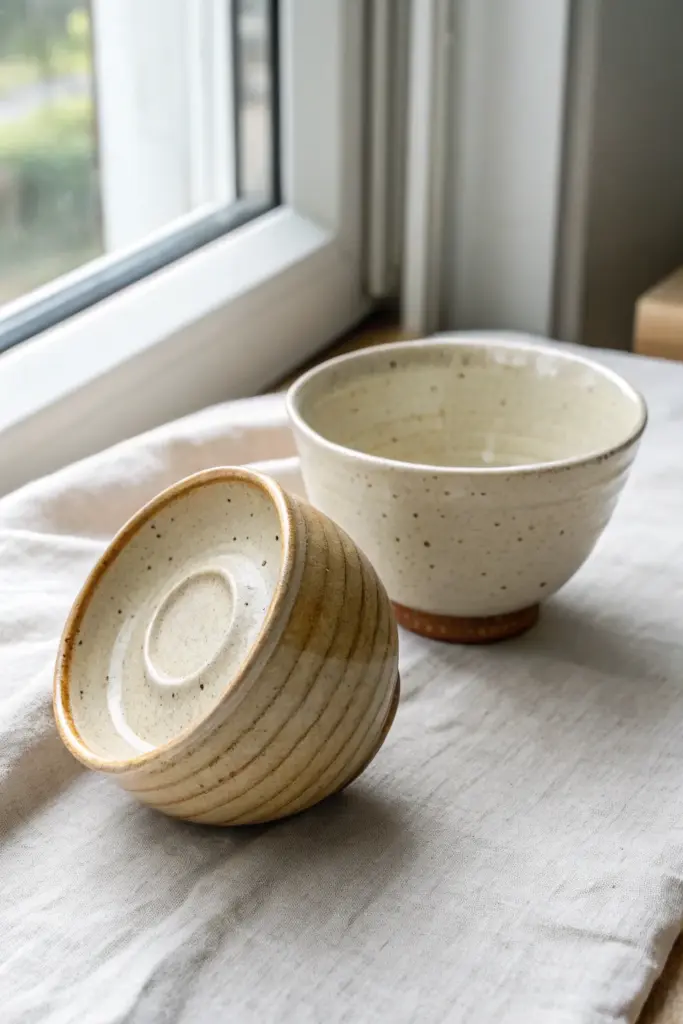
Bamboo Node and Crescent Moon Feet

This project explores a clever variation on the traditional foot ring, often reminiscent of bamboo nodes or crescent moon motifs when trimmed at an angle. The double-ring structure creates a delightful surprise when the bowl uses handled or tipped over, adding visual weight and intrigue to the bottom of your piece.
Step-by-Step
Materials
- Stoneware clay (speckled or buff)
- Pottery wheel
- Throwing sponge
- Wire cutter
- Loop trimming tools (large and small)
- Pin tool
- Rib tool (wooden or metal)
- Oatmeal or cream speckled glaze
Step 1: Throwing the Form
-
Center and open:
Begin with a ball of well-wedged clay, about 1.5 to 2 lbs. Center it firmly on the wheel head. Open the clay, but leave the floor slightly thicker than usual (about 1/2 inch to 3/4 inch) to accommodate the deep trimming needed later. -
Pull the walls:
Pull the walls up into a simple, hemispherical bowl shape. Focus on creating a consistent curve from the floor to the rim. -
Refine the curve:
Use a rib on the inside to compress the clay and smooth out throwing lines, ensuring the interior curve is continuous without a flat bottom. -
Define the rim:
Chamois or lightly compress the rim to make it smooth and rounded. It should be sturdy enough to support the bowl when flipped later. -
undercut for drying:
Use a wooden knife tool to trim a small undercut at the base of the bowl to help you wire it off cleanly. Wire off and set aside to reach leather-hard consistency.
Step 2: Trimming the Double Foot
-
Center and secure:
Once leather hard, center the bowl upside down on the wheel head. Secure it with three or four clay lugs. -
Rough out the exterior:
Using a large loop tool, trim the exterior walls to match the interior curve, removing excess weight from the lower third of the bowl. -
Establish the outer ring:
Mark the width of your main foot ring. Trim away the clay outside this line to define the vertical profile of the foot. -
Hollow the center:
Start trimming the interior of the foot area. Instead of clearing the entire center flat, you will be leaving a raised island of clay in the middle. -
Create the inner valley:
Use a smaller loop tool to dig a ‘valley’ or channel between the outer foot ring and the center. Go deep enough to create shadow, but ensure you don’t breach the floor. -
Shape the inner ring:
Refine the central island of clay into a smaller, inner ring. It should look like a bullseye. I like to make this inner ring slightly shorter than the outer ring so the bowl rests stably on the outer rim. -
Clean up edges:
Use a damp sponge or your finger to smooth any sharp edges on both rings to prevent chipping later. -
Sign and dry:
Sign your name in the very center or on the side, then allow the piece to dry slowly to bone dry.
Don’t trim too deep
Tap the center floor gently while trimming. A deep, hollow sound means the clay is thin. Stop trimming the channel before you cut through the bottom.
Step 3: Glazing and Firing
-
Bisque fire:
Bisque fire the piece to cone 04 (or your clay body’s standard). -
Wax the feet:
Carefully apply wax resist to the bottom of the outer foot ring. For the inner ring, you have a choice: wax it to leave it bare clay, or let the glaze cover it completely. -
Glaze application:
Dip or pour a creamy, speckled oatmeal glaze over the entire piece. If you waxed the inner ring, wipe away any beads of glaze sitting on the wax. -
Clean the foot:
Ensure the very bottom of the outer foot is perfectly clean of glaze to prevent sticking to the kiln shelf. -
Glaze fire:
Fire to maturity (typically Cone 6 or 10 depending on your clay/glaze combo). The heat will draw out the iron speckles in the clay, interacting beautifully with the creamy glaze.
Spiraling texture
Before the final smoothing, gently drag a serrated rib across the exterior while spinning slowly to add subtle chatter marks or spiral grooves.
Now you have a bowl that offers visual interest from every angle, even when drying in the dish rack