If you’ve been itching to sculpt something tiny and full of personality, polymer clay figurines are the sweetest place to start. These ideas lean into simple shapes, charming details, and that collectible, desk-buddy vibe that makes you want to make “just one more.”
Chibi Cat With Big Eyes
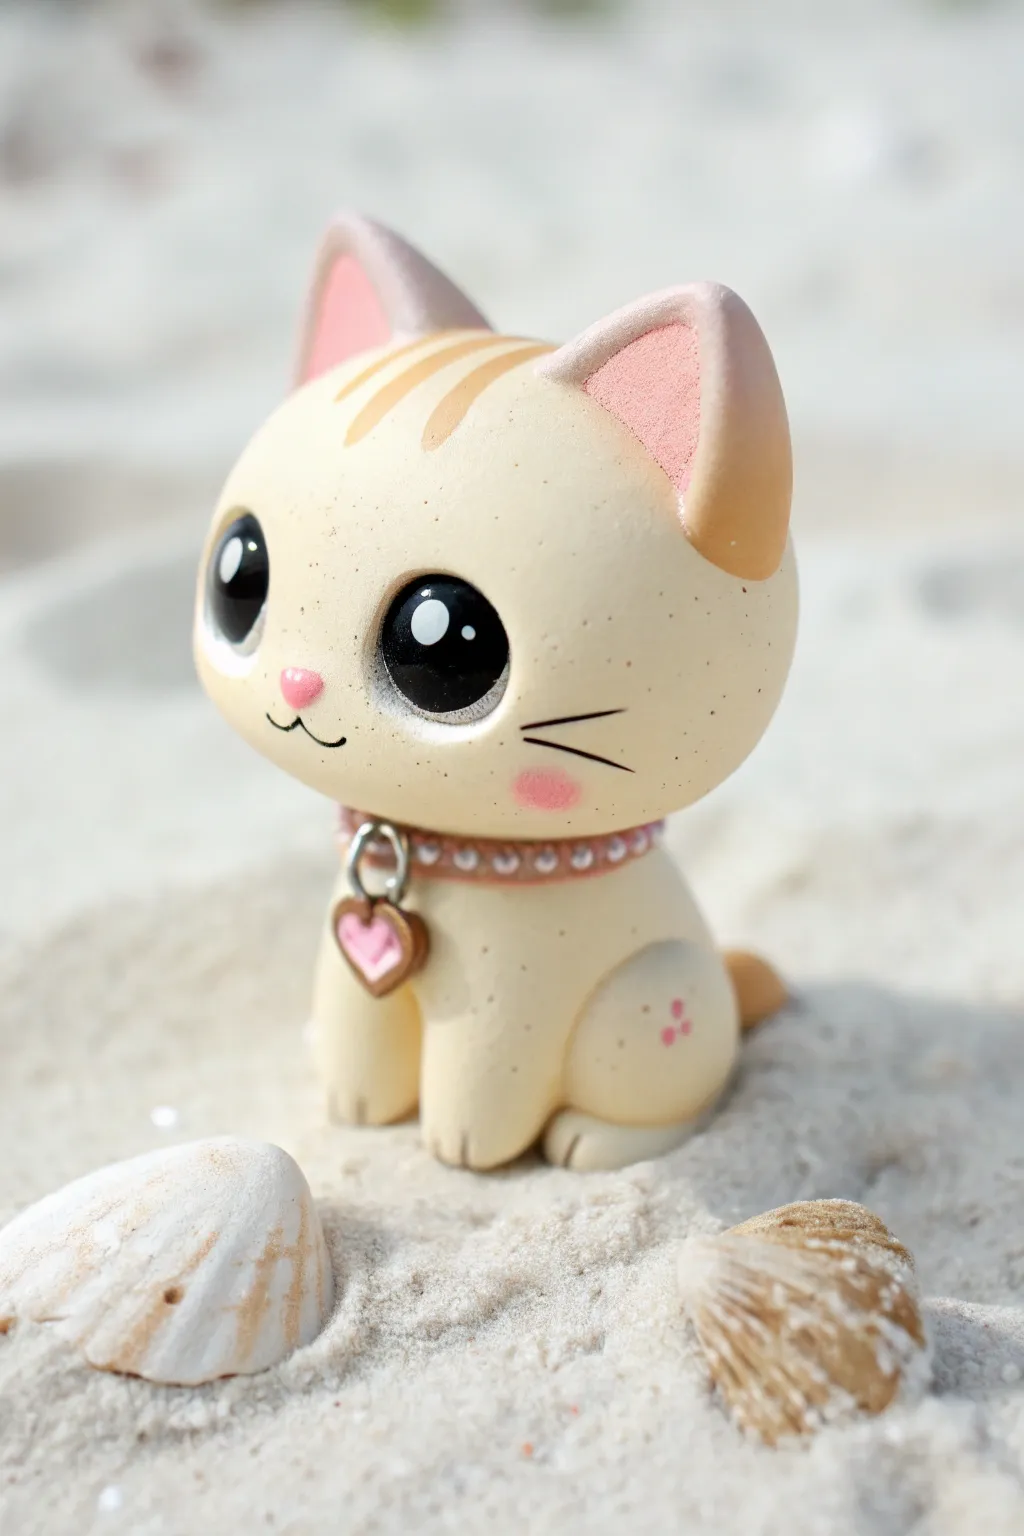
This adorable polymer clay project features a wide-eyed, cream-colored kitten sitting innocently among seashells. With its oversized head, tiny paws, and delicate pearl collar, it captures the essence of chibi cuteness perfect for a desk companion or gift.
Step-by-Step Guide
Materials
- Polymer clay (cream/pale yellow, baby pink, translucent white, brown)
- Black glass cabochons or glossy black beads (6-8mm)
- Soft pastel chalks (orange, pink, brown)
- Sculpting tools (ball styluses, needle tool, rubber shapers)
- Liquid polymer clay or bake and bond
- Small heart charm and jump ring
- Micro beads or tiny faux pearls (pink or white)
- Gloss glaze or UV resin
- Small paintbrush for pastels
- Aluminum foil (for the core)
Step 1: Sculpting the Head & Face
-
Form the core:
Create a tight ball of aluminum foil about the size of a walnut to serve as a lightweight armature for the head, compressing it well to avoid air pockets. -
Wrap the head:
Condition your cream-colored clay until soft, roll it into a sheet, and wrap it smoothly around the foil ball, blending the seams until invisible. -
Shape the head:
Roll the clay-covered ball into a slightly flattened sphere, keeping the cheek area plump and round for that classic chibi look. -
Eye sockets:
Use a large ball tool to press two deep indentations into the lower half of the face where the eyes will sit, spacing them fairly wide apart. -
Insert eyes:
Press the black cabochons or beads firmly into the sockets. If you’re using plain clay for eyes, roll two black balls, flatten them slightly, and press them in, adding a tiny white dot for reflection. -
Add the nose & mouth:
Place a teeny-tiny triangle of pink clay between the eyes for the nose. Use a needle tool or blade to gently impress a small ‘w’ shape just below it for the mouth. -
Create ears:
Shape two triangles of cream clay. Indent the centers with a tool and fill the hollows with flattened triangles of pink clay. Attaching these to the top of the head finishes the basic face structure.
Uneven Eyes?
If the eyes look crossed or wonky, use a mirror to check the symmetry before baking. The reflection often reveals alignment issues you miss when looking directly at the sculpt.
Step 2: Body & Details
-
Form the body:
Roll a smaller teardrop shape of cream clay for the body. It should be significantly smaller than the head to maintain the chibi proportions. -
Attach legs:
Roll two small sausages for front legs and attach them to the front of the body, blending the upper seams smooth. Add tiny distinct toes using a needle tool. -
Haunches and tail:
Add rounded discs of clay to the sides for the rear haunches, blending them into the body. Attach a small, curved tail to the back. -
Assembly:
Insert a short piece of wire or a toothpick into the top of the body, add a drop of liquid clay, and press the head firmly onto the neck. -
Adding whiskers:
Wait until the clay is firm, then gently roll extremely thin threads of black clay or use black wire for whiskers, pressing them lightly onto the cheeks.
Step 3: Shading & Accessories
-
Soft pastel shading:
Scrape some orange and brown pastel chalk into a fine powder. Use a soft brush to dust the top of the head (creating stripes), the tips of the ears, and the top of the tail. -
Blushing cheeks:
I always use a little pink pastel powder to dust round circles on the cheeks just below the eyes to make the expression sweeter. -
Create the collar:
Roll a very thin snake of pink clay and wrap it around the neck. Press your micro beads or tiny pearls into this band one by one using a needle tool. -
Add the charm:
Embed a small jump ring into the center of the collar before baking, and hang the heart charm from it (or attach the charm after baking if it’s heat-sensitive). -
Texture coat:
To mimic the sandy texture in the inspiration photo, you can lightly stipple the surface with a toothbrush or stiff brush before baking, though smooth is also lovely. -
Bake and glaze:
Bake according to your clay manufacturer’s instructions (usually 275°F/130°C for 15-30 mins). Once cool, apply gloss glaze to the eyes and nose for a wet look.
Textured Fur
For a ‘flocked’ or sandy look without painting, mix a small amount of fine decorative sand or translucent embossing powder directly into your outer layer of cream clay.
Place your finished kitty on a shelf or adhere it to a small base with seashells to complete the beachy scene


Round Puppy Sitting Pose
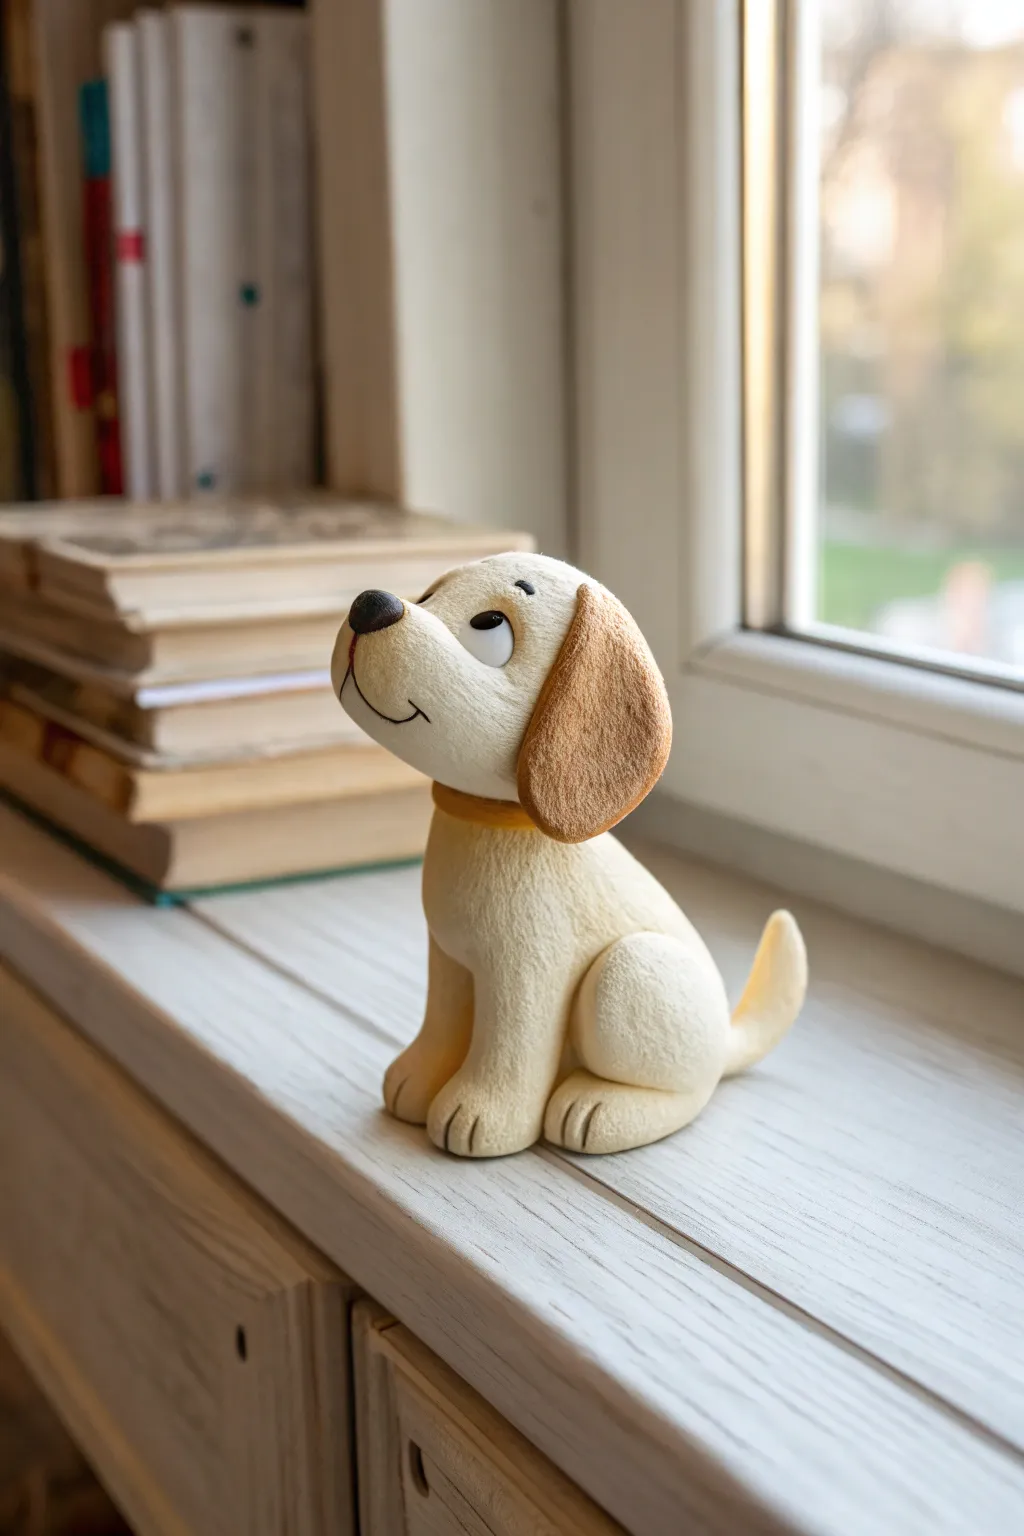
Capture the sweetness of a loyal friend with this adorable polymer clay project featuring a round-bodied puppy in a patient sitting pose. The textured, velvety finish gives the figurine a soft, huggable appearance perfect for brightening up any bookshelf.
Step-by-Step
Materials
- Polymer clay (cream/beige, light brown, dark brown, white, black, yellow)
- Aluminum foil (for armature core)
- Needle tool or toothpick
- Ball stylus tools (various sizes)
- Short-bristled brush or old toothbrush (for texture)
- Clay roller or pasta machine
- Baking tile or parchment paper
- Oven
Step 1: Forming the Core and Body
-
Create the foil core:
Crumple a piece of aluminum foil into a pear shape, roughly 2 inches tall. This saves clay and helps keep the sculpture lightweight while baking. -
Condition the base clay:
Take your cream or beige clay and knead it until it’s soft and pliable. Roll it into a sheet about 1/8 inch thick using your roller or pasta machine. -
Cover the armature:
Wrap the clay sheet around your foil core, smoothing the seams together with your fingers until you have a seamless, pear-shaped body. The wider part will be the puppy’s bottom. -
Texture the body:
Before adding limbs, gently stipple the entire surface with a short-bristled brush or an old toothbrush. This creates the soft, fur-like texture seen in the photo.
Fixing Fingerprints
If you accidentally smooth out your texture while handling the pup, a light dab of baby oil on your texturing brush helps re-impress the fur pattern without dragging the clay.
Step 2: Adding Limbs and Tail
-
Shape the hind legs:
Roll two medium balls of cream clay. Flatten them slightly into rounded teardrops to form the haunches. Press these onto the sides of the body near the bottom. -
Add the front paws:
Roll two thick logs of cream clay for the front legs. Attach them vertically to the front of the body so they sit squarely on the ground. -
Define the toes:
Use a needle tool or the back of a knife to gently press two vertical indentations into the bottom of each paw to create distinct toes. -
Attach the tail:
Roll a small cone of cream clay. Curve it slightly upwards and attach it to the lower back of the puppy, blending the seam so it looks natural. -
Re-texture joints:
Go back over any seams where the legs and tail attach with your texture brush to ensure the fur pattern is continuous.
Make it Sparkle
Once the figurine is baked and cooled, add a tiny dot of UV resin or high-gloss varnish to the eyes and nose. This ‘wet look’ brings the character to life instantly.
Step 3: Sculpting the Head and Face
-
Form the head shape:
Roll a large ball of cream clay for the head. It should be slightly oval-shaped. Press it gently onto the top of the body. -
Create the collar:
Roll a thin snake of yellow or light brown clay. Flatten it slightly and wrap it around the neck seam to hide the connection point and act as a collar. -
Add the ear:
Take a piece of light brown clay and shape it into a large, flat teardrop. Attach this to the right side of the head, letting it hang down floppily. -
Sculpt the muzzle:
Add a smaller, flattened oval of cream clay to the front of the face to build up the snout area. Blend the edges smoothly. -
Make the nose:
Form a small, rounded triangle from dark brown or black clay and press it onto the tip of the muzzle. -
Carve the mouth:
Use a needle tool to draw a simple, curved smile line extending from under the nose up towards the cheek. -
Create the eyes:
Press two small indentations for eye sockets. Fill them with flattened white clay circles. Add smaller black circles for pupils, placing them high to make the dog look like it’s gazing upward. -
Final details:
Add tiny eyebrows with thin threads of black clay or paint them on after baking. Give the head one final pass with your texture tool, avoiding the eyes and nose. -
Bake the figurine:
Bake according to your clay manufacturer’s instructions (usually 275°F/135°C for 15-30 minutes depending on thickness). Let it cool completely before handling.
Place your finished pup on a windowsill or desk where his hopeful gaze can keep you company all day


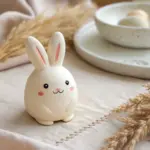
Pocket Bunny With Tiny Tail
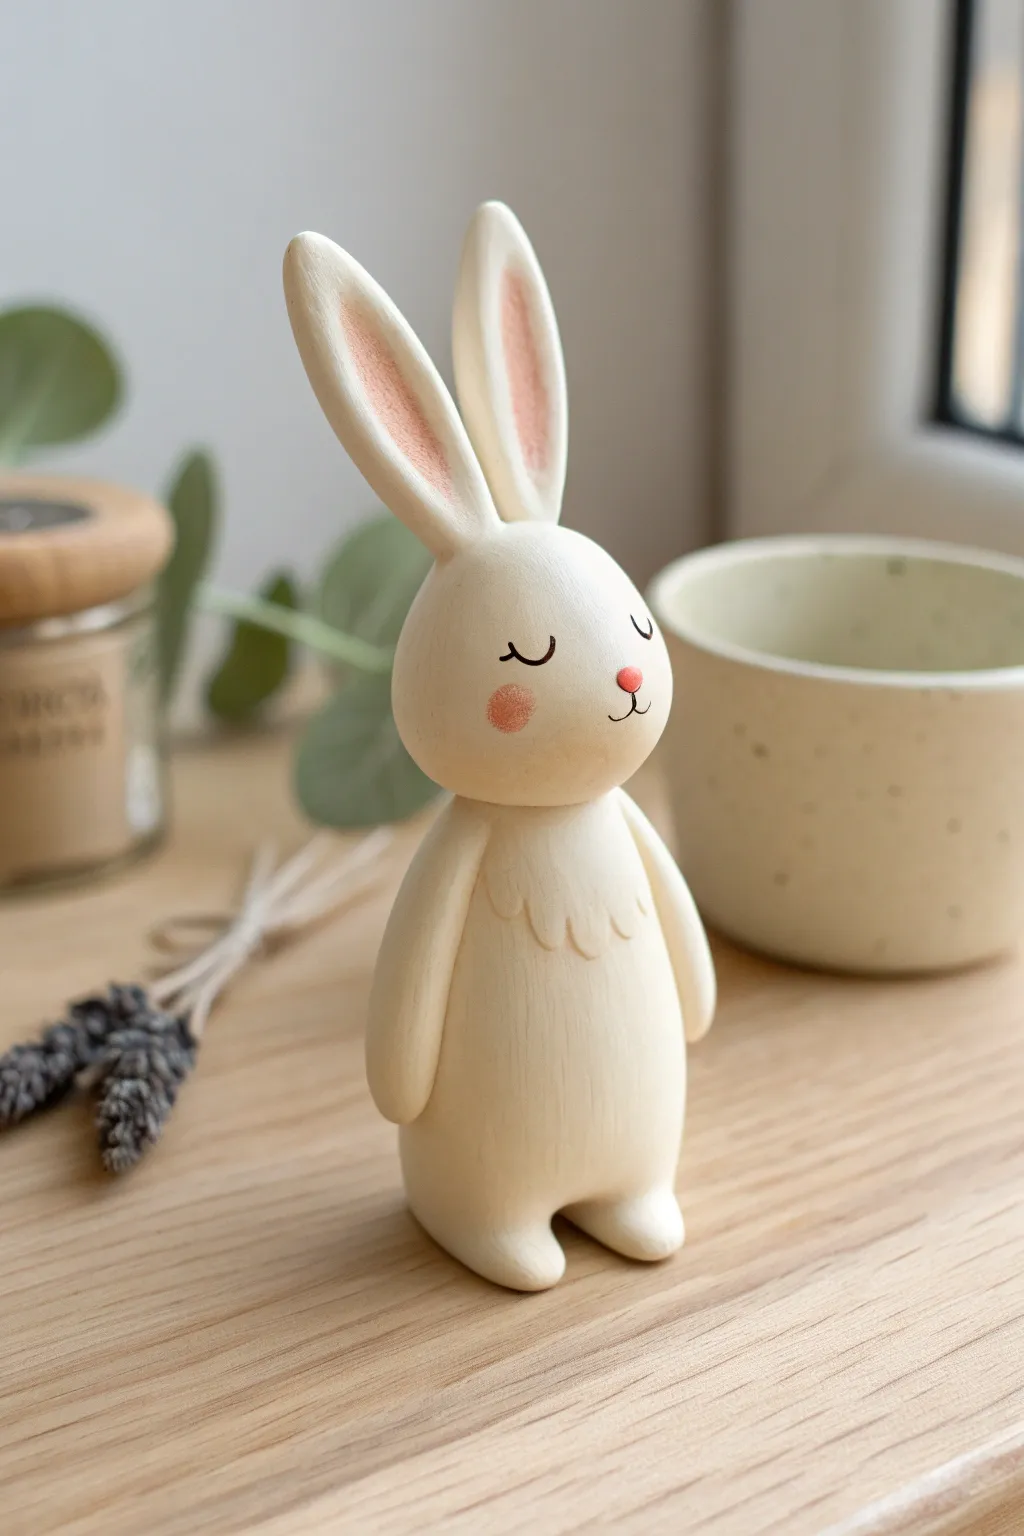
This standing bunny figurine captures a serene, minimalist aesthetic with its smooth cream finish and delicate painted details. The upright posture and long, elegantly curved ears give it a peaceful presence perfect for a desk or shelf.
Detailed Instructions
Materials
- Cream or off-white polymer clay (soft variety)
- Pink soft pastel chalk (for shading)
- Black acrylic paint or fine detail pen
- Soft detail brush
- Pointed silicone sculpting tool
- Needle tool
- Rolling pin
- Aluminum foil (optional, for core)
- Small ball tool
- Pink polymer clay (a tiny amount for the nose)
Step 1: Shaping the Main Body
-
Conditioning the clay:
Start by thoroughly kneading your cream-colored clay until it is warm and pliable. This prevents cracks during the baking process. -
Forming the body base:
Roll a smooth ball of clay, roughly the size of a walnut, then gently roll it back and forth on your work surface to elongate it into a pill-like shape that is slightly wider at the bottom. -
Creating the feet definition:
Stand the body upright and press it gently onto your surface to flatten the base. Using a modeling tool or your finger, press a small indentation into the bottom center of the front to suggest two separate feet. -
Forming the head:
Roll a second, slightly smaller ball for the head. It should be a smooth sphere. -
Attaching the head:
Place the head onto the body. To ensure a strong bond, you can insert a small piece of wire or a toothpick between the two pieces before pressing them together gently. -
Blending the neck:
With a silicone tool or your thumb, very gently smooth the seam where the head meets the body just slightly, so it looks like one cohesive figure rather than a snowman stack.
Ears Drooping?
If the long ears won’t stand up, insert a small piece of floral wire inside each ear that extends into the head for internal support before baking.
Step 2: Adding Features and Limbs
-
Sculpting the arms:
Roll two small, equal-sized logs of cream clay. Taper one end of each log so it blends into the shoulder area. -
Checking symmetry:
Press the arms onto the sides of the body. They should hang straight down, following the curve of the torso. I always step back here to make sure they look even from the front. -
Creating the chest detail:
Roll a very thin, flat sheet of cream clay and cut a semi-circle with a scalloped bottom edge using a small round cutter or needle tool. -
Applying the ‘bib’:
Press this scalloped piece onto the chest area to create the look of fluffy fur texture. -
Shaping the ears:
Create two long, teardrop shapes for the ears. Flatten them slightly, keeping them thick enough to stand upright. -
Indenting the ears:
Use a smooth modeling tool to press a long, shallow groove down the center of each ear. -
Coloring the inner ears:
Scrape a little pink pastel chalk into a powder. Apply this powder into the grooves of the unbaked ears with a soft brush for a soft, gradient effect. -
Attaching the ears:
Attach the ears to the top of the head. Position them close together, angled slightly backward for that alert look. Blend the clay at the base to secure them.
Smooth Operator
Before baking, lightly brush the entire raw sculpture with a tiny amount of baby oil or clay softener to remove fingerprints and dust specs.
Step 3: Finishing Touches
-
Blushing cheeks:
Using the same pink pastel powder, gently brush two round circles onto the cheek area of the raw clay. -
Adding the nose:
Take a tiny speck of pink clay, roll it into a small oval, and press it onto the center of the face as the nose. -
Baking the figure:
Bake the bunny according to your clay manufacturer’s instructions (usually 275°F/130°C for 15-30 minutes). Let it cool completely. -
Painting the eyes and mouth:
Once cool, use a very fine brush with black acrylic paint (or a detail pen) to draw two curved lines for sleeping eyes with tiny eyelashes. -
Final mouth detail:
Paint a small anchor shape extending down from the pink nose to create the mouth.
Place your finished bunny on a windowsill to enjoy its peaceful vibe.


Happy Frog With Simple Spots
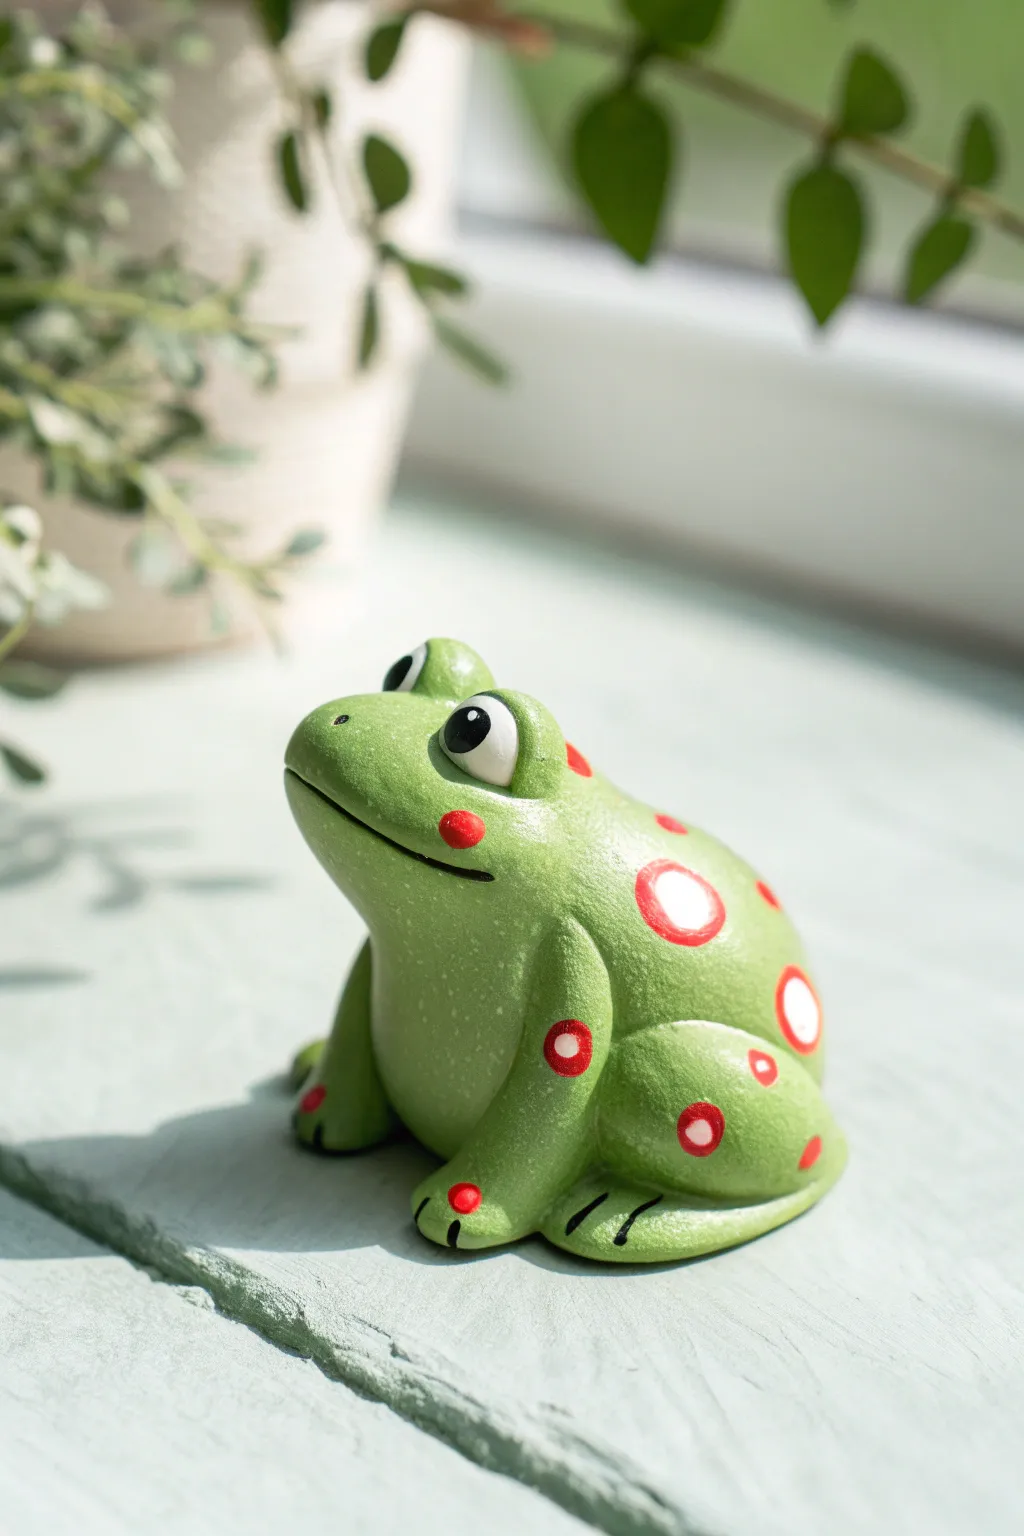
Brighten up your desk or shelf with this cheerful little amphibian friend. This project features a classic sitting frog pose with whimsical red-on-white polka dots that give it a playful, folk-art character.
Step-by-Step Guide
Materials
- Polymer clay: Grass Green, White, Red, Black
- Basic sculpting tools (needle tool, ball stylus)
- Blade or craft knife
- Acrylic roller
- Aluminum foil (for armature)
- Wet wipes (for smoothing)
- Gloss glaze (optional for eyes)
Step 1: Body & Base Shape
-
Prepare the foil core:
Crumple a small piece of aluminum foil into a teardrop shape about the size of a golf ball. This saves clay and keeps the figurine lighter. -
Condition the green clay:
Take a generous amount of grass green clay. Knead and roll it in your hands until it becomes soft, pliable, and warm. -
Cover the core:
Flatten the green clay slightly and wrap it completely around your foil teardrop. Roll it smoothly between your palms to erase any seams or fingerprints. -
Shape the torso:
Mold the Clay-covered teardrop so the heavier end is at the bottom (the belly) and it tapers slightly upward toward where the head will attach. Gently flatten the bottom so it sits stable on your work surface.
Smudged spots?
If red clay bleeds onto the white or green, dip a Q-tip in rubbing alcohol or baby oil and gently wipe the stain away before baking.
Step 2: Head & Face Details
-
Form the head:
Roll a smaller ball of green clay for the head. Shape it into a softened oval and blend it securely onto the top of the body using your thumb or a smoothing tool so the neck seam disappears. -
Create the mouth:
Use a needle tool or a thin blade to cut a wide, curved smile into the face. Deepen the corners slightly to emphasize the happy expression. -
Add eye sockets:
Roll two small balls of green clay and press them onto the top of the head for the eye mounds. Use a large ball tool to make an indentation in the center of each mound. -
Insert the whites:
Roll two balls of white clay and press them into the indentations you just made. They should bulge out slightly. -
Add pupils:
Place small, flat discs of black clay onto the white eyes. I find placing them slightly cross-eyed or off-center adds a lot of personality. -
Highlight the eyes:
Add a tiny speck of white clay to each black pupil to create a ‘catchlight’ reflection.
Glossy Finish
After baking and cooling, brush a coat of UV resin or Polyurethane gloss varnish over just the eyes and the red spots to make them pop and look wet.
Step 3: Limbs & Features
-
Attach the hind legs:
Roll two thick logs of green clay. Bend them into a ‘V’ shape for the knees and press them onto the sides of the body towards the back. Blend the upper thigh into the body. -
Form the front legs:
Create two shorter, straighter logs for the front legs. Attach them vertically under the chin area, blending the shoulders into the main body. -
Define the toes:
Flatten the ends of all four legs slightly to make feet. Use a needle tool to press two or three lines into each foot to create simple toes. -
Add cheek rosiness:
Press two tiny, flattened circles of red clay onto the cheeks right below the eyes.
Step 4: Decorative Spots
-
Create the heavy spots:
Roll several small balls of white clay and flatten them onto the frog’s back and sides. Vary the sizes for a natural look. -
Add red centers:
Place smaller flattened discs of red clay directly into the center of the larger white spots. Gently roll over them with an acrylic roller or your finger to make them flush with the body surface. -
Add solo spots:
Fill in any empty spaces on the back or legs with smaller, solid red dots to balance the pattern. -
Final texture check:
Before baking, give your frog a once-over. You can gently tap the green skin with a toothbrush or stiff brush if you want a subtle skin texture, or leave it smooth. -
Bake:
Bake according to your clay manufacturer’s instructions (usually 275°F/130°C for 15-30 minutes per 1/4 inch thickness). Let it cool completely before handling.
Now you have a charming desk buddy ready to hop into your collection

The Complete Guide to Pottery Troubleshooting
Uncover the most common ceramic mistakes—from cracking clay to failed glazes—and learn how to fix them fast.
Penguin in an Eggshell
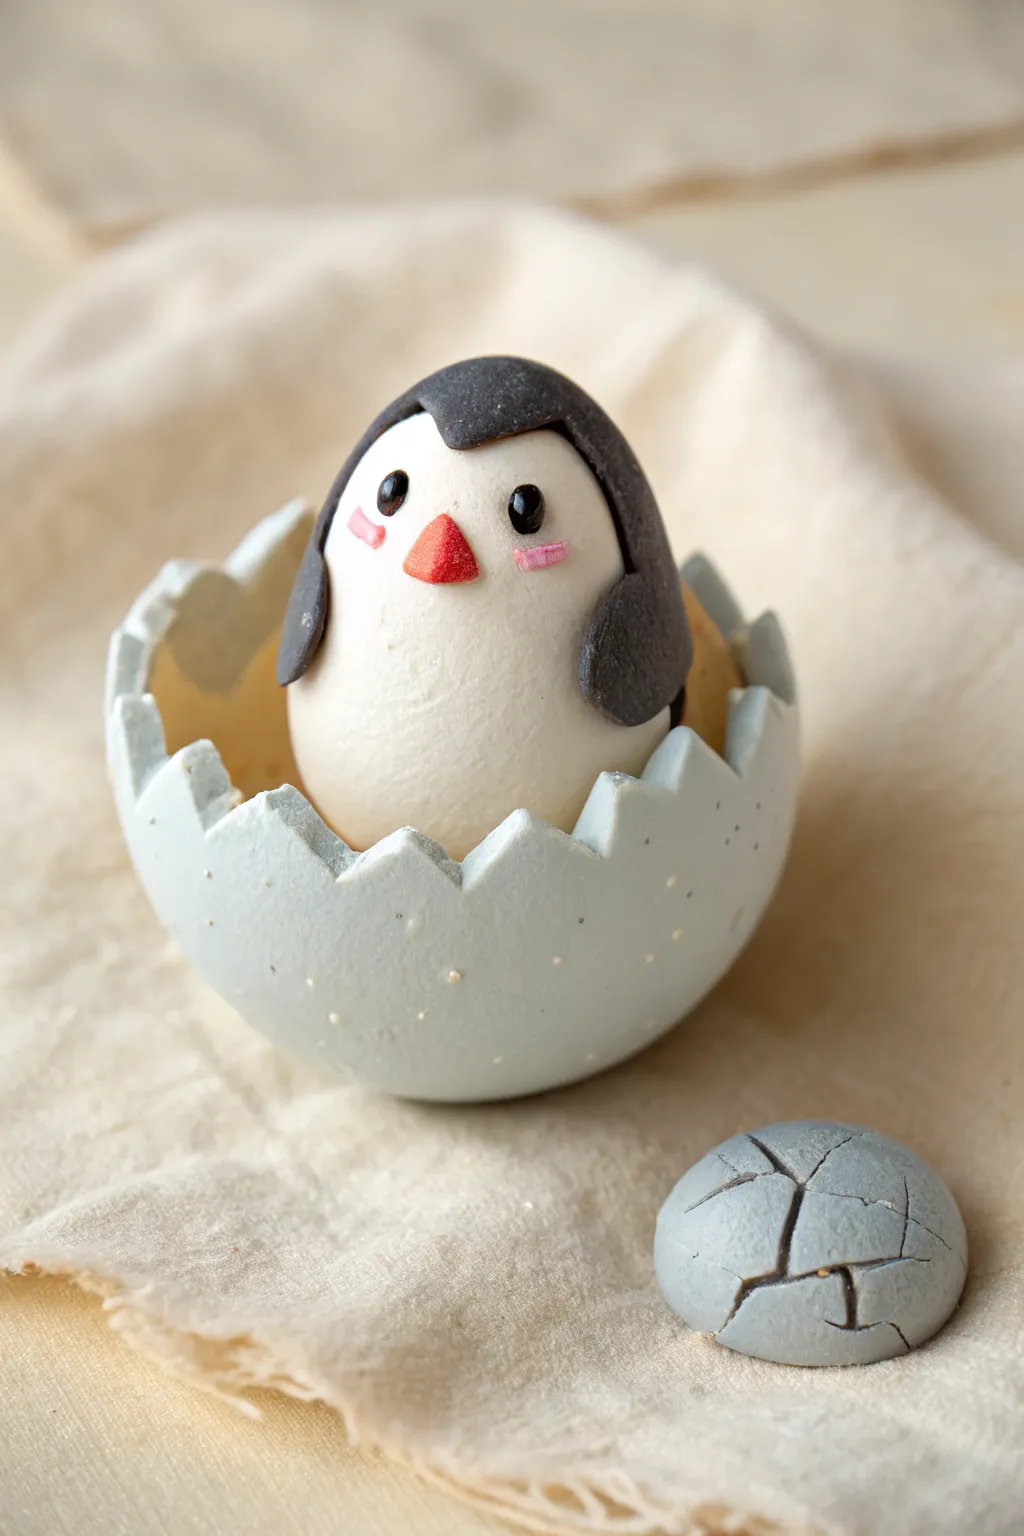
Capture the magic of new life with this adorable polymer clay project featuring a baby penguin peeking out from a speckled blue eggshell. The contrast between the smooth, round penguin and the textured, jagged shell creates a charming scene perfect for Easter or as a desk companion.
Detailed Instructions
Materials
- Polymer clay: White, Black, Light Blue/Grey, Red, Pink
- Rolling pin or pasta machine
- Circle cutters (various sizes)
- Small ball tool
- Modeling tools (blade, needle tool)
- Liquid polymer clay (optional)
- White acrylic paint
- Toothbrush or stiff brush (for speckling)
- Gloss glaze or UV resin
- Aluminum foil (for core structure)
Step 1: Creating the Eggshell Base
-
Texture the Clay:
Condition your light blue-grey clay until soft. For that realistic eggshell look, I like to mix in a tiny pinch of white or beige clay but don’t blend it fully, leaving subtle streaks. -
Form the Shell Shape:
Roll the blue clay into a ball about the size of a golf ball. Use your thumb to create a hollow indentation, pressing and pinching the sides upwards to form a bowl shape. -
Create the Jagged Edge:
Using a craft knife or a small triangular cutter, cut a zig-zag pattern around the top rim of your bowl to simulate a cracked shell. Remove the excess triangles. -
Refine the Wall Thickness:
Gently thin out the edges of the zig-zags with your fingers so they don’t look too chunky. The shell should look fragile but sturdy enough to hold the penguin. -
Add Speckles:
Dip a toothbrush or stiff brush into white acrylic paint. Run your thumb over the bristles to flicker tiny droplets of paint onto the outside of the shell. Let this dry completely before handling. -
Make the Top Fragment:
Roll a smaller ball of blue clay and flatten it into a dome. Use a needle tool or blade to score deep distinct cracks across the surface, creating the broken shell piece that sits on the ground.
Step 2: Sculpting the Penguin
-
Body Basics:
Roll a smooth ball of white clay. Test the fit by placing it inside your eggshell base; it should peek out generously. -
Shape the Egg Shape:
Identifying the top, gently taper the white ball slightly, making it look like an egg shape itself. This is the penguin’s body and head combined. -
The Black Balaclava:
Roll out a thin sheet of black clay. Use a circular cutter to punch out a circle, then use a smaller cutter to remove a section, creating a crescent or ‘widow’s peak’ shape. -
Attach the Headgear:
Drape the black clay shape over the top of the white body. Smooth the edges down carefully so it looks like feathers rather than a helmet. -
Forming Flippers:
Make two small teardrops from black clay and flatten them. Press these onto the sides of the white body, curving them slightly to hug the penguin’s belly.
Pro Tip: Clean White Clay
White clay picks up dust instantly! Always wash your hands and clean your work surface with rubbing alcohol or a wet wipe before handling the white body to keep it pristine.
Step 3: Facial Features & Assembly
-
Eye Sockets:
Use a small ball tool to make two indentations in the white facial area where the eyes will go. -
Adding Eyes:
Roll two tiny balls of black clay and press them into the sockets. They should sit slightly flush with the face. -
The Beak:
Take a tiny amount of red clay and form a small triangle. Press this gently between the eyes. -
Rosy Cheeks:
Roll extremely thin, tiny sausages or ovals of pink clay. Press them onto the cheeks below the eyes for a blushing effect. -
Final Assembly:
Apply a dab of liquid polymer clay or ‘Bake and Bond’ to the bottom of the penguin and nestle it firmly inside the eggshell. -
Baking:
Bake the entire piece according to your clay package directions (usually 275°F/135°C for 15-30 minutes). Support the shell with crumpled foil if needed so it doesn’t tip. -
The Finishing Shine:
Once cool, apply a drop of gloss glaze or UV resin specifically to the black eyes and the beak to make them look wet and lively.
Troubleshooting: Sagging Shell
If your eggshell walls are collapsing while you work, bake the bottom shell portion for 10 minutes to ‘set’ it first. Let it cool, then insert the raw penguin and bake again to finish.
Place your little hatchling on a shelf to warm up the room with its cuteness
Panda Holding a Bamboo Snack
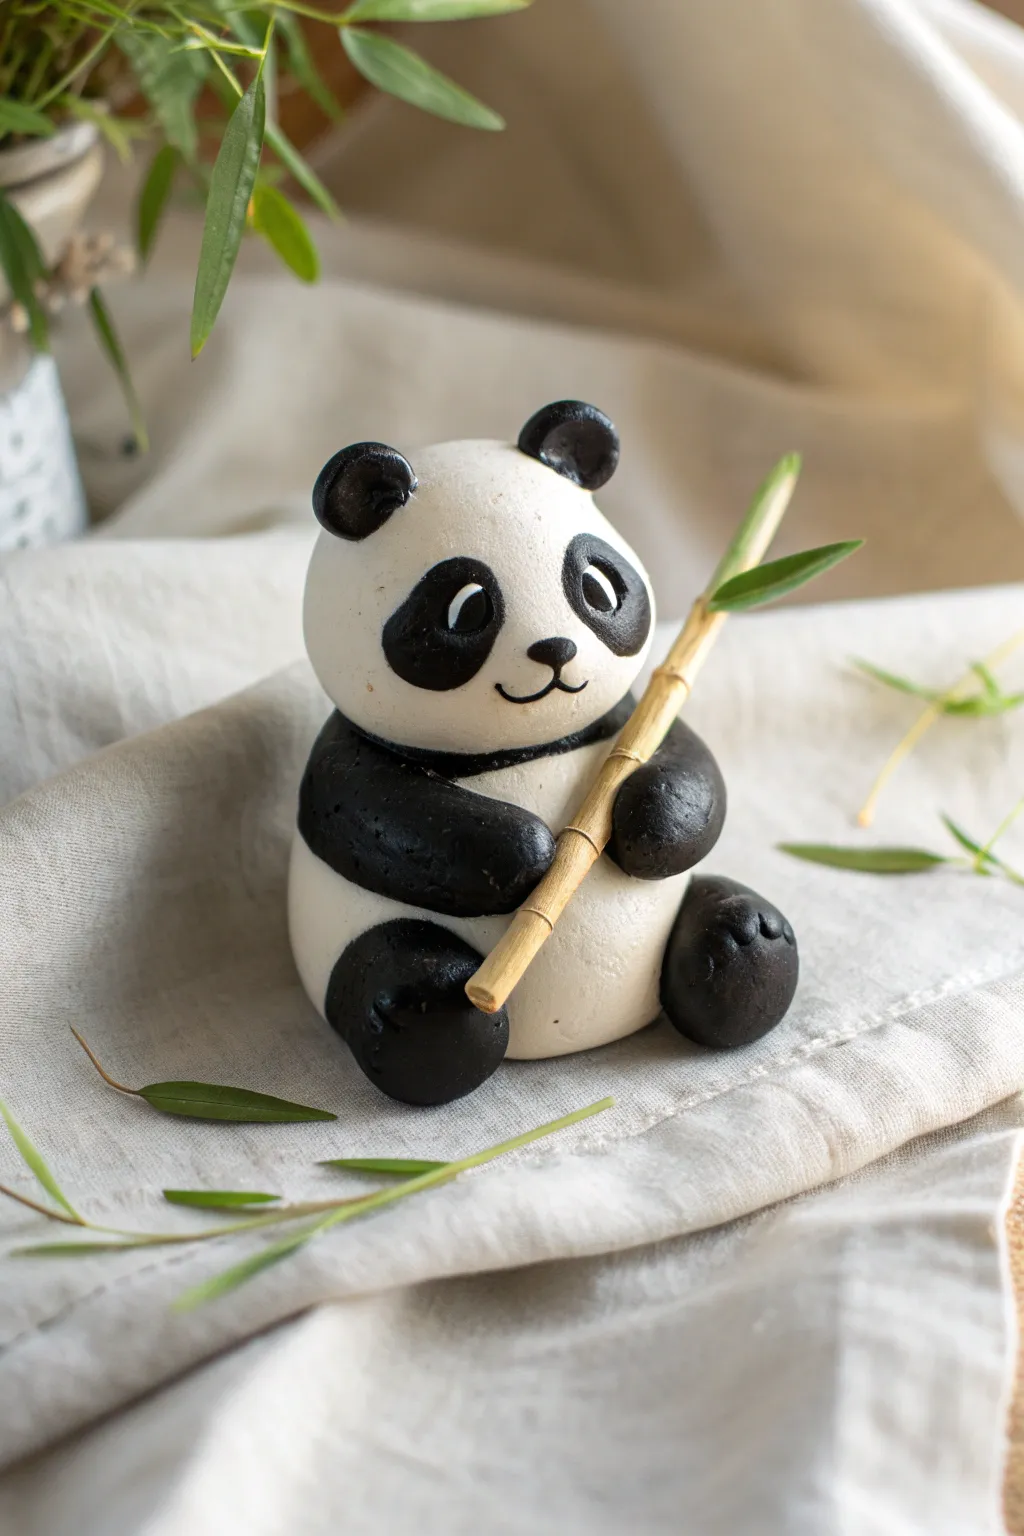
This adorable panda figurine captures the gentle spirit of the beloved bear, featuring a smooth, matte finish and a sweet expression as it holds a bamboo treat. Its rounded, stylized forms make it an accessible project for beginners while offering plenty of charm as a desk companion or gift.
Step-by-Step Tutorial
Materials
- Polymer clay (black, white, and light beige/tan)
- Acrylic paint (black and white)
- Fine-grit sandpaper (optional)
- Sculpting tools (needle tool, ball tool)
- Reference photo
- Small paintbrush for eyes
- Oven for baking
- Thin wooden skewer or toothpick (optional core structure)
- Matte varnish (optional)
Step 1: Forming the Body and Head
-
Condition the clay:
Start by kneading your white polymer clay until it is soft, pliable, and free of cracks. Do the same for the black clay, but wash your hands in between to avoid smudging the white. -
Shape the torso:
Roll a medium-sized ball of white clay into a slightly flattened egg shape. This will be the base of the panda’s body. Press it gently against your work surface so it sits flat. -
Create the head:
Roll a second, slightly smaller ball of white clay for the head. It should be roughly spherical but can be slightly wider than it is tall. -
Join the main sections:
Place the head securely onto the torso. You can use a small piece of toothpick or wire inserted between them as an armature to keep the head stable during baking.
Keep it Clean
White clay attracts dust like a magnet! Keep baby wipes nearby and clean your hands thoroughly before switching from black back to white clay.
Step 2: Adding Colored Details
-
Create the eye patches:
Pinch off two very small balls of black clay and flatten them into teardrop shapes. Press these onto the face, angled slightly downwards toward the nose area. -
Add the ears:
Form two small balls of black clay. Press one onto each side of the top of the head. I like to use a ball tool to gently indent the front of the ear slightly to give it dimension. -
Make the legs:
Roll two generous sausage shapes of black clay for the legs. Curve them slightly to hug the sides of the white body and blend the clay at the back where it meets the torso. -
Form the feet:
Roll two balls of black clay for the feet. Flatten the bottoms slightly and attach them to the front base of the body. Use a needle tool to create tiny indentations for toes if desired. -
Attach the arms:
Create two smaller sausage shapes for the arms. Attach these starting from the shoulder area, curving them forward so the hands will eventually meet or hold the object. -
Add the nose:
Place a tiny triangle or oval of black clay in the center of the face, just below the eye patches.
Head Slumping?
If the head feels too heavy before baking, verify your armature/toothpick goes deep enough into both parts. You can slightly bake the body first to stiffen it.
Step 3: Character Features & Accessories
-
Sculpt the mouth:
Using a needle tool or a very fine blade, gently press a curved line or a small ‘w’ shape under the nose to create a smiling mouth. -
Craft the bamboo stalk:
Roll a thin snake of light beige or tan clay. Use the back of your knife to gently indent rings along the stalk to mimic bamboo segments. -
Position the bamboo:
Place the bamboo stalk diagonally across the panda’s chest. Carefully press the black clay arms over the stalk so it looks like the panda is gripping it firmly. -
Create bamboo leaves:
Using green clay (or painting later), shape tiny, pointed ovals. Attach a few of these leaves to the top end of the bamboo stick for a realistic touch.
Step 4: Finishing Up
-
Smooth the surface:
Before baking, check for fingerprints. You can use a drop of baby oil on your finger to gently buff away any unwanted texture. -
Bake the figurine:
Bake the piece according to your specific clay manufacturer’s instructions. Usually, this is around 275°F (130°C) for 15-30 minutes depending on thickness. -
Cool down:
Allow the figurine to cool completely before handling. It remains fragile while hot. -
Paint the eyes:
Once cool, use a fine detail brush and white acrylic paint to add the highlight dots in the eyes. This brings the character to life. -
Apply varnish (Optional):
If you want to protect your paint job, apply a coat of matte varnish. This preserves the natural, stone-like texture shown in the original image.
Place your finished panda on your desk for a daily dose of calm cuteness


What Really Happens Inside the Kiln
Learn how time and temperature work together inside the kiln to transform clay into durable ceramic.
Mini Dino With Tiny Spikes
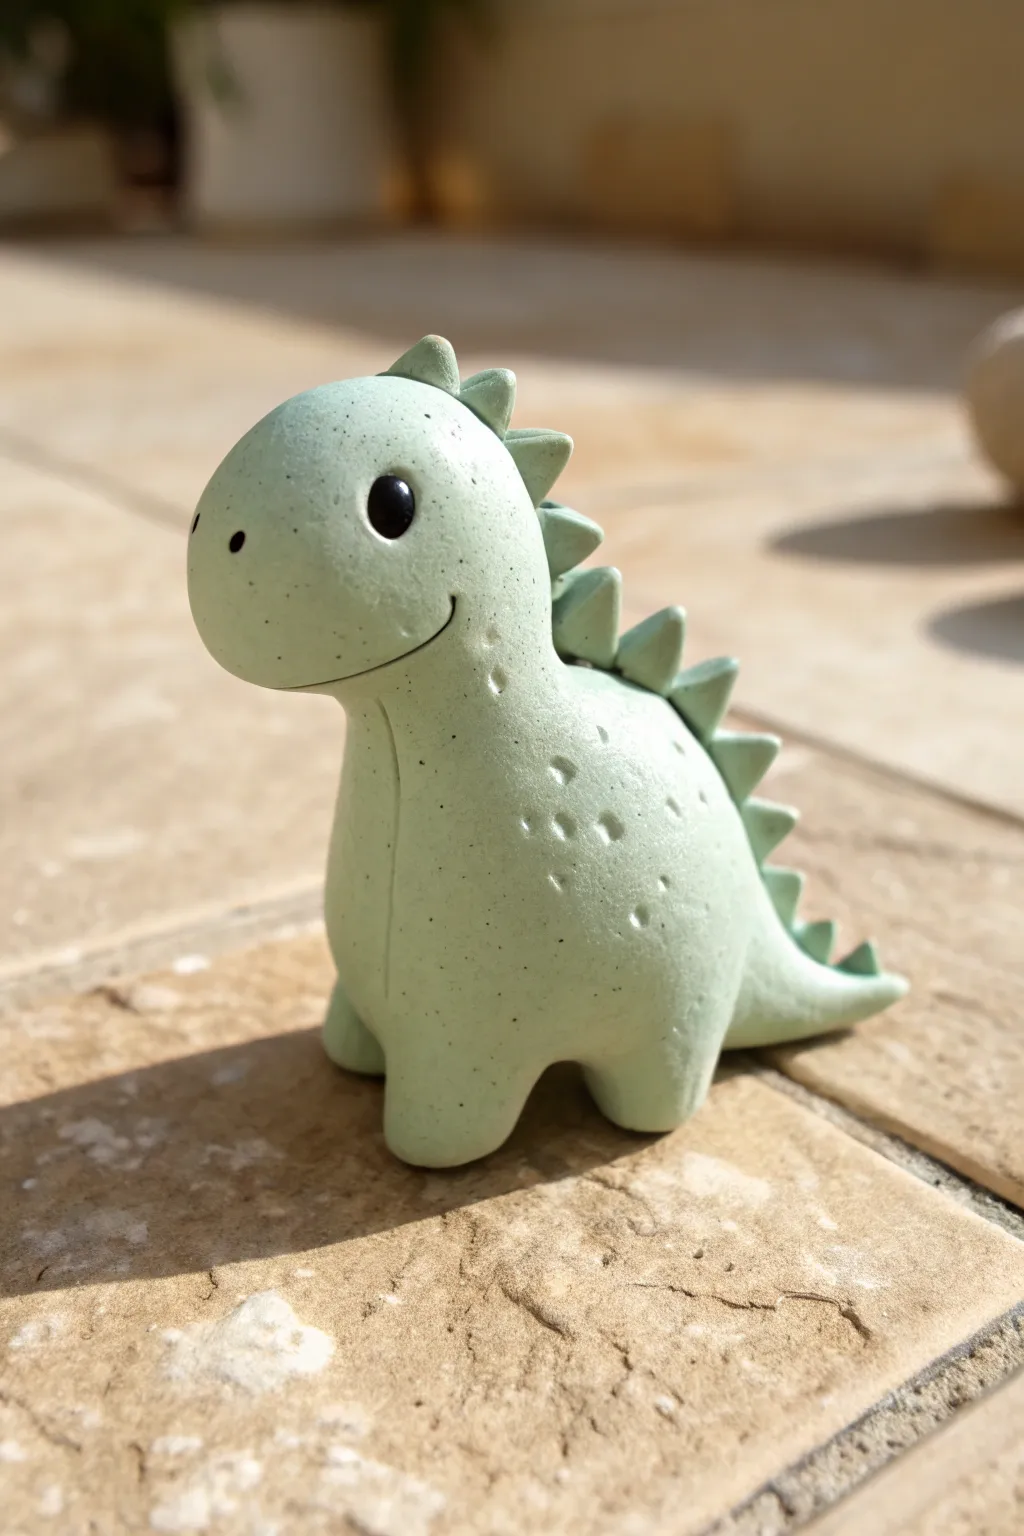
This charming pastel green dinosaur is deceptively simple to sculpt, relying on smooth curves and a single body shape to create maximum cuteness. The speckled clay gives it a professional, stone-like finish that hides fingerprints beautifully.
How-To Guide
Materials
- Polymer clay (Granite or speckle effect in pastel green)
- Black polymer clay (tiny amount for eyes)
- Black acrylic paint (optional, alternative to clay eyes)
- Basic sculpting tools
- Ball stylus tool
- Pin or needle tool
- Baking sheet
- Oven
Step 1: Forming the Body
-
Body Base:
Start by conditioning a substantial ball of your speckled green clay. Roll it into a smooth, seamless sphere, then gently elongate it into a pear or teardrop shape. -
Shaping the Neck:
Pinch and smooth the narrower end of the pear to define the neck and head. Bend the neck slightly upward so the head looks forward, creating a gentle ‘S’ curve in the silhouette. -
Refining the Head:
Gently press the snout area to make it slightly distinct from the forehead. You want a rounded, soft profile rather than a sharp one. -
Creating Legs:
For the front legs, pinch two small sections of clay from the bottom chest area. Pull them down gently and blunt the ends so the dino can stand. -
Back Legs:
Repeat the process for the back legs, making them slightly thicker to support the weight. Ensure all four feet are level by tapping the figure gently on your work surface. -
Tail Extension:
Smoothly pull the back of the body out into a short, pointed tail. This acts as a third balance point for stability.
Stone Cold Smooth
Granite-effect clay is much more forgiving than solid colors. If you accidentally leave a tiny dent or fingerprint, it blends right into the faux-stone texture.
Step 2: Adding Details
-
Spikes Prep:
Roll out a small snake of the same green clay, then flatten it slightly. Use a blade to cut a series of small, uniform triangles. -
Attaching Spikes:
Starting at the top of the head and working down to the tail, gently press the triangles onto the center ridge of the back. Blend the base of each spike into the body so they don’t fall off. -
Eye Sockets:
Take your ball stylus tool and make two indentations on either side of the face where the eyes will go. I find placing them slightly wide apart increases the cuteness factor. -
Eye Globes:
Roll two minuscule balls of black clay. Carefully press them into the sockets you just made, flattening them slightly so they look embedded. -
Nostrils:
Using a needle tool or a very fine glowing stick, poke two tiny holes near the front of the snout for nostrils. -
The Smile:
Use a curved tool or the side of a needle tool to impress a long, sweeping smile line that curves up towards the cheek. -
Texturing:
Use a blunt tool to create shallow, random indentations on the body. This mimics the uneven texture seen in the reference image and adds tactile interest.
Jurassic Garden
Make a tiny prehistoric environment by placing your dino on a rock and surrounding it with real moss or small succulent cuttings for a display.
Step 3: Final Touches
-
Smoothing:
Before baking, do a final check for fingerprints. Because this is ‘stone’ effect clay, you can use a bit of baby oil to smooth imperfections without ruining the look. -
Seam Check:
Verify that the neck seam (if you shaped it from two pieces, though one is preferred) or the leg joins are completely blended for a monolithic look. -
Baking:
Bake the figurine according to your specific clay brand’s instructions. Usually, this is around 230°F to 275°F (110°C – 135°C) for 15-30 minutes. -
Cooling:
Let the dinosaur cool completely inside the oven before moving it to prevent cracking.
Once cooled, your prehistoric buddy is ready to guard your desk or live in a plant pot
Wide-Eyed Owl on a Stump
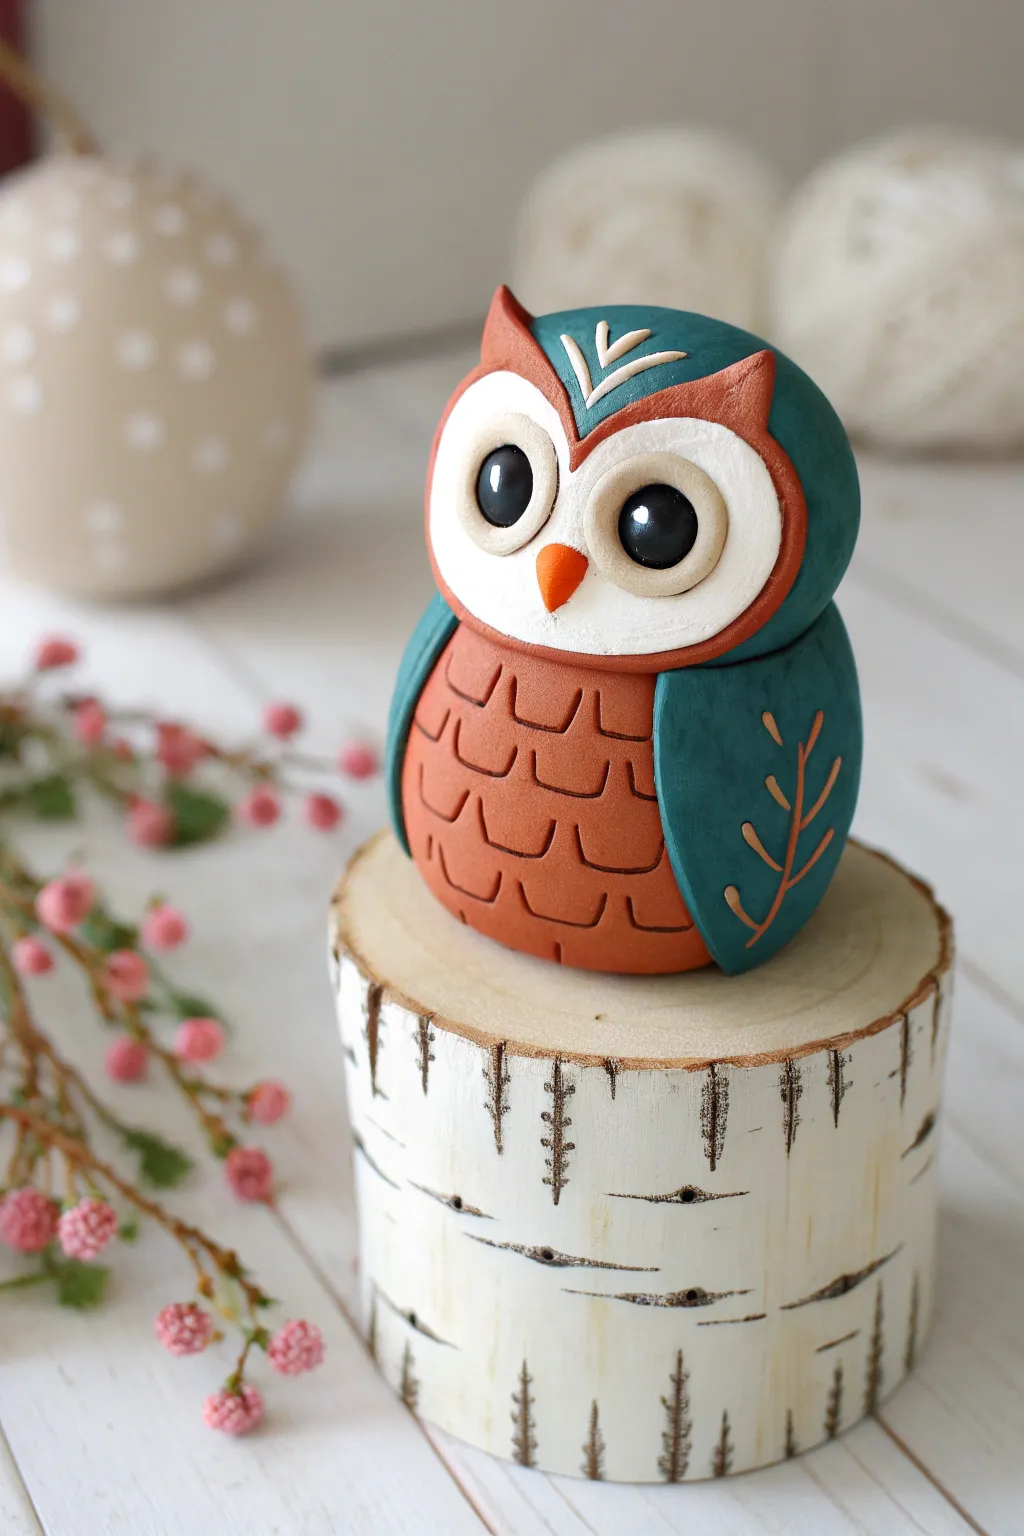
Craft a charmingly simplistic owl perched atop a faux-birch stump using polymer clay. This project features stylized feathers, large expressive eyes, and muted earthy tones for a perfect forest-inspired decoration.
Step-by-Step
Materials
- Polymer clay (teal blue, terracotta/rust orange, white, black, small amount of bright orange)
- Acrylic roller or pasta machine
- Detail needle tool or awl
- Ball stylus tools (large and medium)
- Blade or craft knife
- Round cutters (various sizes)
- Foil (for armature core, optional)
- Small wooden round or pre-cut branch slice (for base)
- White and black acrylic paint (for the stump details)
- Liquid clay or Bake & Bond
Step 1: Owl Body Construction
-
Form the core:
Start by conditioning your terracotta clay. Roll a smooth, substantial ball to form the main body, slightly flattening the bottom so it sits securely. If you want to save clay, you can use a tightly packed foil ball as a core and cover it with a layer of clay. -
Add the belly texture:
Using a needle tool or a small U-shaped clay tool, gently press scallop patterns into the lower half of the terracotta body to simulate feathers. Work in staggered rows from the bottom up. -
Create the head shape:
Take a separate piece of teal clay and roll it into a thick, flattened disc that is slightly wider than the terracotta body. Mold this over the top of the body like a cap, smoothing the seam where the colors meet at the back. -
Sculpt the ears:
Pinch the top corners of the teal head-cap upwards to create two distinct, pointed ear tufts. Smooth them so they curve naturally.
Step 2: Face & Wings
-
Cut the face mask:
Roll out a thin sheet of terracotta clay. Use a heart-shaped cutter (or cut freehand) to make the base for the face. Place this on the front of the teal head area. -
Layer the white mask:
Roll out a sheet of white clay and cut a slightly smaller heart or double-circle shape. Press this onto the terracotta mask layer, leaving a nice orange border visible around the edges. -
Detail the forehead:
Roll very thin snakes of teal and white clay. Create a small ‘V’ shape on the forehead area of the mask for extra decoration. -
Shape the wings:
Create two teardrop shapes from teal clay. Flatten them slightly and curve them to fit the sides of the body. -
Decorate the wings:
Roll a very thin snake of terracotta clay. Press it vertically onto the wing, then add smaller angled pieces to create a branch or feather vein pattern. Attach the wings to the sides of the body.
Fingerprint Troubles?
Work light colors first (white) to avoid color transfer. If needed, lightly brush the unbaked clay with a little baby oil or cornstarch to smooth out prints.
Step 3: Eyes & Finishing Touches
-
Socket indentation:
Use a large ball tool to press two deep sockets into the white face mask area. -
Insert the eyes:
Roll two balls of black clay and press them firmly into the sockets. They should be large and prominent. -
Add the eye shine:
Take tiny specs of white clay and place one on the upper right side of each pupil to give the owl a lively spark. -
Attach the beak:
Form a small, sharp cone from bright orange clay. Place it centrally between and slightly below the eyes. -
Adding texture to eyes:
For extra dimension, you can add a thin ring of white clay around the black eyes before inserting them into the sockets to create eyelids.
Pro Tip: Eye Depth
Press the eye sockets slightly deeper than you think is necessary. The eyes will pop more if they look embedded rather than just stuck on the surface.
Step 4: Stump Base Assembly
-
Prepare the wood base:
Take your wooden round. If it isn’t already white, list paints are best here? I suggest a coat of matte white acrylic paint. Let it dry completely. -
Paint birch details:
Using a thin brush and black acrylic paint mixed with a tiny bit of water, paint horizontal dashes and small ‘eye’ shapes to mimic birch bark. Focus on the sides and the rim. -
Final assembly:
Apply a small amount of liquid clay or strong glue to the top of the dry stump. Press your finished owl firmly onto the center. -
Baking:
Bake the entire piece according to your clay manufacturer’s instructions (usually 275°F/135°C for 15-30 minutes depending on thickness). Let it cool fully before handling.
Display your wise little friend on a shelf or desk for a touch of handmade woodland magic

TRACK YOUR CERAMIC JOURNEY
Capture glaze tests, firing details, and creative progress—all in one simple printable. Make your projects easier to repeat and improve.
Kawaii Mushroom Buddy
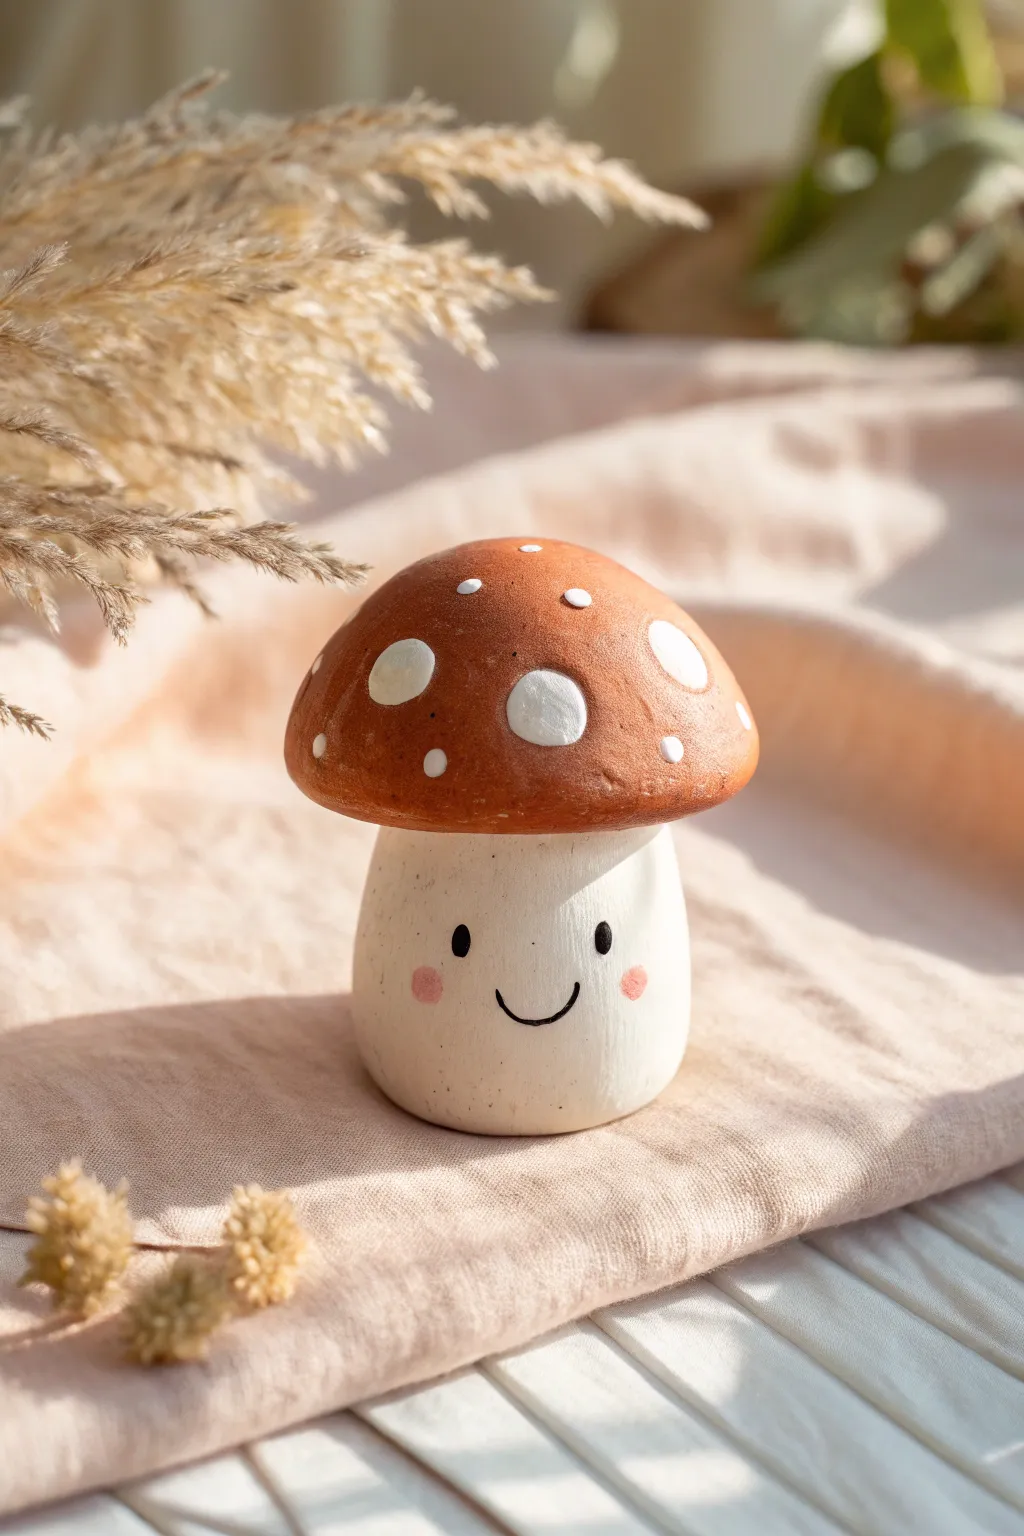
Bring a little woodland warmth to your desk with this adorable smiling mushroom figurine. Featuring a classic red-brown cap and a sweet, simple face, this project is perfect for beginners looking to practice basic sculpting shapes.
Step-by-Step Guide
Materials
- Polymer clay (white, reddish-brown or terracotta, black, soft pink)
- Acrylic rolling pin
- Ball stylus tool (medium and large)
- Needle tool or toothpick
- Liquid polymer clay (optional, for adhesion)
- Blade or craft knife
- Oven for baking
- Matte varnish (optional)
Step 1: Sculpting the Stalk
-
Condition the Clay:
Start by thoroughly kneading a chunk of white polymer clay until it is soft, pliable, and free of cracks. Warm clay is much easier to smooth. -
Form the Base Shape:
Roll the white clay into a smooth ball about the size of a walnut to ensure there are no air bubbles trapped inside. -
Shape the Cylinder:
Gently roll the ball into a thick cylinder shape. Tap the bottom against your work surface to flatten it so the mushroom stands independently. -
Rounded Top:
Using your fingers, gently round off the top of the cylinder slightly. This domed top will help the cap sit more naturally later on. -
Check Stability:
Set the stalk down and make sure it doesn’t wobble. If it leans, press it firmly against the table again to level the base.
Smooth Seams Tip
To merge the white spots seamlessly into the cap, gently roll the entire cap on your work surface after applying them. This embeds the dots into the clay.
Step 2: Creating the Cap
-
Prepare the Cap Color:
Condition a piece of reddish-brown or terracotta-colored clay. This earthy tone gives it that natural mushroom look shown in the photo. -
Roll a Sphere:
Roll this colored clay into a ball comparable in size to the stalk, perhaps slightly larger depending on how much overhang you want. -
Form the Dome:
Press the ball gently into a dome shape. I like to hollow out the underside just slightly with my thumb to create a snug fit for the stalk. -
Add the Spots:
Takes tiny pinches of white clay and roll them into small, flattened discs of varying sizes. -
Apply the Spots:
Press the white discs randomly onto the mushroom cap. Use your finger to smooth them down so they are flush with the cap’s surface rather than sticking out. -
Attach Cap to Stalk:
Place the cap onto the white stalk. If the clay is dry, a drop of liquid polymer clay or ‘Bake and Bond’ creates a stronger connection.
Dust Trouble?
If dust gets on your white clay, a Q-tip dipped in rubbing alcohol or nail polish remover will clean it right off before baking.
Step 3: Adding the Face & Finishing
-
Mark the Features:
Use a needle tool to very lightly mark where you want the eyes and mouth to go to ensure symmetry before committing with clay. -
Create the Eyes:
Roll two miniscule balls of black clay. Press them flat onto the face area to create the wide-set eyes. -
Add the Smile:
Roll a very thin ‘snake’ of black clay. Cut a tiny curved section and carefully press it between the eyes for the smile. -
Blushing Cheeks:
Take the tiniest amount of soft pink clay, flatten it into translucent ovals, and press them onto the cheeks just below the eyes. -
Final Texture:
Before baking, give the whole piece a once-over to smooth out any fingerprints using a drop of baby oil on your finger if needed. -
Bake:
Bake the figurine according to your clay manufacturer’s instructions (usually 275°F/135°C for 15-30 minutes). -
Cool and Varnish:
Let the mushroom cool completely. You can leave it matte or add a coat of matte varnish for extra durability.
Now you have a charming little fungi friend to keep you company.
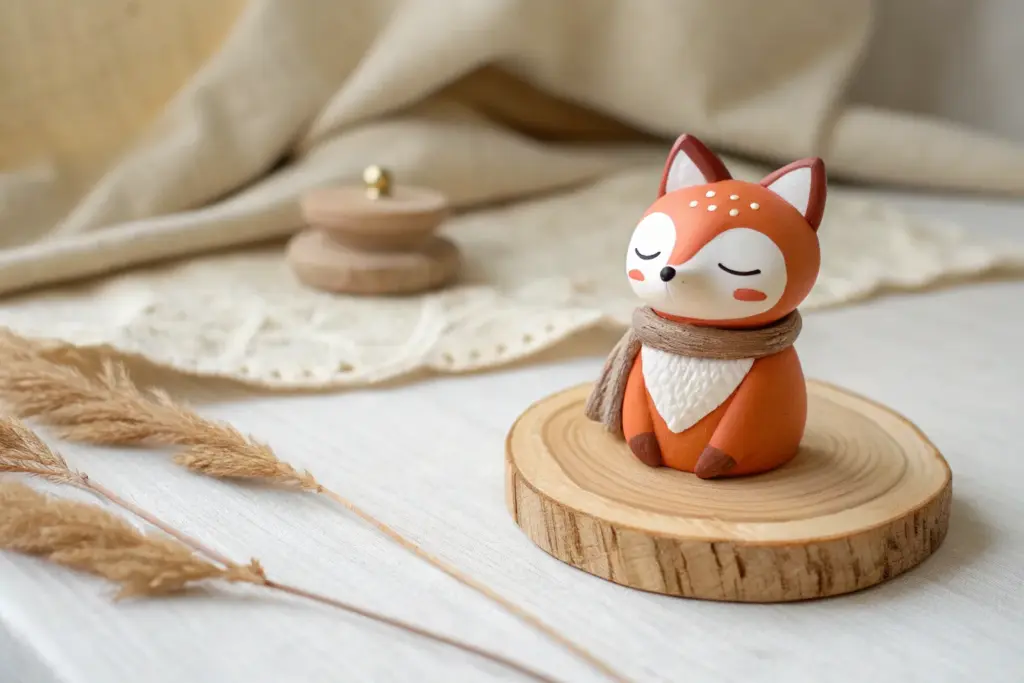
Fox With a Micro Forest Base
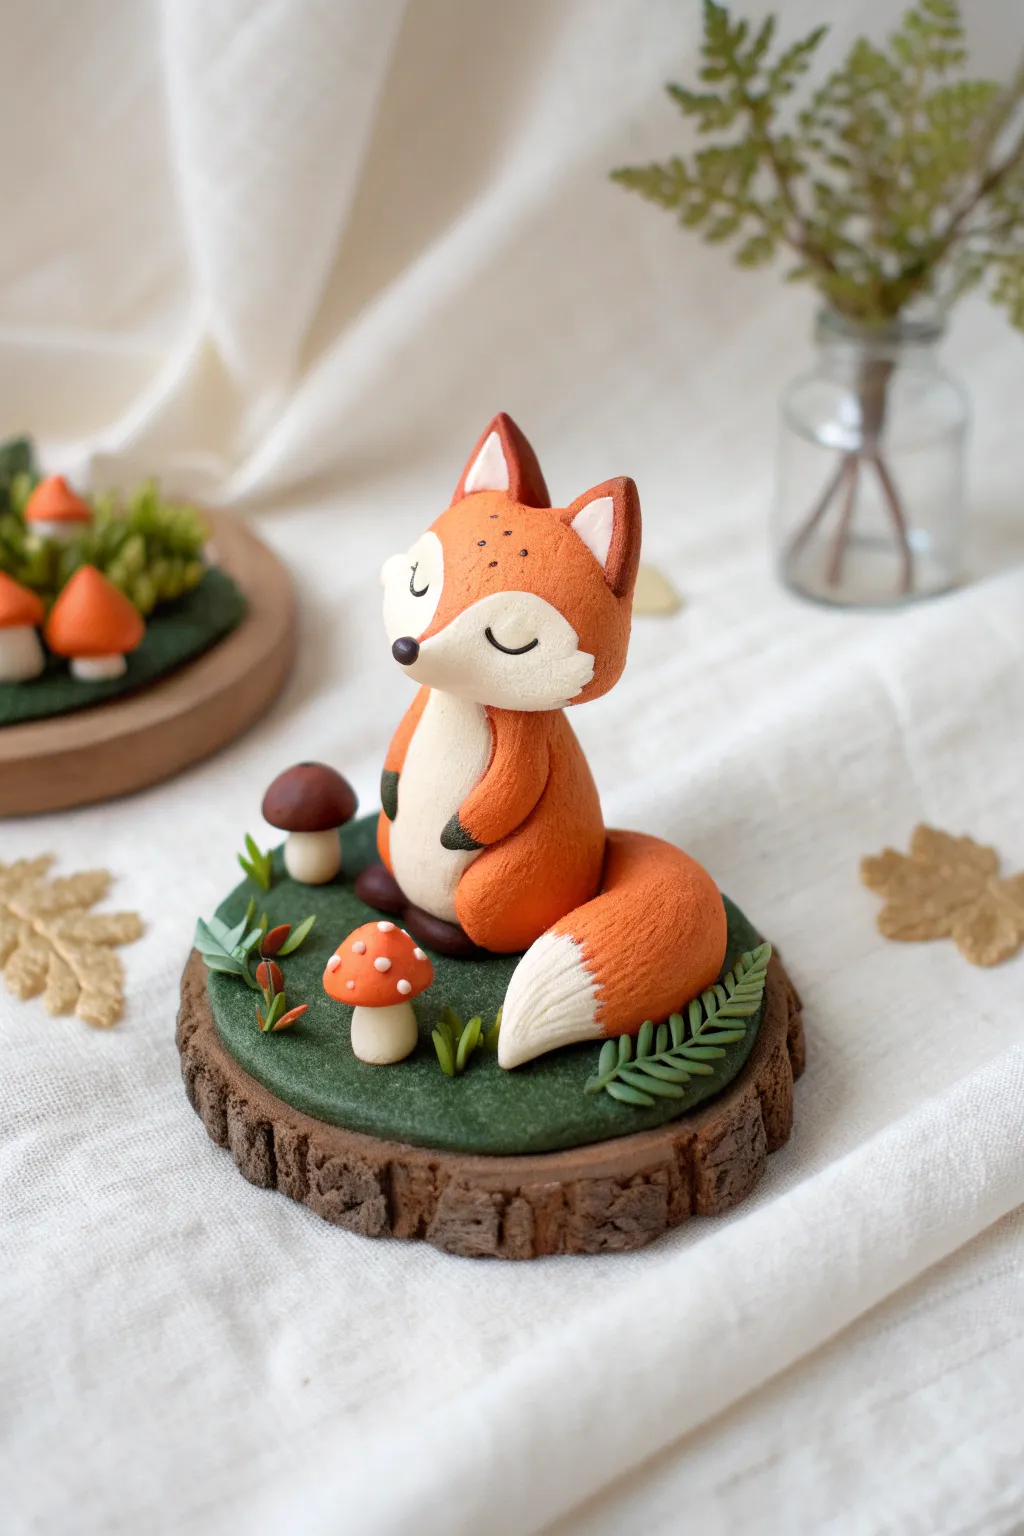
Create a peaceful woodland scene with this sleeping fox perched on a mossy log slice. The project features soft textures, earthy tones, and tiny mushroom details for a whimsical, nature-inspired desk companion.
How-To Guide
Materials
- Polymer clay (Orange/rust, white, dark brown, green, red, black)
- Aluminum foil (for creating the core)
- Needle tool or toothpick
- Ball stylus tool
- Soft paintbrush (for texture)
- Clay roller or pasta machine
- Clay blade
- Toothbrush or texturing sponge
- Baking sheet and oven
Step 1: Creating the Rustic Base
-
Form the core:
Start by scrunching a piece of aluminum foil into a flat, thick disc shape. This saves clay and keeps the figurine lighter. -
Cover the top:
Roll out a sheet of dark green clay. Place the foil disc on top and wrap the green clay over the upper surface, smoothing the edges down the sides. -
Texture the moss:
Gently tap a toothbrush or texturing sponge over the entire green surface to create a realistic, mossy grass texture. -
Add the bark:
Roll a strip of dark brown clay thick enough to cover the sides of your disc. Wrap it around the perimeter. -
Detail the bark:
Using a needle tool, carve deep, vertical grooves into the brown strip to simulate rough tree bark. Pull the tool downward in jagged lines for a natural look.
Clean Clay Trick
White clay picks up dust easily. Keep baby wipes nearby and clean your hands and tools thoroughly before handling the white parts of the fox.
Step 2: Sculpting the Fox
-
Body shape:
Roll orange clay into a smooth pear shape. Flatten the bottom slightly so it sits stable, and gentle press the front to define the chest area. -
White belly:
Flatten a small teardrop of white clay. Attach it to the front of the orange body, smoothing the edges so it blends seamlessly. -
Head formation:
Roll a slightly flattened sphere of orange clay for the head. Pinch the sides gently to start suggesting the cheek fur shape. -
Face mask:
Create a heart-shaped piece of white clay. Place it on the lower half of the face, pulling the points outward to form the fuzzy cheeks. -
Adding features:
Attach a tiny black oval for the nose at the center point. Use a needle tool to gently indent two curved lines for the sleeping eyes. -
Ears:
Shape two small triangles of orange clay with smaller white triangles inside. Attach them to the top of the head. -
Attaching the head:
Place the head securely onto the body. I find that inserting a small piece of toothpick between the head and body adds necessary stability. -
Paws:
Roll two small sausage shapes of orange clay. Add tiny black tips for the paws and attach them to the sides of the body.
Seasonal Switch
Change the vibe by swapping the green base for white glittery clay (snow) and giving the fox a tiny clay scarf for a winter version.
Step 3: The Tail & Forest Details
-
Fox tail:
Roll a large, tapered log of orange clay. Add a white clay tip to the pointed end. Curve it around the side of the fox’s body. -
Fur texture:
Use a needle tool or stiff brush to gently scratch fur lines into the tail and the white cheek areas for a soft, matte finish. -
Mushrooms:
Create tiny stalks from white or beige clay. Top them with red hemispherical caps. Add minuscule white dots to the red caps for a classic toadstool look. -
Ferns and foliage:
Roll thin snakes of green clay. Flatten small tear-drop pieces and attach them along the ‘stem’ to create fern leaves. -
Final assembly:
Arrange the fox, mushrooms, and ferns onto the mossy base. Press them down gently to ensure they adhere to the textured green surface. -
Baking:
Bake the entire piece according to your specific polymer clay package instructions (usually 275°F/135°C for 15-30 minutes).
Once cooled, your little woodland friend is ready to bring a touch of nature to your shelf
Sea Turtle With Coral Details
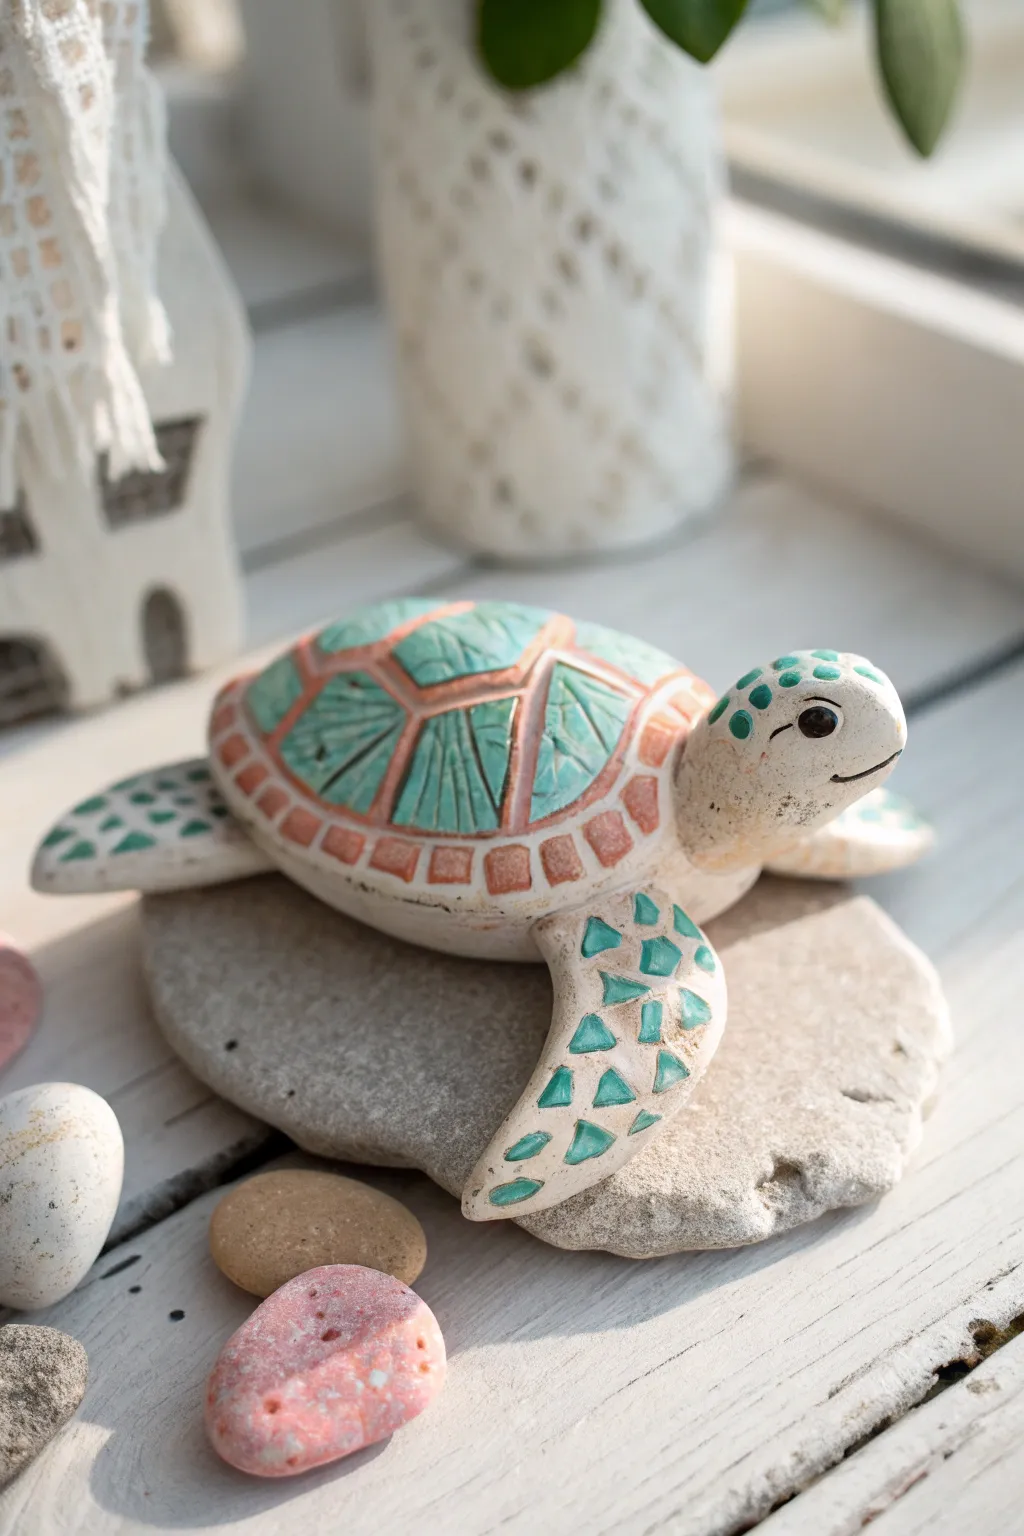
This charming sea turtle figurine captures the rustic beauty of handcrafted pottery without the need for a kiln. With its turquoise shell segments and sandy, speckled texture, it makes for a delightful coastal accent piece.
Step-by-Step Tutorial
Materials
- White or beige polymer clay (approx. 2-3 oz)
- Acrylic paints: Turquoise/Teal, Terracotta/burnt orange, dark brown, black, off-white
- Sculpting tools: Needle tool, ball stylus, rubber shaper
- Aluminum foil (for armature)
- Texturing tool (stiff toothbrush or sandpaper)
- Small flat brush and fine detail brush
- Matte or satin varnish
- Oven for baking
Step 1: Shaping the Base
-
Create the core:
Ball up a piece of aluminum foil into a flattened oval shape, roughly 2 inches long. This saves clay and prevents the thick body from cracking during baking. -
Cover the armature:
Roll out a sheet of beige polymer clay to about 1/4 inch thickness. Wrap it fully around the foil core, smoothing the seams until you have a seamless, smooth pebble shape for the body. -
Form the head:
Roll a separate marble-sized ball of clay. Elongate it slightly to form a neck and smooth it onto the front of the body, blending the clay downwards so it integrates securely. -
Add the flippers:
Create four teardrop shapes—two larger for the front flippers and two smaller for the back. Flatten them gently and curve the tips slightly to suggest movement. -
Attach the limbs:
Press the flippers onto the underside of the body. Use a rubber shaper or your finger to blend the seams on the bottom so they are firmly attached. -
Sculpt the face:
Use a needle tool or small knife to carefully carve a horizontal slit for the mouth, giving it a slight upward curve for a smile. Use a small ball tool to indent the eye sockets.
Step 2: Detailing and Texture
-
Carve the shell pattern:
Using a needle tool, lightly sketch a hexagon in the center of the shell back. From the points of the hexagon, draw lines extending outward to the edge of the shell to create the ‘scutes’ or plates. -
Add flipper details:
On the top of each flipper, use a small carving tool to press in random triangular shapes. These indentations will hold paint later to create a mosaic effect. -
Create the stone texture:
Lightly tap a stiff toothbrush or a crumpled ball of aluminum foil over the entire surface of the turtle—except the shell plates—to create a pitted, stone-like texture. I find this really helps sell the faux-ceramic look. -
Refine the ridges:
Go back over your shell lines with a modeling tool to widen them slightly, creating raised ‘ridges’ between the flat shell segments. -
Bake the piece:
Bake the figurine according to your clay package instructions (usually 275°F for 15-30 minutes depending on thickness). Let it cool completely before painting.
Clean Clamshells
If you struggle to paint clean ridges on the shell, paint the ridges first, let them dry, and then carefully fill in the panels. It’s easier to ‘color inside the lines’ than trace them.
Step 3: Painting the Faux Finish
-
Base coat:
Mix a very watery wash of dark brown acrylic paint. Brush it over the entire turtle, getting into every crevice, then immediately wipe most of it off with a paper towel. This ‘antiquing’ step highlights the texture. -
Dry brush the body:
Load a dry brush with off-white paint and blot it on a napkin until almost dry. Lightly brush over the head, neck, and limbs to brighten the high points while leaving the recessed texture dark. -
Paint the shell segments:
Carefully fill in the flat segments of the shell with turquoise or teal acrylic paint. You may need two coats for opacity, but keep the paint thin so it doesn’t look gloppy. -
Highlight the ridges:
Paint the raised ridges between the shell segments with a terracotta or burnt orange color. A steady hand is key here, or you can dry-brush this color on for a messier, more rustic look. -
Fill flipper triangles:
Using a fine detail brush, dab the same turquoise paint into the triangular indentations on the flippers. -
Add spotting details:
Dip the back end of a paintbrush into turquoise paint and dot a few spots onto the top of the head. -
Final touches:
Paint the eyes solid black with a tiny white reflection dot if desired. Once dry, seal the painted areas (especially the shell) with a satin varnish to give it a ceramic sheen.
Beach Glass Idea
For a translucent effect, press real sea glass into the soft clay shell segments before baking instead of painting them later. Use liquid clay to secure.
Place your finished turtle on a smooth river stone or a piece of driftwood to complete the nautical display
Baby Dragon Hatchling
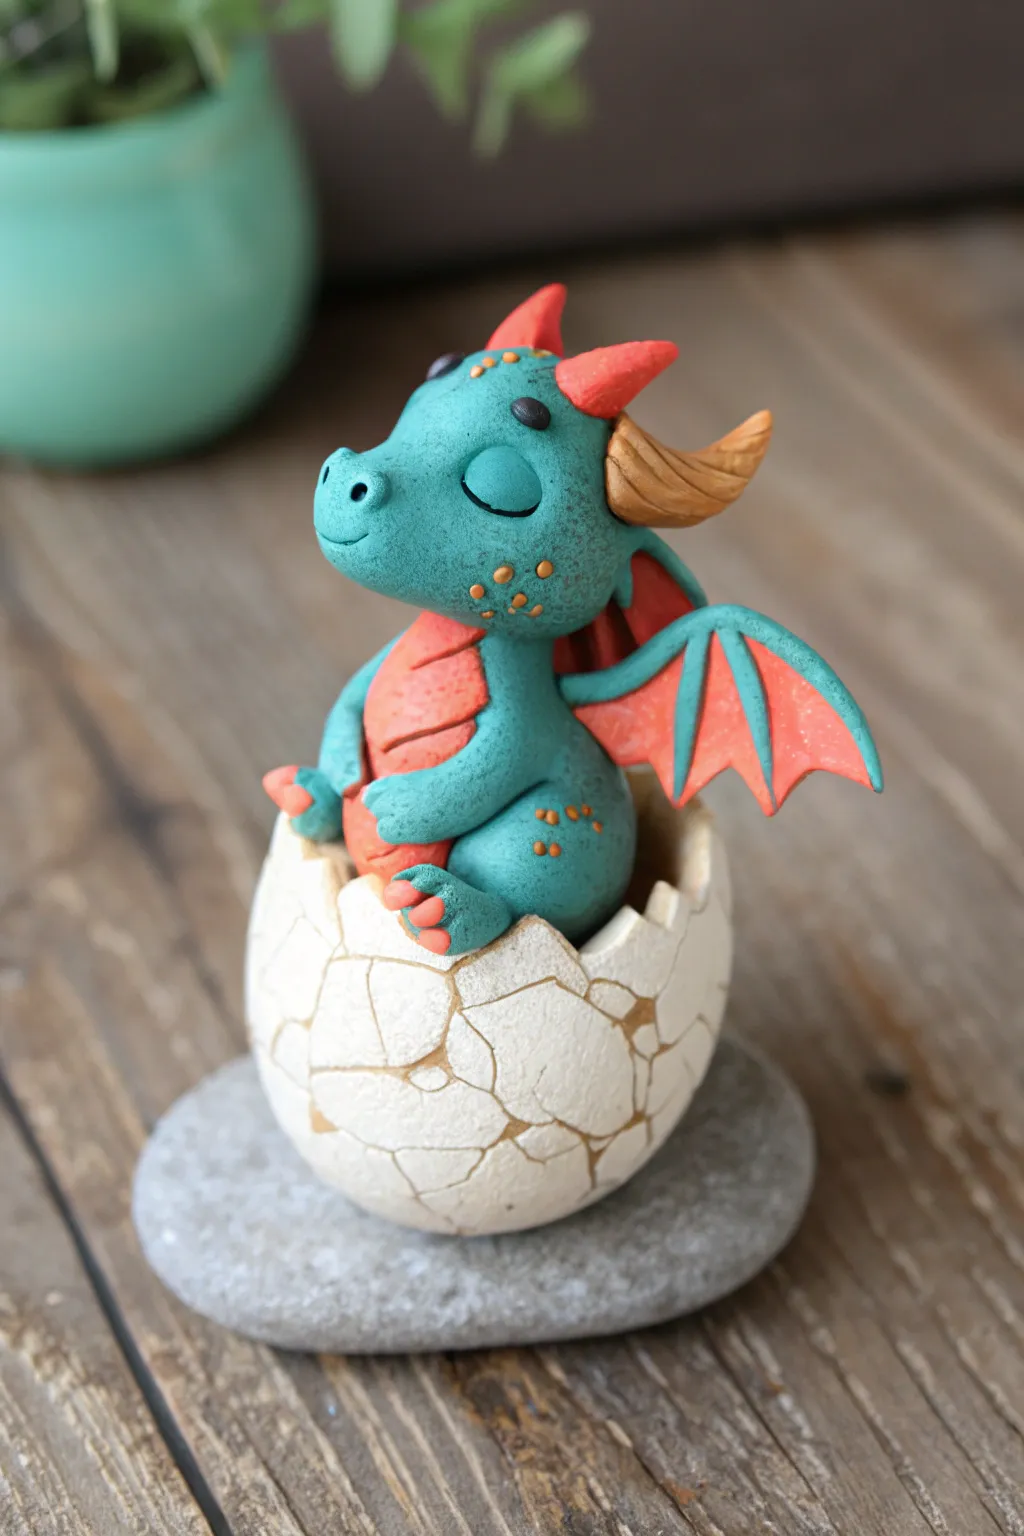
Capture the magical moment of a baby dragon greeting the world with this adorable polymer clay project. You will sculpt a sleepy teal dragon emerging from a textured eggshell, perfect for fantasy lovers.
Step-by-Step Guide
Materials
- Polymer clay: teal, coral/orange, beige, dark grey, gold/light brown
- Aluminum foil
- Basic sculpting tools (dotting tool, needle tool, rubber shaper)
- Hollow plastic egg or styrofoam egg (small)
- Texture sponge or toothbrush
- Blade or X-Acto knife
- Grey acrylic paint (for washing)
- Flat river stone (for base)
- Gloss glaze (optional)
- Oven
Step 1: Sculpting the Egg Base
-
Core preparation:
Begin by crumpling a small ball of aluminum foil into an egg shape to save clay and reduce weight. Alternatively, use a small hollow plastic egg or heat-safe styrofoam as your core. -
Eggshell foundation:
Roll out a sheet of beige clay to about 1/4 inch thickness. Wrap this sheet around your foil or egg core, smoothing the seams completely until you have a flawless egg shape. -
Creating the crack:
Using a blade, carefully cut a zigzag line around the top third of the egg to create the ‘hatching’ effect. Remove the top portion of clay carefully, leaving a jagged edge. -
Adding texture:
Gently press a texture sponge or an old toothbrush against the beige clay surface to give the eggshell a realistic, stony texture. -
Carving the cracks:
Use a needle tool or sharp blade to carve shallow, irregular crack lines all over the surface of the eggshell. These will be highlighted later with paint.
Fixing Cracks
If slight cracks appear in the clay after baking, fill them with a mix of liquid polymer clay and a tiny bit of matching raw clay, then rebake briefly to seal.
Step 2: Forming the Dragon
-
Dragon body and head:
Roll a smooth ball of teal clay for the head and a slightly teardrop-shaped piece for the body. Gently blend the head onto the top of the body, creating a unified form. -
Positioning inside the egg:
Nestle the dragon body into the open cavity of your eggshell. Press it down gently so it sits securely inside. -
Defining the face:
Push the front of the face slightly to define a snout. Use a ball tool to indent eye sockets, but since the eyes are closed, we will keep the surface smooth. Etch two small curved lines for the closed eyelids and two nostrils on the snout. -
Belly details:
Flatten a small oval of coral/orange clay. Press this onto the dragon’s chest and belly. Use a needle tool to press horizontal lines across it for belly scales. -
Arms and legs:
Roll two small teal sausages for arms and two thicker nubs for feet. Attach the feet so they playfully poke over the edge of the eggshell. Place the arms resting on the belly. -
Claws and toes:
Roll tiny specks of coral clay into cones and attach three to each foot and hand for little claws.
Step 3: Wings and Final Details
-
Wing structure:
Create the wing bones by rolling thin snakes of teal clay. Arrange them in a V-shape with a central spine. -
Wing membranes:
Flatten coral clay into thin triangles. Attach these between the teal wing bones to form the webbing. Attach the finished wings to the dragon’s back. -
Horns and spikes:
Shape two small cones of coral clay for the main horns and attach them to the top of the head. Add a larger, curved horn made from gold or light brown clay behind them on the back of the neck, texturing it with horizontal ridges. -
Skin texture:
To make the skin look realistic, lightly tap the teal areas with a texture sponge, being careful not to smash your shapes. -
Freckles:
Roll extremely tiny balls of orange/gold clay and press them onto the dragon’s cheeks and thighs for cute spotted details. -
Baking:
Place the entire assembly on a ceramic tile or baking sheet. Bake according to your specific clay brand’s instructions (usually 275°F/130°C for 15-30 minutes per 1/4 inch thickness).
Level Up: Glossy Eyes
Even though the eyes are closed, add a tiny dot of UV resin or pure gloss glaze to the nostrils and claws to make them look wet and alive.
Step 4: Finishing Touches
-
Cooling:
Allow the piece to cool completely before handling. It remains fragile while warm. -
The antique wash:
Dilute a small amount of dark grey acrylic paint with water. Brush it over the white eggshell, getting into the cracks. Quickly wipe the surface with a damp paper towel or sponge, leaving paint only in the recesses. -
Mounting:
Using strong adhesive or superglue, mount the finished egg onto a smooth, grey river stone to complete the display.
Display your new mythical creature on a shelf or gift it to a fantasy-loving friend
Spooky Ghost With a Tiny Pumpkin
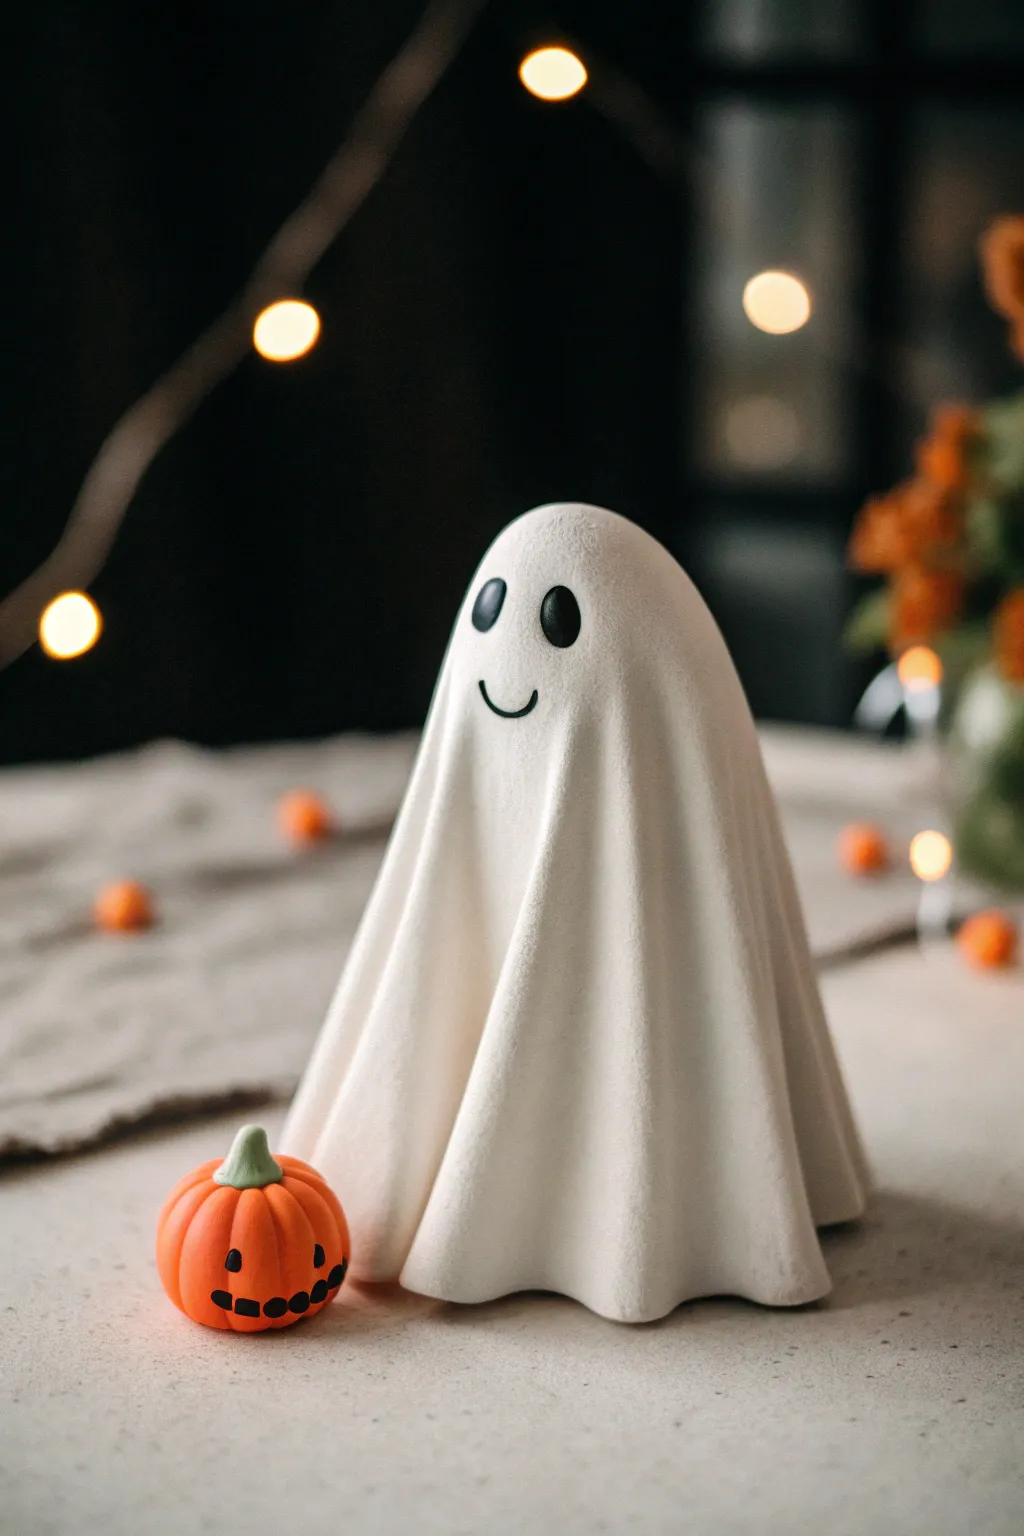
Capture the playful side of Halloween with this charming figurine set featuring a draped sheet ghost and its joyful pumpkin companion. The soft, matte texture of the clay creates an irresistibly smooth finish that looks great on any mantelpiece.
Step-by-Step Tutorial
Materials
- White liquid polymer clay
- White block polymer clay
- Orange polymer clay
- Green polymer clay
- Black polymer clay
- Aluminum foil
- Rolling pin or pasta machine
- Needle tool or toothpick
- Small ball tool
- Gloss glaze (optional, for pumpkin eyes only)
- Baking sheet and parchment paper
- Tissue blade or craft knife
Step 1: Forming the Ghost’s Core
-
Create the armature:
Crumple a piece of aluminum foil into a tall, slightly conical mound. This will be the body shape underneath the sheet, so ensure it stands up on its own and has a rounded top. -
Smooth the base:
Take a portion of white block clay and condition it until soft. Flatten a small disc and press the foil cone onto it to create a stable base, then cover the foil entirely with a thin layer of white clay to smooth out the bumps.
Keeping It Clean
White clay attracts dust like a magnet. Keep a pack of baby wipes nearby to clean your hands and tools often, or use a bit of rubbing alcohol on a brush to wipe away lint before baking.
Step 2: Draping the Sheet
-
Roll out the sheet:
Condition a large amount of white clay. Roll it out into a thin, even circle, about 1/8 inch thick. You want it substantial enough to drape without tearing, but thin enough to look like fabric. -
Place the sheet:
Gently lift your clay circle and center it over the top of your armature. Allow the clay to fall naturally over the sides. -
Sculpt the folds:
Using your fingers, gently guide the clay to create deep vertical folds and ripples, mimicking a hanging sheet. Flare the bottom edges slightly outward so they rest on the table surface. -
Add texture (optional):
For that matte, fabric-like look you see in the photo, I sometimes press a fine piece of muslin cloth or a toothbrush gently against the clay surface to remove fingerprints and add softness.
Matte Magic
To get that velvety, non-reflective finish shown in the photo, lightly dust the unbaked white clay with a tiny bit of cornstarch before baking. It removes the plastic shine instantly.
Step 3: Ghostly Features
-
Create eye sockets:
Use a ball tool to make two oval indentations where the eyes will go. This helps the black clay sit flush with the face rather than bulging out. -
Insert the eyes:
Roll two small balls of black clay into thick ovals. Press them gently into the indentations you just made. -
Add the smile:
Roll an extremely thin snake of black clay. Curve it into a simple ‘U’ shape and press it onto the face below the eyes to form a cheerful grin.
Step 4: Crafting the Tiny Pumpkin
-
Shape the pumpkin body:
Roll a ball of orange clay about the size of a large marble. Gently press it down lightly on your work surface to flatten the bottom. -
Define the segments:
Using a needle tool or the back of a craft knife, press vertical indentations from the top center down to the bottom to create the pumpkin’s ribbed segments. -
Add the stem:
Make a tiny cone from light green clay. Press it onto the top center, bending the tip slightly for character. -
Carve the face:
Create tiny triangular indentations for the eyes and a stitched-mouth pattern. Fill these with microscopic bits of black clay for the classic Jack-o’-lantern look.
Step 5: Baking and Finishing
-
Prepare for baking:
Place both figures on a parchment-lined baking sheet. Double-check that the ghost is standing straight and the folds haven’t collapsed. -
Bake carefully:
Bake according to your clay manufacturer’s instructions (usually 275°F/135°C for 15-30 minutes). Keep an eye on the white clay to ensure it doesn’t scorch or yellow. -
Cool down:
Let the figures cool completely in the oven with the door slightly ajar to prevent cracking from thermal shock.
Arrange your spooky duo on a shelf with some fairy lights to complete the cozy autumn vibe
Cozy Sweater Animal
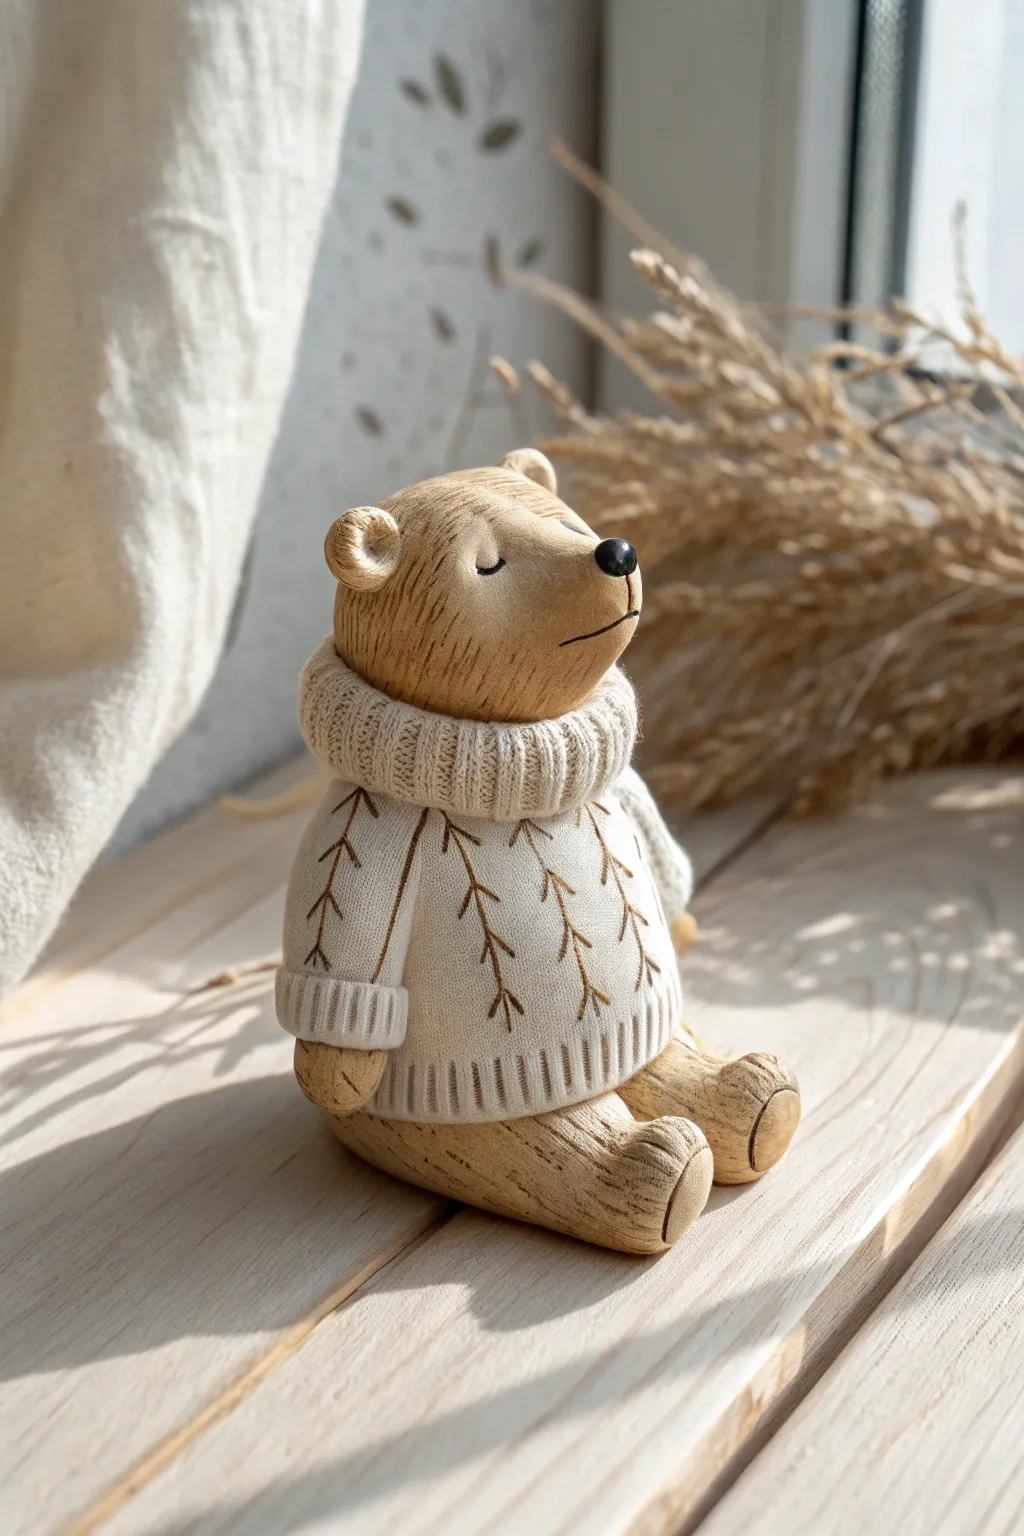
Create a serene, hibernating bear that looks like hand-carved wood but is actually shaped from polymer clay. This charming figurine features a textured sweater design and a soft, earthy finish perfect for autumn or winter decor.
Detailed Instructions
Materials
- Light tan or beige polymer clay (base body)
- White or cream polymer clay (sweater)
- Acrylic paints: Burnt umber, black, dark brown
- Sculpting tools: Needle tool, ball styluses
- Texture tools: Wire brush or coarse sandpaper
- Small craft knife or scalpel
- Fine detail paintbrush (00 or 000)
- Soft pastel chalks for shading (optional)
- Matte varnish
Step 1: Shaping the Bear Base
-
Form the body:
Start with a large ball of tan clay for the torso. Roll it into a pear shape, flattening the bottom slightly so the bear can sit stably on a surface. -
Shape the head:
Roll a slightly smaller ball for the head. Pinch the front gently to pull out a rounded snout area. Attach this to the top of the body, blending the clay at the neck seam to secure it. -
Add the legs:
Create two thick logs for the legs. Attach them to the lower front of the body, creating a seated posture where the paws extend forward. Smooth the connection points firmly. -
Create the ears:
Form two small semi-circles of tan clay. Press a small ball tool into the center of each to create the inner ear depression, then attach them to the top of the head. -
Texturize the ‘wood’:
To mimic wood grain, drag a wire brush or coarse sandpaper vertically down the entire clay surface. Create deeper grooves occasionally with a needle tool to simulate carved chisel marks.
Uneven Texture?
If the clay looks too rough after texturing, lightly brush it with a bit of baby oil before baking to smooth out the microscopic jagged edges while keeping the grooves.
Step 2: Dressing the Bear
-
Prepare the sweater clay:
Condition your cream or white clay until soft. Roll it out into a thin, even sheet, roughly 2-3mm thick. -
Wrap the torso:
Cut a strip wide enough to cover the bear’s torso from the neck down to the hips. Wrap this around the body, smoothing the seam at the back. -
Add the collar:
Roll a thick snake of cream clay and flatten it slightly. Wrap this ring around the neck area. Use a needle tool to score vertical lines all around the ring to create a distinct ribbed knit texture. -
Create the cuffs and hem:
Add smaller flattened strips around the bottom edge of the sweater and where the arms (which we’ll add next) would end. ribbed texture vertical lines into these strips just like the collar. -
Sculpt the arms:
Shape two short arms from tan clay. Wrap the upper portion in the cream ‘sweater’ clay, then attach them to the sides of the body so they rest naturally against the torso or legs. -
Knit detailing:
Using a needle tool, gently press pattern lines onto the main sweater body. Don’t worry about the painted branch design yet; just ensure the clay looks fabric-like.
Step 3: Face and Finishing Details
-
Sculpt the face:
Using a very small ball of black clay, add a nose to the tip of the snout. Use a craft knife to gently incise two curved lines for the sleeping eyes and a subtle curve for the mouth. -
Bake the figurine:
Bake the bear according to your clay manufacturer’s instructions (usually 275°F/130°C for 15-30 minutes). Let it cool completely before painting. -
Enhance the wood grain:
Dilute burnt umber acrylic paint with water to make a thin wash. Brush this over the tan ‘wood’ parts, then immediately wipe off the excess with a paper towel. The dark paint will remain in the texture grooves. -
Paint the sweater design:
Using a fine detail brush and dark brown paint, carefully draw the vertical branch patterns on the sweater. Use small ‘V’ shapes branching off a central line to mimic the pine twig look. -
Draw facial features:
If your incision lines aren’t dark enough, carefully trace the eye and mouth lines with a tiny amount of black paint or a fine tip marker. -
Seal the work:
Once all paint is fully dry, apply a thin coat of matte varnish to protect the surface without making it look glossy or plastic.
Add a Scarf
Instead of a sculpted collar, braid three thin snakes of colored clay together and wrap them around the baked bear’s neck for a mixed-media woolen scarf look.
Place your little bear on a shelf or windowsill to add a touch of handcrafted warmth to your home.
Personalized Couple Cake Topper Figurines

Create a charming, minimalist wedding cake topper featuring a stylized bride and groom with soft, matte textures and adorable details. This project focuses on clean lines, neutral tones, and simple shapes to capture a timeless and innocent aesthetic perfectly suited for a rustic or bohemian wedding.
Step-by-Step Tutorial
Materials
- Polymer clay (flesh tone, cream/white, beige/tan, light brown)
- Set of small ball styluses (dotting tools)
- Needle tool or toothpick
- Small craft knife or scalpel
- Acrylic rolling pin
- Liquid polymer clay (Translucent or Bake & Bond)
- Black acrylic paint or tiny black seed beads (for eyes)
- Soft pink pastel chalk (for blushing cheeks)
- Soft paintbrush
- Wire armature or sturdy toothpicks (for internal support)
- Small round cutter (for the base)
Step 1: Sculpting the Groom
-
Form the pants:
Begin with the beige clay. Roll two equal-sized logs for the legs and press them together gently side-by-side. Flatten the bottom for the feet and insert a toothpick or wire into each leg, leaving enough protruding at the top to secure the torso later. -
Add the shoes:
Shape two small ovals from light brown clay. Slightly flatten the bottom and press them onto the bottom of the pants legs. Use your needle tool to create a tiny separation line between the shoe and the pant cuff. -
Shape the torso:
Roll a cylinder of cream or white clay for the shirt. Slide this onto the leg wires/toothpicks. Smooth the seam where the shirt meets the pants with your finger or a smoothing tool. -
Suspenders and details:
Roll extremely thin strips of beige clay. Lay two strips vertically over the shoulders for suspenders. Add three tiny balls of brown clay down the center of the shirt for buttons. -
Collar and arms:
Fashion a small triangular collar from the shirt-color clay and attach it at the neck. Roll two simple tubes for arms and attach them to the sides of the torso, blending the shoulder seam slightly. -
Groom’s head:
Roll a smooth sphere of flesh-tone clay. Press it gently onto the neck area (ensure the internal wire supports it). Keep the shape round and simplistic. -
Groom’s hair:
Flatten a disc of light brown clay. Place it on the head and use a knife or needle tool to eagerly carve deep, sweeping grooves to simulate hair strands, creating bangs that sweep across the forehead.
Clean Clay Pro-Tip
Keep baby wipes or hand sanitizer nearby. White clay picks up lint instantly! Clean your hands thoroughly between colors, especially before handling the cream wedding dress.
Step 2: Sculpting the Bride
-
Create the dress form:
Roll a thick cone of cream clay for the skirt. Make it tall enough to match the groom’s height. Insert a central support wire through the middle. -
Dress bodice:
Add a smaller cylinder of cream clay on top for the torso. Smooth the transition into the skirt. I like to add a tiny textured belt by twisting two very thin snakes of beige clay and wrapping them around the waist. -
Detailing the dress:
Roll a very thin snake of clay and run it vertically down the center of said dress. Use a needle tool to poke tiny holes along the sides of this strip to mimic lace or buttonholes. -
Arms and sleeves:
Form small bell shapes for sleeves and attach them to the shoulders. Add simple tube arms extending downwards from inside the sleeves. -
Bride’s head:
Roll a sphere of flesh-tone clay, matching the size of the groom’s head. Secure it to the body using liquid clay and the internal wire support. -
Bridal hair:
Apply a flattened sheet of light brown clay over the back and top of the head. Score lines for texture. Create a small bun shape and attach it low at the back of the neck. -
Floral crown:
Roll an incredibly thin thread of clay for the headband. Using a needle tool, pick up tiny specks of white clay and cluster them along the band to look like baby’s breath flowers.
Step 3: Finishing Touches
-
Facial features:
Use a small ball tool to make indentations for the eyes. You can either press in tiny black clay balls or seed beads, or paint them with black acrylic after baking. Simplicity is key here—place them wide apart for a cute look. -
Rosy cheeks:
Before baking, scrape a little pink pastel chalk into a powder. Use a soft, dry paintbrush to gently dust pink circles onto the cheeks of both figures. -
Create the base:
Roll out a sheet of white clay about 1/4 inch thick. Use a round cutter to create a clean disc. Texture the top slightly if desired. -
Mount and bake:
Position your figures on the base. If they are top-heavy, use a dab of Bake & Bond. Bake according to your clay manufacturer’s instructions, usually around 275°F (130°C) for 30 minutes per 1/4 inch of thickness.
Level Up: Texture
Before baking, gently press a piece of lace or textured fabric onto the bride’s dress skirt to imprint a delicate pattern that mimics real vintage fabric.
Once cooled, this adorable couple is ready to stand proudly atop your celebration cake as a keepsake of the big day
Surreal Teacup Creature
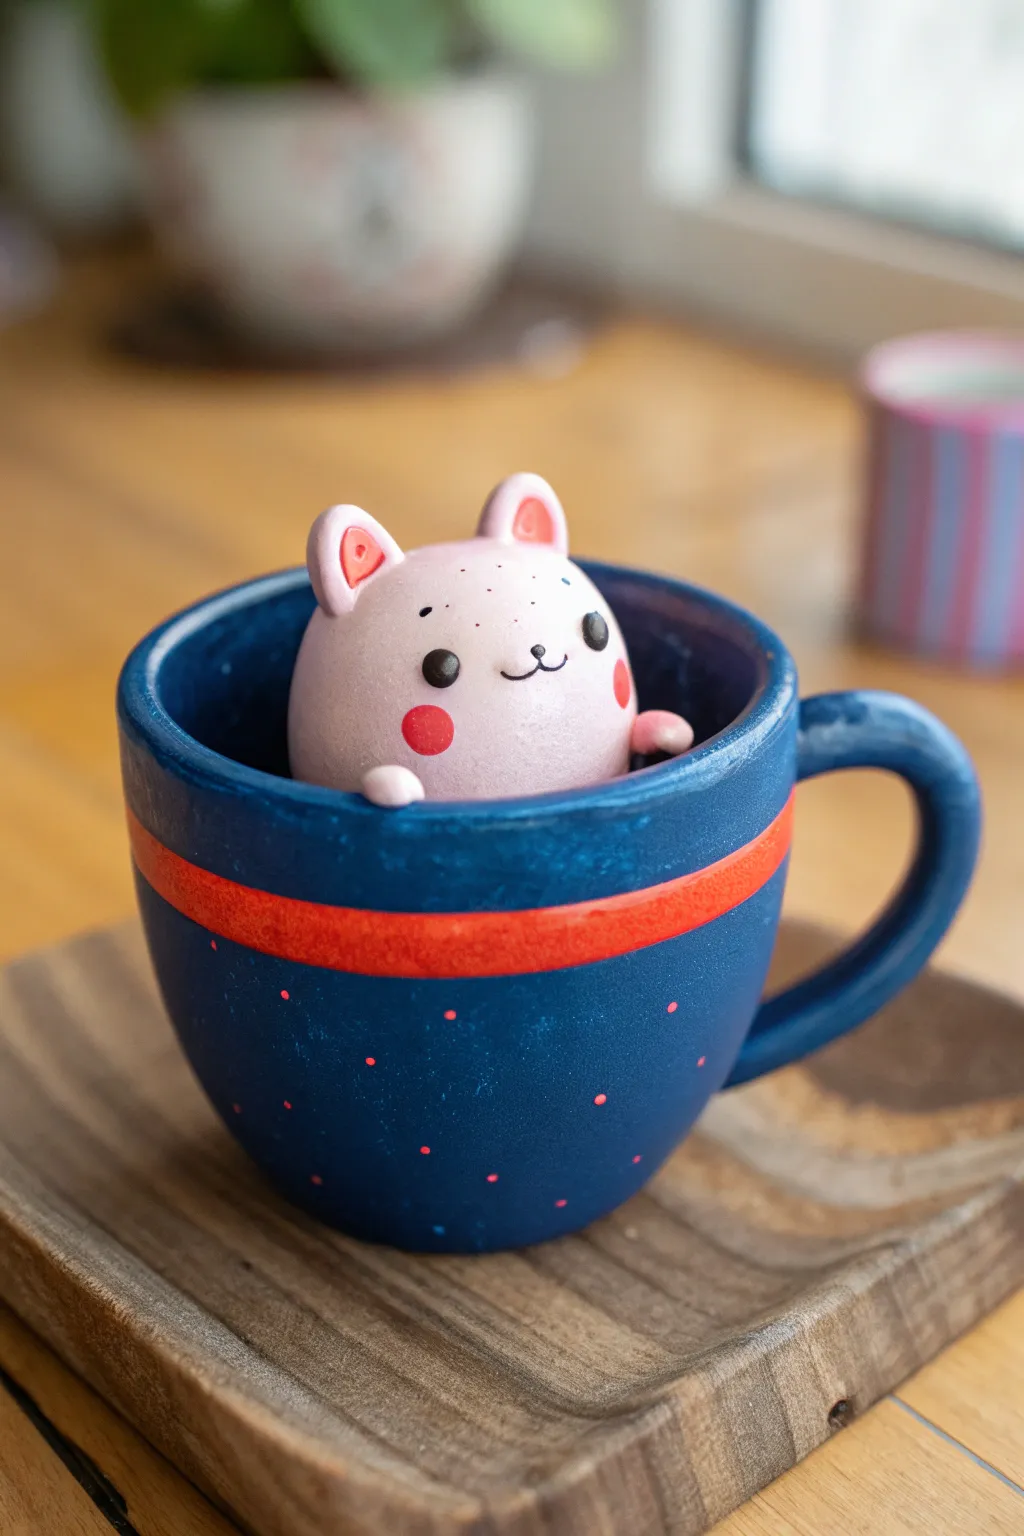
This whimsical project combines a hand-sculpted teacup with an adorable, pastel pink creature peeking out from inside. The deep indigo cup with its bright red stripe creates a striking contrast against the soft features of the little character hidden within.
Detailed Instructions
Materials
- Polymer clay (midnight blue, white, pale pink, red, black)
- Acrylic paint (bright red, pale pink)
- Gloss glaze or varnish
- Liquid polymer clay (Translucent or Bake & Bond)
- Needle tool and dotting tools
- Small fine-point paintbrush
- X-Acto knife or clay blade
- Oven for baking
Step 1: Sculpting the Teacup Base
-
Form the cup body:
Start by conditioning a large ball of midnight blue polymer clay. Press your thumb into the center and pinch the walls upwards to form a rounded cup shape, keeping the walls relatively thick and sturdy. -
Refine the shape:
Smooth the outside of the cup with your fingers to remove prints. Tap the bottom gently on your work surface to create a flat base so it stands on its own. -
Create the rim:
Use a modeling tool or your finger to slightly flare and thicken the rim of the cup to give it that classic ceramic mug look. -
Add the handle:
Roll a snake of the same blue clay. Curve it into a ‘C’ shape. Score the side of the cup where you want the handle to go, use a dab of liquid clay, and attach the handle firmly, blending the seams with a silicone tool. -
Pre-bake the cup:
Bake the cup alone for about 15 minutes at the temperature recommended on your clay package. This solidifies the base so you don’t squash it while adding the creature.
Step 2: Creating the Creature
-
Shape the body:
Condition a ball of pale pink clay sized to fit snugly inside your pre-baked cup. Roll it into a smooth, slightly flattened sphere. -
Insert into cup:
Apply a thin layer of liquid clay to the bottom of the pink ball and press it gently into the blue cup. The top half should dome upwards, peeking over the rim. -
Sculpt the ears:
Form two small triangles of pink clay. Indent the centers with a small ball tool. Fill these indents with a tiny bit of red or darker pink clay for the inner ear detail. -
Attach the ears:
Place the ears on top of the head. I find using a needle tool to gently blend the back of the ears into the head helps them stay secure. -
Add the paws:
Roll two tiny sausages of pink clay for the paws. Press them onto the rim of the blue cup, right in front of the creature beautifully, as if it is pulling itself up.
Smooth Seams
Use Baby Oil! Lightly brushing a tiny amount of baby oil over the clay before baking smooths out fingerprints and helps blend the ear seams invisibly.
Step 3: Details & Final Bake
-
Add facial features:
Use tiny balls of black clay for the eyes and press them flat. Roll an incredibly thin thread of black clay for the mouth and shape it into a small smile. -
Add rosy cheeks:
Take two small circles of red clay and press them onto the cheeks for a blushing effect. -
Texture the surface (Optional):
If you want a rougher, handmade pottery texture on the cup, gently dab the blue clay with a toothbrush or stiff brush. -
Final bake:
Bake the entire piece again for the full duration required by your clay brand (usually 30 minutes per 1/4 inch of thickness).
Cup Warp?
If the cup handle droops during baking, support it with a small wad of paper towel or polyester fiberfill to hold the shape until it hardens.
Step 4: Painting & Finishing
-
Paint the stripe:
Once cool, use a fine brush and bright red acrylic paint to create a bold stripe around the upper third of the blue cup. You may need two coats for opacity. -
Add speckles:
Dip a toothbrush or stiff brush into diluted red or pink paint and lightly flick speckles onto the lower part of the blue cup to mimic a ceramic glaze effect. -
Highlight the eyes:
Use a dotting tool or toothpick to add a tiny spec of white paint to the black eyes for life-like shine. -
Varnish:
Seal the entire piece with a matte or satin varnish. If you want the eyes to look wet, add a drop of gloss glaze or UV resin specifically to them.
Now you have a charming little desk buddy that looks like it popped right out of a ceramic dream