
When I’m in a springy mood, polymer clay Easter projects are my favorite kind of quick, happy making. You can keep it super simple with pastel eggs and bunny faces, or go all-in with tiny scenes that look like they hopped right out of an Easter basket.
Pastel Easter Egg Charms
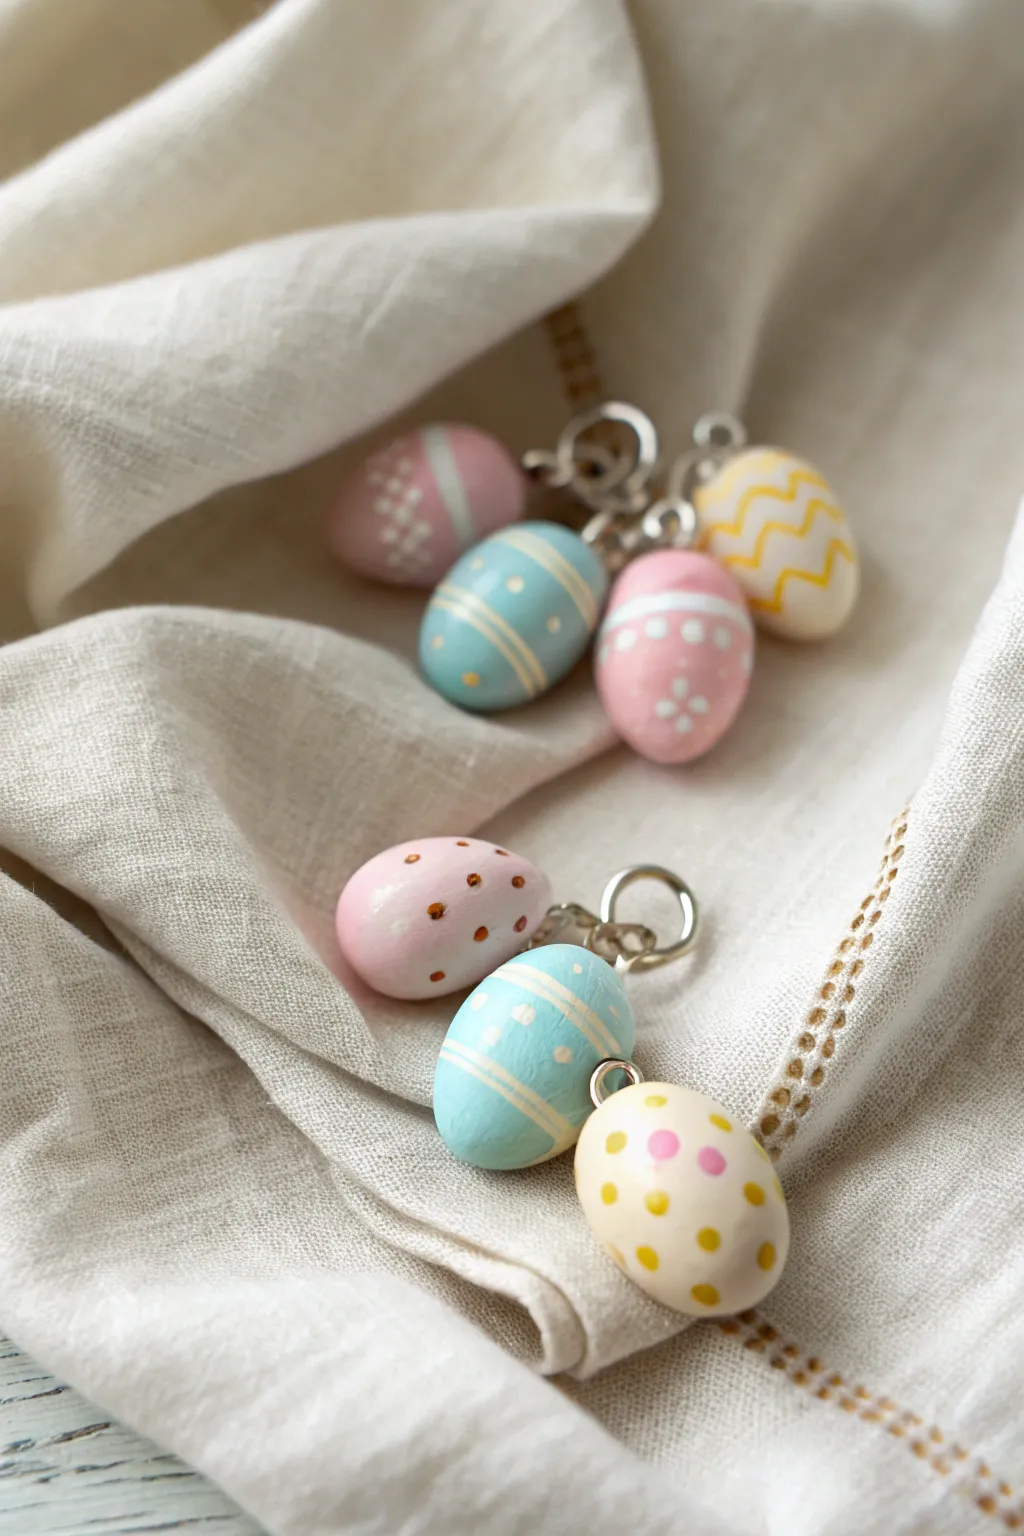
These delicate little charms bring the soft, whimsical colors of spring to your jewelry or decorations. With their miniature patterns and smooth, matte finish, they are a perfect afternoon project for celebrating the season.
Step-by-Step Guide
Materials
- Polymer clay in pastel pink, baby blue, dull yellow, and white
- Acrylic paints (white, gold, pink, blue, yellow)
- Fine detail paintbrush (size 0 or 00)
- Eye pins (silver tone)
- Jump rings (silver tone)
- Jewelry pliers (round nose and flat nose)
- Wire cutters
- Liquid polymer clay or bake-and-bond (optional)
- Gloss or matte glaze (optional)
- Baking tray and parchment paper
Step 1: Shaping the Base
-
Condition the clay:
Begin by thoroughly kneading your chosen pastel clay colors until they are soft and pliable. This conditioning step prevents cracks during baking. -
Roll spheres:
Pinch off small pieces of clay, roughly the size of a large pea or a marble. Roll each piece between your palms to create a perfectly smooth sphere. -
Form the egg shape:
I like to gently roll just one side of the sphere against my palm with a bit more pressure to create a taper. Continue refining it until you have a classic oval egg shape with one end slightly narrower than the other. -
Check for smoothness:
Inspect the eggs for fingerprints. Lightly buff them with your finger or a little cornstarch to ensure the surface is pristine before baking.
Smooth Surface Secret
Before baking, lightly brush the raw clay eggs with baby oil or clay softener. This removes all fingerprints and creates a silky finish.
Step 2: Adding Hardware & Baking
-
Trim eye pins:
Take your eye pins and trim them if they are longer than the egg itself. You want the pin to go deep into the clay without poking through the bottom. -
Insert the pins:
Dip the tip of each eye pin into a tiny bit of liquid clay or bake-and-bond for extra security. Push the pin straight down into the center of the wider end of the egg until only the loop is visible. -
Baking setup:
Arrange your raw charms on a baking tray lined with parchment paper. If you can, stick the eye pins into a structured piece of scrap clay or foil so the eggs stand upright, preventing flat spots. -
Bake:
Bake the charms according to your specific brand of clay’s manufacturer instructions (usually around 275°F or 130°C for 15-30 minutes). Let them cool completely before handling.
Speckled Egg Effect
Mix black acrylic paint with water and flick it off a toothbrush onto the baked eggs for a realistic speckled robin’s egg look.
Step 3: Decoration
-
Paint the stripes:
Using your fine detail brush and white or contrasting pastel paint, carefully paint thin horizontal bands around the middle of selected eggs. Rotate the charm slowly as you pull the brush to keep the line steady. -
Add dots:
Dip the very end of your paintbrush handle or a dotting tool into paint. Gently touch it to the surface of the dry clay to create uniform polka dots. -
Create zig-zags:
For the zig-zag pattern, use the very tip of your brush. Paint small diagonal lines connecting up and down. Don’t worry about perfection; the hand-painted look adds to the charm. -
Add floral details:
To make the tiny flower pattern seen on the pink egg, dot five small white points in a circle. Once dry, add a tiny center dot in a contrasting color. -
Dry and seal:
Allow the acrylic paint to dry fully. If you want protection or shine, apply a thin coat of matte or gloss varnish, though the natural matte look of the clay is also lovely.
Step 4: Assembly
-
Open jump rings:
Use two pairs of pliers to twist your jump rings open. Twist the ends away from each other (front to back) rather than pulling them apart side-to-side, which weakens the ring. -
Attach the charms:
Loop the open jump ring through the eye pin of your finished egg charm. -
Cluster or hang:
If creating a cluster like the photo, attach multiple jump rings onto a larger carrier ring or chain link. Close the rings securely by twisting them back into place until the ends meet perfectly.
Now you have a collection of sweet miniature eggs ready to be turned into earrings or a necklace


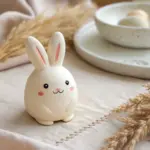
Bunny Face Stud Earrings
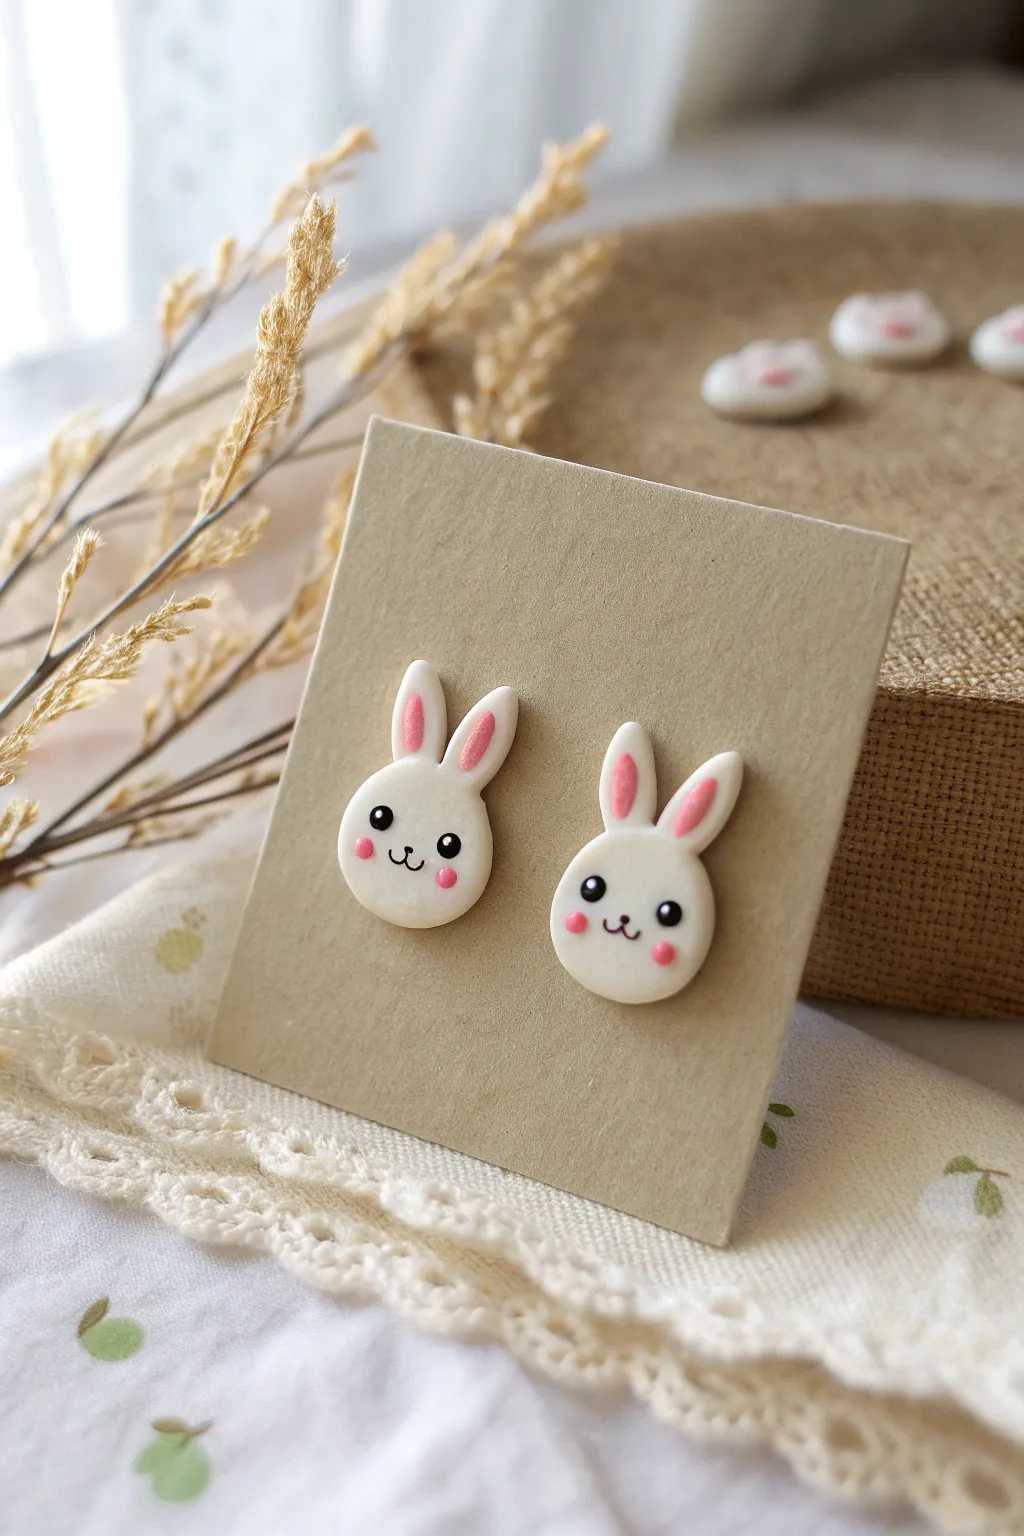
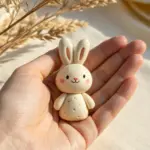
These adorable stud earrings feature sweet, minimal bunny faces perfect for Easter or everyday cuteness. With their soft white finish and tiny pink details, they add a charming touch of whimsy to any outfit.
Detailed Instructions
Materials
- White polymer clay
- Soft pink polymer clay
- Black liquid clay or acrylic paint
- Pink acrylic paint or chalk pastel
- Dotting tools (various sizes)
- Small circle cutter (approx. 10mm)
- Needle tool or toothpick
- Stainless steel earring posts
- Jewelry glue (optional)
- Gloss or matte varnish (optional)
- Ceramic tile or baking sheet
- Oven
Step 1: Creating the Base
-
Condition the clay:
Start by thoroughly kneading your white polymer clay until it is soft and pliable. This prevents cracking later on. -
Roll out a sheet:
Roll the white clay into a smooth, even sheet about 3mm to 4mm thick. You can use a rolling pin or a pasta machine for precision. -
Cut the circles:
Use your small circle cutter to punch out two identical rounds. These will be the main faces of your bunnies. Gently smooth the edges with your fingertip to round them off slightly.
Step 2: Making the Ears
-
Shape the outer ears:
Take two small balls of white clay and roll them into teardrop shapes. Flatten them gently to form the ears. Repeat this to make four ears in total. -
Create the inner ears:
Take tiny amounts of soft pink clay and roll them into even smaller teardrops. Flatten these and place them directly onto the center of the white ear shapes. -
Assemble the ears:
Gently press the pink inner ear into the white outer ear so they become one smooth unit. I find using a silicone tool helps meld them without leaving fingerprints. -
Attach to the head:
Place the ears on top of the white circle heads. Use a blending tool or the back of a needle tool to gently merge the clay at the back of the seam, ensuring they are securely attached.
Sticky Situation
If your white clay is picking up dust or lint, wipe it gently with a cotton bud dipped in rubbing alcohol or acetone before baking to clean it up.
Step 3: Adding the Face Details
-
Create eye sockets:
Use a small ball tool to make two very shallow indentations where the eyes will go. This helps guide your placement. -
Add the eyes:
Using a small dotting tool and black liquid clay (or black acrylic paint after baking), place two small dots in the indentations for the eyes. -
Add the eye highlights:
Once the black dots are set, add a miniscule speck of white paint or clay to the top right of each eye. This ‘catchlight’ brings the bunny to life. -
Paint the nose and mouth:
With a fine needle tool or a very thin brush, draw a tiny ‘Y’ shape or a curved ‘w’ shape between the eyes for the nose and mouth using black paint or liquid clay. -
Apply blush:
Use a dotting tool with a tiny amount of pink paint or crushed pink pastel chalk to dab rosy cheeks just below the eyes.
Make it Sparkle
For a magical twist, use pearlescent white clay for the bunny base or dust the raw clay with white mica powder before baking for a subtle shimmer.
Step 4: Finishing Up
-
Add posts (method A):
If you want the posts embedded, press the flat pad of the earring post into the back of the raw clay gently. Cover the pad with a small, thin smear of white clay or liquid clay to secure it. -
Bake the pieces:
Place your bunnies on a ceramic tile or baking sheet. Bake according to your polymer clay package instructions (usually 275°F/130°C for 15-30 minutes). -
Add posts (method B):
If you didn’t embed the posts earlier, glue the metal posts to the back of the cooled, baked clay pieces using strong jewelry adhesive. -
Varnish:
Once fully cooled and cured, you can apply a thin layer of matte or gloss varnish to protect the painted details, though the natural matte clay look is also lovely.
Now you have a sweet pair of handmade bunny earrings ready to wear or gift


Bunny and Carrot Mismatch Dangles
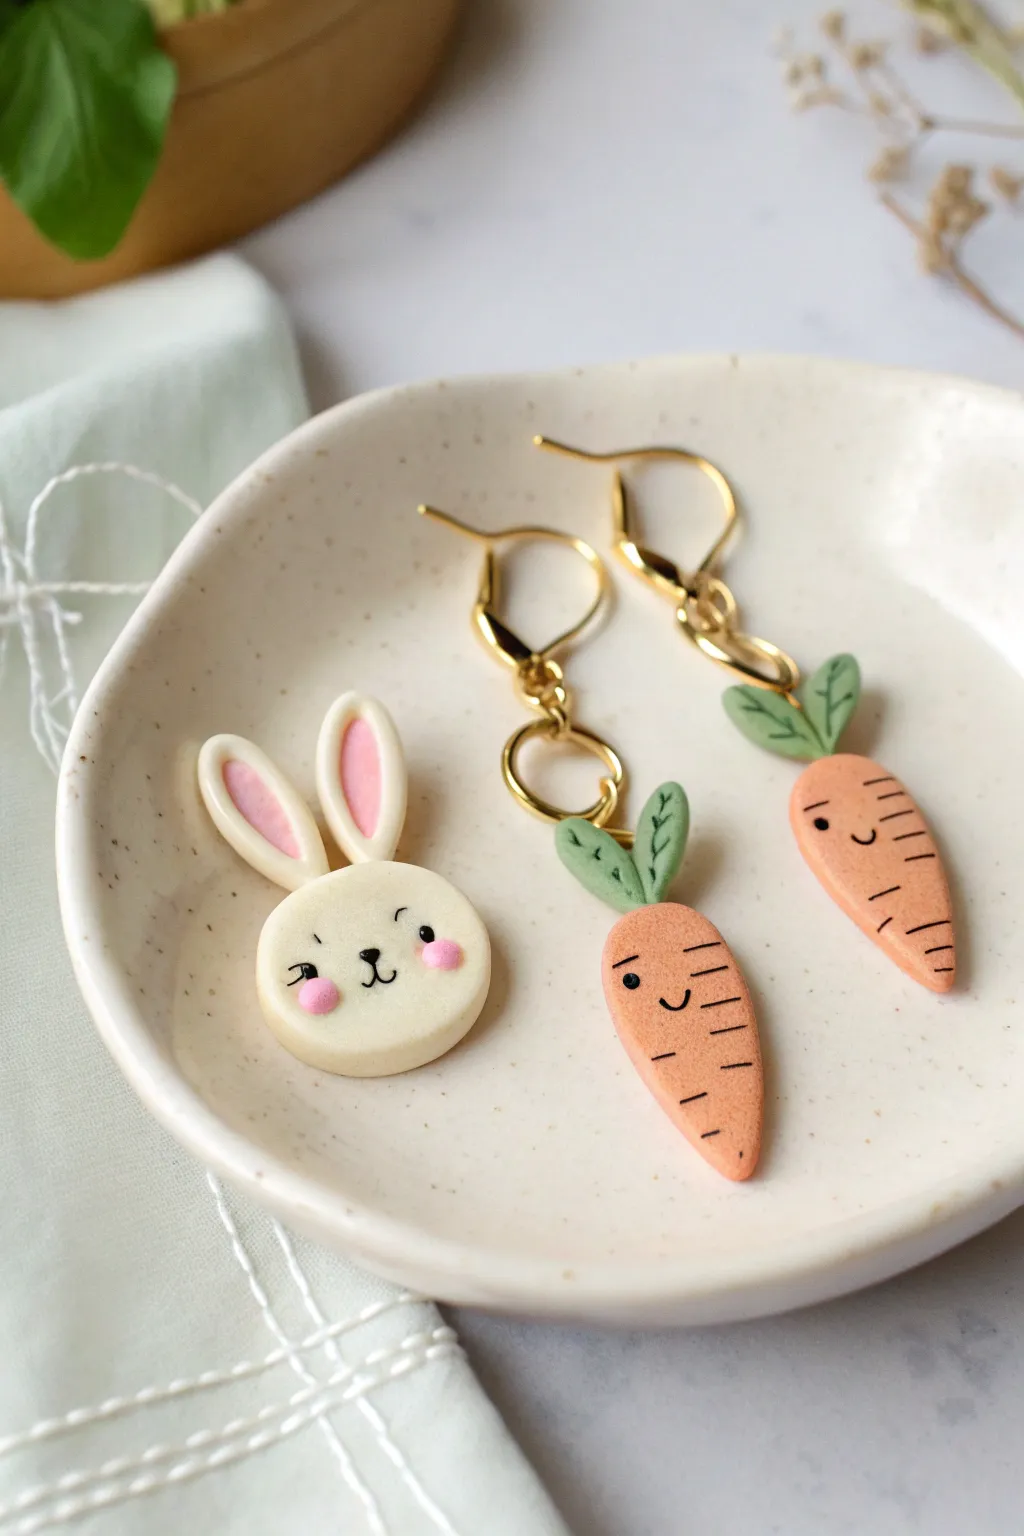
These adorable mismatched dangles feature a sweet, creamy bunny face paired with cheeky, smiling carrots for a playful Easter look. The soft matte finish and hand-painted details give them a charming, illustrative quality perfect for spring.
How-To Guide
Materials
- Polymer clay (white, translucent, orange, green, pink)
- Black acrylic paint
- Fine detail paintbrush (00 or 000 size)
- Rolling pin or pasta machine
- Ball stylus tool (small)
- Small round cutter (approx. 15mm)
- Teardrop cutter (approx. 20-25mm)
- Needle tool or toothpick
- Gold earring hooks (kidney or leverback style)
- Jump rings (4-6mm)
- Jewelry pliers
- Oven for baking
Step 1: Sculpting the Bunny
-
Mix the Base Color:
Start by mixing white polymer clay with a tiny pinch of translucent clay. This creates a soft ‘porcelain’ look rather than a stark, plastic white. Condition it well until pliable. -
Create the Head Shape:
Roll your mixed clay into a sheet about 3-4mm thick. Use your small round cutter to punch out a circle. Gently soften the top edge with your finger to remove any sharp cut marks. -
Form the Ears:
Take two small balls of the same white clay mixture and roll them into elongated teardrops. Flatten them slightly so they aren’t too thick. -
Add Inner Ear Detail:
Roll out a very thin piece of pastel pink clay. Cut smaller teardrop shapes and press them gently into the center of your white ear shapes. -
Attach the Ears:
Place the ears against the top back edge of the round head. Blend the seams on the back side using your needle tool or finger so they are secure. -
Add Cheeks:
Using the same pink clay, roll two tiny balls. Press them onto the bunny’s face area to create rosy cheeks, flattening them just enough so they stick. -
Create Hanging Hole:
Since this is a stud or a charm looking piece in the photo, you have options, but for a dangle, carefully pierce a hole between the ears with a needle tool.
Pro Tip: Clean edges
Before baking, use a cotton swab dipped in a little rubbing alcohol or acetone to gently smooth away fingerprints and dust from the white clay.
Step 2: Sculpting the Carrots
-
Shape the Carrot Body:
Condition orange clay and roll it into a carrot shape (a tapered cone). Flatten it slightly against your work surface so it sits nicely as an earring. -
Texture the Leaves:
Take muted green clay and form two small, flat teardrops. Use a needle tool to impress a central vein and tiny angled lines for leaf texture. -
Attach Leaves:
Press the wide ends of the leaves onto the top of the carrot. I find using a dot of liquid clay here helps ensure they don’t pop off after baking. -
Pierce the Hole:
Use your needle tool to create a jump ring hole through the green leaf section, ensuring there is enough clay above the hole for strength. -
Bake the Clay:
Arrange your bunny and carrot pieces on a tile or baking sheet. Bake according to your specific clay brand’s instructions (usually 275°F/130°C for 15-30 minutes). Let them cool completely.
Step 3: Painting & Assembly
-
Paint Facial Features:
Squeeze a drop of black acrylic paint onto a palette. Using your finest detail brush, carefully paint the bunny’s eyes, lashes, and nose. For the carrot, paint a simple smiley face and horizontal texture lines. -
Seal (Optional):
To protect the paint, you can apply a very thin layer of matte varnish over the painted areas, though bare clay has a wonderful texture on its own. -
Attach Jump Rings:
Open a jump ring by twisting it sideways with your pliers. Slide it through the hole in the carrot leaves. -
Connect Earring Findings:
Before closing the jump ring, slide on the loop of your gold kidney ear wire. Close the jump ring securely. -
Finish Assembly:
Repeat the assembly process for the second carrot. For the bunny, attach it to its own hardware or glue a flat post pad to the back if you prefer it as a stud.
Level Up: Glossy eyes
After the paint is fully dry, add a tiny drop of UV resin or glossy dimensional glaze just to the eyes and nose for a cute, wet-look highlight.
Now you have a unique, playful set of accessories ready to celebrate the season


Hatching Chick Mini Figurines
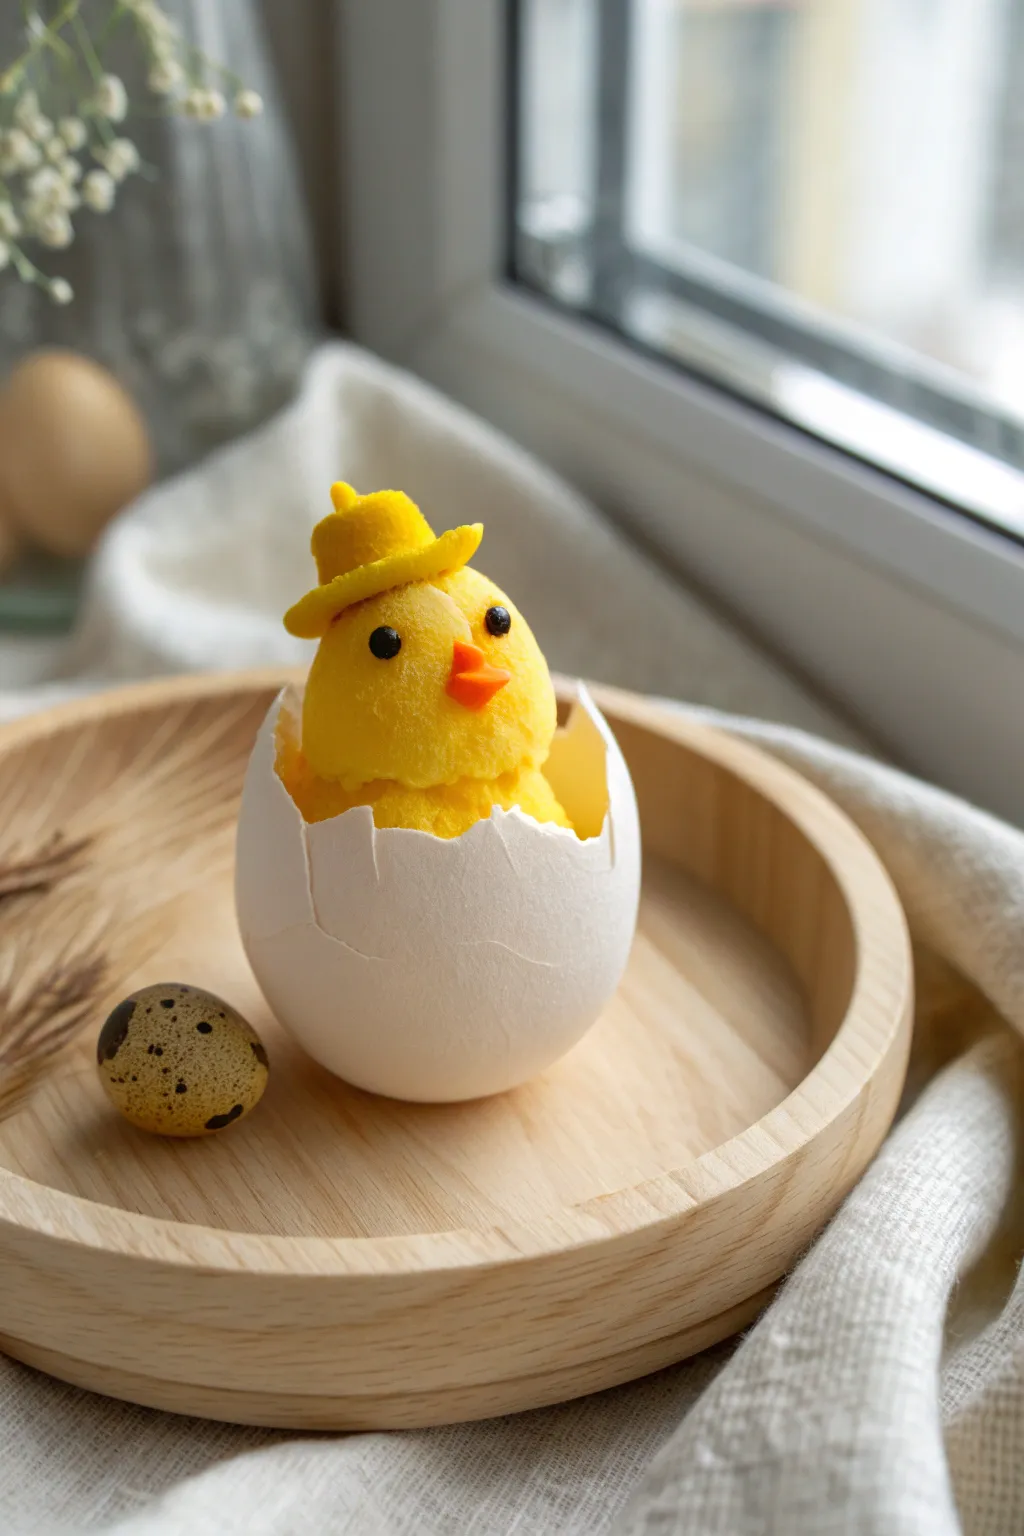
This adorable project combines natural elements with polymer clay sculpting to create a charming little chick emerging into the world. With its bright yellow flocking and tiny matching hat, this figurine makes for a perfect Easter centerpiece or a thoughtful springtime gift.
Step-by-Step
Materials
- White extra-large egg (real)
- Yellow polymer clay
- Orange polymer clay
- Black glass beads or tiny black clay balls (for eyes)
- Yellow flocking powder (velvet powder)
- Craft glue or liquid polymer clay
- Sculpting tools (needle tool, small ball stylus)
- Small paintbrush
- Aluminum foil
- Oven (for baking clay)
- Safety pin or tack
Step 1: Preparing the Shell
-
Empty the Egg:
Take a raw white egg and carefully pierce a small hole in one end and a slightly larger one in the other using a safety pin. Blow the contents out into a bowl for later cooking. -
Create the Opening:
Gently chip away at the top third of the eggshell to create a jagged, broken edge. Rinse the shell thoroughly with water and vinegar, then let it dry completely. -
Reinforce (Optional):
If your shell feels very fragile, you can brush a thin layer of Mod Podge on the inside and let it dry to add strength before inserting the clay.
Oops! Flocking Clumps
If your flocking looks patchy or clumpy, use a dry, soft brush to gently sweep away excess powder before baking. Apply a tiny dot of liquid clay to bald spots and re-dip.
Step 2: Sculpting the Chick
-
Form the Body Base:
Create a ball of aluminum foil slightly smaller than the opening of your eggshell. This saves clay and keeps the figurine light. -
Cover with Clay:
Condition your yellow polymer clay until soft. Roll it into a sheet and wrap it completely around the foil ball, smoothing out any seams. -
Shape the Head and Body:
Mold the yellow clay into a rounded pear shape. The wider bottom will sit in the shell, while the slightly narrower top forms the head. -
Add Texture (Flocking):
Brush a thin, even layer of craft glue or liquid clay over the entire yellow surface. Dip the body into yellow flocking powder or sprinkle it on heavily, patting it gently to adhere. This creates that fuzzy, baby-chick texture. -
Insert the Eyes:
Use a needle tool to make two small indentations for eye sockets. Press two tiny black glass beads or baked black clay balls into the flocced clay. -
Form the Beak:
Take a tiny amount of orange clay and roll it into a small cone. Flatten the underside slightly and press it into the center of the face, just below the eyes.
Pro Tip: Weighted Bottom
Before sealing the foil core, I like to push a small metal washer or coin into the bottom of the clay body. This lowers the center of gravity so the egg stands upright easily.
Step 3: Accessories and Assembly
-
Create the Hat Brim:
Roll a small circle of yellow clay and flatten it to create the brim of the hat. Apply glue and flocking powder to this piece as well. -
Make the Hat Crown:
Form a smaller cylinder or dome of yellow clay. Flock it separately, then adhere it to the center of the brim. -
Position the Hat:
Place the finished hat on the chick’s head at a slight, jaunty angle. Press down gently to secure it. -
Pre-Bake Check:
Test the fit of your chick inside the eggshell. It should sit comfortably without forcing the shell open further. -
Bake the Figurine:
Place the chick (without the eggshell) on a baking sheet or tile. Bake according to your polymer clay package instructions (usually 275°F/135°C for 15-30 minutes). -
Cool Down:
Allow the clay to cool completely inside the oven to prevent cracks. -
Final Assembly:
Place a dab of glue at the bottom of the eggshell interior. Carefully insert the cooled chick into the shell and hold it briefly until set.
Now you have a sweet little herald of spring ready to brighten up your shelf

The Complete Guide to Pottery Troubleshooting
Uncover the most common ceramic mistakes—from cracking clay to failed glazes—and learn how to fix them fast.
Speckled Egg Ornaments and Gift Tags
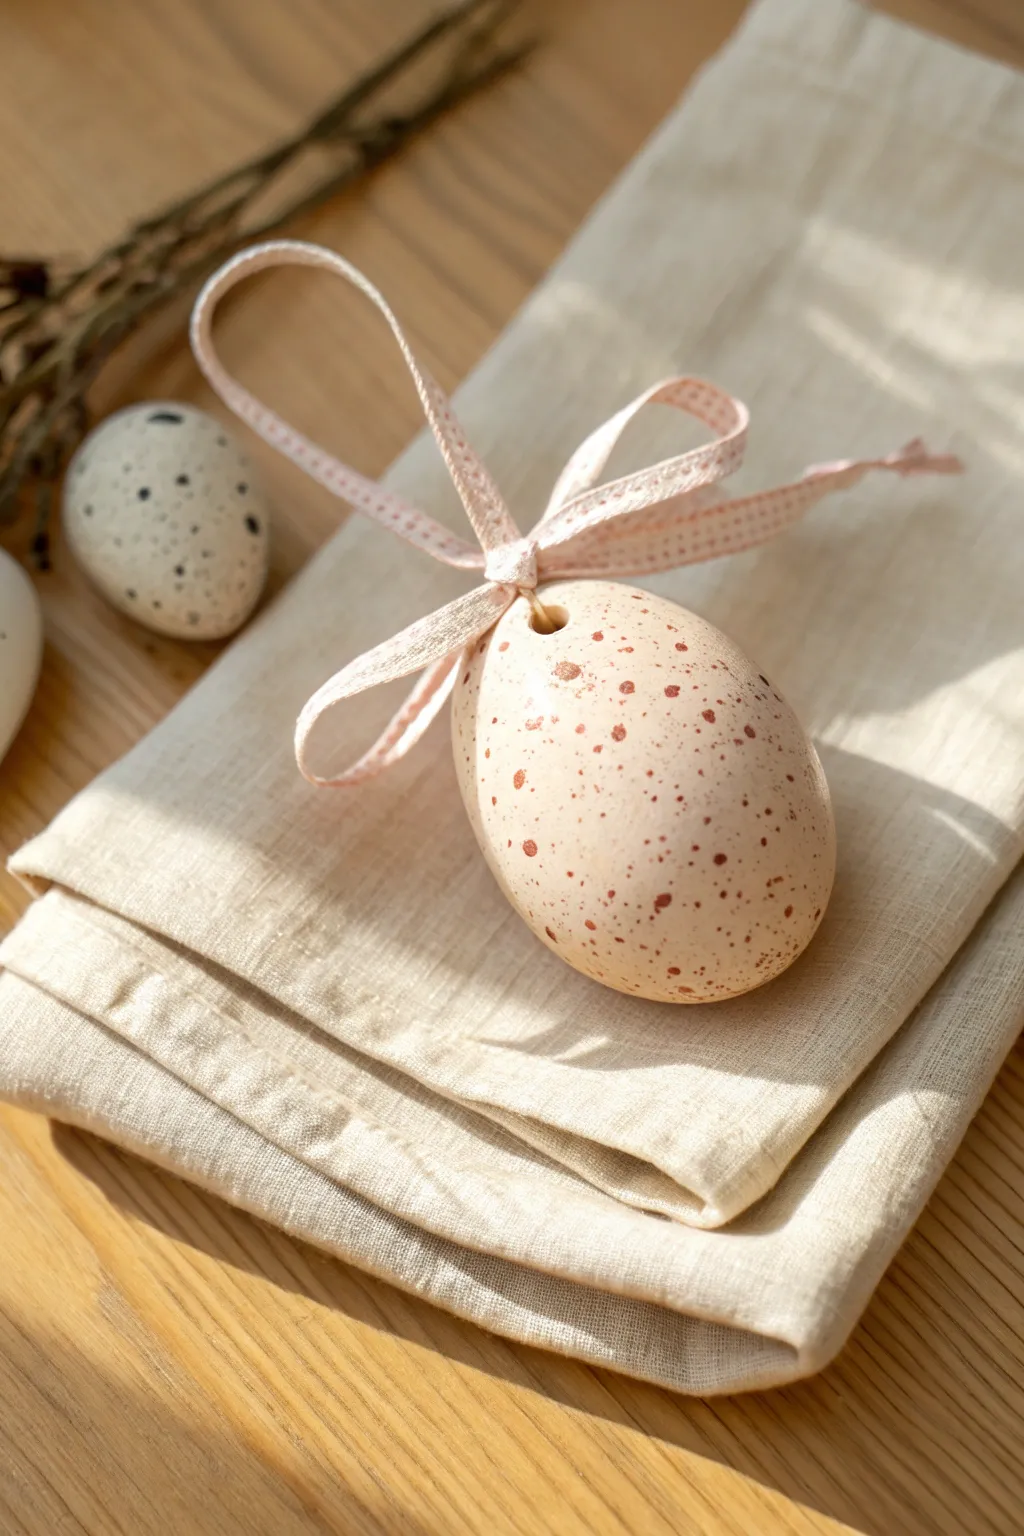
Capture the delicate beauty of bird eggs with these elegant polymer clay ornaments. Their soft peach tone and reddish-brown speckles create a natural, organic look perfect for understated spring decor or personalized gift tags.
Step-by-Step Guide
Materials
- White polymer clay
- Beige or translcent polymer clay (for mixing custom shades)
- Acrylic paint (reddish-brown or burnt sienna)
- Old toothbrush or stiff bristle brush
- Small wooden skewer or toothpick
- Sandpaper (fine grit, 400-600)
- Decorative ribbon (pink/blush)
- Rolling pin or pasta machine (optional)
- Oven for baking
Step 1: Shaping the Egg Base
-
Condition the Clay:
Begin by warming your polymer clay in your hands. Knead it thoroughly until it is soft, pliable, and free of any cracks. -
Mix Your Color:
To achieve the soft peach tone seen in the photo, mix a large amount of white clay with a very small pinched amount of beige or light orange. Blend until the color is completely uniform. -
Form a Sphere:
Roll a portion of the clay into a smooth ball between your palms. Aim for a size roughly slightly smaller than a chicken egg. -
Shape the Egg:
Start rolling one side of the sphere slightly more than the other to create an oval. Gently taper the top end until you have a classic egg silhouette. -
Smooth the Surface:
Inspect the clay for fingerprints. Lightly buff the surface with your finger or a little baby oil to ensure it’s perfectly smooth. -
Create the Hanging Hole:
Take your wooden skewer and pierce a hole through the top, narrower part of the egg. Make sure the hole is wide enough to accommodate your chosen ribbon. -
Refine the Hole:
Gently twist the skewer as you pull it out to keep the hole clean. Smooth the clay around the opening if it bulges slightly.
Step 2: Flicking and Baking
-
Prepare the Speckle Paint:
Dilute a small drop of reddish-brown acrylic paint with a tiny bit of water. You want a consistency that is fluid but not transparent. -
Load the Brush:
Dip the tips of an old toothbrush or stiff bristle brush into the diluted paint. Dab off any excess onto a paper towel to avoid large globs. -
Test the Spatter:
I always recommend doing a quick test spray on a piece of scrap paper first to gauge the size of the droplets. -
Apply the Speckles:
Hold the brush near the raw clay egg and run your thumb across the bristles to flick the paint. Rotate the egg to cover all sides evenly with fine speckles. -
Let Paint Dry:
Allow the acrylic speckles to dry completely on the raw clay before baking. This usually takes about 10-15 minutes. -
Bake the Eggs:
Place your eggs on a baking sheet lined with parchment paper or a bed of cornstarch (to prevent flat spots). Bake according to your clay manufacturer’s specific temperature and time instructions. -
Cool Down:
Once baked, turn off the oven and let the eggs cool down slowly inside to prevent thermal shock and cracking.
Clean Hole Tip
Insert a small eyelet into the hole before baking for a more finished hardware look, ensuring the clay hugs the metal tight.
Step 3: Finishing Touches
-
Light Sanding:
If there are any rough spots, gently wet-sand the cured clay with fine-grit sandpaper. Be careful not to sand off your painted speckles. -
Prepare the Ribbon:
Cut a length of blush pink ribbon, approximately 10-12 inches long. -
Thread the Ribbon:
Feed one end of the ribbon through the hole at the top of the egg. -
Tie the Bow:
Bring the ends together and tie a neat bow near the top of the egg. Adjust the loops so they sit perkily, similar to the reference photo. -
Final Adjustment:
Trim the ribbon ends at an angle to prevent fraying and give a polished finish.
Scented Decor
After baking and cooling, rub a drop of essential oil on the unglazed clay back; it acts as a passive diffuser.
Hang your new speckled creations on branches or tuck them into Easter baskets for a charming handmade touch
Bottoms-Up Bunny Planter Topper
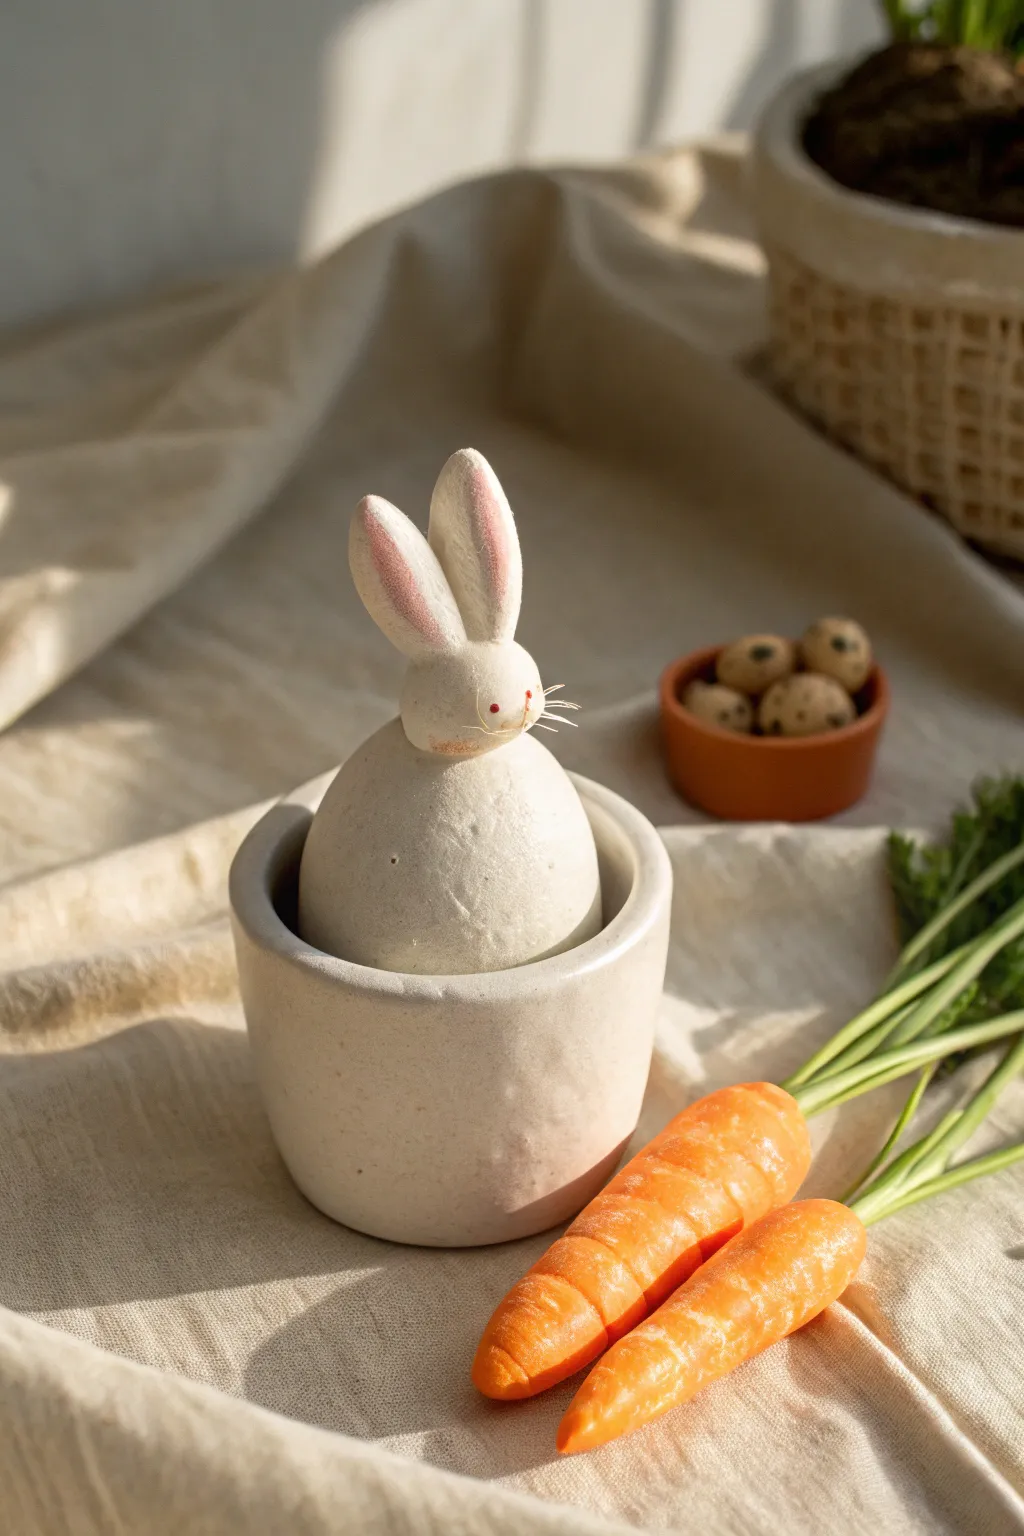
This charming project combines the simplicity of modern decor with classic Easter motifs, featuring a chubby, egg-shaped bunny nesting in a rustic white pot. It’s an adorable way to add a subtle festive touch to your houseplants or create a standalone centerpiece.
Detailed Instructions
Materials
- White polymer clay (approx. 1 block)
- Translucent pink chalk pastel or eyeshadow
- Soft paintbrush for shading
- Needle tool or toothpick
- White sewing thread or thin fishing line (for whiskers)
- Red acrylic paint and a fine dotting tool
- Small ceramic pot (2-3 inches diameter) to fit the bunny
- Aluminum foil
- Liquid polymer clay (optional)
- Acrylic roller or glass jar
Step 1: Shaping the Base
-
Condition the clay:
Start by kneading your white polymer clay until it is soft, pliable, and free of air bubbles. If the clay feels too stiff, warm it in your hands a bit longer. -
Create the core:
Crumple a piece of aluminum foil into a tight ball, slightly smaller than a golf ball. This will be the lightweight core of the bunny’s body, saving clay and reducing baking time. -
Form the body:
Roll a sheet of white clay and wrap it completely around the foil ball. Roll it between your palms to smooth out any seams until you have a perfect, seamless egg shape. -
Test the fit:
Place the clay egg into your chosen ceramic pot to ensure it sits at the right height. It should look like it’s peeking out, much like an egg in a cup. Adjust the size if needed.
Clean Clay Tip
White clay picks up dust easily. Keep a pack of baby wipes nearby to clean your hands and tools often while sculpting.
Step 2: Sculpting the Head & Ears
-
Roll the head:
Take a smaller portion of white clay and roll it into a sphere about one-third the size of the body. Gently flatten the bottom where it will attach to the body. -
Attach the head:
Press the head firmly onto the top of the body. I like to use a tiny drop of liquid polymer clay here to act as glue, ensuring a strong bond during baking. -
Blend the seam:
Use a modeling tool or your finger to smooth the clay slightly at the connection point, though leaving a distinct ‘neck’ line keeps the stylized look. -
Shape the ears:
Roll two equal-sized logs of clay, tapered at both ends. Flatten them gently to create the ear shapes, making one slightly longer if you want a playful, asymmetrical look. -
Pink shading:
Scrape a little pink chalk pastel into a powder. Use a soft, dry brush to dust the center of the unbaked ears with a soft pink gradient. -
Attach the ears:
Press the ears onto the top of the head. Blend the base of the ears into the skull using a needle tool so they look seamless and sturdy.
Step 3: Adding Details & Finishing
-
Texture the body:
For that rustic, stone-like appearance seen in the photo, gently tap the surface of the clay with a stiff toothbrush or crumpled foil. This removes fingerprints and adds visual interest. -
Insert whiskers:
Cut three short pieces of white thread or fishing line. Carefully push them into the cheek area of the raw clay. They will bake right into the piece. -
Bake the piece:
Bake the bunny according to your clay package instructions (usually 275°F/135°C for 15-30 minutes). Use an oven thermometer to ensure accuracy. -
Cool down:
Let the bunny cool completely inside the oven with the door cracked open. This gradual cooling helps prevent cracks in thicker pieces. -
Paint the eyes:
Once cool, dip a tiny dotting tool or the tip of a toothpick into red acrylic paint. Place two minuscule dots for the eyes. -
Final assembly:
Place your finished bunny into the ceramic pot. You can fill the bottom of the pot with moss or paper shred if the bunny needs a boost to show its face.
Texture it Up
Mix black pepper or dried tea leaves into the white clay before rolling to create a speckled ‘pottery’ faux-stone effect.
Now you have a sweet, sophisticated little bunny to watch over your spring garden setup


What Really Happens Inside the Kiln
Learn how time and temperature work together inside the kiln to transform clay into durable ceramic.
Mini Easter Basket Charms
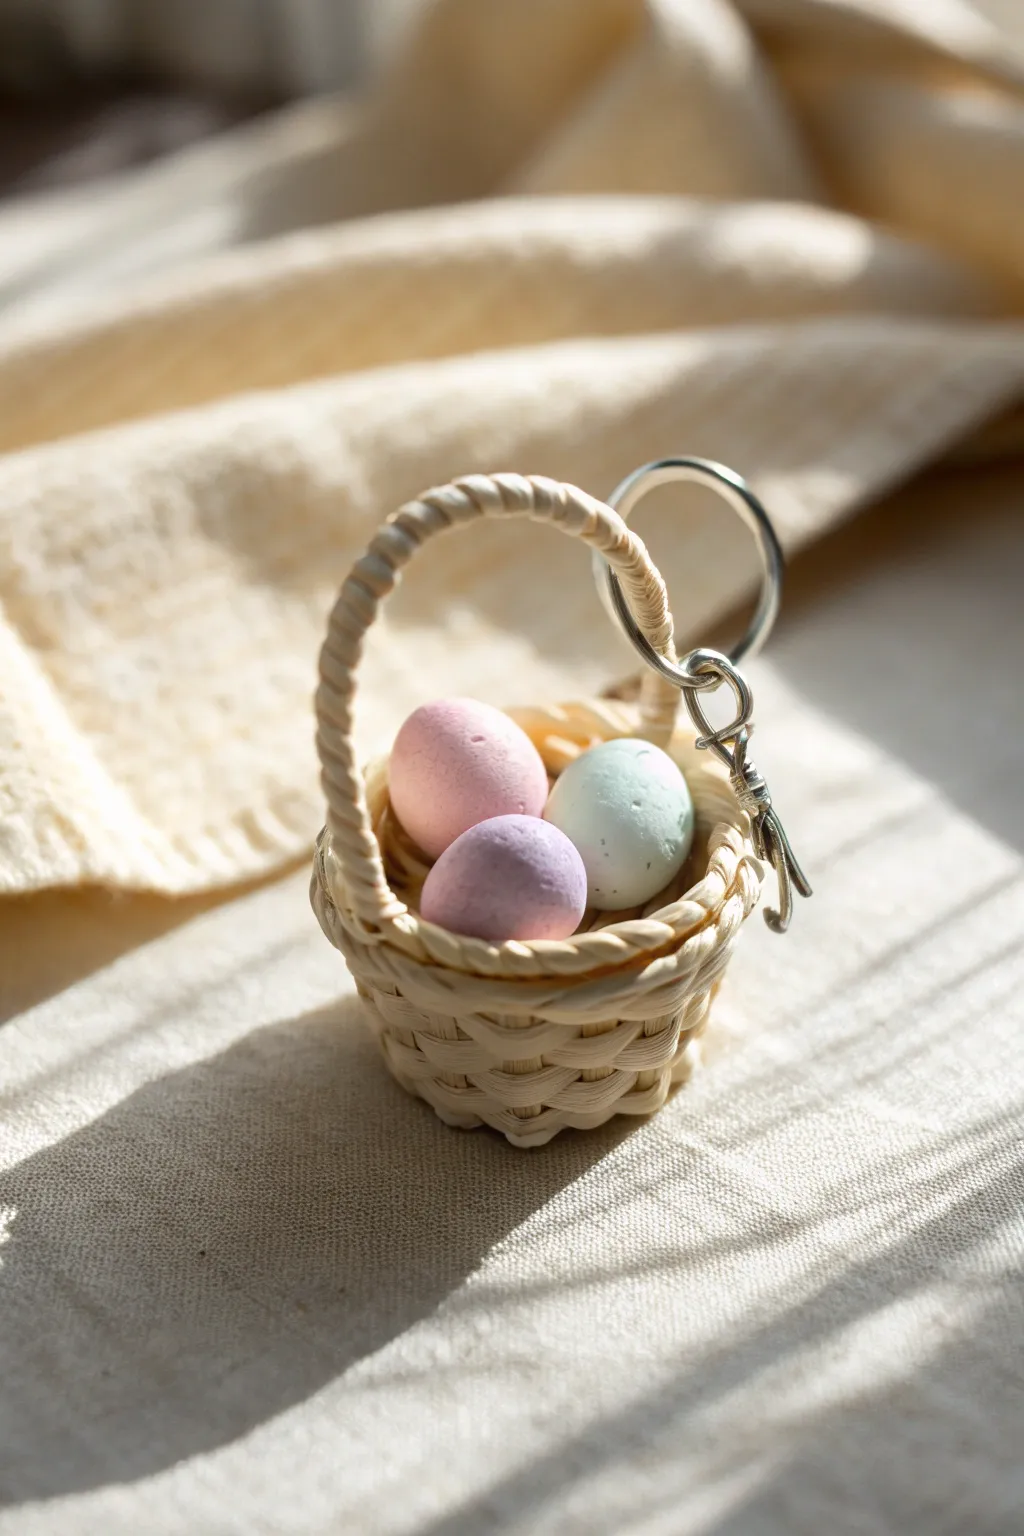
Capture the sweetness of spring with this adorable miniature basket charm, complete with three tiny pastel eggs nestled inside. The realistic woven texture and soft colors make for a delightful keychain or zipper pull that you can carry year-round.
How-To Guide
Materials
- Polymer clay in beige/light tan (for the basket)
- Polymer clay in pastel pink, purple, and mint green (for the eggs)
- Liquid polymer clay (bake and bond)
- Clay extruder with a small round disc (optional but recommended)
- Small metal keychain ring with a jump ring and lobster clasp
- A small round form (like a marble or large wooden bead) to mold the basket
- Needle tool or toothpick
- Cornstarch or baby powder (release agent)
- Gloss or matte varnish (optional)
- Small eye pin
Step 1: Weaving the Basket Base
-
Prepare the Clay Strands:
Condition your beige or tan clay until it is soft and pliable. Using a clay extruder or rolling by hand, create several long, thin snakes of clay. Aim for a thickness of about 1-2mm for a delicate look. -
Twist the Rim:
Take two strands of clay and gently twist them together to create a rope effect. Set this aside; this twisted rope will eventually become the sturdy rim and handle of your basket. -
Prepare the Mold:
Dust your round form (a marble or large bead works beautifully) lightly with cornstarch or baby powder. This ensures the clay won’t stick permanently to your form during the initial shaping. -
Create the Weave Structure:
Lay thin strands of clay across your round form in a crisscross pattern to form the skeleton of the basket. Gently press them together at the very bottom center to secure the base. -
Fill the Basket Shape:
Wrap a single long strand of clay in a spiral motion around the vertical strands you just placed, starting from the bottom and working your way up. I like to gently press the horizontal spiral against the vertical ribs to bond them without smashing the texture. -
Attach the Rim:
Once the basket is the desired height, trim the vertical ribs. Take the twisted rope you made earlier and carefully press it onto the top edge to finish the rim, covering the cut ends of the vertical strands. -
First Bake:
Bake the basket on the form according to your clay manufacturer’s instructions, but for only about 10 minutes to set the shape. Let it cool completely before carefully sliding it off the form.
Step 2: Adding Handle and Hardware
-
Form the Handle:
Cut a segment of your remaining twisted rope to create the basket handle. Apply a tiny dot of liquid clay to the inside of the basket rim on opposite sides. -
Secure the Handle:
Press the ends of the handle firmly into the liquid clay spots. You may need to support the arch of the handle with a bit of scrap paper or foil so it doesn’t droop while baking. -
Insert the Eye Pin:
Trim an eye pin so the stem is short. Dip the end in liquid clay and insert it into the top of the handle weave, ensuring the loop is oriented correctly to attach your keychain later.
Weaving Woes?
If your clay strands break while weaving, add a tiny drop of baby oil or clay softener to your raw clay and re-condition it to restore elasticity.
Step 3: Creating the Eggs
-
Shape the Eggs:
Take tiny pinches of your pastel pink, purple, and mint green clay. Roll them into balls, then gently taper one end to create an authentic oval egg shape. -
Texture the Eggs:
For a realistic matte texture, gently tap the surface of each egg with an old toothbrush or a piece of sandpaper. This removes fingerprints and adds a shell-like quality. -
Arrange in Basket:
Place a small amount of liquid clay inside the bottom of your baked basket. Carefully arrange your three eggs inside, leaning them against each other securely. -
Final Bake:
Bake the entire assembled piece again for the full recommended time (usually 15-30 minutes per 1/4 inch of thickness). This bonds the handle and the eggs permanently to the basket.
Spotty Eggs
Flick some diluted brown or black acrylic paint onto the baked eggs with a stiff brush to create realistic speckles like a robin’s egg.
Step 4: Assembly
-
Cool and Seal:
Allow the charm to cool completely. If desired, brush a very light coat of matte varnish over the eggs to protect them, or leave them bare for a natural finish. -
Attach Keychain:
Using pliers, open the jump ring on your keychain hardware. Loop it through the eye pin on the basket handle and close the ring securely.
Now you have a charming miniature basket ready to accompany you on your keys or bag
Gingham Pattern Egg Slices
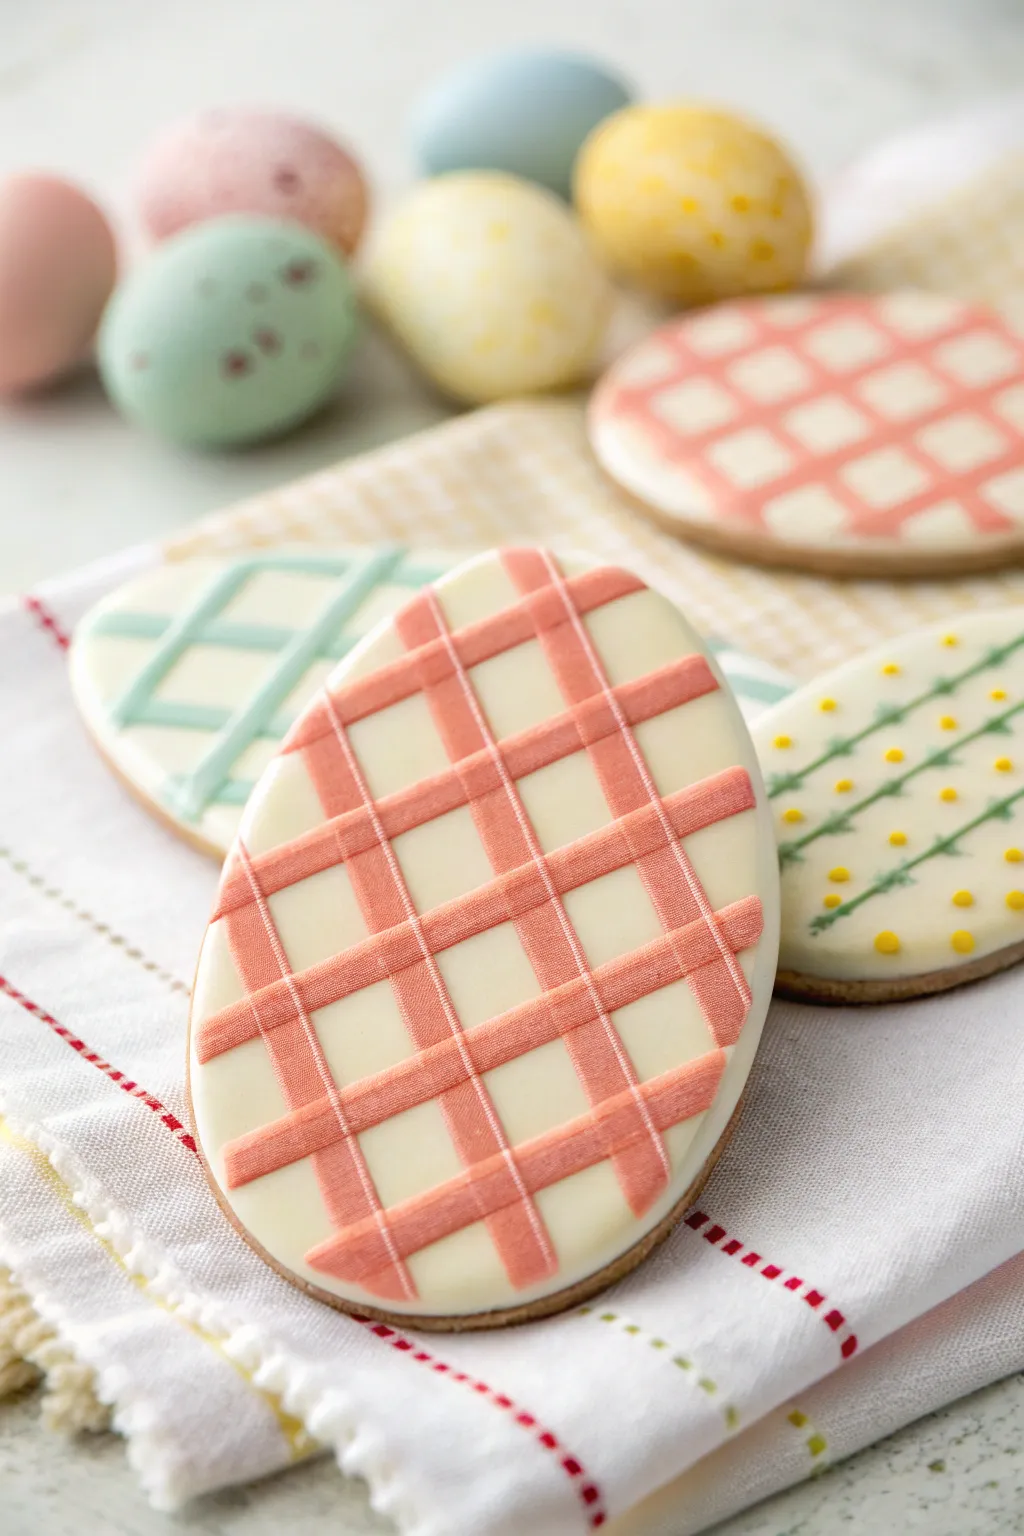
Capture the soft, detailed charm of royal cing cookies using polymer clay to create these lightweight, durable Easter decorations. This project focuses on achieving that crisp, raised icing look with liquid clay and precise layering for a realistic gingham effect.
Step-by-Step Guide
Materials
- Polymer clay (white, ecru/beige for cookie dough)
- Liquid polymer clay (white)
- Chalk pastels (peach/coral, yellow, teal)
- Oval cookie cutter
- Toothbrush or texturing tool
- Needle tool
- Small squeeze bottles with fine metal tips
- Ceramic tile or baking surface
- Glass mat or smooth work surface
- Clay roller or pasta machine
- Soft paintbrush
Step 1: Baking the Cookie Base
-
Mix the dough color:
Start by conditioning your ecru or beige clay. If it’s too dark, mix in a generous amount of white clay until you achieve a light, realistic sugar cookie dough shade. -
Roll and cut:
Roll your clay out to a medium thickness (approx. 4-5mm). Use your oval cutter to punch out clean egg shapes. -
Add texture:
Gently tap the surface and sides of the clay oval with a clean toothbrush or a crumpled ball of aluminum foil. This mimics the slightly porous texture of a baked cookie. -
Shade the edges:
Scrape a small amount of yellow and light brown chalk pastel into distinct piles of dust. Using a soft paintbrush, gently dust the very edges of the oval to simulate golden-brown baking marks. -
First bake:
Place your cookie bases on a ceramic tile and bake according to your clay manufacturer’s instructions. Let them cool completely before decorating.
Lines spreading out?
If your piped lines are spreading too much, your liquid clay is too thin. Let it sit in the open air for 20 minutes to thicken slightly before piping.
Step 2: Creating the Faux Icing
-
Prepare the base icing:
Pour white liquid polymer clay into a small mixing cup. This will serve as your ‘flood’ icing. -
Flood the cookie:
Carefully spread the white liquid clay onto the cooled cookie base, leaving a tiny rim of the ‘dough’ visible around the edge. Use a needle tool to pop any air bubbles and guide the liquid to the edges. -
Flash bake:
Bake the flooded cookie for 10-15 minutes just to set the white layer. This prevents the next layers from sinking into the base. -
Mix the gingham color:
While the base cools, mix a separate batch of white liquid clay with shaved peach or coral chalk pastel. Stir thoroughly until the color is opaque and uniform. -
Fill the applicator:
Transfer your peach-colored liquid clay into a squeeze bottle equipped with a fine metal tip for precision.
Step 3: Piping the Pattern
-
Pipe vertical lines:
Holding the bottle vertically, pipe evenly spaced parallel lines running from the top to the bottom of the egg. Aim for straight, consistent thickness. -
Add horizontal lines:
Pipe a second set of horizontal lines intersecting the first set, creating a grid. To mimic the weave of fabric, try to keep the spacing identical to the vertical lines. -
Create the darker intersections:
This is the trick for realistic gingham: Where the lines cross, add a tiny extra drop of the peach liquid clay. This slight increase in volume makes those squares look darker and more saturated, just like overlapping fabric. -
Refine the edges:
If any lines taper off too thinly at the ends, use your needle tool to gently drag a little extra liquid clay to the edge for a clean finish. -
Final cure:
Place the finished piece back in the oven for a full bake (usually 15-30 minutes depending on brand) to permanently set the raised grid pattern.
Pro Texture Tip
For a fabric look, gently press a piece of fine tulle or mesh onto the piped lines before baking. This imitates the woven texture of ribbon perfectly.
Once cooled, these sweet faux-cookies look lovely displayed in a small basket or attached to napkin rings

TRACK YOUR CERAMIC JOURNEY
Capture glaze tests, firing details, and creative progress—all in one simple printable. Make your projects easier to repeat and improve.
Swirled Marble Easter Eggs
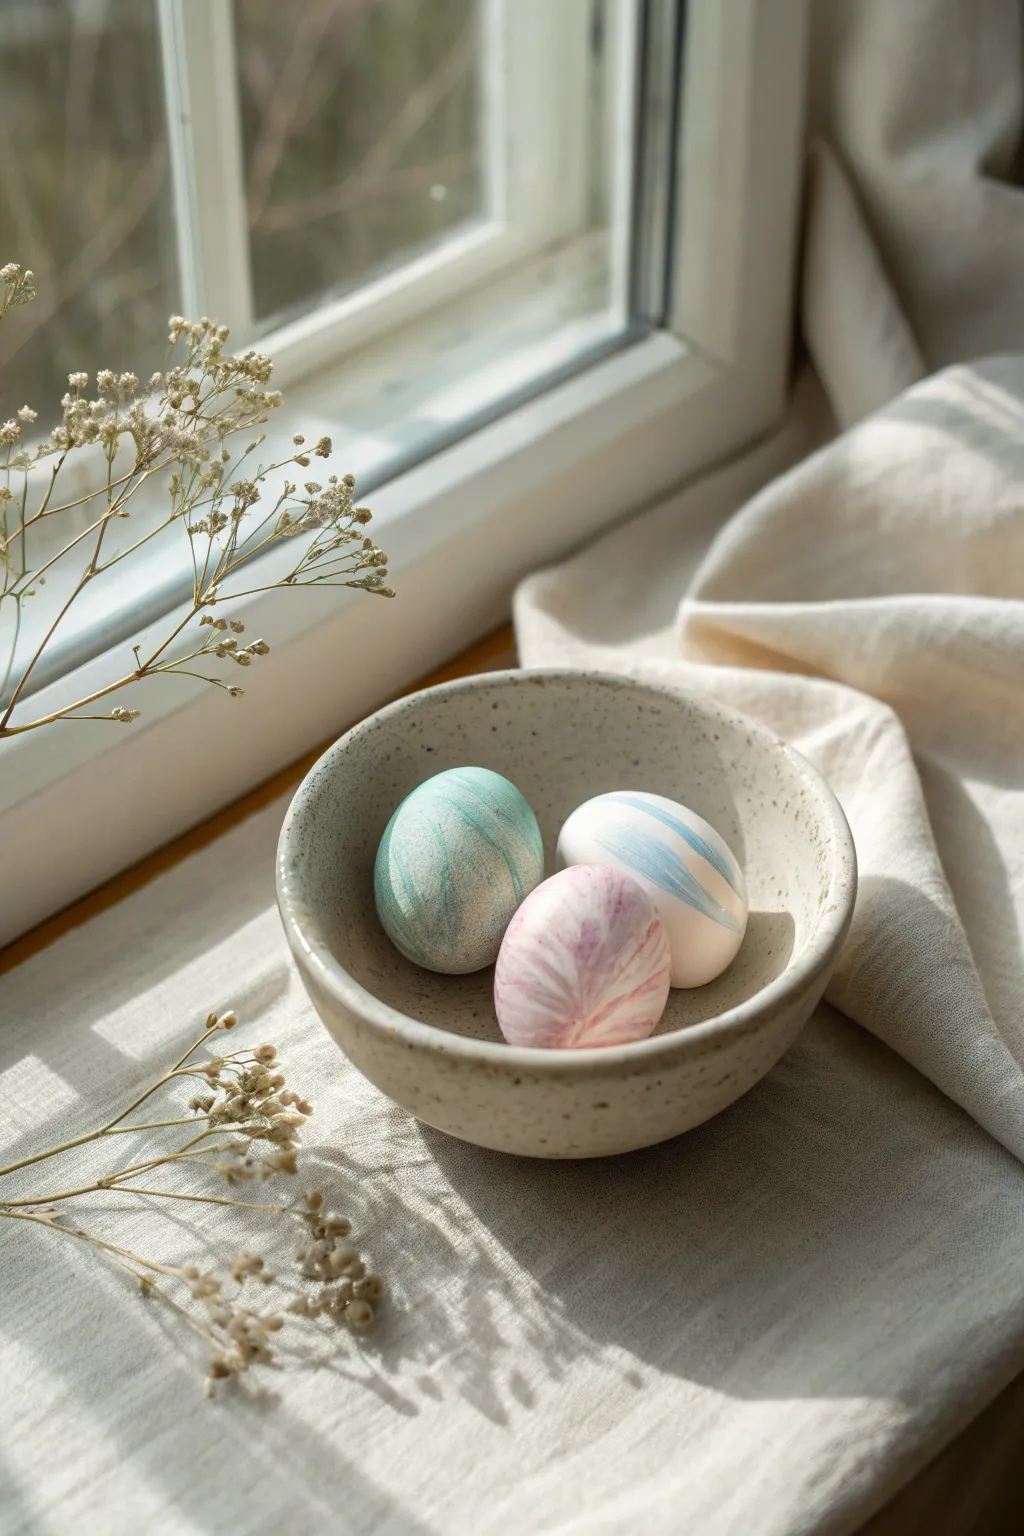
Create sophisticated, minimalist Easter décor with these stunning marbled eggs. Using a simple polymer clay twisting technique, you can achieve organic swirls of teal, mauve, and soft blue that look like polished stone.
How-To Guide
Materials
- White or translucent polymer clay (large block)
- Teal polymer clay
- Mauve/dusty pink polymer clay
- Light blue polymer clay
- Silver or pearlescent white polymer clay (optional)
- Clean ceramic tile or glass work surface
- Clay roller or acrylic rod
- Tissue blade or sharp craft knife
- Blown-out eggshells OR ceramic egg blanks OR aluminum foil for cores
- Fine-grit sandpaper (400-800 grit)
- Oven for baking
Step 1: Preparing the Clay Base
-
Condition the white clay:
Start by taking a significant amount of white clay and kneading it in your hands until it is soft, pliable, and warm. -
Create egg cores:
If you aren’t covering a real eggshell, scrunch aluminum foil into a tight egg shape. This saves clay and keeps the egg lightweight. Cover this foil core with a thin, even layer of your conditioned white clay to create a smooth base. -
Prepare color accents:
Condition small amounts of teal, mauve, light blue, and silver clay separately. You want about 1 part colored clay to 10 parts white clay for a subtle pastel look. -
Roll snakes:
Roll the white clay into a thick log. Then, roll your colored clays into very thin, spaghetti-like strands.
Muddy Colors?
Stop mixing sooner! If you twist and fold the clay too many times, the colors will blend into a single solid muddy hue instead of distinct marble veins.
Step 2: Creating the Marble Effect
-
Apply color strands:
Lay the thin colored strands lengthwise along the thick white log. For the teal egg, use teal and silver strands; for the pink, use mauve and white; for the blue, use blue and translucent. -
Twist the log:
Grasp both ends of the clay log and twist in opposite directions until you have a tight ‘candy cane’ spiral. -
Fold and roll:
Fold the twisted log in half and roll it smooth again on your work surface. I usually repeat this twist-fold-roll process 2-3 times to get intricate, thin veins of color. -
Form a ball:
Once you are happy with the marbling pattern, roll the clay into a smooth ball. You should see swirls of color distributing throughout the white. -
Roll out a sheet:
Use your acrylic roller to flatten the marbled ball into a sheet about 3mm thick. The pattern will stretch and become localized, creating that organic stone look.
Add Golden Veins
Apply delicate gold leaf flakes to the clay sheet before the final rolling. The gold will embed into the surface for a luxurious crackled effect.
Step 3: Shaping and Finishing
-
Cover the egg form:
Gently drape the marbled clay sheet over your prepared egg core (foil or ceramic). Carefully smooth the clay down the sides. -
Trim excess:
Use your craft knife to trim away excess clay at the bottom or seams. Gently massage the seams with your thumb until they disappear completely. -
Smooth the surface:
Roll the entire egg gently between your palms to ensure it is perfectly round and the pattern flows naturally without fingerprints. -
Bake the eggs:
Place your eggs on a baking sheet or in a cardstock accordion fold to keep them from rolling. Bake according to your clay package instructions (usually 275°F/130°C for 15-30 minutes). -
Cool down:
Allow the eggs to cool completely in the oven before handling them to prevent cracking. -
Sanding:
Once cool, wet-sand the eggs under running water using fine-grit sandpaper. This removes any tiny bumps or fingerprints and gives the surface a professional, matte ceramic finish. -
Buffing (Optional):
Rub the dry egg briskly with a piece of denim or a soft cotton cloth to bring out a natural, low-luster sheen without adding glaze.
Arranging these in a simple ceramic bowl creates a centerpiece that feels both modern and timeless.
Bunny Ear Napkin Rings
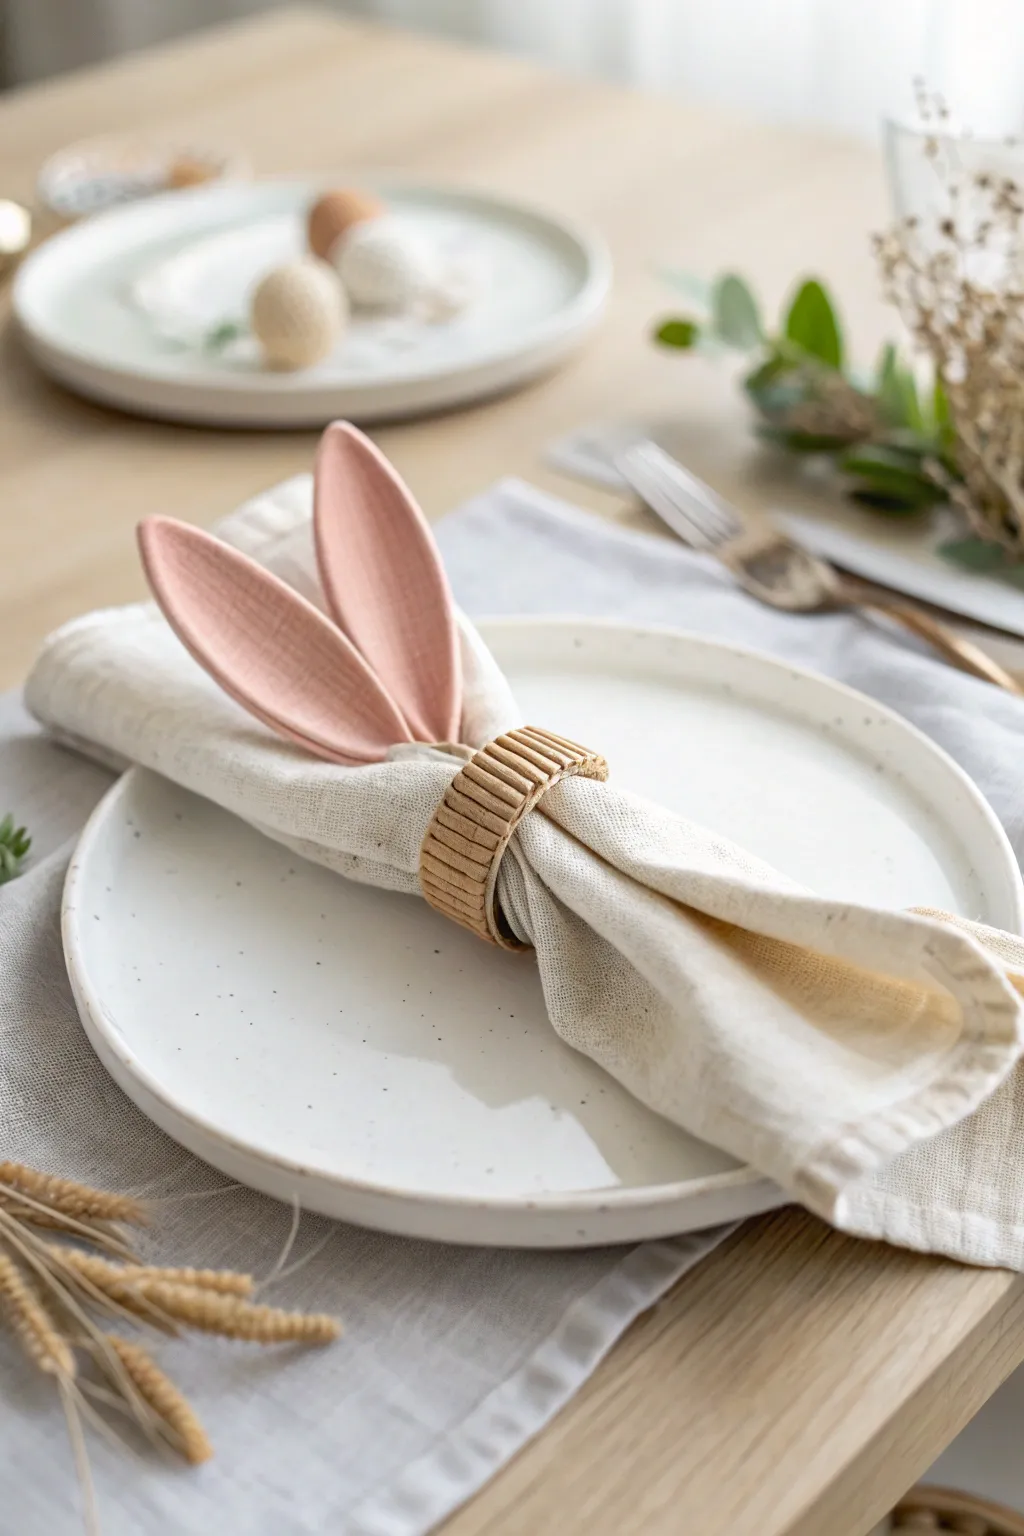
Add a touch of whimsy to your spring table setting with these charming bunny ear napkin rings. The soft pink ears contrast beautifully with a polymer clay ring that mimics the rustic look of woven rattan.
Step-by-Step
Materials
- Polymer clay (Soft pink for ears, Beige/Tan for the ring)
- Acrylic rolling pin
- Craft knife or scalpel
- Texture sheet or fine comb (for faux fabric texture)
- Sculpting tools (needle tool and smoothers)
- Cardboard or foil tube (e.g., empty toilet paper roll, cut to size)
- Parchment paper
- Liquid polymer clay (Bake and Bond)
- Oven and baking sheet
Step 1: Sculpting the Ears
-
Condition the Clay:
Begin by thoroughly conditioning your soft pink polymer clay until it is pliable and warm to the touch. This prevents cracks during baking. -
Roll the Sheet:
Using your acrylic rolling pin, roll the pink clay out onto parchment paper to an even thickness of about 1/8 inch (3mm). -
Cut the Ear Shapes:
Freehand sketch a bunny ear shape on paper first as a template, or cut directly into the clay with your craft knife. You need two long, almond-shaped ears per ring. Make them roughly 2.5 to 3 inches tall. -
Add Texture:
To give the ears a fabric-like appearance similar to the photo, lightly press a piece of coarse linen or a texture sponge onto the surface of the clay ears. -
Curve the Ears:
Since napkins are round, the base of the ears needs a slight curve. Gently shape the bottom edge of each ear against your cardboard tube form so they will attach cleanly to the ring later. -
Initial Bake:
Place the ears on your baking sheet (propped on a bit of crumpled foil to maintain a slight curve if desired) and bake for 15 minutes at the temperature recommended on your clay package. Let them cool completely.
Clean Cuts
If your clay drags while cutting the ear shapes, dust your craft knife with a little cornstarch or dip it in water for a smoother slice.
Step 2: Creating the Faux-Rattan Ring
-
Prepare the Ring Base:
While the ears cool, condition the beige or tan clay. Roll a strip that is about 1 inch wide and long enough to wrap around your cardboard tube (approx. 5-6 inches). -
Form the Circle:
Wrap the beige strip around your cardboard tube (lined with a strip of parchment paper so it doesn’t stick). Join the seams by smoothing the clay together at the back. -
Create Ribbed Texture:
Roll out several thin ‘snakes’ or coils of the same beige clay. These will become the raised ribs of the ring. -
Apply the Ribs:
Lay these thin coils horizontally around the clay ring base, spacing them evenly. Press them down gently so they adhere to the base. -
Detail the Weave:
Using a blunt sculpting tool or the back of a knife, press vertical indentations into the coils at regular intervals. This mimics the look of a woven basket or rattan structure. -
Attach the Ears:
Apply a small amount of liquid polymer clay to the bottom front of the unbaked ring where you want the ears to sit. I find this creates a much stronger bond than pressing clay alone. -
Secure the Assembly:
Press the pre-baked pink ears into the liquid clay on the ring. Add a small strip of beige clay over the base of the ears to ‘trap’ them onto the ring, blending this strip into the ribbed texture so it looks seamless. -
Reinforce the Back:
Smooth the clay around the base of the ears carefully to ensure there are no gaps. The ears should look like they are tucked inside the ring structure. -
Final Bake:
Bake the entire assembled napkin ring on the cardboard tube for a full 30-45 minutes. This long bake ensures the ring is durable. -
Finishing Touches:
Once cool, carefully slide the ring off the cardboard tube. If the finish looks too glossy, you can lightly sand it or apply a matte varnish for a natural look.
Level Up: Washed Effect
After baking, apply a wash of diluted brown acrylic paint into the grooves of the ‘rattan’ ring, then wipe the surface clean to highlight the texture.
Now you are ready to set a delightful Easter table with your handmade creations
Flower-Crowned Bunny Charms
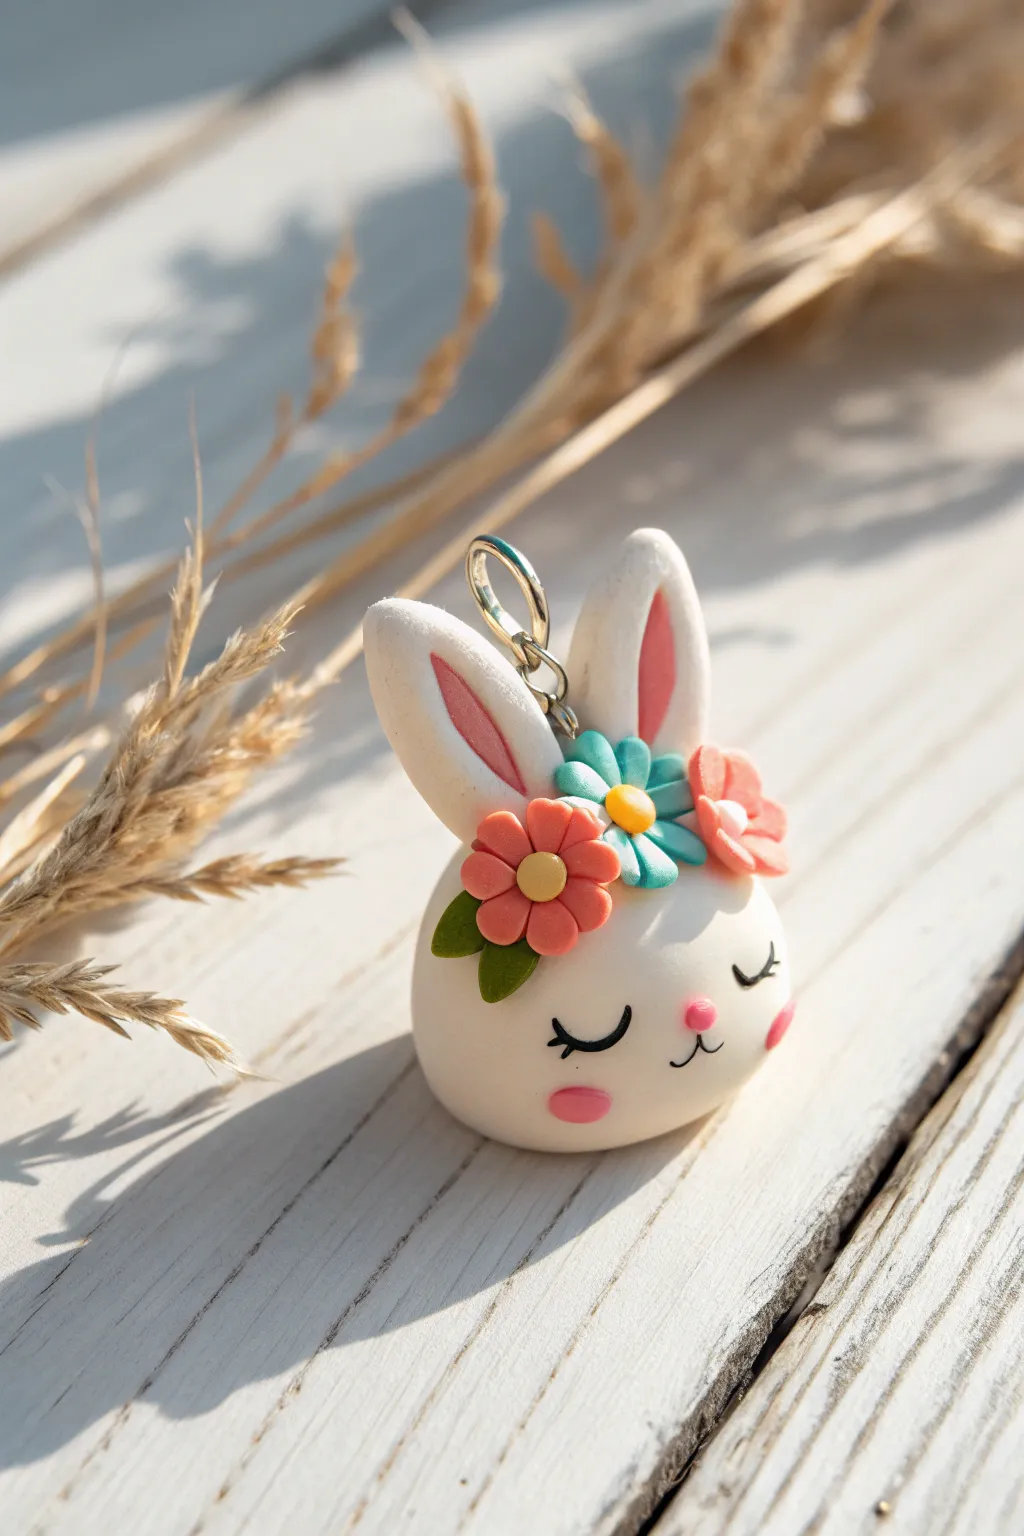
Capture the essence of spring with this adorable polymer clay bunny charm, featuring a sweet flower crown and a serene, sleeping expression. This project uses soft whites and pastels to create a smooth, stylized finish perfect for Easter jewelry or keychains.
How-To Guide
Materials
- White polymer clay (premo or fimo recommended)
- Pink polymer clay
- Teal/Aqua polymer clay
- Green polymer clay
- Yellow polymer clay
- Black acrylic paint or fine-point black marker
- Silver eye screw
- Dotting tools (various sizes)
- Small needle tool or toothpick
- Gloss glaze (optional)
Step 1: Shaping the Head
-
Condition the Clay:
Begin by thoroughly kneading your white clay until it is soft, pliable, and free of air bubbles. Clean hands are crucial here to keep the clay pristine. -
Form the Base:
Roll the white clay into a smooth ball, approximately the size of a large grape or small walnut. Gently flatten the bottom against your work surface so it sits upright without rolling. -
Refine the Shape:
Use your fingers to gently smooth the dome shape. The goal is a slightly squatter ‘bun’ shape rather than a perfect sphere, giving the bunny a cute, chubby look.
Dirty Clay Blues?
White clay picks up dust easily. Keep a pack of baby wipes nearby to clean your hands and tools often, or use a bit of rubbing alcohol on a Q-tip to clean the raw clay before baking.
Step 2: Creating the Ears
-
Form Ear Shapes:
Take two equal, smaller pieces of white clay. Roll them into logs and taper one end of each log to create elongated teardrop shapes. -
Flatten and Indent:
Gently flatten the teardrops. Use a rounded tool or the pad of your thumb to create a shallow depression running down the center of each ear. -
Add Pink Insides:
Roll thin, tapered snakes of pink clay. Place these into the indentations of the white ears and smash them down gently so they sit flush with the white surface. -
Attach to Head:
Place the ears on top of the head, positioning them slightly apart. Use a blending tool or toothpick to securely merge the clay at the base of the ears into the head, ensuring a strong bond.
Step 3: Crafting the Flower Crown
-
Make Flower Petals:
For the teal center flower, roll five tiny balls of teal clay. Flatten them slightly into teardrops to serve as petals. -
Assemble Center Flower:
Arrange the five teal petals in a circle right between the bunny’s ears. Press a small yellow clay ball into the very center to secure them. -
Create Side Flowers:
Repeat the process with coral or pink clay to make two more flowers. Place one on the left and one on the right of the central teal flower. -
Add Leaves:
Shape tiny pieces of green clay into leaf shapes. Using a needle tool, press a central vein into each leaf. Tuck these underneath the flowers on the sides for a pop of greenery. -
Insert Hardware:
If making a charm, screw the silver eye pin into the top of the head, right behind the flower crown, before baking.
Pearl Effects
Mix a tiny amount of translucent or pearl clay into your petal colors. This gives the flower crown a soft, shimmering finish that looks magical in the sunlight.
Step 4: Face Details & Bake
-
Add Cheeks and Nose:
Take tiny amounts of pink clay and flatten them into ovals for the cheeks. Place a tiny triangle or round bit of pink clay in the center for the nose. -
Bake:
Bake the piece according to your clay package instructions (usually 275°F/135°C for 15-30 minutes per 1/4 inch thickness). -
Cool Down:
Allow the bunny to cool completely before handling. I like to let it sit for an hour to ensure the clay hardens fully. -
Paint the Eyes:
Using a very fine detail brush or a fine-tip marker, carefully draw two curved ‘U’ shapes for sleeping eyes. Add small lashes to the outer corners. -
Draw the Mouth:
Draw a tiny vertical line down from the nose, splitting into a small ‘w’ shape to form the mouth. -
Glaze (Optional):
For durability and shine, apply a thin coat of gloss glaze to the eyes and nose, or the entire piece if desired.
Attach a jump ring to your new charm and wear it proudly as a necklace or dangle it from your bag
Marshmallow-Style Bunny and Chick Minis
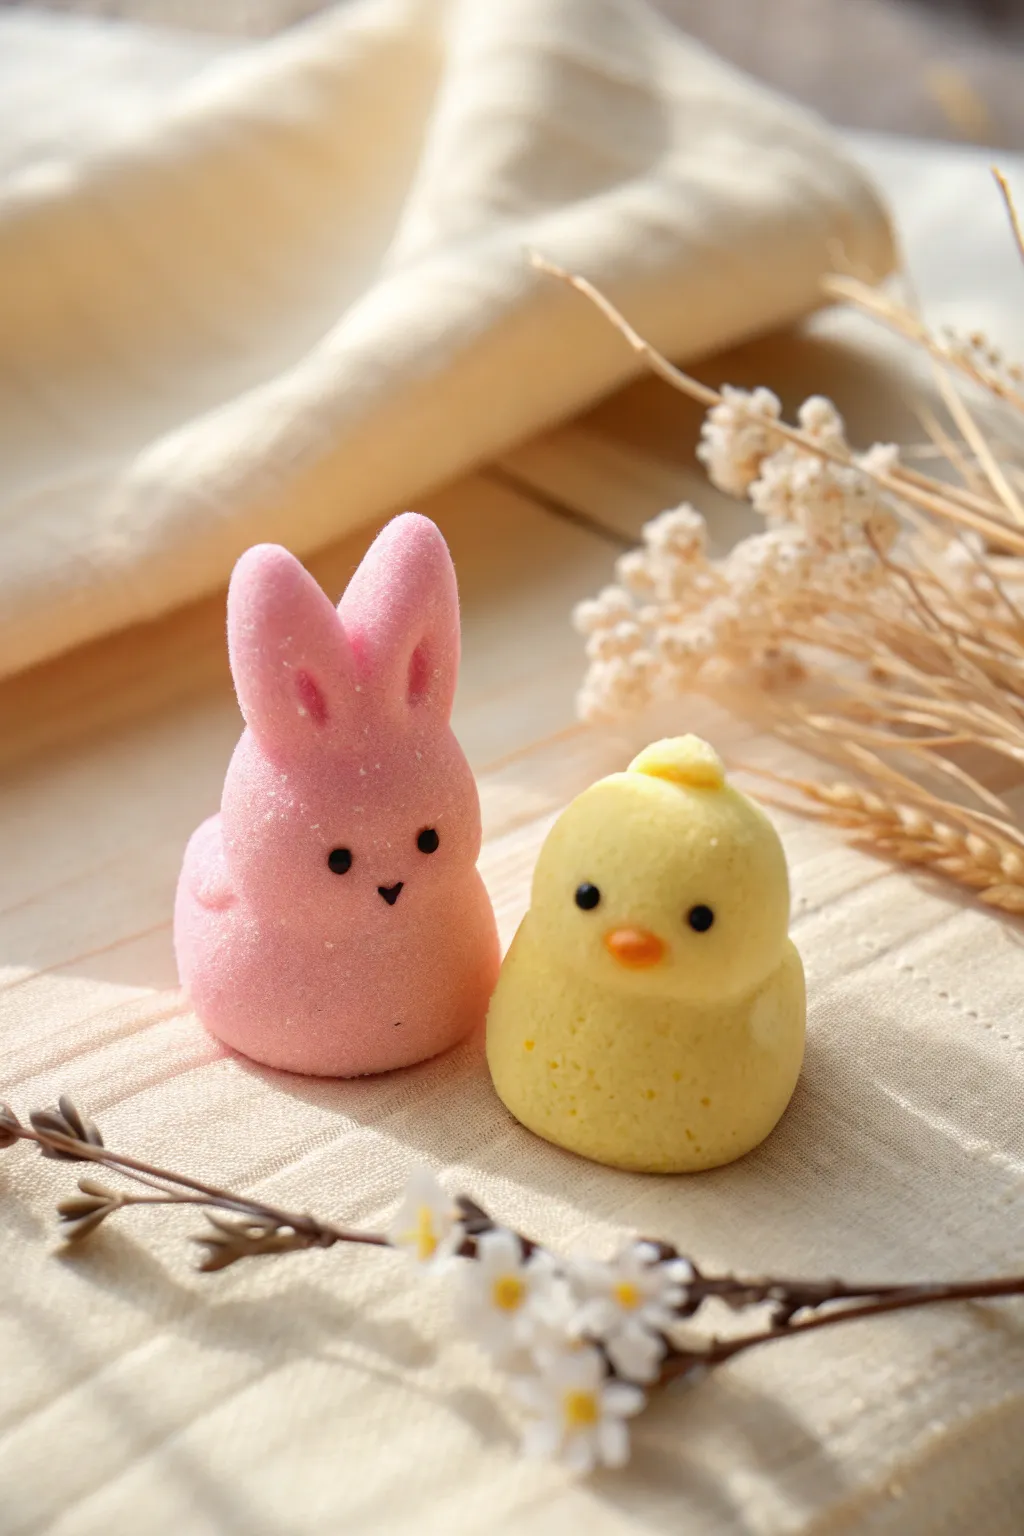
Capture the nostalgic charm of classic Easter marshmallow treats with these incredibly realistic polymer clay miniatures. The secret to their authentic look is a special texturing technique that mimics a coating of fine sugar crystals.
Detailed Instructions
Materials
- Polymer clay (Pastel Pink and Pastel Yellow)
- Black polymer clay (tiny amount for eyes)
- Orange polymer clay (tiny amount for beak)
- White extra-fine glitter or embossing powder
- Liquid Sculpey (translucent or clear)
- Small paintbrush (old or dedicated to craft)
- Needle tool or toothpick
- Ball stylus tool
- Clean ceramic tile or baking sheet
- Toaster oven or conventional oven
Step 1: Shaping the Peep Bunny
-
Create the Body Base:
Start with a chunk of pastel pink clay about the size of a large grape. Condition it until soft, then roll it into a smooth ball. Gently flatten the bottom so it sits securely without rolling away. -
Form the Head:
Take a slightly smaller piece of pink clay and roll it into a ball. Place this on top of the body base. Use your thumb to smudge the clay downwards at the connection point to merge the two pieces seamlessly. -
Shape the Ears:
Roll two small logs of pink clay, tapering them slightly at the top. Flatten them just a bit to mimic the classic marshmallow shape. -
Attach and Blend Ears:
Place the ears on top of the head. Using a silicone tool or your finger, blend the bottom of the ears into the head so there are no visible seams. The ears should stand upright but look soft and rounded. -
Define the Tail:
Roll a tiny ball of pink clay for the tail. Press it onto the lower back of the bunny, blending the edges slightly so it looks like a puff of marshmallow.
Pro Tip: Avoid Fingerprints
Make your shapes slightly taller than you want, then compress them gently. This avoids handling the sides too much and keeps fingerprints minimal.
Step 2: Sculpting the Chick
-
Form the Chick Body:
Condition your pastel yellow clay. Roll a ball similar in size to the bunny’s body. Pinch one side slightly to create a very subtle tail feather shape, while keeping the rest round and plump. -
Create the Chick Head:
Roll a smaller yellow ball for the head. Place it atop the body, blending the neck seam carefully as you did with the bunny. The transition should be smooth and chubby. -
Add the Top Tuft:
Take a very tiny pinch of yellow clay and shape a small, curved tear-drop. Attach this to the very top of the head for that signature marshmallow chick feather accent. -
Make the Beak:
Roll a minuscule piece of orange clay into a cone. Press it gently into the center of the face, flattening it just enough so it integrates without losing its shape.
Level Up: Bite Marks
Use a scalloped cookie cutter to remove a chunk from an ear or side before texturing. Texture the ‘inside’ white to look like bitten marshmallow.
Step 3: The Sugary Texture Technique
-
Prepare the Adhesive:
Squeeze a small amount of liquid Sculpey into a palette or dish. You want a thin, even consistency. -
Coat the Figures:
Using an old brush, apply a thin layer of liquid Sculpey over the entire surface of both the bunny and chick. Avoid the orange beak of the chick for now. Ensure the coat is even and not gloppy. -
Apply the Sugar:
Pour your extra-fine white glitter or embossing powder into a shallow bowl. Gently roll your figures in the ‘sugar’ or spoon it over them until fully coated. Tap off the excess lightly. -
Clean Up Details:
If any glitter stuck to the orange beak, use a needle tool to carefully scrape it off so the beak remains smooth and distinct.
Step 4: Facial Features & Baking
-
Create Eye Sockets:
Use a small ball tool to press tiny indentations where the eyes will go on both figures. Do the same for the bunny’s nose. -
Add Eyes and Nose:
Roll extremely tiny balls of black clay. Use a needle tool to place them into the indentations for the eyes. For the bunny, roll a tiny triangle for the nose and place it below the eyes. -
Texture Check:
The handling might have flattened the ‘sugar’ texture in spots. Sprinkle a tiny bit more glitter on any bald patches if needed. -
Bake:
Place your creations on a ceramic tile. Bake according to your polymer clay package instructions (usually 275°F/135°C for 15-30 minutes). Let them cool completely before handling.
Display these darling faux sweets in a basket with paper grass for a centerpiece that lasts for years
Carrot Patch Mini Diorama
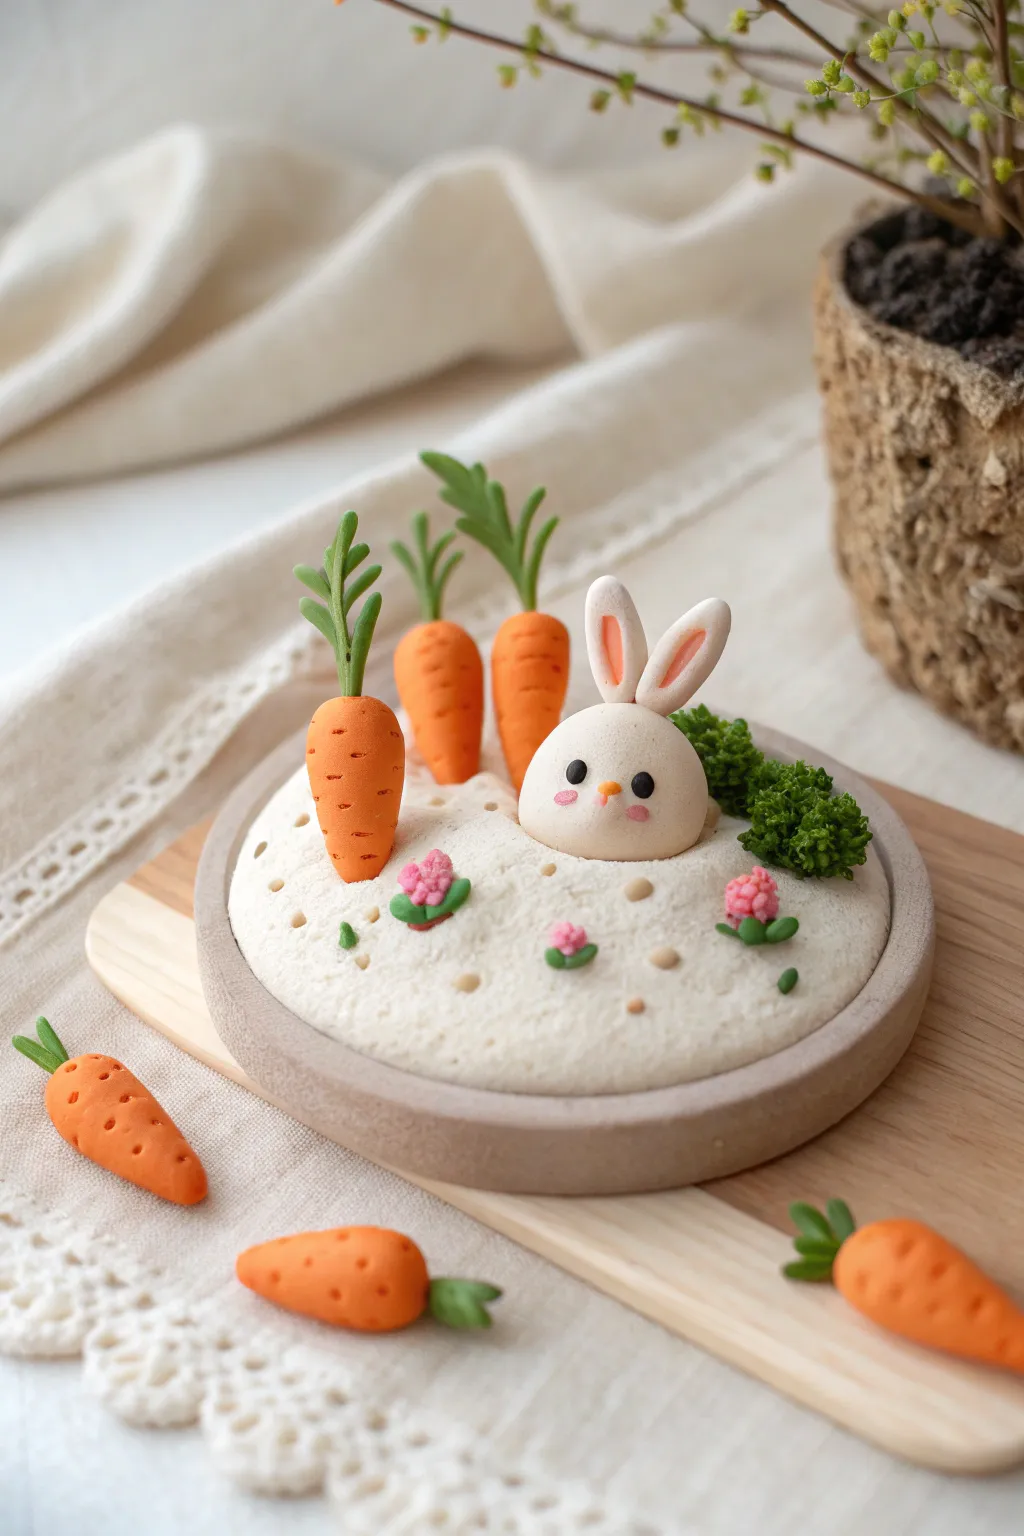
This adorable mini diorama features a playful white bunny emerging from a textured mound of earth, surrounded by a vibrant carrot patch. The soft, matte finish and tiny details like the pink nose and leafy greens make it a perfect Easter display piece.
Step-by-Step Guide
Materials
- Polymer clay (White, Orange, Green, Pink, Black/Dark Brown)
- Round base (ceramic coaster, wood disc, or a clay base)
- Texture tools (toothbrush, needle tool, ball tool)
- Liquid polymer clay (Translucent or White)
- Small blade or craft knife
- Chalk pastels (Pink for shading)
- Soft paintbrush
- Oven for curing
Step 1: Creating the Base and Mound
-
Prepare the base:
Start with a round, flat base. You can use a pre-made ceramic coaster for a sturdy feel, or roll out a thick disc of tan or grey clay to mimic a stone saucer. -
Form the earth mound:
Condition a large ball of white polymer clay. Flatten the bottom and dome the top to create a gentle hill shape that fits within your base, leaving a small rim exposed. -
Add texture:
This step is crucial for realism. Take an old toothbrush or a ball of crumpled aluminum foil and firmly press it all over the white mound. The goal is to create a fluffy, soil-like texture rather than a smooth surface. -
Create the burrow hole:
Use a large ball tool or your thumb to press a deep indentation into the center-right of the mound where the bunny will eventually sit.
Loose Parts?
If the carrots or bunny ears feel wobbly before baking, use a tiny piece of wire or a toothpick snipped to size as an internal armature to hold them upright.
Step 2: Sculpting the Bunny
-
Shape the head:
Roll a smooth ball of white clay. It should be sized to fit snugly into the indentation you made, peeking out just enough to look curious. -
Add the face details:
Attach two tiny black beads of clay for eyes. Roll extremely small balls of pink clay for cheeks and press them gently below the eyes. Add a tiny orange triangle for a nose. -
Form the ears:
Roll two teardrop shapes of white clay and flatten them slightly. Use a smaller tool to press an indentation into the center of each, filling it with a thin strip of pink clay for the inner ear. -
Attach the ears:
I like to use a tiny dab of liquid clay here to ensure a strong bond. Press the ears onto the top of the head, blending the seams at the back with a silicone tool so they look seamless. -
Place the bunny:
Insert the finished head into the burrow hole on the mound. Press gently to secure it without squashing the facial features.
Step 3: Planting the Garden
-
Make the carrots:
Roll several cone shapes from orange clay. Use a needle tool to press horizontal lines across the cones to mimic the texture of real carrots. Make 3 for the patch and a few extras for decoration. -
Create carrot tops:
Roll thin green snakes of clay and flatten them. Cut jagged, fern-like shapes with your craft knife. Attach 2-3 of these leaves to the top of each orange carrot. -
Plant the carrots:
Press the orange carrots into the white mound behind and to the left of the bunny. You want them to look like they are securely planted in the ‘soil’. -
Add shrubbery:
Take small bits of green clay and chop them finely with your blade until they look like moss or broccoli. Cluster these bits behind the bunny to create a bushy texture. -
Form tiny flowers:
Roll tiny balls of bright pink clay. Cluster three or four together to make small flower heads. Add tiny green leaves underneath. -
Scatter the details:
Press the flowers into the white mound near the front. Take tiny bits of tan clay (pebble sized) and press them randomly into the white texture to act as small stones. -
Final bake:
Bake the entire piece according to your clay manufacturer’s instructions (usually 275°F/130°C for 15-30 minutes). Let it cool completely before handling.
Level Up: Fuzzy Texture
Apply white flocking powder to the bunny head before baking. Brush on liquid clay first, then dip in powder for a realistic soft fur effect.
Place your finished carrot patch on a shelf or table to add a touch of whimsy to your spring decor
Tulip and Egg Drop Earrings
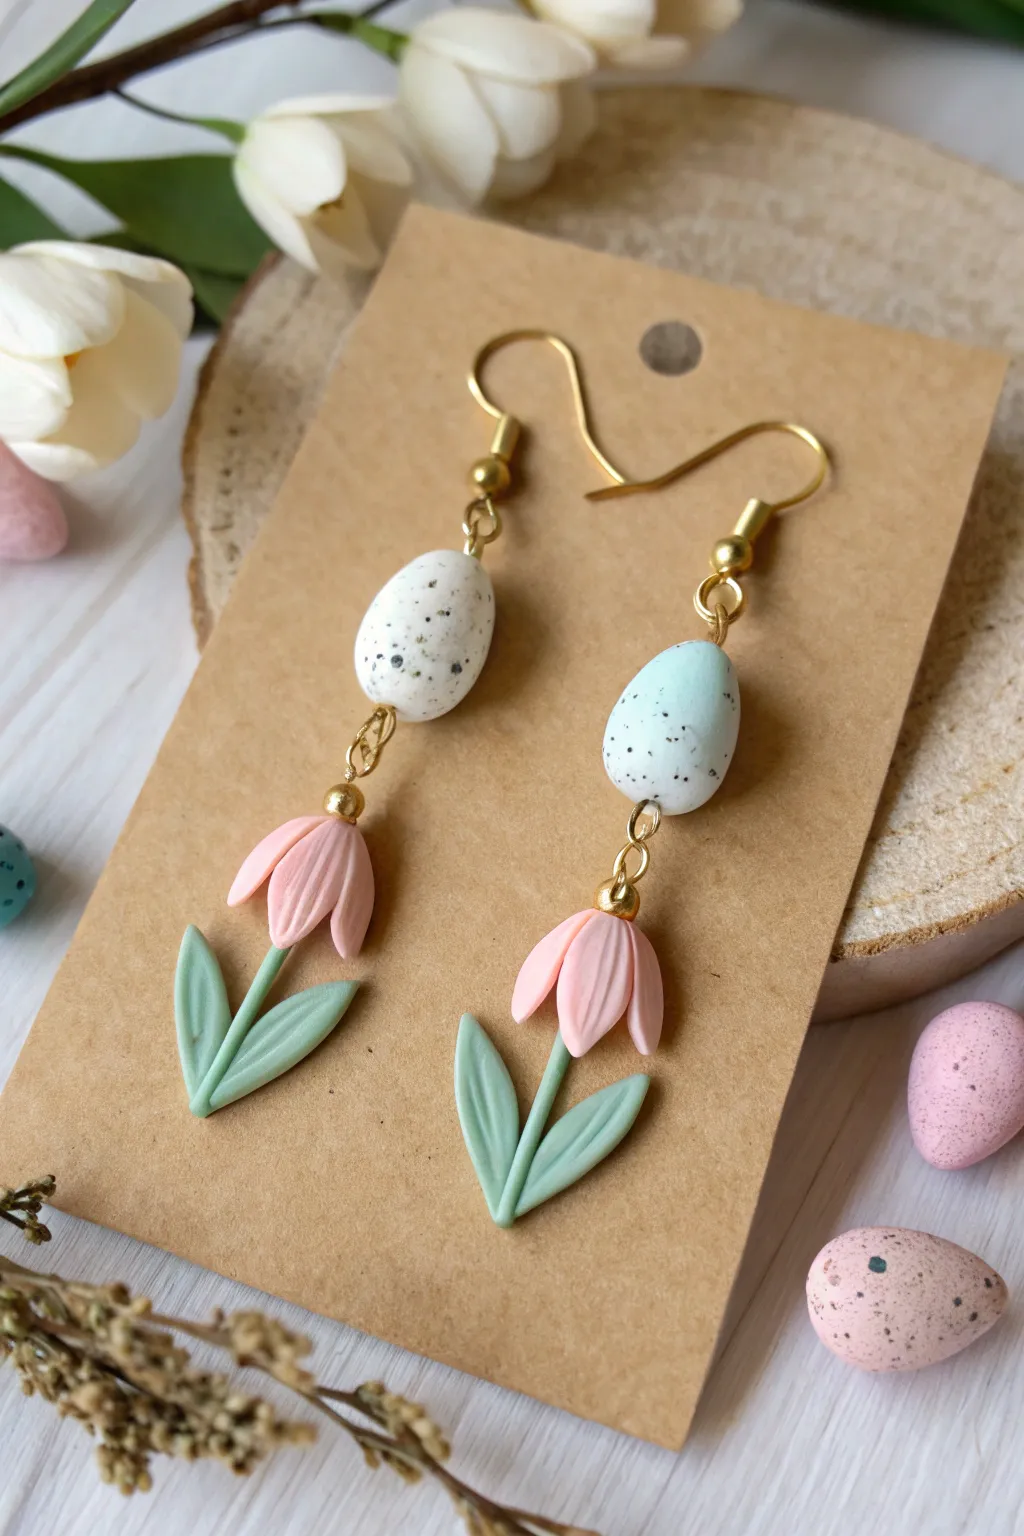
These charming drop earrings combine the quintessential symbols of spring: speckled eggs and blooming tulips. Crafted from polymer clay and accented with gold hardware, they offer a delicate, whimsical touch perfect for your Easter ensemble.
How-To Guide
Materials
- Polymer clay in white, light mint/blue, pastel pink, and sage green
- Black acrylic paint or black pepper (for speckling)
- Gold earring hooks
- Gold eye pins (approx. 25mm length)
- Small gold spacer beads (2-3mm)
- Needle tool or toothpick
- Small craft paintbrush or old toothbrush
- Round nose pliers
- Wire cutters
- Baking sheet/tile
- Gloss varnish (optional)
Step 1: Creating the Speckled Eggs
-
Mix the colors:
Begin by conditioning your white and light mint clay until soft and pliable. You will need one small ball of each color, roughly the size of a pea. -
Shape the eggs:
Roll each ball between your palms until smooth, then gently taper one end to create an oval egg shape. Make sure one is white and one is mint. -
Add the speckles:
To achieve the realistic egg look, dilute a tiny drop of black acrylic paint with water. Dip a stiff brush (or toothbrush) into the mixture and flick it onto the clay eggs by running your finger across the bristles. Alternatively, you can mix ground black pepper directly into the raw clay before shaping for a textured effect. -
Secure the hardware:
Insert a gold eye pin vertically through the center of each egg. Ensure the loop sits flush against the wider bottom end of the egg. If the pin is too long, trim the excess wire at the top forming a simple loop with your round nose pliers.
Step 2: Sculpting the Tulips
-
Form the petals:
Condition the pastel pink clay. Roll three very small teardrop shapes for each tulip flower (six total). Flatten them slightly with your finger. -
Assemble the flower head:
Pick up a new eye pin. Press the three pink petals around the top of the eye pin loop, overlapping them slightly to form a closed tulip bud shape. The loop should be hidden inside the petals but accessible enough to connect later. -
Add the stem:
Take a small snake of sage green clay and wrap it around the wire directly beneath the pink flower to form the stem. I find rolling it gently between fingers helps smooth the seam where it meets the petals. -
Create the leaves:
Shape two elongated, flattened teardrops from the green clay for leaves. Using a needle tool, gently press a central vein line down the middle of each leaf. -
Attach the foliage:
Press the leaves onto the base of the green stem, angling them outward slightly in a ‘V’ shape. Blend the clay at the attachment point so they are secure. -
Bake the pieces:
Arrange your two egg components and two tulip components on a ceramic tile or baking sheet. Bake according to your polymer clay package instructions (usually 275°F/130°C for 15-30 minutes). Let them cool completely.
Loose loops?
If your eye pins slide out after baking, pull them out, add a dab of superglue to the wire, and slide them back in for a permanent hold.
Step 3: Assembly
-
Prepare the links:
Once cool, grab your tulip pieces. Thread a small gold spacer bead onto the wire protruding from the top of the flower (if you left wire exposed) or prepare to attach via jump rings. -
Connect the sections:
Open the bottom loop of the egg component with your pliers. Hook it onto the top loop/wire of the tulip component. Close the loop securely. -
Add ear wires:
Open the loop on your gold earring hook. Attach it to the top loop of the egg component. Repeat for the second earring. -
Final touches:
Inspect all connections to ensure they are tight. If desired, brush a light coat of gloss varnish over the coloured parts of the clay to make the speckles pop and protect the finish.
Smooth Seams
Use a tiny bit of baby oil on your finger to smooth out fingerprints from the clay before baking.
Enjoy wearing your handcrafted floral treasures this spring season
Layered Cutout Egg Pendants
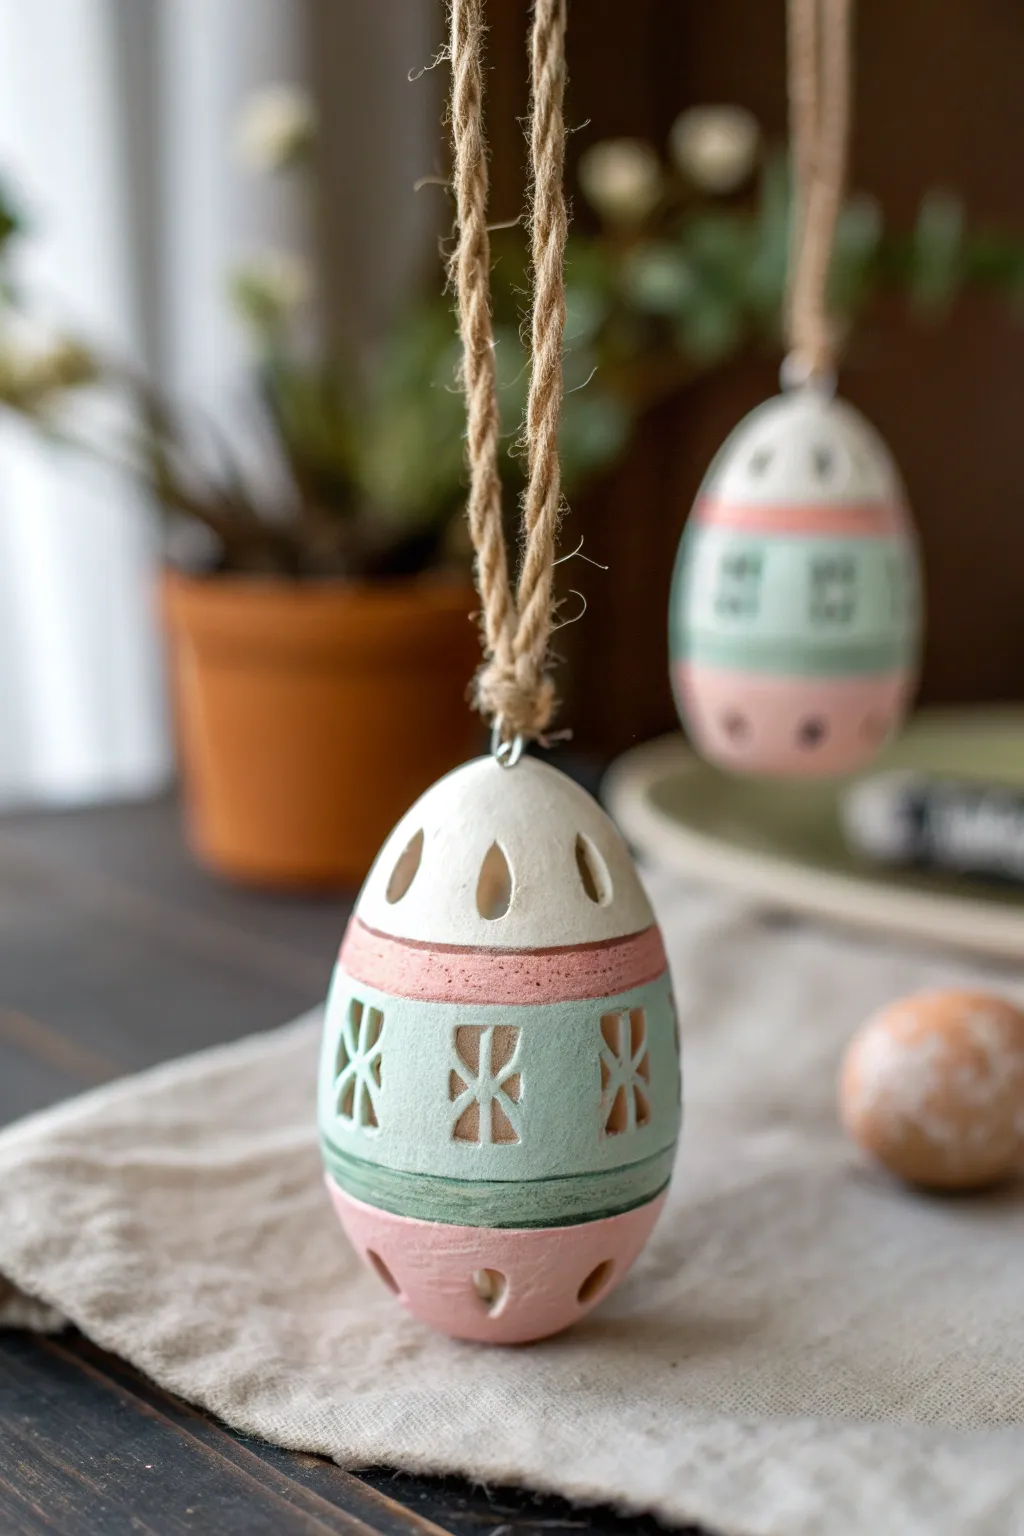
These charming egg pendants mimic the look of unglazed pottery with their matte finish and intricate cutout details. The pastel layering technique creates a delicate, dimensional effect that brings a soft, rustic elegance to your Easter decor.
Detailed Instructions
Materials
- White polymer clay
- Pastel pink polymer clay
- Mint green polymer clay
- Egg-shaped styrofoam base or hollow egg mold (optional, for shaping)
- Small geometric cutters (teardrop, diamond, triangle)
- Clay knife or craft scalpel
- Rolling pin or pasta machine
- Texturing sponge or sandpaper
- Strong craft glue or liquid polymer clay
- Metal eye screw
- Jute twine for hanging
- Matte varnish (optional)
Step 1: Preparing the Base Layers
-
Condition the Clay:
Begin by thoroughly kneading your white, pastel pink, and mint green clays until they are soft and pliable. This prevents cracks during baking. -
Roll Flat Sheets:
Roll out all three colors into sheets of even thickness, approximately 3mm thick. A pasta machine works best for consistency, but a rolling pin with guides works too. -
Create the Egg Shape:
You have two main methods here: either cover a lightweight core (like a blown egg or heat-safe form) completely with a base layer of white clay, or form a solid egg shape from scrap clay and wrap it in your white sheet. Smooth the seams until invisible.
Clean Cuts Pro Tip
Chill your clay egg in the fridge for 15 minutes before carving. Firm clay cuts much cleaner and deforms less under the pressure of the knife.
Step 2: Adding the Color Bands
-
Cut Colored Strips:
From your pink and mint green sheets, cut designated strips. You’ll need a wider central band of mint green and two narrower bands of pink for the top and bottom. -
Texture the Bands:
Before applying, lightly press a coarse sponge or piece of sandpaper onto the colored strips to give them a stone-like, matte texture similar to the photo. -
Apply the Mint Band:
Wrap the wide mint green strip around the center or ‘equator’ of your white egg base. Gently press the seam together at the back and smooth it down. -
Apply Pink Bands:
Place the pink strips directly above and below the mint band. I find it helpful to leave a very tiny gap of white showing between the colors to define the sections clearly. -
Add Accent Lines:
Roll extremely thin snakes of dark green or grey clay. Apply these as borders between the pink and mint sections to create the definitive separation lines seen in the design.
Step 3: Carving the Details
-
Mark Cutout Locations:
Using a needle tool, lightly mark where your cutouts will go. Plan for teardrops on the top white section and geometric ‘star’ shapes on the mint band. -
Cut the Top Teardrops:
Use a small teardrop cutter or a sharp scalpel to carefully remove clay from the top white rounded section. Dig deep enough to create a shadow but not through to the core if using one. -
Carve the Central Motifs:
On the mint band, carve out the geometric pattern. This looks like a vertical rectangle with two triangles on either side. Use a sharp blade to excise these pieces cleanly. -
Detail the Bottom:
Repeat the teardrop or small circular cutouts on the bottom pink section to balance the design. -
Refine Edges:
Use a silicone tool or your finger to gently soften the sharp edges of your cutouts so they look molded rather than sharply sliced.
Smudged Colors?
If pastel colors get dirty during handling, use a cotton swab dipped in rubbing alcohol or acetone to gently wipe the surface clean before baking.
Step 4: Finishing and Assembly
-
Insert Hardware:
Screw a small metal eye hook into the top center of the egg while the clay is still raw. Remove it, add a drop of liquid clay or glue to the hole, and screw it back in for a secure bond. -
Bake the Piece:
Bake the egg according to your polymer clay manufacturer’s instructions. Usually, this is around 275°F (130°C) for 30-45 minutes depending on thickness. -
Cool and Sand:
Allow the egg to cool completely. If there are fingerprints, very lightly sand the surface with fine-grit sandpaper to enhance the matte, ceramic feel. -
Add the Hanger:
Cut a length of natural jute twine. Thread it through the eye hook and tie a secure knot to create a rustic loop.
Hang these near a sunny window where the light can play with the shadows in the cutouts
Lace-Textured Easter Eggs
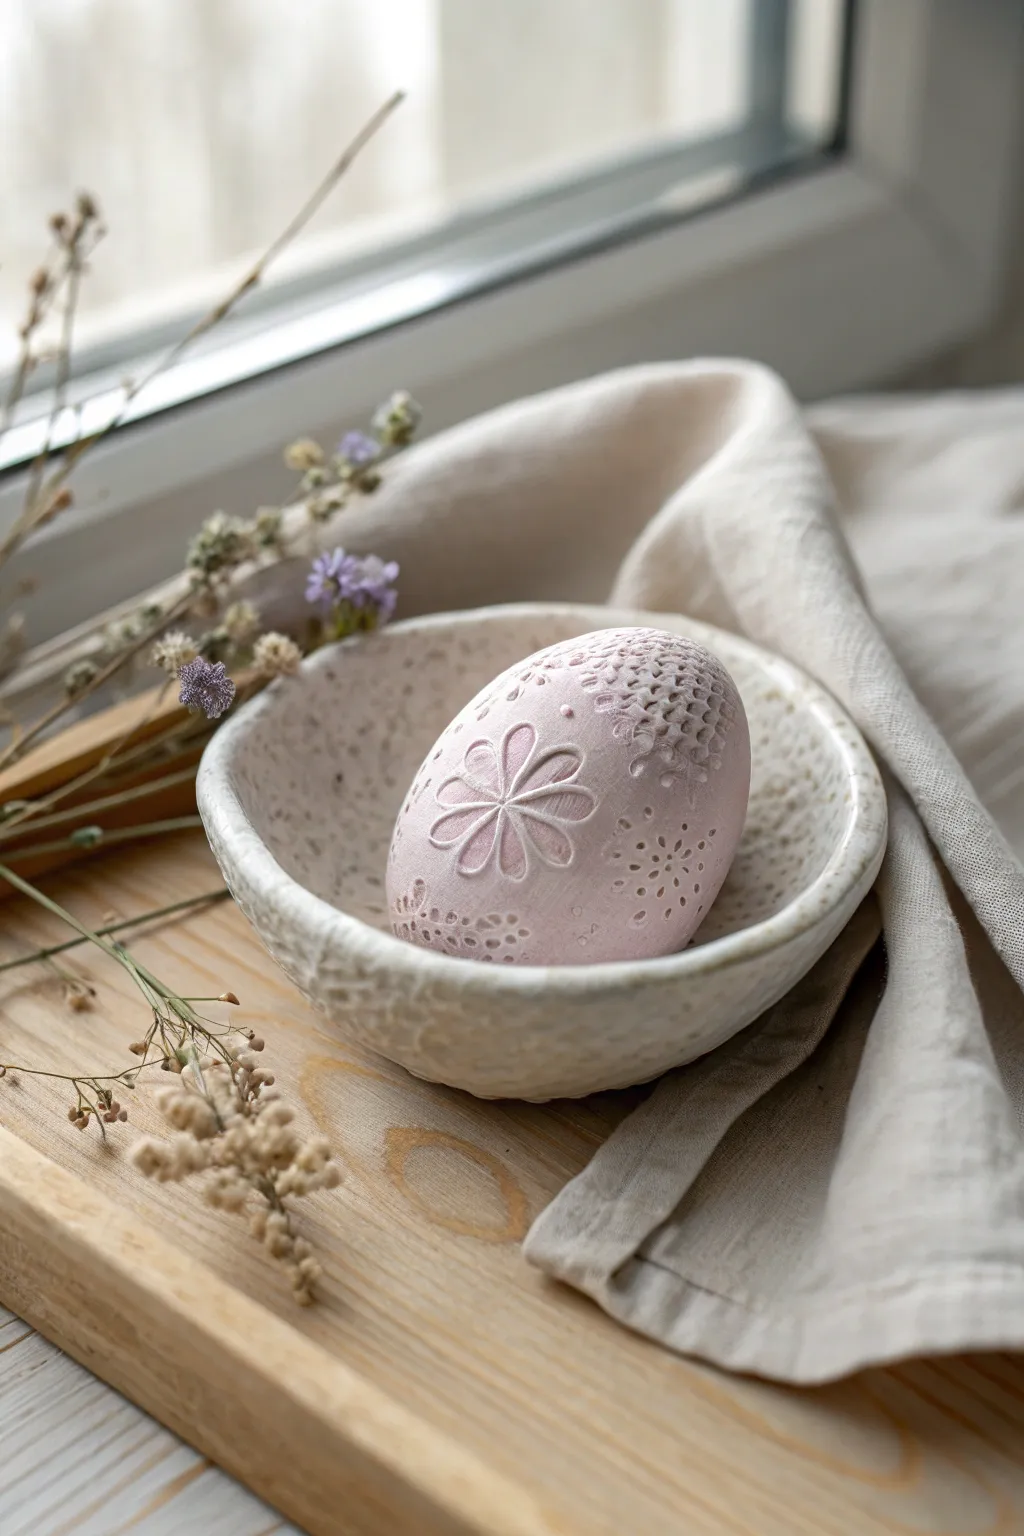
Achieve a sophisticated, understated elegance this spring with these lace-textured eggs. By pressing real lace or fondant molds into soft polymer clay, you create a tactile, vintage-inspired surface that mimics intricate embroidery.
Step-by-Step Tutorial
Materials
- White polymer clay
- Pale pink polymer clay (or red to mix)
- Small styrofoam egg base or blown-out real egg
- Rolling pin (acrylic)
- Scrap of textured lace or lace trim
- Small floral cookie cutter or fondant plunger
- Needle tool or toothpick
- Cornstarch (for release)
- Hobby knife
- Soft brush (for dusting)
- Oven for baking
Step 1: Preparing the Base
-
Mix the perfect shade:
Begin by conditioning your polymer clay. To match the image’s soft dusty rose color, mix a large amount of white clay with a very tiny pinch of pink or red. Knead until the color is completely uniform and streak-free. -
Roll out the sheet:
Roll the clay into a flat sheet, approximately 2-3mm thick. Try to keep the thickness consistent so the coverage on the egg looks smooth. -
Apply to the core:
Wrap your clay sheet around the styrofoam egg or blown egg. Gently massage the seams together with your fingers, smoothing them until they disappear completely. The surface should be flawless before you start texturing.
Step 2: Creating the Floral Motif
-
Positioning the focal point:
Identify where you want your main flower design to sit. In the reference image, it’s slightly off-center for a natural look. -
Add the central flower:
You have two options here: gently press a floral stamp into the soft clay, or for a raised effect like the photo, roll a tiny separate piece of clay, cut a flower shape, and press it onto the egg’s surface. -
Refine the petals:
Using a needle tool, gently re-trace the lines of the petals to deeper definition. If you used an appliqué method, blend the edges slightly so it looks integrated rather than just stuck on.
Sticky Lace?
If clay gets stuck in your lace pattern, pop the clay in the fridge for 10 minutes before stamping. The firmer clay releases easier than warm, soft clay.
Step 3: Adding the Lace Texture
-
Dust the tools:
Lightly brush a small amount of cornstarch onto your lace fragment or texture tool. This is a crucial step I always take to prevent the clay from getting stuck in the intricate fibers. -
Press the texture:
Take your lace scrap and press it firmly into the clay on the upper and lower sections of the egg, leaving some negative space around the central flower. -
Create dotted details:
Study the photo’s ‘eyelet’ lace pattern. Use a small ball tool or the blunt end of a toothpick to poke clusters of small holes into the textured areas to mimic embroidered eyelets. -
Add smaller impressions:
Use the tip of a needle tool to create tiny radiating lines or starburst patterns around the lace edges, softening the transition between textured and smooth areas. -
Check for fingerprints:
Before baking, give the egg a once-over. Smooth out any accidental fingerprints on the plain sections using a very light touch or a drop of baby oil.
Pro Tip: Seamless Blending
If you struggle to hide the seams when wrapping the egg, use a tiny drop of liquid polymer clay (or Sculpey Bake & Bond) as ‘glue’ to help fuse the edges.
Step 4: Baking and Finishing
-
Support the egg:
Create a small bed of baking soda or cornstarch in a baking dish, or use an accordion-folded piece of cardstock to cradle the egg so it doesn’t develop a flat spot in the oven. -
Bake:
Bake carefully according to your clay manufacturer’s instructions (usually around 275°F/130°C for 15-30 minutes). Do not overbake, or the delicate pink color may darken. -
Cool down:
Turn the oven off and let the egg cool down inside with the door slightly ajar. This gradual cooling helps prevent cracks. -
Optional sanding:
If there are any sharp bits of clay sticking up from the texture, very gently pass a high-grit sandpaper over the surface to verify smoothness. -
Matte finish:
The egg in the photo has a matte, unglazed look. Leave the clay as-is, or apply a very thin coat of matte varnish if you want extra protection without shine.
Nestle your finished creation into a bowl with some dried florals for a timeless Easter display that feels both rustic and refined
Terrazzo Confetti Egg Magnets
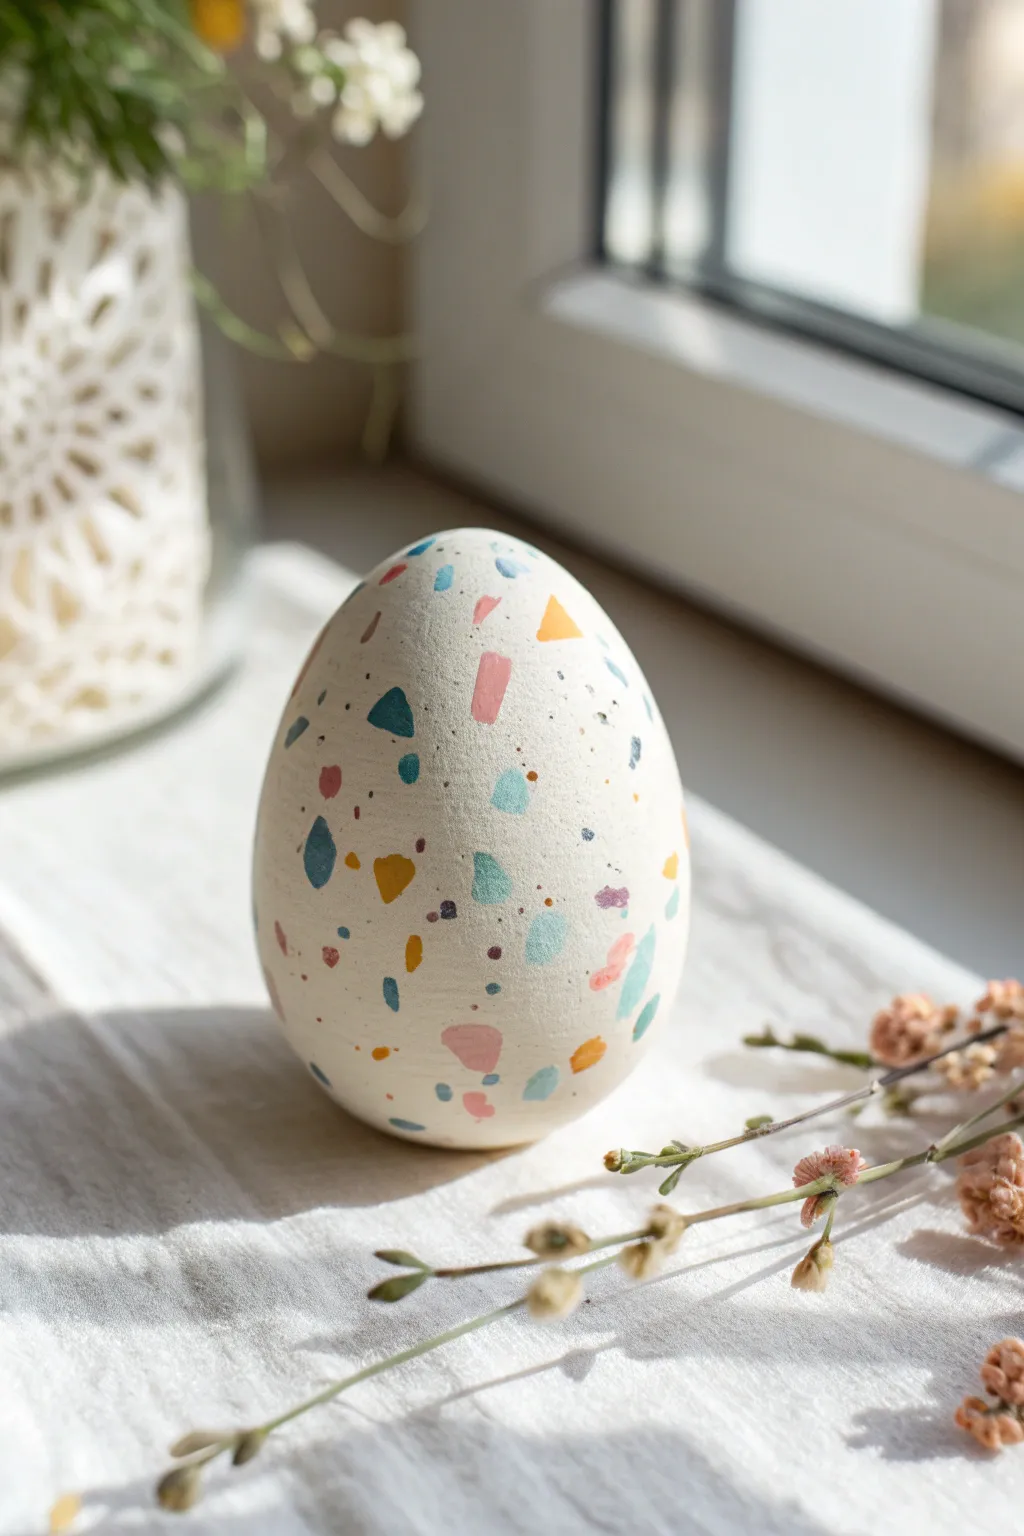
Bring a modern, artistic touch to your Easter decor with these chic terrazzo-style egg magnets. The seemingly random confetti pattern creates a surprisingly sophisticated look using simple polymer clay techniques.
How-To Guide
Materials
- White or cream polymer clay
- Various colored polymer clays (teal, coral, mustard, navy, baby blue)
- Clay roller or pasta machine
- Egg-shaped cookie cutter (large)
- Strong round craft magnets
- Liquid polymer clay or superglue
- Craft knife or tissue blade
- Sandpaper (various grits from 400 to 1000)
- Parchment paper
- Gloss or matte glaze (optional)
Step 1: Preparing the Base
-
Condition the white clay:
Start by thoroughly conditioning your white or cream polymer clay until it is soft and pliable. This ensures a smooth base without cracks. -
Create a sheet:
Roll out the white clay into a thick, even sheet, roughly 1/4 inch thick. This needs to be sturdy enough to hold the magnet and not flex. -
Smooth the surface:
Gently run a finger or a smooth roller over the sheet to remove any fingerprints or imperfections before adding the colors.
Clean Cuts Matter
Chill your clay sheet in the fridge for 10 minutes before using the cookie cutter. Cold clay cuts cleanly without dragging or distorting the shape.
Step 2: Creating the Terrazzo Pattern
-
Chop the colors:
Take small amounts of your colored clays—teal, coral, mustard, etc.—and roll them into thin sheets. Use your craft knife to chop these sheets into tiny, irregular angular bits. -
Vary sizes:
Ensure you have a good mix of sizes. Some pieces should be larger triangles or shards, while others should be tiny specks. -
Sprinkle the confetti:
Randomly scatter the colored clay chips onto your white clay sheet. I prefer to drop them from a slight height to get a truly natural, non-uniform distribution. -
Press gently:
Once you are happy with the arrangement, place a piece of parchment paper over the clay and roll over it firmly with your acrylic roller. -
Embed the colors:
Continue rolling until the colored chips are fully embedded into the white base and the surface is completely flush. The sheet will stretch slightly during this process.
Step 3: Shaping and Finishing
-
Cut the shapes:
Position your egg shaped cutter over the area with the most pleasing pattern distribution and press down firmly to cut out your shape. -
Soften edges:
Gently tap the edges of the cut egg with your finger to round them off slightly so they aren’t sharp or boxy. -
Bake the clay:
Place the eggs on parchment paper on a baking sheet. Bake according to your brand of clay’s instructions (usually 275°F/135°C for about 30 minutes). -
Cool down:
Allow the clay pieces to cool completely before handling them. They are fragile when hot. -
Sand for smoothness:
For that true stone look, wet sand the surface starting with 400 grit and working up to 1000 grit. This reveals the crisp edges of the confetti pieces. -
Buff clean:
Wipe away any sanding dust with a damp cloth and buff with a soft denim cloth or towel to bring out a natural sheen. -
Attach the magnet:
Flip the egg over. Apply a drop of superglue or a smear of liquid polymer clay to the back and press your magnet firmly into the center. -
Final cure (if using liquid clay):
If you used liquid clay to attach the magnet, you’ll need to pop it back in the oven for 15 minutes to set the bond.
Colors Looking Smudged?
If the colors smear during rolling, your clay was too warm. Next time, let the chopped bits sit for a bit or use stiffer clay for the terrazzo chips.
You now have a durable, speckled piece of art to brighten up your magnetic surfaces
Personalized Name Egg Place Cards
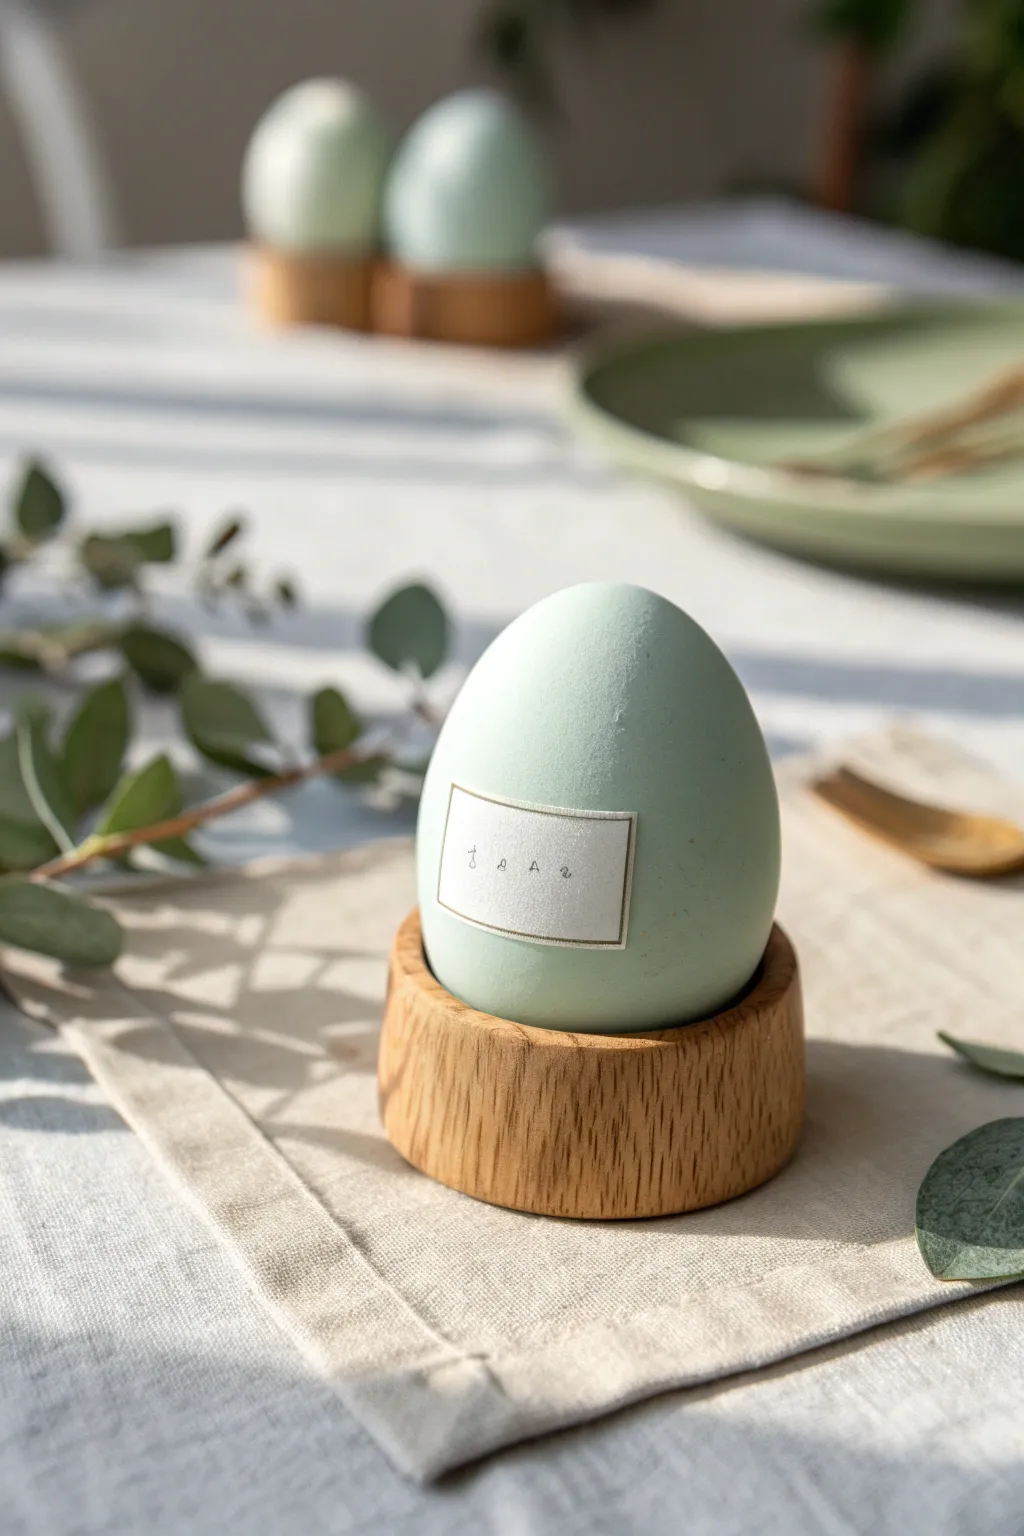
Bring a touch of modern simplicity to your Easter table with these smooth, sage-green polymer clay eggs. Featuring a clean matte finish and delicate stamped nameplates, they function as elegant, reusable place cards for your spring gatherings.
Detailed Instructions
Materials
- Polymer clay (white and translucent)
- Acrylic paint (sage green, white, pale blue)
- Real egg (for shaping) or a solid egg form
- Rolling pin or pasta machine
- Craft knife
- Small rectangular clay cutter or ruler
- Tiny alphabet stamps
- Black ink pad (permanent)
- Gold paint or metallic marker (fine tip)
- Sandpaper (fine grit)
- Oven for baking
Step 1: Prepping the Clay Base
-
Condition the clay:
Start by conditioning your white polymer clay until it is soft and pliable. If you want a slightly more ceramic look, mix in a small amount of translucent clay. -
Create a smooth sheet:
Roll the clay out into a sheet about 3mm thick. You want it substantial enough to hold its shape but not too heavy. -
Form the egg shape:
If using a solid foam or foil core, wrap the clay sheet around it carefully, smoothing out seams with your thumb. Alternatively, you can shape a solid block of clay into an egg form by rolling it between your palms, tapering one end gently. -
Refine the surface:
Once shaped, inspect the egg for fingerprints. Gently buff the surface with a tiny bit of baby oil or cornstarch on your finger to get it perfectly smooth before baking. -
Bake the egg base:
Place your clay egg on a baking sheet lined with cardstock (to prevent shiny spots). I prefer to bake these according to the clay manufacturer’s instructions, usually around 275°F (130°C) for 30 minutes.
Step 2: Adding the Nameplate
-
Create the label area:
Roll out a very thin piece of fresh white clay, approximately 1mm thick. -
Cut the rectangle:
Using a craft knife or a small rectangular cutter, cut a small rectangle about 1.5 inches wide. This will be your nameplate. -
Stamp the name:
Lightly tap your tiny alphabet stamps into black ink. Carefully press the name (e.g., S A M) into the center of the soft rectangle clay piece. Don’t press too hard; you just want a clean impression. -
Attach the label:
Apply a tiny dot of liquid clay or bake-and-bond to the back of the stamped label. Press it gently onto the front of your cooled, baked egg. The curve of the egg means you need to ensure the edges lie flush. -
Second bake:
Return the egg to the oven for another 15-20 minutes to set the nameplate permanently in place.
Smooth Surface Secret
Before painting, lightly sand the baked clay with wet sandpaper (800 grit or higher). This removes imperfections and gives the acrylic paint a better surface to grip onto.
Step 3: Painting and Finishing
-
Mix the custom color:
Mix sage green acrylic paint with a generous amount of white and a tiny drop of pale blue to achieve that soft, pastel seafoam hue seen in the photo. -
First coat of paint:
Paint the entire egg surface, carefully working around the white nameplate. Use a soft, flat brush to minimize stroke marks. Let this dry completely. -
Second coat:
Apply a second coat of paint for full opacity. I find that pouncing the brush slightly can give an eggshell-like texture rather than long streaks. -
Clean up the edges:
If any green paint got onto the white label, carefully scrape it away with a craft knife or touch it up with white paint. -
Add the gold border:
Using a very fine detail brush and gold paint, or a fine-tip metallic marker, draw a thin border around the edge of the white nameplate to frame the text. -
Seal the piece:
Finish by applying a matte varnish over the painted areas to protect the color and give it a velvety finish.
Make It Speckled
For a realistic robin’s egg look, dip a stiff toothbrush in brown paint and flick the bristles to spatter tiny speckles over the green paint before sealing it.
Place your finished egg in a simple wooden cup to recreate that organic, Scandinavian aesthetic.