If you’re craving small clay ideas for beginners, you’re in the sweetest zone of clay-making—quick wins, simple shapes, and that instant “I made this” glow. In my studio, I always start students with tiny projects because they build confidence fast and don’t demand fancy tools or perfect skills.
Pinch Pot Trinket Dish
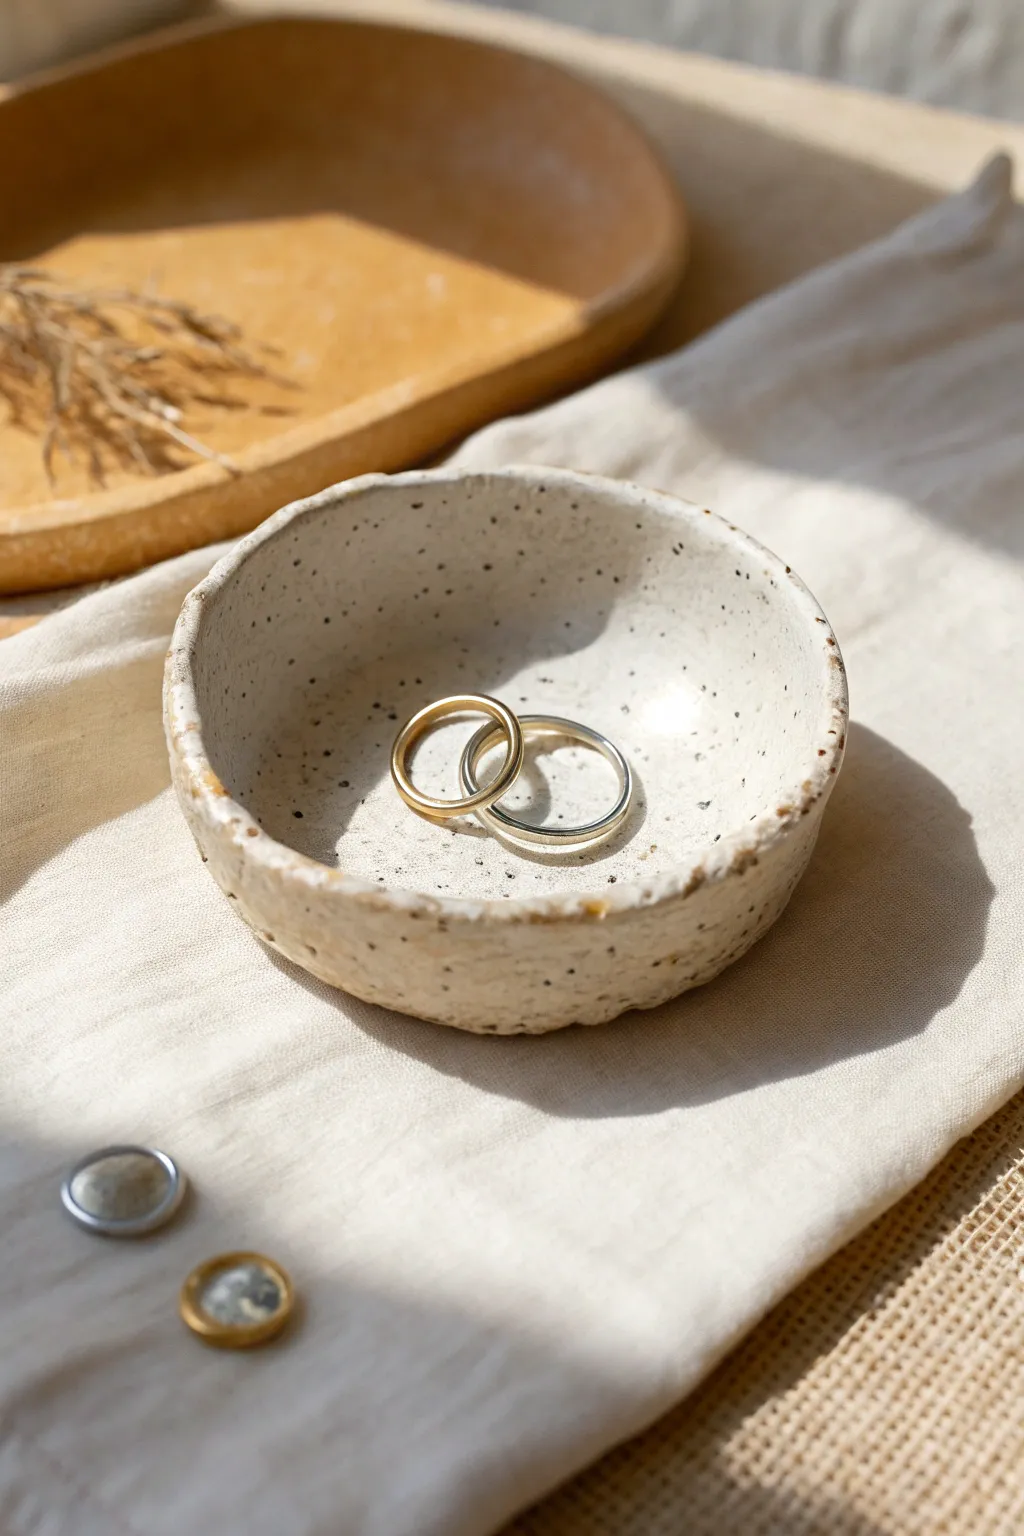
This charming, rustic trinket dish showcases the natural beauty of speckled clay with a simple, organic form. Its shallow basin is perfect for holding your favorite rings or earrings, making it both a practical and beautiful beginner project.
Step-by-Step Guide
Materials
- Speckled stoneware clay (white or buff with grog)
- Small cup of water
- Small sponge
- Wooden modeling tool or old credit card
- Clear glossy glaze (low-fire or high-fire depending on your clay)
- Rolling pin (optional)
- Canvas or cloth board for working surface
- Kiln access (or air-dry clay alternative if firing isn’t an option)
Step 1: Shaping the Base
-
Prepare the Clay:
Start with a ball of clay roughly the size of a golf ball or a small tangerine. Wedge it briefly in your hands to remove air bubbles and ensure it feels consistent throughout. -
Open the Form:
Hold the ball in your non-dominant palm. Press your thumb gently into the center of the ball, stopping about a half-inch from the bottom to leave enough thickness for the base. -
Pinch the Walls:
Using your thumb on the inside and fingers on the outside, gently pinch the clay while rotating the ball in your hand. Work in a spiral from the bottom upward. -
Even Out Technique:
Aim for a consistent wall thickness of about 1/4 inch. Don’t worry if it’s not perfect immediately; the charm of this piece lies in its handmade feel. -
Widen the Rim:
For this specific dish shape, gently pull the walls outward rather than straight up as you reach the rim, creating a shallow bowl profile ideal for easy access to jewelry.
Step 2: Refining and Texture
-
Smooth the Rim:
Dip your finger in a tiny bit of water and run it along the rim to soften any sharp edges. The rim in the image has a slightly uneven, organic wave to it, so avoid making it perfectly flat. -
Refine the Interior:
Use a slightly damp sponge to wipe the interior of the bowl. This compresses the clay particles and creates the smooth, clean surface seen inside the finished dish. -
Create the Outer Texture:
I like to leave the exterior slightly rougher to highlight the clay’s character. You can softly pat the outside with a wooden paddle or just your fingertips to maintain that earthy look. -
Check the Bottom:
Tap the bottom of the pot gently against your table to flatten it slightly. This ensures the dish sits stable and won’t rock when you place rings inside. -
Dry Slowly:
Cover the pot loosely with plastic and let it dry slowly to the ‘leather hard’ stage, then uncover it to dry completely to ‘bone dry’ before firing.
Don’t Overwork Water
Use water sparingly while smoothing. Too much water weakens the clay structure and can make the walls floppy or prone to cracking as they dry.
Step 3: Glazing and Finishing
-
Bisque Fire:
Fire the bone-dry piece in a kiln to the bisque temperature recommended for your specific clay body (usually Cone 06 or 04). -
Clean the Bisque:
Once cool, wipe the bisque ware with a clean, damp sponge to remove any dust that might prevent the glaze from sticking properly. -
Apply Clear Glaze:
Dip the pot into a clear glossy glaze, or brush it on evenly. The clear glaze is crucial as it creates the shine while allowing the beautiful natural speckles of the clay to show through. -
Wipe the Foot:
Use a sponge to wipe all glaze off the very bottom of the pot (the foot) so it doesn’t fuse to the kiln shelf during the final firing. -
Glaze Fire:
Fire the piece for the second time to the glaze maturity temperature indicated on your clay and glaze packaging (often Cone 5 or 6 for stoneware).
Add a Gold Rim
For a luxe touch, apply a thin line of gold luster to the uneven rim after the glaze firing, then fire a third time at a very low temperature (Cone 018).
Enjoy using this little dish to keep your treasures safe and organized


Tiny Ring Cone Holder
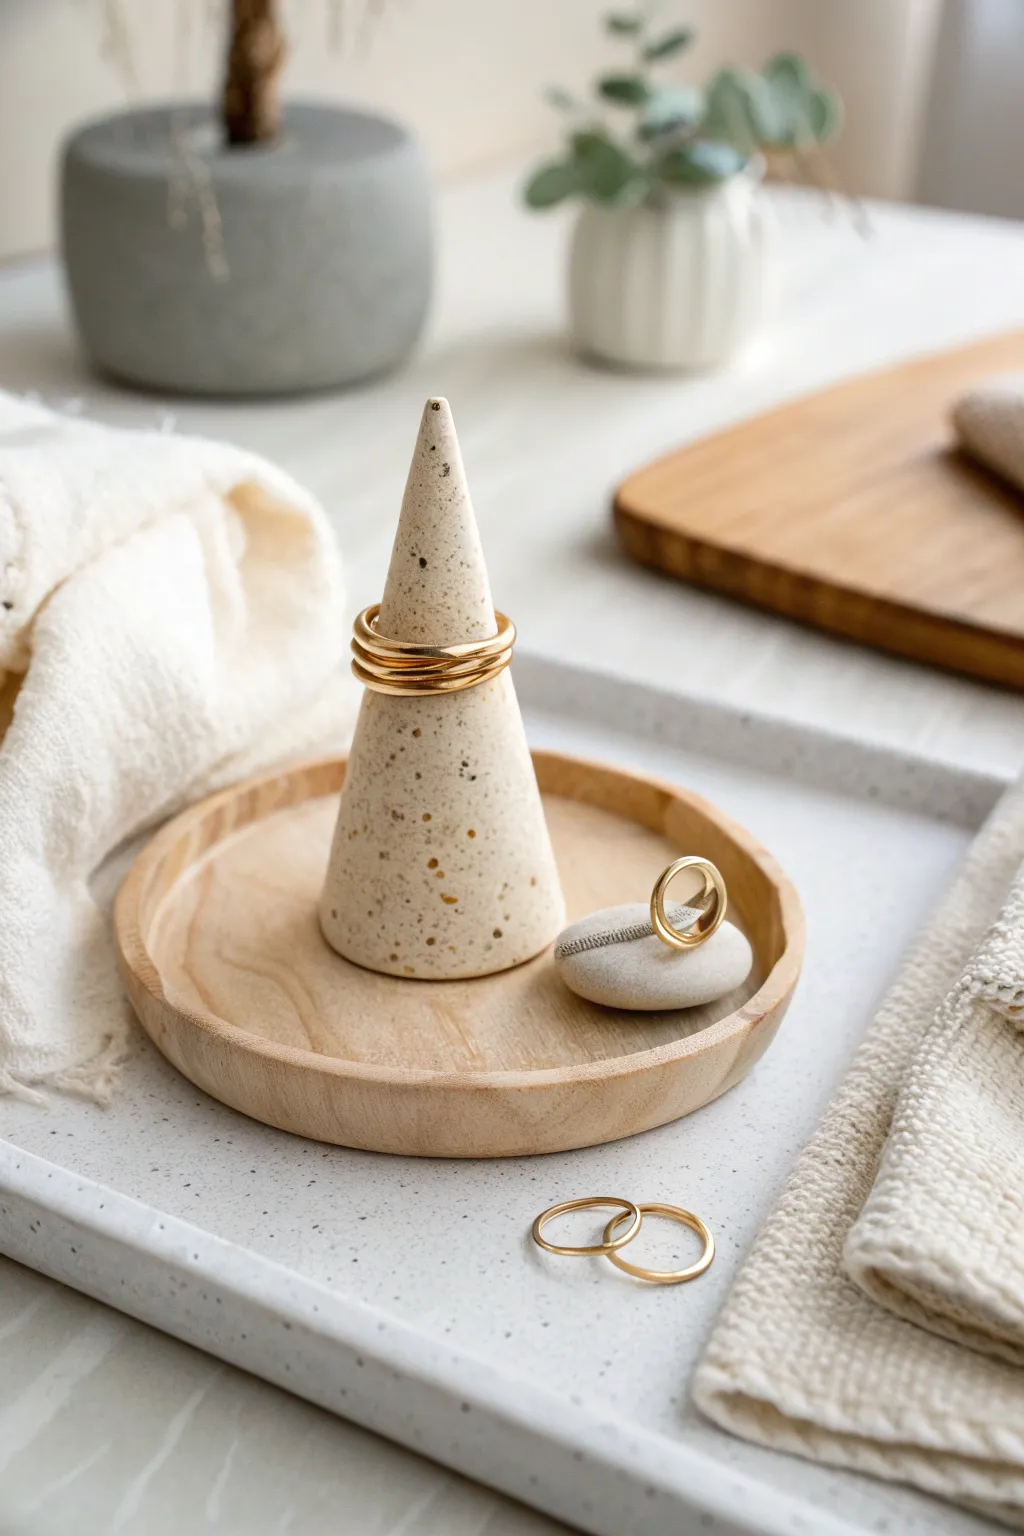
This elegant ring holder mimics the look of high-end speckled pottery using simple polymer clay techniques. The resulting cone features a beautiful granite-like finish that provides a modern, minimalist home for your favorite gold bands.
Step-by-Step
Materials
- Polymer clay (white or beige base)
- Black pepper or dried coffee grounds (for speckles)
- Gold leaf flakes or gold glitter (optional)
- Acrylic rolling pin
- Sharp crafting knife or tissue blade
- Smooth work surface (ceramic tile or glass mat)
- Oven for baking
- Fine-grit sandpaper (400-600 grit)
- Matte varnish (optional)
Step 1: Preparing the Clay
-
Condition the Base:
Begin by taking a block of white or beige polymer clay. Knead it thoroughly in your hands until it becomes soft, pliable, and warm to the touch. -
Create the Speckled Effect:
Flatten your conditioned clay into a pancake shape. Sprinkle a small pinch of coarse black pepper or dried coffee grounds onto the surface. -
Add Metallic Accents:
If you want the subtle gold flecks seen in the photo, add a few tiny flakes of gold leaf or a pinch of gold glitter to the mix now. -
Incorporate the Inclusions:
Fold the clay over to trap the speckles inside. Continue kneading and folding repeatedly until the specks are evenly distributed throughout the entire ball of clay.
Stone Effect Pro-Tip
For a more realistic granite look, mix a tiny pea-sized amount of translucent clay into your white base. It adds depth and makes the speckles look suspended inside.
Step 2: Shaping the Cone
-
Form a Ball:
Roll your speckled clay into a smooth, seamless sphere about the size of a golf ball. Ensure there are no cracks or air bubbles. -
Begin the Taper:
Place the ball on your work surface. Using the palm of your hand, start rolling just one side of the ball back and forth to elongate it into a teardrop shape. -
Refine the Point:
Use your fingers to gently pull and smooth the narrower end upward, creating a sharper tip. I like to rotate the cone constantly while doing this to keep it symmetrical. -
Flatten the Base:
Once you have a rough cone shape, pick it up and gently tap the wide bottom against your work surface to create a flat, stable base. -
Check Stability:
Set the cone down. If it wobbles, tap the base again or gently press it down onto the tile to ensure it stands perfectly straight. -
Smooth the Surface:
Use your finger to lightly buff out any fingerprints. The heat from your skin will help polish the clay ensuring a sleek, matte finish before baking.
Step 3: Baking and Finishing
-
Preheat the Oven:
Set your oven to the temperature recommended on your clay package (usually around 275°F/130°C for polymer clay). -
Bake the Cone:
Place your cone upright on a baking sheet or ceramic tile. Bake it for approximately 15-20 minutes depending on the thickness of the base. -
Let Cool:
Remove the cone from the oven and allow it to cool completely. Do not handle it while hot, as the clay is still slightly soft and fragile. -
Sand for Texture:
Once cool, use a piece of fine-grit sandpaper to lightly sand the surface. This removes any final imperfections and enhances the stone-like texture. -
Reveal the Speckles:
Sanding also helps expose the pepper and gold flakes that might have been hidden just under the surface heavily during rolling. -
Seal (Optional):
If you prefer a sealed finish, apply a thin coat of matte varnish. This protects the inclusions and gives the cone a finished, professional look.
Uneven Base Fix
If your cone leans after baking, simply rub the bottom of the cone against a sheet of coarse sandpaper on a flat table until the base is level.
Your finished ring cone is now ready to display your treasures with earthy elegance


Mini Heart Dish
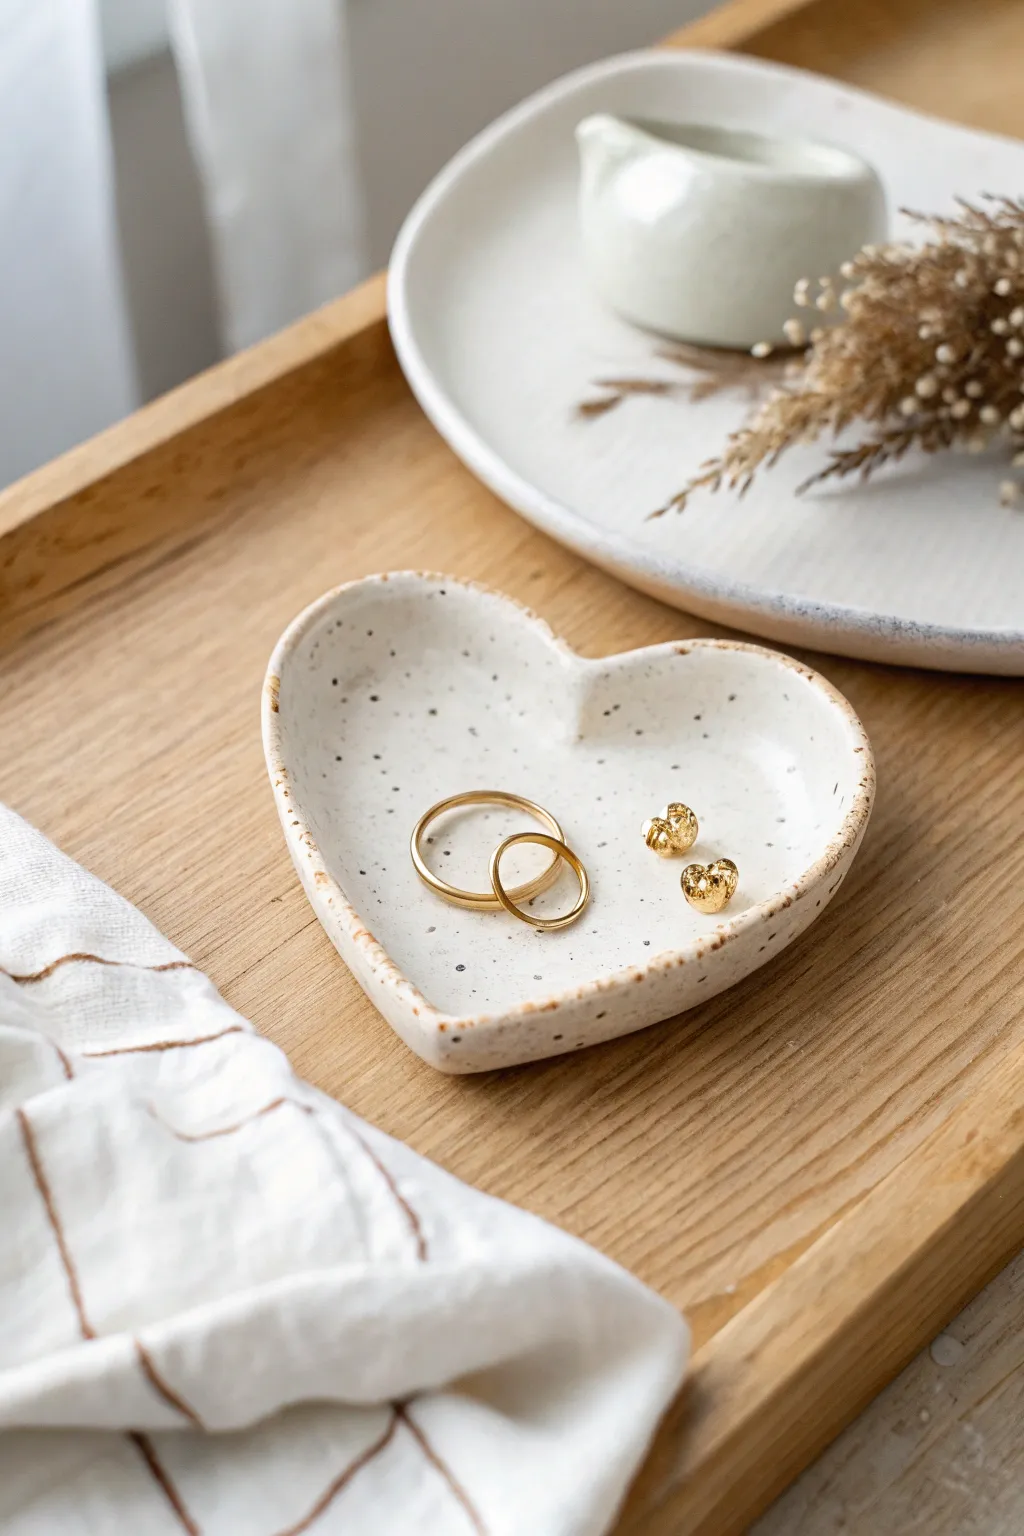
This charming, speckled heart-shaped dish is perfect for holding your favorite rings and earrings. Its organic, hand-formed look and natural glaze make it a beautiful, understated addition to any bedside table or vanity.
How-To Guide
Materials
- White air-dry clay or polymer clay (white/cream color)
- Acrylic rolling pin
- Heart-shaped cookie cutter (approx. 3-4 inches wide)
- Small bowl of water
- Sponge or smoothing tool
- Sandpaper (fine grit)
- Acrylic paints (cream/off-white and light brown)
- Old toothbrush or stiff bristle brush
- Gloss varnish or glaze
- Paintbrushes
- Canvas or parchment paper (work surface)
Step 1: Shaping the Clay
-
Prepare the Clay:
Start by kneading a ball of white clay until it is soft and conditioned. This removes air bubbles and makes the clay easier to work with without cracking. -
Roll it Out:
Place the clay on your parchment paper or canvas mat. Use the acrylic rolling pin to roll the clay out to an even thickness, aiming for about 1/4 inch (6mm) thick. -
Cut the Heart:
Position your heart-shaped cookie cutter over the smoothest section of the clay. Press down firmly to cut out the shape, then carefully peel away the excess clay. -
Soften the Edges:
Dip your finger or a small sponge into a little water. Run it gently around the cut rim of the heart to round off the sharp angle created by the cutter, giving it a softer, handmade feel. -
Create the Curve:
Pick up the clay heart and gently cup it in your palm. Press the center down slightly while lifting the edges upwards to create a shallow bowl shape. I like to continuously rotate the heart while doing this to ensure the curve is even on all sides. -
Smooth the Surface:
Check the inside of the dish for any fingerprints or dents. Use a drop of water and a very light touch to buff these out until the clay is completely smooth.
Rim Cracking?
If the edges start to crack while you are shaping the curve, dip your finger in water (or clay softener) and smooth the crack immediately to bond the clay back together.
Step 2: Drying and Refining
-
Let it Dry:
Place your formed dish on a piece of paper towel or a drying rack. Let it air dry completely according to your clay manufacturer’s instructions, usually 24-48 hours. Rotate it occasionally so the bottom dries too. -
Sand Imperfections:
Once fully cured and hard, take a piece of fine-grit sandpaper and gently sand the rim and any rough spots on the surface. Wipe away the dust with a slightly damp cloth.
Step 3: Painting and Finishing
-
Base Coat:
Paint the entire dish with a creamy off-white acrylic paint. You might need two thin coats for full opacity, letting the first coat dry before applying the second. -
Rim Detail:
Mix a light brown paint. Using a small, angled brush, carefully dab paint along the very edge of the rim to create a rustic border. Don’t worry if it’s not a perfect line; the irregularity adds charm. -
Prepare the Speckle:
Thin down your brown acrylic paint with a small amount of water until it has an inky consistency. -
Apply the Speckles:
Dip an old toothbrush into the thinned brown paint. Hold the brush over the dish and run your thumb across the bristles to flick tiny splatters of paint onto the surface. Test this on paper first to control the spray. -
Dry the Paint:
Allow all paint layers to dry completely. The speckles should be dry to the touch before moving to the final step. -
Varnish:
Apply a coat of gloss varnish or glaze over the entire dish. This seals the paint, protects the clay, and gives it that ceramic-like shine shown in the photo.
Add a Gold Touch
For a luxe finish, swap the brown rim paint for liquid gold leaf. Apply it after the speckles are dry but before the final varnish step for a metallic pop.
Once sealed and dried, your delicate heart dish is ready to lovingly hold your smallest treasures


Clay Beads for a Simple Bracelet
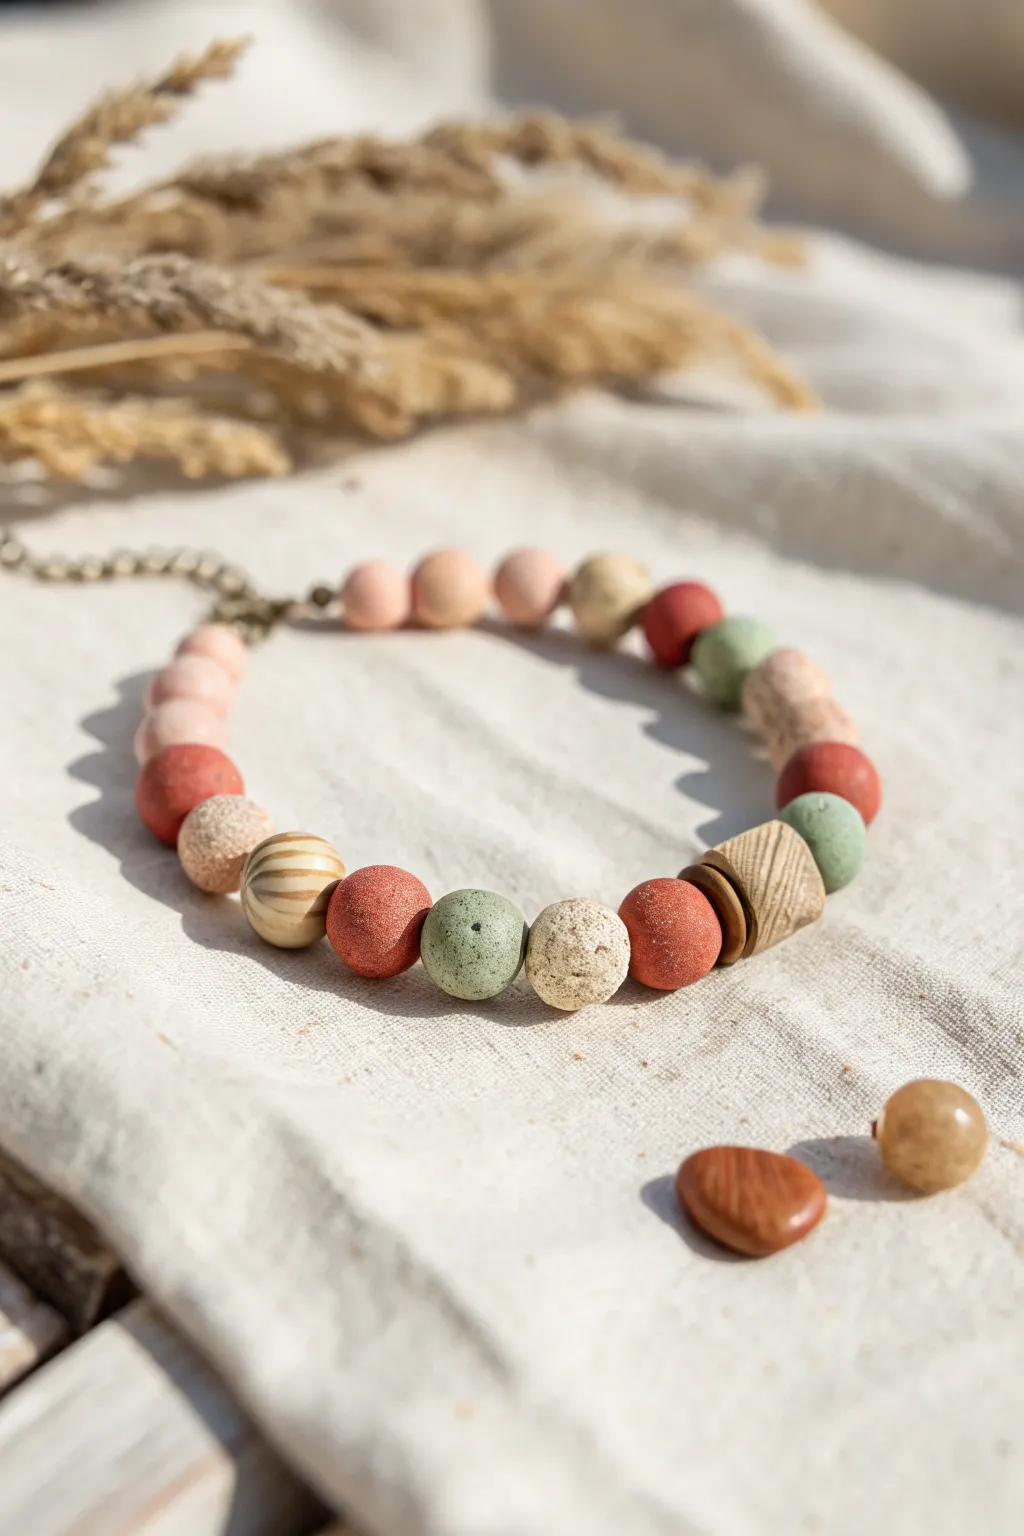
Create a stunningly simple bracelet that mimics the textures of nature with soft matte finishes and organic shapes. This project combines smooth, speckled, and carved clay beads in a soothing palette of terracotta, sage, sand, and peach.
Step-by-Step
Materials
- Polymer clay (terracotta, sage green, beige, white, peach, translucent)
- Black pepper or dried tea leaves (for speckling)
- Toothpicks or a bead piercing tool
- Baking sheet and parchment paper
- Sandpaper (fine grit)
- Beading elastic cord or wire
- Jewelry clasps (lobster clasp and jump rings)
- Crimp beads (if using wire)
- Needle nose pliers
- Clay carving tool or craft knife
- Acryic roller or pasta machine
Step 1: Mixing and Forming the Clay
-
Condition the Peach Tone:
Begin by softening your peach-colored clay. If it feels too bright, mix in a tiny pinch of beige to mute it down to the soft pastel shade seen near the clasp. -
Create the Speckled Texture:
For the textured beige beads, mix white clay with a small amount of beige. Sprinkle in coarse black pepper or crushed dried tea leaves and knead thoroughly until the specks are evenly distributed. -
Form the Base Colors:
Condition your terracotta red and sage green clay blocks separately. Roll all your prepared colors into snakes of even thickness to ensure consistent bead sizing later. -
Cut Even Segments:
Slice your clay snakes into equal-sized segments. For the focal beads, like the striped and carved ones, cut slightly larger segments. -
Roll the Spheres:
Roll the small segments into smooth, round balls between your palms. Aim for mostly uniform sizes, but don’t stress about perfection; the organic look is part of the charm.
Step 2: Detailing the Special Beads
-
Create the Striped Bead:
Take a beige ball and a tiny scrap of white clay. Flatten the white into a thin sheet, cut thin strips, and press them gently onto the beige bead. Roll the bead again in your hands to embed the stripes until smooth. -
Sculpt the Geometric Accent:
Form a larger piece of beige clay into a short, cylindrical tube. Use a knife or hard edge to flatten the sides slightly, giving it a rough geometric or heishi shape. -
Add Texture to the Cylinder:
Using a needle tool or craft knife, scratch fine, diagonal lines across the surface of your geometric bead to mimic a wood-grain texture. -
Texture the Terracotta:
For a few of the red and white beads, lightly roll them over sandpaper or dab them with a stiff toothbrush intended for crafting to give them a stone-like surface.
Clean Bead Tip
To avoid leaving fingerprints on your smooth beads, lightly dust your fingertips with cornstarch before rolling the final shape.
Step 3: Piercing and Baking
-
Pierce the Holes:
Ideally, let the beads rest for 10 minutes so they aren’t too soft. Then, gently twist a toothpick or bead pin through the center of each bead. Rotate the bead, not the tool, to keep the shape round. -
Check Hole Exit Points:
Make sure the exit hole is clean. If the clay pushed out, smooth it back down with your finger. -
Bake the Beads:
Arrange the beads on a parchment-lined baking sheet. Bake according to your clay manufacturer’s instructions (usually 275°F/135°C for 15-30 minutes). -
Cool and Finish:
Allow the beads to cool completely. If any fingerprints remain, lightly sand them away with fine-grit sandpaper for that ultra-matte finish.
Make it Scented
Use porous clay or unglazed terracotta for a few beads. Add a drop of essential oil to them after baking for a wearable diffuser.
Step 4: Assembly
-
Plan the Layout:
Lay out your beads on a cloth. Start with the geometric wood-textured bead as the focal point, then alternate colors (red, green, speckled white) outwards, finishing with the smaller peach beads at the ends. -
String the Beads:
Cut a length of wire or elastic cord. Thread the beads in your planned order. I find it helpful to tape one end of the cord to the table so beads don’t slide off. -
Attach the Hardware:
If using wire and a clasp, thread a crimp bead onto one end, followed by the jump ring or clasp loop. Loop the wire back through the crimp bead. -
Secure the Ends:
Use pliers to flatten the crimp bead securely. Repeat step 15 on the other end with the opposing clasp piece. -
Final Trim:
Trim any excess wire close to the crimp beads, tucking the sharp end into the first clay bead if possible.
Now you have a beautiful, earthy accessory that looks professionally crafted and pairs perfectly with casual wear

The Complete Guide to Pottery Troubleshooting
Uncover the most common ceramic mistakes—from cracking clay to failed glazes—and learn how to fix them fast.
Mini Donut Charm
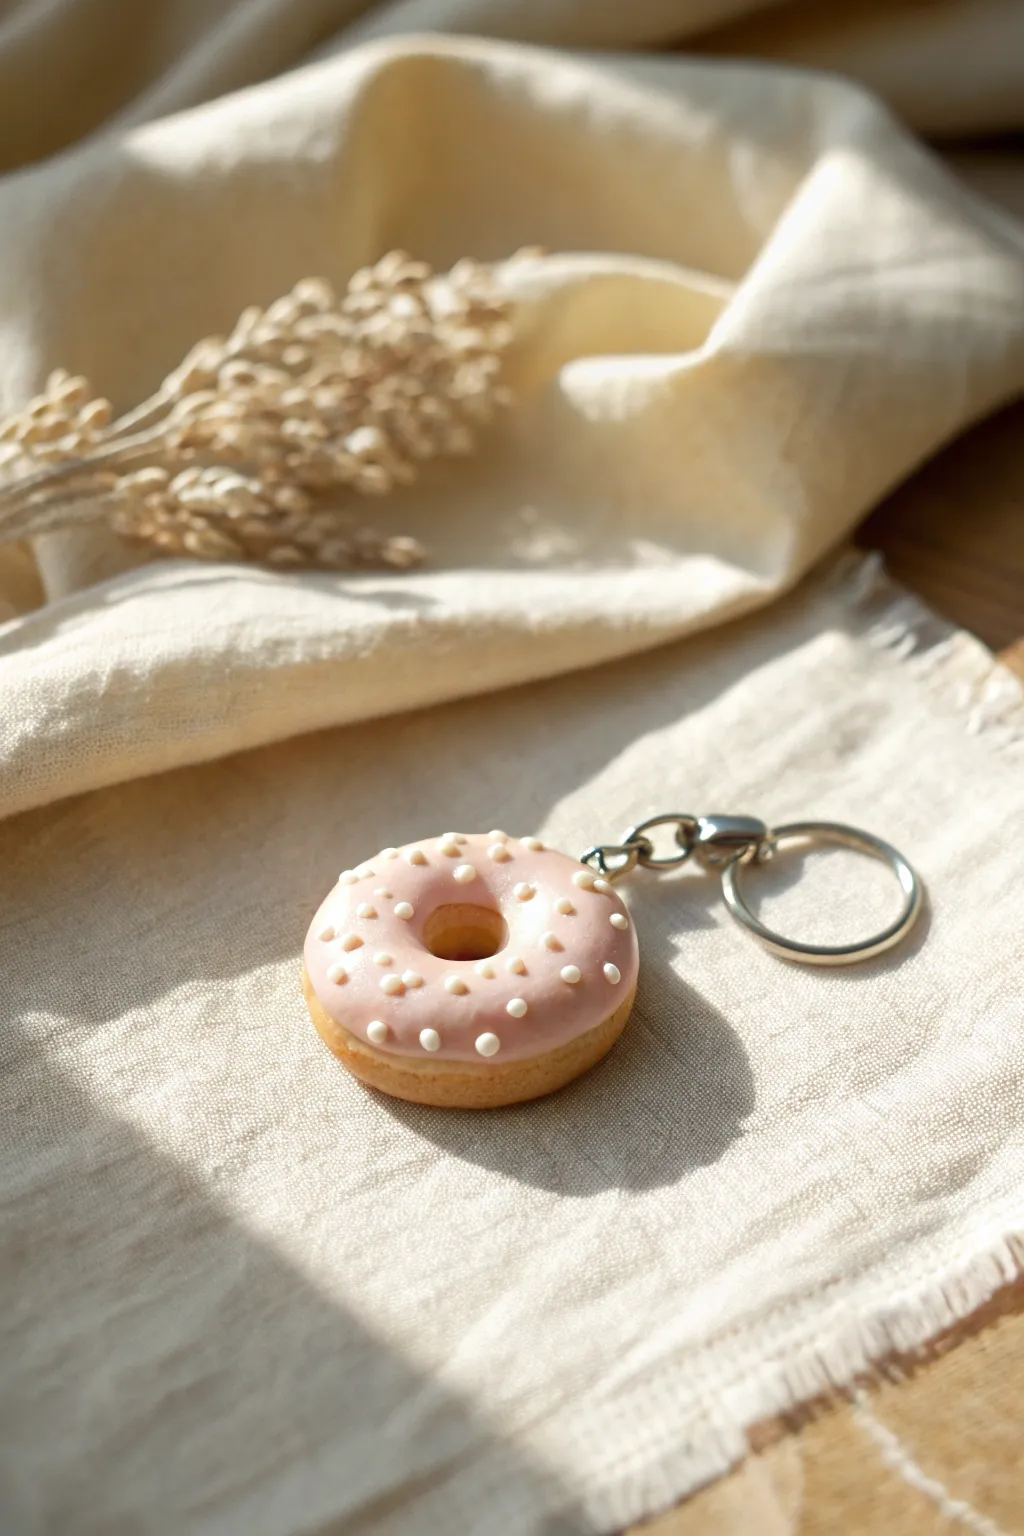
Create a delightful miniature treat that looks good enough to eat but is durable enough to hang from your keys. This polymer clay project captures the classic look of a glazed donut with soft pink icing and pearl-white sprinkles.
How-To Guide
Materials
- Light tan or beige polymer clay (dough color)
- Light pink polymer clay (icing color)
- White liquid polymer clay (or white clay rolled tiny)
- Keychain hardware with screw eye pin
- Translucent liquid clay (TLS)
- Texturing tool (toothbrush or stiff brush)
- Dotting tool or toothpick
- Needle tool
- Soft pastel chalks in ochre/brown
- Small paintbrush
- Gloss varnish (optional)
Step 1: Shaping the Dough
-
Color mixing:
Begin by conditioning your tan clay until it is soft and pliable. If the color is too yellow, mix in a tiny pinhead amount of brown to achieve a realistic baked dough shade. -
Form the base:
Roll a small ball of the tan clay, approximately 2cm (or just under an inch) in diameter. Gently flatten it into a thick disc shape, keeping the edges rounded like a cushion. -
Create the hole:
Using the handle of a paintbrush or a large dotting tool, press into the center of the disc to create the donut hole. Push all the way through, then wiggle the tool slightly to widen the opening. -
Refine the shape:
Smooth out the inner edges around the hole with your finger so they curve gently inward rather than dropping off sharply. -
Add texture:
Take a clean toothbrush or a texture brush and gently tap it all over the surface of the donut base. This creates the porous look of baked cake. -
Shading for realism:
Scrape a little bit of ochre yellow and light brown soft pastel into a powder. Use a dry paintbrush to lightly dust the edges and bottom of the donut, mimicking a golden-brown baked finish.
Step 2: Icing and Decoration
-
Prepare the icing:
Condition your light pink clay. If you want a smoother, more realistic drip, mix the pink clay with a few drops of translucent liquid clay until it reaches a thick paste consistency, like marshmallow fluff. -
Apply the glaze:
Carefully spread the pink icing mixture onto the top of your textured donut. I like to use a needle tool to gently drag small sections of the pink down the sides to create natural-looking drips. -
Check the hole:
Ensure the icing goes slightly into the center hole but doesn’t clog it completely. Use your dotting tool to clear excess icing from the center if needed. -
Making sprinkles:
For the pearl sprinkles shown in the image, roll infinitesimally small balls of white clay between your fingers. They should be smaller than pinheads. -
Place the sprinkles:
Gently press the tiny white balls into the soft pink icing. Using a needle tool can help you pick them up and position them accurately without squishing the base. -
Adding hardware:
Take your screw eye pin. You can add a dab of liquid clay to the threads for extra security, then screw it carefully into the top of the donut.
Look closer
Make a horizontal indentation around the middle of the ‘dough’ before icing. This ‘tan line’ mimics where real donuts float in frying oil and adds major realism.
Step 3: Baking and Assembly
-
Baking:
Place your charm on a baking tile or piece of cardstock. Bake according to your brand of polymer clay instructions (usually around 275°F/130°C for 15-20 minutes). -
Cooling:
Allow the donut to cool completely before handling. The clay is fragile while hot and hardens as it returns to room temperature. -
Varnishing (Optional):
To make the icing look wet and sticky, apply a coat of gloss varnish just to the pink, iced section. Keep the dough part matte for contrast. -
Attach the ring:
Once the varnish is dry, use pliers to open the jump ring connecting your keychain hardware and loop it through the eye pin on the donut. Close the ring securely.
Flavor Variations
Switch up the ‘flavor’ by using dark brown clay for chocolate icing, or mix translucent liquid clay with finely chopped polymer bits for a confetti glaze effect.
Enjoy your sweet new accessory that adds a touch of bakery charm to your daily routine
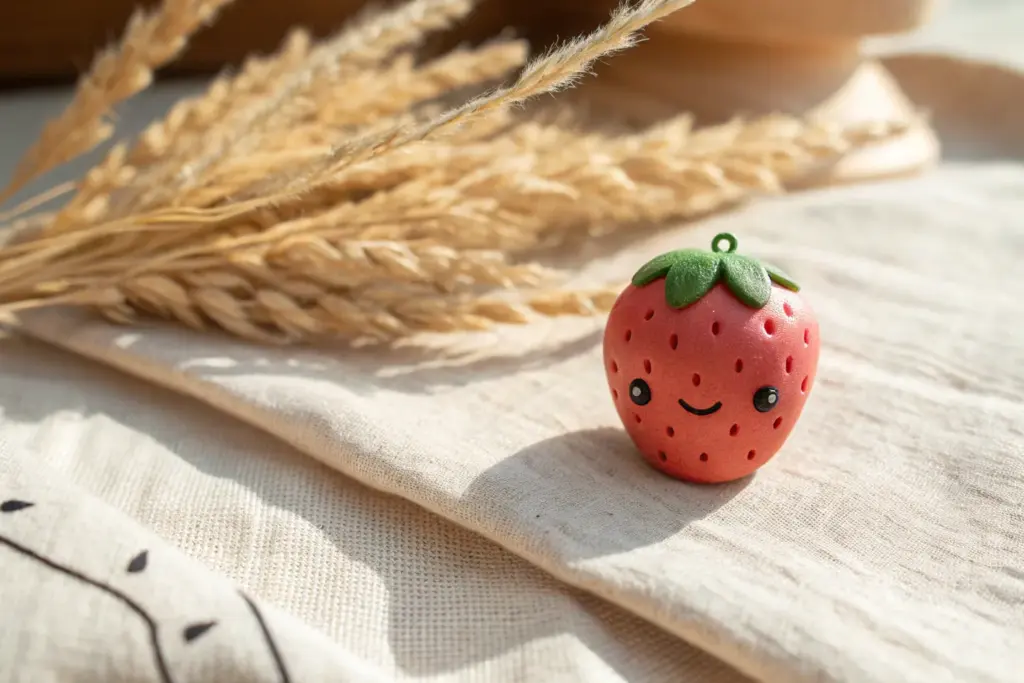
Cute-Face Animal Pebbles
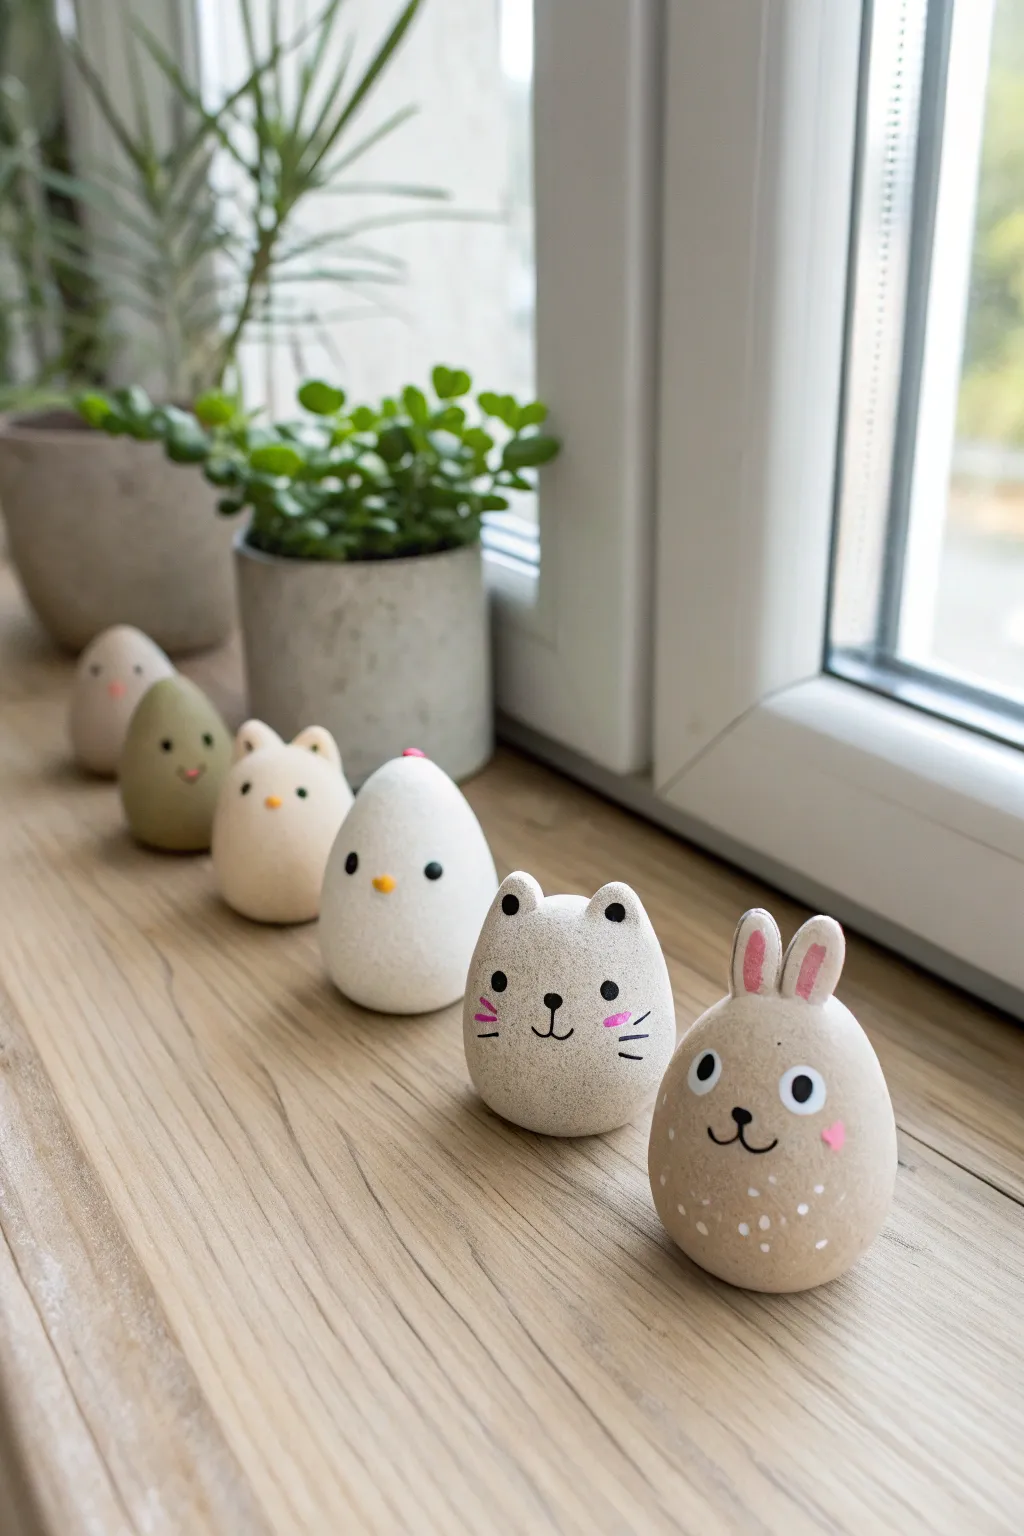
These adorable, simplified animal figurines are perfect for cheering up a windowsill or shelf. With their smooth, egg-like bodies and minimalist painted faces, they offer a charming introduction to shaping and detailing basic forms.
Step-by-Step Guide
Materials
- Air-dry clay (stone effect or white)
- Acrylic paints (black, pink, white, beige, brown)
- Fine detail paintbrush (size 0 or 00)
- Dotting tools or toothpicks
- Fine-grit sandpaper
- Water bowl
- Smooth work surface/rolling mat
- Matte varnish (optional)
Step 1: Shaping the Basic Forms
-
Prepare your clay:
Start by conditioning your clay. Knead a walnut-sized amount in your hands until it becomes warm, pliable, and free of cracks. -
Roll the base shape:
Roll the clay between your palms to create a smooth sphere, then gently gently press and roll one end to taper it slightly into an egg or teardrop shape. -
Flatten the bottom:
Tap the wider end of your egg shape firmly against your work surface. This creates a flat base so your animal will stand upright without wobbling. -
Smooth imperfections:
Dip your finger in a tiny amount of water and gently rub away any fingerprints or seams. Smoothness is key for this minimalist look.
Cracks Appearing?
If you see hairline cracks while drying, mix a tiny bit of fresh clay with water to make a paste (slip) and fill them in, then sand smooth once dry.
Step 2: Adding Ears and Features
-
Form rabbit ears:
For the bunny, roll two tiny logs of clay. Flatten them slightly and attach them to the top of the head, blending the clay downwards at the connection point so they don’t pop off later. -
Create cat ears:
For the cat, pinch two small triangles directly from the top of the head shape, or attach two tiny clay triangles and blend the seams completely smooth. -
Add chicken beak:
For the chicken, make a microscopic cone of clay and press it into the center of the face area. You can also pinch a small comb on top if desired. -
Check stability:
Before setting them aside, give each figure a gentle tap on its base again to ensure the new weight of the ears hasn’t off-balanced them. -
Allow to dry:
Let your figures dry completely. Depending on your humidity and clay type, this usually takes 24 to 48 hours. Turn them occasionally for even drying.
Step 3: Sanding and Base Coat
-
Refine the surface:
Once fully dry, use fine-grit sandpaper to gently buff out any remaining bumps or textured fingerprints. I find a circular motion works best to maintain the roundness. -
Dust off:
Wipe the figures with a slightly damp cloth or a dry brush to remove all white sanding dust. -
Apply base colors:
Paint the bodies in soft, natural tones. Use a speckly beige for the bunny and cat to mimic stone, a muted olive for one bird, and cream for the chicken. Let this layer dry fully.
Pro Tip: Weighted Base
For extra stability, press a small, flat metal washer into the bottom of the clay egg while it’s still wet. Paint over it later to hide it.
Step 4: Painting the Faces
-
Outline the rabbit ears:
Mix a soft pink paint and fill in the center of the rabbit’s ears. Add a tiny pink heart on the cheek for extra sweetness. -
Paint the eyes:
Using a dotting tool or the back of a paintbrush handle dipped in black paint, stamp two solid circles for eyes. For the bunny, paint white circles first, then add smaller black dots inside. -
Draw noses and mouths:
Switch to your finest detail brush. Paint a tiny black ‘Y’ shape for the bunny mouth and a small inverted triangle nose for the cat, connecting to a classic ‘w’ mouth. -
Add whiskers:
With extremely light pressure, flick your brush to create three short whiskers on each side of the cat’s face. -
Detail the chicken:
Paint the chicken’s beak yellow or orange. Place the eyes wide apart for a goofy, cute expression. -
Add highlights:
Dip a toothpick in white paint and add a microscopic reflection dot to the black eyes to bring the characters to life. -
Seal the work:
Protect your painted details with a coat of matte varnish. This unifies the sheen and prevents the paint from chipping over time.
Now you have a whole family of charming clay creatures ready to add personality to your home decor


What Really Happens Inside the Kiln
Learn how time and temperature work together inside the kiln to transform clay into durable ceramic.
Tiny Mushroom Figurines
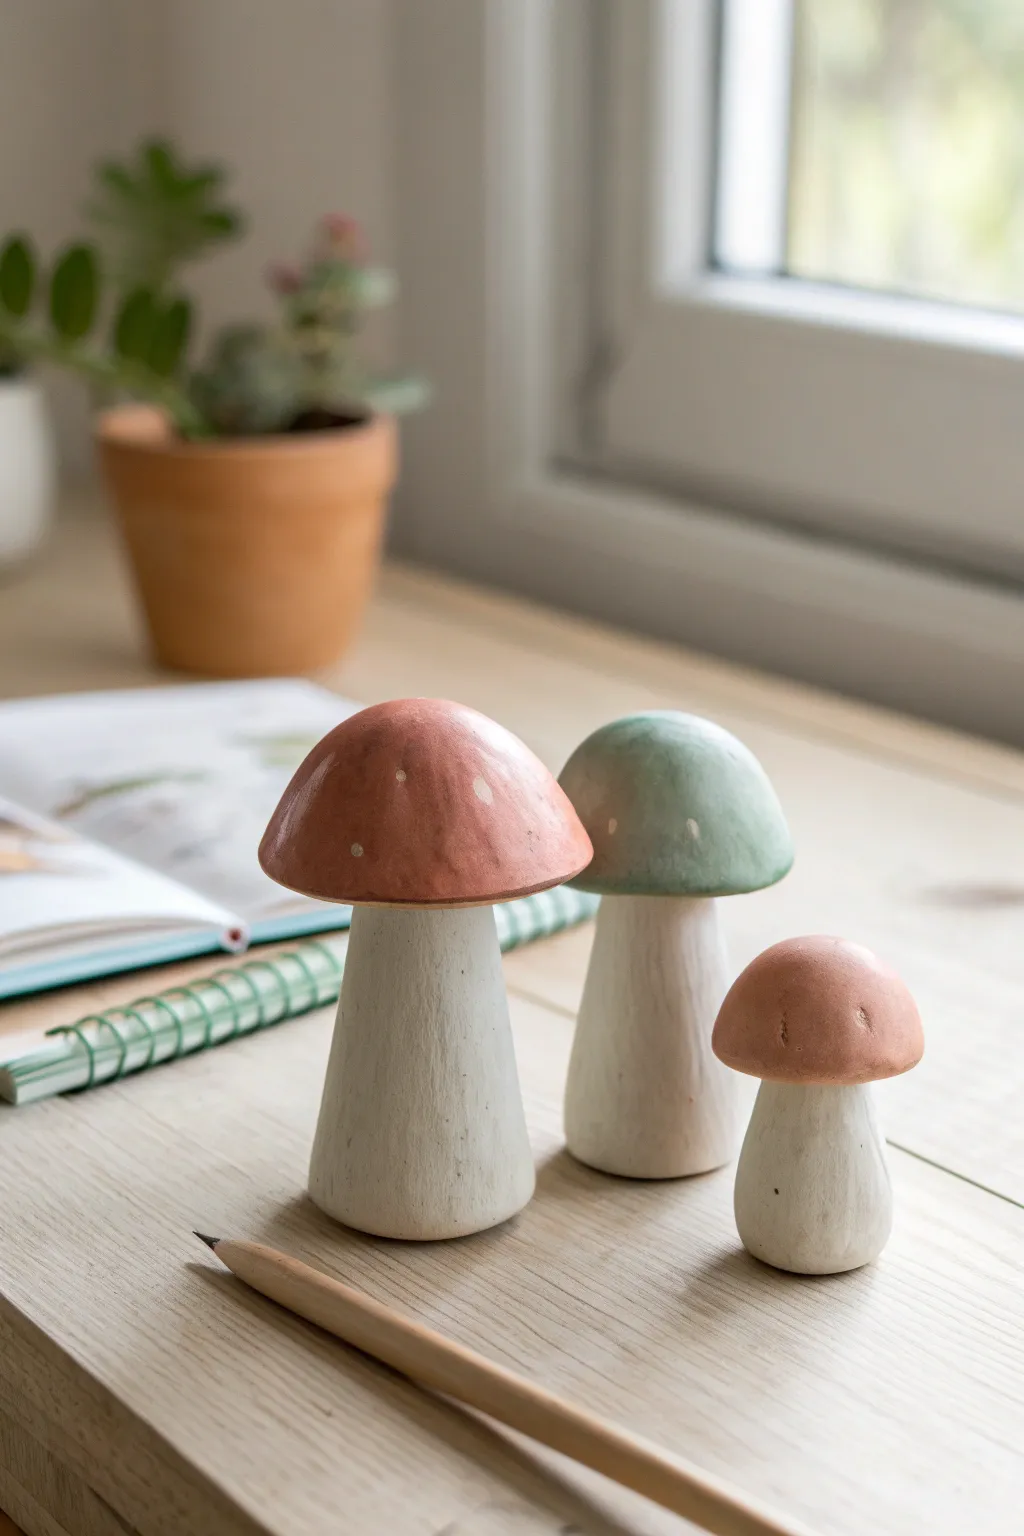
Bring a touch of the forest floor indoors with these charming, minimalist clay mushrooms. Featuring gentle pastel caps in terracotta and sage hues atop textured cream stems, this trio adds an enchanting, organic vibe to any desk or shelf display.
How-To Guide
Materials
- Polymer clay (white or beige color)
- Acrylic paints (terracotta pink, sage green, off-white, antique brown)
- Sculpting tools (needle tool, ball stylus)
- Soft paintbrushes (flat and detail round)
- Aluminum foil
- Rolling pin
- Baking sheet and parchment paper
- Matte varnish or sealant
- Sandpaper (fine grit)
Step 1: Shaping the Stems
-
Condition the Clay:
Begin by kneading your white or beige polymer clay in your hands until it becomes soft, pliable, and warm to the touch. -
Form the Base Shape:
Divide the clay into three unequal portions to create varrying sizes. Roll each portion into a thick cylinder. -
Taper the Stems:
Gently roll one end of each cylinder against your work surface to make it slightly narrower than the base, creating a subtle cone shape that is stable when standing. -
Flatten Ends:
Tap the wider bottom end on the table to flatten it perfectly so it stands upright. Gently press the top narrow end flat as well, creating a platform for the cap. -
Add Texture:
I like to take a piece of sandpaper or a toothbrush and lightly press it against the wet clay stems to mimic an earthy, organic texture rather than leaving them perfectly smooth.
Step 2: Creating the Caps
-
Prepare Cap Clay:
Roll three balls of clay, roughly matching the scale of your stems. -
Shape the Domes:
Press your thumb into the center of each ball and gently pinche around the edges to form a hollow dome shape, similar to a small bowl. -
Refine the Profile:
Smooth out the top of the domes. For the largest mushroom, make the dome wider; for the smallest, clearer and rounder. -
Attach Cap to Stem:
Score the top of the stem and the inside of the cap with a needle tool. Apply a tiny dab of liquid clay or water (if using air dry) and press the parts together firmly. -
Blend Seams:
If you want a seamless look, use a modeling tool to smooth the clay where the underside of the cap meets the stem, although leaving them distinct is also a nice stylistic choice.
Uneven Standing?
If a mushroom wobbles after baking, gently sand the bottom of the stem in a circular motion on a piece of fine-grit sandpaper until the base is perfectly flat.
Step 3: Firing and Finishing
-
Bake:
Place your mushrooms on a baking sheet lined with parchment paper. Bake according to your clay package instructions (usually 275°F/135°C for 15-30 minutes). -
Cool Down:
Allow the clay to cool completely before handling. It hardens fully as it cools. -
Base Coat:
Apply a coat of off-white or cream acrylic paint to the stems. Don’t worry about perfect coverage; a little transparency adds character. -
Paint the Caps:
Mix a warm terracotta pink for two of the caps and a muted sage green for the third. Apply two thin coats for an even matte finish. -
Distress the Stems:
Water down a tiny bit of antique brown paint. Brush it over the textured stems and immediately wipe most of it off with a paper towel to highlight the grooves. -
Add Polka Dots:
Using a very fine detail brush or the tip of a toothpick, add tiny, random specks of off-white paint to the colored caps to mimic natural markings. -
Seal:
Finish with a matte varnish to protect the paint and give the mushrooms a soft, ceramic-like feel.
Glow Up
Mix a tiny amount of glow-in-the-dark powder into the white paint used for the cap spots. They will look normal by day but create a magical forest vibe at night.
Now arrange your little fungi near a window or plant pot to enjoy their quiet charm
Mini Cactus Desk Buddy
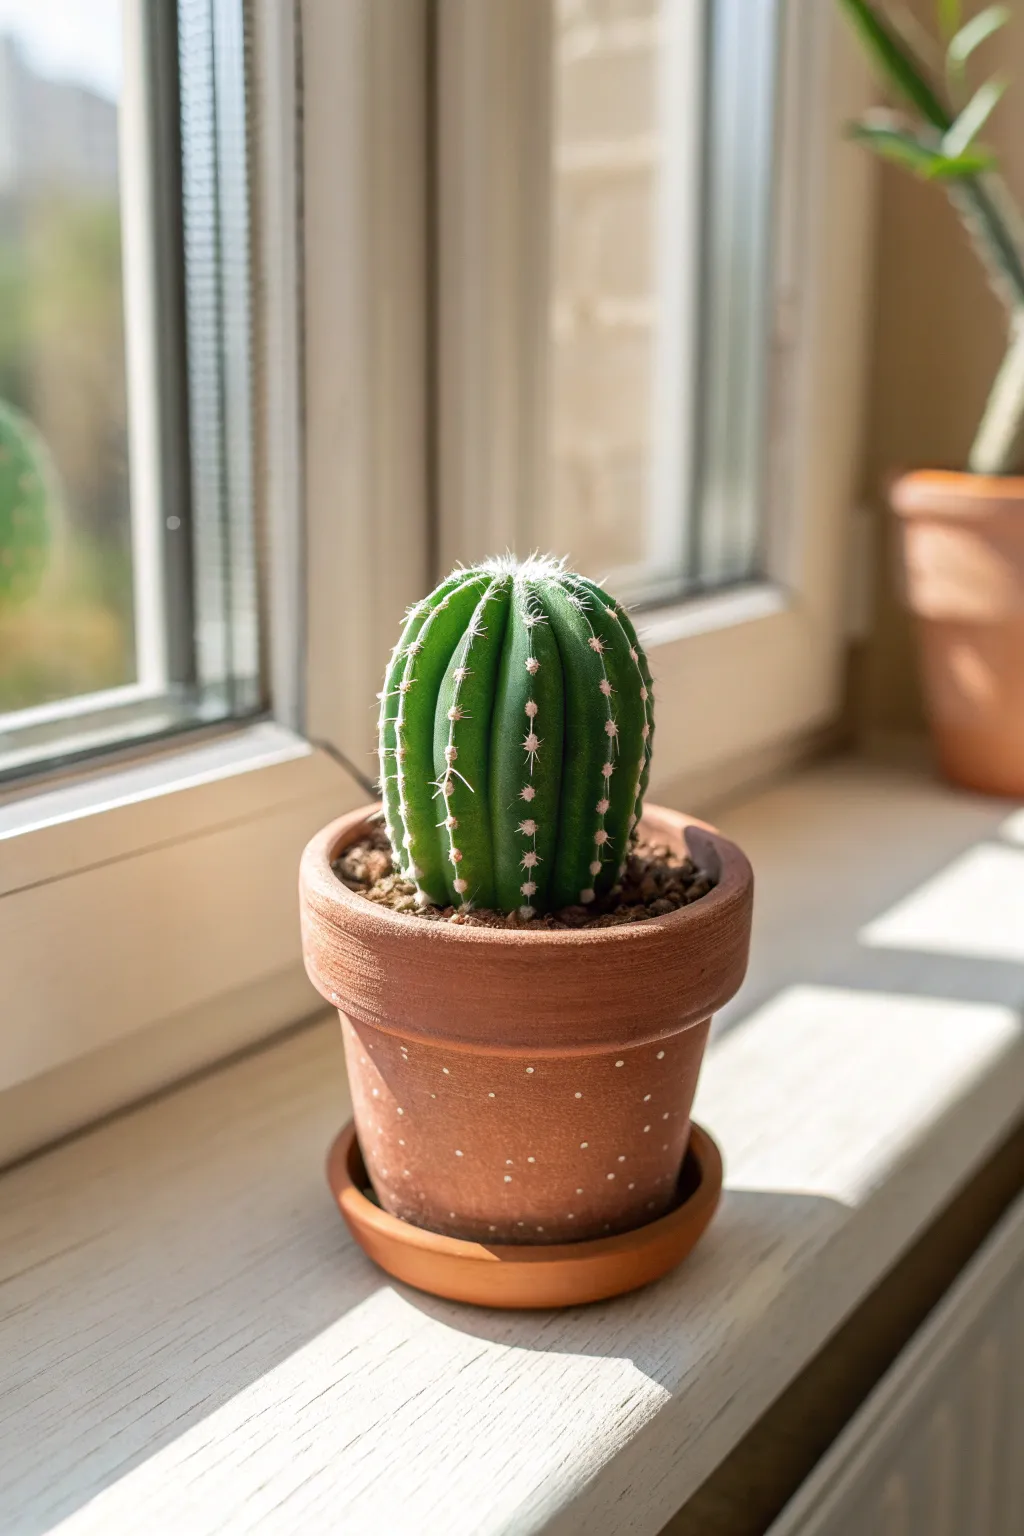
Bring a touch of greenery to your desk that you can never accidentally kill. This beginner-friendly project guides you through sculpting a hyper-realistic, ribbed cactus sitting snugly in its own miniature terracotta pot.
Step-by-Step Tutorial
Materials
- Polymer clay (terracotta color, deep green, white)
- Small clay rolling pin or acrylic roller
- Detail needle tool or toothpick
- Clay shading chalks or soft pastels (dark green, light green, brown)
- Small soft paintbrush
- Liquid clay or bake and bond (optional)
- Clean toothbrush or texture sponge
- Small piece of aluminum foil
Step 1: Sculpting the Pot
-
Form the base:
Start by conditioning your terracotta-colored clay until it’s pliable. Roll a medium-sized ball, roughly the size of a walnut, to form the main body of the pot. -
Shape the vessel:
Gently press your thumb into the center of the ball to create a hollow opening, pinching and rotating the sides to pull up the walls. Aim for a slightly tapered shape, wider at the top and narrower at the bottom. -
Refine the rim:
Roll a thick snake of terracotta clay and flatten it slightly. Wrap this band around the top edge of your pot to create the distinct rim, blending the seam on the inside so it attaches securely. -
Create the saucer:
Flatten a smaller ball of terracotta clay into a thick disc. Press a smaller circle indentation into the center so your pot can sit inside it comfortably, mimicking a drainage saucer. -
Texturize:
To give the pot that authentic earthenware look, lightly tap the exterior with a clean toothbrush or texture sponge. This removes fingerprints and adds a realistic gritty finish. -
Add detailing:
Using a needle tool, poke tiny, random shallow holes around the lower half of the pot to mimic the porous texture seen in aged terracotta.
Step 2: Creating the Cactus
-
Prepare the core:
Crunch up a small ball of aluminum foil to act as a lightweight core. Cover this foil ball completely with a layer of deep green clay, smoothing it until it is a perfect sphere. -
Form the ribs:
Use the side of a needle tool or a knitting needle to press deep vertical indented lines from the top center down to the bottom. Create about 8-10 even sections all the way around to simulate the cactus ribs. -
Enhance the shape:
Gently pinch the clay between the indented lines to make the ribs protrude more, giving the cactus a plump, segmented appearance. Smooth out any sharp ridges with your finger. -
Add ‘soil’:
Looking at the pot you made earlier, fill the bottom with scrap clay or foil. Top it with a layer of dark brown or mixed scrap clay textured with a toothbrush to look like potting soil. -
Seat the cactus:
Press your green cactus firmly onto the ‘soil’ inside the pot. If needed, add a drop of liquid clay to ensure a strong bond during baking.
Uneven Ribs?
To get perfectly spaced ribs, mark the top of your sphere like a clock face (12, 6, 3, 9) first, then fill in the gaps. This ensures symmetry before you indent.
Step 3: Details & Assembly
-
Shade for depth:
Shave some dark green and brown pastel chalks into a powder. With a soft dry brush, dust the indented lines between the ribs to create shadowy depth and realism. -
Highlight the ribs:
I like to brush a tiny amount of lighter green pastel powder just on the protruding parts of the ribs to make the form pop. -
Create the areoles:
Roll extremely tiny specks of white clay. Place these evenly along the ridges of the ribs, spacing them out vertically. -
Add spines:
Using a needle tool, carefully drag the center of each white speck outward to tease out tiny spikes. Alternatively, you can insert tiny snippets of white wire or bristles for sharper spines. -
Creates the apex tuft:
At the very top center of the cactus, cluster several white specks together and texture them heavily with your needle tool to create the fuzzy growth point often seen on barrel cacti. -
Final texture check:
Before baking, do one last check for fingerprints. A light brush with baby oil or cornstarch can help smooth out accidental marks. -
Bake:
Bake the entire piece according to your polymer clay package instructions. Let is cool completely before handling.
Level Up: Aging
After baking, dilute white acrylic paint with a lot of water. Wash it over the terracotta pot and wipe it off quickly to leave white residue in the textures, simulating mineral buildup.
Place your little clay succulent on a sunny windowsill and enjoy your permanent greenery

TRACK YOUR CERAMIC JOURNEY
Capture glaze tests, firing details, and creative progress—all in one simple printable. Make your projects easier to repeat and improve.
Small Letter Tiles
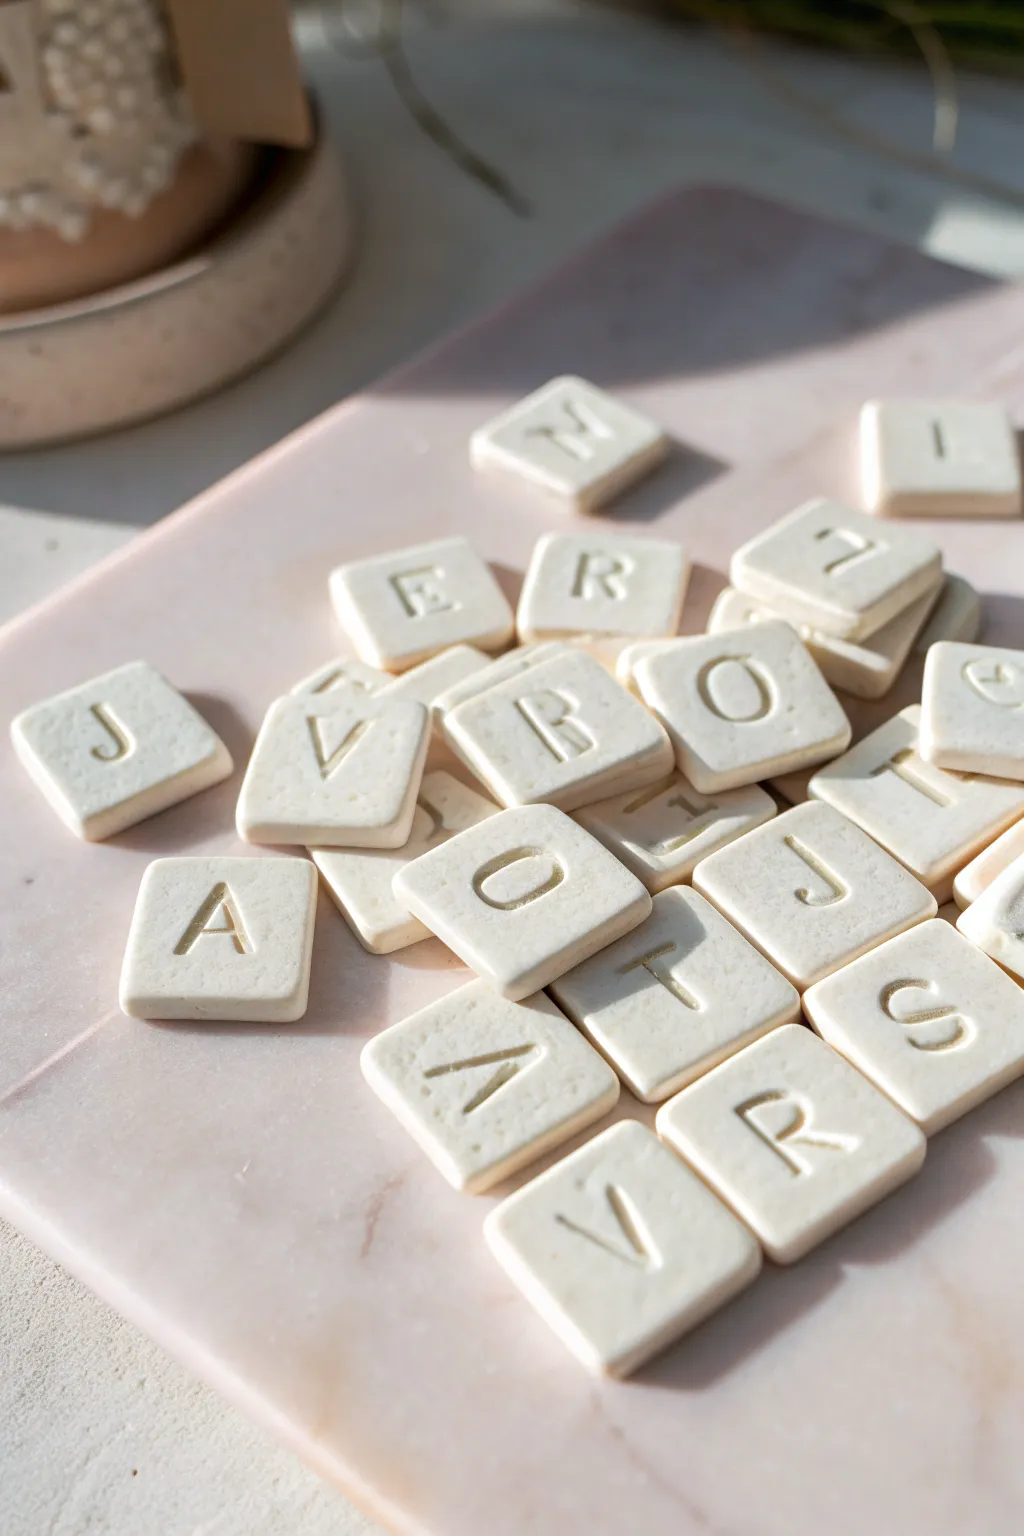
Create your own personalized alphabet with these charmingly rustic clay tiles. Perfect for magnets, learning games, or custom decor, they feature a smooth, creamy finish and deeply impressed lettering that feels both classic and handmade.
Step-by-Step
Materials
- White air-dry clay or polymer clay (white/cream)
- Small letter stamps (silicone or rubber)
- Rolling pin
- Parchment paper or smooth work surface
- Square cookie cutter (approx. 1 inch) or craft knife
- Fine-grit sandpaper (optional)
- Clear matte or satin varnish (optional for sealing)
- Small sponge or brush
Step 1: Preparation & Rolling
-
Condition the Clay:
Start by taking a chunk of your white clay and kneading it in your hands. You want it warm and pliable to prevent cracks from forming later. -
Set Up Your Surface:
Lay down a sheet of parchment paper. This prevents the clay from sticking to your table and makes it easier to move the tiles later without distorting their shape. -
Roll It Out:
Use your rolling pin to flatten the clay. Aim for an even thickness of about 1/4 inch (6mm). If you want perfect uniformity, place guides—like two identical wooden rulers—on either side of the clay to rest your rolling pin on. -
Let It Rest:
I like to let the rolled slab sit for about 10-15 minutes before cutting. This slight drying allows the clay to firm up just enough that it won’t squish when you press into it.
Sticky Stamps?
If clay keeps getting stuck inside your letter stamps, lightly dust the stamp face with cornstarch or baby powder before pressing it into the wet clay.
Step 2: Cutting & Stamping
-
Cut the Shapes:
Using a small square cutter, punch out your tile shapes. Try to fit as many as possible close together to minimize waste. -
Release the Tiles:
Gently remove the excess clay from around the squares. If the squares stick to the cutter, push them out very gently from the back to avoid warping the corners. -
Smooth the Edges:
Dip your finger in a tiny bit of water and run it lightly along the cut edges of each square to soften any sharp ridges or burrs left by the cutter. -
Prepare the Stamps:
Check your letter stamps for dust or old clay. If using polymer clay, you can lightly dust the stamp with cornstarch to ensure a clean release. -
Make the Impression:
Press the letter stamp firmly into the center of a square. Apply even pressure so the depth is consistent, but don’t push all the way through to the table. -
Complete the Set:
Repeat the stamping process for the rest of your alphabet. It helps to work in batches so the clay doesn’t dry out too much before you get to the last letter. -
Refine the Shape:
Stamping sometimes pushes the sides out slightly. Gently tap the edges of the tile back into a perfect square shape if needed.
Pro Tip: Uniform Edges
For a softer, stone-tumbled look, gently tap the sharp corners of each square against your work surface immediately after cutting to round them off slightly.
Step 3: Finishing Touches
-
Dry Completely:
If using air-dry clay, leave the tiles on a flat surface for 24-48 hours, flipping them halfway through to prevent curling. If using polymer clay, bake according to the package instructions. -
Check for Imperfections:
Once fully cured or dry, inspect the edges. Use very fine-grit sandpaper to gently buff away any remaining roughness. -
Clean Up Dust:
Wipe the tiles down with a barely damp cloth or sponge to remove any sanding dust before sealing. -
Seal the Surface:
Apply a thin coat of matte or satin varnish using a soft brush. This protects the clay from moisture and dirt, giving it that finished, ceramic-like look. -
Highlight the Letters (Optional):
For extra contrast, you can dilute a little brown acrylic paint, wash it over the letter, and immediately wipe the surface clean, leaving the dark color only in the crevices. -
Final Cure:
Let the varnish dry completely before handling or attaching magnets to the back.
Now you have a beautiful set of custom letters ready to spell out messages on your fridge or wall
Easy Magnet Set
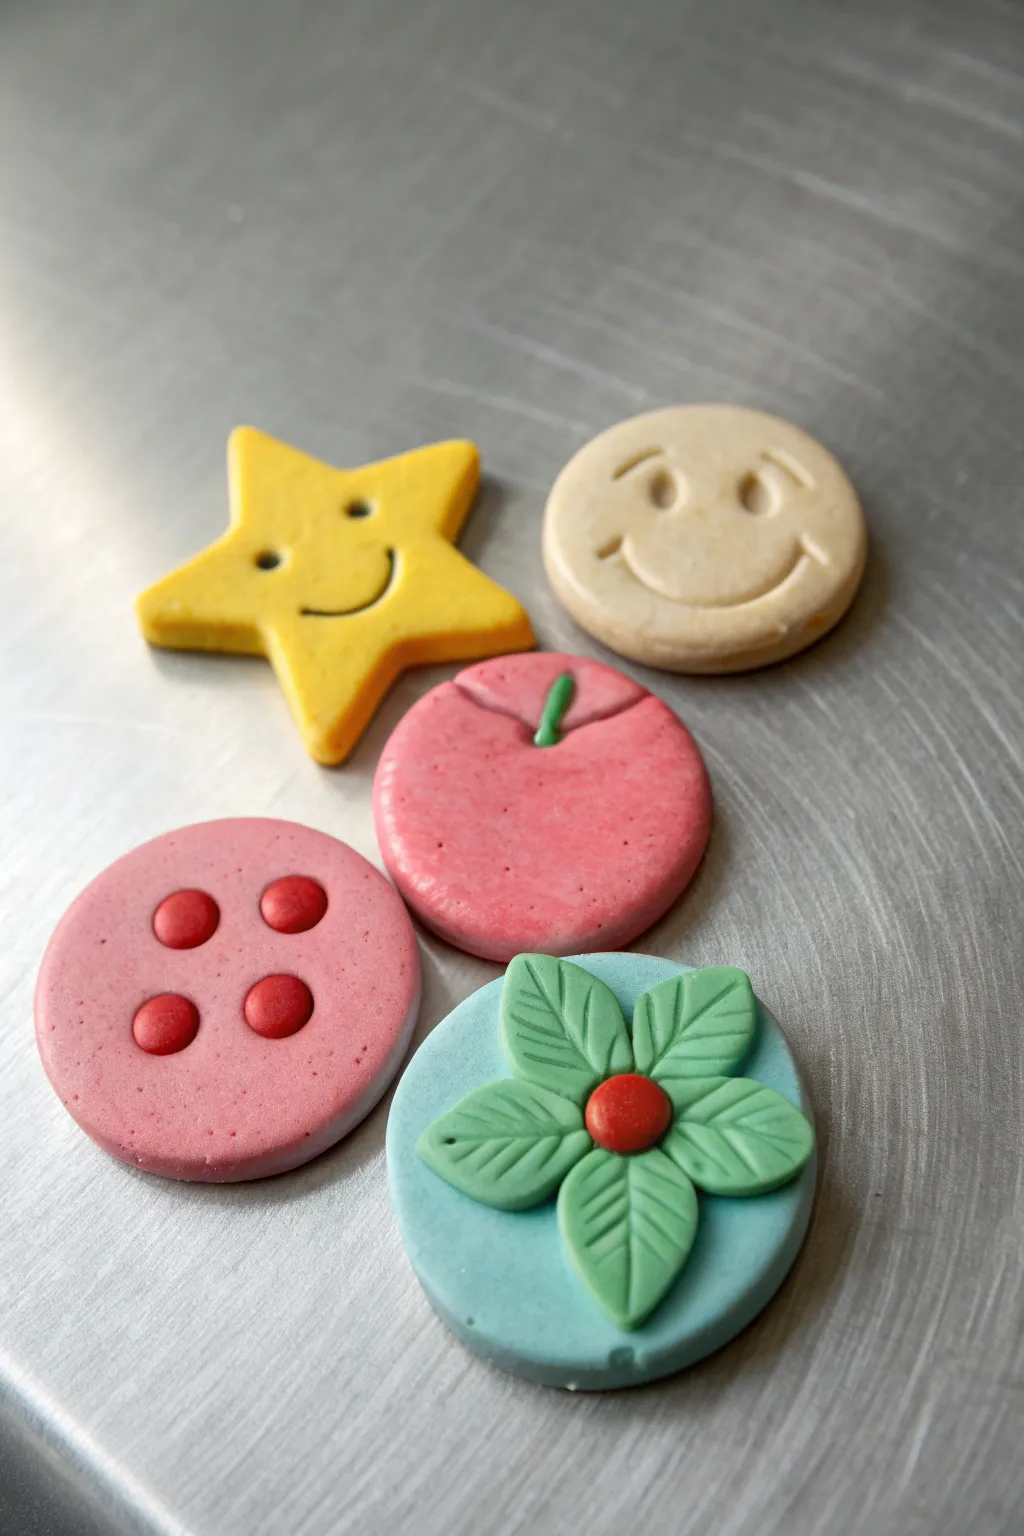
Brighten up your refrigerator or locker with this cheerful set of five polymer clay magnets. From a classic smiley face to a whimsical button and flower, these simple shapes are the perfect introduction to clay crafting.
How-To Guide
Materials
- Polymer clay (yellow, beige, pink, light blue, green, red)
- Small round magnets
- Circle cutters (various sizes)
- Star cutter
- Modeling tools (or a toothpick)
- Super glue (cyanoacrylate)
- Acrylic roller
- Oven and baking sheet
- Parchment paper
Step 1: The Smiling Star
-
Cut the Shape:
Roll out yellow clay to about 1/4 inch thickness and punch out a star shape using your cutter. Soften the edges slightly with your finger so they aren’t sharp. -
Add the Face:
Use a small ball tool or the end of a paintbrush handle to press two eye indentations into the clay. For the mouth, gently press a curved line using a crescent-shaped tool or a bent piece of wire. -
Fill the Details:
Take tiny pinched bits of black clay (or use black acrylic paint after baking) to fill the eye sockets and line the smile for contrast.
Step 2: The Classic Smiley
-
Form the Base:
Roll a ball of beige or light tan clay and flatten it into a thick disc, or cut it with a round cutter. -
Carve Features:
Using a modeling tool, carve two crescent shapes for happy eyes and a wide, u-shaped curve for the mouth. Keep the impressions deep enough to show up well.
Fixing Fingerprints
If you see fingerprints on your raw clay, lightly brush the surface with a little baby oil or cornstarch before baking to smooth them out completely.
Step 3: The Pink Button
-
Create the Disc:
Cut a circle from rolled pink clay. Use a slightly smaller cutter to gently impress a ring around the edge, creating the button’s rim. -
Make the Threads:
Roll four tiny balls of red clay. Flatten them slightly and press them into the center of the button in a square formation to mimic thread holes.
Make It Glossy
For extra durability and a professional shine, coat your cooled, finished pieces with a water-based polyurethane varnish or UV resin.
Step 4: The Apple
-
Shape the Fruit:
Roll a ball of pink or red clay and flatten it into a thick disc. -
Indent the Top:
Press a small indentation at the very top center of the circle to create the apple’s signature dip. -
Add the Stem:
Roll a tiny snake of green clay for the stem. Place it into the indentation you just made, pressing gently to secure it. -
Surface Texture:
I like to gently texture the surface with an old toothbrush or sandpaper to make it look less like plastic and more organic.
Step 5: The Blue Flower Disk
-
Base Layer:
Cut a medium circle from light blue clay as your background base. -
Create Leaves:
Form five small teardrop shapes from green clay. Flatten them and use a needle tool or toothpick to score a central vein and smaller side veins on each. -
Assemble the Flower:
Arrange the five leaves in a star pattern on top of the blue disk, points meeting in the center. -
Add the Center:
Roll a small ball of red clay and press it firmly into the center where all the leaves meet to lock them in place.
Step 6: Finishing
-
Bake:
Place all your pieces on a baking sheet lined with parchment paper. Bake according to your clay manufacturer’s instructions (usually around 275°F/135°C for 15-30 minutes). -
Cool Down:
Allow the clay pieces to cool completely before handling them, as they are fragile while warm. -
Attach Magnets:
Apply a drop of strong super glue to the back of each clay piece and press a magnet firmly into it. Let dry completely.
Now you have a charming collection of custom magnets to hold up your grocery lists and photos
Small Candle Holder
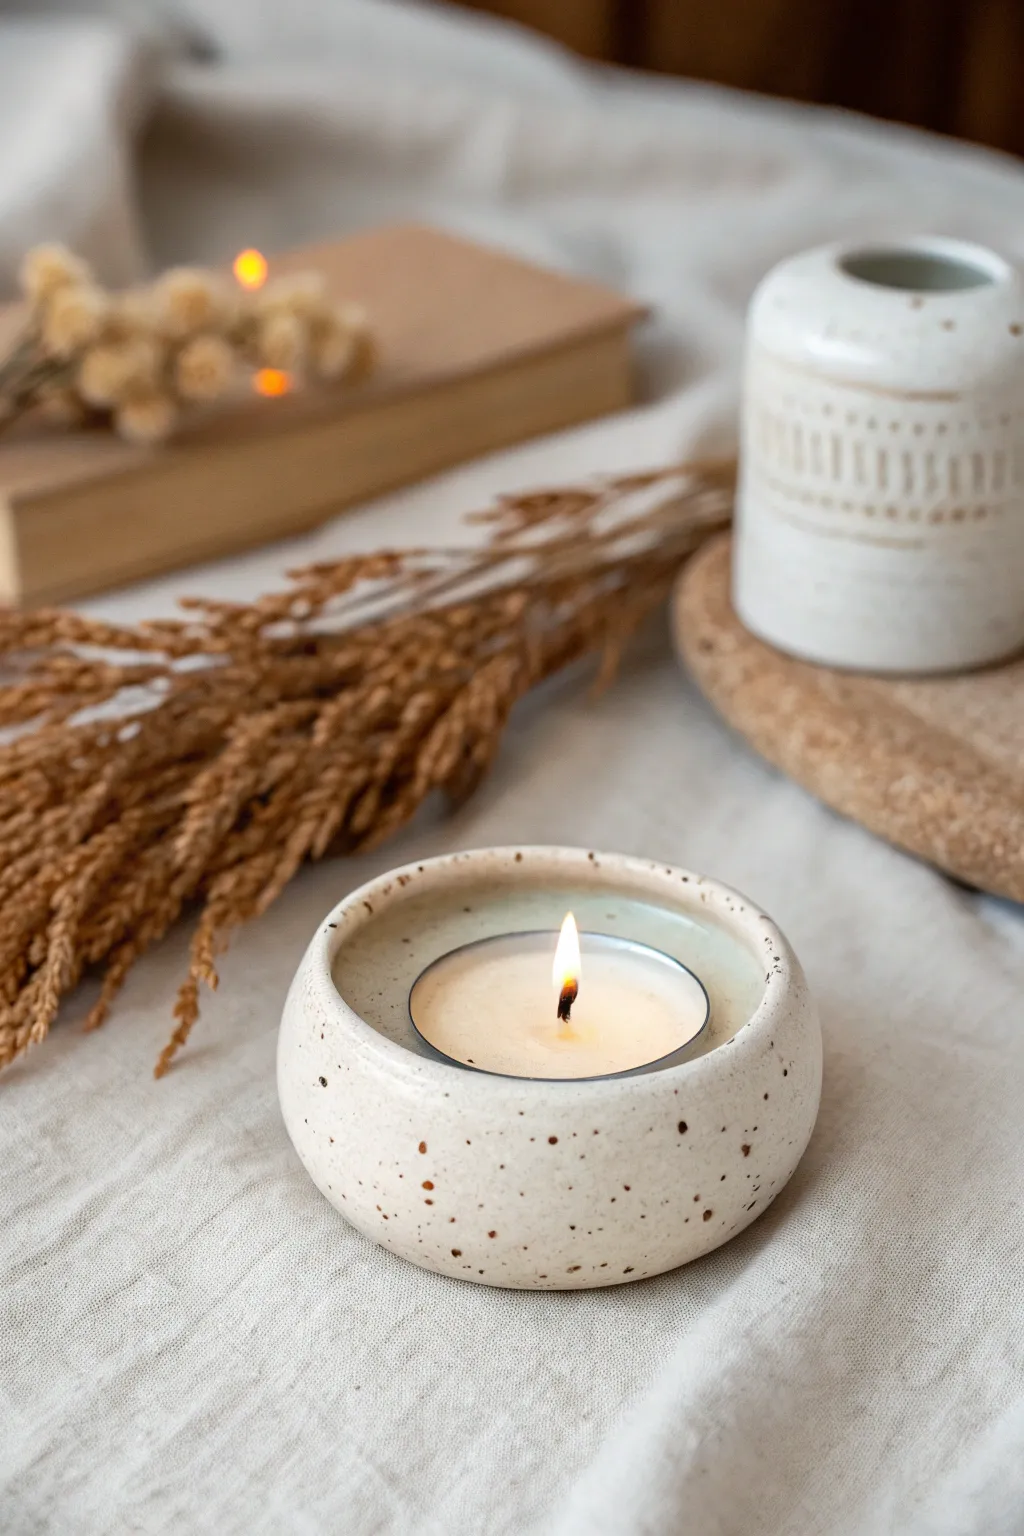
This minimal candle holder brings a cozy, earthy touch to any space with its soft cream glaze and charming speckles. The gently rounded, shallow form is perfect for holding a standard tealight, making it an approachable project for beginners just getting comfortable with clay.
Step-by-Step
Materials
- Air-dry clay or polymer clay (white)
- Small rolling pin
- Tealight candle (for sizing)
- Round cookie cutter (approx. 3-4 inches)
- Small sponge
- Water cup
- Fine-grit sandpaper
- White or cream acrylic paint (matte finish)
- Brown acrylic paint
- Old toothbrush
- Clear matte varnish or sealant
- Sculpting tool or butter knife
Step 1: Shaping the Base
-
Condition the clay:
Begin by taking a ball of clay roughly the size of a tangerine. Knead it in your hands until it becomes warm, pliable, and free of any air bubbles. -
Create a smooth ball:
Roll the clay between your palms to form a perfectly smooth sphere. Spending the extra time here ensures your final shape will be even. -
Press the pinch pot:
Hold the ball in one hand and gently press your thumb into the center, stopping about a half-inch from the bottom. This is the classic pinch pot technique. -
Open the walls:
Use your thumb and fingers to gently pinch and rotate the clay, widening the opening. Keep the walls relatively thick—about a quarter-inch—to match the sturdy look in the photo. -
Check the size:
Place your actual tealight candle inside the hollow. You want a snug fit, but slightly loose to account for shrinkage if you are using air-dry clay. Ensure the rim sits just slightly higher than the candle itself.
Step 2: Refining the Form
-
Flatten the base:
Gently tap the bottom of your bowl against your work surface. This creates a flat area so the holder sits stable and doesn’t wobble. -
Smooth the rim:
I like to dampen my finger slightly with water and run it along the top rim. You want a soft, rounded edge rather than a sharp one to mimic that hand-thrown pottery aesthetic. -
Sponge the surface:
Take a slightly damp sponge and wipe the exterior and interior walls. This smooths out any fingerprints or minor cracks that appeared during shaping. -
Allow to dry:
Let the piece dry completely according to your clay’s package instructions. For air-dry clay, turning it over halfway through the drying process helps the bottom dry evenly. -
Sand for perfection:
Once fully cured, use fine-grit sandpaper to buff away any remaining lumps or uneven spots on the rim and exterior. Wipe away the dust with a dry cloth.
Crack Control
If you see tiny cracks forming as the clay dries, patch them immediately with a ‘slip’ mixture made of a little clay dissolved in water.
Step 3: Glazing and Speckling
-
Apply base color:
Paint the entire holder with your cream or off-white acrylic paint. You may need two coats for full opacity, letting the first coat dry completely before adding the second. -
Prepare the speckle mix:
In a small palette, dilute a small amount of brown acrylic paint with water until it has an ink-like consistency. -
Load the toothbrush:
Dip the bristles of an old toothbrush into the thinned brown paint. Test the spray on a piece of scrap paper first to control the size of the droplets. -
Flick the paint:
Hold the toothbrush near the clay piece and run your thumb across the bristles to flick tiny specks of paint onto the surface. Rotate the bowl to get even coverage all around. -
Seal the piece:
After the paint is bone dry, apply a coat of clear matte varnish. This protects the finish and gives it that authentic ceramic feel.
Faux Glaze Effect
For a glossy ceramic look instead of matte, swap the final varnish for a high-gloss Mod Podge or clear resin coating.
Place your favorite scented tealight inside and enjoy the warm glow of your handmade creation
Tiny Spoon Rest
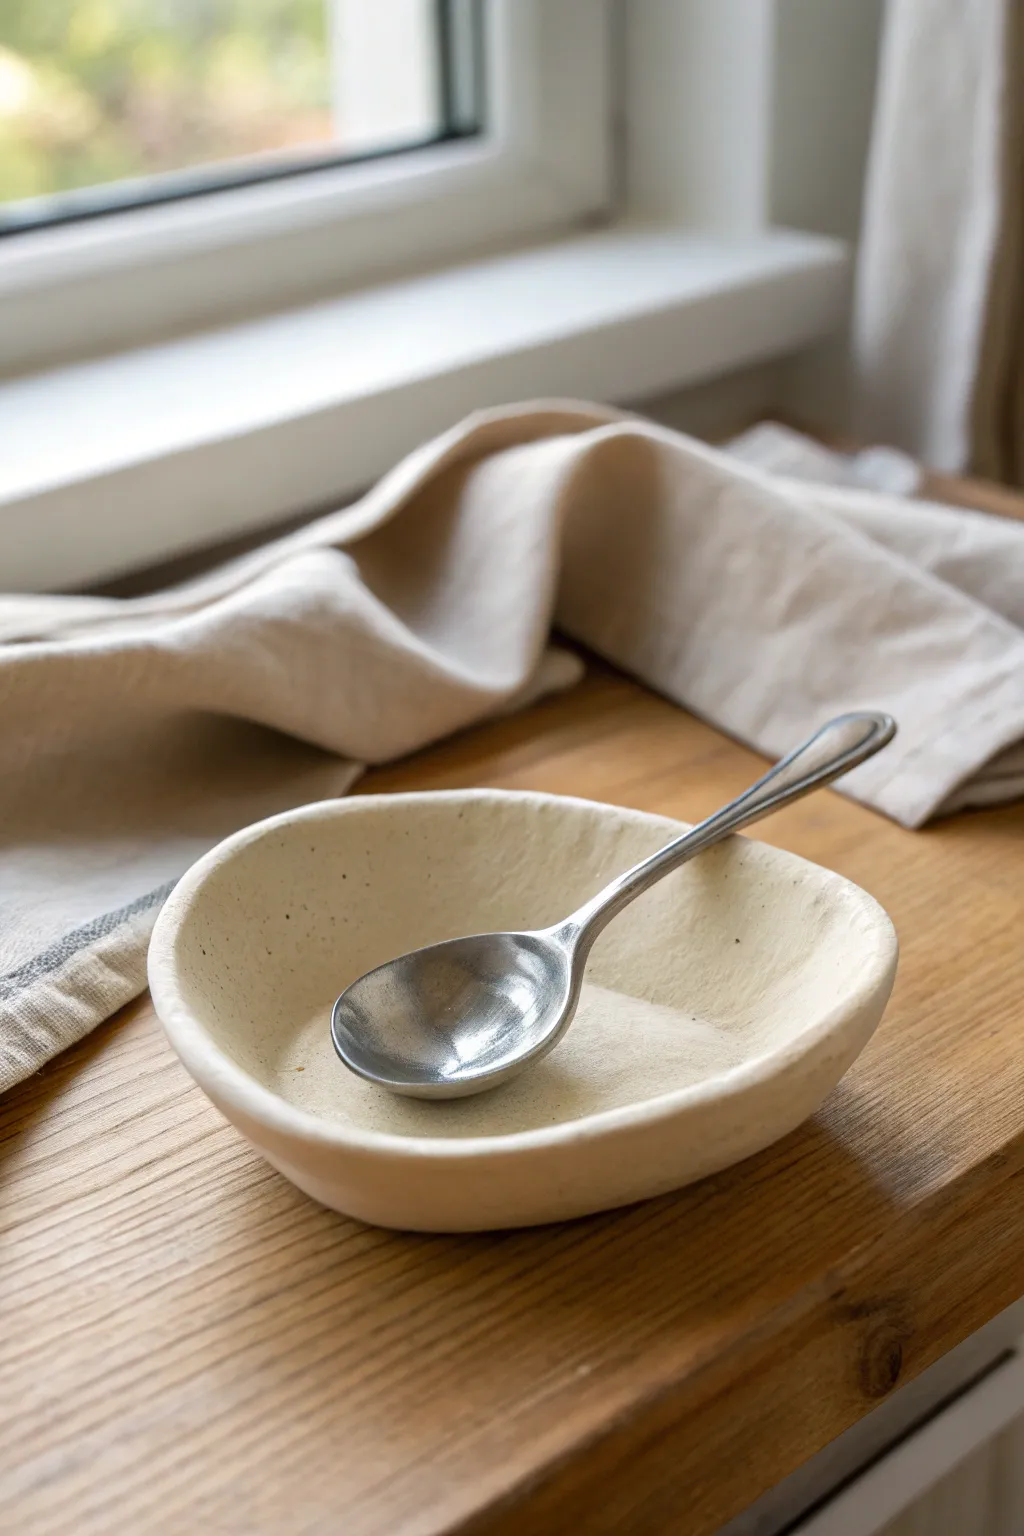
This rustic, hand-built spoon rest embraces organic imperfection with its soft, asymmetric shape and earthy texture. It’s the perfect beginner project to practice pinch techniques while creating something functional for your kitchen counter.
Step-by-Step
Materials
- Light-colored stoneware clay or air-dry clay
- Small wooden paddle or wooden spoon
- Sponge
- Bowl of water
- Fettling knife or needle tool
- Metal rib or old credit card
- Matte white or transparent glaze (if firing)
- Small natural-bristle brush
Step 1: Shaping the Base
-
Prepare the Clay:
Start with a ball of clay roughly the size of a tennis ball. Wedging it thoroughly is crucial to remove air bubbles, so slam it down on your work surface a few times until it feels uniform. -
Form the Sphere:
Roll the clay between your palms or on the table to create a smooth, round sphere. It doesn’t need to be geometrically perfect, just generally round. -
Open the Form:
Hold the ball in your non-dominant hand. Gently press your thumb into the center of the ball, pushing down until you are about a half-inch from the bottom. Don’t go too thin here, as spoon rests need a sturdy base. -
Pinch the Walls:
Begin pinching the clay between your thumb and fingers, rotating the ball as you go. Work from the bottom up, gradually thinning the walls. Aim for a thickness of about 1/4 inch throughout. -
Widen the Bowl:
As you pinch, gently flare the walls outward rather than straight up. You want a shallow, open shape that can easily cradle a spoon handle, not a deep soup bowl.
Step 2: Refining and Drying
-
Create the Asymmetry:
Place the pinched form onto your flat work surface. Gently tap the bottom against the table to flatten the base so it sits securely without rocking. -
Alter the Rim:
I like to gently push one side of the rim slightly inward or lower than the other to give it that organic, ‘found object’ feel. Use your fingers to soften any sharp angles. -
Smooth the Interior:
Use a slightly damp sponge to wipe the inside of the bowl. This compresses the clay particles and removes any distinct fingerprints, creating a smooth surface for the spoon to rest on. -
Refine the Exterior:
Take your metal rib or an old credit card and flexible scrape the outside walls. This removes loose bits of clay and creates the slightly textured, matte finish seen in the photo. -
Check the Lip:
Run your damp finger or a piece of chamois leather over the very top rim. A spoon rest gets a lot of contact, so you want to ensure the edge is smooth and chip-resistant. -
Slow Dry:
If using ceramic clay, cover the piece loosely with plastic for a day to let the moisture redistribute, then uncover to let it dry completely to the bone-dry stage. If using air-dry clay, follow the package instructions.
Uneven is Okay
Don’t stress about perfect symmetry. The charm of this piece comes from its slight wobble and hand-formed look, mimicking a river stone.
Step 3: Finishing Touches
-
First Firing (Bisque):
If you are using kiln-fire clay, fire the piece to bisque temperature (usually cone 04). This hardens the clay and prepares it for glazing. -
Sanding (Optional):
Once bisqued (or fully dried for air-dry clay), you can lightly sand any rough spots on the bottom with fine-grit sandpaper. Remember to wear a dust mask. -
Glazing Strategy:
Select a matte off-white or cream glaze. Pour a small amount inside the bowl and swirl it to coat the interior, pouring the excess back out. This ensures the food-contact surface is sealed. -
Exterior Glazing:
Dip the exterior or brush the glaze on. For the speckled look shown, you might choose a clay body with grog or speckles, or flick a stiff toothbrush dipped in iron oxide wash lightly over the damp glaze. -
Wipe the Foot:
Use a clean, damp sponge to wipe any glaze off the very bottom of the piece. If you leave glaze here, it will fuse to the kiln shelf during firing. -
Final Firing:
Fire the piece again to the maturation temperature of your specific clay and glaze (often cone 5 or 6 for stoneware). Let the kiln cool completely before opening to avoid thermal shock.
Stamp It
While the clay is leather-hard, press a piece of lace, a leaf, or a custom maker’s mark into the underside for a hidden texture surprise.
Now you have a charming, functional piece of art ready to keep your countertops clean
Mini Earring Stud Shapes
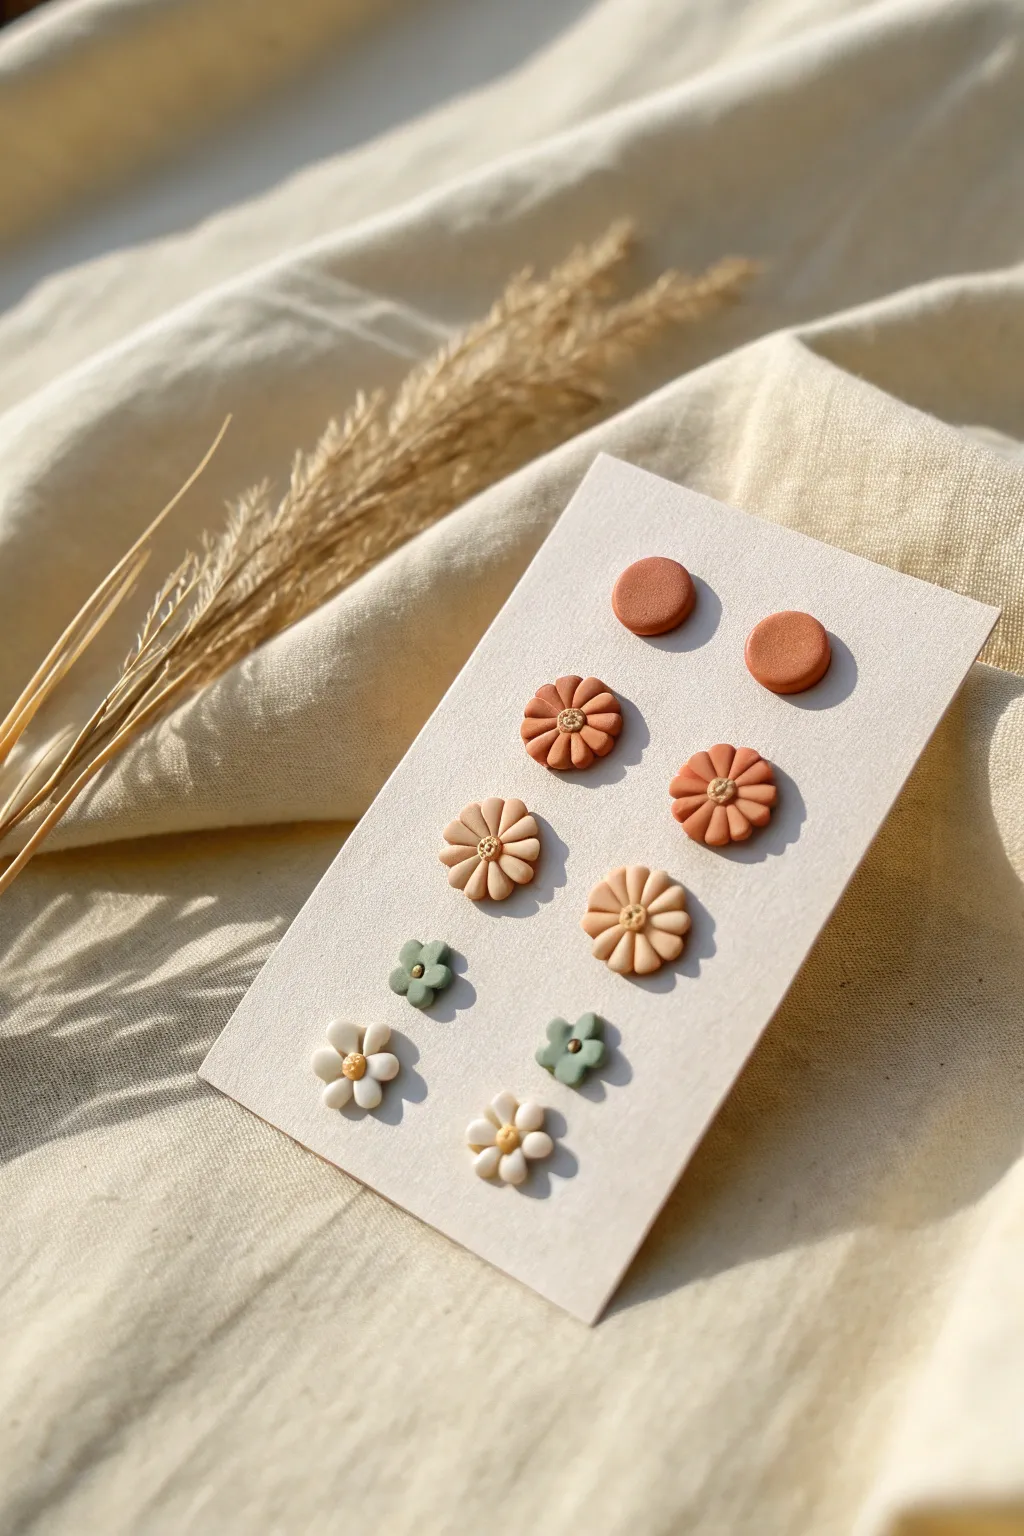
Create a charming set of mini stud earrings inspired by warm, earthy tones and delicate botanical shapes. These tiny clay studs range from simple textured rounds to intricate daisies, making them the perfect starter project for practicing precision on a small scale.
Detailed Instructions
Materials
- Polymer clay in terracotta, peach, beige, cream, and sage green
- Earring stud posts (surgical steel or gold-plated)
- Strong craft glue (like E6000) or UV resin
- Small circle cutter (approx. 6-8mm)
- Needle tool or toothpick
- Small ball tool (for detailing)
- Ceramic tile or glass sheet (for baking)
- Alcohol wipes (for cleaning)
Step 1: Preparation & Color Mixing
-
Condition the Clay:
Begin by conditioning all your clay colors until they are soft and pliable. Warm clay is essential for preventing cracks in tiny pieces. -
Roll Out Sheets:
Roll your clay out into even slabs, aiming for a consistent thickness of about 3mm. If you have a pasta machine, a medium setting is perfect here.
Clean Edges Trick
Use a piece of plastic wrap over the clay before cutting your circle studs. This creates a lovely domed edge instead of a harsh straight cut.
Step 2: Creating the Simple Studs
-
Cut the Base Circles:
For the top pair, use your small circle cutter on the terracotta clay to punch out two clean circles. -
Add Texture:
Gently tap the surface of these circles with a piece of sandpaper or a toothbrush to give them a matte, stone-like texture rather than leaving them perfectly smooth.
Add Subtle Shine
Before baking, brush a tiny amount of pearl mica powder over just the center pollen dots to make them catch the light subtly.
Step 3: Sculpting the Medium Daisies
-
Prepare the Petals:
For the terracotta and peach flower pairs, roll tiny balls of clay—you will need about 7 or 8 per earring. -
Assemble the Shape:
Arranging these tiny balls into a ring on your work tile is easier than trying to move a finished flower. Press them gently together at the center so they stick. -
Define Petals:
Use your needle tool to press an indentation down the center of each ball, flattening it slightly and creating that classic petal definition. -
Add Centers:
Place a tiny contrasting ball of clay (yellow or textured beige) in the center of the ring. I like to prick this center piece with a needle tool to mimic pollen.
Step 4: Mini Flowers & Greenery
-
Forming Tiny Daisies:
Repeat the previous method using the beige and white clay, but make your starter balls half the size for a daintier look. -
Sculpting the Green Flowers:
For the sage green pair, use only 5 petals instead of 8 to create a different floral variety. Press the petals slightly flatter for a softer shape. -
Final Shaping:
Once all flowers are formed on the tile, go back with your needle tool and ensure the petals are distinctly separated and not merging together.
Step 5: Baking & Assembly
-
Clean Up:
Before baking, gently wipe any fingerprints or lint off the clay using a cotton swab dipped in a little rubbing alcohol. -
Bake:
Bake the pieces on the tile according to your clay manufacturer’s instructions (usually 275°F/135°C for 15-30 minutes). Let them cool completely. -
Attach Posts:
Apply a small dot of strong glue to the flat pad of an earring post and press it firmly onto the back of a cooled clay piece. -
Secure the Backs:
For extra durability, you can add a tiny drop of UV resin or liquid clay over the post pad (avoiding the stick part) and cure it to seal the metal to the clay.
Arranging your finished studs on a card makes them feel like a professional boutique collection gift for yourself or a friend.
Small Soap Dish With Lines
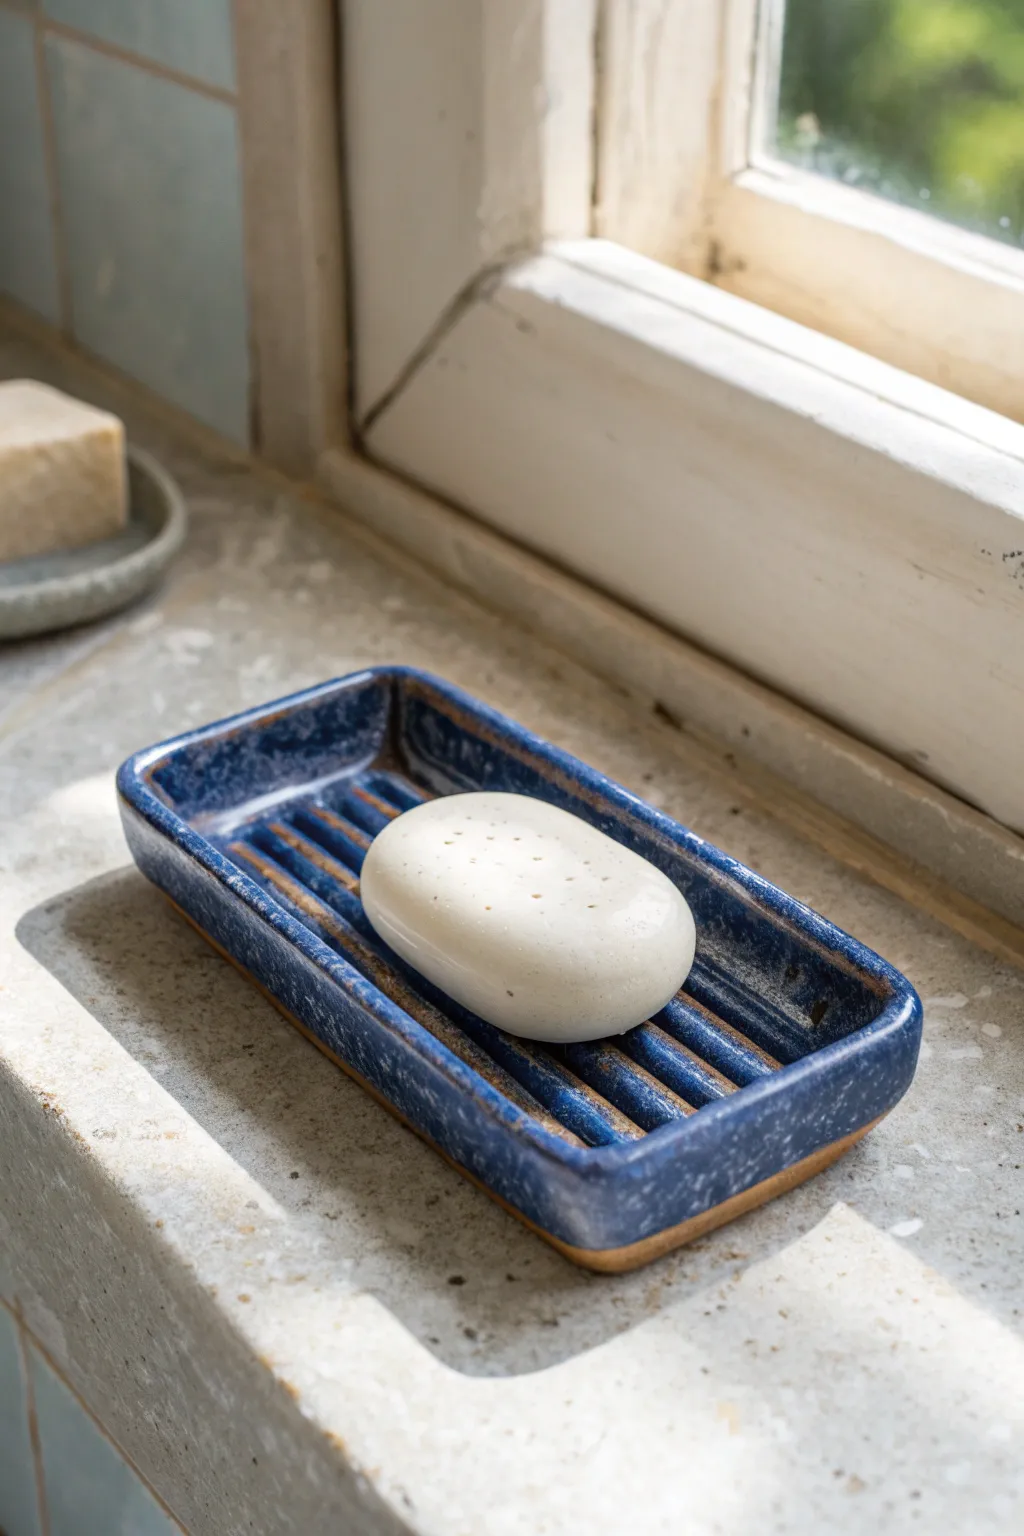
This rustic, rectangular soap dish features deep grooved lines to keep your soap dry and long-lasting. Its deep blue glaze with speckles contrasts beautifully with the warm, exposed clay rim, making it a functional piece of art for any bathroom.
Step-by-Step
Materials
- Stoneware clay (smooth or with grog)
- Rolling pin
- Guide sticks (approx. 1/4 inch thick)
- Rectangular template (paper or cardstock)
- Needle tool or fettling knife
- Wooden modeling tool (rounded edge)
- Rib tool (smooth metal or rubber)
- Sponge
- Speckled blue glaze
- Clear glaze (optional)
- Kiln for firing
Step 1: Shaping the Base
-
Prepare the slab:
Begin by wedging your clay to remove air bubbles. Place it on a canvas board, set up your guide sticks on either side, and roll out a slab to a uniform thickness of about 1/4 inch. -
Cut the rectangle:
Lay your rectangular template onto the clay slab. Use your needle tool or fettling knife to cut cleanly around the template. A size around 3×5 inches works well for standard soap bars. -
Smooth the surface:
Lightly run a damp sponge or a rubber rib over the surface of the clay rectangle. This compresses the clay particles and creates a smooth canvas for your texture. -
Raise the walls:
Gently pinch up the edges of the rectangle to create a low wall, roughly half an inch high. I find using my thumb on the inside and clean fingers on the outside helps maintain an even thickness. -
Refine the shape:
Use a wooden tool to square off the corners if they’ve become rounded. Smooth the connection point between the floor and the wall so there are no cracks. -
Refine the rim:
Run a damp sponge along the top rim to round it off slightly. This prevents sharp edges that could chip easily after firing.
Clean Lines
When carving the grooves, wipe your tool clean after every single pass. Sticky clay build-up on the tool will ruin the smoothness of the next channel.
Step 2: Adding the Grooves
-
Mark spacing:
Using a needle tool, lightly scratch tick marks along the short ends of the inside floor to guide where your ridges will go. Aim for about 5-6 evenly spaced lines. -
Carve the channels:
Take a rounded wooden modeling tool or a loop tool. Press firmly and drag it from one end of the dish to the other to create deep grooves. Do not cut all the way through the bottom. -
Smooth the ridges:
The carving process might leave small clay burrs. Wait until the clay is leather hard, then gently brush these away with a soft brush or smooth them with a damp fingertip. -
Add drainage holes (optional):
If you prefer extra drainage, use a small hole cutter to punch 2-3 holes in the deepest part of the grooves. This is optional, as the ridges usually elevate the soap enough. -
Dry slowly:
Cover the dish loosely with plastic to let it dry slowly to the bone-dry stage. This helps prevent warping, especially with the differing thicknesses caused by the grooves.
Step 3: Glazing and Finishing
-
Bisque fire:
Fire the bone-dry piece in the kiln to bisque temperature (usually Cone 04 or 06). This prepares it for glazing. -
Wax the bottom:
Apply wax resist to the bottom of the dish and slightly up the side if you want an exposed clay foot. This prevents glaze from sticking where it shouldn’t. -
Expose the rim:
For the look in the photo, you’ll also want to carefully apply a thin line of wax resist along the very top edge of the rim before dipping. -
Apply glaze:
Dip the dish into a speckled blue glaze. Ensure the glaze flows into all the grooves. Shake off excess glaze so it doesn’t pool too thickly in the bottom channels. -
Clean up:
Use a damp sponge to wipe away any glaze beads that may be clinging to your waxed areas, ensuring sharp, clean lines where the clay meets the glaze. -
Glaze fire:
Place the dish in the kiln for the final glaze firing according to your clay and glaze specifications (e.g., Cone 5 or 6). -
Final inspection:
Once cool, check the bottom for any sharp bits of glaze or clay. Sand them down lightly with wet-dry sandpaper if necessary to protect your sink surfaces.
Change the Texture
Instead of straight lines, try carving a wavy pattern or a herringbone design for the drainage channels to give the dish a unique personality.
Enjoy the simple satisfaction of using your own handmade pottery every time you wash your hands
Stamp-Textured Mini Coasters
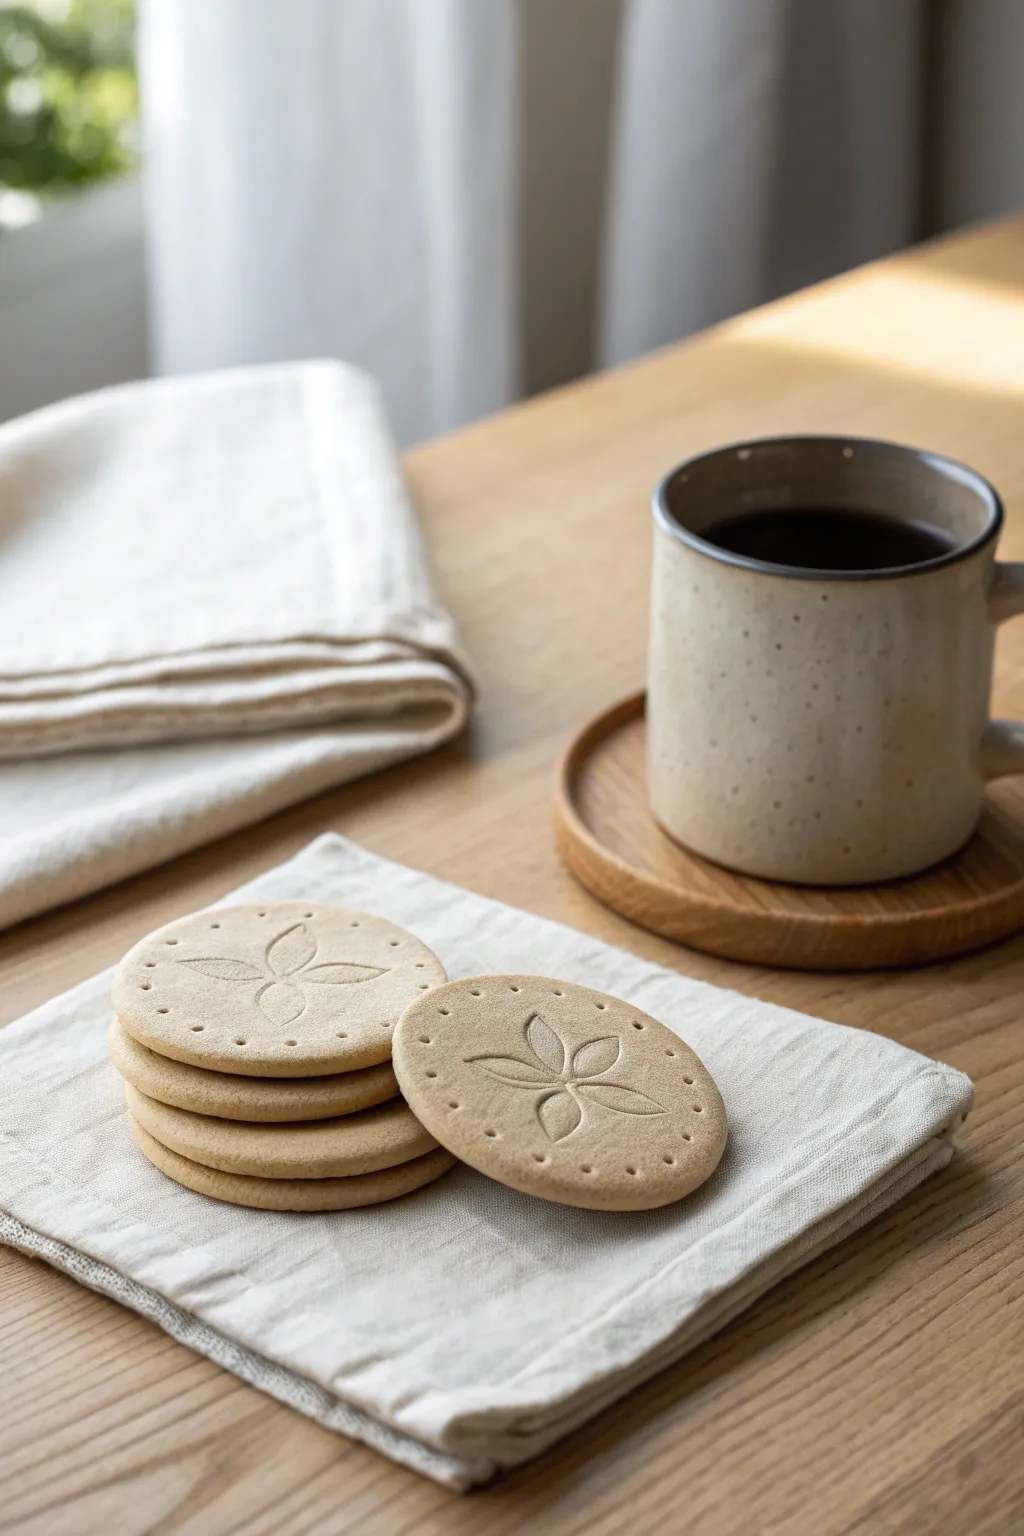
These charming, biscuit-like coasters bring a touch of warm minimalism to your table setting. With their subtle speckled clay texture and simple floral embossing, they are an easy and satisfying project perfect for clay beginners.
Detailed Instructions
Materials
- Air-dry clay (stone or biscuit color)
- Round cookie cutter (approx. 3.5 inches)
- Small floral stamp or embossing tool
- Rolling pin
- Two guide sticks or slats (approx. 1/4 inch thick)
- Toothpick or small dotting tool
- Fine-grit sandpaper
- Canvas mat or parchment paper
- Matte acrylic sealant or varnish
Step 1: Preparing the Clay Base
-
Condition the clay:
Begin by taking a handful of air-dry clay and kneading it in your hands until it becomes warm and pliable. This conditioning step prevents cracks from forming later. -
Set up your workspace:
Lay down your canvas mat or parchment paper on a flat surface. Place your two guide sticks parallel to each other, slightly wider apart than the width of your intended coaster. -
Roll out the slab:
Place your clay ball between the guide sticks. Using the rolling pin, roll the clay out until the pin rests on the sticks, ensuring an even thickness of about 1/4 inch across the entire slab. I find this thickness gives the coaster a nice, substantial weight. -
Cut the circles:
Using your round cookie cutter, press firmly into the clay slab to cut out your circles. Twist slightly to ensure a clean cut before lifting the cutter away. -
Smooth the edges:
Dip your finger in a tiny bit of water and run it gently around the circumference of each circle to smooth out any rough edges or stray bits of clay left by the cutter.
Step 2: Adding Texture and Details
-
Center the floral stamp:
Identify the exact center of your clay circle. Gently position your floral stamp over this spot without pressing down yet to check alignment. -
Press the design:
Press the stamp evenly and firmly into the clay. You want the impression to be deep enough to see clearly, but not so deep that it warps the flat coaster shape. -
Create the dotted border:
Take your toothpick or a small dotting tool. create a ring of small indentations about a quarter-inch from the edge. Try to space them evenly as you work your way around the circle. -
Check for flatness:
Sometimes stamping can slightly warp the edges. If the coaster looks a bit wonky, place a flat object like a hardback book gently on top for a few seconds to level it back out.
Preventing Curling
If your coasters curl up at the edges while drying, place a light book or flat board on top of them during the last half of the drying process to weigh them down flat.
Step 3: Drying and Finishing
-
Begin the drying process:
Transfer the coasters onto a clean sheet of parchment paper or a wire rack. Let them sit in a dry area away from direct sunlight. -
Flip for even drying:
After about 4-6 hours, carefully flip the coasters over. This crucial step helps prevent curling edges as the moisture evaporates from the clay. -
Complete drying:
Allow the coasters to dry for a full 24 to 48 hours until they are completely hard and room temperature to the touch (cold clay means there is still moisture inside). -
Sand rough spots:
Once fully dry, take a piece of fine-grit sandpaper and lightly buff the edges and surface. This removes any fingerprints or uneven texture, giving it that professional ‘stone’ look. -
Apply sealant:
Using a soft brush, apply a thin coat of matte acrylic varnish or sealant. This protects the clay from moisture, which is essential for a functional coaster. -
Seal the bottom:
Wait for the top coat to dry completely, then flip the coaster and seal the bottom side as well. -
Final cure:
Let the sealant cure according to the manufacturer’s instructions, usually another 24 hours, before placing a hot mug on your new creation.
Stamp Release Trick
Dust your floral stamp or tool very lightly with cornstarch before pressing it into the clay. This acts as a release agent and ensures the stamp doesn’t stick or pull up the clay design.
Now you have a beautiful set of handmade coasters ready to protect your surfaces with style
Pocket-Size Whistle Bead
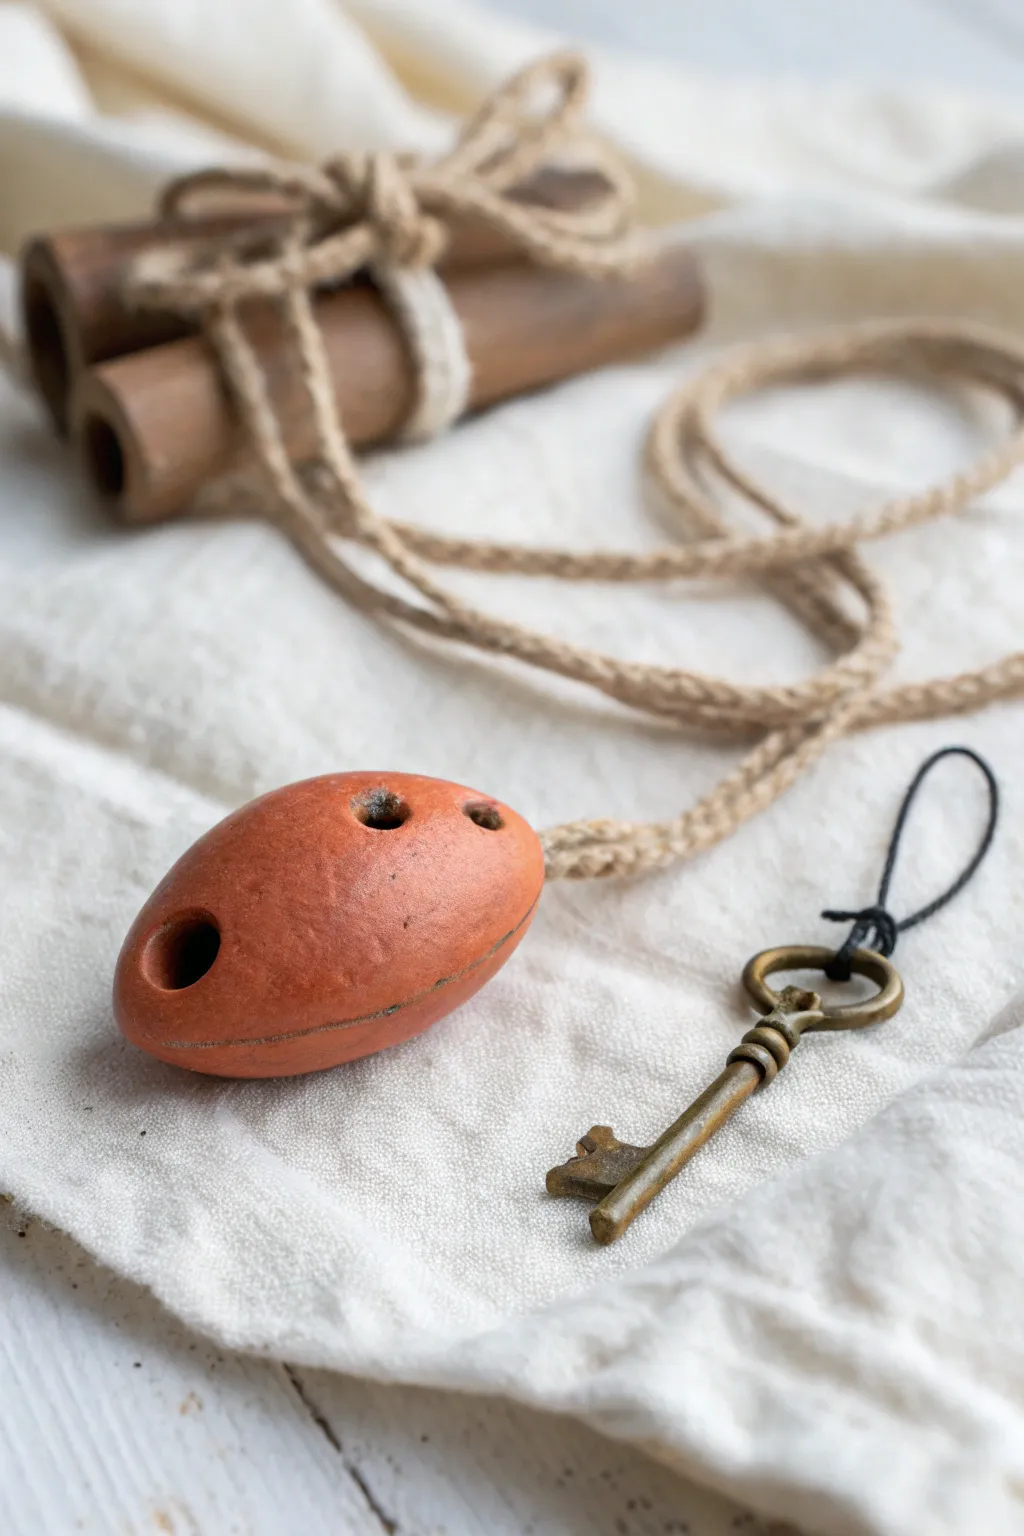
Transform a simple lump of earth into a functional musical instrument with this charming, rustic project. Using natural terracotta clay, you’ll sculpt a smooth, pebble-like pendant that produces a clear, bright sound when blown.
Step-by-Step Guide
Materials
- Terracotta air-dry clay or polymer clay (oven-bake)
- Popsicle stick or flat modeling tool
- Wooden skewer or toothpick
- Smooth work surface
- Small cup of water (if using air-dry clay)
- Sandpaper (fine grit)
- Hemp cord or leather thong for stringing
Step 1: Shaping the Clay Body
-
Prepare the Clay:
Start with a ball of clay about the size of a large walnut. Knead it well until it is pliable and free of air bubbles, ensuring a smooth consistency for shaping. -
Form the Basic Shape:
Roll the ball between your palms to create a smooth sphere, then gently elongate it into an egg or oval shape about 2 to 2.5 inches long. -
Create the Air Cavity:
Carefully slice the egg in half lengthwise. Hollow out both halves using a loop tool or spoon, leaving a wall thickness of approximately 1/4 inch. Leave the ‘tail’ end solid for the airway. -
Rejoin the Halves:
Score the edges of your hollow halves (cross-hatch with a needle tool) and add a little water or slip. Press them back together firmly to reform the egg shape. -
Smooth the Seam:
Using your thumb or a modeling tool, blend the clay across the seam line until it completely disappears. The surface should look continuous and unbroken.
No sound?
The sharp edge (fipple) must split the airstream perfectly. If it’s silent, try cleaning debris from the airway or slightly sharpening the ramp edge.
Step 2: Creating the Voice Mechanism
-
Make the Mouthpiece:
Flatten one end of the oval slightly to create a mouthpiece area. Insert a popsicle stick flat into this end to create the windway (the air passage). -
Cut the Window:
On the top surface, about an inch from the mouthpiece, cut a small square or rectangular hole (the window) using a sharp knife. -
Form the Fipple:
This is the crucial step. Create a sharp 45-degree ramp on the side of the window furthest from the mouthpiece. The air from the windway needs to hit this sharp edge to split and create sound. -
Align the Airway:
Re-insert your popsicle stick into the windway. Look through the window; the stick should aim directly at the sharp edge of the ramp you just carved. I find adjusting this tiny angle makes the biggest difference in sound quality. -
Test the Sound:
Gently blow through the mouthpiece. If it makes a whistling sound, great! If it sounds like rushing air, adjust the angle of the ramp or the direction of the windway slightly until you get a clear tone.
Make it yours
Before drying, carve geometric patterns or rune-style symbols into the surface for an ancient, artifact aesthetic. Finish with a darker wash to highlight grooves.
Step 3: Finishing Touches
-
Drill Tuning Holes:
Once the whistle works, add two small holes on the top or sides using a skewer. These will allow you to change the pitch when covered with fingers. -
Refine the Surface:
Smooth over any fingerprints or rough spots with a slightly damp finger or sponge. For that burnished look in the photo, rub the surface with the back of a spoon. -
Add Suspension Hole:
Pierce a horizontal hole near the tail end of the whistle so it can be strung as a necklace later. Make sure this doesn’t puncture the air cavity. -
Dry or Bake:
If using air-dry clay, let the piece dry slowly for 2-3 days away from direct heat to prevent cracking. If using polymer, bake according to package instructions. -
Sand and Polish:
Once fully cured, use fine-grit sandpaper to remove any remaining burrs, especially around the mouthpiece. -
String It Up:
Thread a length of rustic hemp cord through the suspension hole to complete your wearable instrument.
Enjoy wearing your handcrafted amulet and surprising friends with its hidden musical ability
Tiny Fairy Door Charm
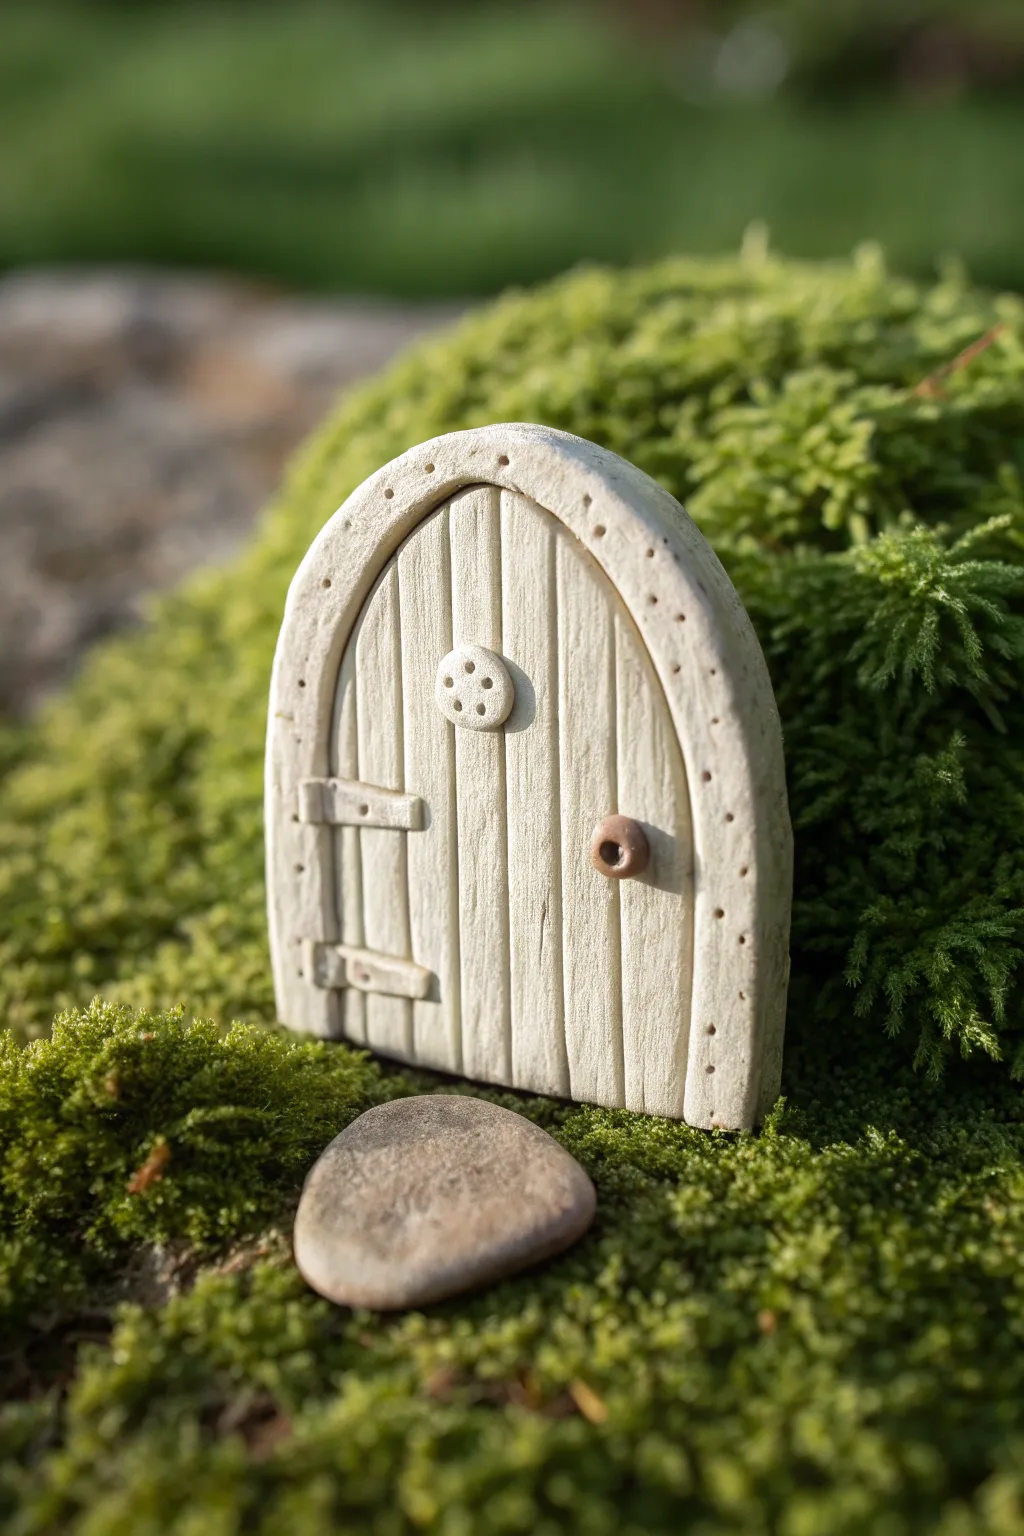
Bring a touch of magic to your potted plants or garden with this tiny, detailed fairy door. Featuring realistic wood grooves and miniature hardware, this clay charm is a perfect beginner project that looks deceptively intricate.
Step-by-Step Tutorial
Materials
- Beige or off-white polymer clay
- Brown polymer clay (very small amount)
- Clay roller or rolling pin
- Texture tool or needle tool
- Small circle cutter (approx. 5-7mm)
- Small ball stylus
- Flexible clay blade or craft knife
- Oven for baking
- Sandpaper (optional)
- Brown acrylic paint (for antiquing)
- Paper towel
Step 1: Shaping the Base
-
Condition the clay:
Begin by kneading your beige clay until it is soft and pliable. This prevents cracks later on. -
Roll the slab:
Roll the beige clay out into a thick, even slab, approximately 1/4 inch thick. You want it substantial enough to stand up on its own. -
Create the arch shape:
Using your flexible clay blade or a custom-made paper template, cut out a tombstone or arch shape. This will be the main body of your door. -
Smooth the edges:
Gently run your finger along the cut edges to soften any sharp corners and create a nice, rounded finish.
Step 2: Adding Wood Texture
-
Define the frame:
Use a needle tool to gently scribe a line parallel to the outer edge, creating a border about 3-4mm wide all around the arch. Don’t cut all the way through. -
Create vertical planks:
Inside the frame you just made, drag your needle tool vertically to create parallel lines. These represent the wooden planks of the door. -
Add wood grain details:
I like to gently press the needle tool deeper in random spots along the vertical lines to simulate varied wood depths and natural imperfections. -
Detail the frame:
Using a small ball stylus or the tip of a toothpick, poke a series of evenly spaced holes along the outer frame for decorative texture.
Uneven Texture?
If your needle drags clay up and creates burrs while making wood grain, lay a piece of plastic wrap over the clay before drawing the lines for a cleaner finish.
Step 3: Hardware and Hardware Details
-
Make the window:
Roll a tiny ball of beige clay and flatten it into a disc. Press this onto the upper center of the door. -
Add window texture:
Use a needle tool or toothpick to poke four holes in the center of the disc, making it look like a button or a tiny peephole. -
Sculpt the hinges:
Cut two small, thin rectangular strips of beige clay. Press them horizontally across the left side of the door, one near the top and one near the bottom. -
Detail the hinges:
Press a small indentation into the left side of each hinge strap to simulate the knuckle of the hinge. -
Create the doorknob:
Take a tiny pinch of brown clay (or mix beige with a speck of brown) and roll it into a small ball. Press it onto the right side of the door. -
Socket the doorknob:
Use a ball tool to press an indentation into the center of the doorknob for a finished look.
Add a Doorstep
Sculpt a small, flat stone out of grey clay or find a smooth real pebble (like in the photo) to glue at the base of your door for a welcoming entryway.
Step 4: Finishing Touches
-
Bake the project:
Bake your door according to the polymer clay package instructions. This usually involves 275°F (135°C) for about 15-30 minutes depending on thickness. -
Cool down:
Let the piece cool completely before handling so it hardens fully. -
Optional antique wash:
To make the grain pop like in the photo, dilute a little brown acrylic paint with water. Brush it over the door, getting into the grooves. -
Wipe away excess:
Immediately wipe the high points with a paper towel, leaving the dark paint only in the recessed lines and textures.
Now find a cozy nook in some moss or at the base of a tree to install your new magical entrance