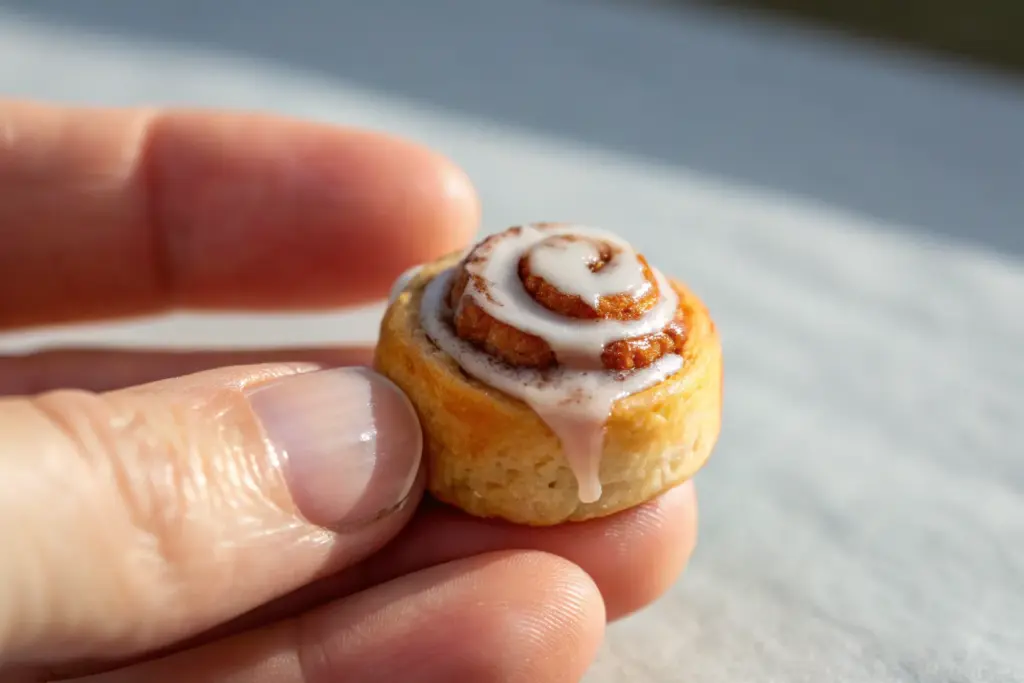
If you love tiny things, polymer clay miniatures are basically happiness you can hold between two fingers. These ideas are the kinds of projects I make on a cozy studio day—sweet, satisfying, and totally doable at home.
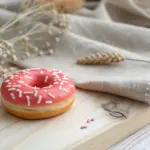
Mini Donut Box Assortment
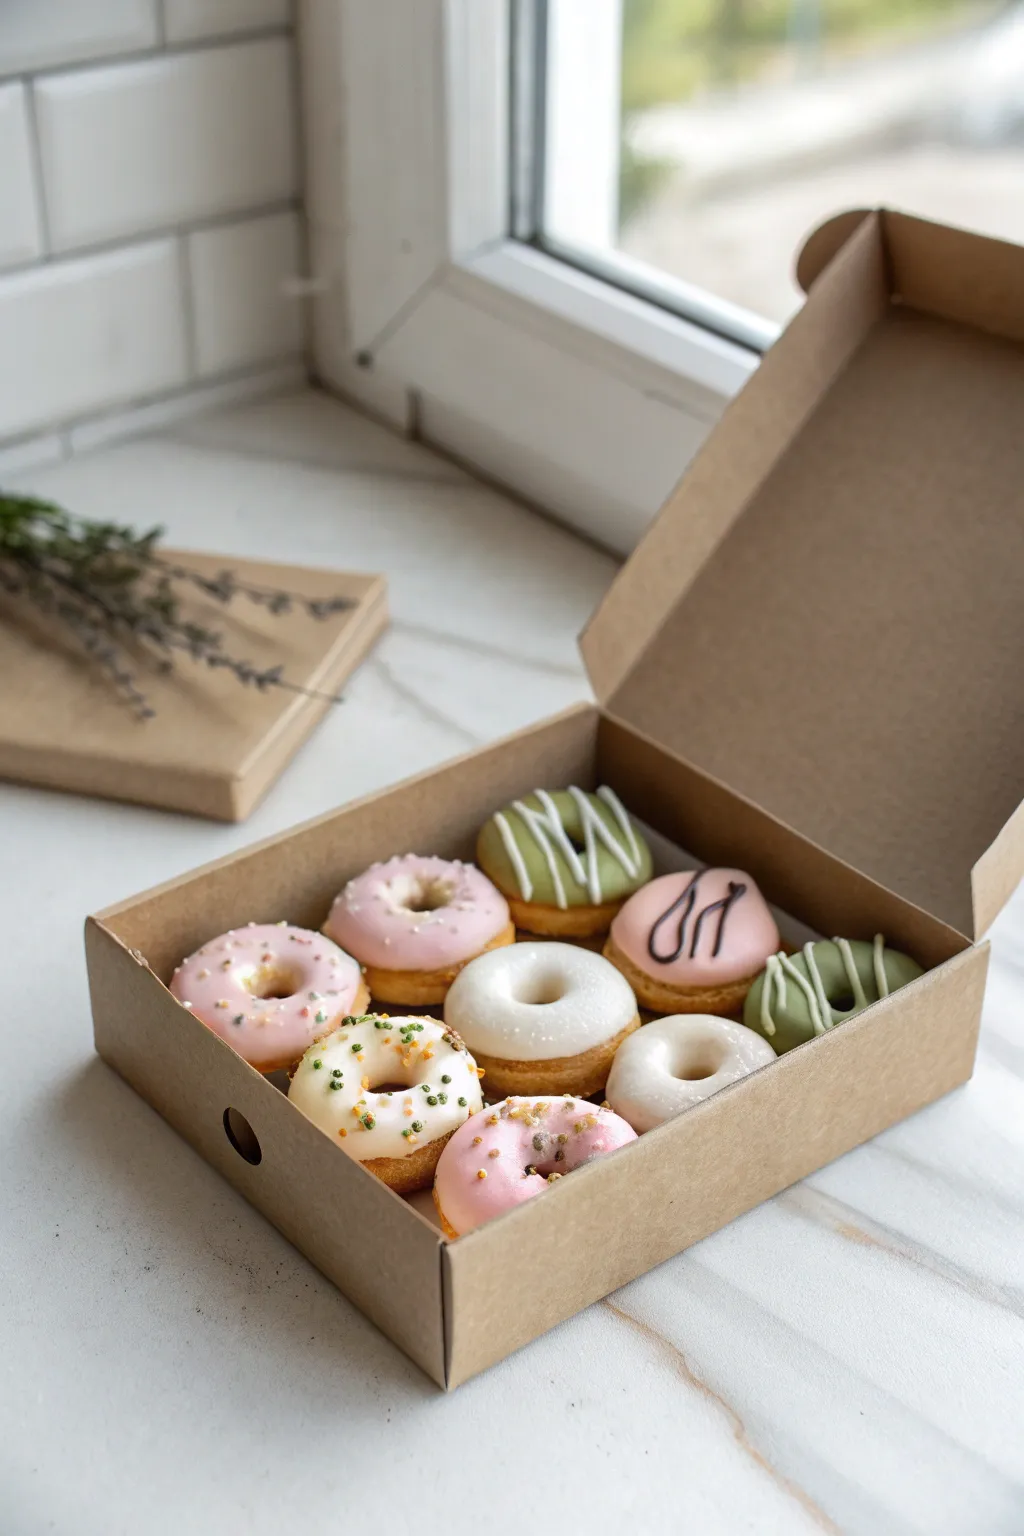
Create a delightful assortment of lifelike miniature donuts neatly packed in a kraft paper box. This project focuses on realistic textures, convincing glaze effects, and precise scale consistency to make a charming bakery display.
Detailed Instructions
Materials
- Polymer clay (dough color, white, pink, green, brown)
- Liquid polymer clay (translucent and white)
- Chalk pastels (ochre, orange-brown, dark brown)
- Soft paintbrushes
- Needle tool and ball stylus
- Small round cutter (approx. 1cm) and a smaller straw/tube for holes
- Brown kraft cardstock
- Ruler, craft knife, and glue tape
- Gloss glaze (UV resin or water-based varnish)
- Micro beads or scraped clay for sprinkles
Step 1: Sculpting the Dough Base
-
Mix the dough color:
Blend white, translucent, and a tiny amount of yellow ochre and brown clay to create a realistic ‘baked dough’ base color. The translucent clay adds that slightly airy look essential for donuts. -
Form the shapes:
Roll the clay into a sheet about 4-5mm thick. Use your small round cutter to punch out nine circles. Gently press the edges to round them off so they don’t look like sharp mechanical cuts. -
Create the center holes:
For the ring donuts, use a small straw or tube to punch out the centers. Widen the hole slightly with a tool if needed, smoothing the inner edges with your finger. -
Texturing the dough:
Using a needle tool or an old toothbrush, gently tap texture onto the surface of the donuts. Avoid the very center ‘ring’ line where the dough expands while frying; keep that area smooth for realism. -
Shading for a baked look:
Shave ochre and orange-brown chalk pastels into powder. With a soft dry brush, dust the tops and bottoms of the donuts, concentrating the darker brown on the edges to simulate frying. Leave the center stripe lighter. -
Initial bake:
Bake the naked donuts according to your clay manufacturer’s instructions (usually 20 minutes at 275°F/130°C). Let them cool completely before icing.
Icing Runniness
Is your liquid clay dripping too much? Let the mixture sit open on a palette for 20 minutes before applying. This evaporates some plasticizer, thickening it for better control.
Step 2: Icing and Decoration
-
Prepare the glazes:
Mix liquid polymer clay with small bits of solid clay to create your icing colors: pale pink, white, matcha green, and a dark chocolate brown. The consistency should be like heavy cream. -
Dip and glaze:
Carefully apply the icing to the top half of the donuts using a needle tool to drag the liquid down the sides slightly, mimicking gravity drips. -
Decorate the pink donuts:
Glaze three donuts in pink. While wet, sprinkle micro beads or finely chopped cured clay on two of them to look like sprinkles. Leave one plain or add subtle white dots. -
Pipe the matcha donuts:
Glaze two donuts with the green mixture. To create the white drizzle shown in the image, put a tiny amount of white liquid clay on a needle tip and drag fine lines back and forth across the wet green base. -
Add detail to the white donuts:
Glaze three donuts in white. For the sprinkled one, add colorful microbeads. For the plain glazed ones, ensure the icing looks thick and opaque. I like to let this settle for a minute to self-level. -
Create the specialty drizzle:
Glaze the final donut in pink. Using your dark brown liquid clay mixture on a fine needle tool, carefully draw the chocolate loops and squiggles on top. -
Final bake:
Place the decorated donuts back in the oven for about 10-15 minutes to set the liquid clay icing. Watch carefully so the white icing doesn’t yellow. -
Varnishing:
Once cool, brush a thin layer of gloss glaze or UV resin only over the icing parts to give them a sugary, wet shine. Leave the dough areas matte.
Level Up: Grease Spots
Rub a tiny amount of baby oil on the tissue paper underneath the donuts. This creates hyper-realistic translucent ‘grease spots’ on the paper packaging.
Step 3: Constructing the Box
-
Draft the template:
On kraft cardstock, draw a grid for the box base that is slightly larger than your 3×3 donut arrangement. Include tabs on the sides for gluing. -
Cut and fold:
Cut out the template with a craft knife. Score the fold lines lightly so they bend cleanly without cracking the paper. -
Assemble the lid:
Create a connected lid piece if you want a hinged box like the photo, ensuring the lid depth matches the height of the donuts. -
Final arrangement:
Place a small square of tissue paper or parchment inside the box, then arrange your finished donuts in rows of three, mixing the colors for a balanced composition.
Now you have a sweet little box of pastries perfect for a dollhouse kitchen or a charming desk display


Tiny Croissants With Golden Browning
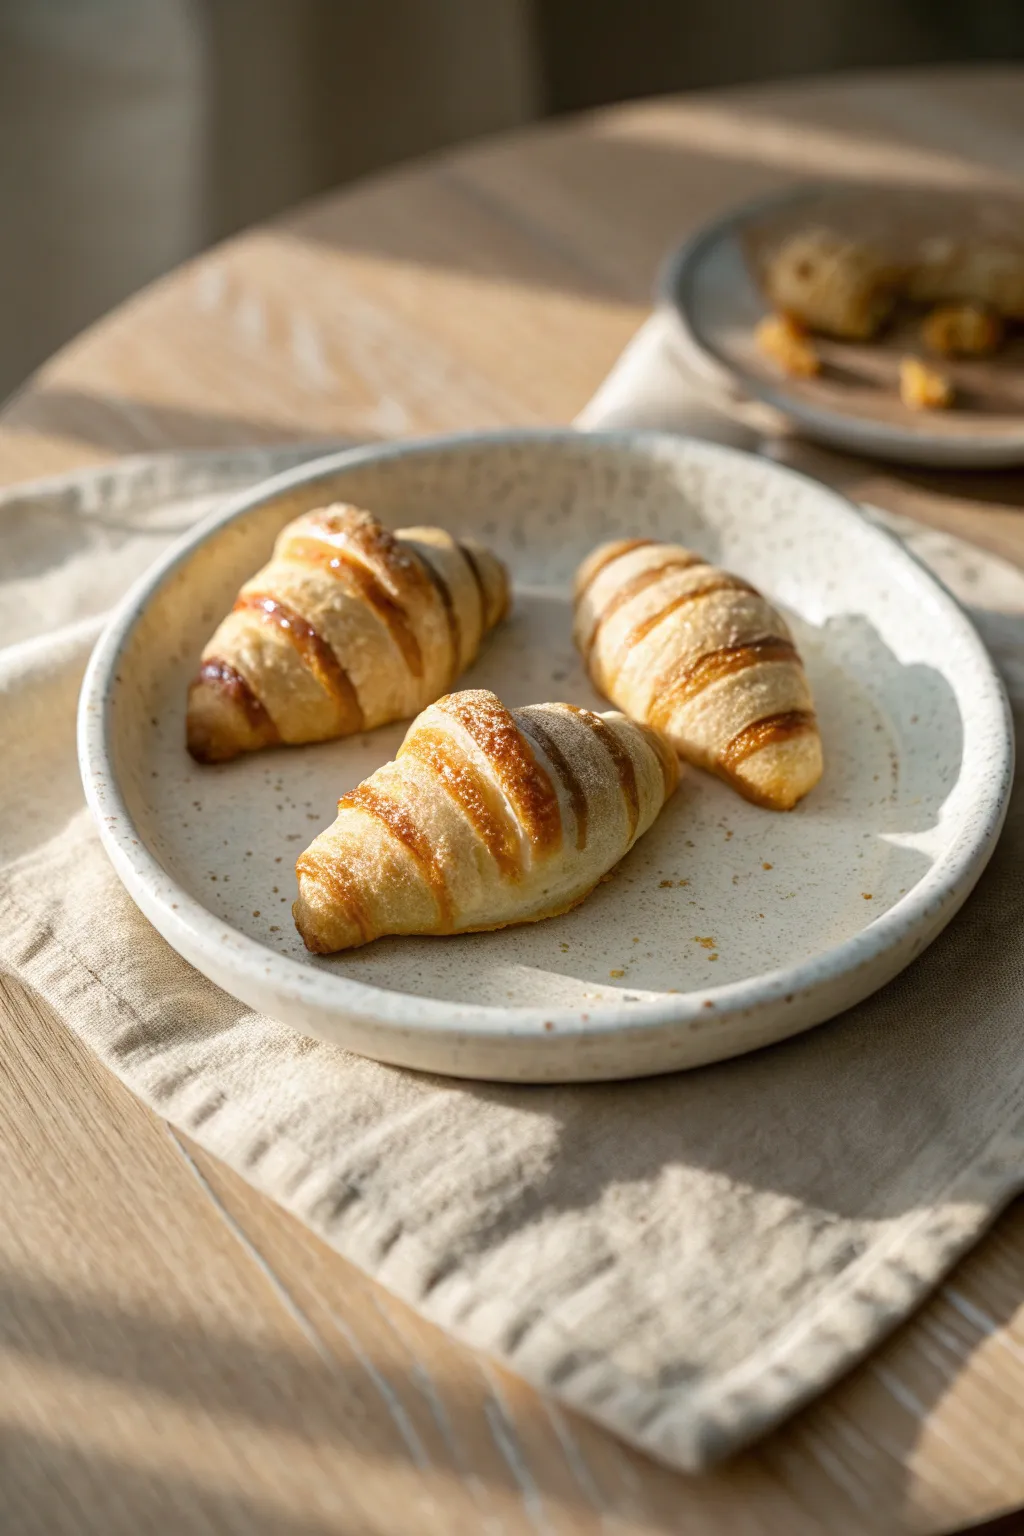
Achieve the ultimate bakery-fresh look with these miniature polymer clay croissants, featuring distinct golden bands and a delicate sugared finish. The secret lies in a layered shading technique that creates hyper-realistic crust definition.
Step-by-Step
Materials
- Polymer clay (white and translucent)
- Soft pastel chalks (yellow ochre, raw sienna, burnt umber)
- Liquid polymer clay (Fimo liquid or similar)
- White sand or extra-fine embossing powder
- Razor blade or craft knife
- Needle tool
- Old toothbrush
- Small fluffy brush
Step 1: Dough Preparation
-
Mixing the Base Tone:
Begin by conditioning equal parts white and translucent polymer clay. To get that barely-baked dough color, mix in a tiny shaving of yellow ochre pastel chalk until the clay is a pale, creamy off-white. -
Rolling:
Roll the clay out into a thin sheet, approximately 1mm thick. Uniformity is key here for consistent layers. -
Cutting Triangles:
Using your razor blade, cut long, narrow isosceles triangles. The base should be about 1.5cm wide and the height about 4cm. -
Shaping the Croissant:
Starting from the wide base of the triangle, gently roll the clay upward toward the point. Keep your rolling pressure light so you don’t squash the layers together. -
Curving the Edges:
Once rolled, gently tap the ends to tamper them slightly, then curve the tips inward to create the classic crescent shape.
Don’t Over-Blend
When applying the darker pastel stripes, don’t smudge! Let the powder sit on the surface texture. Over-blending makes the bread look burnt rather than glazed.
Step 2: Creating Texture
-
Adding Flakiness:
To mimic puff pastry, take a needle tool and very gently trace the spiral lines where the clay was rolled, deepening them slightly. -
Surface Texture:
Lightly tap the surface of the clay with an old toothbrush. This breaks up the smoothness of the plastic-looking clay and simulates a baked flour surface. -
Securing the Tip:
Ensure the very tip of the triangle (which ends up on top or slightly underneath) is pressed down firmly enough so it doesn’t pop up during baking.
Step 3: The Golden Browning
-
First Coat – Ochre:
Scrape some yellow ochre pastel into a fine powder. Using a small fluffy brush, dust the entire croissant very lightly. -
Second Coat – Sienna:
Now, focus on the raised ridges of the rolled dough. Apply raw sienna pastel specifically to the top of each spiral band, leaving the crevices pale. -
Deepening the Crust:
I like to take a tiny amount of burnt umber powder and apply it solely to the most prominent curves and the tips to simulate a well-done crust. -
Creating the Striped Effect:
To match the reference photo’s distinct striped look, use a slightly stiffer brush to apply the darker pastels in defined horizontal bands across the top curve, rather than a wash over the whole object.
Almond Filling
Before rolling the triangle, spread a thin mix of yellow clay and liquid gel inside. Let a tiny bit ooze out the sides for a realistic ‘filled’ look.
Step 4: Glazing and Sugaring
-
Partial Baking:
Bake the croissants for 10 minutes at the manufacturer’s recommended temperature to set the shape. -
Applying ‘Egg Wash’:
Once cooled, brush a thin layer of liquid polymer clay over the top center of the croissants where the browning is strongest. -
Dusting with ‘Sugar’:
While the liquid clay is wet, sprinkle a pinch of white sand or extra-fine embossing powder over the top. Blow away any excess that lands on the sides. -
Final Bake:
Return the pieces to the oven for a final 15-20 minutes to cure the liquid clay and bond the ‘sugar’ granules permanently. -
Finishing Touches:
If the finish looks too glossy after cooling, dab it lightly with a matte varnish to restore a realistic pastry texture.
Display these on a tiny ceramic plate for the perfect miniature breakfast scene


Slice-of-Cake Charms With Drippy Icing
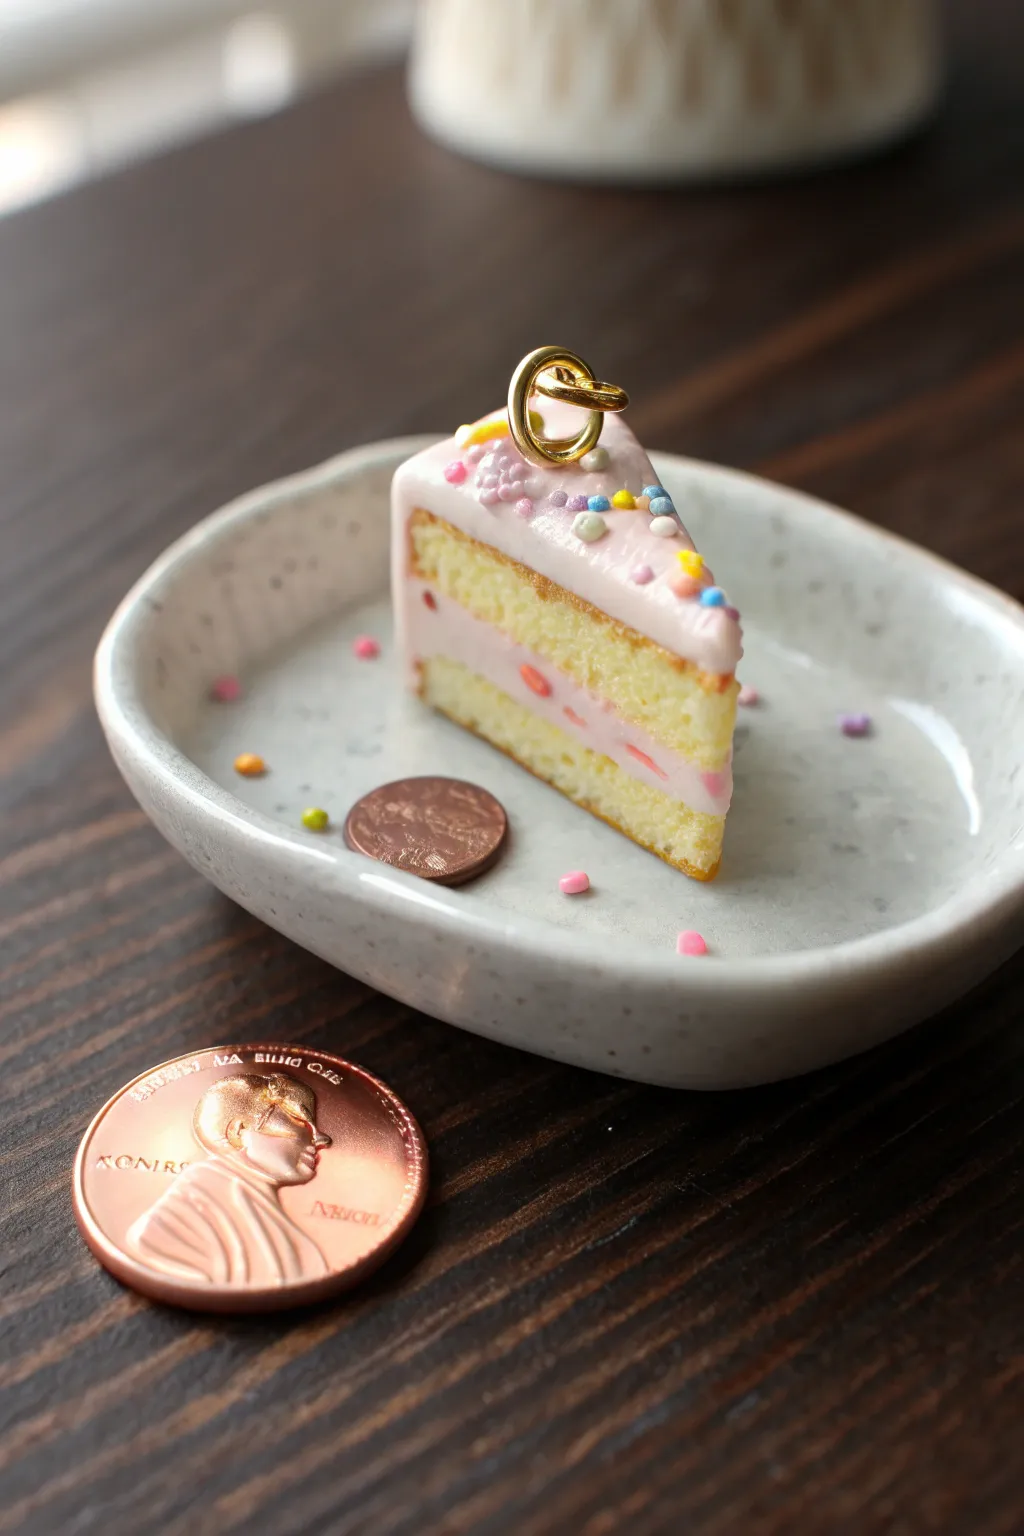
This delightful miniature layered cake slice features realistic sponge textures and a luscious, glossy pink frosting that captures the sweetness of a real dessert. At just under the size of a penny, this tiny charm is perfect for jewelry making or adding to a dollhouse tea party.
Step-by-Step Tutorial
Materials
- Polymer clay (yellow/cream for cake, pink for filling)
- Translucent liquid polymer clay (TLS)
- Soft pastel chalks in golden yellow and orange
- Acrylic paint (pink, white)
- Needle tool or stiff toothbrush
- Blade or X-Acto knife
- Microbeads or faux sprinkles
- Gold screw eye or jump ring
- Gloss glaze (polyurethane or UV resin)
- Small artist brush
Step 1: Creating the Cake Layers
-
Mix the Sponge Color:
Start by mixing translucent white clay with a small amount of yellow and a tiny touch of white opaque clay. This combination creates a realistic, airy sponge cake look rather than a flat, solid yellow. -
Roll the Sheets:
Roll out your sponge-colored clay into a sheet that is approximately 3-4mm thick. Do the same with your pink clay for the filling, rolling it slightly thinner than the yellow layers to mimic the proportions in the image. -
Cut the Shapes:
Use a small round cutter or your blade to cut out two equal circles of the yellow cake sponge. Cut one identical circle from the pink filling clay. -
Stack the Cake:
Gently stack the layers: start with yellow, place the pink in the middle, and top with the second yellow layer. Press them together lightly, ensuring no air bubbles are trapped between the sheets. -
Texture the Edges:
Using a needle tool, gently drag the clay vertically down the sides to blend the layers slightly, then pick at the surface of the yellow sponge layers to create a crumb texture. A stiff toothbrush tapped vigorously against the sides also works wonders for this effect. -
Cut the Slice:
With a very sharp, thin blade, cut a triangular slice out of your round cake stack. Make this cut decisive and quick to avoid squashing your beautiful texturing. You can re-texture the cut sides if they get slightly smoothed out. -
Shade the Crust:
Shave some golden yellow and orange soft pastel chalk into a powder. Use a soft brush to dust the outer curved edge (the back of the slice) and the very top and bottom edges to simulate a baked golden-brown crust.
Texturing Tip
For ultra-realistic crumbs, freeze the unbaked clay for 5 minutes before cutting your slice. The clay will be firmer, preventing the layers from smushing together.
Step 2: Frosting and Finishing
-
Prepare the Liquid Icing:
In a small cup or on a palette, mix translucent liquid clay with a drop of pink acrylic paint and a tiny bit of white paint. You want a consistency that is thick enough to hold its shape but fluid enough to look like melted glaze. -
Apply the Base Frosting:
Carefully drip the liquid mixture onto the top of your cake slice. Use a toothpick to guide the liquid clay to the edges, allowing it to drip naturally down the sides just a little bit, mimicking gravity. -
Add the Sprinkles:
While the liquid clay is still wet, carefully place your microbeads or faux sprinkles onto the frosting using tweezers. Vary the colors—pinks, yellows, and blues—to match the festive look in the photo. -
Insert the Charm Hardware:
Take a small gold screw eye or open jump ring. Dip the end into a tiny bit of liquid clay for extra grip, then press it firmly into the center of the frosting on top of the slice. -
Bake the Piece:
Place your cake slice on a ceramic tile or baking sheet. Bake according to your brand of polymer clay instructions, usually at 275°F (130°C) for about 15-20 minutes. Watch closely to ensure the white frosting doesn’t yellow. -
Cool and Glaze:
Let the piece cool completely before touching it. Once cool, apply a coat of gloss glaze or UV resin strictly over the frosting area to give it that wet, sugary shine seen in the reference photo. Leave the sponge cake areas matte for contrast.
Troubleshooting
If your liquid clay is too runny and dripping too much, mix in a tiny pinch of cornstarch or bake it for just 2-3 minutes to thicken it before applying.
Attach your finished slice to a bracelet or necklace chain for a sweet accessory that looks good enough to eat


Mini Cookie Tray With Mixed Shapes
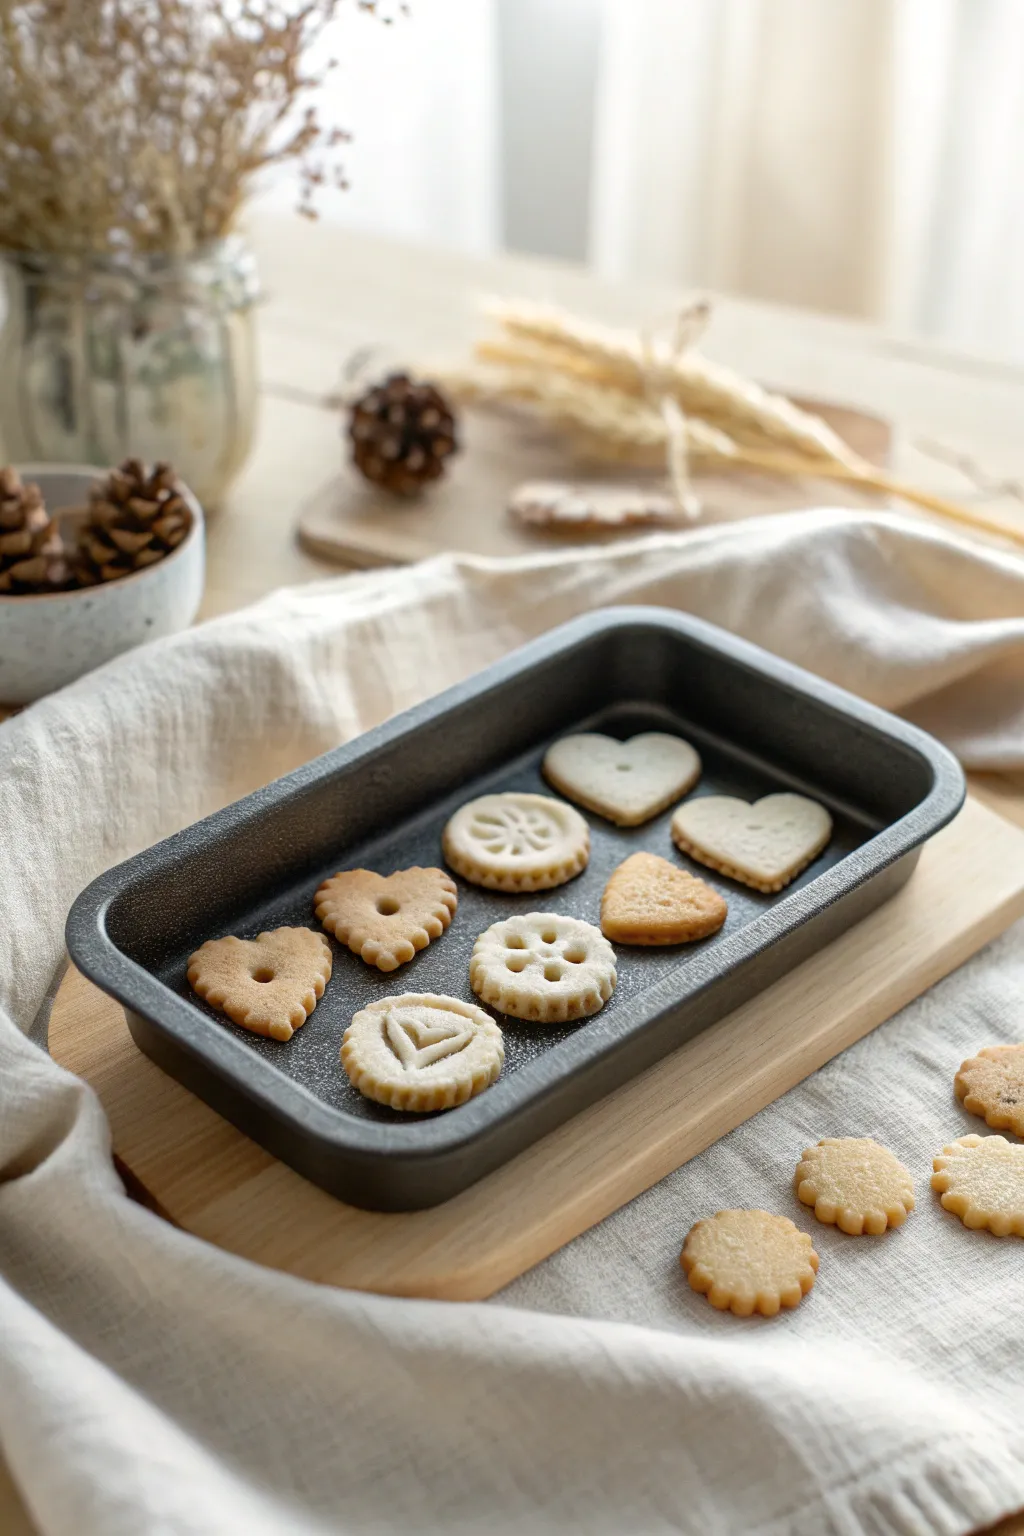
Capture the cozy warmth of baking day without heating up the kitchen with this adorable miniature cookie tray. You’ll sculpt a realistic non-stick baking pan and fill it with an assortment of tiny, perfectly textured sugar cookies.
Step-by-Step
Materials
- Polymer clay (black/gunmetal, translucent, white, écru/beige)
- Liquid polymer clay (clear)
- Soft pastels (yellow ochre, burnt umber)
- Craft knife or tissue blade
- Find sandpaper or texturing brush
- Miniature cookie cutters (teardrop, circle) or soda straws
- Needle tool
- White acrylic paint or baby powder (for the ‘flour’)
- Gloss varnish (optional)
Step 1: Sculpting the Baking Pan
-
Mix the metal color:
Start by mixing black polymer clay with a small amount of silver or gunmetal mica powder if you have it, or simply use plain black clay for a matte non-stick look. Alternatively, a dark charcoal grey works beautifully. -
Form the base:
Roll the dark clay into a smooth sheet about 2mm thick. Cut a rectangle approximately 4cm by 2.5cm (adjusting scale to your needs). This forms the bottom of your pan. -
Add the walls:
Roll a long snake of the same clay, flattening it slightly to create a strip about 3mm high. Wrap this strip around the perimeter of your rectangular base. -
Blend the seams:
Use a clay shaper or your finger to smooth the seam where the wall meets the base, ensuring it creates a watertight-looking seal. Round the outer corners gently for a realistic stamped-metal appearance. -
create the lip:
Press the top edge of the walls outward slightly to create a rolled rim effect, which is characteristic of real baking sheets. Bake this piece according to your clay package instructions so it provides a solid base for the cookies.
Too Dark?
If your cookies look burnt after baking, cover them with tented aluminum foil or a layer of baking soda during the curing process to protect the delicate pastel shading.
Step 2: Creating the Dough
-
Mix the cookie color:
Combine white clay with a touch of translucent and a very small amount of écru or yellow ochre. You want a pale, raw dough color. The translucent clay adds that realistic depth found in buttery dough. -
Texture the sheet:
Roll your dough color out thinly. Before cutting shapes, gently press fine sandpaper or a toothbrush over the surface to give it a porous, baked-good texture rather than smooth plastic. -
Cut heart shapes:
Use a tiny heart cutter or gently pinch a small ball of clay into a teardrop and indent the top with a needle tool to form hearts. Make 3-5 of these. -
Cut round shapes:
Use the end of a straw or a small round cutter to make circle cookies. For the fluted edges seen in the photo, use a needle tool to press tiny vertical indentations all around the rim. -
Add surface details:
For the Linzer-style cookies, use a smaller straw or needle tool to punch holes in the center. I like to make a few different patterns—single center holes or spoke designs.
Go For Realism
Make a “bitten” cookie! Use a tiny flower cutter to remove a chunk from one of the loose cookies, then use a needle to rough up the exposed inside edge for crumb texture.
Step 3: Baking and Assembly
-
Shade the cookies:
Before putting them in the pan, shave some yellow ochre and burnt umber chalk pastels into a powder. With a dry soft brush, gently dust the edges of the cookies to make them look golden brown. -
Arrange in the pan:
Place a thin layer of liquid polymer clay on the bottom of your baked pan to act as glue. Arrange your varied cookie shapes inside, leaving a little breathing room between them. -
Add the ‘flour’:
To recreate the dusted look from the photo, tap a tiny amount of baby powder or white pastel dust over the tops of the raw cookies. This simulates powdered sugar or leftover flour. -
Create loose cookies:
Don’t forget to make a few extra cookies to scatter on the table next to the tray. Texture and shade these exactly like the ones in the pan. -
Final bake:
Bake the entire piece (pan with cookies inside plus loose cookies) again. Watch the temperature closely so the lovely golden shading doesn’t darken too much. -
Finishing touches:
Once cool, you can add a tiny drop of brown liquid clay inside the holes of the Linzer cookies to mimic jam, or leave them plain as shown in the reference.
Display your freshly baked miniatures on a piece of linen or lace for the ultimate cozy presentation

What Really Happens Inside the Kiln
Learn how time and temperature work together inside the kiln to transform clay into durable ceramic.
Fast-Food Mini Meal Set
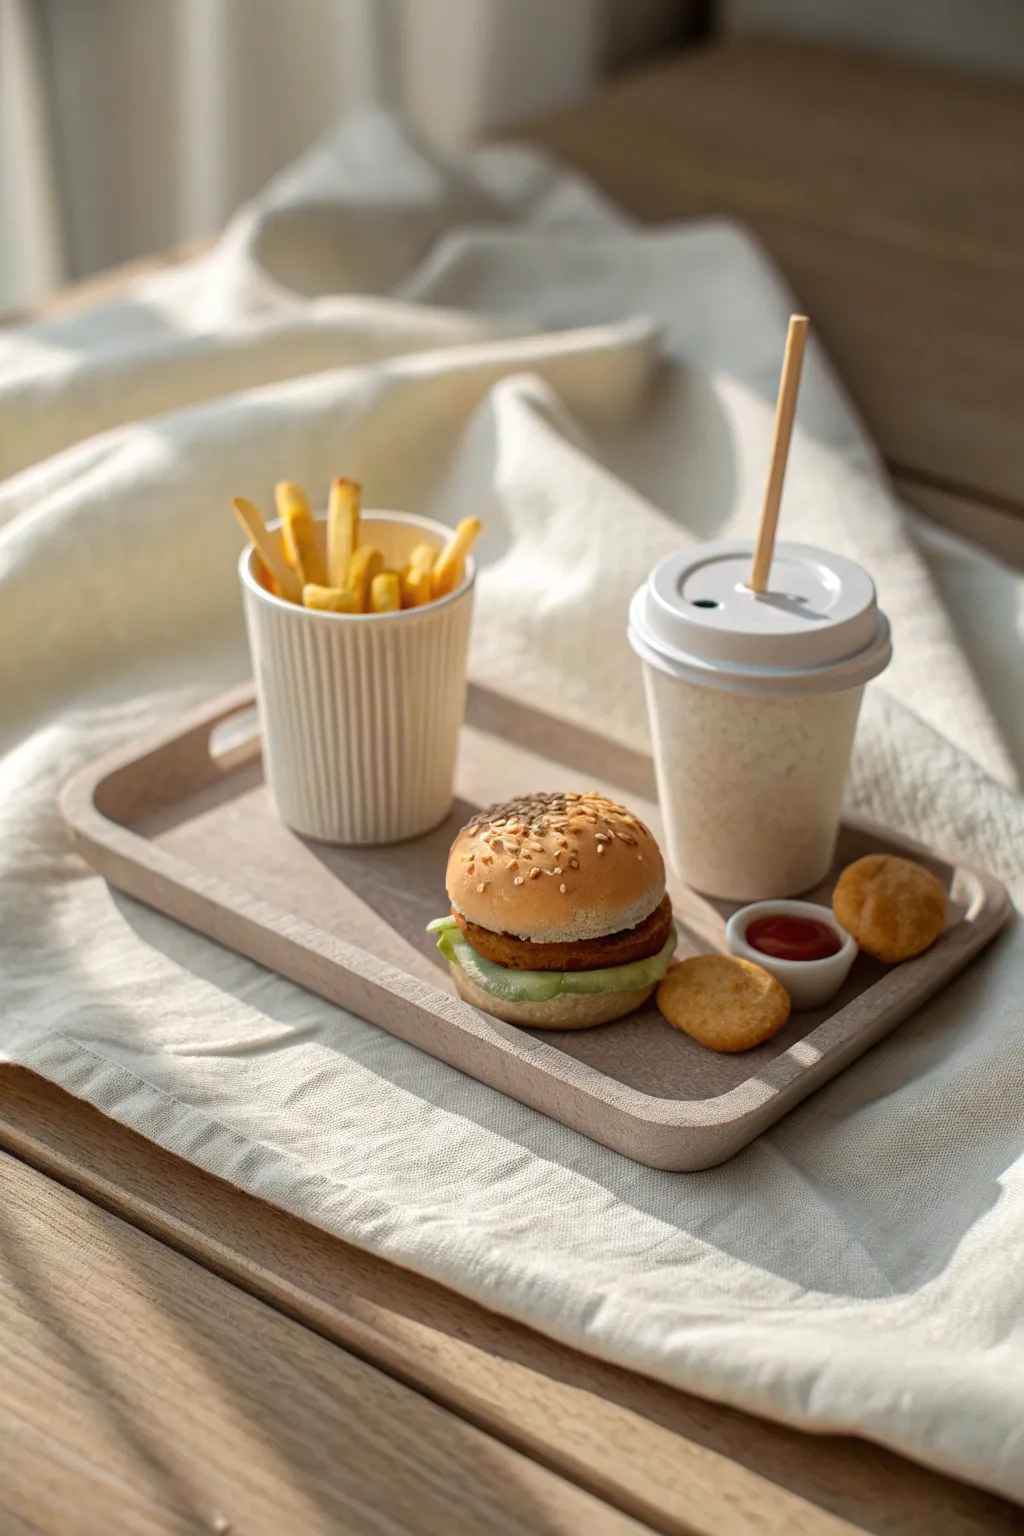
Capture the nostalgic charm of classic fast food with this ultra-realistic miniature set made from polymer clay. The texturing on the burger bun and the crisp edges of the crinkle cup create a delightful trompe-l’œil effect perfect for dollhouses.
Step-by-Step Guide
Materials
- Polymer clay (colors: ochre, tan, translucent white, brown, green, red, yellow)
- Liquid polymer clay (white and translucent)
- Pastel chalks (browns, oranges, yellows) for shading
- Small round cutter or drinking straw (for burger bun)
- Blade or X-Acto knife
- Needle tool or toothpick
- Toothbrush or tinfoil ball (for texturing)
- Manila folder or cardstock (for the tray)
- Gloss glaze (for ketchup and moisture)
- Fine sandpaper
- Small piece of thin wire (for the straw support)
Step 1: Cooking the Burger
-
Bun Basics:
Mix ochre with a tiny bit of white clay to get a classic bread color. Roll a small ball, flatten slightly, and cut it into a top and bottom bun using your round cutter. -
Bun Texture:
Gently tap the curved top of the upper bun with a toothbrush or a crumpled ball of aluminum foil to simulate the baked bread texture. -
The Perfect Toast:
Use a soft brush to dust the top bun with shaved brown and orange pastel chalks, concentrating the darker colors in the center to mimic baking browning. -
Seeding:
Roll incredibly tiny specks of tan clay into teardrop shapes (your sesame seeds) and press them gently onto the top bun. I like to use a needle tool to secure them without squashing the dome. -
Patty Prep:
Mix brown clay with a touch of black for a grilled look. Press a small ball flat and texture the edges roughly with a needle tool to look like ground meat. -
Lettuce Layer:
Roll out translucent green clay as thin as possible. Tear the edges irregularly and ruffle them slightly before stacking underneath the patty for that fresh crunch look.
Chalk Adhesion
If your pastel chalk isn’t sticking to the raw clay, lightly brush the clay with a tiny bit of baby oil or liquid clay before dusting. This acts as a primer for the color.
Step 2: Fries & Sides
-
Cutting Fries:
Roll yellow clay into a thin sheet. Use a sharp blade to cut uniform, matchstick-sized strips for your french fries. -
Seasoning the Fries:
Dust the tips of the fries with yellow-orange chalk to make them look crispy and golden. -
The Ripple Cup:
Roll white clay into a strip. Use a specialized ripple blade or carefully press vertical lines with a needle tool to create the ribbed texture. Wrap this around a small cylindrical form (like the end of a paintbrush handle) to shape the cup. -
Filling the Cup:
Fill the bottom half of the cup with scrap clay, then arrange your fries sticking out the top in a natural, overflowing fan shape. -
Golden Nuggets:
Form two irregular oval shapes from ochre clay. Texture them heavily with the toothbrush to mimic breading, and shade deeply with orange-brown chalks.
Step 3: Drink & Condiments
-
Cup Structure:
Form a tapered cylinder from white or beige clay for the drink cup. Create a matching lid by cutting a circle slightly larger than the cup rim and pressing a smaller circle indent into the top. -
The Straw:
Coat a tiny piece of thin wire with tan clay to create the straw. Poke a hole in the lid and insert the straw before baking. -
Ketchup Ramekin:
Shape a tiny white bowl. Mix red liquid clay or red polymer clay mixed with liquid gel to create the sauce. Pour a small drop into the ramekin.
Realistic “Grease”
For ultra-realism, lightly dab gloss varnish on the french fries and the edges of the nuggets after baking to simulate that oily, deep-fried sheen.
Step 4: Assembly & Tray
-
Tray Construction:
Cut a rectangle from beige clay. Add a raised rim around the edge by attaching a thin snake of clay and smoothing the seams. Add small handles if desired. -
Final Bake:
Arrange all your items on a baking tile (not the clay tray yet, bake them separately to avoid sticking or warping) and bake according to your clay manufacturer’s instructions. -
Finishing Touches:
Once cool, glue the components onto the tray. Add a layer of gloss glaze to the ketchup and the ‘meat’ of the burger patty for a juicy appearance.
Now you have a charming fast-food feast ready to be served in your miniature world
Dollhouse Kitchen Counter Coffee Setup
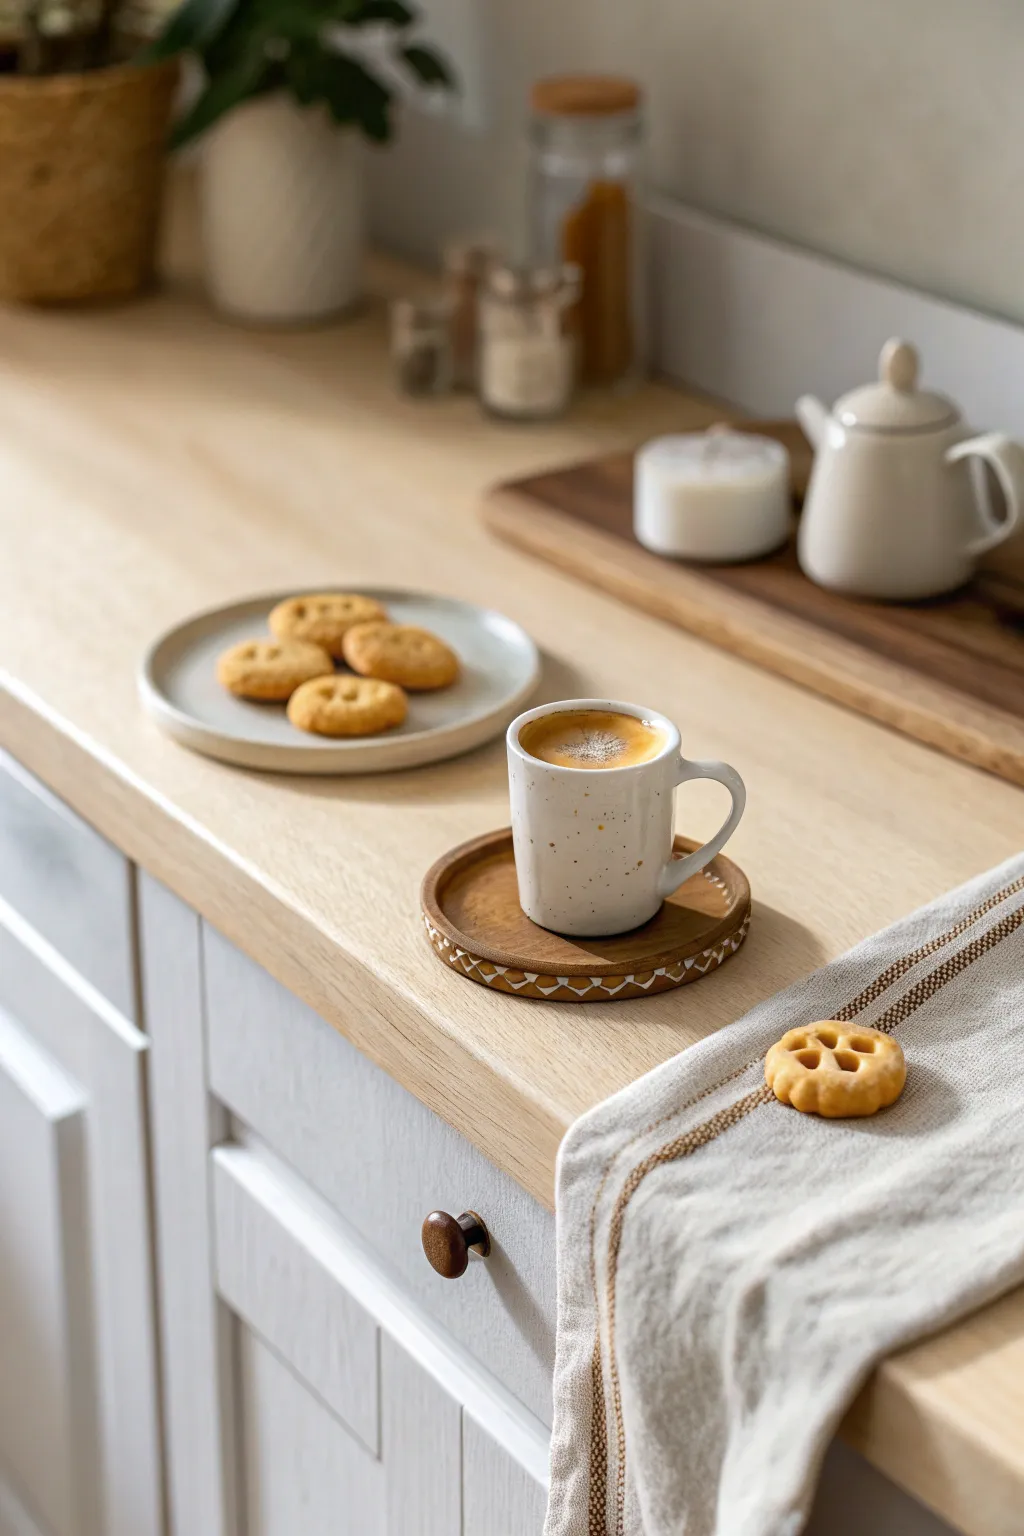
Capture the cozy warmth of a lazy weekend morning with this hyper-realistic polymer clay miniature set. You’ll create a petite speckled mug filled with frothy espresso, accompanied by classic butter cookies and a rustic wooden coaster.
Detailed Instructions
Materials
- Polymer clay (white, beige, translucent, raw sienna, burnt umber)
- Fimo Liquid or TLS (Translucent Liquid Sculpey)
- Chalk pastels (orange, brown, yellow ochre)
- Glossy polyurethane varnish
- Small round cutter (approx. 1cm) or straw
- Dotting tools and needle tool
- Soft paintbrush for shading
- X-Acto knife or craft blade
- Toothbrush (for texture)
- Fine sandpaper
Step 1: Sculpting the Ceramic Mug
-
Mixing the Clay:
Start by mixing white polymer clay with a very tiny amount of beige to create an off-white, ceramic tone. Roll this into a smooth log. -
Forming the Cylinder:
Cut a small segment of the log to define the height of your mug. Gently press your smallest ball stylus or the back of a paintbrush into the center to hollow it out, keeping the walls even. -
Refining the Rim:
Smooth the top edge with your finger to remove any sharp angles. We want this to look like hand-thrown pottery, so a slight unevenness adds charm. -
Adding Speckles:
Grate a tiny amount of brown or black chalk pastel into a powder. Pick up the dust with a dry brush and flick or tap it randomly onto the raw clay mug to create a realistic speckled glaze effect. -
Creating the Handle:
Roll a very thin snake of the same clay mixture. Curve it into a ‘C’ shape and gently press it onto the side of the mug, blending the attachment points with a rubber shaper or needle tool. -
First Bake:
Bake the empty mug according to your clay package instructions (usually 20-30 minutes) so it holds its shape for the filling step.
Varnish Secrets
For the most realistic coffee look, apply the gloss varnish in thick drops. Surface tension will create a natural meniscus curve at the cup’s edge.
Step 2: Crafting the Butter Cookies
-
Cookie Dough Color:
Mix beige clay with a touch of translucent and a speck of yellow ochre. This translucent addition gives the cookies that baked-good depth rather than looking like flat plastic. -
Shaping the Dough:
Roll the clay into a sheet about 3mm thick. Use a small round cutter or a cut-down straw to punch out four or five circles. -
Texturing:
Gently tap the surface of each clay circle with a clean toothbrush. This mimics the crumbly surface of a shortbread cookie. -
Adding Detail:
For the specific design in the photo, press a needle tool or small geometric stamp into the center to create the waffle-like indentation pattern visible on the focus cookie. -
Baking Effect:
Shave some orange and brown chalk pastel. With a soft brush, gently dust the edges and the raised ridges of the cookies to simulate a golden-brown bake.
Crumbs for Scale
Make ‘crumbs’ by baking a tiny scrap of cookie-colored clay, chopping it finely with a blade, and gluing the bits near the cookies.
Step 3: The Wooden Coaster
-
Wood Base:
Mix brown clay with raw sienna to get a warm wood tone. Roll it flat and cut a circle slightly larger than your mug. -
Wood Grain Texture:
Use a coarse sandpaper or drag a needle tool lightly across the surface to create linear wood grain scratches. -
Geometric Details:
Take a tiny snake of white clay, flatten it, and wrap it around the edge of the coaster. Use a needle tool to press tiny triangle patterns into this white rim.
Step 4: Assembly and Coffee
-
Filling the Mug:
Once the mug is cool, fill it halfway with scrap clay to save materials. Top it off with a mixture of Fimo Liquid and brown chalk pastel/paint to represent the black coffee. -
Creating Crema:
Mix a separate drop of liquid clay with yellow ochre and white pastel. Swirl this lightly into the center of the dark brown liquid to create the foamy espresso crema. -
Final Bake:
Place the coaster, cookies, and filled mug on your tile and bake everything for the full recommended time. -
Glazing:
After cooling, coat the mug (avoiding the handle if you want a matte ceramic look) and the coffee surface with glossy varnish. Leave the cookies and coaster matte.
Arrange your tiny breakfast set in your dollhouse kitchen and enjoy the permanent aroma of imaginary coffee


The Complete Guide to Pottery Troubleshooting
Uncover the most common ceramic mistakes—from cracking clay to failed glazes—and learn how to fix them fast.
Mini Salad Bowl With Layered Ingredients
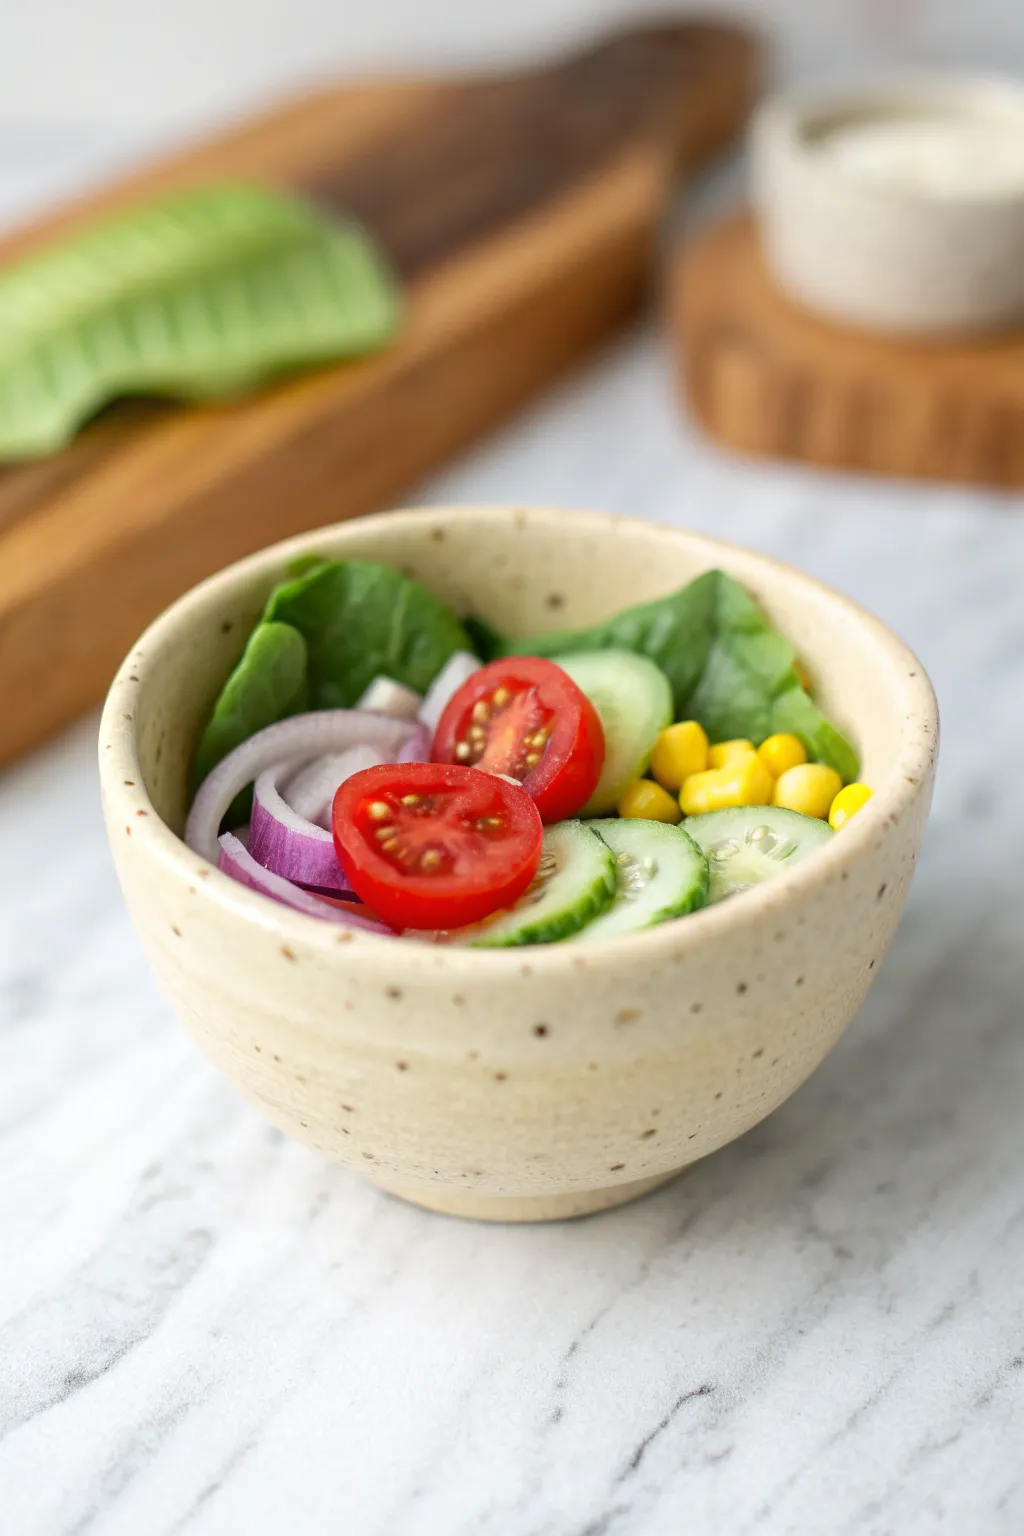
This project captures the freshness of a garden salad in miniature form, featuring a rustic, speckled bowl filled with colorful veggies. The realism comes from layering translucent clays and adding tiny textural details like tomato seeds and cucumber skins.
Step-by-Step Guide
Materials
- Polymer clay (beige, white, translucent, cadmium red, yellow, green, purple)
- Liquid polymer clay (Translucent)
- Black pepper or dried tea leaves (finely ground)
- Small round cutter or bottle cap
- Ball tool
- Razor blade or craft knife
- Needle tool
- Chalk pastels (dark green, brown)
- Gloss varnish
Step 1: Crafting the Rustic Bowl
-
Mix the clay:
Start by mixing a beige or ecru polymer clay with a very small amount of finely ground black pepper or dried tea leaves. This creates the realistic ‘speckled ceramic’ effect seen in the reference photo. -
Form the base:
Roll the speckled clay into a smooth ball, approximately 1 inch in diameter, or sized according to your desired scale. -
Shape the bowl:
Press a large ball tool or your thumb into the center of the clay sphere to create the hollow. Gently pinch the walls upwards, keeping them somewhat thick and uneven to mimic hand-thrown pottery. -
Refine the shape:
Flatten the bottom slightly so it stands stability. Use your finger to smooth the rim, ensuring it isn’t too sharp. -
Pre-bake:
Bake the empty bowl according to your clay manufacturer’s instructions (usually 275°F/130°C for 15-20 minutes). Let it cool completely before filling.
Scaling Issues
If your veggie slices look chunky, try cooling your canes in the fridge for 10 minutes before slicing. Cold clay yields much thinner, cleaner cuts without squishing.
Step 2: Creating the Greens & Corn
-
Mix leaf color:
Blend green clay with a touch of translucent to create a leafy spinach shade. Roll it out very thinly. -
Texture the leaves:
Tear small, irregular pieces of the green sheet. Use a needle tool to press gentle vein lines into them and crimp the edges slightly for a wilted, natural look. -
Fill the bowl:
Place these leafy pieces into the bottom of the cooled bowl, creating a bed of greens. I like to secure them with a drop of liquid clay. -
Make corn kernels:
Mix yellow clay with a tiny bit of white. Roll a very thin snake and cut tiny, rice-sized pellets. Round the edges with your finger. -
Place the corn:
Cluster the corn kernels together on one side of the salad bed.
Juicy Realism
Mix a tiny drop of yellow glass paint or alcohol ink into your liquid clay for the tomato centers. It adds a realistic acidic tint that plain clear liquid clay lacks.
Step 3: Slicing the Onions & Cucumbers
-
Onion cane structure:
Create a ‘bullseye’ cane for the red onion. Wrap a thick log of purple clay with a thin sheet of white clay, then wrap that with a thin sheet of purple. Repeat if you want more rings. -
Slice onions:
Reduce the onion cane to the correct scale and slice very thin cross-sections. Cut these circles in half or separate the rings to create curved onion slivers. -
Cucumber cane center:
For cucumbers, roll a log of translucent clay mixed with a tiny bit of very pale green. Wrap this log in a thin sheet of darker green clay for the skin. -
Add cucumber seeds:
Slice the cucumber cane. Before placing, use a needle tool to indent the center slightly and add tiny scratches to mimic the seed pattern. -
Arrange layers:
Tuck the onion slices and cucumber rounds amongst the leaves in the bowl, overlapping them naturally.
Step 4: Adding the Tomatoes
-
Form tomato halves:
Roll small balls of bright red clay. Cut them perfectly in half using a sharp blade. -
Create the interior:
Using a small ball tool, make indents in the flat (cut) side of the tomato. Fill these indents with liquid translucent clay. -
The seeds:
Take tiny scrapings of yellow or ecru clay and drop them into the liquid clay pools to represent tomato seeds. -
Final placement:
Place the two tomato halves prominently on top of the salad as the focal point. -
Final bake:
Bake the entire piece again for the full recommended duration to set the vegetables. -
Glazing:
Once cool, apply gloss varnish only to the cut surfaces of the tomatoes and cucumbers to make them look juicy and wet.
Display your miniature salad on a tiny wooden board for the ultimate lunchtime scene
Tiny Soda-Style Cup With Citrus Slice
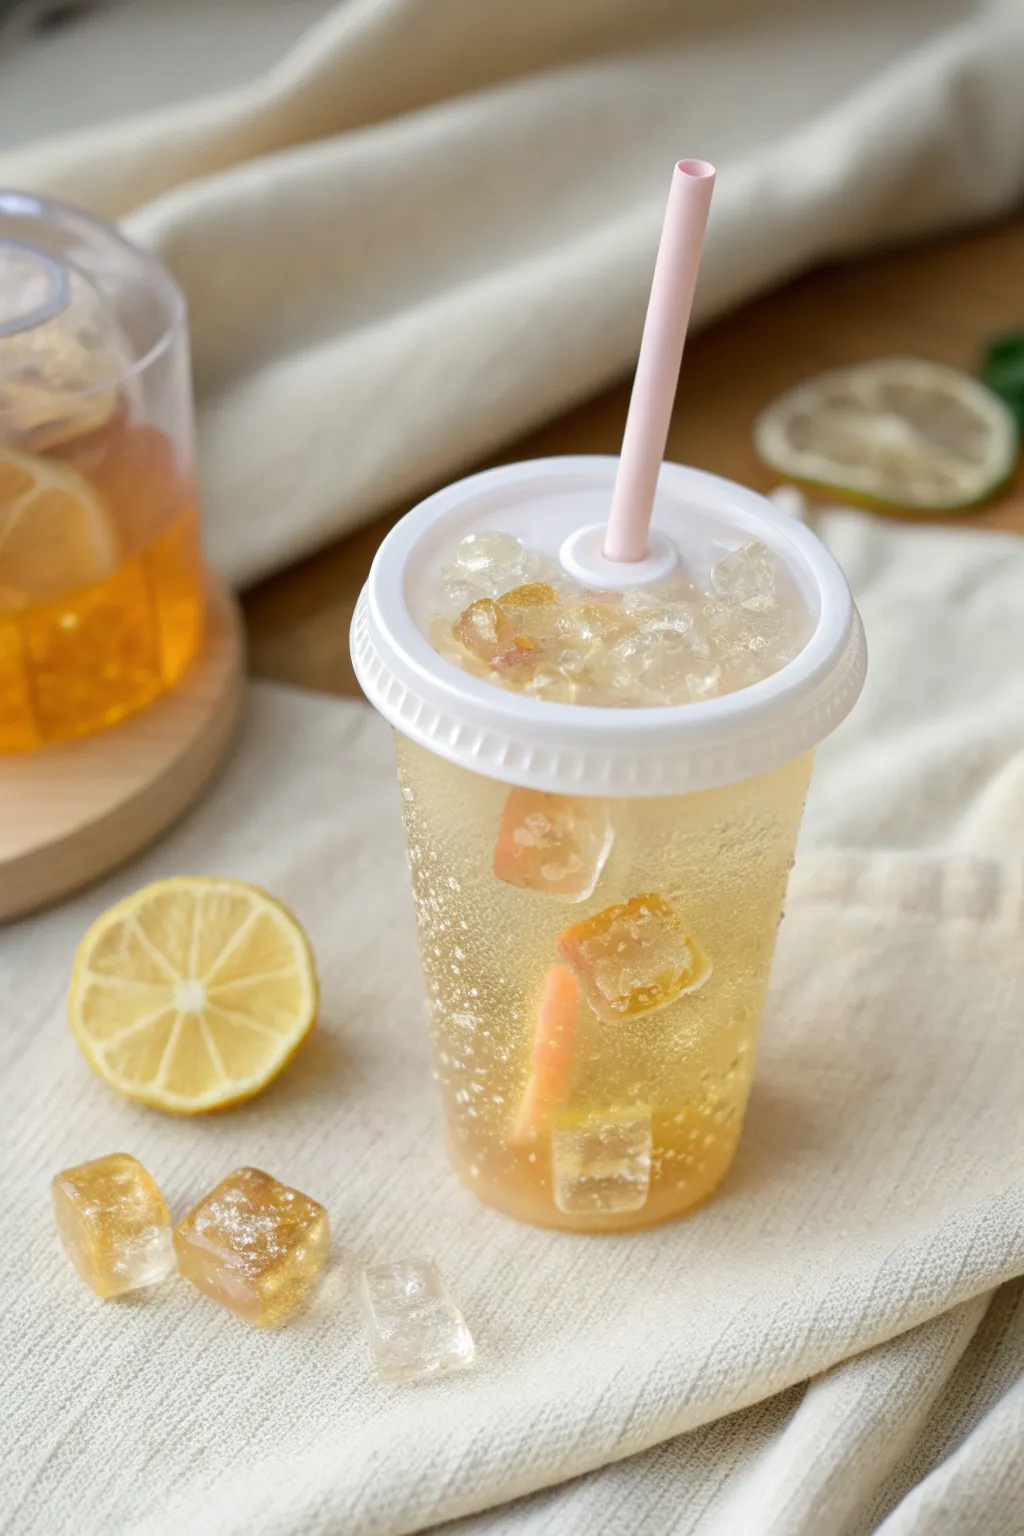
Capture the refreshing fizz of summer in miniature form with this bubbly citrus soda cup. Using a combination of UV resin and polymer clay, you’ll create floating ice cubes and translucent lemon slices suspended in a realistic, fizzy beverage.
Detailed Instructions
Materials
- Translucent and yellow polymer clay
- Clear UV resin
- UV lamp
- Yellow alcohol ink or resin dye
- Empty miniature plastic cup (or mold)
- Miniature plastic lid (fitting the cup)
- Hollow plastic tube (for the straw)
- Liquid polymer clay (optional)
- Sharp craft knife
- Fine-grit sandpaper
- Toothpick
- Heat gun or lighter (for bubbles)
Step 1: Creating the Citrus Inclusions
-
Form the segments:
Mix a tiny amount of yellow clay with a larger portion of translucent clay to create a pale lemon pulp color. Roll this into a small log. -
Wrap the segments:
Roll out a very thin sheet of white or pale yellow clay. Wrap the translucent log in this sheet completely, then roll it gently to smooth the seam. -
Shape the cane:
Compress the log into a teardrop shape to mimic a citrus segment. Repeat this process to make 6-8 identical segments. -
Assemble the fruit slice:
Arrange the teardrop segments in a circle, points facing inward. Wrap the entire bundle in a thin sheet of yellow clay (the rind) and compress gently to reduce the cane size. -
Bake and slice:
Bake the cane according to your clay manufacturer’s instructions. Once cooled, use a very sharp blade to slice thin, translucent citrus wheels. Cut a few into quarters for the chunks inside the drink.
Step 2: Preparing the Ice
-
Craft the ice cubes:
Chop a block of baked translucent clay or cured clear resin into rough, small cubes. Irregular edges look more realistic than perfect squares. -
Frost the ice:
Briefly sand the edges of your resin chunks with fine sandpaper to give them a frosty, chilled appearance.
Cloudy Resin?
If your resin looks milky instead of fizzy, you may be stirring too aggressively or introducing moisture. Stir slowly to fold in air, or use a specific mold release that doesn’t react with UV resin.
Step 3: Assembling the Drink
-
Tint the resin:
Pour clear UV resin into a small mixing cup. Add a tiny drop of yellow alcohol ink—you want a pale, tea-like color, not a neon yellow. -
First pour:
Pour a small layer of tinted resin into your miniature cup. Cure under the UV lamp for 60 seconds. -
Add floating elements:
Pour a second layer of resin. Using tweezers, place a few ‘ice’ chunks and a lemon quarter into the liquid. Don’t push them all to the bottom; let them float in the middle. -
Create the fizz:
I like to use a toothpick to vigorously stir the uncured resin layer. This introduces tiny air bubbles that mimic carbonation. Cure immediately to trap the bubbles. -
Fill the cup:
Continue layering resin, ice chunks, and lemon pieces until you reach just below the rim. Cure between layers to keep the heavy pieces suspended.
Add Condensation
Mix clear gloss varnish with tiny glass microbeads. Brush this mixture onto the outside of the plastic cup to simulate realistic water droplets and condensation on a cold drink.
Step 4: The Lid and Straw
-
Top it off:
For the slushy top texture shown in the image, mix crushed bits of cured clear resin with a little uncured gel. Pile this slightly above the rim. -
Seal the lid:
Place your miniature plastic lid onto the cup. If needed, secure it with a tiny dot of UV resin around the rim and cure. -
Insert the straw:
Cut a small length of pink plastic tubing or a stripped wire casing. Insert it through the hole in the lid, angling it slightly for a casual look. -
Final cure:
Do one final cure under the lamp from all angles to ensure the resin inside is fully hardened.
Place this refreshing little cup in a dollhouse kitchen or turn it into a summery charm

TRACK YOUR CERAMIC JOURNEY
Capture glaze tests, firing details, and creative progress—all in one simple printable. Make your projects easier to repeat and improve.
Miniature Avocado Half With Cute Face
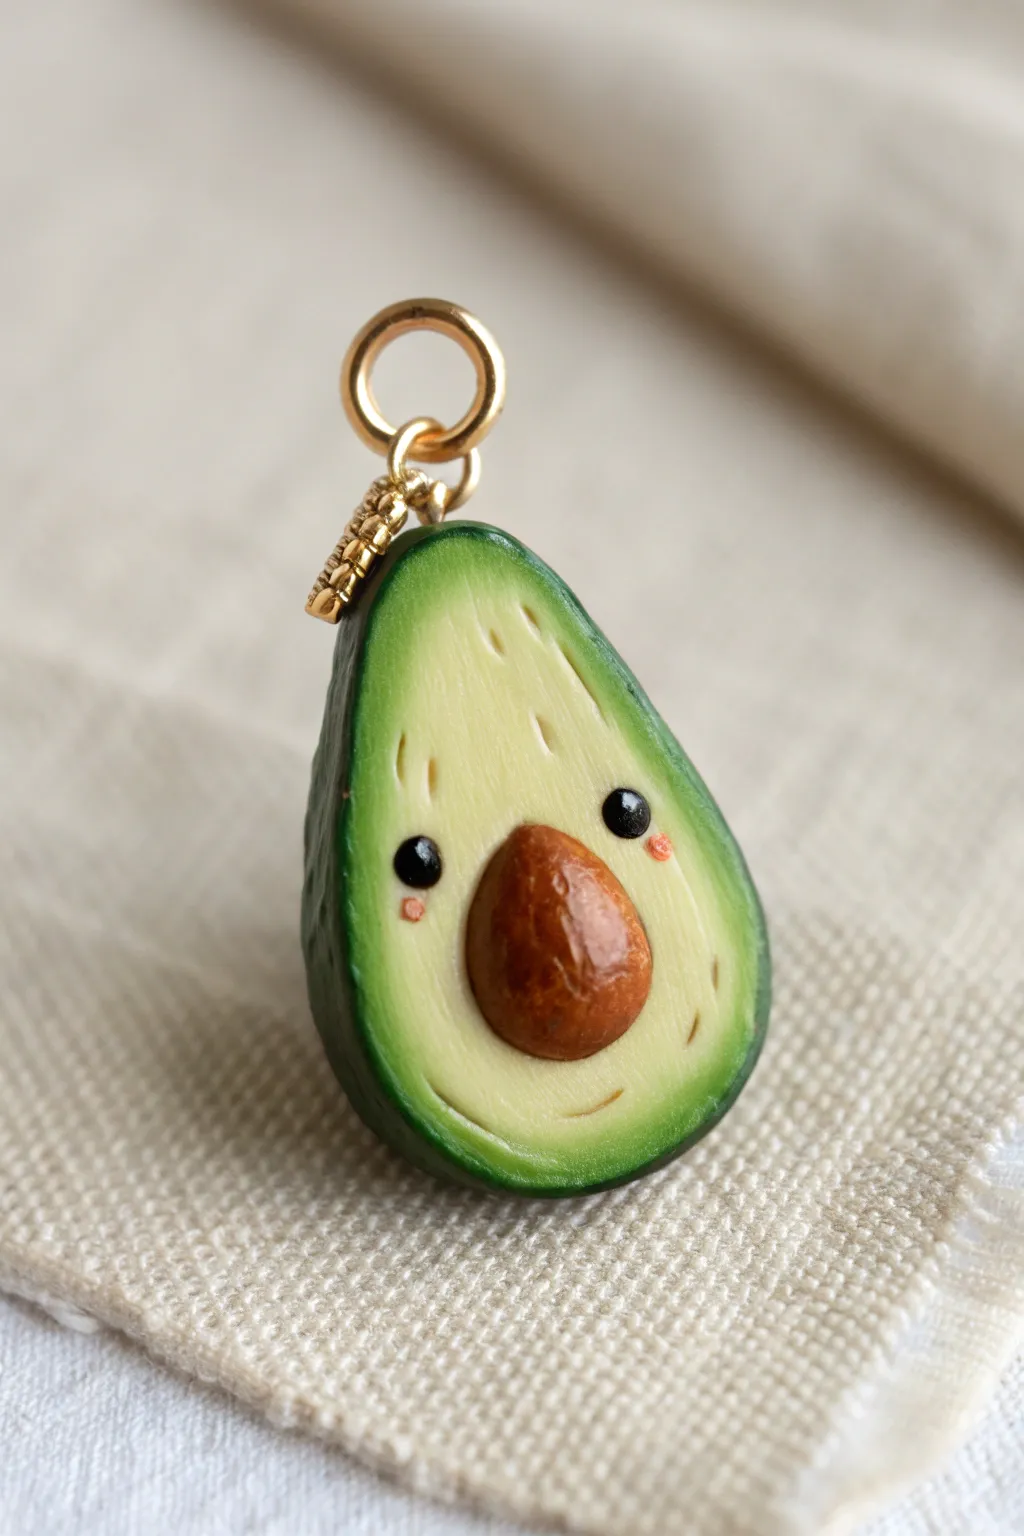
This adorable polymer clay avocado charm brings a smile to anyone’s face with its tiny, happy expression. Perfect for necklaces or stitch markers, this project combines simple sculpting with careful texturing to create a realistic yet whimsical miniature.
Step-by-Step
Materials
- Polymer clay (Dark green, Light yellowish-green, Brown, Black, Pink)
- Liquid polymer clay or Bake & Bond
- Headpin or screw eye pin
- Needle tool or toothpick
- Soft pastel chalks (dark green, optional)
- Gloss varnish or UV resin
- Ball stylus tool
- Craft blade
- Sandpaper (fine grit)
- Gold jump ring
Step 1: Shaping the Base
-
Mix the perfect green:
Start by conditioning your light yellowish-green clay. If straight from the package feels too artificial, mix in a tiny pinhead of brown or a touch of white to get that creamy avocado flesh tone seen in the reference. -
Form the teardrop:
Roll the light green clay into a smooth ball about the size of a marble. Use your fingers to gently pinch and roll one end, elongating it into a classic teardrop or pear shape. -
Flatten the face:
Place the teardrop on your work surface and gently press down to flatten the back slightly, but focus on pressing the front face flat. You want a distinct cut-avocado look, not a rounded whole fruit. -
Create the skin layer:
Roll out a sheet of dark green clay very thinly, about 1mm thick. This will be the skin. Wrap this dark sheet around the curved back and sides of your light green teardrop. -
Trim the excess:
Use your craft blade to carefully trim the dark green clay flush with the flat face of the avocado. The transition between the light flesh and dark skin should be clean and sharp. -
Texture the skin:
Take a stiff toothbrush or a crumpled ball of aluminum foil and tap it all over the dark green skin. This creates that bumpy, realistic hass avocado texture.
Step 2: Adding Details & Expression
-
Make the seed indent:
Using a large ball tool or just your thumb, press a shallow, round indentation into the lower center of the avocado face where the pit will sit. -
Form the pit:
Roll a small ball of brown clay. Shape it slightly into a teardrop but keep it mostly round. Test the fit in your indentation; it should protrude significantly, like a real avocado pit. -
Texture the pit:
Before attaching, lightly scratch the surface of the brown pit with your needle tool or sandpaper to give it a woody, organic texture rather than smooth plastic. -
Attach the pit:
Add a tiny drop of liquid clay or Bake & Bond to the indentation and press the brown pit firmly into place. I like to position it just slightly lower than center to leave room for the face. -
Add surface details:
Use a needle tool to gently scratch short, faint lines radiating from the top of the avocado down towards the pit. These mimic the fibers often seen in the fruit. -
Create the eyes:
Roll two minuscule balls of black clay. Use a needle tool to pick them up and place them on either side of the top of the pit. Press them gently so they adhere but stay slightly raised. -
Add rosy cheeks:
Roll two even tinier bits of pink clay. Place these directly under the eyes, slightly to the outer edge, and flatten them completely flush with the surface. -
Add the smile:
Use your needle tool or a very small curved blade to impress a simple curved line underneath the pit, connecting the space visually between the cheeks for a sweet smile.
Realistic Skin Hack
Mix just a tiny bit of translucent clay into your dark green skin layer. It adds depth and prevents the skin from looking like opaque plastic.
Step 3: Finishing Touches
-
Insert the hardware:
Trim a headpin or screw eye pin to the right length. Dip the end in liquid clay and insert it vertically into the top center of the avocado. -
Bake the piece:
Bake firmly according to your clay manufacturer’s instructions (usually 275°F/130°C for 15-30 minutes). Let it cool completely. -
Glazing:
Once cool, apply a coat of gloss varnish or UV resin specifically to the brown pit to make it look wet and realistic. Leave the green flesh matte or satin for contrast. -
Assembly:
Open your gold jump ring using two pairs of pliers and loop it through the eye pin to finish your charm.
Smudged Clay?
If dark green skin smears onto the light flesh while trimming, use a Q-tip dipped in a tiny bit of rubbing alcohol or baby oil to gently wipe the light clay clean.
Now you have a charming little avocado friend ready to hang on your favorite bag or necklace.
Kawaii Breakfast Toast Characters
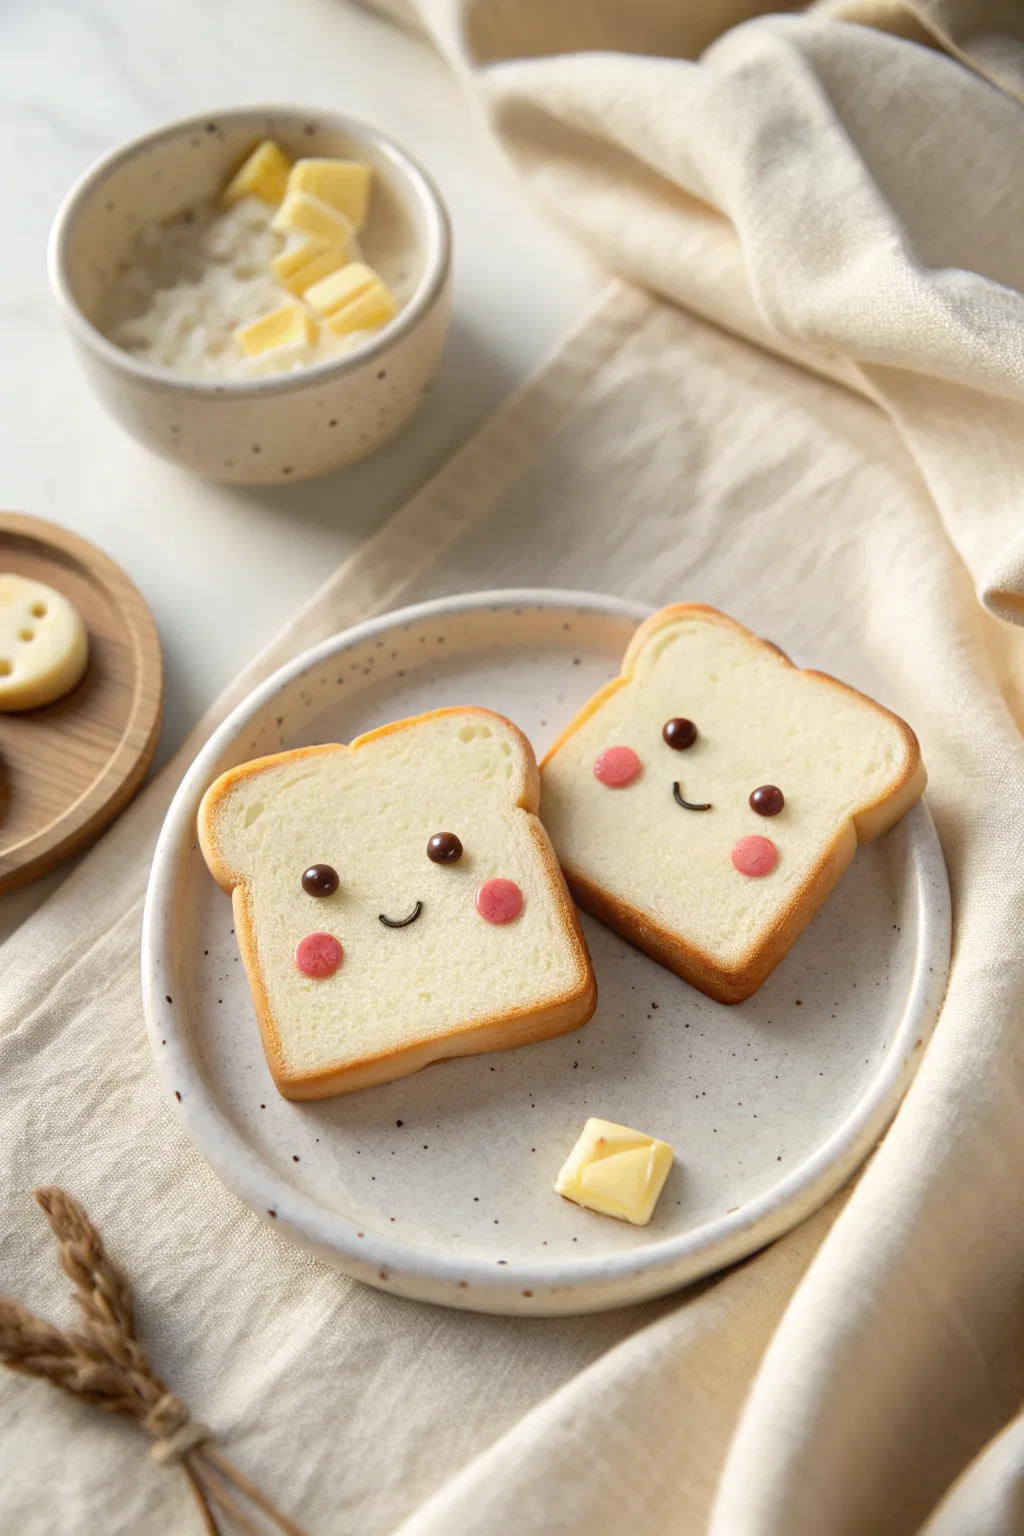
These adorable white bread slices look fresh from the toaster with their golden crusts and sweet, cheerful expressions. Perfect for miniature food enthusiasts, this project captures the soft, fluffy texture of bread using simple texturing techniques and a touch of pastel shading.
Detailed Instructions
Materials
- White or translucent white polymer clay
- Yellow ochre soft pastel or chalk
- Burnt sienna soft pastel or chalk
- Dark brown polymer clay (for eyes/mouth)
- Pink polymer clay (for cheeks) or pink pastel
- Translucent liquid polymer clay (TLS)
- Needle tool or toothpick
- Clean toothbrush or texture loose
- Soft paintbrush
- Blade or craft knife
- Gloss glaze (optional)
Step 1: Shaping the Loaf
-
Mix the Dough Color:
Start by conditioning your white polymer clay. If you want a more realistic bread look, mix in a tiny pinhead-sized amount of yellow ochre clay or translucent clay to warm up the stark white, but keep it very pale. -
Form the Base Shape:
Roll the clay into a thick sheet, approximately 5mm thick. Use a blade to cut out a square shape, roughly 2cm by 2cm, or use a small square cutter if you have one. -
Create the Indentation:
Gently press the top of the square with your finger to create the characteristic dip of a bread slice, rounding the top two corners slightly to form the ‘ears’ of the toast. -
Round the Bottom:
Soften the bottom corners just a tiny bit so the slice doesn’t look like a harsh geometric square. It should look soft and pillowy.
Step 2: Adding Texture and Crust
-
Texture the Surface:
This is the most crucial step for realism. Take a clean toothbrush or a texture tool and tap it firmly over the entire front and back surface of the clay. Go over it multiple times until all smooth spots are gone. -
Texture the Sides:
Don’t forget the sides! Use a needle tool to drag tiny lines and pick at the clay on the edges to simulate the aerated texture of the crust. -
Prepare the Pastels:
Scrape some yellow ochre and burnt sienna soft pastels into fine powders on a piece of paper. -
Base Crust Layer:
Using a soft paintbrush, gently dust the yellow ochre powder around the very edges of the toast slice. I like to let a little spill onto the front face to show where the crust meets the bread. -
Deepen the Crust:
Now, take the burnt sienna powder and apply it strictly to the outer rim of the slice. Build up the color gradually to look like a perfectly baked golden-brown crust.
Texturing Tip
For ultra-realistic bread texture, let the clay sit for 10 minutes after shaping. Cooler clay holds fine textures from the toothbrush better than warm, soft clay.
Step 3: Bringing it to Life
-
Make the Eyes:
Roll tiny spheres of dark brown clay for the eyes. They should be very small to maintain the kawaii scale. Place them wide apart on the bread face. -
Create the Rosy Cheeks:
Roll two small balls of pink clay, slightly flat, and press them onto the face below and slightly outside the eyes. Alternatively, you can brush on a small circle of pink pastel powder. -
Form the Smile:
Roll an incredibly thin snake of dark brown clay. Cut a tiny u-shape segment and carefully place it between the eyes using your needle tool. -
Secure the Features:
Once you are happy with the expression, gently press the facial features flat so they adhere well to the textured surface. A tiny dab of liquid clay can help them stick if they are stubborn. -
The Butter Pat (Optional):
If you want the extra detail seen in the scene, cut a tiny square of pale yellow clay to create a butter pat accessory. -
Baking:
Bake the pieces according to your brand of polymer clay instructions—usually at 275°F (130°C) for 15-30 minutes. -
Finishing Touches:
Once cool, you can leave the bread matte for a natural look, but add a tiny dot of gloss glaze to the eyes to make them sparkle.
Make it a Charm
Insert a jewelry eye pin into the top ‘crust’ before baking. Once baked, these make adorable matching earrings, phone charms, or zipper pulls for a backpack.
Now you have a pair of sweet, toasty friends ready to brighten your day
Tiny Potted Succulents for Dollhouse Shelves
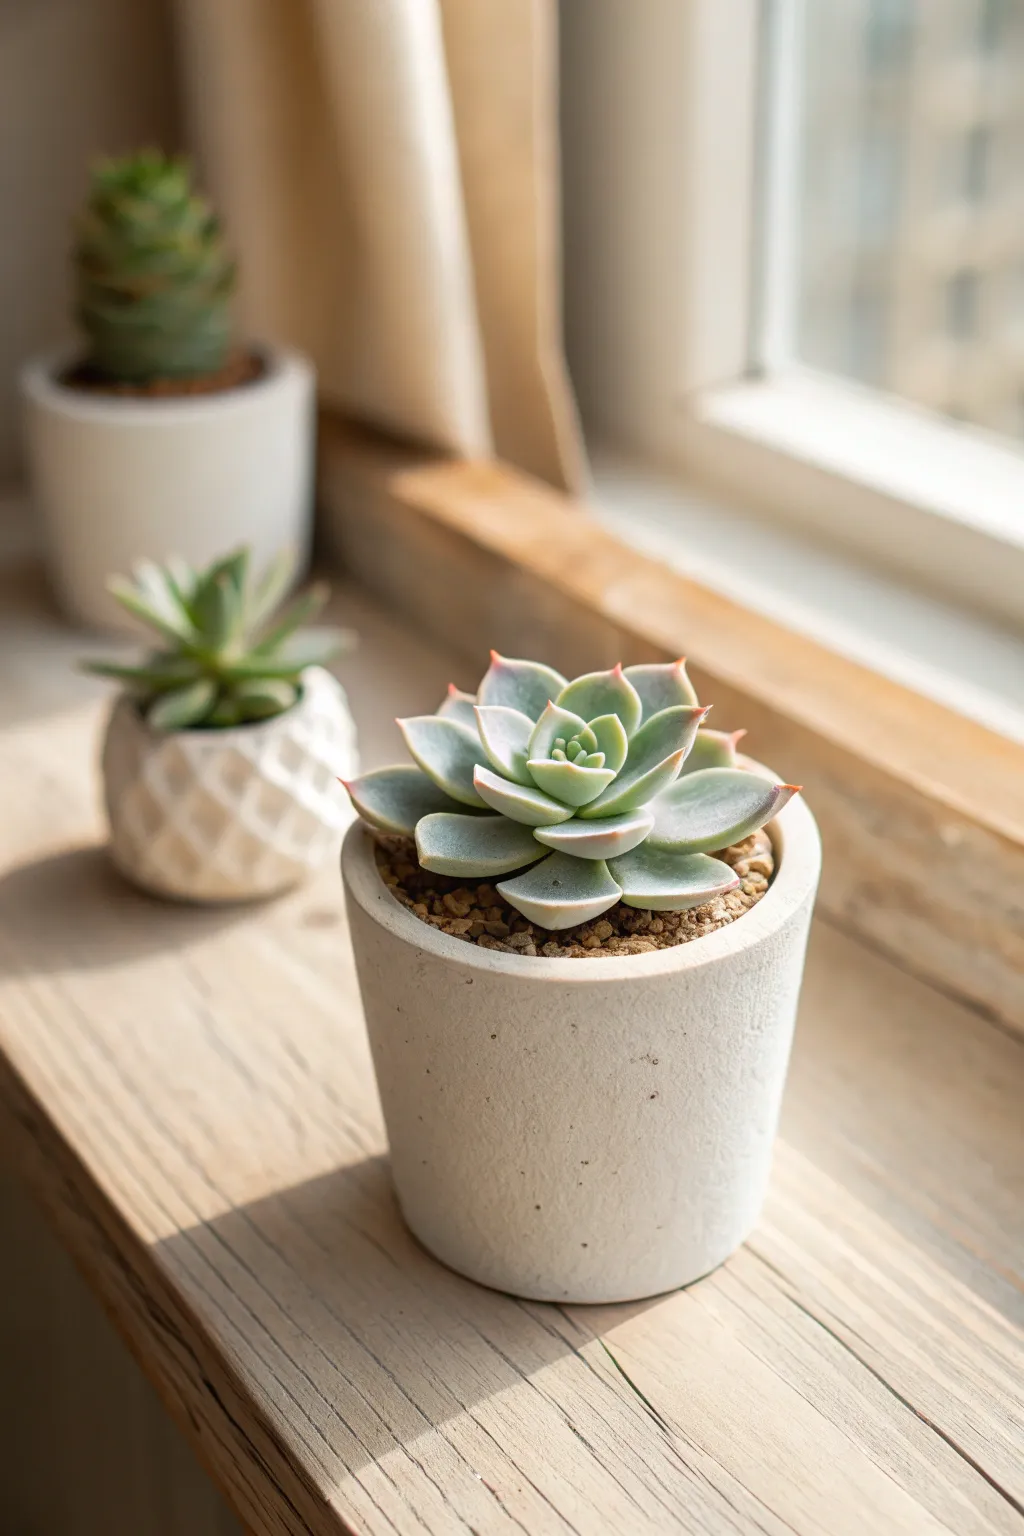
Capture the serenity of a sunlit windowsill with this delicate polymer clay succulent, featuring realistic powdery leaves and a sturdy planter. The subtle blue-green hues and soft pink tips make this Echeveria rosette a perfect, low-maintenance addition to any miniature shelf.
How-To Guide
Materials
- Polymer clay (pale sage green, translucent, white, and terracotta/brown)
- Chalk pastels (soft pink, deeper green, and grey)
- Modeling tools (ball tool, needle tool)
- X-acto knife or clay blade
- Liquid polymer clay or bake and bond
- Fine grit sandpaper
- Small paintbrush
- Clear matte varnish
- Texture tool (toothbrush or stiff bristle brush)
- Faux soil material (dried tea leaves or coffee grounds)
Step 1: Creating the Faux-Concrete Pot
-
Mix the clay:
Begin by conditioning white clay mixed with a very small amount of black or grey to achieve a light, cement-like shade. I also like to mix in a tiny pinch of sand or salt for embedded texture. -
Form the cylinder:
Roll the clay into a thick log, then flatten the bottom against your work surface to create a stable base. The pot should be a simple, straight-sided cylinder. -
Hollow it out:
Using a large ball tool or the handle of a paintbrush, gently press into the center of the cylinder to create the cavity for the plant. Don’t go too deep; you only need enough space for the ‘soil’ layer. -
Texturize the surface:
Tap a stiff toothbrush or a crumpled ball of aluminum foil all over the exterior of the pot. Concrete isn’t perfectly smooth, so this pitting adds necessary realism. -
First bake:
Pre-bake the pot alone according to your clay package instructions (usually 15 minutes is sufficient for this thickness) to make it firm enough to hold the delicate leaves later.
Sticky Situation?
If leaves stick to your fingers, lightly dust your fingertips withcornstarch. This prevents fingerprints and helps keep the delicate leaf shapes intact without distortion.
Step 2: Mixing & Shaping Leaves
-
Create the leaf color:
Mix sage green clay with a significant amount of translucent clay and white. The goal is a milky, pale jade color that allows light to pass through slightly. -
Prepare leaf portions:
Roll a thin snake of clay and cut it into about 20-25 tiny segments, graduating them in size from very small (center) to medium (middle layers) to slightly larger (outer ring). -
Form the teardrops:
Roll each segment into a ball, then pinch one end to form a teardrop shape. Flatten the wider end gently with your finger to create the spoon-like leaf shape typical of Echeverias. -
Adding the ‘farina’:
Succulents have a powdery coating called farina. Use a soft brush to dust the unbaked leaves lightly with a mix of white and pale green chalk pastel. -
Detailing the tips:
Using a very fine brush or cotton swab, dab the very tip of each leaf (the pointed end) with soft pink chalk pastel. This mimics the sun-stress coloration often seen on window plants.
Pro Tip: Translucency
Don’t skip the translucent clay in your leaf mix! It creates that crucial depth where the edges of the leaves seem to glow, just like a real fleshy succulent in the sun.
Step 3: Assembly & Finishing
-
Prepare the soil base:
Take your terracotta/brown clay and fill the cavity of your pre-baked pot. Texture the top surface roughly with a needle tool to look like dirt. -
Build the outer ring:
Start pressing the largest leaves into the brown clay around the very edge of the pot. Angle them slightly upward, ensuring the pink tips point out. -
Layer the middle:
Place the medium-sized leaves in a second ring inside the first, offsetting them so they sit in the gaps between the outer leaves. -
Create the center rosette:
Use your smallest leaves for the center. Stand these up more vertically, clustering them tightly together to look like new growth unfolding. -
Final texture check:
Before the final bake, if you smudged any of the pastel ‘dust’ while handling, gently re-apply it now. -
Final bake:
Bake the entire piece again for the full recommended duration. Watch the temperature carefully so the white pot doesn’t scorch. -
Adding miniature soil:
Once cool, brush a little liquid glue or varnish over the visible brown clay between the leaves. Sprinkle carefully with dried tea leaves or coffee grounds for ultra-realistic soil texture. -
Sealing the pot:
Apply a coat of matte varnish to the concrete pot only—leave the succulent leaves unvarnished to maintain their natural, matte, waxy appearance.
Place your finished miniature on a sunny shelf and enjoy the everlasting greenery.
Mini Tea Set With Matching Pastries
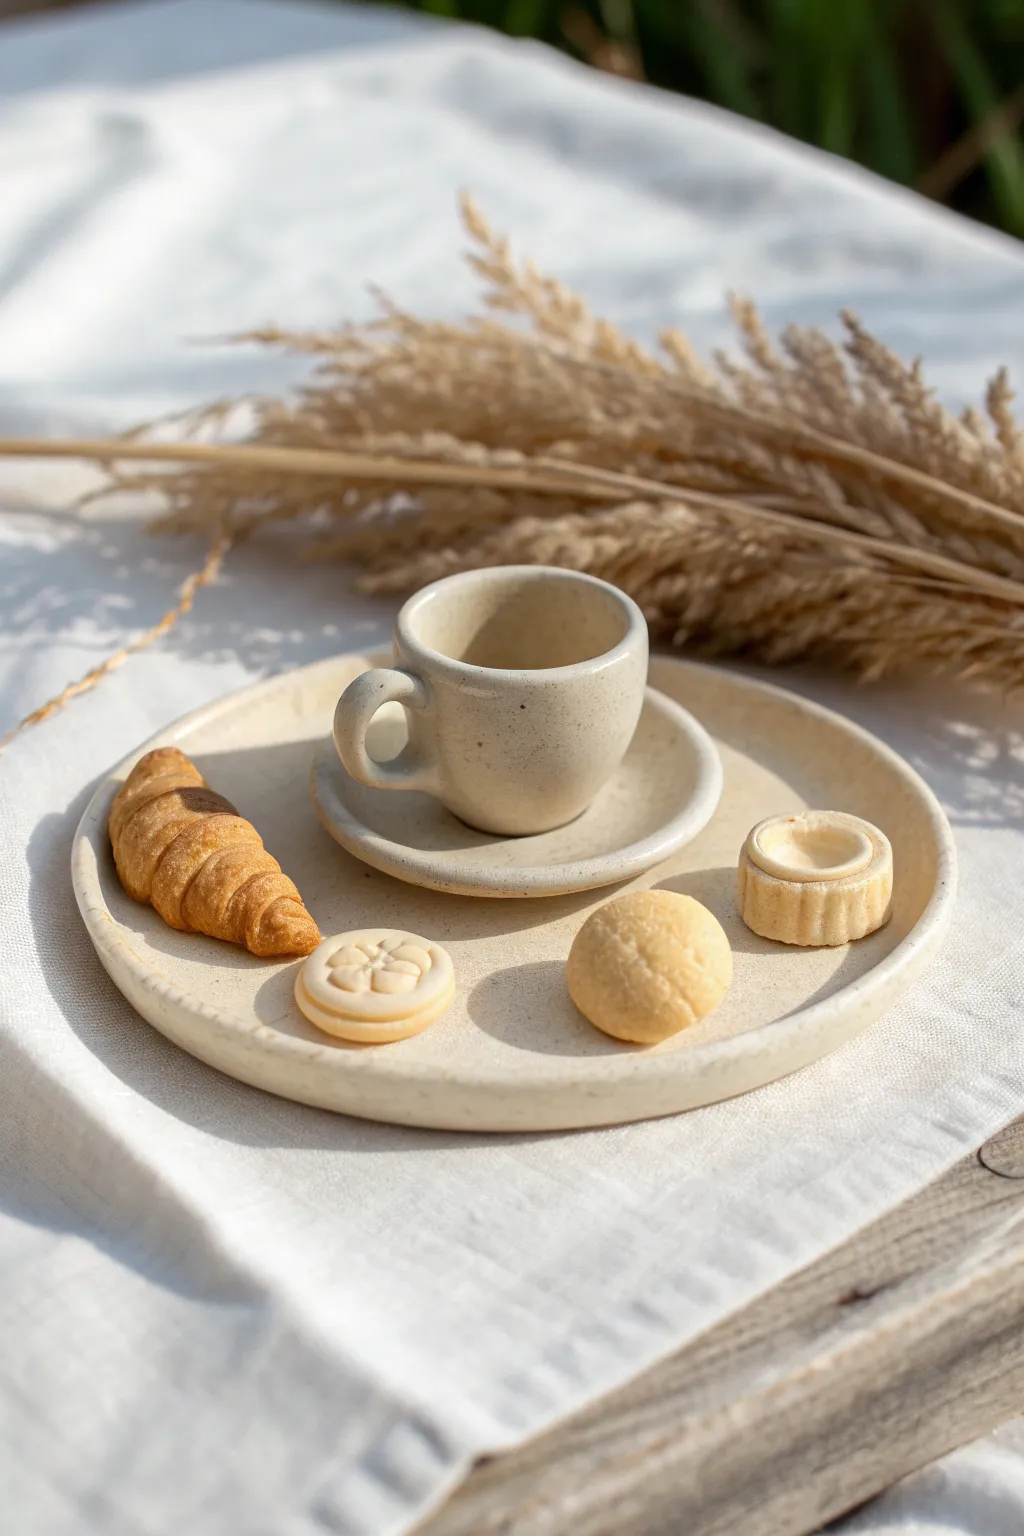
Embrace the beauty of minimalism with this faux-ceramic tea set and matching pastry collection. By mixing simple clay techniques with clever texturing, you can create a sophisticated artisanal look that mimics real stoneware on a tiny scale.
Step-by-Step Tutorial
Materials
- Polymer clay (translucent, white, beige, ochre)
- Ground black pepper or fine dried herbs (for speckling)
- Pastel chalks (burnt sienna, orange, yellow ochre)
- Small paintbrush
- Circle cutters (various micro sizes)
- Needle tool or toothpick
- Ball tool
- Liquid polymer clay (Fimo liquid or similar)
- Gloss varnish (optional)
Step 1: Crafting the Stoneware Set
-
Mix the faux-ceramic clay:
Start by mixing a large portion of white clay with a small amount of beige and translucent clay to get a smooth, creamy base color. To create the realistic stoneware effect shown in the image, knead in a tiny pinch of ground black pepper or very finely crushed dried herbs until the specks are evenly distributed. -
Form the main plate:
Roll out a portion of your speckled clay to about 2mm thickness. Use a medium-sized circle cutter to punch out the main serving plate. Gently press the edges upward with your finger to create a slight lip. -
Create the saucer:
For the saucer, roll the clay slightly thinner than the plate and cut a smaller circle. Use your ball tool to gently indent the center where the cup will sit, and lift the rim just like the dinner plate. -
Shape the tea cup:
Roll a small ball of the speckled clay and press your ball tool into the center to hollow it out, shaping the walls evenly. Flatten the bottom slightly so it sits stable. -
Attach the handle:
Roll a tiny snake of clay, flatten it slightly, and cut a small C-shape. Carefully attach this to the side of the cup, blending the seams with a rubber shapers or your needle tool for a smooth, joined look.
Step 2: Baking the Basics
-
First bake:
Bake the plate, saucer, and cup according to your clay manufacturer’s instructions. Baking these now ensures they hold their shape while you work on the delicate pastries.
Pepper Perfection
Don’t over-knead the pepper into the clay or it might bleed and turn the clay grey. You want distinct specks, so fold it in just until distributed.
Step 3: Creating the Pastries
-
Mix pastry dough colors:
Combine white, translucent, and a touch of yellow ochre clay to create a realistic raw dough color. Divide this into four small portions. -
Sculpt the croissant:
Take one portion and shape it into a teardrop. Flatten it slightly and roll it up starting from the wide end towards the point. Curve the ends inward to form a crescent shape. -
Texture the croissant:
Use a needle tool or blade to lightly score lines across the rolled layers of the croissant to emphasize the flaky pastry texture. -
Form the sandwich cookie:
Roll out a thin sheet of the dough color and cut two tiny identical circles. Roll a smaller ball of white clay for the filling, flatten it, and sandwich it between the two dough circles. -
Add cookie details:
Use a needle tool to impress a simple floral or geometric pattern onto the top cookie face, mimicking a classic custard cream design. -
Make the fluted tartlet:
Shape a small cylinder of clay. Use the side of a needle tool to press vertical grooves all around the outside edge. Press the center down to create a well. -
Fill the tart:
Fill the center well with a drop of white liquid clay or a tiny disk of white clay to resemble a cream filling. -
Shape the round bun:
Roll a simple sphere from the dough mixture. Texture the surface lightly with a toothbrush or sandpaper to give it a baked goods texture rather than smooth plastic.
Sticky Situation?
If your tiny pastries stick to your fingers while shading with chalk, stick them to a piece of masking tape or hold them lightly with tweezers to keep your fingerprints off.
Step 4: Detailed Shading
-
Prepare the pastels:
Scrape your burnt sienna and orange pastel chalks into a fine powder. This is crucial for the realistic ‘baked’ look. -
Shade the croissant:
With a dry brush, apply the orange powder generously over the croissant, focusing the darker burnt sienna on the ridges and tips where a real pastry would brown most. -
Shade the other pastries:
Lightly dust the edges of the sandwich cookie and the top of the round bun. For the tartlet, shade the fluted ridges to make the texture pop.
Step 5: Final Assembly
-
Arrangement:
Arrange the raw pastries onto the pre-baked ceramic plate. I find securing them with a tiny dab of liquid clay helps them stay in place permanently after the final bake. -
Final Bake:
Bake the entire set again for the full duration recommended for your clay brand. -
Varnish (Optional):
If you want a glazed ceramic look, paint a thin layer of gloss varnish only on the tea set, leaving the pastries matte for contrast.
Now you have a charming, rustic tea set ready for a dollhouse afternoon tea
Upcycled Bottle-Cap Pie Tins
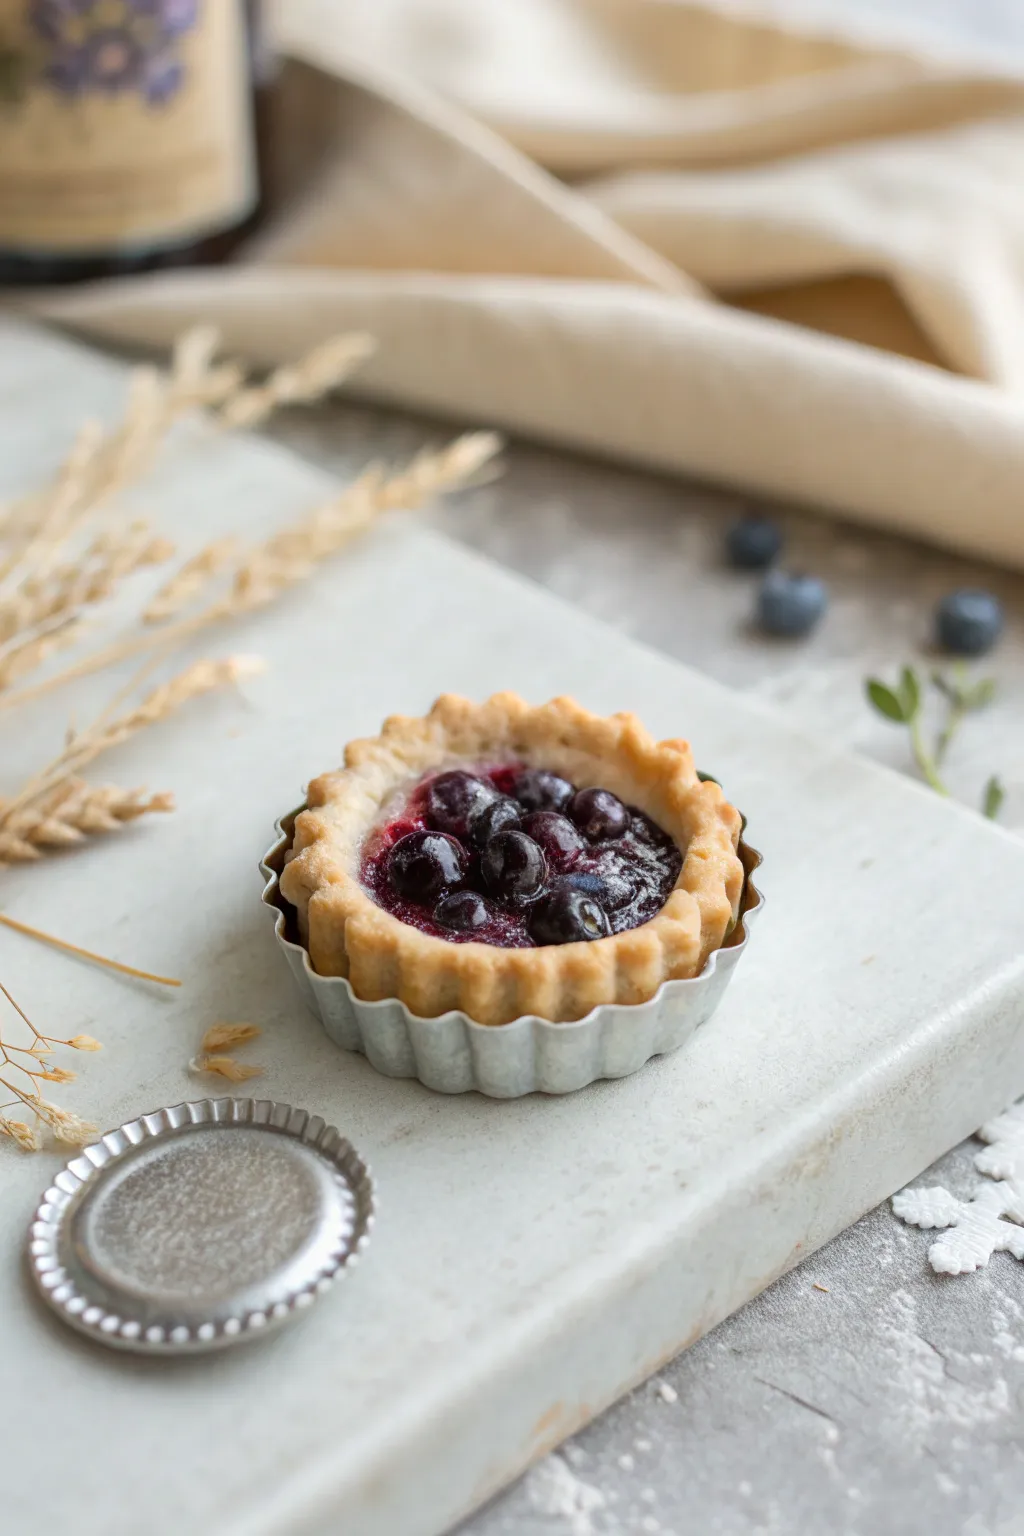
Turn standard crimped bottle caps into adorable rustic pie tins for this realistic polymer clay miniature. With bubbly translucent filling and plump berries, this tiny tart looks fresh from the oven and ready to serve.
How-To Guide
Materials
- Metal bottle caps (crimped edges)
- Polymer clay: Beige/Tan (crust)
- Polymer clay: Dark Blue, Purple, Translucent (filling)
- Liquid polymer clay (Fimo Liquid or TLS)
- Chalk pastels: Ochre, Burnt Sienna
- High-gloss varnish
- Needle tool or toothpick
- Small ball tool
- Soft paintbrush
- Rolling pin
- Baby oil (optional)
Step 1: Preparing the Tin & Crust
-
Clean the caps:
Remove any plastic liners from inside your metal bottle caps. Soak them in warm soapy water if necessary to scrub away any residue, then dry completely. -
Mix the crust color:
Blend beige polymer clay with a tiny speck of white and translucent clay. This creates a more realistic, slightly flaky pastry dough look rather than a flat plastic color. -
Roll the dough:
Roll your pastry clay into a thin sheet, approximately 2mm thick. Use a round cutter slightly larger than the bottle cap to cut out a circle. -
Line the tin:
Gently press the clay circle into the bottle cap. Instead of smoothing it flat against the sides, allow the clay to naturally drape into the crimped grooves of the metal cap. -
Texture the edge:
Using a needle tool or toothpick, gently tease the clay at the rim to mimic a flaky crust edge. -
Pre-shading the crust:
Scrape some ochre chalk pastel into a fine powder. Use a soft brush to lightly dust the rim of the unbaked crust to give it a ‘golden brown’ head start.
Secret Ingredient
Mix a pinch of real sand or black pepper into your dough clay. It adds texture that mimics whole wheat flour specks flawlessly in macro photos.
Step 2: Creating the Filling
-
Make the berry spheres:
Desperately tiny work ahead: roll many very small spheres using dark blue and purple clay. Vary the sizes slightly for realism, keeping them between 1-3mm. -
Create the blueberry ‘crown’:
On the larger berries, use a needle tool to poke a shallow indentation on top. Use the tip to drag tiny flaps of clay inward, creating the characteristic star-shaped crown of a blueberry. -
Mix the sauce:
On a tile or mixing palette, combine liquid polymer clay with a small scraping of purple and blue chalk pastel. It should be translucent and syrupy, not opaque paint. -
Base layer:
Pour a small amount of your syrupy liquid mixture into the bottom of the unbaked crust to act as a glue for the berries.
Step 3: Assembly & Baking
-
Arrange the fruit:
Place your clay blueberries into the tart shell. I find it easiest to use tweezers here to pile them slightly higher in the center. -
Add the glaze:
Drip more of your colored liquid clay over the berries, ensuring it settles into the crevices like melted fruit compote. -
Dust the fruit:
For a ‘baked’ look, lightly dust the tops of the berries with a tiny bit of white cornstarch or powder before baking to simulate the cloudy bloom on real blueberries. -
Bake carefully:
Bake according to your clay manufacturer’s instructions, usually at 275°F (130°C) for 15-20 minutes. Since the metal cap conducts heat, keep an eye on it to prevent burning. -
Cool down:
Allow the tart to cool completely inside the metal cap. The liquid clay needs this time to clarify and harden fully. -
Final varnish:
Apply a high-gloss varnish only to the berries and the visible sauce. Leave the crust matte for contrast.
Preventing Burning
Metal heats faster than clay. If your crust burns, shield the bottle cap with a small tent of aluminum foil or lower your oven temp by 10 degrees.
Place your warm little tart on a miniature cooling rack and enjoy the perpetual freshness.