When I’m building a bowl with coils, I love how one simple “snake of clay” can turn into a totally different vibe just by changing the pattern, the edge, or the finish. Here are my favorite clay coil bowl ideas—from classic, beginner-friendly looks to the kind of textures that make people pick it up and turn it around.
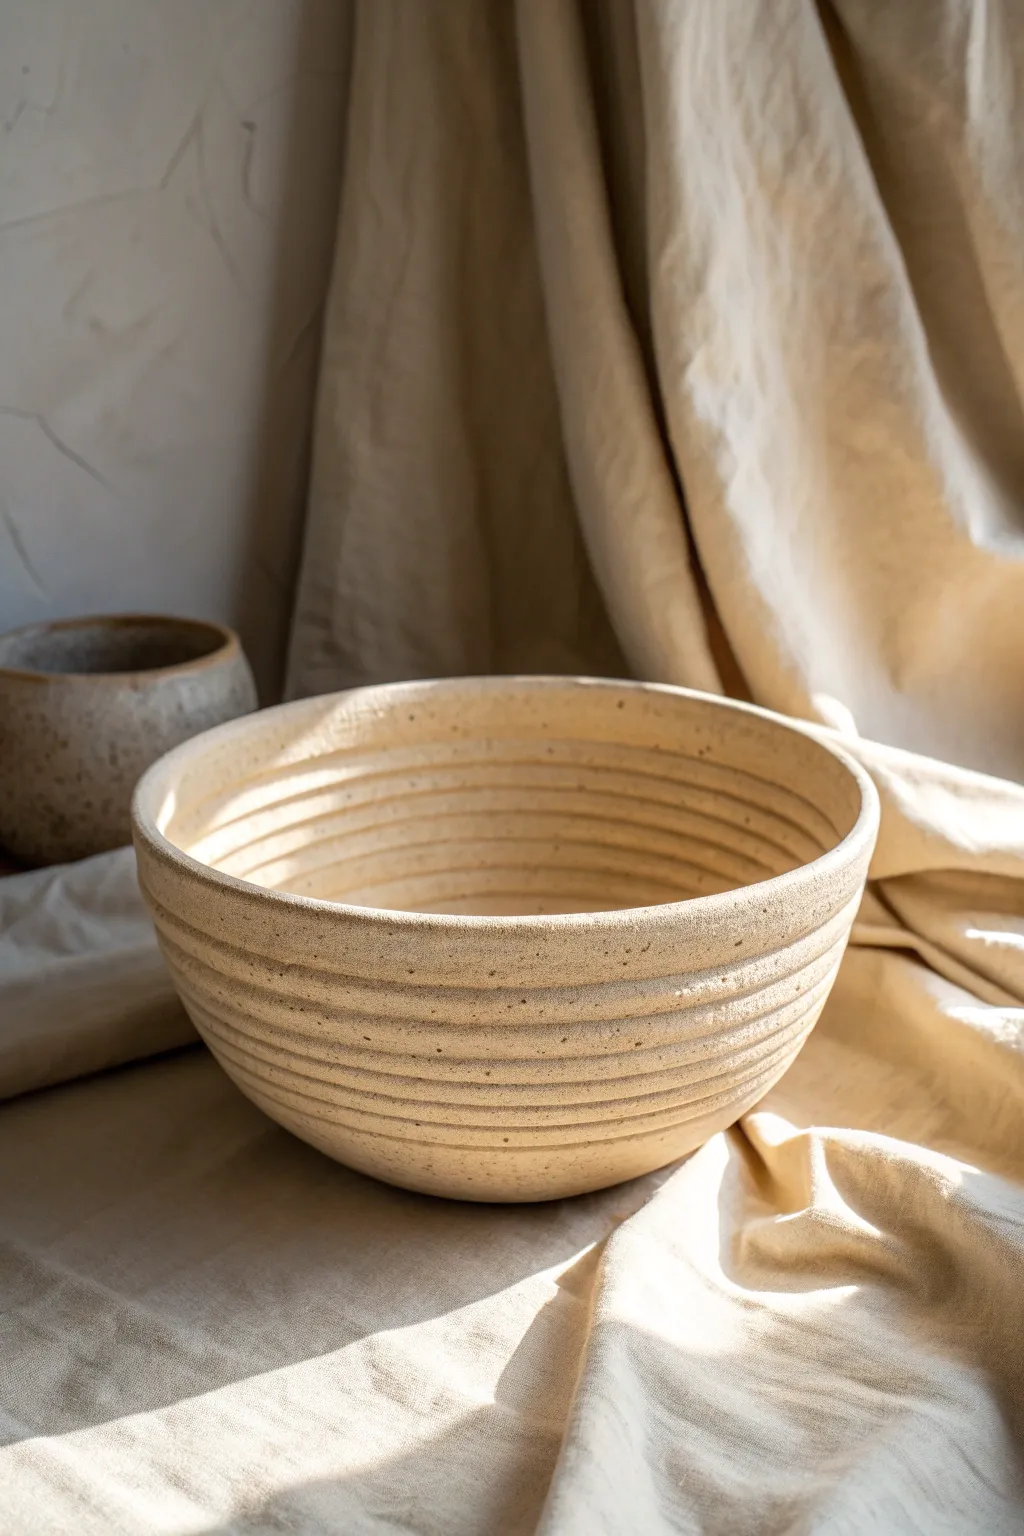
Smooth-Inside, Textured-Outside Coil Bowl
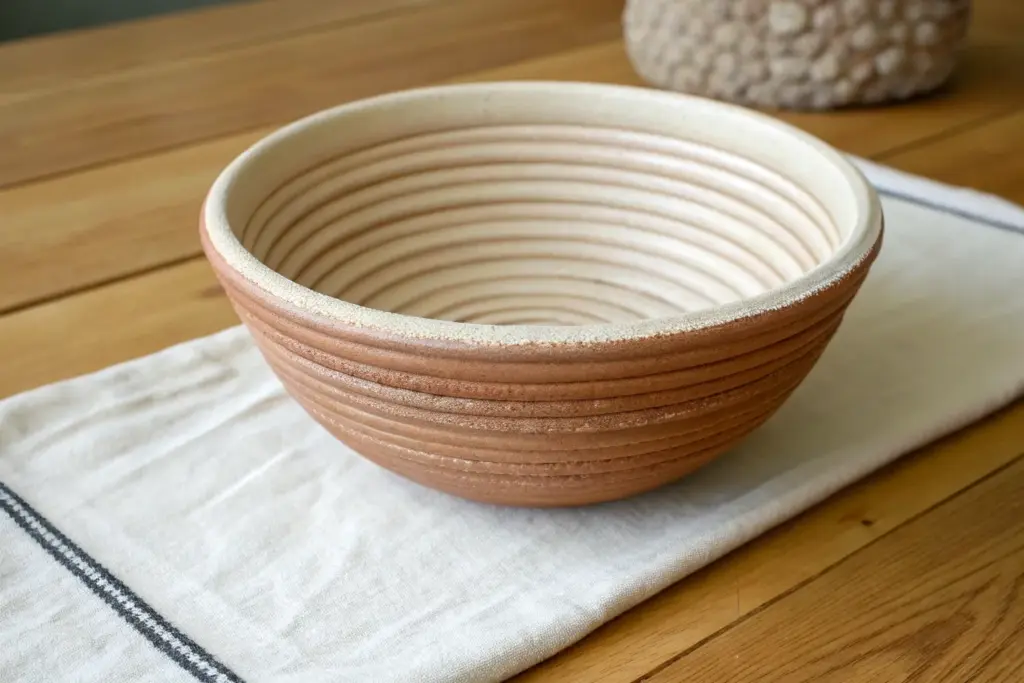
Embrace the natural beauty of clay with this soothing, textured coil bowl, distinct for its rhythmic horizontal ridges that wrap around both the interior and exterior. The finished piece features a creamy, speckled stoneware body that perfectly mimics the look of stacked stone or woven rope.
How-To Guide
Materials
- Speckled buff stoneware clay (or a clay body with grog/manganese speckles)
- Clay extruder (optional, but recommended for speed)
- Rolling pin and guide sticks (if rolling coils by hand)
- Serrated metal rib (kidney tool)
- Soft rubber rib
- Wooden modeling tool or blending tool
- Fettling knife
- Slip and scoring tool
- Round banding wheel
- Porous bat or wooden board
- Sponge
Step 1: Preparing the Base
-
Wedge the clay:
Start with a well-wedged ball of speckled stoneware clay to remove any air bubbles. This clay body is essential for recreating the sandy, spotted look of the final bowl. -
Create the slab floor:
Roll out a slab of clay to approximately 3/8-inch thickness. You can use guide sticks to ensure it is perfectly even. -
Cut the circle:
Place your slab on the banding wheel. Use a needle tool or fettling knife to cut a perfect circle about 5 to 6 inches in diameter. This will serve as the heavy, stable bottom of your bowl. -
Score the perimeter:
Rough up the outer edge of your circular base with a scoring tool and apply a liberal amount of slip. This creates the ‘glue’ for your first coil.
Keep It steady
Use a template cut from stiff cardboard held against the side of the pot as you maintain the outward curve. This ensures your bowl doesn’t get lopsided as you build.
Step 2: Building the Walls
-
Extrude or roll coils:
Produce several long, even coils. If you are rolling by hand, aim for the thickness of a large finger (about 3/4 inch). If using an extruder, select a round die of similar size. -
Attach the first ring:
Lay the first coil directly on top of the scored edge of the base. Gently press it down to ensure contact, cutting the ends at an angle to join them seamlessly. -
Blend the interior connection:
For this specific bowl, you need a strong base connection. Smear the *inside* edge of the first coil down into the slab floor using your thumb or a wooden tool. Leave the outside ridge visible. -
Stack for height and shape:
Continue adding coils, stacking them directly on top of one another. To achieve the wide, open shape shown in the photo, place each new coil slightly further outward than the one below it. -
Maintain the ridges:
Unlike traditional coil pots where you scrape everything smooth, you want to preserve the definition of each coil here. Do not smudge the coils together on the visible surfaces yet. -
Join the coils invisibly:
Here I prefer to use a technique called ‘slip and squish.’ Score the top of the old coil and bottom of the new one deeply, apply slip, and press firmly. This creates a bond without needing to drag clay across the surface ridges. -
Refine the shape:
Once you have built up about 5-6 inches of height, step back. Spin the banding wheel and gently pat the outside to ensure the bowl is symmetrical.
Natural Stone Look
Don’t glaze the very bottom inch of the exterior. Leaving raw clay at the foot enhances the organic feel and contrasts beautifully with the smooth white interior.
Step 3: Refining and Surface Texture
-
Soften the ridges:
The bowl in the image isn’t raw ropes; it’s smoothed slightly. Take a damp sponge or a soft rubber rib and run it horizontally along the grooves. You want to round off the sharp crevices between coils without erasing them. -
Uniform the interior:
Repeat this smoothing process on the inside. The interior ridges should be visible but soft enough that they won’t trap dust or dirt easily. -
Finish the rim:
Use your fingers or a piece of chamois leather to compress and round the top rim. It should look like the final coil, just slightly smoother for a finished appearance. -
Dry slowly:
Cover the rim loosely with plastic to let the base dry at the same rate as the top. Uneven drying can cause warping in wide bowls like this. -
Bisque fire:
Once bone dry, fire the piece to Cone 04 (or your clay’s specific bisque temperature). -
Glaze application:
Choose a matte, semi-opaque white or cream glaze. The key is to check the glaze thickness; if it’s too thick, it will fill your beautiful grooves. If it’s too thin, the specks will be too rough. -
Final firing:
Glaze fire to the maturity temperature of your stoneware (likely Cone 5 or 6). This will bring out the iron speckles through the creamy glaze, creating that stone-like effect.
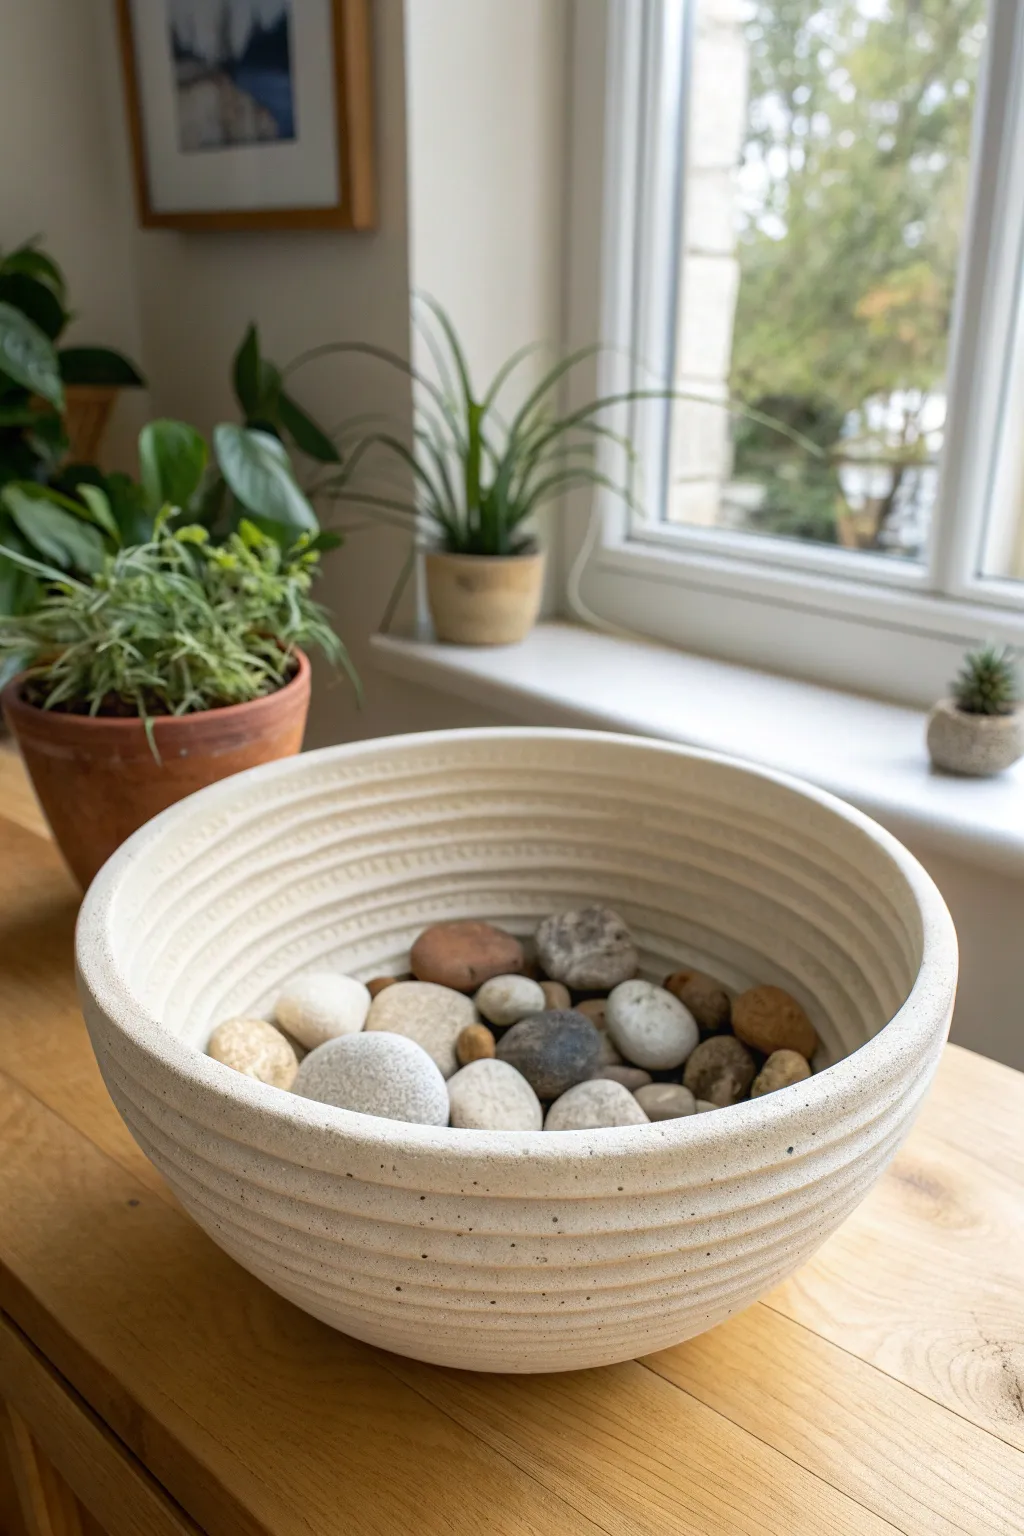
Now perfectly fired, your bowl is ready to display a collection of river stones or stand alone as a sculptural centerpiece.


Deep Everyday Snack Coil Bowl
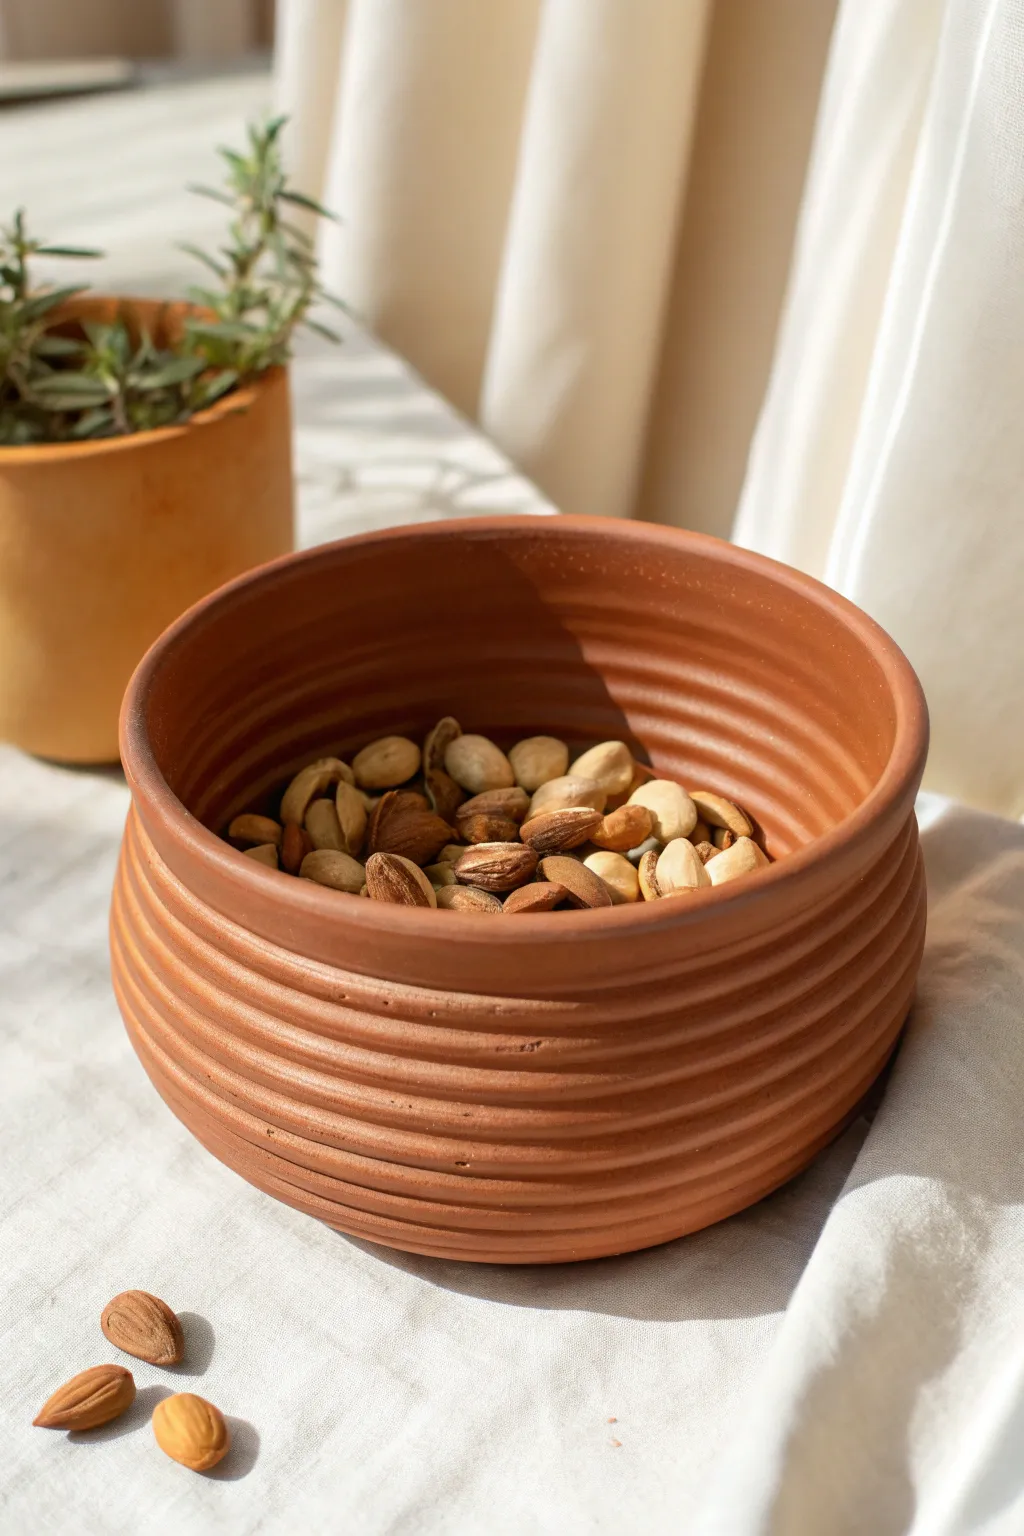
This deep, rounded vessel combines the ancient charm of terracotta with practical modern design. The tightly stacked coils create a beautiful ribbed texture on the exterior while remaining perfectly smoothed inside for holding your favorite nuts or snacks.
How-To Guide
Materials
- Red earthenware or terracotta clay (approx. 2-3 lbs)
- Clay scoring tool or serrated rib
- Slip (clay mixed with water)
- Wooden modeling tool
- Small sponge
- Rolling pin or slab roller
- Canvas mat or work board
- Fettling knife
- Rubber kidney tool (soft)
- Potter’s wheel (optional, for banding wheel)
- Clear food-safe glaze
Step 1: Base Construction
-
Prepare the slab:
Begin by rolling out a thick slab of your terracotta clay, aiming for a consistent thickness of about 1/3 inch. Smooth it out with a rubber rib to remove any canvas texture. -
Cut the circle:
Use a round template or bowl (approximately 5-6 inches in diameter) to cut a perfect circle from your slab using a fettling knife. This will act as the stable foundation for your bowl. -
Score the perimeter:
Take your scoring tool and rough up the outer 1/4 inch of the top surface of your base circle. Apply a generous amount of slip to these score marks.
Seamless Seams
When blending coils on the inside, support the outside with your free hand. This prevents the decorative outer ridges from getting squashed or deformed.
Step 2: Coiling Up
-
Roll the first coils:
Roll out several long, snake-like coils of clay. Try to keep them uniform in thickness, roughly the diameter of your pinky finger or slightly thicker. -
Place the first ring:
Lay your first coil directly onto the slipped edge of the base. When the ends meet, cut them at an angle and join them securely. -
Blend the inside:
Using your thumb or a wooden modeling tool, firmly smear the clay from the coil down onto the base on the *interior* side only. This creates the seal. -
Stack for height:
Continue adding coils one on top of the other. For this deep profile, stack them directly vertically rather than flaring outwards, perhaps tapering inward ever so slightly once you pass the halfway point. -
Join and smooth interiors:
After every 2-3 coils, stop to blend the interior seams completely smooth using a rib or your finger. The inside needs to be seamless for food safety, while the outside will retain the coil texture. -
Refine the exterior:
Instead of blending the outside coils, encourage the definition. Run a damp finger or a rounded wooden tool gently along the grooves between coils to neaten them without erasing the ridge.
Step 3: Shaping and Finishing
-
Establish the rim:
Once you reach the desired height (about 4-5 inches), add your final coil. I prefer to smooth this top coil gently with a chamois or damp sponge to create a soft, rounded lip comfortable for handling. -
Compress the walls:
Support the outside wall with one hand while using a rib on the inside to compress and shape the bowl outward slightly, creating that subtle belly curve seen in the image. -
Final sponge wipe:
Use a barely damp sponge to wipe down the interior one last time to remove any slurry or rough grit, ensuring the surface is impeccable. -
Slow drying:
Cover the rim loosely with plastic to let the base dry at the same rate as the top. Uneven drying can cause cracks in deep vessels. -
Bisque fire:
Once bone dry, fire the piece to bisque temperature (usually cone 04) to prepare it for glazing. -
Glaze application:
This style looks best with a raw clay exterior. Apply a clear, food-safe glaze to the *interior* only, or verify your clay body is fully vitrified and food-safe if leaving unglazed. -
Final firing:
Fire again to the maturity temperature of your clay body. The terracotta will deepen into that rich, warm orange color.
Rustic Speckle
Use a clay body with grog or fine sand included. After smoothing, sponge away the surface clay slightly to reveal the grit for a textured, stone-like look.
Enjoy using this sturdy, earthy bowl for your next casual gathering or movie night snack session


Slump-Mold Coil Bowl
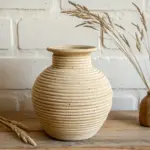
This project uses the classic coil technique combined with a slump mold to create a wonderfully symmetrical bowl with a modern, textured feel. The exposed coils on the exterior create beautiful horizontal ridges that catch the light, reminiscent of wheel-thrown pottery but entirely hand-built.
Step-by-Step
Materials
- Speckled stoneware clay (beige/buff)
- Slump mold (a smooth plastic or metal bowl)
- Canvas cloth or heavy fabric (to line the mold)
- Rolling pin
- Spray bottle with water
- Serrated metal rib or scoring tool
- Wooden modeling tool
- Rubber potter’s rib
- Circular bat or banding wheel (optional)
- Clean sponge
- Matte transparent glaze
Step 1: Preparing the Base
-
Roll the slab:
Begin by wedging your speckled clay to remove air bubbles. Roll out a small slab, about 1/4 inch thick, which will serve as the heavy bottom of your bowl. -
Cut the circle:
Using a needle tool or knife, cut a perfect circle from your slab. This circle should be roughly 3-4 inches in diameter to form a stable foot. -
Prepare the mold:
Select a bowl from your kitchen to use as a slump mold. Line the inside carefully with a piece of canvas or heavy fabric; this prevents the clay from sticking and adds a subtle texture to the clay surface. -
Position the base:
Place your clay circle into the very center of the lined mold. Press it down gently so it conforms to the curve of the bowl.
Step 2: Building the Coils
-
Roll your coils:
Roll out several long, even snakes of clay. Aim for a thickness of about a pinky finger. Try to keep them consistent, as this uniformity is key to the bowl’s ribbed aesthetic. -
Score and slip:
Score the outer edge of your base circle and apply a little water or slip. Do the same to your first coil. -
First layer:
Lay the first coil inside the mold, resting it directly against the edge of the base circle. Press it firmly against the mold wall. -
Blend the interior:
Using your thumb or a wooden tool, smear the clay from the coil downwards onto the base *only on the inside*. Leave the outside coil definition visible against the mold (which will become the exterior). -
Continue stacking:
Score the top of the placed coil and add the next one. Continue stacking coils up the wall of the mold, ensuring each one is pressed firmly against the cloth backing. -
Smooth the inside:
After every 2-3 coils, stop to blend the interior seams completely smooth. I find using a rubber rib here creates a seamless, professional inner surface while protecting the exterior ridges. -
Reach the rim:
Continue coiling until you reach the top edge of your mold. For the final coil (the rim), you might want to slightly taper the edge for a delicate look. -
Refine the rim:
Use a damp sponge to smooth the very top lip of the bowl, ensuring it is level and comfortable to the touch.
Consistent Coils
Use two wooden dowels or rulers as guides while rolling your coils. This physical barrier ensures every snake is the exact same thickness.
Step 3: Finishing and Firing
-
Stiffening:
Let the bowl dry inside the mold until it is leather-hard. This ensures the clay remembers the shape and doesn’t collapse when removed. -
Removal:
Gently lift the fabric to pop the bowl out of the mold. Peel the fabric away to reveal the exterior coil texture. -
Exterior touch-up:
Run a damp finger or a very soft sponge lightly over the exterior ridges to soften any sharp crumbles, but be careful not to erase the distinct horizontal lines. -
Dry slowly:
Invert the bowl on a board and cover it loosely with plastic to let it dry slowly and evenly, preventing warping. -
Bisque fire:
Once bone dry, fire the piece to bisque temperature (usually cone 04). -
Glaze application:
Apply a matte transparent or satin clear glaze. This highlights the natural speckles of the clay without distracting from the coil texture. -
Final fire:
Glaze fire to the temperature appropriate for your specific clay body (likely cone 5 or 6 for stoneware).
Make it Colorful
Instead of clear glaze, rub a black or dark brown underglaze into the exterior crevasses and sponge it off the high points to accentuate the ribbed lines.
Once fired, fill your new bowl with fruit or display it empty to show off those calming, rhythmic lines


S-Scroll Coil Mosaic Bowl
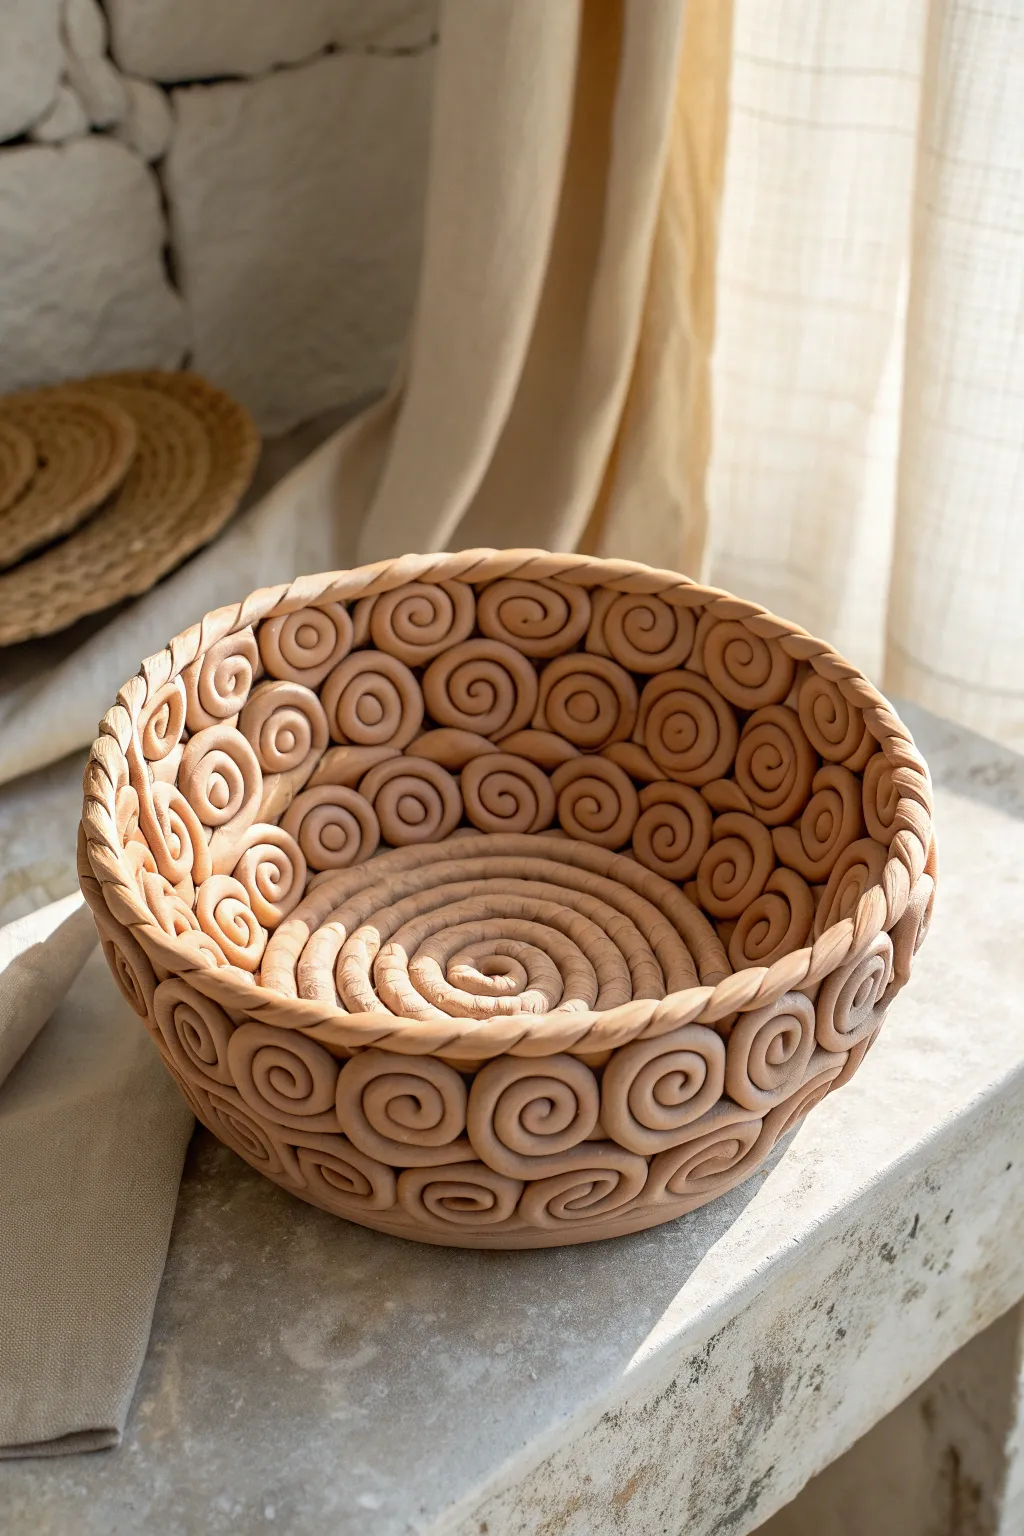
This stunning coiled vessel relies on a repeating pattern of tight spirals to create a structural, mosaic-like wall. The unglazed finish highlights the natural warmth of the clay, making it a perfect centerpiece for a rustic table setting.
Detailed Instructions
Materials
- High-quality pottery clay (stoneware or terracotta recommended)
- Clay scoring tool or serrated rib
- Slip (clay mixed with water to a yogurt consistency)
- Wooden modeling tool
- Rolling pin or slab roller (optional)
- Clean sponge
- Bowl mold (plastic or metal, wrapped in plastic or newspaper)
- Wire clay cutter
Step 1: Preparation & Base
-
Prepare your clay:
Begin by wedging your clay thoroughly to remove any air bubbles. This step is crucial for coil building, as trapped air can cause cracks during firing. -
Select a mold:
Choose a bowl from your kitchen to use as a slump mold. Line the interior with plastic wrap or damp newspaper to prevent the clay from sticking to the surface. -
Roll the base coil:
Roll out a long, even snake of clay, approximately the thickness of your ring finger. Try to keep the pressure consistent so the coil stays round. -
Form the spiral base:
Starting from the center bottom of your mold, coil the clay snake into a tight, flat spiral. Continue adding to this spiral until you’ve created a solid disc about 4-5 inches in diameter. -
Smooth the interior:
While the spiral texture is beautiful on the outside (the side touching the mold), I prefer to gently blend the coils together on the inside surface using a rib tool for structural stability.
Cracking Coils?
If your coils are cracking while you roll them, your clay is too dry. Spritz the clay block with water and re-wedge it, or use a damp sponge to moisten your hands while rolling.
Step 2: Creating the Spiral Wall
-
Roll many small coils:
Prepare a large batch of clay snakes, keeping them slightly thinner than your base coil. You will need dozens of these for the wall sections. -
Form individual S-scrolls:
Take a short segment of clay coil and roll it into a tight spiral button shape. Make roughly 20-30 of these individual buttons to start. -
Attach the first row:
Score the outer edge of your base disc and apply a generous amount of slip. Place your spiral buttons onto this edge, pressing them firmly against the base and against their neighbors. -
Blend hidden joints:
On the *inside* of the bowl, use a wooden modeling tool to smudge the clay from the spirals downward into the base and sideways into each other. This hidden welding prevents the bowl from falling apart. -
Build upward:
Continue creating rows of spiral buttons. Stack them directly on top of the previous row, adhering with score-and-slip marks. Ensure the spirals are facing outward for that mosaic look. -
Fill the gaps:
If you notice large gaps between the round spirals, roll tiny little balls of clay and gently press them into the triangular voids to make the wall more solid.
Step 3: Rim & Finishing
-
Create the twisted rim:
Roll two long, even coils. Twist them gently around each other to create a braided rope effect. -
Attach the rim:
Score the top surfaces of your uppermost spiral row. Apply slip, then carefully lay the twisted rope on top, pressing down gently to secure it. -
Refine the connections:
Check the interior of the bowl one last time. Smooth out any rough joinery marks with a barely damp sponge, but be careful not to wash away the texture. -
Dry slowly:
Cover the bowl loosely with plastic. Let it dry very slowly over several days to prevent the many connection points from cracking apart as they shrink. -
Firing:
Once bone dry, bisque fire the piece. You can leave it unglazed for a natural terracotta look shown in the image, or apply a clear matte glaze to seal the interior.
Color Contrast
Try using two different clay bodies (like white stoneware and red terracotta) for the spirals to create a striking two-tone checkerboard effect.
Now you have a beautifully textured vessel that celebrates the fundamental building blocks of pottery