A pinch pot vase is proof that the simplest handbuilding trick can still look seriously special. Here are my favorite pinch pot vase ideas—starting with the classics and ending with the ones that always get a “how did you make that?” in my studio.
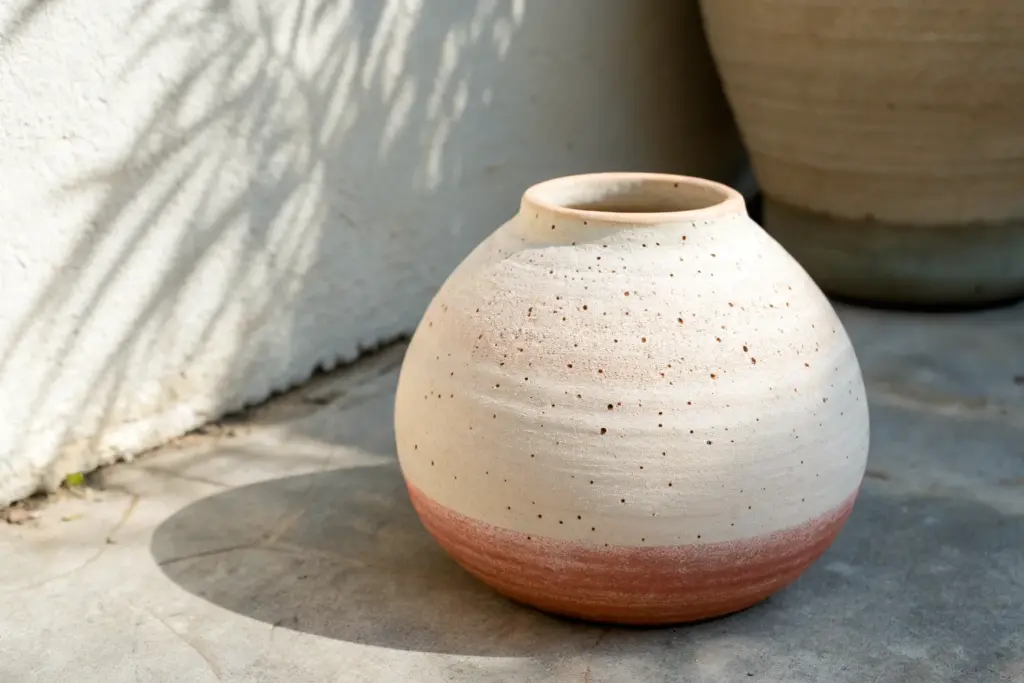
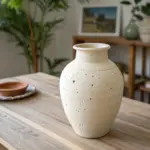
Classic Pinch Pot Bud Vase
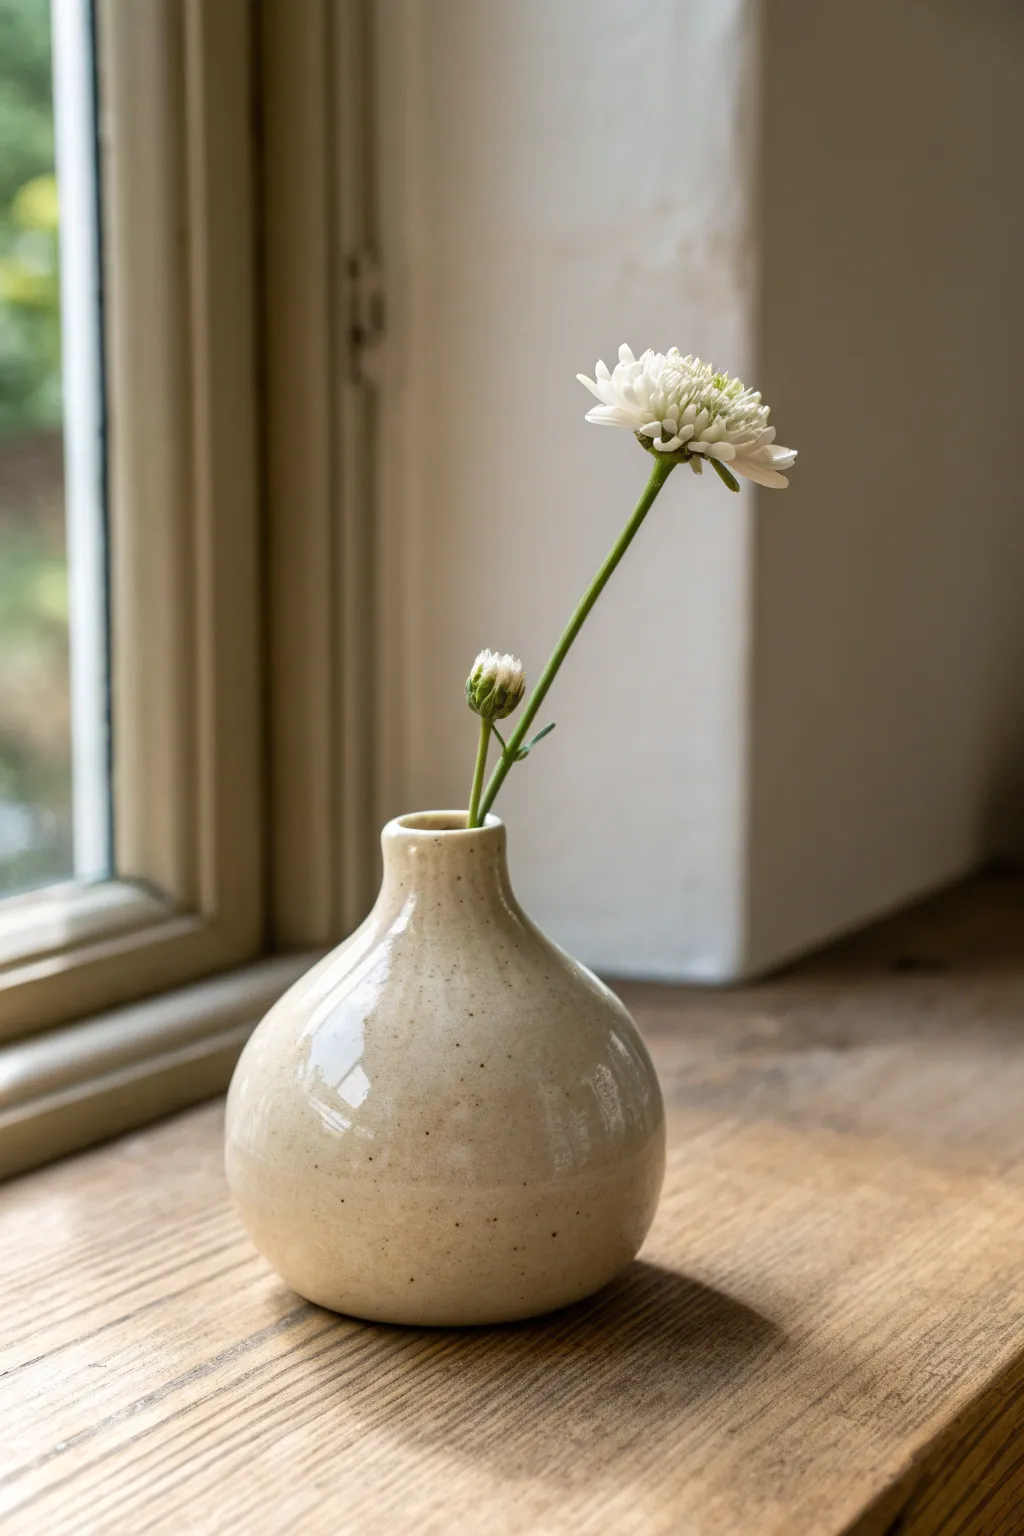
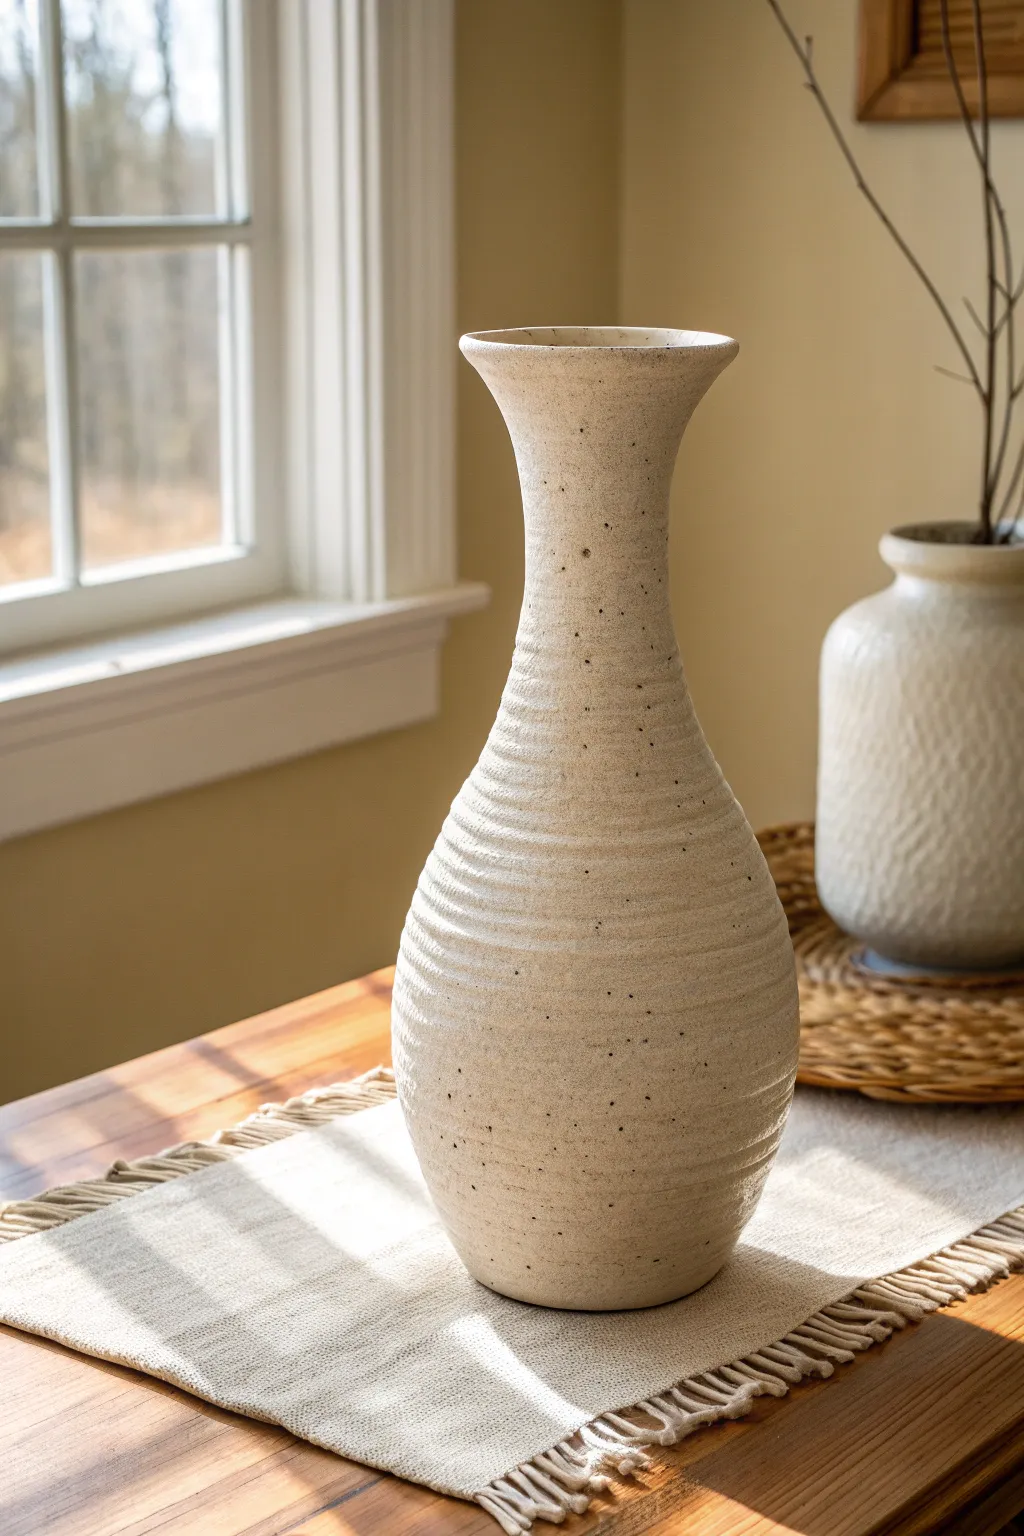
Capture the essence of ceramic minimalism with this classic bulb-shaped bud vase. The smooth, speckled cream glaze and gentle curves create a timeless vessel perfect for showcasing a single standout bloom.
How-To Guide
Materials
- White stoneware clay or speckled clay body
- Water in a small cup
- Wooden modeling tool or old spoon
- Sponge
- Needle tool or fettling knife
- Speckled cream or ‘oatmeal’ brush-on glaze
- Soft fan brush (for glazing)
- Small paintbrush (for detail)
- Kiln (or access to a firing service)
Step 1: Forming the Base
-
Prepare the Clay:
Cut a piece of clay roughly the size of a tennis ball. Wedge it thoroughly to remove air bubbles and ensure the consistency is even, then roll it into a smooth, seamless sphere. -
Begin the Pinch:
Hold the clay ball in one hand. With your other hand, gently press your thumb into the center of the sphere, stopping about a half-inch from the bottom to leave a solid base. -
Open the Walls:
Slowly rotate the ball while gently pinching the clay between your thumb (inside) and fingers (outside). Work in a spiral from the bottom up, thinning the walls evenly as you go. -
Shape the Belly:
Continue pinching until you have a cup shape. Gently push the walls outward from the inside to create that nice, round bulbous belly seen in the photo. Keep the walls about 1/4 inch thick.
Collaring Tip
Keep your hands wet when narrowing the neck. The reduced friction prevents the clay from twisting or tearing as you squeeze inwards.
Step 2: Creating the Neck
-
Collar the Rim:
To start the neck, gently encircle the top rim with your hands and squeeze slightly while rotating the pot. This is called ‘collaring in’ and helps narrow the opening. -
Extend the Neck:
As you narrow the opening, pinch the clay upwards to raise the neck. You may need to add a small coil of clay to the rim if you ran out of material during the initial pinch. -
Smooth the Transition:
Use your thumb to smooth the clay where the belly meets the neck, ensuring a gentle, organic curve rather than a sharp angle. -
Refine the Lip:
Use a damp sponge or your fingers to round off the very top edge of the rim. It should be smooth and perfectly circular to support a delicate flower stem. -
Surface Smoothing:
Once the shape is final, use a metal rib or a smooth wooden tool to burnish the outside surface, removing any fingerprints or uneven bumps. -
Dry and Bisque:
Allow the vase to dry slowly under plastic for a day, then uncover until bone dry. Fire it in a bisque kiln according to your clay body’s instructions.
Step 3: Glazing and Finishing
-
Clean the Bisqueware:
Wipe the fired vase with a damp sponge to remove any kiln dust. This ensures the glaze adheres properly to the ceramic surface. -
Stir the Glaze:
Mix your speckled cream glaze thoroughly. If using a pre-speckled glaze, ensure the heavy particles at the bottom are well distributed. -
Apply First Coat:
Using a soft fan brush, apply a smooth, even layer of glaze to the interior first. Pouring a small amount inside, swirling, and pouring out the excess is often easier for narrow-necked vases. -
Glaze the Exterior:
Brush the first coat onto the exterior, using long, vertical strokes. I like to let this dry briefly until the sheen disappears before adding the next layer. -
Build Up Layers:
Apply 2-3 coats total, letting each dry in between. Alternating the direction of your brush strokes (vertical then horizontal) helps achieve the uniform finish seen in the image. -
Wipe the Foot:
Use a wet sponge to completely wipe away any glaze from the bottom of the vase and about 2mm up the side. This prevents it from fusing to the kiln shelf. -
Final Fire:
Place the glazed vase in the kiln for the final glaze firing. Once cool, sand the bottom lightly if there are any rough spots.
Level Up: Texture
Before the clay dries, gently tap the exterior with a wooden paddle or spoon to enhance the organic, hand-shaped silhouette.
Place it on a windowsill where the natural light can catch that glossy, speckled finish.


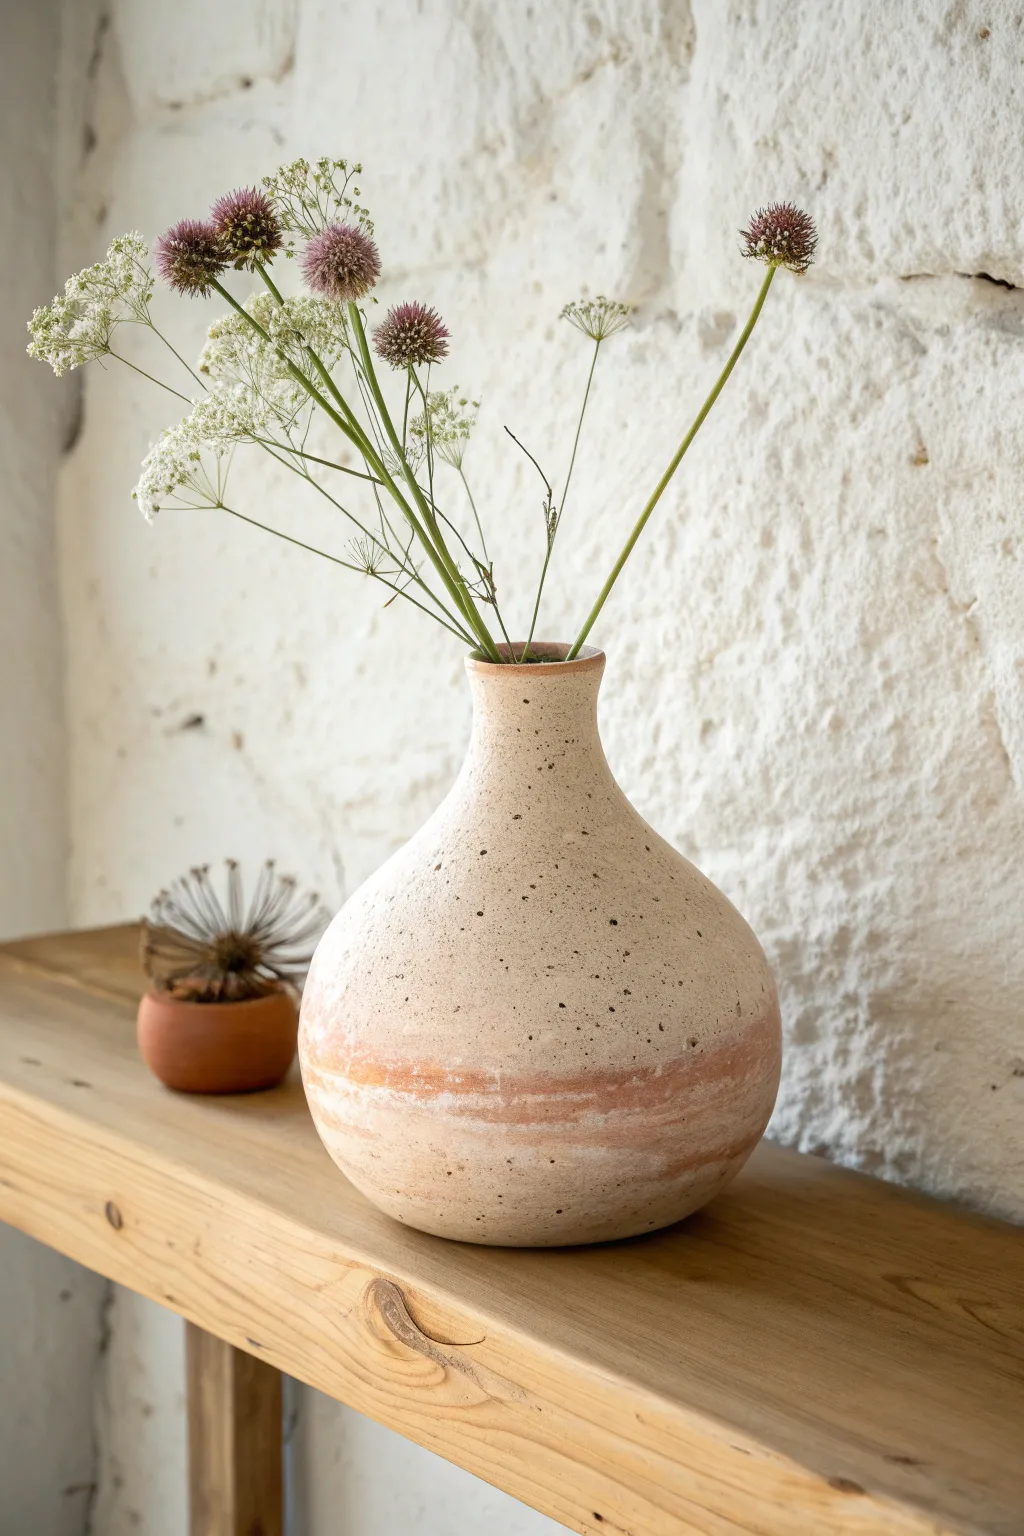
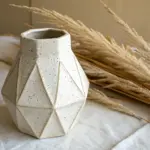
Narrow-Neck Pinch Pot Bottle Vase
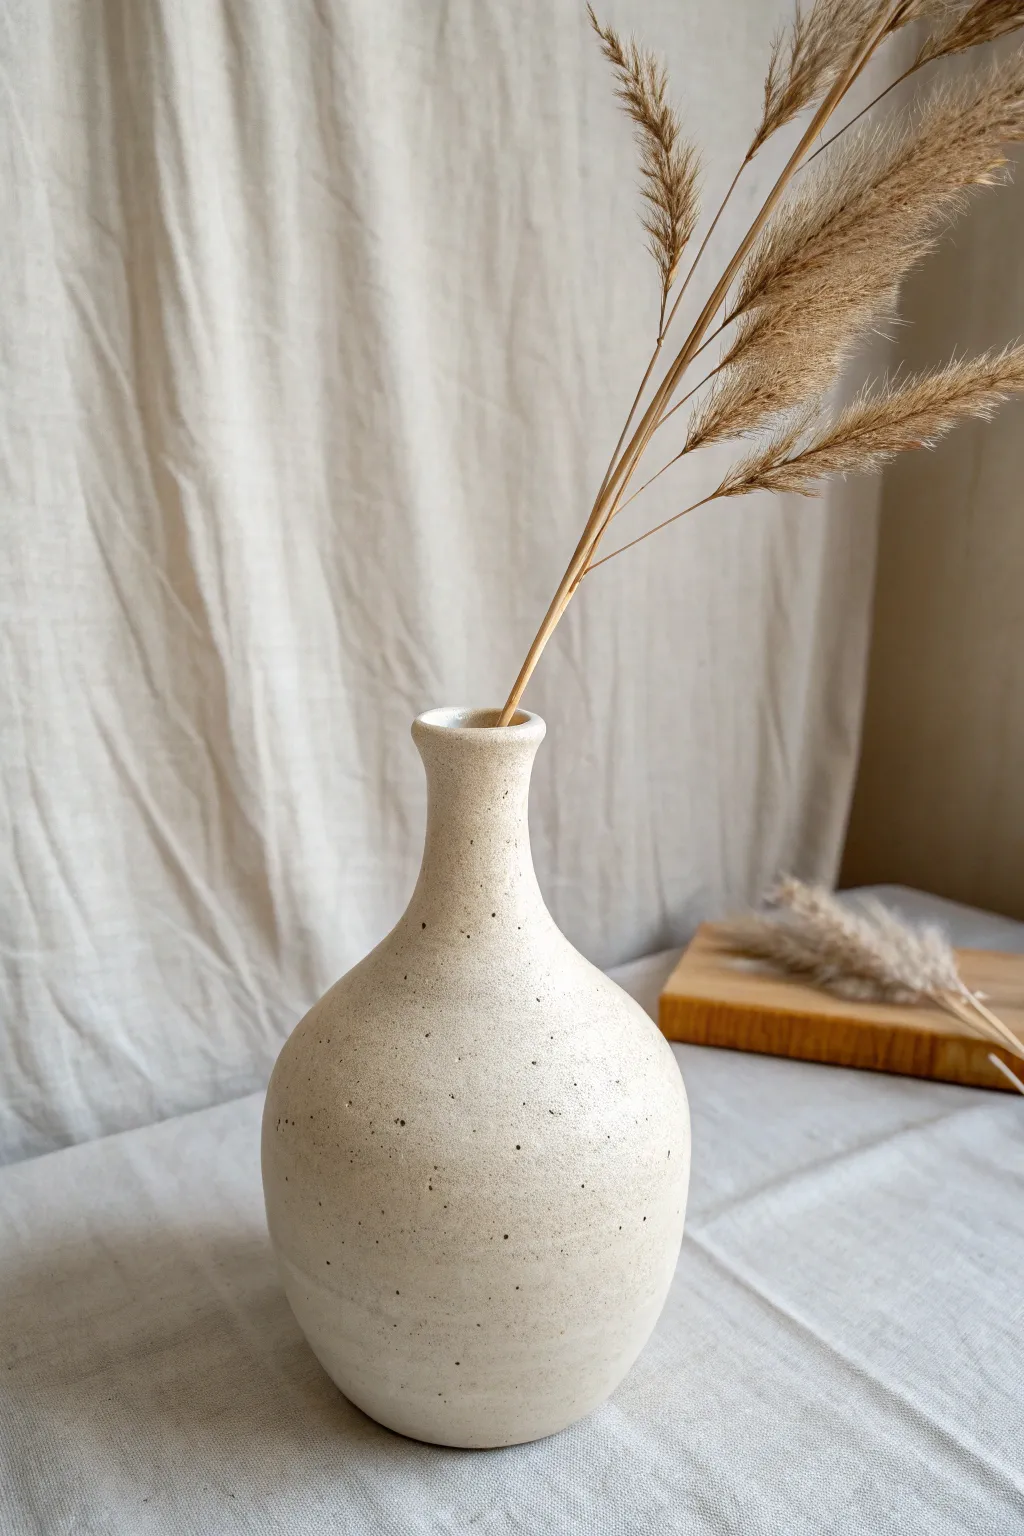
This project transforms a simple pinch pot into an elegant, narrow-neck bottle vase perfect for displaying dried grasses. The finish features a creamy matte glaze with distinctive dark speckles, giving it a modern farmhouse aesthetic.
Detailed Instructions
Materials
- Speckled buff stoneware clay (or white clay with grog)
- Potter’s needle tool
- Wooden rib tool
- Metal kidney scraper (smooth)
- Sponge
- Slip (clay mixed with water)
- Serrated rib or scoring tool
- Paddle tool
- Matte white or cream glaze
- Kiln access
Step 1: Forming the Base
-
Prepare the Clay:
Start with a ball of well-wedged speckled buff clay roughly the size of a large grapefruit. Pat it into a smooth sphere. -
Open the Pot:
Hold the clay in one hand and press your thumb into the center, stopping about half an inch from the bottom to create the floor. -
Pinch the Walls:
Gently pinch the clay between your thumb and fingers, rotating the ball as you work. Focus on keeping the walls even as you pull the clay upward and outward to create a rounded belly shape. -
Close the Form:
As you get higher up the walls, start pinching inward slightly to create a shoulder. The opening should narrow down to about 2-3 inches wide. -
Smooth the Exterior:
Use a wooden rib or paddle to gently tap the outside of the pot while it’s still pliable. This refines the spherical shape and removes deep finger marks.
Smooth Operator
To get that incredibly smooth finish before firing, burnish the leather-hard clay with the back of a spoon. This compresses the particles for a silky touch.
Step 2: Building the Neck
-
Prepare the Rim:
Use a needle tool to slice the uneven rim of your pinch pot so it is perfectly level. Score this top edge with a serrated tool and apply a little slip. -
Add a Coil:
Roll a thick coil of clay and place it onto the scored rim. Blend the clay downwards onto the body on both the inside and outside until no seam is visible. -
Pull the Neck:
Support the clay from the inside with a finger and gently pull and squeeze the coil upward to create height. Aim for a gentle taper, creating a bottle-neck silhouette. -
Flare the Rim:
Once you have the desired neck height (about 2-3 inches), use your thumb to gently press the very top edge outward, creating a small, rounded lip. -
Refine the Profile:
Use a metal kidney scraper to smooth the transition between the belly and the neck. This key step gives the vase its seamless, continuous curve.
Wobbly Neck?
If the neck starts sagging while you build, the clay is too wet. Use a heat gun or hair dryer briefly to firm up the lower section before adding more height.
Step 3: Finishing and Glazing
-
Drying:
Let the piece dry slowly under plastic to the leather-hard stage. Once firm, you can trim the bottom if necessary to ensure it sits flat. -
Bone Dry:
Allow the vase to dry completely until bone dry before the first firing. -
Bisque Fire:
Fire the piece in a kiln to bisque temperature (usually cone 04 or 06). -
Prepare Glaze:
Mix your matte cream glaze thoroughly. If using a brush-on glaze, ensure your brush is wide and soft to avoid streaks. -
Apply Glaze:
Dip the vase or apply 3 generous coats of glaze. The speckles from the clay body will naturally burn through a white glaze, but if you used plain clay, flick iron oxide specks onto the wet glaze now. -
Wipe the Foot:
Clean the bottom of the vase with a wet sponge to remove all glaze from the surface that will touch the kiln shelf. -
Final Fire:
Fire the piece to the maturity temperature of your clay and glaze (typically cone 5 or 6 for stoneware).
Place a few stems of dried pampas grass inside to complete the serene, organic look


Wide-Belly Pinch Pot Vase With Tiny Mouth
This charming, wide-bellied vase features a distinct narrow neck and a rustic, speckled finish that feels right at home in a cottage setting. The design incorporates a subtle marbled band of white and pink clay near the base, giving the piece a gentle, sunrise-like gradient.
Step-by-Step
Materials
- Speckled buff stoneware clay
- White stoneware clay
- Pink stoneware clay (or white clay stained with mason stain)
- Pottery sponge
- Rib tool (metal and rubber)
- Needle tool
- Scoring tool or serrated rib
- Slip (clay mixed with water)
- Wooden paddle
- Kiln and clear glaze (optional, for waterproofing)
Step 1: Forming the Base
-
Prepare the marbled clay:
Take a small ball of your speckled clay (about the size of a plum) and two smaller grape-sized balls of white and pink clay. Twist them together gently without over-blending to preserve striations. -
Start the pinch pot base:
Press your thumb into the center of the marbled clay ball almost to the bottom. Rotate the ball in one hand while pinching the walls with the other to open up a wide, shallow bowl shape. -
Smooth the marbled section:
Once the initial cup shape is formed, use a rubber rib to smooth the outside, compressing the different clays together so the marbling appears as a continuous surface rather than separate chunks.
Step 2: Building the Belly
-
Roll your coils:
Switch to your main speckled clay body. Roll out several coils about the thickness of your index finger on a canvas surface. -
Attach the first coil:
Score and slip the rim of your marbled pinch pot base. Lay the first coil on top, slightly angling it outward to begin widening the belly. -
Blend the clay:
Use your thumb or a wooden tool to blend the coil downward on the inside and upward on the outside until the seam disappears. This is crucial for structural integrity. -
Expand the form:
Add 2-3 more coils, stacking each one slightly further outward than the last to create that dramatic wide belly. I like to paddle the outside gently after every few layers to round out any lumpy areas. -
Begin the closure:
Once you’ve reached the widest point (about halfway up), start stacking your coils slightly inward. This requires patience; don’t rush the curve or the walls might collapse. -
Support the shape:
As the opening gets smaller, keep one hand inside the pot to support the wall while you blend the exterior surface with your rib tool.
Uneven Drying?
If the base dries faster than the rim, the different shrinkage rates cause cracks. Wrap the bottom tightly in plastic while working on the neck to keep moisture equalized.
Step 3: Creating the Neck
-
Narrow the opening:
Continue adding inward-leaning coils until the opening is about 2 inches wide. Ensure your walls remain a consistent thickness. -
Form the vertical neck:
Add two final coils stacked directly vertically (not inwardly) to create the chimney-style neck. Smooth and refine the transition from the shoulder to the neck. -
Refine the surface:
Allow the pot to dry to a ‘leather hard’ state. Use a metal rib to scrape away surface imperfections and reveal the beautiful speckles in the clay. -
Trim the rim:
Use a damp sponge or a piece of chamois leather to compress and smooth the rim of the mouth so it is soft to the touch. -
Dry and fire:
Let the vase dry slowly under plastic for a few days to prevent cracking. Once bone dry, bisque fire it in a kiln. -
Glaze interior:
Pour a clear liner glaze inside to make it watertight. You can leave the raw clay exterior unglazed if you love the texture, or apply a very thin matte clear coat.
Highlight the Speckles
After the final shaping, wipe the exterior gently with a damp sponge. This exposes the grit and speckles in the clay body, enhancing that rustic texture.
Fill your new handmade vessel with dried wildflowers or fresh blooms to complete the earthy look


Mini Pinch Pot Vase Trio Set
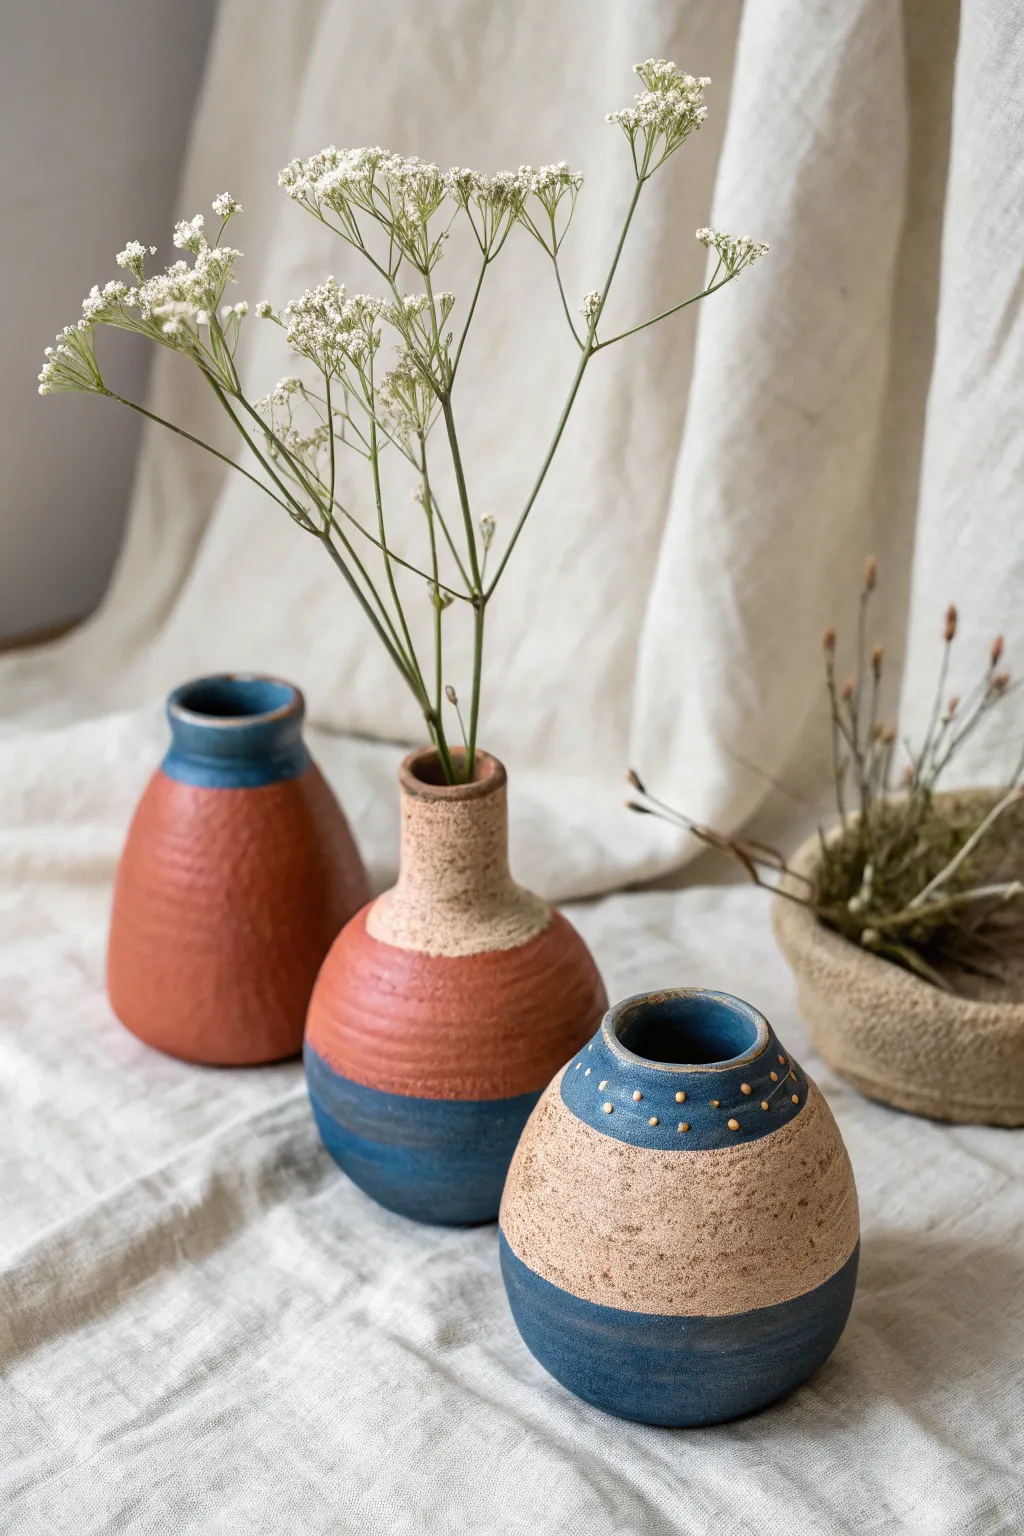
Embrace the imperfect charm of hand-built ceramics with this stunning trio of mini vases. Combining raw clay texture with blocks of deep blue and earthy red glazes creates a sophisticated, rustic-modern set perfect for small floral stems.
Step-by-Step Tutorial
Materials
- Stoneware clay (grogged or speckled is best for texture)
- Pottery tools (needle tool, rib tool, loop tool)
- Sponge
- Water bowl
- Blue ceramic glaze (matte or satin)
- Reddish-brown ceramic glaze (or terracotta slip)
- Dark yellow or Gold underglaze (for dotted details)
- Small applicator bulb or fine brush
- Kiln access (for bisque and glaze firing)
Step 1: Forming the Vases
-
Prepare Clay Balls:
Wedging your clay thoroughly to remove air bubbles, divide it into three equal portions. Roll each portion into a smooth, tight sphere roughly the size of a tennis ball. -
Open the Pot:
Hold a clay ball in one hand and gently press your thumb into the center, stopping about a half-inch from the bottom. This establishes the interior depth. -
Pinch the Walls:
Using your thumb on the inside and fingers on the outside, gently pinch and rotate the clay. Work from the bottom up, thinning the walls evenly as you go to shape the initial rounded form. -
Shape Vase 1 (The Tall Teardrop):
For the leftmost vase, keep pinching upward to create height. Once the body is formed, gently collar (squeeze) the neck inward to narrow it, flaring the rim slightly at the very top. -
Shape Vase 2 (The Bottle):
For the middle vase, keep the body round and bulbous. Use your fingers to pull a distinct, narrow cylinder upward from the center to create a bottle-neck shape. -
Shape Vase 3 (The Round Urn):
For the rightmost vase, maintain a squat, spherical shape. Instead of narrowing the neck significantly, create a wider opening and refine the rim so it is smooth and level. -
Refine Surfaces:
Once shaped, use a metal or wooden rib tool to scrape the exteriors. This smooths out major fingerprints but leaves a nice, organic texture. -
Dry and Bisque Fire:
Allow your trio to dry slowly under plastic for a day, then uncovered until bone dry. Fire them in a kiln to bisque temperature (usually Cone 04 or 06).
Uneven Walls?
If one side feels thicker while pinching, focus pressure only on that thick spot while rotating. Use a needle tool to gauge thickness if you aren’t sure.
Step 2: Glazing and Decoration
-
Wax Resist (Optional):
If you want distinct lines between raw clay and glaze, apply wax resist to the areas you want to remain unglazed, like the neck of the middle vase or the center band of the right vase. -
Glaze Vase 1:
Pour the reddish-brown glaze inside to coat the interior, pouring out the excess. For the exterior, brush the red glaze up to the neck. Dip just the rim into the blue glaze for a contrasting rugged top. -
Glaze Vase 2:
Coat the interior with clear or white glaze. Brush the reddish-brown glaze on the upper shoulder, leaving the neck raw. Dip the bottom third of the vase into the blue glaze for a color-blocked look. -
Glaze Vase 3 – Base Layers:
Glaze the interior blue. On the exterior, dip the bottom third in blue. Carefully brush a blue band around the rim/shoulder area, leaving the middle section as exposed raw clay. -
Apply Dotted Detail:
For the finishing touch on the third vase, use a slip trailer or a fine brush to apply small dots of gold or yellow underglaze around the blue shoulder band. -
Clean the Foot:
Ensure the bottom of every vase is completely wiped clean of glaze with a damp sponge so they don’t fuse to the kiln shelf. -
Glaze Fire:
Fire the vases again to the maturation temperature of your specific clay and glaze (often Cone 5 or 6 for stoneware). Let the kiln cool completely before unloading.
Smooth Rims
Use a damp chamois strip or a small piece of plastic wrap over the rim while smoothing with your fingers to get a professional, compressed lip.
Arrange your finished trio together with some dried baby’s breath for a serene and artistically handcrafted display

The Complete Guide to Pottery Troubleshooting
Uncover the most common ceramic mistakes—from cracking clay to failed glazes—and learn how to fix them fast.
Footed Pinch Pot Vase With Coil Ring
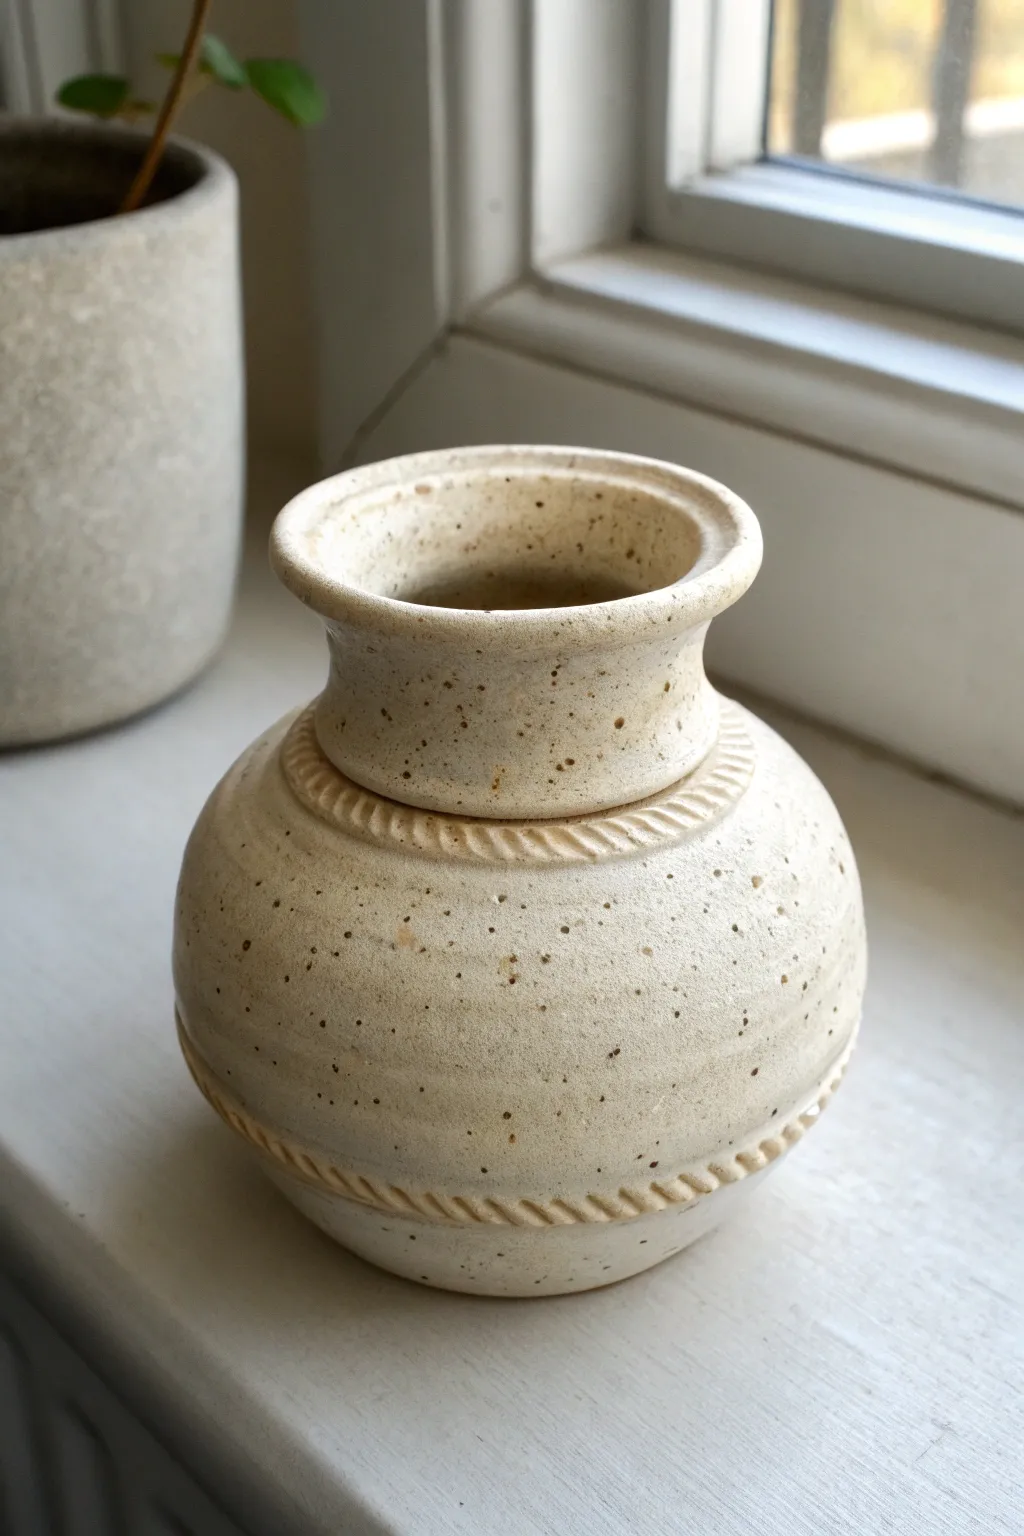
This charming vase combines the organic feel of pinch pottery with elegant, structured details. Featuring a creamy speckled glaze and distinctive twisted coil accents, it creates a timeless piece perfect for small wildflower arrangements.
Detailed Instructions
Materials
- Speckled buff stoneware clay
- Pottery needle tool
- Serrated rib or scoring tool
- Wooden modeling tool
- Small sponge
- Water or slip
- Cream matte glaze (cone 5/6 or suitable for your clay)
- Kiln access
Step 1: Forming the Base Body
-
Prepare the clay:
Start with a ball of speckled stoneware clay roughly the size of a large orange. Wedge it thoroughly to remove air bubbles and ensure consistency. -
Open the pinch pot:
Hold the clay in one hand and press your thumb into the center, stopping about a half-inch from the bottom. Gently pinch and rotate the clay to open up a bowl shape. -
Shape the walls:
Continuing the pinching motion, thin the walls evenly. Aim for a rounded, spherical shape rather than a wide bowl. Bring the rim of the pot inward slightly to create a enclosed shoulder. -
Smooth the surface:
Use a flexible rib or your thumb to smooth out the exterior pinch marks. I find gently paddling the outside with a wooden spoon helps round out the form nicely. -
Refine the bottom:
Gently tap the pot on your work surface to create a small flat spot so the vase stands stable. You can also carve a shallow foot ring if desired.
Twist Tip
When making the rope coil, roll the initial strand slightly thinner than you think you need. The twisting process doubles the bulk instantly.
Step 2: Adding the Neck and Details
-
Create the neck coil:
Roll a thick coil of clay, about the thickness of your thumb. Attach this to the opening of your pinch pot using the score and slip method. -
Throw or model the neck:
Pinch the attached coil upwards to create height for the neck. Flare the top rim outwards significantly to create that wide, welcoming mouth seen in the reference. -
Create the twisted rope:
Roll a long, thin coil of clay. Fold it in half and twist the two strands together tightly to create a rope effect. Make enough to circle the vase twice. -
Attach the shoulder rope:
Score the area where the neck meets the body. Apply slip, then press your twisted rope coil firmly into the seam, smoothing the ends together invisibly. -
Attach the lower rope:
Repeat the process near the bottom third of the vessel. Score a horizontal line around the belly of the vase and attach the second twisted rope coil. -
Refine the texture:
Use a damp sponge to smooth any rough edges on the rope coils without losing the twisted definition. Clean up any slip that squeezed out.
Color Pop
Before glazing, brush a little iron oxide wash over the twisted rope coils. Wipe it back with a sponge to leave dark contrast in the crevices.
Step 3: Drying and Glazing
-
Slow drying:
Cover the vase loosely with plastic to let it dry slowing. This is crucial for pinch pots to prevent uneven shrinkage cracks. -
Bisque fire:
Once bone dry, fire the piece to bisque temperature (usually cone 04) according to your clay body’s specifications. -
Clean the bisque:
Wipe the fired pot down with a damp sponge to remove any kiln dust before glazing. -
Apply the glaze:
Dip or brush on a cream-colored matte glaze. If brushing, apply 2-3 even coats, letting each dry in between. -
Wipe the foot:
Carefully wipe all glaze off the very bottom of the pot and about 2mm up the side to prevent it from sticking to the kiln shelf. -
Glaze fire:
Fire the vase a second time to the glaze’s maturity temperature (e.g., cone 5 or 6). This will bring out the speckles in the clay through the translucent cream glaze.
Place your finished vase on a sunny windowsill where the light can catch the subtle texture of the rope details
Oval Pinch Pot Vase With Soft Sides
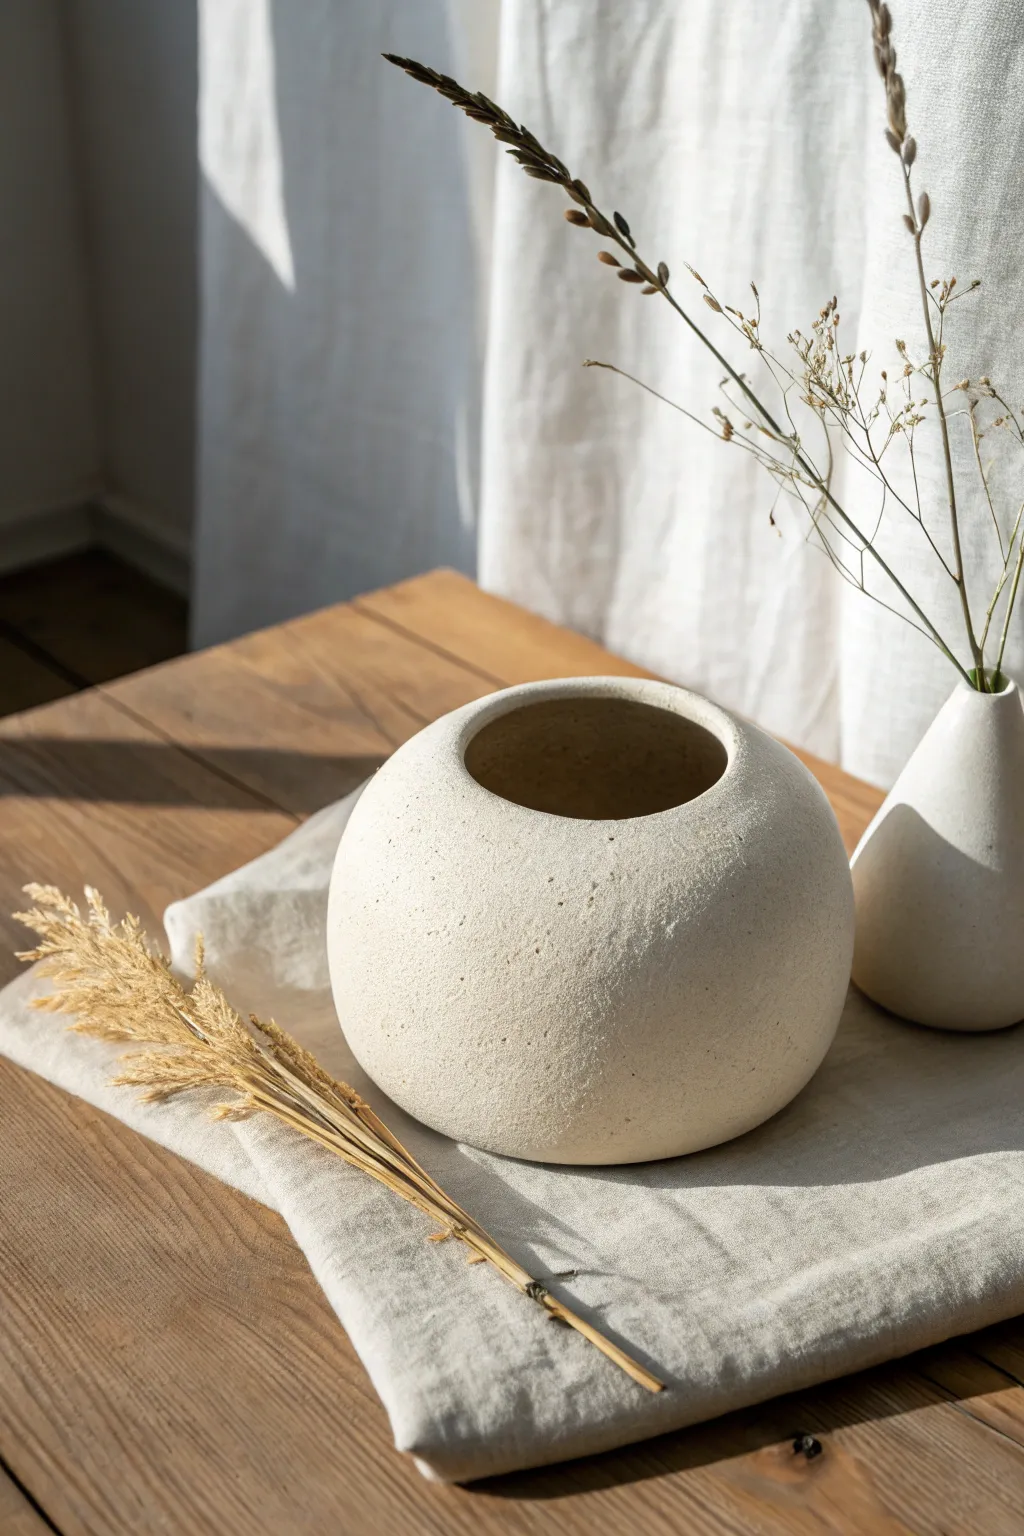
This project captures the essence of raw minimalism with a beautifully stout, spherical vase featuring a tactile, stone-like finish. Its soft, rounded sides and wide mouth make it perfect for displaying dried grasses or standing alone as a sculptural piece.
Step-by-Step Tutorial
Materials
- White or cream stoneware clay (groggy clay recommended for texture)
- Pottery sponge
- Rib tool (wooden or silicone)
- Needle tool
- Serrated metal rib or scoring tool
- Paddle (wooden kitchen spoon works)
- Matte white or transparent glaze (optional)
- Kiln (or air-dry clay alternative materials for a decorative-only version)
Step 1: Forming the Base Shape
-
Prepare the clay:
Start with a ball of clay roughly the size of a large grapefruit. Wedge it thoroughly to remove air bubbles and ensure an even consistency. -
Open the hole:
Hold the ball in your non-dominant hand. Press your thumb into the center, pushing down until you are about half an inch from the bottom. -
Pinch the walls:
Begin rotating the ball while rhythmically pinching the clay between your thumb (inside) and fingers (outside). Work from the bottom up, aiming for an even wall thickness of about 1/4 inch. -
Close the form:
As your pinch pot grows taller, gently curve the walls inward to create a more enclosed sphere rather than an open bowl. I find gently collaring the rim with both hands helps control the opening.
Step 2: Refining the Silhouette
-
Paddle shape:
Once the basic sphere is formed, use a wooden paddle to gently tap the exterior. This compresses the clay and helps achieve that distinctively squat, oval profile. -
Flatten the base:
Tap the pot gently on your work surface to create a small, flat stable bottom so it won’t roll. -
Smooth the interior:
Use a damp sponge on the inside to smooth out deep finger marks, but don’t worry about perfection; the exterior texture is the focus. -
Define the rim:
Use a chamois or your wet finger to round off the rim. It should look soft and organic, not sharp or mechanically cut.
Pro Tip: Texture Trick
Use an old toothbrush to spatter a little iron oxide wash on the surface before the final firing to create tiny distinctive dark speckles like real stone.
Step 3: Adding Texture and Finishing
-
Create the stone texture:
This is key to the look. Take a dry sponge or a rough stone and dab it all over the exterior surface while the clay is leather hard. This creates the pitted, matte surface seen in the image. -
Enhance the grit:
If your clay is smooth, press coarse sand or grog into the surface now for added tactile dimension. -
Slow drying:
Cover the vase loosely with plastic to let it dry slowly over a few days. This prevents uneven shrinkage. -
Bisque fire:
Once bone dry, fire the piece to the appropriate cone for your clay body (usually Cone 06/04). -
Glazing decision:
To keep the raw ‘stone’ look, skip a glossy glaze. Instead, wash the exterior with a very watered-down white underglaze, or simply wipe it with a damp sponge if the raw clay color is already correct. -
Final wipe back:
If you applied underglaze, wipe most of it off with a damp sponge, leaving pigment only in the small pits and texture marks to accentuate depth. -
Glaze interior:
Pour a clear matte glaze inside the vase and swirl it around to coat the interior if you want it to hold water. -
Final firing:
Fire the piece again to the final maturation temperature of your clay.
Level Up: Double Pot
Make two pinch pots of the same size, score the rims, and join them together to make a fully closed sphere. Cut a hole in the top for a perfectly round vase.
Enjoy styling your new handcrafted vessel with some simple dried botanicals for a serene display


What Really Happens Inside the Kiln
Learn how time and temperature work together inside the kiln to transform clay into durable ceramic.
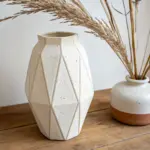
Fluted Pinch Pot Vase With Thumb Grooves
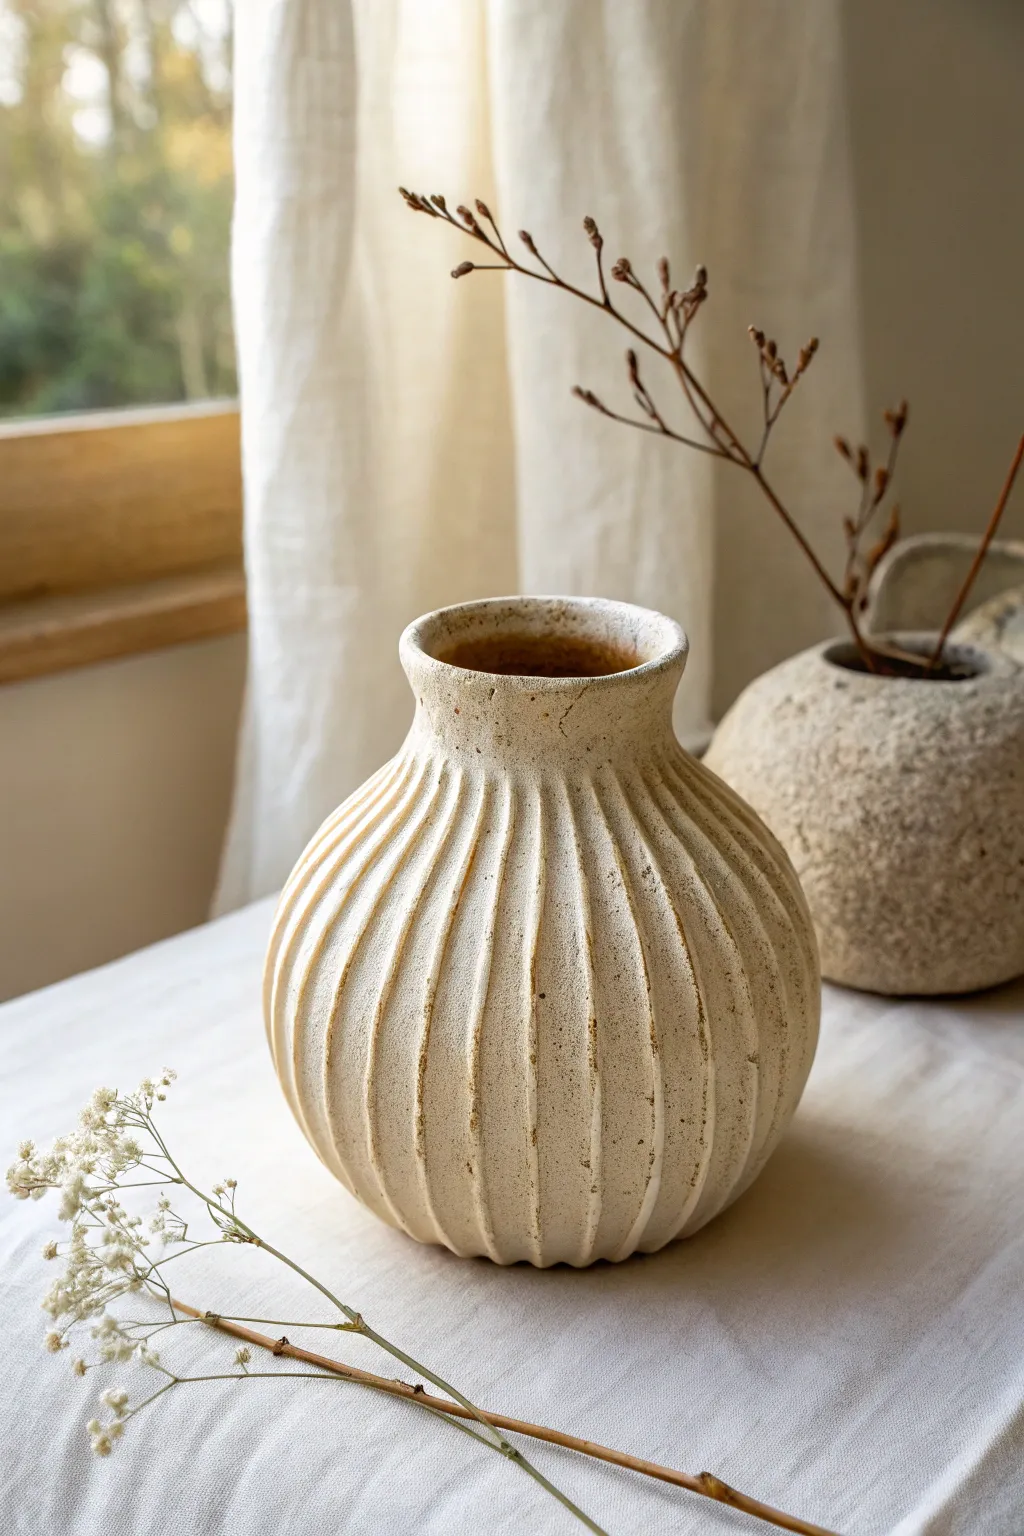
Create a stunningly textured vessel that balances rustic charm with elegant lines. This fluted vase starts from two simple pinch pots joined together and features deep, rhythmic grooves carved to catch the light and emphasize the clay’s natural grit.
Detailed Instructions
Materials
- Stoneware clay with grog or sand (for texture)
- Small bowl of water
- Serrated metal rib (scoring tool)
- Wooden modeling tool or spoon handle
- Loop tool (medium size)
- Needle tool
- Sponge
- Paddle (optional)
Step 1: Forming the Base Structure
-
Prepare your clay:
Begin by wedging a softball-sized amount of clay to remove air bubbles. Divide this clay into two equal balls. These will become the top and bottom halves of your vase. -
Pinch the first pot:
Take one ball and press your thumb into the center, stopping about a half-inch from the bottom. Rotate the clay in your hand while rhythmically pinching the walls between your thumb and fingers to thin them out. -
Refine the shape:
Continue pinching until you have a uniform bowl shape. Aim for walls that are roughly 1/4 inch thick. Repeat this entire process with the second ball of clay so you have two matching hemispheres. -
Score and slip:
Take your serrated rib or needle tool and aggressively scratch the rims of both bowls. Dab a little water or slip (liquid clay) onto the scratched areas to act as glue. -
Join the halves:
Place one bowl upside down on top of the other, aligning the rims. Press them firmly together. Use your thumb to smudge the clay across the seam on the outside until the line disappears completely. -
Reinforce the interior:
I find it helpful to reach inside (if your hand fits) or use a long wooden tool to smooth the seam on the inside as well. This prevents cracking during drying.
Step 2: Shaping the Neck and Body
-
Shape the sphere:
Gently paddle the exterior of your hollow sphere to round it out and compress the clay. If you don’t have a paddle, rolling it gently on the table works too. -
Open the top:
Decide which side is the top. Use your needle tool to cut a small circle out of the top center. Remove the clay disc to create the opening. -
Add a coil for the neck:
Roll a thick snake of clay. Score and slip the opening using the same technique as before, then attach the coil to build up a neck. -
Blend the neck:
Smooth the coil downwards onto the body of the vase so it integrates seamlessly. Use your fingers to flare the rim slightly outward for that classic vase silhouette. -
Wait for leather hard:
Let the vase sit uncovered for a few hours until it reaches a ‘leather hard’ state. It should be firm enough to handle without deforming, but soft enough to carve.
Trapped Air Warning
Before sealing the two bowls, poke a tiny pinhole if you plan to reshape extensively. Air trapped inside creates pressure that helps hold the shape, but can cause blowouts if not released.
Step 3: Carving the Texture
-
Plan your grooves:
Visualize vertical lines running from the neck down to the bottom. You can lightly mark guide lines with a needle tool if you’re worried about spacing, but organic irregularity is part of the charm. -
Start carving:
Using a U-shaped loop tool, start at the base of the neck. Drag the tool downward with steady pressure to carve shallow furrows. Let the tool follow the curve of the belly. -
Vary the depth:
As you pull the tool down the widest part of the vase, press slightly harder to widen the groove, then ease up as you reach the bottom. This accentuates the spherical form. -
Refine the ridges:
Continue carving around the entire circumference. Once finished, use a damp sponge to soften the sharp edges created by the loop tool. You want the ridges to look worn and soft, not razor-sharp. -
Final texture check:
If your clay lacks the gritty texture shown in the photo, you can gently sponge away the fine surface clay to reveal the ‘grog’ (sand-like particles) underneath.
Clean Lines
When carving the flutes, pull the tool toward your body rather than pushing away. This gives you significantly more control over the depth and straightness of the line.
Once fired and glazed in a matte finish, your textured vase will be ready to hold dried botanicals or fresh blooms.
Stamped Texture Pinch Pot Vase
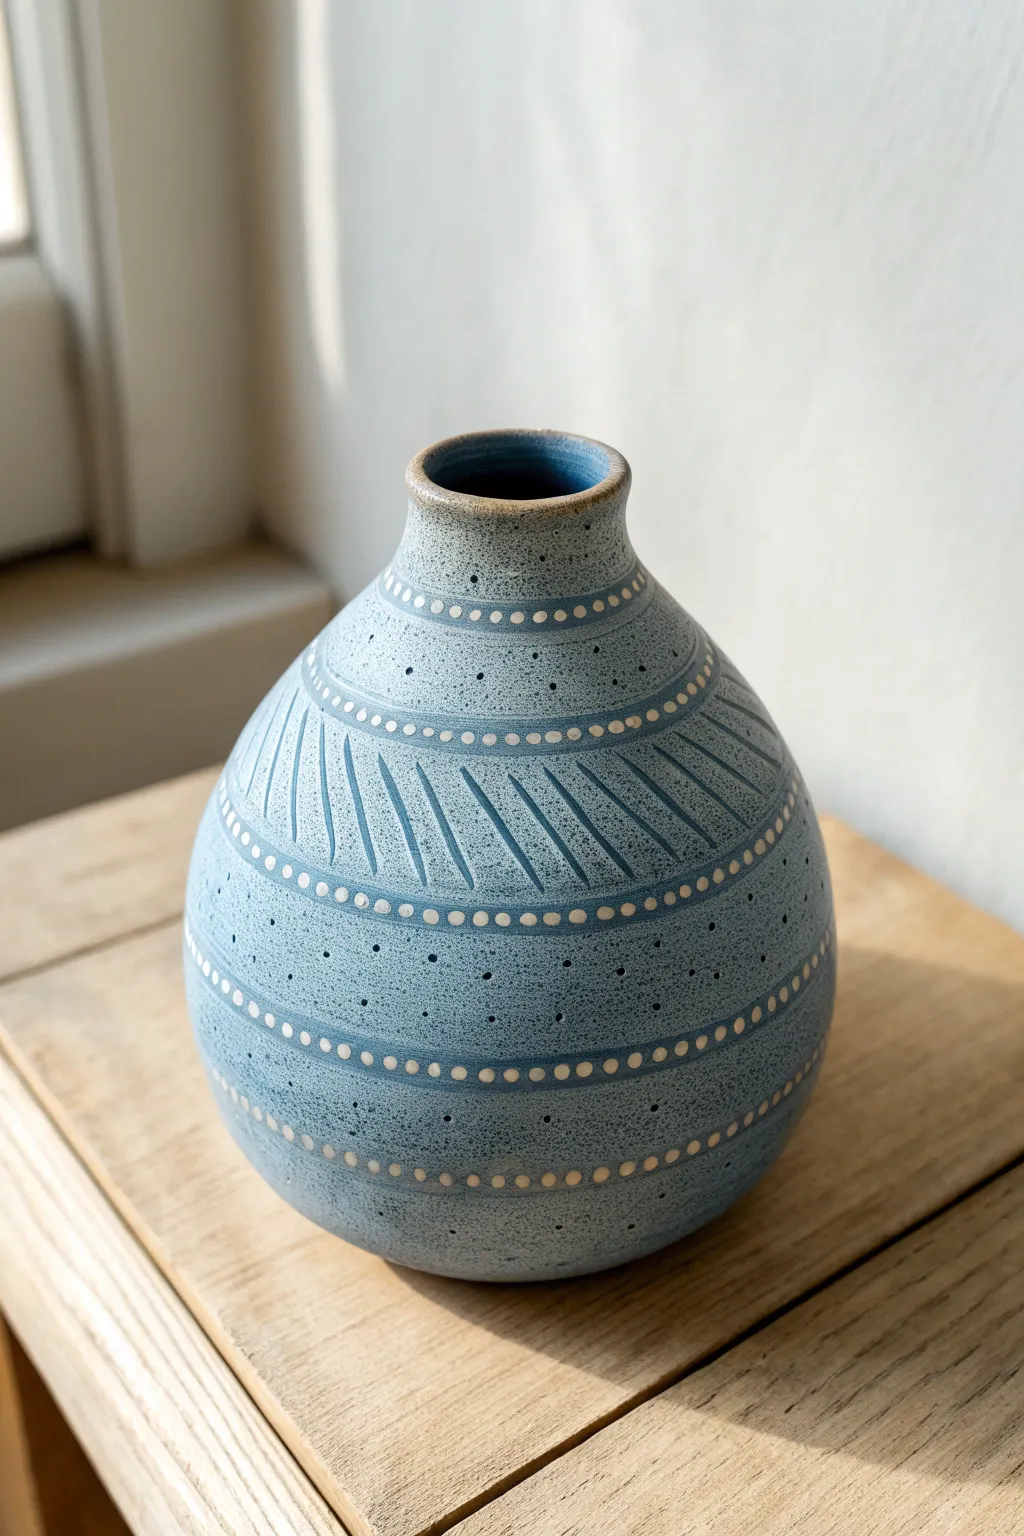
This elegant pinch pot vase features a soothing blue glaze with delicate white slip dots and rhythmic carved lines. The bulbous form narrows gracefully at the neck, creating a classic silhouette that feels both modern and handmade.
Step-by-Step
Materials
- Stoneware clay body
- Pottery wheel (optional, can be hand-built)
- Rib tool
- Needle tool
- Carving tool (small loop or sgraffito tool)
- White underglaze or slip
- Fine-tip slip trailer or small brush
- Satin matte blue glaze
- Sponge
- Kiln
Step 1: Forming the Body
-
Prepare the Clay:
Start with a ball of well-wedged stoneware clay, about the size of a large grapefruit. If you are pinching, ensure the clay is pliable but firm enough to hold its shape. -
Open the Form:
Whether throwing on the wheel or hand-building, create a hollow sphere. For a pinch pot, insert your thumb and pinch while rotating to create even walls. -
Build Height:
Once the base sphere is established, gently collar the clay inward as you move up to create that distinct, narrow neck leading to the rim. -
Refine the Shape:
Use a rib tool on the exterior while pushing out gently from the inside to create a smooth, bulbous curve. The transition from the wide belly to the neck should be gradual, not sharp. -
Finish the Rim:
Trim the rim so it is level. Use a damp chamois or your finger to round it off smoothly, ensuring it’s pleasant to the touch. -
Leather Hard Stage:
Allow the vase to dry slowly until it reaches a leather-hard state. This is crucial for clean carving; the clay should be firm but still cold to the touch.
Slip Trailer Troubles?
If the slip dots retain sharp peaks like meringue, tap the vase gently on the table immediately after piping to help them settle into smooth rounds.
Step 2: Decorating the Surface
-
Plan the Bands:
Place the pot on a banding wheel. While spinning it slowly, lightly scour horizontal guide lines with a needle tool to divide the vase into sections for your patterns. -
Carve Diagonal Textures:
In the prominent middle band, carve diagonal lines using a small loop or sgraffito tool. Keep the spacing consistent to create a rhythmic, woven look. -
Apply Blue Glaze:
After bisque firing, dip or spray the entire piece in a satin matte blue glaze. This particular finish has a lovely speckled character. -
Wipe Back (Optional):
If you want the carved lines to be darker or show the clay body, you can gently wipe the surface with a damp sponge, leaving more glaze in the recesses. -
Prepare White Slip:
Load a slip trailer with white slip or underglaze. Ensure the consistency is like thick yogurt so the dots stand up slightly. -
Dot Application – Main Lines:
Following your scored banding lines, carefully pipe small, uniform dots of white slip directly over the unfired glaze layer. -
Spacing the Dots:
I find it helpful to place the four cardinal point dots first (north, south, east, west) and fill in the gaps to keep spacing even. -
Add Secondary Dots:
Add smaller rows of dots near the neck and base to frame the central carved section, mirroring the composition seen in the example.
Try a Wax Resist
Apply wax resist over your white slip dots before dipping in blue glaze. The glaze will bead off the dots, revealing the pure white slip clearly.
Step 3: Finishing
-
Rim Detail:
Wipe the very top edge of the rim with a damp sponge to expose the raw stoneware clay, creating a nice contrast with the blue glaze. -
Dry Completely:
Let the applied slip and glaze dry thoroughly. Any lingering moisture in the added slip dots could cause them to pop off during firing. -
Glaze Fire:
Load the vase into the kiln and fire to the maturity temperature of your clay and glaze (likely Cone 5 or 6 for stoneware). -
Final Inspection:
Once cool, check the bottom for any sharp glaze drips and sand them down if necessary using a diamond sanding pad.
Place your finished vase near a window where the light can catch the subtle texture of the carving and the cheerful rows of dots

TRACK YOUR CERAMIC JOURNEY
Capture glaze tests, firing details, and creative progress—all in one simple printable. Make your projects easier to repeat and improve.
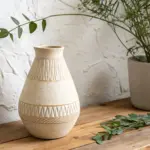
Carved Linework Pinch Pot Vase
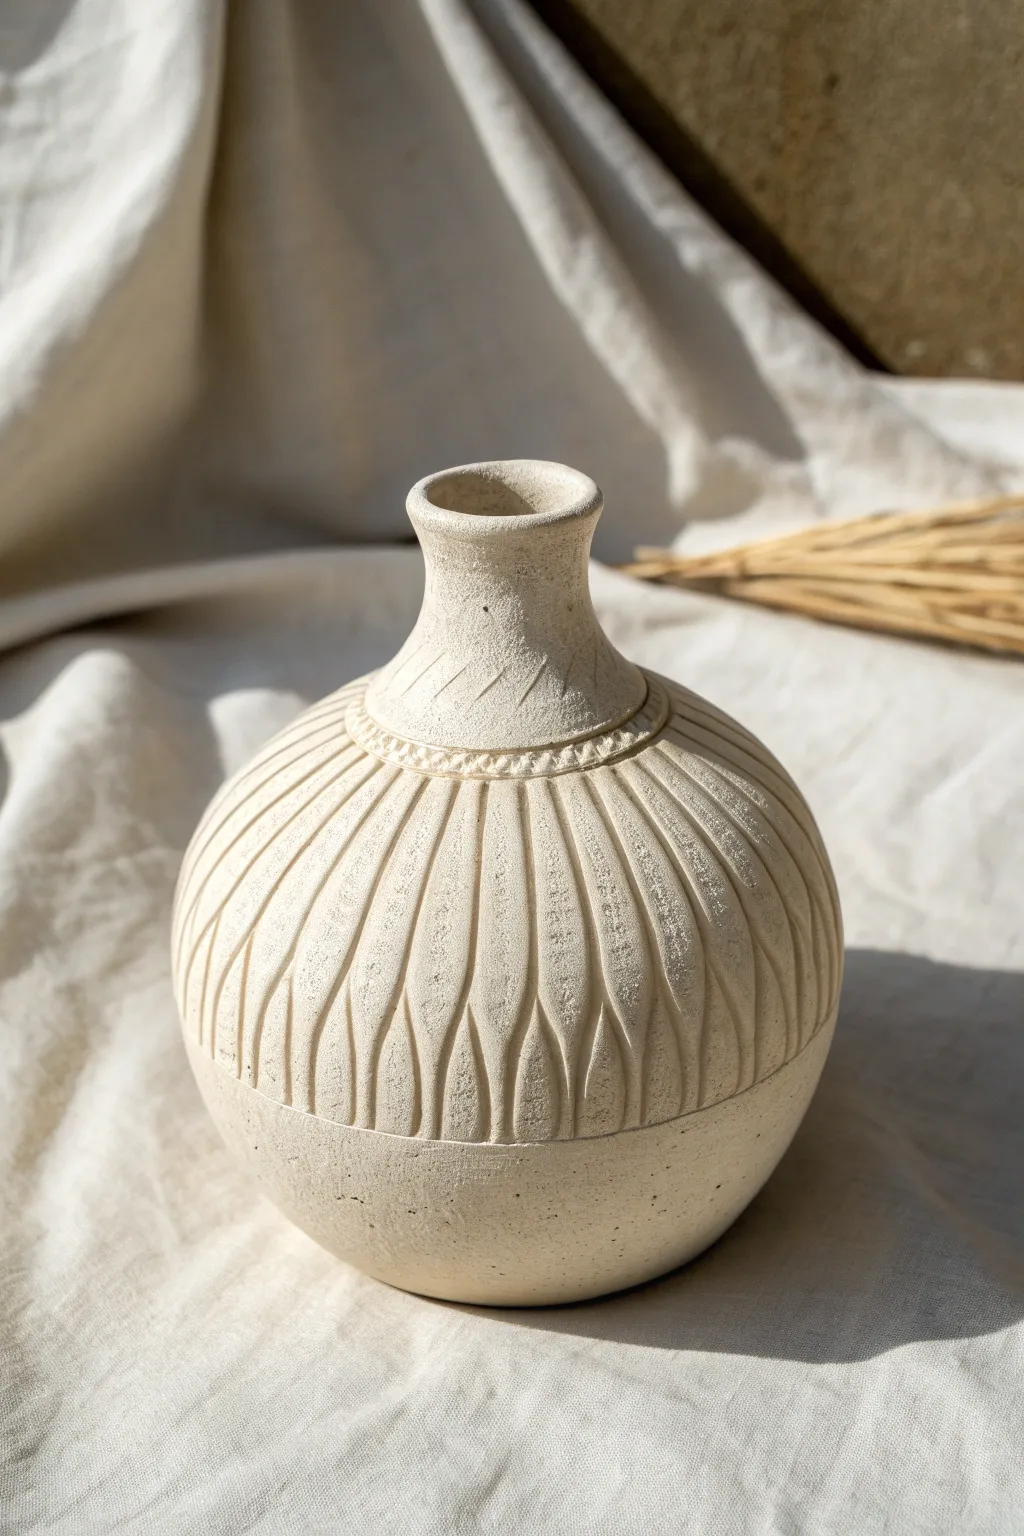
This elegant, bell-shaped vase features intricate yet approachable carved linework that resembles wheat or leaf patterns. The unglazed finish highlights the raw beauty of the clay, creating an organic, earthy centerpiece perfect for dried florals.
Detailed Instructions
Materials
- White or speckled stoneware clay
- Pottery carving tools (loop tool, needle tool)
- Rib tool (metal or rubber)
- Sponge
- Slip (clay mixed with water)
- Scoring tool or fork
- Wire cutter
- Canvas working mat
Step 1: Forming the Base
-
Prepare the Clay:
Start by wedging a baseball-sized ball of white stoneware clay to remove air bubbles and ensure consistency. -
Open the Pinch Pot:
Push your thumb into the center of the ball, stopping about half an inch from the bottom. Begin pinching the walls upwards while rotating the clay in your hand. -
Shape the Belly:
Gently push the walls outward from the inside to create a bulbous, rounded bottom half. Aim for an even thickness of about ¼ inch throughout. -
Create the Top Section:
Repeat the process with a slightly smaller ball of clay to create a second, inverted bowl shape that will sit on top of the first pinch pot to close the form. -
Join the Halves:
Score the rims of both pots with your needle tool and apply slip. Press them firmly together to create a sealed hollow sphere. -
Smooth the Seam:
Use a rib tool to blend the clay across the seam line, smoothing it until the join is invisible and the sphere is uniform.
Uneven Carving Lines?
Don’t panic! If a line goes astray, fill it with a tiny bit of soft clay and slip, smooth it over with a rib, wait a few minutes for it to firm up, and carve again.
Step 2: Adding the Neck
-
Open the Top:
Carefully cut a small hole in the top of your sphere where the neck will go. Save this clay if needed for slipping. -
Form a Coil:
Roll a thick coil of clay. Attach this coil to the opening you just made, blending the clay downward onto the body of the vase to secure it. -
Shape the Flue:
Pull the coil upward and slightly outward to create the flared neck shape shown in the image. Smooth the rim with a damp sponge. -
Define the Shoulder:
Where the neck meets the rounded body, use a modeling tool to create a slight indentation or ‘collar’ ring, separating the neck visually from the textured body.
Step 3: Carving the Texture
-
Leather Hard Stage:
Allow the vase to dry to a ‘leather hard’ state. The clay should be firm enough to hold its shape but soft enough to carve without chipping. -
Mark Guidelines:
Lightly sketch vertical lines with a needle tool to divide the vase into sections, ensuring your pattern stays symmetrical. -
Carve the Collar:
Just below the neck, carve a horizontal band with small, repeated notches or dots to create the decorative border seen in the reference. -
Start the Vertical Lines:
Using a sharp loop tool, carve long, sweeping vertical lines from the decorative collar down to the midpoint of the vase’s belly. -
Create the Petal Shapes:
Between your main vertical lines, carve shorter, curved lines that meet at the bottom points, creating the ‘wheat sheath’ or petal effect. -
Neck Texture:
Add subtle diagonal texture to the neck of the vase using lighter strokes with your carving tool. -
Clean Up Burrs:
I like to wait until the clay is bone dry to brush away the little crumbs, rather than sponging them now, to keep the lines crisp. -
Final Polish:
Gently rub the smooth, uncarved bottom section with a smooth stone or the back of a spoon to create a subtle contrast in texture. -
Bisque Fire:
Fire the piece in a kiln to bisque temperature. Since the look relies on raw clay texture, you can skip the glaze firing or apply a clear matte glaze to the inside only for water tightness.
Accentuate the Details
After bisque firing, apply a diluted black underglaze or an iron oxide wash into the carved lines, then sponge off the surface to make the texture pop.
Place complete dried wheat stalks in your new vessel to echo the carved patterns on the surface
Scalloped Rim Pinch Pot Vase
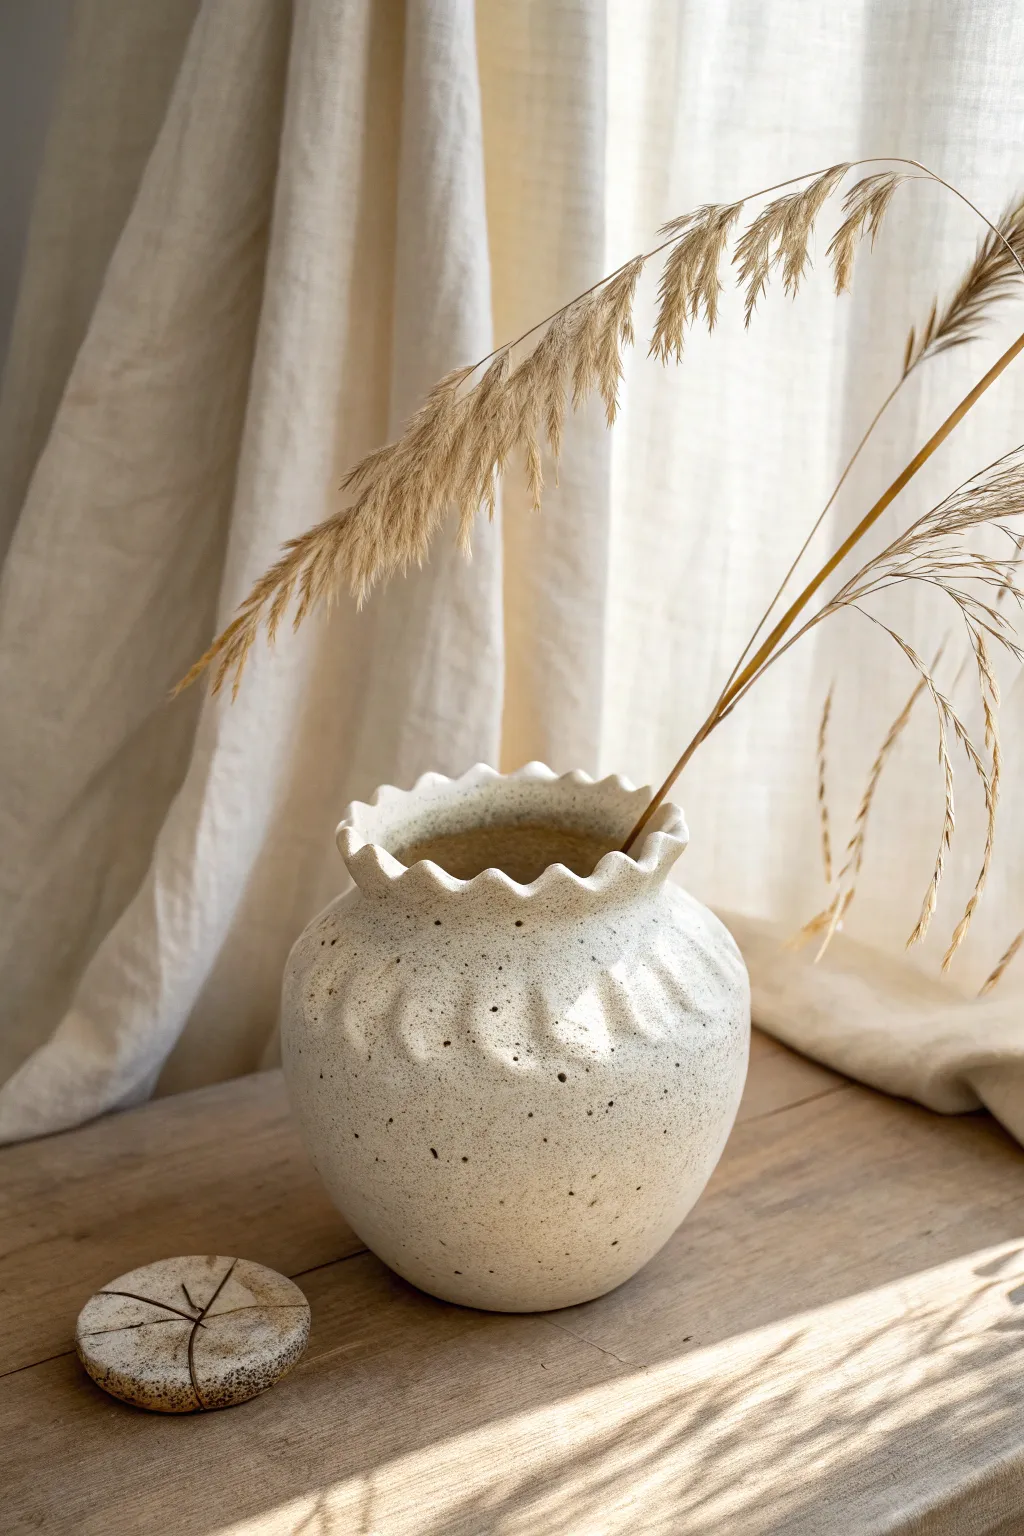
This charming, bulbous vase combines organic texture with a playful wavy rim, creating a piece that feels both rustic and refined. The speckled clay body and soft, ribbed details make it a perfect vessel for displaying dried grasses or single-stem botanicals.
Step-by-Step Guide
Materials
- Speckled sandstone clay (or white stoneware with added grog)
- Pottery sponge
- Pin tool or needle tool
- Wooden modeling tool (rounded end)
- Rib tool (kidney shaped, wood or metal)
- Canvas or ware board
- Small bowl of water
- Clear matte glaze
Step 1: Forming the Base
-
Prepare the Clay:
Start by wedging a softball-sized amount of speckled clay to remove any air bubbles. Pat it into a smooth, round ball in your hands. -
Open the Pot:
Hold the ball in one hand and press your thumb into the center, stopping about a half-inch from the bottom. This will create the initial opening for your pinch pot. -
Pinch the Walls:
With your thumb inside and fingers on the outside, gently pinch and rotate the clay. Work from the bottom upward, thinning the walls significantly as you go. -
Shape the Belly:
To create that nice bulbous shape shown in the image, push the clay outward from the inside with your thumb while supporting the exterior with your palm. Aim for a wide, rounded middle section. -
Collar the Neck:
As you reach the top third of the pot, gently squeeze the clay inward with both hands, tapering the form to create a narrower neck area before flaring it out slightly at the very rim.
Cracking Up?
If the rim starts cracking while you scallop it, the clay is too dry. Spritz it lightly with water, wrap it in plastic for 20 minutes to rehydrate, and try shaping again.
Step 2: Refining and detailing
-
Smooth the Surface:
Use a kidney-shaped rib tool to smooth the exterior walls. This helps compress the clay and creates a uniform curve, though you can leave some finger marks if you prefer a rougher look. -
Create the Ribbing:
Using the rounded end of a wooden modeling tool, gently press vertical indentations around the shoulder of the vase. Space them evenly, allowing them to fade out as they move down the body of the pot. -
Form the Scalloped Rim:
Using your thumb and forefinger, gently pinch the rim into a wave pattern. I like to support the inside curve with my finger while pressing down into the gaps with a tool handle for consistency. -
Refine the Edge:
Take a slightly damp sponge and run it over the scalloped rim to soften any sharp edges. The look should be organic and soft, not sliced or jagged. -
Check the Bottom:
Tap the vase gently on your table to flatten the bottom slightly so it stands stability. If needed, use your thumb to press a slight concave indentation into the center of the base.
Step 3: Finishing Touches
-
Dry Slowly:
Loosely cover the vase with plastic for the first day to ensure even drying, then uncover it and let it dry completely to the bone-dry stage. -
Bisque Fire:
Once bone dry, fire the piece in a kiln to cone 04 (or your clay body’s specific bisque temperature). -
Apply Glaze:
Pour a clear matte glaze inside the vase and swirl to coat the interior. Pour out the excess. For the exterior, dip or brush the clear glaze mainly to seal the surface while letting the natural speckles show through. -
Wipe the Foot:
Use a damp sponge to remove any glaze from the bottom of the pot to prevent it from sticking to the kiln shelf. -
Glaze Fire:
Fire the vase a second time to the maturation temperature of your specific clay and glaze combination (likely cone 5 or 6 for stoneware).
Go Geometric
Instead of soft scalloping, try sharper, triangular points on the rim for a modern twist, or create deeper, carved fluting on the body for more dramatic texture.
Now you have a beautifully handcrafted vessel ready to hold your favorite dried stems or wildflowers
Handled Pinch Pot Vase for One Stem
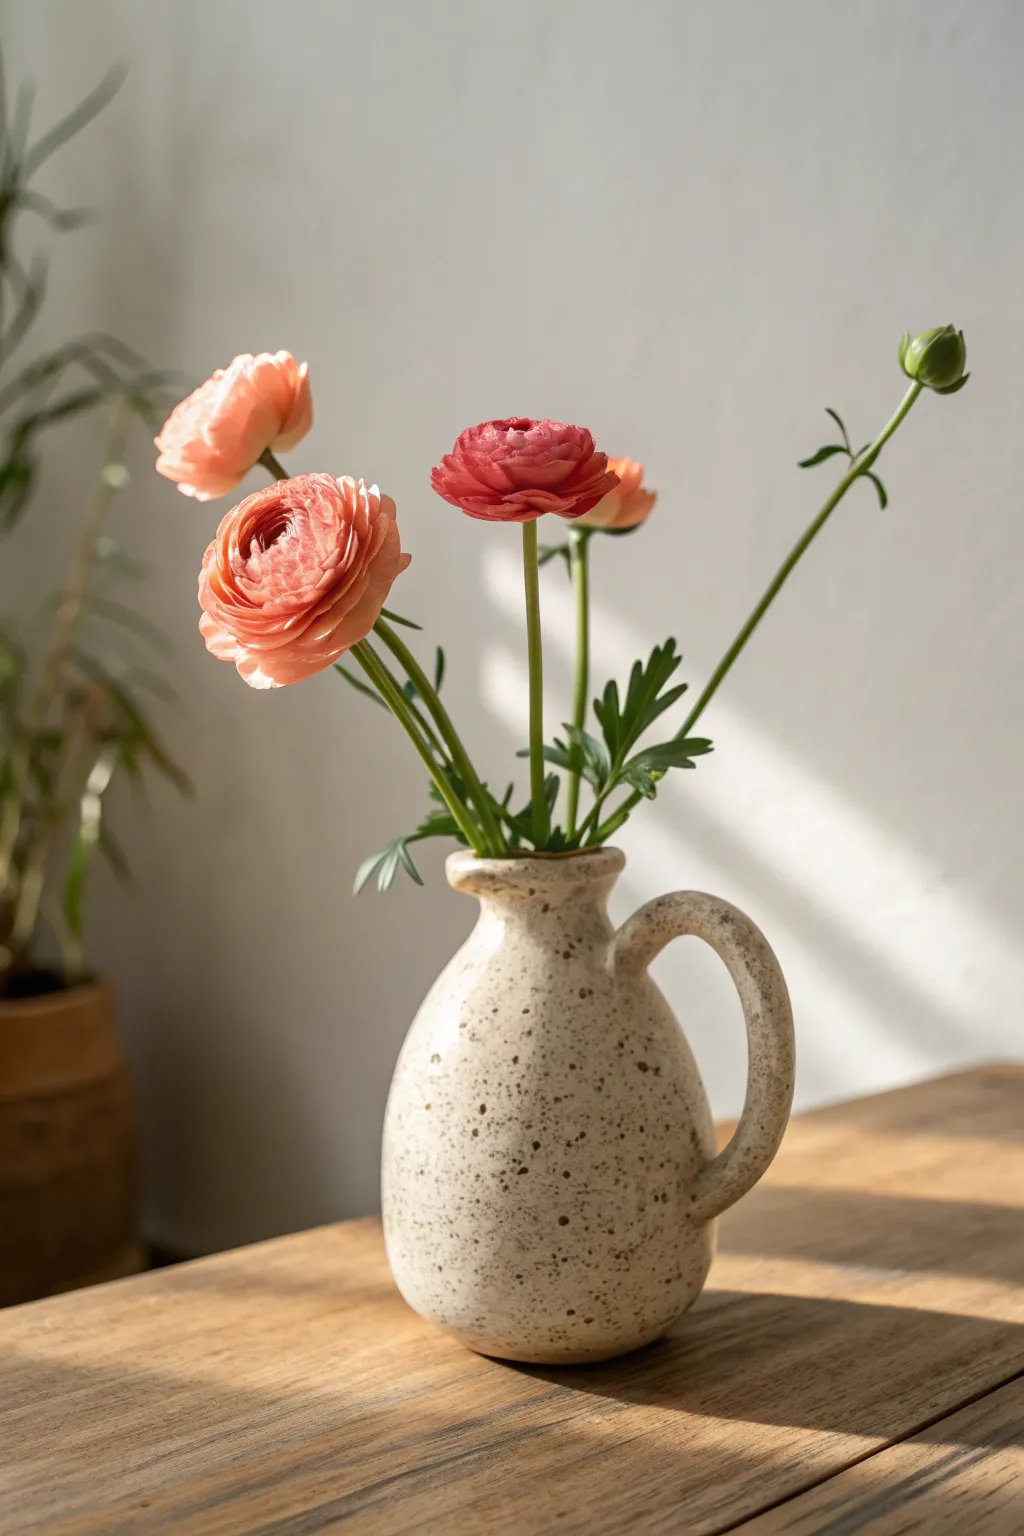
This charming, rustic vase combines the organic feel of a pinch pot with the elegance of a classic pitcher silhouette. Its speckled finish and sturdy handle make it the perfect vessel for displaying a cheerful cluster of ranunculus or wildflowers.
Detailed Instructions
Materials
- Stoneware clay (speckled or light buff)
- Pottery tools (needle tool, rib tool, scoring tool)
- Sponge
- Water slip or vinegar
- Rolling pin (optional)
- Clear or transparent white glaze
- Kiln
Step 1: Forming the Body
-
Prepare the clay:
Start with a ball of clay roughly the size of a large orange. Wedge it thoroughly to remove air bubbles and ensure even consistency. -
Open the pot:
Hold the ball in your palm and press your thumb into the center, leaving about half an inch of thickness at the bottom. -
Pinch the walls:
Gently pinch and rotate the clay between your thumb and fingers. Work your way from the bottom up, aiming for even wall thickness. -
Shape the belly:
As you pinch, gently push the walls outward from the inside to create a rounded, bulbous belly shape. Keep the opening slightly narrower than the widest part of the base. -
Add a coil for height:
Roll a thick coil of clay. Score and slip the top rim of your pinch pot, then attach the coil to add height for the neck. -
Smooth the join:
Blend the coil downwards onto the body on both the inside and outside. I find using a wooden rib tool here helps create a seamless transition. -
Refine the neck:
Gently collar the neck inward to make it narrower than the body, pulling the clay upward slightly to elongate it. -
Flare the rim:
Using your fingers or a wet sponge, gently flare the very top edge outward to create a soft, inviting lip.
Smooth Operator
For that perfectly smooth transition between the pinch pot base and neck coil, use a flexible metal rib on the outside while supporting the wall from the inside.
Step 2: Adding the Handle
-
Pull or roll a handle:
Create a coil or pull a strap of clay for the handle. It should be proportional to the vase—thick enough to look sturdy but not overwhelming. -
Shape the curve:
Arch the clay strip into an ‘ear’ shape and let it set up for a few minutes until it holds its curve without sagging. -
Determine attachment points:
Hold the handle up to the vase to find the best placement. Typically, the top attaches just below the rim and the bottom rests on the shoulder/belly. -
Score and slip:
Mark the attachment spots on the vase and the ends of the handle. Score the surfaces deeply and apply slip generously. -
Attach firmly:
Press the handle firmly onto the body. Use a small modeling tool to blend the clay around the connection points so they look integrated, not just stuck on. -
Check alignment:
Look at the vase from multiple angles to ensure the handle is straight and centered vertically.
Handle Drooping?
If your handle creates a flat spot or sags, prop it up with a small piece of crumpled newspaper or foam underneath the curve while it dries to leather hard.
Step 3: Finishing Touches
-
Smooth the surface:
Once leather hard, use a slightly damp sponge to smooth out finger marks or rough textures, unless you prefer a very rustic look. -
Bisque fire:
Allow the vase to dry completely, which may take several days depending on humidity. Fire it to bisque temperature (usually cone 04 or 06). -
Glaze application:
Dip or brush on a clear or semi-transparent white glaze. This will allow the natural speckles of the clay body to show through beautifully. -
Wipe the foot:
Clean off any glaze from the bottom of the vase with a damp sponge to prevent it from sticking to the kiln shelf. -
Final firing:
Fire the piece again to the maturity temperature of your clay and glaze (often cone 5 or 6 for stoneware).
Once cooled, fill your new speckled vase with water and arrange your favorite flowers to bring a handmade touch to any room
Two-Pinch-Pot Joined Gourd Vase

This rustic, textured beauty is created by joining two simple pinch pots to form a bulbous gourd shape. The contrasting rough clay center and smooth blue painted bands give it a timeless, hand-thrown appearance without needing a pottery wheel.
Step-by-Step Guide
Materials
- Air-dry clay (terracotta or reddish-brown color preferred) or earthenware clay
- Pottery sponge
- Small bowl of water
- Modeling tool or old credit card
- Serrated kidney scraper or fork
- Fingers (best tools available)
- Acrylic paint (matte blue)
- Medium flat paintbrush
- Fine grit sandpaper (optional)
Step 1: Forming the Base
-
Prepare Clay Balls:
Start by taking two equal amounts of clay and rolling them into smooth balls, roughly the size of oranges. This ensures your vase will be symmetrical. -
Create First Pinch Pot:
Press your thumb into the center of one ball, stopping before you break through the bottom. Gently pinch and rotate the clay between your thumb and fingers to thin out the walls evenly. -
Form the Top Half:
Repeat the process with the second ball of clay. This time, try to open the rim slightly wider than the first pot, creating a shape that’s more like a bowl. -
Score the Edges:
Using a serrated kidney or a fork, scratch up the rims of both pinch pots aggressively. This rough texture acts like Velcro for the clay. -
Apply Slip:
Mix a tiny bit of clay with water to create ‘slip’ (liquid clay glue) and dab it generously onto the scored edges of both pots.
Seam Splitting?
If the join line cracks while drying, dampen the area slightly and fill the crack with fresh soft clay. Smooth it over and let it dry slowly away from direct heat.
Step 2: Assembling the Gourd
-
Join the Pots:
Place the two pots rim-to-rim. Push them together firmly, giving a little wiggle to interlock the scored clay. -
Blend the Seam:
Using your thumb or a modeling tool, drag clay across the seam to merge the two halves completely. Smooth the outside until the join line disappears. -
Paddle into Shape:
Gently tap the joined sphere on your work surface to create a flat stable bottom. Use a flat wooden spoon or your palm to paddle the sides if you want to refine the roundness. -
Open the Neck:
If you closed the form entirely, cut a small hole in the top. If you left an opening, use your fingers to pinch and pull a neck upwards, flaring it slightly at the rim for that classic vase look.
Step 3: Texturing and Finishing
-
Add Surface Texture:
Take a rough sponge or a stiff-bristled brush and stipple the surface of the clay, especially around the middle section. This replicates the sandy, stone-like texture seen in the photo. -
Smooth the Bands:
While the texture is great for the middle, use a wet finger to smooth out the very bottom and the neck area where you plan to paint later. -
Dry Completely:
Let the vase dry thoroughly. I prefer to let air-dry clay sit for at least 24-48 hours to ensure no moisture is trapped inside. -
Sand Gently:
Once dry, run fine-grit sandpaper over the smooth sections (top and bottom) to prep them for painting, wiping away any dust afterwards. -
Paint the Base:
Load your brush with matte blue paint. Carefully paint a band around the bottom third of the vase, following the natural curve of the form. -
Paint the Neck:
Paint the upper neck and rim in the same blue shade. You can create a crisp line or leave it slightly organic for a more rustic feel. -
Final Touches:
If the paint looks too opaque, you can gently sand it back slightly to let some clay warmth peek through, or dilute a darker wash to dirty it up a bit.
Waterproof it
Air-dry clay isn’t water-tight! To hold real fresh flowers, insert a small glass jar or plastic cup inside the neck before arranging your stems.
Fill your new creation with dried grasses for an effortlessly organic display piece
Double-Neck Pinch Pot Vase
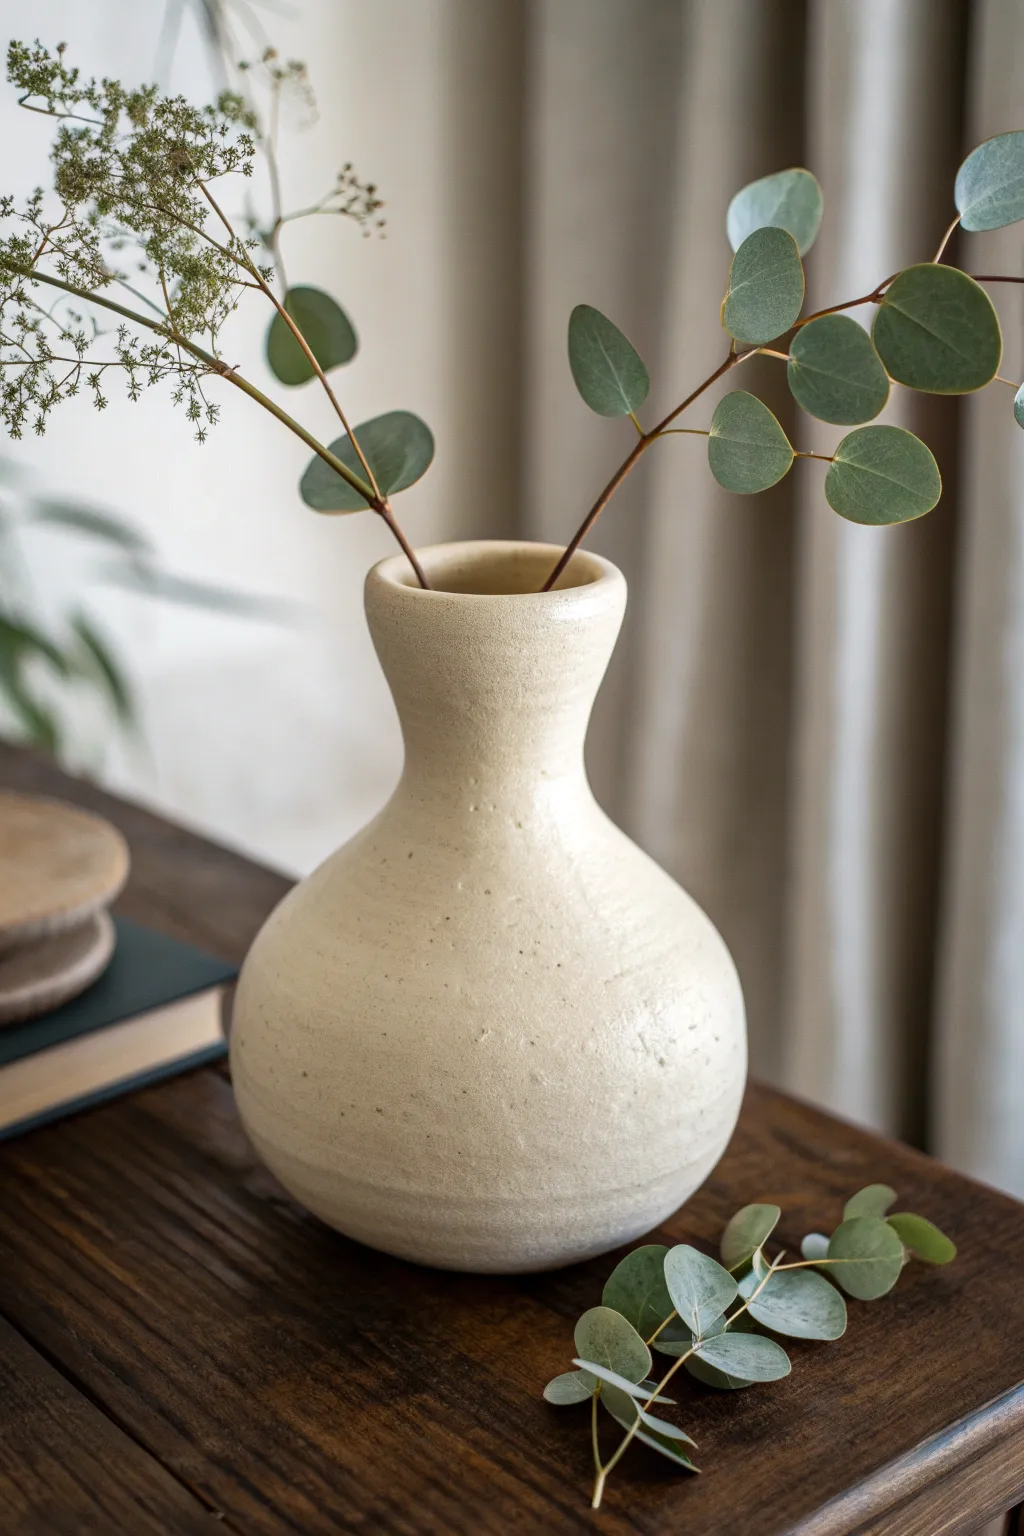
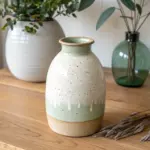
This charming, rustic vase features a classic bulbous base that tapers gracefully into a flared neck, perfect for displaying eucalyptus or dried botanicals. Its creamy, oatmeal-colored finish and subtle speckled texture give it a timeless, handmade warmth that suits any decor style.
Step-by-Step Tutorial
Materials
- Stoneware clay (preferably speckled)
- Pottery wheel (optional, can be hand-built)
- Rib tool (wooden or metal)
- Sponge
- Cutting wire
- Loop trimming tool
- Needle tool
- Creamy matte stoneware glaze (e.g., Oatmeal or Antique White)
- Kiln
Step 1: Shaping the Base Form
-
Prepare your clay:
Begin by wedging about 2-3 pounds of stoneware clay thoroughly to remove air bubbles. Form it into a rough ball shape. -
Start the pinch pot:
Push your thumb into the center of the ball, stopping about half an inch from the bottom. This establishes the floor thickness. -
Pinch the walls:
Gently rotate the clay while pinching between your thumb and fingers, working from the bottom up. Aim for a consistent wall thickness of about 1/4 inch. -
Create the bulbous shape:
As you pinch upward, encourage the belly of the pot to round out by pushing gently from the inside while supporting the outside. I like to paddle the outside gently with a wooden spoon to refine this curve.
Cracks at the rim?
If the rim starts cracking while you flare it, the clay is too dry. Compress the rim with a wet sponge or chamois cloth immediately to rehydrate and seal the micro-cracks before continuing.
Step 2: Adding the Neck
-
Prepare the opening:
Once your round base is formed, the opening at the top might be quite wide. Use a technique called ‘collaring’—place your hands around the rim and gently squeeze inward while rotating to narrow the opening. -
Add a coil for height:
Roll a thick coil of clay. Score and slip the rim of your base, then attach the coil to begin forming the neck. -
Blend the coil:
Smooth the coil downward on the outside and upward on the inside to securely join it to the pinch pot base. Ensure there are no visible seams. -
Shape the neck:
Pinch the added coil upwards to thin it out and create height. The neck should be narrower than the body, creating that elegant silhouette. -
Flare the rim:
Gently press your thumb outward against the very top edge of the neck to create a soft, rounded flare.
Go taller with coils
To make a dramatic floor vase version, continue adding coils to the neck. Wait for the lower coils to stiffen slightly before adding more height so the vase doesn’t slump.
Step 3: Refining and Texture
-
Smooth the surface:
Use a flexible metal or rubber rib to smooth the exterior walls. Don’t aim for perfection; keeping some subtle finger ridges adds to the organic feel. -
Add subtle texture:
Very lightly dab the surface with a damp, coarse sponge. This lifts the finer clay particles and exposes the grog or sand slightly, enhancing the stony look. -
Dry to leather hard:
Let the vase sit loosely covered until it reaches a leather-hard state, where it is stiff but still cool to the touch. -
Trim the foot:
If needed, turn the pot over and use a loop tool to trim a shallow foot ring on the bottom for stability.
Step 4: Glazing and Firing
-
Bisque fire:
Fire the completely dry greenware in the kiln to a bisque temperature (usually cone 04 or 06). -
Clean the bisque:
Wipe the fired pot down with a damp sponge to remove any kiln dust, which helps the glaze adhere properly. -
Apply the glaze:
Pour your creamy matte glaze inside the vase, swirl to coat, and pour out. Then, dip the exterior or brush on two heavy coats to achieve that thick, opaque finish. -
Final Fire:
Fire the glazed piece to the clay body’s vitrification temperature (often cone 5 or 6 for stoneware) to finish the piece.
Place your finished vase near a window where natural light can highlight the subtle textures of your handcrafted surface
Triple-Bud Pinch Pot Vase Cluster
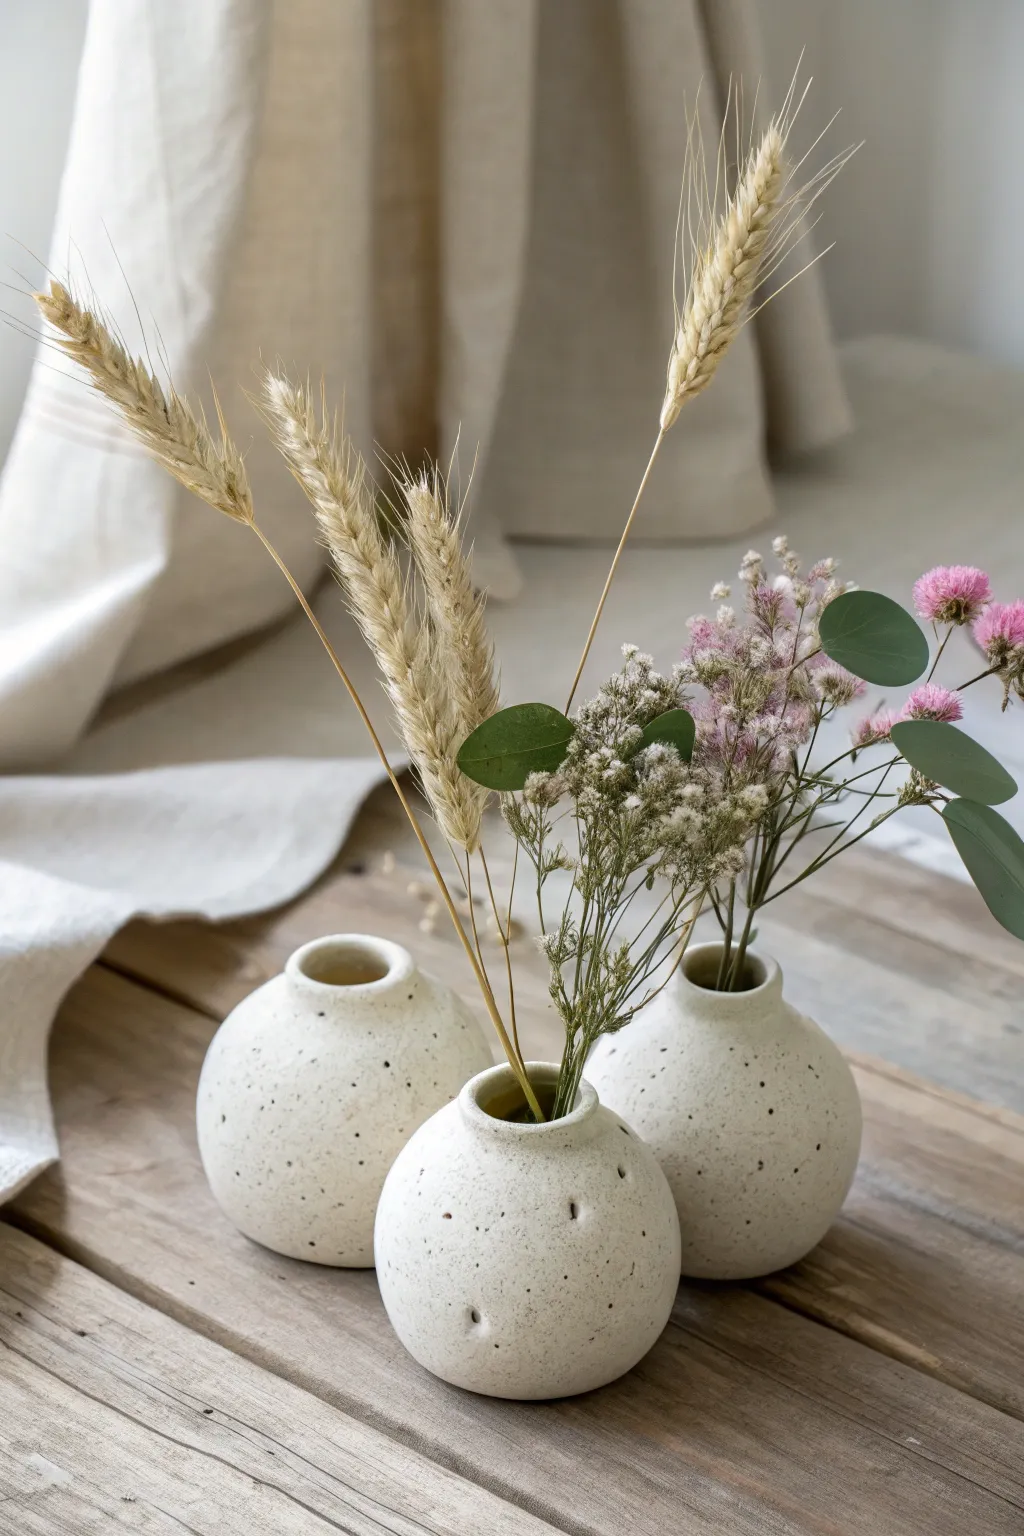
These charming, globe-shaped bud vases bring a touch of earthy minimalism to any space. By creating a cluster of three distinct but cohesive pinch pots, you’ll craft a versatile centerpiece perfect for displaying delicate dried botanicals.
Detailed Instructions
Materials
- White or cream stoneware clay (preferably with grog or speckles)
- Pottery sponge
- Pin tool or needle tool
- Wooden rib or smoothing tool
- Small bowl of water
- Kiln (or access to firing services)
- Clear matte glaze or a white speckled glaze (if using plain clay)
- Dried florals (wheat, bunny tails, baby’s breath)
Step 1: Shaping the Globes
-
Portion the clay:
Cut three lumps of clay of slightly varying sizes—think small tangerine to large lemon sizes. Wedge each piece thoroughly to remove air bubbles and create a uniform consistency. -
Roll spheres:
Roll each lump of clay between your palms or on a canvas surface until you have three smooth, perfect spheres. -
Start the pinch:
Hold a clay sphere in your non-dominant hand. Press your thumb gently into the center, stopping about a half-inch from the bottom to leave a sturdy base. -
Form the walls:
Slowly rotate the ball while pinching the clay between your thumb and fingers. Work your way from the bottom up, aiming for an even wall thickness of about 1/4 inch. -
Close the form:
As you pinch upward, encourage the clay to curve back inward at the top to maintain that round, globular shape rather than letting it flare out like a bowl. -
Refine the surface:
Using a slightly damp sponge, smooth the exterior to remove major fingerprints, but don’t over-wet the clay as it can weaken the structure.
Cracking at the Rim?
If the rim cracks while narrowing the neck, the clay is likely too dry. Score the crack, add a tiny bit of slip (clay slurry), and smooth it back together immediately.
Step 2: Creating the Neck
-
Define the opening:
At the very top where the walls curve in, pinch a small, distinct rim. This should be narrow, roughly the width of a quarter, suitable for just a few stems. -
Smooth the lip:
Use a piece of chamois leather or a very careful finger swipe to round off the rim so it isn’t sharp or jagged. -
Add texture (optional):
If your clay doesn’t have natural speckles, you can gently poke small, random indentations with a needle tool to mimic the pitted texture seen in the photo. -
Dry slowly:
Cover the pots loosely with plastic for the first 24 hours to let them dry slowly, then uncover them to reach a bone-dry state before the first firing.
Make it a Set
Instead of separate pots, join the three spheres together at the ‘leather hard’ stage using the score-and-slip method to create one unified, multi-neck vase sculpture.
Step 3: Firing and Finishing
-
Bisque fire:
Fire the bone-dry pieces in a kiln to bisque temperature (usually cone 04 or 06) to harden them for glazing. -
Apply glaze:
Dip the pots into a satin white or clear matte glaze. Ideally, use a clay body that already has speckles (like a speckle buff), or use a glaze with suspended speckles to achieve the dotted look. -
Wipe the feet:
Sponge off any glaze from the very bottom of each pot so they don’t fuse to the kiln shelf. -
Glaze fire:
Load the kiln again for the final glaze firing according to your clay and glaze specifications (often cone 5 or 6 for stoneware). -
Arrange the trio:
Once cool, arrange the three pots together. I find staggering the heights creates a more dynamic composition. -
Insert botanicals:
Place tall stems of dried wheat, eucalyptus, or small pink wildflowers into the narrow necks to complete the look.
Now you have a handmade ceramic vignette ready to display your favorite dried stems or grasses
Tall Pinch Pot Vase With Coil Neck
This elegant vase combines the organic feel of hand-building with a refined, elongated silhouette perfect for dried botanicals. The textured surface features subtle horizontal ridges from the coil-building process, finished with a creamy, speckled glaze that mimics natural sandstone.
Step-by-Step Tutorial
Materials
- Speckled stoneware clay (approx 3-4 lbs)
- Scoring tool or serrated rib
- Slip (clay slurry)
- Wooden modeling tool
- Flexible metal or rubber rib
- Sponge
- Cutting wire
- Matte cream/white speckled glaze
- Kiln (or access to a firing service)
Step 1: Forming the Base
-
Create the base pinch pot:
Start with a ball of clay roughly the size of a large orange. Push your thumb into the center and pinch the walls evenly while rotating the ball in your hand until you have a wide, bowl-like shape about 4 inches high. -
Level the rim:
Once your pinch pot is formed, gently tap the bottom on your work surface to create a flat, stable base. Use a needle tool to trim the upper rim so it is level and even, preparing it for the first coil. -
Score and slip:
Score the top rim of your pinch pot thoroughly using a serrated rib or needle tool. Brush on a generous amount of slip to act as glue for your first coil layer.
Smooth Seam Trick
Use a wooden paddle to gently tap the outside of the coils as you build. This compresses the clay particles and strengthens the walls without losing the organic shape.
Step 2: Building the Body
-
Roll your coils:
Roll out several long ropes of clay, aiming for a thickness of about half an inch. Try to keep them consistent to ensure the walls of your vase remain even as you build upward. -
Add height:
Layer the first coil on top of the scored rim. Blend the clay downwards on the inside of the pot using your thumb or a wooden tool to seal the seam completely. I find blending the outside only lightly helps preserve that lovely ribbed texture. -
Stack and shape:
Continue adding coils, stacking them slightly inward to begin narrowing the form as you move past the belly of the vase. Smooth the interior seams perfectly smooth for structural integrity. -
Refine the belly:
As you build the main body, use a flexible rib on the outside to gently compress and smooth the form while rotating. Don’t smooth it completely flat—leave faint horizontal undulations to mimic the look in the photo.
Textured Gradient
Lightly wipe a damp sponge horizontally around the belly of the vase before drying. This exposes the gritty texture of the clay, enhancing the speckles after firing.
Step 3: Creating the Neck
-
Taper inward:
As you reach the top of the bulbous section, place your coils noticeably further inward with each layer. This creates the shoulder of the vase and transitions into the slender neck. -
Elongate the neck:
Once the opening is narrowed to your desired width (about 2-3 inches), stack coils directly vertically to build the long neck. Keep the walls even and ensure the interior is smooth so it doesn’t crack during drying. -
Flare the rim:
For the final coil at the very top, gently pinch nearly the edge outward to create a graceful, slight flare. This mimics a classic trumpet shape and gives the piece a finished look. -
Surface detailing:
Take a serrated rib or a rough sponge and drag it very lightly horizontally across the surface to emphasize the coil lines. This enhances the tactile, handmade quality visible in the example.
Step 4: Finishing and Firing
-
Dry slowly:
Cover the vase loosely with plastic and let it dry slowly over several days. Tall forms can warp if they dry unevenly, so patience is key here. -
Bisque fire:
Once bone dry, fire the piece to bisque temperature (usually Cone 04 or 06) to prepare it for glazing. -
Glaze application:
Pour a matte cream glaze inside the vase, swirl to coat, and pour out the excess. For the exterior, dip or brush the glaze evenly. To get that speckled look, ensure your clay body has grog or iron specks that will bleed through, or use a specifically speckled glaze. -
Final firing:
Fire the vase a second time to the maturity temperature of your clay and glaze (typically Cone 5 or 6 for stoneware). Let it cool completely in the kiln before removing.
Place your finished vase near a window where natural light can highlight the subtle ridges and earthy speckles
Cutout Window Pinch Pot Vase
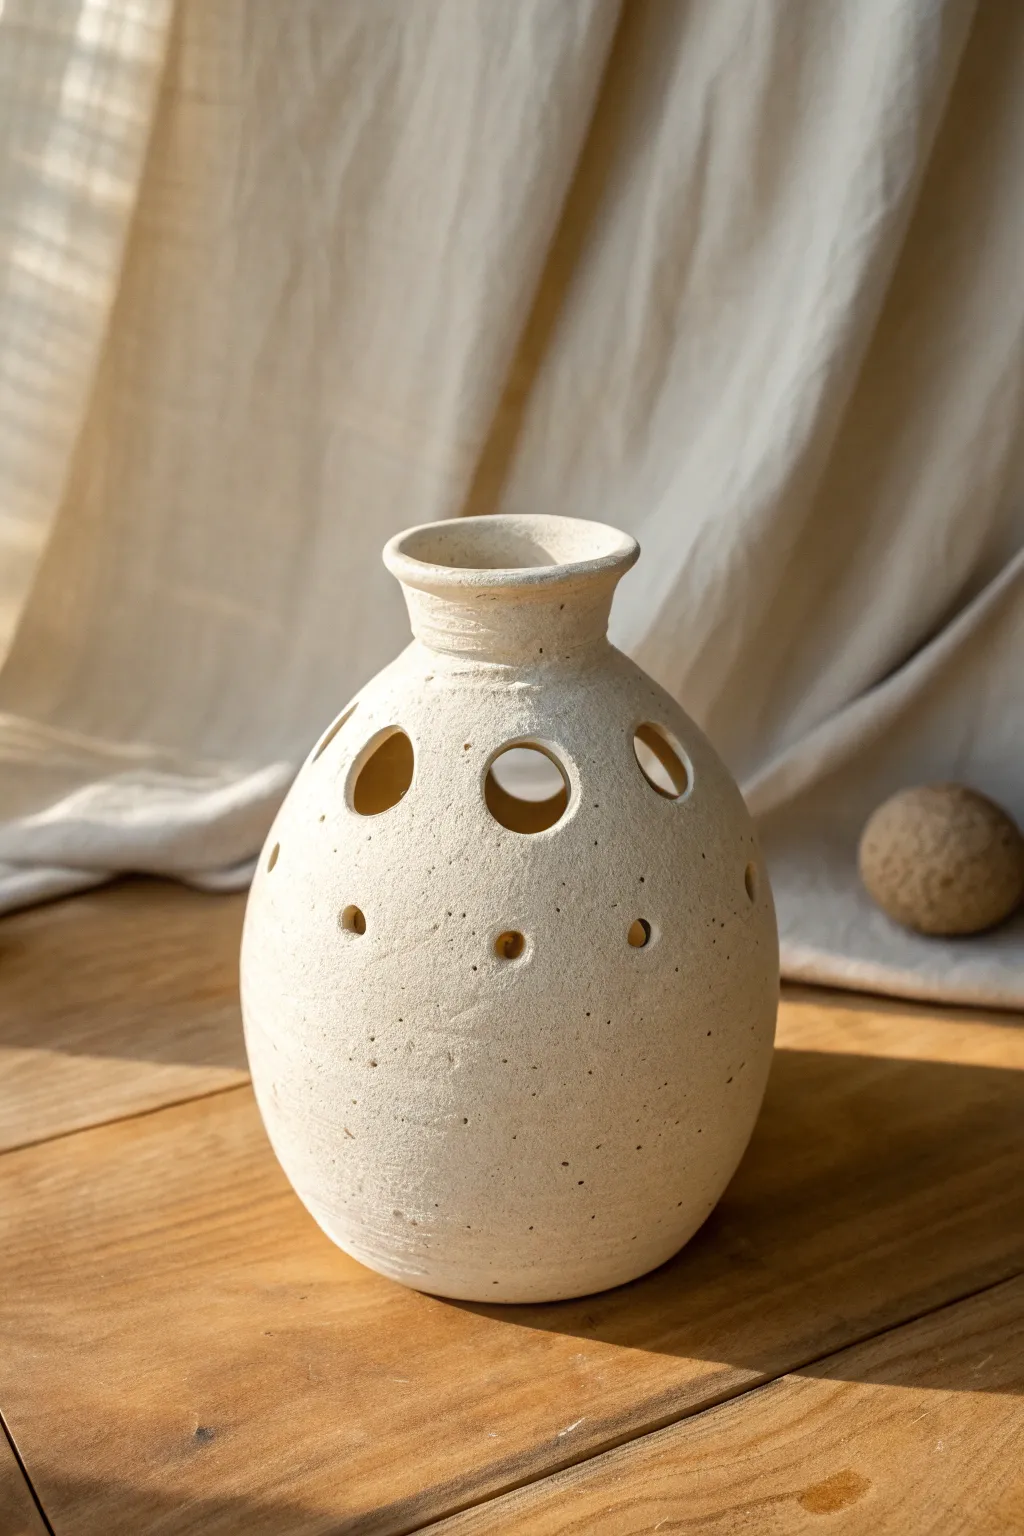
This rustic ceramic project transforms two simple pinch pots into a stunning vessel featuring playful peek-a-boo windows. The finished piece captures a lovely speckled sandstone texture with an organic, handcrafted silhouette perfect for dried stems or candles.
Step-by-Step Guide
Materials
- Speckled buff stoneware clay (or air-dry clay)
- Small bowl of water
- Serrated metal rib or scoring tool
- Wooden sculpting tool
- Needle tool
- Small circle cutter (approx. 1 inch)
- Drill bit or straw (for small holes)
- Sponge
- Paddle tool (optional)
Step 1: Forming the Base Body
-
Roll two spheres:
Begin by separating your clay into two equal portions. Roll each portion firmly between your palms to create tight, smooth spheres about the size of a large orange. -
Pinch the pots:
Insert your thumb into the center of the first sphere. Rotate the clay while gently pinching between your thumb and fingers to open up a bowl shape. Repeat this for the second sphere to create two matching hemispheres. -
Score and slip:
Take a serrated rib or needle tool and rough up the rims of both bowls. Apply a generous amount of clay slip or water to the scored areas to act as glue. -
Join the halves:
Press the two rims together firmly to form a hollow sphere. Wiggle them slightly to ensure a tight bond without trapping too much air inside. -
Seal the seam:
Drag clay from one side of the seam across to the other using a wooden tool or your thumb. Do this all the way around until the seam is completely invisible, then smooth the surface with a rib.
Trapped Air Warning
Before sealing your two pinch pots, ensure you prick a tiny, invisible hole in the joined sphere. This lets air escape as you work, preventing the sphere from ballooning or bursting.
Step 2: Shaping and Refining
-
Flatten the bottom:
Gently tap the sphere on your work surface to create a flat, stable base so the vase won’t roll away. -
Shape the neck:
At the top of the sphere, gently squeeze and pull the clay upward to form a neck. If the clay feels too thick, I like to pinch it slightly thinner as I pull up to create that elegant, narrow throat. -
Flare the rim:
Once the neck is established, press your thumb outward against the top edge to flare the rim. Smooth the lip with a damp sponge for a soft, finished look. -
Refine the surface:
Use a metal or rubber rib to scrape away lumpy areas on the body. Leave some texture if you want that organic, rustic feel shown in the photo.
Step 3: Creating the Cutouts
-
Wait for leather hard:
Allow the vase to dry until it is ‘leather hard’—stiff enough to hold its shape but soft enough to carve. This matches the crisp edges seen in the image. -
Mark the circle locations:
Lightly trace where you want your large windows to go around the upper shoulder of the vase using a needle tool. Spacing them evenly is key for balance. -
Cut the large windows:
Use a small circle cutter or a fettling knife to carefully remove the clay circles. Support the wall from the inside with a finger if possible to prevent collapsing. -
Smooth the cut edges:
Dip your finger or a small brush in water and smooth the sharp internal edges of the cutouts. This step prevents cracking during firing. -
Add the tiny vents:
below the large windows, punch smaller decorative holes. A drinking straw or a drill bit works perfectly for these tiny, uniform accents. -
Final texture check:
Lightly sponge the exterior one last time to bring the grog or speckles to the surface. Allow the piece to dry slowly under plastic before firing.
Glow Up
Turn this into a luminary! Place a battery-operated tea light inside the finished vase. The light will cast beautiful, patterned shadows through the cutouts onto your walls.
Once fired, the natural speckled clay body shines through, giving you a timeless decorative accent.
Whimsical Face Pinch Pot Vase
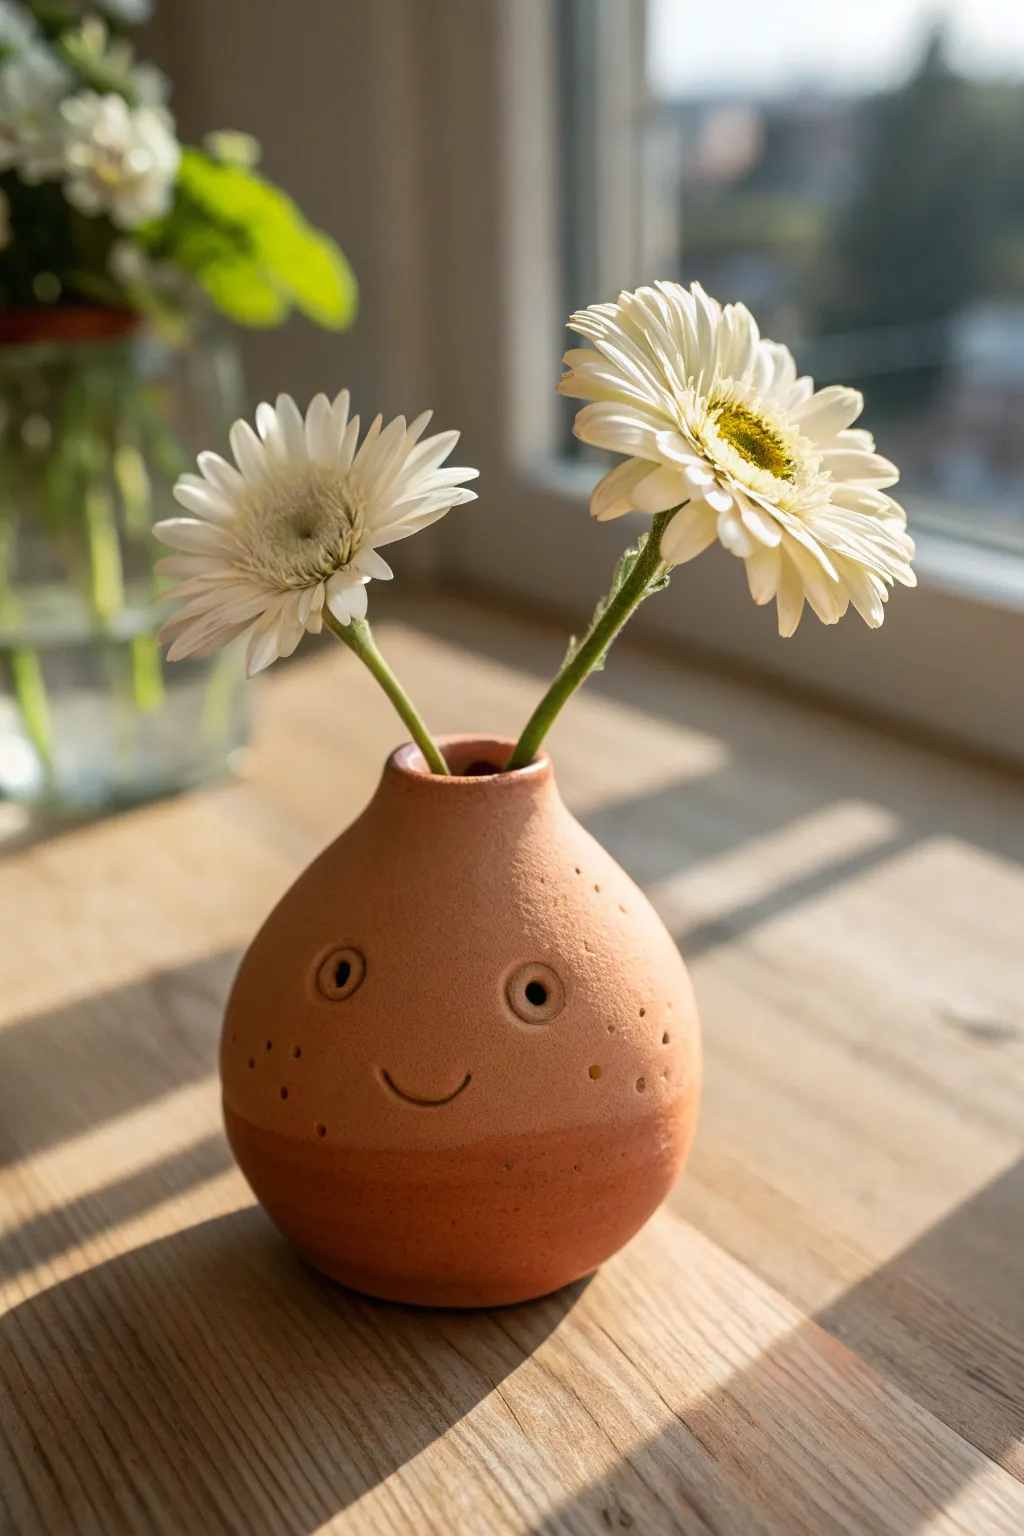
Bring a little joy to your windowsill with this charming terracotta pinch pot vase. Featuring a sweet, carved expression and a classic two-tone finish, this beginner-friendly project is the perfect home for your favorite stems.
Step-by-Step Tutorial
Materials
- Terracotta clay (or air-dry clay)
- Small bowl of water
- Sponge
- Needle tool or toothpick
- Loop tool or small carving tool
- Wooden modeling tool
- Clear matte glaze (optional, for fired clay)
- Matte sealant (for air-dry clay)
Step 1: Forming the Base
-
Prepare the Clay:
Start with a ball of terracotta clay roughly the size of a tennis ball. Wedge it thoroughly to remove any air bubbles, which helps prevent cracks during drying or firing. -
Start the Pinch:
Hold the clay ball in one hand and press your thumb into the center, stopping about a half-inch from the bottom. This thickness will ensure your vase is stable. -
Open the Shape:
Gently pinch the clay between your thumb and fingers, rotating the ball as you go. Work from the bottom up, thinning the walls evenly until they are about a quarter-inch thick. -
Refine the Belly:
Use your fingers to push the walls outward slightly in the middle section, creating a nice, rounded belly shape while keeping the rim slightly thicker for now. -
Close the Neck:
As you reach the top third of the pot, change your pinching motion. Instead of pressing outward, gently collar the clay inward to create a narrower neck. -
Smooth the Surface:
Once you are happy with the pear-like shape, dip your sponge or fingers in a tiny bit of water and smooth out any fingerprints or cracks on the exterior. I like to spend extra time here to get that clean, matte finish. -
Create the Rim:
Level off the top rim. You can gently tap the opening against a flat surface or use a needle tool to trim it evenly. Soften the edge with your damp finger so it isn’t sharp.
Step 2: Sculpting the Personality
-
Map the Face:
Lightly trace where you want the features to go using a needle tool. Place the eyes slightly wide apart on the upper curve of the ‘belly’ for a cute look. -
Carve the Eyes:
Using a small loop tool, carve out two shallow circular indentations for the eye sockets. Don’t go too deep; you just want to create a shadow. -
Define the Pupils:
Take the blunt end of a wooden tool or the back of a paintbrush and press firmly into the center of each eye socket to create the ‘pupil’ hole. -
Add Eye Details:
Use a needle tool or small carving tool to etch a tiny arc above each eye socket, suggesting an eyelid or eyebrow. Keep the lines clean and simple. -
Carve the Smile:
Carve a simple, U-shaped line for the mouth. Press a bit deeper at the corners of the smile to make the expression look friendly and genuine. -
Add Freckles:
Using the tip of your needle tool, poke clusters of small dots on the ‘cheeks’ area beneath the eyes. Vary the pressure slightly so some freckles are deeper than others. -
Texture Clean-up:
Examine the carving. If there are little burs or crumbs of clay sticking out, wait until the clay is leather-hard and brush them away with a soft, dry brush rather than smudging them while wet.
Use a Spoon
For a super smooth surface like the photo, rub correct-dry clay with the back of a metal spoon. This compresses particles and adds a subtle sheen.
Step 3: Finishing Touches
-
Create the Two-Tone Effect:
The image shows a distinct line near the bottom where the texture changes. You can achieve this by leaving the bottom inch slightly rougher or by burnishing (polishing) only the top section with a spoon. -
Dry Slowly:
Place your vase on a board and cover it loosely with plastic. Let it dry slowly over several days to prevent warping. -
Firing or Sealing:
If using real ceramic clay, bisque fire it, then apply a clear matte glaze to the inside only to make it watertight before the final firing. If using air-dry clay, apply a matte sealant to protect it, but use a glass insert for fresh flowers.
Make it Functional
If you can’t fire the clay, stick a small glass test tube or spice jar inside the neck. This lets you hold water without ruining the air-dry clay.
Once filled with cheerful blooms, your little clay friend will brighten up any corner of the room