If you’re going to make an ashtray, it might as well be ridiculously charming—like a tiny piece of decor you’re proud to leave out. Here are my favorite cute clay ashtray ideas that keep the function (rest notches and all) but totally upgrade the vibe.
Classic Round Ashtray With Sweet Scalloped Rim
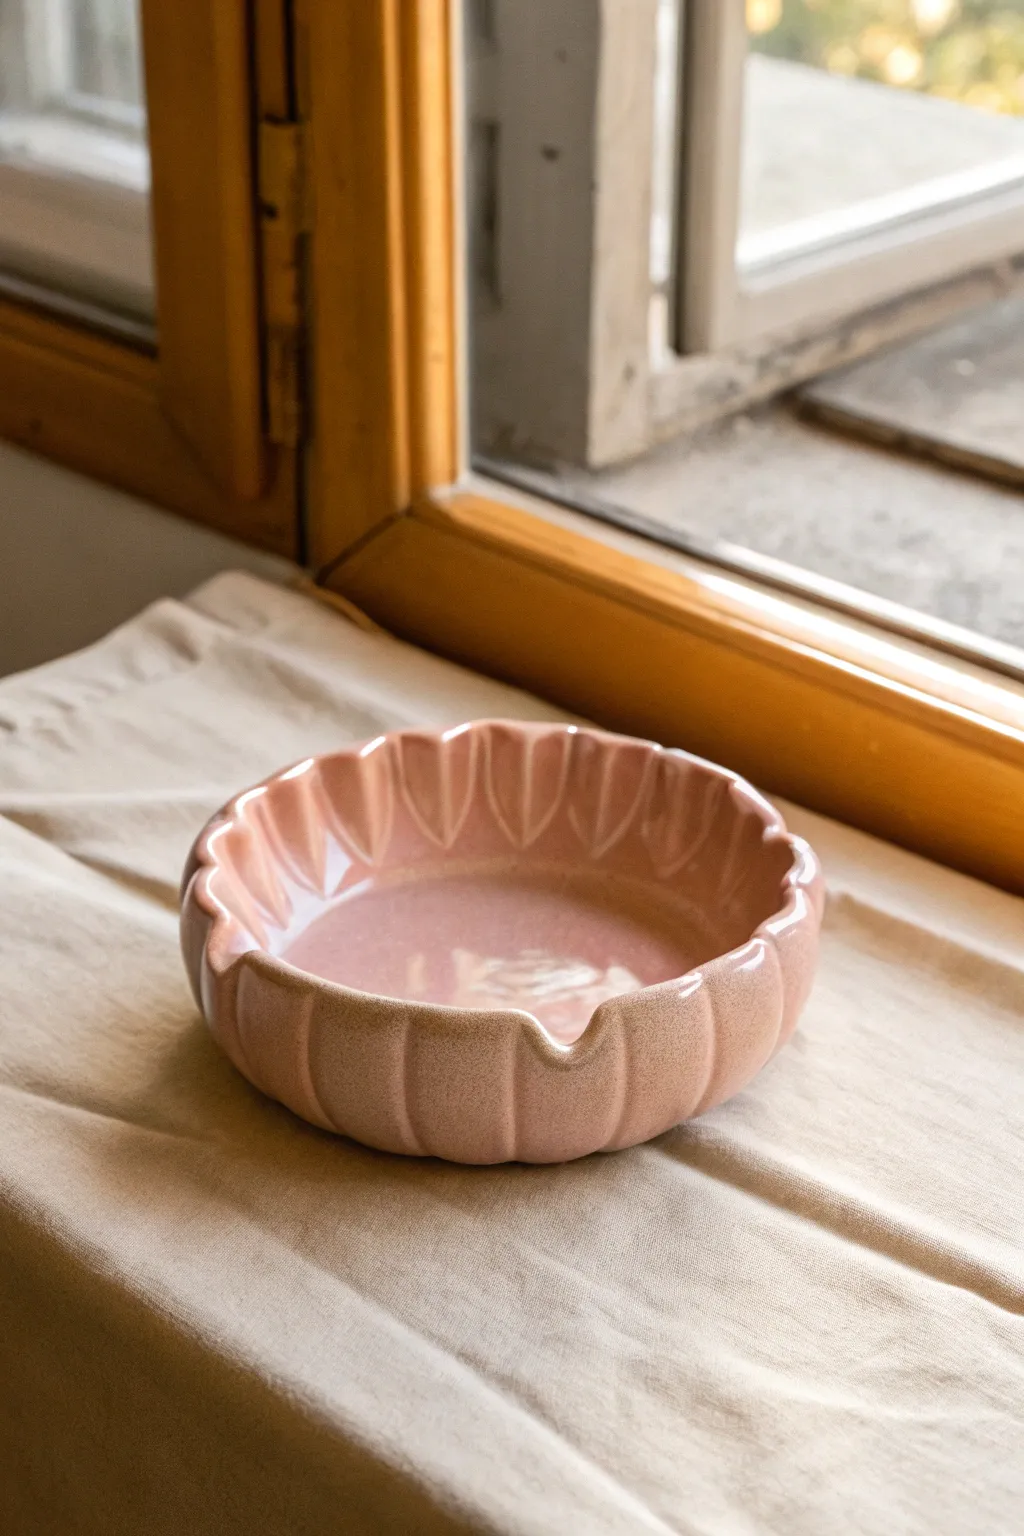
This charming ceramic piece reimagines the classic ashtray with a soft, flower-like touch. Featuring deep, straight walls and a lovely repeating scalloped detail around the rim, it’s perfect as a catch-all dish or a traditional receptacle with a vintage flair.
How-To Guide
Materials
- Low-fire white earthenware clay (approx 1 lb)
- Rolling pin
- Two long wooden dowels (1/4 inch thickness)
- Circular template (paper or cardstock, approx 5-inch diameter)
- Needle tool
- Scoring tool or old fork
- Slip (clay mixed with water)
- Modeling tool with a curved end (or spoon handle)
- Sponge
- Soft pink glossy glaze (cone 04-06)
- Clear glaze (optional, for extra shine)
- Kiln access
Step 1: Forming the Base
-
Prepare the slab:
Begin by wedging your white earthenware clay to remove air bubbles. Place the clay between your two wooden dowels on a canvas board. Roll the clay out until the rolling pin rests on the dowels, ensuring a perfectly even 1/4 inch thickness. -
Cut the circle:
Lay your circular template onto the slab. Using the needle tool held vertically, trace around the template to cut out the base of your ashtray. Set the excess clay aside. -
Measure the circumference:
Use a flexible measuring tape or a piece of string to measure the exact circumference of your circle base. This measurement will determine the length of the wall slab you need to cut.
Uneven Scallops?
If your spacing is off at the end, gently smooth out the last few marks and redistribute the space. The clay is forgiving while plastic.
Step 2: Building the Walls
-
Cut the wall strip:
Re-roll your scraps into a long rectangular slab, again using the dowels for thickness. Cut a long strip that matches your circumference measurement plus one inch for overlap. Make the strip about 1.5 to 2 inches tall. -
Score and slip:
Rough up the outer top edge of your circular base and one long edge of your wall strip using your scoring tool. Apply a generous amount of slip to both scored areas. -
Attach the wall:
Carefully wrap the wall strip around the base, placing the scored edge of the wall onto the scored edge of the base. Press firmly to join them. Here, I like to overlap the ends of the wall slightly, slice through both layers at an angle, and join the seam for a clean continuous circle. -
Reinforce the visible seam:
Smooth the vertical seam on the wall inside and out so it disappears completely. Then, use a small coil of clay along the bottom interior seam (where the floor meets the wall) and blend it smooth for added strength. -
Smooth the rim:
Use a slightly damp sponge to compress and smooth the top rim of the wall. It should be perfectly level before you start sculpting.
Pro Tip: Glaze Pooling
Apply the glaze slightly thinner inside the grooves and thicker on the high points to accentuate the 3D texture and create beautiful visual depth.
Step 3: Sculpting the Scallops
-
Mark the intervals:
Lightly mark vertical lines on the outside of the wall to guide where your scallops will go. Space them evenly, about 3/4 of an inch apart all the way around. -
Create the indentations:
Using a curved modeling tool or the handle of a spoon, press vertically into the clay wall from the outside at each mark. Press deep enough to create a distinct groove that runs from the rim down to the base. -
Refine the interior:
While supporting the outside groove with your finger, gently press between the grooves on the inside to push the clay outward slightly, emphasizing the curve of each ‘petal’. -
Add cigarette rests:
To make this functional, choose one or two spots on the rim. Use your thumb or a round tool to gently press the rim downward into a smooth U-shape, interrupting the scallop pattern just slightly to hold a cigarette. -
Final smoothing:
Once the clay is leather hard, use a damp sponge to soften any sharp edges on the scallops. The glaze will break beautifully over these soft curves, so ensure they are smooth.
Step 4: Glazing and Firing
-
Bisque fire:
Let the piece dry slowly and completely. Bisque fire the greenware to cone 04 (or as recommended for your specific clay body). -
Apply glaze:
Wipe the bisque ware with a damp sponge to remove dust. Brush on 3 even coats of a soft pink glossy glaze. Ensure the glaze gets into the deep grooves of the scallops but isn’t so thick that it runs. -
Clean the foot:
Wipe away any glaze from the bottom of the pot to prevent it from sticking to the kiln shelf. -
Glaze fire:
Fire the piece again to the temperature recommended by your glaze manufacturer (usually cone 05 or 06 for earthenware).
Once cooled, your glossy pink creation is ready to add a touch of softness to your table


Heart-Shaped Ashtray With Tiny Dots
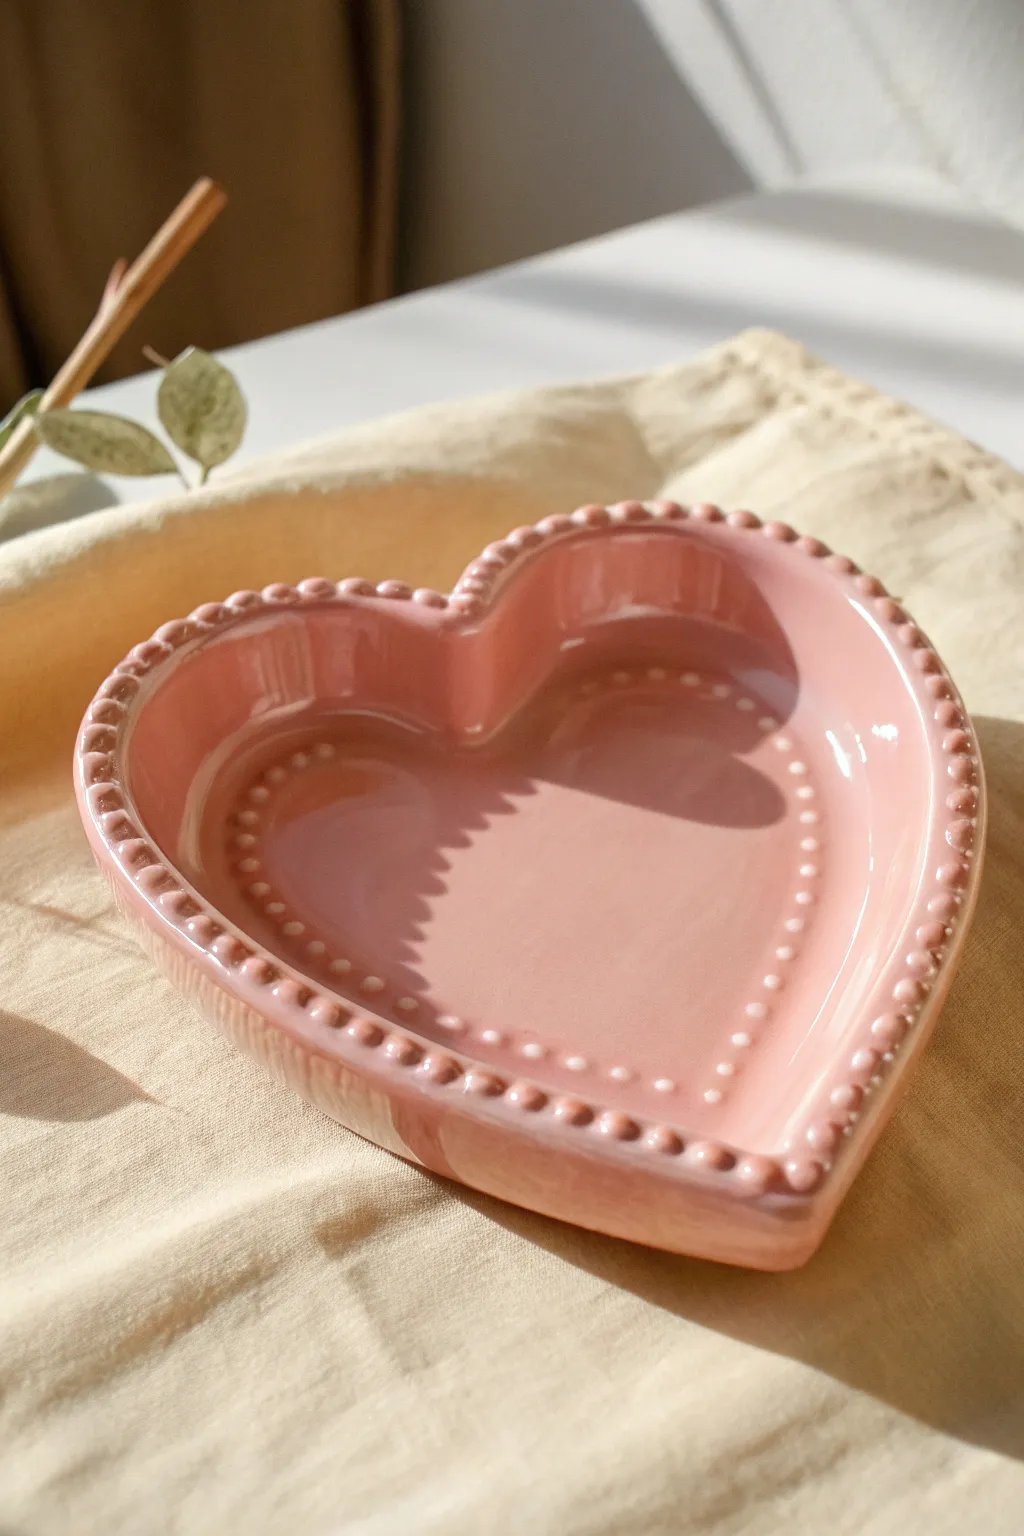
This adorable heart-shaped ashtray features a soft pink glossy finish and a charming beaded texture along the rim. It’s a perfect blend of delicate vintage style and modern minimalism that livens up any coffee table.
Step-by-Step
Materials
- Air-dry clay (or polymer clay)
- Rolling pin
- Heart-shaped template (paper or cookie cutter)
- Clay knife or craft blade
- Ball stylus tool (or a rounded toothpick)
- Small bowl of water
- Sponge or fine sandpaper
- Acrylic paint (soft pink)
- High-gloss varnish or resin
- Paintbrushes
Step 1: Shaping the Base
-
Prepare the Clay:
Start by conditioning your clay. Knead a fist-sized ball until it is soft, pliable, and free of cracks. -
Roll it Out:
Use your rolling pin to flatten the clay into an even slab. Aim for a thickness of about 1/4 inch (6mm) to ensure the dish is sturdy. -
Cut the Heart Shape:
Place your heart template or large cookie cutter onto the slab. Carefully cut around the outline with your clay knife to create the base of the ashtray. -
Create the Wall Coils:
Roll out a separate long snake of clay. This coil should be about the thickness of a pencil and long enough to wrap around the entire perimeter of your heart base. -
Attach the Walls:
Score the edges of the heart base and the bottom of the coil using a needle tool or toothpick. Apply a little water (or slip) to the scored areas. -
Build the Rim:
Press the coil onto the edge of the heart base. Gently blend the clay from the inside of the coil down onto the base to create a seamless transition, ensuring there are no gaps. -
Smooth the Edges:
Using a slightly damp sponge or your finger, smooth the outside and top of the rim to remove any fingerprints or harsh seam lines.
Uniform Dots
Use a small circular piping tip or a straw to punch out tiny circles from a flattened sheet of clay. Roll these circles into balls for perfectly consistent sizing.
Step 2: Adding the Details
-
Create the Outer Beads:
Roll many tiny balls of clay, approximately 3-4mm in diameter. You will need enough to line the entire top rim of the heart. -
Attach the Rim Detail:
Brush a small amount of water along the top edge of the wall. Press each tiny ball gently onto the rim, spacing them tightly together to look like a string of pearls. -
Create the Inner Pattern:
For the interior heart outline, you can either roll tinier balls of clay or use the ‘relief’ method. To mimic the photo exactly, roll very small dots of clay. -
Place Inner Dots:
Arrange these smaller dots on the floor of the dish in a heart shape, roughly half an inch inward from the walls. Press them down gently so they adhere but keep their rounded shape. -
Dry Completely:
Set the project aside in a cool, dry place. Let it dry for at least 24-48 hours until it is bone dry and turns a lighter color. -
Sand Imperfections:
Once fully dry, use fine-grit sandpaper to gently buff away any rough spots on the exterior or back, being careful not to damage the decorative dots.
Cracked Clay?
If you see tiny hairline cracks forming while the clay dries, mix a small amount of clay with water to make a paste and fill the cracks immediately, then smooth over.
Step 3: Finishing Touches
-
Apply Base Color:
Paint the entire piece, including the dots, with a soft pink acrylic paint. It usually takes 2-3 thin coats to get full, opaque coverage. -
Highlight the Texture:
I like to use a slightly lighter shade of pink on the very tops of the dots to make the texture pop, though a solid color works beautifully too. -
Seal with Glaze:
To achieve that ceramic-like shine shown in the photo, apply a thick coat of high-gloss varnish. Alternatively, a layer of UV resin will create a glass-like protected surface. -
Final Cure:
Allow the varnish or resin to cure completely according to the manufacturer’s instructions before using your new tray.
Enjoy your lovely new handmade dish adds a sweet touch to your space


Star-Shaped Ashtray With Sparkly Speckles
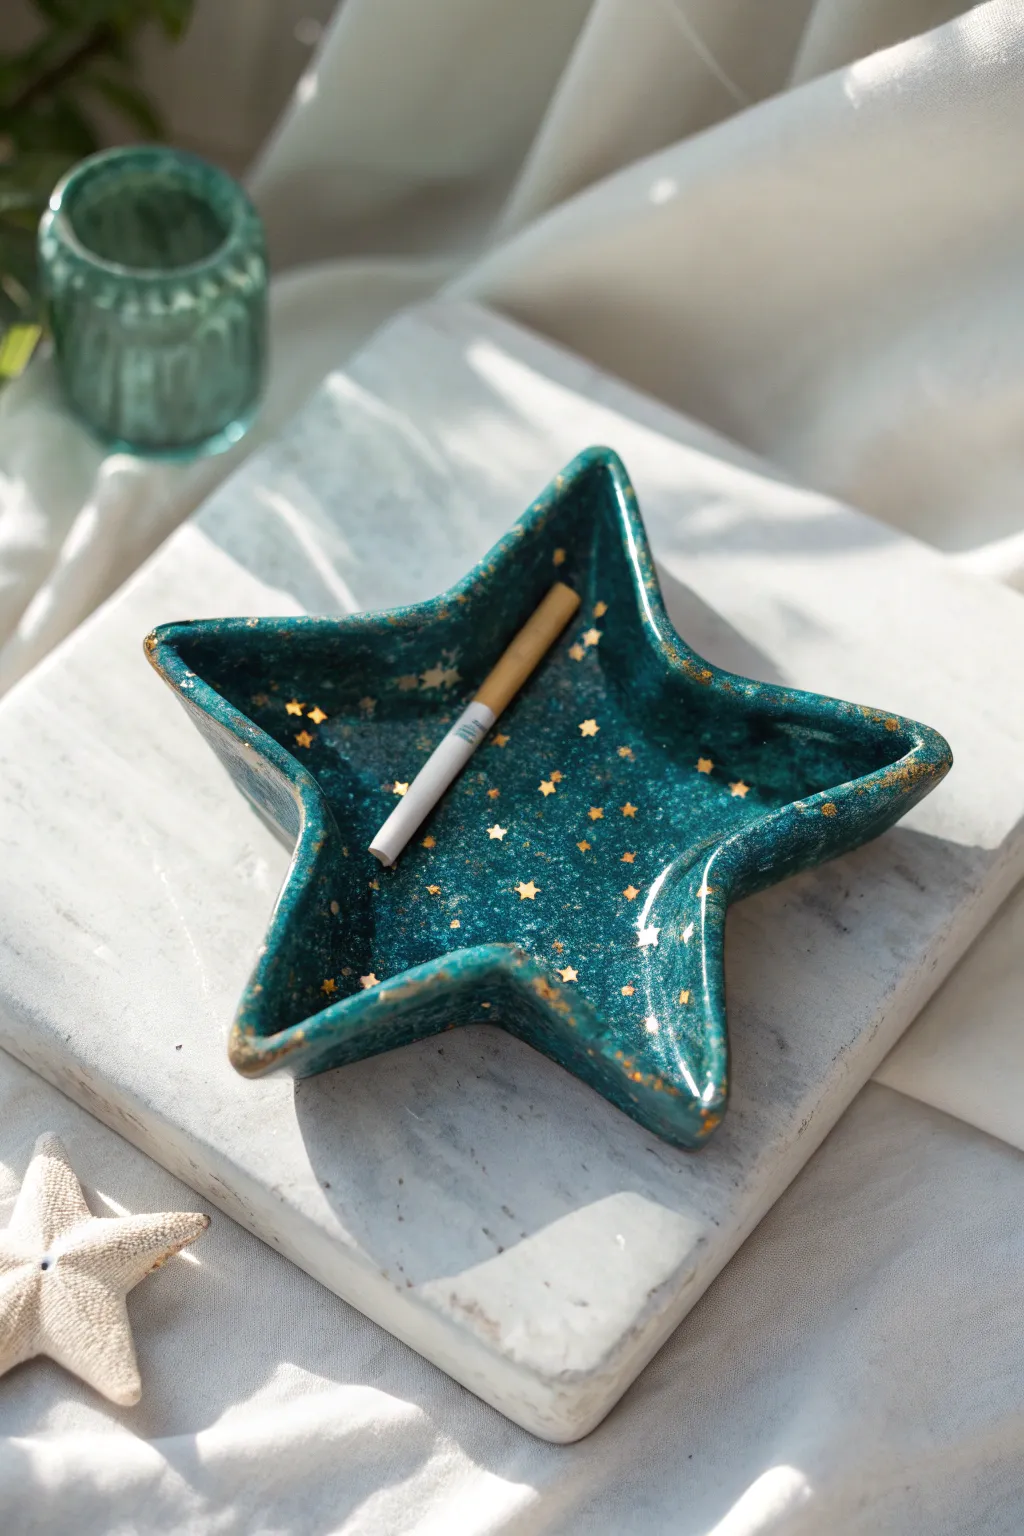
Bring the galaxy down to your tabletop with this enchanting, star-shaped catch-all. Its deep teal glaze and scattered golden stars create a dreamy, night-sky effect that adds a touch of magic whether used as an ashtray or a jewelry dish.
How-To Guide
Materials
- Air-dry clay or polymer clay (white)
- Star-shaped cookie cutter (large)
- Acrylic rolling pin
- Sanding sponge or fine-grit sandpaper
- Deep teal or emerald green acrylic paint
- Gold star glitter or confetti (small size)
- Gold metallic paint or gold leaf pen
- High-gloss varnish or UV resin
- Small paintbrush
- Clay sculpting tools (specifically a smoothing tool)
- Water cup (for smoothing)
Step 1: Shaping the Star
-
Condition the Clay:
Begin by warming up your clay in your hands. Knead it thoroughly until it is soft, pliable, and free of any air bubbles. -
Roll it Out:
Using your acrylic roller, flatten the clay into an even slab. Aim for a thickness of about 1/4 inch (6mm) to ensure the ashtray feels substantial and durable. -
Cut the Shape:
Press your large star-shaped cookie cutter firmly into the clay slab. Wiggle it slightly to ensure a clean cut, then remove the excess clay from around the outside. -
Lift the Edges:
Gently lift the clay star from your work surface. Uses your thumbs to carefully curl the points and edges upward, creating a lip or wall. Work slowly around the perimeter to keep the height consistent. -
Refine the Form:
Smooth out any fingerprints or cracks using a little water on your finger (for air-dry clay) or baby oil (for polymer clay). Round off the top rim so it isn’t sharp. -
Create the Rest:
Select one or two valleys between the star points and gently press a rounded tool or the side of a cigarette-sized dowel into the rim to create a small indentation for resting a cigarette. -
Dry or Bake:
If using air-dry clay, let it sit in a cool, dry place for 24-48 hours until fully hardened. If using polymer clay, bake according to the package instructions.
Pro Tip: Seamless finish
When lifting the edges to form the bowl, use a damp sponge to smooth the transition between the base and the wall efficiently.
Step 2: Painting the Galaxy
-
Smooth the Surface:
Once hardened, inspect your star. Use a fine-grit sanding sponge to gently buff away any rough spots on the rim or the underside. -
Base Coat Application:
Apply a coat of deep teal acrylic paint to the entire piece, including the bottom. I usually like to let the first coat dry completely before adding a second to ensure rich, opaque coverage. -
Add the Stars:
While the second coat of teal paint is still wet (or using a thin layer of decoupage glue), carefully sprinkle your gold star glitter into the basin of the ashtray. -
Secure the Glitter:
Use a soft brush to gently pat the stars down so they lay flat against the surface. Let the paint dry completely. -
Rim Detailing:
Using a small detail brush dipped in gold metallic paint, or a gold leaf pen, carefully trace the rim of the ashtray. Allow the gold to smudge slightly down into the bowl for an organic, aged look. -
Add Speckles:
Load a toothbrush or stiff brush with the gold paint and flick the bristles to create tiny, distant star speckles across the dark teal background.
Level Up: Cosmic depth
Mix a tiny drop of iridescent blue or purple glitter into your final resin pour to give the galaxy background a holographic 3D shimmer.
Step 3: Sealing and Glazing
-
Prepare the Finish:
Ensure all paint is bone dry. This is crucial to prevent cloudiness in your topcoat. -
Apply Gloss:
Pour a generous amount of high-gloss varnish or UV resin into the center of the star. Tilt the piece to help it flow to the edges. -
Pop Bubbles:
If using resin, pass a lighter quickly over the surface to pop any air bubbles. If using varnish, brush out bubbles gently. -
Final Cure:
Allow the varnish to dry for the time recommended on the bottle, or cure the UV resin under a UV lamp until tough and glassy.
Enjoy the celestial sparkle of your new creation every time you use it


Cloud Ashtray With Blushy Cheeks
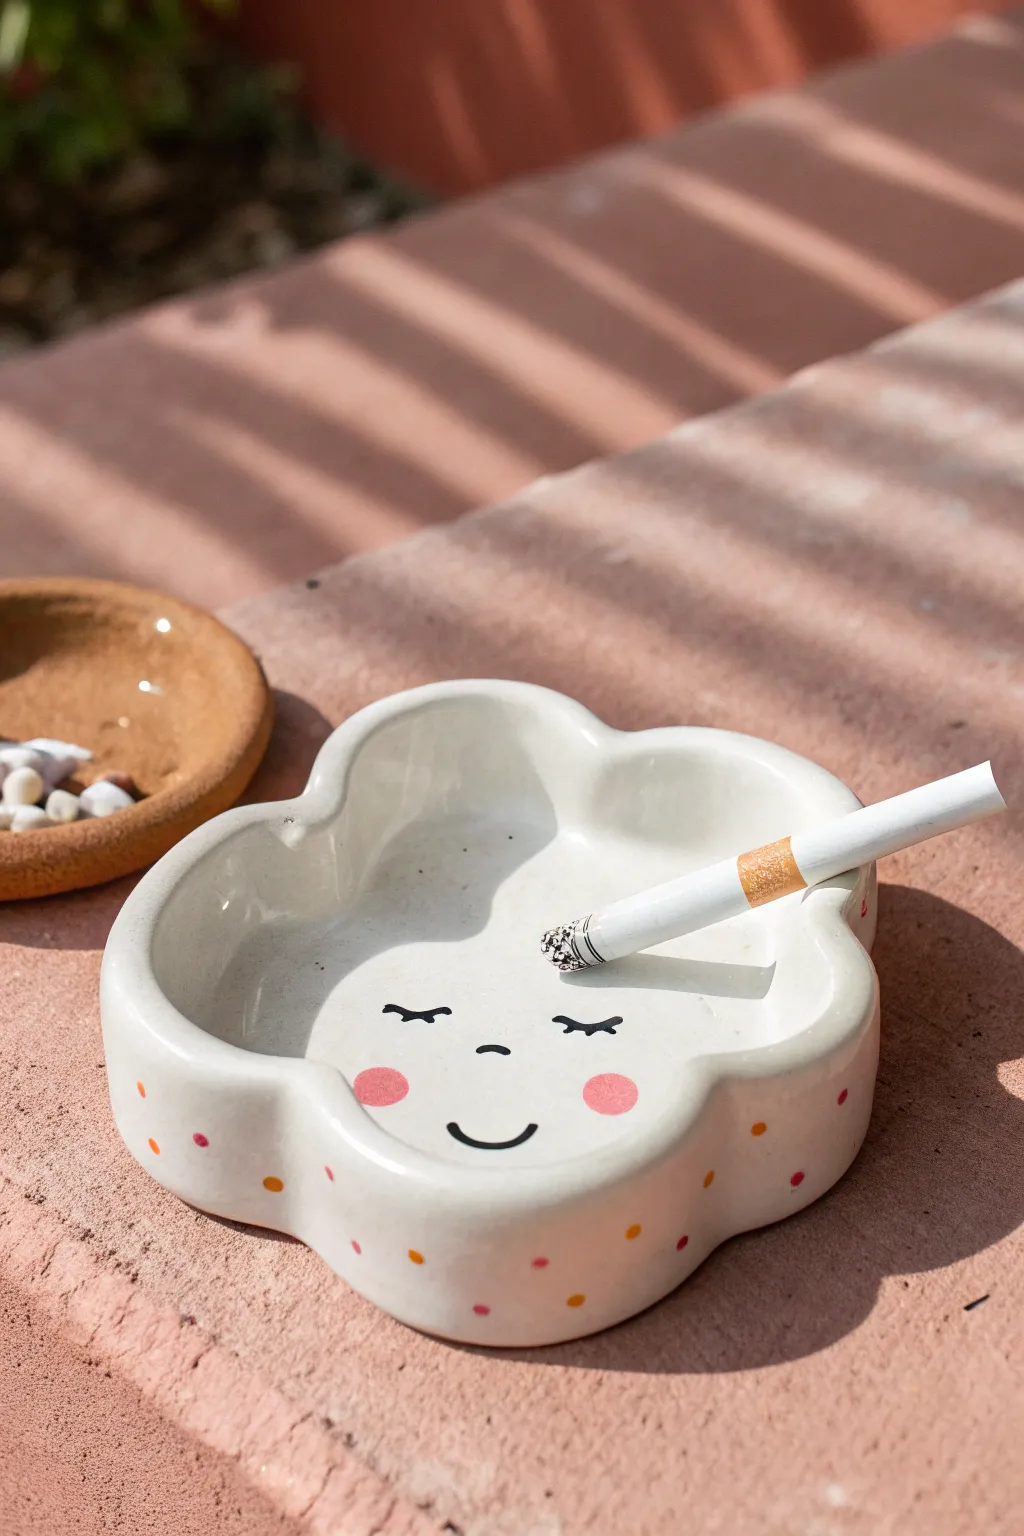
Bring a touch of whimsical calm to your space with this adorable cloud-shaped ashtray featuring a sleepy, happy face. With its soft curves, glossy white finish, and playful polka dot details, it transforms a functional object into a sweet piece of decor.
Step-by-Step
Materials
- Air-dry clay or polymer clay (white)
- Clay roller or rolling pin
- Cloud-shaped cookie cutter (large) or paper template
- Clay sculpting tools (needle tool, smoothing tool)
- Sponge and water bowl
- Sandpaper (fine grit)
- Acrylic paints (black, baby pink, orange, yellow, magenta)
- Fine detail paintbrush
- High-gloss varnish or resin
- Palette or small mixing dish
Step 1: Shaping the Cloud
-
Condition the Clay:
Start by taking a generous handful of white clay and kneading it in your hands until it becomes warm, soft, and pliable. This prevents cracks later on. -
Roll the Base:
Roll out the clay on a flat surface to a uniform thickness of about 1/4 inch. Ensure it’s thick enough to be sturdy but thin enough to look delicate. -
Cut the Shape:
Place your cloud cutter or paper template onto the rolled slab. Cut out the cloud shape cleanly. If using a paper template, trace around it carefully with your needle tool. -
Build the Walls:
Roll a long snake or coil of clay, roughly the same thickness as your base. Place this coil along the very edge of your cloud base, following every curve. -
Blend the Seams:
Using a modeling tool or your thumb, drag the clay from the coil down onto the base on the inside, and up from the base onto the coil on the outside. The goal is to make the seam disappear completely. -
Smooth the Edges:
Wet your finger or a small sponge slightly and run it along the top rim and the blended sides. This smooths out fingerprints and refines the cloud shape. -
Add Cigarette Rests:
While the clay is still soft, gently press your finger or a thick marker into the rim at two or three spots to create divots for holding items. Smooth these indentations again with a damp finger. -
Dry Completely:
Allow the piece to dry fully. For air-dry clay, this takes 24-48 hours. Turn it over halfway through I usually find helps prevent warping.
Cracks Appearing?
If you see hairline cracks while drying, make a ‘slurry’ paste by mixing a little clay with water. Paint this into the cracks and sand smooth once dry.
Step 2: Decorating and Finishing
-
Sand for Perfection:
Once bone dry, take your fine-grit sandpaper and gently buff the entire surface. Focus on the rim and the curves of the cloud to make them silky smooth. -
Base Coat:
Paint the entire piece with white acrylic paint if your clay isn’t naturally bright white, or just to create a solid primer layer. Let this dry. -
Paint the Face Settings:
Lightly sketch the face layout with a pencil first. You want the eyes closed in a ‘U’ shape with lashes, and a simple curve for the smile. -
Detail the Face:
Using your finest brush and black paint, carefully trace over your pencil lines for the eyes and mouth. Keep a steady hand for crisp lines. -
Add Blushy Cheeks:
Mix a soft baby pink color. Dip the end of a round brush handle or a sponge dobber into the paint and stamp two perfect circles on the cheeks. -
Dot the Rim:
Using the back of a paintbrush or a dotting tool, apply small decorative dots around the exterior wall. Use alternating colors like orange, pink, and yellow for a confetti look. -
Seal and Shine:
Finish the project by applying two coats of high-gloss varnish. This mimics the ceramic look in the photo and protects the paint from ash and heat.
Make it Functional
Turn this into an incense holder instead! Just poke a small hole in the center of the cloud before the clay dries to hold an incense stick.
Now you have a charming little cloud companion to brighten up your table

The Complete Guide to Pottery Troubleshooting
Uncover the most common ceramic mistakes—from cracking clay to failed glazes—and learn how to fix them fast.
Smiley Face Ashtray With Chunky Rim
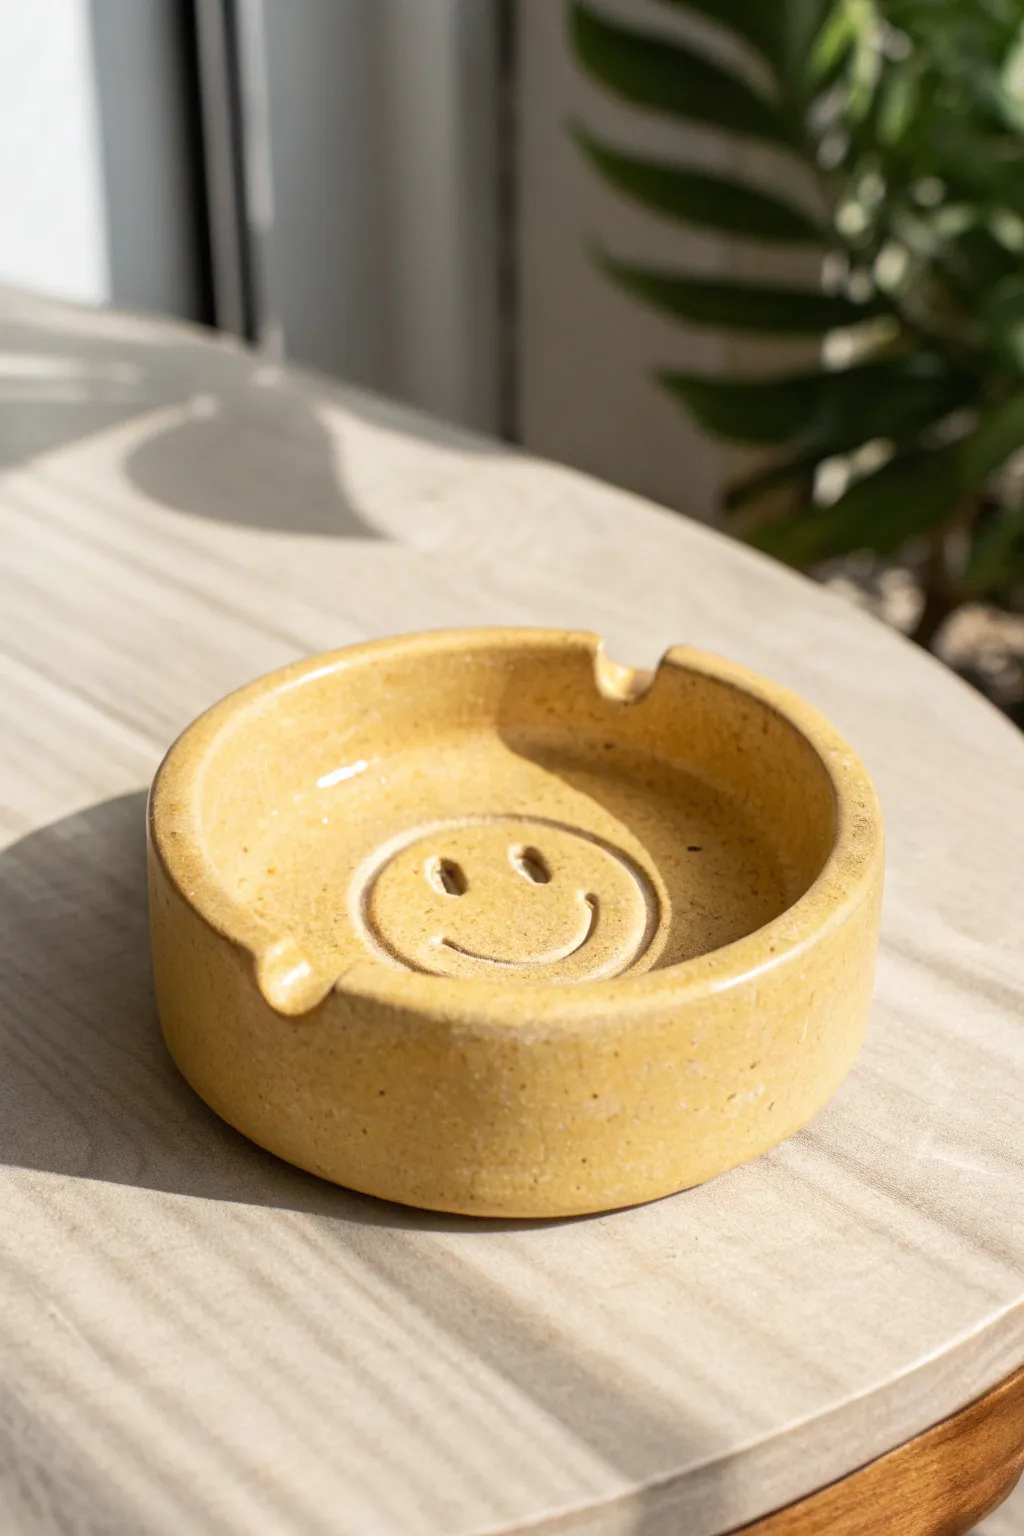
Brighten up your table with this cheerful, chunky ashtray featuring a classic smiley face relief. The thick, rounded rim gives it a satisfying weight and a retro feel, finished in a warm, speckled yellow glaze.
Detailed Instructions
Materials
- White or light-colored stoneware clay (approx. 1-1.5 lbs)
- Pottery wheel (or slab roller/rolling pin for hand-building)
- Needle tool
- Rib tool (kidney shaped)
- Sponge
- Loop trimming tool
- Small carving tool or rounded stylus
- Yellow speckled glaze (cone 5/6 recommended)
- Clear glaze (optional, if yellow is matte)
- Kiln access
Step 1: Forming the Body
-
Prepare your clay:
Begin by thoroughly wedging your clay to remove any air pockets. Form it into a smooth, even ball. -
Center on the wheel:
Throw the clay onto the wheel head and center it. You want a relatively wide, low puck shape to start, rather than a tall cylinder. -
Open the form:
Open the clay, leaving a generous floor thickness—at least 1/2 inch to 3/4 inch. This extra thickness is crucial for carving the smiley face later without breaking through. -
Pull the walls:
Pull the walls up, keeping them thick and sturdy. Unlike a delicate bowl, we want a ‘chunky’ aesthetic here, so aim for a wall thickness of about 1/2 inch. -
Shape the rim:
Use a chamois or a wet sponge to round over the rim. Compress it gently to avoid sharp edges; it should look soft and substantial like a donut. -
Create cigarette rests:
While the wheel is stopped (or the clay is leather hard), use your thumb or the handle of a tool to gently press down two or three indentations into the rim for rests.
Cracked Floor?
S-cracks in the bottom usually happen due to uneven drying. Compass the floor firmly during throwing and dry the piece slowly under loose plastic.
Step 2: Adding the Smile
-
Dry to leather hard:
Allow the piece to dry until it is leather hard. It should be firm enough to handle without warping but soft enough to carve easily. -
Trim the base:
Flip the piece over and trim the foot. A simple flat bottom or a very shallow foot ring works best for this sturdy design. -
Mark the face:
Flip it back over. Lightly sketch a circle in the center of the interior floor using a needle tool to guide your design, then mark the eyes and mouth placement. -
Carve the outline:
Using a small loop tool or carving tool, carve a deep groove for the outer circle of the face. -
Carve the features:
Carve out the two oval eyes and the curved smile. I like to dig slightly deeper here to ensure the glaze pools nicely in the recesses later. -
Smooth the edges:
Take a slightly damp sponge or a blending tool and smooth down any sharp burrs created by the carving. The relief should look soft and molded, not jagged.
Glaze Pooling
For a darker smile, apply a thin wash of iron oxide or darker underglaze into the carved grooves before applying the yellow top glaze.
Step 3: Finishing
-
Bisque fire:
Once the piece is bone dry, load it into the kiln for a bisque firing (usually Cone 04 or 06). -
Apply the glaze:
Choose a warm yellow glaze, preferably one with speckles to mimic the reference. Pour the glaze into the interior, swirl it to coat the walls and the smiley face, and pour out the excess. -
Glaze the exterior:
Dip or brush the exterior with the same yellow glaze. Ensure an even coat, but be careful not to make it too thick on the vertical sides to prevent running. -
Clean the foot:
Wipe the bottom of the ashtray entirely clean of glaze with a damp sponge to prevent it from sticking to the kiln shelf. -
Glaze fire:
Fire the piece again to the maturation temperature of your clay and glaze (typically Cone 5 or 6). This will melt the glaze into that glossy, durable finish.
Now you have a durable, happy little accessory ready for use
Daisy Flower Ashtray With Petal Indents
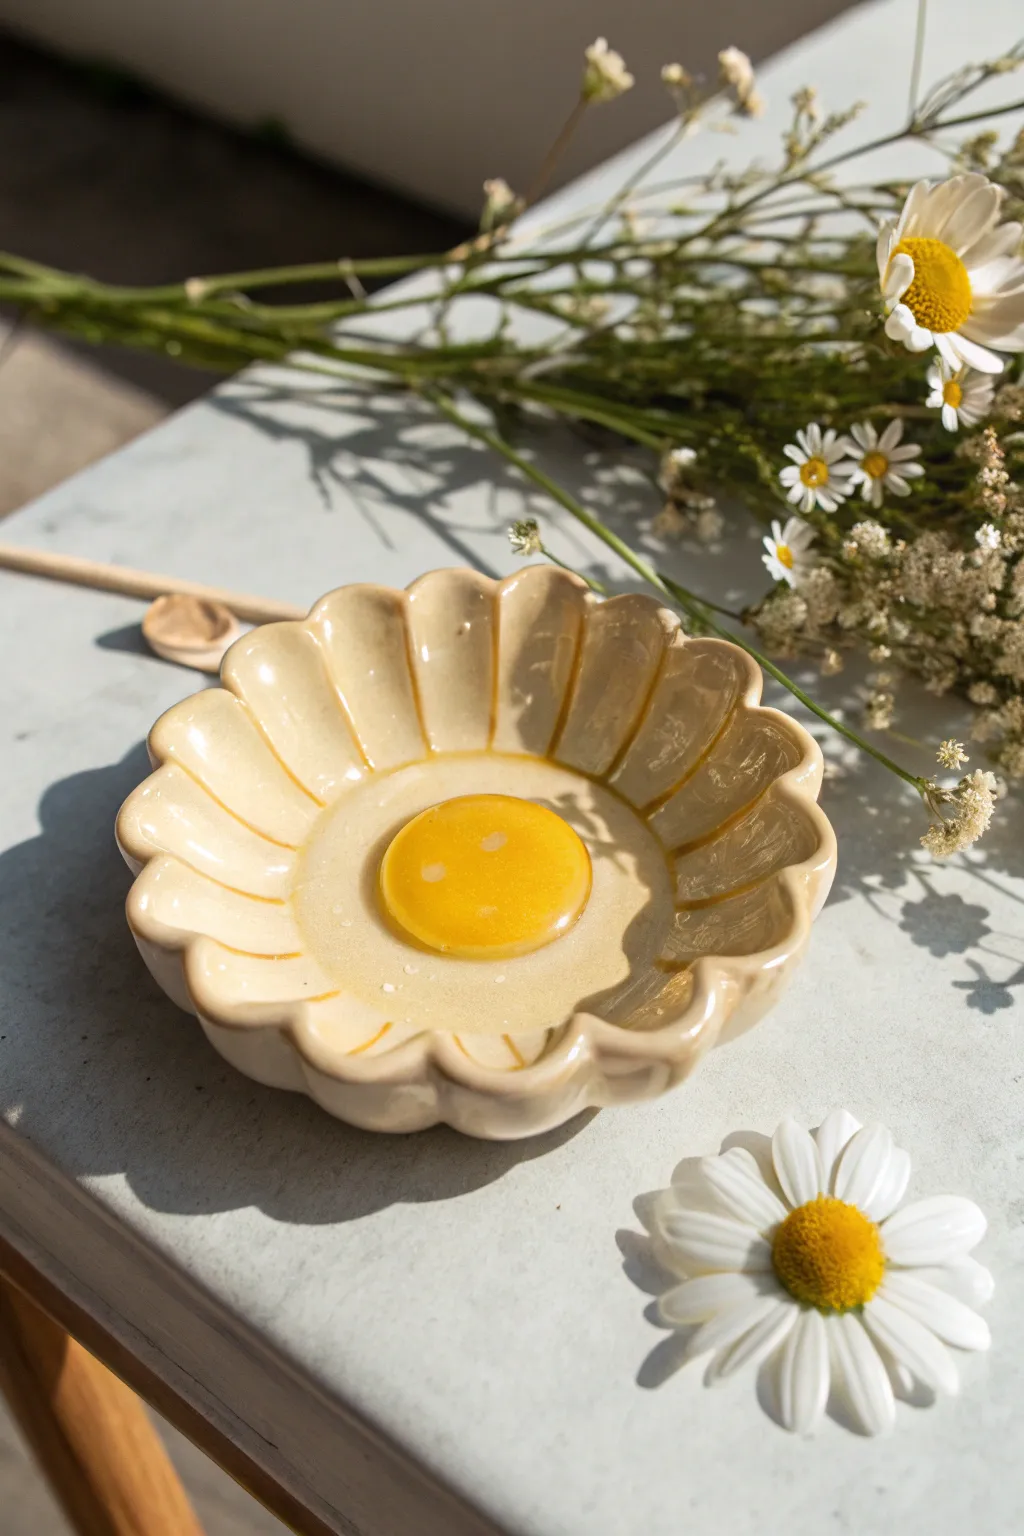
This charming daisy-shaped tray boasts a delicate scalloped edge and a vibrant, yolk-like center that brings a touch of sunshine to any tabletop. With its glossy finish and soft porcelain hues, it serves as the perfect spot for small trinkets or as cute decor.
Step-by-Step
Materials
- White polymer clay or low-fire earthenware clay
- Rolling pin
- Circle cutter (approx. 4 inches in diameter)
- Small round sculpting tool or chopstick
- Sponge and water bowl
- Yellow underglaze or acrylic paint
- Clear high-gloss glaze or varnish
- Small paintbrush
- Kiln (if using earthenware) or Oven (if using polymer)
Step 1: Shaping the Flower base
-
Prepare the caly:
Start by wedging your white clay thoroughly to remove any air bubbles. I find it helpful to warm polymer clay in my hands for a few minutes to make it pliable. -
Roll out a slab:
Roll the clay out onto a clean, flat surface until it is an even slab, approximately 1/4 inch thick. Use guide sticks if needed to keep the thickness consistent. -
Cut the primary shape:
Use your 4-inch circle cutter to punch out a perfect round disk from the slab. Remove the excess clay. -
Mark petal guides:
Lightly sketch lines radiating from the center to the edge, dividing the circle into about 12-14 equal sections, like slicing a pizza. Don’t cut through; just mark surface guidelines.
Smooth Surface Secret
Before glazing, wipe with a damp chamois cloth. It smooths tiny imperfections better than a sponge, giving you that glass-like professional finish.
Step 2: Sculpting the Petals
-
Indent the rim:
At the outer edge of each guideline, gently press inward with your finger or a round tool to create the scalloped ‘dips’ between the petals. -
Curve the sides:
Lift the edges of the circle upwards to form a shallow bowl shape. You can cup it in your palm or drape it over a small mold to hold the curve. -
Create petal definitions:
Use a rounded sculpting tool or the side of a chopstick to press depressions along the radial lines you marked earlier. Press deeply enough to create ridges between the petals, but be gentle near the center. -
Smooth the edges:
Dip a small sponge in water (or use a smooth finger for polymer) to soften the rim of each scallop, removing any sharp cutting marks or rough textures. -
Flatten the center:
Use your thumb to gently press down the very center of the bowl, creating a smooth, flat circular area where the ‘pollen’ will go.
Uneven Petals?
If your scallops look wonky, trace a real flower or a paper template onto the clay first instead of freehanding the indents.
Step 3: Initial Firing (If Ceramic)
-
Dry slowly:
Allow the piece to dry slowly under loose plastic if using earthenware to prevent warping. For polymer, proceed directly to baking according to package instructions. -
Bisque fire:
If using real clay, fire the piece to bisque temperature (usually cone 04) once bone dry.
Step 4: Glazing and Finishing
-
Paint the center:
Apply a bright, sunny yellow underglaze or acrylic paint specifically to the recessed center circle. Apply 2-3 coats for opaque coverage. -
Define the petals:
For the petals, you can leave the white clay bare if it’s high quality, or apply a very diluted wash of warm beige or cream glaze to give it that soft, organic look shown in the photo. -
Add clear gloss:
Once the color is dry, coat the entire piece in a clear, high-gloss glaze (or varnish for polymer). This gives it that ‘wet’, shiny ceramic finish. -
Final cure:
Fire the piece again for the glaze method, or let the varnish cure completely. Ensure no dust settles on the surface while the glossy topcoat dries.
Now you have a blooming lovely dish ready to brighten up your coffee table


What Really Happens Inside the Kiln
Learn how time and temperature work together inside the kiln to transform clay into durable ceramic.
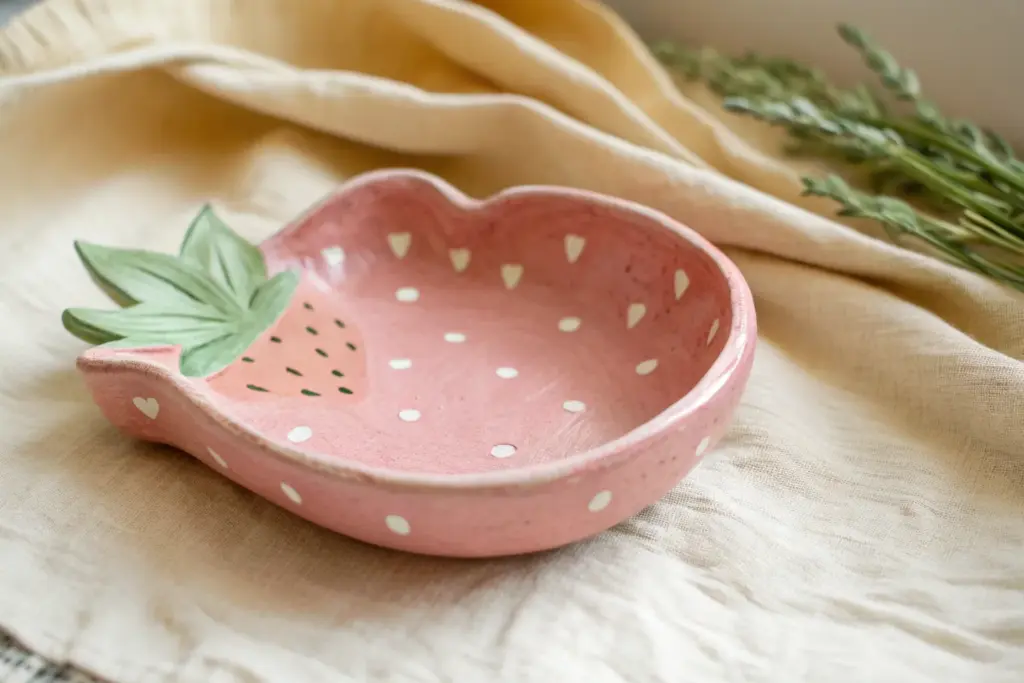
Strawberry Ashtray With Leafy Top Rim
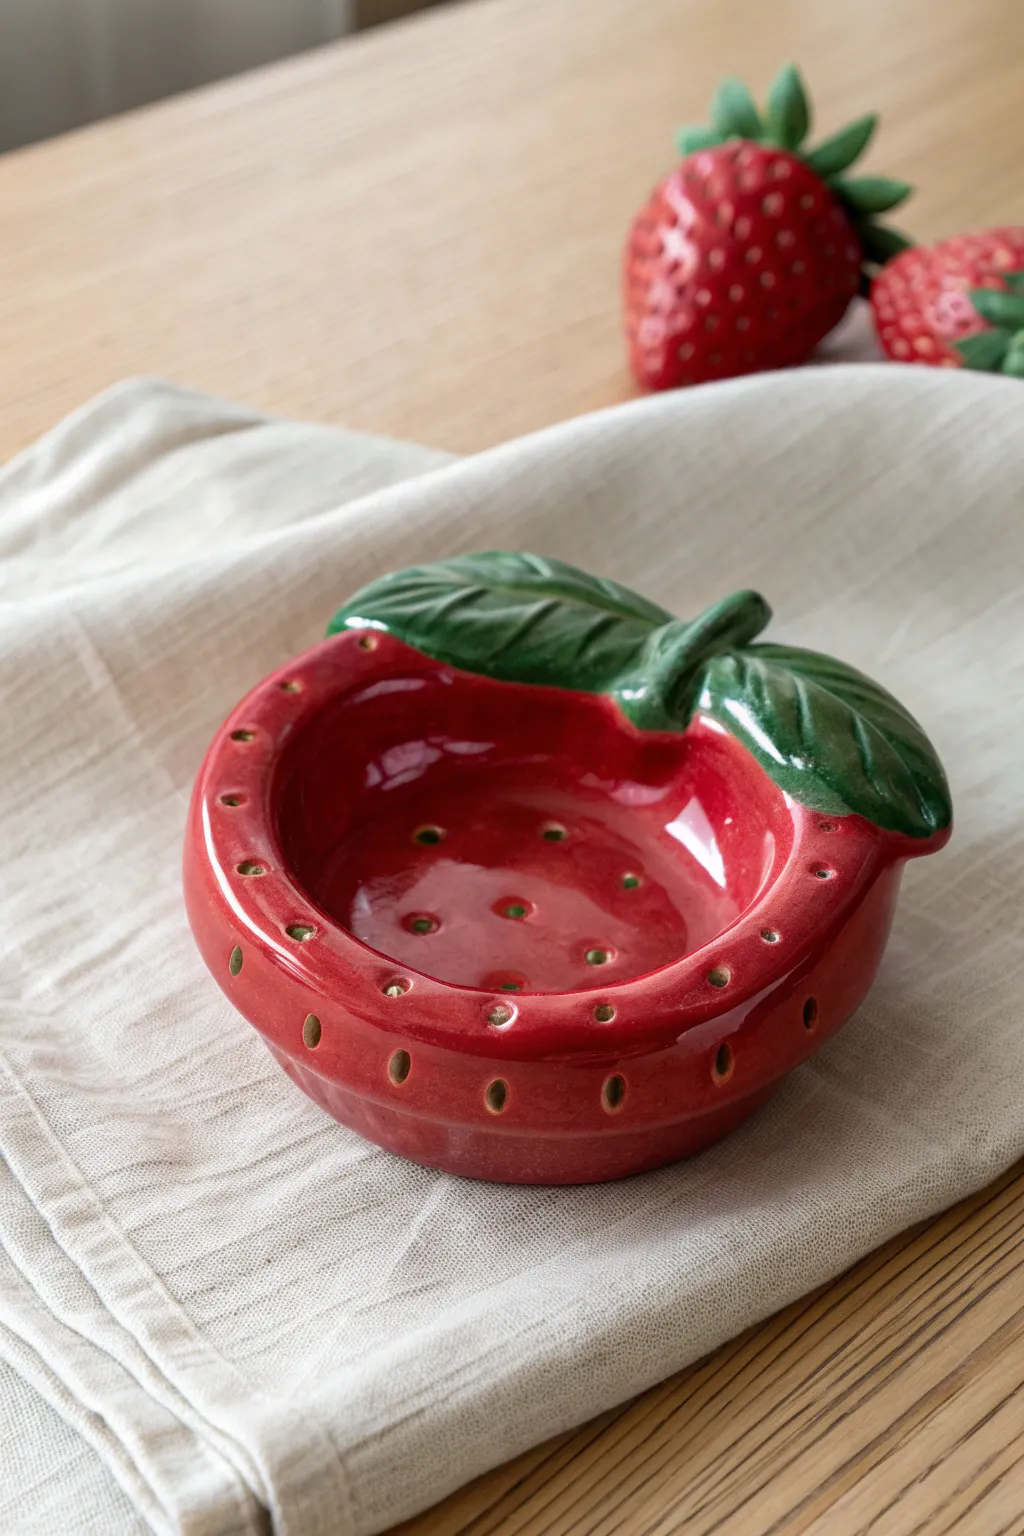
This whimsical ashtray captures the charm of a ripe strawberry with its deep red glaze and sculptural leafy rim. It’s a functional piece of art that combines slab building and pinching techniques for a sturdy yet delicate finish.
Detailed Instructions
Materials
- White stoneware or earthenware clay
- Rolling pin and guide sticks (approx. 1/4 inch)
- Needle tool or clay knife
- Small loop tool
- Slip and score tool (or fork)
- Red underglaze or glaze
- Green underglaze or glaze
- Clear glaze (if using underglazes)
- Small round paintbrush
- Sponge and water
- Kiln access
Step 1: Forming the Base
-
Prepare the Clay:
Begin with a ball of clay about the size of a large orange. Wedge it thoroughly to remove air bubbles, ensuring the clay is smooth and workable. -
Roll the Slab:
Roll your clay out into a thick slab, roughly 1/4 to 1/2 inch thick but not perfectly flat. You want some volume to work with. If I want a more organic look, I sometimes just tap it flat with my hand instead of rolling. -
Shape the Bowl:
Cut a rough circle, then gently pinch the edges upward to create a shallow bowl shape. Smooth the interior with a damp sponge so the transition from wall to floor is seamless. -
Thicken the Rim:
Roll a small coil of clay and attach it to the top rim of your bowl using slip and scoring. This adds the necessary bulk to create the rounded, puffy lip of the strawberry. -
Refine the Silhouette:
Smooth the coil into the main body until no seams are visible. Gently manipulate the rim to curve inward slightly, mimicking the rounded shoulder of a berry.
Step 2: Sculpting the Details
-
Create the Leafy Top:
Roll a smaller slab of clay and cut out two distinct leaf shapes. They should be roughly oval with pointed tips. -
Attach the Leaves:
Score the back of the leaves and a section of the rim. Press the leaves onto the rim, allowing them to drape slightly over the edge and into the bowl’s interior. -
Add Veining:
Use a needle tool to gently carve vein lines into the leaves. Start with a central line and branch outwards for realistic texture. -
Sculpt the Stems:
Roll a tiny coil for the stem connection point where the two leaves meet. Attach it securely and blend the edges. -
Indent the Seeds:
Use the rounded end of a paintbrush handle or a small loop tool to press indentations into the exterior. These should be spaced somewhat evenly to mimic strawberry seeds. -
Puncture Interior Holes:
If you are using this as a soap dish or incense burner instead of a traditional ashtray, you might gently poke drainage holes in the bottom, though for an ashtray, keep it solid. -
Dry to Leather Hard:
Let the piece dry slowly under plastic until it reaches a leather-hard state. This is crucial before any firing.
Seed Depth Secret
Make your seed indentations slightly deeper than you think necessary. Glaze tends to fill small holes, so deeper divots ensure the texture remains visible after firing.
Step 3: Glazing and Finishing
-
Bisque Fire:
Fire the piece in a kiln to bisque temperature (usually Cone 04) to prepare it for glazing. -
Apply Red Glaze:
Brush a glossy red glaze over the entire body of the strawberry, avoiding the leaves. Be sure to get the glaze into the seed indentations. -
Wipe the Seeds (Optional):
For contrast, you can gently wipe the surface with a damp sponge, leaving more glaze pooled in the seed dents to make them appear darker. -
Glaze the Leaves:
Carefully paint the leaves with a deep forest green glaze. Use a smaller brush to keep the line between red and green crisp. -
Glaze Firing:
Place the piece back in the kiln for the final glaze firing according to your clay and glaze specifications (typically Cone 5/6 for stoneware). -
Inspect and Cool:
Once the kiln has cooled, remove your strawberry. Check for any sharp spots on the bottom and sand them if necessary.
Cracked Leaves?
If the leaves crack while drying, you likely attached wet clay to dry clay. Wrap the whole piece in damp paper towels and plastic for 24 hours to rehydrate and join again.
Now you have a glossy, vibrant berry dish ready to brighten up your coffee table
Cat Paw Ashtray With Toe Bean Details
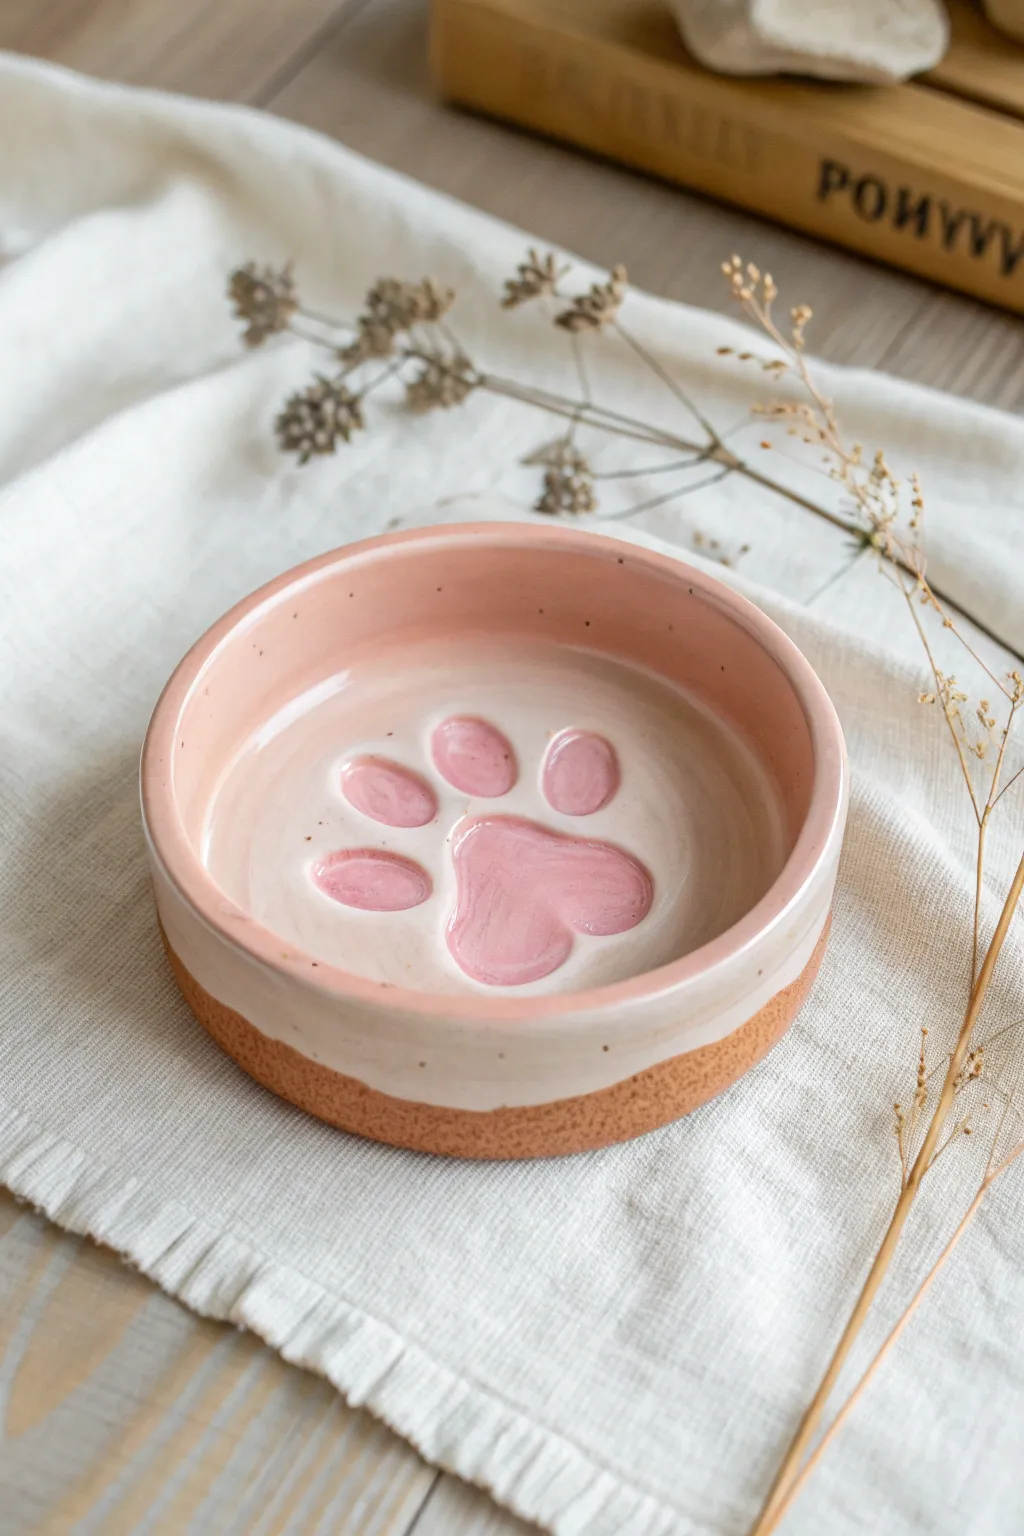
Capture the sweetness of toe beans with this delightful ceramic dish, featuring a raised paw print relief in the center. The soft pink glaze contrasts beautifully with the raw, speckled clay base, making it a perfect spot for trinkets or ashes.
Step-by-Step
Materials
- Speckled stoneware clay (mid-fire)
- Pottery wheel (or slab roller/rolling pin for hand-building)
- Needle tool
- Loop trimming tools
- Sponge
- Pink underglaze or glaze
- Clear or white semi-opaque glaze
- Soft fan brush
- Small detail brush
- Rib tool (metal or rubber)
- Kiln
Step 1: Forming the Base
-
Prepare the Clay:
Begin with about 1.5 lbs of speckled stoneware clay. Wedge it thoroughly to remove air bubbles and ensure consistency. -
Center and Open:
If throwing on the wheel, center your clay and open it up, leaving a floor that is thicker than usual—aim for at least 3/4 inch thickness. You need this extra material to carve out the design later. -
Pull the Walls:
Pull the walls up to create a simple cylinder shape, roughly 2 inches high. Keep the rim slightly rounded and thick for durability. -
Compress the Floor:
Use a sponge or rib to compress the floor thoroughly. This prevents cracking and creates a smooth surface for your carving. -
Refine the Shape:
Shape the vessel into a low bowl or ashtray form with straight vertical sides. Smooth the exterior with a rib. -
Dry to Leather Hard:
Wire the piece off the bat and let it dry slowly until it reaches a leather-hard state. It should be firm enough to hold its shape but soft enough to carve.
Smooth Operator
Use the back of a spoon to burnish the raised paw pads before firing. This compresses the clay particles, making the pads look extra smooth and shiny after glazing.
Step 2: Carving the Paw Print
-
Sketch the Design:
Lightly sketch the outline of a large central paw pad and four toe beans directly onto the interior floor using a needle tool. Don’t dig deep yet; just mark the placement. -
Carve the Background:
Using a small loop tool, begin carving away the clay *around* your sketched paw pads. You are lowering the floor of the bowl while leaving the paw print raised. -
Refine the Shapes:
Continue carving until the background is roughly 1/4 inch lower than the top of the paw pads. Slope the edges gently for a soft, pillowy look rather than sharp, cliff-like edges. -
Smooth the Details:
Dip a small sponge or your finger in water and gently run it over the carved areas and the raised pads to remove tool marks and soften any sharp ridges. -
Trim the Exterior including the Foot:
Flip the leather-hard piece over and trim the bottom. Create a defined foot ring and leave the bottom third of the exterior unrefined if you want that raw clay texture shown in the photo.
Make It Glossy
For a ‘wet nose’ look, add a coat of clear gloss over just the pink paw pads, even if the rest of your glaze is matte or satin. The contrast adds great dimension.
Step 3: Glazing and Firing
-
Bisque Fire:
Once bone dry, fire the piece in the kiln to bisque temperature (usually Cone 04). -
Apply Pink to Pads:
Using a small detail brush, carefully apply 2-3 coats of pink underglaze or glaze specifically to the raised paw pads. -
Clean the edges:
If you get any pink on the surrounding floor, wipe it away cleanly with a damp brush or sponge. Clean edges make the design pop. -
Glaze the Interior:
Pour a semi-opaque white or clear glaze into the interior. Swirl it to coat the floor and walls, then pour out the excess. This will seal the bowl while letting the pink pads show through. -
Glaze the Exterior Rim:
Dip just the top rim and upper portion of the exterior into the white glaze. I like to stop about halfway down the side to leave the raw speckled clay exposed at the bottom. -
Final Fire:
Fire the piece to maturity (Cone 5 or 6 depending on your clay body). When cool, sand the unglazed bottom lightly if needed for smoothness.
Enjoy your customized creation and the charming peek-a-boo effect of the paw print at the bottom.

TRACK YOUR CERAMIC JOURNEY
Capture glaze tests, firing details, and creative progress—all in one simple printable. Make your projects easier to repeat and improve.
Sleeping Cat Curl Ashtray
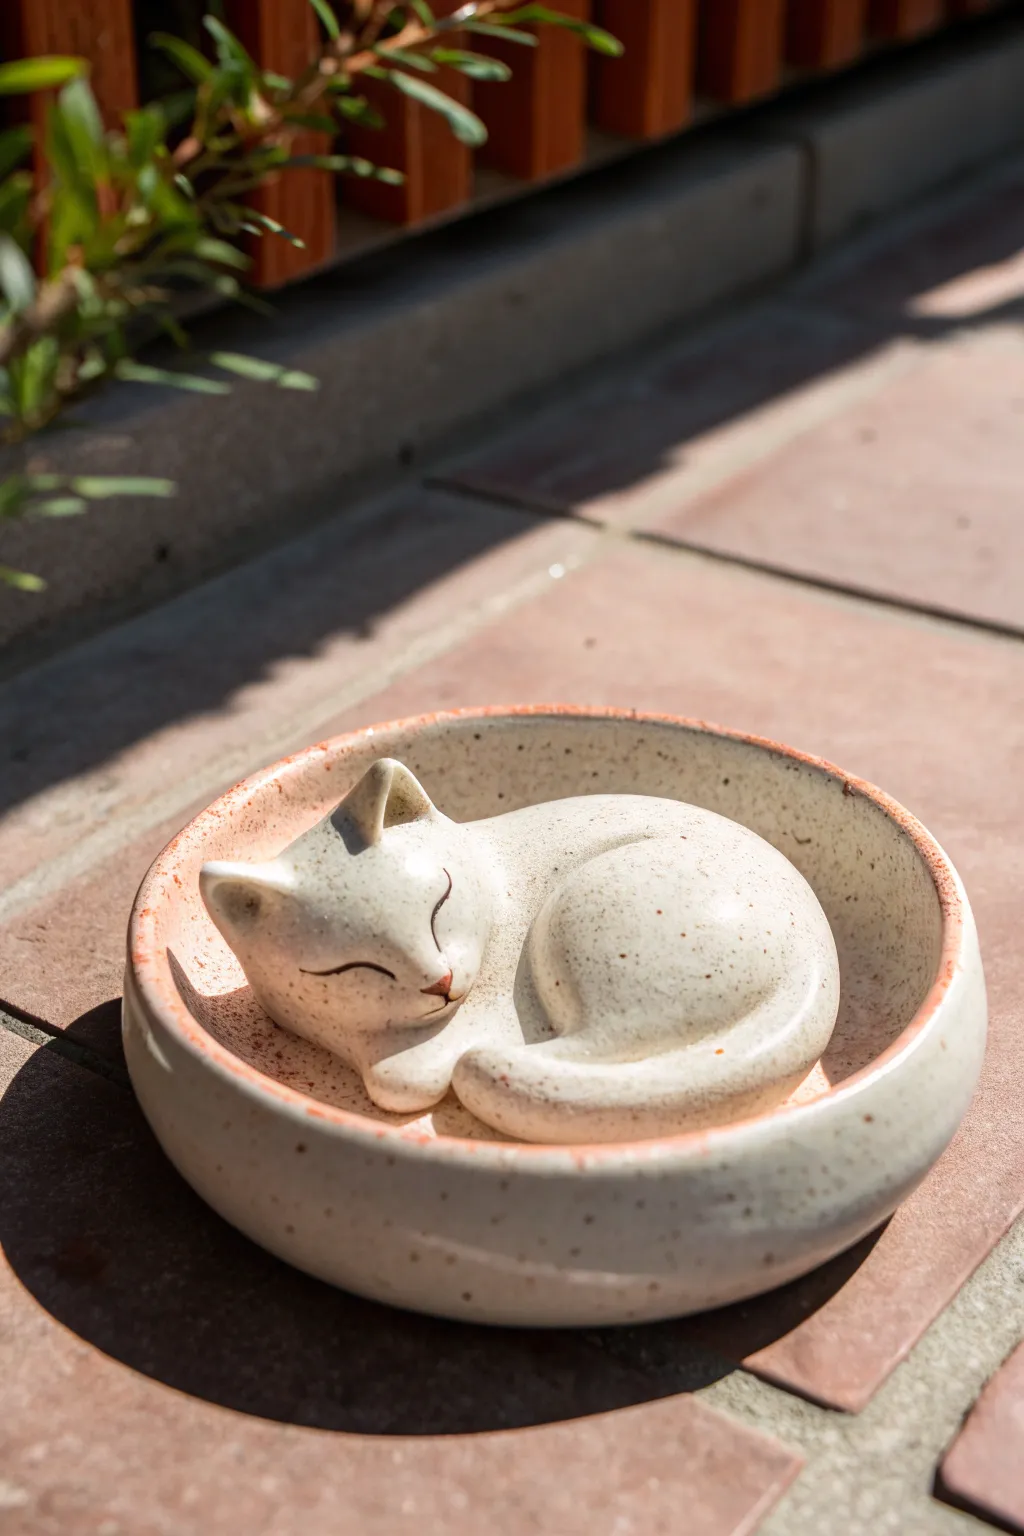
This adorable dish brings a sense of calm to any space, featuring a stylized cat curled peacefully within a shallow bowl. The piece uses speckled clay and gentle glazes to create a warm, tactile finish that mimics the cozy feeling of a napping pet.
How-To Guide
Materials
- Speckled stoneware clay (white or light cream)
- Pottery wheel (optional, hand-building is also fine)
- Rib tool (kidney shaped)
- Needle tool
- Loop carving tool
- Scoring tool or old toothbrush
- Slip (liquid clay)
- Underglaze (black or dark brown for details, pink for nose)
- Fine detail brush
- Clear or transparent glossy glaze
- Sponge
Step 1: Forming the Base Dish
-
Prepare the clay:
Begin by wedging a softball-sized amount of speckled clay to remove air bubbles. This speckled body is key to achieving that organic, stone-like look in the final firing. -
Shape the bowl:
If using a wheel, throw a shallow, low-walled dish with a flat bottom. The walls should curve gently inward at the top, like a hug. -
Hand-building alternative:
If hand-building, roll a slab for the base and attach a coil for the wall. Smooth the seams thoroughly to create a seamless, rounded interior and exterior form. -
Trim and refine:
Once the dish is leather-hard, trim the footing or simply smooth the bottom. Use a damp sponge to round off the rim so it feels soft to the touch.
Step 2: Sculpting the Cat
-
Measure the space:
Before sculpting, determine how much clay you need by visually estimating the interior volume of your leather-hard dish. The cat needs to fill the center comfortably. -
Form the body mass:
Roll a smooth, oval-shaped lump of clay. Gently flatten it slightly so it looks like a sleeping animal’s torso. -
Create the head:
Shape a smaller sphere for the head. Pinch two small triangles at the top for ears, ensuring they are thick enough to not be fragile. -
Attach the head:
Score the neck area of the body and the base of the head vigorously. Apply slip and press them together firmly, blending the clay across the seam until invisible. -
Shape the tail:
Roll a tapered coil for the tail. Wrap it around the body mass, curling it towards where the nose will be. -
Refine the pose:
I like to gently press the head down onto the front paws (small lumps of clay added near the chest) to make it look deeply asleep.
Hollow It Out
If your cat sculpture is thicker than an inch, hollow out the underside before attaching it to the bowl. This prevents explosions in the kiln during firing.
Step 3: Assembly and Detailing
-
Join the cat to the dish:
Score the bottom of the cat sculpture and the center of the dish interior. Add plenty of slip and press the cat firmly into the bowl. -
Clean the seams:
Use a modeling tool or brush to clean up any excess slip where the cat meets the bowl floor. The transition should look clean. -
Carve the features:
With a needle tool, very lightly mark the curves of the eyes (simple sweeping arcs) and the line of the mouth. -
Smooth everything:
Using a slightly damp sponge or a soft brush and water, go over the entire cat to smooth out fingerprints and harsh tool marks. -
Slow drying:
Cover the piece loosely with plastic to let it dry very slowly. Because the cat is thick, uneven drying can cause cracks.
Custom Coats
Instead of leaving the clay bare under a clear glaze, use underglazes to paint calico patches, tabby stripes, or tuxedo markings before the final firing.
Step 4: Glazing and Finishing
-
Bisque fire:
Once bone dry, fire the piece to bisque temperatures (usually Cone 04 or 06, depending on your clay). -
Add color details:
Using a very fine brush, paint a thin line of black or dark brown underglaze into the eye crevices. Dab a tiny spot of pink underglaze on the nose. -
Wipe back:
If the underglaze lines are too thick, gently wipe them with a damp sponge so the color remains only in the recessed lines. -
Apply clear glaze:
Dip the entire piece in a transparent glossy glaze. This will seal the clay and make those beautiful natural speckles pop. -
Final firing:
Glaze fire the piece to the temperature recommended for your specific clay body (often Cone 5 or 6 for stoneware).
Now you have a serene little companion to keep you company on your table or desk
Tiny Frog Friend Ashtray With Lily Pad Base
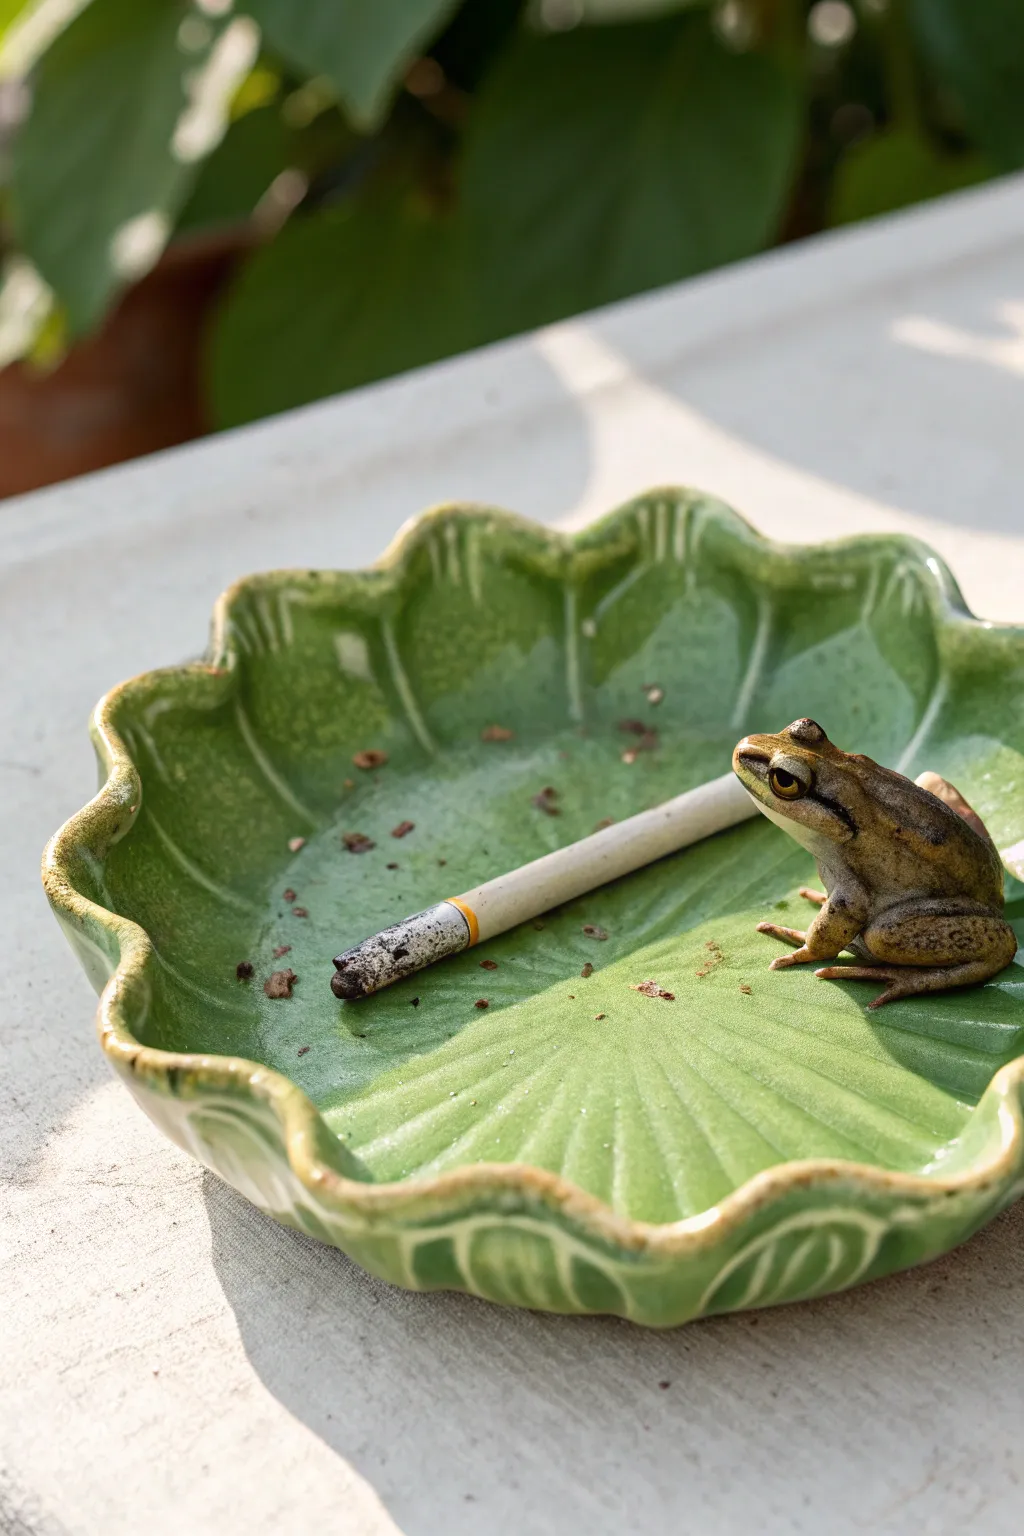
This whimsical ashtray brings a touch of pond life to your tabletop with its beautifully glazed lily pad design and a delightful little frog companion perched on the rim. The high-gloss green finish mimics wet leaves perfectly, making this a functional piece of art that looks just as good empty as it does in use.
Step-by-Step
Materials
- White stoneware or earthenware clay
- Rolling pin
- Clay sculpting tools (needle tool, modeling tool, ribbon tool)
- Small sponge
- Slip (clay mixed with water)
- Leaf template (optional)
- Celadon green glaze (translucent)
- Underglazes: Beige, brown, dark green, black, gold/yellow
- Clear glaze
- Kiln access
- Fine detail paintbrush
Step 1: Shaping the Lily Pad Base
-
Roll the slab:
Begin by wedging your white clay to remove air bubbles, then roll it out to an even slab approximately 1/4 inch thick. A consistent thickness prevents cracking during firing. -
Cut the circular form:
Cut a rough circle about 6-7 inches in diameter. You don’t need a perfect circle; an organic, slightly irregular shape looks more natural for a leaf. -
Form the scalloped edges:
Gently push the edges of the circle upward and inward to create a shallow bowl shape. Use your fingers to pinch and undulate the rim, creating a scalloped, wave-like pattern typical of a lotus leaf or lily pad. -
Carve the veins:
Using a needle tool or a dull carving tool, lightly score radial lines starting from the center of the bowl out towards the scalloped dips. These represent the leaf veins. Don’t cut all the way through; just create indentations for glaze to pool in later. -
Smooth the surface:
Wipe the entire piece down with a damp sponge to soften any sharp edges on the rim and smooth out the vein lines so they look natural rather than mechanical.
Glaze Pooling Pro-Tip
For deeper color variation, apply the green glaze slightly thicker in the center depression and vein grooves. The pooling creates a rich ‘jade’ effect.
Step 2: Sculpting the Frog Companion
-
Form the body:
Roll a small ball of clay into an oval shape for the frog’s body. Pinch one end slightly to define the head area. -
Shape the legs:
Roll two thin coils for the legs. Fold the back legs into a ‘Z’ shape to mimic a sitting frog’s powerful thighs, and attach them to the rear of the body. Attach smaller front legs that will support the chest. -
Attach the frog:
Score the spot on the lily pad rim where you want your friend to sit. Score the bottom of the frog. Apply slip to both surfaces and press the frog firmly onto the leaf. -
Refine the details:
Use a small modeling tool to blend the frog’s legs onto the leaf for a seamless connection. Add tiny toes, define the eye sockets, and smooth the back. -
First firing:
Allow the piece to dry slowly and completely (bone dry) before bisque firing it in the kiln according to your clay’s specifications.
Level Up: Water Droplets
Before the final firing, add tiny beads of clear glass frit or clear glaze blobs on the leaf surface. They will melt into realistic ‘dew drops’!
Step 3: Glazing and Finishing
-
Paint the frog base:
Start by applying a beige or light tan underglaze to the entire frog body. This provides a natural base tone. -
Add frog details:
Using a fine brush, add brown stripes or spots along the frog’s back and legs. Paint a dark stripe through the eye area. Use gold or yellow for the iris and a tiny dot of black for the pupil. -
Apply the leaf glaze:
Coat the entire lily pad bowl (avoiding the frog) with a translucent Celadon green glaze. I prefer dipping or pouring for an even coat, but brushing works if you apply 3 smooth layers. -
Highlight the veins:
The translucent green glaze will naturally pool in the carved veins, making them appear darker and adding lovely depth without extra painting. -
Clear coat the frog:
Carefully carefully apply a clear glaze over the painted frog so it matches the glossy finish of the leaf. -
Final wipe:
Wipe the very bottom foot of the ashtray with a sponge to ensure no glaze touches the kiln shelf. -
Glaze firing:
Fire the piece a second time to the temperature required by your glaze. This melts the glass and fuses the colors for that brilliant, wet-look shine.
Once cooled, your little amphibian friend is ready to guard your coffee table
Chubby Bear Face Ashtray With Ears as Rests
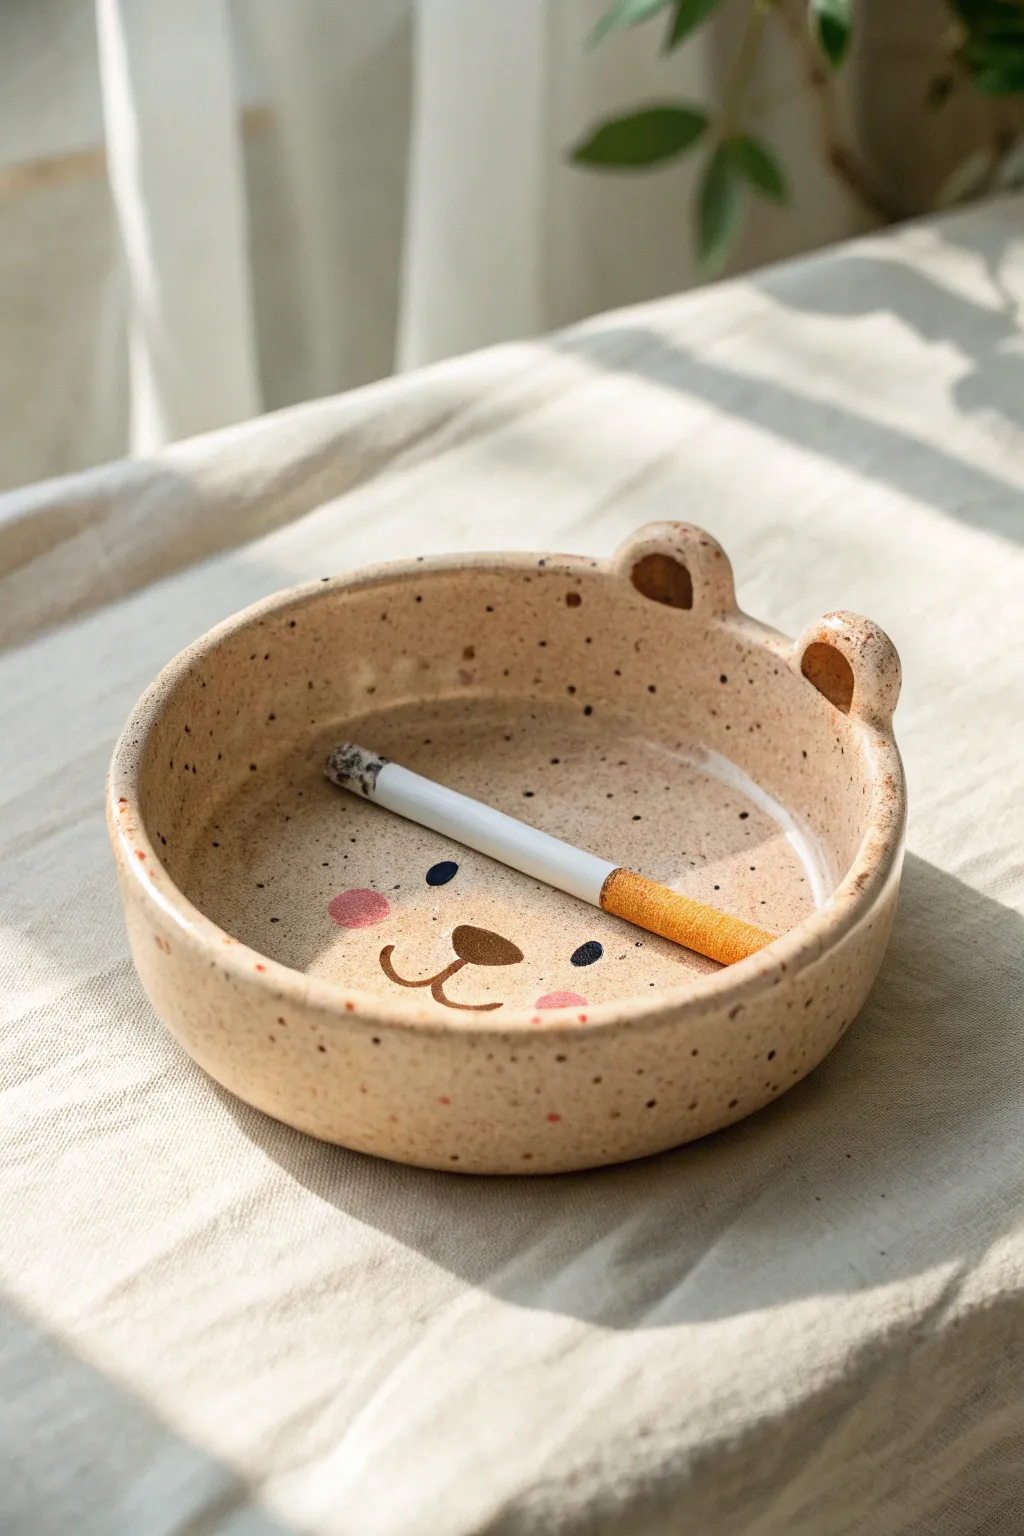
This adorable handmade ashtray features a sweet, minimal bear face painted onto speckled clay, turning a utilitarian object into a charming piece of decor. The small, rounded ears serve a clever dual purpose, acting as perfect resting spots for cigarettes.
How-To Guide
Materials
- Speckled buff stoneware clay (or polymer clay with speckled effect)
- Pottery wheel (optional, can be hand-built)
- Fettling knife
- Needle tool
- Sponge
- Rolling pin (if hand-building)
- Underglaze (Black and Pink)
- Small round paintbrush
- Clear transparent glaze
- Kiln (fire to cone 6 or as per your clay body)
Step 1: Forming the Base
-
Prepare the Clay:
Begin by wedging a ball of speckled buff clay weighing approximately 1 to 1.5 pounds to remove any air bubbles. -
Shape the Bowl:
Throw a simple, low cylinder on the wheel. Aim for a flat bottom and vertical walls that rise about 1.5 to 2 inches high. If hand-building, roll a slab for the base and attach a coil or slab strip for the wall. -
Refine the Rim:
Smooth the rim with a chamois or sponge to ensure it is rounded and comfortable to the touch. -
Dry to Leather Hard:
Allow the piece to dry until it reaches a leather-hard state, where it is firm enough to handle without deforming but still holds moisture. -
Trim the Foot:
Flip the piece over and trim the bottom to create a neat foot ring, cleaning up any excess weight from the base.
Clean Lines Pro Tip
If your underglaze lines are shaky, let them dry and gently scratch away mistakes with a needle tool before glazing.
Step 2: Sculpting the Features
-
Form the Ear Lumps:
Roll two small balls of clay, roughly the size of large marbles, for the bear’s ears. -
Attach the Ears:
Score and slip the top rim of the bowl where you want the ears to sit. Press the balls firmly onto the rim, blending the clay downwards for a seamless connection. -
Create the Rest Groove:
Using the handle of a paintbrush or your thumb, gently press an indentation into the center of each ear. This creates the ‘U’ shape needed to hold a cigarette. -
Smooth the Transitions:
Use a damp sponge to smooth around the ears, ensuring there are no sharp edges or cracks where they join the main body.
Level Up: Texture
Before the clay dries, gently press a real cigarette filter into the ear grooves to ensure they are the perfect size.
Step 3: Decoration and Glazing
-
Bisque Fire:
Once bone dry, fire the piece in the kiln to a bisque temperature (usually Cone 04). -
Sketch the Face:
I find it helpful to lightly sketch the face placement with a pencil first; the graphite will burn off in the kiln. -
Paint facial Features:
Using black underglaze and a fine-tip brush, paint two small ovals for eyes and a rounded triangle for the nose. -
Add the Smile:
Paint a simple ‘w’ shape directly under the nose to create the bear’s mouth. -
Apply Rosy Cheeks:
Dip a slightly larger brush into pink underglaze and dab two soft circles on either side of the mouth for cheeks. -
Clear Glaze Application:
Once the underglaze is dry, dip the entire piece into a clear transparent glaze. This seals the clay and makes the speckled texture pop. -
Wipe the Foot:
Carefully wipe any glaze off the bottom foot ring with a sponge to prevent it from sticking to the kiln shelf. -
Final Firing:
Fire the piece for the final glaze firing according to your clay body’s specifications.
Once cooled, your bear friend is ready to add a cozy touch to your table
Bunny Head Ashtray With Long Ear Notches
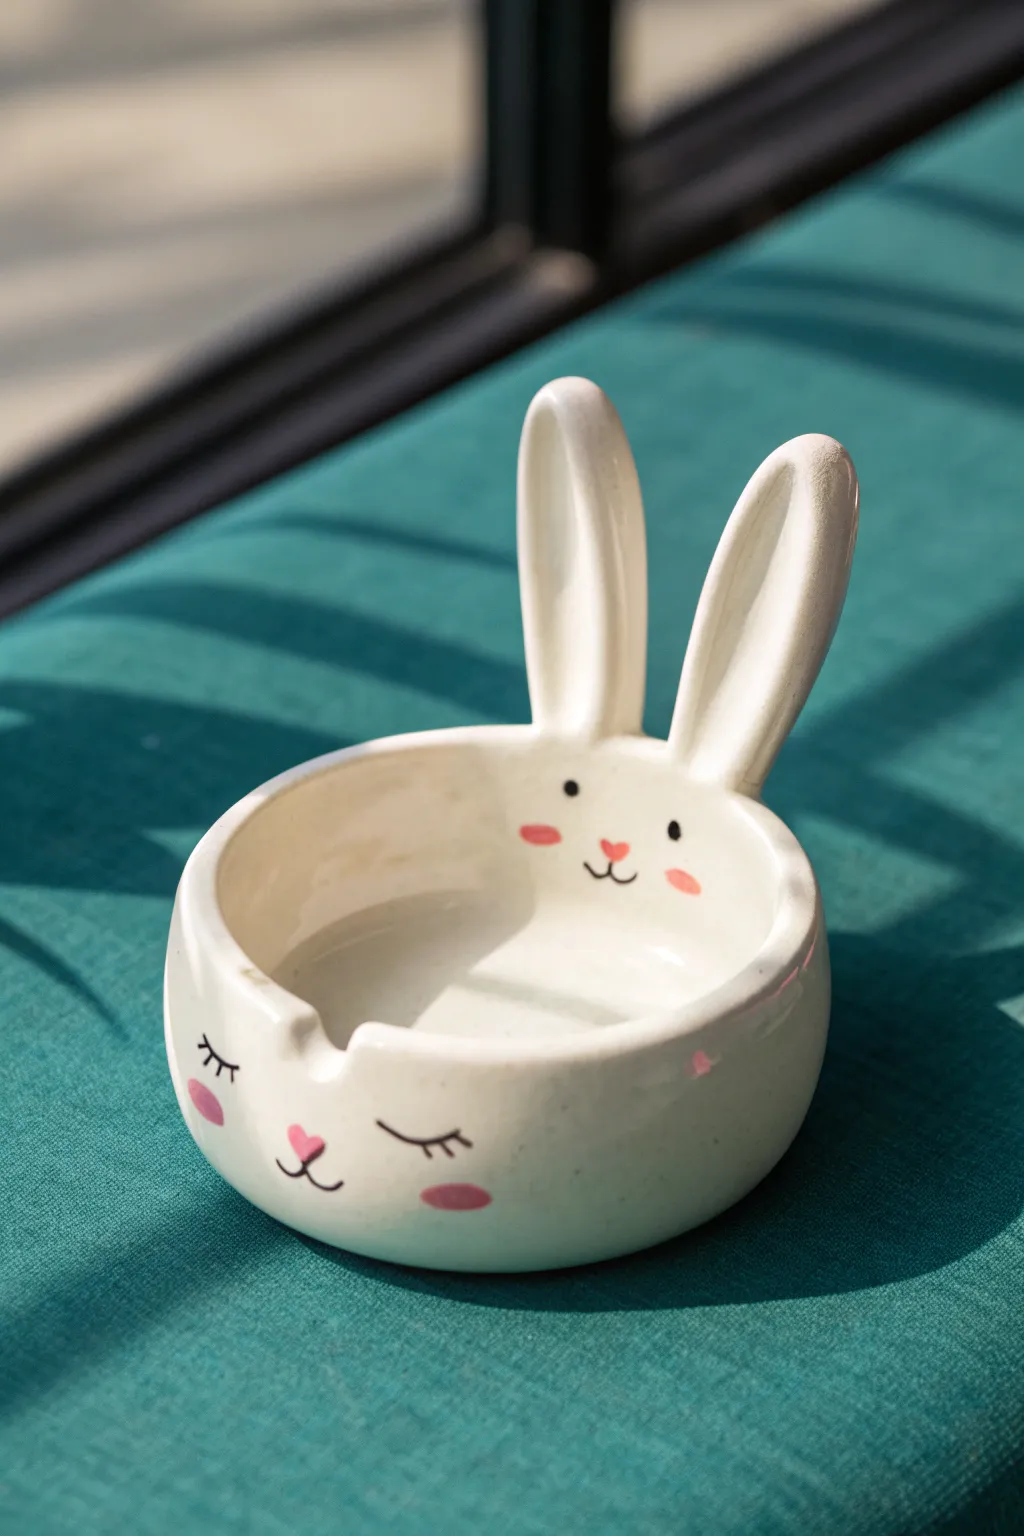
This adorable bunny-shaped ashtray combines functionality with charm, featuring long ears that double as rests and a sweet hand-painted face. Its smooth, glossy white finish and touches of pink make it a delightful addition to any tabletop decor.
Detailed Instructions
Materials
- Air-dry clay or polymer clay (white)
- Rolling pin
- Clay sculpting tools (knife, smoothing tool)
- Small bowl (for use as a mold, optional)
- Water (for smoothing)
- Sandpaper (fine grit)
- Acrylic paints (white, pink, black)
- Fine detail paintbrushes
- Glossy varnish or sealant (heat-resistant if used as a real ashtray)
Step 1: Shaping the Base
-
Prepare the clay:
Start by conditioning your clay until it is soft and pliable. Roll a ball about the size of a large orange to ensure you have enough material for the thick walls. -
Form the bowl shape:
Press your thumbs into the center of the ball and pinch the sides upwards to create a bowl shape. You want the walls to be fairly thick and sturdy, about 1/4 inch wide. -
Smooth the interior:
Use a little water on your finger to smooth out the interior curve of the bowl, ensuring there are no cracks or uneven bumps at the bottom. -
Flatten the rim:
Gently tap the rim of the bowl against a flat surface or use a flat modeling tool to create a nice, level edge around the top circle.
Ear Stability Fix
If the ears droop while drying, prop them up from behind using small cardboard scraps or crumpled foil until the clay hardens enough to hold its weight.
Step 2: Adding the Ears and Notches
-
Shape the ears:
Roll two smaller logs of clay and flatten them slightly into long, rounded bunny ear shapes. I like to taper them slightly at the top for a more natural look. -
Curve the ears:
Gently curve the clay ears lengthwise to give them a concave inner surface, mimicking the depth of real bunny ears. -
Attach the ears:
Score the back rim of your bowl and the base of the ears. Apply a little slip (clay mixed with water) and press the ears firmly onto the back edge, standing upright. -
Blend the seams:
Using a modeling tool, drag clay from the ears down onto the bowl and vice versa until the seam is completely invisible and structural integrity is solid. -
Carve the notches:
At the front of the bowl, directly across from the ears, use a round tool or the handle of a paintbrush to press a U-shaped notch into the rim. Add a second notch on the side if desired.
Make it Sparkle
Mix a tiny pinch of iridescent fine glitter into your final glossy varnish coat to give the ceramic bunny a subtle, magical shimmer in the sunlight.
Step 3: Finishing and Painting
-
Dry thoroughly:
Let the piece dry completely. If using air-dry clay, this might take 24-48 hours; if using polymer, bake according to package instructions. -
Sand until smooth:
Once dry and cool, use fine-grit sandpaper to buff away any fingerprints or rough textures. Wipe away the dust with a damp cloth. -
Base coat:
Apply two to three coats of white acrylic paint to the entire piece, letting each layer dry before adding the next to ensure opaque coverage. -
Paint facial features:
For the front face, use a fine brush with black paint to draw closed eyes with lashes and a small mouth. Use pink for the heart-shaped nose and rosy cheeks. -
Paint the inner face:
Inside the bowl, near the ears, paint a second smaller face. Two black dots for eyes, a tiny pink heart nose, and pink cheeks create a surprise element. -
Seal the piece:
Finish with a high-gloss varnish. If this will be used as a functional ashtray, ensure your sealant is heat-resistant and non-flammable.
Once the varnish cures, your charming bunny ashtray is ready to hold trinkets or be used as intended
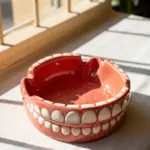
Big-Mouth Creature Ashtray
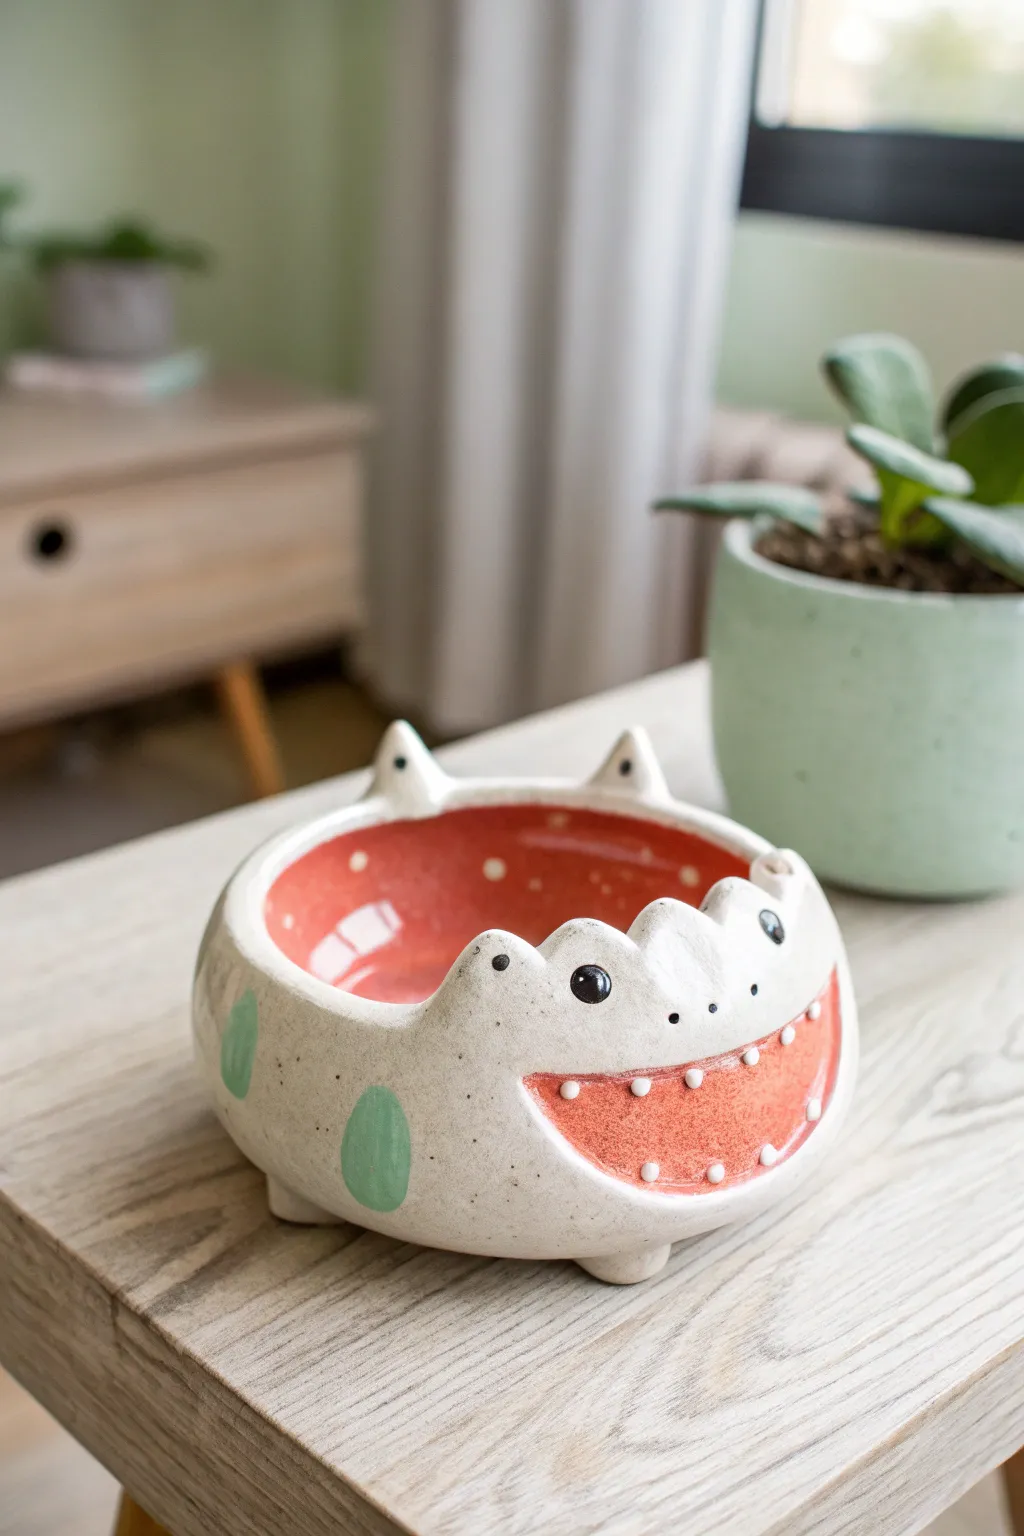
This delightful little creature doubles as a functional tray, featuring a wide, toothy grin that invites you to drop in trinkets or ash. With its speckled cream glaze, coral-red interior, and bubbly personality, it adds a playful pop of color to any tabletop.
Step-by-Step Tutorial
Materials
- White stoneware or polymer clay (oven-bake)
- Pottery tools (needle tool, rib, sponge)
- Rolling pin
- Slip and scoring tool (if using stoneware)
- Underglazes: Coral red, mint green, black
- Clear variation glaze (speckled cream/matte white)
- Small round brushes
- Kiln (if stoneware) or home oven (if polymer)
Step 1: Forming the Body
-
Prepare the base:
Start with a ball of clay about the size of a large orange. Pinch into the center with your thumbs while rotating to open up a basic bowl shape, aiming for walls about 1/4 inch thick. -
Refine the shape:
Use a rib tool or your fingers to smooth the interior and exterior surfaces. Gently push the walls out to create a rounded, bulbous belly rather than straight vertical sides. -
Add the feet:
Flip the bowl over. Roll four small, equal-sized balls of clay and attach them to the bottom as stubby legs. Space them evenly for balance and blend the clay seamlessly into the main body. -
Level lightly:
Turn the pot right-side up and tap it gently on the table to ensure the feet are level and the creature sits flat without wobbling.
Step 2: sculpting the Face
-
Shape the mouth rim:
On the front side of the rim, use a knife or needle tool to crave a gentle downward dip. This creates the bottom lip of the open mouth. -
Build the upper teeth:
Add small bits of clay to the rim above the mouth area to form rounded, saw-tooth spikes. These act as the upper teeth and give the rim its jagged character. -
Add the horns/ears:
Mold two small triangular points and attach them to the back rim, opposite the mouth. These little spikes act as ears or horns to balance the creature’s silhouette. -
Create the smile:
Using a needle tool, lightly etch a wide, U-shaped line on the front belly of the pot. This defines the separate lower mouth area that we will paint later. -
Sculpt the eyes:
Roll two tiny balls of clay and attach them just below the jagged rim ‘teeth.’ Press them down slightly so they bulge out, creating bug-eyed features. -
Add texture:
Before firing or baking, smooth any rough fingerprints with a slightly damp sponge. I find this creates a cleaner canvas for the glazing steps.
Clean Lines Hack
Use liquid wax resist over your underglaze details (like the red mouth and green spots) before dipping the whole pot in clear glaze to keep colors crisp.
Step 3: Decorating & Glazing
-
Initial firing:
If using ceramic clay, bisque fire your piece to cone 04. If using polymer clay, bake according to package instructions now (painting happens after baking for polymer). -
Paint the interior:
Apply three coats of coral red underglaze or acrylic paint to the entire inside of the bowl, ensuring full, opaque coverage. -
Paint the smile:
Fill in the etched U-shape on the exterior belly with the same coral red color to create the open mouth look. -
Detail the teeth:
Using a fine-tip brush and white glaze (or white paint), carefully add small dots along the coral red smile to represent the lower teeth. Add tiny white dots to the tips of the rim spikes as well. -
Add spots:
Paint large, oval-shaped spots on the sides of the creature using a soft mint green color. Keep the edges soft and organic. -
Define the eyes:
Paint the bulging eye mounds black, leaving a tiny pinprick of white (or scratching through to the white clay body) to create a lifelike reflection spot. -
Apply speckle glaze:
For the main body, apply a speckled cream or matte white glaze around the colored areas. Be careful not to smear your painted details. -
Final fire:
Glaze fire the piece to the appropriate temperature for your clay body (usually Cone 5/6 for stoneware), letting the heat fuse the glossy finish.
Wobbly Monster?
If the creature rocks after adding feet, place a piece of sandpaper on a flat surface and gently rub the feet against it in a circular motion to level them out.
Once cooled, your quirky creature is ready to devour loose change or catch ash with a smile
Dust Bunny Eyeball Cluster Ashtray
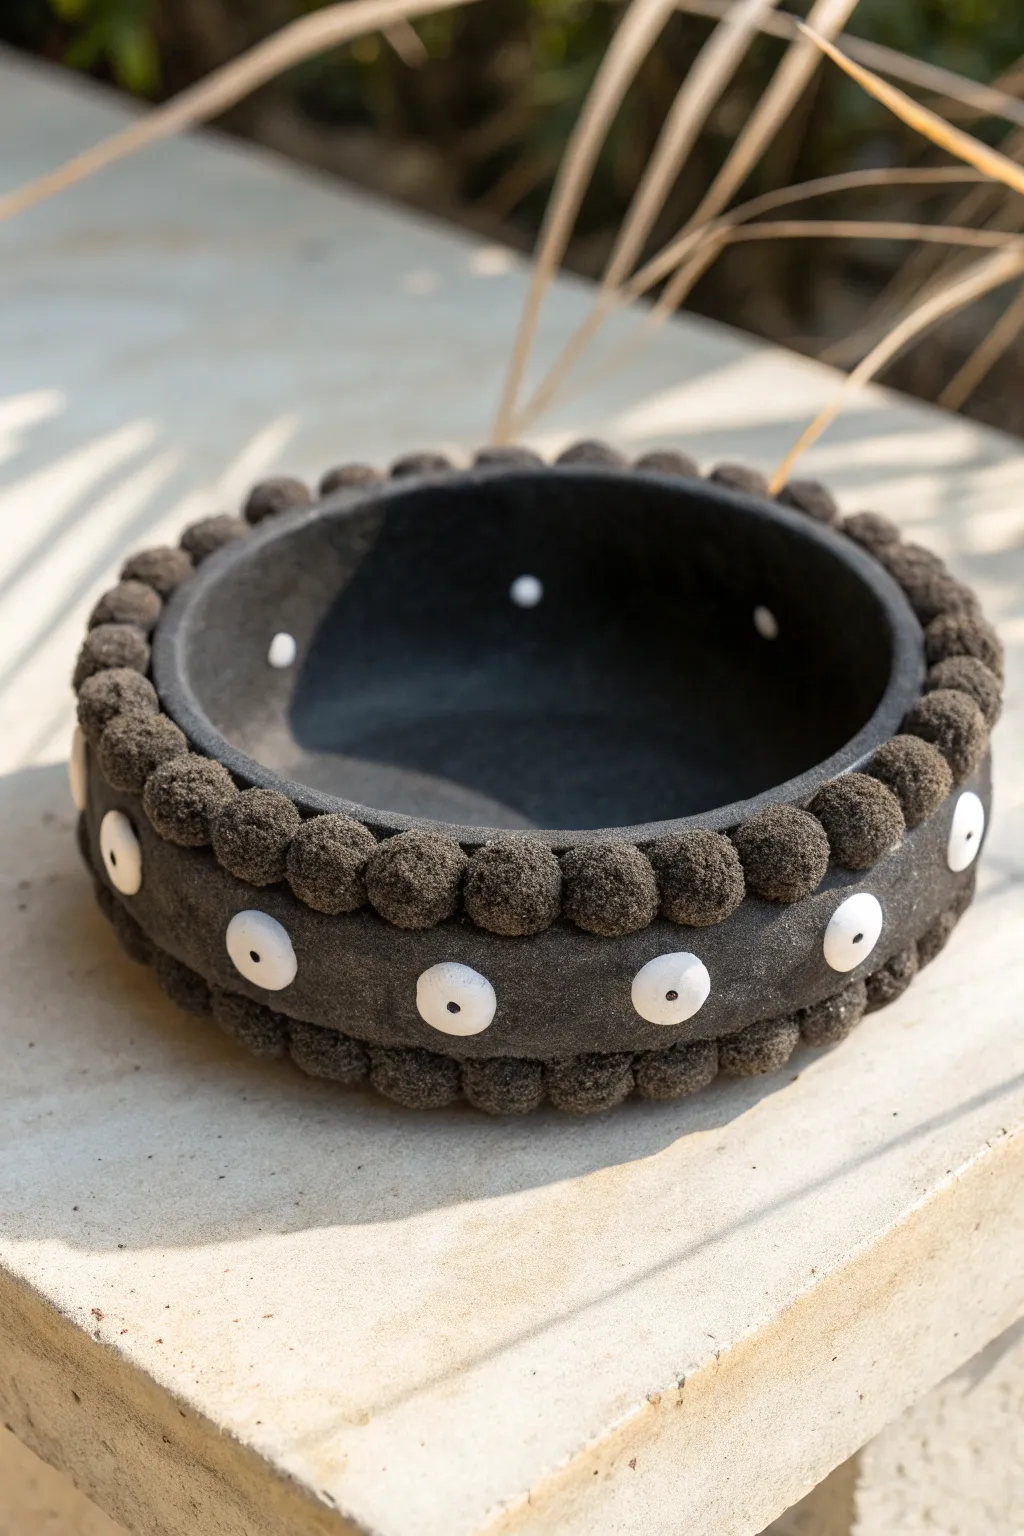
This whimsical ashtray combines a rough, organic texture with quirky, stylized eyes, resembling a cluster of little soot sprites or dust bunnies. The matte black finish paired with bright white details creates a striking contrast perfect for an edgy, modern decor piece.
Detailed Instructions
Materials
- Black stoneware clay or polymer clay (dark grey/black)
- White clay slip or white polymer clay
- Pointed sculpting tool or needle tool
- Sponge
- Clay scoring tool or old toothbrush
- Rolling pin
- Canvas or working mat
- Circular template or bowl (for sizing)
- Black underglaze (if using light clay)
- Clear matte glaze (optional)
- Small round paintbrush
Step 1: Forming the Base Structure
-
Roll the slab:
Begin by rolling out your black clay into a consistent slab, approximately 1/4 inch thick. Since we are building a sturdy vessel, I like to ensure the slab is uniform to prevent warping during drying. -
Cut the base:
Use a circular object or template to cut out the flat round bottom of your ashtray. A 4 to 5-inch diameter is a good standard size for this project. -
Create the walls:
Cut a long rectangular strip from your remaining slab. This strip should be long enough to wrap around the circumference of your base and about 2 inches tall. -
Attach the wall:
Score the outer edge of the base and the bottom edge of your wall strip. Apply a little slip (or water/liquid clay) and join them together, smoothing the seam on both the inside and outside so it becomes one solid piece.
Cracking Spheres?
If the small spheres crack away from the wall while drying, your slip wasn’t wet enough. Repair by wetting the joint and adding a tiny coil of fresh clay between the gaps.
Step 2: Creating the Dust Bunny Texture
-
Roll spheres:
Roll dozens of small clay spheres, roughly the size of large peas. You will need enough to create two solid rows around the entire perimeter of the bowl. -
Texture the spheres:
To get that fuzzy ‘dust bunny’ look, gently tap a stiff bristle brush or a piece of rough sponge against the surface of each sphere before attaching it. -
Score the rims:
Score a horizontal line around the very top rim of the wall and the very bottom edge where the wall meets the table. -
Attach the bottom row:
Using slip, attach the textured spheres in a tight row around the base of the ashtray. Press them firmly so they bond with the wall but maintain their round shape. -
Attach the top row:
Repeat the process for the top rim, placing the textured spheres side-by-side to create a bumpy, decorative lip.
Spooky Glow Up
Mix glow-in-the-dark pigment powder into the white clay or paint used for the eyeballs. The ashtray will stare back at you when the lights go out.
Step 3: Adding the Eyes
-
Form the eyeballs:
Roll small, flattened discs using white clay. These should be slightly larger than the textured spheres you made earlier. -
Position the outer eyes:
Space the white discs evenly around the smooth center band of the exterior wall. Score and slip the backs, then press them gently onto the black clay. -
Position interior eyes:
Place a few smaller white dots randomly on the interior walls of the bowl for a surprising detail when looking inside. -
Add pupils:
Take tiny pinched bits of black clay and press them into the center of each white disc to create the pupils. I find pressing them in slightly helps them adhere better than just setting them on top.
Step 4: Refining and Finishing
-
Texture match:
If the smooth band between the dust bunny rows looks too clean, dab it lightly with your sponge to give it a matte, slightly gritty texture that matches the rest of the piece. -
Clean the white clay:
Use a barely damp brush to wipe any black clay smudges off the white eyeballs to keep them crisp and bright. -
Dry slowly:
Cover the piece loosely with plastic to let it dry slowly. This prevents the small added spheres from popping off as the clay shrinks. -
Bisque fire:
Once bone dry, fire the piece to bisque temperature (usually Cone 04) if using stoneware. -
Glaze or Seal:
If you used black clay, you can leave the exterior unglazed for a matte look and apply a clear glaze just to the eyes. Alternatively, wash a thin matte black underglaze over the dark parts to deepen the color before the final firing.
Once fired or cured, you’ll have a delightful little conversation piece that adds character to any table
Koi Pond Ashtray With Blue Water Glaze
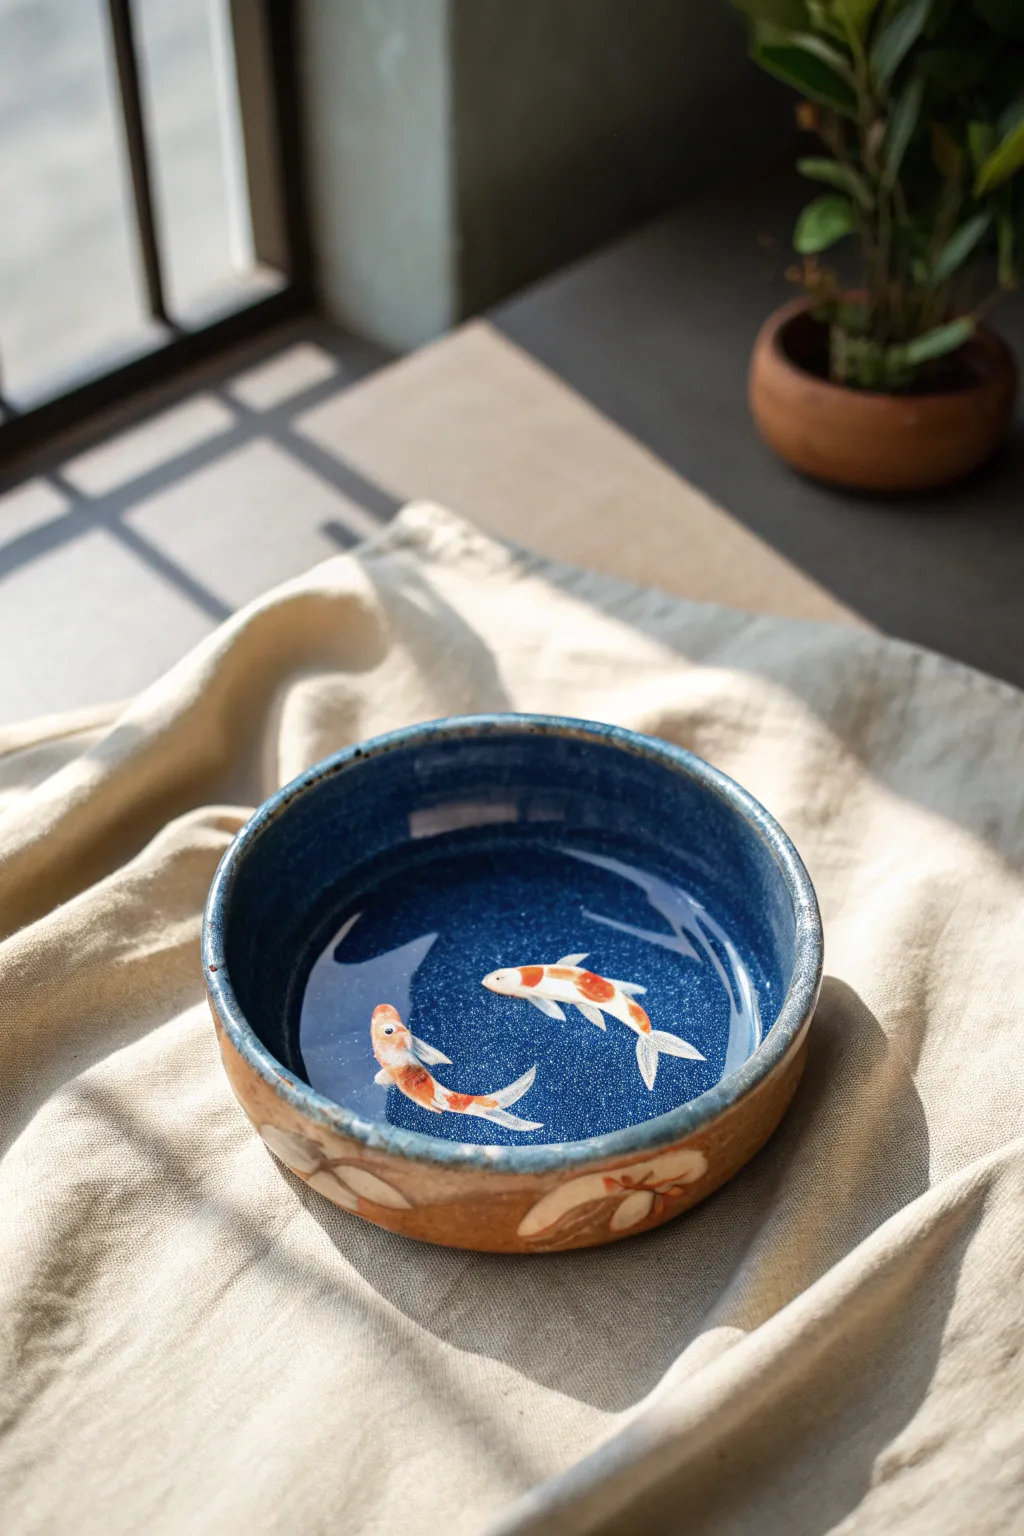
Transform a simple clay vessel into a tranquil water scene with this stunning koi pond ashtray concept. The combination of deep blue glaze, sparkling resin, and delicately painted fish creates a breathtaking illusion of depth that’s both functional and artistic.
Step-by-Step Tutorial
Materials
- Pottery clay (stoneware suggested)
- Pottery wheel or rolling pin/slab guides
- Underglaze (deep blue, white, orange/red)
- Clear glaze (food safe recommended)
- Fine detail brushes
- Clear epoxy resin (two-part)
- Ceramic paint or acrylics (if not firing a second time)
- Blue glitter or mica powder (optional)
- Pottery trimming tools
- Sponge
Step 1: Forming the Vessel
-
Shape the base:
Begin by throwing a wide, shallow cylinder on the wheel, or hand-build one using slab construction. Aim for a diameter of about 5-6 inches and straight, vertical walls about 2 inches high. -
Refine the walls:
Smooth the walls to ensure they are even thickness. Create a distinct, slightly rounded rim that will hold the ‘water’ effectively later. -
Decoration prep:
Once the clay is leather hard, trim the foot and clean up the exterior. I like to sponge the surface smooth to remove any grog that might interfere with the painting.
Depth Perception
Paint drop shadows under the fish on the blue glaze before painting the fish themselves. This slight offset shadow creates an incredible illusion that the fish are floating.
Step 2: Glazing and Exterior Design
-
Exterior motifs:
On the raw exterior clay, sketch loose, organic shapes resembling falling petals or leaves. Paint these with white slip or underglaze, leaving plenty of the raw clay body exposed for an earthy contrast. -
Interior glaze application:
Apply a deep, rich blue glaze to the entire interior. Choose a glaze that has depth or speckling to mimic deep water. Ensure the coverage is thick and even. -
Rim detailing:
Allow the blue interior glaze to overlap slightly onto the very top of the rim, creating a bordered effect. -
First firing:
Fire the piece according to your clay and glaze specifications (bisque and glaze firings as needed).
Make It Grow
Embed tiny dried flowers or fake miniature lily pads into the wet resin layer. They will float above the fish, adding another layer of realistic pond dimension.
Step 3: Painting the Koi
-
Base layer:
Once the piece is fully fired and cooled, you will paint the fish directly onto the shiny blue glaze floor. Mix a bright white acrylic or ceramic paint to create the silhouette of two koi swimming in a circle. -
Adding color:
Paint distinct orange or red patches on the back and head of the koi. Keep the edges soft to mimic scales under water. -
Detailing fins:
Use your finest brush to feather out the tails and side fins with translucent white, giving them a flowy, gauzy appearance. -
Adding eyes:
Place tiny black dots for eyes on the sides of the head to bring the fish to life.
Step 4: The Water Effect
-
Mixing resin:
Prepare a small batch of clear two-part epoxy resin. Follow the manufacturer’s instructions carefully regarding ratios and mixing time to avoid sticky spots. -
Adding sparkle:
Mix in a tiny pinch of fine blue glitter or silver mica powder. You want a subtle shimmer, not a glitter bomb, so start with less than you think you need. -
Pouring the layer:
Carefully pour the resin into the bottom of the bowl, covering the painted fish. The resin should be about 1/4 inch deep to create a 3D ‘water’ effect. -
Removing bubbles:
Use a heat gun or a lighter passed quickly over the surface to pop any bubbles that rise to the top. -
Curing:
Cover the piece with a box to prevent dust from settling and let it cure undisturbed for 24-48 hours until rock hard.
Place your finished piece in the sunlight to watch the resin water sparkle and shimmer over your swimming koi
Sea Turtle Pool Ashtray
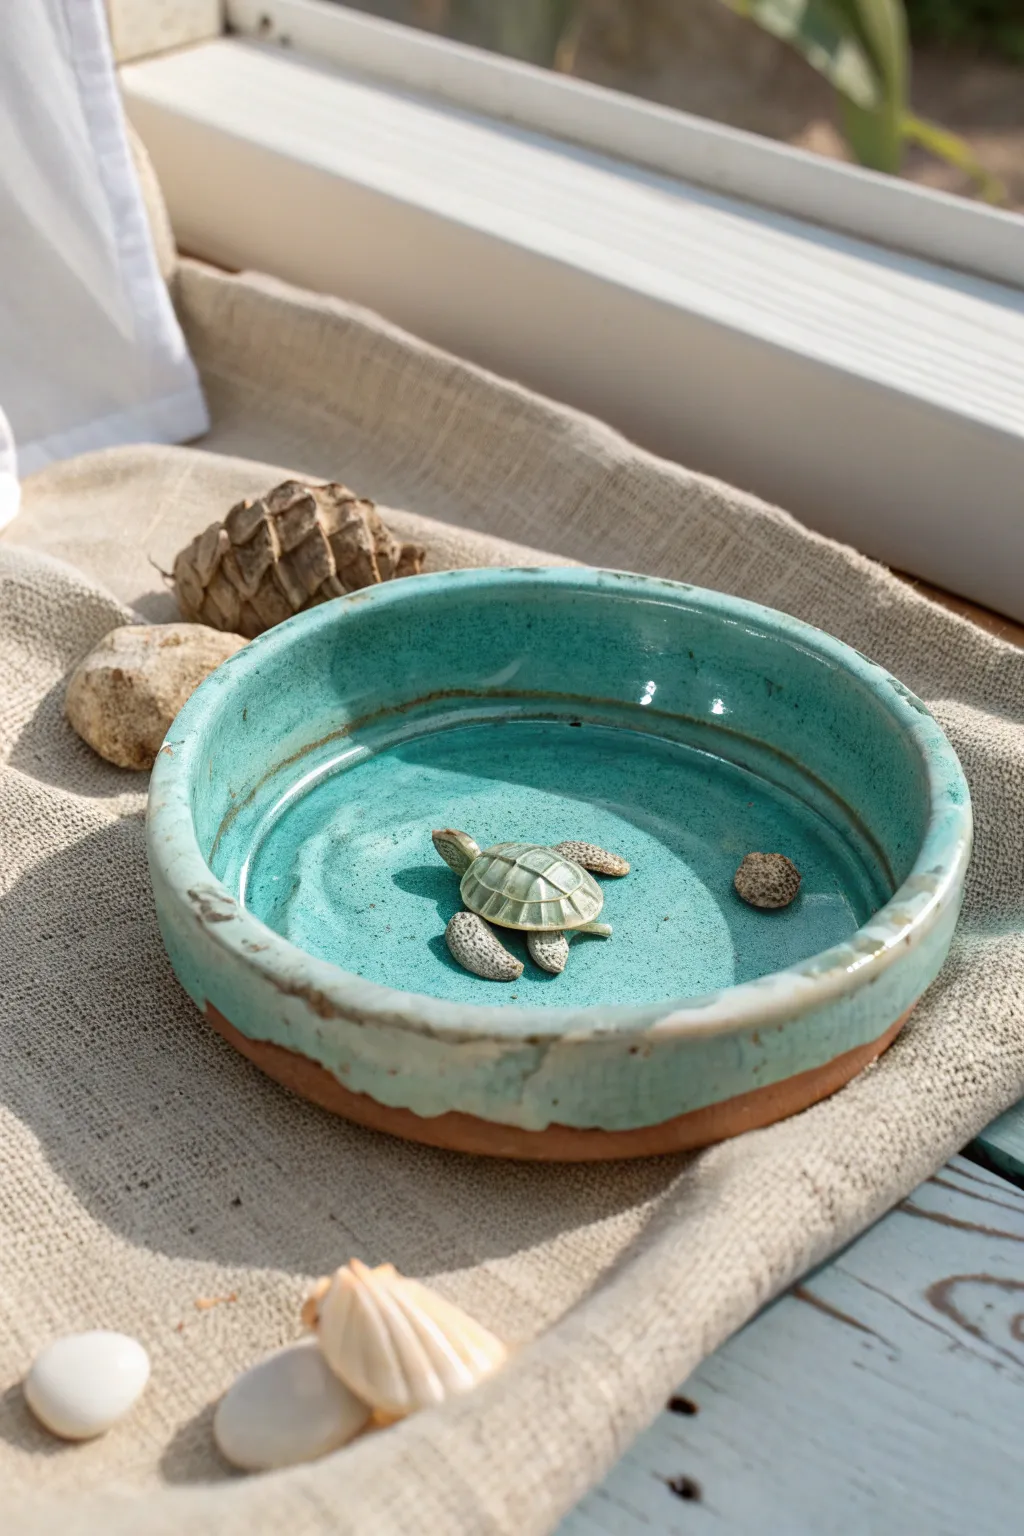
This charming ceramic piece creates the illusion of a tiny sea turtle swimming in a sunlit pool. The vibrant turquoise glaze pools at the bottom, mimicking clear tropical water, while the unglazed base adds a rustic, earthy touch.
How-To Guide
Materials
- Terracotta or red earthenware clay
- Rolling pin
- Circle template or bowl (approx. 5-6 inches)
- Needle tool
- Scoring tool (or an old toothbrush)
- Slip (clay mixed with water)
- Turquoise crackle glaze (cone 04-06)
- Small liner brush
- Medium soft glaze brush
- Modeling tools
- Sponge
Step 1: Sculpting the Basin
-
Prepare the base:
Start by rolling out a slab of terracotta clay to an even thickness of about 1/4 inch. Use a circle template or a small bowl to trace and cut out a perfect circle, which will serve as the floor of your ashtray. -
Create the walls:
Roll a long coil of clay, slightly thicker than a pencil. Place this coil on top of the outer edge of your circular base. -
Blend the coil:
Using your thumb or a modeling tool, firmly smudge the clay from the coil down onto the base on the inside seem. Repeat on the outside seam to fully integrate the wall. -
Shape the rim:
Pinch the walls gently to raise them to a height of about 1 inch. Keep the rim slightly thick and rounded for durability. Smooth any fingerprints with a slightly damp sponge, but leave a bit of texture if you prefer a handmade look.
Glass Effect Tip
To make the ‘water’ look deeper, add a pinch of crushed clear glass frit to the bottom of the bowl before the final firing. It melts into a transparent pool.
Step 2: Creating the Sea Turtle
-
Form the shell:
Roll a small ball of clay, roughly the size of a large marble, and flatten it slightly into a dome shape to create the turtle’s shell. -
Add texture:
With a needle tool, gently carve a hexagonal pattern onto the shell to mimic the scutes. While doing this, I like to press lightly to avoid collapsing the dome shape. -
Sculpt the limbs:
Create four tiny teardrop shapes for the flippers and a small rounded nub for the head. Texture the flippers by stippling them with the point of your needle tool. -
Assemble the turtle:
Score the underside of the shell and the attachment points of the limbs. Apply a dab of slip and press the pieces together firmly. -
Plan placement:
Decide where your turtle will swim. Off-center placement usually looks more natural and dynamic. -
Attach to the pool:
Score the bottom of the turtle and the spot in the basin where it will sit. Apply slip and press the turtle down securely so it doesn’t detach during firing. -
Optional pebble:
Roll a tiny, irregular ball of clay to act as a decorative rock. Texture it with a rock or sponge and score-and-slip it into the basin near the turtle.
Glaze Running?
If your glaze runs too much down the outside, use a ‘cookies’ or catch plate under your piece in the kiln to protect the shelf from drips.
Step 3: Glazing and Finishing
-
Bisque fire:
Allow the piece to dry slowly and completely (bone dry) before bisque firing it to cone 04 (or according to your clay’s instructions). -
Clean surface:
Wipe the bisque-fired piece with a damp sponge to remove any kiln dust that might resist the glaze. -
Wax resist (optional):
If you want a very clean line at the bottom, brush wax resist on the exterior base and up the side about half an inch. -
Apply the glaze:
Using a soft brush, apply 2-3 coats of turquoise crackle glaze to the entire interior of the bowl. -
Glaze the turtle:
Carefully brush the glaze over the turtle’s shell and flippers. The glaze will naturally break over the textures you carved, highlighting the details. -
Exterior glazing:
Brush the glaze over the top rim and let it come down the outside walls about halfway. Leave the bottom portion unglazed to expose the beautiful terracotta color. -
Glaze firing:
Fire the piece again to the temperature recommended for your specific glaze. Place it on a stilt if you are worried about the glaze running too far down the outside.
Once cooled, your little turtle will have a permanent, shimmering pool to call home
Waffle Breakfast Ashtray With Syrup Drips
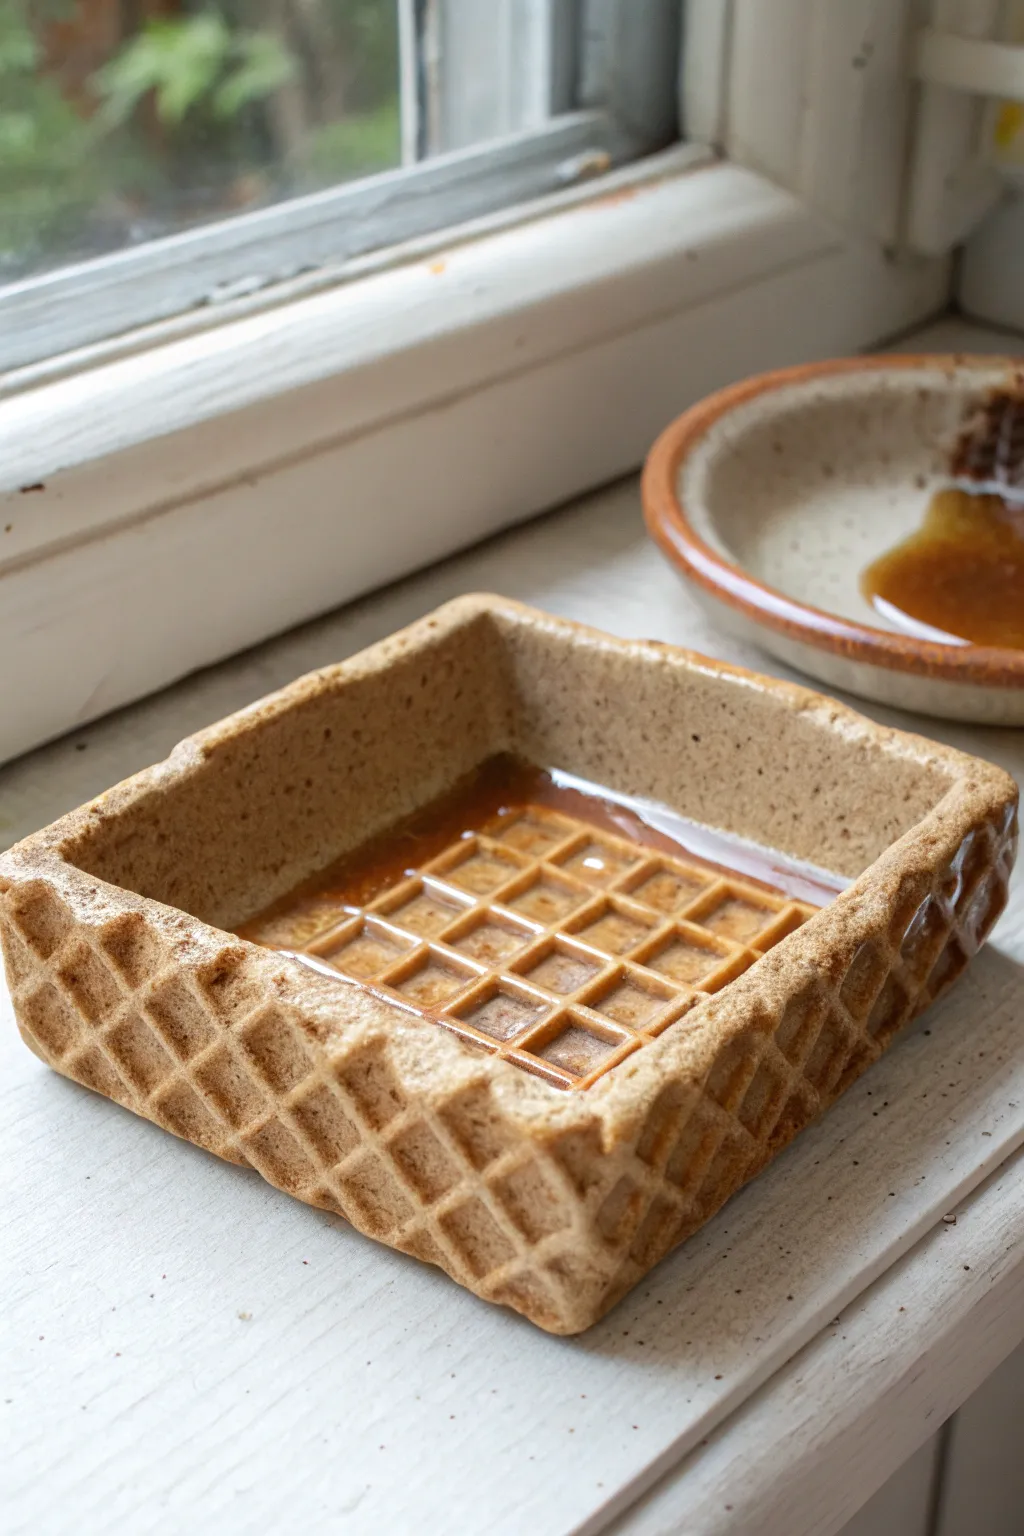
Transform your clay into a deliciously deceptive waffle ash catcher that looks good enough to eat. This project combines structural slab building with realistic food texturing to create a whimsical and functional piece complete with faux glossy syrup.
Step-by-Step Tutorial
Materials
- Polymer clay (beige/tan color)
- Liquid polymer clay (translucent)
- Alcohol ink (amber, caramel, or brown)
- Clay roller or pasta machine
- Square cookie cutter (approx. 3-4 inches) or ruler and craft knife
- Grid texture sheet or clean waffle cone roller
- Small square cutter (very small) or blunt tool for internal grid
- Chalk pastels (orange, brown, yellow) for shading
- Paintbrush for pastels
- UV resin (optional, for extra glossy syrup finish)
- Gloss varnish
- Oven
Step 1: Base Construction
-
Roll the slab:
Condition your beige polymer clay until pliable and roll it out into a smooth, even slab about 1/4 inch thick. You want it sturdy enough to hold its shape. -
Cut the base:
Using a square cutter or a ruler and craft knife, cut out a perfect square for the base of your ashtray. Set aside the excess clay for the walls. -
Create the inner grid:
To mimic the waffle pockets, gently press a small square cutter repeatedly into the center of the base slab. If you don’t have a cutter that small, use the back of a knife to press a grid pattern, but don’t cut all the way through. -
Cut the walls:
Roll out four strips of clay for the walls. These should be the same thickness as the base and long enough to fit the sides of your square. -
Texture the walls:
Before attaching them, press a diamond or grid texture sheet onto the exterior side of each wall strip to create that classic crispy waffle cone look. -
Assemble the box:
Score the edges of your base and the wall strips. Apply a tiny amount of liquid clay as glue, then attach the walls to the base, ensuring the textured side faces outward.
Sticky Situation?
If your liquid clay syrup is too runny and flowing out of control, let the mixture sit open for an hour. This allows some plasticizer to evaporate, thickening it up for better control.
Step 2: Refining and Shading
-
Blend seams:
carefully smooth the interior seams where the walls meet the floor and each other. I like to use a rubber sculpting tool here to reach into the corners without marring the texture. -
Soften edges:
Waffles aren’t perfectly sharp squares. Gently tap the top rim with your finger to give it a slightly uneven, ‘cooked batter’ appearance. -
Shade the clay:
Scrape some brown and orange chalk pastels into a powder. Use a soft brush to dust this powder into the deep crevices of the outer texture and the inner grid. -
Highlight the crispy bits:
Brush a little extra golden-brown pastel on the top rim and corner edges to simulate perfectly toasted batter. -
Bake the piece:
Bake the clay according to the manufacturer’s instructions for the specific brand you are using. Let it cool completely before moving to the syrup phase.
Step 3: The Syrup Finish
-
Mix the syrup:
In a small cup, mix translucent liquid polymer clay with a few drops of amber or caramel alcohol ink until you get a rich, maple syrup color. -
Pour the syrup:
Carefully pour the liquid clay mixture into the center of the ashtray. Let it pool naturally in the waffle grid indentations. -
Add a realistic drip:
Using a toothpick, guide a tiny bit of the syrup so it looks like it’s creeping up the side wall slightly, just like sticky syrup would. -
Bake again:
Bake the piece again for about 15-20 minutes to cure the liquid clay syrup. Watch it closely to ensure the color doesn’t darken too much. -
Add high gloss:
Once cool, coat just the syrup areas with a high-gloss varnish or a thin layer of UV resin to make it look permanently wet and sticky. -
Seal the waffle:
Finish by applying a matte varnish to the ‘dry’ waffle areas to protect the chalk pastel shading.
Make it à la Mode
Before baking the final time, sculpt a small scoop of vanilla ice cream from white clay and place it in the syrup pool for an adorable dessert-themed level up.
Now you have a charming, realistic breakfast piece that serves a practical purpose while looking delightful on your shelf
Boba Cup Ashtray With Straw Rest
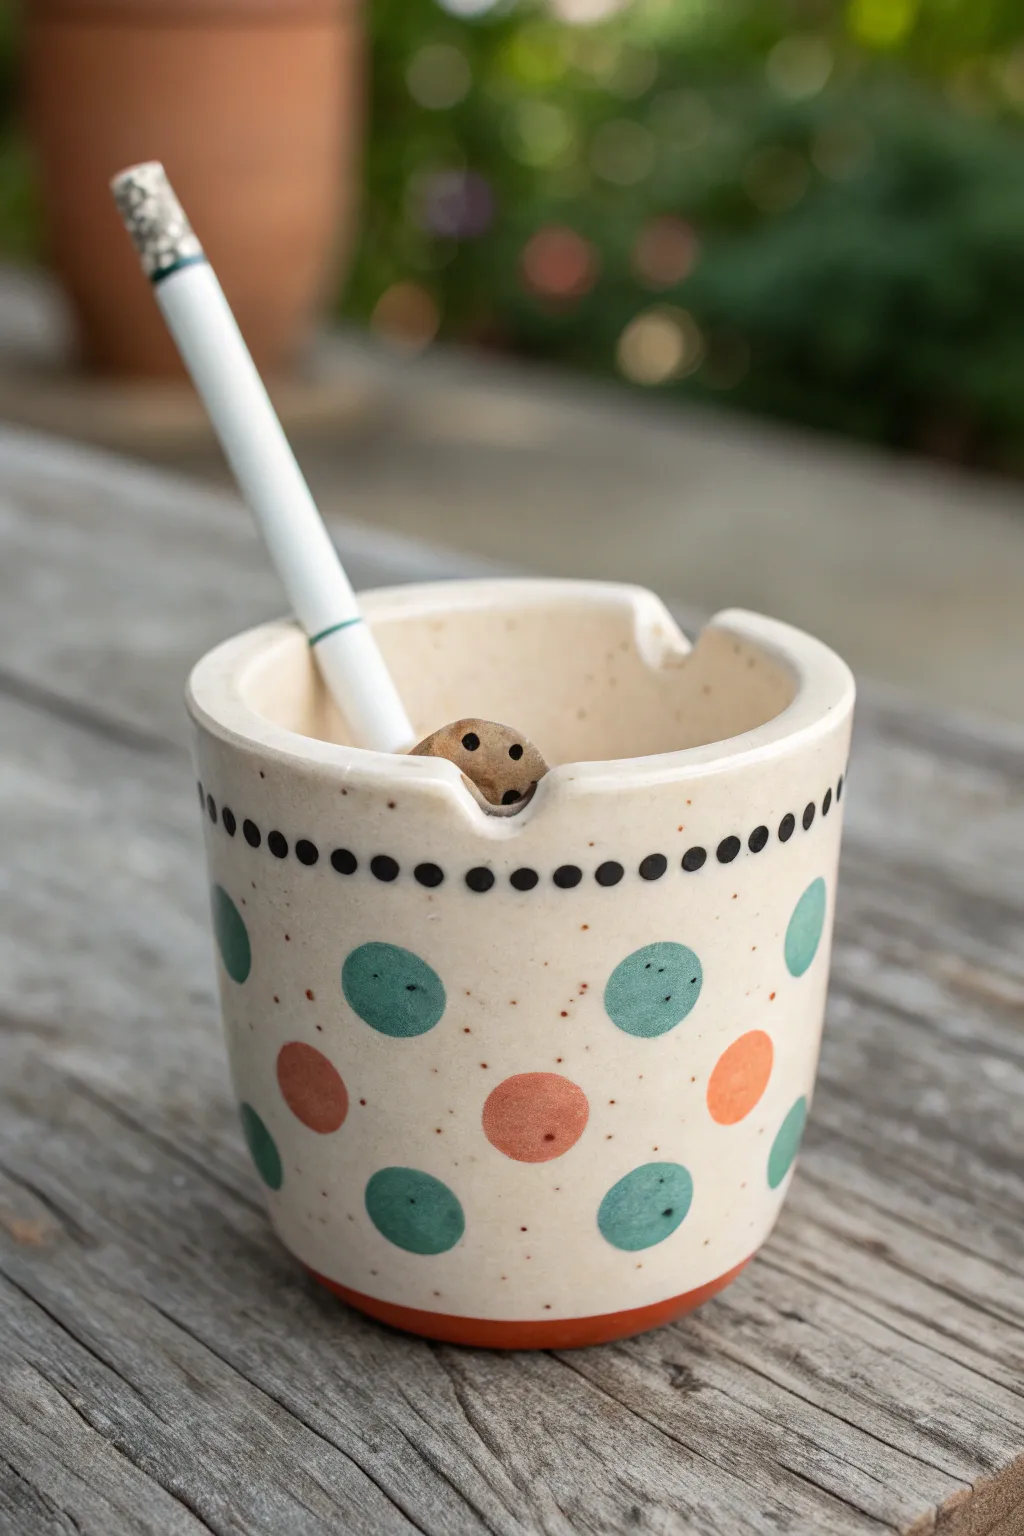
Modeled after a classic boba tea cup with its iconic polka dots, this handmade clay ashtray adds a touch of playful nostalgia to your side table. The cheerful green and orange dots, paired with a clever straw-like rest, creates a functional piece that doubles as charming decor.
How-To Guide
Materials
- White or speckled stoneware clay
- Rolling pin
- Clay cutting tool or needle tool
- Slip and scoring tool
- Wooden sculpting tool (rounded end)
- Smoothing sponge
- Underglazes: Teal/Mint Green, Burnt Orange, Black
- Small round paintbrush
- Clear glossy glaze
- Kiln (or access to firing services)
Step 1: Building the Form
-
Roll out the slab:
Begin by wedging your clay to remove air bubbles, then roll out a consistent clay slab approximately 3/8 inch thick. Make sure the surface is smooth and even. -
Cut the base and walls:
Cut a circular base about 3 inches in diameter. Next, measure the circumference of your circle and cut a rectangular strip for the walls that matches this length, plus a half-inch for overlapping. -
Prepare the connection points:
Score the edges of the circular base and the bottom edge of the rectangular wall strip using a needle tool or serrated rib. -
Assemble the cylinder:
Apply slip to the scored areas. Wrap the wall around the base, pressing firmly to adhere them. Score and slip the vertical seam where the wall ends meet, blending the clay together inside and out until the seam disappears. -
Create the rim notches:
Once your cylinder is sturdy, use a rounded wooden tool or your finger to gently press down two opposing notches on the rim. These will serve as the cigarette rests. -
Thicken the rim:
Roll a very thin coil of clay and attach it to the interior upper edge of the rim. Blend it downwards to create a slightly thicker, rounded mouth for the cup, mimicking the rolled edge of a paper cup. -
Initial smoothing:
Use a damp sponge to smooth out any fingerprints or rough textures on the surface. Pay special attention to the rim notches to ensure they are soft and rounded.
Step 2: Adding the Details
-
Sculpt the internal feature:
Form a small, rounded nub of clay—almost like a tiny mushroom cap—and attach it securely to the center of the inside bottom of the cup using the score-and-slip method. Poke two tiny holes in it to mimic a boba straw or bubble. -
Slow drying:
Cover your piece loosely with plastic and let it dry to a ‘leather hard’ stage. This usually takes a day or two depending on humidity. -
Bisque fire:
Once fully bone dry, fire the piece in the kiln to bisque temperature (usually Cone 04) to prepare it for glazing.
Uneven Walls?
If your cylinder walls are warping or slumping, stuff the inside with crumpled newspaper or plastic bags to support the shape while it dries to leather-hard.
Step 3: Painting and Glazing
-
Apply base color (optional):
If your clay body isn’t naturally cream-colored like the photo, apply a light coat of cream or off-white underglaze to the entire exterior and interior. -
Paint the large dots:
Using your teal/mint green and burnt orange underglazes, paint large, alternating polka dots around the body of the cup. I find that doing two coats ensures the colors pop without being streaky. -
Detail the rim:
Take a fine-tip brush and black underglaze to carefully paint a row of small, uniform dots just below the rim of the cup, encircling the entire piece. -
Add speckles:
To mimic the speckled clay texture seen in the photo, you can flick a stiff toothbrush loaded with watered-down brown underglaze lightly over the piece. -
Clear glaze application:
Once the underglaze is completely dry, dip the entire piece into a clear glossy glaze. Shake off any excess drips. -
Base cleaning:
Wipe the bottom of the ashtray entirely clean of glaze with a damp sponge to prevent it from sticking to the kiln shelf. -
Final firing:
Fire the piece again to the maturation temperature of your specific clay and glaze (typically Cone 5 or 6). Let it cool completely before removing.
Make it a Set
Make smaller matching versions to use as toothpick holders or shot glasses. Vary the polka dot colors for a rainbow ‘boba flavor’ collection.
Now you have a charming, sturdy little vessel that brings a bit of sweetness to your daily ritual.