
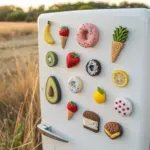
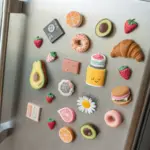
If you’ve ever wanted a quick, satisfying clay project, small clay magnets are the sweetest little win. I love how you can make a whole set in an afternoon and instantly add personality to your fridge, locker, or any magnetic board.
Pizza Slice Magnets
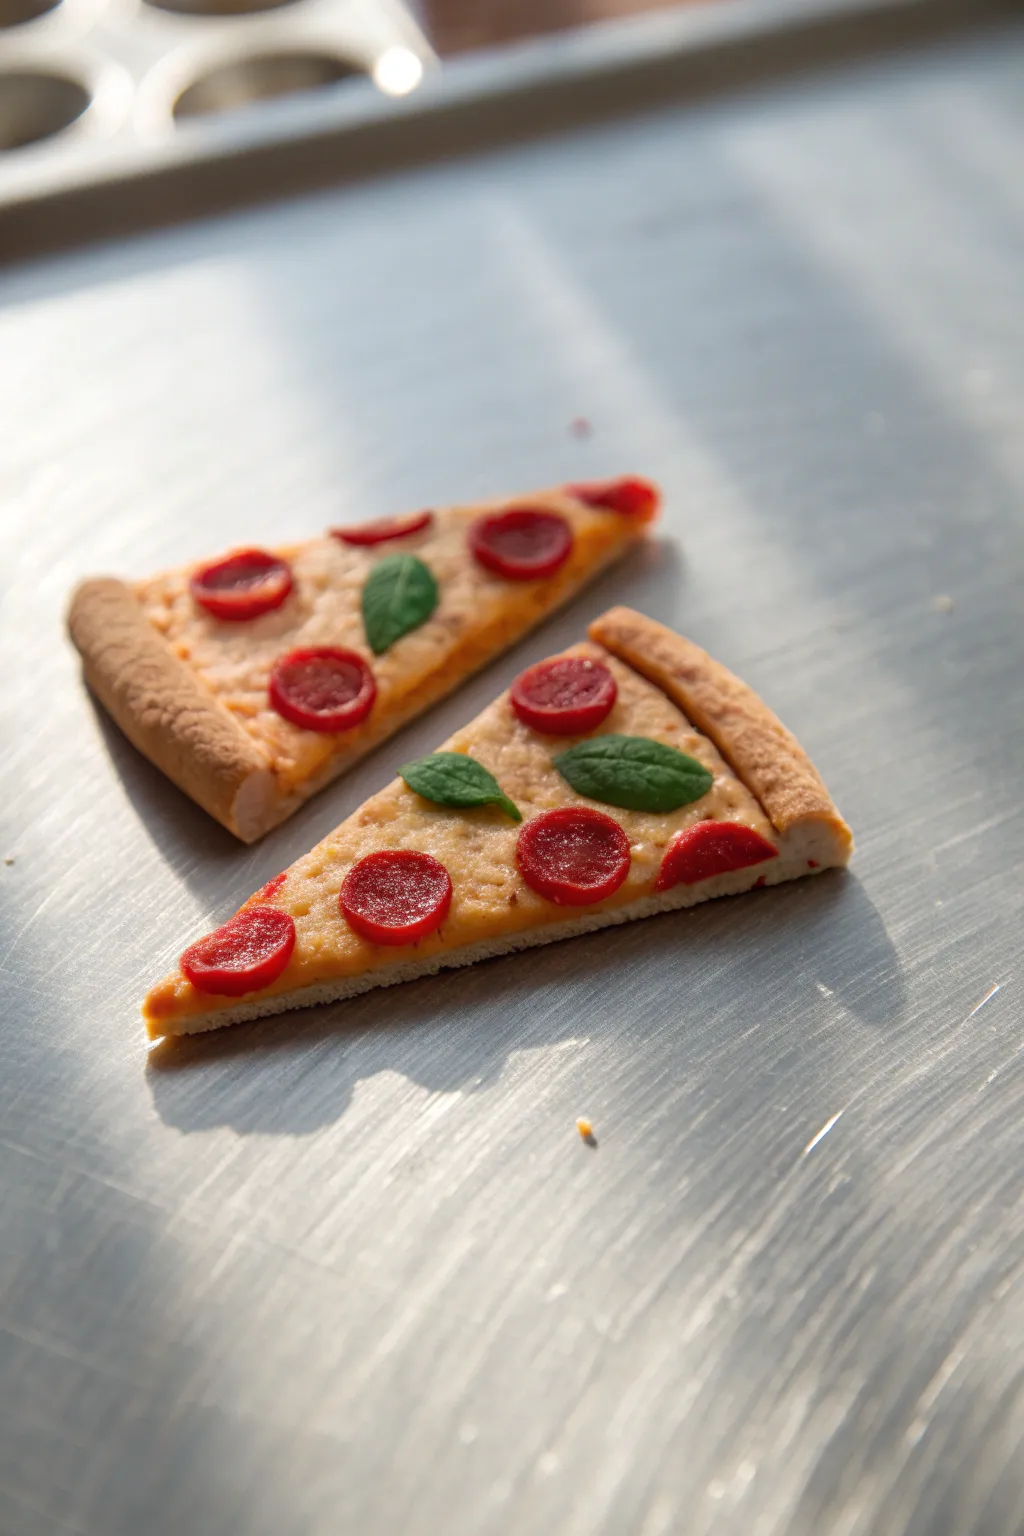
These delightfully realistic pizza slice magnets look good enough to eat but are permanently preserved in polymer clay. With textured golden crusts, translucent melted cheese, and tiny pepperoni cups, they add a savory touch to any magnetic surface.
Detailed Instructions
Materials
- Polymer clay: Beige/ecru (crust), Translucent + White + Yellow (cheese), Dark Red (pepperoni), Green (basil)
- Pastel chalks (ochre, orange, brown) for shading
- Liquid polymer clay (Translucent)
- Small round cutter (approx. 5mm) or straw
- Needle tool or toothpick
- Toothbrush or crumpled foil (for texturing)
- Small paintbrush
- Rolling pin or pasta machine
- Craft knife or scalpel
- Strong round magnets
- Superglue or E6000
Step 1: Forming the Dough Base
-
Mix the Dough Color:
Start by mixing beige polymer clay with a tiny amount of white to achieve a light, raw dough color. Condition it well until pliable. -
Roll and Cut:
Roll your clay into a flat sheet about 3-4mm thick. Using a craft knife, cut out a classic drying wedge shape—essentially a long triangle with a slightly curved top edge. -
Sculpt the Crust:
Roll a separate snake of the same dough color. Attach this along the curved top edge of your triangle, blending the seam on the bottom side to create a raised crust rim. -
Texture the Crust:
Take a toothbrush or a ball of crumpled aluminum foil and tap it firmly all over the raised crust area. This creates that bubbly, baked bread texture. -
Pre-Shading the Bread:
I like to use a soft brush to dust scraped ochre and light brown pastel chalk specifically onto the raised crust, giving it a ‘baked’ appearance before adding toppings.
Pepperoni Perfection
Mix translucent clay into your red pepperoni clay (about 1:1 ratio). This makes the meat look cured and fatty rather than flat and plastic-like.
Step 2: Making the Toppings
-
Create the Sauce Base:
Mix a small amount of liquid polymer clay with orange and red chalk scrapings (or a drop of red clay softener) to make a thick, sauce-like paste. -
Apply the Sauce:
Spread a thin layer of your sauce mixture onto the flat triangular area of the dough, stopping just before the raised crust. -
Mix the Cheese:
Combine translucent clay with a tiny speck of white and yellow. Chop this mixture into tiny, jagged crumbles rather than rolling it smooth—this mimics shredded mozzarella. -
Melt the Cheese:
Press the cheese crumbles onto the sauce layer. Then, smear a thin layer of plain translucent liquid clay over the crumbles to help them bond and look ‘melty’ once baked. -
Make Pepperoni Canes:
Roll a thin snake of dark red clay. Slice thin discs using your craft knife. For realism, gently press the center of each disc with a ball tool so the edges curl up like cupped pepperoni. -
Sculpt Basil Leaves:
Take tiny pinched amounts of green clay and flatten them into teardrop shapes. Use a needle tool to impress a central vein down the middle of each leaf. -
Assemble the Toppings:
Arrange your pepperoni slices and basil leaves onto the cheesy surface. Press them down slightly so they embed into the liquid clay.
Colors Look Flat?
If the baked pizza looks too pale, lightly brush specifically the high points of the cheese and crust with watered-down brown acrylic paint, then wipe off quickly.
Step 3: Texturing and Finishing
-
Final Texturing:
Use a needle tool or toothpick to gently poke and drag through the cheese area between toppings, simulating the gooey, uneven surface of melted cheese. -
Final Shading Pass:
Dust a little more orange pastel chalk over the cheese and pepperoni to make the whole slice look oily and oven-baked. -
Bake:
Bake the slices according to your clay manufacturer’s instructions (usually 275°F/135°C for 15-30 minutes). Let them cool completely. -
Seal (Optional):
If you want a greasy pizza look, lightly glaze the cheese and toppings with a satin varnish, keeping the crust matte. -
Magnetize:
Once fully cooled, flip the slice over. Apply a dab of superglue or E6000 to the back and press your magnet firmly into place.
Now stick these savory slices to your fridge for a permanent pizza party


Avocado Half Pairs
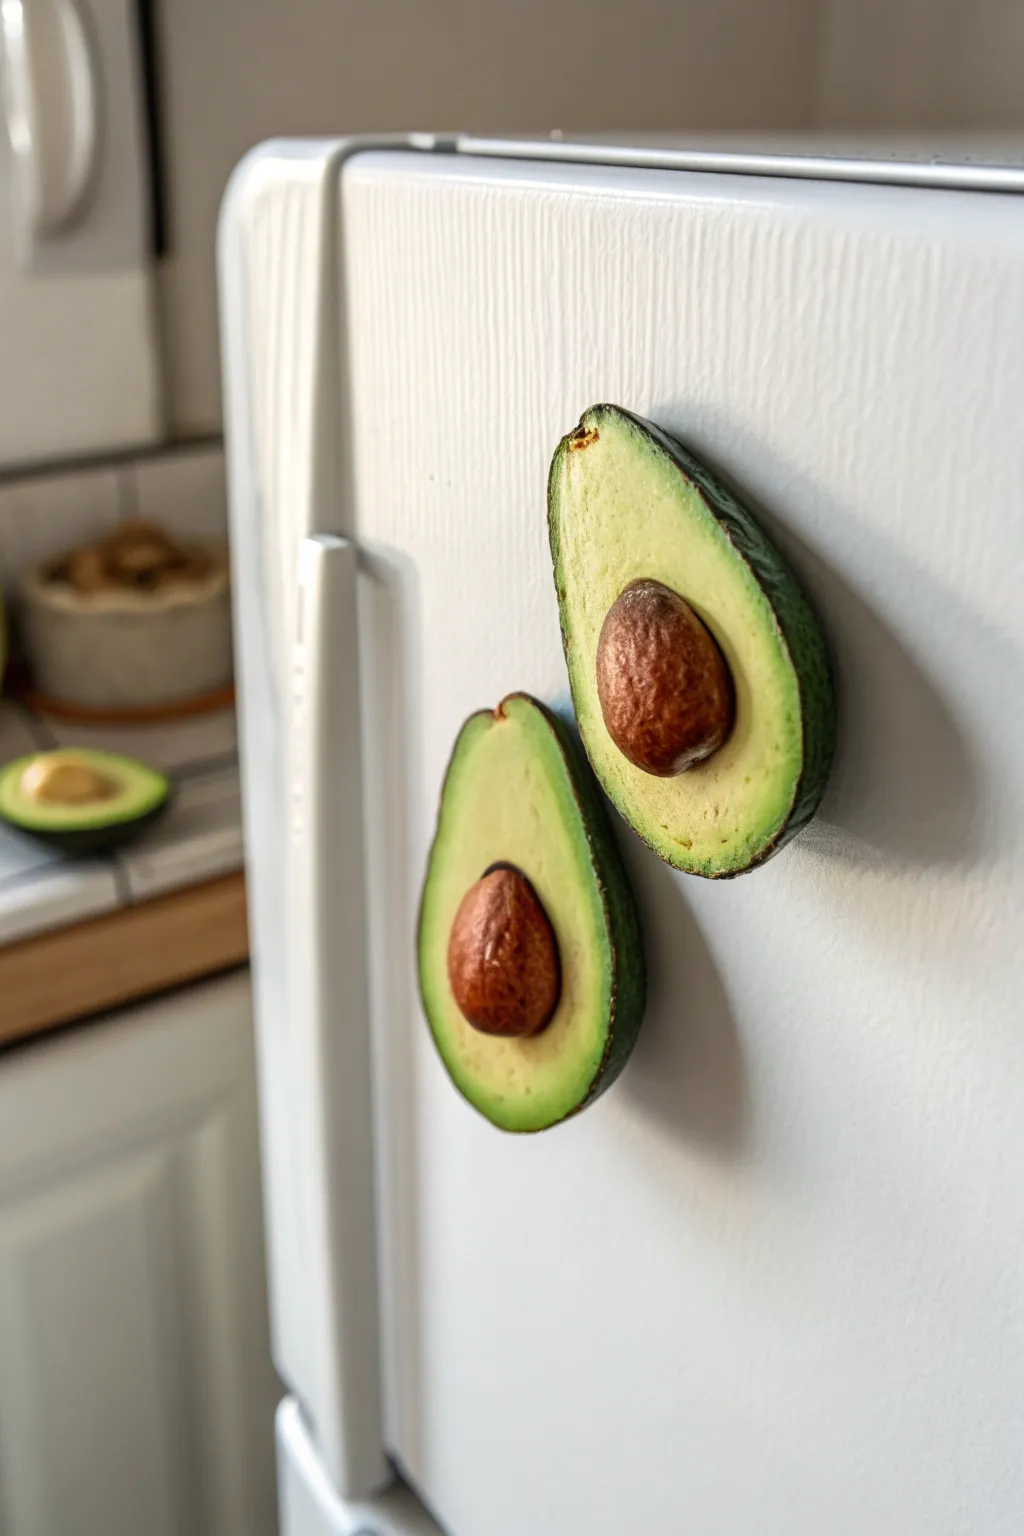
These charming refrigerator magnets mimic the look of fresh avocados so well you’ll be tempted to eat them. Using polymer clay and careful texturing, you can create a delightful pair complete with pits and realistic skin.
Detailed Instructions
Materials
- Polymer clay (dark green, light yellow-green, brown, translucent)
- Strong round magnets
- Liquid polymer clay (optional)
- Texture tool (toothbrush or stiff bristle brush)
- Needle tool or toothpick
- Soft pastel chalks (brown, dark green, ochre)
- Small paintbrush
- X-acto knife or craft blade
- Gloss glaze or varnish
- Superglue
- Oven for baking
Step 1: Shaping the Avocado
-
Mix the flesh color:
Start by conditioning your light yellow-green clay. To get that creamy avocado interior look, I like to mix in a small amount of translucent clay, about a 1:4 ratio. This prevents the color from looking too flat and plastic-like. -
Create the base form:
Roll the mixed clay into a smooth ball about the size of a walnut. Flatten it slightly into a teardrop shape that mimics the silhouette of a real avocado pear. -
Slice in half:
Use your craft blade to slice the teardrop shape directly down the center to create two matching halves. Smooth the cut edges gently with your finger to remove any sharp lines or drag marks. -
Form the skin layer:
Roll out a thin sheet of dark green clay. It should be quite thin, roughly 1-2mm. Place your avocado halves cut-side down onto the green sheet and trim around them, leaving enough excess to wrap up slightly around the sides. -
Blend the skin:
Gently smooth the dark green clay up the sides of the light green flesh so they adhere together, creating a seamless ‘rind’ that cups the bottom. -
Texturizing the skin:
Take your toothbrush or stiff bristle brush and firmly tap it all over the dark green exterior. Real avocados have bumpy skin, so don’t be afraid to apply pressure here to create a rugged texture.
Gradient Secrets
For a hyper-realistic gradient, blend a tiny snake of yellow clay between the dark skin and light flesh before smoothing them together.
Step 2: Adding the Pit and Details
-
Create the seed indent:
Use a ball tool or the back of a measuring spoon to press a round indentation into the center of both avocado halves. Make sure they are roughly in the same spot on both sides. -
Sculpt the pit:
Roll a ball of brown clay that fits snugly into one of the indentations. Press it in securely. For realism, slightly shape it so it isn’t a perfect sphere, but rather a bit ovoid. -
Detail the pit:
Using a needle tool, scratch fine, irregular lines onto the surface of the brown pit. This mimics the woody texture found on real avocado seeds. -
Texturize the flesh:
Gently tap the light green surface with your toothbrush. Unlike the skin, keep this texture very light—just enough to break the smooth shine of the clay.
Step 3: Coloring and Finishing
-
Apply pastel shading:
Scrape some green and ochre soft pastel into dust. Use a dry brush to apply the darker green dust around the very outer edge of the flesh, right where it meets the skin. Blend it inwards to create a gradient. -
Highlight the pit:
Dust a tiny amount of brown or reddish-brown pastel onto the textured pit to enhance the depth of the scratches you made earlier. -
Embed the magnets:
Flip the halves over to the textured skin side. Press your magnet firmly into the clay to create a socket, then remove it. Put a drop of liquid clay or strong glue in the hole, replace the magnet, and smooth the clay over the magnet edges to secure it. -
Bake the project:
Bake the pieces according to your clay manufacturer’s instructions, usually around 275°F (130°C) for 15-30 minutes depending on thickness. -
Reinforce magnets:
Once baked and fully cooled, check the magnets. If they popped out during baking, glue them back in with superglue. -
Add a glossy finish:
Brush a thin layer of gloss glaze only over the brown pit/seed area. This small detail makes the seed look moist and freshly cut, contrasting beautifully with the matte flesh.
Make it Toast
Use a textured tan clay triangle as a base instead of the skin to turn this project into ‘Avocado Toast’ magnets.
Now your fridge has a fresh touch of greenery that will never turn brown


Sunny Egg and Bacon Duo
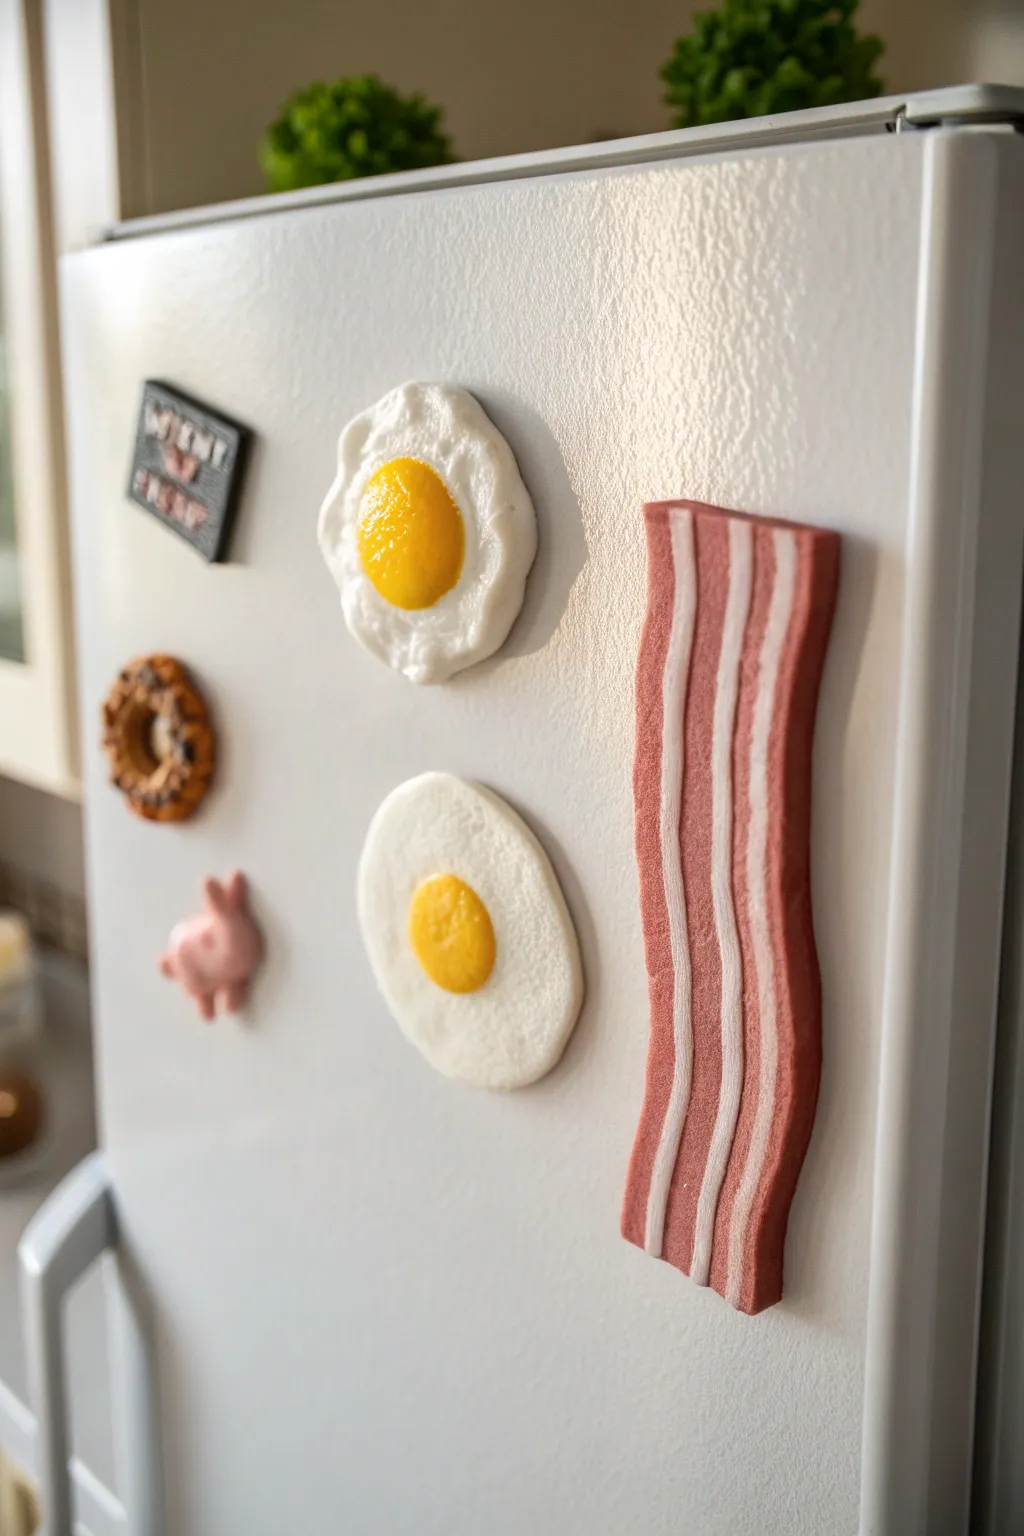
Bring a hearty breakfast to your fridge door with these surprisingly realistic sunny-side-up egg and bacon magnets. This project uses polymer clay to capture the translucent quality of egg whites and the savory texture of crispy bacon.
Step-by-Step Tutorial
Materials
- White polymer clay (translucent and opaque mixed)
- Yellow polymer clay
- Orange polymer clay (tiny amount)
- Red-brown or maroon polymer clay
- Pink or flesh-tone polymer clay
- Liquid polymer clay (clear or translucent)
- Gloss glaze or varnish
- Texture tool (toothbrush or stiff brush)
- Needle tool or toothpick
- Round cutters (small)
- Pastel chalks (browns, oranges) for shading
- Strong craft magnets (neodymium recommended)
- Super glue or E6000
Step 1: Cooking the Eggs
-
Mix the perfect white:
Start by conditioning your white clay. To get that realistic egg-white look, I like to mix about two parts standard opaque white with one part translucent clay. This prevents the white from looking too plastic or flat. -
Create the base:
Roll a small ball of your white mixture and flatten it with your thumb against your work surface. Don’t use a roller; you want organic, uneven edges just like a real egg hitting a hot pan. -
Texturing the white:
While flattened, use your fingers to gently pull and stretch the edges outward creating thin, irregular borders. Gently press a ball tool into the center to create a slight indentation for the yolk. -
Forming the yolk:
Mix yellow clay with a tiny speck of orange to get a rich yolk color. Roll a small ball that fits the scale of your white base and press it gently into the indentation you made earlier. -
Refining the shape:
Using a dome tool or your finger, smooth the bottom edges of the yolk slightly so it looks attached to the white, not just sitting on top. It should maintain a nice, high dome shape.
Sticky Situation?
If your white clay picks up dust or lint, use a cotton swab dipped in rubbing alcohol or acetone to gently wipe the impurities off the raw clay before baking.
Step 2: Sizzling the Bacon
-
Preparing colors:
Condition your meat-colored clay (red-brown) and your fat-colored clay (white mixed with a touch of beige/pink). You want distinct contrast but harmonious tones. -
Creating the strips:
Roll out thin snakes of both colors. You will need about three red-brown strips and two or three thinner white strips for the marbling effect. -
Stacking the slab:
Lay the strips side-by-side, alternating colors to mimic bacon fat layers. Press them together firmly so they adhere to one another without gaps. -
Rolling out the slice:
Use an acrylic roller to flatten the combined strips into a single ribbon. Roll lengthwise to stretch the grain, making the lines look natural. -
Cutting the shape:
Use a blade to trim the edges into a long rectangular strip. Wiggle the blade slightly as you cut to create a rough, cooked texture on the sides rather than a perfect geometric line. -
Adding texture:
Take a stiff toothbrush or a texture sponge and tap it vigorously over the surface of the clay. This stippling effect mimics the rough texture of cooked meat. -
Creating the wave:
To make the bacon look crispy, gently bend the strip into a subtle ‘S’ curve or wave shape. It shouldn’t lie perfectly flat.
Pro Tip: Liquid Shine
Mix a tiny drop of yellow alcohol ink into liquid clay and dab it on the finished yolk. It adds depth and makes the egg look freshly cracked.
Step 3: Finishing and Baking
-
Shading for realism:
Using a soft brush and brown chalk pastels, gently dust the edges of the egg white and the high points of the bacon. This adds a ‘fried’ golden-brown look. -
Baking:
Place your pieces on a baking tile or parchment paper. Bake according to your brand of clay’s instructions—usually 275°F (130°C) for 15-30 minutes. -
Cooling:
Allow the pieces to cool completely before handling. They are fragile while warm. -
Adding the shine:
Apply a coat of gloss glaze specifically to the egg yolk to make it look runny and wet. For the bacon, apply a semi-gloss or matte varnish to seal in the chalk pastels without making it look plastic. -
Attaching magnets:
Flip the cured pieces over. Apply a drop of strong super glue or E6000 to the back and press your magnet firmly into place. Let the glue cure fully for 24 hours.
Once dry, stick these on your fridge for a classic American diner vibe right in your kitchen


Simple Sunflower Faces

Brighten up your fridge door with this charmingly textured sunflower magnet featuring a sweet, sleepy smile. The unique finish is achieved by mimicking fabric textures in clay, giving the flower a cozy, hand-stitched appearance.
Detailed Instructions
Materials
- Polymer clay (golden yellow, dark brown)
- Circle clay cutter (approx. 1.5 inch)
- Texturing tools (clean toothbrush, stiff bristle brush, or crumpled foil)
- Needle tool or toothpick
- Ball stylus tool
- Liquid polymer clay or bake-and-bond
- Strong craft magnet
- Superglue
- Oven and baking sheet
- Clay roller or pasta machine
Step 1: Creating the Center
-
Shape the base:
Condition your dark brown clay until it is soft and pliable, then roll it into a ball about the size of a walnut. -
Flatten deeply:
Press the ball down onto your work surface to create a thick, rounded disc. You want it to be domed, not perfectly flat like a cookie. -
Add heavy texture:
This project relies on texture. Take a clean toothbrush or crumpled ball of tin foil and press it firmly all over the brown dome. Be aggressive here; you want a deeply pitted, sponge-like surface. -
Carve the features:
Using a ball stylus, press two indentations for the eyes about halfway down the face. -
Add the smile:
Use a needle tool to drag a curved line for the smile immediately below the eyes. Press in little dimples at the ends of the smile for extra character. -
Re-texture if needed:
If smoothing the features flattened the brown clay too much, gently tap your texturing tool around the edges again.
Sticky Situation?
If your texturing tool (toothbrush/foil) keeps sticking to the clay, dust the tool lightly with cornstarch or baby powder before pressing it down.
Step 2: Forming the Petals
-
Prepare petal clay:
Condition the golden yellow clay and roll it out into a sheet about 1/8 inch thick. -
Cut the shapes:
You will need about 12-15 petals. Cut small diamond or teardrop shapes using a small cutter or a craft knife. Each should be roughly an inch long. -
Texture the petals:
This is crucial for the fabric look. Press a piece of coarse fabric (like denim or canvas) or a stiff bristle brush onto each petal to imprint a weave pattern. -
Add the center vein:
Use a needle tool or the back of a knife to gently score a line down the center of each petal, creating a leaf-like fold. -
Pinch the tips:
Gently pinch the outer point of each petal to sharpen it, and pinch the bottom (where it attaches) to create a bit of volume.
Step 3: Assembly & Baking
-
Attach the first layer:
Apply a tiny amount of liquid clay to the back rim of your brown center. -
Position petals:
Press the bottom end of your yellow petals onto the back of the brown center, arranging them in a circle. They should overlap slightly. -
Add the second layer:
For a fuller look, add a second row of petals behind the first row, filling in any gaps where the first petals separate. -
Secure the back:
Gently smooth the clay where all the petals meet on the back side. You can add a thin disc of scrap clay over the join to ensure everything stays together. -
Final check:
Turn the flower over and adjust the petals so they cup slightly forward around the face. -
Bake:
Bake according to your clay manufacturer’s instructions (usually 275°F for 15-30 minutes). -
Cool down:
Let the piece cool completely before handling it, as warm clay is fragile. -
Magnetize:
Apply a drop of superglue to the back of the finished flower and press your magnet deeply into the center suitable spot.
Fabric Effect
To get that ultra-plush, felt-like look on the petals, press a piece of real sandpaper gently onto the clay surface before baking.
Now your fridge has a sunny, textured friend to hold up your most important notes

The Complete Guide to Pottery Troubleshooting
Uncover the most common ceramic mistakes—from cracking clay to failed glazes—and learn how to fix them fast.
Paw Print Minis
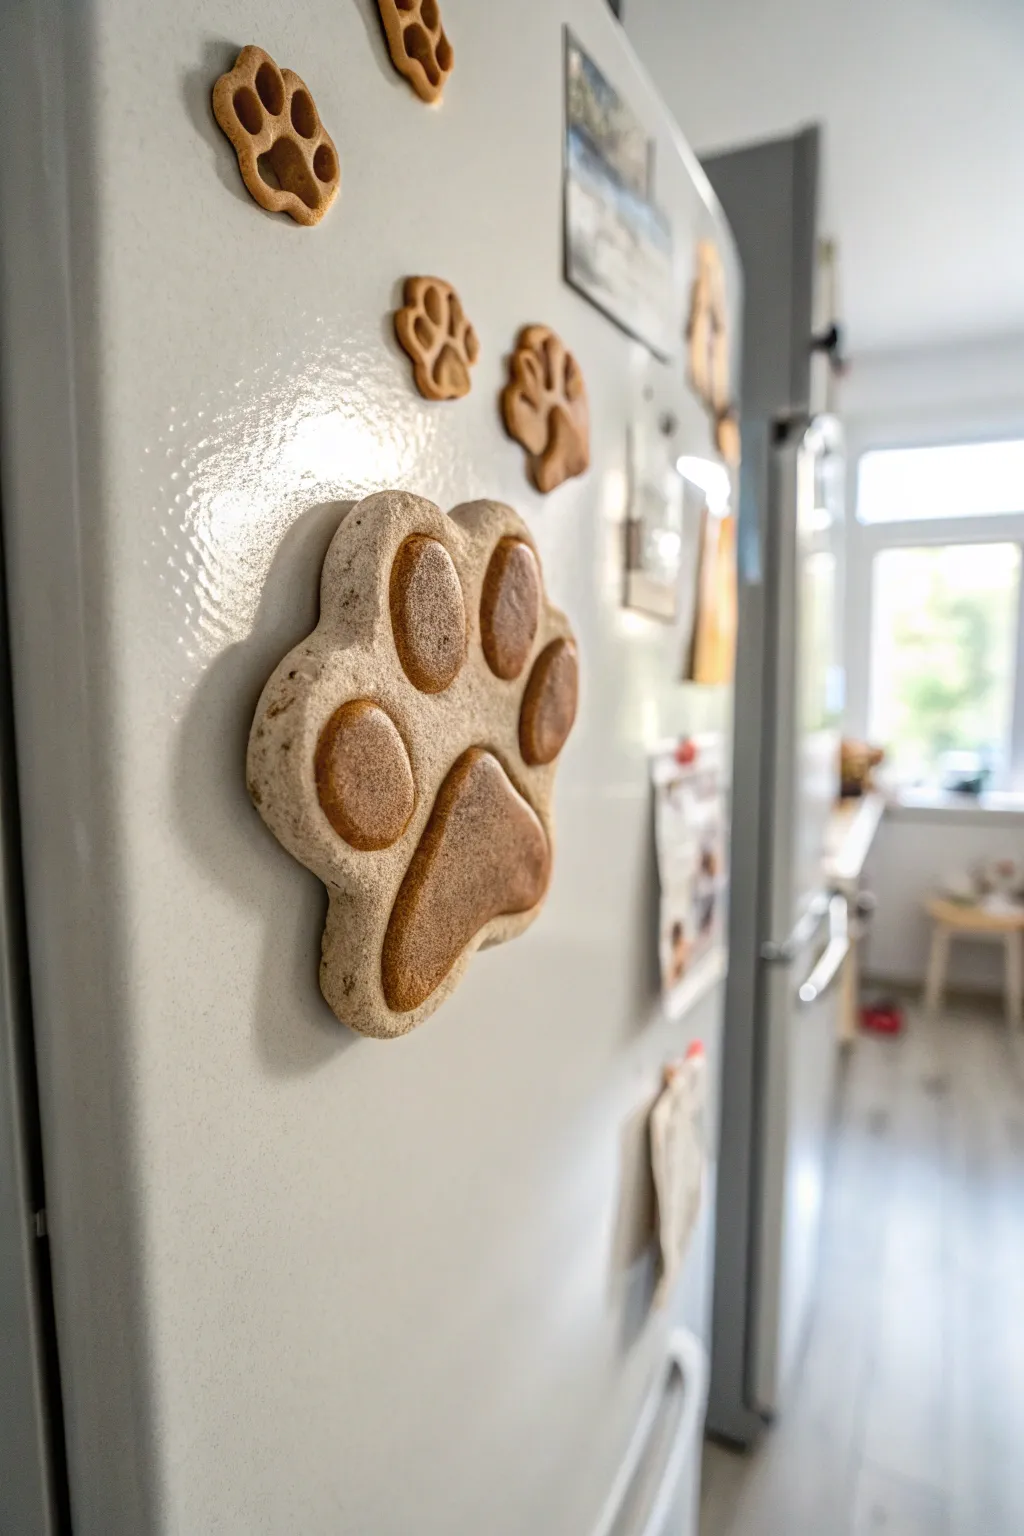
Capture a rustic, pet-loving aesthetic with this textured clay magnet that mimics the look of carved stone. The project features a two-tone design with deep terracotta pads set against a speckled, creamy beige base, perfect for holding photos on your fridge.
Step-by-Step
Materials
- Polymer clay (beige/granite effect)
- Polymer clay (terracotta or reddish-brown)
- Rolling pin or pasta machine
- Paw print cookie cutter (or paper template)
- Small round cutter or sculpting tool
- Texture sponge or stiff-bristled toothbrush
- Dark brown acrylic paint (for antiquing)
- Paper towels
- Strong round craft magnet
- Superglue or E6000 adhesive
- Gloss varnish (optional)
Step 1: Shaping the Base
-
Condition the clay:
Begin by conditioning your beige or granite-effect polymer clay until it is soft and pliable. If you don’t have speckled clay, you can mix a tiny amount of black pepper or black sand into plain beige clay. -
Roll the slab:
Roll out the clay to a thick, consistent slab, approximately 1/4 inch thick. You want it substantial enough to look like a stone tablet. -
Cut the outline:
Use a paw-shaped cookie cutter to stamp out the main shape. If you don’t have a cutter, print a paw shape, lay it on the clay, and carefully trace around it with a craft knife. -
Soften the edges:
Gently rub the cut edges with your fingertip to round them off. Stone doesn’t have sharp, machined corners, so aim for a tumbled, natural look. -
Create the indentations:
Using a small round cutter or the back of a measuring spoon, press gently into the clay to create shallow depressions where the toes and main pad will go. Do not press all the way through.
Stone Texture Trick
Mix a pinch of dried coffee grounds into the beige clay before rolling. This adds varying speckle sizes and a natural grit that mimics real sandstone perfectly.
Step 2: Adding the Pads
-
Prepare the insert color:
Condition your terracotta or reddish-brown clay. Roll it out slightly thinner than your base slab. -
Cut the shapes:
Cut out four small ovals for the toes and one larger, triangular shape with rounded corners for the main pad. These should match the size of the indentations you made earlier. -
Insert the pads:
Place the colored clay pieces into the indentations on your beige base. Press them down firmly so they bond with the base layer. -
Level the surface:
I like to gently roll over the entire piece one more time with the rolling pin to ensure the pads are flush with the surrounding ‘stone’ surface. -
Add heavy texture:
This is crucial for the stone look. Take a stiff toothbrush or a coarse texture sponge and stipple the entire surface vigorously. Don’t be afraid to leave deep pockmarks.
Troubleshooting: Lint
If dust or lint gets stuck in your light-colored clay while rolling, use a piece of clear scotch tape to dab it off prior to baking; rubbing alcohol helps too.
Step 3: Finishing and Assembly
-
Bake the clay:
Place your paw print on a baking sheet lined with parchment paper. Bake according to the manufacturer’s instructions for your specific brand of polymer clay. -
Cool down:
Allow the piece to cool completely before handling. It will be slightly fragile while warm. -
Apply an antique wash:
Dilute a small amount of dark brown acrylic paint with water. Brush this wash over the entire fully cooled paw print, ensuring it gets into all the texture crevices. -
Wipe away excess:
Immediately wipe the surface with a damp paper towel. The paint will stay in the texture, highlighting the ‘stone’ effect, while the high points remain the original clay color. -
Seal (Optional):
If you want a wet stone look, apply a thin coat of gloss varnish to just the pad areas, leaving the rest matte. -
Attach the magnet:
Flip the paw print over. Apple a dot of strong adhesive like E6000 to the center. -
Secure the magnet:
Press your round magnet firmly into the glue. Let the adhesive cure for at least 24 hours to ensure it can support the weight of the clay.
Once the glue is fully set, your rustic paw print is ready to add a touch of charm to your kitchen
Cat Face Buttons
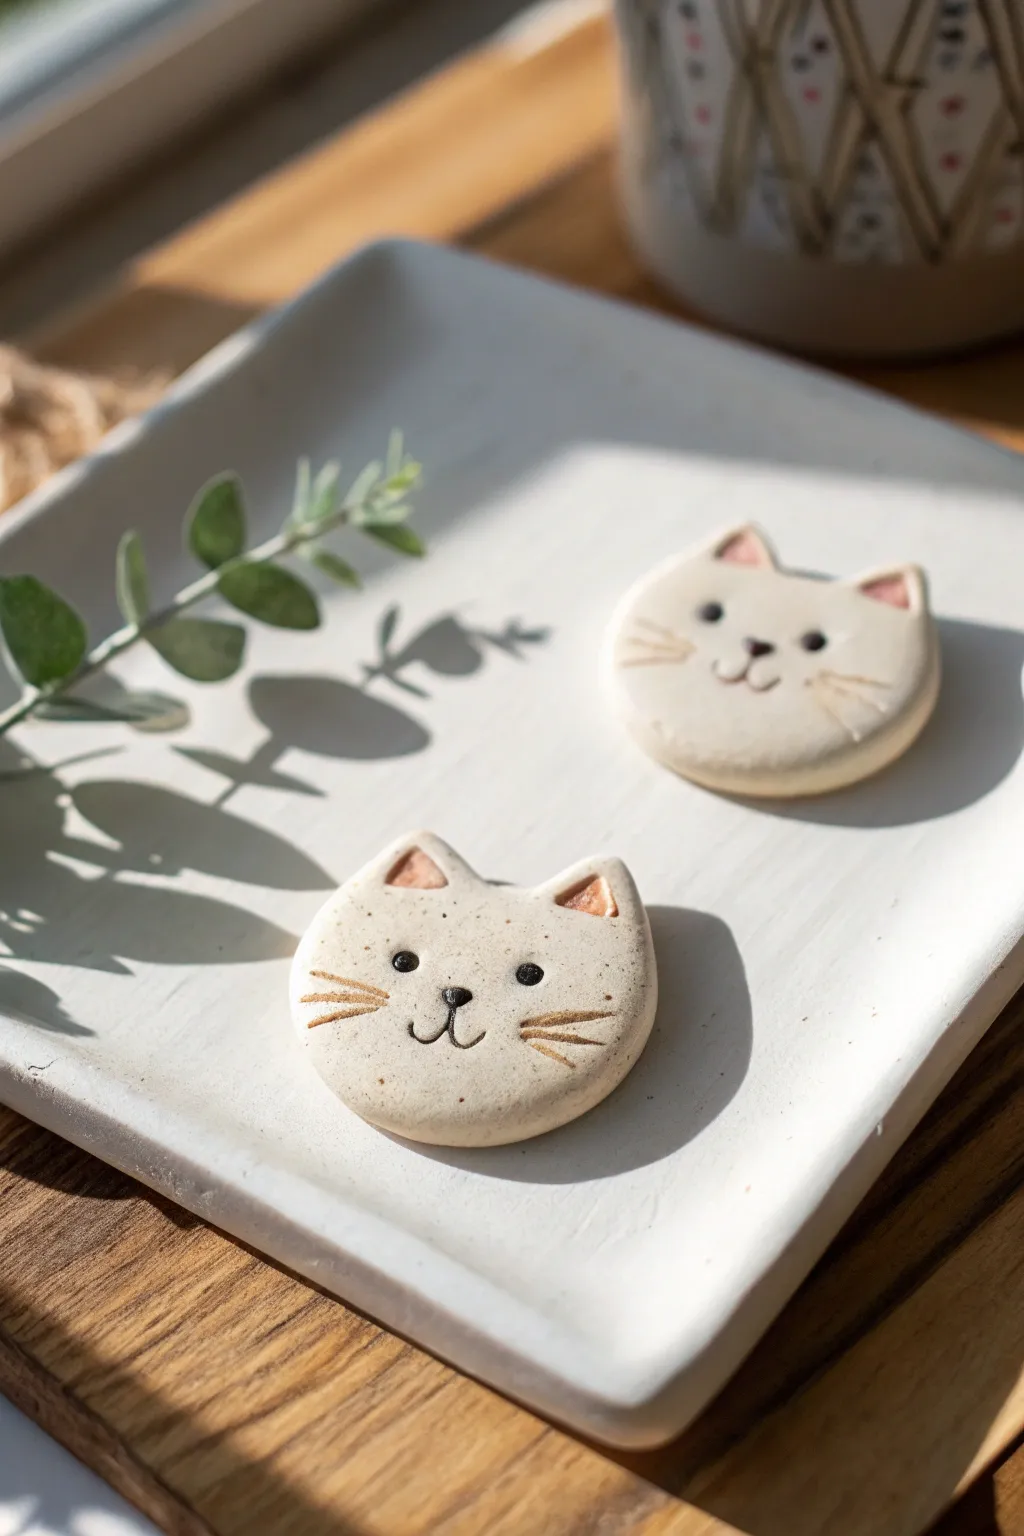
These adorable little cat faces bring a touch of feline charm to any magnetic surface with their simple, clean lines and soft, speckled finish. Perfect for beginners, this project turns basic white clay into sweet minimalist art that looks great on the fridge or holding up notes.
How-To Guide
Materials
- White polymer clay (with granite or speckle effect preferred)
- Small round cookie cutter or bottle smooth cap (approx. 1.5 inches)
- Needle tool or toothpick
- Small ball stylus tool
- Black acrylic paint
- Terracotta or soft pink acrylic paint
- Fine detail paintbrush (size 000)
- Golden brown pastel chalk or diluted acrylic paint (for whiskers)
- Strong round magnets
- Super glue or E6000
- Rolling pin
- Parchment paper
Step 1: Shaping the Base
-
Condition the Clay:
Begin by kneading your white polymer clay until it is soft and pliable. If you want that natural ceramic look shown in the photo, mix in a tiny pinch of black pepper or use ‘granite’ style clay. -
Roll it Out:
Place the clay between two sheets of parchment paper and roll it out to an even thickness of about 1/4 inch (6mm). You want them sturdy, not wafer-thin. -
Cut the Circles:
Use your round cutter to punch out two clean circles. Tap the clay out gently so you don’t warp the round shape. -
Form the Ears:
Take two very small balls of excess clay for each face. Shape them into tiny triangles. -
Attach the Ears:
Press the triangles onto the top of the circle. Use your finger or a smoothing tool to blend the seam on the back so the ears become one solid piece with the head. -
Smooth the Edges:
Dip your finger in a tiny bit of rubbing alcohol or water (depending on clay type) and run it around the circumference to soften any sharp cutting ridges.
Smooth Seams
When attaching ears, blend the clay downwards into the head using a silicone tool. A seamless join prevents the ears from snapping off after baking.
Step 2: Adding Details
-
Mark the Whisker Lines:
Using a needle tool, gently press—don’t drag—three lines into each cheek area to create the indentations for whiskers. -
Create Eye Sockets:
Use a small ball stylus to make tiny, shallow depressions where the eyes will go. This helps the paint sit neatly later. -
Sculpt the Inner Ear:
Press the smaller end of a tool or a paintbrush handle into the center of each triangular ear to create a little hollow. -
Bake or Dry:
Follow the manufacturer’s instructions for your specific clay. For polymer clay, place the cats on a baking sheet and bake at the recommended temperature. Let them cool completely before painting.
Make it a Set
Create a whole family by varying the shapes slightly—make some faces wider or ears pointier. Use gray or orange clay washes to make tabby stripes.
Step 3: Painting and Finishing
-
Paint the Inner Ears:
Mix a wash of terracotta or soft pink paint. Carefully fill the hollows of the ears. A wash (paint thinned with water) looks more natural than opaque paint here. -
Highlight the Whiskers:
With a very fine brush, paint brown or golden paint into the whisker indentations. I sometimes wipe the surface quickly with a damp paper towel to ensure the color stays only in the grooves. -
Add the Facial Features:
Using pure black acrylic paint and your finest brush, dot in the eyes. Then, paint a small inverted triangle for the nose and a dainty ‘w’ shape for the mouth. -
Let Paint Cure:
Allow the painted details to dry completely. This is crucial so you don’t smudge the crisp black lines. -
Seal (Optional):
For durability, you can brush on a thin layer of matte varnish, though the natural matte look of the clay is also lovely unsealed. -
Attach the Magnet:
Flip the dried cat face over. Apply a drop of strong adhesive to the center of the back. -
Final Press:
Press your round magnet firmly into the glue and let it set undisturbed for the time recommended on your glue bottle.
Your charming feline magnets are now ready to organize your notes with style


What Really Happens Inside the Kiln
Learn how time and temperature work together inside the kiln to transform clay into durable ceramic.
Panda Face Minis

This adorable panda face magnet is a simple yet striking project that relies on strong contrast and clean shapes. Modeled from polymer clay, the finished piece has a smooth, matte texture with just a hint of shine on the eyes, making it a perfect little companion for your fridge or filing board.
Step-by-Step
Materials
- White polymer clay
- Black polymer clay
- Round clay cutter (approx. 2 inch diameter)
- Small round clay cutter or piping tip (for ears)
- Acrylic roller or pasta machine
- Ball stylus tool
- Needle tool or toothpick
- Liquid clay (TLS) or Bake and Bond (optional)
- Small flat magnet
- Super glue (E6000 or similar)
- Soft pastel chalks (pink) and a soft brush
- Baking sheet and parchment paper
- Oven
Step 1: Base Construction
-
Condition the white clay:
Start by thoroughly conditioning your white polymer clay until it is soft and pliable. This prevents cracks during baking. I like to continuously roll and fold it for a few minutes to ensure it’s perfectly smooth. -
Roll out the sheet:
Roll the white clay into a slab that is approximately 1/4 inch thick. You want it substantial enough to hold the magnet but not too heavy. -
Cut the main shape:
Use your larger round cutter to punch out a perfect circle. Gently smooth the edges with your fingertip to remove any sharp ridges left by the cutter. -
Texture the surface (optional):
For a slight organic feel like in the photo, you can lightly tap the surface with a piece of sandpaper or a toothbrush, though leaving it smooth works just as well.
Dirty Clay Blues?
White clay picks up dust easily. Keep a pack of baby wipes or rubbing alcohol nearby to clean your hands and tools before touching the white clay, especially after handling the black clay ears.
Step 2: Creating the Features
-
Make the ears:
Condition a small amount of black clay. Roll a small log and cut two equal pieces. Roll these into balls and flatten them slightly into thick discs. -
Attach the ears:
Press the black discs firmly against the top left and right edges of the white circle. You can use a tiny drop of liquid clay here for a stronger bond. -
Secure the seam:
On the back side of the panda, use a modeling tool to smudge the black clay of the ears slightly into the white clay to ensure they don’t pop off later. -
Form the eye patches:
Roll two small balls of black clay and flatten them into teardrop or oval shapes. These shouldn’t be too thin. -
Place the patches:
Position the black ovals on the face, angling them slightly downwards towards the center. Press them down gently so they adhere without distorting the shape. -
Add the nose:
Create a tiny, soft rounded triangle or oval from black clay. Place this in the center of the face, just below the eye line.
Step 3: Details & Finishing
-
Sculpt the mouth:
Roll an incredibly thin snake of black clay—as thin as a thread. Cut two tiny curves from it. -
Attach the smile:
Carefully place the two curves coming down from the nose to form the classic ‘w’ mouth shape. Use a needle tool to gently press them into place. -
Add eye highlights:
Take two minuscule specks of white clay, roll them into balls, and place them on the upper outer corners of the black eye patches. This brings the panda to life. -
Add blush:
Scrape a little pink pigment from a pastel chalk stick. Dip a soft brush into the powder and gently dab it onto the cheek area for a rosy glow. -
Bake the project:
Place your panda on a baking sheet lined with parchment paper. Bake according to your clay manufacturer’s instructions (usually 275°F/135°C for 15-30 minutes per 1/4 inch thickness). -
Cool down:
Allow the piece to cool completely in the oven or on a wire rack. Do not handle it while hot as the clay is still fragile. -
Attach the magnet:
Once cool and hard, flip the panda over. Apply a dab of strong super glue to the center back and press your magnet firmly into place. Let the glue set fully.
Bamboo Snack
Make a tiny green bamboo shoot using a mix of green and translucent clay. Attach it near the mouth before baking so it looks like your panda is enjoying a little snack.
Now your fridge has a friendly new face to greet you every time you reach for a snack