Small clay projects are my favorite kind of studio session because you can finish something adorable without committing to a giant, complicated build. Here are a bunch of small clay art ideas that feel totally doable, even if you’re brand-new to air dry clay or polymer clay.
Tiny Round Animal Figurines

These charming, egg-shaped figurines capture a sweet, minimalist aesthetic perfect for shelving or desk decor. Using simple hand-molding techniques and soft, matte tones, you’ll create a trio of woodland friends—a bear, rabbit, and cat—that feel organic and playful.
Step-by-Step Tutorial
Materials
- Air-dry clay (preferably a smooth, fine-grain type)
- Acrylic paints (Warm tan/beige, pale pink, black, white)
- Fine grit sandpaper (220-400 grit)
- Small bowl of water
- Fine detail paintbrush (00 or 000 size)
- Smoothing tool or sponge
- Ball stylus tool
- Matte spray varnish
Step 1: Shaping the Bodies
-
Portion the clay:
Start with three equal lumps of air-dry clay, each roughly the size of a large tangerine or a tennis ball, depending on your desired final size. Knead them well to remove air bubbles and warm up the material. -
Roll the base shapes:
Roll each lump into a smooth ball between your palms. Once round, gently taper the top half slightly to create a subtle egg shape that is wider at the bottom for stability. -
Flatten the bottoms:
Tap the bottom of each egg shape firmly on your work surface. This creates a flat base so your animals will stand upright without wobbling. -
Smooth the surface:
Dip your finger in a little water and run it over the clay to erase any fingerprints or cracks. The smoother the base now, the easier it will be to paint later.
Step 2: Adding Features
-
Form the bear ears:
For the front figurine (the bear), roll two tiny pea-sized balls. Press them gently onto the top sides of the head and use a modeling tool to blend the seams downward until they attach seamlessly. Press an indentation into the center of each ear. -
Create the rabbit ears:
For the middle figure, roll two small sausages of clay. Flatten them slightly and taper the ends. Scoring the attachment points first helps adhesion, so scratch the top of the head and the bottom of the ears before pressing them on. -
Shape the cat ears:
For the third figure, pinch the top of the clay egg directly to pull up two triangular points. This integral method gives the cat a sleek, streamlined look compared to the attached ears of the others. -
Add feet:
Roll small, flattened ovals for feet. Attach two to the bottom front of the bear figure so they just peek out. The other figures can remain simple baseless shapes if you prefer the minimalist look. -
Dry thoroughly:
Let the figurines dry completely. Depending on humidity and clay thickness, this can take 24 to 48 hours. Rotate them occasionally to ensure the bottoms dry evenly.
Seamless Blending
When attaching ears, use a rubber-tipped clay shaper tool to drag clay across the seam. This merges the pieces perfectly so they won’t pop off during drying.
Step 3: Finishing and Painting
-
Sand for smoothness:
Once bone dry, use fine-grit sandpaper to buff away any lumpy areas or rough texture. Wipe away the dust with a barely damp cloth. -
Base coat – Bear:
Paint the bear figurine with a warm, sandy-brown acrylic. You may need two coats for opaque coverage. Let the first coat dry fully before applying the second. -
Base coat – Rabbit & Cat:
Mix a very pale dusty pink for the rabbit and a slightly more saturated pink for the cat. Paint each figure entirely, keeping the strokes smooth. -
Paint inner ears:
Using a slightly lighter shade of the body color (or a soft pink for the bear), paint the inside indentations of the ears. -
Draw facial features:
Switch to your finest detail brush and black paint. For the bear, paint a small round nose and simple eye dots. For the rabbit and cat, paint arched lines for happy, closed eyes. -
Add whiskers and mouths:
Paint delicate whiskers on the cheeks. Keep your hand steady and use very little pressure. Add simple ‘w’ or ‘u’ shapes for the mouths. -
Decorative details:
On the bear, use white paint to add tiny floral patterns or dots on the forehead and cheek for a whimsical touch. -
Seal the work:
Finish with a matte spray varnish to protect the paint without making the figures shiny, preserving that natural, earthy feel.
Textured Fur Effect
Before the clay dries, gently tap the surface with a stiff-bristle toothbrush. This adds a subtle, stone-like texture that looks great with the matte paint.
Now you have a trio of adorable, minimalist creatures ready to brighten up your shelf


Mini Penguins and Ducks
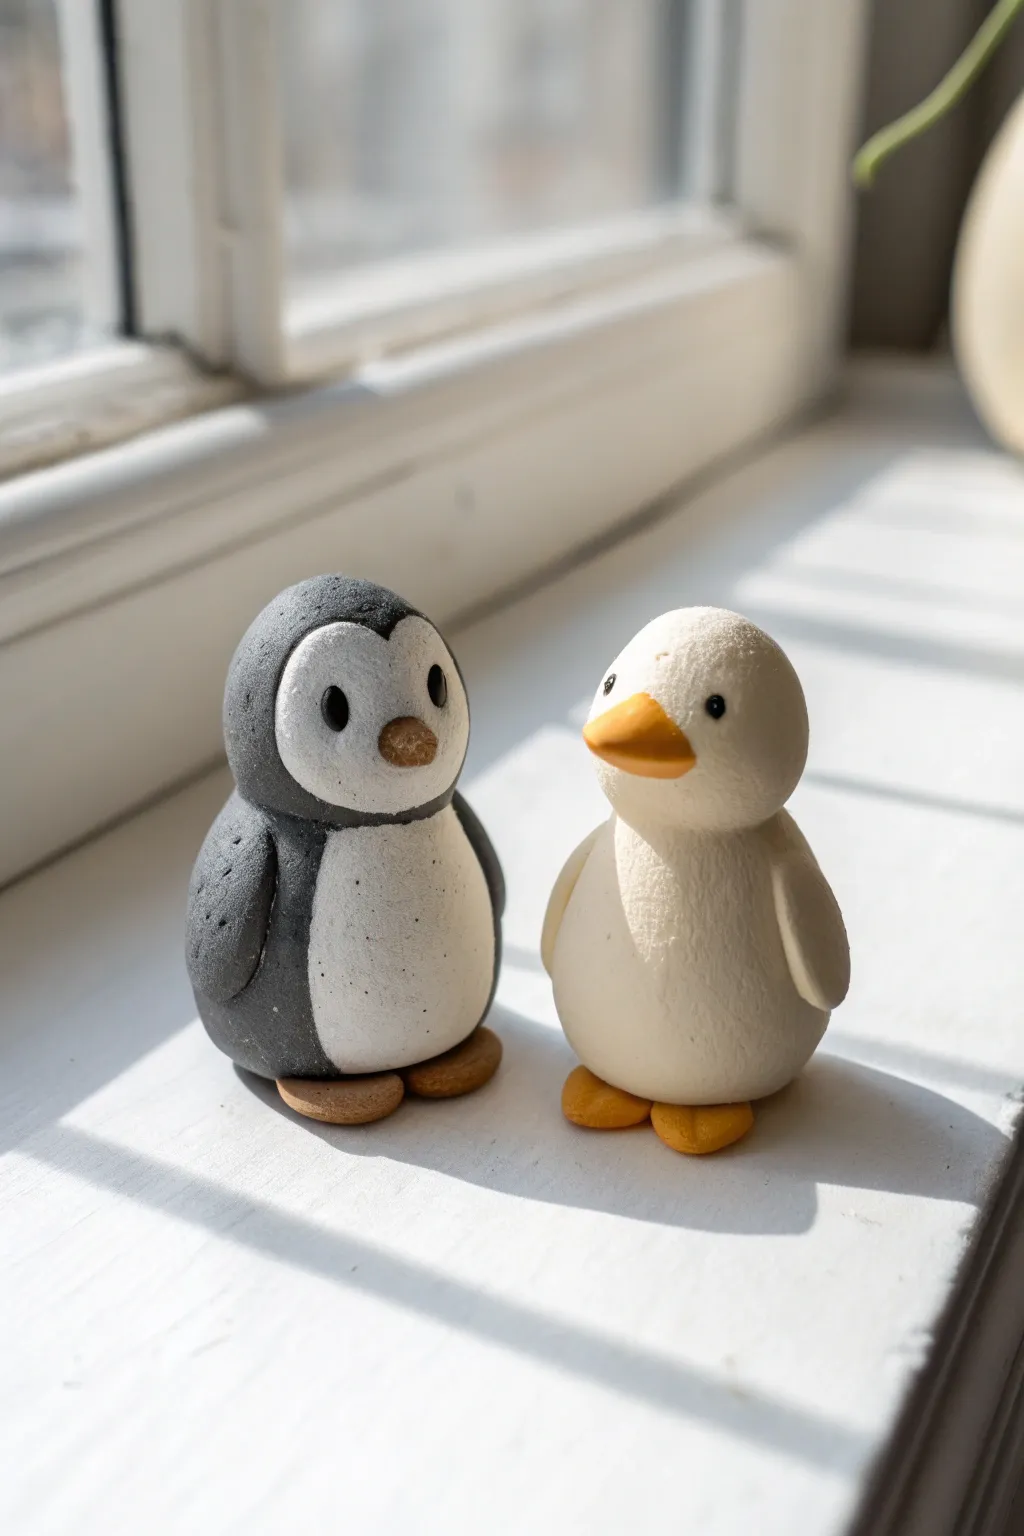
These charming polymer clay figurines capture a sweet moment on the windowsill, featuring a smooth gray penguin and a textured cream duckling. Their round, simple shapes make them perfect for beginners, while the subtle details like the duck’s fuzzy texture and the penguin’s layered face give them personality.
Detailed Instructions
Materials
- Polymer clay (Dark grey/charcoal, white, cream/off-white, orange/mustard)
- Small ball tool or dotting tool
- Pointed sculpting tool or toothpick
- Clean toothbrush or stiff bristle brush
- Black glass beads or black clay for eyes
- Baking sheet and foil
- Oven
Step 1: Sculpting the Penguin’s Body
-
Form the Base:
Start with a piece of dark grey clay about the size of a walnut. Roll it into a smooth ball, then gently elongate it slightly into an egg shape, keeping the bottom flatter so it stands upright. -
Define the Head:
Using your thumb, gently press to create a very subtle indentation about one-third of the way down to differentiate the head from the body without creating a distinct neck. -
Create the White Belly:
Roll a smaller ball of white clay and flatten it into a thin oval distinctively curved at the top. Press this onto the front of the belly area, smoothing the edges so it merges seamlessly with the grey body. -
Shape the Face Plate:
Flatten a small, heart-shaped piece of white clay. Place this over the face area, ensuring the top ‘dip’ of the heart aligns with the forehead. Smooth the edges down carefully. -
Add Wings:
Create two small teardrop shapes from grey clay. Flatten them and attach them to the sides of the body, pointing downwards. Blend the top attachment point into the shoulder area for strength. -
Texture the Body:
I like to take a clean toothbrush and gently tap it all over the white parts of the clay to give just a hint of texture, resembling soft feathers.
Clean Clay Tip
White clay picks up dust instantly. Wash hands thoroughly before handling the white and cream sections to keep the penguin’s belly and duck pristine.
Step 2: Face Details & Feet
-
Position the Eyes:
Use a ball tool to make two small indentations in the white face mask. Insert small black clay balls or glass beads firmly into the sockets. -
Attach the Beak:
Roll a tiny speck of mustard-colored clay into a small cone. Press it horizontally between the eyes, flattening the bottom slightly against the face. -
Create Penguin Feet:
Flatten two small balls of brown or dark orange clay into ovals. Place the penguin body on top of them, positioning them so just the front toes peek out.
Step 3: Sculpting the Duckling
-
Form the Duck Body:
Roll a ball of cream or off-white clay, slightly smaller than the penguin. Shape this into a pear form with a rounder bottom. -
Define the Duck Head:
Gently pinch and mold the top third to define a round head sitting atop a chubby body, keeping the transition smooth. -
Make the Duck Wings:
Shape two teardrops of cream clay and flatten them. Press these onto the sides of the body. Unlike the penguin, curve the tips slightly outward for a playful look. -
Apply Full Texture:
This is crucial for the duck’s look: use a stiff brush or a crumpled ball of aluminum foil to rigorously tap texture over the entire surface, creating a ‘fuzzy’ down effect. -
Add the Duck Beak:
Form a flattened triangle from bright orange clay. Attach it to the center of the face, pressing gently to secure it without losing the shape. -
Place Duck Eyes:
Create eye sockets with your ball tool on either side of the beak. Insert tiny black beads or clay balls. -
Duck Feet:
Make two flat, heart-shaped pieces from bright orange clay. Position them centrally under the body so they sit side-by-side, pointing slightly apart.
Winter Scarf Idea
Roll a long, thin snake of red clay and wrap it around the penguin’s neck before baking for a cozy winter accessory.
Step 4: Finishing Up
-
Final Check:
Examine both figures from all angles. Ensure they stand stably and that no fingerprints are visible—smooth them out or re-texture if needed. -
Bake:
Place your duo on a foil-lined baking sheet and bake according to your clay package instructions (usually 275°F/135°C for 15-30 minutes). -
Cooling:
Let the figures cool completely in the oven with the door cracked open to prevent cracking from sudden temperature changes.
Once cooled, place your new clay friends on a sunny windowsill just like in the inspiration photo and enjoy their company


Chubby Octopus Desk Buddy
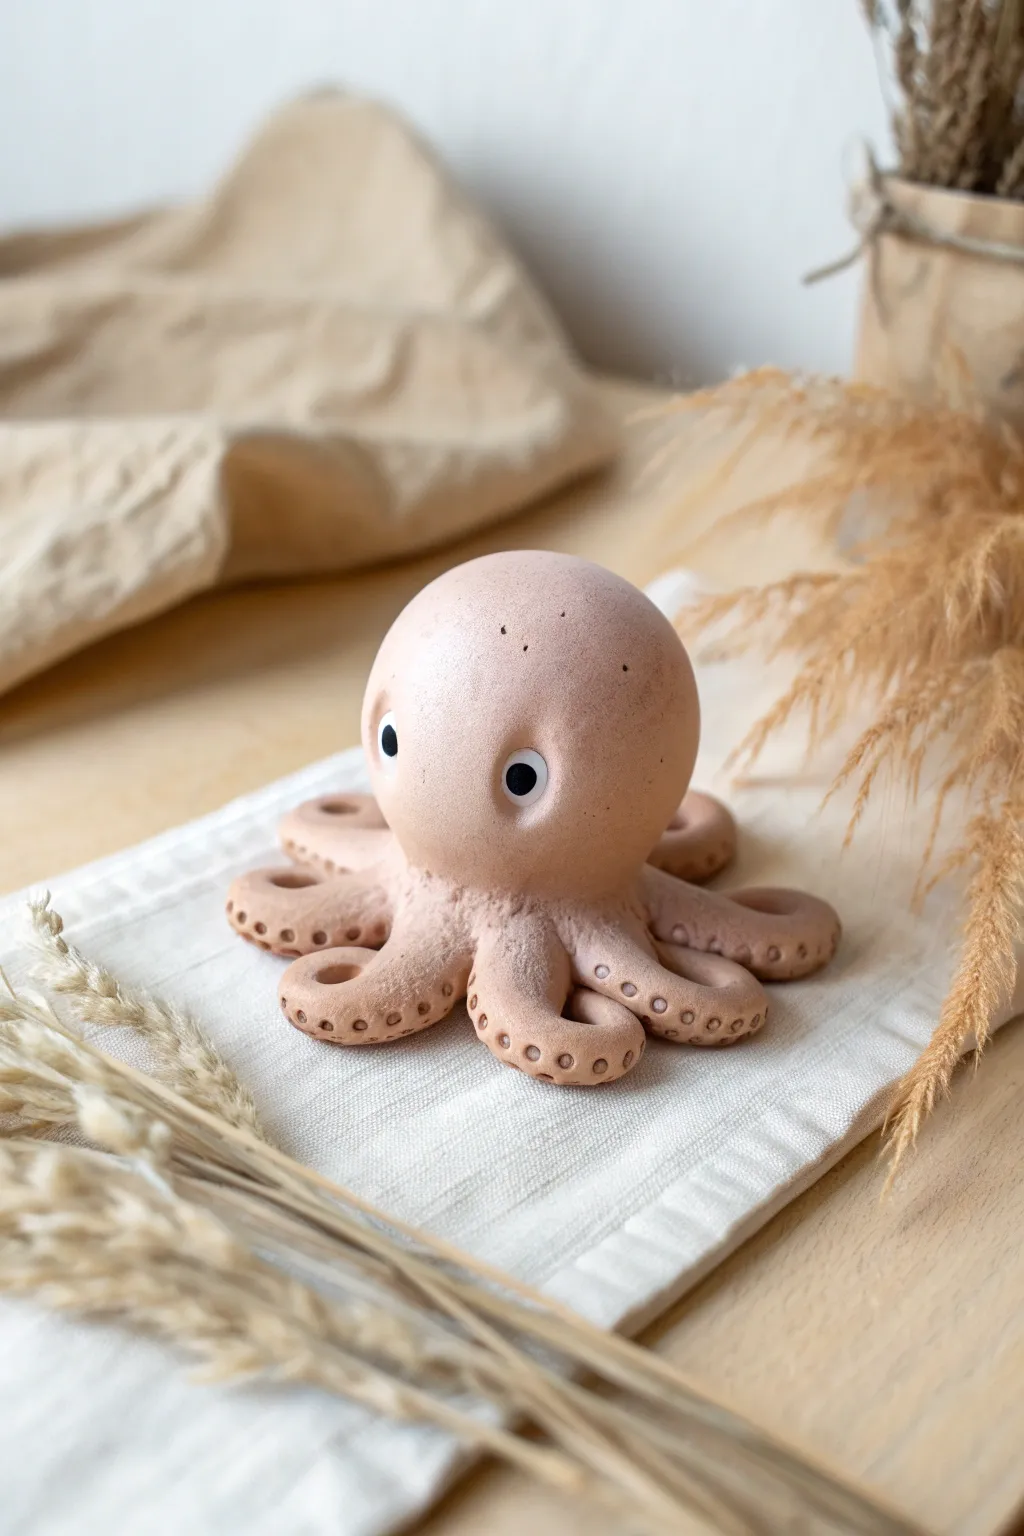
Create a calming, minimal desk companion with this adorable clay octopus project. Featuring a smooth, matte finish and charmingly curled tentacles, this little sea creature is perfect for beginners looking to practice simple shapes and texture.
Step-by-Step Tutorial
Materials
- Beige or dusty pink polymer clay (approx. 2oz)
- White polymer clay (small amount)
- Black polymer clay (tiny amount)
- Dotting tool or small ball stylus
- Smoothing tool or your finger
- Clean work surface (tile or glass)
- Aluminum foil (optional, for armature)
- Oven (for baking polymer clay)
Step 1: Forming the Base
-
Prepare the clay:
Start by conditioning your beige or dusty pink clay until it is soft and pliable. Warm clay is much less likely to crack during the sculpting process. -
Shape the head:
Roll about two-thirds of your clay into a smooth, seamless ball. To keep it lightweight and bake faster, you can create a small core of tightly crinkled aluminum foil and wrap the clay around it, smoothing out any seams completely. -
Refine the shape:
Gently gently roll the ball on your work surface to ensure it is perfectly round, then set it aside. This will be the main body of your octopus.
Uneven Seams?
If the seams where the legs join the body are visible, roll a thin snake of clay, wrap it around the joint like a scarf, and blend it upwards and downwards to hide the gap.
Step 2: Tentacles and Details
-
Create tentacle logs:
Take the remaining beige clay and divide it into eight equal portions. Roll each portion into a tapered log shape, thicker at one end and pointy at the other. -
Attach the first legs:
Turn the head upside down. Press the thicker end of the first four tentacles onto the bottom of the head in a cross pattern (North, South, East, West). Blend the clay seams smoothly into the head using a smoothing tool or your finger. -
Add remaining legs:
Attach the remaining four tentacles in the spaces between the first four. Blend these seams carefully as well so the connection points look organic and invisible. -
Curl the tips:
Turn the octopus right-side up. Gently curl the tips of the tentacles outward and upward. Some can curl tightly while others wave loosely to give the piece a natural, relaxed movement. -
Add texture:
Using a small ball stylus or dotting tool, press distinct rows of small indentations along the sides and tops of the curled tentacles to mimic suction cups. Vary the pressure slightly for a natural look. -
Final smoothing:
Check the surface of the head for any fingerprints. I find that lightly brushing the surface with a tiny bit of baby oil or cornstarch can help smooth out these little imperfections before baking.
Level Up: speckled finish
Mix a tiny pinch of black pepper or brown embossing powder into your beige clay before sculpting to create a realistic, sandy speckled granite texture.
Step 3: The Face and Finish
-
Create eye sockets:
Use a larger ball tool to press two indentations into the front of the face where the eyes will sit. Space them somewhat wide apart for that cute, chubby look. -
Make the whites:
Roll two small balls of white clay. Press them gently into the sockets you just created. They should protrude slightly but sit snugly in the holes. -
Add the pupils:
Roll two tiny balls of black clay. Press these into the center of the white clay eyes. Flatten them gently to secure them. -
Inspect form:
Give your octopus a final once-over. Ensure the tentacles are resting flat on the surface so it will be stable when finished. -
Bake:
Bake the sculpture according to your specific clay manufacturer’s instructions (usually around 275°F or 135°C for 15-30 minutes depending on thickness). -
Cool down:
Let the piece cool completely inside the oven with the door cracked open to prevent thermal shock cracks.
Set your new little friend on your desk to keep you company during your workday


Simple Jellyfish Charms
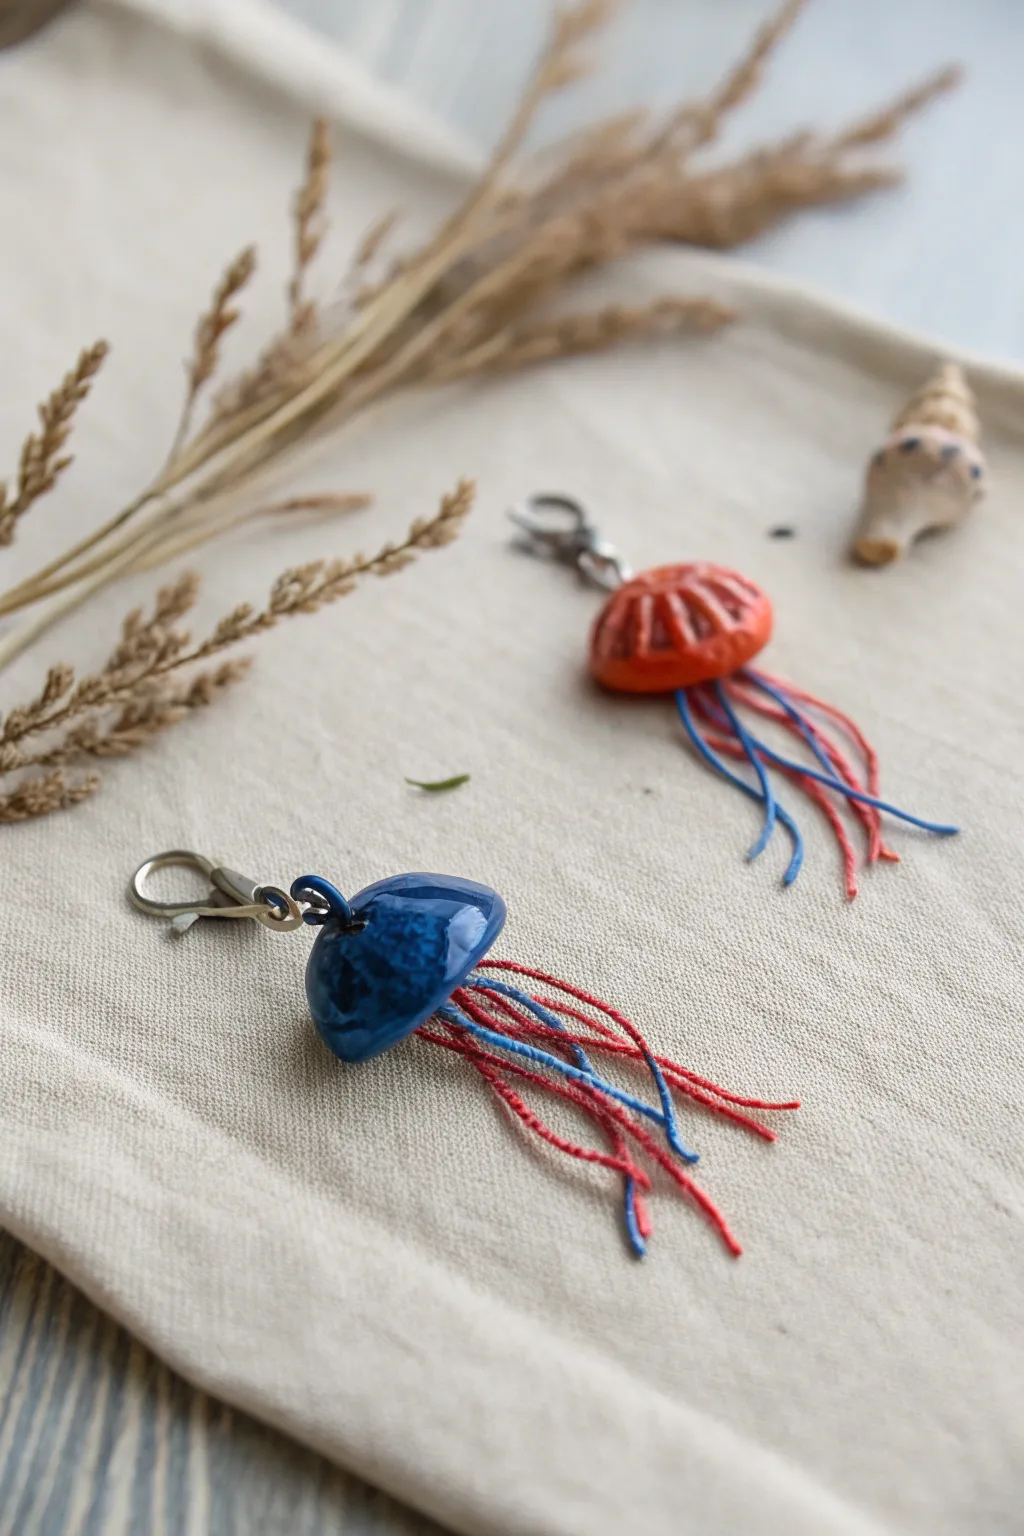
Capture the fluid movement of the ocean with these delightful jellyfish charms featuring glossy, ceramic-style caps and lively fiber tentacles. Their playful mix of smooth clay tops and textured string legs makes them perfect as whimsical keychains or bag ornaments.
Detailed Instructions
Materials
- Polymer clay (Deep Blue and Burnt Orange)
- High-gloss polyurethane varnish or UV resin
- Waxed cotton cord or embroidery floss (Red and Blue)
- Small metal lobster clasps
- Jump rings (approx. 6mm)
- Jewelry eye pins or thin wire
- Sculpting tool with a blunt edge
- Round nose pliers
- Wire cutters
- Needle tool
- Superglue (cyanoacrylate)
Step 1: Sculpting the Caps
-
Condition the clay:
Start by kneading your polymer clay until it is soft and pliable. Warm hands make this much easier. -
Shape the domes:
Roll a grape-sized ball of clay for each jellyfish. Gently press it onto your work surface to flatten the bottom while keeping the top rounded into a high dome shape. -
Create the ruffled edge:
For the orange version, use a blunt sculpting tool to press vertical indentations all around the side of the dome, giving it a ribbed, umbrella-like appearance. -
Smooth the blue version:
For the blue variant, keep the surface perfectly smooth. I find lightly running a fingertip with a drop of baby oil over the clay removes any fingerprints. -
Insert the hardware:
Cut an eye pin so the stem is about 1cm long. Insert it into the top center of the dome. If you don’t have eye pins, form a small loop with wire and push the twisted ends into the clay. -
Create the tentacle anchor:
Flip the dome over. Use a needle tool to create a shallow, wide hole or multiple small punctures underneath where the strings will eventually be glued. This creates a grip for the adhesive later. -
Bake the clay:
Bake your pieces according to the manufacturer’s instructions for your specific brand of clay. Let them cool completely before moving to the next step.
Loose Legs?
If the string bundle keeps falling out, glue a small circle of felt over the knot on the underside. This creates more surface area for the glue to grip against the clay.
Step 2: Adding the Finish
-
Apply the glaze:
To achieve that wet, ceramic-like shine, apply a thick coat of high-gloss varnish or UV resin to the top and sides of the clay dome. Do not coat the bottom yet. -
Cure or dry:
Allow the varnish to dry fully (usually 24 hours) or cure the UV resin under a UV lamp for a few minutes until it is hard and non-tacky. -
Secure the pin:
Gently tug the top eye pin. If it feels loose after baking, pull it out, add a dab of superglue to the stem, and reinsert it immediately.
Step 3: Tentacles and Assembly
-
Prepare the strings:
Cut 6 to 8 pieces of waxed cotton cord or embroidery floss per jellyfish, each about 3 inches long. Mix red and blue colors for a vibrant contrast. -
Bundle the legs:
Gather your cut strings into a small bundle. Tie a simple overhand knot at one end to hold them all together. -
Attach the tentacles:
Apply a generous drop of superglue into the hollow anchor point you made on the underside of the clay dome. -
Set the bundle:
Press the knotted end of your string bundle firmly into the glue. Hold it in place for 30 seconds to ensure a strong bond. -
Trim to size:
Once the glue is fully dry, trim the dangling strings to your desired length. Varying the lengths slightly adds a more organic, natural look. -
Add the clasp:
Open a jump ring with your pliers. Slide on the lobster clasp and the loop from the top of the jellyfish. -
Close the ring:
Use the pliers to close the jump ring securely, ensuring there is no gap for the charm to slip through.
Gloss Like Glass
For an ultra-thick, glass-like finish, apply two or three thin layers of gloss rather than one thick one. This prevents drips and bubbles
Enjoy your durable little sea creatures as they add a splash of color to your daily accessories

The Complete Guide to Pottery Troubleshooting
Uncover the most common ceramic mistakes—from cracking clay to failed glazes—and learn how to fix them fast.
Tiny Dino and Dragon Nuggets
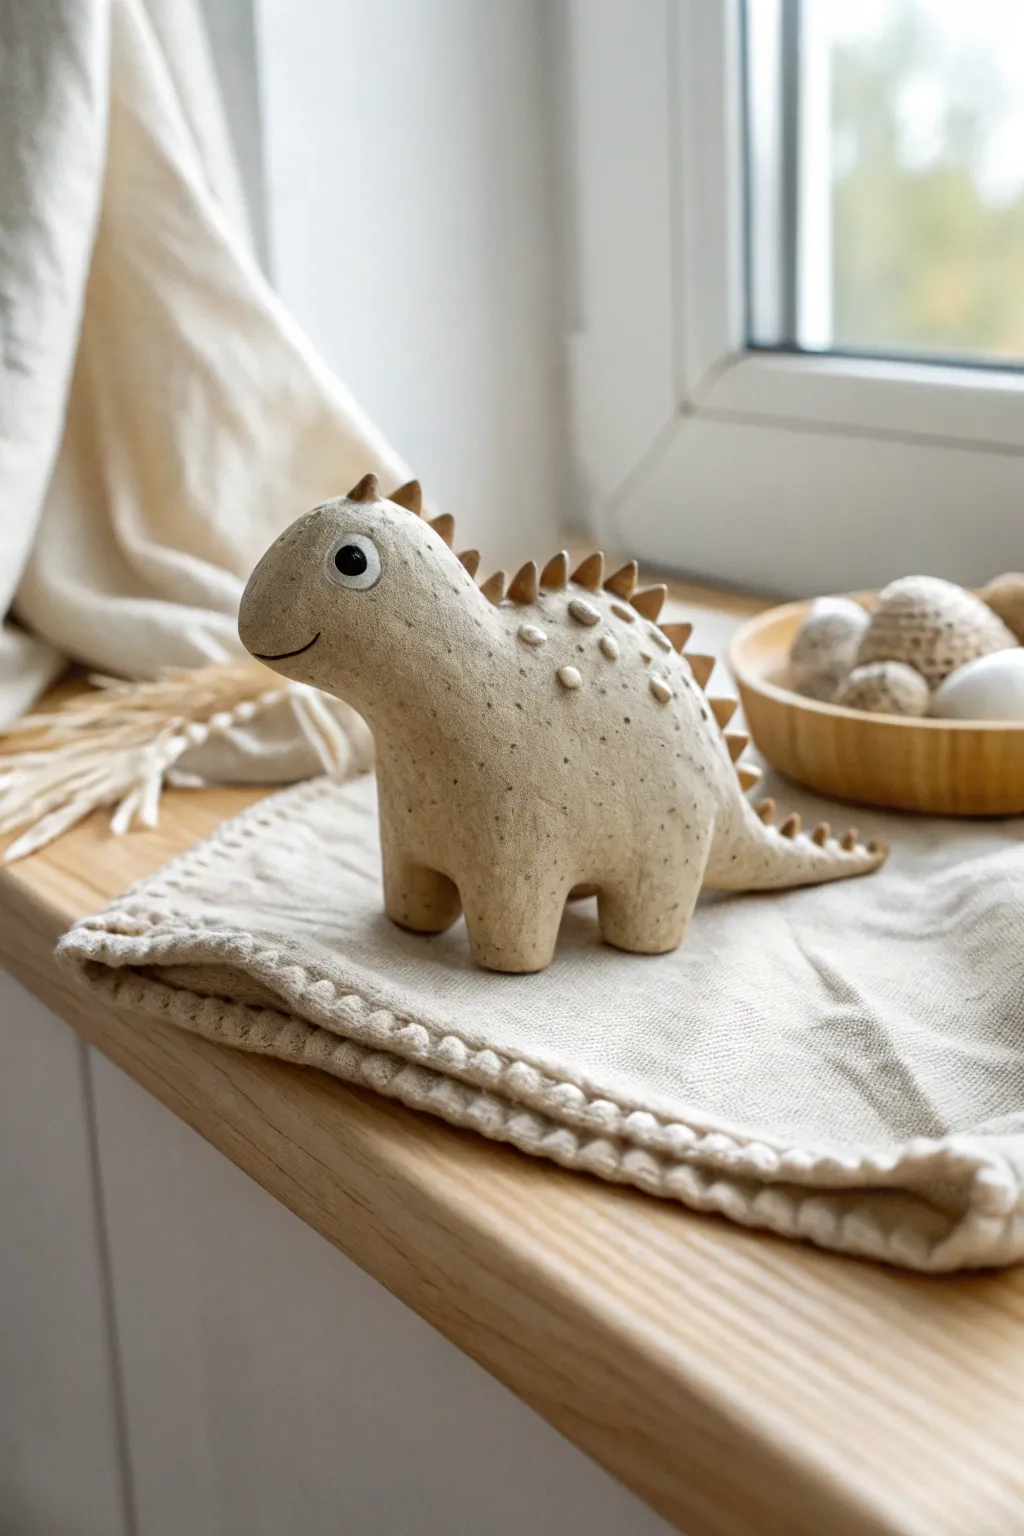
This adorable little dinosaur brings a modern, minimalist charm to any shelf with its speckled clay body and cheerful expression. The natural, unglazed finish highlights the texture of the stoneware, making it feel like a tiny archeological treasure.
How-To Guide
Materials
- Speckled stoneware clay (or polymer clay with faux granite effect)
- Needle tool or toothpick
- Small wooden clay modeling tool
- Slip (clay and water mixture) for joining
- Black acrylic paint
- White acrylic paint
- Fine detail paintbrush
- Sponge and water bowl
Step 1: Shaping the Body
-
Create the base form:
Start with a ball of clay roughly the size of a tangerine. Roll it between your palms to smooth out any major cracks, warming the clay so it becomes pliable. -
Form the teardrop:
Gently roll one side of the ball against your work surface to elongate it into a teardrop shape. This thicker end will be the body, while the tapered end will become the tail. -
Pull the neck:
On the thicker end of your teardrop, pinch and gently pull the clay upwards and slightly forward to create the neck and head area. Aim for a smooth, organic curve rather than a sharp angle. -
Define the head:
Round off the top of the neck to form a distinct head shape. It should look like a soft, rounded snout protruding slightly from the neck. -
Smooth the surface:
Use a slightly damp sponge or your finger to smooth over the entire form. This step is crucial for achieving that finished, minimalist look.
Cracks while Drying?
If using air-dry or real clay, cracks happen if it dries too fast. Repair small fissures by rubbing a paste of vinegar and soft clay into them, then cover loosely with plastic to slow drying.
Step 2: Adding Extremities
-
Prepare the legs:
Roll four small cylinders of clay, ensuring they are thick and sturdy enough to support the body’s weight. Flatten the tops and bottoms slightly. -
Score and slip:
Use your needle tool to scratch cross-hatch marks (score) on the tops of the legs and the spots on the body where they will attach. Apply a dab of slip to these textured areas acting as glue. -
Attach the legs:
Press the legs firmly onto the underside of the body. I like to twist them slightly as I push to create a suction seal that holds better. -
Blend the seams:
Using a wooden tool or your finger, drag clay from the legs onto the body to blur the connection line until it’s seamless. The legs should look like they grew out of the body. -
Construct the spikes:
Roll tiny balls of clay, graduating in size. Pinch each one into a small triangle or pyramid shape to create the classic stegosaurus plates.
Step 3: Details and Finishing
-
Attach the spine plates:
Starting at the top of the head and working down to the tail, score, slip, and attach your triangular plates in a single row along the spine. -
Add side texture:
Make very small, flattened dots of clay and press them randomly onto the upper back and sides to mimic bumpy dinosaur skin texture. -
Sculpt the face:
Use the needle tool to gently carve a simple, curved line for the mouth. For the eyes, press a small indentation where you want them to sit. -
Dry and fire (or bake):
If using ceramic clay, let the piece dry slowly under plastic for a few days before bisque firing. If using polymer clay, bake according to the package instructions. -
Paint the eye base:
Once cool, paint a small white circle inside the eye indentation. You may need two thin coats for solid coverage. -
Add the pupil:
carefully paint a smaller black circle inside the white one. Leave a tiny speck of white showing, or drag the black slightly, to give the eye direction and life. -
Outline the eye:
Using your finest brush, paint a very thin black ring around the white of the eye to make it pop against the stoneware color. -
Final touches:
Check your paintwork. If the mouth line got lost during firing/baking, you can darken it very slightly with a watered-down dark paint, wiping away the excess immediately.
Make it a Planter
Before baking or firing, use a melon baller to scoop out the back area behind the neck. It makes the perfect sized hollow for a tiny air plant or succulent to sit in the dino’s back.
Place your new prehistoric friend near a window to let the natural light show off the texture
Mushroom Friends With Faces
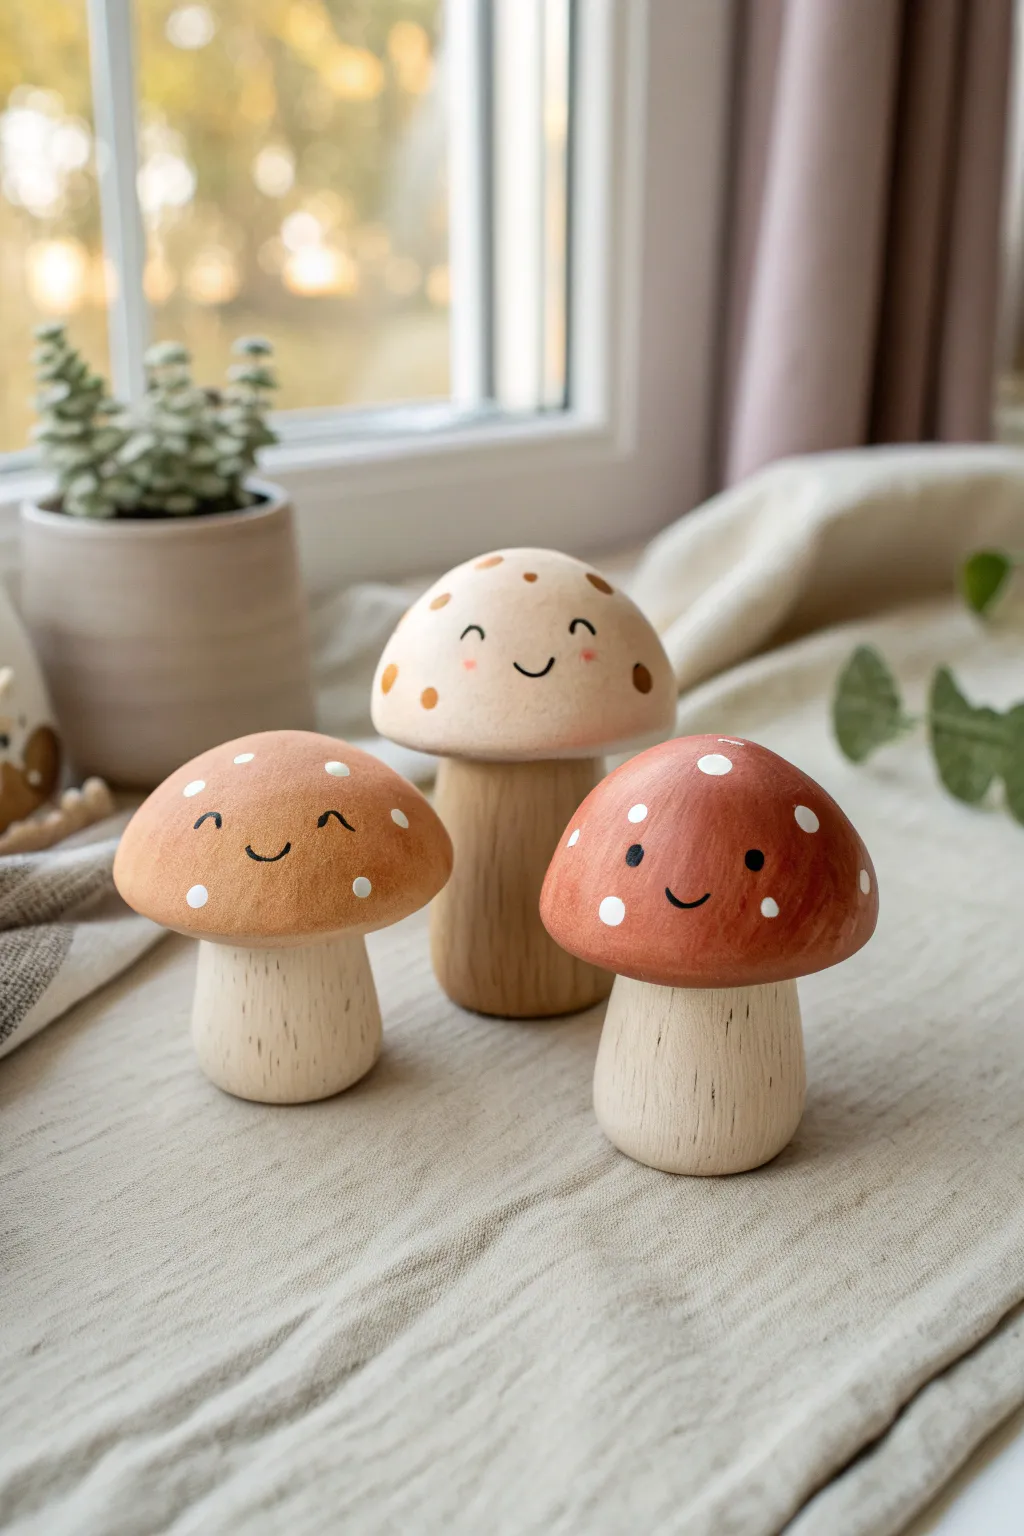
Create a cozy autumn atmosphere with these adorable mushroom figurines featuring natural wood-grain stems and smooth clay caps. Their sweet, minimalist faces and gentle earth tones make them perfect companions for a windowsill or seasonal shelf display.
Step-by-Step Tutorial
Materials
- Polymer clay (terracotta, beige, and white colors)
- Wooden peg doll bodies or unfinished wooden dowels (thick)
- Acrylic paints (black, white, burnt sienna, cream)
- Fine detail paintbrush (size 0 or 00)
- Small round paintbrush
- Sculpting tool or craft knife
- Strong craft glue or E6000
- Matte varnish or sealant
- Fine-grit sandpaper
Step 1: Shaping the Caps
-
Condition the clay:
Start by warming pieces of polymer clay in your hands until they become soft and pliable. You’ll need three separate balls for the three different mushroom sizes. -
Form the basic domes:
Roll each piece into a smooth ball, then gently flatten the bottom against your work surface to create a hemisphere. Aim for slightly different widths to give each mushroom character. -
Refine the shape:
Gently press the center of each dome with your thumb to curve the edges downward slightly, creating that classic mushroom cap overhang. Smooth out any fingerprints with a drop of baby oil if needed. -
Create the stem connection:
Flip the caps over. Take your wooden base (or a spare dowel of the same size) and press it firmly into the center of the underside to create an indentation. This ensures a perfect fit after baking. -
Bake the clay:
Place your clay caps on a baking sheet lined with parchment paper. Bake according to the manufacturer’s instructions for your specific brand of clay, usually around 275°F (130°C) for 15-20 minutes.
Uneven Surfaces?
If your clay caps have fingerprints after baking, lightly sand them with wet sandpaper (600 grit or higher) before painting. This creates a perfectly smooth, professional finish.
Step 2: Preparing the Wooden Stems
-
Sand the wood:
While the caps bake, take your wooden bases and lightly sand them with fine-grit sandpaper. This removes any rough splinters and prepares the surface for a clean look. -
Enhance the grain:
If your wooden pieces are very plain, I like to use a sharp craft knife or sculpting tool to scratch vertical, slightly wavy lines into the wood. This mimics the natural texture of a mushroom stalk. -
Clean the surface:
Wipe the wooden stems with a damp cloth to remove all sawdust, ensuring a clean surface for gluing later.
Add Forest Details
Glue dried moss or tiny felt leaves around the base where the wooden stem meets the table. It grounds the figures and adds a pop of green texture.
Step 3: Assembly and Decoration
-
Attach the caps:
Once the clay caps have fully cooled, apply a small dab of strong craft glue into the indentation you made earlier. Press the corresponding wooden stem firmly into place and let it set. -
Paint the base colors:
If you used white clay and want specific colors, paint the caps now. Use burnt sienna for the reddish one, a warm biscuit color for the middle one, and leave the beige one natural or paint it cream. Let dry completely. -
Add the spots:
Dip the handle end of a paintbrush into paint to stamp perfect circles. Use white paint for the dark caps and a warm brown for the beige cap. Vary the sizes for a natural look. -
Paint the eyes:
Using your finest detail brush and black acrylic paint, carefully paint two small semi-circles for closed, smiling eyes on the beige and tan mushrooms. For the red mushroom, paint simple black dots. -
Draw the smiles:
With the same fine brush, add a tiny, delicate ‘u’ shape between the eyes for the mouth. Keep the lines very thin to maintain the cute, minimalist aesthetic. -
Add rosy cheeks:
Mix a tiny amount of pink paint with a lot of water to create a wash, or use watered-down red paint. Dab two faint spots outside the eyes to give them a blushing look. -
Add eye highlights:
For the open-eyed red mushroom, use a toothpick to place a tiny speck of white paint in the upper corner of each black eye pupil. This brings the character to life. -
Seal the work:
Once all paint is bone dry, apply a coat of matte varnish over the clay caps. Avoid the wooden stems to keep their natural texture visible.
Now these charming little fungi are ready to add a touch of woodland magic to your home decor


What Really Happens Inside the Kiln
Learn how time and temperature work together inside the kiln to transform clay into durable ceramic.
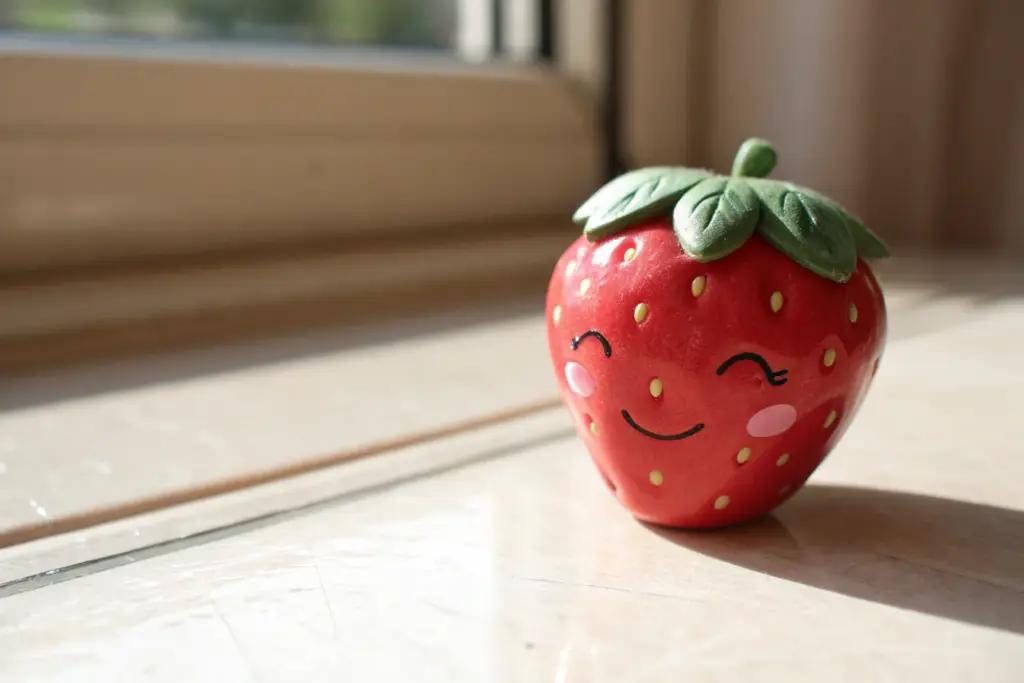
Tiny Fruit Slice Magnets
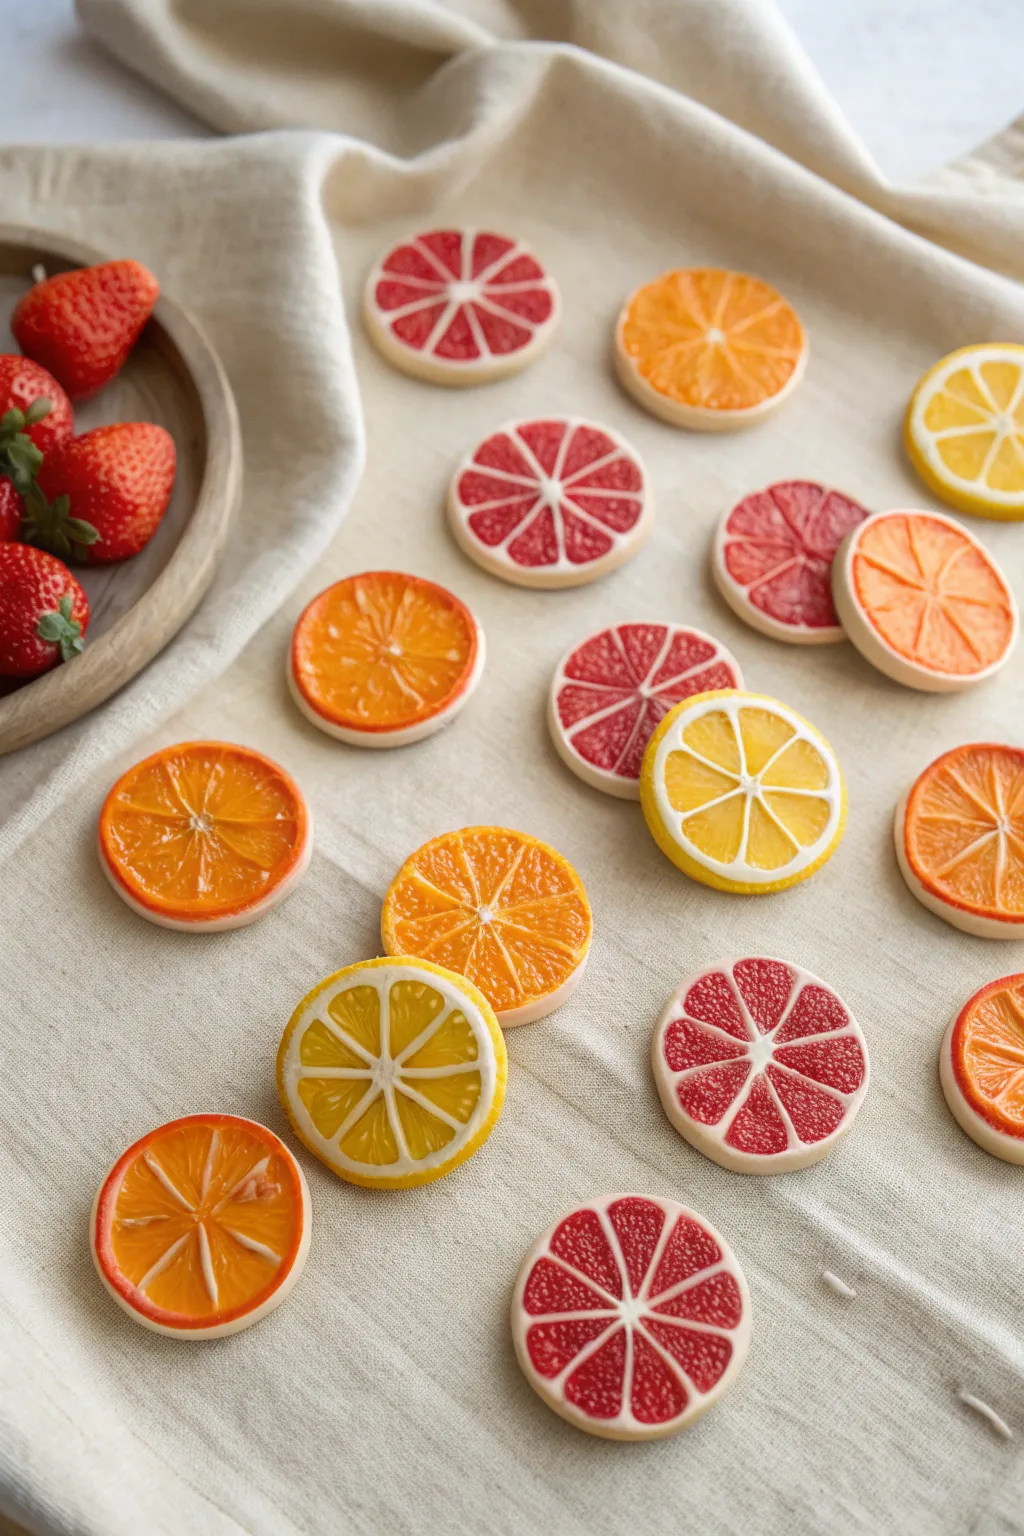
Brighten up your fridge with these incredibly realistic, juicy-looking citrus slice magnets. Using simple clay techniques and liquid coloring, you’ll create a varied harvest of grapefruits, oranges, and lemons that look good enough to eat.
Step-by-Step
Materials
- White polymer clay
- Translucent polymer clay
- Liquid polymer clay (clear/translucent)
- Alcohol inks or clay dyes (yellow, orange, red)
- Small round cutter (approx. 1.5 – 2 inches)
- Needle tool or toothpick
- Razor blade or craft knife
- Small magnets
- Superglue
- Gloss glaze (optional)
Step 1: Creating the Base
-
Conditioning the clay:
Start by thoroughly conditioning your white polymer clay until it is soft and pliable. Roll it out into a uniform sheet about 1/4 inch thick. -
Cutting the rounds:
Using your round cutter, punch out several circles. These will form the opaque ‘pith’ or base of your fruit slices. -
Creating the rim:
To create the colored rind, roll out a very thin snake of clay tinted just slightly with your chosen fruit color (e.g., pale yellow for lemon). Wrap this thin strip around the outer edge of your white circle, smoothing the seam so it blends naturally.
Juicy Texture Trick
Add a sprinkle of clear embossing powder into your liquid clay mix before baking. It melts into tiny bubbles that perfectly mimic citrus vesicles.
Step 2: Forming the Segments
-
Tinting the fruit flesh:
Mix translucent polymer clay with a very small amount of alcohol ink or clay dye. You want a ‘jelly’ look, so don’t over-saturate it with opaque pigment. Make batches for red grapefruit, orange, and yellow lemon. -
Applying the flesh layer:
Flatten a disc of your tinted translucent clay so it is slightly smaller than the white base. Press it gently onto the top of the white circle, leaving a thin rim of white visible around the edge. -
Marking the center:
Take your needle tool and make a small indentation in the exact center of the slice. This acts as a guide for your segments. -
Dividing the segments:
Press the needle tool or the back of a knife blade into the translucent clay, creating lines radiating from the center like wheel spokes. Create 8 to 10 equal sections. -
Defining the pith lines:
Gently widen these radial grooves. You want to push the translucent clay aside to reveal the white base underneath, simulating the pith walls between fruit segments.
Step 3: Adding Texture & Juice
-
Texturing the interior:
Using the very tip of your needle tool, scratch tiny, messy lines inside each triangular fruit segment. I like to work from the outside in, creating a rough texture that mimics pulp. -
Creating the ‘Juice’:
Mix a few drops of liquid polymer clay with your alcohol inks to match your fruit colors. The mixture should be syrupy. -
Filling the segments:
Carefully drip a tiny amount of the colored liquid clay into the center of each textured segment. It should pool slightly, creating a wet, juicy appearance. -
Spreading the liquid:
Use a toothpick to gently guide the liquid clay to the edges of the segment, ensuring it covers the texture but doesn’t spill over the white pith lines.
Make ‘Em Useable
Make them double-sided! Put a clay slice on both sides of a paperclip before baking to create adorable planner clips instead of magnets.
Step 4: Finishing Touches
-
Baking:
Arrange your slices on a baking sheet lined with parchment paper. Bake according to your brand of polymer clay instructions (usually 275°F for 15-30 minutes). -
Cooling:
Let the pieces cool completely. The translucent clay will become clearer as it cools, revealing the depth of color. -
Glazing (Optional):
For an extra wet look, brush a thin layer of gloss glaze over just the fruit segments, avoiding the white pith and rind. -
Attaching the magnet:
Flip the slice over and place a drop of superglue in the center. Press a strong magnet firmly into the glue and let it set for at least an hour before placing it on your fridge.
Now you have a refreshing set of citrus slices to make your kitchen organization a little sweeter
Mini Smiley Face Magnets
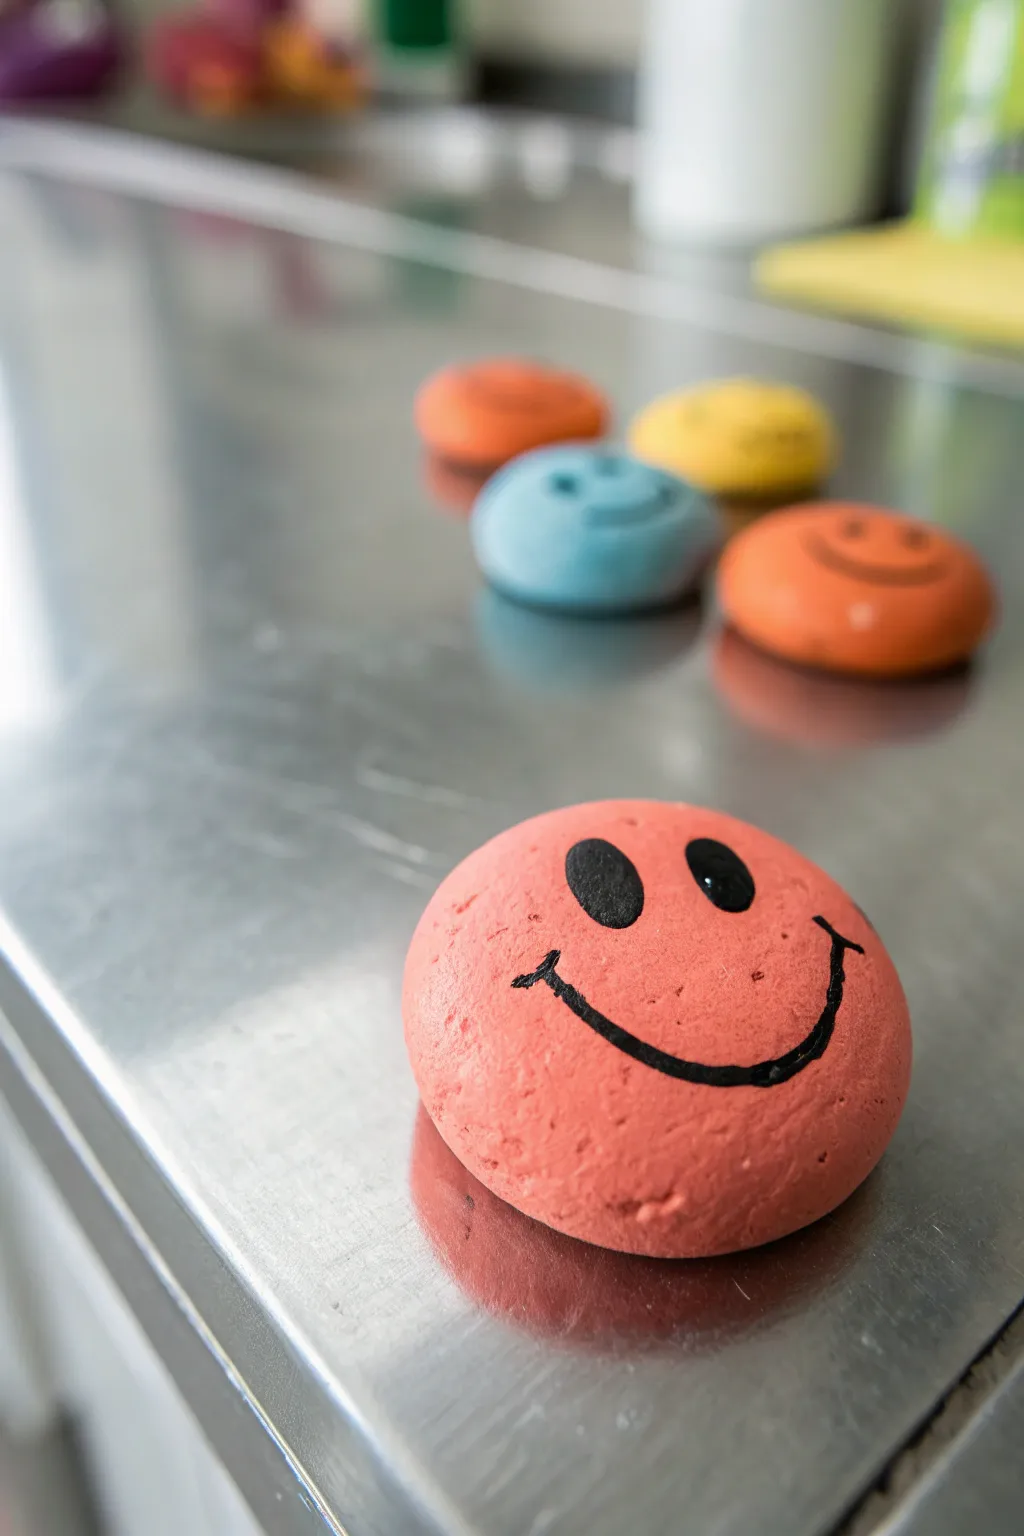
Spread a little joy throughout your home with these charming, brightly colored smiley face magnets crafted from air-dry clay. Each piece has a unique, hand-formed texture that adds warmth and character to any magnetic surface.
Step-by-Step Tutorial
Materials
- White air-dry clay (or polymer clay)
- Acrylic paints (coral pink, bright blue, orange, yellow)
- Black acrylic paint or fine-tip black paint marker
- Paintbrushes (small flat brush and very fine liner brush)
- Small round magnets
- Strong craft glue (E6000 or similar)
- Water cup and paper towels
- Fine-grit sandpaper (optional)
- Matte or satin varnish (optional for protection)
Step 1: Shaping the Clay
-
Portion the clay:
Start by pinching off small pieces of air-dry clay, aiming for chunks roughly the size of a walnut or a large bouncy ball. -
Roll spheres:
Roll each piece between your palms to create smooth, round spheres. Don’t worry if they aren’t geometric perfection; a little irregularity adds to the organic, stone-like feel. -
Flatten into disks:
Gently press each sphere down onto a flat surface to create a thick disk shape. You want them to look like smooth river stones, slightly domed on top but flat on the bottom. -
Smooth the edges:
Dip your finger in a tiny bit of water and run it along the edges to smooth out any large cracks, though leaving a subtle stone-like texture is perfectly fine. -
Dry completely:
Set your clay disks aside to dry. Depending on the brand and thickness, this usually takes 24 to 48 hours. Flip them halfway through so the bottoms dry evenly.
Step 2: Painting the Base
-
Prepare your palette:
Squeeze out your base colors. For the main piece shown, mix a little white into red or orange to achieve that soft, matte coral pink shade. -
Apply the first coat:
Using a flat brush, paint the entire top and sides of the clay disk. The porous clay will soak up the paint quickly. -
Layer for opacity:
Once the first coat is touch-dry, apply a second coat to get a solid, vibrant color. I find that dabbing the paint on rather than stroking it helps create that nice textured look visible in the photo. -
Paint the background batch:
Repeat this process for your other disks using sky blue, bright yellow, and warm orange to create a colorful set. -
Let the base cure:
Ensure the base coats are completely dry before attempting any detail work to prevent the colors from muddying.
Uneven Surface?
If your dried clay surface is too bumpy to paint easily, give it a quick rub with fine-grit sandpaper to create a smoother canvas before applying your base color.
Step 3: Adding Personality
-
Draft the face:
If you are nervous about free-handing, lightly sketch the eyes and mouth placement with a pencil first. -
Paint the eyes:
Using a fine liner brush and black acrylic paint, create two oval-shaped eyes. These should be tall ovals rather than perfect circles for that classic cartoon look. -
Draw the smile:
Paint a wide, simple u-shape for the smile. Start from the center and curve upwards toward the cheeks. -
Add corner details:
At the very ends of the smile line, add tiny perpendicular tick marks or dimples to accentuate the friendly expression. -
Refine the lines:
Go back over the black lines if they look transparent; solid, bold black lines pop best against the pastel backgrounds.
Expression Session
Vary the faces to create a mood board! Try painting a winking face, a surprised ‘O’ mouth, or adding tiny pink circles for blushing cheeks to give each magnet unique character.
Step 4: Finishing Up
-
Seal the surface:
For durability, apply a thin coat of matte or satin varnish over the painted face. This is helpful if they’ll be used in a kitchen where they might get splashed. -
Attach the magnet:
Flip the dry clay piece over. Apply a strong dot of craft glue to the center of the flat back. -
Press and hold:
Press a small round magnet firmly into the glue. Let the glue cure fully according to the package instructions before sticking it to your fridge.
Now your fridge is ready to greet you with a friendly smile every time you reach for a snack

TRACK YOUR CERAMIC JOURNEY
Capture glaze tests, firing details, and creative progress—all in one simple printable. Make your projects easier to repeat and improve.
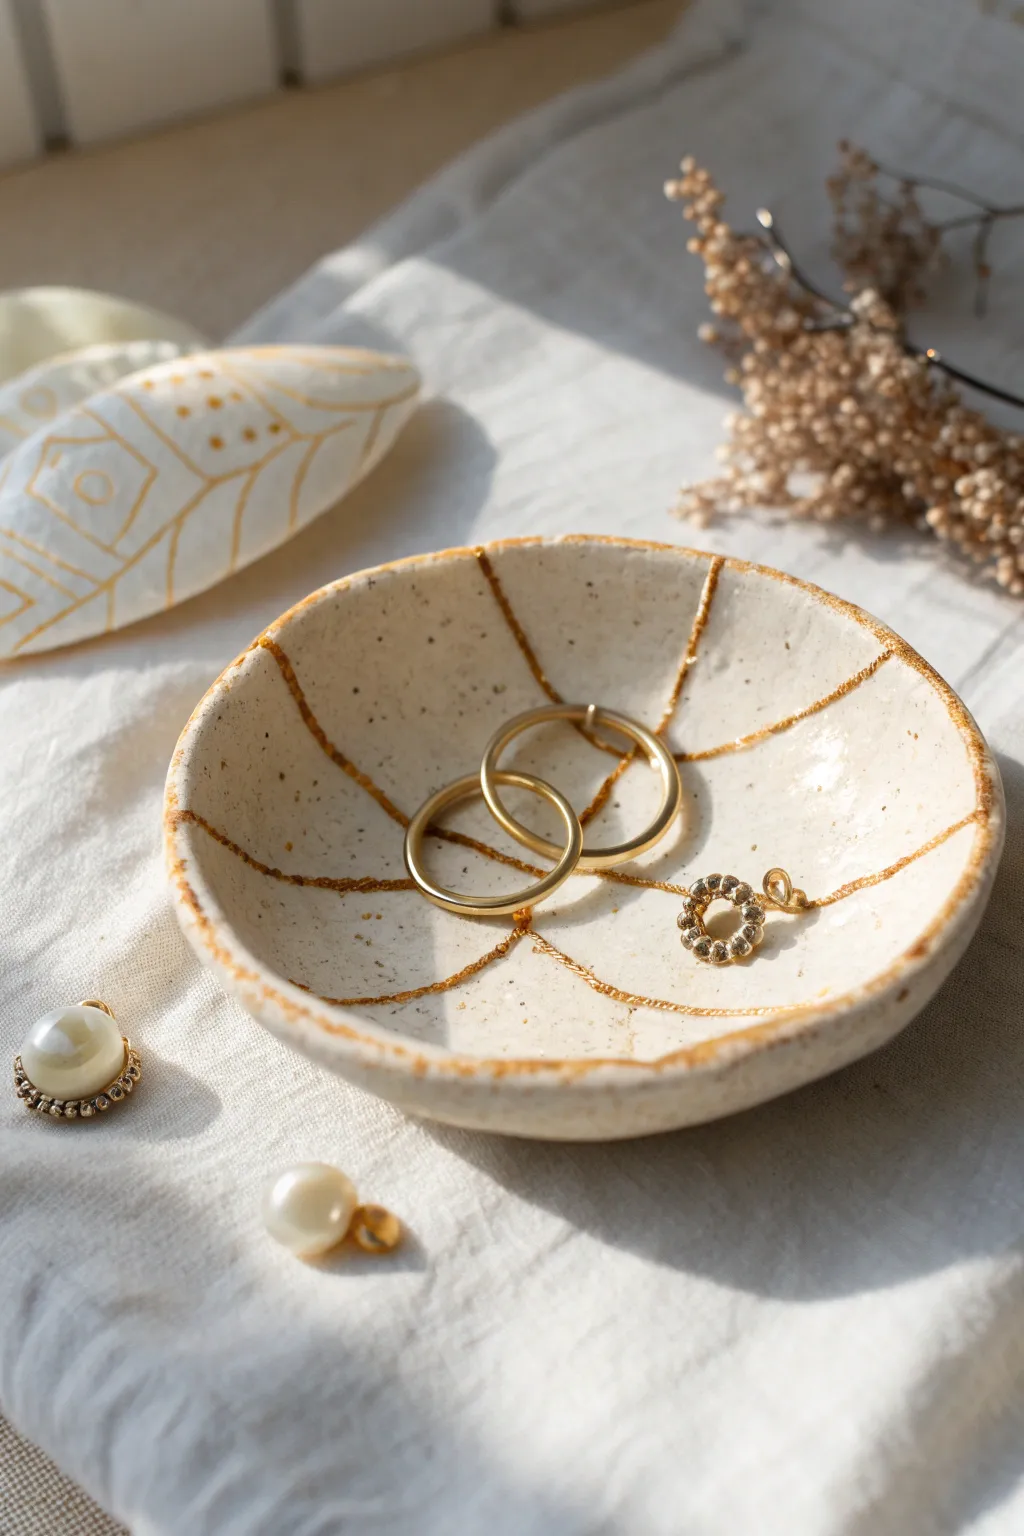
Mini Trinket Dish for Rings
This delicate little trinket dish mimics the organic elegance of a seashell, complete with gentle ridges and a lovely speckled stone finish. It is the perfect size for keeping your favorite rings safe and adds a touch of natural texture to your bedside table.
Step-by-Step
Materials
- Speckled air-dry clay (or white clay mixed with cracked pepper/sand)
- Rolling pin
- Small bowl or round cookie cutter (approx. 4 inches)
- Modeling tool or dull butter knife
- Small sponge
- Fine-grit sandpaper
- Small bowl for drying (curved shape)
- Water
- Matte varnish or sealant
Step 1: Shaping the Base
-
Prepare the clay:
Begin by conditioning a sphere of speckled air-dry clay about the size of a clementine. If you don’t have pre-speckled clay, you can kneed in a pinch of black pepper or fine sand into plain white clay to achieve that stony look. -
Roll it out:
Using your rolling pin, flatten the clay sphere into an even slab. Aim for a thickness of about 1/4 inch—too thin and it might crack, too thick and it loses elegance. -
Cut the circle:
Press your round cookie cutter or trace around a small bowl onto the slab to create a perfect circle. Remove the excess clay and set it aside for future repairs or other projects. -
Smooth the edges:
Dip your finger in a little water and run it along the cut edge of the circle. This removes any sharp lines left by the cutter and gives the piece a softer, handmade finish.
Tip: Organic Edges
Don’t aim for perfect symmetry on the rim. Varying the height of the waves slightly makes the piece look more like a natural found object.
Step 2: Sculpting the Scallops
-
Mark the ridges:
Imagine the circle has a center point. Using your modeling tool or the back of a knife, gently press indentation lines radiating from the center out toward the edge, stopping just short of the very middle. -
Create the wave:
Between each indented line, use your thumb to push the edge of the clay slightly upward and inward. This creates the scalloped, wavy rim characteristic of a shell. -
Deepen the texture:
Go back over your radiating lines and press a bit firmly to accentuate the grooves. The texture needs to be deep enough to catch shadows but not cut through the clay. -
Refine the rim:
Using a damp sponge, gently dab the wavy outer rim to soften any harsh tool marks while maintaining the undulating shape. -
Initial shaping:
Cupping the clay in your palm, gently press the center down to start forming a bowl shape. I find it helpful here to adjust the scallops again as the curve usually flattens them slightly.
Step 3: Drying and Finishing
-
Set to dry:
Place your clay piece inside a small, curved bowl lined with a paper towel. The bowl acts as a mold to ensure the dish dries in a concave shape rather than flattening out. -
Flip halfway:
After about 12 hours (or when the top feels dry to the touch), carefully remove it from the support bowl and flip it over to let the bottom dry evenly. This prevents warping. -
Sand the imperfections:
Once fully cured—usually 24 to 48 hours depending on humidity—take your fine-grit sandpaper and lightly buff the rim and underside to remove any rough spots. -
Clean dust:
Wipe the entire dish down with a very slightly damp cloth or a dry soft brush to remove the sanding dust. -
Seal the surface:
Apply a thin coat of matte varnish to protect the clay from moisture and stains. The matte finish preserves that raw, stone-like aesthetic. -
Let it cure:
Allow the varnish to dry completely according to the manufacturer’s instructions before placing any jewelry inside.
Fix: Cracking Clay
If small cracks appear while shaping, smooth a tiny bit of water or a slip (clay mixed with water) over the area immediately to bond it back together.
Your new jewelry dish is ready to catch the light and hold your treasures safely
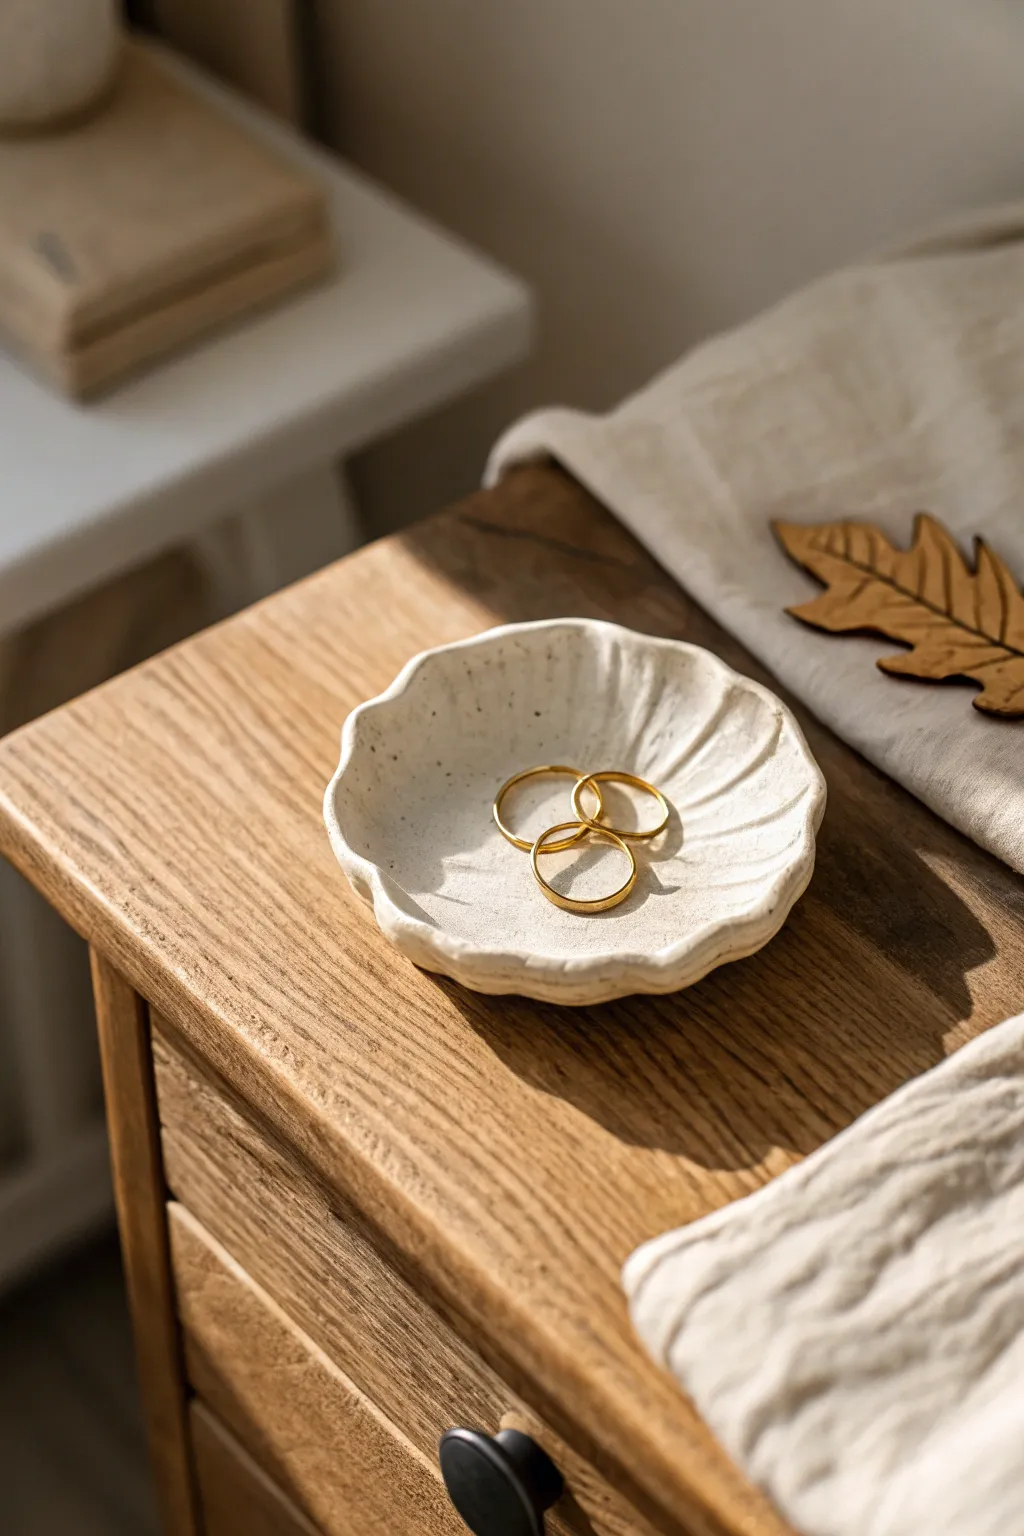
Tiny Turtle Shell Ring Dish
This charming little jewelry holder mimics the segmented pattern of a turtle shell with elegant gold accents on a speckled creamy base. It’s the perfect beginner-friendly project to create a sophisticated spot for your favorite rings and studs.
How-To Guide
Materials
- Speckled stoneware clay or white air-dry clay
- Rolling pin
- Small bowl (for a mold) or a circular cookie cutter (approx. 4 inches)
- Sponge
- Needle tool or toothpick
- Pottery knife or old credit card
- Fine-grit sandpaper
- Glossy white or transparent glaze (if using kiln clay)
- Opaque white acrylic paint (if using air-dry clay)
- Gold leaf paint or liquid gold leaf
- Fine detail paintbrush
- Clear sealant (polyurethane or varnish)
Step 1: Shaping the Base
-
Condition and roll:
Begin by taking a ball of clay about the size of a tangerine. Knead it warmly in your hands to condition it, removing any air bubbles. On a clean cloth or canvas, use your rolling pin to flatten the clay into a slab approximately 1/4 inch thick. -
Cut the circle:
Place your circular cutter or a small bowl upside down on the slab. Use a needle tool or knife to cut a clean circle. If the edges are sharp or ragged, dip your finger in a little water and gently smooth them until rounded. -
Form the curve:
To get that gentle, scooped shape, you can either drape your clay circle over the bottom of a small upturned bowl or press it inside a larger bowl. I prefer pressing it inside a bowl lined with plastic wrap so I can control the depth more easily. -
Refine the shape:
While the clay is in the mold, gently press from the center outwards to ensure an even curve. Use a slightly damp sponge to wipe the interior surface smooth, erasing any fingerprints.
Smooth Operator
Use the back of a spoon to burnish (rub) the clay while it’s leather hard. This compresses the surface and makes it incredibly smooth before you ever start painting.
Step 2: Creating the Pattern
-
Draft the segments:
Once the clay is leather-hard (firm but still cool to the touch), usually after drying for an hour or two, it’s time to add the design. Lightly sketch a large, somewhat organic pentagon or hexagon shape in the center using a needle tool. Don’t press deep yet. -
Radiate outwards:
From each corner of your central shape, draw a line extending straight out to the rim of the dish. This creates the segmented ‘scute’ look of a turtle shell. -
Carve the grooves:
Go back over your sketched lines with the needle tool, pressing firmly to carve distinct grooves. You want these channels deep enough to hold paint later, but be careful not to slice all the way through the clay. -
Soften the burrs:
Carving often leaves little crumbs or ‘burrs’ of clay along the lines. Wait until the clay feels completely dry to the touch, then gently brush these away with a soft, dry paintbrush or your finger. -
Dry completely:
Let your dish dry fully. For air-dry clay, this takes 24-48 hours. For kiln clay, fire it to bisque according to your manufacturer’s instructions.
Gemstone Finish
Instead of plain gold paint, mix a tiny bit of golden mica powder into your varnish for a subtle, shimmering topcoat that sparkles in the sunlight.
Step 3: Glazing and Painting
-
Base coat application:
If using air-dry clay, paint the entire dish with two coats of creamy or off-white acrylic paint. If you have speckled clay, a transparent glaze is beautiful; otherwise, use a speckled white glaze to mimic the stone look. -
Seal or fire:
For air-dry clay, apply a layer of satin or gloss varnish to seal the paint. For ceramic clay, apply your glaze and fire the piece in the kiln for the final glaze firing. -
Prepare the gold:
Shake your liquid gold leaf or gold paint thoroughly. You want the pigment to be rich and opaque. Pour a very small amount onto a palette or scrap paper. -
Fill the grooves:
Dip a fine detail brush into the gold. carefully painting inside the carved grooves. Let the brush glide along the tracks you made earlier. It’s okay if the line is slightly shaky; it adds to the organic feel. -
Gild the rim:
Reload your brush and run it along the very top edge of the rim. This frames the piece beautifully and ties the design together. -
Clean up edges:
If any gold smudged onto the main panels, you can sometimes gently scrape it off with a craft knife once dry, or touch it up with a tiny bit of your base white paint. -
Final protection:
Allow the gold to cure completely. If your gold leaf requires sealing (check the bottle), apply a gentle coat of sealant over the gold lines only to prevent tarnishing over time.
Place this little turtle shell dish on your nightstand and enjoy a piece of handmade functional art every day.
Mini Ring Cones and Holders
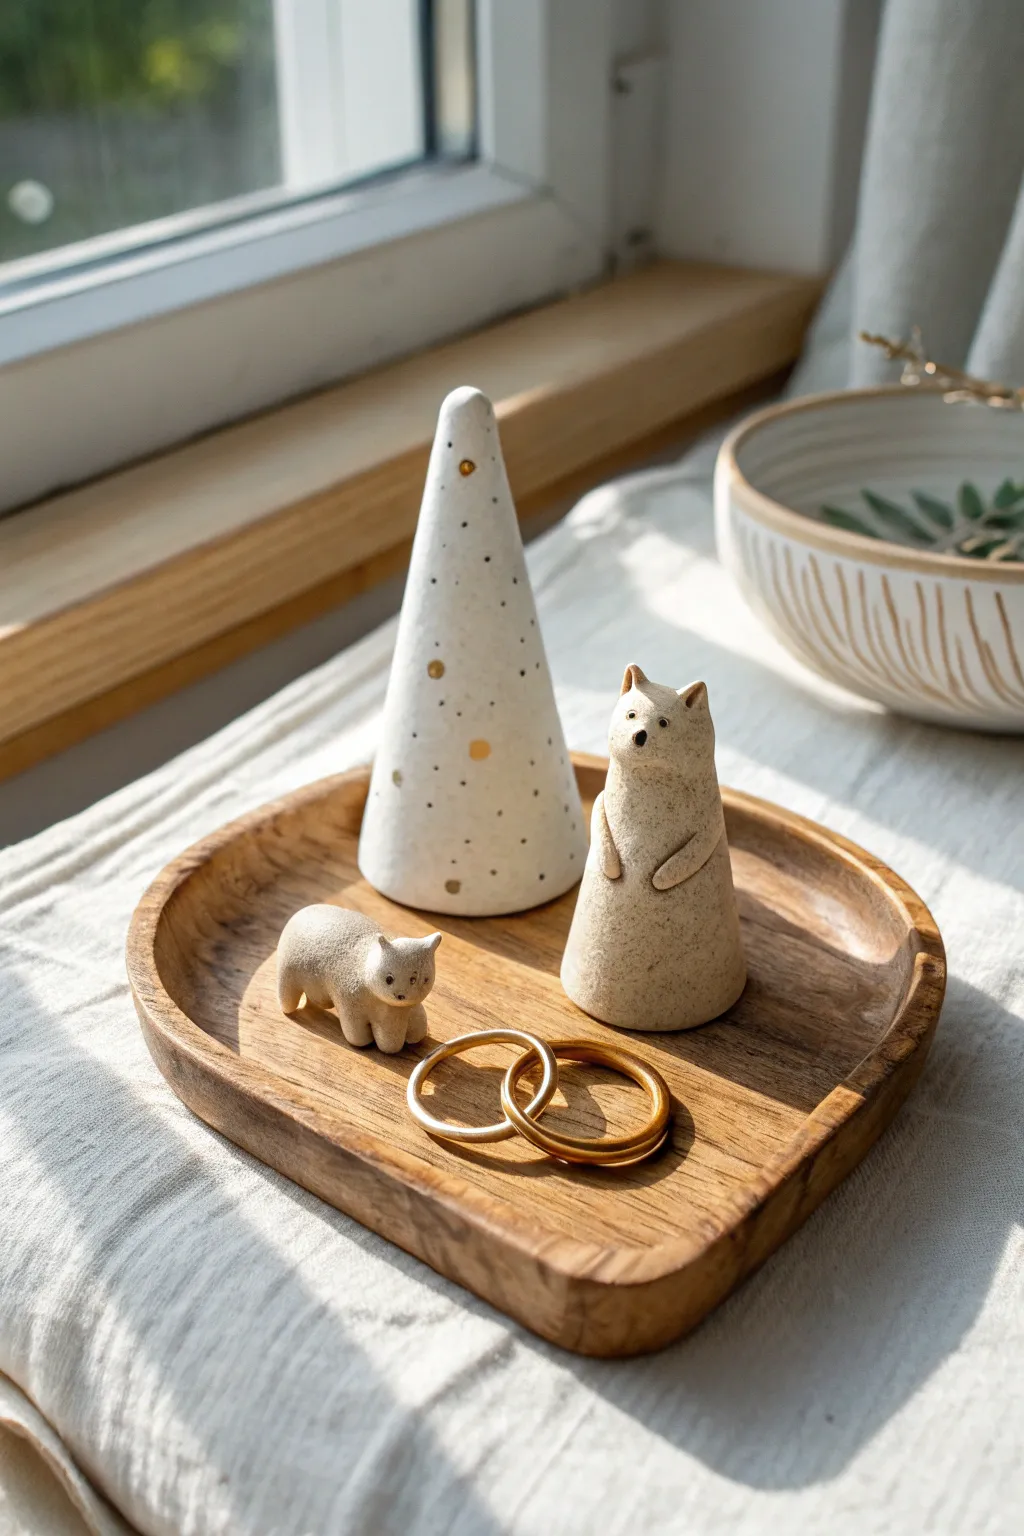
Create a charming woodland vignette for your jewelry with this trio of clay miniatures featuring a stylized tree cone and two adorable bear companions. The speckled clay finish and gold accents give these pieces a sophisticated yet rustic look perfect for a sunny windowsill.
Step-by-Step
Materials
- Speckled stoneware clay (or polymer clay with faux granite effect)
- Clean work surface (canvas or silicone mat)
- Needle tool
- Small rolling pin
- Sponge
- Water slip (if using ceramic clay) or liquid polymer clay
- Gold luster or gold leaf paint
- Fine detail paintbrush
- Kiln (for stoneware) or home oven (for polymer)
- Smoothing tool or rib
- Sanding sponge (fine grit)
Step 1: Shaping the Tree Cone
-
Form the Base Cone:
Start with a ball of clay about the size of a golf ball. Roll it back and forth on your work surface, applying more pressure to one side to elongate it into a smooth, tall cone shape. -
Flatten the Bottom:
Gently tap the wide base of the cone against your table to flatten it perfectly so it stands stable without wobbling. -
Refine the Surface:
Use a damp sponge or your finger to smooth out any fingerprints or ridges, ensuring the cone looks geometric and clean. -
Add Texture Details:
Using a needle tool, poke random, shallow indentations all around the cone at varying intervals. These tiny divots will hold the gold accents later.
Pro Tip: Clean Lines
Keep a baby wipe or damp chamois handy. Wiping the clay periodically removes oils from your hands and keeps that raw, matte finish looking pristine.
Step 2: Sculpting the Standing Bear
-
Create the Body Cylinder:
Roll a cylinder of clay that is slightly tapered at the top, resembling a shorter, blunter cone than your tree. This forms the bear’s body. -
Pinch the Ears:
At the narrower top end, gently pinch two small triangles of clay upwards to form the ears. Soften the tips slightly so they aren’t sharp. -
Define the Snout:
Pinch the front center of the face area to pull out a subtle snout. Use the needle tool to impress a small dot for the nose and two for the eyes. -
Attach the Arms:
Roll two very small, thin coils for arms. Score and slip (or use liquid clay) to attach them to the sides of the body, curving them forward as if the bear is holding its belly.
Level Up: Functional Dish
Before baking, adhere your figures to a matching clay coaster or small tray to create a single, unified jewelry catch-all station.
Step 3: Sculpting the Walking Bear
-
Form the Torso:
Roll a small, thick sausage shape for the walking bear’s body. Gently arch the back slightly for a natural posture. -
Create Legs:
Instead of attaching separate legs, I prefer to pinch and pull four short, stout legs directly from the bottom of the torso for durability. -
Shape the Head:
Form a small ball for the head and attach it to the front of the body. Blend the seam at the neck completely smooth so it looks like one solid piece. -
Final Bear Details:
Add tiny pinched ears and use your needle tool to create the facial features, matching the style of the standing bear.
Step 4: Firing and Finishing
-
Dry and Fire:
Allow all pieces to dry completely (for ceramic clay) before bisque firing. If using polymer clay, bake according to the manufacturer’s package instructions. -
Sand for Smoothness:
Once fired or baked and cooled, gently sand the bottoms and any rough spots with a fine-grit sanding sponge. -
Apply Gold Accents:
Dip a fine detail brush into your gold luster or paint. Dab small dots into the indentations you made on the tree cone. -
Highlight the Bears:
Add a tiny touch of gold to the bears’ noses or ears if desired, or keep them natural to let the speckles shine. -
Final Cure:
If using ceramic luster, fire the pieces a second time at the appropriate lower temperature. For paint, let it cure fully before display.
Arrange your charming woodland trio on a wooden tray or vanity to keep your favorite rings safe and accessible
Tiny Toothbrush Holder Creature
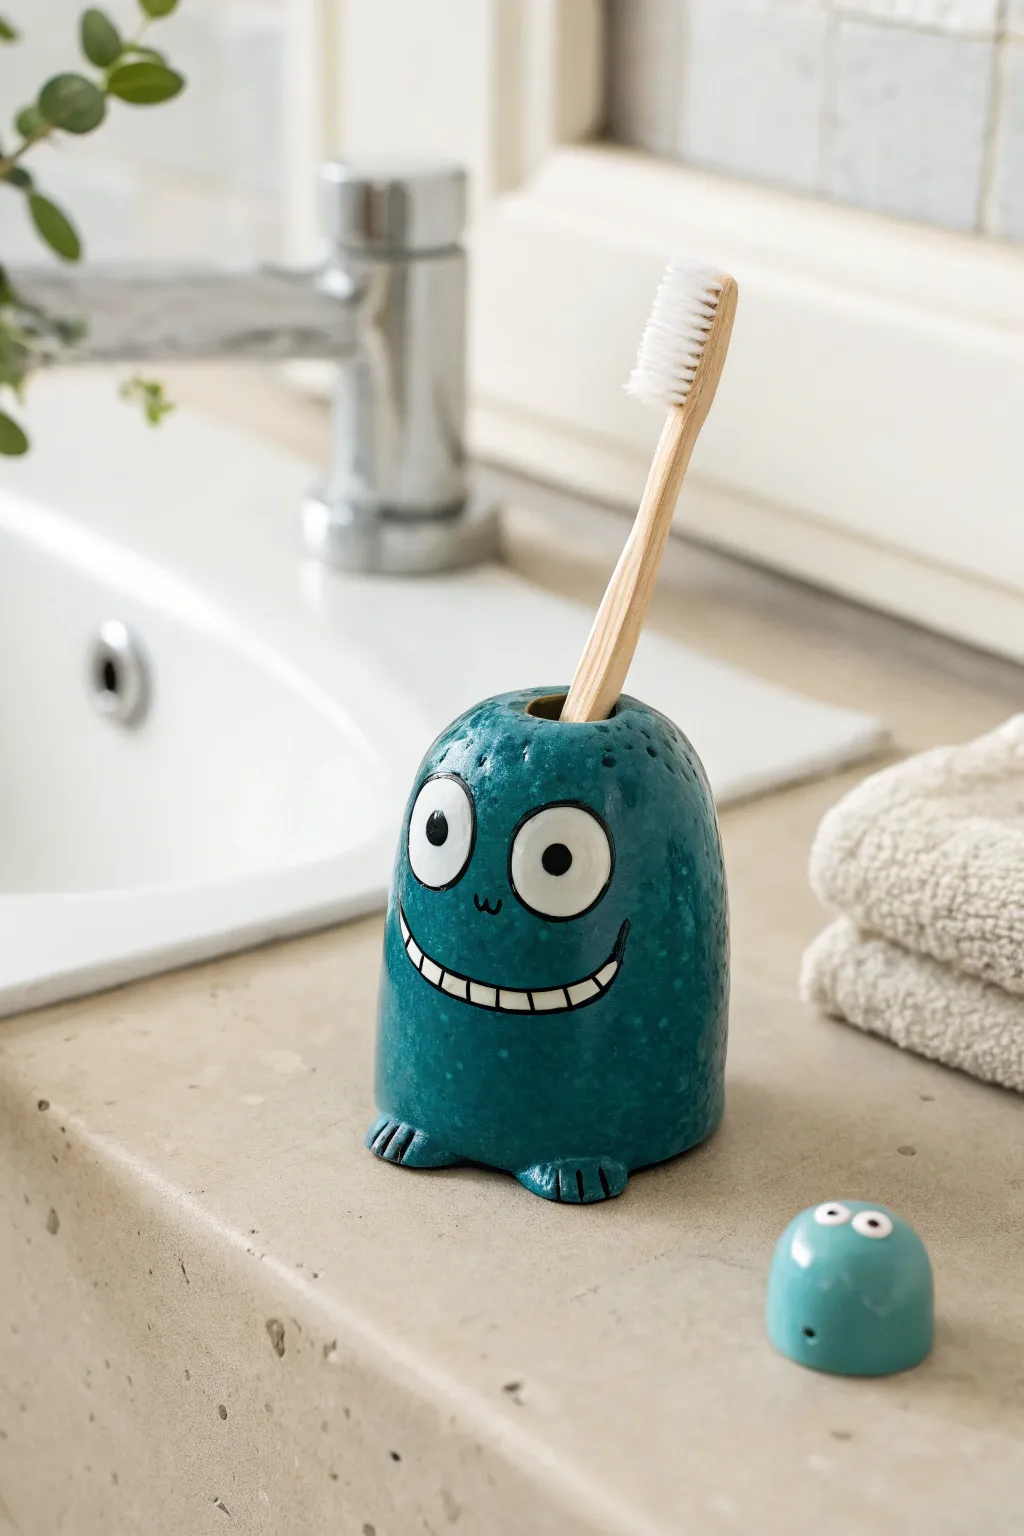
Brighten up your morning routine with this quirky, teal monster toothbrush holder. Shaped from clay with a cheerful, toothy grin and wide eyes, this functional little sculpture adds a dose of personality to any bathroom sink.
Step-by-Step Guide
Materials
- Polymer clay (teal/turquoise)
- Polymer clay (white)
- Polymer clay (black)
- Basic clay sculpting tools (needle tool, ball stylus)
- Aluminum foil
- Acrylic roller
- Gloss glaze or varnish
- Soft paintbrush
- A standard toothbrush (for sizing)
Step 1: Shaping the Base Body
-
Core construction:
Start by scrunching a piece of aluminum foil into a cylinder shape that closely resembles the size you want for the monster’s body. This saves clay and keeps the piece lightweight. -
Prepare the teal clay:
Condition your teal polymer clay until it is soft and pliable. Use your acrylic roller to flatten it into a sheet about 1/4 inch thick. -
Wrap the core:
Wrap the teal clay sheet around your foil armature. Smooth the seams together with your fingers or a sculpting tool until the foil is completely hidden and the surface is uniform. -
Create the toothbrush hole:
Press the handle of your actual toothbrush into the top center of the shape to create the well. Wiggle it slightly to ensure the hole is wide enough, then remove the brush. -
Refine the shape:
Gently taper the top of the cylinder so it rounds off around the hole, giving the monster a soft, domed head appearance.
Uneven Seams?
If you can’t smooth the seams perfectly with fingers, use a tiny drop of baby oil or clay softener on your finger to gently buff out the lines before baking.
Step 2: Adding Personality Details
-
Form the feet:
Roll two small balls of teal clay. Flatten them slightly and attach them to the bottom front of the body. Use a needle tool to press three indentations into each foot to create toes. -
The eyes:
Roll two medium-sized balls of white clay. Press them firmly onto the upper front of the face, spacing them slightly apart but quite close to the center. -
Pupils:
Take tiny specs of black clay, roll them into dots, and press them into the center of the white eyes. -
Outline the eyes:
Roll a very thin snake of black clay. Carefully wrap this around the outer edge of each eye to define them and make them pop. -
Adding the nose:
Using a needle tool or a fine black marker after baking (if you prefer), draw a tiny ‘w’ shape between the eyes for a cute nose.
Step 3: The Grin and Finish
-
Create the mouth base:
Roll a thin, curved snake of black clay and press it onto the face in a wide U-shape for the smile. -
Add teeth:
Roll a thin strip of white clay. Lay it over the black smile line, flattening it slightly so the black line is still visible underneath as a border. -
Define the teeth:
Use a needle tool to score vertical lines across the white strip, creating individual teeth. I find adding a thin black clay outline around the whole mouth really helps the expression stand out. -
Optional texture:
If you want a speckled look like the image, lightly prick the teal body with a toothbrush or stiff brush to create subtle pores. -
Baking:
Bake the piece according to your specific polymer clay’s package instructions (usually 275°F/135°C for 15-30 minutes). -
Glazing:
Once fully cooled, apply a coat of gloss glaze over the entire piece. This mimics the ceramic look and protects the clay from water splashes.
Make a Buddy
Use your leftover clay scraps to make a tiny, round mini-monster (like the one in the corner) to hold floss picks or just keep your toothbrush holder company.
Now you have an adorable, water-resistant friend ready to greet you every time you brush your teeth
Small Incense Holder Dish
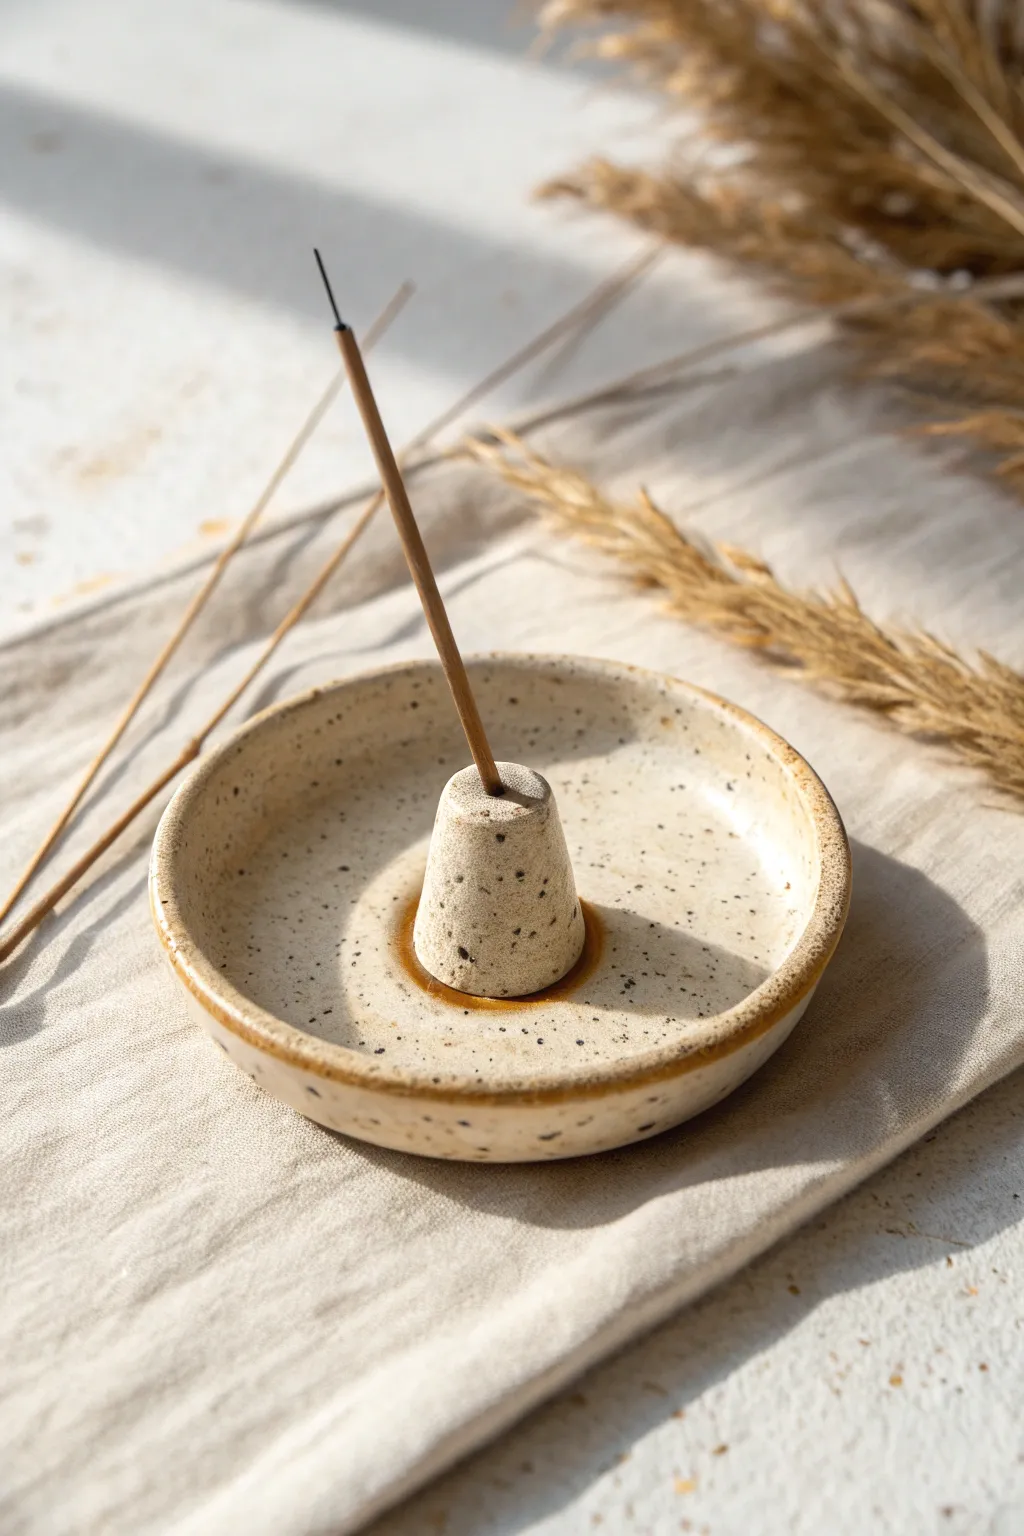
This minimalist incense holder features a charmingly rustic speckled finish and a simple, geometric design. Its shallow dish catches falling ash perfectly, while the central cone holds your favorite incense stick securely upright.
Step-by-Step Tutorial
Materials
- Speckled stoneware clay (white or buff)
- Small rolling pin
- Circle cutter or a bowl (approx. 4-inch diameter)
- Needle tool or toothpick
- Small sponge
- Rib tool or old credit card
- Slip (clay mixed with water)
- Scoring tool or fork
- Transparent glossy glaze
- Kiln (fire to cone 5/6)
- Incense stick (for sizing)
Step 1: Forming the Base
-
Prepare the slab:
Begin by wedging a fist-sized ball of speckled clay to remove air bubbles. Flatten it onto a canvas board or cloth and use your rolling pin to roll it out into an even slab, about 1/4 inch thick. -
Cut the circle:
Place your circle cutter or an inverted bowl onto the clay slab. Press down firmly or trace around the bowl with a needle tool to cut out a perfect circle. -
Smooth the edges:
Dip your finger or a small sponge in a tiny bit of water and run it gently along the cut edge of the circle. This softens the sharp cut line and prevents cracking later. -
Lift the rim:
Gently pinch the outer edge of the circle upwards to create a shallow rim. You want the edges to curve up slightly, creating a dish shape rather than a flat plate. -
Refine the shape:
Use a damp sponge to smooth out your finger marks on the rim. I like to rotate the dish slowly on the table while sponging to ensure the curve is symmetrical all around.
Step 2: Creating the Central Cone
-
Roll a small coil:
Take a small leftover piece of clay and roll it into a short, thick cylinder. It should be roughly an inch tall. -
Shape the cone:
Gently taper the top of the cylinder by rolling it back and forth with slightly more pressure on one end, forming a truncated cone shape. The bottom should be wide enough to be stable. -
Create the hole:
Using an actual incense stick or a needle tool, poke a hole straight down into the center of the cone top. Wiggle it very slightly to make the hole just a hair larger than the stick to account for clay shrinkage. -
Check the depth:
Ensure the hole goes about halfway down the cone but not all the way through to the bottom.
Rim Too Sharp?
If the rim feels sharp after bisquing, sand it lightly with 220-grit sandpaper before glazing. Always wear a mask when sanding dry clay to avoid inhaling dust.
Step 3: Assembly & Finishing
-
Score the attachment points:
Use your scoring tool or a fork to scratch up the exact center of your dish and the bottom of your cone. This texture is vital for a strong bond. -
Apply slip:
Dab a generous amount of slip onto both scored areas. The slip acts as the glue for your ceramic piece. -
Attach the cone:
Press the cone firmly onto the center of the dish. Give it a tiny twist as you press down to lock the clay particles together. -
Clean up the seam:
Use a small modeling tool or your fingertip to smooth the clay where the cone meets the dish. A tiny coil of clay can be added and smoothed in if there’s a gap. -
Dry slowly:
Cover the piece loosely with plastic and let it dry slowly over a few days until bone dry. This prevents the rim from warping. -
Bisque fire:
Load your bone-dry piece into the kiln for a bisque firing (usually cone 04). -
Glaze application:
Wipe the bisqued piece with a damp sponge to remove dust. dip it into a transparent glossy glaze. Wipe the bottom of the dish clean with a sponge so it doesn’t stick to the kiln shelf. -
Final firing:
Fire the piece again to the maturation temperature of your clay and glaze (typically cone 5 or 6 for stoneware).
Hole Shrinkage
Clay shrinks when drying and firing. Make the incense hole about 15-20% larger than the stick itself, or the stick won’t fit once the piece is finished.
Once cooled, your holder is ready to bring a moment of calm to your space with its beautiful, speckled simplicity
Mini Photo and Card Holders
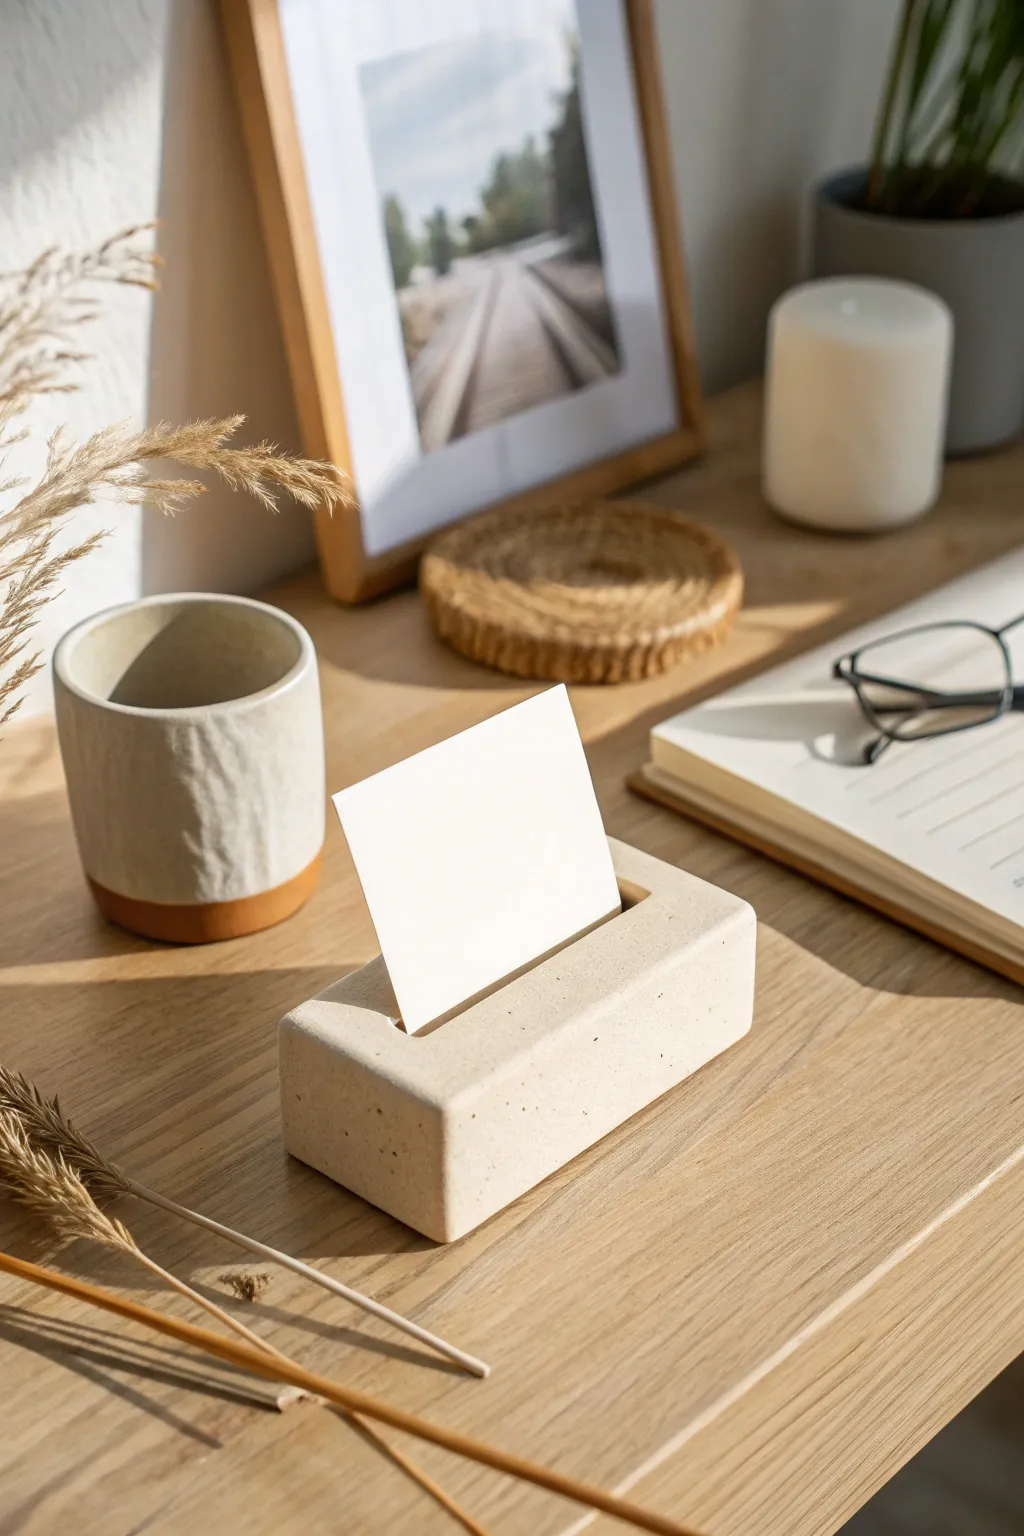
Achieve a high-end, architectural look for your desk with this incredibly simple clay project. This sturdy rectangular holder features a faux-concrete finish and a clean, recessed slot perfect for displaying business cards or cherished polaroids.
Step-by-Step
Materials
- Polymer clay (white or beige base)
- Black pepper or dried tea leaves (for speckling)
- Rolling pin or acrylic roller
- Tissue blade or sharp clay knife
- Rectangular cookie cutter (optional, for shaping)
- Ruler
- Cardstock or an old credit card (to create the slot)
- Fine-grit sandpaper (400 to 600 grit)
- Matte varnish (optional)
Step 1: Preparing the Clay
-
Condition the Base:
Begin by conditioning a block of white or light beige polymer clay in your hands until it becomes soft and pliable. You want a smooth consistency without cracks. -
Add Texture:
To mimic the look of natural stone or concrete seen in the photo, sprinkle a small pinch of ground black pepper or dried loose-leaf tea onto the flattened clay. -
Mix Thoroughly:
Fold the clay over the speckles and knead it repeatedly. Continue folding and kneading until the particles are evenly distributed throughout the entire block. -
Form the Basic Shape:
Roll the clay into a thick log, then gently press it against your work surface to begin flattening the bottom and sides.
Fixing a Warped Slot
If the slot closes up during baking, wait until the clay is warm (not hot) and carefully re-insert your credit card spacer to reopen the gap as it cools.
Step 2: Shaping the Block
-
Refine the Rectangle:
Using your acrylic roller or block, flatten the top surface until the height is approximately 1 to 1.5 inches. Use your hands to square off the ends. -
Sharpen Edges:
Use a tissue blade or a ruler to press against the long sides and the ends to create straight, vertical walls. The goal is a crisp, brick-like shape. -
Create the Bevel:
I like to gently run my finger or the flat of the blade along the top edges to soften them slightly, creating that subtle rounded bevel seen in the image. -
Measure the Slot:
Mark the center of the top surface where the card will sit. Ensure your slot will be centered lengthwise. -
Insert the Spacer:
Take a piece of thick cardstock or an old credit card. Press it vertically into the center of the clay block to create the holding slot. -
Wiggle for Width:
Gently wiggle the card forward and backward just a tiny bit to widen the slot slightly, ensuring a business card will fit easily after baking. -
Check Depth:
Ensure the slot is about half an inch deep so it can support paper securely, then carefully remove the card spacer straight up. -
Final Smooth:
Check the shape one last time to ensure pressing the slot didn’t bulge the sides out. Gently tap the sides with your ruler to realign them if needed.
Step 3: Baking and Finishing
-
Bake:
Preheat your oven according to your clay package instructions (usually 275°F or 130°C). Place the block on a parchment-lined tray and bake for 45-60 minutes. -
Cool Down:
Allow the piece to cool completely in the oven with the door cracking open. This gradual cooling helps prevent cracks in thicker pieces like this. -
Sand for Texture:
Once cool, use fine-grit sandpaper to lightly buff the surface. This removes fingerprints and enhances the matte, stone-like texture. -
Check Stability:
Sand the bottom specifically to ensure it sits perfectly flat on a table without wobbling. -
Seal (Optional):
If you want extra protection, apply a very thin layer of matte varnish. Avoid glossy finishes to maintain the realistic concrete aesthetic.
Pro Tip: Weighted Base
For a heavier, more premium feel, embed a few small metal washers or a clean stone inside the center of your clay block before shaping the final rectangle.
Place your favorite photo or a fresh business card in the slot and enjoy your chic new desk accessory
Tiny Charm Pendants
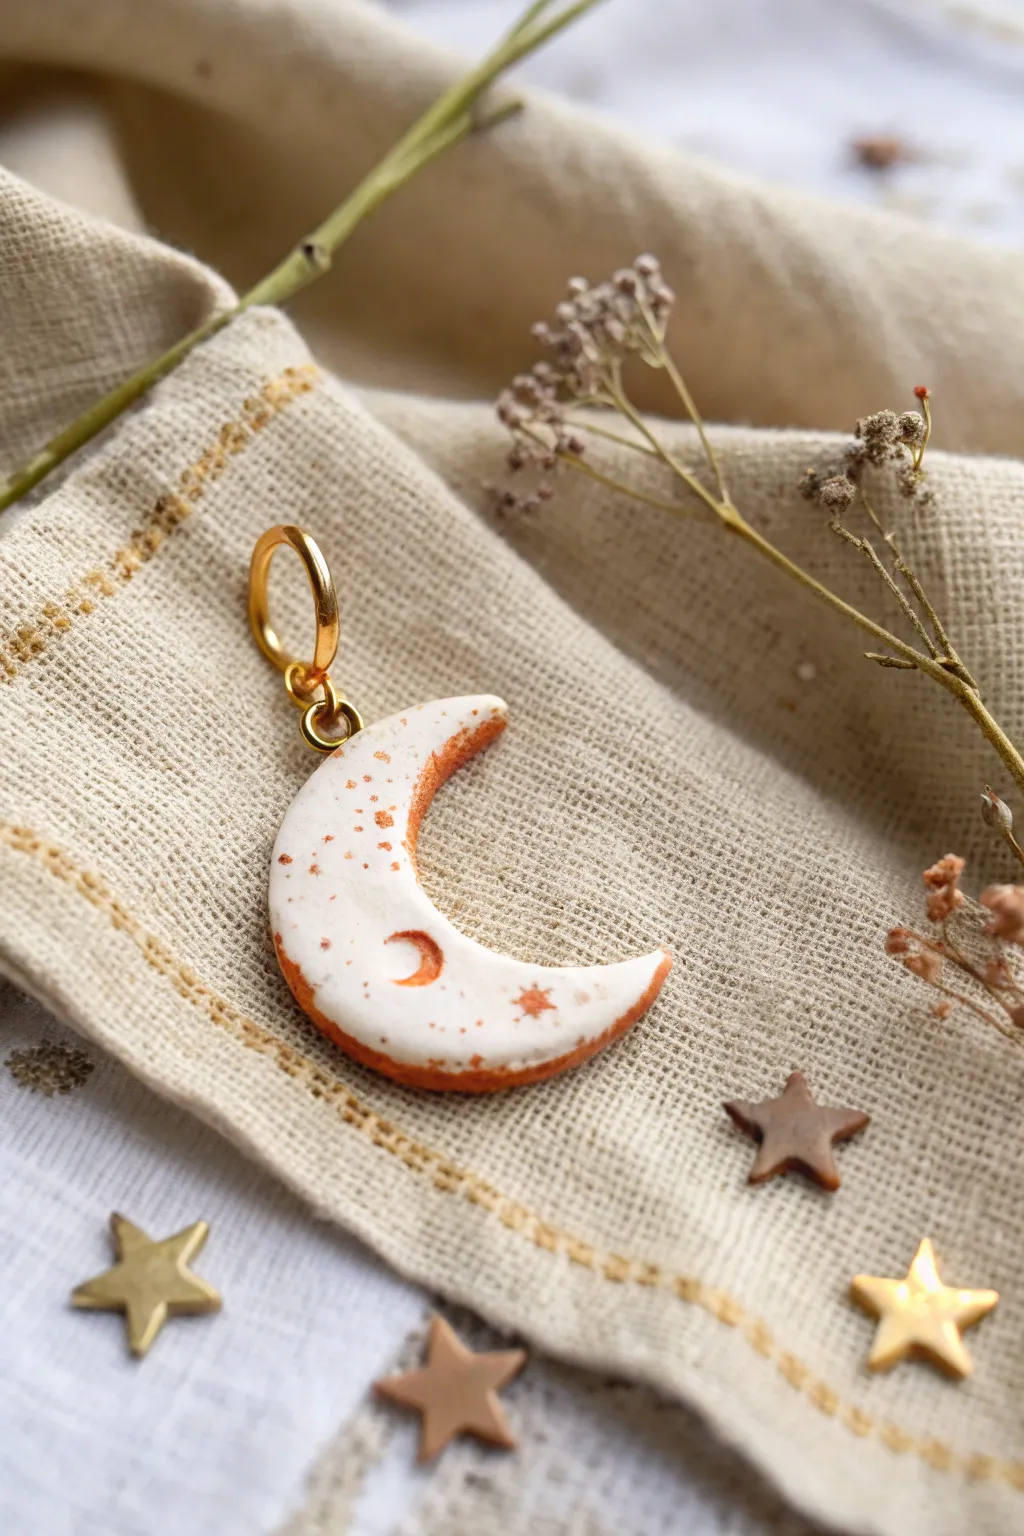
Capture the magic of the night sky with this dainty crescent moon pendant. Featuring rustic bronze detailing and delicate impressed motifs, this charm brings a touch of celestial whimsy to any necklace or bracelet.
Step-by-Step Guide
Materials
- White polymer clay
- Bronze or copper acrylic paint
- Glossy polyurethane varnish or glaze
- Small circle cutter (approx. 1 inch)
- Small circle cutter (approx. 0.75 inch) or a craft knife
- Tiny star stamp or finding
- Small straw or toothpick (for indentations)
- Gold jewelry jump ring (6-8mm)
- Rolling pin or pasta machine
- Fine detail paintbrush
- Paper towel or sponge
- Needle tool
Step 1: Shaping the Crescent
-
Condition the clay:
Start by warming a small amount of white polymer clay in your hands. Knead it until it becomes soft, pliable, and free of cracks. -
Roll the slab:
Roll the clay out onto a clean work surface. You want a consistent thickness of about 3-4mm—thick enough to be sturdy but light enough for jewelry. -
Cut the outer circle:
Use your larger circle cutter to punch out a clean, round disc of clay. -
Form the crescent:
Take the smaller circle cutter and position it overlapping the clay disc you just cut to create a moon shape. Adjust the overlap until you are happy with the crescent’s width, then press down to cut. -
Smooth the edges:
Gently run your finger along the cut edges of the fresh moon shape. This softens the sharp cut lines and gives the piece a more finished, organic look. -
Pierce the hanging hole:
Use a needle tool or a very small straw to create a hole at the top tip of the crescent. Make sure the hole is big enough for your jump ring but not too close to the edge to prevent breaking.
Step 2: Adding Celestial Details
-
Impress the mini moon:
Use the rounded end of a paintbrush handle or a very small circular tool to gently press a tiny crescent shape into the lower half of the pendant. -
Stamp the star:
If you have a tiny star stamp, press it near the bottom tip. If not, carefully use the tip of your needle tool to prick a small starburst pattern. -
Bake the clay:
Place your charm on a baking tile or parchment-lined tray. Bake according to your brand of polymer clay’s package instructions (usually around 275°F/130°C for 15-30 minutes). Let it cool completely.
Clean Edges Trick
Use a little cornstarch on your cutters before pressing into the clay. This prevents sticking and ensures your crescent shape releases perfectly without dragging.
Step 3: Decorating and Finishing
-
Apply the base color:
Dip a fine brush into bronze or copper acrylic paint. Carefully paint along the outer and inner edges of the crescent moon. -
Create the speckled effect:
While the brush still has a little paint, lightly dab or ‘stipple’ random spots across the white face of the moon. Focus on the areas around your impressed details. -
Highlight the impressions:
Use a tiny amount of the metallic paint to fill in the small impressed moon and star. I find wiping the surface quickly with a paper towel helps keep the paint just in the recesses. -
Let the paint dry:
Allow the acrylic paint to dry fully. This usually takes only about 10–15 minutes. -
Glaze the charm:
Apply a thin, even coat of glossy polyurethane varnish or clay glaze over the entire front and sides. This seals the paint and gives it that ceramic-like shine. -
Add the hardware:
Once the glaze is rock hard, use jewelry pliers to twist open your gold jump ring. Thread it through the top hole and twist it closed securely.
Faux Ceramic Look
Mix just a speck of black pepper or sand into the white clay before rolling. This adds tiny specks that mimic real stoneware pottery texture.
Wear your new celestial charm on a simple chain to let its subtle shimmer shine
Mini Food Bites and Sweets
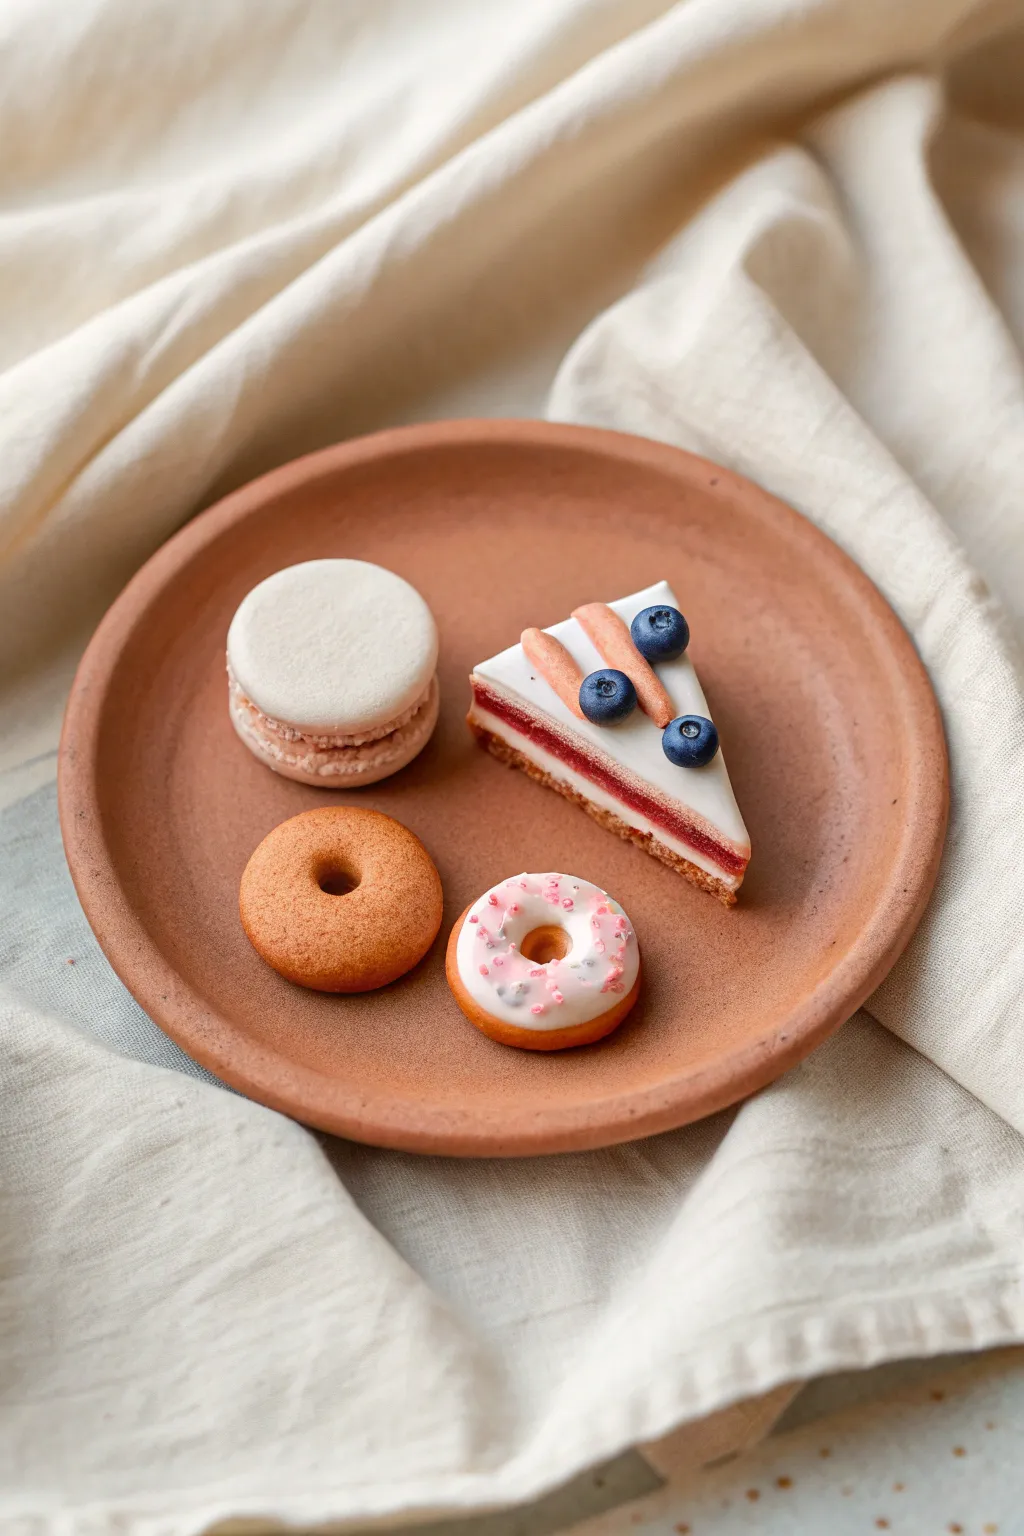
Create a delightful spread of tiny treats that look good enough to eat but live forever on your shelf. This tutorial guides you through sculpting a realistic macaron, cheesecake slice, and two styles of donuts, all displayed on a rustic terracotta-style plate.
Detailed Instructions
Materials
- Polymer clay (white, beige, translucent, berry red, terracotta/brown)
- Soft artist pastels (shades of ochre, brown, and pink)
- Liquid polymer clay (translucent and white)
- Small round cutter and blade tool
- Needle tool or toothpick
- Ball stylus tool
- Texture tools (sandpaper or toothbrush)
- Acrylic rolling pin
- Gloss varnish
Step 1: The Rustic Plate
-
Form the base:
Mix terracotta and a touch of brown clay to create an earthy ceramic color. Roll a medium ball and flatten it evenly into a disk about 2-3 inches in diameter. -
Shape the rim:
Gently pinch and pull the edges upwards and slightly outwards to create the plate’s lip. Keep the shape slightly imperfect to mimic hand-thrown pottery. -
Texture the surface:
Tap a piece of coarse sandpaper or a stiff brush lightly over the clay to give it a matte, unglazed ceramic texture. Bake this piece first according to your clay package instructions so you have a solid base.
Secret Ingredient
Mix translucent clay into your fruit toppings creates a realistic ‘juicy’ depth that solid colors can’t match.
Step 2: The Berry Macaron
-
Create the shells:
Mix white clay with a tiny speck of light pink. Roll a small sheet and cut two equal circles with your smallest cutter. Smooth the top edges into a dome shape. -
Add the ‘feet’:
Using a needle tool, gently tease the clay at the very bottom edge of each shell to create the crumbly texture known as ‘feet’. -
Pipe the filling:
Roll a small ball of slightly darker pink clay, flatten it, and sandwich it between the two shells. Press gently so the filling is just visible.
Tiny Utensils
Twist thin silver wire to create a miniature fork or spoon to place on the plate next to the cheesecake.
Step 3: The Berry Cheesecake
-
Layer the cake:
Roll out three layers: a thin textured beige layer for the crust, a thick layer of white mixed with translucent clay for the cheese, and a thin berry-red layer for the jam. Stack them: crust, cheese, jam, then another thin layer of cheese. -
Cut the slice:
Use a sharp blade to cut a clean triangular slice from your stack. Texture the crust area with a needle tool to simulate crumbs. -
Add toppings:
Roll tiny tubes of beige clay for the crust decoration on top. Create distinct blueberries by rolling tiny balls of dark blue clay and poking a small indentation in the center.
Step 4: The Donut Duo
-
Shape the donuts:
Roll two balls of beige clay (mix ochre into white). Flatten them slightly and use a small tool or the back of a paintbrush to poke a hole through the center, smoothing the edges. -
Texture the plain donut:
For the plain donut, use an old toothbrush to tap texture over the surface. Brush on shaved pastel chalk in golden brown to simulate a baked look. -
Frost the second donut:
Mix white liquid clay with white solid clay to create a spreadable frosting. Carefully apply this to the top of the second donut. -
Sprinkle details:
While the frosting is ‘wet’, scrape tiny bits of cured pink clay or use micro-beads to add sprinkles on top. -
Assemble and Bake:
arrange all your treats on the pre-baked plate. Bake the entire assembly again following package directions. Once cool, add a touch of gloss varnish to the fruit toppings and donut glaze for a moist look.
Display your miniature patisserie platter on a small stand or turn it into a charming magnet for your fridge
Tiny Dollhouse-Style Furniture
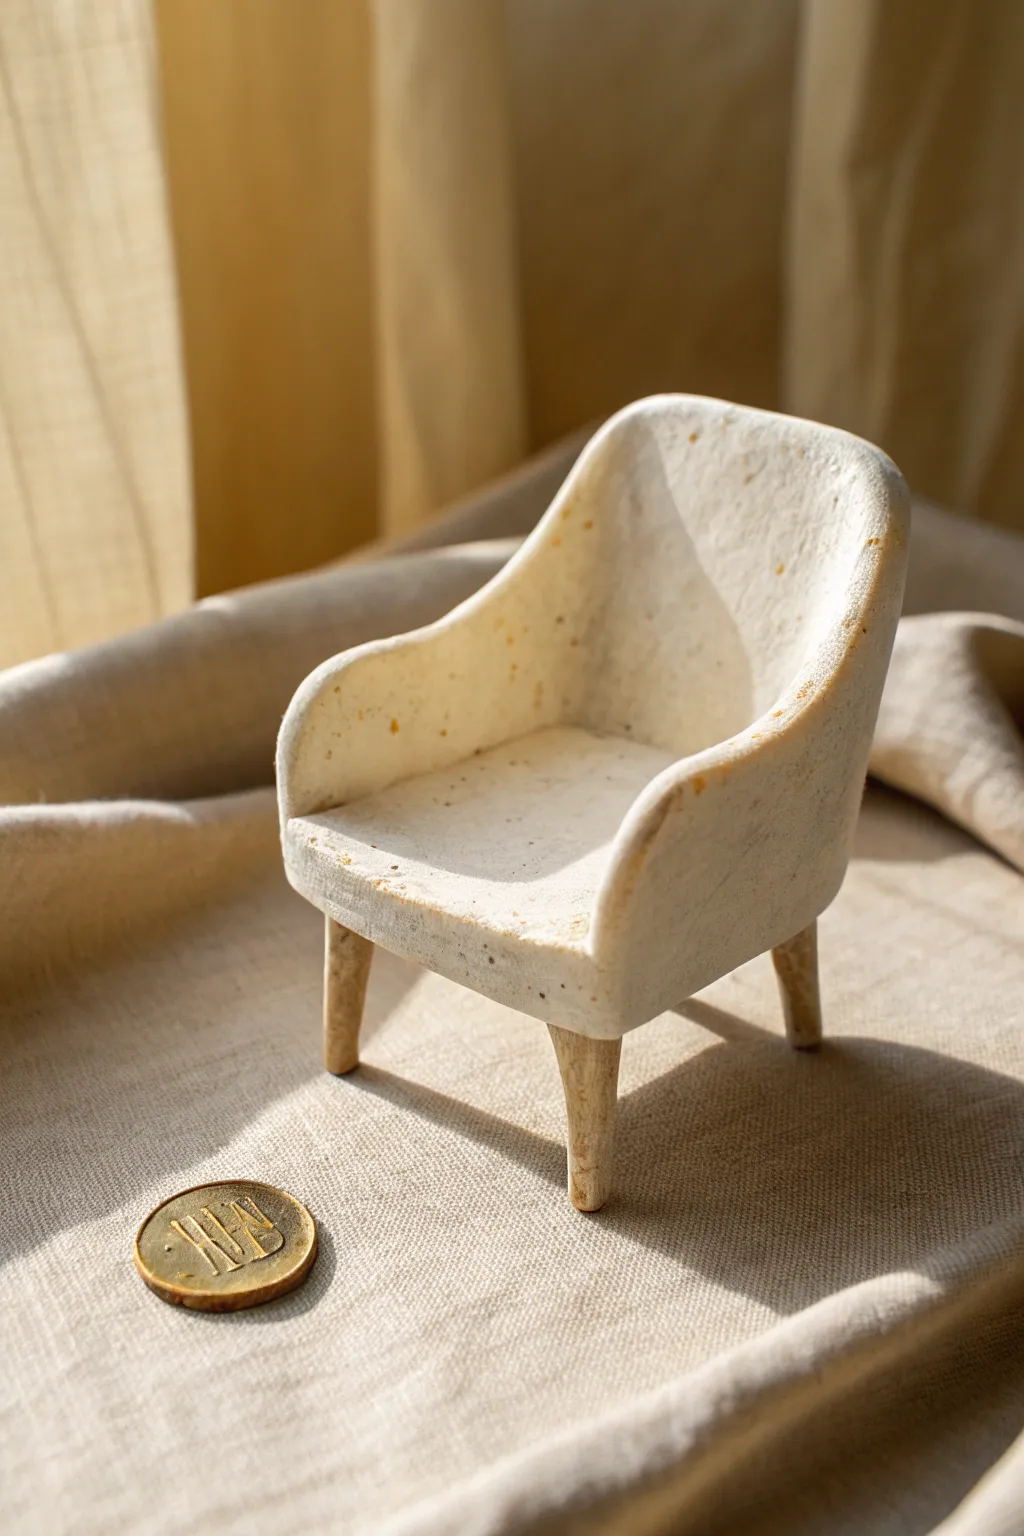
This charming little armchair brings a modern, organic touch to any dollhouse or miniature collection. Its speckled, stone-like texture and gentle curves give it a deceptively high-end look created entirely from clay.
How-To Guide
Materials
- White polymer clay
- Translucent polymer clay
- Fine grit sandpaper or crushed black pepper (for specks)
- Acrylic rolling pin
- Clay blade or craft knife
- Needle sculpting tool
- Wooden toothpicks or tiny dowels (for legs)
- Beige or light brown acrylic paint
- Fine paintbrush
- Matte varnish
- Oven for baking
Step 1: Preparing the Faux Stone Clay
-
Mix the Base Clay:
Start by conditioning a block of white polymer clay until it is soft and pliable. Mix in a small amount of translucent clay—about a 4:1 ratio of white to translucent—to give the finished piece a slightly less opaque, more stony depth. -
Create the Speckles:
To achieve that organic, gritty texture seen in the photo, sprinkle a pinch of finely ground black pepper or dried used coffee grounds onto your clay. Fold the clay over and knead it thoroughly until the specks are evenly distributed throughout the batch. -
Roll Out the Slab:
Using your acrylic roller, flatten the clay into a consistent slab about 3-4mm thick. This thickness ensures the chair looks sturdy but not clunky.
Step 2: Sculpting the Chair Form
-
Cut the Base Shape:
Use your clay blade to cut a rounded rectangle for the seat. The edges shouldn’t be sharp; use your fingertip to gently soften and round off the cut lines. -
Form the Backrest:
Cut a second, larger piece of clay for the back and sides. This should be a wide strip that can wrap around the seat. Taper the top edge slightly so it gets thinner toward the top rim, mimicking a delicate ceramic edge. -
Attach the Backrest:
Curve the backrest piece around three sides of the seat base. I find it easiest to work on a piece of parchment paper here so I can rotate the piece without squishing it. -
Blend the Seams:
Where the backrest meets the seat base, use a sculpting tool to drag clay across the seam, joining them securely. Smooth this join with your finger until it is completely invisible. -
Shape the Curves:
Gently press the sides inward to create the armrest curves. The transition from the armrest to the back should be fluid and sloping, not angular. -
Texture the Surface:
Take a toothbrush or a ball of aluminum foil and lightly tap it all over the surface. This removes fingerprints and enhances the rough, stone-cast appearance.
Smoother Curves
Use a little baby oil on your finger when smoothing seams. It melts the clay slightly, erasing tool marks instantly.
Step 3: Adding Legs and Finishing
-
Prepare the Legs:
Cut four short lengths of toothpick or tiny wooden dowel, each about 1cm long. You can also roll small tapered snakes of beige clay if you prefer all-clay construction, but wood adds stability. -
Insert the Legs:
Carefully press the wooden legs into the underside of the chair seat. Ensure they are angled slightly outward for a mid-century modern stance. Check that the chair sits level. -
Paint the Legs:
If using wood, paint the legs with a wash of beige or light brown acrylic to blend them slightly with the seat color while maintaining a natural wood look. -
Bake the Piece:
Place the chair on a ceramic tile or baking sheet. Bake according to your polymer clay manufacturer’s instructions (usually around 275°F/130°C for 15-30 minutes). Let it cool completely. -
Add Weathering:
Once cool, use dry brush technique with a tiny amount of brown paint on the edges and armrests to mimic wear and enhance the texture. -
Seal the Work:
Finish with a coat of matte varnish. Avoid glossy finishes, as the goal is a natural, unglazed pottery look.
Comfort Upgrade
Sew a tiny cushion using a scrap of linen approximately the size of a postage stamp to place on the seat for added cozy realism.
Now you have a stylish, modern piece of furniture ready for a tiny inhabitant to relax in