If you’re in the mood for something cute and a little silly, a clay frog is one of my favorite quick wins at the studio table. Here are my go-to clay frog ideas, starting with the classics and drifting into more playful, storybook-style builds.
Classic Chubby Clay Frog
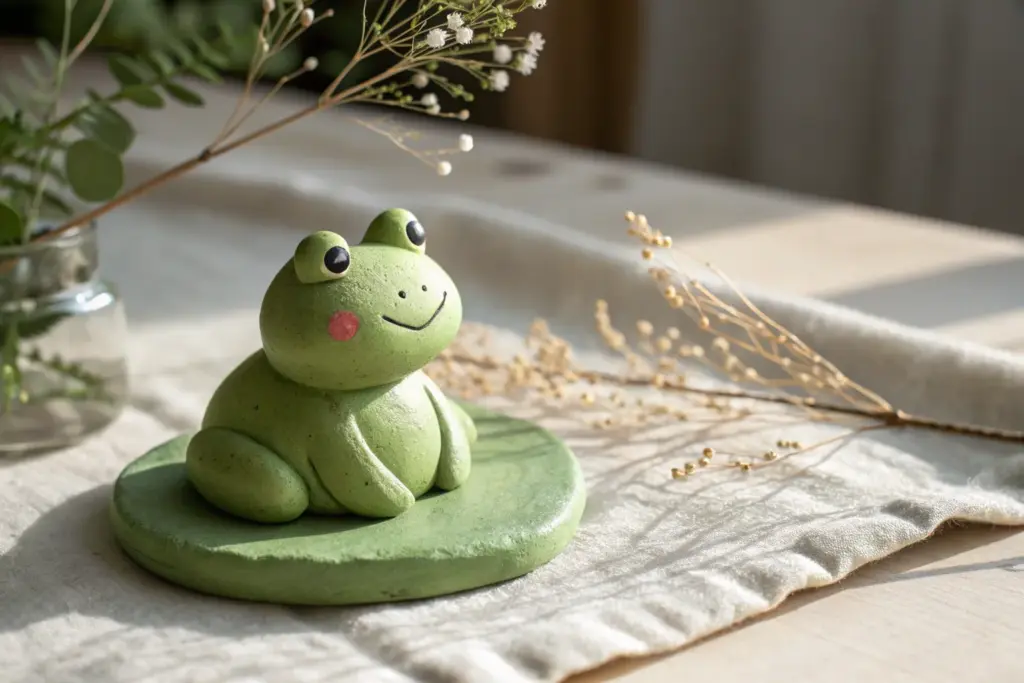
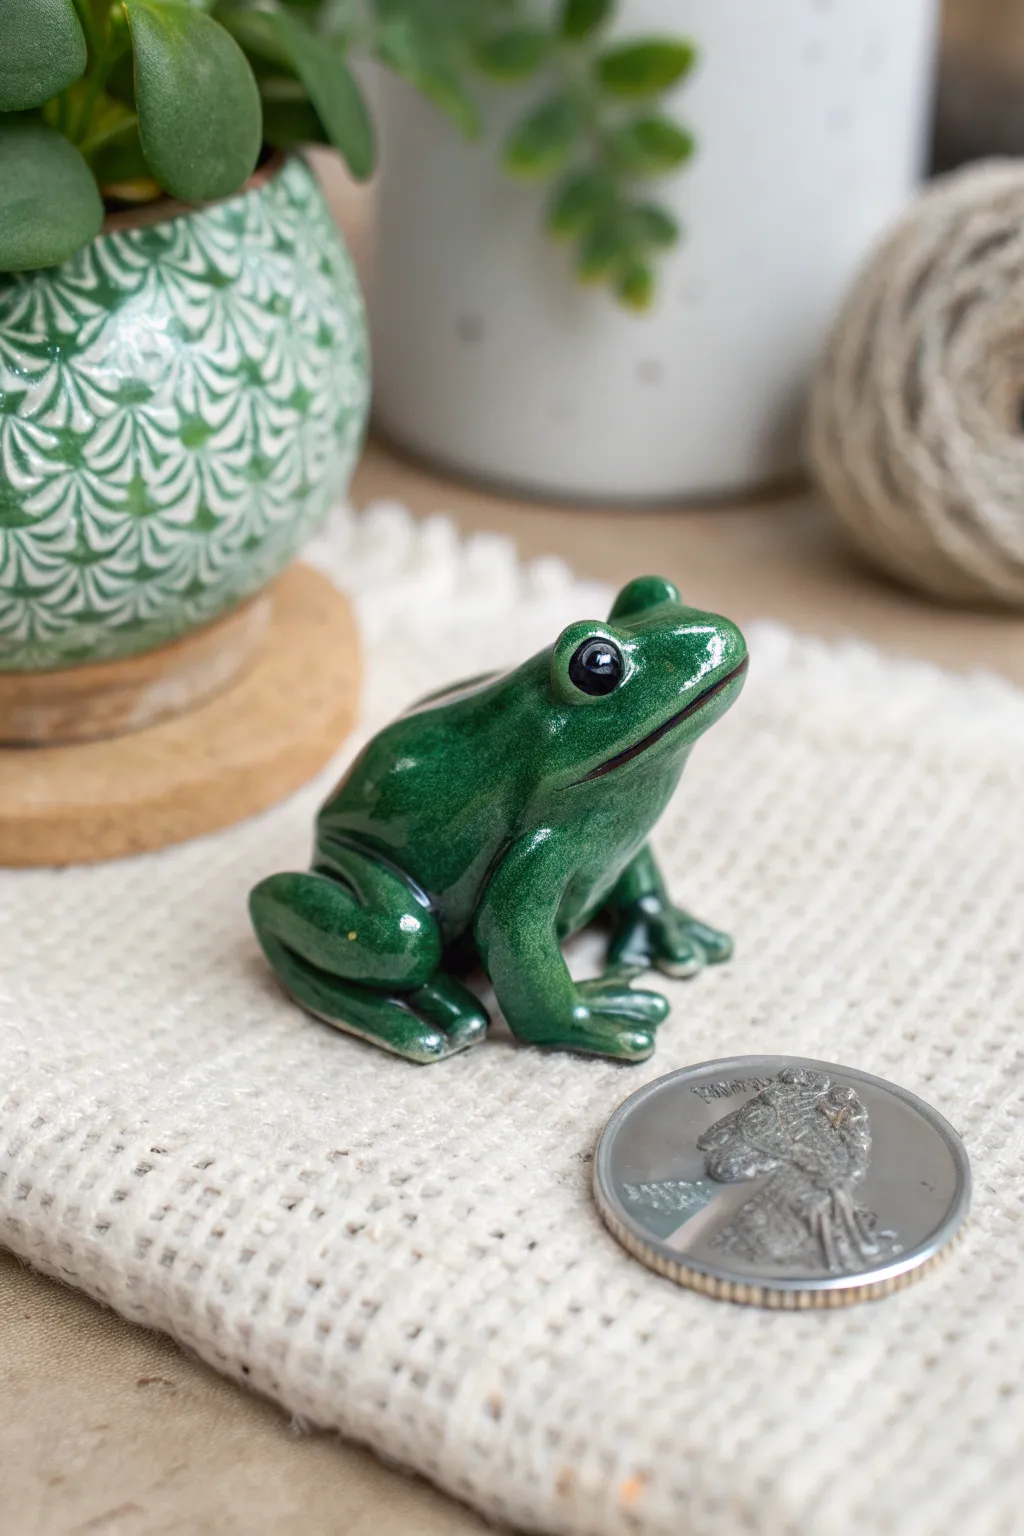
This charmingly rotund frog captures a sense of quiet contentment with its simple, rounded forms and earthy green finish. The project focuses on building volume with basic shapes and adding personality through careful facial sculpting and texturing.
Step-by-Step Guide
Materials
- Air-dry clay or polymer clay (white or light grey)
- Acrylic paints (olive green, dark green, black, white)
- Matte sealant or varnish
- Sculpting tools (needle tool, ball stylus)
- Aluminum foil (for armature)
- Water and sponge (for smoothing)
- Fine grit sandpaper
- Stiff bristle brush (for texture)
Step 1: Forming the Core
-
Create the armature:
Begin by crumpling aluminum foil into a tight, egg-shaped ball. This will form the bulk of the frog’s chubby body, saving clay and reducing weight. Compressing it tightly helps prevent air pockets. -
Cover with clay:
Roll out a thick sheet of your chosen clay. Wrap it completely around the foil core, ensuring an even layer about 1/4 inch thick. Seal any seams by dragging clay across them with your thumb. -
Shape the body:
Roll the clay-covered form gently on your work surface to smooth it. Shape it into a pear-like form, slightly wider at the bottom to give the frog a distinct ‘sitting’ posture, but keep the transition to the head area subtle and thick. -
Smooth the surface:
Dip a sponge or your finger in a little water and buff out any fingerprints or bumps. A smooth base is crucial for this minimalist style.
Cracking Clay?
If you see small cracks appearing as the clay dries, make a ‘slurry’ paste by mixing a little clay with water. Paint this into the cracks and smooth it over immediately.
Step 2: Sculpting Features
-
Add the eye mounds:
Roll two medium-sized balls of clay. Place them on top of the head area, spacing them slightly apart but ensuring they are integral to the skull shape. Blend the bottom edges of these balls seamlessly into the main body using a modeling tool. -
Form the eyes:
Inside each mound, press a smaller indentation. Roll two tiny spheres for the eyeballs and press them into these sockets. They should protrude slightly but look protected by the mounds. -
Create the arms:
Roll two thick sausages of clay for the arms. Terminate one end into a rounded point (no distinct fingers are needed for this stylized look). Attach these vertically along the sides of the belly so they hug the rotund form. -
Add the feet:
Fashion two flat, wide semi-circles for the feet. Use a knife tool to mark two simple lines on each to suggest toes. Slide these under the bottom front of the body so the frog appears to be resting on them. -
Carve the smile:
Using a needle tool or a thin blade, carve a long, wide smile that stretches almost from one side of the face to the other. Curve the ends upward slightly into the cheeks to create that satisfied expression. -
Final smoothing:
Go over all joints—especially where the arms meet the body—with a damp brush to ensure everything looks like one cohesive piece.
Step 3: Finishing and Painting
-
Dry and sand:
Allow the sculpture to dry completely (24-48 hours depending on clay type). I like to give it a quick pass with fine-grit sandpaper to remove any lingering surface imperfections before painting. -
Base coat:
Paint the entire frog with a light olive green acrylic. You may need two coats for full opacity. -
Add dimension:
Mix a slightly darker shade of green. Using a technique called ‘dry bushing’ (wiping most paint off the brush), gently stroke over the textured areas and curves to emphasize the roundness. -
Detail the face:
Paint the eyeballs black with a tiny white reflection dot. Use a very fine liner brush and watered-down black paint to darken the carved smile line. -
Apply speckles:
Dip a stiff toothbrush or a splatter brush into diluted brown or dark green paint. Flick tiny speckles onto the frog’s back and sides to mimic organic skin texture. -
Seal the work:
Once the paint is fully dry, apply a matte varnish. Avoid glossy finishes, as the matte look contributes to the natural, stony aesthetic of the piece.
Garden Safe
To make this frog suitable for outdoor decor, use polymer clay or kiln-fired ceramic instead of air-dry clay, and seal with a heavy-duty outdoor polyurethane.
Place your new friend on a sunny windowsill where his contented smile can be seen every day


Frog on a Lily Pad Base
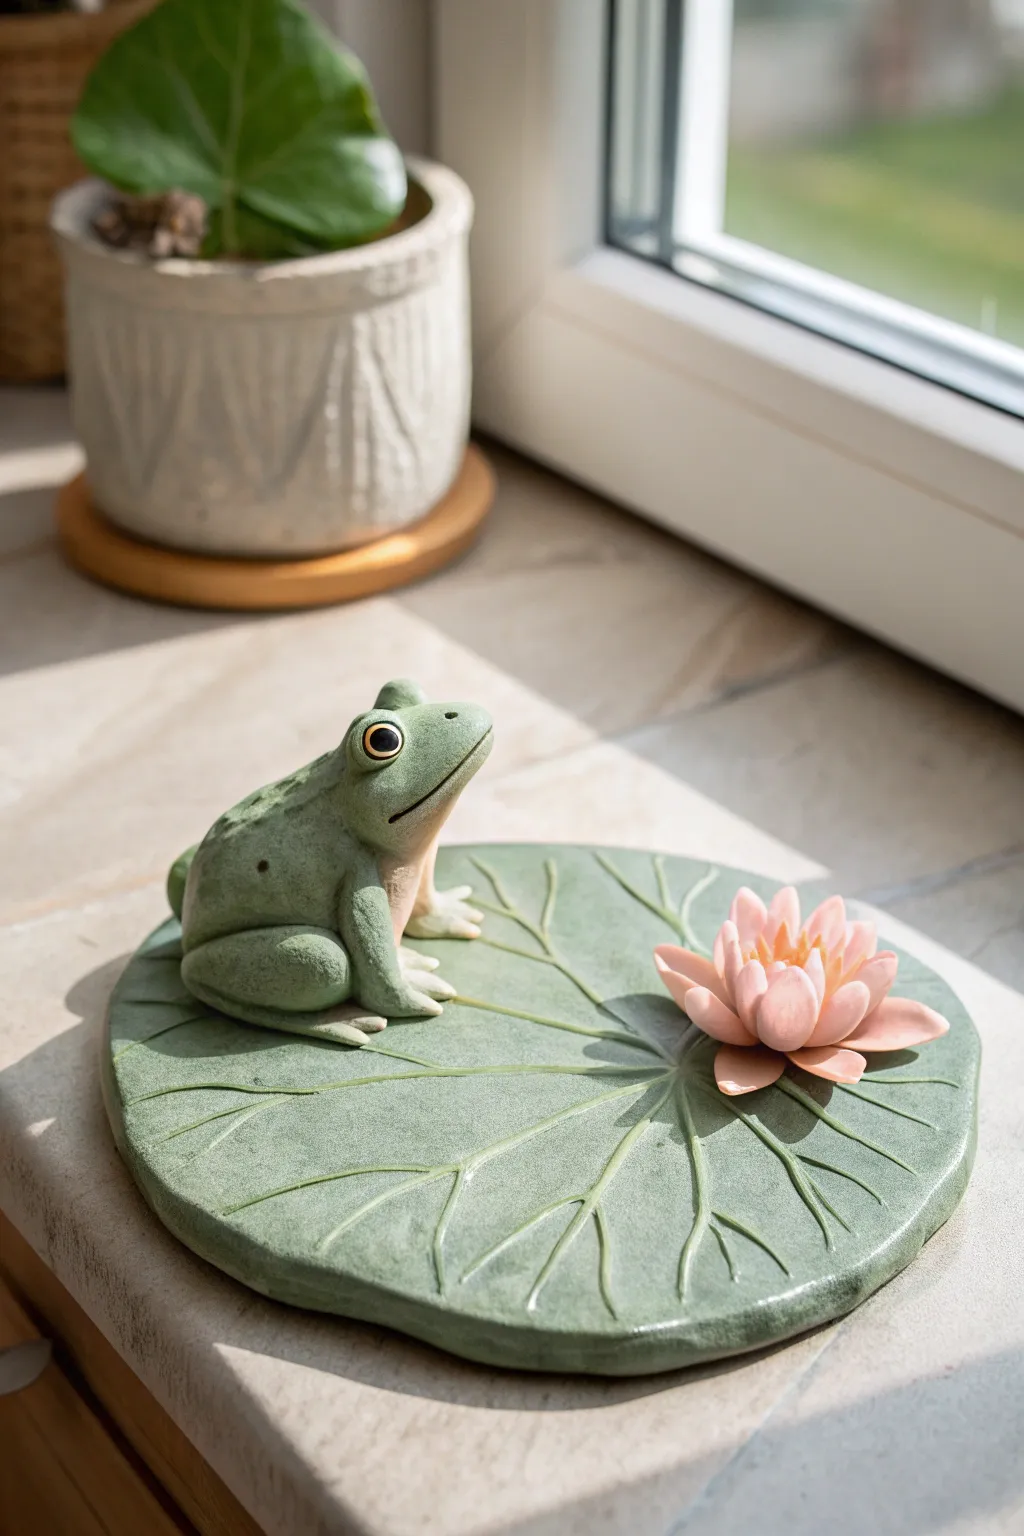
This charming sculpture features a contemplative green frog resting on a realistically textured lily pad, accompanied by a delicate pink lotus flower. The piece captures a serene moment in nature, combining smooth sculptural forms with detailed carving work.
How-To Guide
Materials
- Polymer clay or air-dry clay (Green, White, Pink, Yellow/Orange)
- Clay sculpting tools (needle tool, ball stylus, rubber shaper)
- Acrylic paints (Dark Green, Light Green, Cream, Pink, Black, Gold/Yellow)
- Paintbrushes (fine detail and flat shader)
- Rolling pin or pasta machine
- Texturing tool or toothpick
- Circle cutter or bowl (approx. 5-6 inches diameter)
- Aluminum foil (for armature)
- Matte varnish
Step 1: Sculpting the Lily Pad Base
-
Prepare the clay slab:
Begin by conditioning your green clay and rolling it out into a flat, even slab about 1/4 inch thick. You want it substantial enough to support the frog without warping. -
Cut the shape:
Use a large circle cutter or trace around a small bowl to cut out a perfect circle. Once cut, gently press your thumb into one edge to create the characteristic ‘V’ notch of a lily pad. -
Smooth the edges:
Run a damp finger (for air-dry clay) or a touch of baby oil (for polymer) along the cut edges to soften them. The rim should look organic, not sharp. -
texture the veins:
Using a needle tool or a dull knife, gently score veins radiating from the center of the pad out towards the edges. Make the lines deeper near the center and faintly fade them out as they reach the rim. -
Add secondary veins:
Create smaller, branching veins off the main lines to add realism. Keep your touch light so you don’t cut all the way through the clay.
Eye Placement Trick
Position the eyes slightly further apart than you think they should be. This gives the frog a much cuter, more characterful expression compared to close-set eyes.
Step 2: Forming the Frog
-
Create the body armature:
Ball up a small piece of aluminum foil into a teardrop shape. This saves clay and makes the frog lighter. -
Cover the body:
Sheet out green clay and wrap it completely around the foil core. Smooth all seams until the surface is uniform. -
Shape the head:
Pinch the narrower end of the teardrop to define the head. Use your thumb to create a slight indentation for the neck area just behind the head. -
Add the hind legs:
Roll two thick logs of green clay. Bend them into a ‘V’ shape and attach them to the sides of the body. Blend the seams at the top into the back, leaving the thigh muscle distinct. -
Form the front legs:
Roll two smaller cylinders for the front arms. Attach them under the chest area, positioning them so they prop the frog up slightly. -
Sculpt the feet:
Flatten the ends of all four legs slightly and use a knife tool to cut distinct toes—four for the front, five for the back. Gently round the tips of each toe. -
Add facial details:
Use a needle tool or blade to slice a wide, curved line for the mouth. Roll two small balls of green clay for the eye sockets and attach them to the top of the head. -
Make the eyes:
Press a small indentation into each eye socket. Roll tiny balls of white clay, place them inside, and add a minuscule black pupil to the center. Outline the eye with a thin rope of gold or yellow clay for a realistic pop.
Glossy Water Effect
After sealing, use UV resin or high-gloss varnish to add ‘puddles’ or random droplets on the lily pad leaf for a realistic wet effect.
Step 3: Crafting the Lotus & Assembly
-
Form the petals:
Roll pink clay into a thin log and cut small, equal segments. Flatten each into a teardrop shape, pinching the tip to make it pointed. -
Assemble the flower center:
Start with a small yellow center. Attach the smallest petals around it tightly, cupping them upwards. -
Add outer petals:
Continue adding layers of slightly larger petals around the center, letting the outer ones open up more widely like a blooming flower. -
Position the elements:
Place the frog on one side of the lily pad and the lotus flower on the opposite side. If using polymer clay, use a dab of liquid clay to bond them; for air-dry clay, score and slip the contact points. -
Texture the skin:
I like to take a stiff bristle brush or a piece of sandstone and gently tap it over the frog’s green skin (avoiding the eyes and belly) to create a subtle, bumpy texture. -
Final finish:
Bake or dry the sculpture according to your clay’s specific instructions. Once hardened, apply a matte varnish to protect the piece, or spot-gloss just the eyes and the water droplets on the pad for a wet look.
Now you have a peaceful pond companion ready to sit on your windowsill and catch some sun.


Bug-Eyed Kawaii Frog Mini
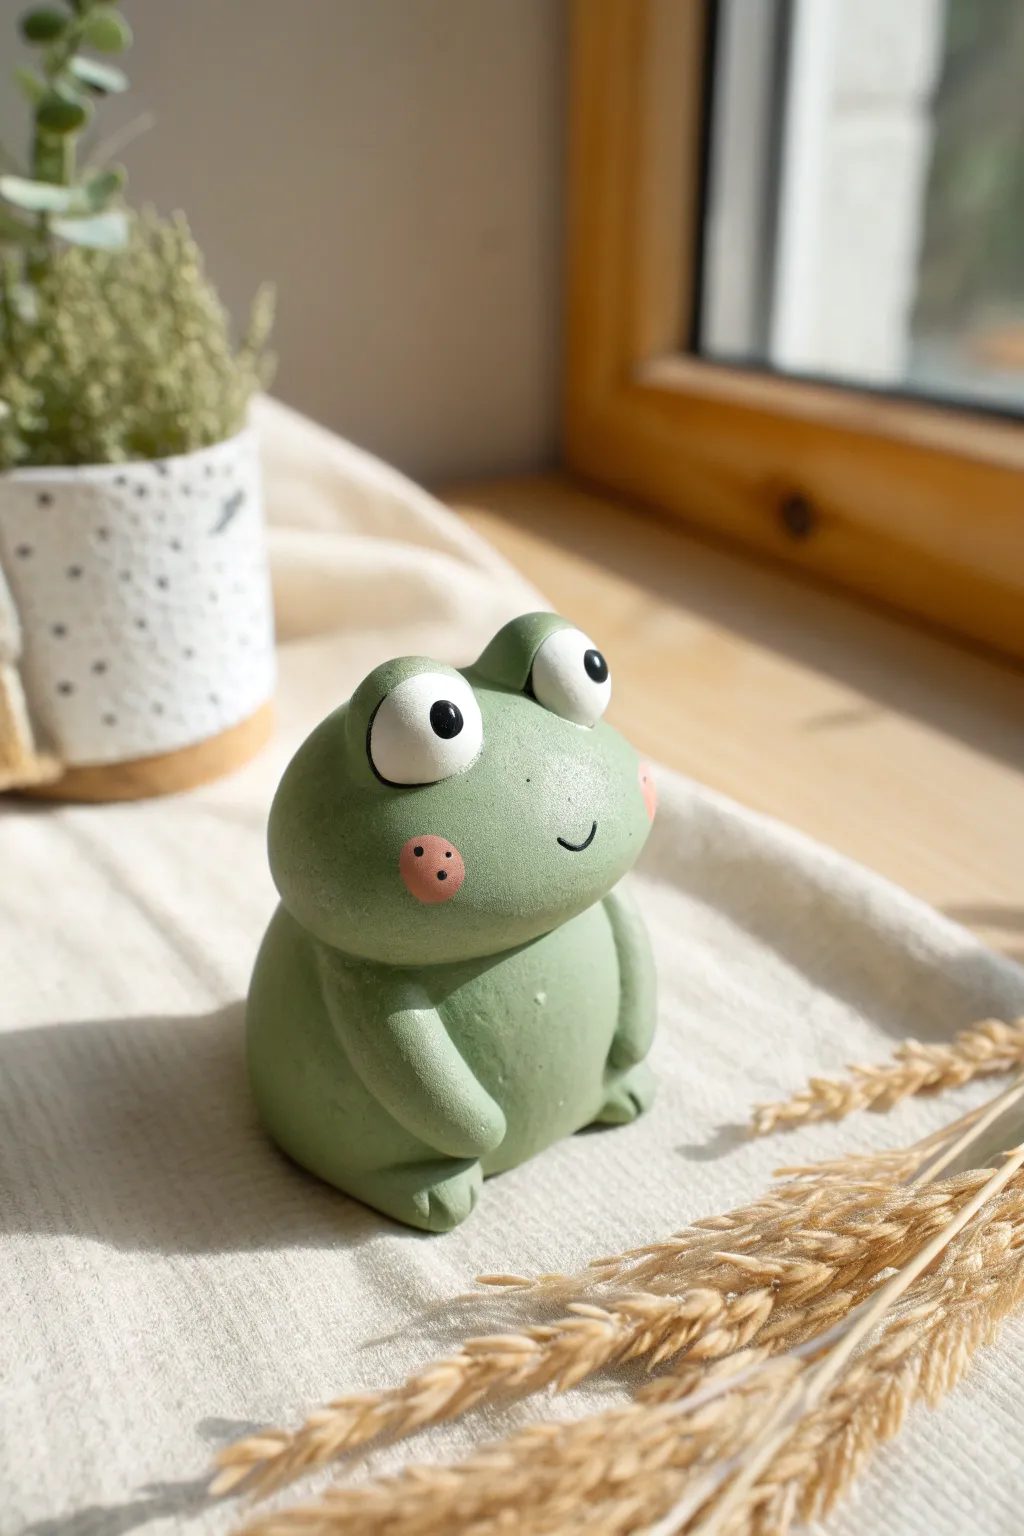
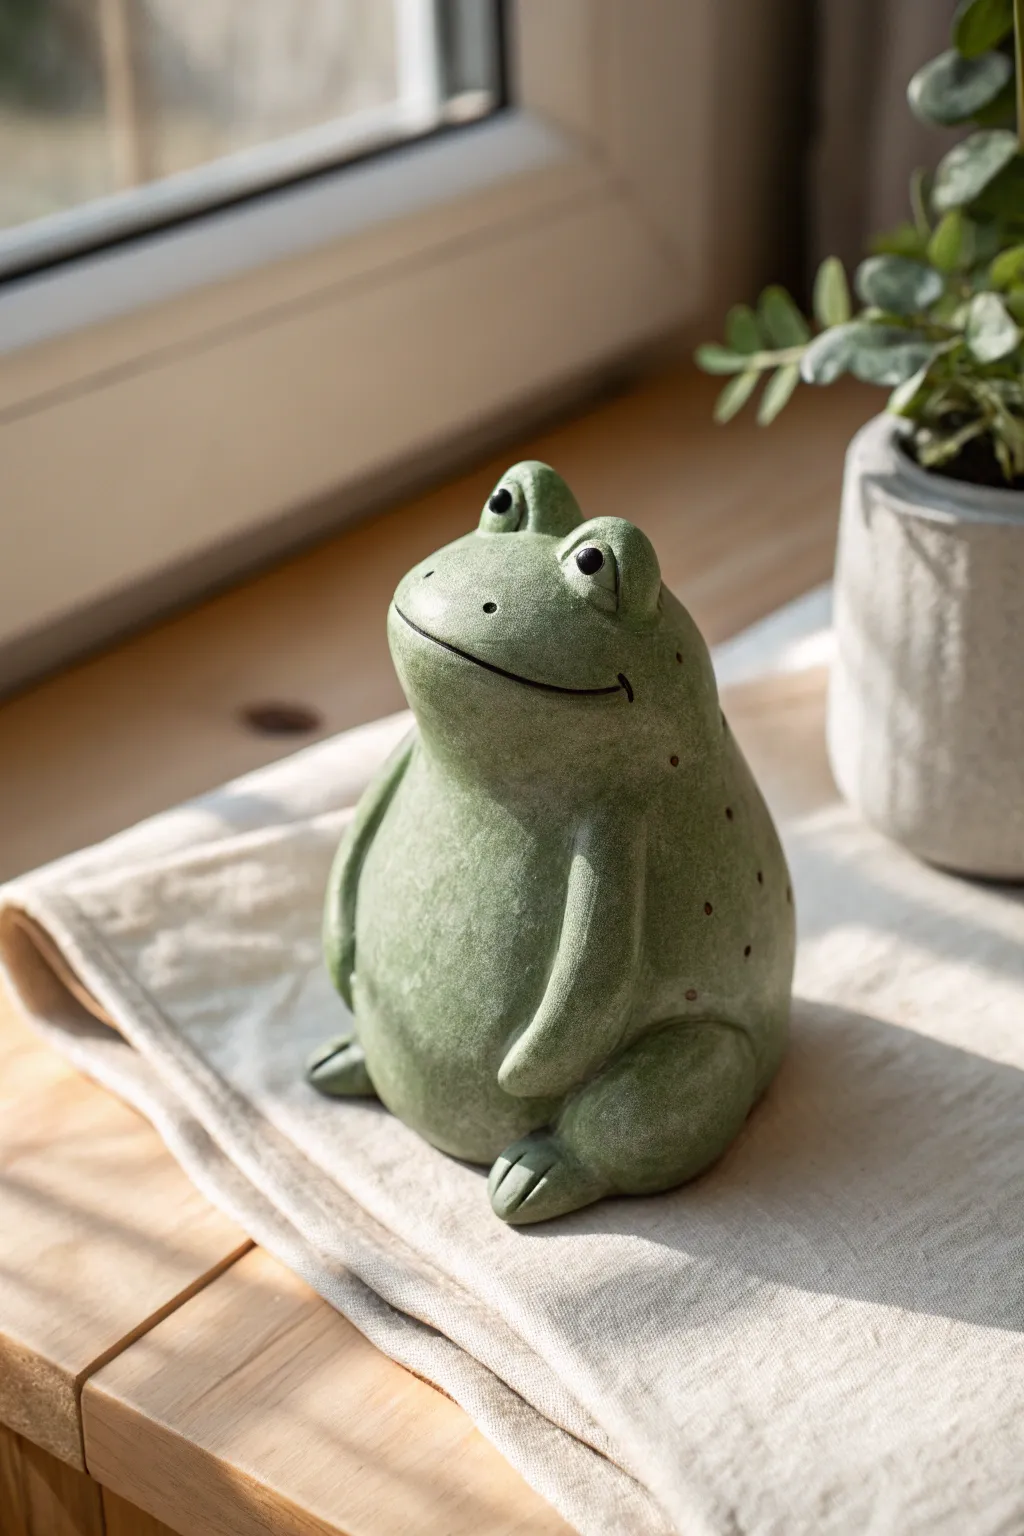
Embrace the cute aesthetic with this adorably chubby frog figurine, featuring oversized bug eyes and sweet rosy cheeks. Its matte, pastel green finish makes it a perfect little companion for your desk plants or windowsill.
Step-by-Step Guide
Materials
- Green polymer clay (or air-dry clay)
- White polymer clay
- Black polymer clay (or black acrylic paint)
- Pink polymer clay (or pink acrylic paint/chalk pastel)
- Needle tool or toothpick
- Ball stylus tool
- Clay roller or rolling pin
- Baking sheet and oven (if using polymer)
- Fine-grit sandpaper (optional)
- Matte varnish
Step 1: Shaping the Base
-
Prepare the green clay:
Begin by conditioning the green clay in your hands until it becomes soft and pliable. If the tone is too bright, you can mix in a tiny bit of white or beige to achieve that pastel, earthy sage green seen in the photo. -
Form the body:
Roll a large chunk of the green clay into a smooth ball about the size of a golf ball. -
Shape the torso:
Gently press the ball onto your work surface to create a flat base so the frog sits upright without wobbling. Then, subtly taper the top part just a little to differentiate the head area from the chubby belly resulting in a gumdrop shape. -
Smooth imperfections:
Run your finger lightly over the clay to smooth out any fingerprints or cracks. Getting the surface smooth now is much easier than fixing it after it hardens.
Uneven Eyes?
If your white eye balls aren’t matching perfectly in size, roll them both into a single log first, cut it exactly in the middle, and then roll the two halves into balls.
Step 2: Creating the Face
-
Create eye sockets:
Use a large ball stylus or the back of a paintbrush to press two shallow indentations on top of the head where the eyes will sit. This helps anchor them. -
Form the eyes:
Roll two balls of white clay. These should be fairly large relative to the body to get that bug-eyed look. Make sure they are equal in size. -
Attach the eyes:
Press the white balls firmly into the indentations you made earlier. Blend the bottom edges slightly into the green clay if you want a seamless look, or leave them resting on top for dimension. -
Add pupils:
Take two minuscule pieces of black clay, roll them into dots, and press them onto the center of the white eyes. Alternatively, you can paint these on after baking for more precision. -
Make the cheeks:
Flatten two small discs of pink clay. Press these onto the face just below the eyes. -
Detail the cheeks:
Using a needle tool, poke three tiny dots into each pink cheek for texture. -
Carve the mouth:
Use a needle tool or a small curved blade to gently carve a simple ‘u’ shape smile between the cheeks. I like to press a little deeper at the corners to make the expression friendlier.
Step 3: Limbs and Finishing
-
Make the arms:
Roll two evenly sized logs of green clay for the arms. They should be slightly thicker at the bottom (the hand end) and thinner at the top. -
Attach the arms:
Press the arms onto the sides of the body. Angle them so the hands rest gently on the frog’s belly. -
Add hands and feet details:
Use your needle tool or a knife to press two indentations into the end of each arm to create fingers. Do the same for two small flattened balls of green clay attached at the very bottom front for the feet. -
Final smooth:
Do a final check around the seams where arms connect to the body. Use a blending tool or your finger to smooth the clay together so parts don’t fall off later. -
Bake or dry:
If using polymer clay, bake according to the package instructions (usually around 275°F/135°C for 15-30 minutes). If using air-dry clay, let it sit in a dry spot for 24-48 hours. -
Varnish:
Once fully cured and cooled, apply a thin coat of matte varnish to protect the surface and remove that ‘raw clay’ look without making it shiny.
A Rosy Glow
For a softer look, skip the pink clay cheeks. Instead, use a dry paintbrush to gently dust pink chalk pastel powder onto the cheeks before baking.
Now you have a charming little amphibian friend ready to bring a smile to anyone’s face


Tiny Frog Pocket Pal
This charming little amphibian is the perfect size to keep you company on a desk or travel in your pocket for good luck. Sculpted from polymer clay and finished with a high-gloss glaze, it mimics the wet, shiny look of a real frog sitting by a pond.
Step-by-Step Tutorial
Materials
- Emerald green polymer clay
- Small amount of white polymer clay
- Small amount of black polymer clay
- Sculpting tools (needle tool, smooth ball stylus)
- Rubbing alcohol and a small brush
- High-gloss polyurethane varnish or UV resin
- Detail paintbrush
- Designated craft oven or toaster oven
Step 1: Sculpting the Body
-
Prepare the Core:
Start by conditioning your emerald green clay until it is soft and pliable. Roll a piece about the size of a large grape into a smooth ball, then gently elongate it into a teardrop shape. This will form the main body and head. -
Shape the Head:
Press lightly on the narrow end of the teardrop to distinguish the head from the back. Smooth the transition so it remains organic, but ensure the nose area tapers to a gentle point. -
Form the Rear Legs:
Roll two smaller balls of green clay for the powerful thigh muscles. Flatten them slightly and press them against the sides of the rear body. Use a silicone tool or your finger to blend the seams completely into the torso so the legs look integrated, not just stuck on. -
Add the Rear Feet:
Create two tiny flattened ovals for the feet. Using a needle tool, gently cut small notches to define the toes. Attach these to the bottom of the thigh pieces, blending the heel joint carefully. -
Sculpt the Front Legs:
Roll two thin ‘snakes’ of green clay for the front arms. These should be much thinner than the back legs. Attach them just under the head area sitting vertically. -
Create Front Toes:
Flatten the ends of the front legs slightly and use your needle tool to separate distinct toes. I find it helps to splay them out slightly so the frog looks like it is gripping the surface.
Sticky Situation?
If the clay gets too soft or sticky while sculpting the tiny toes, pop the crude shape in the fridge for 10 minutes. The firmer clay will hold detail much better without smushing.
Step 2: Adding Details and Baking
-
Create Eye Sockets:
Use a ball stylus to make two distinct indentations on the top of the head where the eyes will go. These should be prominent, as frogs have naturally bulging eyes. -
Form the Eyes:
Roll two tiny balls of white clay and place them into the sockets. Carefully press a smaller, flat circle of black clay onto the center of each white ball to create the pupil. -
Eyelids and Expression:
Roll an extremely thin thread of green clay to act as the eyelid. Place this over the top half of the eye to give it that sleepy, realistic frog expression. Blend the green clay into the head skin. -
Carve the Mouth:
Use a needle tool or a thin blade to carefully score a long, curving line for the mouth. Start from the front and curve it gently downwards toward the ‘cheeks’ to define the jawline. -
Smooth the Surface:
Before baking, brush the entire piece lightly with a little rubbing alcohol. This removes fingerprints and creates a professional, seamless texture. -
Bake the Clay:
Place your frog on a tile or parchment paper. Bake according to your clay manufacturer’s instructions—usually around 275°F (135°C) for 15-20 minutes, given the thickness.
Natural Texture
Before baking, lightly tap the back of the frog with an old toothbrush or stiff paintbrush. This adds a subtle skin texture that looks incredible under the glossy topcoat.
Step 3: Finishing Touches
-
Cool and Clean:
Let the frog cool completely inside the oven to prevent cracking. Once cool, wipe it down with a damp cloth to ensure no dust is stuck to the surface. -
Paint the Mouth Line:
Mix a tiny amount of black or dark brown acrylic paint with water. Carefully run a fine brush along the mouth indentation to darken it, wiping away excess paint from the surface quickly. -
Highlight the Skin:
If you want extra depth, you can dry-brush a slightly lighter shade of green on the ridges of the back and the tops of the legs. -
Apply the Glaze:
Coat the entire frog with a high-gloss polyurethane varnish or UV resin. This is the secret step that makes the frog look ‘wet’ and alive. Apply two thin coats rather than one thick one. -
Final Cure:
Let the varnish dry fully (or cure under a UV lamp if using resin). Your tiny pocket pal is now ready for adventure.
Enjoy the company of your new, incredibly low-maintenance amphibious friend.

The Complete Guide to Pottery Troubleshooting
Uncover the most common ceramic mistakes—from cracking clay to failed glazes—and learn how to fix them fast.
Clay Frog Charm or Pendant
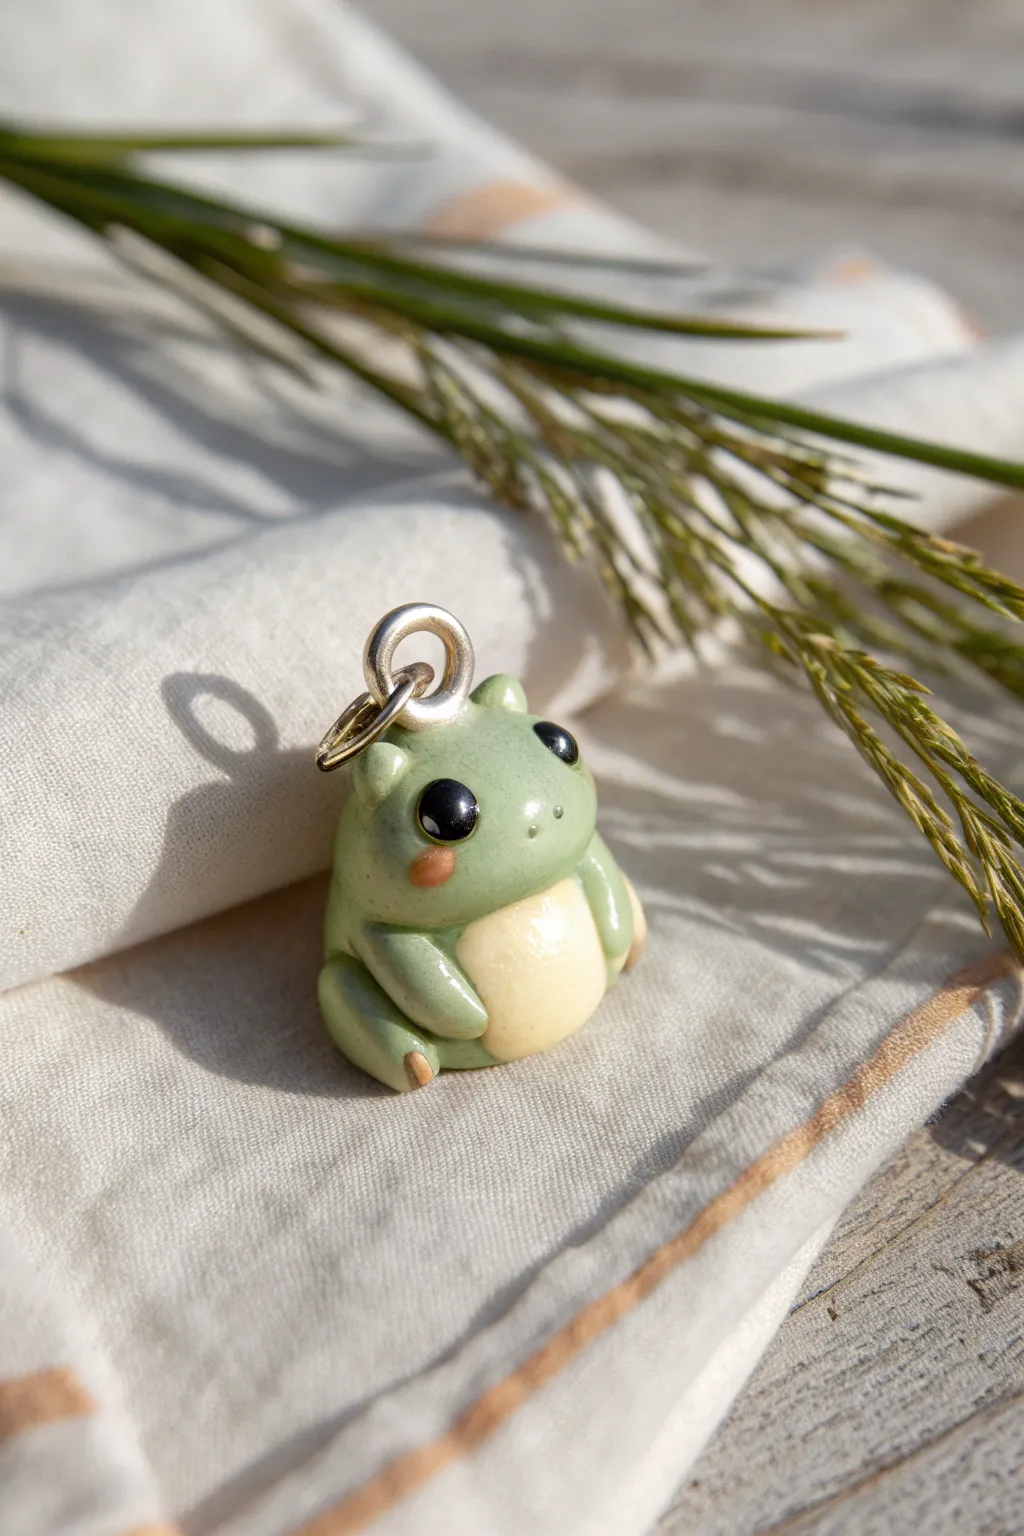
This adorable little polymer clay frog is the perfect addition to a charm bracelet or a necklace. With its shiny finish, rosey cheeks, and perfectly round body, it captures a whimsical, kawaii style that is sure to bring a smile to anyone’s face.
How-To Guide
Materials
- Polymer clay (Sage green, Cream/Light Yellow, Black, Pink)
- Small metal jump ring or eye screw
- Gloss, polyurethane varnish, or UV resin
- Ball stylus tool (medium and small)
- Needle tool or toothpick
- Clay roller or pasta machine
- Blade or X-Acto knife
- Soft paintbrush
- Oven for baking polymer clay
- Rubbing alcohol and Q-tips (for cleaning)
Step 1: Shaping the Base
-
Condition the clay:
Start by kneading your sage green clay until it is soft and pliable. This prevents cracking later on. Create a smooth ball about the size of a large marble; this will be the main body. -
Form the body shape:
Gently roll the green ball on your work surface, applying slightly more pressure to the top to create a rounded pear or gumdrop shape. The bottom should be wider than the top to give him a chubby, seated look. -
Flatten the base:
Tap the bottom of your shape against your work surface so the frog sits flat and stable without tipping over. Smooth out any fingerprints with a light touch. -
Create the belly patch:
Roll a small ball of cream or light yellow clay. Flatten it into a thin oval using your roller or fingertips. Gently press this onto the front of the green body, smoothing the edges so it looks integrated rather than just stuck on.
Step 2: Adding Features
-
Make the thigh muscles:
Roll two equal-sized small balls of green clay for the back legs. Flatten them slightly into thick discs and press them onto the lower sides of the body, wrapping them slightly towards the front. -
Form the front arms:
Roll two small sausage shapes of green clay. Attach these vertically above the thighs, angling them so they look like they are resting on the belly. Use your smoothing tool to blend the top of the arms into the shoulder area. -
Add tiny feet:
For the front paws, barely flatten the ends of the arm sausages. For the back feet, add tiny oval pieces of green clay sticking out from under the thighs. You can use a needle tool to impress tiny toe divisions if you like. -
Sculpt the eye sockets:
Using a medium ball stylus, create two indentations on the upper sides of the head area where you want the eyes to sit. This helps the eyes look set-in rather than popping out too much. -
Insert the eyes:
Roll two small balls of black clay. Place them into the sockets you just made. Gently press them in to secure them, ensuring they are symmetrical. -
Create the eye highlights:
Take the tiniest speck of white clay (or use white acrylic paint after baking) and place a micro-dot on the upper right side of each black eye. This ‘catchlight’ brings the frog to life.
Clean Clay Pro-Tip
Keep a pack of wet wipes or baby wipes nearby. Wipe your hands thoroughly when switching from the black clay eyes back to the light green body to avoid dark smudges.
Step 3: Finishing Touches
-
Add cheeks:
Roll two tiny, flattened discs of pink clay. Press these onto the face, just below the eyes and slightly to the outside. -
Nostrils:
Take a needle tool or toothpick and make two tiny pinprick holes between the eyes for nostrils. -
Insert hardware:
If you are using an eye screw, gently twist it into the top center of the head now. If you plan to use a jump ring through a drilled hole later, skip this step. -
Smooth and clean:
dip a Q-tip in a little rubbing alcohol and very gently brush over the green clay to remove any dust, lint, or fingerprints before baking. -
Bake:
Bake the frog according to your polymer clay package instructions (usually around 275°F or 130°C for 15-30 minutes). Let it cool completely. -
Glaze:
I prefer to brush a coat of gloss varnish or UV resin over the entire frog (except the bottom if you want it matte) to give it that wet, amphibian look shown in the photo. Let the glaze cure or dry fully. -
Final assembly:
Once dry, open a jump ring with pliers and loop it through the eye pin or screw to finish your charm.
Level Up: Lily Pad Base
Make a flat, notched green disc (a lily pad) and bake the frog sitting directly on it. This turns the charm into a cute desk figurine or planter decoration!
Now you have a charming little green friend ready to hang on a necklace or gift to a fellow nature lover.
Frog Magnets With Big Faces
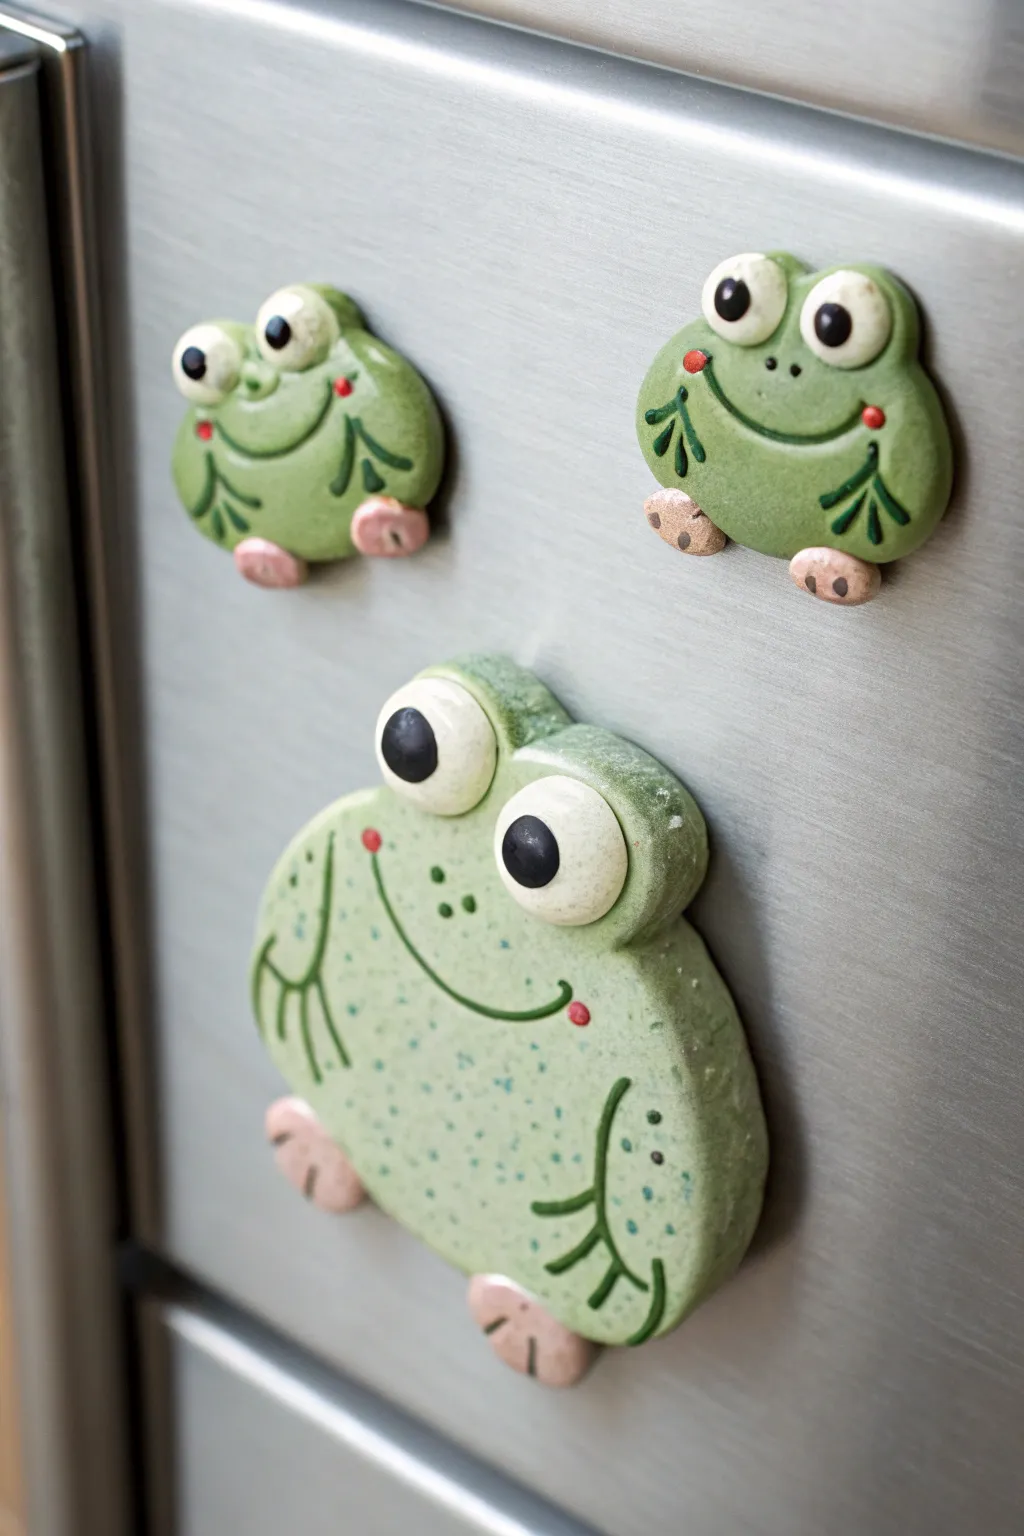
These cheerful frog magnets feature distinctively large, bulbous eyes and a rounded, friendly shape that adds whimsy to any refrigerator. Their simple, flat-backed design makes them an approachable sculpting project perfect for beginners looking to practice creating expressions.
How-To Guide
Materials
- Green polymer clay (or air-dry clay)
- White polymer clay
- Black polymer clay
- Pink polymer clay (or light beige paint)
- Green acrylic paint (darker shade)
- Red acrylic paint
- Adhesive magnets (strong round discs)
- Sculpting tools (needle tool, small ball stylus)
- Rolling pin
- Gloss varnish or glaze
- Super glue (if using non-adhesive magnets)
- Blue speckle paint or old toothbrush (optional for texture)
Step 1: Shaping the Bodies
-
Create the base:
Start by conditioning your green clay until it is soft and pliable. Roll a ball of clay about the size of a walnut for the large frog, and two smaller hazelnut-sized balls for the little frogs. -
Flatten the form:
Press the ball onto your work surface to flatten the back completely. Gently pat the top into a rounded, slightly flattened oval shape, ensuring the edges are smooth and not sharp. -
Form the feet:
Take two tiny pieces of pink clay (or beige clay if you plan to paint them later) and roll them into small ovals. Flatten them slightly and press them onto the bottom edge of the green body. -
Detail the toes:
Using a needle tool or a knife, press two indentations into each pink foot to create three distinct toes.
Sticky Situation?
If your white eyes get dirty from green clay residue on your fingers, clean them gently with a cotton swab dipped in rubbing alcohol or baby oil before baking.
Step 2: Adding the Big Eyes
-
Prepare the eye sockets:
Use a large ball tool or your thumb to make two shallow wide indentations on the top of the green head where the eyes will sit. -
Sculpt the eyeballs:
Roll two balls of white clay. These should be quite large relative to the body to achieve that cartoonish look. Press them firmly into the indentations you made, ensuring they touch each other in the center. -
Add pupils:
Roll two much smaller balls of black clay. Flatten them into discs and press them onto the center of the white eyeballs. Alternatively, you can paint these on after baking for more precision.
Make It a Set
Try making different expressions by changing the pupil placement—looking up, crossed, or looking sideways—to give each frog a unique personality.
Step 3: Creating Details & Texture
-
Carve the arms:
Instead of adding clay for arms, use a carving tool or needle tool to incise lines directly into the green body. Draw a curved line for the arm and three lines splaying out for the fingers on both sides. -
Create the smile:
Use a needle tool to carve a wide, U-shaped smile connecting the two cheek areas. Add tiny dimple marks at the ends of the smile. -
Add texture (optional):
If you want the speckled look shown in the large frog, gently flick a stiff toothbrush dipped in diluted blue or dark green paint over the raw clay, or wait to do this after baking. -
Bake or dry:
Follow the manufacturer’s instructions for your specific clay type. If using polymer clay, bake on a tile or parchment-lined tray. If utilizing air-dry clay, allow 24-48 hours for full drying.
Step 4: Painting and Finishing
-
Highlight the carving:
Once cool or dry, use a thin brush with dark green paint to carefully trace inside the carved arm lines and the smile to make them pop. I find mixing a little water into the paint helps it flow into the grooves better. -
Add cheek accents:
Dip the end of a paintbrush handle or a ball tool into red paint and dot it at the corners of the smile for rosy cheeks. -
Add nose dots:
Using a fine-tip tool or toothpick, place two tiny dots of dark green or black between the eyes for nostrils. -
Glazing:
Apply a coat of gloss varnish to the entire piece, or just the eyes if you want a contrast between matte skin and shiny eyes. This seals the paint and gives it a finished ceramic look. -
Attach the magnet:
Turn the frog over. Apply a strong adhesive or a drop of super glue to the back and press your round magnet firmly into place. Let it cure completely before sticking it to the fridge.
Once the magnets are fully set, pop them onto your fridge to greet you every time you reach for a snack


What Really Happens Inside the Kiln
Learn how time and temperature work together inside the kiln to transform clay into durable ceramic.
Frog Ring Dish or Trinket Tray
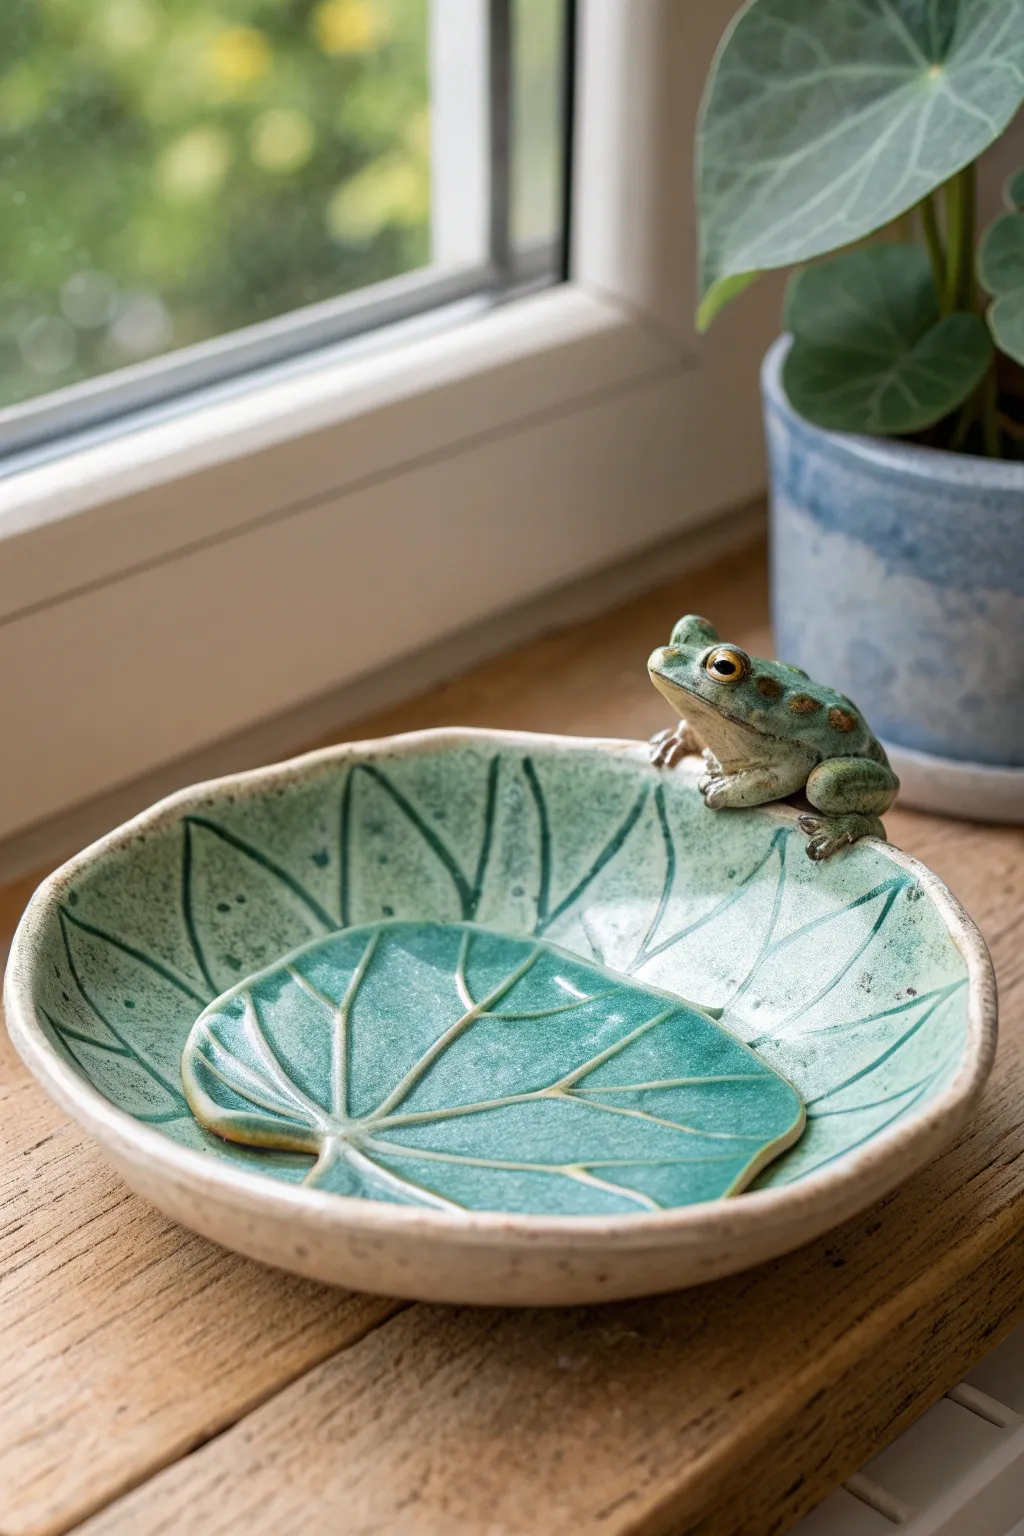
Capture the charm of a pondside scene with this handcrafted ceramic dish, featuring a textured leaf design and a realistic little frog perched on the edge. The glossy teal glazes pool beautifully in the veins, creating a stunning contrast against the speckled clay body.
Detailed Instructions
Materials
- Speckled stoneware clay (approx. 1 lb)
- Rolling pin
- Canvas board or mat
- Leaf template (paper) or a large real leaf
- Needle tool
- Loop tool or carving tools
- Sponge
- Scoring tool (or fork)
- Slip (clay mixed with water)
- Small paintbrush for detailing
- Semi-transparent teal or celadon glaze
- Dark green underglaze (for frog spots)
- Brown/oxide wash (for frog eyes and shading)
- Clear glaze (optional, for frog)
- Kiln
Step 1: Forming the Leaf Base
-
Roll the slab:
Begin by rolling out your speckled clay on a canvas surface until it is an even slab, approximately 1/4 inch thick. Compress the clay with a rib to prevent warping later. -
Cut the shape:
Place your leaf template or a large real leaf onto the slab. Using a needle tool, trace and cut out a rounded, organic leaf shape. Smooth the raw edges with a damp sponge. -
Create the curve:
Gently lift the edges of the slab to create a shallow bowl shape. You can slump this over a mold or simply pinch and prop up the edges with foam supports until it holds its form. -
Carve the veins:
Using a dull pencil or a modeling tool, firmly press the main vein structure into the center of the dish. I like to radiate lines outward to mimic a lily pad or lotus leaf. -
Add texture:
Use a carving tool to create the secondary vein lines around the rim. In the photo, these are incised lines that will later catch the glaze, so make them deep enough to be distinct but not cut through the clay.
Step 2: Sculpting the Frog
-
Shape the body:
Roll a small ball of clay (about the size of a walnut) into an oval shape for the frog’s body. Pinch slightly to define the head area. -
Attach the legs:
Roll four tiny coils for legs. Fold the back legs into a ‘Z’ shape to look like it’s ready to jump, and attach them to the sides of the body using the score and slip method. -
Refine the face:
Add two tiny beads of clay for the eyes. Use a small wooden tool to press a slit for the mouth and shape the brow ridges to give him a curious expression. -
Position the frog:
Find the perfect spot on the rim of your dish. Score both the rim and the underside of the frog deeply, apply slip, and press the frog firmly onto the edge. His front toes should just overlap the inside of the bowl.
Frog Falling Off?
If the frog feels loose during attachment, the clay might be too dry. Add a tiny coil of fresh soft clay between the frog and the rim to act as ‘glue’ and blend the seams thoroughly.
Step 3: Drying and Glazing
-
Bisque fire:
Allow the piece to dry slowly under plastic for several days to prevent cracking, then bisque fire it according to your clay’s specifications (usually Cone 04). -
Wax resist:
Apply wax resist to the bottom of the dish and potentially the very tips of the frog’s toes if you want them to remain unglazed stoneware. -
Glaze the leaf:
Pour or brush a semi-transparent teal glaze over the entire interior of the dish. The glaze should be fluid enough to pool in the carved veins, creating that darker definition. -
Detail the frog:
For the frog, use a smaller brush. Paint the body a light sage or pale green. Dab small spots of dark green underglaze on his back for texture. -
Eye details:
Carefully paint the eyes using a golden-brown underglaze or oxide. A tiny dot of black glaze for the pupil brings him to life. -
Leave the rim exposed:
Wipe away any glaze from the very outer rim of the dish with a damp sponge to expose the speckled raw clay, creating a nice frame for the glaze. -
Final wipe:
Ensure the bottom is completely clean of glaze before loading it into the kiln. -
Glaze fire:
Fire the piece to the maturity temperature of your clay and glaze (typically Cone 5 or 6 for stoneware). Let the kiln cool completely before opening.
Make It Glossier
To make the frog look perpetually wet like the photo, apply a coat of clear gloss glaze over the frog’s underglaze painting before the final firing.
Once cool, your charming new friend is ready to guard your favorite rings and trinkets.
Frog Spoon Rest for the Kitchen
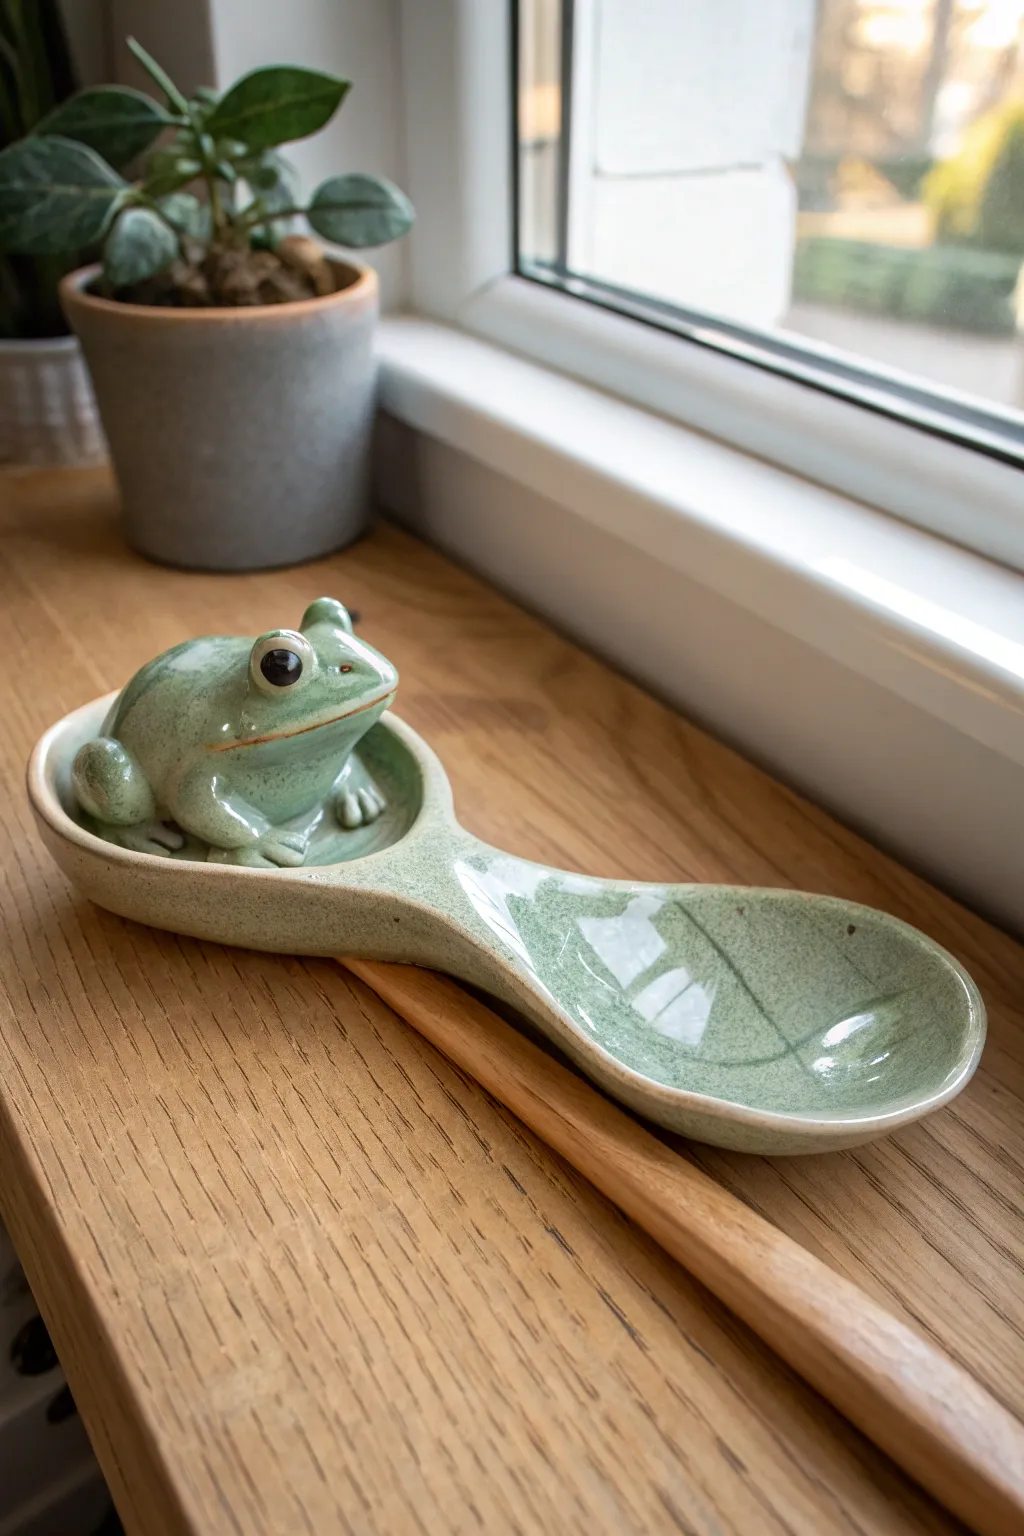
This charming kitchen companion combines functionality with whimsy, featuring a watchful frog perched on a classic spoon rest shape. The piece is finished with a stunning translucent celadon glaze that pools beautifully in the details, highlighting the texture of the speckled clay underneath.
Step-by-Step Tutorial
Materials
- Speckled stoneware clay (mid-fire)
- Rolling pin
- Canvas working mat or slab mat
- Needle tool
- Flexible metal kidney rib
- Wooden modeling tools
- Scoring tool (or serrated kidney)
- Slip (clay mixed with water)
- Sponge
- Two long wooden guide strips (approx. 1/4 inch thick)
- Celadon glaze (Green/Jade)
- Mop brush for glazing
Step 1: Forming the Base
-
Roll the Slab:
Start by wedging your speckled clay to remove air bubbles. Place it on your canvas mat between two wooden guide strips. Roll the clay out into a long, even slab about 1/4 inch thick. -
Cut the Shape:
Using a needle tool, cut out a large spoon shape. You want a wide oval for the spoon bowl and a slightly narrower, rounded area for the handle where the frog will sit. Smooth the cut edges with a damp sponge to remove any sharp burrs. -
Shape the Bowl:
Gently lift the wide oval end and cradle it in your palm or press it into a shallow slump mold if you have one. You want to create a gentle depression that will hold liquid drips. Use a flexible rib to smooth the interior curve. -
Raise the Handle:
Slightly elevate the handle end (where the frog will go) by propping it up with a small wad of spare clay underneath. This creates a pleasing curve and ensures the spoon handle rests comfortably.
Step 2: Sculpting the Frog
-
Form the Body:
Roll a ball of clay roughly the size of a golf ball into a slightly flattened egg shape. This will be the frog’s main body. -
Check the Fit:
Place the body on the handle area of the spoon rest to ensure the proportions look right. It should dominate the handle but not overhang the edges. -
Create Legs:
Roll two thick coils for the hind legs. Bend them into a ‘V’ shape. Attach these to the sides of the body so the knees stick up and the feet point forward. -
Add Front Arms:
Roll two smaller coils for the front arms. Position them so they look like they are propping the frog up, blending the shoulders seamlessly into the main body. -
Shape the Features:
Use a wooden modeling tool to press in separation lines for the toes. Gently carve a wide, slightly upturned line for the mouth to give him a contented expression. -
Make the Eyes:
Roll two small balls of clay for eyes and attach them to the top of the head. I like to use a small loop tool to slightly hollow out the area where the eyes attach first for a better fit. -
Attach to Base:
Score the bottom of the frog and the top of the spoon rest handle thoroughly. Apply slip to both scored areas and press the frog firmly onto the base. Wiggle it slightly to create a suction bond.
Celadon Secrets
Use a translucent celadon glaze rather than an opaque one. This allows the speckles in your stoneware clay to show through, mimicking the texture of real frog skin.
Step 3: Refining and Finishing
-
Refine Connections:
Use a small modeling tool to smooth the seam where the frog meets the base. You want it to look like one continuous piece of clay. -
Smooth the Surface:
Go over the entire frog with a slightly damp sponge or a soft brush to remove fingerprints and tool marks. Smoothness is key for that glossy finish later. -
Detail the Spoon Bowl:
Using a needle tool, lightly incise a leaf vein pattern into the bowl of the spoon rest. These lines will catch the glaze later, creating beautiful darker green stripes. -
Bisque Fire:
Allow the piece to dry slowly under plastic for a few days to prevent warping, then uncover it to dry completely. Fire it to cone 04 (bisque). -
Glaze Application:
Wipe the bisqued piece with a damp sponge to remove dust. Brush on 3 coats of a translucent green celadon glaze. Let each coat dry before applying the next. -
Wait for the Glaze:
Pay special attention to the recessed areas around the legs and the leaf veins; the glaze should be allowed to pool slightly here for depth, but not so thick that it crawls. -
Paint the Eyes:
Carefully dab a shiny black underglaze or a specific black glaze onto the pupils of the frog’s eyes for a focused look. -
Final Fire:
Glaze fire the piece to cone 5 or 6 (depending on your clay body instructions). Make sure the bottom is wiped clean of glaze before firing.
Make It Bigger
Upscale the dimensions of the spoon bowl section significantly to turn this from a spoon rest into a functional soup ladle holder for those big batches of stew.
Now you have a durable, adorable protector for your stovetop ready to catch every rogue drop of sauce.

TRACK YOUR CERAMIC JOURNEY
Capture glaze tests, firing details, and creative progress—all in one simple printable. Make your projects easier to repeat and improve.
Frog Planter Buddy for Pots
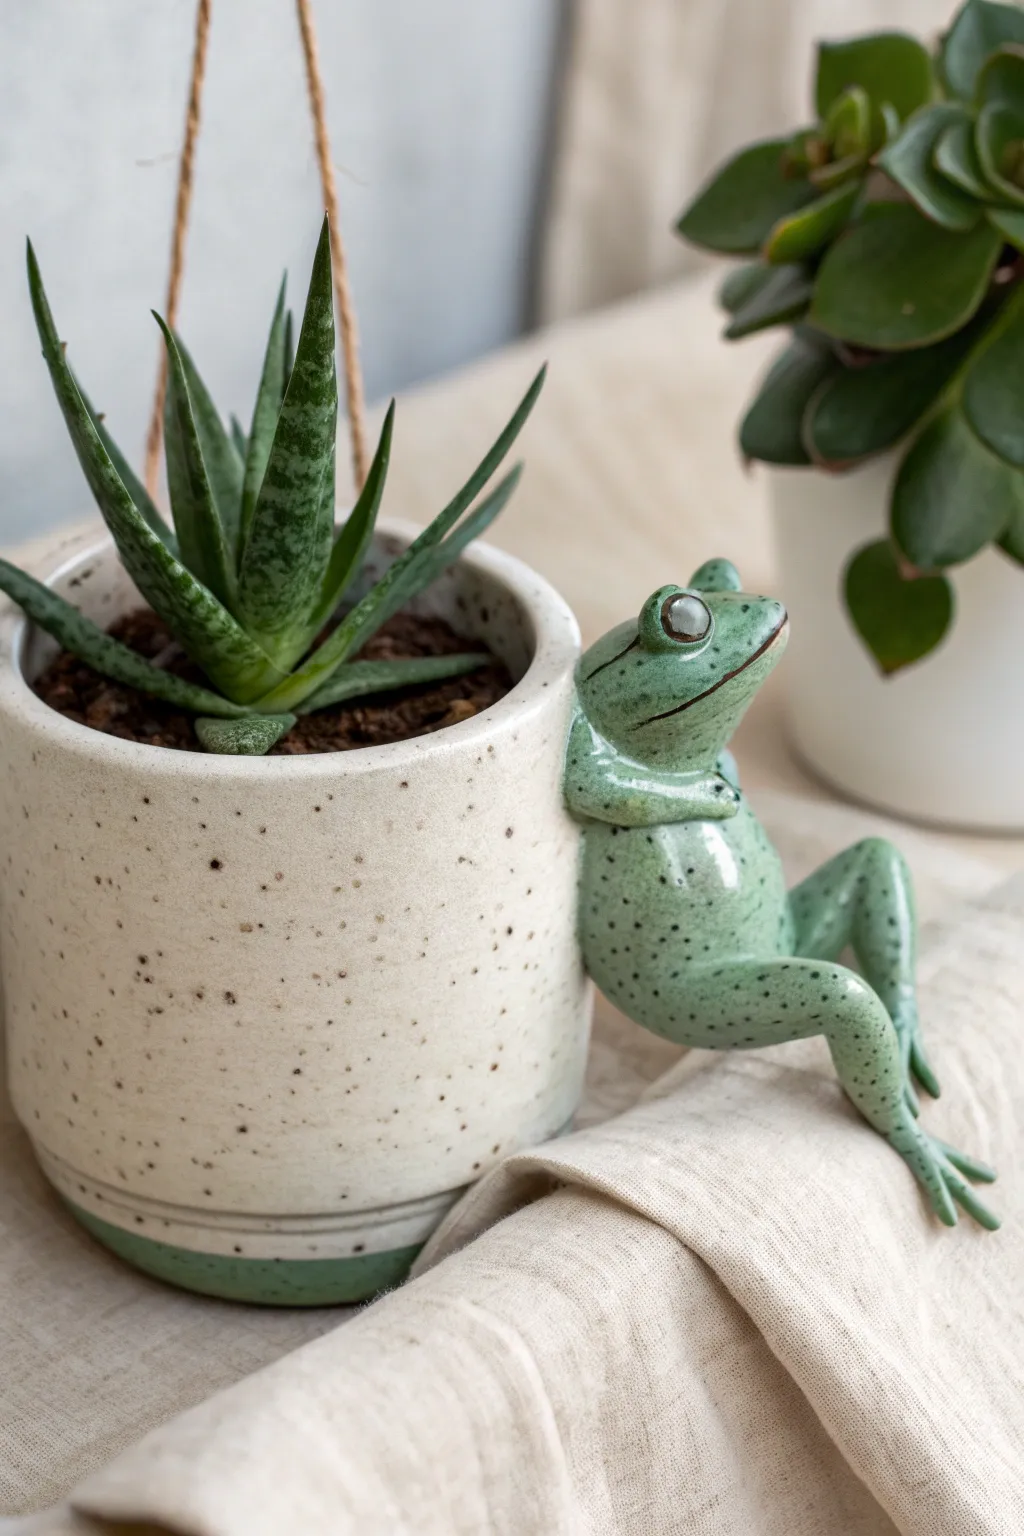
Transform a simple planter into a whimsical conversation starter with this adorable ceramic frog that looks like he’s just hopped up for a rest. This intermediate clay project combines wheel-throwing or hand-building a pot with sculptural modeling to create a seamless, integrated planter companion.
How-To Guide
Materials
- White stoneware clay (suitable for functional ware)
- Pottery wheel (or slab roller/rolling pin for hand-building)
- Needle tool
- Scoring tool or serrated rib
- Slip (clay slurry)
- Wooden modeling tools
- Small sponge
- Celadon glaze (soft green for the frog)
- Speckled cream/white glaze (for the pot)
- Underglaze pencil or dark underglaze (for details)
- Kiln
Step 1: Creating the Vessel
-
Form the base pot:
Begin by throwing a simple cylinder on the wheel, aiming for about 4-5 inches in height and width. If you prefer hand-building, roll out a slab and form a clean cylinder, attaching it securely to a circular base. -
Refine the shape:
While the clay is still workable but firming up, trim the bottom to create a small foot. I like to smooth the walls with a rib to ensure a nice canvas for the glaze later. -
Add texture (optional):
If you want the pot itself to have character, you can gently sponge the surface or leave subtle throwing rings, though the speckles in the clay or glaze will do a lot of work for you.
Step 2: Sculpting the Frog Body
-
Shape the torso:
Roll a ball of clay about the size of a golf ball or small lime into an elongated teardrop shape. This will be the frog’s main body. -
Position the body:
Score and slip the side of your leather-hard pot where you want the frog to sit. Press the body onto the side so the flatter ‘tummy’ side adheres to the pot wall. -
Form the legs:
Roll two coils for the legs, slightly thicker at the thigh end. Bend them into a ‘Z’ shape to mimic frog legs—thigh going back, calf coming forward, and foot pointing down. -
Attach the legs:
Score and slip the hips to the lower sides of the body. Blend the clay seamlessly at the hip joint so it looks like one solid piece. -
Create the arms:
Roll two smaller coils for the arms. Position them so they look like they are folded over the rim or resting on the frog’s own chest, as seen in the photo. The hands should gently tuck under the chin area.
Clean Connection
When attaching the frog, thoroughly blend the clay seams where the body meets the pot wall. This prevents the sculpture from popping off as the clay shrinks during drying.
Step 3: Adding Details & Expression
-
Sculpt the head:
Shape a separate, slightly flattened oval for the head. Press your thumb gently into the clay where the eyes will go to create sockets. -
Attach the head:
Score and slip the top of the body and attach the head securely. Tilt it slightly upward for an inquisitive look. -
Add the eyes:
Roll two small spheres of clay for eyes and attach them to the top of the head. Use a small modeling tool to smooth the connection points so they bulge naturally. -
refine the feet:
Use a needle tool or small knife to define the toes. Since these hang off the pot, ensure they are thick enough not to be brittle but delicate enough to look realistic. -
Carve the mouth:
Use a needle tool or wire cutter to slice a thin, long smile across the face. Curve it slightly at the corners.
Hanging Planter Hack
Before firing, punch three small, evenly spaced holes near the rim of the pot. After firing, thread twine or leather cord through them to turn this into a hanging planter.
Step 4: Glazing & Firing
-
Bisque fire:
Once the piece is bone dry, fire it to cone 04 (or your clay’s bisque temperature). -
Apply wax resist:
Paint liquid wax resist carefully over the frog sculpture. This will keep the pot glaze off the frog. -
Glaze the pot:
Dip or brush your speckled cream glaze onto the pot. Wipe away any drips that bead up on the waxed frog immediately. -
Glaze the frog:
Once the pot glaze is dry, remove the wax (if peelable) or simply paint your green celadon glaze directly onto the frog. The celadon is translucent, which pools beautifully in the sculpted details. -
Add speckles and eyes:
Use a dark underglaze or oxide wash to paint the pupils of the eyes. You can also flick a toothbrush with dark iron oxide wash over the frog to create extra speckles on the green skin. -
Final fire:
Fire the piece to cone 6 (or your glaze’s maturity temperature). Let it cool completely before planting your succulent.
Pop in your favorite aloe or succulent and enjoy your new little green guardian
Frog Incense Holder With a Mouth Groove
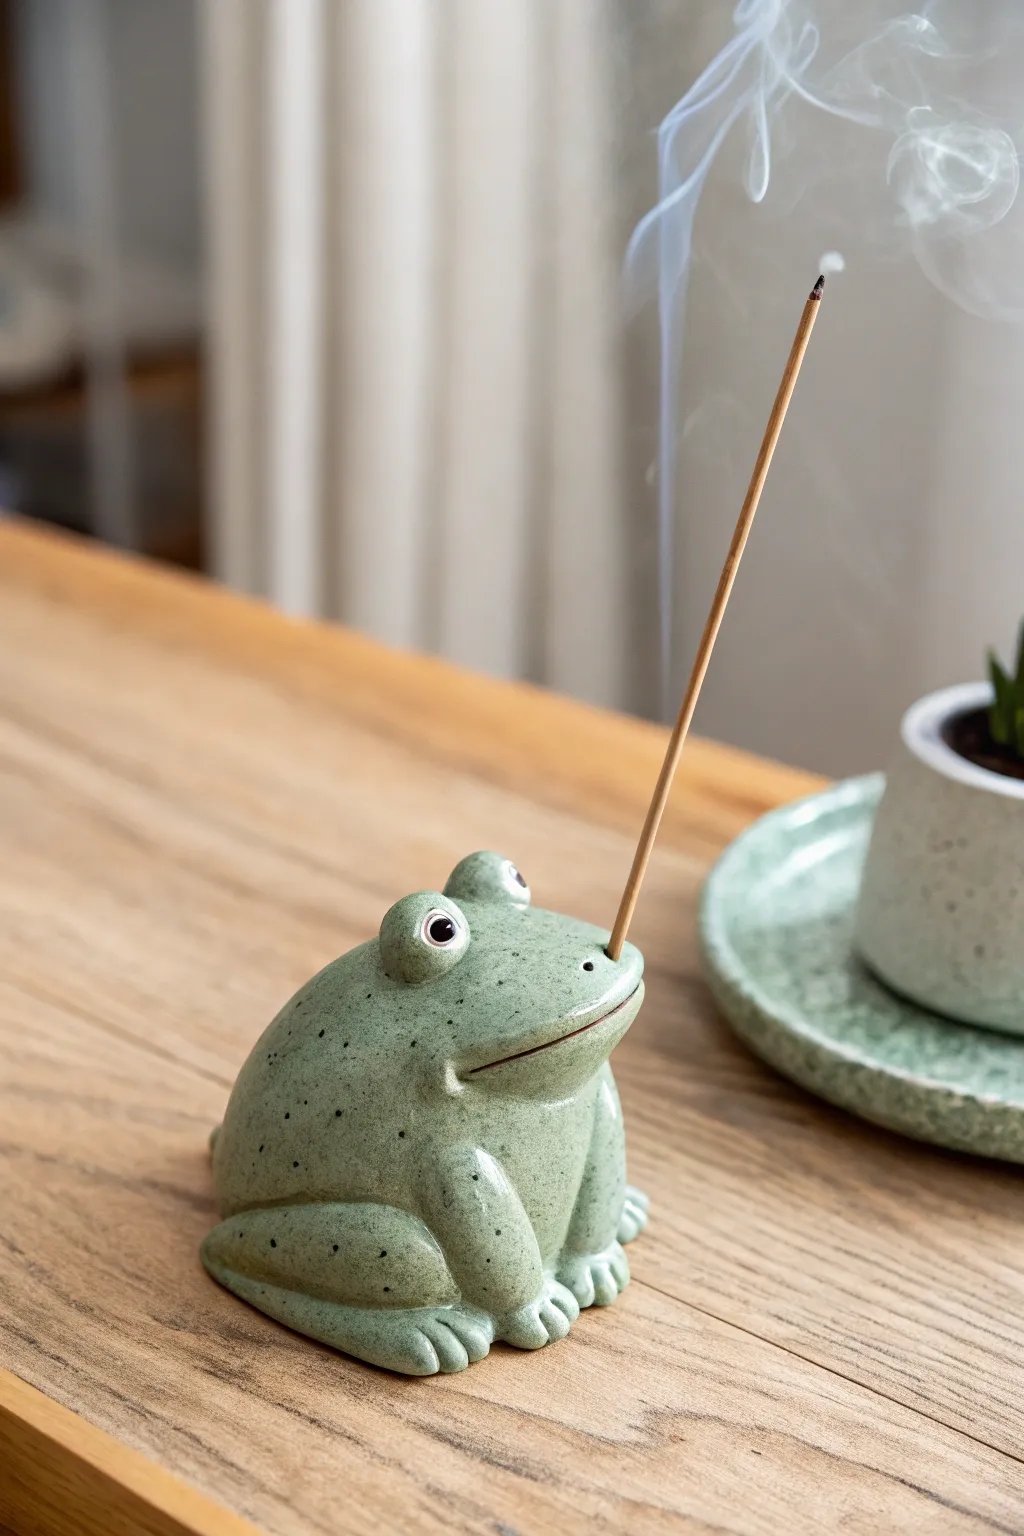
This charming incense holder combines functionality with a fun, amphibian design. Sculpted from clay with a speckled light green glaze, this little frog sits patiently while holding your favorite scent, adding a touch of nature to your relaxation space.
Detailed Instructions
Materials
- White stoneware or polymer clay (if not firing)
- Speckled Celadon glaze (light green) or acrylic paints
- Incense stick (for sizing)
- Needle tool
- Wooden sculpting tools
- Sponge and water
- Slip (if using ceramic clay)
- Scoring tool
- Small paintbrush
Step 1: Forming the Body
-
Create the base:
Start with a fist-sized ball of well-wedged clay. Gently tap it on your work surface to flatten the bottom slightly, creating a stable base so he won’t wobble later. -
Shape the torso:
Using your palms, smooth the clay upwards into a rounded gumdrop shape. You want the back to be hunched and the front to slope down gently where the face will be. -
Add the hind legs:
Roll two thick coils of clay for the thighs. Attach these to the sides of the body using the score and slip method, blending the clay seamlessly into the main body form so no seams remain visible. -
Sculpt the feet:
Flatten the ends of the leg coils slightly and use a needle tool or wooden knife to press in three distinct toes on each foot. Round off the tips of the toes so they look soft and organic. -
Form the front legs:
Create two smaller, shorter coils for the front arms. Attach these vertically under the chest area, blending the shoulders into the body mass. Add small toes to these feet as well, resting them flat on the table surface.
Hole Too Small?
Glaze often fills small holes during firing. Re-drill the incense hole carefully with a small masonry bit after firing if the stick no longer fits inside.
Step 2: Detailing the Face
-
Carve the mouth:
Use a wire tool or a thin wooden knife to slice a wide, happy smile into the front of the face. Curve the line upwards at the corners to give him a pleasant expression. -
Refine the lip:
Gently press down on the bottom lip to open the mouth just a crack. Smooth the edges with a damp sponge so the smile isn’t sharp or jagged. -
Make the eyes:
Roll two small spheres of clay. Score and slip the top of the head where the eyes should go, and press the spheres firmly into place. -
Add eye details:
Use a small loop tool or the back of a paintbrush to create slight sockets around the eyes, then add tiny clay pupils or simply poke a small hole for the pupil if you plan to paint them later. -
Puncture the nostrils:
Take a small needle tool and poke two tiny holes right above the mouth line for nostrils. This adds a lot of character with very little effort.
Lily Pad Catcher
Create a simple, flat clay plate shaped like a lily pad to go underneath. It acts as an ash catcher and completes the swampy aesthetic perfectly.
Step 3: Functional Adjustments
-
Create the incense hold:
This is the most crucial mechanical step. Take an actual incense stick (or a tool of the exact same diameter) and press it into the mouth groove. -
Check the angle:
Create the hole deep enough to hold the stick securely, angled slightly outward so the ash will fall away from the frog’s face. I like to wiggle the tool slightly to ensure the glaze won’t fill the hole later. -
Smooth the surface:
Go over the entire piece with a barely damp sponge. This removes fingerprints and smoothes out any rough textures before drying.
Step 4: Finishing
-
Drying:
Allow the clay to dry slowly under plastic for a day, then uncover it to dry completely. If you are kiln firing, proceed to bisque fire once bone dry. -
Glazing:
Apply a speckled green glaze. The specks in the glaze will naturally mimic the texture of frog skin. If using polymer clay, paint with light green acrylics and add tiny black specks with a toothbrush splatter technique. -
Eye details:
Paint the eyes white with black pupils to make them pop. If using ceramic glazes, use an underglaze for the eyes before the final clear or green coat to keep them distinct. -
Final Fire or Seal:
Fire the piece to the temperature required by your clay body tailored to the glaze. If using air-dry or polymer clay, seal the piece with a non-flammable varnish.
Once the kiln cools or the paint dries, your little green friend is ready to hold your incense and bring a peaceful vibe to the room.
Frog Tealight Buddy
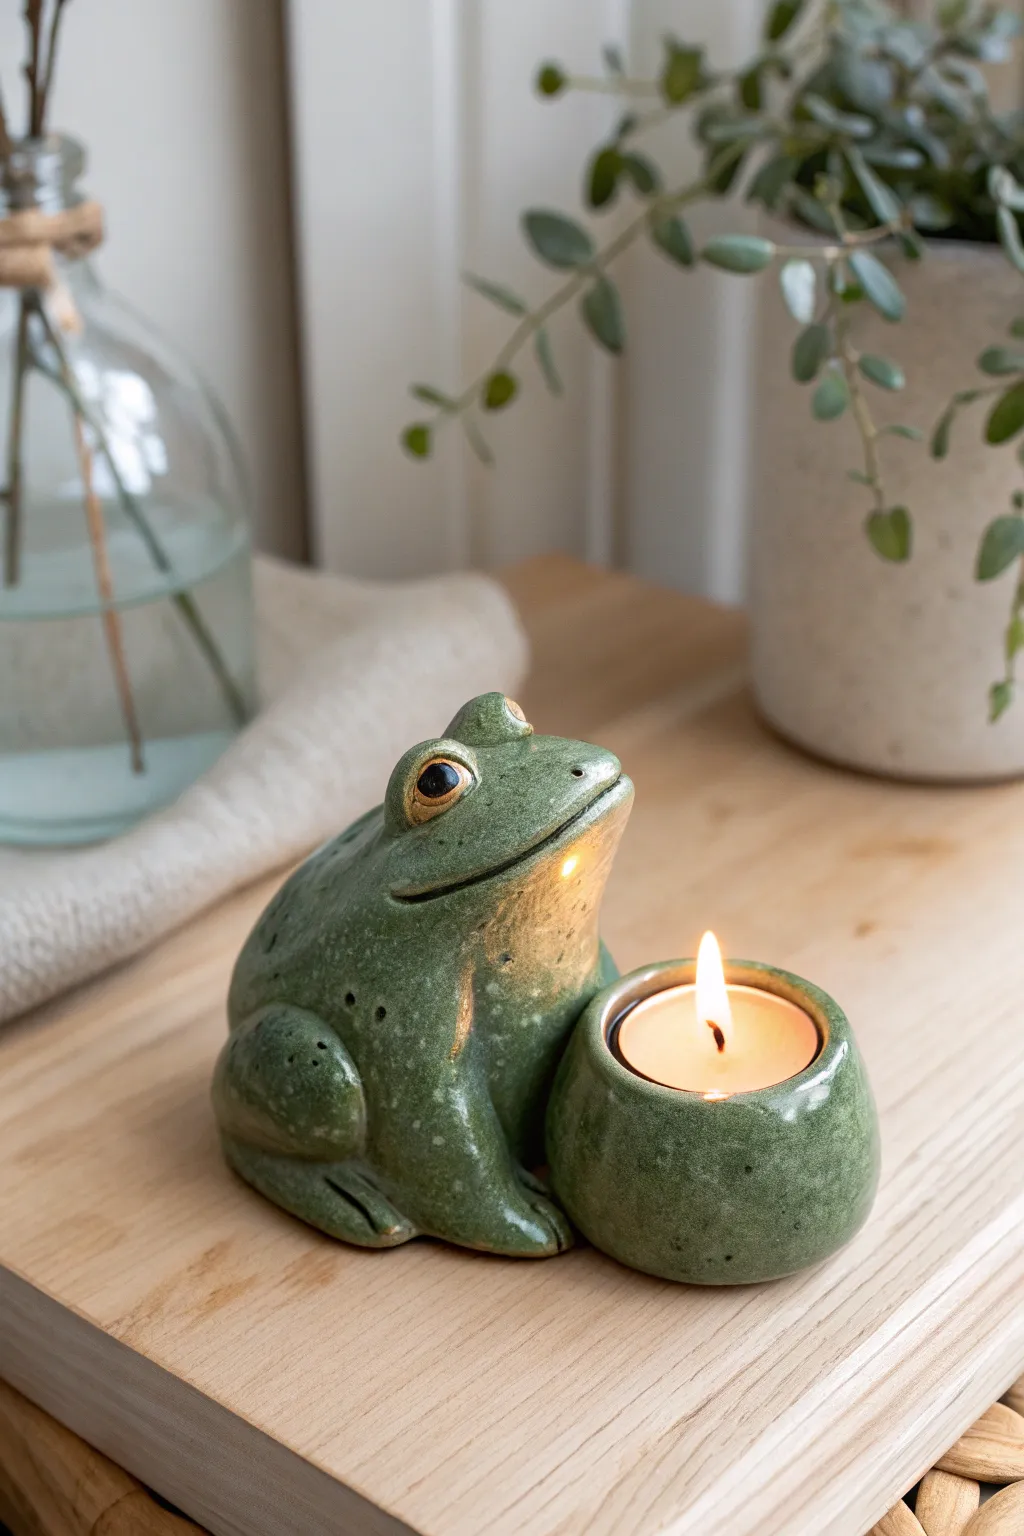
This charming project combines a sculpted frog figurine with a functional tealight holder, finished with a glossy glaze that mimics high-end stoneware. The gentle expression and mottled green finish give this piece a serene, nature-inspired aesthetic perfect for cozy corners.
Step-by-Step
Materials
- Air-dry clay or polymer clay (white or grey base)
- Sculpting tools (needle tool, ball stylus, rubber shaper)
- Tealight candle (for sizing)
- Water and a small sponge (for smoothing)
- Acrylic paints (olive green, dark green, brownish-orange, black, white)
- High-gloss varnish or resin
- Aluminum foil (for armature core)
- Fine grit sandpaper
- Paintbrushes (soft synthetic bristles and a stiff bristle for speckling)
Step 1: Sculpting the Base Forms
-
Prepare the foil core:
Crumple a piece of aluminum foil into a tight egg shape for the frog’s body. This saves clay and reduces drying or baking time. It should be about the size of a lemon. -
Cover the core:
Roll out a sheet of clay approximately 1/4 inch thick. Wrap it fully around your foil egg, smoothing the seams together until you have a solid clay oval. -
Shape the frog body:
Gently press the oval onto your work surface to flatten the bottom. Pinch the top slightly to form a narrower head area, keeping the back rounded and hunched. -
Form the candle bowl:
Create a separate ball of clay slightly larger than a golf ball. Press your thumb into the center, or use the actual tealight candle (wrapped in plastic wrap so it doesn’t stick) to create the perfect indent. Smooth the outer walls into a rounded, bowl-like shape.
Step 2: Adding Details and Assembly
-
Attach the legs:
Roll two thick sausages of clay for the rear legs. Flatten them and attach them to the sides of the body, blending the clay seams carefully with a rubber modeling tool or your wet finger. -
Refine the thighs:
Ensure the thighs curve upward and fold against the body, creating that classic sitting frog posture. Scribe subtle lines for the folded legs. -
Add the front arms:
Create two smaller tubes for the front legs. Attach them vertically under the chest area, blending the shoulders into the main body so they look integrated, not stuck on. -
Connect the bowl:
Place the candle bowl directly in front of or slightly to the side of the frog. Score and slip (scratch and wet) the contact points, then press them firmly together. Blend the clay at the join so they become one solid unit. -
Sculpt the face:
Add two small balls of clay to the top of the head for eyes. Use a needle tool to carve a wide, gently curving mouth that wraps around the snout for a friendly expression. -
Smooth the surface:
Dip a sponge or soft brush in water (or clay softener) and go over the entire piece. You want to remove all fingerprints to achieve that slick, ceramic look later. Let the piece dry or bake according to your clay manufacturer’s instructions.
Weight it Down
For safety, manipulate the wet clay so the bottom is slightly concave. This creates a suction effect and ensures the holder won’t wobble when lit.
Step 3: Painting and Glazing
-
Base coat:
Once hardened and sanded smooth, apply a base coat of olive green acrylic paint. Cover the frog and the bowl completely. -
Add depth:
While the base is still slightly tacky, dab dark green paint into the crevices—around the legs, under the chin, and at the base of the bowl—blending it out for a shadowed effect. -
Create the mottled texture:
I like to use an old toothbrush or a stiff brush here. Load it with watered-down light green or white paint and flick fine speckles over the green skin to mimic stone or speckled glaze. -
Paint the eyes:
Paint the raised eye bumps a brownish-orange color. Once dry, add a large black pupil in the center and a tiny white dot for a reflection. -
Gloss finish:
This is the most crucial step for the ‘ceramic’ look. Apply two to three coats of high-gloss varnish or UV resin. This mimics the firing of glazed pottery and makes the colors pop.
Cracked Clay?
If using air-dry clay, cracks happen as it shrinks. Mix a ‘slip’ of clay and water into a paste, fill the cracks, let dry, and sand smooth before painting.
Now you have a peaceful little guardian for your candlelight moments
Frog Trinket Box With a Lift-Off Head
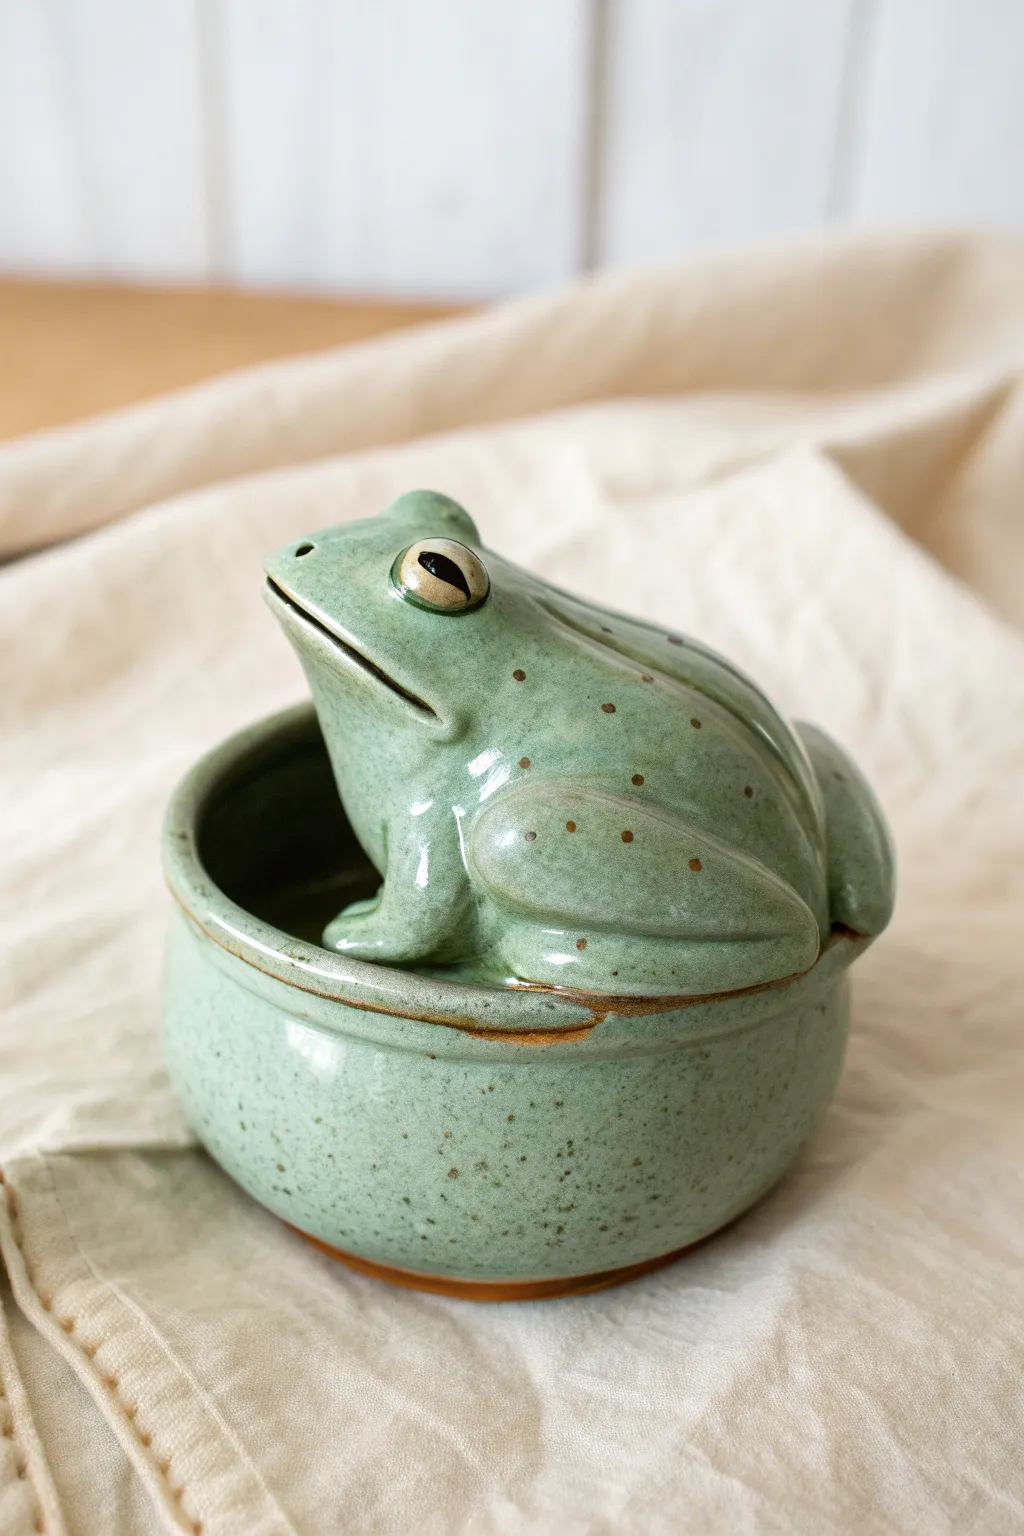
This whimsical ceramic trinket box features a charming, sculpturesque frog perched atop a simple round basin. With its glossy speckled green glaze and brown accents, it makes a perfect hiding spot for small treasures or salt.
Step-by-Step Tutorial
Materials
- Stoneware clay (speckled or buff)
- Pottery wheel (optional, can be hand-built)
- Rib tool
- Needle tool
- Loop tool
- Scoring tool or serrated rib
- Slip
- Celadon or translucent green glaze
- Iron oxide wash or brown underglaze
- Soft sculptural sponge
- Small paintbrush
- Kiln
Step 1: Forming the Base
-
Throw or Build the Bowl:
Start by creating the bottom vessel. If you are on the wheel, throw a small, thick-walled bowl about 3-4 inches wide. Alternatively, pinch a round pot and smooth the walls with a rib. -
Refining the Rim:
While the clay is still workable but firming up, use a chamois or sponge to round the rim smoothly. This is crucial because the lid will sit directly on this edge. -
Create a Gallery (Optional):
You can trim a small recessed gallery on the inside of the rim to help the lid sit securely, or simply leave the rim flat for a simple resting lid style like the example.
Clean Those Eyes
Before glazing, wipe the black underglaze on the pupils with a damp sponge. This keeps the black sharp and prevents the green glaze from clouding the eye detail.
Step 2: Sculpting the Frog Lid
-
Rough out the Shape:
Take a lump of clay slightly larger than your bowl’s opening. Shape it into a dome that overhangs the bowl slightly, then pinch one side to begin forming the frog’s rising head. -
Hollow the Lid:
Flip the dome over and pinch or use a loop tool to hollow out the underside. Check the fit against your base frequently; shrinking will happen, so ensure the lid is just slightly larger than the rim for a good fit later. -
Sculpt the Legs:
Roll two thick coils for the rear legs. Attach them to the sides of the body using the score and slip method, bending them at the ‘knee’ so the thigh presses against the body and the foot rests near the rim. -
Refining the Thighs:
Blend the clay of the legs into the body seamlessly. Use a modeling tool to define the crease between the leg and the belly, emphasizing the muscular haunch shape. -
Form the Front Feet:
Add two smaller nubs of clay to the front chest area. Sculpt them into simple three-toed feet that look like they are propping the frog up. -
Build the Face:
Add small balls of clay for the eyes, positioned high on the head. Use a needle tool to gently carve a wide, slightly downturned mouth line that wraps around the front of the face.
Step 3: Detailing and Surface Work
-
Eye Details:
Flatten the eye mounds slightly and define the eyelids with a small tool. You can score a pupil or rely on glaze later, but defining the iris area now adds character. -
Smooth the Surface:
Use a damp sponge to wipe down the entire frog, removing any harsh tool marks and creating that smooth, water-worn skin texture. -
Drying and Bisque:
Allow both the pot and the frog lid to dry slowly under plastic to prevent warping. Once bone dry, bisque fire them according to your clay body’s specifications.
Lily Pad Plate
Make a flat, slab-built saucer shaped like a lily pad with carved vein textures. It creates a perfect coaster for your frog jar to sit on.
Step 4: Glazing
-
Wax Resist:
Apply wax resist to the foot of the bowl and the very contact points where the lid meets the bowl to prevent them from fusing in the kiln. -
Accent Painting:
Using iron oxide wash or a brown underglaze, carefully paint the pupils of the eyes and add small speckles across the frog’s back and legs. -
Highlighting the Rim:
Run a thin band of the iron oxide along the rim of the bowl and the mouth line of the frog to define the separation. -
Apply the Main Glaze:
Dip or brush the entire piece in a translucent celadon or glossy green glaze. I find that dipping gives a more even coat that breaks beautifully over the sculpted leg muscles. -
Final Firing:
Fire the piece to the maturity temperature of your glaze (typically Cone 5 or 6 for stoneware) and let it cool completely before opening the kiln.
Now you have a functional little amphibian friend ready to guard your desk items
Frog Stack Totem of Mini Poses
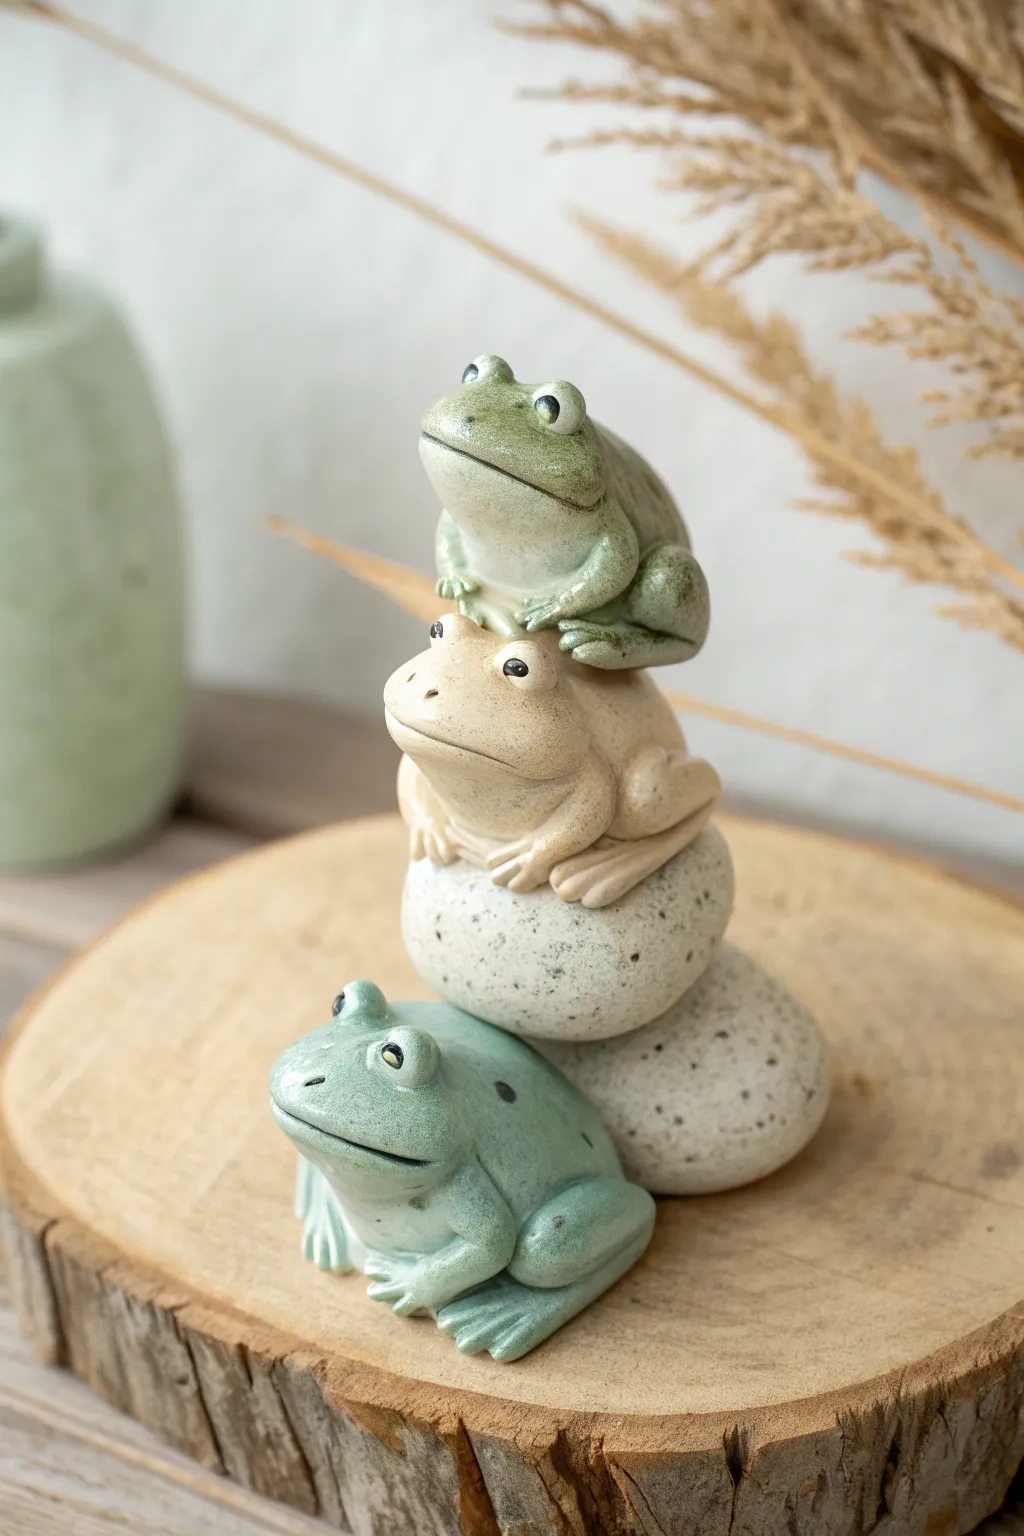
This whimsical totem features three distinct clay frogs balanced precariously on smooth, speckled river stones. With a charming mix of glossy green and matte beige glazes, this sculpture captures a playful moment of amphibian acrobatics perfect for a garden shelf.
Step-by-Step Guide
Materials
- White stoneware or polymer clay (oven-bake)
- Pottery tools (needle tool, modeling tool, rib)
- Slip and score tool (for ceramic clay)
- Underglazes: Sage green, cream/beige, white, black
- Clear glaze (optional for shiny finish)
- Sponge and water
- Rolling pin
- Kiln (if using stoneware) or Oven (if using polymer)
Step 1: Sculpting the Base Frogs
-
Form the bottom frog’s body:
Start with a fist-sized ball of clay and gently shape it into a squat, rounded oval. Flatten the bottom slightly so it sits stable on your work surface, creating a wide, supportive base for the rest of the stack. -
Define the head and mouth:
Using your thumbs, press gently into the front of the oval to distinguish the head area from the back. Use a needle tool or modeling knife to slice a wide, slightly curved line for the mouth, pressing it deeper at the corners for a subtle smile. -
Add the bottom legs:
Roll two thick coils for the rear legs. Attach them to the sides of the body, blending the upper thigh into the torso. Bend the legs forward so the knees jut out, then shape simple, webbed feet resting on the ground. -
Create the front legs:
Form two smaller coils for the front arms. Attach these under the chin area, positioning the feet so they look like they are propping the frog up. Use a small tool to indent toes for realistic detail. -
Sculpt the eyes:
Roll two small spheres of clay. Score and slip the top of the head (if using ceramic clay) and attach the eyes prominently. Smooth the connection point so the eyes seem to bulge naturally from the skull rather than just sit on top.
Balance Check
Before firing or baking, insert a hidden toothpick or wire armature through the center of the stack. This invisible spine prevents the heavy top pieces from sliding off during heating.
Step 2: Creating the Stones and Middle Layer
-
Form the base stones:
Create two organic, egg-shaped forms to serve as the ‘rocks’ between the frogs. One should be slightly larger than the other. Texture them lightly by rolling them against a piece of canvas or tapping them with a stiff brush to mimic stone. -
Sculpt the middle frog:
Repeat the body-sculpting process used for the first frog, but make this one slightly smaller. Focus on a more compact, resting pose since it will be sitting on a ‘rock’ rather than the ground. -
Attach the limb details:
Add the rear legs folded tightly against the body, much like a sitting toad. Ensure the front feet are positioned to grip the curved surface of the clay stone beneath it. -
Stack the middle section:
I find it helpful to test the fit now. Place the larger clay stone on the bottom frog’s back (don’t attach yet), then place the middle frog on that stone to ensure the curves nestle together without wobbling.
Slumping Frogs?
If your frogs are sagging under the weight of the stack while wet, sculpt and dry/bake them as three separate units. Glue them together with strong epoxy after they are finished and hardened.
Step 3: The Top Frog and Assembly
-
Sculpt the top frog:
Create the final, smallest frog. Give this one a slightly more alert posture, perhaps looking slightly upward or to the side to add character to the grouping. -
Refine the surface:
Use a damp sponge to smooth out any fingerprints or harsh tool marks on all three frogs and the two stones. Clean transitions are key for a professional look. -
Join the components:
If you want a permanent single sculpture, score and slip (or use liquid clay) to join the pieces: Bottom Frog > Large Stone > Middle Frog > Small Stone > Top Frog. Press firmly to bond them. -
Add final details:
Check the eyes on all frogs to ensure they are symmetrical. Use a tiny ball tool to create nostrils.
Step 4: Glazing and Finishing
-
Apply base colors:
Once dried and bisque fired (or baked), apply your base colors. Use a sage green for the top and bottom frogs, and a warm cream or beige for the middle frog to create visual contrast. -
Paint the stones:
Paint the stones a neutral off-white or light gray. Use a stiff brush to flick tiny specks of black or dark gray paint onto them to create a realistic granite texture. -
Detail the faces:
Carefully paint the eyes white with black pupils. Add a tiny dot of white in the black pupil to create a ‘catchlight’ reflection, which brings the expression to life. -
Enhance texture:
Consider doing a light dark wash (watered down dark paint) over the frogs and wiping it back. This will settle into the crevices of the legs and mouth, accentuating the sculpt. -
Final seal:
If using ceramic glazes, fire the piece again. If using acrylics on polymer clay, apply a matte varnish to the stones and a satin or gloss varnish to the frogs to make them look wet.
Place your finished totem in a sunny spot and enjoy the peaceful vibe these little amphibians bring to your space.
Mushroom Forest Frog Scene
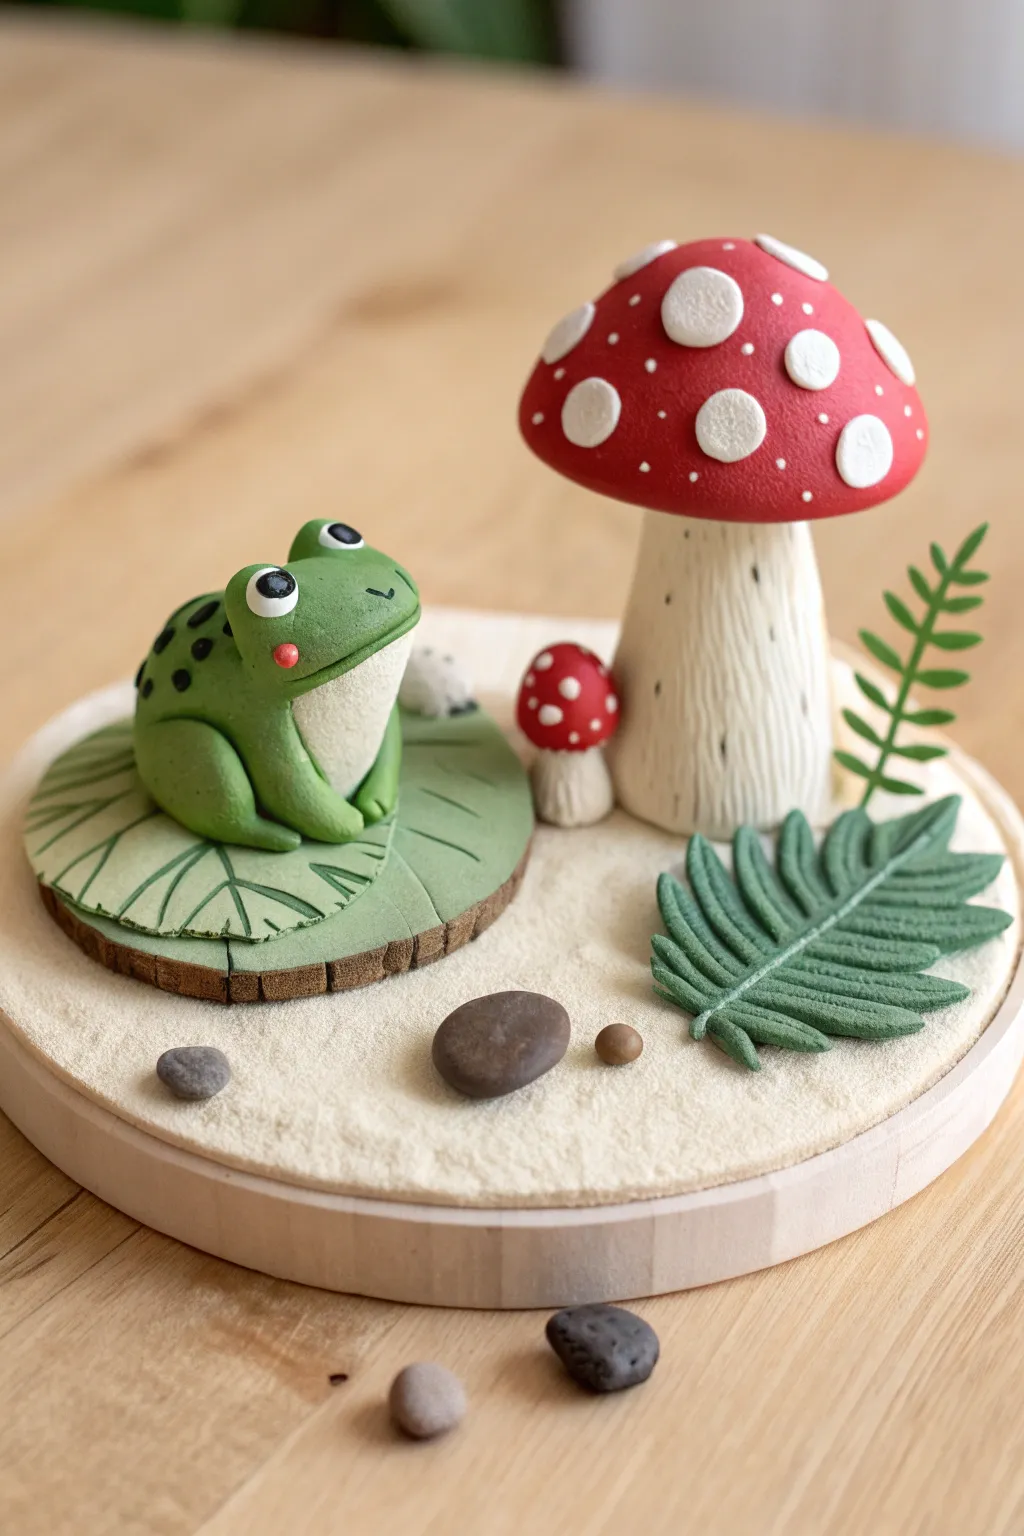
Create a charming woodland vignette featuring a friendly frog resting on a leaf, surrounded by vibrant mushrooms and ferns. This polymer clay project combines texture and sculpting techniques to build a peaceful little scene on a wooden base.
Step-by-Step
Materials
- Polymer clay (Green, White, Red, Black, Beige/Tan, Dark Green)
- Round wooden disc base (approx. 4-6 inches)
- Light tan crafting sand or texture paste
- Ball stylus tools
- Needle tool or toothpick
- Clay knife or scalpel
- Small smooth stones or pebbles
- Liquid clay (translucent or Bake & Bond)
- Acrylic roller
- Matte varnish (optional)
Step 1: Preparing the Base
-
Sand Foundation:
Begin by coating the top surface of your wooden disc with a thin layer of craft glue or tacky glue. Sprinkle fine tan sand evenly over the glue, or spread a layer of sandy texture paste, to create the forest floor ground. -
Adding Pebbles:
While the glue or paste is still wet, press a few small, smooth pebbles into the foreground and background areas to establish the scene’s layout.
Seamless Spots
To make the mushroom dots look painted on rather than stuck on, gently roll the red cap on your work surface after applying the white dots to embed them fully.
Step 2: Sculpting the Mushrooms
-
Mushroom Stems:
Roll a thick cylinder of beige clay for the main mushroom stem. Widen the base slightly so it stands firm. Use a needle tool to scratch verical lines up the entire stalk for a fibrous texture. -
Large Cap:
Form a large dome from red clay. Press flattened, irregular circles of white clay onto the surface. Use a ball tool or your finger to gently press these spots so they sit flush with the red dome. -
Assembly:
Attach the red cap to the beige stem. I like to use a drop of liquid clay here to ensure a strong bond during baking. -
Mini Mushroom:
Repeat the process on a much smaller scale to create the tiny companion mushroom: a small textured stump and a little red cap with white dots.
Glossy Finish
For a wet, amphibian look, apply high-gloss glaze only to the frog’s eyes and the red parts of the mushrooms after baking.
Step 3: Creating the Frog & Leaf
-
Leaf Base:
Roll out light green clay into a flat circle. Use a needle tool to score veins branching out from a center point. Create ragged edges by cutting small notches around the perimeter. -
Wood Slice Detail:
Create a textured brown disc slightly larger than the leaf to act as a ‘wood slice’ platform, scoring the edges to look like bark, and stack the green leaf on top. -
Frog Logic:
Roll a smooth green ball for the frog’s body. Press a smaller, flattened oval of white clay onto the front for the belly. -
Legs and Limbs:
Roll two thick sausages for hind legs, pressing them against the sides of the body. Add two smaller tubes for the front arms, positioning them so the frog looks attentive. -
Face Details:
Add two small balls of green for eye sockets on top of the head. Press white balls inside, then tiny black pupils. Use a needle tool to carve a simple smile and add small pink blush dots to the cheeks. -
Frog Spots:
Apply very tiny, flat discs of dark green or black clay to the frog’s back for pattern details.
Step 4: Ferns and Finishing
-
Fern Fronds:
Roll dark green clay into a long, tapered teardrop shape and flatten it. Use a craft knife to cut diagonal slits along both sides to create the fern leaflets. -
Vertical Fern:
Make a second, thinner fern shape. Insert a small piece of wire inside if needed for support, and stand it upright near the mushroom. -
Final Assembly:
Place the frog on its leaf platform, the mushrooms, and the ferns onto the sanded wooden base. Secure all clay parts with a dab of liquid clay. -
Baking:
Bake the entire piece according to your clay manufacturer’s instructions (usually 275°F/130°C for 15-30 minutes).
Once cooled, your little forest friend is ready to bring a touch of nature to your desk or shelf
Wizard-Hat Fantasy Frog
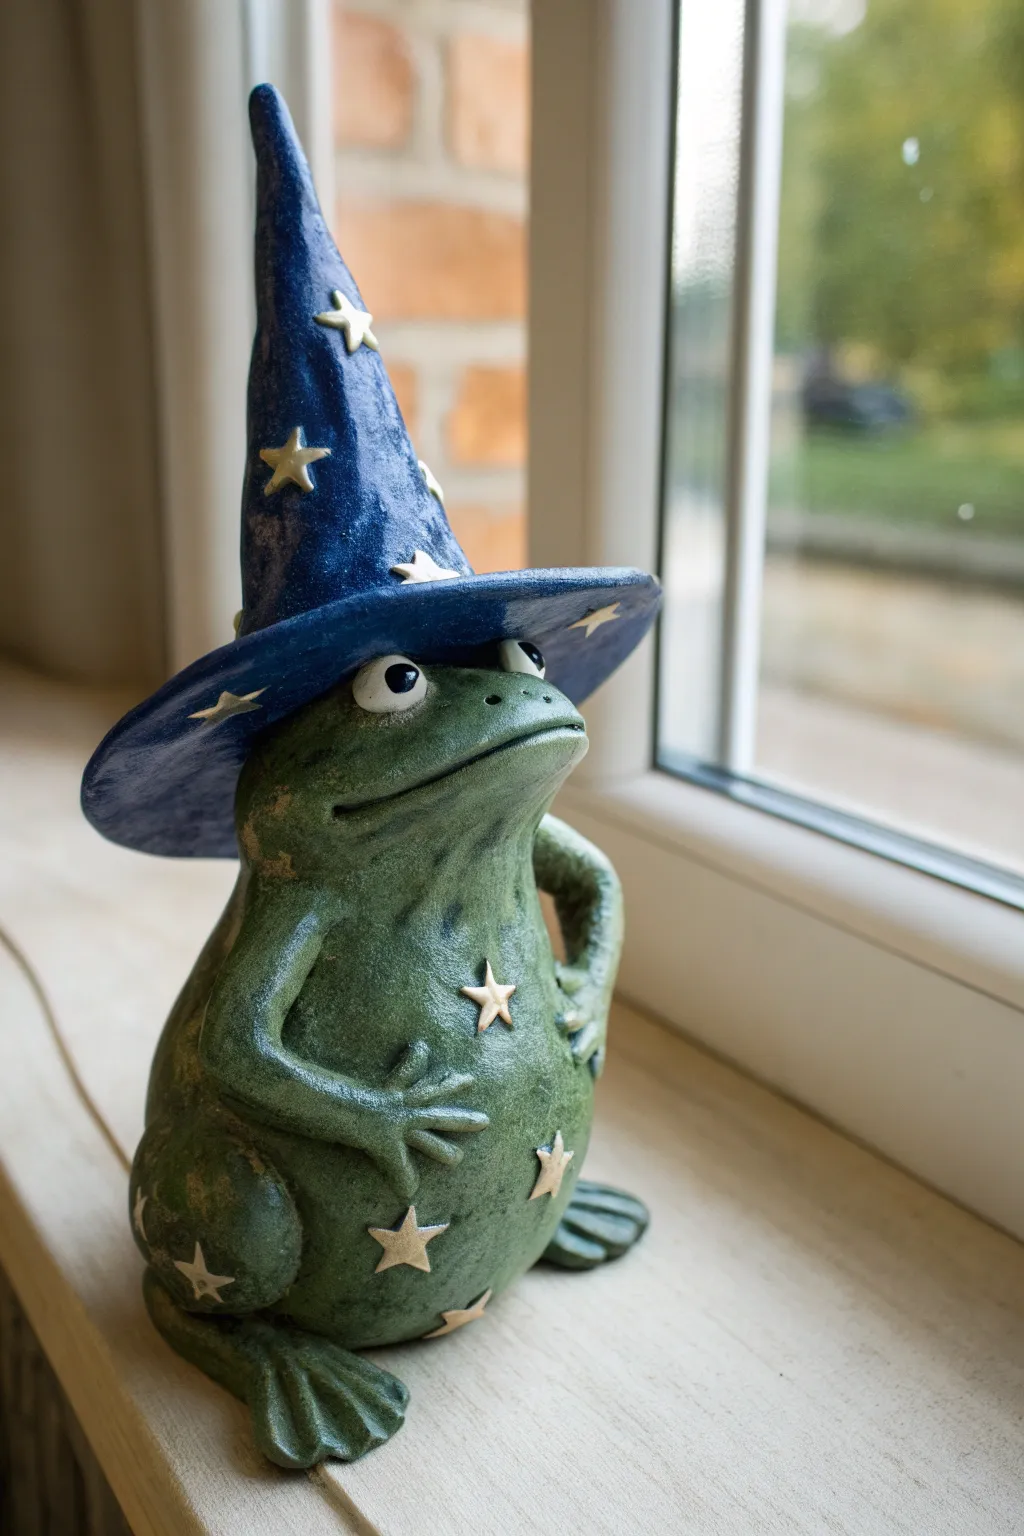
Summon a bit of magic to your windowsill with this whimsical wizard frog sculpture. Featuring a textured green body and a striking starry blue hat, this project is perfect for adding a touch of fantasy to your clay collection.
How-To Guide
Materials
- Polymer clay or air-dry clay (olive green, dark blue, white)
- Acrylic paints (if using white clay) in olive green, dark blue, gold/silver
- Sculpting tools (needle tool, ball stylus, rubber shaper)
- Foil or wire for armature
- Rolling pin
- Star-shaped clay cutter (tiny) or precision knife
- Glossy varnish or glaze
- Slip or liquid clay (for joining)
Step 1: Shaping the Base
-
Build the armature:
Begin by crumpling aluminum foil into a pear shape for the frog’s body and a separate cone shape for the wizard hat. This keeps the sculpture lightweight and saves clay. -
Cover the body:
Sheet your green clay to about 1/4 inch thickness. Wrap it entirely around the pear-shaped foil armature, smoothing the seams with your fingers or a rubber tool until the surface is uniform. -
Form the legs:
Roll two thick logs of green clay for the hind legs. Bend them into a ‘V’ shape and attach them to the lower sides of the body, blending the clay where it meets the torso so it looks seamless. -
Sculpt the feet:
Fashion two flat, flipper-like shapes for feet. Use a needle tool to score lines for toes. Attach these beneath the hind legs, ensuring the frog sits stable and flat. -
Add the arms:
Roll two thinner coils for arms. Attach one so the hand rests on the hip (handle-style) and the other resting gently on the belly. Flatten the ends slightly to create hands and use a knife to separate the fingers.
Step 2: The Wizard’s Hat
-
Prepare the hat brim:
Roll out a circle of blue clay roughly wider than the frog’s head. Cut a hole in the center so it can rest on the frog’s brow, then curl the edges upward for that worn, magical look. -
Creating the cone:
Take your foil cone armature and cover it with a layer of blue clay. Extend the very top into a slightly crooked point, giving it character rather than a perfect geometric shape. -
Assemble the headgear:
Place the brim onto the frog’s head first, pressing it gently to conform to the skull shape. Then, attach the cone to the brim using slip or liquid clay, blending the connection point smooth. -
Add the eyes:
Roll two balls of white clay. Place them just under the brim of the hat so they peek out. Add tiny black pupils made of clay or paint them later for a focused stare. -
Refine the face:
Use a needle tool to carve a wide, long smile straight across the face. Add two tiny holes for nostrils just above the mouth line.
Hat Slumping?
If the hat brim droops too much while wet, prop it up with small balls of crumpled foil or tissue paper underneath until the clay stiffens or finishes baking.
Step 3: Magical Details
-
Cut the stars:
Roll out a thin sheet of white or pale yellow clay. Use a very small star cutter or a craft knife to cut out about 10-15 five-pointed stars. -
Adorn the hat:
Press several stars onto the blue hat cone and brim. I usually like to curve the stars slightly so they wrap around the form rather than sticking out straight. -
Decorate the body:
Apply the remaining stars randomly across the frog’s green belly and legs. Press them firmly enough that they adhere well but remain raised. -
Surface texture:
Take a stiff bristle brush or a texture sponge and gently tap it all over the green skin areas. This removes fingerprints and gives it a realistic, porous skin look. -
Bake or dry:
Follow the manufacturer’s instructions for your specific clay. If baking polymer clay, tent it with foil to prevent the white stars from scorching.
Glowing Magic
Use glow-in-the-dark polymer clay for the stars. During the day they look white, but at night your wizard frog will cast a faint, magical glow.
Step 4: Finishing Touches
-
Painting details:
If you used colored clay, you might want to dry-brush a little darker green into the skin crevices to add depth. If using plain clay, paint the full base colors now. -
Highlight the stars:
Paint the stars with a metallic silver or gold acrylic paint to make them pop against the matte clay. -
Glazing:
Apply a high-gloss varnish to the eyes to make them look wet and alive. Apply a satin or semi-gloss finish to the rest of the sculpture to mimic the sheen of ceramic or moist skin.
Place your finished sorcerer near a window or plant pot where he can oversee his kingdom
Tongue-Out Frog With a Tiny Fly Diorama
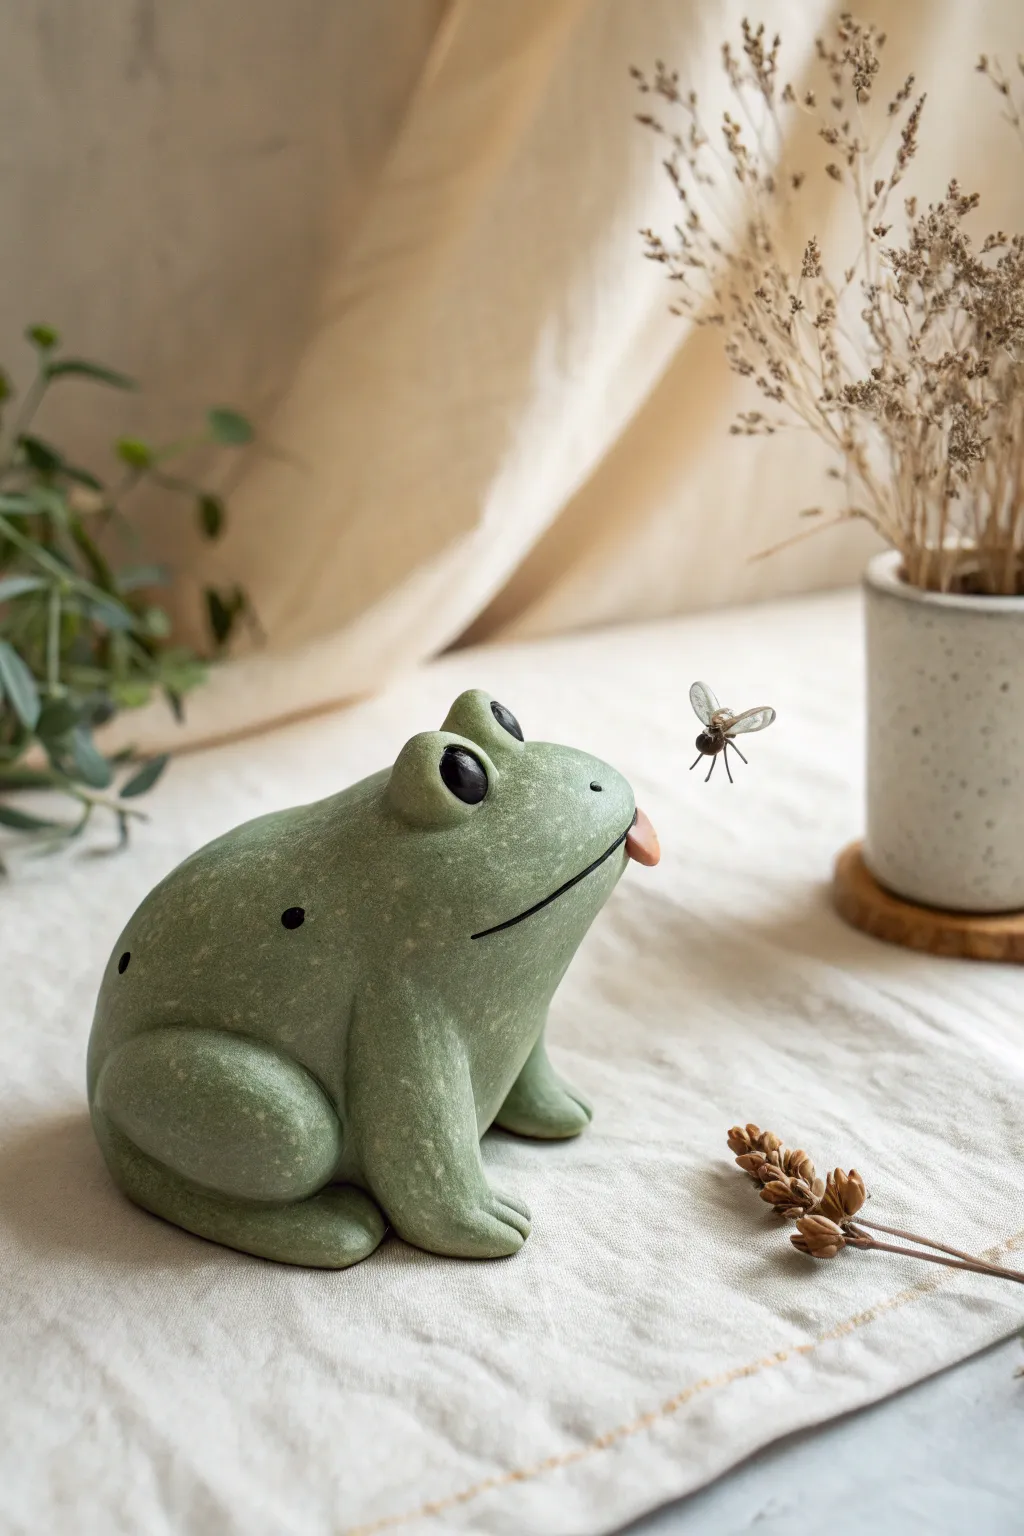
Capture a humorous moment in time with this charming clay sculpture of a frog eyeing its lunch. This project combines smooth, rounded forms with delicate wire work to create the illusion of a buzzing fly frozen in mid-air.
Step-by-Step Guide
Materials
- Air-dry clay or polymer clay (white or grey)
- Acrylic paints (sage green, light green, black, white, pink)
- Thin sculpting wire or floral wire (24-28 gauge)
- Clear epoxy or UV resin (optional for fly wings)
- Sculpting tools (needle tool, ball stylus, rubber shaper)
- Fine grit sandpaper
- Matte varnish
- Super glue or strong craft glue
Step 1: Shaping the Frog Body
-
Form the base:
Start with a large ball of clay roughly the size of a tennis ball. Gently roll it into a slightly elongated oval shape, flattening the bottom so it sits securely on your work surface. Taper one end slightly for the head area. -
Define the legs:
Roll two smaller logs of clay for the rear legs. Bend them into a ‘V’ shape and attach them to the sides of the body, blending the seams thoroughly with a rubber shaper or your finger. The thigh should be thick and round, tapering towards the foot. -
Sculpt the front legs:
Create two shorter, straighter logs for the front limbs. Attach these under the chest area, ensuring they are slightly splayed to support the frog’s weight. Add small distinct toes by pressing into the clay with a needle tool. -
Add the eyes:
Roll two small spheres of clay and attach them to the top of the head. Use a ball stylus to create a slight indentation in the center of each, which will later hold the painted pupil, or keep them rounded for a cartoonish look. Blend the bottom of the spheres into the head so they look integrated, not just stuck on. -
Create the mouth:
Using a needle tool or thin blade, slice a long, curving line across the front of the face for the mouth. At the very center, gently pry the lips apart just enough to create a small opening where the tongue will go. -
Smooth the surface:
Dip your finger in a little water (for air-dry clay) or baby oil (for polymer) and smooth out all fingerprints and bumps. The texture should be soft and matte, mimicking the stone-like finish in the reference. -
Add the tongue:
Fashion a tiny, flat tear-drop shape from clay. Insert the wider end into the mouth opening you created earlier, letting the tip protrude slightly. Curve it upward just a fraction to suggest movement.
Wire Wobble Fix
If the wire holding the fly droops, the gauge is too thin. Twist two strands of thin wire together for stiffness, or shorten the wire distance.
Step 2: Creating the Fly and Wire Mount
-
Form the fly body:
Using a tiny speck of clay, roll a small oval for the fly’s body. It should be minuscule compared to the frog. -
Wing detail:
For the wings, you can either shape tiny flat bits of clay or, for a more realistic look, cut tiny teardrop shapes from clear plastic packaging. Attach these to the fly body. -
Prepare the wire:
Cut a 2-inch piece of very fine sculpting wire. Insert one end into the underside of the fly’s body while the clay is still wet. I find using a dab of super glue here after baking/drying helps secure it permanently. -
Mounting mechanism:
Decide where the fly will hover. You can gently push the other end of the wire into the frog’s tongue or lower lip before the clay hardens. Alternatively, drill a tiny hole after the frog is finished and glue the wire in then.
Natural Texture
Before the clay dries, gently press a clean piece of coarse sponge against the skin to create a realistic, porous skin texture.
Step 3: Painting and Finishing
-
Base coat:
Once the frog is fully dry or cured, paint the entire body with a sage green acrylic paint. Apply two thin coats rather than one thick one to avoid brush strokes. -
Texture application:
To get that speckled, stone-like texture, dilute a lighter green or cream paint with water. Dip an old toothbrush into this mix and flick the bristles to splatter tiny dots lightly over the green base. -
Detailing the face:
Paint the eyes huge and solid black to match the reference. Add a tiny white reflection dot if you want extra life, though solid black gives that cute glassy look. Paint the tongue a muted dusty pink. -
Shadows and depth:
Use a very watered-down black or dark green wash to paint inside the mouth line, emphasizing the grin. You can also add a few larger dark spots on the back for pattern. -
Painting the fly:
Paint the fly body black or dark brown. If you made clay wings, paint them a light grey or white. -
Sealing the piece:
Finish with a coat of matte varnish to protect the paint. If you want the eyes to look wet, apply a drop of gloss varnish or UV resin specifically to the black eye circles.
Now you have a hungry little amphibian friend that brings a moment of nature’s comedy to your shelf