If you’ve been itching to make a clay clock that actually feels like you, this is the fun part—choosing the vibe. I’m sharing my favorite ideas that keep the build approachable while still giving you that “I made this” wow on the wall.
Minimal Round Slab Wall Clock
Bring an organic, earthy touch to your walls with this textured clay clock that mimics the look of carved stone. Its raised rim and indented numerals create subtle shadows, making it a functional piece of modern art.
Detailed Instructions
Materials
- Air-dry clay (white or stone colored, approx. 1kg)
- Rolling pin
- Large round cutter or bowl (approx. 10-12 inches)
- Cardboard or sturdy stencil sheets
- Craft knife
- Clock mechanism kit with gold hands
- Sandpaper (fine and medium grit)
- Number stencils or stamps (optional)
- Gold or brass studs (small)
- Strong craft glue
- Acrylic paint (warm beige/stone mixing medium)
- Texturing tool (old toothbrush or sponge)
- Jute twine for hanging
Step 1: Shaping the Base
-
Prepare the workspace:
Lay down a non-stick mat or parchment paper on a flat surface. Knead your air-dry clay thoroughly to warm it up and remove any air bubbles, which helps prevent cracking later. -
Roll out the slab:
Roll the clay into a large, even circle. Aim for a thickness of about 1/4 inch for the clock face itself. -
Cut the primary circle:
Place your large bowl or round template onto the clay and cut around it with a craft knife to get a perfect circle. Don’t discard the excess clay yet. -
Create the rim:
Roll the remaining clay into a long, even snake or rectangular strip about 1.5 inches wide. This will form the raised wall around the clock face. -
Attach the rim:
Score the outer edge of your base circle and the bottom edge of your clay strip. Apply a little water or slip (clay mixed with water) and press the strip firmly around the circumference to create a shallow tray shape. -
Smooth the seams:
Use a modeling tool or your finger dipped in water to blend the seam where the wall meets the base until it’s completely invisible. Smooth the top edge of the rim for a clean finish.
Don’t Rush the Dry
To prevent warping, dry the clock on a wire rack and place a light book on top (with parchment paper) once it’s firm but technically still damp.
Step 2: Adding Details
-
Pierce the center:
Find the exact center of your circle and poke a hole large enough for your clock mechanism’s shaft to fit through. Test the mechanism now to ensure the clay isn’t too thick. -
Create the numbers:
Roll out a thin sheet of fresh clay. Use small number cutters or a knife to cut out numerals 1 through 12. Alternatively, for the look in the photo, cut only 12, 3, 6, 9, and simple dashes for the others. -
Attach numerals:
Score the backs of the numbers and their positions on the clock face. Attach them using slip, pressing gently so they adhere but remain raised. -
Add hour markers:
Use a small tool or thin dowel to press small dots or indentations around the perimeter for precise minute markers if desired. -
Texture the surface:
To achieve that stony, matte look, gently dab the surface with an old toothbrush or a coarse sponge. This removes the ‘plastic’ smoothness of the clay.
Faux Stone Trick
Mix dried used coffee grounds or fine sand into your clay before rolling it out. This adds genuine grit and speckling for a realistic concrete effect without painting.
Step 3: Finishing Touches
-
Let it dry:
Allow the clock to dry slowly away from direct heat for 24-48 hours. I like to flip it gently halfway through if possible to let the bottom breathe. -
Sand for perfection:
Once fully dry, lightly sand any rough edges on the rim or numbers. Don’t over-sand the textured face; simply knock off any sharp burrs. -
Paint lightly:
Mix a watery wash of warm beige or stone-colored acrylic. Brush it over the entire piece, letting it settle into the texture to enhance the depth. -
Add metallic accents:
Glue tiny brass or gold studs at the major hour markers (12, 3, 6, 9) for a mixed-material look. -
Install mechanism:
Insert the clock movement through the back. Secure it with the washer and nut provided in your kit. -
Attach the hands:
Press the hour and minute hands onto the shaft. Ensure they are parallel to the clock face so they don’t catch on the raised numbers. -
Add hanging hardware:
If your mechanism doesn’t have a hook, glue a sturdy D-ring to the back or drill holes in the rim to loop the jute twine through for a rustic hanging style.
Now you have a timeless, handcrafted centerpiece ready to hang


Terrazzo-Style Speckled Clay Clock
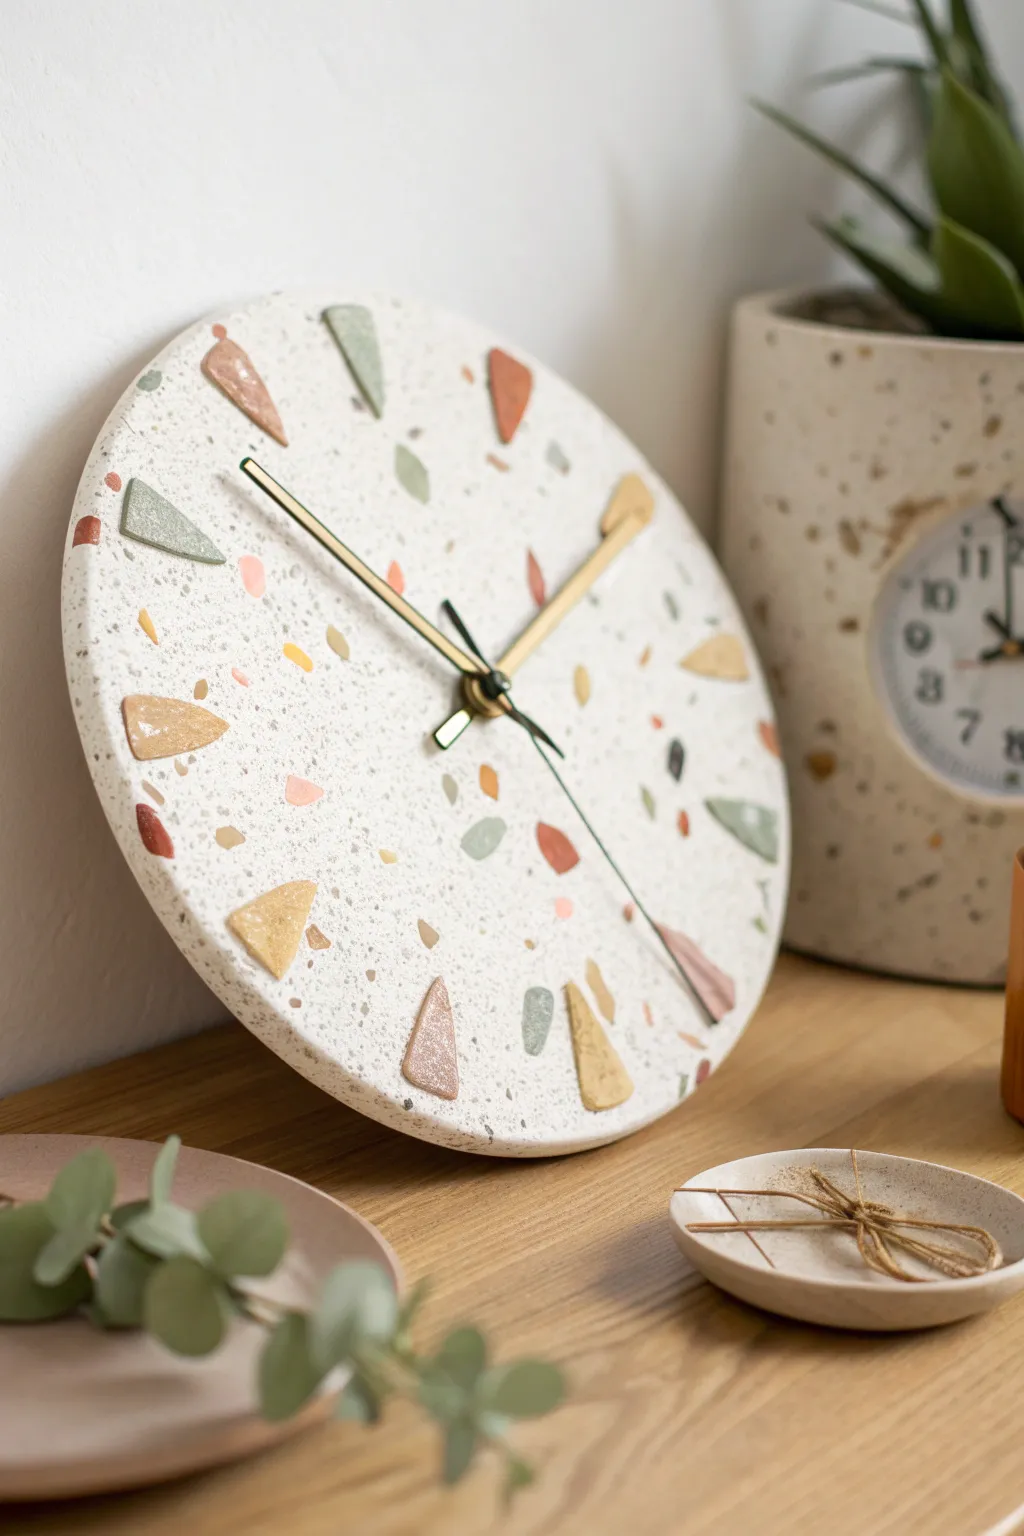
Bring a touch of modern art into your home with this chic, terrazzo-inspired wall clock. Using polymer or air-dry clay, you’ll create a functional timepiece featuring a playful speckled pattern and raised geometric hour markers.
How-To Guide
Materials
- White air-dry clay or polymer clay (approx. 500g)
- Small amounts of colored clay (mustard yellow, terracotta, sage green, blush pink)
- Black pepper or dried coffee grounds (for speckling)
- Rolling pin
- Circle clay cutter or craft knife
- Clock mechanism kit (movement, hands, and mounting hardware)
- Sandpaper (fine grit)
- Matte sealant or varnish
- Strong craft glue (E6000 or similar)
- Ruler or template
- Baking sheet and oven (if using polymer clay)
Step 1: Preparing the Base
-
Condition the white clay:
Begin by kneading your main block of white clay until it is soft, pliable, and free of cracks. If you are using air-dry clay, keep your hands slightly moist to prevent drying. -
Add the speckled texture:
To achieve that authentic stone look, sprinkle a pinch of ground black pepper or dried coffee grounds onto the white clay. -
Incorporate the flecks:
Fold the clay over the granules and knead repeatedly until the specks are evenly distributed throughout the entire ball. -
Roll out the slab:
Place the clay on a smooth surface or baking mat. Roll it out into an even slab, aiming for a thickness of about 1/4 to 1/2 inch to ensure the clock is sturdy. -
Cut the clock face:
Place a large bowl or round template over the slab. Use a craft knife to trace around it, cutting out a perfect circle for the clock face. -
Create the center hole:
Find the exact center of your circle using a ruler. Use a straw or the shaft of your clock mechanism to punch a clean hole right in the middle, ensuring it’s wide enough for the mechanism to pass through.
Smooth Moves
To remove fingerprints before drying, lightly brush the clay surface with a tiny bit of baby oil (for polymer) or water (for air-dry).
Step 2: Creating the Terrazzo Pattern
-
Prepare colored fragments:
Take your small amounts of colored clay—mustard, terracotta, sage, and blush—and condition them separately. -
Form the shapes:
Flatten bits of the colored clay and cut them into small, irregular triangles and chips. Keep them fairly thin, as these will be pressed into the surface. -
Arrange the background pattern:
Randomly scatter the small colored chips onto the wet white slab. Press them gently so they adhere but don’t completely flatten out yet. -
Roll to embed:
Gently run your rolling pin over the surface one final time. This presses the colored chips flush with the white clay, creating a smooth, seamless terrazzo effect. -
Make the hour markers:
With the remaining colored clay, cut out 12 distinct, slightly thicker triangular or geometric shapes. These will serve as your raised hour markers. -
Position the markers:
Arrange these 12 larger shapes around the clock face in the standard clock positions (12, 1, 2, etc.). I find using a printable clock face template underneath helps get the spacing perfect. -
Secure the markers:
Press these markers firmly onto the surface. Since they are raised, do not roll over them; simply ensure they are bonded well to the base.
Gold Glam
Before sealing, paint the edges of the raised hour markers with liquid gold leaf for an upscale, metallic detail.
Step 3: Finishing and Assembly
-
Dry or bake the clay:
Process the clay according to the manufacturer’s instructions. If baking polymer clay, use a low temperature to avoid scorching. For air-dry clay, let it sit on a drying rack for 24-48 hours. -
Sand the edges:
Once fully cured, use fine-grit sandpaper to smooth out the outer rim of the clock and gently buff the surface if any unevenness occurred during drying. -
Seal the surface:
Apply a coat of clear matte varnish or sealant to protect the clay from dust and moisture, giving it a professional, finished look. -
Install the mechanism:
Insert the clock movement shaft through the back of the center hole. Secure it with the washer and nut provided in your kit. -
Attach the hands:
Press the hour hand, then the minute hand, onto the shaft. Add the second hand last if your kit includes one, making sure they don’t touch each other as they rotate. -
Add hanging hardware:
Most clock mechanisms have a built-in hanger, but if yours feels heavy, glue a sturdy hook to the back of the clay or the mechanism box for extra security.
Pop a battery in the back and hang your beautiful, handmade timepiece on the wall to admire your work every hour of the day.


Hand-Built Ceramic Clock With Stamped Texture
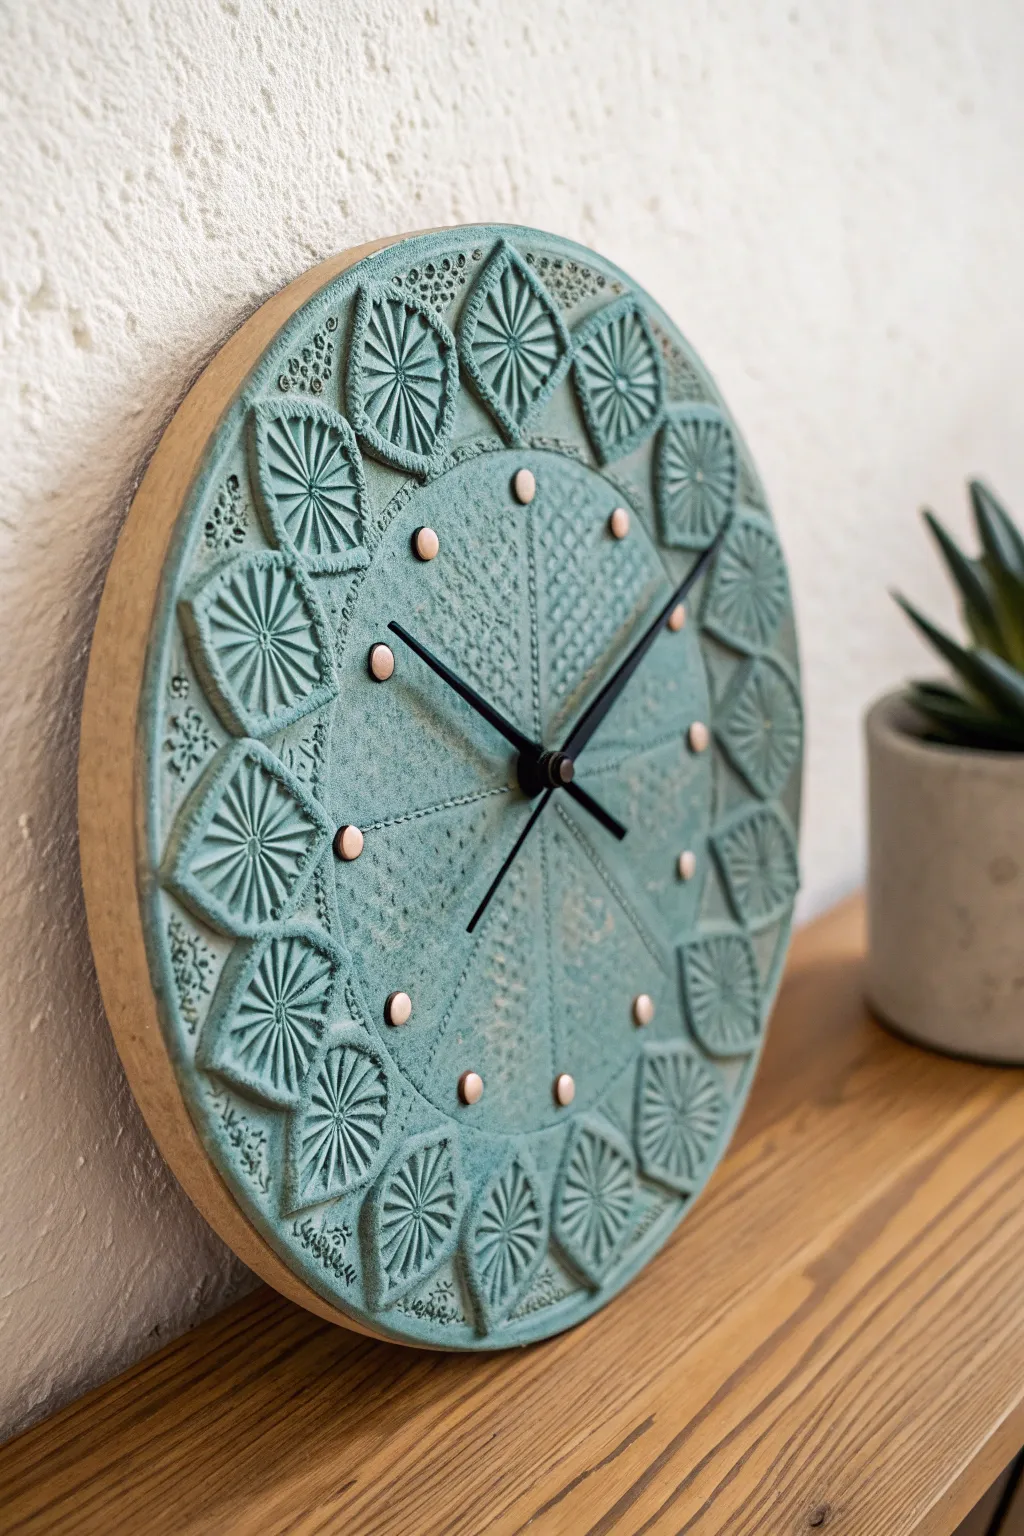
This rustic yet elegant timepiece marries the organic warmth of hand-built ceramics with intricate, lace-inspired textures. Finished with a stunning turquoise wash that highlights every stamped detail, it makes a striking functional art piece for any mantle or wall.
Step-by-Step Guide
Materials
- Low-fire white earthenware clay or stoneware (smooth body)
- Circular bat or banding wheel
- Rolling pin with guide strips (approx. 1/4 inch thickness)
- Large circular template (paper or flexible plastic, approx. 10-12 inches)
- Needle tool or fettling knife
- Leaf-shaped or petal-shaped clay stamp/sprig mold
- Lace, doily, or textured fabric (for background texture)
- Small circular cutter (for clock mechanism hole)
- Sponge and water
- Turquoise or teal ceramic oxide wash or underglaze
- Clear matte glaze (optional)
- Clock mechanism kit with black hands
- 12 small copper studs, round beads, or metallic paint for hour markers
- Strong epoxy glue (if attaching studs separately)
Step 1: Forming the Clock Face
-
Prepare the slab:
Begin by wedging your clay to remove air bubbles, then roll it out onto a canvas board. Use guide strips to ensure an even thickness of about 1/4 inch across the entire slab to prevent warping later. -
Apply background texture:
Before cutting the final shape, lay your chosen lace or textured fabric gently over the central area of the slab. Roll over it firmly with the rolling pin once to imprint the delicate pattern, then carefully peel the fabric away. -
Cut the circle:
Place your large circular template over the textured slab. Using a needle tool, trace around the template edge with a steady hand to cut your perfect circle. -
Smooth the edges:
Dip a sponge in water and wring it out almost completely. Run it gently along the cut rim to round off any sharp edges and compress the clay particles, which helps prevent future chipping. -
Create the center hole:
Find the exact center of your circle. Use the small circular cutter to punch a hole for the clock shaft. Make sure this hole is slightly larger than your mechanism’s shaft to account for clay shrinkage during drying.
Step 2: Stamping and Detailing
-
Mark placement guidelines:
Lightly score extremely faint lines dividing the clock face into 12 sections, emanating from the center like wheel spokes. This will help you align your decorative stamps symmetrically. -
Stamp the border:
Using your leaf or petal-shaped stamp, press firmly into the clay around the outer perimeter. Orient the stamps so the ‘leaves’ point outward, spacing them evenly. I like to do the 12, 3, 6, and 9 positions first to ensure balance. -
Add radial texture:
Use a texture tool or the edge of a ruler to gently press dotted lines radiating from the center hole toward each hour position, connecting the center to the border stamps. -
Mark the hours:
At the 12 positions inside the decorative border, make a small, distinct impression or indentation where the hour markers will sit. This creates a dedicated ‘seat’ for your metal finish later. -
Slow drying:
Sandwich the clay slab between two boards of drywall or place it under loose plastic. Dry it very slowly over several days to ensure it stays perfectly flat.
Warp Patrol
Flat slabs love to warp. Flip your drying slab upside down every 12 hours during the drying phase to ensure even airflow and a perfectly flat clock face.
Step 3: Finishing and Assembly
-
Bisque fire:
Once bone dry, fire the piece to the appropriate bisque temperature for your clay body (usually cone 04/06). -
Apply the wash:
Mix your turquoise oxide or watered-down underglaze. Brush it generously over the entire surface, ensuring it gets deep into all the stamped textures and lace impressions. -
Wipe back:
Using a large, damp sponge, wipe away the surface layer of the color. The turquoise will remain trapped in the depressed textures, highlighting the pattern while leaving the high points natural clay color. -
Final firing:
Fire the piece again to set the stain. You can leave it unglazed for a matte, stone-like finish shown in the photo, or apply a thin clear matte glaze before firing if you want a sealed surface. -
Add metallic accents:
Once fully cooled, glue small copper studs or beads into the 12 hour indentations you made earlier. Alternatively, paint these dots with a metallic copper paint. -
Install mechanism:
Insert the clock movement through the back of the central hole. Secure it with the washer and nut provided in the kit, then press the black hands onto the shaft.
Make Your Own Stamp
Don’t have a leaf stamp? Carve your own custom design into a small block of plaster or polymer clay, bake it rigid, and use that to stamp your unique signature texture.
Hang your timeless creation and enjoy the play of light over those beautiful handmade textures

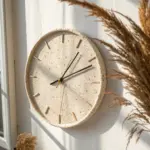


Raised Dot And Dash Hour Markers
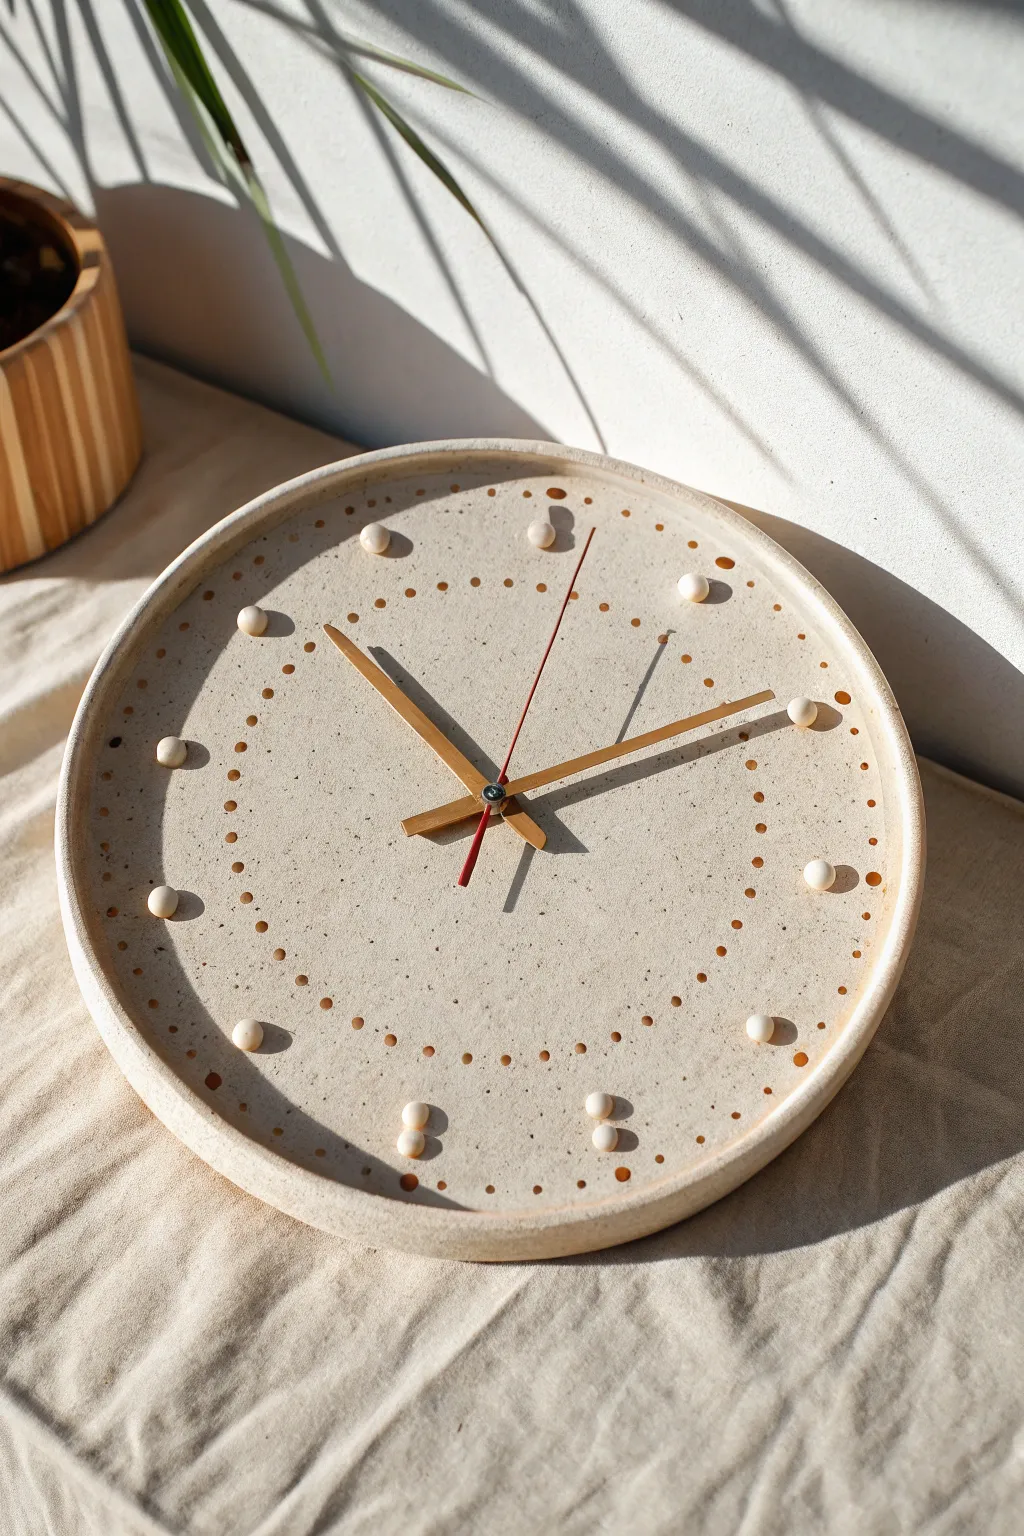
Embrace the beauty of raw texture with this minimalist clay clock featuring raised hour markers and delicate impressed details. Its sandy, speckled finish and warm wood tones create a perfect balance of modern design and organic charm.
Detailed Instructions
Materials
- Speckled buff stoneware clay (or polymer clay with faux granite effect)
- Clock mechanism kit (movement, gold hour/minute hands, red second hand)
- Rolling pin with guide rings (approx. 1/4 inch)
- Round circular cutter or template (10-12 inches)
- Small circular cutter or straw (for center hole)
- Wooden sculpting tool or blunt needle tool (for dot impressions)
- Slip (clay slurry) and scoring tool (if using ceramic clay)
- Small amount of extra clay for rolling balls
- Sanding sponge
- Matte clear glaze (optional) or leave unglazed for raw texture
- Cardboard or paper template for dial spacing
Step 1: Forming the Base
-
Prepare the Clay:
Begin by wedging your speckled clay body thoroughly to remove any air bubbles. If you are using polymer clay, condition it until it is pliable and warm in your hands. -
Roll the Slab:
Use a rolling pin with guide rings to roll out a smooth, even slab about 1/4 to 3/8 inch thick. Ensure the slab is large enough to accommodate your desired clock diameter. -
Cut the Circle:
Place your large circular template or cutter over the slab and cut out the main clock face. Smooth the outer edges with a damp sponge or your finger to remove any sharp cutting marks. -
Create the Rim:
Roll a long coil of clay, roughly the thickness of a pencil. Attach this coil to the top perimeter of your circle to create a raised rim. If using ceramic clay, score and slip both surfaces first; for polymer, blend the seam smoothly. -
Punch the Center:
Find the absolute center of your circle and use a straw or small cutter to create the hole for the clock shaft. Make this hole slightly larger than the shaft to account for shrinkage if using ceramic clay.
Perfect Placement
Print a clock face template from the internet and poke holes through the paper at the hour marks. Lay this over your wet clay to mark positions instantly.
Step 2: Adding Details
-
Map the Hours:
Lightly place a paper clock template over your clay face to mark the 12 hour positions. Use a pin tool to make tiny, barely visible guide marks where the raised dots will go. -
Roll the Hour Markers:
Roll twelve small, uniform balls of clay, approximately the size of a pea. Try to keep them as identical as possible for a professional finish. -
Attach the Markers:
Secure a clay ball at each hour position. For ceramic clay, score the spot and add a dab of slip before pressing the ball down firmly but gently, ensuring it stays round. Repeat for all 12 markers. -
Create Inner Rings:
Using a blunt sculpting tool or the back of a drill bit, press a circle of small indentations into the clay. Create two concentric rings inside the hour markers to add visual depth. -
Refine the Surface:
Check the surface for any unwanted fingerprints. Lightly buff them away with a soft rib or a damp sponge, being careful not to disturb the raised dots.
Dual-Tone Design
Before firing, brush a white underglaze or slip onto the rolled hour marker balls only. This creates a subtle pop of contrast against the darker speckled base.
Step 3: Firing and Assembly
-
Drying:
Allow the clay to dry slowly and evenly to prevent warping. Place it on a wire rack or a piece of drywall, covering it loosely with plastic for the first day. -
The Bisque Fire:
Once bone dry, fire the piece to bisque temperature (usually cone 04). If using polymer clay, bake according to the package instructions. -
Glazing (Optional):
To maintain the raw look seen in the photo, you might choose to leave the clay unglazed or apply a very thin matte clear wash. Fire the piece again to the clay body’s maturity temperature (e.g., cone 6 for stoneware). -
Sanding:
After firing (or baking), I lightly sand the bottom and any rough edges with 400-grit sandpaper to ensure it sits flush against the wall. -
Install Mechanism:
Insert the clock movement shaft through the back hole. Secure it with the washer and nut provided in your kit. -
Attach Hands:
Press the hour and minute hands onto the shaft. Finally, snap on the red second hand, ensuring they all run parallel and don’t touch the raised clay dots.
Hang your new timepiece and enjoy the tranquil, earthy vibe it brings to your room

The Complete Guide to Pottery Troubleshooting
Uncover the most common ceramic mistakes—from cracking clay to failed glazes—and learn how to fix them fast.
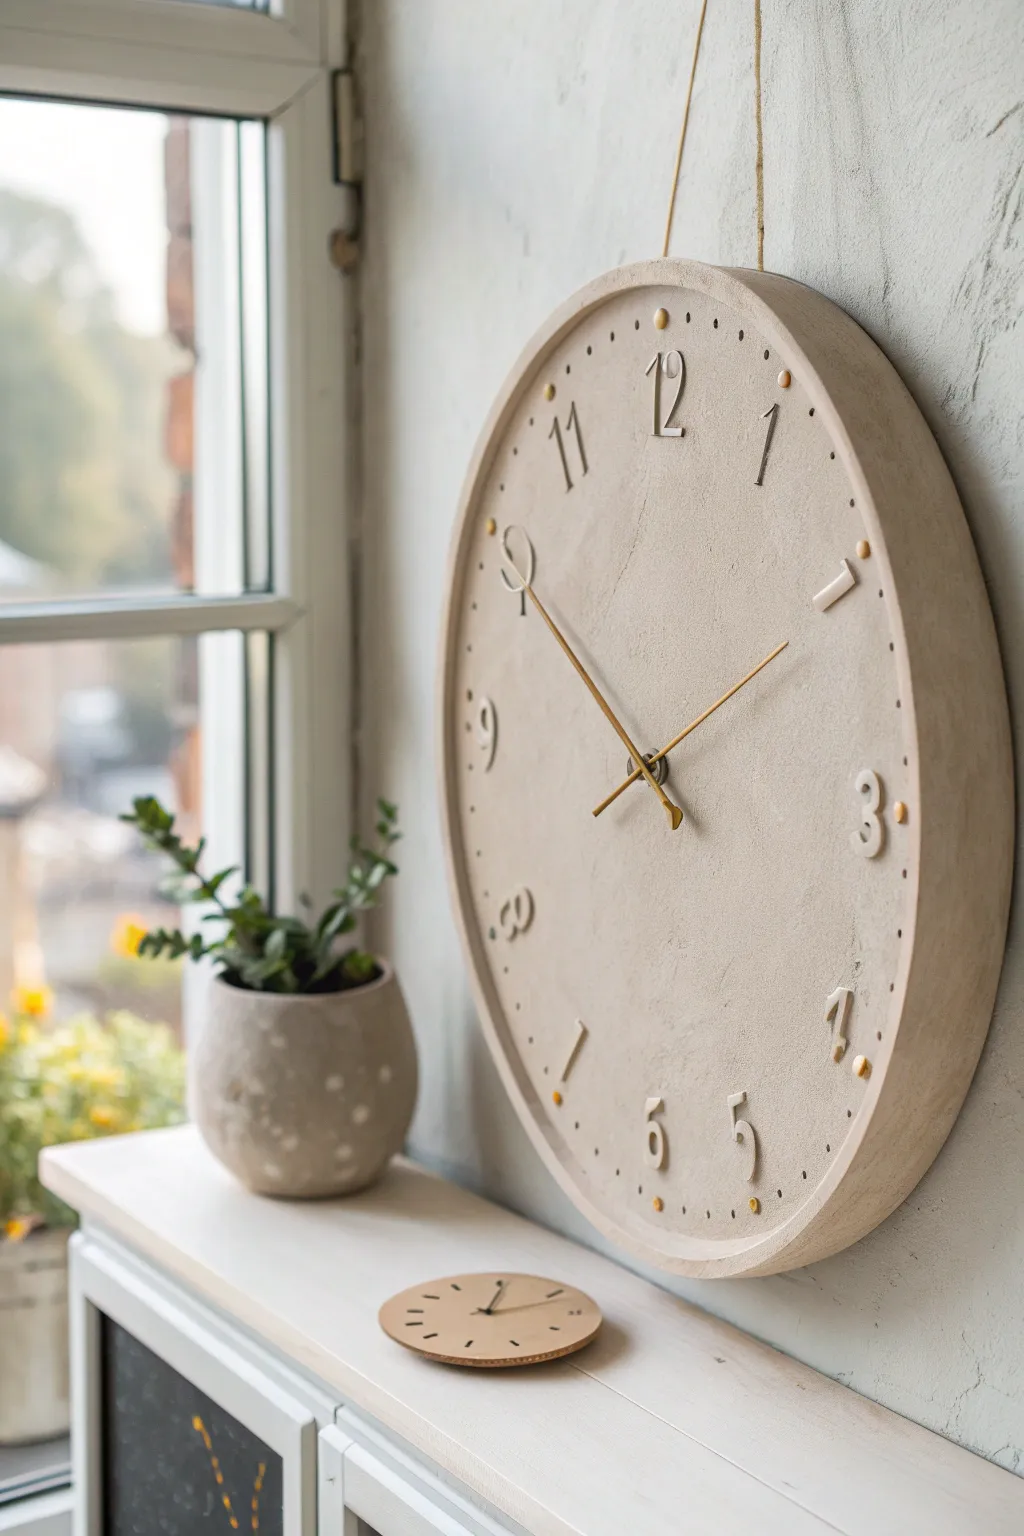
Sculpted Clay Numerals In Bold Color
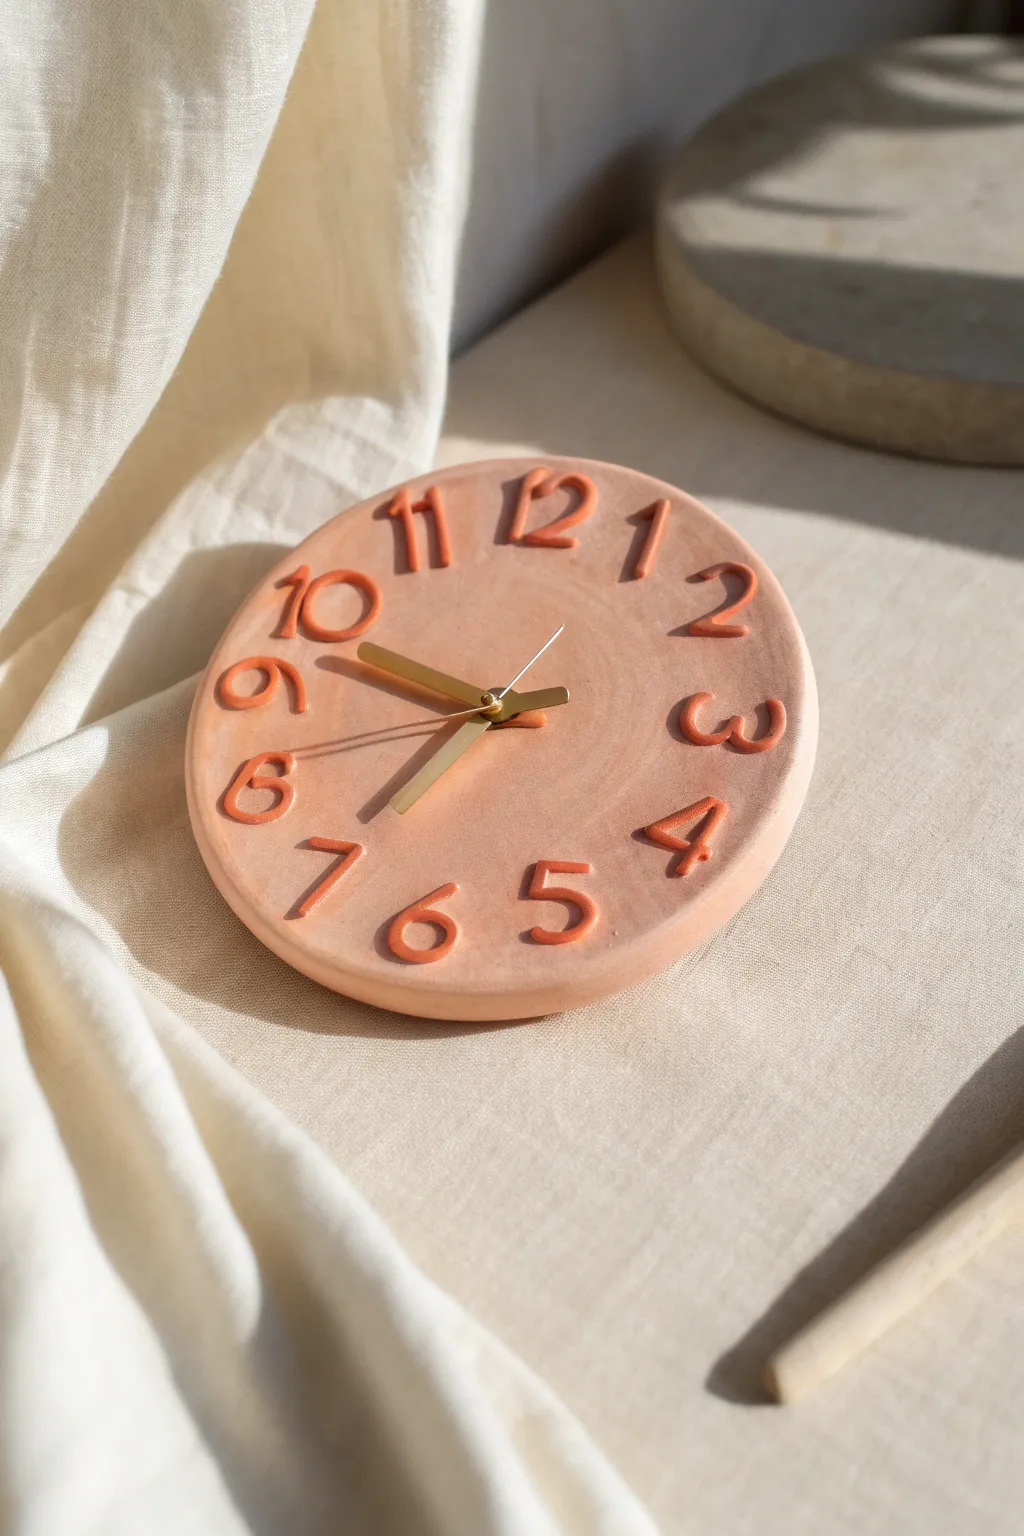
This minimalist wall clock brings a warm, artisanal touch to any room with its soft peach base and bold, raised numerals. The project combines simple slab-building techniques with delicate sculpting to create a functional piece of art that feels earthy and modern.
How-To Guide
Materials
- Light peach or beige polymer clay (base)
- Terracotta or dark orange polymer clay (numerals)
- Acrylic roller or rolling pin
- Large circular cookie cutter (or bowl and craft knife)
- Clock mechanism kit with gold hands
- Small geometric clay cutters (optional for text)
- Needle tool or toothpick
- Liquid polymer clay (bake and bond) or heavy gel medium
- Sandpaper (various grits)
- Parchment paper
- Oven (for baking polymer clay)
Step 1: Forming the Base
-
Condition and Roll the Base:
Start by conditioning your light peach clay until it’s pliable and smooth. Roll it out on a piece of parchment paper to a uniform thickness of about 1/4 inch. I like to use depth guides or playing cards on either side of the roller to ensure the slab is perfectly even. -
Cut the Circle:
Place your large circular cutter or a bowl upside down onto the clay slab. Press down firmly to cut the shape. If using a bowl, trace around the edge carefully with a sharp craft knife to get a clean edge. -
Create the Spindle Hole:
Find the exact center of your circle. Use a drinking straw or a small circular cutter to punch a hole through the center. Make sure this hole is slightly larger than the shaft of your clock mechanism to allow for shrinkage during baking. -
Smooth the Edges:
Dip your finger in a little water (or baby oil if the clay is sticky) and gently run it along the cut edge of the circle to smooth out any harsh lines or jagged bits.
Clean Cuts Only
To prevent distorted numbers when cutting your clay snakes, let the rolled clay sit in the fridge for 10 minutes before slicing. The cold makes it firmer and easier to cut clearly.
Step 2: sculpting the Numerals
-
Prepare Accent Clay:
Condition the darker terracotta clay. Roll it into very thin ‘snakes’ or coils. Aim for a thickness of about 2-3mm to keep the numerals delicate but legible. -
Shape the Numbers:
Cut sections of the clay coil and gently shape them into numbers 1 through 12. You can do this freehand for a charming, organic look as seen in the photo, or lightly print a template to trace over. -
Dry Fit the Layout:
Before attaching anything, place your shaped numbers onto the clock face. Start by placing the 12, 3, 6, and 9 to establish symmetry, then fill in the remaining numbers around the circle. -
Refine the shapes:
Use a needle tool or the flat side of a knife to gently tap the sides of the numbers, making them straight and uniform. If any number looks too bulky, trim the ends slightly.
Texture Play
Before baking, lightly press a piece of canvas or coarse fabric onto the base clay slab. This adds a subtle woven texture that contrasts beautifully with the smooth numerals.
Step 3: Assembly and Finishing
-
Attach the Numerals:
Lift one number at a time and apply a tiny dab of liquid polymer clay or ‘bake and bond’ to the back. Press it gently back into its spot on the base, ensuring it adheres well without squishing the shape. -
Check Adhesion:
Go around the clock face and ensure no edges of the numbers are lifting. A light tap with your finger is usually enough to secure them. -
Bake the Project:
Transfer the parchment paper with the clock face onto a baking sheet. Bake according to your specific clay manufacturer’s instructions (usually around 275°F or 130°C for 15-30 minutes). -
Cool Down:
Let the clock face cool completely inside the oven with the door slightly ajar. This prevents thermal shock which can cause cracking. -
Install the Mechanism:
Once cool, insert the clock movement shaft through the back of the center hole. Secure it with the washer and nut provided in your kit. -
Attach the Hands:
Press the hour hand onto the shaft first, pointing to 12. Follow with the minute hand, also pointing to 12. Secure the second hand or cap nut on top.
Hang your new handcrafted timepiece and enjoy the warm, custom aesthetic it brings to your wall
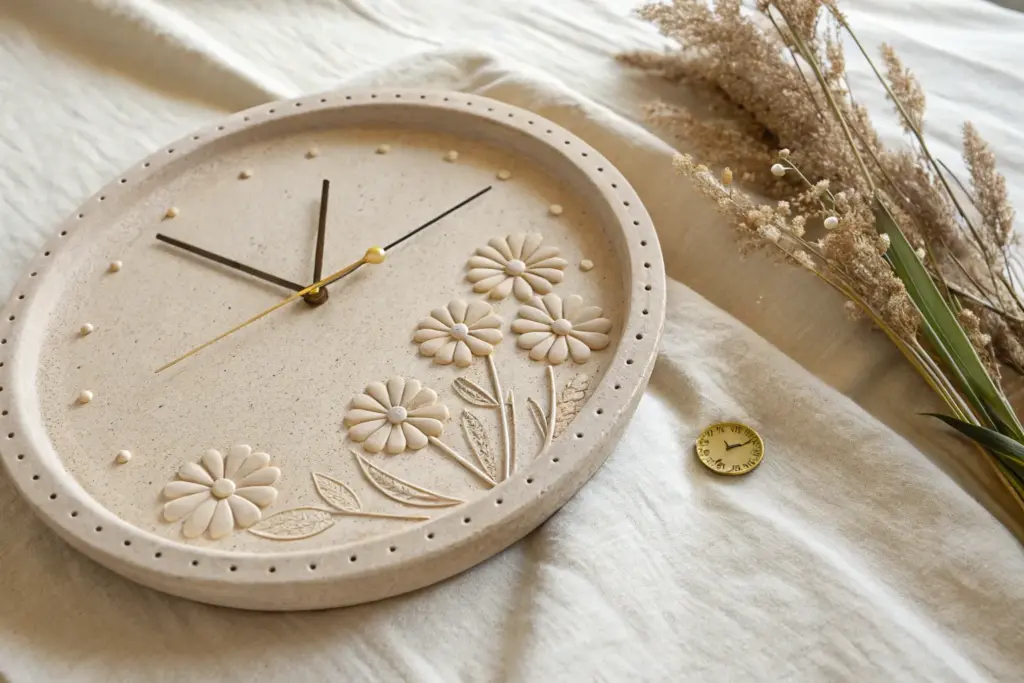
Floral Wreath Border Clock
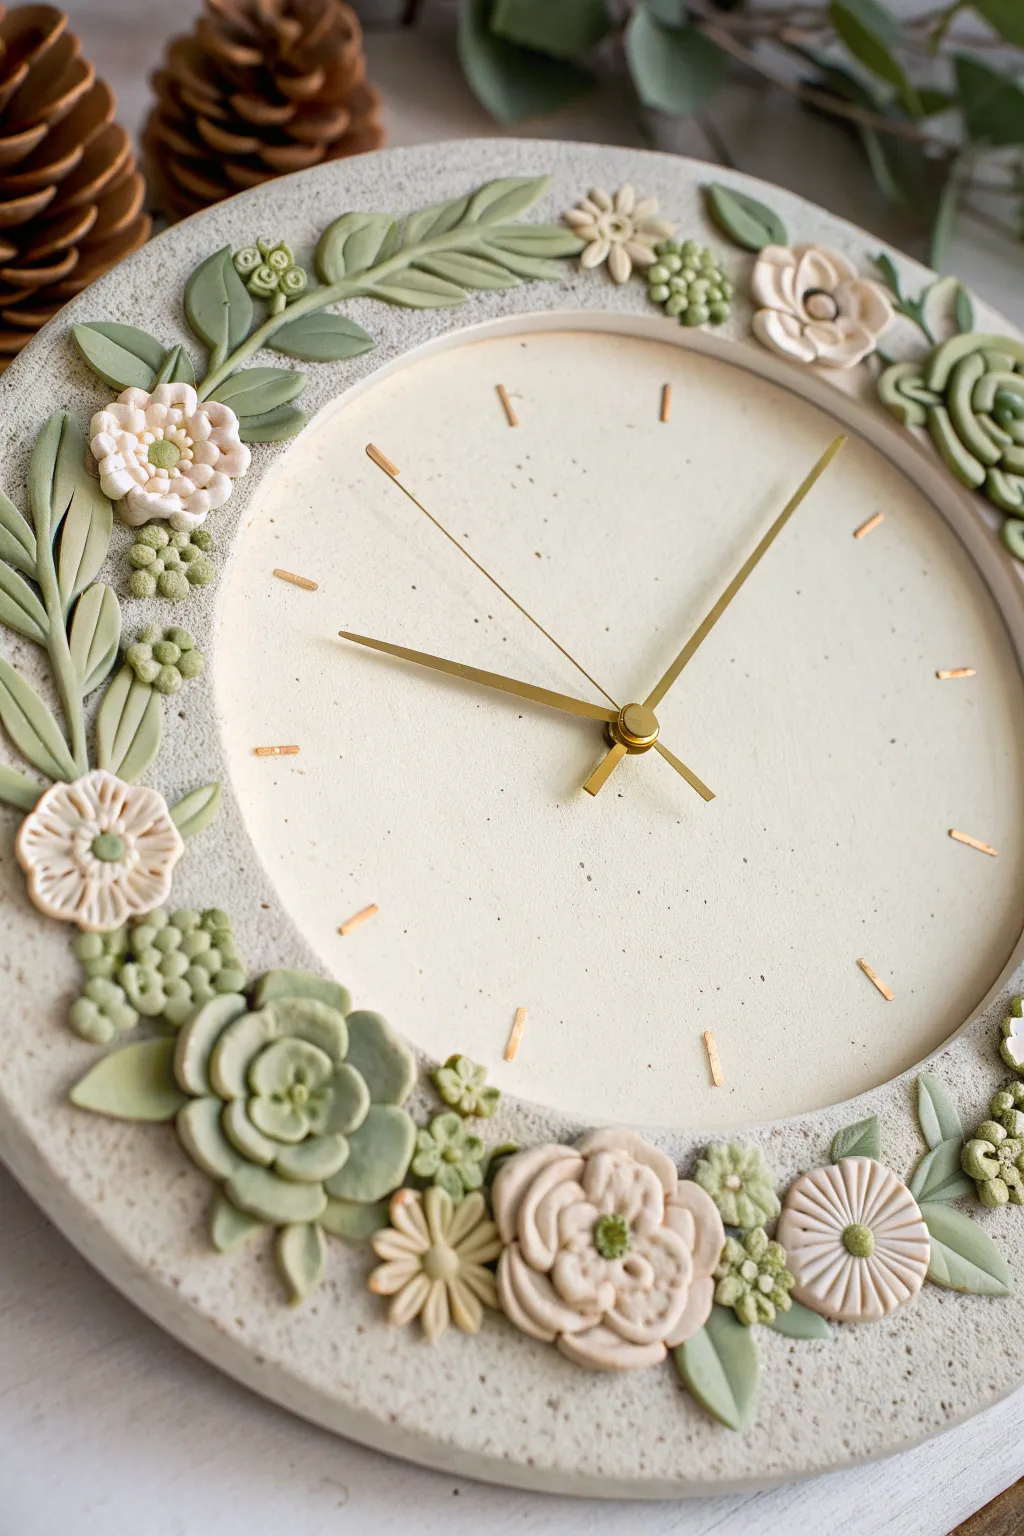
Bring the calming essence of a garden indoors with this understated, nature-inspired timepiece. Featuring hand-sculpted clay succulents and delicate blooms in a soft sage and cream palette, this clock transforms functional décor into a textural work of art.
Detailed Instructions
Materials
- Polymer clay (Sage Green, White, Translucent, Beige)
- Round wooden clock base (approx. 10-12 inches)
- Clock mechanism kit with gold hands
- Textured rolling pin or sandpaper (for stone effect)
- Liquid polymer clay (Bake & Bond)
- Black pepper or dried tea leaves (for speckling)
- Needle tool
- Ball stylus tools
- Small flower cutters (optional)
- X-Acto knife
- Acrylic paint (Light Gold for hour markers)
- Gloss varnish (optional)
Step 1: Preparing the Stone-Effect Base
-
Mix the Base Color:
Begin by conditioning a large block of white clay mixed with a small amount of beige to create a warm, creamy off-white tone. To achieve the speckled stone look seen in the photo, kneed in a pinch of ground black pepper or dried tea leaves until distributed evenly. -
Cover the Clock Face:
Roll your speckled clay out into a large, even sheet about 1/4 inch thick. Apply a thin layer of liquid clay to your wooden base, then drape the clay sheet over it, smoothing it outwards to remove air bubbles. Trim the excess flush with the edge using your X-Acto knife. -
Add Texture:
Before the clay cures or hardens, gently press a piece of sandpaper or a texturing sponge over the entire surface to give it a matte, stone-like finish. Use a needle tool to poke a hole through the clay where the clock mechanism will eventually go. -
Mark the Hours:
Using a ruler, lightly press small indentations for the 12 hour markers. You can embed small strips of gold clay here, or simply leave the indentations to be painted later.
Clay Adhesion Won’t Stick?
If your decorative flowers aren’t sticking to the base clay, brush a tiny amount of liquid polymer clay (or PVA glue if using air-dry clay) onto the back of each piece before pressing it down.
Step 2: Sculpting the Floral Wreath
-
Leaf Mixing:
Mix three shades of green clay: a pale mint, a medium sage, and a darker olive. Marbling in a bit of white or translucent clay helps keep the look organic rather than plastic. -
Forming the Base Leaves:
Roll small teardrops of green clay and flatten them. Use a needle tool to score a central vein down each one. Arrange these in clusters around the outer rim of the clock face, pressing them gently into the base to secure them. -
Creating the Succulents:
For the rosette succulents, make several tiny teardrop shapes in pale sage. Flatten the wide end of each teardrop. Assemble them in a spiral, starting with a tight center bud and overlapping larger petals as you work outward. -
Sculpting the Cream Blooms:
To make the ruffled flowers, roll a thin strip of cream clay and twist it into a loose spiral, pinching the bottom. Gently flare the edges of the ‘petals’ to open the flower. -
Adding Texture to Flowers:
For the daisy-like flowers, use a needle tool to press lines into flattened discs of clay. Add a tiny textured ball of green clay to the center of each one. -
Arranging the Border:
Position your succulents and flowers directly onto the leaf bed you created earlier. I prefer to cluster the larger succulents at the bottom left and top right to create visual balance, filling gaps with smaller berries or buds. -
Adding Detail Elements:
Roll tiny balls of sage clay to create berry clusters. Pile them together in small mounds near the larger flowers, pressing them down with a ball tool to ensure they adhere.
Step 3: Assembly and Finishing
-
Baking:
Once your arrangement is complete, bake the entire piece according to your polymer clay package instructions. If using a wooden base, ensure your oven temperature is low enough not to scorch the wood (usually 265°F/130°C is safe). -
Painting Details:
After the clock has cooled completely, use a fine detail brush and light gold acrylic paint to fill in the hour marker indentations you made earlier. This adds a subtle, elegant shine. -
Installing Mechanism:
Insert the clock shaft through the center hole from the back. Attach the washer and nut on the front side to secure it tight against the clay surface. -
Attaching Hands:
Press the hour hand onto the shaft first, followed by the minute hand, and finally the second hand (if yours has one). Ensure they are parallel so they don’t catch on the sculpted flowers.
Pro Tip: Softening the Look
Dust a little bit of cornstarch or baby powder onto your clay before pressing it into molds or texturing it. This prevents sticking and leaves a velvety, matte finish on the leaves.
Hang your new handcrafted timepiece and enjoy the serene atmosphere it adds to your room


What Really Happens Inside the Kiln
Learn how time and temperature work together inside the kiln to transform clay into durable ceramic.
Leaf-Impressed Botanical Clay Clock
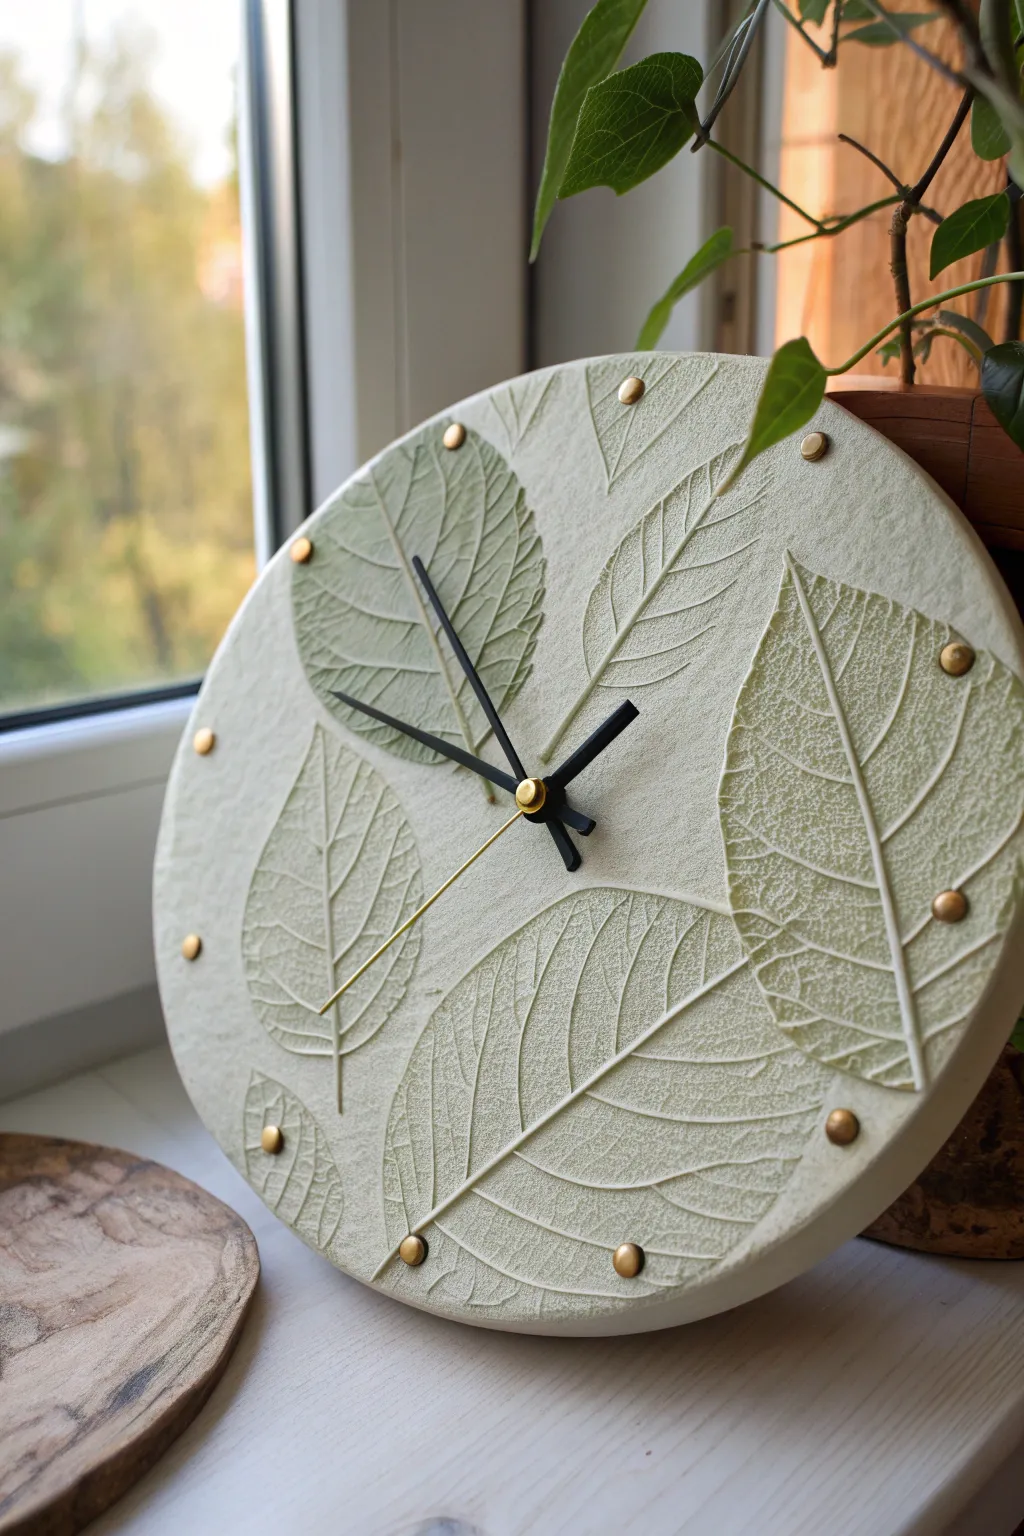
This elegant clock project freezes the beauty of nature in place, featuring realistic leaf impressions on a textured, pale clay surface. The soft green tones and gold hour markers create a sophisticated, organic piece perfect for bringing a touch of the outdoors inside.
Step-by-Step Tutorial
Materials
- Air-dry clay (white or pale stone)
- Fresh leaves with prominent veins (like hydrangea, beech, or similar)
- Rolling pin
- Clock mechanism kit (movement, hands, washer)
- Gold studs or brads (small, round)
- Craft knife or scalpel
- Sandpaper (fine grit)
- Acrylic paints (sage green, white, pale yellow)
- Small sponge and fine paintbrush
- Measuring tape or ruler
- Circle template or large bowl (approx 10-12 inches)
- Straw or cylindrical tool (for the center hole)
- Matte varnish or sealant
Step 1: Preparation & Impressions
-
Roll the clay base:
Begin by conditioning your air-dry clay until it is smooth and pliable. Roll it out on a flat, non-stick surface to a consistent thickness of about 1/4 inch (6-7mm), ensuring it’s wide enough for your desired clock diameter. -
Texture the surface:
Before adding the main leaves, lightly press a textured sponge or crumpled aluminum foil over the entire surface to give the clay a subtle, stone-like grain rather than a perfectly smooth finish. -
Arranging the botanicals:
Select fresh leaves with thick, sturdy veins. Lay them vein-side down onto the clay in a pleasing pattern, letting some overlap the edges to create a sense of movement. -
Pressing the pattern:
Use your rolling pin to firmly press the leaves into the clay. I emphasize using steady, even pressure here; you want the leaf to sit flush with the clay surface without distorting the overall flatness of the slab. -
Reveal the details:
Carefully peel back the leaves by their stems to reveal the intricate impressions left behind. If any small pieces of organic matter stick, gently lift them out with tweezers.
Vein-Side Down
Make sure you press the *back* of the leaf into the clay. The veins are much more prominent on the underside, which creates a deeper, crisper impression.
Step 2: Shaping & Mechanism Prep
-
Cut the circle:
Place your circle template or large bowl over the clay, positioning it to capture the best part of your leafy arrangement. Cut around the edge cleanly with a craft knife. -
Smooth the edges:
Dip your finger in a little water and run it along the cut edge to smooth out any sharpness or roughness left by the knife. -
Mark the center:
Find the exact center of your circle using a ruler. Use a straw or a tool slightly larger than your clock mechanism’s shaft to punch a clean hole right in the middle. -
Drying phase:
Let the clay dry completely on a flat surface, turning it over occasionally to prevent warping. This usually takes 24-48 hours depending on humidity.
Watercolor Effect
Instead of acrylics, try using watercolor paints for the leaves. The pigment naturally pools in the deepest veins, creating an organic, stained look instantly.
Step 3: Decoration & Assembly
-
Sand for perfection:
Once fully dry, essentially bone dry, lightly sand the outer rim to ensure a perfect circle and smooth finish. -
Painting the impressions:
Mix a diluted wash of sage green acrylic paint. Using a brush, apply this into the leaf depressions. -
Wiping back:
While the paint is still wet, use a damp sponge to wipe the surface gently. This leaves the pigment in the deep veins and recesses while keeping the raised surface pale, highlighting the texture. -
Adding depth:
For extra realism, dry-brush a tiny bit of white or pale yellow across the highest points of the clay texture to simulate light hitting stone. -
Insert hour markers:
If your clay is soft enough, you might press studs in before drying, but for hardened clay, mark 12 equidistant points near the rim. Use a small drill bit or strong adhesive to attach your gold studs at these hour marks. -
Seal the piece:
Apply a coat of matte varnish to protect the clay from humidity and dust without making it look plasticky or shiny. -
Install the movement:
Insert the clock mechanism from the back, securing it with the washer and nut on the front side. -
Attach the hands:
Press the hour, minute, and second hands onto the shaft in the correct order according to your kit’s instructions, ensuring they are parallel and don’t touch.
Hang your new botanical timepiece in a sunlit spot where the changing light will dance across the textured leaf veins throughout the day
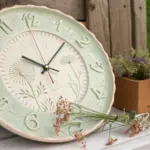
Scalloped Edge Flower-Shaped Clock
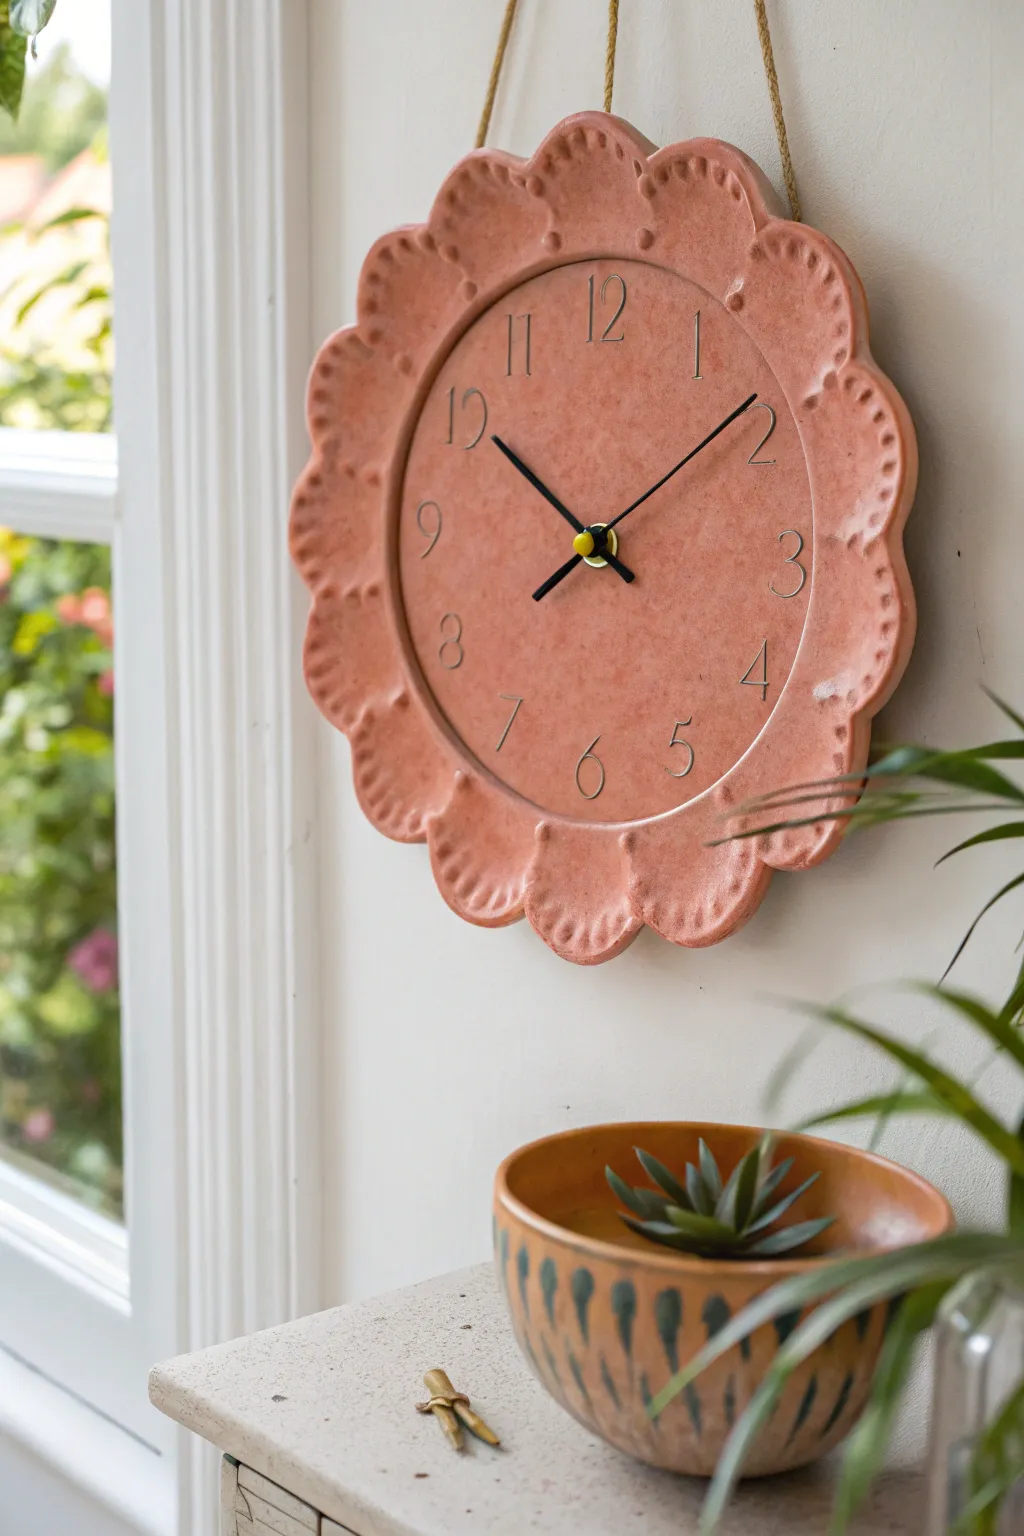
Bring the warmth of a garden indoors with this charming flower-shaped wall clock. Featuring gentle scalloped edges and a textured finish reminiscent of terracotta pottery, this project adds an artisanal touch to any room.
Step-by-Step
Materials
- Air-dry clay (terra cotta color) or polymer clay
- Rolling pin
- Large circular template (plate or bowl approx 10-12 inches)
- Small circular cutter or bottle cap (approx 1 inch)
- Modeling tool or drinking straw (for texture dots)
- Clock mechanism kit (movements and hands)
- Acrylic paint (in a dusty rose or terra cotta shade)
- Metallic silver paint pen or fine brush
- Strong craft glue (E6000)
- Sandpaper (fine grit)
- Jute twine or cord for hanging
- Gloss or satin varnish (optional for finish)
- Ruler
Step 1: Shaping the Clay Body
-
Roll out the slab:
Begin by conditioning your clay until it is pliable and smooth. Roll it out on a non-stick surface or canvas cloth to an even thickness of about 1/4 inch, ensuring it’s wide enough for your desired clock face size. -
Cut the primary circles:
Place your large circular template on the clay slab and cut around it to create the main clock face. Then, using a slightly larger guide or freehanding, cut a second, larger circle that extends about 1.5 inches beyond the first one; this outer ring will become your scalloped border. -
Create the scalloped edge:
Around the outer edge of your clay circle, gently push the clay inward at regular intervals to create indentations, forming the flower-like petals. Use your fingers to smooth and round each ‘petal’ so they are uniform in size. -
Define the inner rim:
Using a slightly smaller round object or a sculpting tool, lightly press a concentric circle into the clay about an inch or two in from the scalloped edge. This creates the visual separation between the flower petals and the clock face. -
Add decorative texture:
Take your small circular cutter, bottle cap, or a modeling tool and press distinct dots or small circles into each scalloped petal. Aim for a consistent pattern, perhaps three dots per petal or a rim of small dots, to mimic the embossed look in the reference. -
Create the center hole:
Find the exact center of your circle using a ruler. Use a straw or a small round cutter to punch a hole cleanly through the middle. Ensure this hole is large enough to fit the shaft of your specific clock mechanism. -
Drill hanging holes:
If you plan to hang the clock with twine as shown, poke two holes near the top edge of the clock (at roughly the 11 and 1 positions). Make sure they are sturdy and not too close to the very edge.
Keeping It Flat
To prevent curling while air-dry clay cures, place a heavy book on top of the clay once it’s dry to the touch but still flexible, sandwiching it between parchment paper.
Step 2: Finishing and Assembly
-
Dry the clay:
Allow the clay to dry completely according to the package instructions. For air-dry clay, I usually flip it over halfway through the drying process to prevent warping and ensure even drying. -
Sand imperfections:
Once fully cured, use fine-grit sandpaper to smooth out any rough edges on the petals or the rim. Wipe away all dust with a slightly damp cloth. -
Apply base color:
Paint the entire surface with your terracotta or dusty rose acrylic paint. You might need two coats for full opacity. To achieve the speckled texture seen in the photo, you can flick a toothbrush loaded with slightly darker or lighter paint over the surface. -
Seal the surface:
Protect your paint job with a layer of satin varnish. This gives the clock a finished ceramic look and makes it easier to clean later. -
Mark the numerals:
Lightly sketch the numbers 1 through 12 in their correct positions. A simple way to get spacing right is to mark 12, 6, 3, and 9 first, then fill in the rest. -
Paint the numbers:
Using a silver paint pen or a very fine brush with metallic silver paint, carefully trace over your sketched numbers. Use a serif font style to match the classic aesthetic of the original. -
Install the mechanism:
Insert the clock movement shaft through the back of the center hole. Secure it with the washer and nut provided in your kit, tightening gently so you don’t crack the clay. -
Attach the hands:
Press the hour, minute, and second hands onto the shaft at the 12:00 position, following the manufacturer’s order. Make sure they are parallel so they don’t catch on each other. -
Add the hanger:
Thread your jute twine through the two top holes you created earlier. Knot the ends securely at the front or back depending on your preference, creating a rustic loop for hanging.
Loose Hands?
If the clock hands swing loosely or won’t stay at 12:00, ensure the nut holding the mechanism is tight enough and that the hands are pressed down fully onto the shaft.
Hang your beautiful new timepiece in a bright spot where the natural light can highlight its floral texture

TRACK YOUR CERAMIC JOURNEY
Capture glaze tests, firing details, and creative progress—all in one simple printable. Make your projects easier to repeat and improve.
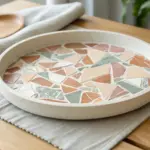
Mosaic Tile Clay Clock Face
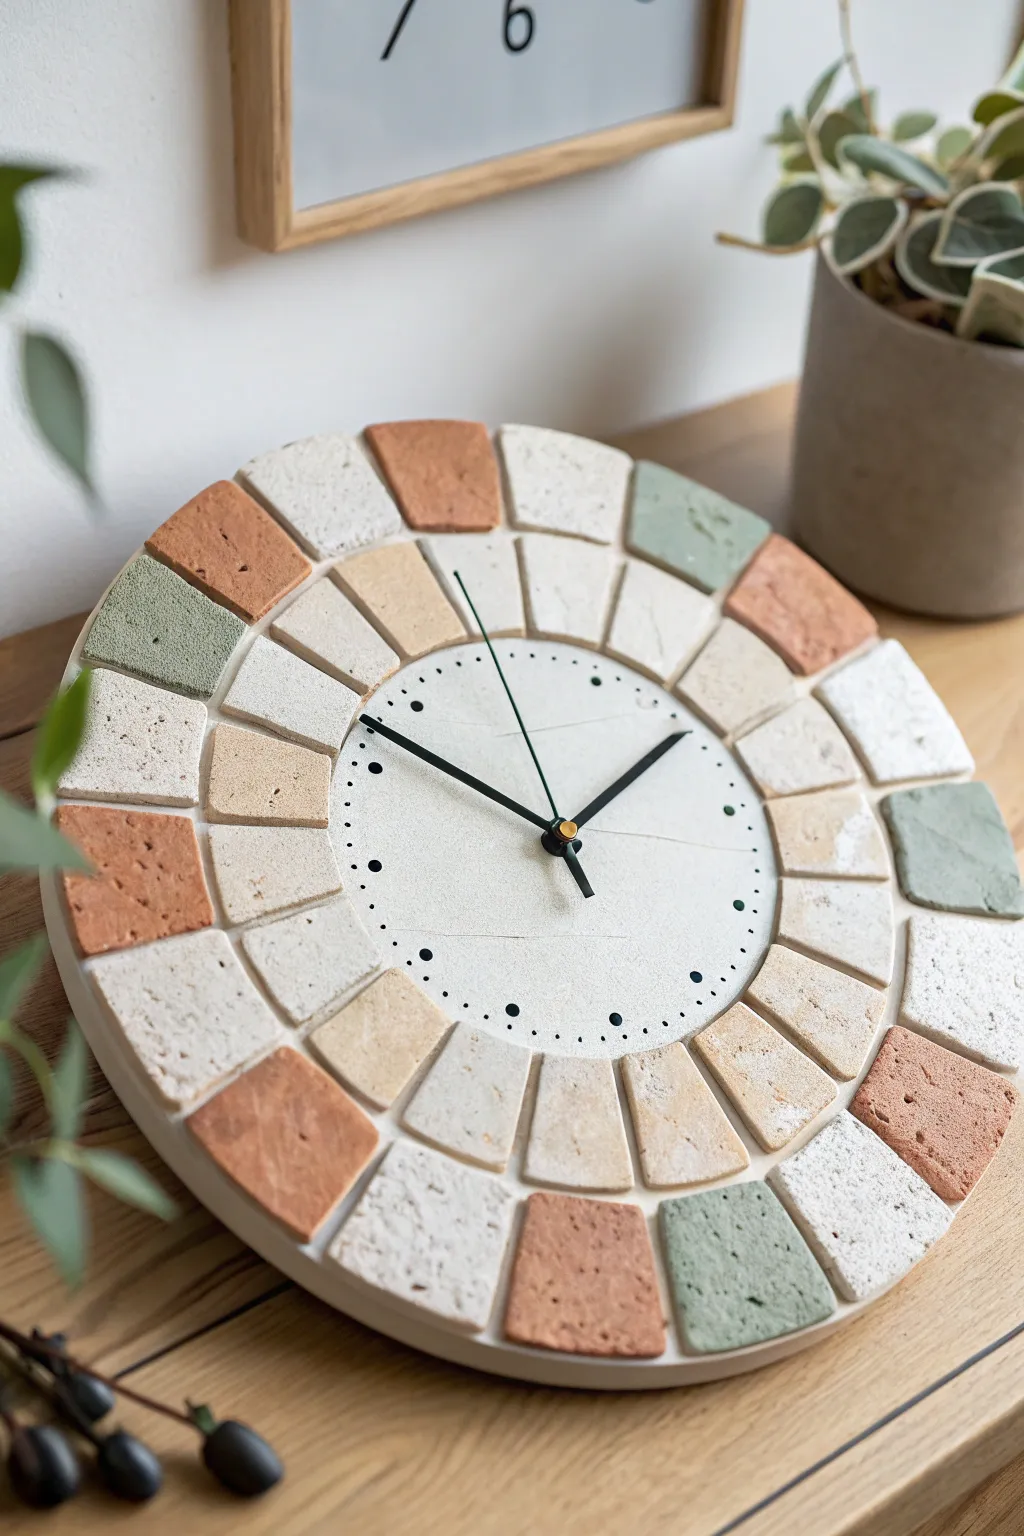
This project creates a stunning, earthy timepiece using textured clay tiles arranged in a radiating mosaic pattern. The design features a mix of terracotta, sage green, and cream hues that bring a natural, handcrafted warmth to any wall.
How-To Guide
Materials
- White or cream air-dry clay (approx. 500g)
- Terra cotta colored air-dry clay
- Sage green acrylic paint (or pre-colored clay)
- Rolling pin with texture mat or heavy fabric
- Circle cutters (large for base, smaller for center)
- Ruler and craft knife
- Sandpaper (fine grit)
- Strong craft glue (E6000 or similar)
- Clock mechanism kit (movement and hands)
- Acrylic sealer (matte finish)
- Round wooden backing board (approx. 10-12 inches)
- Black fine-tip marker
- Toothpick or awl
Step 1: Preparation & Tile Making
-
Prepare the base:
Begin by selecting a circular wooden backing board that will serve as the foundation. Find the exact center and drill a hole large enough to fit the shaft of your clock mechanism. -
Roll the clay:
Roll out slabs of the white and terracotta clay to a uniform thickness, about 1/4 inch. For a natural stone look, I like to press a piece of coarse fabric or a crumpled plastic bag gently onto the surface to create subtle texture. -
Color mixing (optional):
If you don’t have green clay, mix a small amount of sage green acrylic paint into a portion of white clay until the color is uniform. -
Cut the center circle:
Using a large circle cutter or a bowl as a guide, cut out a central disc from the textured white clay. This should be about 4-5 inches in diameter. Poke a hole in the dead center for the clock shaft. -
Template the manageable segments:
To ensure your mosaic tiles fit perfectly, trace your wooden base onto paper. Draw concentric circles radiating from the center, then divide these rings into segments to create trapezoidal templates for your ‘stones’. -
Cut the tiles:
Using your paper templates and a sharp craft knife, cut the trapezoid shapes from your various clay colors. You will need smaller trapezoids for the inner ring and slightly larger ones for the outer ring. -
Create variety:
Cut a mix of colors. The image shows a predominance of cream/white tiles, interspersed with terracotta and sage green accents. Don’t worry about perfect edges; a little roughness adds to the rustic charm. -
Drying time:
Lay all your clay pieces—the center disc and the individual tiles—on a flat surface. Weight them down gently with a board to prevent curling and let them dry completely, which usually takes 24-48 hours.
Shrinkage Issues?
Air-dry clay shrinks as it dries. If your tiles end up too small for the board, simply increase the gap spacing between them for a wider ‘grout’ look.
Step 2: Assembly & Finishing
-
Smooth the edges:
Once dry, use fine-grit sandpaper to gently smooth any sharp burrs on the edges of your tiles, but keep the surface texture intact. -
Dry fit the design:
Arrange the pieces on your wooden board without glue first. Place the center disc, then the inner ring of tiles, followed by the outer ring. Adjust the spacing to leave small, even gaps that mimic grout lines. -
Glue the center:
Apply strong craft glue to the back of the center clay disc and press it firmly onto the wooden board, aligning the center holes perfectly. -
Secure the inner ring:
Glue the inner ring of tiles one by one. Mix up the colors randomly, perhaps placing a cream tile next to a terracotta one. -
Secure the outer ring:
Proceed to glue the outer ring. Try to stagger the ‘mortar lines’ so they don’t align perfectly with the inner ring, creating a brick-lay effect. -
Add the time markers:
Using a fine-tip black marker, draw small dots on the central white disc to represent the minutes. Make the dots at the 12, 3, 6, and 9 positions slightly bolder for easier reading. -
Seal the surface:
Apply a coat of matte acrylic sealer over the entire face of the clock. This protects the clay from dust and moisture without making it look plasticky. -
Install mechanism:
Insert the clock movement through the back of the board. Secure it with the washer and nut on the front side. -
Attach hands:
Press the hour hand onto the shaft first, followed by the minute hand, and finally the second hand (if your kit includes one). Ensure they are parallel so they don’t catch on each other.
Grout for Realism
For a true mosaic feel, fill the gaps between clay tiles with actual limestone-colored tile grout. Wipe clean with a damp sponge before it sets.
Hang your new handcrafted timepiece and enjoy the organic texture it adds to your room
Sunburst Ray Texture Clock
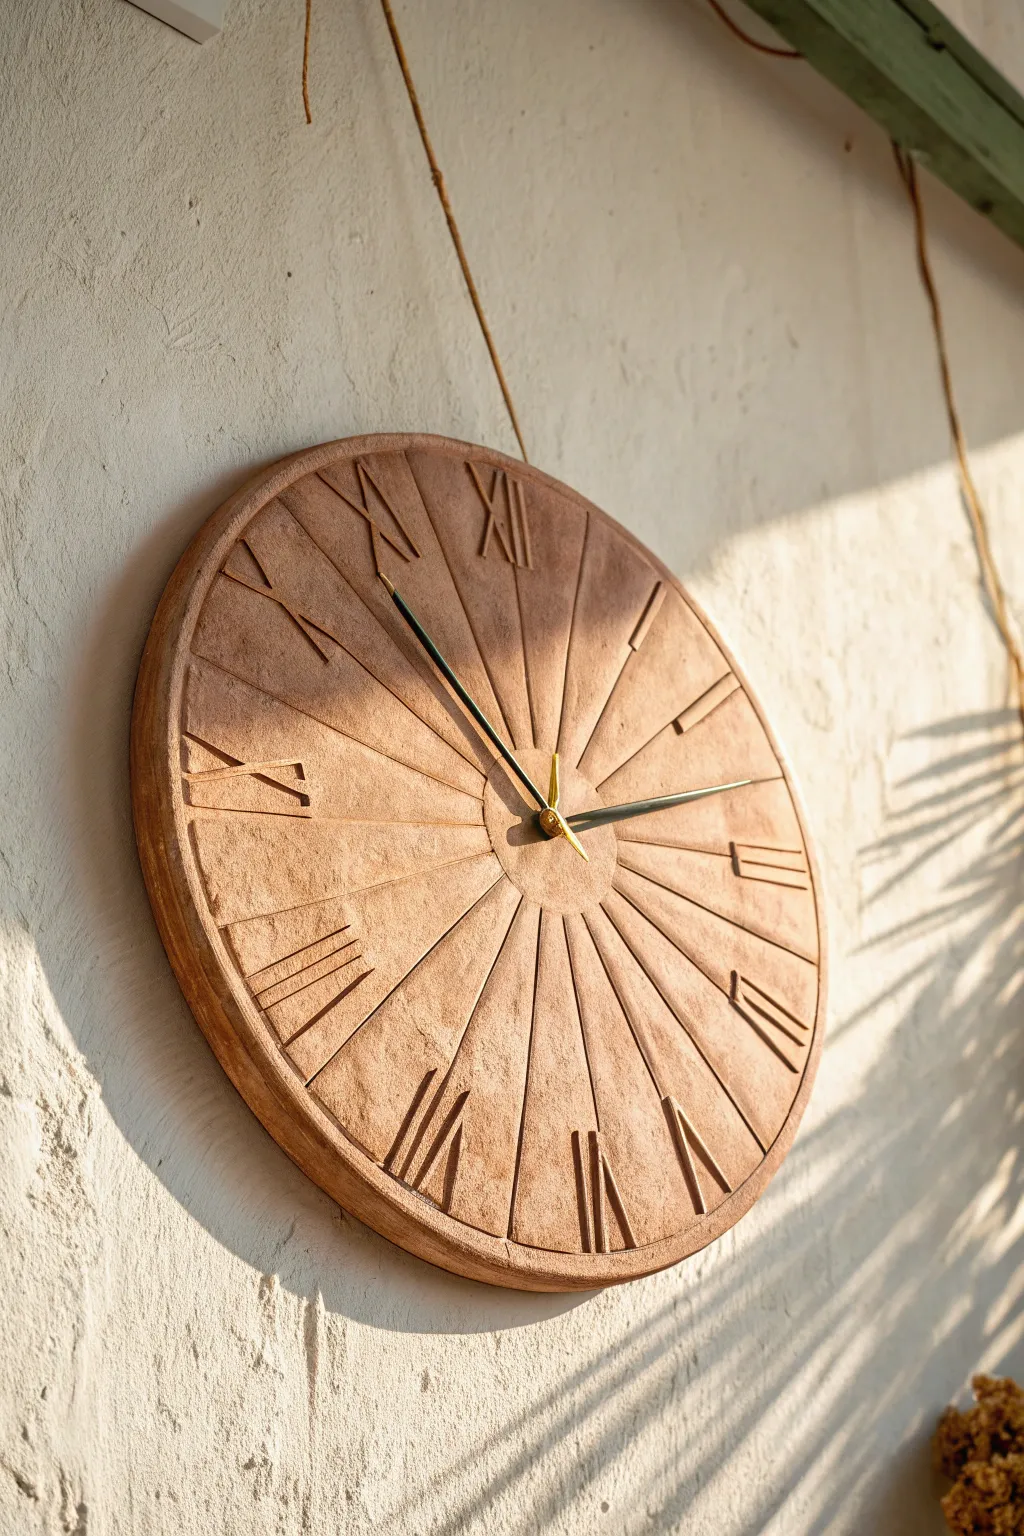
Capture the warmth of Mediterranean design with this textured clay clock. Featuring deep straight rays and classic Roman numerals carved into faux-stone clay, this piece combines rustic charm with modern geometry.
Step-by-Step
Materials
- Air-dry clay (terra cotta color, approx. 1kg)
- Round wooden board or MDF cutout (12-14 inches)
- Rolling pin
- Clock mechanism kit with hands (batteries separately)
- Ruler or straight edge
- Sculpting tools (needle tool, flat loop tool)
- Water and sponge
- Sandpaper (medium and fine grit)
- Matte sealer or varnish
- Strong craft glue (E6000 or wood glue)
- Drill with bit matching clock shaft size
Step 1: Base Preparation
-
Prepare the substrate:
Begin by drilling a hole in the exact center of your wooden circle that is large enough for your clock mechanism’s shaft to pass through comfortably. -
Condition the clay:
Knead your terra cotta air-dry clay thoroughly until it is soft and pliable. If it feels too stiff, dip your fingers in water and work the moisture in. -
Roll the slab:
Roll out the clay on a flat surface to a thickness of about 1/4 inch. Ensure the slab is slightly larger than your wooden base. -
Adhere clay to wood:
Apply a generous layer of glue to the front of the wooden board. Carefully lift the clay slab and press it firmly onto the wood, smoothing out any trapped air bubbles from the center outward. -
Trim the edges:
Use a knife to trim the excess clay flush with the edge of the wooden circle. I like to smooth this edge with a wet finger to create a nice, rounded rim. -
Re-open the center:
Locate the center hole through the clay using a needle tool and carefully clear the opening for the clock shaft.
Cracking Clay?
Minor cracks add character, but if large ones appear while drying, fill them with a ‘slip’ made of clay mixed with water, then smooth over.
Step 2: Carving the Design
-
Mark the hours:
Lightly mark the 12, 3, 6, and 9 o’clock positions first to ensure symmetry, then fill in the remaining hour positions. -
Create the sunburst rays:
Place your ruler from the center hole to the edge for each hour mark. Using a sculpting tool, press a firm, straight line into the clay for each hour, creating the ‘rays’ that divide the clock face. -
Define the numerals:
Between the rays near the outer edge, carefully sketch Roman numerals (I, II, III, etc.) using a needle tool. Keep the font simple and linear. -
Carve the depth:
Using a flat loop tool or a small knife, carve out the clay from inside your numeral sketches. Make the cuts deep enough to create shadows. -
Refine the surface:
The charm of this clock is its texture, so don’t smooth it perfectly. However, gently dab the surface with a damp sponge to soften any sharp clay burrs from carving. -
Create texture:
If the clay looks too smooth, gently press sandpaper or a stiff bristle brush onto the surface to give it that stone-like, gritty appearance shown in the inspiration photo.
Metallic Accent
Mix a tiny amount of gold mica powder into your sealer for the numeral grooves to make them catch the light subtly.
Step 3: Finishing Touches
-
Main drying phase:
Allow the clock to dry completely flat. This will take at least 24 to 48 hours depending on humidity. Flip it occasionally if possible to let air reach the wood backing. -
Sanding:
Once fully dry, lightly sand the edges to ensure a clean silhouette. Avoid sanding the face too much if you want to keep the rough texture. -
Sealing:
Apply a matte varnish or sealer to the clay. This deepens the terracotta color and protects the clay from humidity without making it look glossy or plastic. -
Install mechanism:
Insert the clock mechanism from the back. Secure it with the washer and nut on the front side according to the kit’s instructions. -
Attach hands:
Press the hour and minute hands onto the shaft. For this look, simple black or brass hands work best to contrast with the textured clay background.
You have now created a timeless piece of decor that brings earthen warmth to your wall
Pastel Cloud Nursery Clay Clock
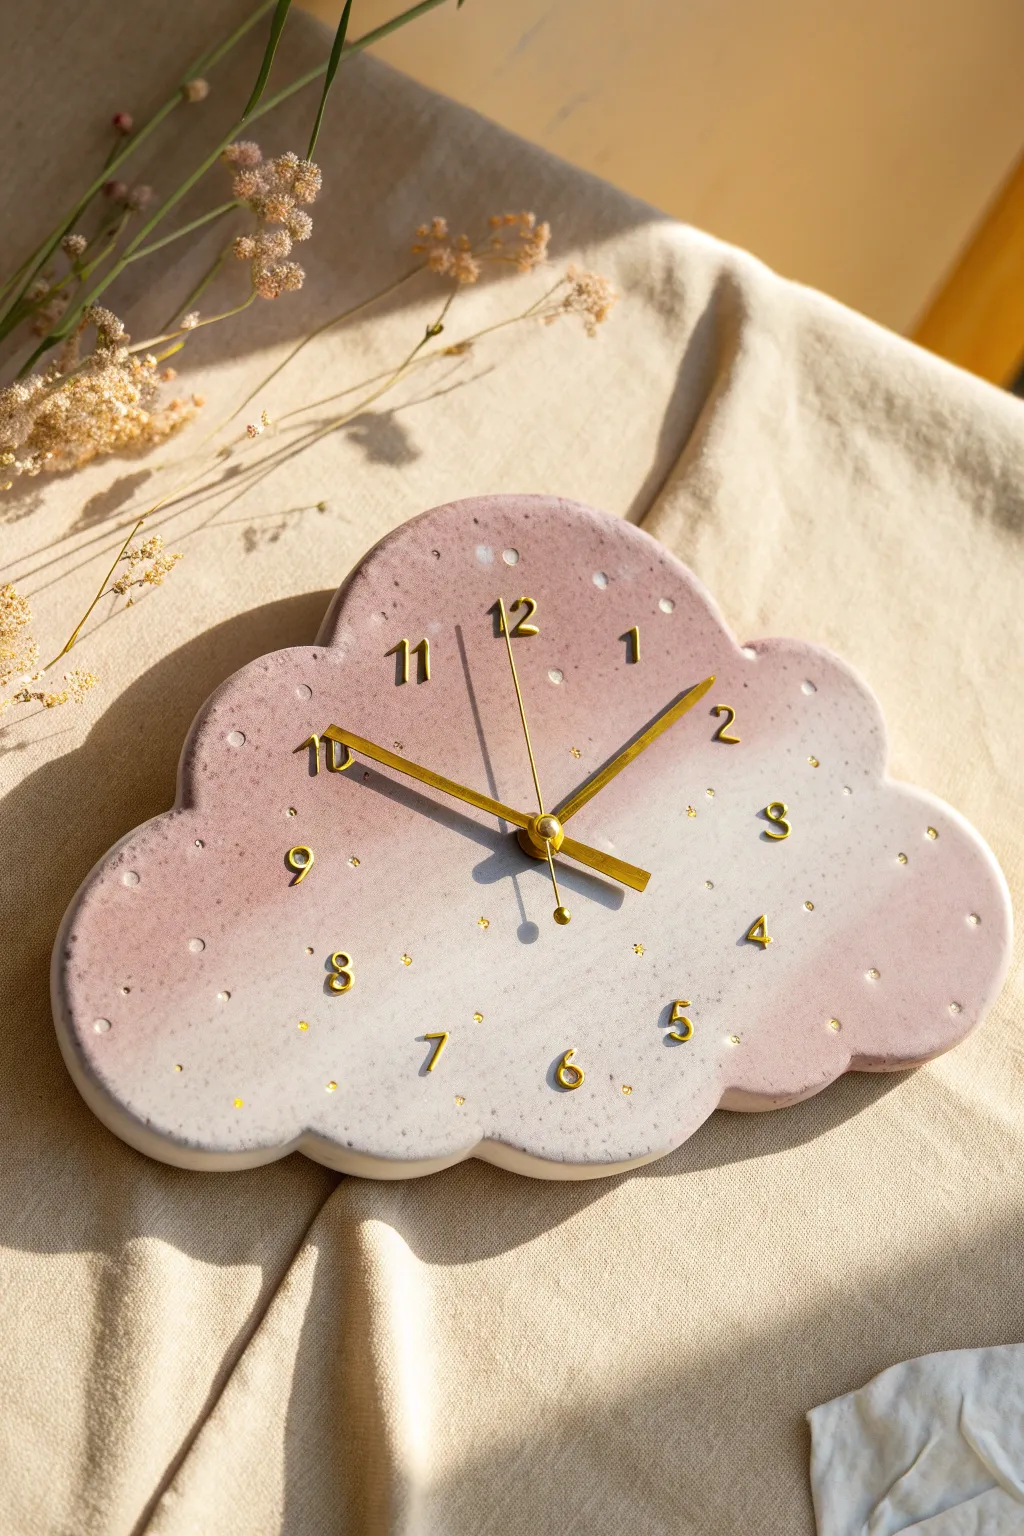
Bring a touch of whimsy to any nursery or bedroom with this soft, pastel gradient cloud clock. Hand-sculpted from clay and finished with elegant gold accents, it captures the serene feeling of a sunset sky.
Step-by-Step Tutorial
Materials
- Air-dry clay or polymer clay (white)
- Pink acrylic paint or clay pigment
- Rolling pin
- X-Acto knife or clay cutting tool
- Smooth work surface or silicone mat
- Sandpaper (fine grit)
- Gold acrylic paint
- Small detail paintbrush
- Clock mechanism kit (with gold hands)
- Ruler
- Small spray bottle or old toothbrush (for speckling)
- Paper template of a cloud shape
- Gloss or matte varnish (optional)
Step 1: Shaping and Coloring the Cloud
-
Prepare the clay:
Begin with a large block of white clay. Knead it thoroughly until it is warm and pliable to prevent cracking later. -
Create the gradient:
Separate about a third of your clay and mix in a small amount of pink paint or pigment. Knead until the color is uniform. You want a soft, dusty pink shade. -
Blend the colors:
Take the pink clay and the remaining white clay. Press them together side-by-side and begin to roll them out. Fold the clay over itself and roll again a few times to create a marbled, ombré transition where the pink fades into the white. -
Roll out the slab:
Roll the clay out into a smooth, even slab about 1/4 to 1/2 inch thick. Ensure the pink section is at the top and fades downwards into white, mimicking a sky. -
Cut the shape:
Place your paper cloud template over the clay slab. Using your cutting tool, carefully trace around the edge to cut out your cloud shape. Smooth the cut edges with a bit of water on your finger to round them off. -
Make the center hole:
Find the exact center of your cloud using a ruler. Use a straw or a tool sized to your clock mechanism shaft to punch a clean hole right in the middle.
Seamless Gradient Trick
To get that perfect fade, roll the two colors into ‘snakes’ first, twist them together, fold, and roll. Stop before they fully mix to keep the separation.
Step 2: Adding texture and details
-
Create speckles:
Dilute a tiny amount of grey or dark beige paint with water. Load an old toothbrush or stiff brush, and flick the bristles to splatter tiny, subtle speckles across the clay surface for a stone-like texture. -
Dry the clay:
Allow the clay to dry completely according to the package instructions. For air-dry clay, this usually takes 24-48 hours. Flip it occasionally to ensure even drying and prevent warping. -
Sand for smoothness:
Once fully cured, gently sand the edges and surface with fine-grit sandpaper to remove any rough spots or fingerprints.
Step 3: Assembly and Finishing
-
Mark the hours:
Lightly mark the positions for the numbers. Start with 12, 3, 6, and 9 to ensure symmetry, then fill in the remaining hours evenly spaced between them. -
Attach the numbers:
If you have pre-made gold number charms, glue them onto your markings. Alternatively, paint the numbers directly onto the clay using gold acrylic paint and a steady hand. -
Add decorative dots:
Using the tip of a paintbrush handle or a dotting tool, add tiny gold dots or stars randomly around the cloud face to enhance the magical feel. -
Seal the piece:
Apply a coat of varnish if you want to protect the paint and give the clock a finished sheen. I usually prefer a matte finish for a softer look, but gloss works well too. -
Install the mechanism:
Insert the clock mechanism shaft through the hole from the back. Secure it with the washer and nut provided in the kit. -
Attach the hands:
Press the gold hour, minute, and second hands onto the shaft at the 12 o’clock position. Make sure they don’t touch each other as they rotate.
Warping While Drying?
If the clay starts curling up at the edges while drying, place a heavy book on top of it (sandwich the clay between parchment paper first) to flatten it out.
Hang your beautiful new timepiece on the wall and enjoy the peaceful atmosphere it creates.
Peeking Animal Edge Clay Clock
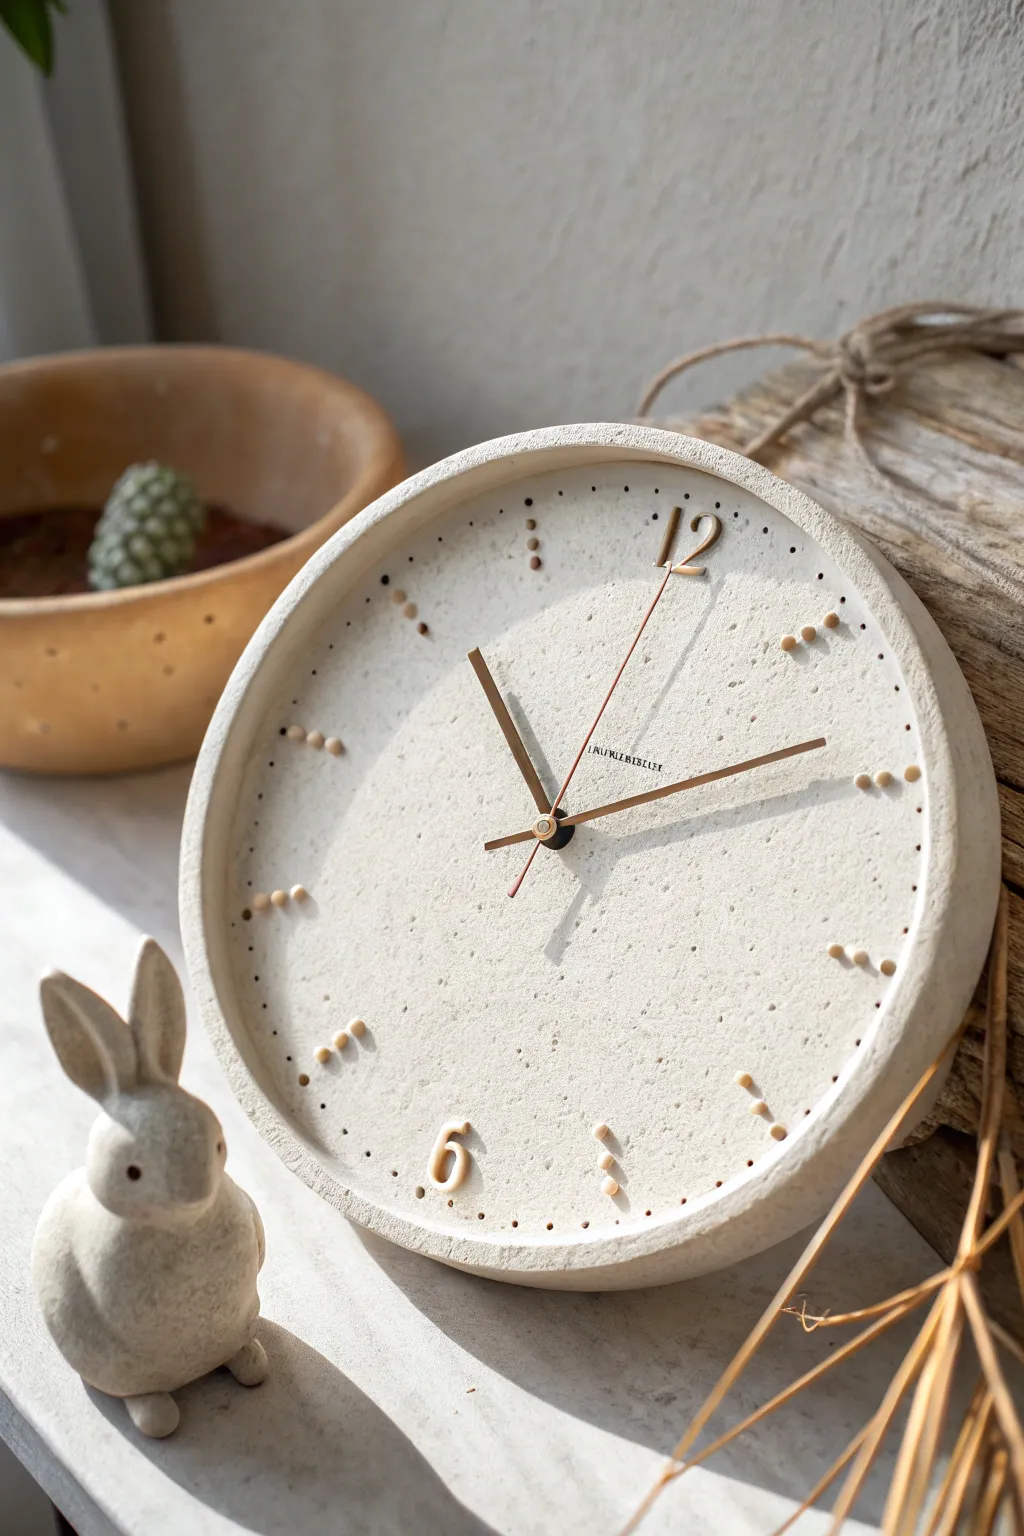
Create a stunningly simple timepiece with a natural, sandy aesthetic that mimics the look of high-end stone. This project focuses on texture and restraint, using subtle dimensional dots to mark the hours for a modern, serene addition to any shelf or mantel.
Step-by-Step Guide
Materials
- White polymer clay or air-dry stoneware clay (approx. 500g)
- Round cookie cutter or bowl (approx. 6-7 inches diameter)
- Rolling pin
- Parchment paper
- Sandpaper (medium and fine grit)
- Acrylic paint (beige/sand colors)
- Clean toothbrush or stiff bristle brush
- Small round piping tip or straw (for punching dots)
- Clock mechanism kit with gold/copper hands
- E6000 or strong craft glue
- Clear matte varnish spray
- Drill bit (matching clock shaft diameter)
Step 1: Shaping the Base
-
Prepare the Clay:
Condition your clay by kneading it until it is soft and pliable. If using polymer clay, this warms it up; for air-dry clay, ensure there are no air bubbles trapped inside. -
Roll out the Slab:
Roll the clay onto a sheet of parchment paper to a thickness of about 1/4 to 1/2 inch. Keep it relatively thick to give the clock a substantial, stone-like presence. -
Cut the Circle:
Place your round cutter or a bowl upside down on the clay. Cut around it with a craft knife to create a perfect circle. Smooth the edges immediately with a damp finger to remove any sharp cut lines. -
Create the Rim:
Roll a long snake of clay, flattening it slightly creating a strip about 1 inch wide. Wrap this around the circumference of your circle base to create a raised rim, blending the seam on the outside and inside using a modeling tool or your finger for a seamless join.
Step 2: Adding Details & Texture
-
Center Hole:
Find the exact center of the circle and pierce a hole large enough for your clock mechanism’s shaft. It’s better to make it slightly loose now than restrict the movement later. -
Texture Application:
To achieve that porous, stone effect, take a clean toothbrush or a stiff brush and tap it firmly all over the surface of the wet clay. I find that inconsistent pressure creates a more natural, organic look. -
Forming the Dots:
Roll tiny, consistent balls of clay for the hour markers. You will need clusters of three dots for the 3, 9, and intermediate positions like 1, 2, 4, 5, etc. -
Making the Numbers:
Roll thin coils of clay to form the numbers ’12’ and ‘6’. Keep them slender and elegant. Press them gently onto the clock face at the top and bottom positions. -
Attaching the Markers:
Using a dab of liquid clay (or slip if using air-dry clay), attach the number coils. For the dot markers, press them gently into the textured surface in their respective hour positions. Use a ruler to ensure radial symmetry.
Uneven texture?
If the toothbrush texture looks too uniform, press a piece of crumpled tinfoil or sheer sandpaper into the wet clay for deeper, random pitting.
Step 3: Finishing Touches
-
Curing or Drying:
Bake the polymer clay according to package directions, or let air-dry clay set for 24-48 hours until completely hard and white. -
Sand and Refine:
Once hardened, lightly sand the outer rim and back to ensure it sits flat. Be very gentle near the raised numbers and dots to avoid snapping them off. -
Speckled Painting:
Mix a small amount of watered-down brown acrylic paint. Dip a toothbrush into it and flick the bristles with your thumb to mist tiny speckles over the clock face, enhancing the faux-stone appearance. -
Sealing:
Spray the entire piece with a matte clear varnish. This protects the faux stone finish and makes the clock easier to dust later. -
Install Mechanism:
Insert the clock movement from the back through the center hole. Secure it with the washer and nut provided in the kit. -
Attach Hands:
Press the hour hand, then the minute hand onto the shaft. Ensure they are parallel to the clock face so they don’t catch on the raised clay dots.
Level Up: Hidden Stand
Press a small heavy washer into the clay at the bottom back before drying. This adds weight and stability so the clock won’t tip over easily.
Now you have a timeless, handcrafted piece that brings a quiet calm to your space
Faux Stone Texture Minimal Clay Clock
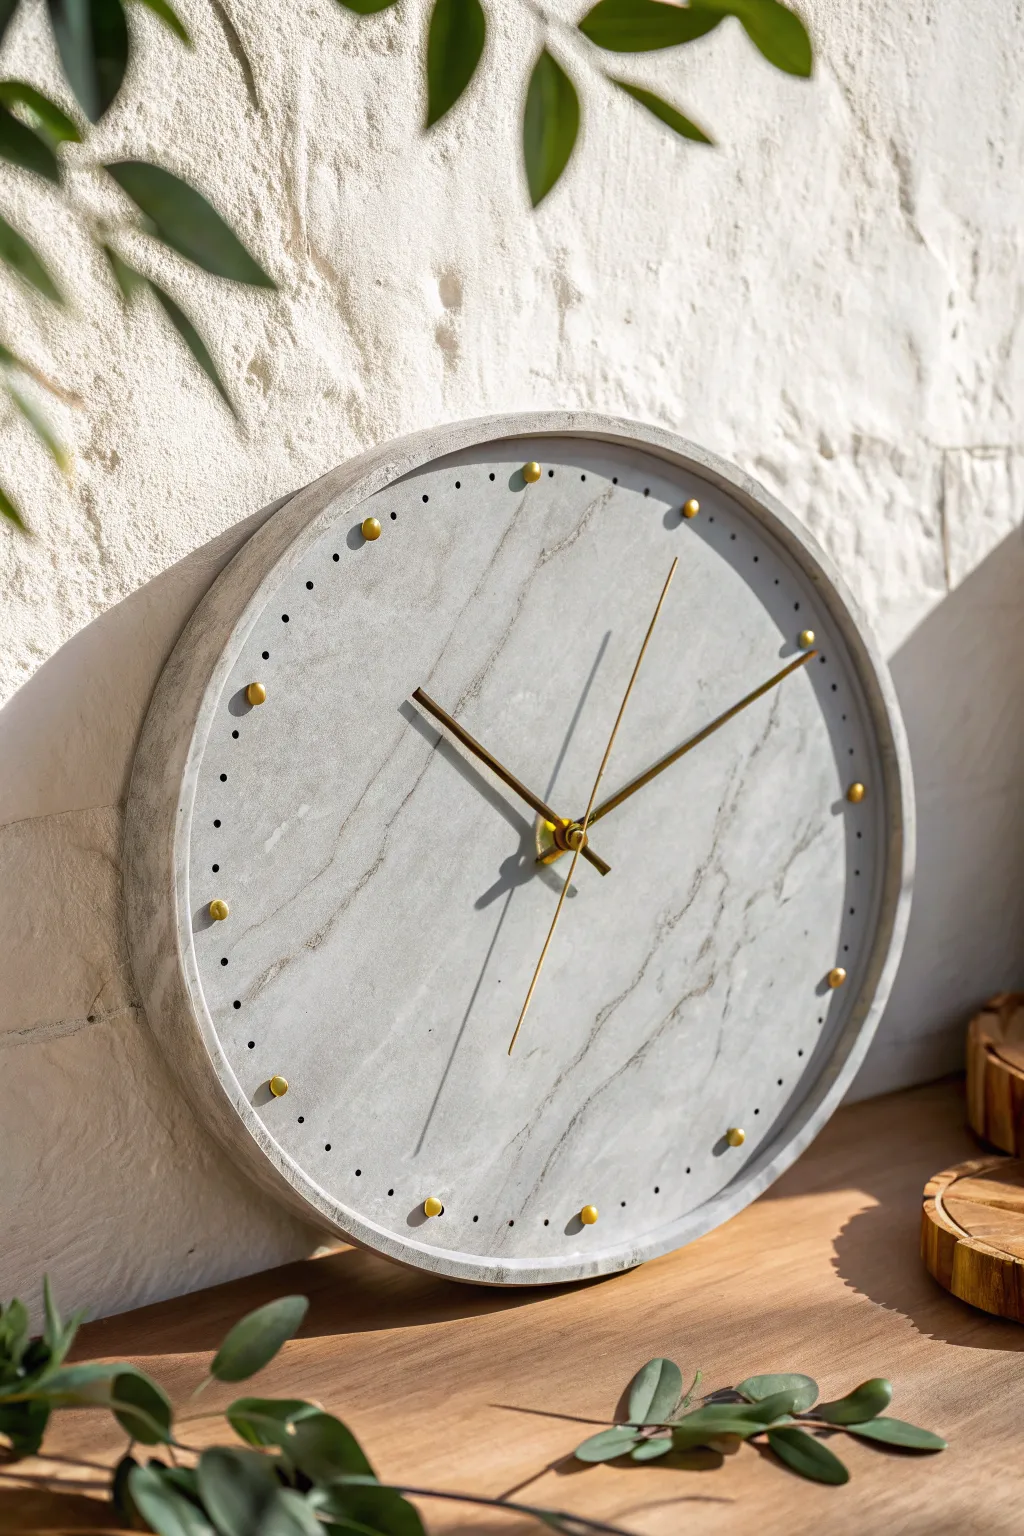
Bring a touch of modern elegance to your wall with this sophisticated clay clock featuring a realistic faux stone finish. The subtle marbling effect and crisp gold accents create a high-end look without the weight or cost of real stone.
Step-by-Step Tutorial
Materials
- Air-dry clay (white or light grey)
- Round cake pan or silicone mold (approx. 10-12 inches)
- Acrylic paints (cool grey, charcoal, white)
- Rolling pin
- Craft knife
- Sandpaper (fine grit)
- Clock mechanism kit with gold hands
- Gold studs or beads (for hour markers)
- Small drill bit or awl
- Black fine-tip permanent marker or paint pen
- Matte sealant or varnish
- Ruler
- Protractor
- Glue (E6000 or strong craft glue)
Step 1: Shaping the Base
-
Condition the clay:
Start by kneading your air-dry clay thoroughly until it is soft, pliable, and free of any air pockets. -
Roll it out:
Roll the clay into a large, smooth circle about 1/4 inch thick. Make sure the surface is as level as possible to ensure the clock mechanism sits correctly later. -
Create the rim:
To get that distinct tray-like shape, you can either mold the clay inside a round cake pan or form a long snake of clay. If using the snake method, flatten it slightly and wrap it around the circumference of your rolled slab. -
Smooth the seams:
If you added a separate rim, use a little water and a modeling tool to blend the seam where the rim meets the base so it looks like one solid piece of stone. -
Center hole:
Find the exact center of your circle using a ruler. Use a straw or a tool roughly the size of your clock shaft to punch a clean hole right in the middle. -
Dry thoroughly:
Let the clay dry completely. This usually takes 24-48 hours depending on thickness. Flip it halfway through if possible to prevent warping.
Natural Texture
Before the clay dries, gently press a crumpled ball of aluminum foil onto the surface. This imitates the subtle pitting found in real stone or concrete.
Step 2: Creating the Faux Stone Finish
-
Sand for smoothness:
Once fully dry, use fine-grit sandpaper to smooth out any fingerprints or rough edges, focusing on the top rim for a clean profile. -
Base coat:
Paint the entire face and rim with a light cool grey acrylic paint. You might need two coats for full opacity. -
Marbling technique:
While the base is still slightly tacky, mix a tiny bit of darker charcoal paint with water to make a glaze. Use a feather or fine liner brush to drag shaky, organic veins across the surface. -
Softening the veins:
Immediately use a dry, soft brush or a sponge to dab and blur the harsh lines of your veins, melting them into the background for a natural stone look. -
Adding depth:
Splatter incredibly tiny specks of watered-down white and dark grey paint across the surface using an old toothbrush to mimic the texture of concrete or granite. -
Seal the surface:
Once you are happy with the painting, apply a coat of matte varnish. This seals the work and unifies the sheen, making it look more like real honed stone.
Terrazzo Twist
Instead of painting veins, mix small chips of dried, colored clay into your wet white clay base before rolling it out for a trendy terrazzo effect.
Step 3: Assembly and Detailing
-
Marking the hours:
Using a protractor, measure and lightly mark twelve positions around the edge of the clock face, spaced exactly 30 degrees apart. -
Applying gold markers:
Glue your gold studs or beads onto these twelve marks. Ensure they are perfectly aligned with the outer rim for symmetry. -
Adding minute tracks:
Using a ruler and a fine-tip black marker, carefully place smaller dots between the hour markers. I find marking the halfway point first makes spacing the rest easier. -
Install the mechanism:
Insert the clock movement shaft through the back of the center hole. Secure it with the washer and nut provided in your kit. -
Attach the hands:
Press the gold hour hand onto the shaft first, followed by the minute hand, and finally the second hand (if your kit includes one). Make sure they are parallel so they don’t catch on each other.
Now hang your sleek, stone-effect timepiece and enjoy the minimalist charm it adds to your space