I reach for slab construction whenever I want crisp lines, easy measuring, and shapes the wheel just won’t give me. Here are my favorite slab-built pottery ideas—from classic starter projects to a few playful, “how did you make that?” forms.
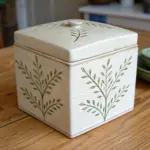
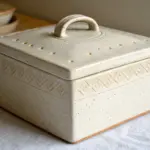
Classic Lidded Slab Box
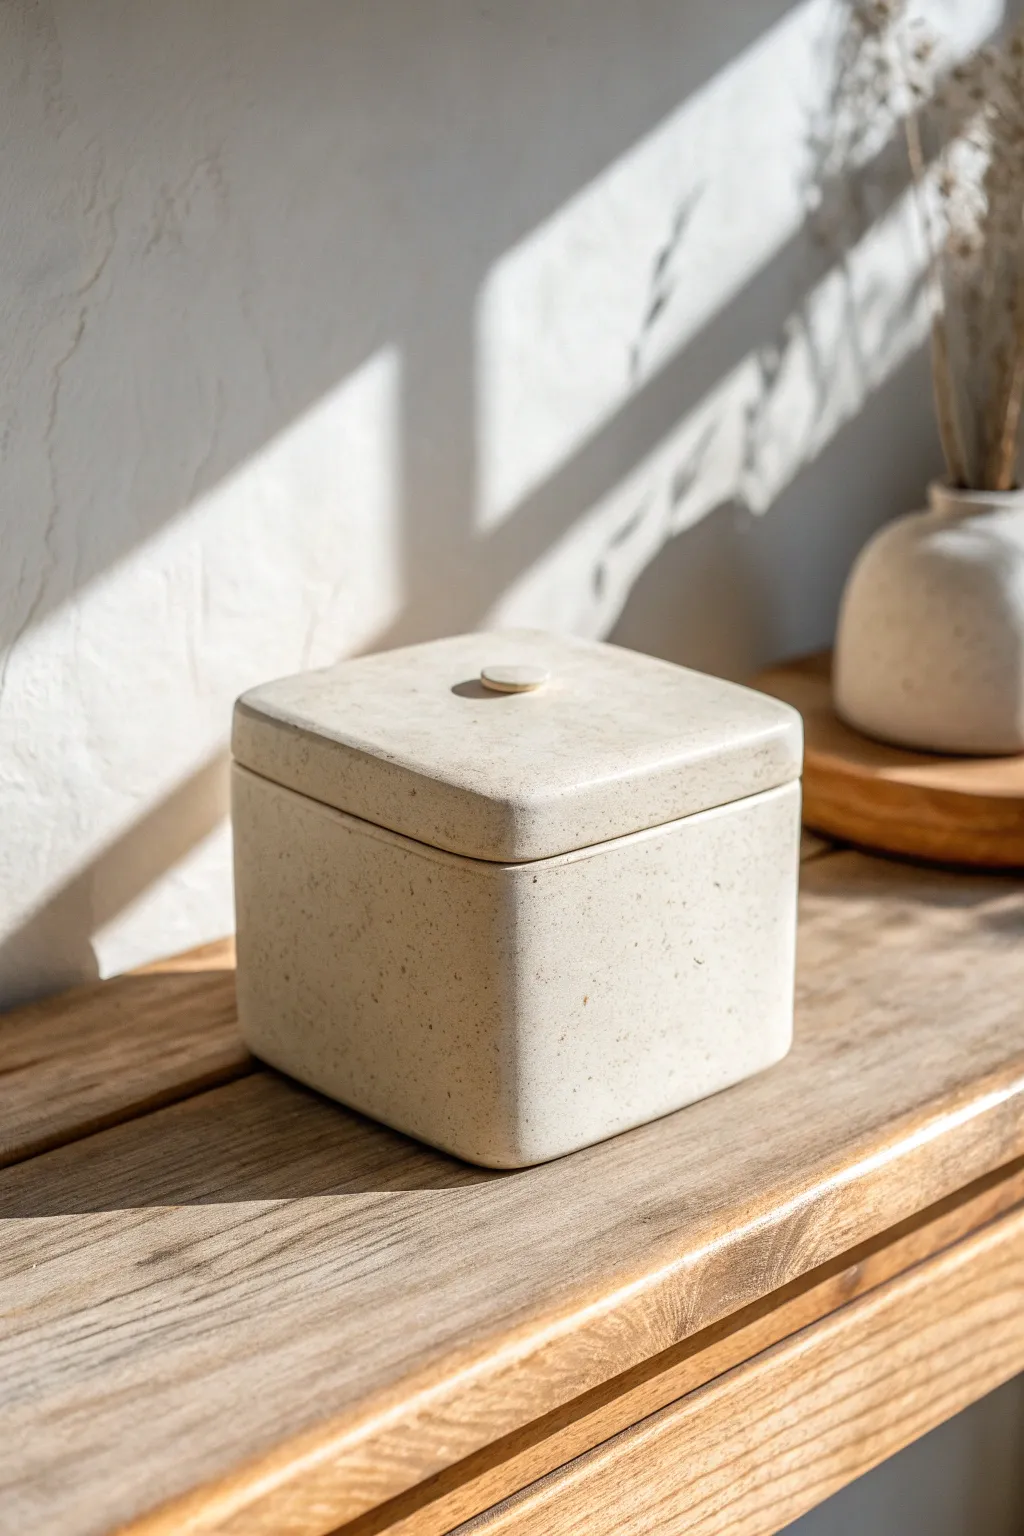
Capture the essence of understated elegance with this speckled clay slab box. Featuring soft, rounded corners and a perfectly fitted lid, this project is a fantastic introduction to precise slab construction with a modern twist.
Detailed Instructions
Materials
- Speckled stoneware clay (mid-fire)
- Rolling pin
- Two wooden guide strips (thickness guides, approx. 1/4 inch)
- Fettling knife or X-Acto tool
- Serrated rib or scoring tool
- Slip (clay mixed with water)
- Rubber rib (soft)
- Wooden paddle
- Ruler or square template
- Sponge
- Plastic wrap for slow drying
Step 1: Preparing the Slabs
-
Roll out the clay:
Begin by wedging your speckled clay to remove air bubbles. Place the clay between two wooden guide strips on a canvas surface and roll it out until the rolling pin rests on the guides, ensuring a perfectly even thickness. -
Compress the slab:
Use a soft rubber rib to compress the clay on both sides. This aligns the clay particles, preventing warping during firing, and smooths out the canvas texture. -
Let it stiffen:
Allow the slab to dry until it reaches a ‘soft leather-hard’ state. It should hold its shape when lifted but still be flexible enough to bend without cracking.
Dry with Lid ON
Always dry and fire your box with the lid in place. Clay has a memory, and keeping them together ensures they shrink at the same rate and warp together, maintaining a perfect fit.
Step 2: Constructing the Box Body
-
Cut the walls:
Using a ruler, cut a long rectangular strip that will form all four walls. Measure the total length needed (side length x 4) plus a little extra for the overlap join. -
Cut the base:
Cut a square slab for the floor of the box. Ensure it is slightly larger than the final footprint so you can trim it flush later. -
Score and slip the join:
Score the short ends of your long wall strip. Apply a generous amount of slip to the scored areas. -
Form the shape:
Bend the strip into a square shape, joining the ends together to create a continuous wall. I like to overlap them slightly and blend the clay across the seam for a stronger bond. -
Attach to base:
Score the bottom edge of your wall loop and the perimeter of your base slab. Apply slip, place the walls onto the base, and press down firmly to adhere. -
Reinforce the interior:
Roll a very thin coil of clay and press it into the interior seam where the floor meets the wall. Smooth this out with a modeling tool or your finger to ensure a watertight seal.
Step 3: Refining and Lid Making
-
Shape the corners:
While the clay is still pliable, gently push the walls from the inside out to square up the form. Use a wooden paddle on the exterior corners to gently round them off, softening the sharp angles like in the photo. -
Create the lid slab:
Roll a fresh slab or use remaining clay for the lid. Place your box upside down on this slab and lightly trace around it to get the exact size. -
Add a flange:
To keep the lid from sliding off, you need a flange. Cut a strip of clay slightly smaller than the interior of the box opening. Attach this strip to the underside of the lid slab in a square shape so it fits snugly inside the box rim. -
Make the knob:
Roll a small ball of clay and flattening it into a disk for the knob. Score and slip the center of the lid, then attach the disk. -
Smooth the surfaces:
Once the box is leather hard, use a damp sponge to smooth all edges. Pay special attention to the rim of the box and the edge of the lid to ensure they feel soft to the touch. -
Slow drying:
Place the lid on the box. Wrap the entire piece loosely in plastic to let it dry very slowly. This prevents the lid from warping and ensures it will fit perfectly after firing.
Warping Walls?
If your walls are bowing inward while working, stuff the inside of the box lightly with crumpled newspaper. This acts as internal support while the clay stiffens to leather hard.
Once fired, the natural speckle of the clay will shine through, giving you a beautiful vessel for keepsakes


Jewelry Tray With Lifted Corners
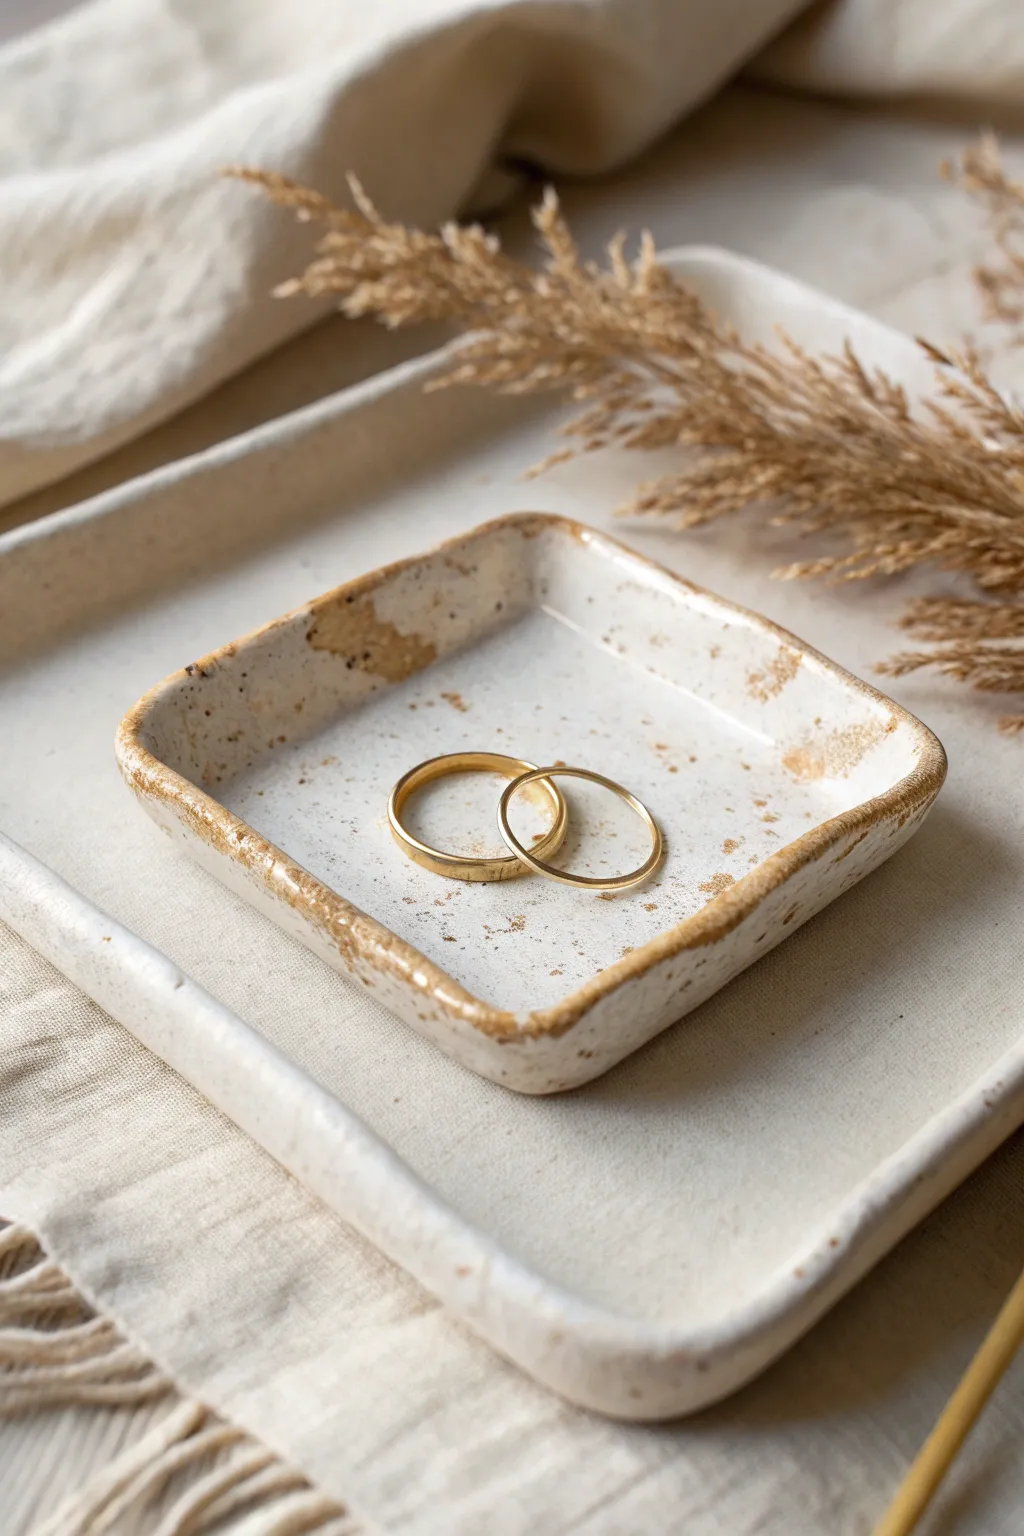
This delicate slab-built tray combines rustic stoneware charm with an elegant touch of gold luster. Its slightly lifted corners create a gentle curve that perfectly cradles rings and small keepsakes, while the speckled glaze adds organic warmth.
Step-by-Step Guide
Materials
- Speckled buff stoneware clay
- Rolling pin
- Canvas or slab mat
- Square paper template (approx. 4×4 inches)
- Fettling knife or needle tool
- Small sponge
- Rib tool (soft silicone or rubber)
- Kiln
- White or cream gloss glaze
- Gold overglaze (luster)
- Small detail brush for luster
- Respirator (for luster application)
Step 1: Creating the Slab Base
-
Prepare the clay:
Begin by wedging a small ball of speckled buff stoneware clay to ensure there are no air bubbles within the mass. -
Roll the slab:
Place the clay on your canvas or slab mat. Using a rolling pin, roll the clay out evenly until it is approximately 1/4 inch thick. Aim for a consistent thickness to prevent warping. -
Check consistency:
I like to run a soft rib tool over the surface of the slab at this stage. This compresses the clay particles and creates a lovely smooth canvas for your glaze later. -
Cut the shape:
Lay your square paper template gently on top of the slab. Use a fettling knife or needle tool to cut vertically around the template for clean, straight edges. -
Refine the edges:
Don’t leave the edges sharp. Dip your finger or a small sponge in water and gently run it along the cut sides to round them off slightly.
Smooth Moves
Use a damp chamois strip to compress the rim immediately after forming. It smooths tiny cracks better than a sponge and leaves a professional, buttery edge.
Step 2: Forming the Lifted Corners
-
Initial lift:
Carefully slide the clay square onto a ware board. Gently pinch and lift the four corners upwards. You aren’t folding them; you are just encouraging the clay to curve upward. -
Refine the curve:
Once the corners are lifted, use your thumb to smooth the interior curve of the lip so the transition from the flat bottom to the rim is seamless. -
Level the rim:
Look at the tray from eye level. If one side is higher than the other, gently pat or nudge the rim to ensure it is relatively symmetrical, though a little organic movement adds character. -
Slow drying:
Cover the tray loosely with plastic to let it dry slowly to the leather-hard stage. This prevents the corners from curling down or warping as they shrink. -
Bisque fire:
Once bone dry, fire the piece in the kiln to cone 04 (or your clay body’s bisque temperature).
Step 3: Glazing and Gold Luster
-
Apply base glaze:
Dip or brush your white gloss glaze onto the bisque-fired tray. Ensure the coat is even but not too thick, as you want the natural speckles of the clay to show through. -
Clean the foot:
Wipe the bottom of the tray completely clean of glaze with a damp sponge so it won’t stick to the kiln shelf. -
Glaze fire:
Fire the tray again, this time to the maturity temperature of your glaze and clay (typically cone 5 or 6 for stoneware). -
Apply gold luster:
Once the piece is cool and clean, use a small detail brush to paint a thin line of gold overglaze along the very edge of the rim. Work in a well-ventilated area and wear a respirator. -
Add rustic touches:
For the look in the image, don’t make the line perfect. Dab slightly thicker spots of gold on the corners or let the brush drag slightly onto the face of the tray for a distressed look. -
Final firing:
Load the kiln carefuly for the third firing. Fire the piece to cone 018 (or the specific low-fire temperature recommended by your gold manufacturer) to set the metal.
Texture Play
Before cutting the square, press a piece of rough linen or lace into the slab. The glaze will pool in the texture, adding depth beneath the speckles.
Now you have a stunning, boutique-worthy tray ready to hold your most precious rings


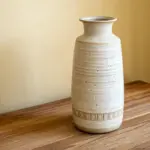

Rectangular Slab Vase With Crisp Edges
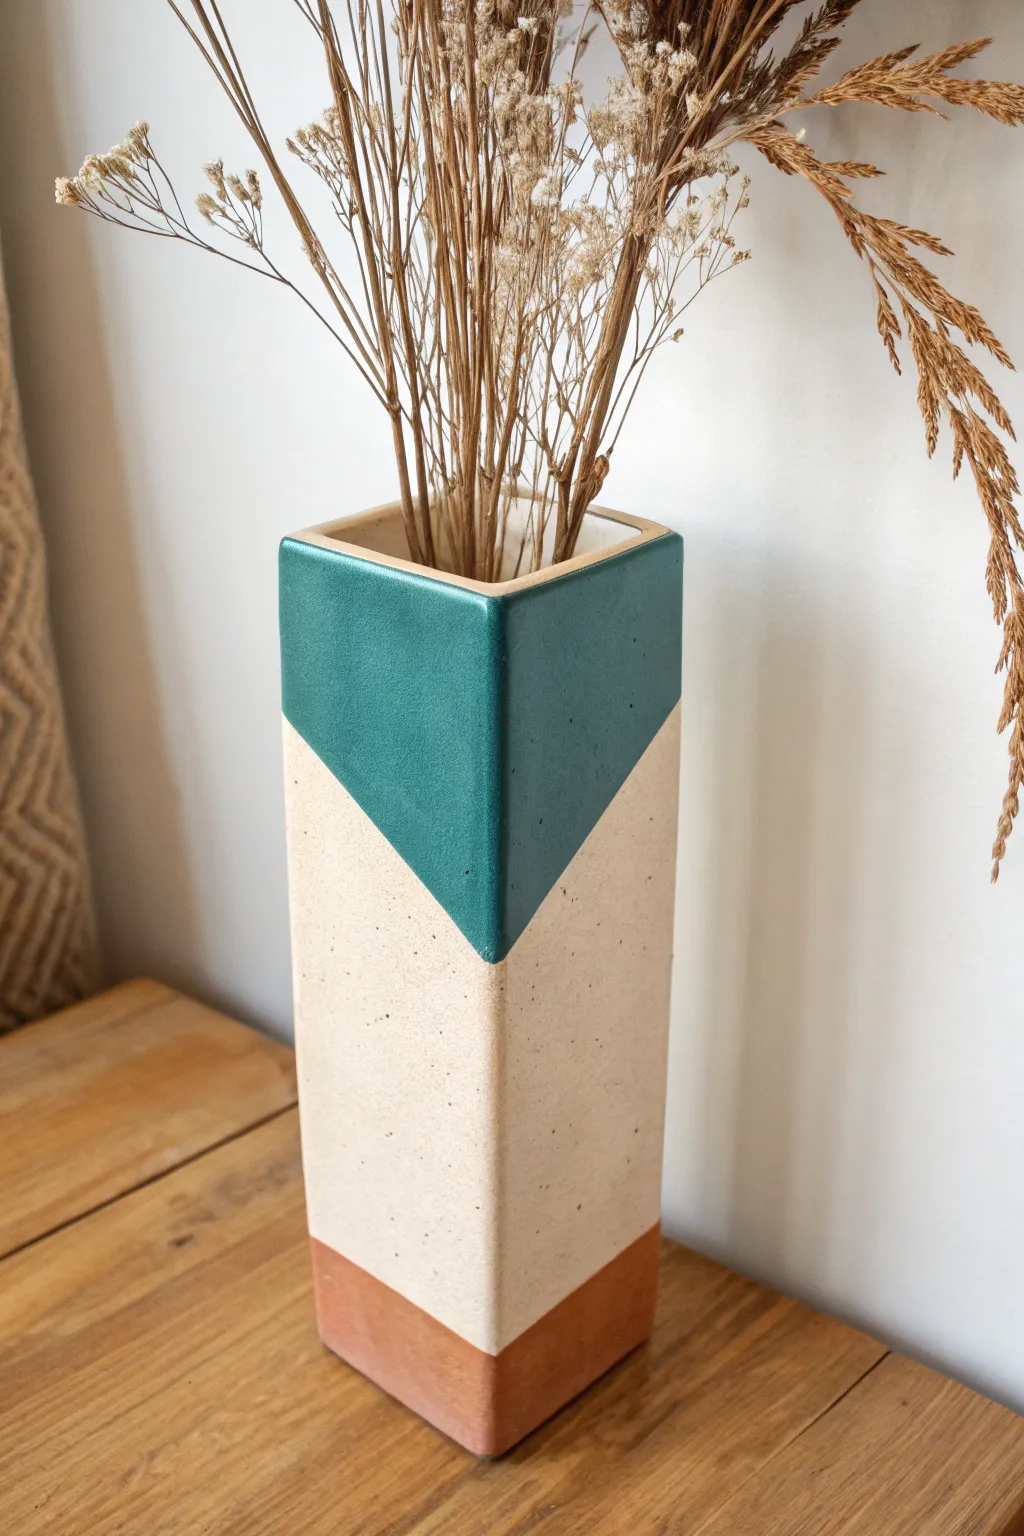
This striking rectangular vase combines precise slab construction with bold, color-blocked glazing for a modern aesthetic. The crisp edges and contrasting textures between the matte speckle, glossy teal, and raw terra cotta make it a standout piece for any shelf.
Detailed Instructions
Materials
- Stoneware clay (speckled or buff)
- Terra cotta clay (or iron oxide stain to mimic base)
- Rolling pin and guide sticks (1/4 inch)
- Fettling knife or X-Acto blade
- Ruler and set square
- Scoring tool and slip
- Wooden ribs
- Bevel cutter (45-degree angle)
- Sponge
- Masking tape (for glazing)
- Glossy teal glaze
- Matte cream/speckled glaze
- Wax resist
Step 1: Creating the Slabs
-
Roll main slabs:
Begin by rolling out your main stoneware clay body to a consistent 1/4 inch thickness. You will need enough for four tall rectangular walls and one square base. -
Smooth the surface:
Use a smooth rubber or wooden rib to compress the clay on both sides. This removes canvas textures and aligns clay particles to prevent warping later. -
Measure and cut walls:
Using your ruler and set square, cut four identical rectangles. For the proportions seen here, aim for approximately 3 inches wide by 8 inches tall. -
Bevel the edges:
Carefully bevel the long sides of each rectangle at a 45-degree angle. This miter joint is crucial for achieving that sharp, seamless corner look. -
Prepare the base:
Cut a square slab for the bottom. This should be slightly smaller than the outer dimensions of your assembled vase so the walls can sit flush around it, or cut it to fit inside the walls. -
Stiffen the slabs:
Let the cut pieces sit until they reach a leather-hard state. They need to be rigid enough to stand up without slumping but soft enough to score and join.
Sharpen Those Corners
To get ultra-crisp corners, wait until the clay is leather hard, then gently run a metal kidney rib up the corner edge to shave off a tiny sliver of clay, sharpening the angle.
Step 2: Assembly
-
Score and slip:
Thoroughly score the beveled edges of your walls and apply a generous amount of slip. Do the same for the edges of the base. -
Join the first corner:
Stand two walls up and press the beveled edges together to form a corner. Ensure the 90-degree angle is perfect using your set square. -
Complete the box:
Attach the remaining two walls and the base, pushing the joints firmly together. Creating a closed box is tricky, so take your time aligning the final seam. -
Reinforce the interior:
If you can reach inside (or use a tool on a stick), run a thin coil of clay along the interior seams to reinforce them. -
Refine exterior seams:
On the outside, use a wooden paddle to gently tap the corners sharp. Smooth over the join lines with a rib so the clay looks like one solid piece. -
Smooth the rim:
Use a damp sponge or a chamois cloth to perfect the top rim, ensuring it is level and smooth.
Step 3: Glazing and Finishing
-
Bisque fire:
Once bone dry, fire the piece to bisque temperature (usually Cone 04/06). -
Create the V-shape resist lines:
Use masking tape to create the sharp geometric V-shape on the upper portion of the vase. The tape acts as a barrier between the different glaze zones. -
Apply the teal glaze:
Dip or brush the top section (above the tape) with the glossy teal glaze. I prefer dipping for a smoother, more uniform finish. -
Remove tape and re-mask:
Once the teal is dry, carefully peel off the tape. Re-apply tape over the edge of the teal section to protect it while you glaze the middle section. -
Apply the cream glaze:
Apply the matte speckled cream glaze to the middle section of the vase, stopping about an inch from the bottom if you want the raw clay look shown in the image. -
Define the base:
Use wax resist or tape to keep the bottom inch completely unglazed to reveal the raw clay body (or apply a terra cotta slip here if your main clay is white). -
Final fire:
Fire the vase to the maturity temperature of your clay and finish the project.
Warped Walls?
If your walls are bowing inward while drying, stuff the vase with crumpled newspaper or foam to offer internal support until the clay stiffens completely.
Now fill your sleek geometric vase with dried botanical arrangements and enjoy the modern vibe it adds to your room


Slump-Mold Bowl With Wavy Rim
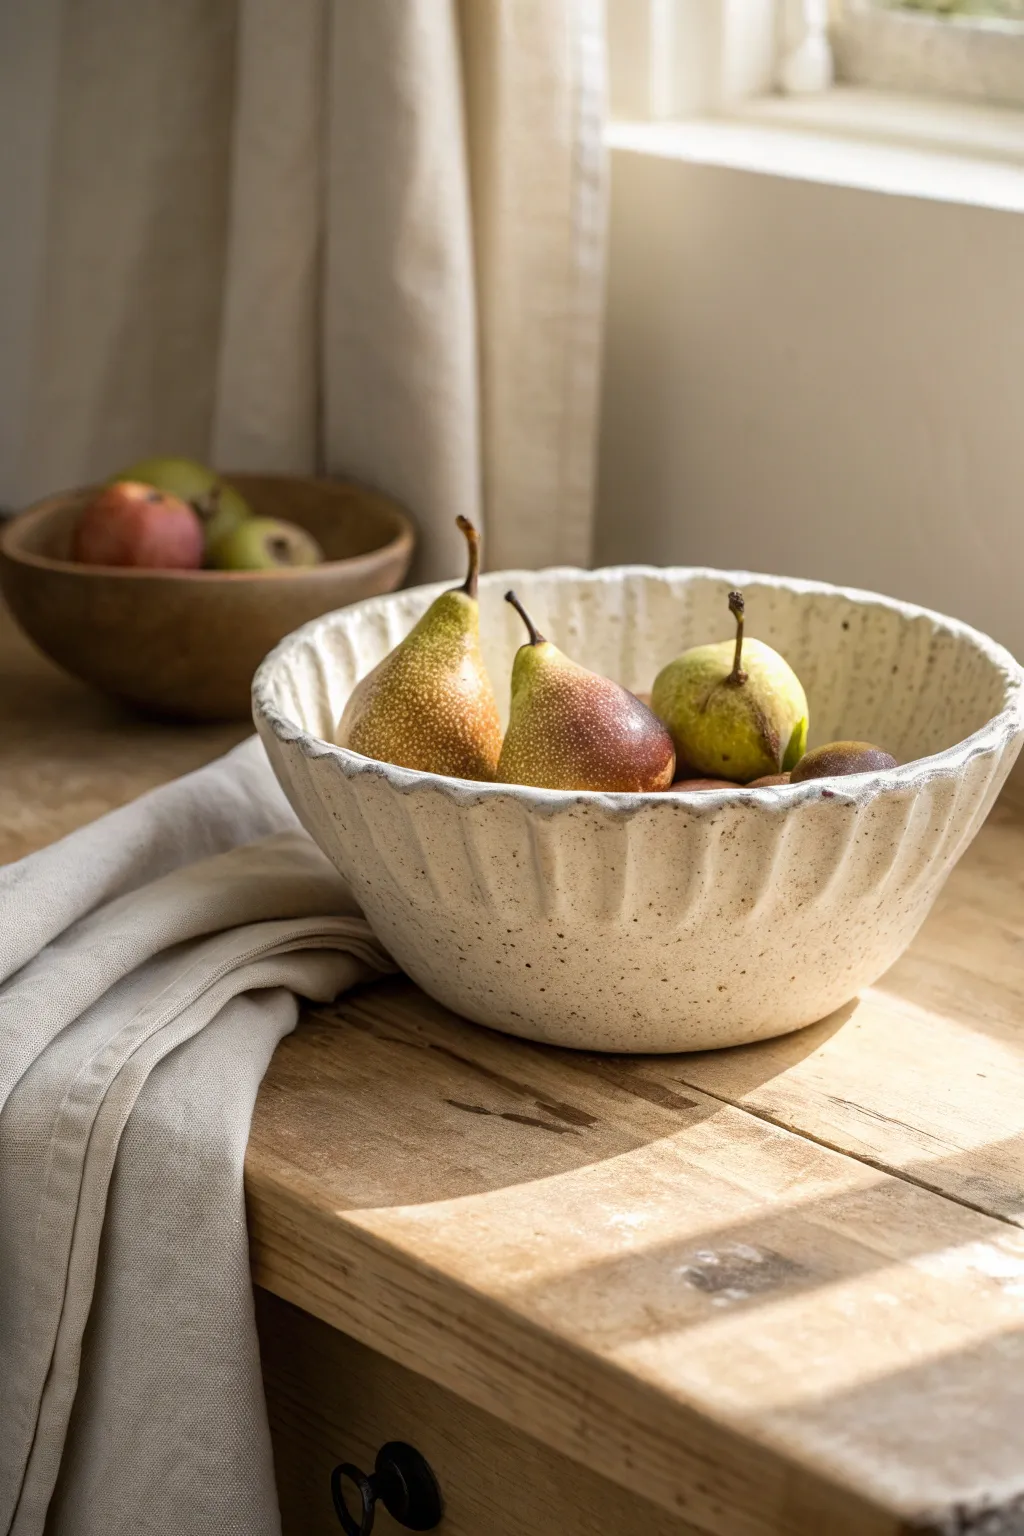
Embrace the imperfect beauty of wabi-sabi with this textured slab-built bowl. It features a distinctively grooved exterior and a natural, wavy rim, finished with a speckled cream glaze that highlights the handmade details.
Step-by-Step Guide
Materials
- Stoneware clay (preferably with grog or speckles)
- Large rolling pin
- Canvas or slab mat
- Bisque bowl mold (or a sturdy plastic bowl)
- Wooden sculpting tool with a rounded end
- Metal rib
- Needle tool
- Sponge
- Matte cream or white speckled glaze
Step 1: Preparing the Slab
-
Wedging and Rolling:
Begin by thoroughly wedging your stoneware clay to remove air bubbles. Roll out a large slab that is approximately 3/8 inch thick, ensuring it’s wide enough to drape completely over your chosen mold. -
Compressing the Clay:
Use a metal rib to smooth and compress the clay on both sides. This step is crucial for preventing cracks later and aligning the clay particles for strength. -
Cutting the Circle:
Place your mold upside down on the slab to gauge the size, adding about 2-3 inches of overhang. Use a needle tool to cut a rough circle; it doesn’t need to be perfect as the rim will be manipulated later.
Slumping Issues?
If the bowl warps when removed from the mold, the clay was too wet. Let it dry longer in the mold next time, or use a hair dryer briefly to stiffen the walls.
Step 2: Forming the Bowl
-
Draping the Clay:
Gently lift your clay slab and drape it over your slump mold (if using a slump mold, place it *inside* the mold; if using a hump mold, drape it *over* the mold). The image suggests a slump mold technique where the texture is added to the outside afterwards, but draping *inside* a fluted mold is easier. However, to get the specific hand-tooled look in the photo, we will drape it *inside* a plain bowl mold first to get the shape. -
Setting the Shape:
Press the clay firmly against the interior walls of your mold. Use a damp sponge to smooth the bottom and sides, ensuring there are no air pockets trapped between the clay and the mold. -
Defining the Rim:
Trim the excess clay from the rim using a needle tool. Instead of a straight cut, allow for a slight wave or undulation to mimic the organic feel of the reference image. -
Waiting for Leather Hard:
Allow the clay to dry until it reaches a stiff leather-hard stage. This is vital because you need the bowl to hold its shape when you remove it from the mold for texturing.
Step 3: Adding Texture and Detail
-
Removing from Mold:
Carefully pop the bowl out of the mold. It should be sturdy enough to stand on its own but soft enough to carve. -
Marking the Flutes:
Using a wooden modeling tool with a rounded end, press vertical indentations into the exterior of the bowl. Start at the base and drag the tool upward toward the rim. -
Varying the Pressure:
As you drag the tool up, vary your pressure slightly. Press deeper near the middle and lighten up as you reach the rim to create those soft, pillowy ridges seen in the photo. -
Refining the Rim:
Once the fluting meets the rim, use your fingers to gently pinch and soften the edge. The rim should follow the flow of the vertical flutes, dipping slightly between them. -
Smoothing the Interior:
Check the interior of the bowl. If your exterior pressing deformed the inside too much, use a soft rib to gently smooth it back out while supporting the outside with your hand. -
Adding the Foot (Optional):
If you want a lifted look, score and slip a small coil ring onto the bottom. Paddle it flat so the bowl sits level on the table.
Make it Shine
For a stunning contrast, use a high-gloss clear glaze on the inside of the bowl and keep the textured exterior matte. This makes it easier to clean if used for food.
Step 4: Finishing and Glazing
-
Bisque Firing:
Let the bowl dry completely (slowly, under loose plastic) before bisque firing it to cone 04. -
Selecting the Glaze:
Choose a matte or satin finish glaze in a cream or off-white tone. If your clay body isn’t speckled, look for a glaze that has ‘speckles’ or iron filings included. -
Application:
Pour the glaze inside the bowl, swirl to coat, and pour out. Wait a moment for it to dry, then dip the exterior or brush it on carefully. I find dipping ensures the glaze pools nicely in the fluted crevices. -
Rim Emphasis:
The rim in the photo is slightly darker. You can achieve this by wiping a tiny bit of glaze off the very edge with a sponge, revealing the clay body, or layering a transparent oxide wash on the rim. -
Final Firing:
Fire the piece to cone 5/6 (or whatever your clay and glaze specifies). Ensure the bottom is wiped clean of glaze before loading the kiln.
Fill your new creation with seasonal fruit and enjoy the simple elegance it brings to your table

What Really Happens Inside the Kiln
Learn how time and temperature work together inside the kiln to transform clay into durable ceramic.
Soap Dish With Drainage Channels
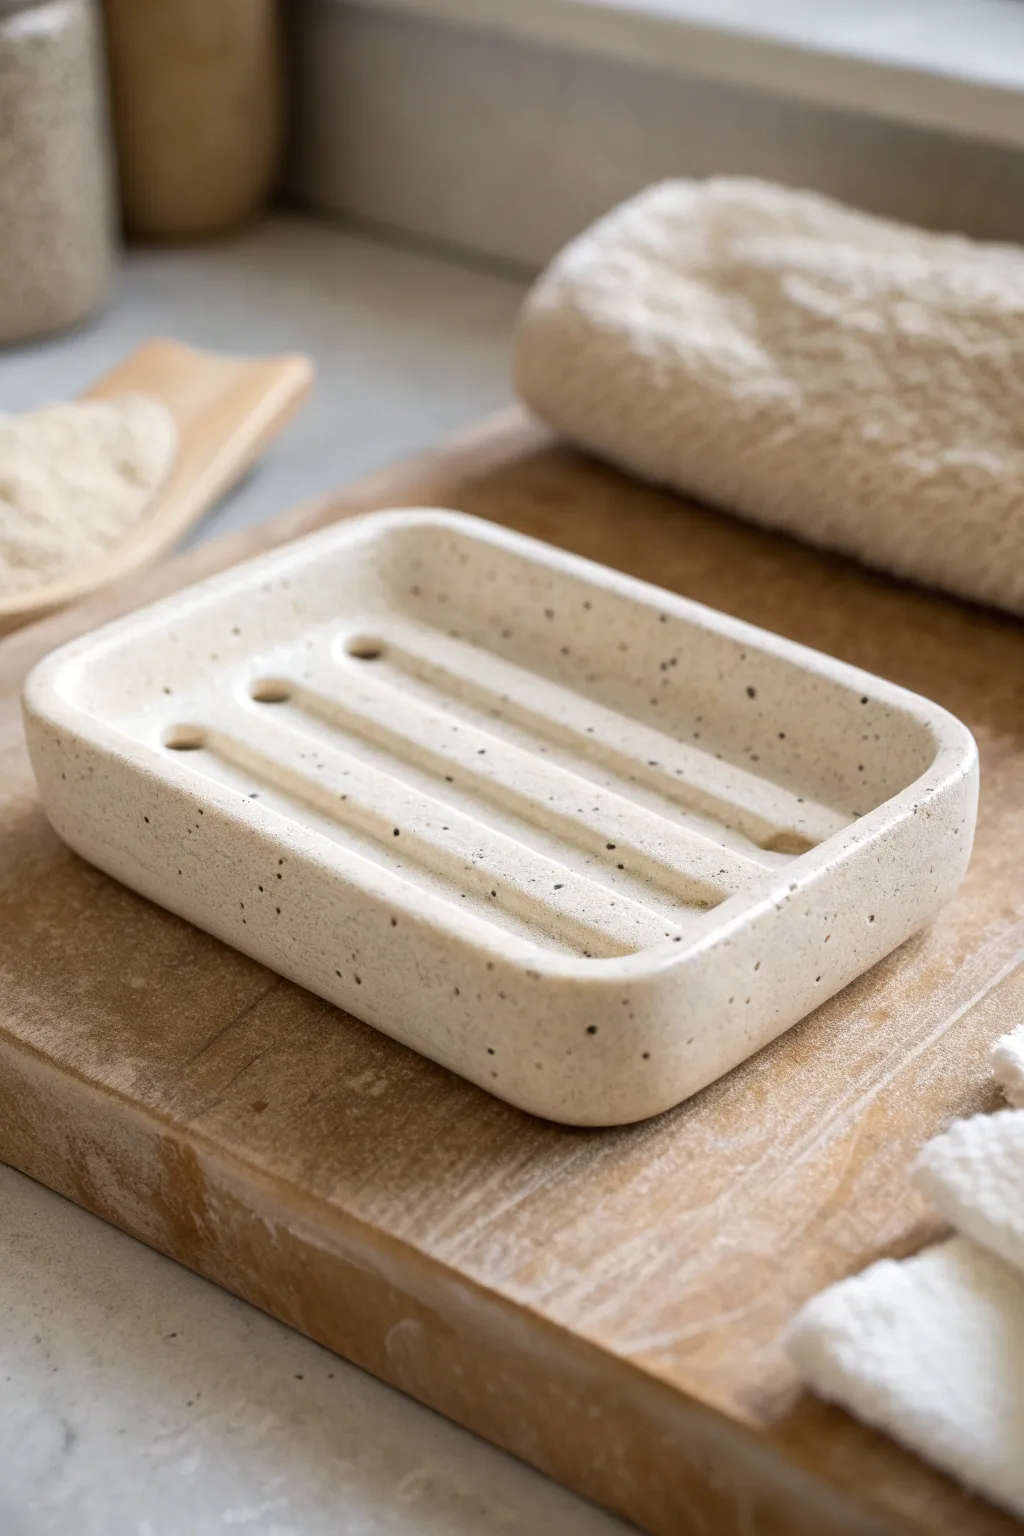
Create a serene, minimalist addition to your bathroom with this slab-built soap dish. The design features functional drainage channels and holes carved into a soft, speckled stoneware, blending modern utility with a calming, organic aesthetic.
Step-by-Step Tutorial
Materials
- Speckled stoneware clay (mid-fire)
- Rolling pin
- Two wooden guide slats (approx. 1/4 inch thick)
- Rectangular template (3.5 x 5 inches cardstock)
- Needle tool
- Fettling knife
- Loop tool (medium width)
- Drill bit or hole cutter (small size)
- Rib tool (soft silicone or rubber)
- Scoring tool or fork
- Slip
- Sponge and water
- Matte white or clear glaze (transparent allows speckles to show)
Step 1: Preparing the Slab
-
Roll the clay:
Begin by wedging your speckled stoneware clay to remove air bubbles. Place the clay between two wooden guide slats on a canvas board and roll it out until it is perfectly even and smooth. -
Compress the surface:
Using a soft silicone rib, gently compress the clay slab on both sides. This aligns the clay particles to prevent warping during firing and creates that buttery smooth surface finish we want visible on the final piece. -
Cut the base:
Place your rectangular cardstock template on the slab. Use a needle tool to trace the shape lightly, then cut it out cleanly with the fettling knife. This will form the bottom of your dish. -
Cut the walls:
From the remaining slab, cut a long strip approximately 1 inch tall. Ensure the length is sufficient to go around the entire perimeter of your rectangular base.
Clean Tip
When punching drainage holes, wait until the clay is leather hard. If the clay is too soft, the pressure will deform the channels you just carved.
Step 2: Assembling the Form
-
Score the edges:
Score the outer edge of your rectangular base and one long edge of your wall strip. Apply a generous amount of slip to the scored areas. -
Attach the walls:
Wrap the wall strip around the base. I prefer to attach the wall on top of the base rather than against the side for a cleaner seam. Press firmly to secure. -
Buttressing the joint:
Where the two ends of the wall strip meet, cut them at a 45-degree angle for a precise miter joint. Score, slip, and press these ends together. -
Reinforce seams:
Roll a very thin coil of clay and press it into the interior seam where the wall meets the floor. Smooth this coil out completely with your finger or a modeling tool so it disappears. -
Smooth the exterior:
Use a paddle or a flat wooden tool to gently tap the walls straight and ensure the corners are slightly rounded but defined. Smooth the exterior connection points with a rib.
Step 3: Carving Details
-
Thicken the floor:
Because we will be carving into the floor, you might want to add a second thin slab layer to the interior bottom if your initial slab was thin. This ensures you don’t carve right through the bottom. -
Mark the channels:
Using a ruler and needle tool, very lightly mark three parallel lines lengthwise down the center of the dish. These will guide your carving. -
Carve grooves:
Take a medium loop tool and carefully drag it along your marked lines to carve out three distinct channels. Make them deep enough to hold water but keep the bottom intact. -
Refine the ridges:
Use a damp sponge or your finger to smooth the sharp clay edges created by the loop tool. The ridges between the channels should feel soft to the touch, not sharp. -
Create drainage holes:
At one end of each carved channel, punch a clean hole all the way through the clay using a small hole cutter or drill bit. This allows excess soapy water to drain away completely.
Make It a Set
Create a matching toothbrush holder using the same speckled clay. Roll a cylinder and punch similar drainage holes in the bottom for a cohesive vanity set.
Step 4: Finishing Touches
-
Clean the edges:
Wipe down the top rim of the dish with a slightly damp sponge to round it off. Sharp rims tend to chip easily, so a soft curve is more durable. -
Dry slowly:
Place the soap dish on a board and loosely cover it with plastic. Let it dry slowly over a few days to prevent the flat bottom from warping or cracking. -
Bisque fire:
Once bone dry, fire the piece to bisque temperature (usually verify with your clay body, but typically Cone 04 or 06). -
Glaze application:
Apply a transparent or semi-opaque creamy matte glaze. Avoid heavy pooling glazes that might fill in your carefully carved drainage holes. Wipe the bottom clean. -
Final firing:
Fire to the clay’s maturity (likely Cone 5 or 6). Once cool, sand the bottom if necessary to protect countertops.
Enjoy the simple luxury of your handmade, spa-quality soap dish every time you wash your hands
Planter Box With Little Feet

This charming, square planter combines clean geometric lines with a warm, two-toned glaze finish. Standing on four tiny feet, it features subtle decorative stitching texture along the glaze line for a handcrafted touch.
Step-by-Step
Materials
- Stoneware clay body (smooth or speckled)
- Slab roller or rolling pin with guide strips (1/4 inch)
- Clay knife or fettling knife
- Ruler and square
- Scoring tool (serrated rib or needle tool)
- Slip or vinegar
- Small wooden tools or paddle
- Decorating wheel (optional, for texture)
- White matte glaze
- Warm beige or rutile glaze
Step 1: Creating the Slabs
-
Roll the clay:
Begin by wedging your clay thoroughly to remove air bubbles. Roll out a consistent slab that is approximately 1/4 inch thick. Using guide strips is helpful here to ensure the walls are perfectly even. -
Smooth the surface:
Before cutting, take a moment to compress the slab on both sides using a soft rubber rib. This aligns the clay particles and creates a smooth canvas for your glazing later. -
Measure the components:
You will need five square pieces for the box. Determine your desired size (e.g., 4×4 inches) and mark these dimensions lightly on the slab. -
Cut the shapes:
Using your ruler and a sharp fettling knife, cut out the four wall panels and the one base panel. Keep the knife perpendicular to the table for straight 90-degree edges, or beveled at 45 degrees if you prefer mitered joints. -
Leather hard stage:
Let the slabs stiffen up slightly until they are ‘leather hard.’ They should be firm enough to stand up without bending but still hold moisture for joining.
Clean Seams
For invisible seams, drag a serrated kidney rib diagonally across the joined wall connections to blend the clay, then smooth it back down with a rubber rib.
Step 2: Assembling the Box
-
Score the edges:
Take your serrated tool and aggressively score the edges where the walls will meet the base and each other. Apply a generous amount of slip or vinegar to these roughed-up areas. -
Attach walls to base:
Place one wall onto the base slab first. Press firmly. Attach the adjacent wall next, pressing the vertical seam together to create a corner. -
Reinforce the interior:
Once all four walls are up, take a thin coil of soft clay and press it into the bottom interior seams. Smooth this coil out with a wooden tool or your finger to ensure a watertight seal. -
Refine the exterior:
Use a paddle to gently tap the outside walls. This helps squared-up the shape and ensures the joints are completely unified. -
Clean the distinct corners:
If you want the rounded-square look seen in the photo, gently run a damp sponge or finger along the sharp vertical corners to soften them slightly.
Step 3: Adding Feet & Texture
-
Cut the feet:
Roll a slightly thicker strip of clay or use leftovers from your slab. Cut four small squares or rectangles, roughly 1/2 inch tall. -
Attach the feet:
Flip the box over. Score and slip the four corners of the base and attach the feet. I like to tap the planter on the table gently after attaching to level them out. -
Add drainage:
This is crucial for plant health—use a hole punch or drill tool to create a drainage hole in the center of the bottom slab. -
Create the texture line:
The image features a textured band where the glazes meet. Use a tracing wheel or a fork to press a horizontal line of dots around the lower third of the pot. -
Bisque fire:
Allow the piece to dry slowly and evenly, loosely covered with plastic for the first day. Once bone dry, bisque fire it according to your clay’s specifications.
Add an Underplate
Make a matching square saucer using the same clay slab. Simply cut a square slightly larger than the pot and curve the edges up for a finished set.
Step 4: Glazing
-
Wax the bottom:
Apply wax resist to the bottom of the feet to prevent them from sticking to the kiln shelf. -
Dip the top half:
Hold the pot by the foot area. Dip the top two-thirds into a speckled white matte glaze. Hold it there for a few seconds to get opaque coverage. -
Dip the bottom half:
Once the top glaze is dry to the touch, hold the pot by the rim. Dip the bottom third into a warm beige or light rutile glaze, bringing the fluid level right up to your textured line. -
Clean up the line:
If the glazes overlapped too much, gently sponge back the edge so the indented texture remains visible as the transition point. -
Final firing:
Fire the piece in your glaze kiln. The textured dots often collect more glaze, creating the beautiful distinct line seen in the finished piece.
Once fired, pop in a small succulent or jade plant to complete the minimal, earthly aesthetic


The Complete Guide to Pottery Troubleshooting
Uncover the most common ceramic mistakes—from cracking clay to failed glazes—and learn how to fix them fast.
Tealight Luminary With Cutouts
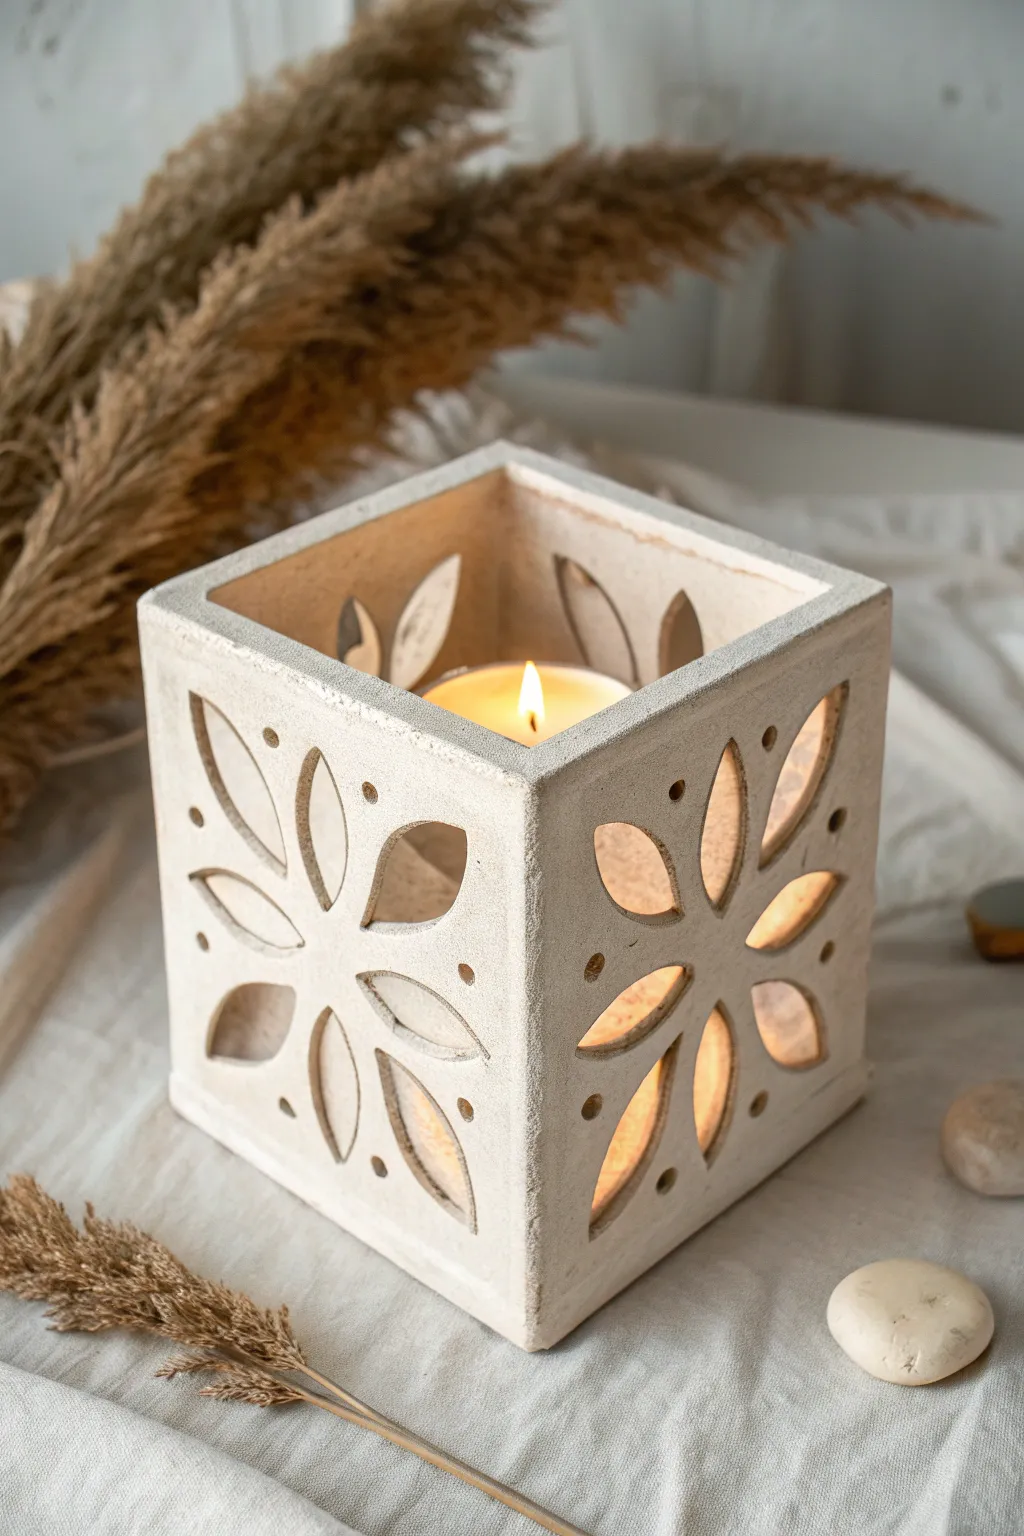
This elegant square luminary, crafted from white stoneware, features delicate petal-shaped cutouts that cast a warm, dancing glow when lit. The clean lines of the slab construction contrast beautifully with the organic floral motifs, making it a perfect centerpiece for cozy evenings.
Detailed Instructions
Materials
- White stoneware or porcelain clay body
- Rolling pin with guide strips (1/4 inch thick)
- Ruler and square template
- Fettling knife or X-Acto knife
- Needle tool
- Scoring tool or serrated rib
- Slip (clay and vinegar/water mix)
- Small circular hole cutter or drill bit
- Smoothing sponge
- Sanding pad (fine grit)
- Kiln and transparent matte glaze (optional)
Step 1: Preparing the Slabs
-
Roll the clay:
Begin by wedging your white stoneware to remove air bubbles. Roll out a large, even slab using a rolling pin and 1/4-inch guide strips to ensure consistent thickness throughout the wall. -
Cut the components:
Using a ruler and a fettling knife, measure and cut five identical squares. For a standard tealight size, 4×4 inch squares work perfectly. You need four for the walls and one for the base. -
Dry to leather hard:
Lay the cut squares on a ware board covered with canvas or paper. Let them dry until they reach a leather-hard state—firm enough to hold their shape upright but still soft enough to carve easily.
Warped Walls?
If walls start to bow inward while drying, place a supportive object like a rigid foam block or a crumpled ball of newspaper inside the box to hold the shape structurally.
Step 2: Carving the Design
-
Sketch the motif:
Lightly sketch your floral design onto what will be the four wall panels using a needle tool. The design in the image features a central flower composed of eight petal shapes radiating outward from the center. -
Cut the petals:
Carefully slice through the clay along your petal outlines with a sharp X-Acto knife. Remove the clay pieces gently. I find it helpful to support the back of the slab with my fingers while cutting to prevent warping. -
Wait to refine:
Don’t try to smooth the rough cut edges immediately, as you might distort the shape. Let the clay stiffen slightly more, then use a damp brush or sponge to tidy up the interior curves of the petals. -
Add decorative holes:
Using a small circular punch or drill bit, create small accent holes between the petal tips and near the corners to mimic the pollen or seeds, adding extra ventilation and light points.
Step 3: Assembly
-
Miter the edges:
For a seamless corner, cut the side edges of your four wall panels at a 45-degree angle. This creates a stronger miter joint than a simple butt joint. -
Score and slip:
Aggressively score the mitered edges and the perimeter of the base square. Apply a generous amount of slip to all scored areas. -
Construct the box:
Press two walls together onto the base, ensuring the corner is square. Continue attaching the remaining walls, wiping away excess slip that squeezes out as you go. -
Reinforce the interior:
Roll very thin coils of clay and press them gently into the interior seams of the box to reinforce the joints. Smooth these coils down with a modeling tool so they are flush.
Textured Surface
Before cutting your slabs, roll the wet clay onto a textured fabric or canvas. This imparts a subtle, tactile finish that catches the light beautifully on the uncarved sections.
Step 4: Finishing Touches
-
Smooth the exterior:
Use a metal rib or paddle to gently tap the outside walls, ensuring they are perfectly flat and the corners are sharp. Any slight bowing can be corrected now before the clay fully dries. -
Dry slowly:
Cover the box loosely with plastic to allow it to dry slowly and evenly. Fast drying can cause the thin lattice-work of the petals to crack. -
Bisque fire:
Once bone dry, fire the piece in a kiln to bisque temperature (usually Cone 04). -
Glaze and final fire:
Apply a clear matte glaze, or leave the exterior unglazed for a raw stone look as shown in the photo. Fire one last time to the maturation temperature of your specific clay body.
Place a beeswax candle inside and enjoy the tranquil atmosphere created by your handiwork
Textured Slab Tile Wall Hanging
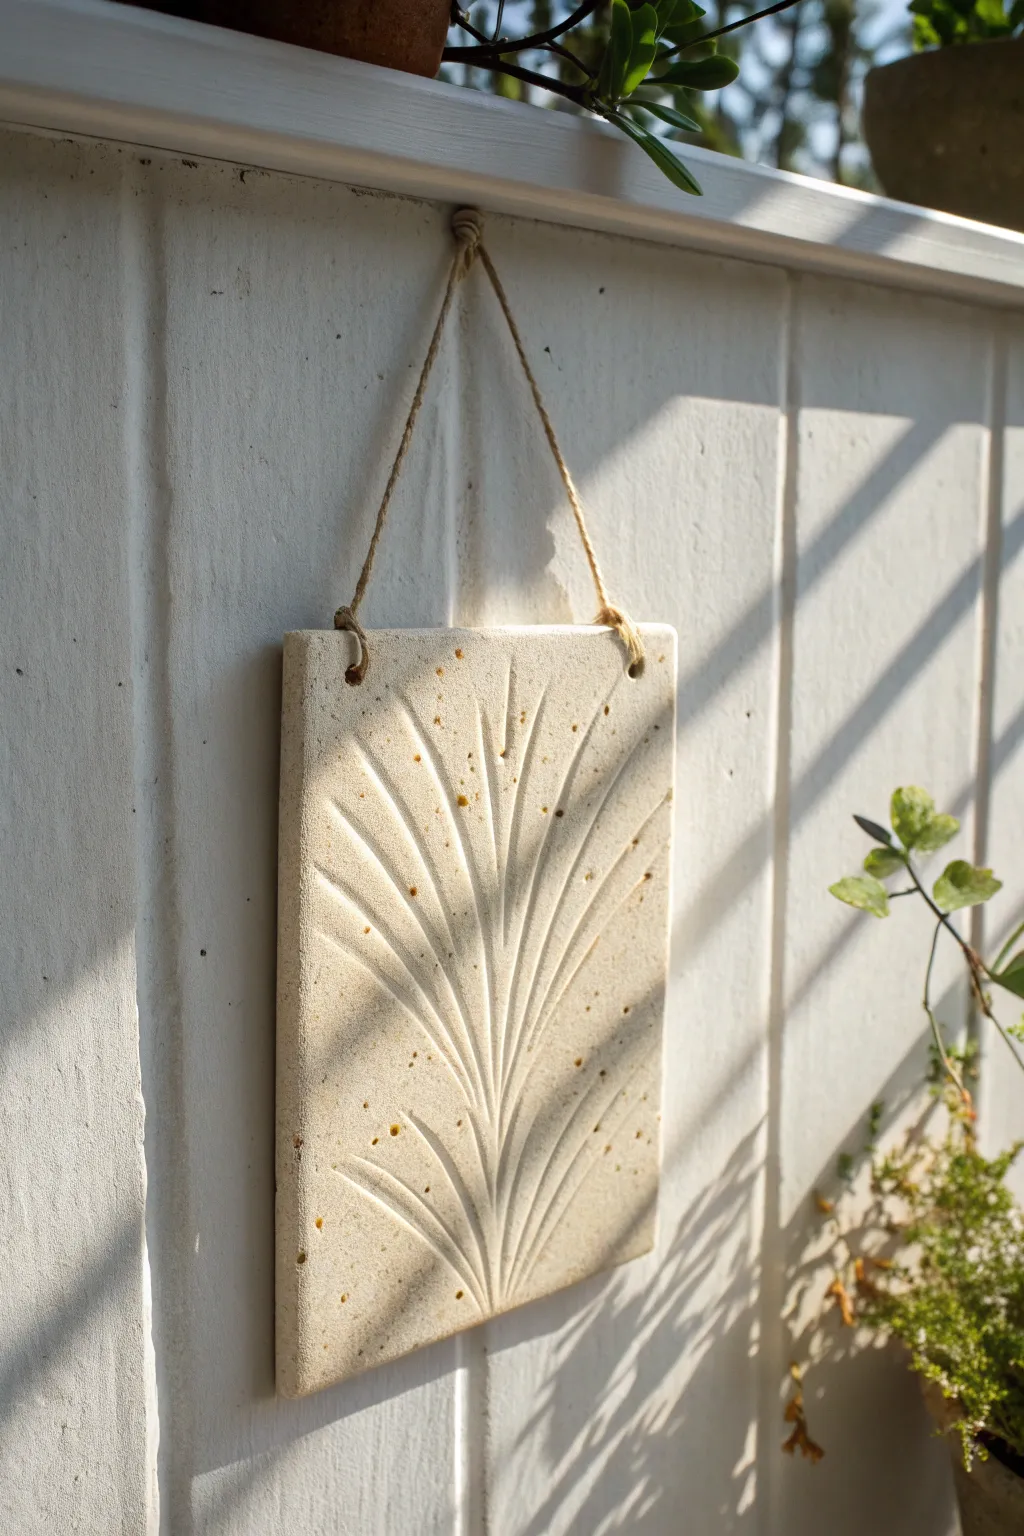
Capture the organic beauty of nature with this simple yet striking ceramic wall hanging featuring a carved radiating leaf design. The speckled stoneware clay adds a wonderful earthy grit that is highlighted by the clean, incised lines and warm sunlight.
Step-by-Step Guide
Materials
- Speckled stoneware clay (mid-fire)
- Rolling pin
- Canvas or slab mat
- Two 1/4 inch wooden guide strips
- Fettling knife or needle tool
- Carving tool (loop tool or sgraffito tool)
- Metal rib
- Sponge
- Smooth wooden board for drying
- Jute twine or hemp cord
- Hole cutter or drinking straw
Step 1: Preparing the Slab
-
Wedge the clay:
Begin by thoroughly wedging a grapefruit-sized ball of speckled stoneware clay to ensure it is uniform in consistency and free of air bubbles. -
Roll out the slab:
Place your guide strips on either side of the clay on your canvas. Roll the clay out until the rolling pin rests flat on the guide strips, ensuring an even 1/4 inch thickness. -
Compress the surface:
Take a metal rib and drag it smoothly across the surface in multiple directions. This aligns the clay particles which prevents warping and creates a nice, smooth canvas for your carving. -
Cut the rectangle:
Using a ruler and your fettling knife, cut a clean rectangle. For the look in the image, aim for a piece approximately 6 inches wide by 9 inches tall. -
Smooth the edges:
Run a damp sponge or your finger along the cut edges to soften them slightly, removing any sharp burrs left by the knife.
Step 2: Creating the Design
-
Mark the center point:
Find the bottom center of your rectangle. Lightly mark a dot about an inch or two up from the bottom edge; this will be the convergence point for your leaf lines. -
Carve the central vein:
Using a loop tool or varying pressure with a dull needle tool, carve a slightly curved line straight up from your center dot toward the top edge. I like to make the line deeper at the bottom and shallower at the top. -
Add primary radiating lines:
Carve two long, curving lines on either side of the center vein, fanning them out toward the top corners of the tile. -
Fill in secondary lines:
Continue adding curved lines radiating from that central lower area, filling the space symmetrically. Vary the length of the strokes so some stop midway up the tile. -
Add detail strokes:
In the wider gaps between your main lines, carve shorter, unconnected strokes that follow the same upward curve to add density and texture. -
Clean up burrs:
Let the clay dry to a leather-hard state. Once firm, gently brush away the little clay crumbs (burrs) created by the carving tool using a soft brush or your finger. Don’t do this while wet or you’ll smear the lines.
Clean Lines Pro-Tip
When carving long lines, pull the tool toward your body rather than pushing it away. This gives you much better control over the curve and pressure of the stroke.
Step 3: Finishing and Firing
-
Punch hanging holes:
Using a hole cutter or a drinking straw, punch two holes in the top corners. Position them about 1/2 inch from the top and side edges to ensure strength. -
Dry slowly:
Place the tile on a wooden board and cover it loosely with plastic. Allow it to dry very slowly over several days to prevent the corners from curling up. -
Bisque fire:
Once bone dry, bisque fire the piece to Cone 04 (or according to your clay body’s instructions). -
Glaze or wash (optional):
To match the reference image, leave the raw clay unglazed to show off the speckles. Alternatively, apply a clear matte glaze to seal it without hiding the clay body. -
Final firing:
Fire the piece to maturity (likely Cone 5 or 6 for stoneware). This vitrifies the clay and brings out the dark iron speckles. -
Attach the cord:
Cut a length of jute twine. Thread the ends through the holes from back to front and tie secure knots on the front side, or loop it through for a hidden knot style.
Warping Woes
If your tile edges start lifting while drying, flip the tile over onto a piece of drywall or weigh down the corners gently with small sandbags to flatten it out.
Hang your finished tile where the sunlight can rake across the surface and highlight your beautiful carving work

TRACK YOUR CERAMIC JOURNEY
Capture glaze tests, firing details, and creative progress—all in one simple printable. Make your projects easier to repeat and improve.
Mini Slab House Village
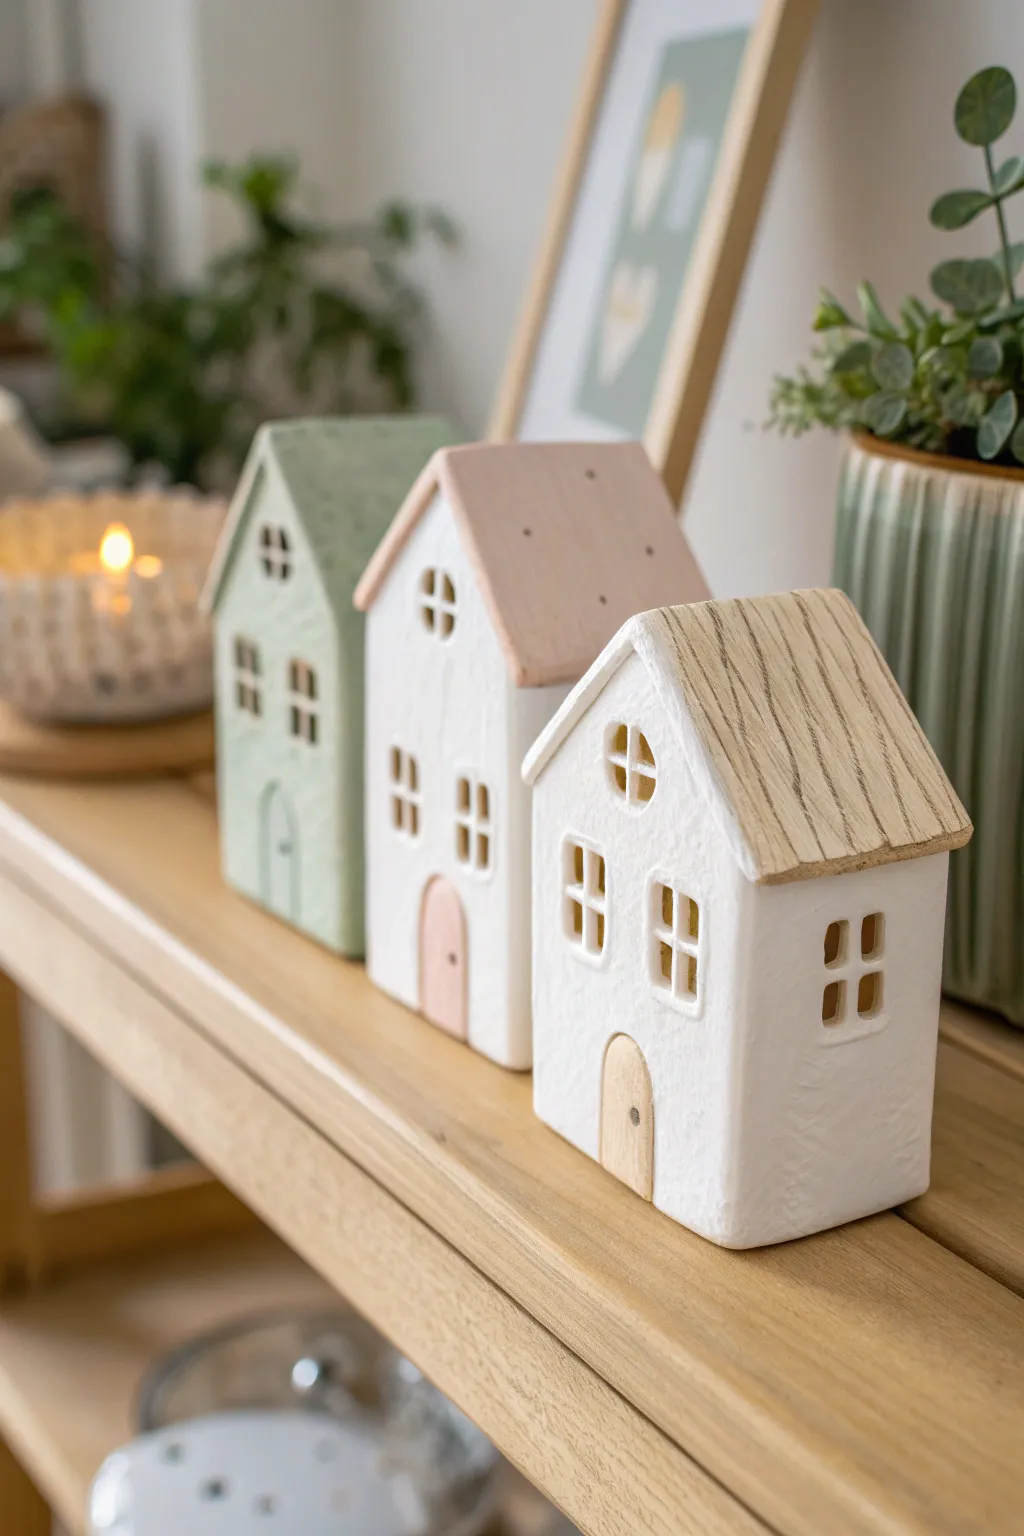
These charming slab-built houses bring a touch of playful architectural elegance to any shelf or mantelpiece. With their varied roof textures and soft pastel accents, this mini village is a perfect project for mastering clean corners and delicate cutouts.
How-To Guide
Materials
- White stoneware or earthenware clay
- Rolling pin
- Guide strips (1/4 inch thickness)
- Fettling knife or craft knife
- Needle tool
- Ruler
- Paper templates (front/back, sides, roof)
- Slip and scoring tool
- Small square cutters (optional)
- Basic pottery tool kit (rib, sponge)
- Underglazes (pastel green, soft pink, beige/tan)
- Matte clear glaze
Step 1: Preparing the Slabs and Templates
-
Roll out the clay:
Begin by rolling out a generous amount of white clay between your guide strips. You want a consistent thickness of about 1/4 inch to ensure the walls are sturdy enough to stand but thin enough to look delicate. -
Smooth the surface:
Before cutting anything, take a rubber rib and compress the clay on both sides. This aligns the clay particles, preventing future warping, and gives you a lovely smooth canvas for the walls. -
Cut the components:
Place your paper templates onto the slab. You will need two pentagon shapes for the designated front and back walls, two rectangles for the side walls, and two rectangles for the roof panels. Cut cleanly around them using a fettling knife. -
Texture the roof panels:
For the wood-grain effect seen on the front house, use a needle tool to drag wavy, parallel lines across the roof slabs while they are flat. For the other houses, you can leave the roof smooth or lightly dimple it for variation.
Keep it Straight
Walls bowing in? Let your slabs stiffen to ‘leather hard’ before assembling. Soft clay is too floppy to hold a crisp box shape.
Step 2: Assembly and Refining
-
Miter the edges:
For the sharpest 90-degree corners, bevel the vertical edges of your wall pieces at a 45-degree angle. This removes bulk from the joints and creates a seamless box structure. -
Score and slip:
Rough up the beveled edges with a scoring tool and apply a generous amount of slip. It acts as the glue that will bond your village together. -
Construct the walls:
Stand up the walls and press the joints firmly together. I find it helpful to use a small wooden block inside the house to push against, ensuring the corners are square and tight. -
Reinforce the interior:
Roll a very thin coil of clay and press it into the interior corners of the house. Smooth this out with a modeling tool to add significant structural integrity. -
Attach the roof:
Score the top edges of your wall structure and the underside of your roof panels. Place the roof panels on, ensuring they overhang slightly if desired, and press them firmly onto the walls and into each other at the peak.
Step 3: Adding Details
-
Cut the windows:
Once the house has stiffened to a leather-hard state, use a small square cutter or a sharp knife to remove the clay for the windows. For the divided pane look, cut four small squares leaving a cross of clay in the center. -
Add the door:
Roll a small, thin slab for the door. Cut an arch shape that fits the scale of your house facade. Score the back of this piece and attach it directly to the front wall, rather than cutting a hole. -
Refine the surface:
Use a slightly damp sponge to smooth out any rough edges around the windows and corners. Be careful not to wash away the texture on the roof. -
Dry slowly:
Cover the houses loosely with plastic to let them dry slowly. Uneven drying can cause the flat walls to warp or the roof seams to crack.
Crack Control
If hairline cracks appear at the roof peak during drying, score the area deeply, add vinegar-heavy slip (magic water), and compress firmly.
Step 4: Firing and Glazing
-
Bisque fire:
Fire the bone-dry houses to cone 04 (or your clay body’s specifications). This prepares them for decorating. -
Apply pastel colors:
Using underglazes, paint the specific areas. For the green house, paint the walls a soft sage green. For the others, paint the roofs pink or tan, and the doors a contrasting wood tone or pink. -
Wipe back texture:
If you textured the wood-grain roof, apply the tan underglaze and then gently wipe it back with a damp sponge. The color will stay in the grooves, highlighting the texture. -
Final glaze:
Dip or brush a clear matte glaze over the entire piece. A glossy glaze can obscure the subtle details, so matte is best for this rustic, paper-like finish. -
Final firing:
Fire the glazed pieces to the final temperature required by your clay and glaze combination.
Arranging your finished houses in a cluster creates a cozy narrative scene right on your bookshelf
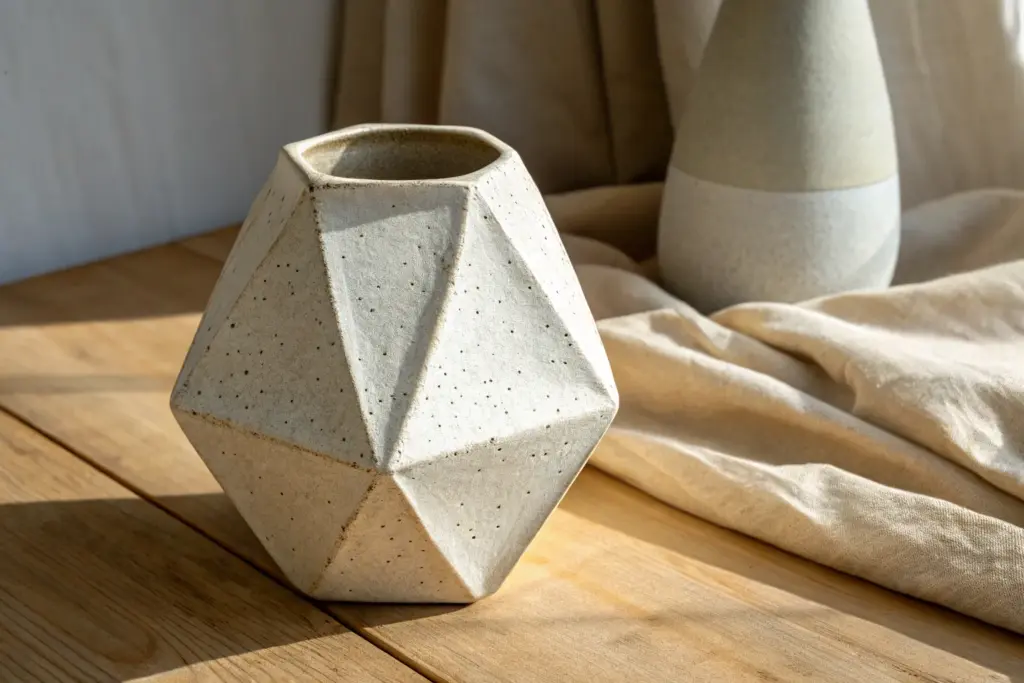
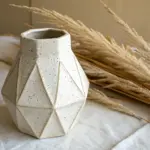
Folded Soft-Slab “Paper” Vase
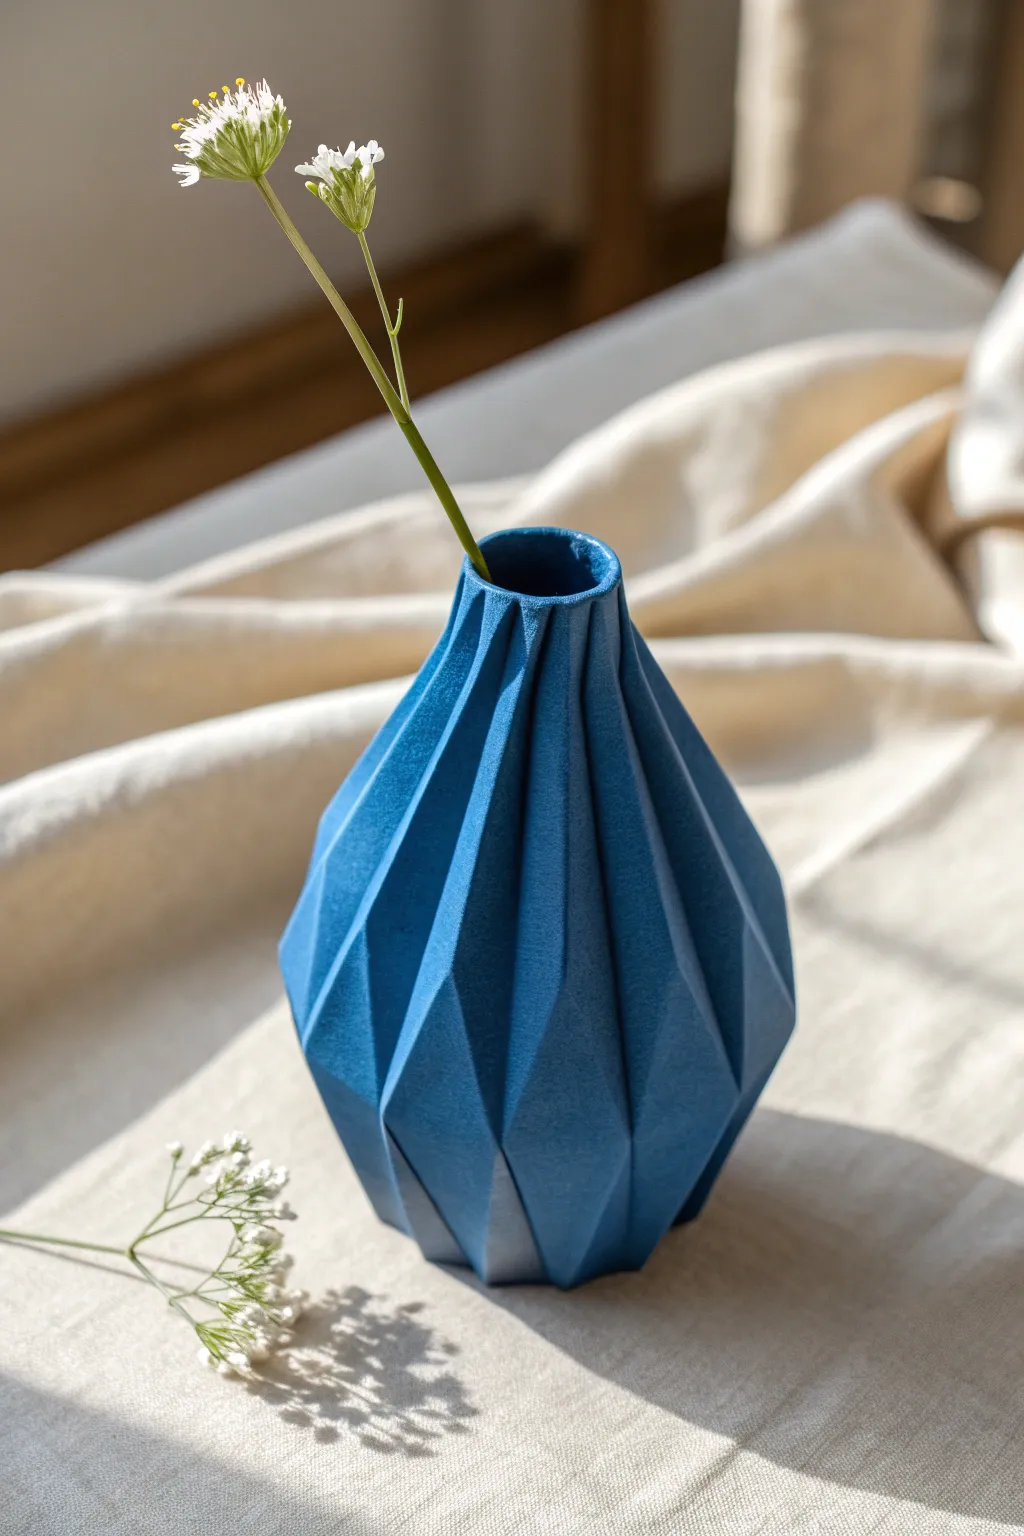
Mimic the crisp, exacting lines of folded paper in ceramic form with this striking faceted vase. Using soft slab construction, you will build a complex geometric form that plays with light and shadow through its angular ridges and valleys.
Step-by-Step Tutorial
Materials
- Cone 5-6 Stoneware clay (smooth body preferred)
- Rolling pin
- Two long wooden dowels or guide strips (1/4 inch thick)
- Fettling knife or X-Acto blade
- Paper vase template (printable or hand-drawn)
- Canvas work surface
- Scoring tool or serrated rib
- Slip
- Soft rib (silicone or rubber)
- Sponge
- Deep cobalt blue underglaze
- Matte clear glaze
Step 1: Preparing the Slabs
-
Roll the clay:
Begin by wedging your clay to remove air bubbles. Place it on your canvas between the 1/4 inch guide strips and roll it out until it is perfectly uniform in thickness. -
Smooth the surface:
Before cutting, take your soft rib and compress the slab on both sides. This aligns the clay particles and removes the canvas texture, which is crucial for achieving that paper-smooth finish later. -
Firming up:
Let the slab sit until it reaches ‘leather hard’ stage—it should be flexible enough to bend without cracking, yet stiff enough to hold a sharp crease. This is the most critical timing step.
Step 2: Template and Folding
-
Transfer the pattern:
Lay your paper template onto the slab. You will need a pattern that resembles a fan or a series of connected diamonds/triangles. Lightly trace the outline and the internal fold lines with a needle tool, being careful not to cut through. -
Cut the perimeter:
Using your fettling knife or X-Acto blade, cut the exterior shape of the vase wall. Keep your blade perpendicular to the table for clean, 90-degree edges. -
Score the fold lines:
For the ‘valley’ folds (folds that go inward), lightly score the clay along your traced lines. Do not cut all the way through; you just want to weaken the clay slightly to encourage it to bend there. -
Create the peaks:
For the ‘mountain’ folds (folds that point outward), flip the slab over and score the corresponding lines on the back side. This allows the clay to hinge sharply. -
The accordion bend:
Gently start bending your slab along the scored lines. Work slowly, bending each section a little at a time until the accordion shape begins to form
Cracking at the Crease?
If jagged cracks appear while folding, your slab is too dry. Spritz it with water, wrap in plastic, and wait 30 minutes. The clay must be leather-hard but still pliable.
Step 3: Assembly
-
Join the cylinder:
Bring the two vertical edges of your folded slab together to form the vase body. Score and slip these edges aggressively, then press them firmly together. Use a thin coil on the interior seam to reinforce it. -
Adding the base:
Roll a small separate slab for the base. Place your faceted tube onto this slab and trace around the bottom opening. -
Attach the bottom:
Score and slip both the bottom edge of the vase and the perimeter of the base piece. Press them together. I usually use a modeling tool to smooth the seam so it blends perfectly with the facets. -
Refine the rim:
The neck opening might be irregular from the folding. Gently manipulate the top folds to create a circular opening, smoothing the rim with a damp sponge so it feels soft to the touch. -
Sharpen the creases:
Once assembled, go back over the exterior folds. pinched them lightly with your fingers to sharpen the geometric lines, reinforcing that crisp ‘paper’ look.
Pro Tip: Sharp Shadows
After applying underglaze, lightly wipe the raised ‘mountain’ folds with a damp sponge. This thins the color slightly on edges, enhancing the 3D effect.
Step 4: Surface and Glazing
-
Bisque fire:
Allow the vase to dry slowly under plastic for a day or two to prevent warping, then uncover it to bone dry. Fire to bisque temperature (usually Cone 04). -
Apply color:
Apply 3 coats of deep cobalt blue underglaze to the bisque ware. Let each coat dry before applying the next to ensure solid, opaque coverage. -
Glaze application:
Dip or brush strictly the interior with a glossy clear liner glaze to make it watertight. For the exterior, brush on a thin layer of matte clear glaze to seal the underglaze without creating a high shine. -
Final fire:
Fire the piece to maturity (Cone 5 or 6). The matte exterior will absorb light, emphasizing the sharp structural shadows of your folds.
Place a single delicate stem in your new vase and admire how the sharp geometry contrasts with organic forms
Darted Slab Cup With Facets
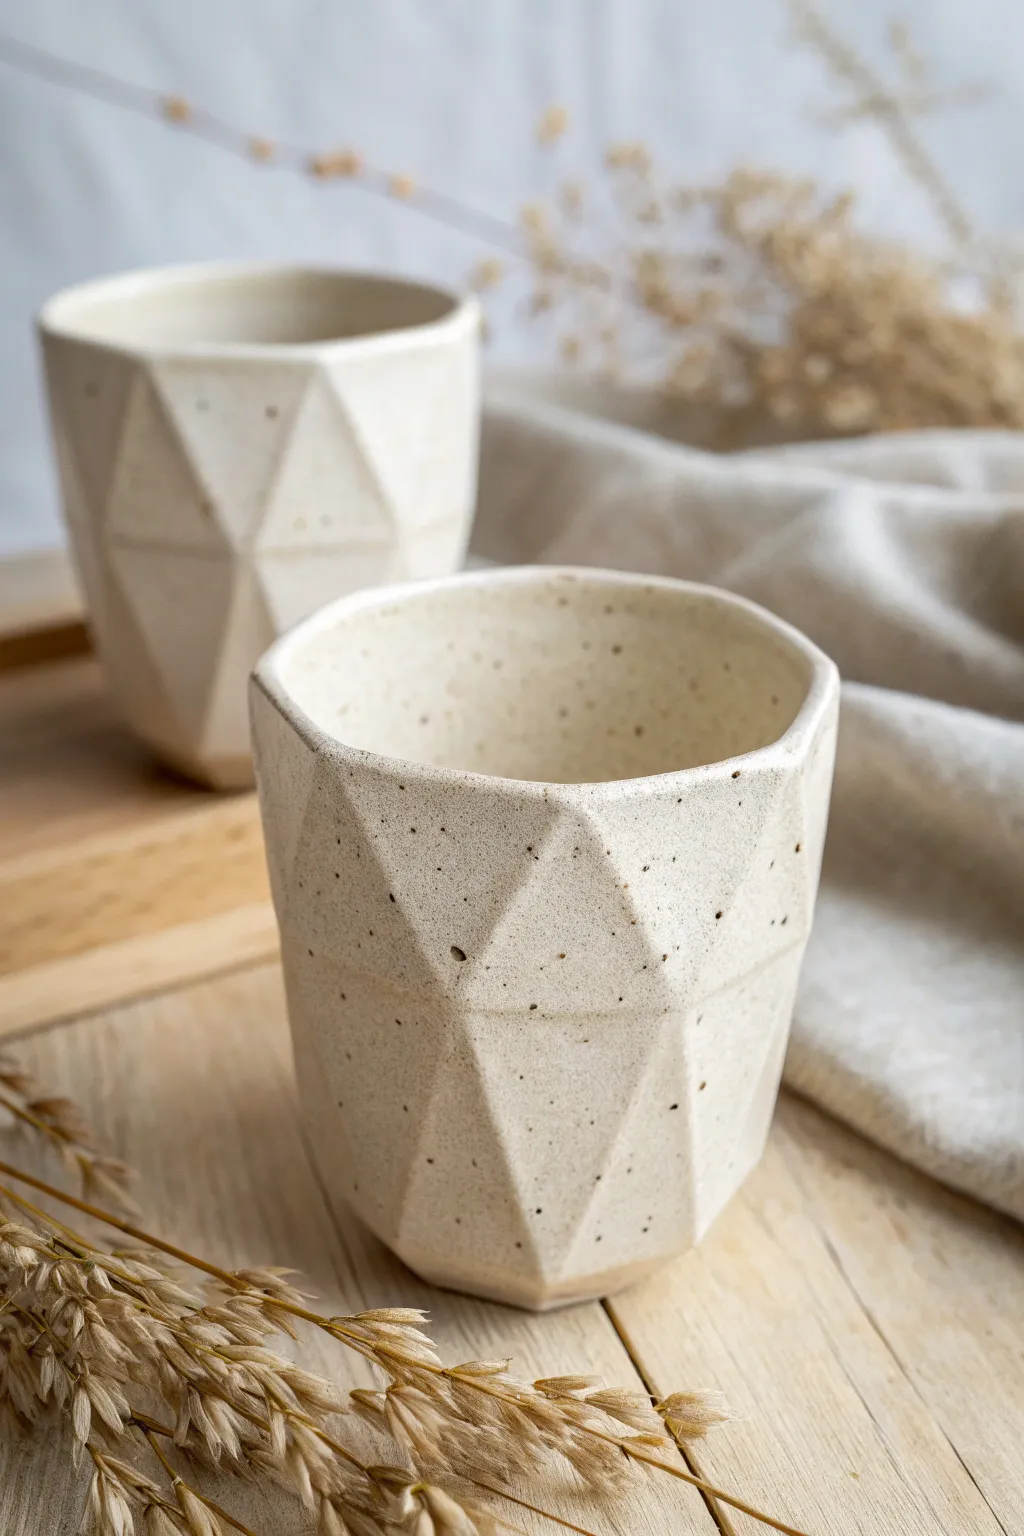
These elegant, speckled ceramic cups feature a stunning geometric form created through a specific darting technique that mimics the look of gemstone facets. The creamy stoneware glaze highlights the sharp angles and natural clay speckles, resulting in a modern yet rustic piece ideal for your morning coffee.
How-To Guide
Materials
- Speckled stoneware clay (mid-fire)
- Rolling pin
- Canvas working surface
- Paper template (circular or arched wedge)
- Fettling knife or X-Acto knife
- Needle tool
- Scoring tool (serrated rib or needle)
- Slip (clay slurry)
- Wooden paddle
- Surform or rasp tool
- Soft sponge
- Chamois strip
- Matte or satin cream glaze
Step 1: Preparing and Forming the Slab
-
Wedge the clay:
Begin by thoroughly wedging your speckled stoneware clay to remove any air bubbles. This is crucial for avoiding cracks later, given the precise darting we’ll be doing. -
Roll the slab:
Roll out a slab of clay to an even thickness, approximately 1/4 inch thick. Compress the clay on both sides with a rubber rib to align the particles and smooth the surface. -
Cut the main form:
Using a paper template, cut a long rectangle or a slight arc (depending on if you want a tapered rim). For the specific cup shown, a straight rectangle roughly 10 inches long by 4.5 inches tall works well for a standard tumbler. -
Bevel the edges:
Using your knife held at a 45-degree angle, bevel the two short vertical ends of your slab in opposite directions. This allows for a seamless join. -
Create the cylinder:
Score the beveled edges generously and apply slip. Carefully lift the slab and curl it into a cylinder, pressing the beveled ends together firmly. -
Reinforce the seam:
Use a wooden tool or your thumb to smooth the seam both inside and out. I like to run a rib vertically over the join to make it disappear completely. -
Add the base:
Roll a small slab for the floor. Score and slip the bottom of your cylinder and attach it to this slab. Trim away the excess clay flush with the cylinder wall using a needle tool.
Seam Splitting?
If your darts crack open during drying, you likely worked too dry. Score immediately, add fresh soft clay to the gap, and compress firmly. Dry very slowly.
Step 2: Darting and Faceting
-
Stiffen the clay:
Let the cylinder sit until it reaches a sturdy leather-hard state. It needs to be firm enough to handle cutting and pressing without collapsing. -
Mark dart locations:
Lightly mark a grid on your cylinder. To achieve the alternating triangular pattern shown, mark points around the top rim, the middle, and near the base, staggering them (like bricks in a wall). -
Cut the darts:
Cut diamond or triangular shaped wedges (darts) out of the cylinder walls at the marked locations. Based on the image, focus on removing clay where you want the form to pull inward. -
Close the darts:
Score and slip the cut edges of your darts. Gently push the clay together to close the gaps. This action naturally creates the angular, faceted planes seen in the photo. -
Enhance the facets:
Once the darts are closed, use a flat wooden paddle to beat the facets flat. This sharpens the angles between the planes and defines that geometric look. -
Refine the surface:
Use a Surform or rasp to gently shave down any uneven areas or bulky seams, further emphasizing the flat planes.
Sharper Angles
Wait until the clay is a hard leather-hard before paddling. The drier the clay, the crisper your facet lines will remain after using the paddle.
Step 3: Finishing and Glazing
-
Smooth the rim:
The rim should remain relatively circular despite the body’s angles. Use a strip of damp chamois leather to compress and smooth the lip for comfortable drinking. -
Sponge and dry:
Go over the entire piece with a barely damp sponge to soften really sharp corners that might chip. Allow the piece to bone dry slowly under plastic. -
Bisque fire:
Fire the cup to bisque temperature (usually Cone 04) based on your clay body’s specifications. -
Apply glaze:
Dip or brush on a cream-colored glaze. A satin or matte finish is best here, as a high-gloss glaze can sometimes obscure the subtle differences in the faceted angles. -
Wipe the foot:
Thoroughly wipe away any glaze from the bottom of the cup and about 1/4 inch up the side to prevent sticking to the kiln shelf. -
Final firing:
Fire to the maturity temperature of your clay and glaze (likely Cone 5 or 6). Once cooled, sand the bottom lightly if needed.
Now you have a beautifully structured cup that feels wonderful to hold in your hands