If you’re craving fresh polymer clay pendant inspiration, you’re in the right place—I’m sharing my favorite designs that look amazing without needing fancy tools. These ideas range from super-beginner shapes to a few “how did you make that?” statement pieces you can totally grow into.
Minimal Geometric Cutouts
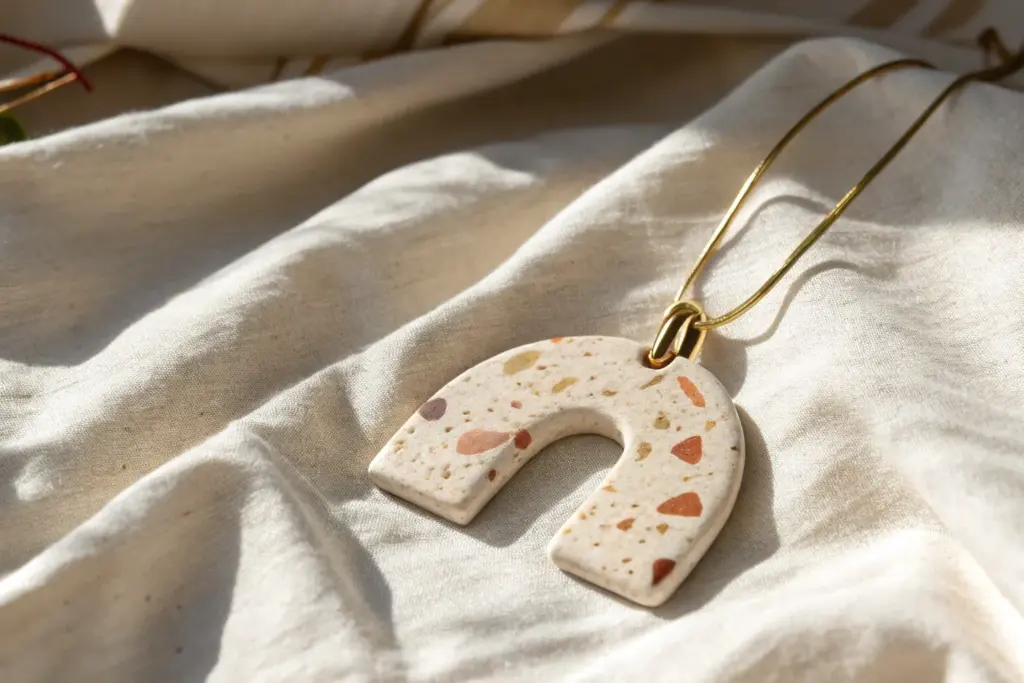
Embrace the warmth of natural tones with this simple yet striking polymer clay arch necklace. Its smooth lines and earthy color palette make it a versatile accessory that pairs beautifully with breezy linen or cozy knits.
Step-by-Step
Materials
- Polymer clay in terracotta/burnt orange
- Polymer clay in beige or sand
- Polymer clay in cream or white
- Basic clay or acrylic roller
- Clay cutting blade or tissue blade
- U-shaped clay cutter (optional but helpful)
- Round wooden bead (approx. 10-12mm)
- Brown suede or faux suede cord
- Needle tool or toothpick
- Super glue or liquid polymer clay (Bake and Bond)
- Sandpaper (fine grit)
Step 1: Preparing the Clay
-
Condition the clay:
Start by warming up your terracotta, beige, and cream polymer clay in your hands. Knead each color separately until it is soft, pliable, and free of cracks. -
Roll the snakes:
Take a portion of the terracotta clay and roll it into a snake on your work surface. Aim for a consistent thickness of about 4-5mm. -
Create more strands:
Repeat the rolling process with the beige clay and the cream clay. You should also roll a second snake of the terracotta clay, as this design uses the dark color on both the outermost and innermost arches. -
Check consistency:
Lay your four snakes side-by-side to ensure they are all roughly the same diameter. If one is too thick, gently roll it out further to match the others.
Clean Cuts Only
Chill your clay in the fridge for 10 minutes before slicing the bottom. Firm clay distorts less, giving you a sharp, professional edge.
Step 2: Forming the Arch
-
Form the inner arch:
Take the second terracotta snake (the inner one) and gently bend it into a tight U-shape. This will be the smallest arch at the center of your pendant. -
Layer the next color:
Wrap the beige clay snake snugly around the outside of your terracotta arch. Gently press them together along the seam so they adhere without smashing the round shape. -
Add the cream layer:
Take your cream-colored snake and wrap it around the beige layer. Smooth it as you go to avoid any gaps between the strips. -
Add the outer layer:
Finish the rainbow shape by wrapping the final terracotta snake around the entire stack. -
Secure the layers:
Once all four layers are assembled, gently press the sides inward to ensure a solid bond. I like to lightly roll over the top surface with a roller just once to flatten the face slightly, which gives it that modern, geometric look shown in the photo.
Texture Twist
Before baking, press a piece of coarse sandpaper or a toothbrush onto the clay surface to add a stone-like texture.
Step 3: Refining and Baking
-
Trim the bottom:
Using your sharp clay blade, make a straight, clean cut across the bottom of the legs to make them even. This creates the flat base of the pendant. -
Create a hanging loop:
Roll a very small, thin snake of terracotta clay. Form it into a small loop and attach it securely to the top center of the outer arch. You can use a dab of liquid clay to ensure it doesn’t pop off. -
Pierce the loop:
Ensure the hole in your new loop is large enough for your cord. Use a needle tool or toothpick to wiggle it open if necessary. -
Smooth imperfections:
Before baking, dip your finger in a little rubbing alcohol or cornstarch and gently smooth away any fingerprints or lint. -
Bake carefully:
Place your pendant on a ceramic tile or baking sheet lined with parchment paper. Bake according to your clay manufacturer’s instructions, usually around 275°F (130°C) for 30 minutes. Let it cool completely.
Step 4: Assembly
-
Thread the cord:
Take a long piece of brown suede cord (about 30 inches, or your desired length) and fold it in half to find the center. -
Larks head knot:
Push the folded loop of the cord through the clay loop on your pendant from front to back. Then, pull the loose ends of the cord through that suede loop and pull tight to secure it. -
Add the bead:
Thread both ends of the suede cord through your wooden bead. Slide the bead down until it rests just above the clay loop. -
Finish the cord ends:
You can simply tie the ends of the cord in a knot at the desired length, or leave them loose if you want an adjustable tie.
Wear your new geometric piece with pride and enjoy the subtle pop of color it adds to your day

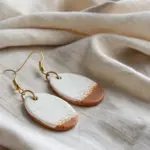

Classic Teardrop Statement Pendant
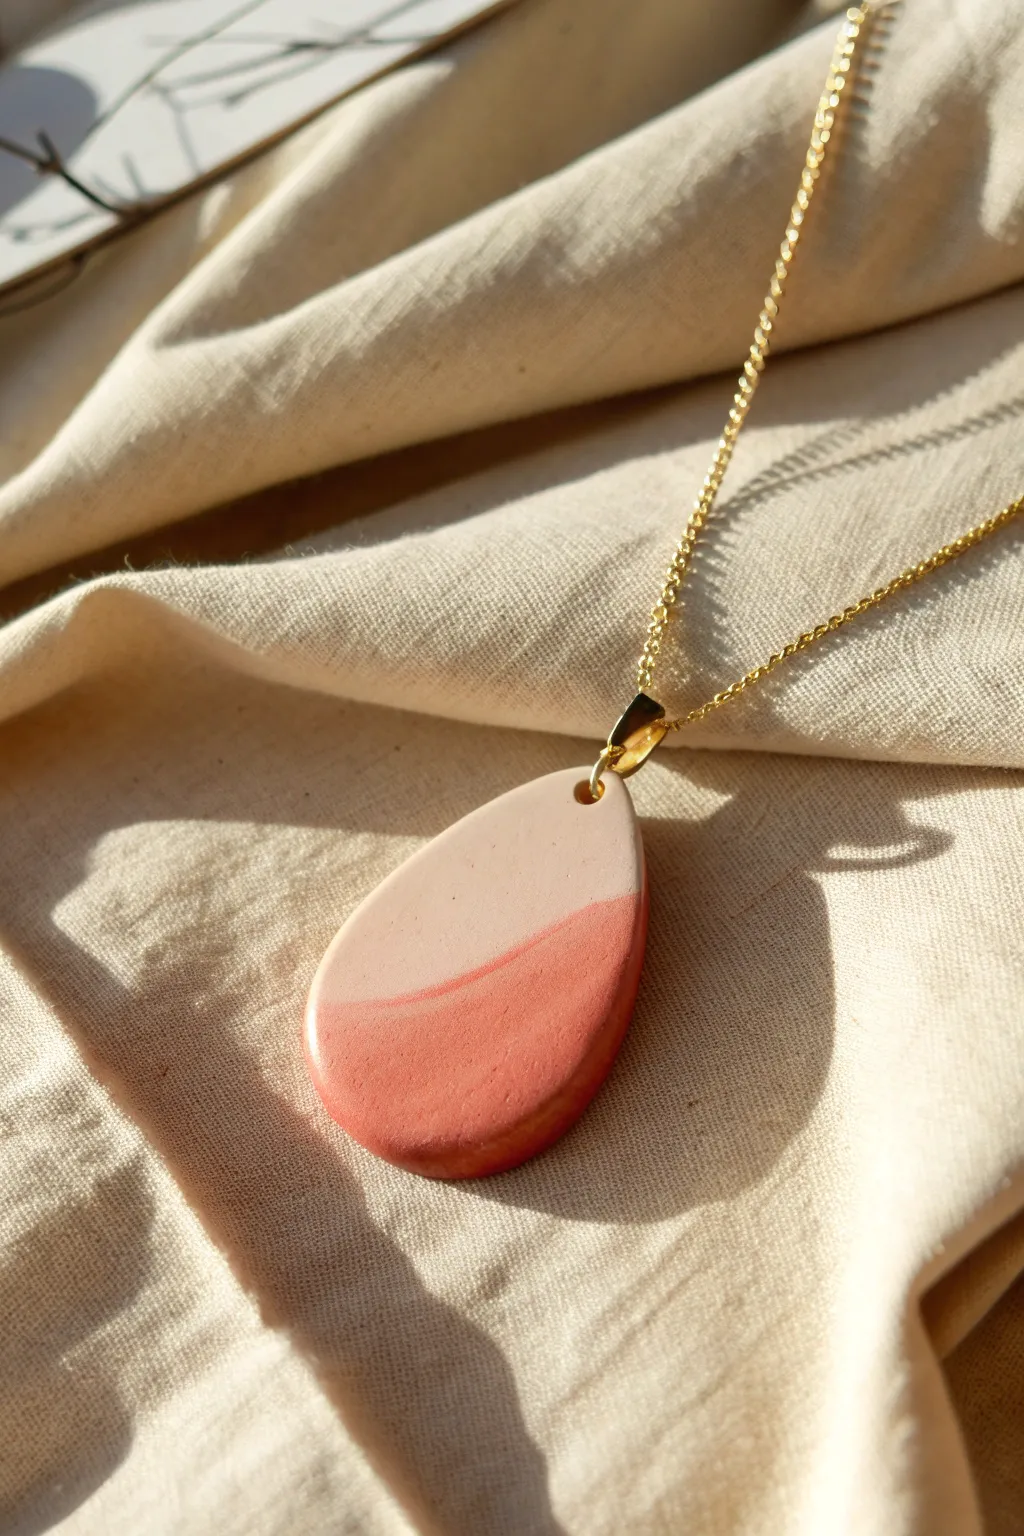
This elegant statement piece combines soft cream and warm terracotta tones in a seamless, organic gradient. The classic teardrop shape and smooth, matte finish give it a sophisticated, minimalist appeal perfect for everyday wear.
Detailed Instructions
Materials
- Polymer clay (peachy-cream color)
- Polymer clay (terracotta or coral color)
- Acrylic rolling pin or pasta machine
- Teardrop-shaped clay cutter (medium to large)
- Tissue blade or craft knife
- Hand drill or small clean toothpick
- Wet/dry sandpaper (400, 600, and 1000 grit)
- Gold pinch bail
- Gold finish satellite or cable chain
- Jewelry pliers
- Ceramic tile or glass work surface
- Oven
Step 1: Preparing the Clay Slab
-
Condition the materials:
Begin by thoroughly conditioning both the cream and terracotta polymer clays separately. knead them in your hands until they are soft, pliable, and free of any air bubbles. -
Create the base sheets:
Roll each color out into a sheet of equal thickness, roughly 3mm to 4mm thick. You can use an acrylic roller with depth guides or a pasta machine on a medium setting. -
Cut the junction line:
Using your tissue blade, cut a gentle, wavy curve through the cream sheet and a matching curve through the terracotta sheet. This curve will form the dreamy horizon line where the colors meet. -
Fit the pieces together:
Place the top cut of the cream clay against the bottom cut of the terracotta clay (or vice versa, depending on your preference) on your work surface. Push them gently together so the edges touch completely without overlapping. -
Join the seam:
Place a piece of parchment paper over the joined clay. Gently rub over the seam with your finger or roll significantly lightly with the roller to heal the join on the surface. -
Smooth the back:
Flip the combined sheet over. If the seam is fragile, apply a very thin ‘snake’ of clay along the back of the seam and smooth it down to reinforce the bond.
Step 2: Shaping and Refining
-
Cut the teardrop:
Position your teardrop cutter over the joined slab. Aim to have the curved seam sit in the lower third of the shape for that asymmetrical, organic look shown in the image. Press down firmly. -
Release the shape:
Lift the cutter and pull away the excess clay from the outside. If the clay is stuck to your surface, slide your tissue blade underneath to release it without distorting the shape. -
Soften the edges:
Gently tap the edges of the raw clay with your fingertip to remove the sharp cut marks. I find this creates a more stone-like, polished final look than leaving the edges crisp. -
Pierce the hole:
Use a small toothpick or a pin tool to create a hole at the very top center of the teardrop. Ensure the hole is large enough to accommodate the prongs of your pinch bail. -
Bake firmly:
Place the piece on a ceramic tile or baking sheet covered with cardstock. Bake according to the manufacturer’s instructions for your specific brand of clay (usually 275°F/130°C for 30-45 minutes).
Clean Finish Trick
Before baking, lightly wipe the surface of the raw clay with a small amount of rubbing alcohol or acetone on a cotton swab. This removes lint and minor fingerprints effortlessly.
Step 3: Finishing Touches
-
Cool down:
Let the pendant cool completely inside the oven or on a cooling rack. Do not attempt to sand it while it is still warm. -
Sand for a smooth finish:
Submerge the piece in a bowl of water. Start sanding with 400 grit wet/dry sandpaper, moving in circular motions to remove fingerprints. Progress to 600 grit, and finish with 1000 grit for a silky matte texture. -
Buff (Optional):
If you want a slight sheen like a river stone, rub the dry pendant briskly against a piece of denim or heavy canvas fabric. -
Attach the bail:
Open the prongs of your gold pinch bail slightly. Insert the prongs into the hole you created earlier and use your pliers to squeeze it shut securely. -
String the pendant:
Thread your gold satellite chain through the loop of the bail. Check that the clasp works correctly and the chain sits flat.
Make it Sparkle
Add a thin line of gold leaf or metallic paint directly over the seam between the two colors after baking to emphasize the separation and add a touch of luxury.
Now you have a custom, gallery-worthy pendant ready to elevate any simple outfit


Soft Marble Swirl Pendant
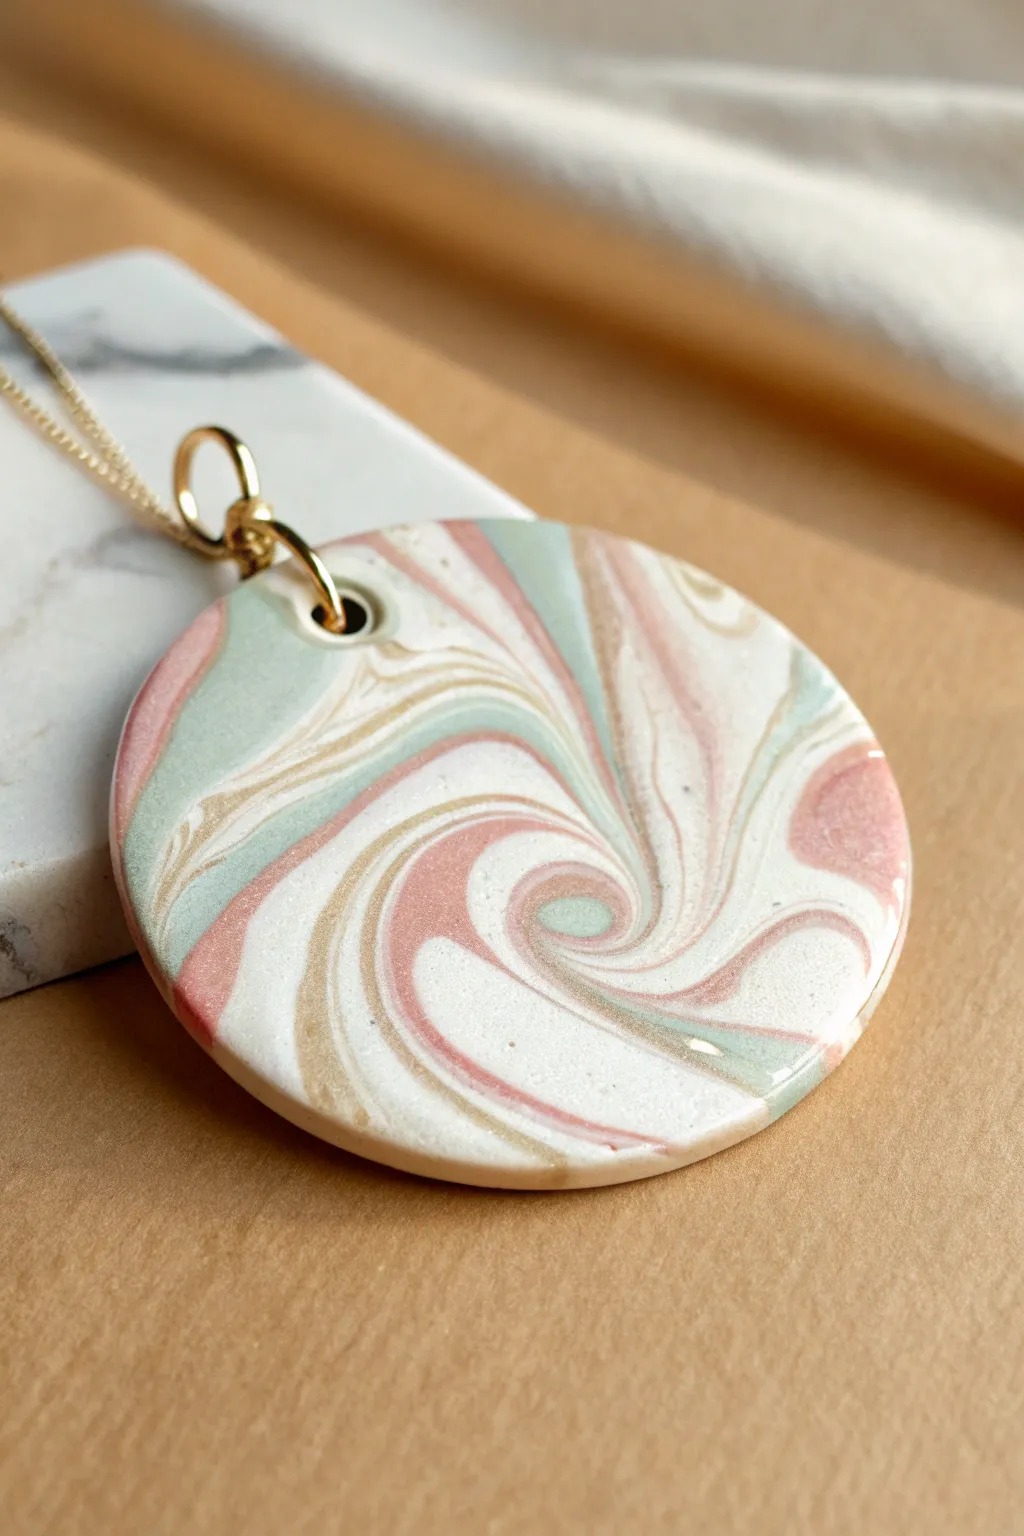
Capture the elegance of natural stone with this dreamy, soft marble swirl pendant. By combining muted pastels with translucent shimmers, you’ll create a sophisticated piece that looks far more complex than the simple technique required to make it.
Step-by-Step
Materials
- Polymer clay (White, Pastel Pink, Sage Green, Beige/Gold)
- Translucent polymer clay (optional, for depth)
- Acrylic rolling pin or pasta machine
- Circular clay cutter (approx. 2 inches)
- Small circular cutter or straw (for the jump ring hole)
- Sharp tissue blade
- Fine-grit wet/dry sandpaper (up to 1000 grit)
- Glossy polyurethane varnish or resin
- Soft brush for glazing
- Gold jump ring and necklace chain
- Ceramic tile or baking sheet
- Oven
Step 1: Preparing the Palette
-
Condition the clay:
Start by thoroughly conditioning your white polymer clay until it is soft and pliable. Do the same for your pastel pink, sage green, and beige clays. -
Mix custom shades:
If your colors are too vibrant, mix a small amount of white into the pink and green to soften them into true pastels. Mixing a tiny bit of translucent clay into the white base can add a stone-like depth later on. -
Create snakes:
Roll each color into a long, thin snake or log. You want the white snake to be slightly thicker than the colored ones, as it will act as the background separator.
Step 2: Creating the Marble Pattern
-
Bundle the colors:
Gather your clay snakes together into a single bundle. Twist them together gently, like wringing out a towel, to start combining the colors. -
Fold and roll:
Fold the twisted log in half and roll it out smoothly on your work surface to lengthen it again. This is the first step in marbleizing. -
Repeat the twist:
Repeat the twisting and folding process 2-3 times. Be careful not to over-mix; you want distinct lines of color, not a muddy grey blend. -
Form a ball:
Roll the marbled log into a smooth ball. You should see interesting streaks of color wrapping around the surface. -
Create the swirl focus:
Place the ball on your work surface. Look for a spot where the lines converge nicely. Press down gently with your thumb or palm, slightly rotating your hand to encourage the lines to spiral outward from the center.
Muddy Colors?
Stop twisting sooner! Over-mixing blends distinctive lines into a brown mush. Stop while the distinct stripes of color are still very clear before flattening the ball.
Step 3: Shaping and Refining
-
Flatten the slab:
Use your acrylic roller to flatten the ball into a slab about 4mm thick. Roll in different directions to maintain the varied swirl pattern without distorting it too much linearly. -
Select your crop:
Hover your circular cutter over the clay slab to find the most pleasing composition. I like to position the center of the swirl slightly off-center for a more dynamic look. -
Cut the shape:
Press the cutter firmly down into the clay. Give it a tiny wiggle to separate it from the surrounding scrap clay before lifting. -
Make the hole:
Use a small cutter or a drinking straw to punch a hole near the top edge for the hardware. Ensure it’s not too close to the edge to prevent breakage. -
Smooth the edges:
Gently run your finger around the cut edge of the circle to smooth down any sharpness or burrs left by the cutter.
Pro Tip: Gold Veins
Add a very thin snake of metallic gold clay into your initial bundle. When swirled, this creates delicate, sparkling mineral veins throughout the marble pattern.
Step 4: Finishing Touches
-
Bake the piece:
Place the pendant on a ceramic tile and bake according to your clay manufacturer’s instructions (usually 275°F/130°C for 30 minutes). -
Cool and sand:
Once completely cool, wet-sand the edges and surface with fine-grit sandpaper. Start with 400 grit and work up to 1000 grit for a silky smooth finish. -
Apply gloss:
Brush on a thin, even coat of glossy varnish or UV resin. This will make the marble colors pop and give it a polished stone appearance. -
Assemble:
Open a large gold jump ring using pliers. Thread it through the hole in the pendant, attach your chain, and close the ring securely.
Wear your new swirled masterpiece with pride or gift it to a friend who loves gentle pastels


Terrazzo Speckle Disc Pendant
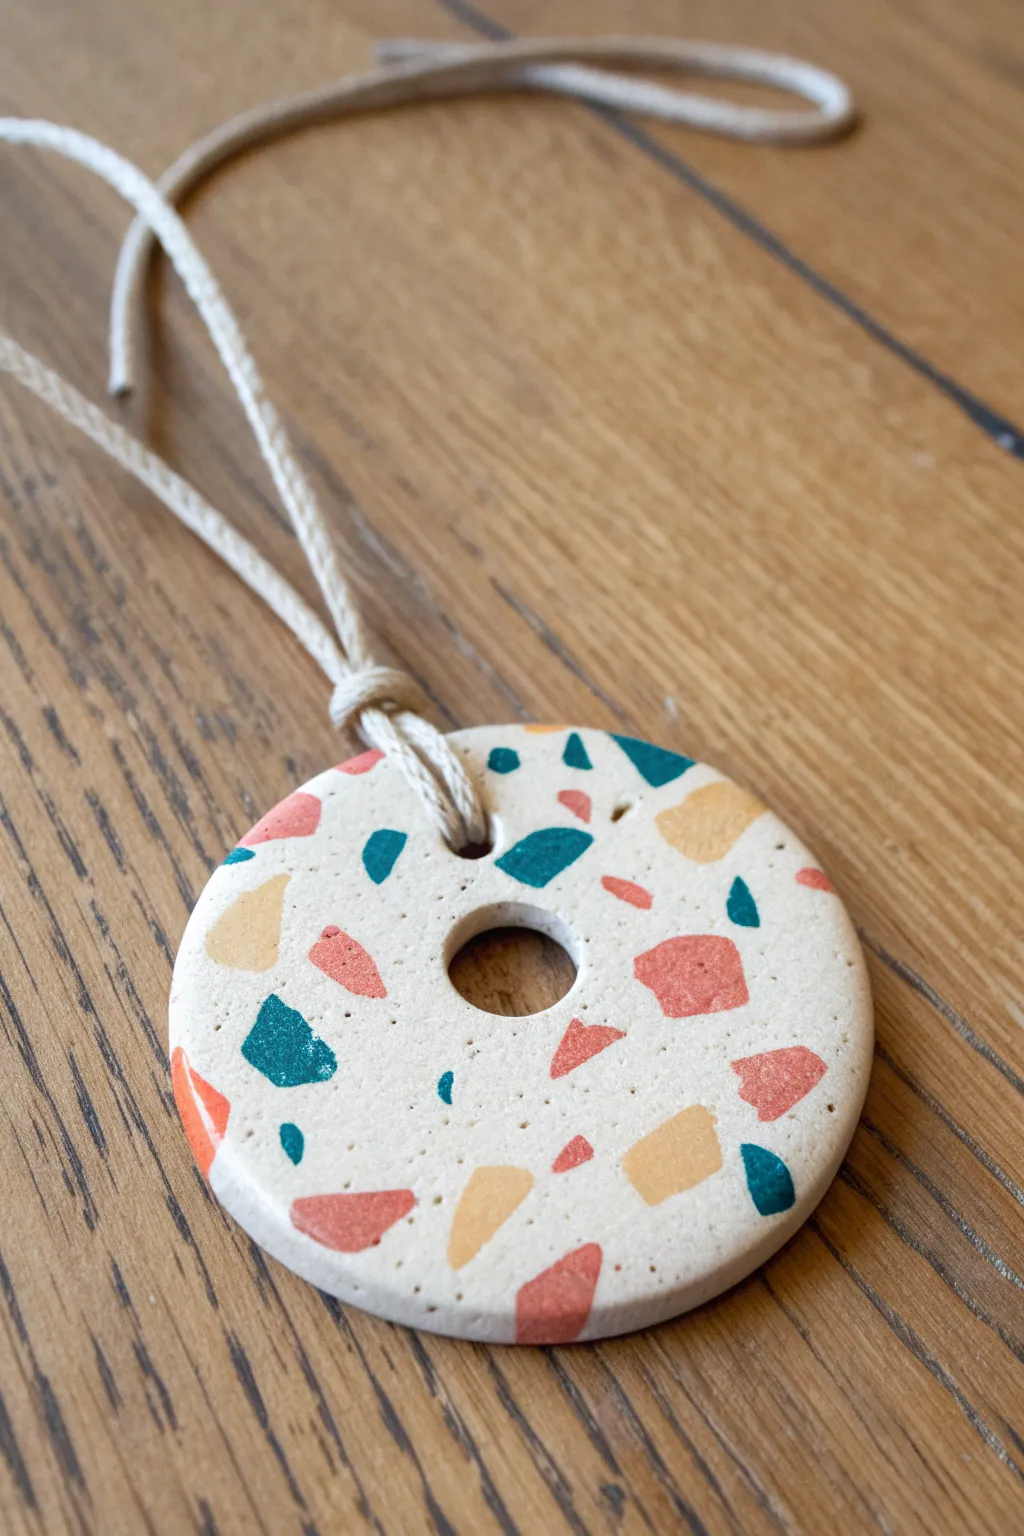
Embrace the modern, playful aesthetic of terrazzo with this simple yet striking disc pendant. By mixing bold chips of color into a neutral base, you’ll create a wearable piece of art that looks like authentic stone.
Step-by-Step Guide
Materials
- White or beige polymer clay (base)
- Teal or dark turquoise polymer clay
- Terracotta or burnt orange polymer clay
- Mustard yellow or gold polymer clay
- Acrylic rolling pin or pasta machine
- Medium circle cutter (approx. 2-3 inches)
- Small circle cutter (approx. 0.5 inch for the center)
- Tissue blade or craft knife
- Parchment paper or ceramic tile
- Fine grit sandpaper (400-1000 grit)
- Cord or leather thong for hanging
- Oven for baking
Step 1: Preparing the Terrazzo Chips
-
Condition the colored clay:
Start by conditioning your colored clays—teal, terracotta, and mustard—until they are soft and pliable. -
Flatten the colors:
Roll each colored piece into a very thin sheet. You want these to be quite delicate, almost paper-thin. -
Create the chips:
Use your tissue blade to chop the thin sheets into small, irregular fragments. Aim for a variety of shapes like triangles and jagged shards. -
Separate and confuse:
Gently toss the chopped pieces so they aren’t stuck together in clumps. I find it helpful to keep the colors slightly separate at first so I can control the distribution later. -
Partially bake (optional):
For easier handling and sharper edges, you can bake these chips for 5-10 minutes at the recommended temperature, though using raw chips works perfectly fine for a smoother integration.
Step 2: Forming the Base
-
Condition the base clay:
Take your white or beige clay and condition it thoroughly. If you want a stone effect, you can mix in a tiny pinch of black pepper or translucent clay. -
Roll the slab:
Roll the base clay into a slab that is roughly 4mm thick. It needs enough substance to be durable. -
Apply the chips:
Randomly sprinkle your colored chips onto the white slab. Don’t overthink the placement; randomness is key to the terrazzo look. -
Press them in:
Place a piece of parchment paper over the slab and use your acrylic roller to firmly press the chips into the base clay so they are flush with the surface. -
Smooth the surface:
Roll over the slab repeatedly until the surface is completely level and the chips have stretched slightly, becoming part of the slab rather than sitting on top.
Clean Cuts Tip
Use a piece of plastic wrap over the clay before using your cutter. This creates a beautifully rounded, doomed edge rather than a sharp, flat cut.
Step 3: Cutting and Refining
-
Cut the main shape:
Position your large circle cutter over an area of the pattern you like best and press down firmly to cut the main disc. -
Cut the center hole:
Use the smaller cutter to remove a circle from the exact center. You can eyeball this or measure lightly to ensure symmetry. -
Smooth the edges:
Gently rub the raw edges with your fingertip to remove any sharp ridges left by the cutters. -
Final inspection:
Check for any air bubbles or uneven spots and smooth them out gently before baking.
Go Glossy
For a polished ceramic look instead of matte stone, skip the sanding and apply a coat of UV resin or polymer clay gloss varnish after baking.
Step 4: Baking and Finishing
-
Bake the pendant:
Place the piece on a ceramic tile or baking sheet covered with parchment paper. Bake according to your brand of clay’s instructions (usually 275°F/130°C for 30 minutes). -
Cool down:
Allow the pendant to cool completely before handling. It will be slightly soft when hot but hardens as it cools. -
Sand the surface:
Wet sand the surface under running water using fine-grit sandpaper. This reveals the crisp edges of the chips and gives the clay a professional, stone-like matte finish. -
Drill (if needed):
If you didn’t cut a hole large enough for your cord earlier, you can carefully drill a hole now using a hand drill. -
Attach the cord:
Fold your cord in half, push the loop through the center hole, and pull the loose ends through the loop to create a lark’s head knot.
Wear your new geometric statement piece with a simple top to let the colors truly pop

The Complete Guide to Pottery Troubleshooting
Uncover the most common ceramic mistakes—from cracking clay to failed glazes—and learn how to fix them fast.
Leaf Imprint Nature Pendant
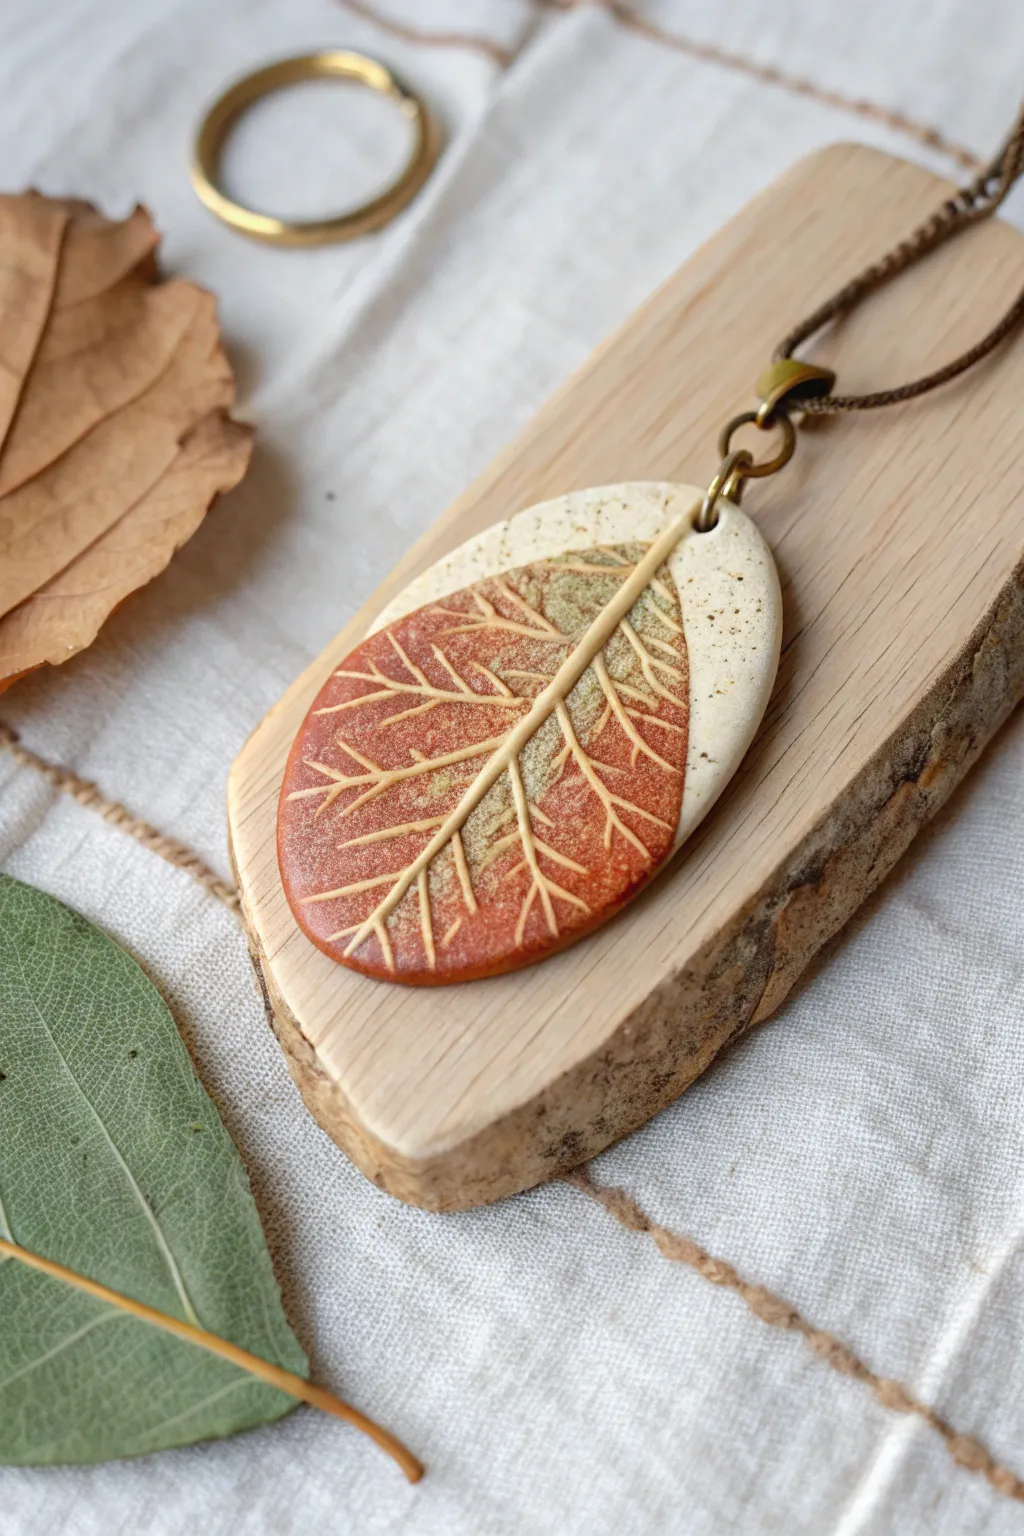
Capture the fleeting beauty of fall with this sophisticated polymer clay pendant featuring an inlaid leaf design. The piece combines a rustic speckled base with a warm, multi-toned leaf imprint that looks like a fossilized treasure.
Step-by-Step
Materials
- Polymer clay (cream or beige)
- Polymer clay (terracotta or rust orange)
- Polymer clay (sage or olive green)
- Ground black pepper or dried tea leaves (for speckling)
- Acrylic roller or rolling pin
- Pointed oval or marquise clay cutter
- X-acto knife or craft blade
- Detailed texture tool or needle tool
- Coarse sandpaper or salt (for texture)
- Jump ring and necklace cord (brown)
- Jewelry pliers
- Small hand drill or pin vise
Step 1: Preparing the Speckled Base
-
Condition the Clay:
Start by thoroughly conditioning your cream-colored polymer clay until it is soft and pliable. Warm clay prevents cracks later on. -
Add Speckles:
Sprinkle a small pinch of ground black pepper or finely crushed dried tea leaves into the cream clay. Knead it in thoroughly to distribute the specs evenly, giving it a natural, stony look. -
Roll the Sheet:
Roll out the speckled clay into a medium-thick slab, about 3-4mm thickness. You want it substantial enough to hold the inlay. -
Cut the Base Shape:
Use your cutter or a blade to cut a freeform oval or use a large oval cutter. Gently smooth the edges with your finger to remove any harsh cut lines.
Step 2: Creating the Leaf Inlay
-
Mix Leaf Colors:
Take small amounts of the terracotta and sage green clay. Roughly mix them together but don’t blend fully; you want a marbled effect where both colors are visible. -
Roll the Leaf Sheet:
Roll this marbled mixture into a thin sheet, slightly thinner than your base slab. -
Cut the Leaf Shape:
Use a marquise cutter or freehand cut a distinct leaf shape (pointed at both ends) from the marbled clay. It should be smaller than your base slab. -
Create the Space:
Place your colored leaf shape on top of the cream base to gauge positioning. Lightly trace around it with a needle tool, then remove the colored clay. -
Carve the Inlay Pocket:
Carefully scoop out a shallow layer of clay from the traced area on the base. You are creating a recess for the colored clay to sit in. -
Insert the Leaf:
Place the colored leaf shape into the recess. Gently press it down. Use your roller lightly over the entire piece to ensure the two clays bond and become flush with each other.
Uneven Surface?
If the inlay isn’t flush, lay a piece of parchment paper over the pendant and burnish firmly with the back of a spoon to level the seams.
Step 3: Detailing and Texturing
-
Shape the Form:
Trim the excess cream clay around the leaf, leaving a pleasing asymmetrical border as seen in the photo. Smooth the outer rim again. -
Add Veins:
Using a needle tool or a blunt texture tool, carve deep vein lines into the leaf. Start with a central spine, then branch out. I find dragging the tool slightly pulls up the underlying cream color for contrast. -
Refine the Stem:
Roll a very tiny snake of cream clay. Lay it into the central vein groove you just carved to accentuate the stem, extending it slightly off the top of the leaf. -
Surface Texture:
Lightly tap the colored leaf areas with coarse sandpaper or a toothbrush to give it an organic, non-shiny surface finish. -
Pierce the Hole:
Use a needle tool or small straw to create a hole at the top of the pendant for your jump ring. Make sure it’s not too close to the edge.
Add Realism
Before baking, lightly brush gold mica powder or crushed pastels onto the red sections of the leaf for a subtle, shimmering autumnal glow.
Step 4: Finishing
-
Bake:
Bake the piece according to your polymer clay manufacturer’s instructions (usually 275°F/135°C for 15-30 minutes). -
Cool Down:
Allow the pendant to cool completely before handling. It is fragile while hot. -
Antique (Optional):
If you want more depth, brush a little brown acrylic paint into the veins and wipe away the excess immediately with a wet wipe. -
Assemble:
Twist open a jump ring using your pliers. Thread it through the hole and attach it to your brown cord.
Now you have a stunning piece of wearable nature art to celebrate the season.
Pressed Botanical Silhouette Pendant

This elegant pendant captures the delicate beauty of a fern frond against a stark, matte black background. The raised botanical design offers a tactile element, making it a sophisticated piece of nature-inspired jewelry.
Step-by-Step Guide
Materials
- Black polymer clay
- Beige or translucent white polymer clay
- Baking surface (ceramic tile or glass)
- Small oval clay cutter
- Needle tool or X-Acto knife
- Acrylic roller or pasta machine
- Gold mica powder (optional)
- Soft paintbrush
- Gold jump ring (6-8mm)
- Hand drill or pin vibe
- Jewelry pliers
- Sandpaper (fine grit)
Step 1: Base Preparation
-
Condition the dark clay:
Begin by thoroughly conditioning your black polymer clay until it is soft and pliable. Warm clay prevents cracking later. -
Roll out the sheet:
Roll the black clay into a sheet approximately 3-4mm thick using your acrylic roller or pasta machine on a medium setting. -
Cut the shape:
Clean your oval cutter to remove any old residue, then press firmly into the black clay sheet to cut your base shape. -
Smooth the edges:
Gently lift the oval from the work surface. Use your finger to softly smooth the sharp cut edges for a more finished look.
Step 2: Creating the Fern
-
Condition lighter clay:
Condition a very small amount of beige clay. Roll it into a thin ‘snake’ or log to serve as the central stem of the fern. -
Place the stem:
Lay thin stem diagonally across the black oval. Press it down very lightly so it sticks but doesn’t flatten completely. -
Make the leaves:
Create tiny teardrop shapes from the beige clay. You will need about 7-9 pairs of varying sizes, getting smaller toward the top. -
Position the leaves:
Arrange the teardrops on either side of the stem, pointing slightly upward. I usually start at the bottom with largest leaves and work my way up. -
Add the texture:
Using a needle tool, press a central vein down the middle of each tiny leaf. Then, make tiny diagonal indentations on the sides of the leaves to mimic fern veins. -
Refine the shape:
Ensure all pieces are securely attached to the black base by gently pressing down with the flat side of a tool, being careful not to obscure your texture work.
Clean Lines
Keep baby wipes or rubbing alcohol nearby to clean your hands between colors. Black clay residue on the beige fern leaves will ruin the crisp contrast.
Step 3: Finishing Touches
-
Optional dusting:
If you want a slight shimmer, dust a tiny amount of gold mica powder over the fern leaves using a dry, soft brush before baking. -
Bake the pendant:
Place the piece on a ceramic tile and bake according to your clay manufacturer’s instructions (usually 275°F/135°C for 30 minutes). -
Cool down:
Allow the clay to cool completely in the oven or on a wire rack before handling. This ensures maximum strength. -
Drill the hole:
Use a small hand drill or pin vise to carefully bore a hole at the very top center of the oval, leaving enough margin so the edge doesn’t snap. -
Attach hardware:
Open a gold jump ring by twisting it sideways with two pairs of pliers. Thread it through the drilled hole and twist it closed securely.
Go Antique
After baking, rub a little brown acrylic paint into the textured veins of the fern and wipe off the excess for an aged, botanical specimen look.
Now you have a timeless botanical pendant ready to wear or gift


What Really Happens Inside the Kiln
Learn how time and temperature work together inside the kiln to transform clay into durable ceramic.
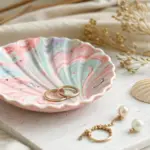
Stamped Floral Medallion Pendant
Capture the elegance of antique carvings with this sophisticated embossed pendant project. Using simple stamping techniques on beige clay, you’ll create a beautifully textured medallion complete with delicate gold accents.
Step-by-Step Tutorial
Materials
- Beige or antique white polymer clay
- Round clay cutter (approx. 4-5 cm diameter)
- Floral pattern rubber stamp or texture sheet (must fit within the cutter size)
- Needle tool or toothpick
- Gold mica powder or gold acrylic paint
- Small soft paintbrush
- Rolling pin or pasta machine
- Ceramic tile or baking sheet
- Jump ring (antique brass finish recommended)
- Hand drill or pin vibe (if drilling after baking)
Step 1: Preparing the Base
-
Condition the Clay:
Begin by thoroughly kneading your beige polymer clay until it is soft, pliable, and free of air bubbles. Warm hands help this process significantly. -
Roll the Slab:
Roll out the conditioned clay into a smooth, even sheet. Aim for a thickness of about 4-5mm to ensure the pendant feels substantial and durable. -
Cut the Shape:
Place your clay sheet on your working tile. Use the round cutter to punch out a perfect circle, pressing down firmly to cut all the way through. -
Smooth the Edges:
Remove the excess clay from around the circle. Gently run your finger along the rim of the medallion to soften the sharp cut edge, giving it a more finished, stone-like appearance.
Stuck Stamp Solution
If your stamp sticks to the raw clay, lightly dust the clay surface with cornstarch or spritz the stamp with water before pressing. This acts as a release agent.
Step 2: Creating the Design
-
Align the Stamp:
Select a rubber stamp featuring a six-petal flower or medallion design. Center it carefully over your clay circle before touching the surface. -
Impress the Pattern:
Press the stamp evenly and firmly into the clay. You want a deep, clear impression, but be careful not to distort the round shape of the pendant. Peel the stamp back slowly. -
Define the Petals:
If your stamp impression is shallow, use a dull needle tool to gently deepen the outline of each petal, enhancing the separation between the flower and the background. -
Add Dotted Detail:
Using the blunt end of a needle tool or a small ball stylus, create a ring of evenly spaced dots around the outer perimeter of the medallion, framing the central flower. -
Create the Hanging Hole:
While the clay is still raw, press a straw or a large needle tool through the top edge of the pendant to create a hole for the jump ring. Ensure it is at least 3mm from the edge for strength.
Step 3: Finishing Touches
-
Apply Gold Accents:
Dip a small, dry paintbrush into gold mica powder. Gently dust it into the deep recesses of the floral pattern, specifically inside the petals where the intricate filigree is located. -
Wipe the Surface:
I like to gently wipe the raised surface of the clay with a baby wipe or damp finger. This removes excess gold from the top, leaving the shimmer only in the indented textures. -
Bake the Pendant:
Bake the piece according to the manufacturer’s instructions for your specific brand of clay (usually around 275°F/130°C for 15-30 minutes). -
Cool Down:
Allow the pendant to cool completely inside the oven or on a cooling rack. The clay is fragile when hot and usually reaches full strength only after cooling. -
Antiquing (Optional):
For a more vintage look, you can apply a thin wash of brown acrylic paint into the cracks and wipe it away quickly, though the mica powder often provides enough contrast on its own. -
Attach Hardware:
Open a sturdy antique brass jump ring using two pairs of pliers. Thread it through the hole you created and close it securely.
Level Up: Gemstone Center
Before baking, press a small, heat-safe rhinestone or a flat-back crystal into the very center of the flower for a touch of sparkling luxury.
Wear your handcrafted medallion on a long leather cord or gold chain to showcase its artisan charm
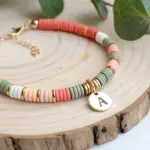
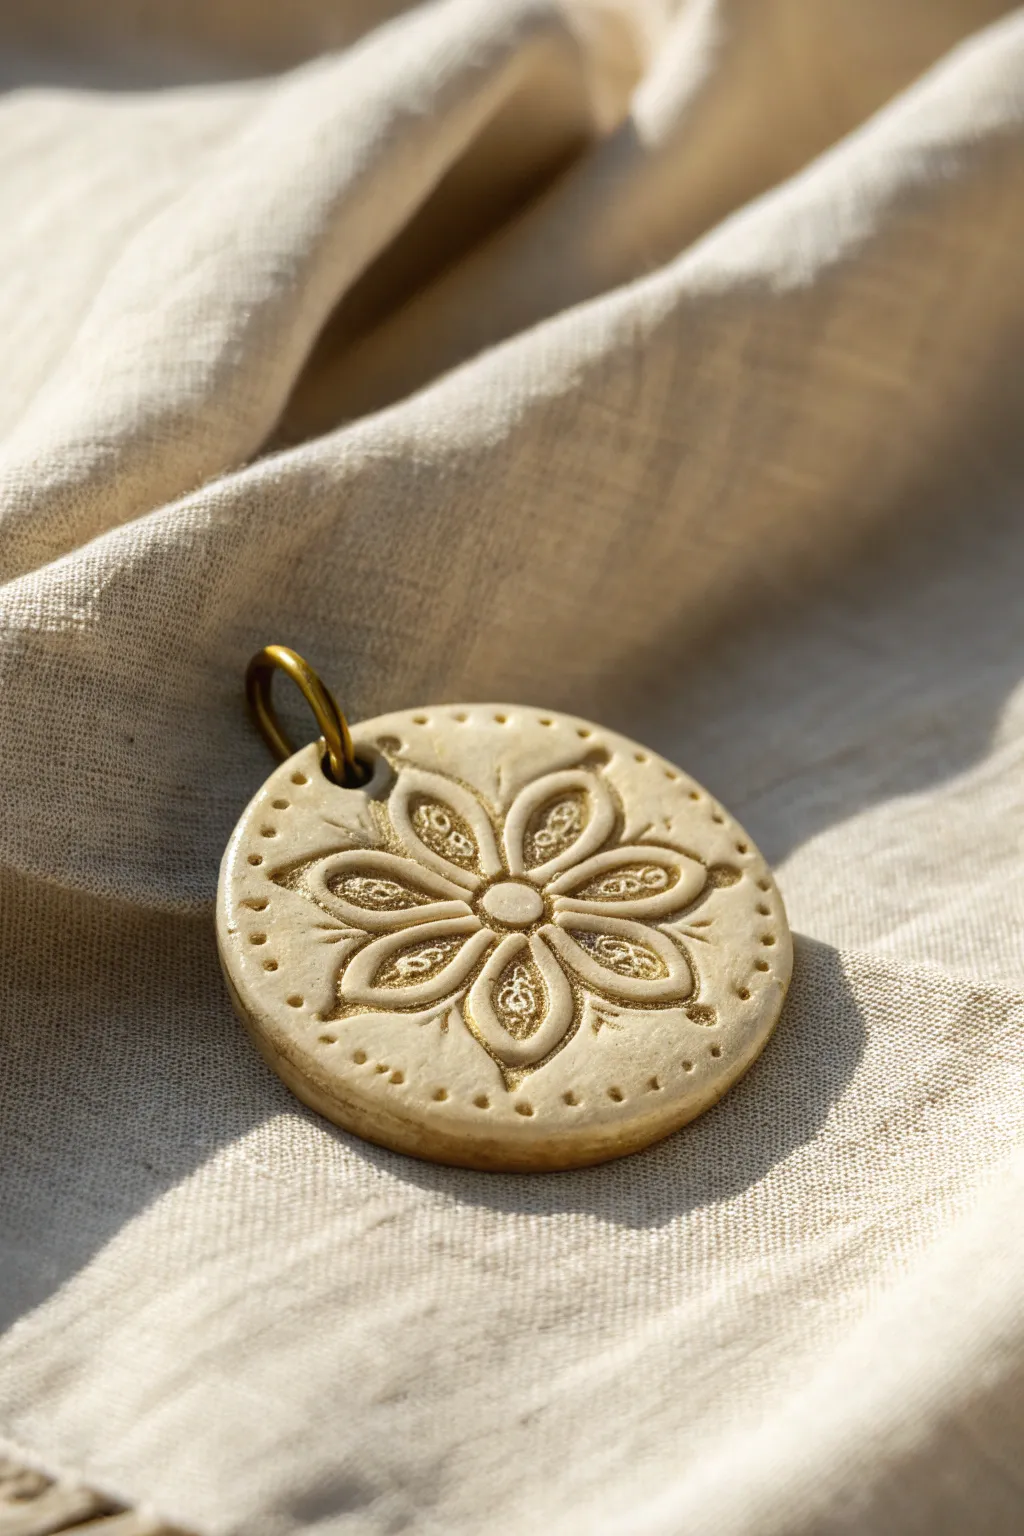
Dotted Boho Pattern Pendant
Embrace earthy tones and simple geometric patterns with this striking polymer clay pendant. The warm rust orange combined with creamy white creates a modern bohemian look that pairs perfectly with casual linen or denim outfits.
Step-by-Step Guide
Materials
- Polymer clay in terracotta/rust orange
- Polymer clay in cream or ecru (optionally speckled)
- Acrylic rolling pin or pasta machine
- Rectangular clay cutter (approx. 1.5 inch x 2.5 inch)
- Dotting tools (various sizes)
- Needle tool or fine detail brush
- Liquid polymer clay (translucent or matching terracotta)
- Tissue blade
- Hand drill or small round cutter (for the hole)
- Jump rings and bail finding (gold tone)
- Sandpaper (wet/dry 400-1000 grit)
- Matte finish varnish (optional)
Step 1: Preparing the Base
-
Condition the terra cotta clay:
Begin by thoroughly conditioning your rust-colored polymer clay until it is soft and pliable. Warm clay prevents cracking later on. -
Roll the main sheet:
Roll the conditioned terracotta clay into a sheet approximately 3-4mm thick. This will be the main body of your pendant, so ensure the thickness is even. -
Condition the cream clay:
Condition the cream or ecru clay. If you want the speckled look seen in the image, mix in a tiny pinch of black pepper or craft sand, or use a pre-mixed ‘granite’ effect clay. -
Create the color block:
Roll the cream clay into a sheet of the same thickness as the terracotta. Using your tissue blade, cut a straight edge on both clay sheets. Join them side-by-side to create a two-tone slab, but don’t blend them; we want a crisp division. -
Cut the shape:
Position your rectangular cutter over the joined clay slab. Arrange it so the cream section takes up about one-third of the width on the left side. Press down firmly to cut the pendant shape.
Smudged Colors?
If your terracotta smears onto the white while rolling, use a cotton swab dipped in rubbing alcohol or acetone to gently wipe the surface clean before baking.
Step 2: Adding the Pattern
-
Create the large dots:
Roll a very thin sheet of the terracotta clay. Use a small round cutter or a straw to punch out small circles. Carefully place these in a vertical row down the center of the cream section. -
Flatten the dots:
Gently roll over the pendant with your acrylic roller just enough to embed the terracotta dots into the cream background so they become flush with the surface. -
Add the stripes:
Extrude or hand-roll two very thin snakes of terracotta clay. Place these vertically in the transition area between the cream and terracotta sections. One line should border the cream edge, and the second should sit just inside the cream field. -
Embed the stripes:
Once again, gently roll over the surface to press these thin lines flush into the base clay. Be careful not to distort the straightness of the lines. -
Apply the tiny dots:
For the delicate dotted pattern on the right (terracotta) side, use cream liquid clay or a dotting tool dipped in softened cream clay. Create two vertical columns of tiny dots: the inner column having larger, more spaced-out dots, and the outer column featuring smaller, tighter dots. -
Clean the edges:
Use your finger or a smoothing tool to gently soften the cut edges of the rectangle, removing any sharp ridges left by the cutter. -
Make the hole:
Use a small circular cutter or a straw to punch a hole at the top center of the pendant for the hardware. Make sure it is centered relative to the overall shape, not just the pattern.
Make it a Set
Use the scrap clay left over from cutting the rectangle to make matching mini-stud earrings. Simply cut small circles from the patterned leftovers.
Step 3: Finishing Touches
-
Bake the piece:
Place the pendant on a ceramic tile or baking sheet lined with plain paper. Bake according to your clay manufacturer’s instructions (usually 275°F/130°C for 30-45 minutes). -
Sand for a smooth finish:
Once fully cooled, wet sand the edges and surface with 400 grit sandpaper, moving up to 1000 grit. I find this step crucial for getting that professional, stone-like matte finish. -
Buff creates sheen:
Rub the piece vigorously with a soft denim cloth or microfiber towel to give it a soft, natural sheen without making it glossy. -
Attach hardware:
Open a large gold jump ring using two pairs of pliers. Thread it through the hole in the pendant and attach your bail finding. Close the jump ring securely.
Now you have a stunning, handcrafted piece of jewelry ready to wear or gift

TRACK YOUR CERAMIC JOURNEY
Capture glaze tests, firing details, and creative progress—all in one simple printable. Make your projects easier to repeat and improve.
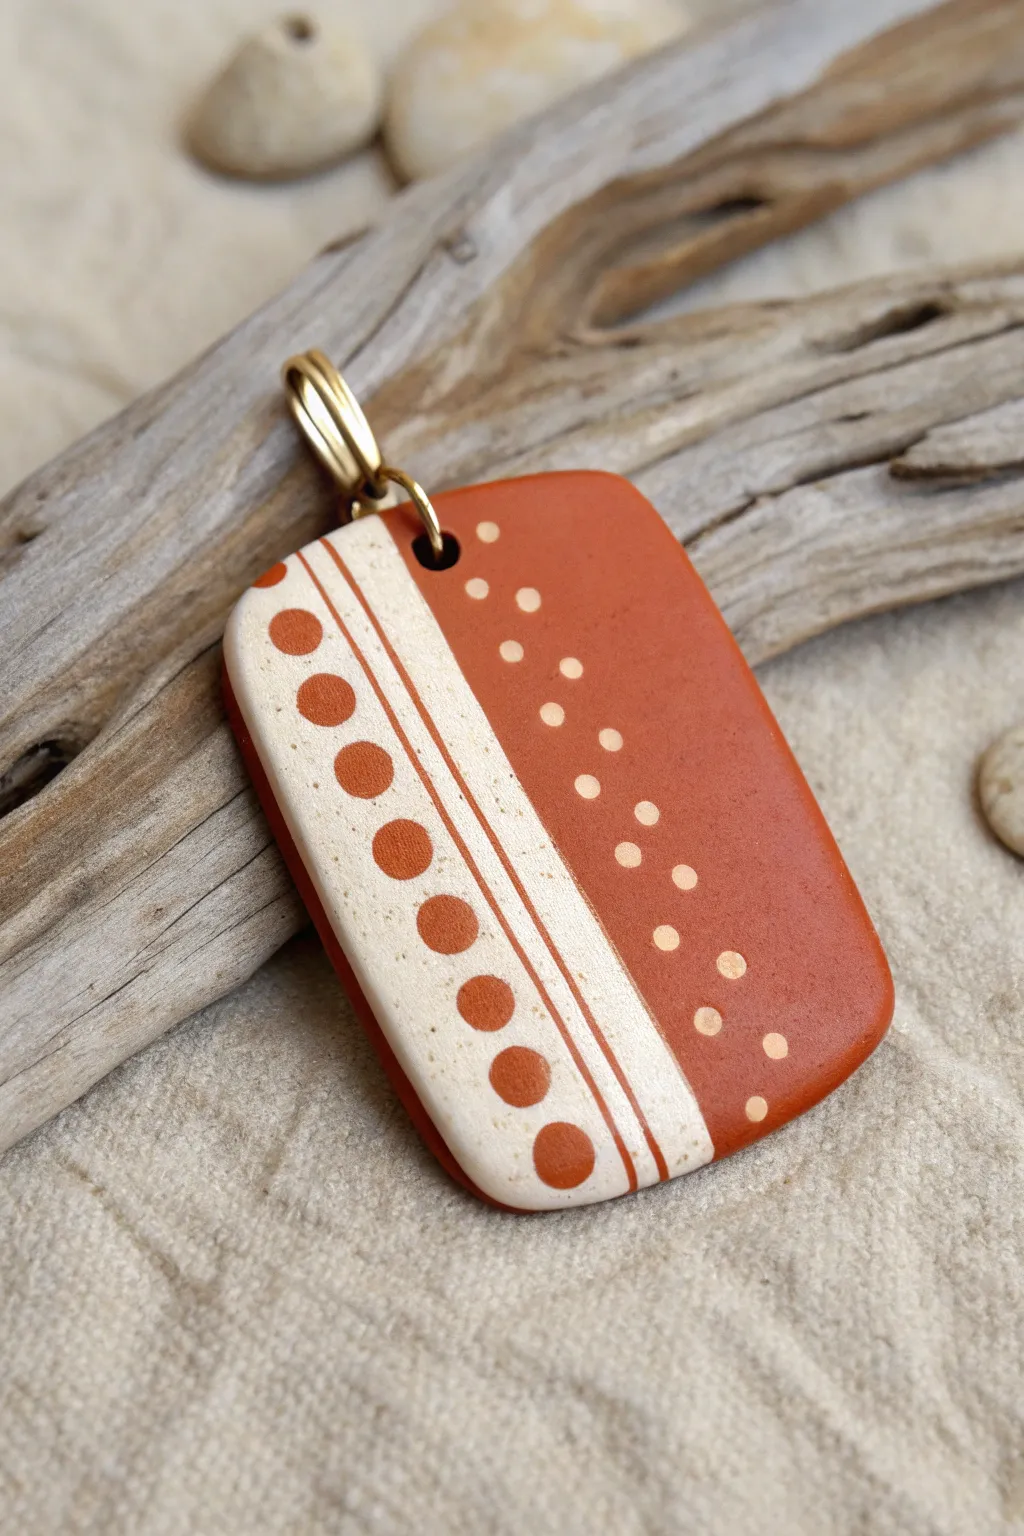
Faux Stone Cabochon Pendant
This elegant pendant captures the soft translucency and subtle veining of natural rose quartz without needing a lapidary wheel. Using polymer clay techniques, you’ll create a convincing faux stone cabochon set in a classic vintage-style bronze bezel.
Step-by-Step Tutorial
Materials
- Translucent white polymer clay
- White polymer clay (opaque)
- Small amount of translucent pink polymer clay (or pink alcohol ink)
- Bronze oval bezel setting with rope detail (approx. 30mm x 40mm)
- Matching bronze necklace chain
- Liquid polymer clay (translucent)
- Sandpaper in various grits (400, 600, 800, 1000, 2000)
- Buffing wheel or denim cloth
- UV resin or gloss varnish
- Clay blade or tissue blade
- Acrylic roller or pasta machine
- White or light grey acrylic paint (optional for veining)
- Oven
Step 1: Mixing the Faux Stone
-
Prepare the base:
Start by conditioning a block of translucent white polymer clay until it is soft and pliable. You want the majority of your mixture to be translucent to mimic the depth of real quartz. -
Tint the clay:
Mix in a tiny amount—think the size of a lentil—of translucent pink clay. Alternatively, you can mix in a drop of pink alcohol ink. The goal is a barely-there blush color, not a solid bubblegum pink. -
Add opacity:
Take a very small amount of opaque white clay and chop it into tiny, irregular shards using your tissue blade. Do not blend these fully. -
Create the inclusions:
Gently fold the opaque white shards into your translucent pink mixture. Twist the clay slightly but stop before the white blends in completely; you want those milky streaks to remain distinct.
Ice Water Shock
Plunge the hot, baked piece immediately into ice water after removing it from the oven. This ‘shocking’ technique increases the translucency of the clay.
Step 2: Forming the Cabochon
-
Check the bezel size:
Press a small ball of scrap clay into your bronze bezel to gauge the volume needed, then remove it. This helps ensure you don’t overfill or underfill the setting later. -
Shape the stone:
Roll your faux quartz mixture into a smooth ball causing no air bubbles. Flatten it slightly into an oval shape that roughly matches your bezel’s dimensions. -
Fit to bezel:
Place the clay directly into the metal bezel. Press it down firmly at the center and gently smooth the edges so the clay meets the rope rim without spilling over. -
Create the dome:
Using your thumb or a smoothing tool, gently shape the top of the clay into a nice, rounded dome (cabochon shape). Ensure the surface is smooth and free of fingerprints. -
Add subtle veining (optional):
If you want crackle lines, lightly score the surface with a needle tool. You can rub a tiny bit of diluted white paint into these scores after baking for extra realism.
Amethyst Variation
Swap the pink tint for a tiny drop of purple alcohol ink and add flecks of gold leaf into the clay mix for a luxurious faux amethyst version.
Step 3: Baking and Finishing
-
First bake:
Bake the pendant according to your clay manufacturer’s instructions (usually 275°F/130°C) for about 30 minutes. Let it cool completely. -
Pop out the stone:
Once cool, the clay might have shrunk slightly or popped out. If it’s stuck but you want to glue it permanently, gently pry it out. If it’s secure, you can skip to sanding. -
Secure the stone:
Apply a few drops of liquid polymer clay or strong super glue to the inside of the metal bezel and press the baked stone back in firmly. -
Wet sanding:
Begin wet sanding the prominent dome of the stone with 400 grit sandpaper to remove any imperfections. Move progressively through 600, 800, and up to 2000 grit. -
Buffing:
Vigorously rub the stone with a piece of denim or use a buffing wheel on a rotary tool. The friction creates a natural, semi-gloss sheen characteristic of polished quartz. -
Gloss coat (optional):
For a ‘wet’ look, or to seal in any painted crackle lines, apply a thin layer of UV resin and cure under a UV lamp, or use a high-gloss glaze. -
Final assembly:
Attach the finished pendant to your bronze chain using a matching jump ring if the bezel loop requires it.
Wear your beautiful faux stone pendant with pride knowing you crafted it from scratch
Geode Slice Pendant Look

Recreate the stunning, organic beauty of a natural agate slice using nothing but polymer clay and glitter. This tutorial focuses on achieving that coveted translucent layering and sparkling druzy center, finished with a luxe gold rim that looks like expensive electroplating.
Detailed Instructions
Materials
- Translucent polymer clay (white or colorless)
- Opaque polymer clay (white and beige/tan)
- Liquid polymer clay (translucent)
- Glass microbeads or clear coarse glitter (for the druzy center)
- Gold leaf or metallic gold paint
- Gold alcohol ink or mica powder (optional)
- Gloss glaze or UV resin
- Rolling pin or pasta machine
- Scalpel or craft knife
- Bail (gold-colored)
- Small drill bit or needle tool
Step 1: Creating the Crystal Core
-
Mix the Druzy Base:
Start by mixing a small amount of liquid polymer clay with your glass microbeads or coarse clear glitter. You want a thick, sugary paste consistency that holds its shape but is thoroughly coated. -
Form the Center Shape:
On a small tile or piece of parchment paper, shape this sugary mixture into an irregular oval or elongated diamond shape. This will be the sparkling ‘hollow’ of your geode. -
Initial Bake (Optional but Recommended):
I prefer to bake this center piece for about 10 minutes at the manufacturer’s recommended temperature. This makes it easier to wrap layers around without squishing the crystal texture.
Cloudy Translucence?
If your translucent clay looks milky after baking, quench it immediately in ice water right out of the oven. This shock-cooling clarifies the clay significantly.
Step 2: Building the Agate Layers
-
Prepare Translucent Canes:
Condition your translucent clay. To get that realistic mineral look, tint small portions of it with tiny amounts of alcohol ink or mica powder—think very pale ambers or soft grays. Keep one portion pure translucent. -
Roll Snakes:
Roll your tinted translucent clay, pure translucent clay, and opaque white clay into long, thin snakes. Vary the thickness slightly for a more organic, natural appearance. -
Wrap the Core:
Take your baked (or unbaked) druzy center and wrap a snake of tinted translucent clay tightly around the perimeter. Press it gently to adhere. -
Add Variation:
Continue wrapping snakes around the form. Alternate between translucent, opaque white, and tinted translucent. For this specific look, create a thicker band of translucent mixed with a tiny bit of brown towards the middle. -
Create the Outer Shell:
Finish the wrapping layers with a final band of opaque beige or creamy white clay to simulate the rock’s outer crust. -
Compress the Layers:
Gently squeeze the entire assembly from the sides to merge the clay snakes together. You want to eliminate air gaps without completely distorting the concentric ring pattern.
Pro Tip: Depth of Field
Mix a tiny drop of brown alcohol ink into your resin or glaze just over the darker bands. This adds incredible visual depth without adding bulk.
Step 3: Slicing and Shaping
-
Slice the Geode:
Using a very sharp tissue blade, slice horizontally through your clay assembly. This reveals the beautiful banding pattern inside, just like cutting open a real rock. -
Flatten and Smooth:
Take a slice that is about 4mm thick. Use an acrylic roller to gently flatten it further. This will help blur the distinct lines between the snakes, making them look like natural mineral deposits. -
Refine the Edge:
Use your fingers to texturize the outer edge. A real geode isn’t perfectly smooth; pressing lightly with a toothbrush or rough sandpaper can create a realistic rocky texture on the rim. -
Insert Hardware:
Carefully push a metal bail into the top of the pendant, or use a needle tool to create a hole for a jump ring. If embedding a bail, ensure the clay grips the metal prong securely.
Step 4: Finishing Touches
-
Final Bake:
Bake the pendant according to your polymer clay’s instructions (usually 275°F/130°C for 30 minutes per 1/4 inch thickness). Let it cool completely. -
Gild the Edges:
Paint the rough outer edge with liquid gold leaf or metallic gold acrylic paint. Extend the paint slightly onto the front face of the pendant to frame the stone. -
Seal for Shine:
Apply a coat of UV resin or high-gloss glaze over the geode face. This is crucial—it turns the cloudy baked translucent clay into ‘glass’ and makes the glitter center sparkle. -
Cure the Finish:
If using UV resin, cure under a UV lamp for 2-3 minutes. If using glaze, allow it to air dry fully in a dust-free environment.
Wear your geologic masterpiece with pride or gift it to a rock-loving friend
Faux Aged Metal Coin Pendant
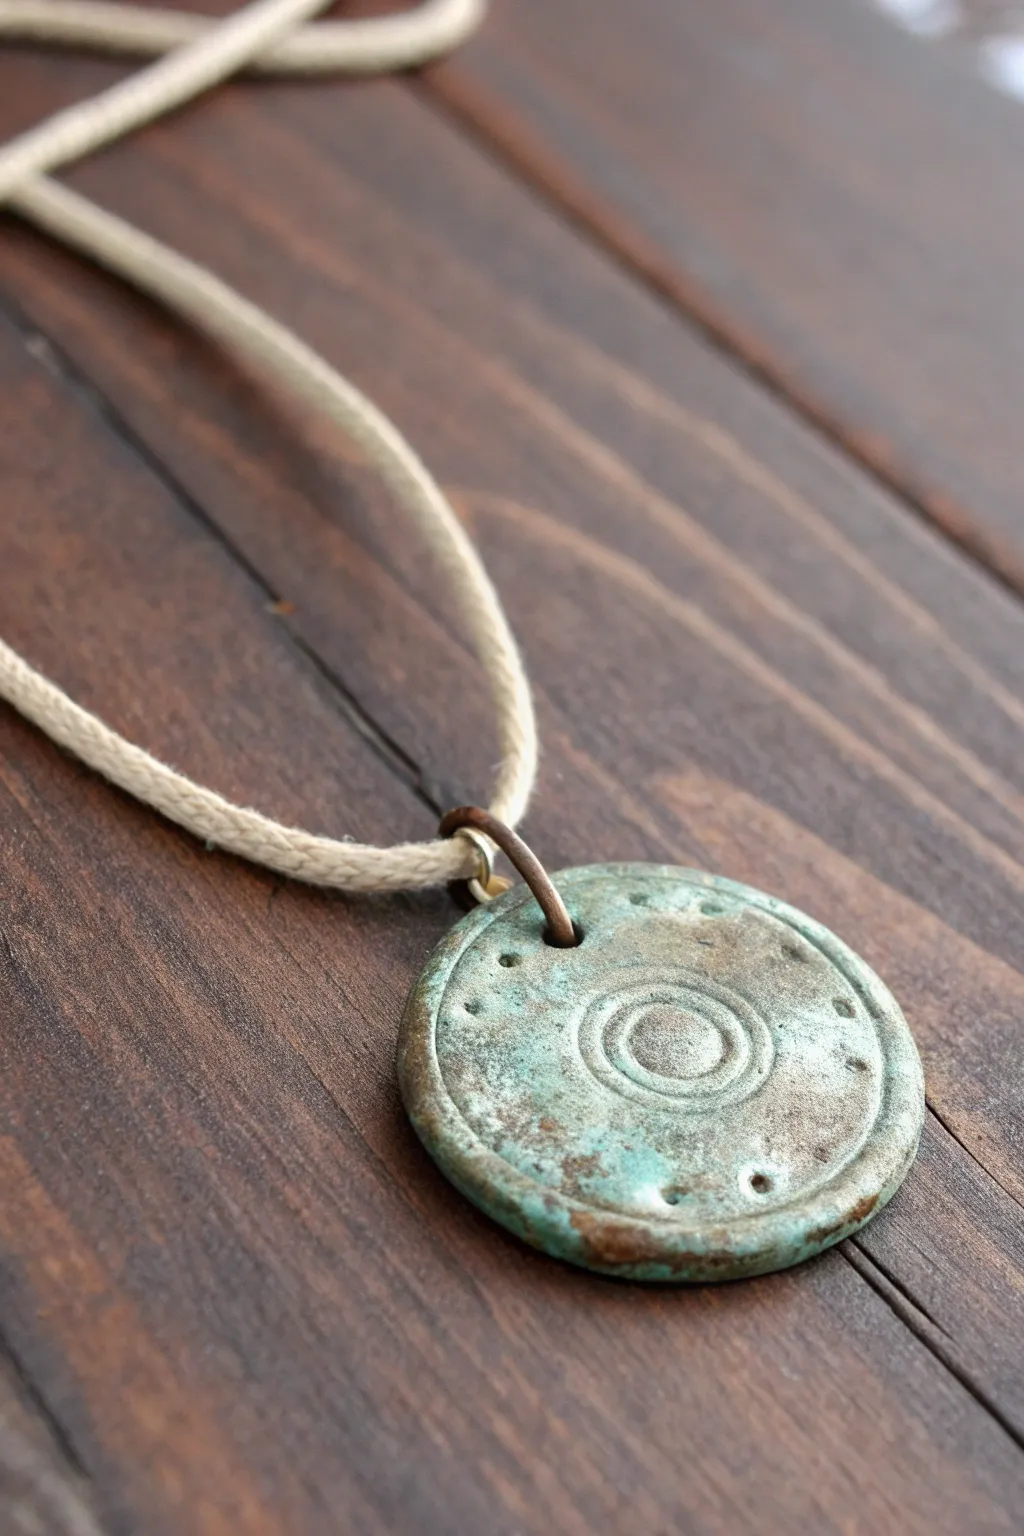
Transport your jewelry collection back in time with this stunningly realistic faux archaeological find. Using clever texturing and painting techniques on polymer clay, you’ll create a weathered coin pendant that looks like it’s been unearthed after centuries.
Step-by-Step
Materials
- Polymer clay (black or dark brown recommended)
- Acrylic paints: Metallic copper/bronze, teal, bright green, antique white or beige
- Cornstarch or baby powder (release agent)
- Round clay cutter (approx. 1.5 – 2 inches)
- Small circle cutter or pen cap (for center detail)
- Texturing tools: Sandpaper, old toothbrush, stiff bristle brush
- Awl or toothpick
- Jump ring (antique copper finish)
- Jewelry pliers
- Beige cotton or hemp cord
Step 1: Shaping the Artifact
-
Condition the Clay:
Begin by conditioning your dark polymer clay until it is soft and pliable. Roll it out into a sheet approximately 4mm or 1/4 inch thick; you want this piece to have a bit of heft to simulate metal. -
Cut the Base Shape:
Use your large round cutter to punch out a disc. While the clay is still inside the cutter or just after releasing, gently tap the edges with your finger to round them off so they don’t look unnaturally sharp. -
Add General Texture:
Lightly dust the surface with cornstarch. Press a piece of rough sandpaper or a stiff brush onto the clay surface to remove the smooth, manufactured look. Don’t be afraid to add a few accidental nicks or dents. -
Create the Rim:
Using a slightly smaller circle cutter or a spherical tool, gently press an indentation creating a border about 3-4mm from the edge. Do not cut through; just create a shallow recessed ring. -
Stamp the Center Motif:
Press a small circle cutter or pen cap directly into the center of the pendant. Then, press a rounded tool or ball stylus into the very middle of that circle to create the bullseye effect seen in the photo. -
Detail the Perimeter:
Take your awl or a toothpick and poke a series of small, evenly spaced holes around the flat area between your central motif and the rim. Twist the tool slightly as you pull it out to keep the holes clean. -
Create the Hanging Hole:
pierce a larger hole near the top edge for your jump ring. Make sure it is wide enough to accommodate the hardware you plan to use. -
Bake the Clay:
Bake the piece according to the manufacturer’s instructions for your specific brand of clay. Let it cool completely before moving to the painting phase.
Paint Not Sticking?
Polymer clay can be oily. If your acrylic paint beads up, wash the baked clay with dish soap and water or wipe with alcohol before painting.
Step 2: The Aging Process
-
Base Metallic Coat:
Apply a coat of metallic copper or bronze acrylic paint over the entire piece. I like to let this dry, then dry-brush a second layer to ensure deep coverage. Let this dry completely. -
Create the Patina Mix:
Mix a small amount of teal acrylic paint with a tiny dot of bright green and white. You want a chalky, oxidized copper color. Water this mixture down slightly so it flows into crevices. -
Apply the Verdigris:
Brush the watery teal mixture generously over the entire pendant, ensuring it sinks into the textured areas, the central rings, and the perimeter holes. -
Wipe Back:
Before the wash dries completely, take a paper towel or damp cloth and wipe the surface. Remove most of the paint from the raised areas, leaving the green trapped in the textures and lower recesses. -
Add Surface Grime:
For extra realism, mix a tiny bit of brown or beige paint with water. Dab this randomly in just a few spots to simulate dirt or encrusted earth, then dab off the excess. -
Highlighting:
Once all paint layers are dry, take a very small amount of bright copper paint on your finger or a dry brush. Lightly graze just the highest points—the rim and the center dot—to make the ‘metal’ shine through the corrosion.
Pro Tip: Rustic Texture
Before baking, roll a ball of aluminum foil over the clay surface. This creates random, organic pitting that looks incredibly like corroded metal.
Step 3: Assembly
-
Seal the Finish:
Apply a matte varnish to protect the paint. Avoid glossy finishes, as real ancient coins have a dull, matte surface. -
Install Hardware:
Use your pliers to twist open the jump ring (open it sideways, not pulling apart). Thread it through the top hole of the pendant and close it securely. -
String the Cord:
Cut a length of beige cotton or hemp cord to your desired necklace size. Thread it through the jump ring and tie a simple knot at the ends to finish.
Now you have a piece of history around your neck that looks like it belongs in a museum display
Feather Texture Drop Pendant
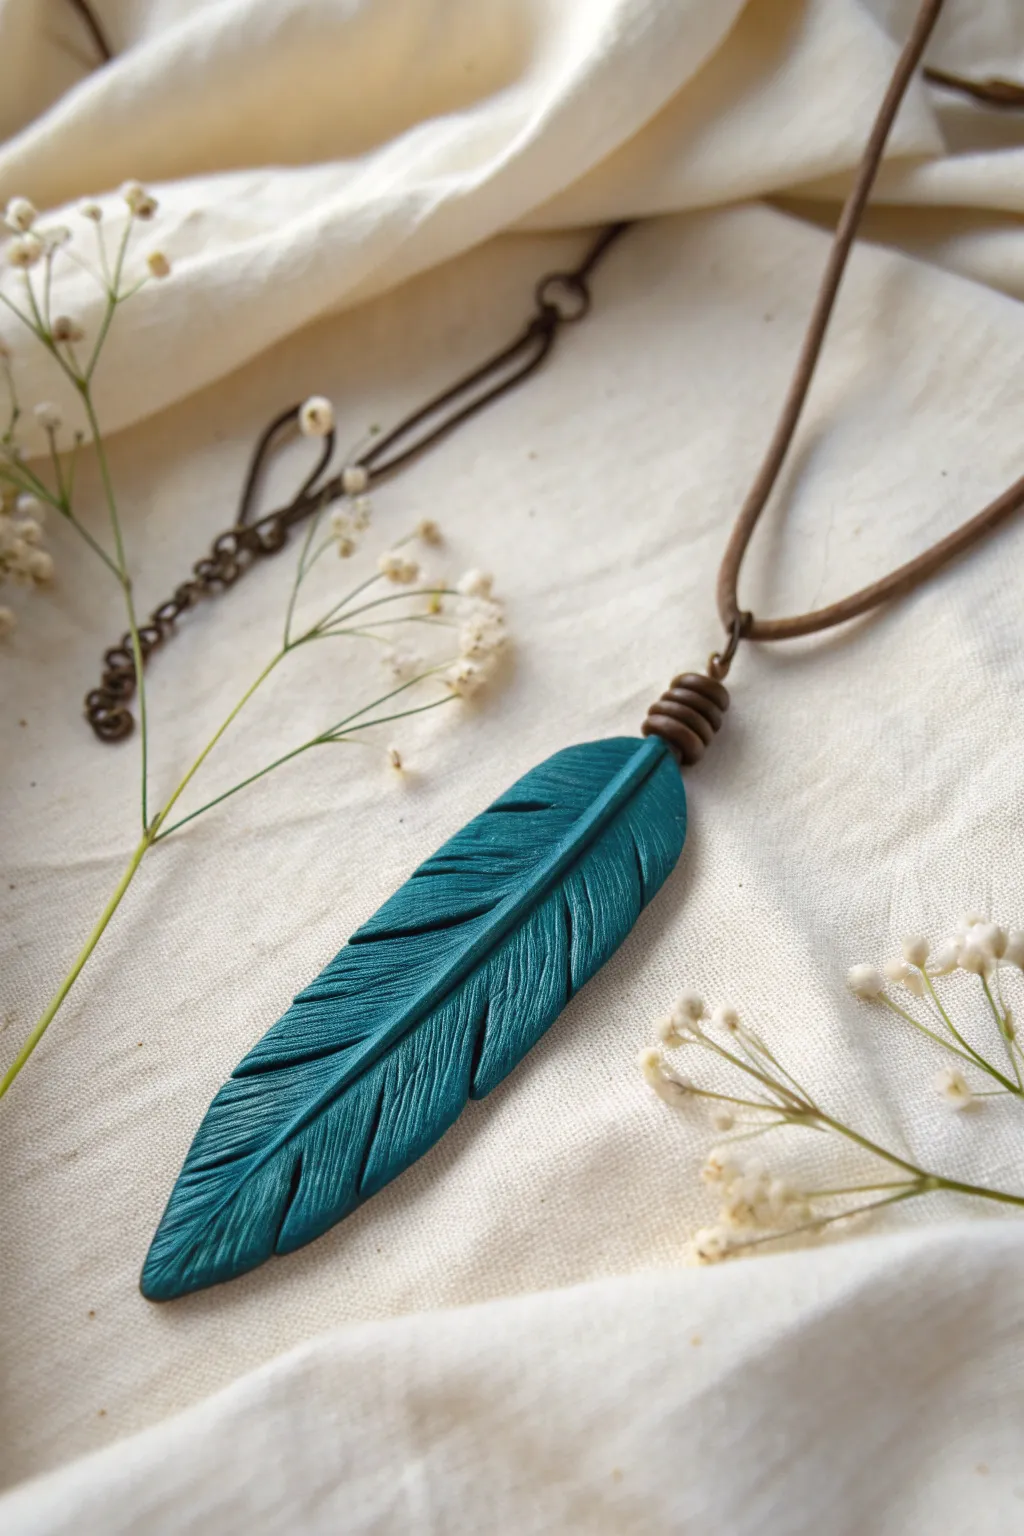
This elegant feather pendant combines deep teal polymer clay with realistic texturing to create a piece that feels both rustic and refined. The organic lines and simple cord binding give it a natural, bohemian charm perfect for everyday wear.
Step-by-Step Guide
Materials
- Teal polymer clay (e.g., Soufflé or Premo)
- Brown polymer clay (for the bail coil)
- Acrylic rolling pin or pasta machine
- Needle tool or sharp toothpick
- X-Acto knife or flexible clay blade
- Mica powder (teal or pearl, optional for sheen)
- Small ball tool
- Eye pin or head pin (bronze tone)
- Leather or suede cord (brown)
- Round nose pliers
- Wire cutters
- Oven for baking
Step 1: Shaping the Feather
-
Condition the Clay:
Begin by conditioning your teal clay until it is soft and pliable. Roll it into a smooth ball to ensure there are no air bubbles trapped inside. -
Create a Sheet:
Roll the clay out into a sheet approximately 3-4mm thick. You want it substantial enough to hold the texture but not too heavy to wear. -
Cut the Outline:
Using your X-Acto knife or needle tool, freehand cut a long, tapered oval shape. It should be wider at the top and come to a gentle point at the bottom, mimicking a natural feather silhouette. -
Smooth the Edges:
Gently tap the cut edges with your finger to soften the sharpness. I find that a little cornstarch on my finger helps glide over the clay without sticking. -
Mark the Spine:
Use a needle tool or the back of a knife to gently press a curved line down the center of the shape. This establishes the rachis, or central spine, of the feather.
Natural Curve
Before baking, drape the feather over a curved object (like a soda can or lightbulb) to give it a gentle, lifeless shape instead of baking it perfectly flat.
Step 2: Texturing and Details
-
Add Main Vane Lines:
Starting from the central spine, drag your needle tool outward and slightly downward toward the edge using firm pressure. Repeat this all the way down one side. -
Refine the Texture:
Go back in and add finer, shallower lines between the deep ones. Varying the pressure creates a more realistic, organic look rather than a uniform pattern. -
Create Separation:
To make the feather look weathered, use your knife to cut small triangular notches out of the edges in two or three spots. -
Create the Splits:
Where you cut the notches, use the needle tool to deepen the groove all the way to the spine, slightly separating the clay sections to simulate natural splits. -
Repeat on Side Two:
Texture the other side of the feather using the same technique, ensuring the lines flow downwards. -
Add Subtle Shimmer:
If you want the finish shown in the photo, lightly brush a tiny amount of matching mica powder over the raised areas to catch the light.
Step 3: Assembly and Baking
-
Insert the Eye Pin:
Carefully push a bronze eye pin into the top center of the feather. It should go deep enough to be secure but not poke through the textured faces. -
Make the Coil Bail:
Roll a very thin snake of brown polymer clay. Wrap this snake around the top stem of the feather, covering where the metal pin enters the clay, creating a decorative coil. -
Secure the Coil:
Gently press the coil onto the teal clay to bond them. You can use a drop of liquid polymer clay here if you want extra security. -
Bake:
Bake the piece according to your clay manufacturer’s instructions (usually 275°F/130°C for 30 minutes). I recommend tenting it with foil to prevent scorching. -
Cool and Finish:
Let the pendant cool completely in the oven. Once cool, thread your leather cord through the eye pin loop and tie a simple knot.
Antique Wash
After baking, apply diluted black acrylic paint into the grooves and wipe off the surface immediately. This makes the texture pop and adds depth.
Now you have a stunning, nature-inspired accessory ready to wear or gift
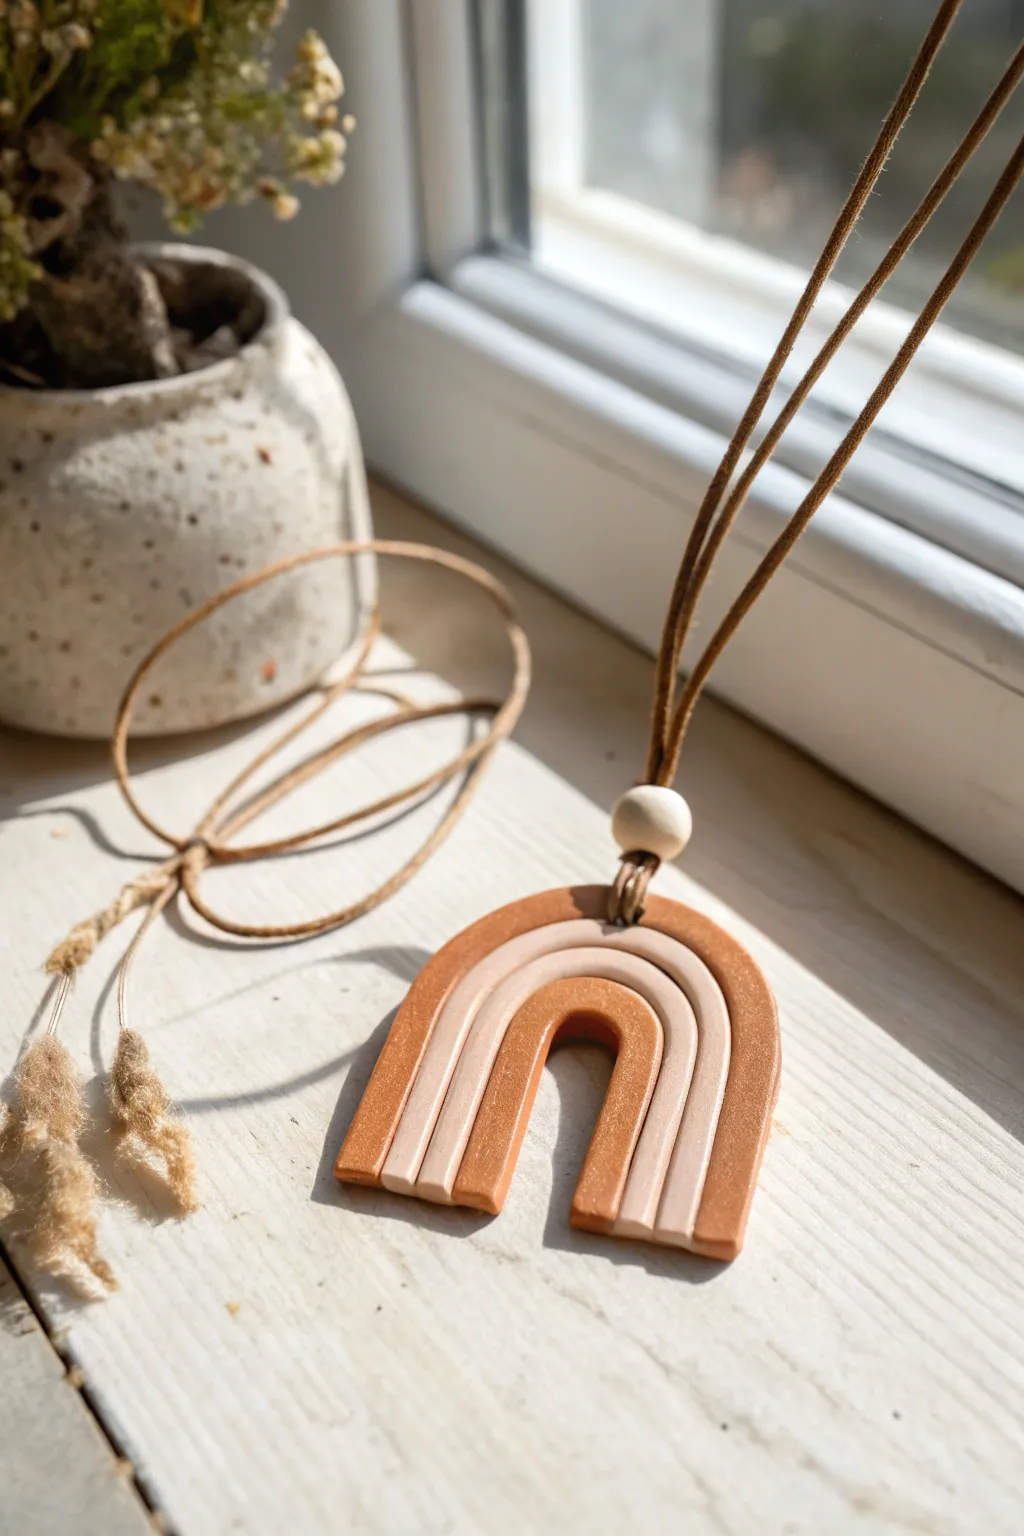
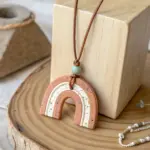
Layered Arch Stack Pendant
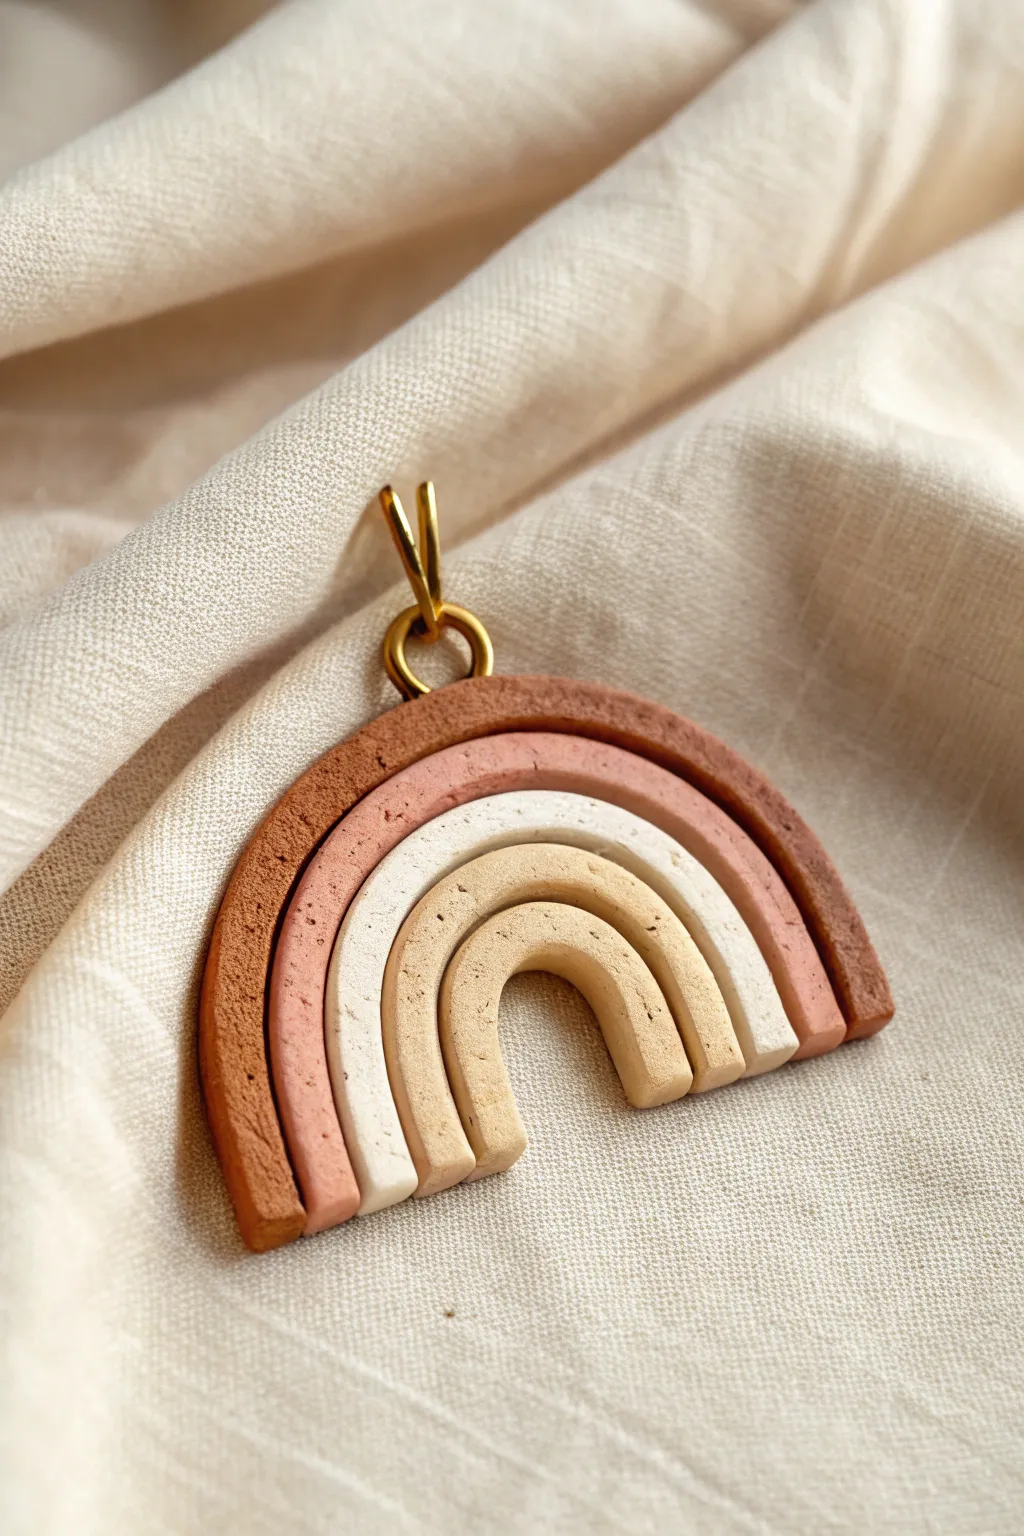
Capture the warmth of earthy hues with this textured polymer clay arch pendant. Featuring four concentric layers in a soothing gradient from deep terracotta to soft beige, this project creates a piece that feels both modern and organically timeless.
Step-by-Step
Materials
- Polymer clay in four colors: Dark Terracotta/Rust, Dusty Pink, Cream/White, Beige/Sand
- Acrylic roller
- Fimo liquid or liquid polymer clay (optional but recommended)
- Small circle cutter (approx 10-12mm diameter)
- Larger round cutters or templates for arches (optional)
- Tissue blade or X-Acto knife
- Fine grit sandpaper or sanding block
- Coarse grit sandpaper or toothbrush (for texturing)
- Gold jewelry bail
- Gold jump ring (8-10mm)
- Hand drill or needle tool
- Jewelry pliers
- Oven
Step 1: Preparing the Clay
-
Condition the clay:
Start by conditioning each of your four clay colors separately until they are soft and pliable. If you want that trendy speckled stone look seen in the photo, mix in a tiny pinch of ground black pepper or coarse sand into the cream and beige clays during conditioning. -
Roll out sheets:
Roll each color into a slab of consistent thickness, roughly 3mm to 4mm. It is important that all layers have the same depth for a flush surface.
Separating Layers?
If layers split after baking, apply a thin line of superglue or 2-part epoxy resin between the arches. For future pieces, use ‘BacH’ (Bake & Bond) liquid clay before baking.
Step 2: Constructing the Arches
-
Cut the center arch:
Using your smallest circle cutter, punch a hole in the beige clay slab. Use your blade to cut the resulting circle in half, or manipulate a small strip of clay into a tight ‘U’ shape. This innermost beige arch determines the size of the whole piece. -
Create the second layer:
Cut a strip of the cream-colored clay. Gently curve this strip over the top of your beige arch. Trim the ends so they are flush with the bottom of the beige piece. Press them together gently to adhere. -
Add the third layer:
Repeat the process with the dusty pink clay. Cut a strip of equal width, drape it snugly over the cream layer, and trim the bottom edges flush. Smooth the seam between the layers with your finger or a sculpting tool. -
Form the final layer:
Add the final outer strip using the dark terracotta clay. Ensure this outer arch maintains a nice, rounded shape at the top. I find using the curve of a circle cutter as a guide helps keep everything symmetrical. -
Bonding the layers:
If your clay is dry and not sticking well, you can brush a minuscule amount of liquid polymer clay between the strips before pressing them together.
Step 3: Texturing and Refining
-
Add surface texture:
To achieve the stone-like finish, gently press coarse sandpaper or the bristles of a toothbrush onto the surface of the clay. Do this lightly; you want subtle pitting, not deep gouges. -
Clean the edges:
Use your tissue blade to slice a tiny sliver off the bottom edge of the entire stack. This ensures a perfectly flat, professional-looking base where all colors align. -
Make the hole:
Using a needle tool or a small straw, create a hole at the very top center of the terracotta arch. Make sure it is wide enough to accommodate your jump ring.
Granite Effect
Mix black pepper or dried used coffee grounds into your lighter clay colors. It creates a realistic faux-stone speckle that adds amazing depth without painting.
Step 4: Baking and Assembly
-
Bake carefully:
Place the pendant on a ceramic tile or baking sheet lined with paper. Bake according to your brand of clay’s instructions—usually around 275°F (130°C) for 30 minutes. Let it cool completely. -
Sand and buff:
Once cooled, inspect the edges. If there are fingerprints or sharp spots, wet sand them gently with fine-grit sandpaper for a smooth matte finish. -
Install the hardware:
Open your large gold jump ring using two pairs of pliers (twist sideways, don’t pull apart). Thread it through the hole you made in the clay. -
Attach the bail:
Slide the loop of your gold bail onto the jump ring before closing the ring securely. Ensure the closure is tight so the pendant doesn’t slip off.
Now you have a stunning, earth-toned accessory ready to wear or gift
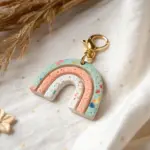
Negative Space Window Pendant
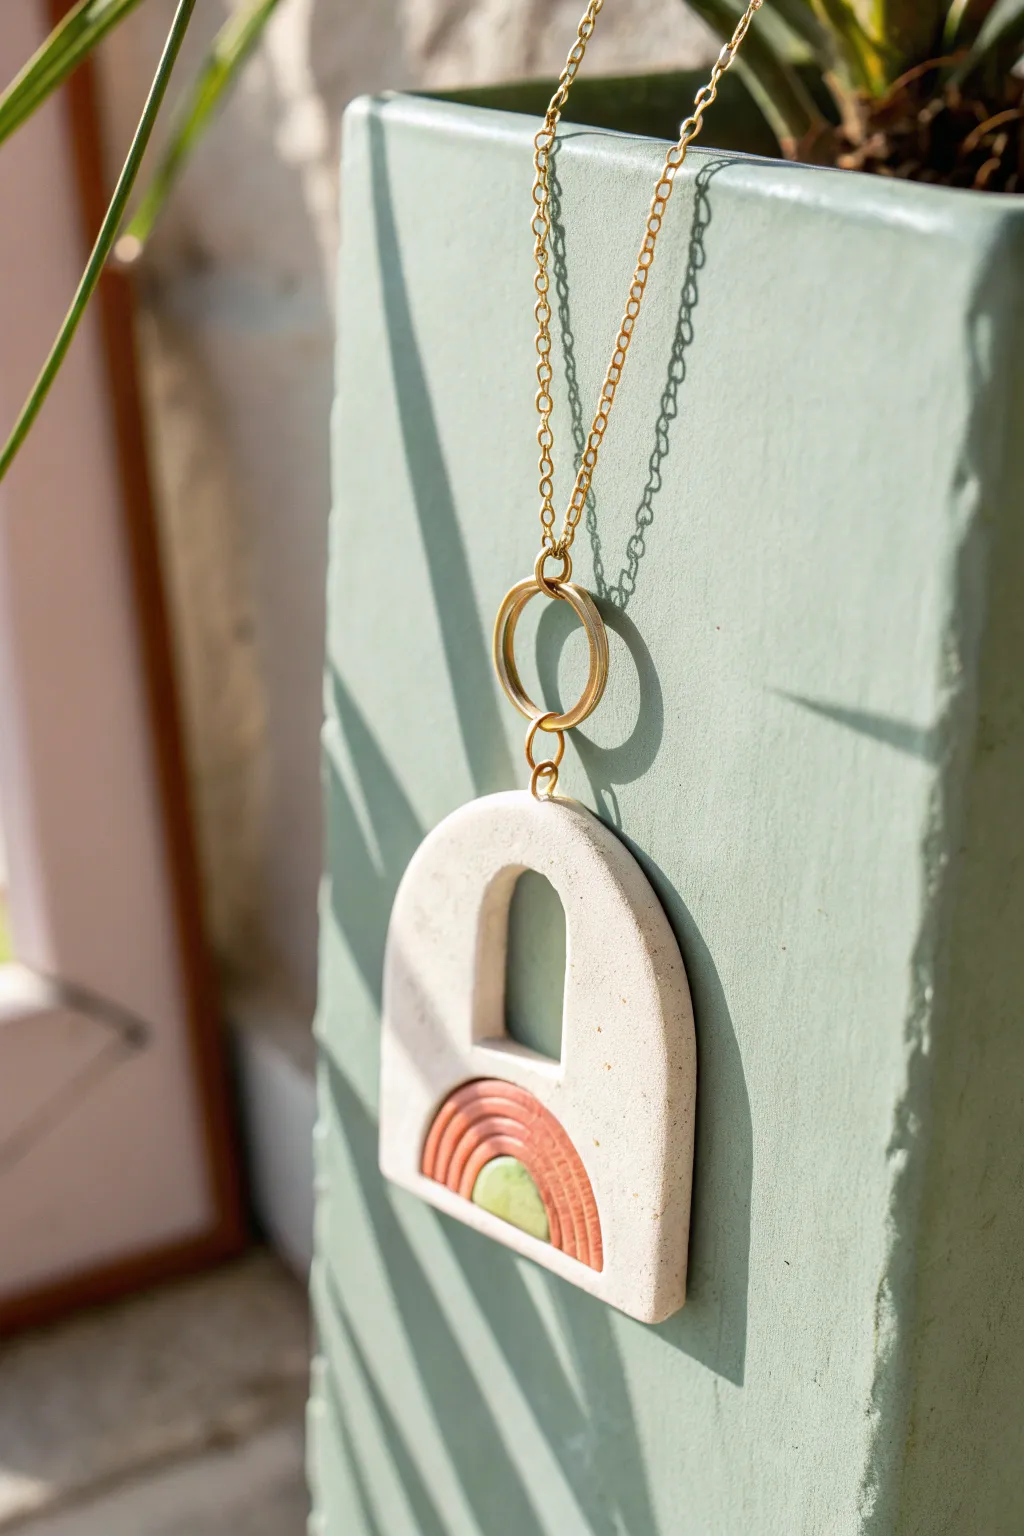
This earthy, minimalist pendant combines negative space with a subtle pop of color for a truly modern accessory. The speckled stone texture contrasts beautifully with the warm terra cotta and sage green details, creating a wearable piece of art that feels both structured and organic.
How-To Guide
Materials
- Polymer clay (speckled white/granite, terra cotta, sage green)
- Acrylic roller or pasta machine
- sharp tissue blade
- Small oval or arch cutter (approx 1.5 – 2 inches)
- Small square cutter (for internal window)
- Needle tool or toothpick
- Jump rings (gold finish)
- Large connector ring (gold finish)
- Necklace chain
- Jewelry pliers
- Hand drill or small bit
- Baking tile or parchment paper
Step 1: Creating the Base
-
Condition the clay:
Start by conditioning your speckled white clay until it is soft and malleable. This helps prevent cracks during baking. -
Roll the slab:
Roll the speckled clay out to a medium thickness, roughly 3-4mm. You want it substantial enough to hold the pendant shape without being too heavy. -
Cut the outer arch:
Use your main arch cutter to gently stamp out the primary shape. If you don’t have a specific cutter, you can cut a rectangle and use your blade to round off the top corners manually. -
Create the window:
Using a smaller square or rectangular cutter, remove a section from the upper-middle portion of the arch. This negative space is the signature ‘window’ look of the piece. -
Smooth the edges:
Dip your finger in a tiny bit of water or baby oil and gently run it along the cut edges to smooth out any harsh lines or burrs left by the cutters.
Step 2: Adding the Details
-
Prepare accent colors:
Condition small amounts of the terra cotta and sage green clay. Roll them out slightly thinner than your base slab. -
Cut the semicircle:
Cut a small semicircle from the sage green clay. This will sit at the very bottom center of your arch. -
Make the rainbow strands:
Roll a thin snake of terra cotta clay. I find it helps to use an acrylic block to roll evenly so the distinct thickness is consistent. -
Form the arcs:
Place the sage green semicircle at the bottom center of the white arch. Carefully drape the terra cotta snake over the green center to create the first rainbow band, trimming the excess at the bottom. -
Add texture:
Using a needle tool, gently press vertical lines into the terra cotta bands to give them a ribbed, rope-like texture. -
Secure the pieces:
Ensure the added clay pieces are firmly pressed onto the white background so they bond seamlessly during baking.
Smooth Cuts Pro-Tip
Place a piece of cling wrap over your clay before pressing down with your cutters. This creates a lovely domed edge instantly, meaning you’ll have much less sanding to do later.
Step 3: Finishing and Assembly
-
Pierce the hole:
Use a needle tool to poke a hole at the very top center of the arch. Make sure it is large enough to fit your jump ring. -
Bake:
Place your pendant on a ceramic tile or parchment paper. Bake according to your polymer clay manufacturer’s instructions (usually 275°F/130°C for 30 minutes per 1/4 inch thickness). -
Cool down:
Let the piece cool completely inside the oven or on the counter. The clay hardens fully as it cools. -
Sand (optional):
If there are any rough spots on the edges after baking, lightly sand them with fine-grit wet/dry sandpaper. -
Attach the connector:
Open a small jump ring using two pairs of pliers. Thread it through the hole in the pendant and attach the large gold connector ring. -
Add the chain:
Thread your chain through the large connector ring. Alternatively, you can attach the chain directly to the connector ring with smaller jump rings for a fixed position.
Fingerprint Fixer
If you notice fingerprints on your raw clay before baking, lightly brush the surface with a little cornstarch or baby oil. This smooths the texture without altering the shape.
Now you have a stunning, architectural pendant is ready to wear or gift.
Scrap Patchwork Mosaic Pendant
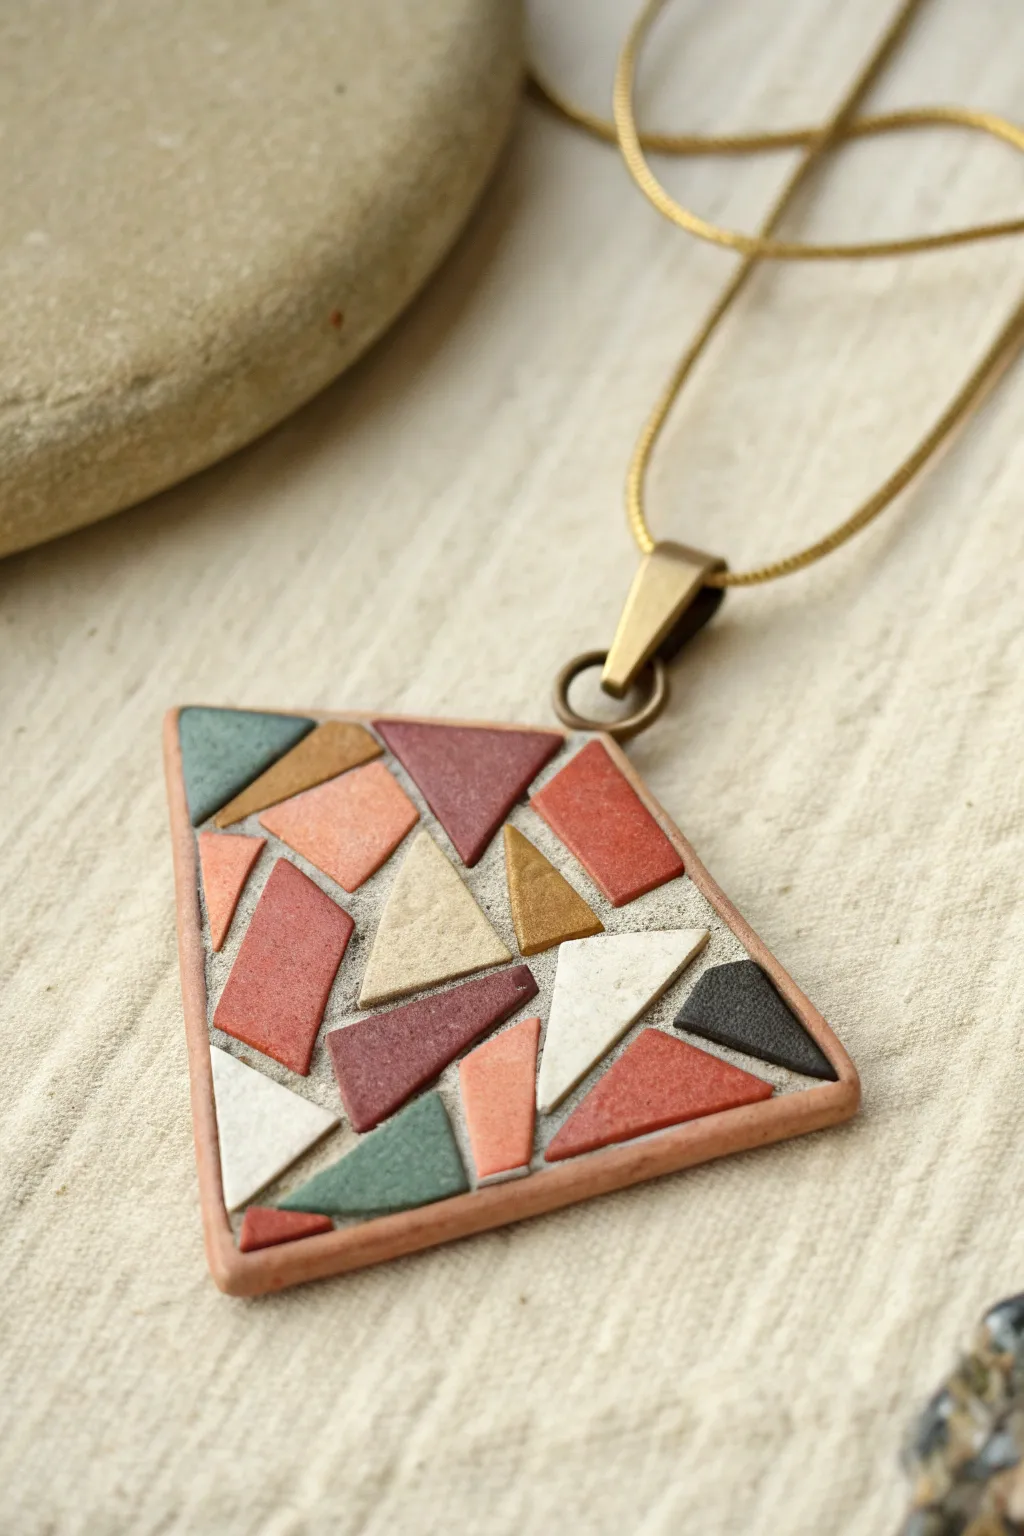
This project transforms tiny scraps of polymer clay into an elegant, geometric statement piece with a sophisticated faux-stone finish. The earthy palette and precise mosaic arrangement create a modern artifact look that feels both rustic and refined.
Step-by-Step Tutorial
Materials
- Polymer clay in various earth tones (rust, terra cotta, muted green, cream, white, black, antique gold)
- Granite or stone-effect polymer clay (for the base/grout)
- Liquid polymer clay (clear or translucent)
- Clay roller or pasta machine
- Sharp craft blade or tissue blade
- Sandpaper (grits 400 to 1000)
- Small metal jump ring and bail
- Needle tool or small drill bit
- Matte varnish (optional)
Step 1: Preparing the ‘Tiles’
-
Condition the colors:
Begin by conditioning each of your colored clays separately until they are soft and pliable. You’ll need very small amounts of each color: rust, terra cotta, sage green, cream, white, black, and a touch of gold. -
Create thin sheets:
Roll each color out into a thin sheet, approximately 1mm to 1.5mm thick. Uniform thickness is key for a flat surface later. -
Cut geometric shapes:
Using your sharp craft blade, cut the colored sheets into a variety of small, irregular triangles and quadrilaterals. Aim for sharp angles and varying sizes to mimic the fragmented look of a mosaic. Set these aside on a piece of paper or glass.
Gaps look uneven?
If the spaces between tiles are too wide or messy, use a needle tool to nudge tiles closer before pressing them down. You can also press tiny bits of ‘grout’ clay into accidental large gaps.
Step 2: Base Construction
-
Form the base slab:
Condition your stone-effect or granite clay. Roll it into a slab that is slightly thicker than your colored tiles, about 2mm to 3mm thick. -
Texture the base (optional):
If your stone clay is smooth, gently press a piece of coarse sandpaper or a stiff toothbrush onto the surface to give it a realistic, gritty stone texture. -
Cut the pendant shape:
Cut the base slab into your desired pendant shape. The image shows an irregular quadrilateral—wider at the bottom and narrower at the top—which adds a contemporary feel. -
Create the frame:
Roll a thin ‘snake’ of terra cotta clay. Flatten it slightly into a long, thin strip. Carefully wrap this strip around the edge of your base shape to create a bezel wall. Trim the excess and smooth the seam.
Clean Color Tip
Wipe your blade with baby wipes or rubbing alcohol between cutting different colors. This prevents the dark rust or black clay from smearing onto your pristine white or cream pieces.
Step 3: Mosaic Assembly
-
Apply adhesive:
Spread a very thin layer of liquid polymer clay onto the surface of the stone-effect base, inside the frame. This acts as the glue for your tiles. -
Arrange the pattern:
Using a needle tool or tweezers, place your colored clay shapes onto the base. Start with distinct colors separated from each other to balance the composition. I like to place the gold accent piece early to ensure it has a prominent spot. -
Fill the gaps:
Continue filling in the design with the remaining shapes, leaving small, even gaps between them to let the ‘stone’ grout show through. You may need to trim pieces as you go to make them fit like a puzzle. -
Embed the pieces:
once the design is full, lay a piece of parchment paper over the pendant. Gently rub over the surface with your finger or a roller to press the tiles down firmly into the base, ensuring they are level.
Step 4: Finishing Touches
-
Add the hardware connection:
At the top point of the pendant, carefully insert a small metal jump ring directly into the clay frame before baking, or pierce a hole that you can thread a ring through later. -
First Bake:
Bake the piece according to the manufacturer’s instructions for your specific brand of clay. Usually, this is around 275°F (130°C) for 30 minutes. Let it cool completely. -
Sanding for smoothness:
Once cool, wet-sand the surface gently with 400 grit sandpaper, moving up to 1000 grit. This will level any uneven tiles and remove fingerprints, giving it that polished stone feel. -
Buffing:
Rub the pendant briskly with a piece of denim or a soft cloth to bring out a natural sheen. -
Attach the bail:
Open your jump ring and attach the larger bail. Thread your chain through the bail to complete the necklace.
Wear your geometric masterpiece with pride or gift it to someone who appreciates modern design
Night Sky Speckle Pendant
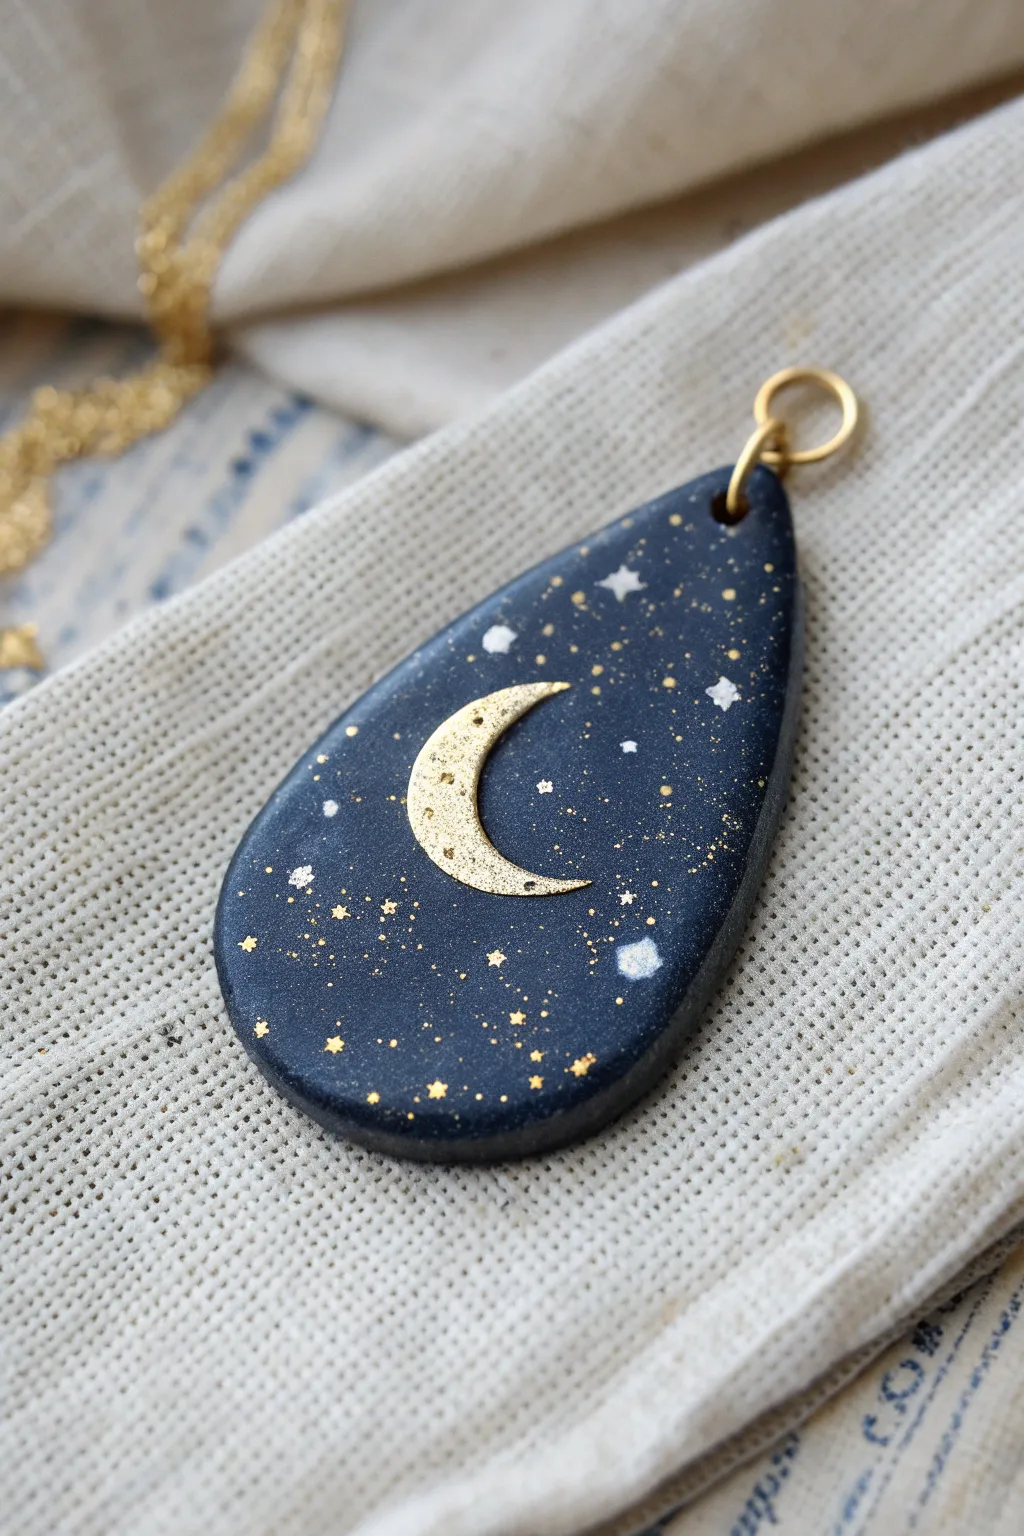
Capture the magic of the cosmos in a single piece of jewelry with this deep blue teardrop pendant. Using polymer clay and careful gold detailing, you’ll create a stunning crescent moon scene surrounded by a delicate field of stars.
How-To Guide
Materials
- Navy blue polymer clay
- Black polymer clay
- Gold polymer clay
- White polymer clay
- Teardrop clay cutter (approx. 1.5 – 2 inches)
- Small circle cutter (for the moon)
- Acrylic rolling pin
- Pasta machine (optional but helpful)
- Small detail paintbrush
- Gold acrylic paint
- Toothbrush or stiff bristle brush
- Hand drill or pin vibe
- Jump ring (gold)
- Resin or gloss varnish
- Wet wipes
- Baking tile or parchment paper
Step 1: Preparing the Base
-
Condition the clay:
Begin by conditioning the navy blue clay until it is soft and pliable. If the blue feels too bright, mix in a very small amount of black clay to achieve that deep, midnight sky hue. -
Roll out the slab:
Roll your conditioned dark blue clay into a flat slab. Aim for a thickness of about 3mm to 4mm so the pendant feels substantial but not heavy. -
Cut the shape:
Place your teardrop cutter on the clay slab. Press down firmly and evenly to cut out the base shape. Gently remove the excess clay from around the cutter before lifting the shape. -
Smooth the edges:
Once cut, run your finger lightly along the edges of the teardrop to smooth out any sharp ridges left by the cutter.
Step 2: Creating the Celestial Details
-
Prepare the moon clay:
Condition a small piece of gold polymer clay. Roll it out very thinly, much thinner than your base slab. -
Cut the crescent:
Use a small circle cutter to cut a circle from the gold clay. Then, position the same cutter slightly off-center over the circle you just cut to slice away a crescent moon shape. -
Attach the moon:
Gently lift the gold crescent—a needle tool helps here—and place it centrally on the blue teardrop base. Press it down very lightly so it adheres without losing its shape. -
Add texture to the moon:
Using a needle tool or an old toothbrush, gently tap the surface of the gold moon to give it a slightly pitted, crater-like texture. -
Form the larger stars:
Take tiny pinches of white clay and roll them into microscopic balls. Place 3-5 of these randomly on the background. -
Flatten the stars:
Press the tiny white balls flat onto the blue clay. You can use a needle tool to drag the edges out slightly to make them look more like twinkling stars.
Clean Clay Tip
Deep blue clay shows dust easily. Before starting, wipe your hands, tools, and work surface with a baby wipe or rubbing alcohol to keep lint off your night sky.
Step 3: Adding the Milky Way
-
Prepare the splatter paint:
Put a small dab of gold acrylic paint on a palette. Dip an old toothbrush or a stiff bristle brush into the paint, then wipe off the excess on a paper towel so it isn’t dripping. -
Create the splatter effect:
Hold the brush over the clay pendant and run your thumb across the bristles to flick tiny speckles of gold paint onto the surface. Aim for a dense cluster near the bottom and lighter speckles toward the top. -
Add specific stars:
Dip a fine detail brush or a toothpick into the gold paint. Add specific plotted stars or dots where the splatter feels too sparse, balancing the composition. -
Clean up:
If any gold paint landed on the edges of the pendant where you don’t want it, quickly wipe it away with a baby wipe before it dries.
Uneven Splatter?
If your paint splatter creates huge globs instead of mist, your brush is too wet. Test-flick onto a piece of paper first until you get a fine spray pattern.
Step 4: Finishing Up
-
Let the paint dry:
Allow the acrylic paint to dry completely. This usually takes about 10-15 minutes since the speckles are so fine. -
Make the hole:
Using a small straw or a tool, punch a hole at the very top point of the teardrop for your jump ring. Alternatively, you can drill this after baking. -
Bake the piece:
Place the pendant on a ceramic tile or parchment paper. Bake according to the manufacturer’s instructions for your specific brand of clay (usually 275°F/130°C for 30 minutes). -
Cool and seal:
Once baked and fully cooled, apply a thin layer of gloss varnish or UV resin to seal the paint and give the night sky a glassy, wet look. Cure or dry as required. -
Assemble:
Open a gold jump ring using two pairs of pliers. Thread it through the hole at the top of the pendant and close it securely.
Wear your starry masterpiece and let it add a little cosmic shimmer to your everyday style.
Hollow Frame Pendant With Charm Dangle
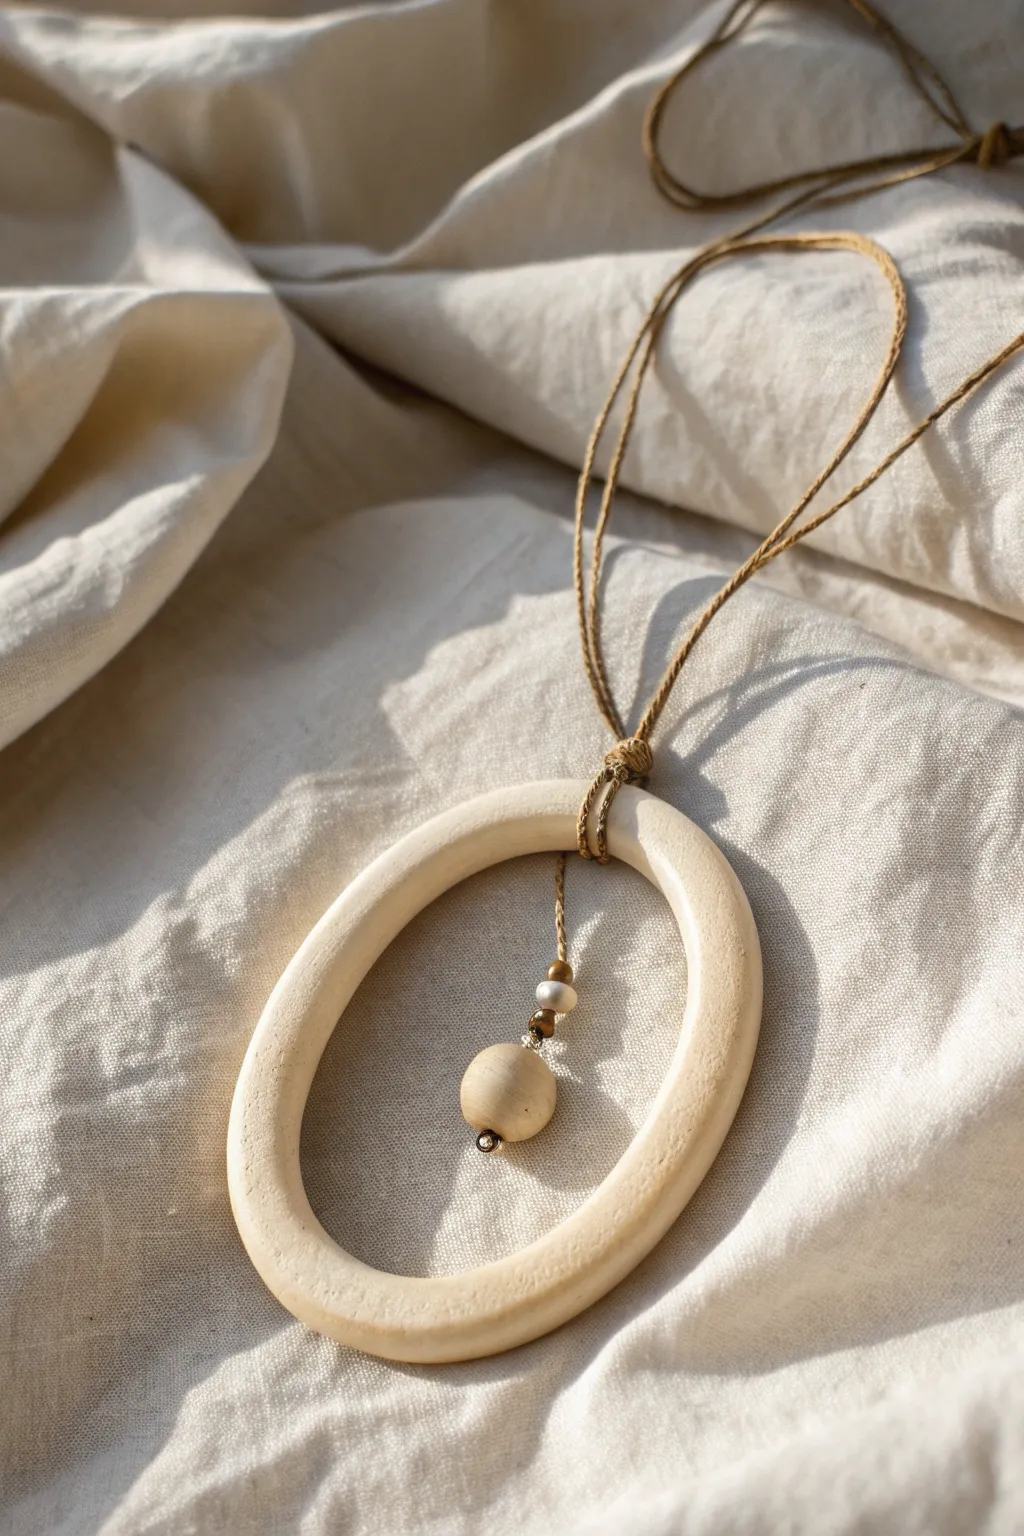
This elegant project features a beautifully minimalist, hollow oval frame crafted from polymer clay to resemble natural bone or light wood. Accented with a delicate central bead dangle and strung on a simple cord, it captures a raw, earthy aesthetic perfect for everyday wear.
Step-by-Step Guide
Materials
- Polymer clay (Ecru, Beige, or Translucent White mix)
- Acrylic roller
- Oval cutter (large, approx. 3-4 inches)
- Oval cutter (medium, approx. 1 inch smaller than the large one)
- Needle tool or toothpick
- Liquid polymer clay (optional)
- Wooden bead (natural finish, approx. 12-14mm)
- Small metallic spacer beads (bronze or gold tone)
- Tiny seed bead or crimp bead
- Waxed cotton or hemp cord (natural brown)
- Headpin (bronze or gold tone)
- Round nose pliers
- Wire cutters
- Sandpaper (medium to fine grit)
- Oven
Step 1: Sculpting the Frame
-
Condition the Clay:
Begin by thoroughly conditioning your chosen polymer clay until it is soft and pliable. If you want a more natural, stone-like look, you can mix in a tiny speck of brown or use a ‘granite’ effect clay. -
Roll the Slab:
Roll the clay out into a thick, even slab. Aim for a thickness of about 4mm to 5mm; you want the frame to look substantial and three-dimensional, not flat and flimsy. -
Cut the Outer Shape:
Use your largest oval cutter to punch out the main shape. If you don’t have a cutter this large, you can print a template on paper, place it on the clay, and carefully trace around it with a craft knife. -
Create the Frame:
Center the smaller oval cutter inside the shape you just created. Press down firmly to remove the center. This creates your hollow frame structure. -
Soften the Edges:
The cut edges will be sharp and squared off. Use your fingertips to gently smooth and round over all the edges—inner and outer—so the piece looks worn and organic rather than machine-cut. -
Add Texture (Optional):
For a ‘bone’ look, lightly drag a coarse sandpaper or a toothbrush over the surface to create subtle striations. I prefer a very light touch here just to kill the plastic sheen. -
Bake the Clay:
Place your clay frame on a ceramic tile or baking sheet. Bake according to the manufacturer’s instructions (usually 275°F/135°C for 30-45 minutes). Let it cool completely inside the oven to prevent cracking.
Step 2: Finishing and Assembly
-
Sand for Finish:
Once cool, use fine-grit sandpaper to buff the surface. This is crucial for mimicking that smooth, matte texture seen in the photo. -
Prepare the Dangle:
Take a headpin and thread on your beads in this order: the large wooden bead at the bottom, followed by a metallic spacer, perhaps a tiny pearl or accent bead, and another spacer. -
Create the Loop:
Using your round nose pliers, create a wrapped loop at the top of the bead stack. Ensure the loop is large enough to allow a cord to pass through, but small enough to look delicate. -
Cut the Cord:
Cut a long length of waxed cotton or hemp cord, approximately 30 inches, depending on how low you want the pendant to hang. -
Attach the Frame:
Find the center of your cord. Use a ‘Lark’s Head’ knot (also known as a Cow Hitch) to attach the cord to the top of the oval clay frame. Pull it tight securely. -
Tie the Dangle:
Wait, don’t finalize the knot yet! Actually, incorporate the dangle. Thread the bead charm onto one strand of the cord so it sits right in the center of the oval opening. -
Secure the Knot:
Wrap the cord around the top of the frame several times to create a decorative, wrapped bale look similar to the image. Tie it off securely on the back side. -
Adjust Hanging Length:
Ensure the dangle hangs freely in the center of the negative space without touching the bottom of the frame. -
Finish the Cord Ends:
Tie a simple adjustable sliding knot on the ends of the necklace cord so you can change the wearing length easily.
Smoother Surfaces
Before baking, lightly brush the raw clay with a little baby oil or cornstarch. This helps smooth out fingerprints tailored to that matte finish.
Mixed Media Magic
Replace the wooden bead with a raw crystal shard or a tumbled sea glass piece to completely change the vibe from earthy to coastal.
Now you have a stunning, organic statement piece that pairs perfectly with linen and natural fibers