If you love the cozy, hands-on feel of a pinch pot base but crave the height and texture of coil-built walls, this technique is your sweet spot. I pulled together my favorite coil pinch pot ideas—starting with the classics and sliding into the fun, slightly weird studio experiments.
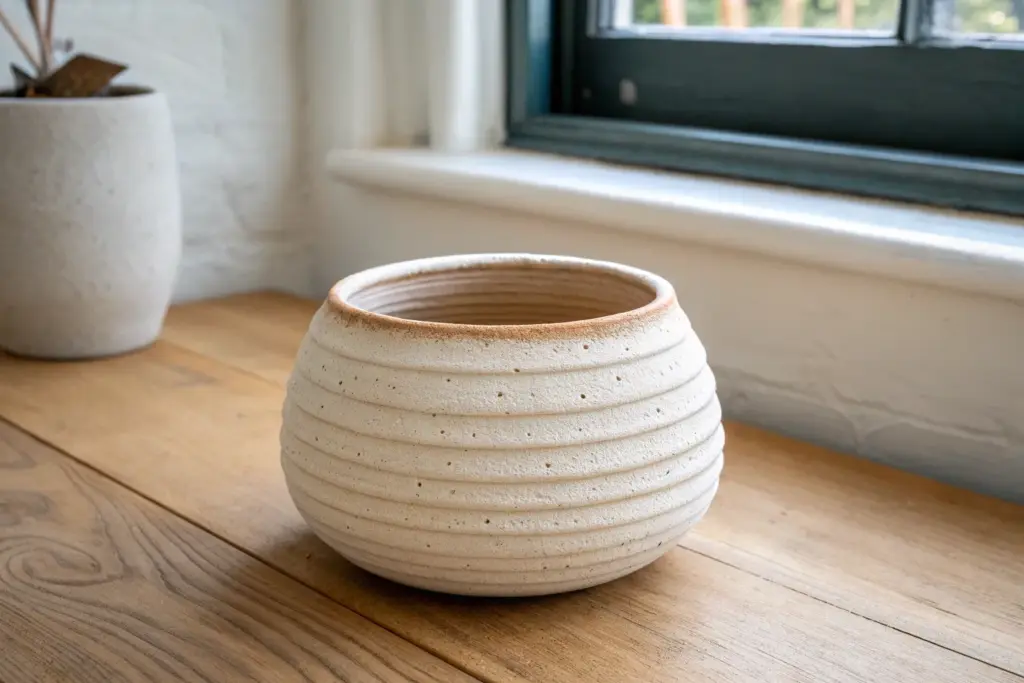
Classic Pinch-Bowl With Coil Rims
This project celebrates the humble beauty of speckled clay with a bowl that blends pinch and coil techniques for a shape that feels both organic and refined. The finished piece features a gently textured exterior and a smooth, creamy matte glaze that highlights the natural clay spots.
Step-by-Step Tutorial
Materials
- Speckled stoneware clay (Cone 5/6)
- Pottery wheel (optional, can be hand-built)
- Ware board or bat
- Water cup and sponge
- Metal rib scraper
- Wooden modeling tool
- Needle tool
- Serrated rib or scoring tool
- Creamy matte white glaze
- Kiln access
Step 1: Forming the Base
-
Prepare your clay ball:
Start with a ball of speckled stoneware clay roughly the size of a large grapefruit. Wedge it thoroughly to remove any air bubbles and ensure an even consistency throughout the clay body. -
Open the pinch pot:
If hand-building, hold the ball in one hand and press your thumb into the center about three-quarters of the way down. Begin pinching and rotating the clay to open up a basic bowl shape, keeping the walls relatively thick (about 1/2 inch) to support the coils later. -
Flatten the bottom:
Gently tap the base of your pinch pot onto your work surface to create a flat, stable bottom. This creates a footless, modern silhouette that sits flush with the table.
Step 2: Adding the Coil Rim
-
Roll out a coil:
Take a separate piece of clay and roll it on the table into a long, even snake shape. Aim for a thickness similar to your pinky finger to match the wall thickness of your base pinch pot. -
Score and slip:
Use a serrated rib or needle tool to scratch up the top rim of your pinch pot base and one side of your clay coil. Apply a small amount of water or slip (clay slurry) to the scratched areas. -
Attach the coil:
Place the coil on top of the pinch pot rim. Gently press it down to adhere it. If the coil is too long, cut the excess at a diagonal angle and join the ends together smoothly. -
Blend the seams:
Using your thumb or a wooden tool, smear the clay from the coil downwards onto the pinch pot base, both on the inside and the outside. This creates a strong structural bond and is crucial preventing cracking during firing.
Uneven Rim?
If your coil rim ends up wavy, use a needle tool to slice the top level while spinning the bowl on a banding wheel, then re-compress with a sponge.
Step 3: Refining the Shape
-
Smooth the interior:
Take a damp sponge or a soft rubber rib and smooth the inside of the bowl. work in a circular motion to erase the seam where the coil was added, creating a seamless curve from bottom to rim. -
Shape the exterior:
On the outside, use a metal rib to scrape away excess clay and refine the curve. I find that holding the rib at a 45-degree angle helps compress the clay particles while smoothing out major bumps. -
Add texture:
Instead of smoothing the outside perfectly, leave subtle horizontal drag lines from your fingers or the rib tool. These faint rings add that handmade character visible in the reference photo. -
Refine the rim:
Use a damp sponge or chamois cloth to gently compress and round the top rim. A smooth rim is essential for functional ware so it feels comfortable against the lips.
Go Raw
For a rustic look, leave the exterior unglazed. The contrast between raw speckled clay outside and smooth white glaze inside is stunning.
Step 4: Drying and Firing
-
Slow drying:
Cover your bowl loosely with plastic and let it dry slowly to the leather-hard stage. Once leather-hard, you can uncover it to let it reach bone dry status. This slow process prevents the coil seam from separating. -
Bisque fire:
Load the bone-dry bowl into the kiln for a bisque firing (usually Cone 04 or 06). This initial firing hardens the clay and prepares it for glazing. -
Apply the glaze:
Dip the bisqued bowl into a creamy matte white glaze. Hold it upside down by the foot to dip, or pour the glaze inside, swirl, and pour out. Ensure the coating is even but not too thick, as you want the clay’s speckles to show through. -
Clean the foot:
Use a damp sponge to wipe any glaze off the very bottom of the bowl so it doesn’t fuse to the kiln shelf. I like to wipe just a millimeter up the side as well for a clean line. -
Glaze fire:
Fire the bowl again to the maturation temperature of your clay and glaze (typically Cone 5 or 6 for stoneware). This melts the glaze into that beautiful, durable finish. -
Final sand:
Once cooled and removed from the kiln, check the bottom. If the unglazed clay feels rough, give it a quick sand with high-grit sandpaper to protect your table surfaces.
Enjoy using your new handmade bowl for morning oatmeal or as a minimalist display piece


Tiny Trinket Dish Coil Pinch Pots
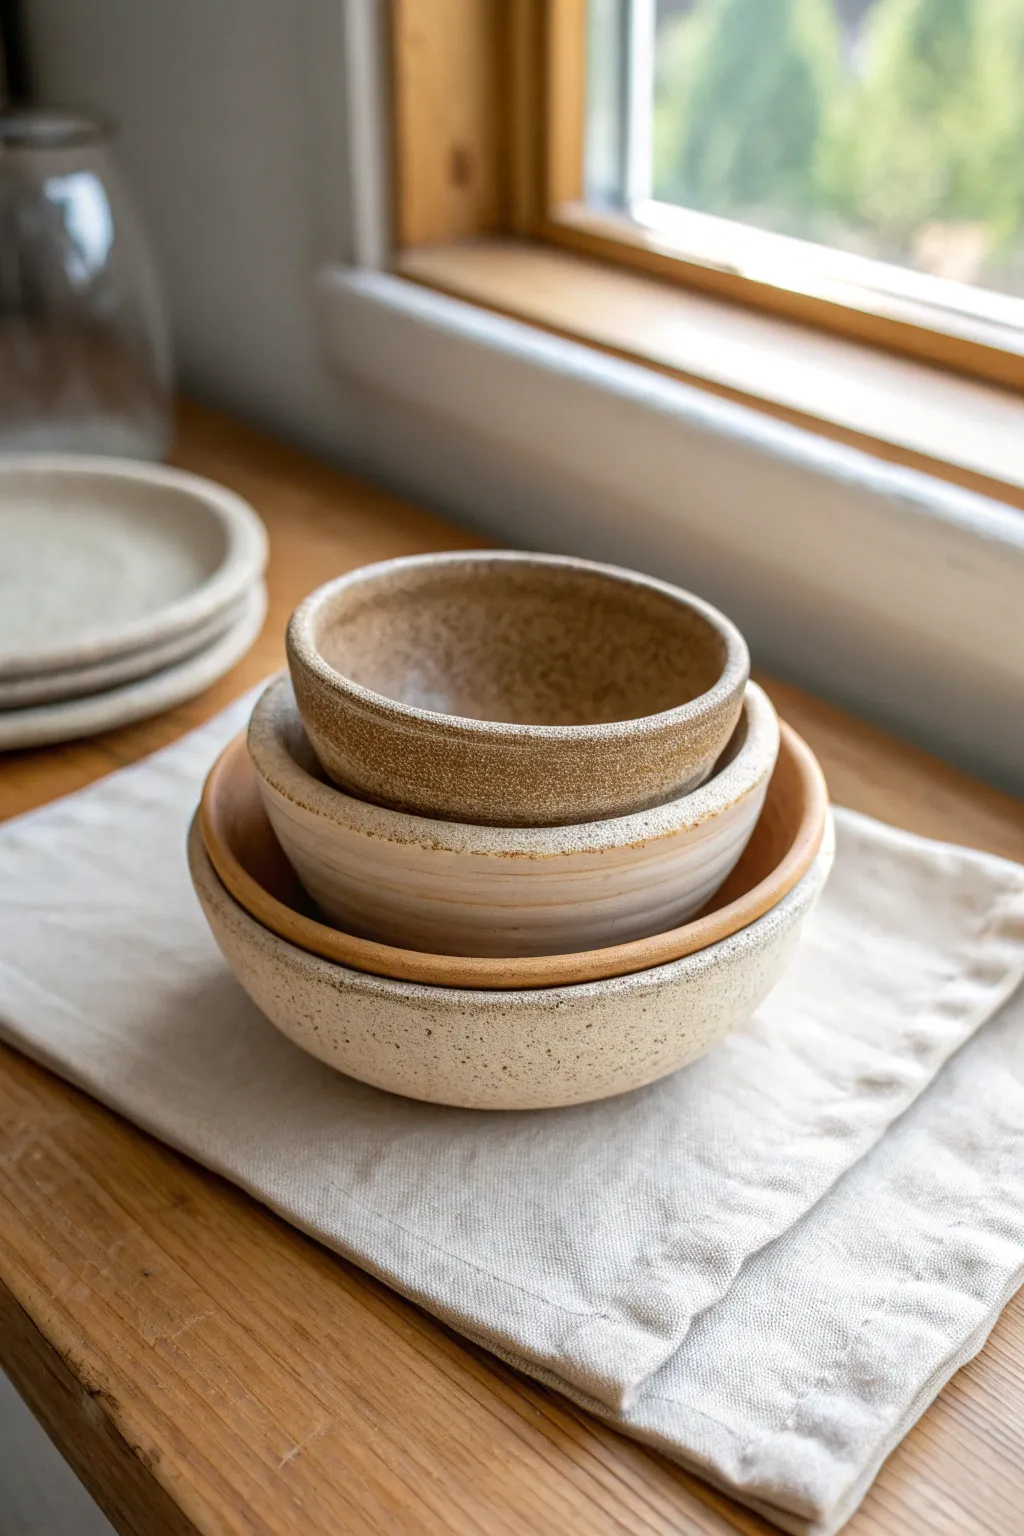
These charming nesting dishes combine the organic feel of hand-building with a clean, modern aesthetic. The set features three slightly different sizes made from beautiful speckled clay, perfect for holding jewelry or simply adding texture to a shelf.
Detailed Instructions
Materials
- Speckled stoneware clay (mid-fire)
- Needle tool
- Scoring tool (or serrated rib)
- Slip (clay mixed with water)
- Rolling pin
- Wooden modeling tool
- Smooth kidney rib (rubber)
- Sponge
- Canvas mat or ware board
- Clear matte glaze
Step 1: Prepping and Base Building
-
Prepare your clay:
Begin by wedging your speckled stoneware clay thoroughly to remove air bubbles. Since we are making a set of three nesting dishes, separate the clay into three distinct balls: one small, one medium, and one large. -
Roll the bases:
Flatten each ball slightly with your palm. Using a rolling pin, roll out slabs for the bases that are roughly 1/4 inch thick. I like to keep these fairly uniform for stability. -
Cut the circles:
Use a needle tool or a circle cutter to cut out three base circles in graduated sizes (e.g., 2 inches, 3 inches, and 4 inches in diameter). Smooth the cut edges with your finger. -
Create coils:
Roll out several long ropes of clay, aiming for the thickness of your pinky finger. Ensure they are consistent in thickness so the walls build up evenly.
Smooth Operator
Use a flexible metal rib to scrape the exterior during the leather-hard stage. This removes slurry and exposes more of the grog or speckles for texture.
Step 2: Building the Walls
-
Score and slip:
Take your smallest base. Score the outer rim with your tool and apply a generous amount of slip. Do the same to one side of a coil. -
Attach the first coil:
Lay the coil onto the scored base, overlapping the ends slightly. Cut the excess coil at an angle and join the ends firmly. -
Blend the coil:
Using your thumb or a wooden tool, smear the inside of the coil down onto the base to seal the seam. Support the outside with your other hand. Then, blend the outside of the coil down onto the base edge. -
Build upward:
Repeat the scoring and slipping process to add 2-3 more coils, depending on how deep you want the dish. Stack them slightly outward if you want a wider opening, or straight up for vertical walls. -
Repeat for all sizes:
Follow the same process for the medium and large bases. The goal is to have the medium bowl fit inside the large one, and the small one fit inside the medium one.
Two-Tone Look
Try leaving the raw clay exposed on the exterior and only glazing the inside. This creates a striking contrast between the rough clay and smooth interior.
Step 3: Refining and Shaping
-
Smooth the walls:
Once the coils are attached, use a rubber kidney rib to smooth the interior and exterior walls. This compresses the clay and removes the distinct coil lines for a seamless look. -
Pinch thinning:
Gently pinch the walls between your thumb and forefinger to thin them out and achieve that delicate, organic rim seen in the photo. Rotate the piece constantly for even thickness. -
Rim finishing:
Use a damp sponge to soften the top rim. You don’t want sharp edges on a trinket dish. -
Check the fit:
While the clay is still leather hard, carefully test-stack them to ensure they nest comfortably. If the bottom of a bowl is too wide, gently press the walls in while supporting the base. -
Dry slowly:
Cover the bowls loosely with plastic to let them dry slowly. Uneven drying can cause warping, which ruins the nesting effect.
Step 4: Finishing Touches
-
Bisque fire:
Once bone dry, fire the pieces in a kiln to bisque temperature (usually cone 04). -
Glaze application:
Dip or brush a clear matte glaze over the interior and exterior. This allows the beautiful natural speckles of the clay body to shine through as the main design element. -
Wipe the feet:
Use a clean sponge to wipe the glaze off the bottom of each bowl so they don’t stick to the kiln shelf. -
Final firing:
Fire the glazed pieces to the maturity temperature of your clay (likely cone 5 or 6). Once cool, sand the bottoms if needed to prevent scratching surfaces.
Stack your finished set near a window to let the natural light highlight the subtle texture of the clay.


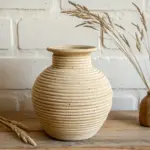
Coil Pinch Planter With Drainage Feet
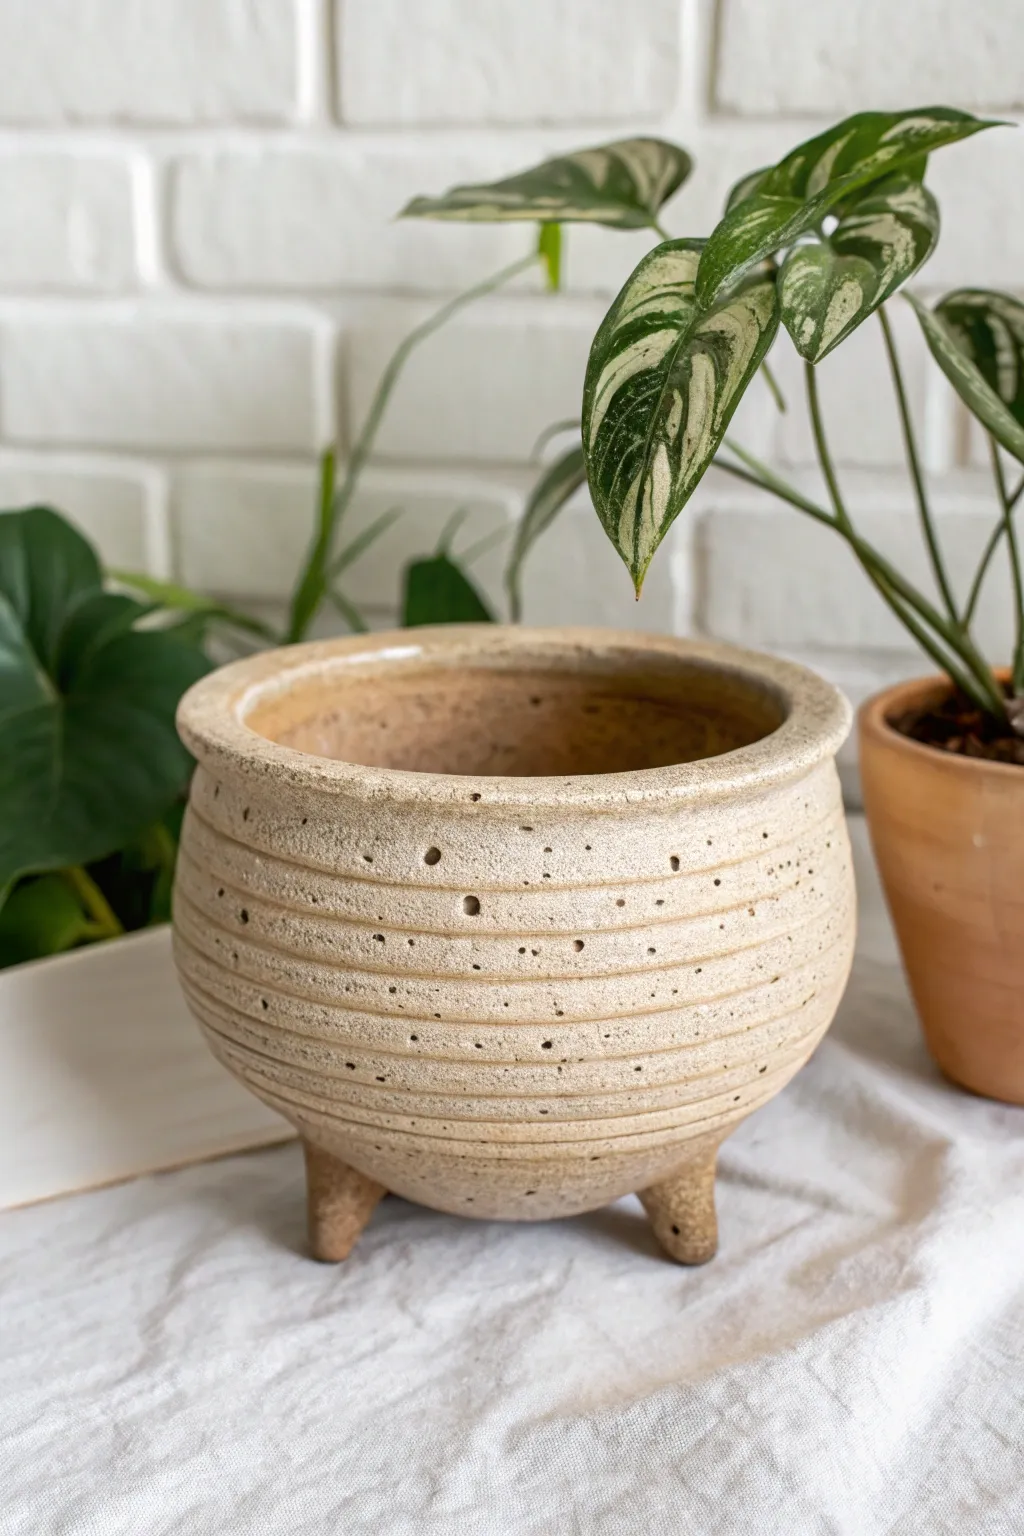
This earthy, textured planter combines the stability of coil building with a charmingly imperfect, hand-built aesthetic. Its key features are the horizontal ribbed texture, the speckled clay body, and the tripod feet that give it a playful lift.
Step-by-Step Guide
Materials
- Speckled Stoneware Clay (e.g., Lagunitas or similar groggy clay)
- Pottery Wheel (optional, but likely used for the base form)
- Rolling pin or coil extruder (if hand-building entirely)
- Scoring tool (serrated rib or needle tool)
- Slip (clay and water slurry)
- Wooden modeling tool
- Sponge
- Cutting wire
- Clear or transparent matte glaze
Step 1: Forming the Base
-
Prepare the Clay:
Wedge your speckled stoneware clay thoroughly to remove air bubbles. This clay body is essential for recreating those lovely dark spots that peek through the glaze later. -
Create the Floor:
Start by flattening a ball of clay into a thick pancake (about 1/2 inch thick). You can do this on a banding wheel or directly on a bat if you plan to move it later. This creates the solid bottom of the pot. -
Roll Your Coils:
Roll out several long, even ropes of clay. Aim for a thickness similar to your pinky finger. Consistency here helps the ribbed texture look intentional rather than accidental. -
Build the Walls:
Begin stacking coils on top of the base. Score and slip between each layer heavily to ensure a strong bond. Instead of smoothing the outside completely flat, we want to preserve that stacked definition. -
Shape the Belly:
As you add coils, slightly overlap them outward to create the rounded ‘belly’ of the pot. Support the clay from the inside with one hand while gently pressing from the outside to merge the coils structurally without losing the horizontal lines.
Step 2: Refining and Feet
-
Narrow the Rim:
Once you pass the widest point of the belly, begin stacking coils slightly inward. This creates the gentle curve back toward the opening. Finish with a slightly thicker coil at the top for a sturdy rim. -
Enhance the Texture:
Use a wooden tool or your finger to gently define the grooves between coils. You can also poke small, random holes or divots into the surface now to mimic the natural pitting seen in the reference, adding character. -
Smooth the Interior:
While the outside remains textured, use a curved rib or your fingers to smooth the interior walls completely. This prevents water from getting trapped in crevices and ensures the pot is watertight. -
Flip and Prep for Feet:
Let the pot stiffen to a leather-hard state so it can hold its shape. Gently turn it upside down on a piece of foam or a soft towel. -
Form the Tripod Feet:
Roll three thick, short cones of clay. They should be substantial enough to support the pot’s weight. Tap the wider end on the table to flatten it slightly—this will be the attachment point. -
Attach the Feet:
Score the bottom of the pot and the flat tops of your feet aggressively. Apply slip and press the feet firmly into place in a tripod arrangement. Seal the seams with a modeling tool. -
Check for Balance:
Turn the pot right-side up and gently press down to ensure all three feet touch the surface evenly. If it wobbles, tap the pot gently on the table to level the feet.
Cracking Coils?
If your coils are cracking as you shape the belly, the clay is too dry. Spritz with water and cover with plastic for an hour before continuing to work.
Step 3: Glazing and Finishing
-
Bisque Fire:
Allow the pot to dry slowly and thoroughly before its first firing (bisque fire) to cone 04 (or your clay’s specific recommendation). -
Partial Glazing:
For the specific look in the photo, pour a clear or semi-transparent matte glaze inside the pot and swirl to coat the interior. Then, dip or brush the exterior. -
Let the Clay Shine:
I prefer using a glaze that breaks over texture. This ensures the darker speckles of the clay body show through, and the glaze settles slightly thicker in the coil grooves to highlight the horizontal lines. -
Leave the Feet Raw:
Wipe away any glaze from the very bottom of the feet using a damp sponge. Leaving the feet unglazed adds a nice textural contrast and prevents the pot from sticking to the kiln shelf. -
Final Firing:
Fire the piece to the glaze maturity temperature (likely Cone 5 or 6 for stoneware). Once cooled, your textured planter is ready for its green inhabitant.
Clean Texture Tip
To get those crisp horizontal lines without blending them away, use a rounded wooden tool to compress the seam *between* the coils rather than smoothing over them.
This charming planter adds a wonderful handmade focus to any indoor jungle collection


Mug-Style Coil Pinch Cup With Handle
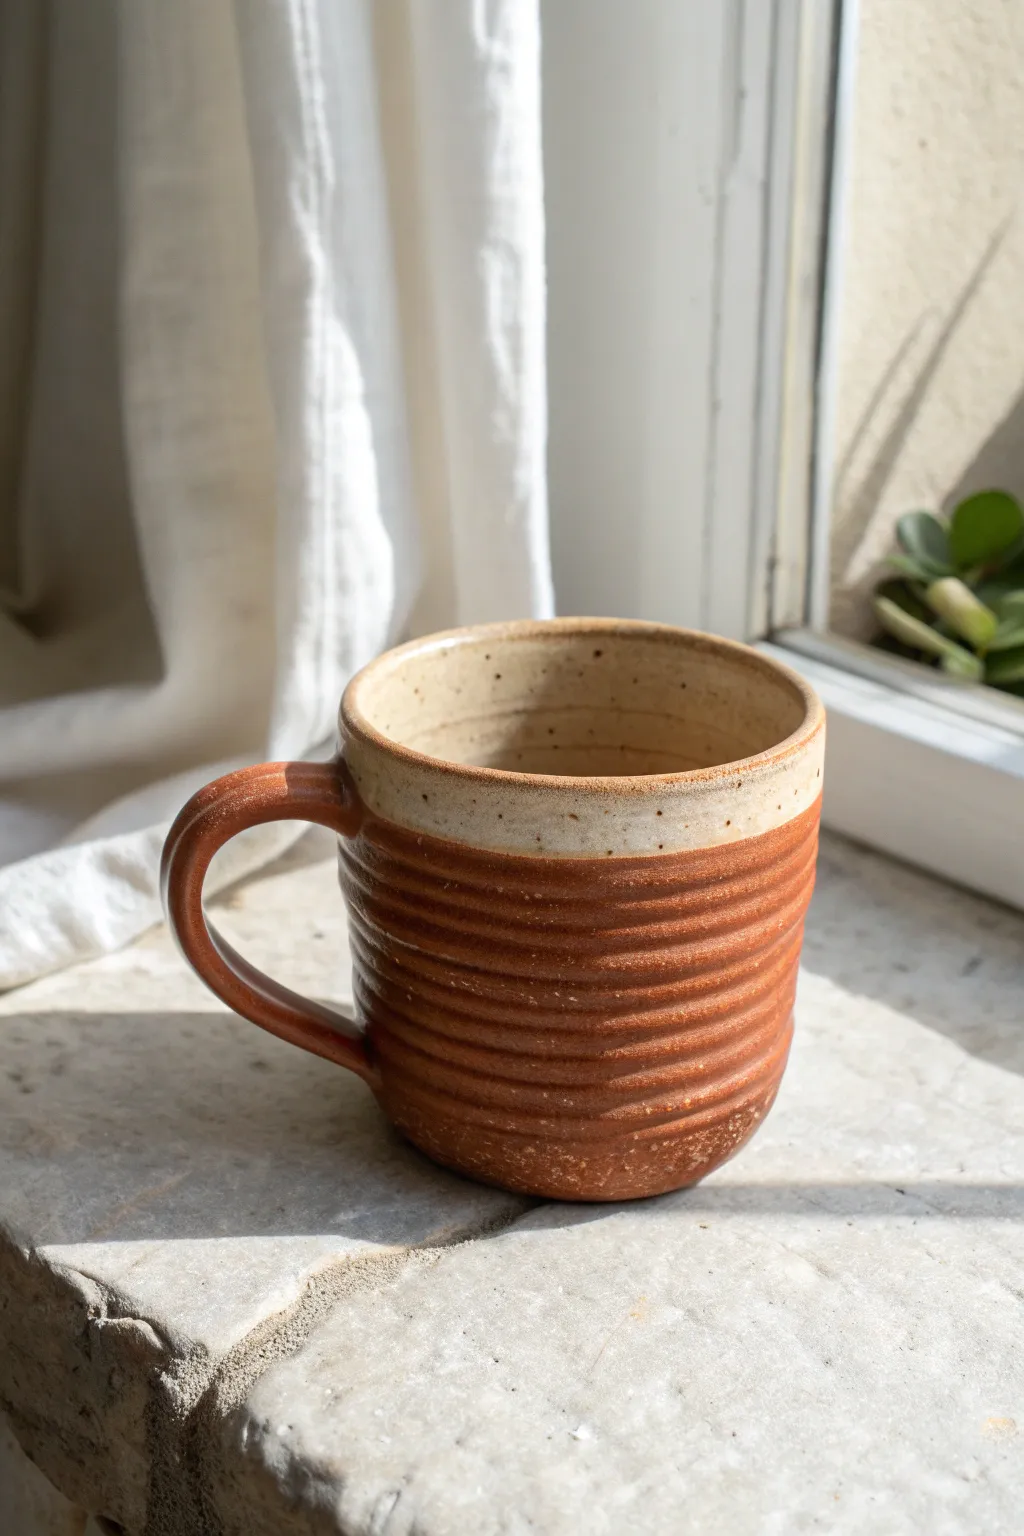
This rustic mug combines the tactile charm of visible coils with the comfort of a smooth drinking rim. The two-tone glazing highlights the texture while providing a clean, finished look for your morning coffee.
How-To Guide
Materials
- Stoneware clay (speckled or smooth)
- Scoring tool or fork
- Slip (clay mixed with water)
- Wooden modeling tool
- Sponge
- Cutting wire
- Rolling pin (optional)
- Kiln for firing
- Red-brown glaze
- Cream or speckled white glaze
Step 1: Forming the Base
-
Create the floor:
Start by rolling a ball of clay roughly the size of a tangerine. Flatten it into a disc about 1/4 inch thick to serve as the bottom of your mug. -
Score and slip:
scratch up the outer edge of your clay disc using a scoring tool or a fork. Dab a little bit of slip onto the scratched area to act as glue. -
Roll the first coil:
Take a chunk of clay and roll it on your work surface until you have a long, even snake about the thickness of your finger. -
Attach the first layer:
Lay the coil onto the scored edge of the base. When the ends meet, cut them at an angle and join them together smoothly. -
Blend the inside:
Using your thumb or a wooden tool, smear the inside edge of the coil down into the base so the seam completely disappears. Leave the outside unblended to keep the ridge texture.
Step 2: Building the Walls
-
Continue coiling:
Roll out more coils. Score and slip the top of the previous row, then stack the new coil on top. Continue this process, building the walls up vertically. -
Smooth the interior:
After every two or three rows, stop to smooth the inside walls. Support the outside with one hand while dragging clay down on the inside to seal the coils together. -
Define the outer ridges:
On the exterior, run a damp finger or a rounded tool gently along the grooves between coils. You want to clean up rough bits without losing that distinct ribbed pattern. -
create the smooth rim:
Once you reach about 3/4 of your desired height, add one final wide coil. Instead of leaving the texture, blend this coil smooth on both the inside and outside to create a comfortable drinking lip.
Cracking at the seams?
If your coils separate while drying, you likely didn’t score deeply enough. Use a serrated rib or needle tool to really rough up the clay before adding slip
Step 3: Handle and Finishing
-
Pull a handle:
Shape a separate piece of clay into a thick carrot shape. holding the thick end, pull downward with wet hands to elongate it into a strap handle. -
Curve and dry:
Curve the strap into a ‘C’ shape and let it stiffen up for about 20 minutes until it holds its form but is still flexible. -
Attach the handle:
Score and slip the contact points on both the mug and the handle. Press the handle firmly onto the smooth rim section and the lower coiled body. -
Refine the connection:
Use a small coil of clay to reinforce the joints if necessary, smoothing everything out so the handle looks like it grew out of the mug. -
Bisque fire:
Let the mug dry slowly under plastic for a few days before uncovering it to dry completely. Fire it in a bisque kiln according to your clay’s temperature.
Make it yours
Try using an iron oxide wash on the textured coils instead of a full glaze. This highlights the deep grooves while leaving the clay body visible
Step 4: Glazing
-
Wax the bottom:
Apply wax resist to the bottom of the mug and slightly up the side to prevent glaze from running onto the kiln shelf. -
Glaze the interior:
Pour a cream or speckled white glaze inside the mug, swirl it around to coat the entire inner surface, and pour out the excess. -
Dip the rim:
Dip the top inch of the mug (the smooth section) into the same cream glaze. Let this dry. -
Glaze the body:
Dip the bottom portion of the mug—up to where the texture meets the smooth rim—into a reddish-brown glaze. Be careful not to overlap the white rim glaze too heavily. -
Final fire:
Place the glazed mug into the kiln for the final glaze firing.
Enjoy your morning brew in a beautiful vessel that feels as good to hold as it looks

The Complete Guide to Pottery Troubleshooting
Uncover the most common ceramic mistakes—from cracking clay to failed glazes—and learn how to fix them fast.
Bud Vase Coil Pinch Mini Vessel
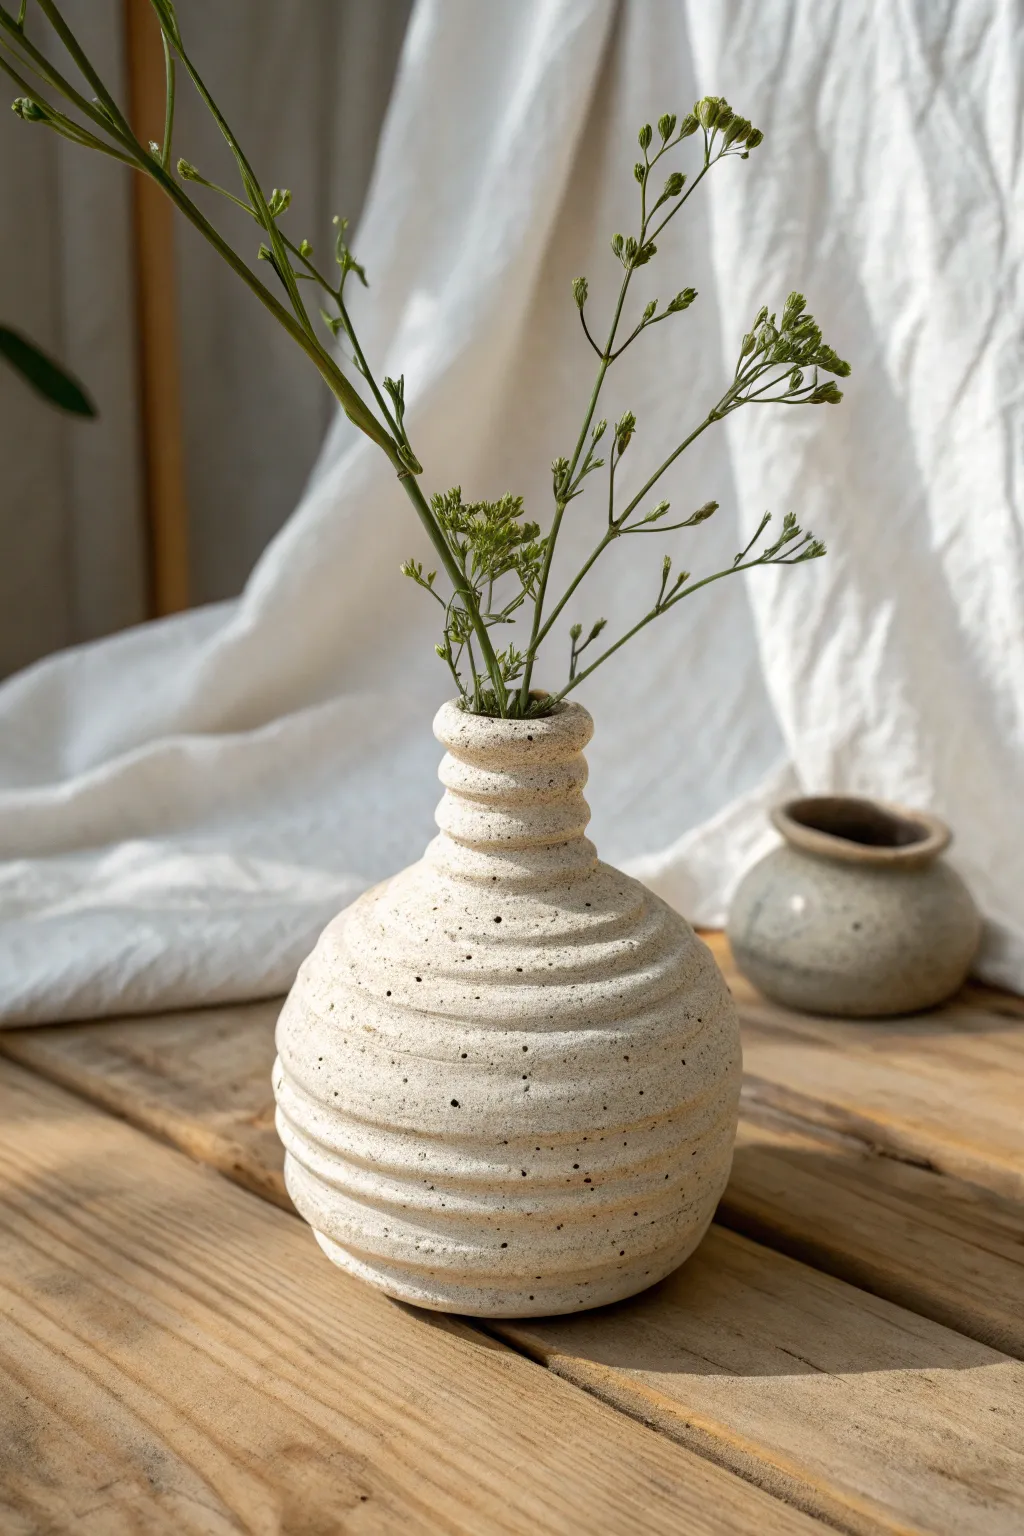
Embrace the organic texture of hand-building with this charming bud vase that highlights the beauty of visible coils. The speckled stoneware clay gives it a natural, earthy finish perfect for holding delicate dried stems.
Step-by-Step Tutorial
Materials
- Speckled stoneware clay (mid-fire)
- Scoring tool or serrated rib
- Slip (clay mixed with water)
- Wooden modeling tool
- Sponge
- Cutting wire
- Plastic bat or wooden board
- Clear matte glaze (optional)
Step 1: Creating the Base
-
Prepare the Base Slab:
Start by taking a small ball of speckled clay, about the size of a lime, and flatten it gently with your palm onto your work board. -
Shape the Bottom:
Refine this flattened piece into a perfect circle, roughly 3 inches in diameter. This will serve as the sturdy foundation for your coil pot. -
Score the Perimeter:
Using your scoring tool or a serrated rib, scratch up the outer edge of the circular base. Apply a small amount of slip to these scratches to act as glue.
Cracks Appearing?
If coils separate as they dry, your slip wasn’t wet enough. Score deeply and use plenty of slip. Compress the join firmly on the inside.
Step 2: Building the Body
-
Roll Your Coils:
Roll out several long, even snakes of clay on your table. Aim for a thickness similar to your pinky finger to ensure the walls aren’t too heavy. -
Attach the First Ring:
Place your first coil onto the scored edge of the base. Gently press it down to adhere it without flattening the coil’s round shape completely. -
Blend the Interior:
This is crucial for strength: use your thumb or a wooden tool to smear the *inside* of the coil down onto the base. Leave the outside texture untouched to keep that ribbed look. -
Build Outwards:
Continue stacking coils. As you add the next two or three rings, place them slightly towards the outer edge of the previous coil to widen the belly of the vase. -
Secure Each Layer:
Remember to score and slip between every single coil layer, blending the clay downward on the interior specifically. -
Create the Curve:
Once you’ve reached the widest point (about 4-5 coils up), start placing the next coils slightly inward. This creates the shoulder of the vase. -
Refine the Shape:
Pause to look at the silhouette. If it looks lopsided, gently pat the exterior with a flat wooden paddle or your hand to even out the curve.
Step 3: Forming the Neck
-
Narrow the Opening:
As you continue stacking inward, the opening will get smaller. You want to create a distinct neck, so stack the last 3-4 coils vertically rather than curving in. -
Smooth the Rim:
On the very last coil, wet your fingers slightly and run them over the rim to round it off. It should feel smooth to the touch, not sharp. -
Clean the Interior:
If your finger no longer fits inside, use a long wooden tool or a stick with a small piece of sponge attached to smooth out any rough slip on the bottom inside.
Change the Silhouette
Try varying the coil thickness. Use thick coils at the bottom and thinner ones at the neck for a graduated, organic aesthetic.
Step 4: Finishing Touches
-
Enhance the Texture:
Take a moment to inspect the exterior coils. If any gaps look too deep, gently press the clay together from the outside, but try to maintain the distinct horizontal lines. -
Dry Slowly:
Cover the vase loosely with plastic for the first day to let the moisture equalize. This prevents the coils from cracking apart as they shrink. -
Bisque Fire:
Once bone dry, fire the piece to cone 04 (or your clay’s specific bisque temperature). -
Glaze Application:
For the look in the photo, dip the entire vase into a clear matte glaze. This seals the clay while letting the natural speckles and coil texture remain the star. -
Final Firing:
Fire the piece a final time to the temperature recommended for your stoneware clay body.
Fill your new vessel with simple dried botanicals to complete the rustic, handmade aesthetic
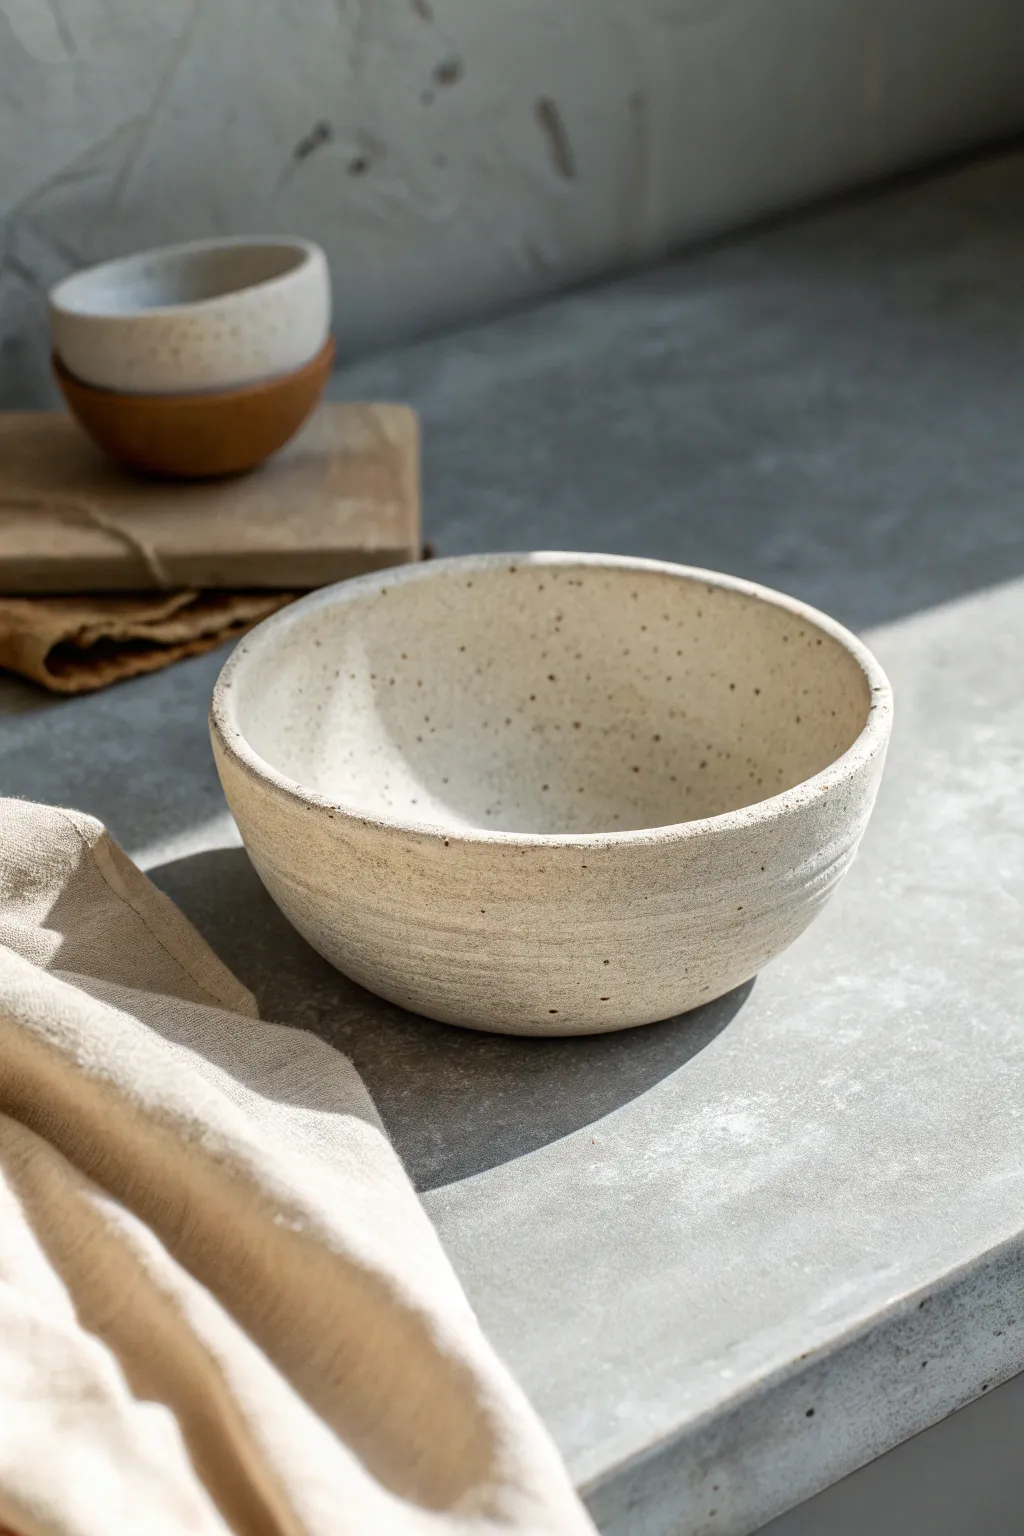
Nesting Set Of Coil Pinch Bowls
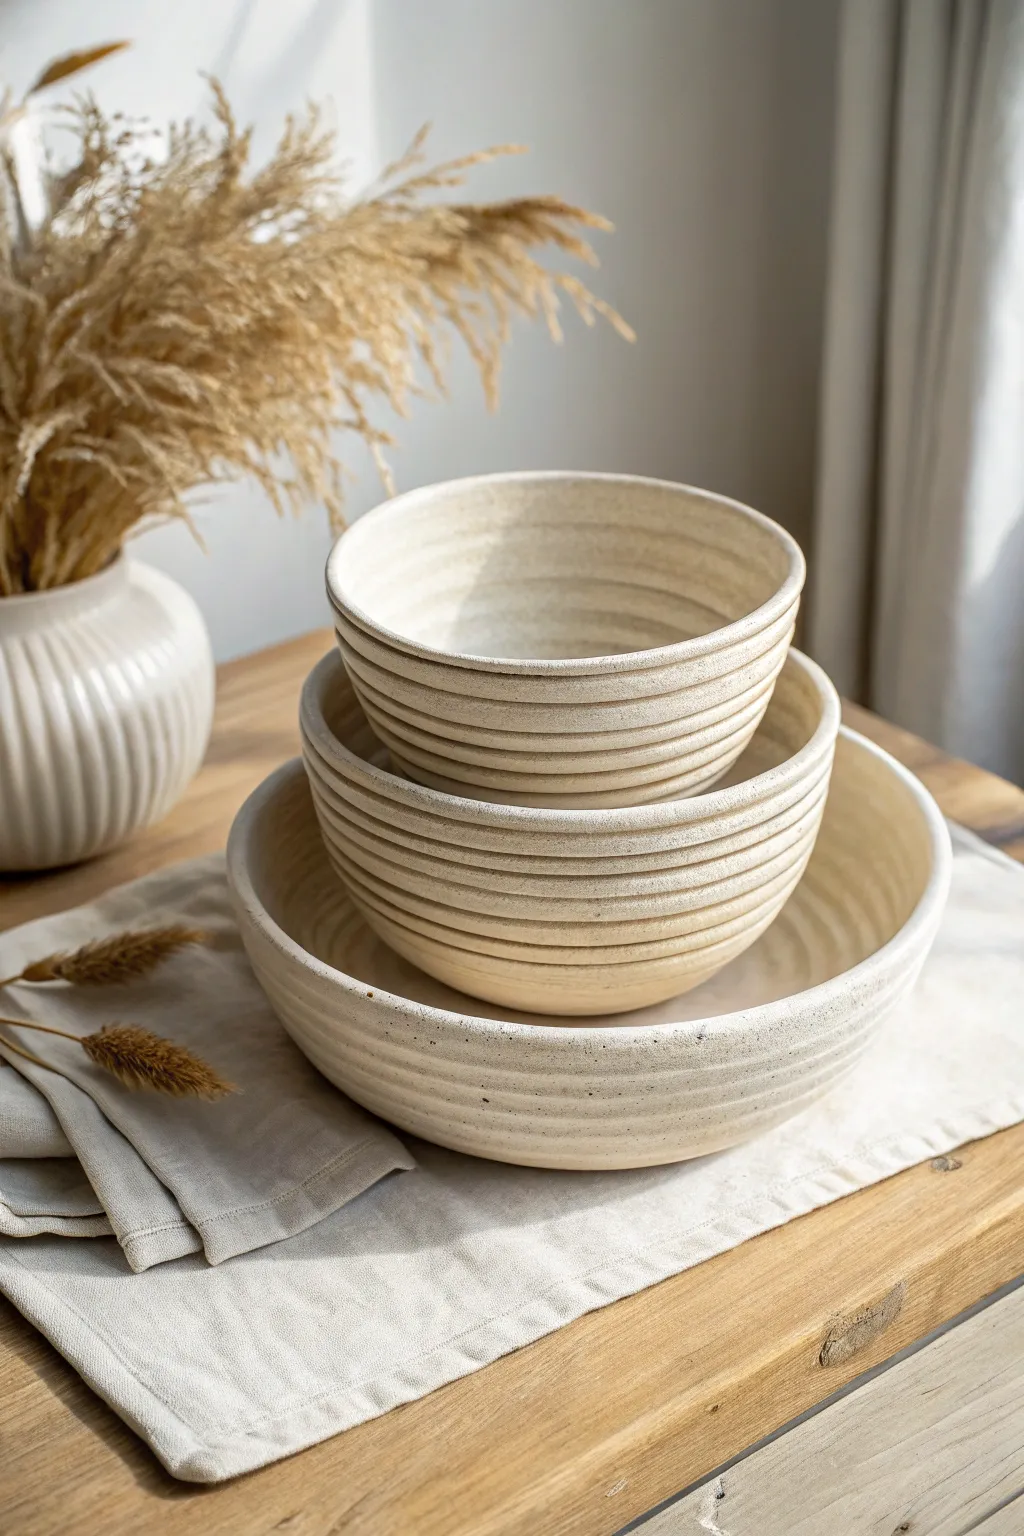
These three nesting bowls balance organic texture with clean lines, creating a set that looks both handmade and elegantly modern. By carefully stacking and smoothing coils, you’ll achieve that distinct ribbed exterior while keeping the interior perfectly polished.
How-To Guide
Materials
- White stoneware clay with fine grog or speckles
- Rolling pin or slab roller
- Circular templates (paper or cardboard, 3 sizes)
- Needle tool
- Scoring tool or serrated rib
- Slip (clay slurry)
- Wooden modeling tool
- Smooth kidney rib (soft rubber)
- Sponge
- Matte cream or white speckled glaze
Step 1: Creating the Bases
-
Roll your slabs:
Begin by rolling out a medium-sized slab of clay to a uniform thickness, roughly 1/4 inch. Since we are making a nesting set, ensure you have enough clay for three different base sizes. -
Cut the circles:
Using your paper templates, cut out three circles for the bases. A good ratio is 4 inches, 6 inches, and 8 inches to ensure they nest comfortably. -
Smooth the edges:
Take your finger or a slightly damp sponge and gently round off the sharp cut edges of each clay circle. This sets a clean foundation for the first coil.
Cracks Appearing?
If tiny cracks appear between coils as you build, your clay is too dry. Score deeper, use more slip, and wrap your work in plastic for 20 minutes to rehydrate before continuing.
Step 2: Coiling and Building
-
Roll consistent coils:
Roll out several long coils of clay. Aim for a thickness of about a pencil or pinky finger. Uniformity is key here for that even, ribbed look. -
Attach the first row:
Score the outer edge of your smallest base and apply slip. Lay your first coil on top of the scored area, pressing it down gently but firmly to adhere. -
Blend the interior:
Using your thumb or a wooden tool, smear the clay from the coil downwards onto the base on the *inside* only. This seals the seam. -
Smooth the inner wall:
I like to use a soft rubber kidney rib immediately after blending a few rows to ensure the inside is perfectly seamless and smooth. -
Stack for height:
Continue stacking coils one on top of the other. Score and slip between every single layer. For these bowls, stack them slightly outward to create a gentle curve. -
Refine the exterior texture:
Unlike typical coil pots where you blend the outside, we want to keep the coil definition. Instead of smearing, use your finger to gently press the coils together, enhancing the horizontal grooves without erasing them. -
Shape the rim:
Once you reach the desired height, add a final coil. Compress the rim with a damp sponge wrapper over it to make it smooth and rounded. -
Repeat for all sizes:
Repeat this building process for the medium and large bases. Check the fit occasionally by holding the smaller bowls inside the larger ones (without touching walls) to ensure the angles match.
Level Up: Gradient fit
Use a dark clay body (like chocolate stoneware) and coat only the inside with white glaze. The contrast between the dark, raw exterior coils and bright interior is stunning.
Step 3: Finishing and Firing
-
Dry slowly:
Cover the bowls loosely with plastic. Because the rims dry faster than the thick bases, slow drying prevents warping or cracking. -
Bisque fire:
Fire the bone-dry pieces to cone 04 (or your clay body’s specified bisque temperature). -
Glaze application:
Pour a matte cream or speckled white glaze inside the bowl, swirl to coat, and pour out. This ensures the smooth interior is fully covered. -
Exterior glazing:
Dip the exterior or spray the glaze. If you want the texture to pop, slightly wipe the glaze back with a damp sponge on the high points of the ridges. -
Final wipe:
Clean the foot of the bowls thoroughly with a sponge so no glaze touches the kiln shelf. -
Glaze fire:
Fire to the final maturity temperature of your clay and glaze (likely cone 5 or 6 for stoneware).
Enjoy using your perfectly stacked set for serving or simply displaying on your table


What Really Happens Inside the Kiln
Learn how time and temperature work together inside the kiln to transform clay into durable ceramic.
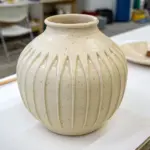
Textured Coils Left Bold And Visible
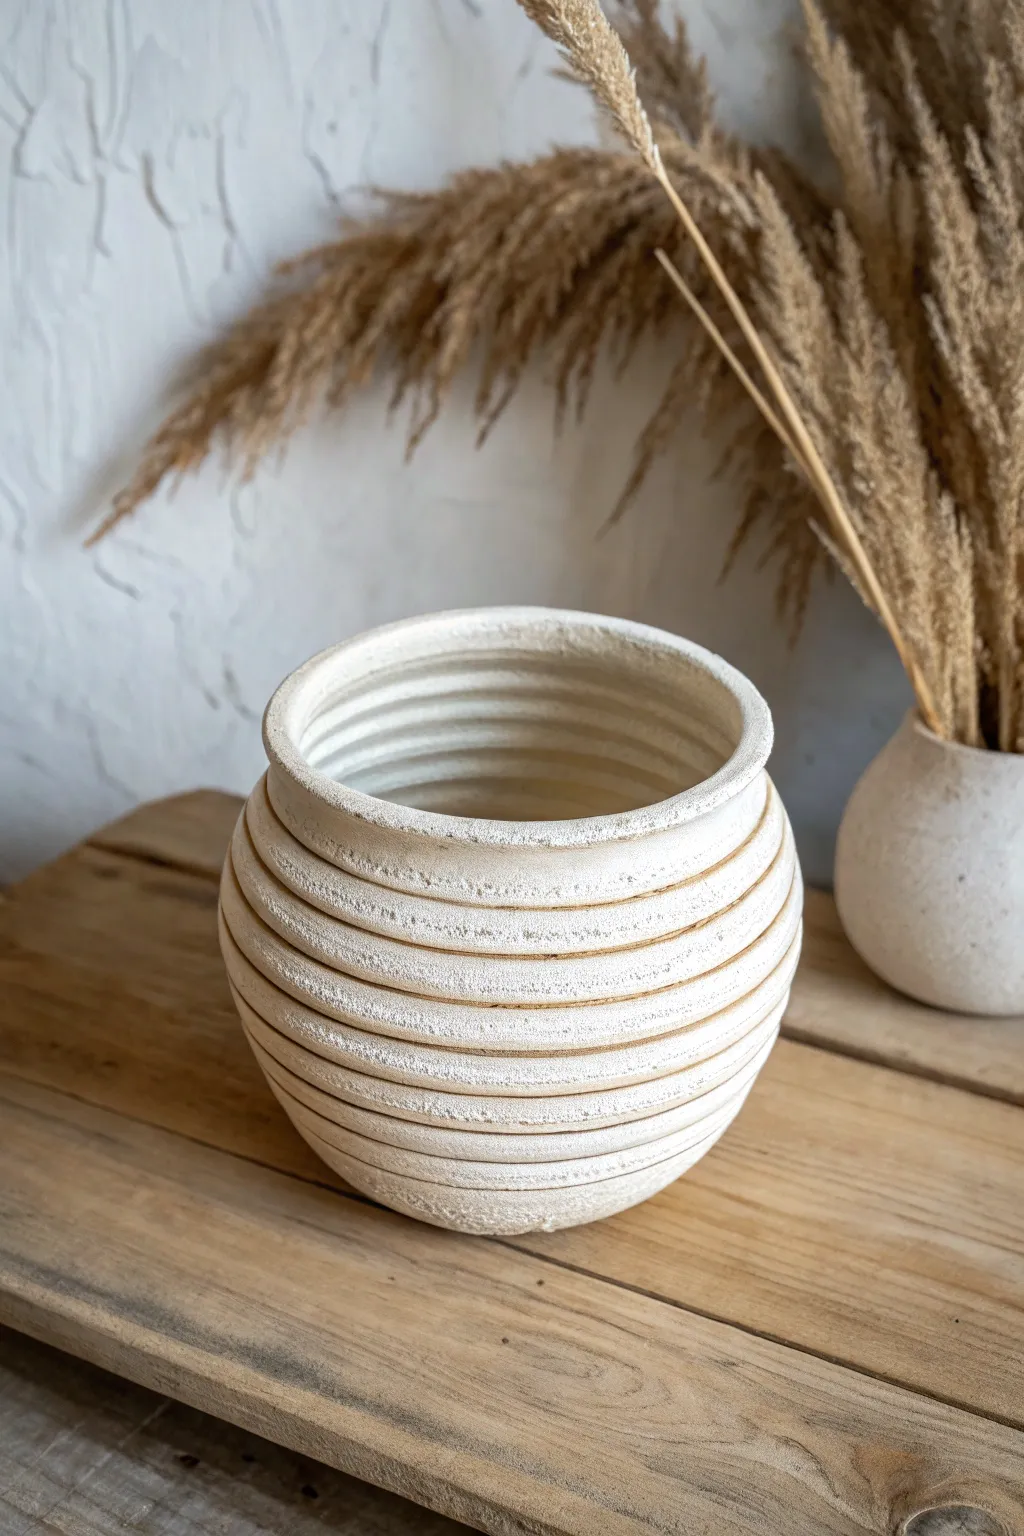
Embrace the natural beauty of hand-building with this pot that leaves its structural coils front and center. The result is a tactile, ribbed vessel with a creamy matte finish that mimics the look of ancient stone.
Step-by-Step Tutorial
Materials
- White or speckled stoneware clay (preferably with grog for texture)
- Clay scoring tool or fork
- Slip (clay mixed with water)
- Wooden modeling tool
- Sponge
- Rolling pin (optional)
- Canvas or cloth work surface
- Matte white or cream glaze
Step 1: Creating the Base
-
Roll the bottom slab:
Start with a ball of clay about the size of a tennis ball. Flatten it against your canvas surface using your palm. -
Refine the circle:
Use a rolling pin to get an even thickness of about 1/4 inch. Cut out a perfect circle, roughly 4-5 inches in diameter, using a needle tool or a round template like a lid. -
Score the edge:
Take your scoring tool or a simple fork and scratch up the outer rim of your base circle. Brush on a generous amount of slip to act as your glue.
Step 2: Building the Coils
-
Roll your first coil:
Take a chunk of clay and roll it between your hands or on the table into a long snake. Aim for a thickness similar to your pinky finger. -
Attach the first row:
Place the coil onto the scored edge of the base. Gently press it down. -
Blend the interior:
This is crucial for strength: use your thumb or a wooden tool to smear the *inside* of the coil downward onto the base. Leave the *outside* of the coil untouched to preserve that horizontal line. -
Continue stacking:
Roll another coil. Score and slip the top of the previous coil, then place the new one on top. -
Shape the belly:
To create the rounded profile shown in the photo, place each new coil slightly further outward than the one before it as you build up. -
Blend as you go:
After every 2-3 coils, stop to smooth the interior seams completely. I prefer using a slightly damp sponge to compress the inside wall while supporting the outside very gently. -
Narrowing the neck:
Once you’ve reached the vessel’s widest point (the belly), begin placing the next coils slightly inward. This creates the curved shoulder.
Uneven Walls?
If your pot is leaning, the clay might be too soft. Let it stiffen for 30 minutes before adding more height, or use a heat gun briefly to firm up the lower walls.
Step 3: Refining and Finishing
-
Form the rim:
For the final coil, place it directly on top or slightly flared out, depending on your preference. Smooth the very top lip with a damp chamois or sponge so it’s pleasant to touch. -
Enhance the texture:
Run a wet finger or a round wooden tool lightly along the exterior grooves between the coils. This deepens the shadow lines and cleans up any messy bits of slip. -
Dry slowly:
Cover the pot loosely with plastic to let it dry slowly over a few days. This prevents the coils from cracking apart. -
Bisque fire:
Once bone dry, fire the piece in a kiln to bisque temperature (usually Cone 04). -
Glaze application:
Dip or brush on a matte white or cream glaze. Avoid glossy glazes, as the high shine can obscure the subtle texture of the coils. -
Final firing:
Fire the piece again to the maturation temperature of your specific clay and glaze.
Stone Effect
For that weathered look, sponge off some glaze on the raised ridges before firing. This lets the raw, gritty clay body peek through the white finish.
Place your finished pot in a sunny spot to highlight the beautiful rhythmic shadows created by the coils
Smooth-Sided Coil Pinch Pot With Hidden Coils
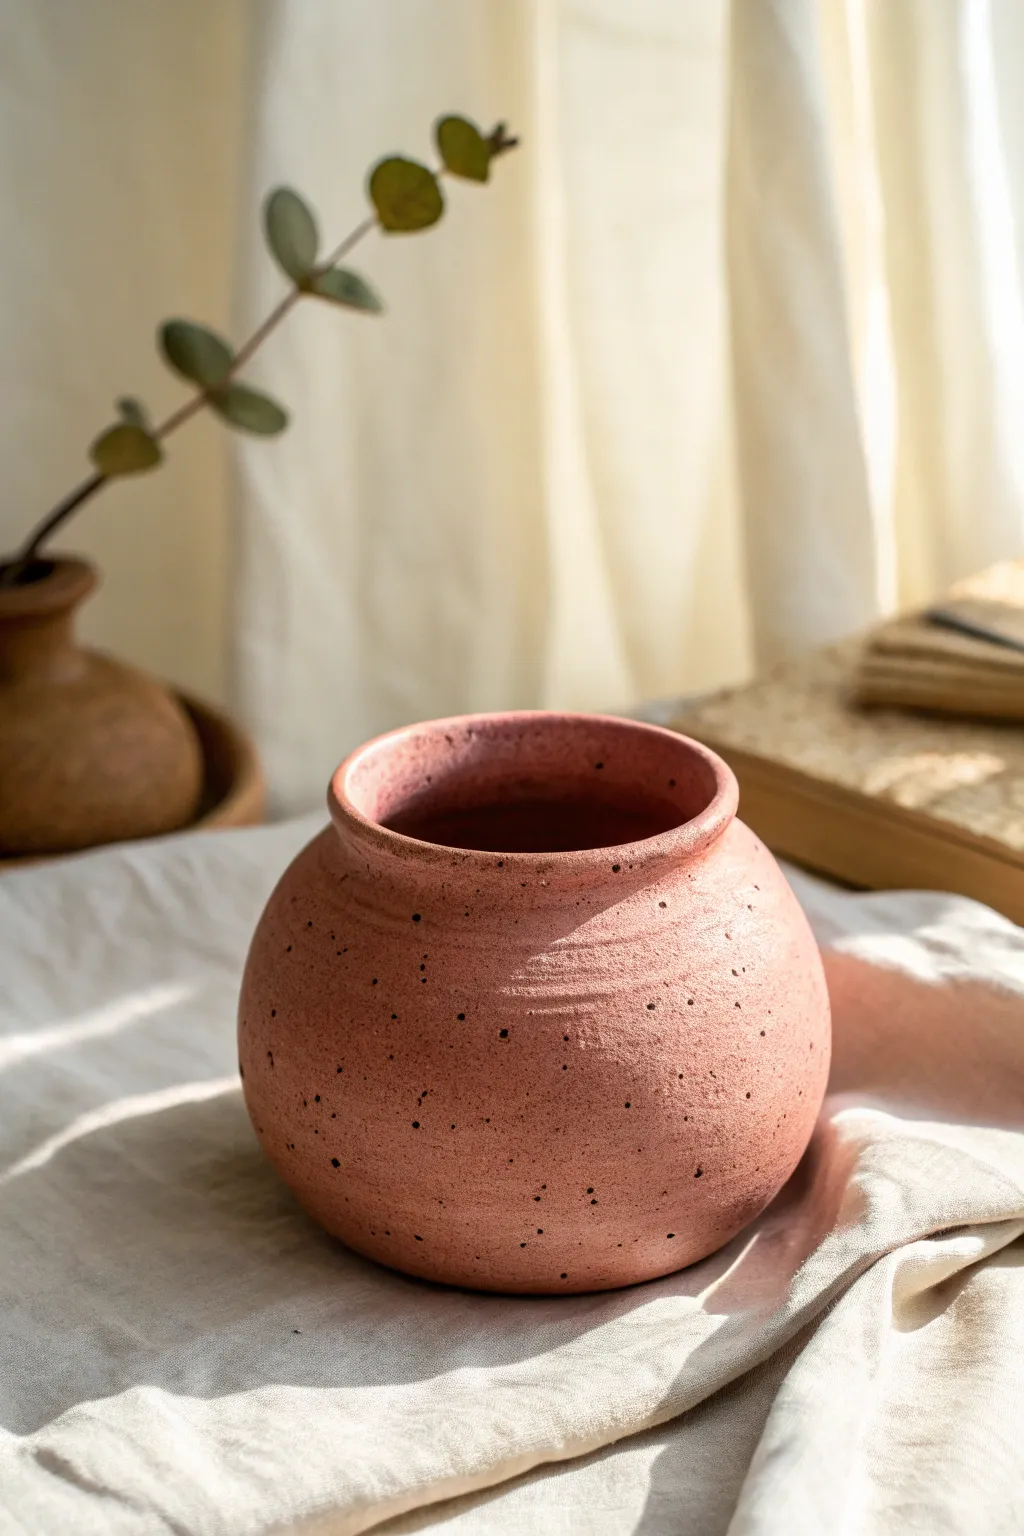
This charming, globe-shaped vessel showcases the beauty of a smooth, hand-built form while keeping its coil construction a secret. With its dusky pink hue and rustic iron speckles, it creates a warm, earthy home for dried stems or simply stands alone as a sculptural piece.
Step-by-Step
Materials
- Speckled clay body (Mid-fire stoneware with iron pyrite)
- Pottery wheel or banding wheel (optional but helpful)
- Basic clay tools (needle tool, wooden rib, metal rib, sponge)
- Serrated rib or scoring tool
- Slip (clay mixed with water)
- Matte pink glaze (or clear glaze if using pink clay)
- Rolling pin (optional)
- Canvas surface or wooden ware board
Step 1: Forming the Base
-
Prepare the base:
Start by taking a ball of speckled clay about the size of a tangerine. Flatten it gently with your palm on a canvas board to create a circular slab about 1/2 inch thick. -
Roll your coils:
Take fresh clay and roll out several long, even coils. Aim for the thickness of a thick marker or your thumb. Keep them consistent to ensure the walls build up evenly. -
Score and slip:
Using a serrated rib or needle tool, scratch up the outer edge of your base. Apply a dab of slip (liquid clay) to the scratched area to act as glue. -
Attach the first coil:
Lay your first coil directly on top of the scored edge of the base. Once the ring is complete, cut the excess coil at a diagonal angle and join the ends together smoothly.
Step 2: Building the Sphere
-
Blend the coil:
Before adding height, you must blend the clay. Use your thumb or a wooden tool to smear the clay from the coil down onto the base on both the inside and outside. This is crucial for strength. -
Add outward layers:
Continue stacking coils. To create the widening belly of the pot, place each new coil slightly toward the outer edge of the coil below it. -
Blend as you go:
After every 2-3 rows, pause to blend the coils together. Smear the clay downwards on the outside and upwards on the inside to lock the layers together. -
Start tapering in:
Once you have reached the widest point of the belly (about 3-4 inches high), begin placing your coils slightly toward the inner edge of the previous row. This creates the inward curve of the sphere. -
Form the collar:
As the opening gets smaller, add one final, slightly thicker coil straight up create a distinct vertical rim or ‘collar’ for the pot.
Blending Secret
Support the wall from the opposite side whenever you blend coils. If you push from the outside, your hand should be pressing back from the inside.
Step 3: Refining and Smoothing
-
Initial smoothing:
Using a serrated kidney rib, scrape the entire exterior of the pot in cross-hatching motions. This removes lumpy high spots and reveals the round form hidden beneath the coils. -
Compress with a rib:
Take a flexible metal or smooth wooden rib. Bend it slightly to match the curve of your pot and run it purely over the surface while supporting the wall from the inside with your other hand. This erases the coil lines completely. -
Clean the rim:
Use a damp chamois or a very slightly damp sponge to gently round over the sharp edge of the top rim. You want it to look soft, not sharp. -
Refine the texture:
I prefer to leave just a hint of drag marks or stone texture on the surface rather than making it glass-smooth. If you want more texture, lightly pat the surface with the flat of a wooden paddle. -
Drying:
Allow the pot to dry slowly under loose plastic for a day to equalize moisture, then uncover it to dry completely to the bone-dry stage (chalky and light).
Wobbling Walls?
If the pot starts to slump or wobble, the clay is too wet or the walls are too thin. Stop building, cover the rim with plastic, and let the base stiffen for an hour.
Step 4: Glazing and Finishing
-
Bisque fire:
Fire the piece in a kiln to cone 04 (or your clay’s specific bisque temperature). This hardens the clay and prepares it for glazing. -
Apply glaze:
Dip or brush on a matte pink glaze. If your clay body is heavily speckled, a semi-opaque glaze works best to let those iron spots bleed through the color. -
Wipe the foot:
Use a wet sponge to wipe all glaze off the very bottom of the pot so it doesn’t fuse to the kiln shelf. -
Final firing:
Fire the pot a second time to the glaze’s maturity temperature (likely Cone 5 or 6 for stoneware). The heat will bring out the characteristic brown speckles seen in the image.
Now you have a beautifully earthy vessel ready for your favorite dried botanicals

TRACK YOUR CERAMIC JOURNEY
Capture glaze tests, firing details, and creative progress—all in one simple printable. Make your projects easier to repeat and improve.
Wavy Rim Coil Pinch Pot Bowl
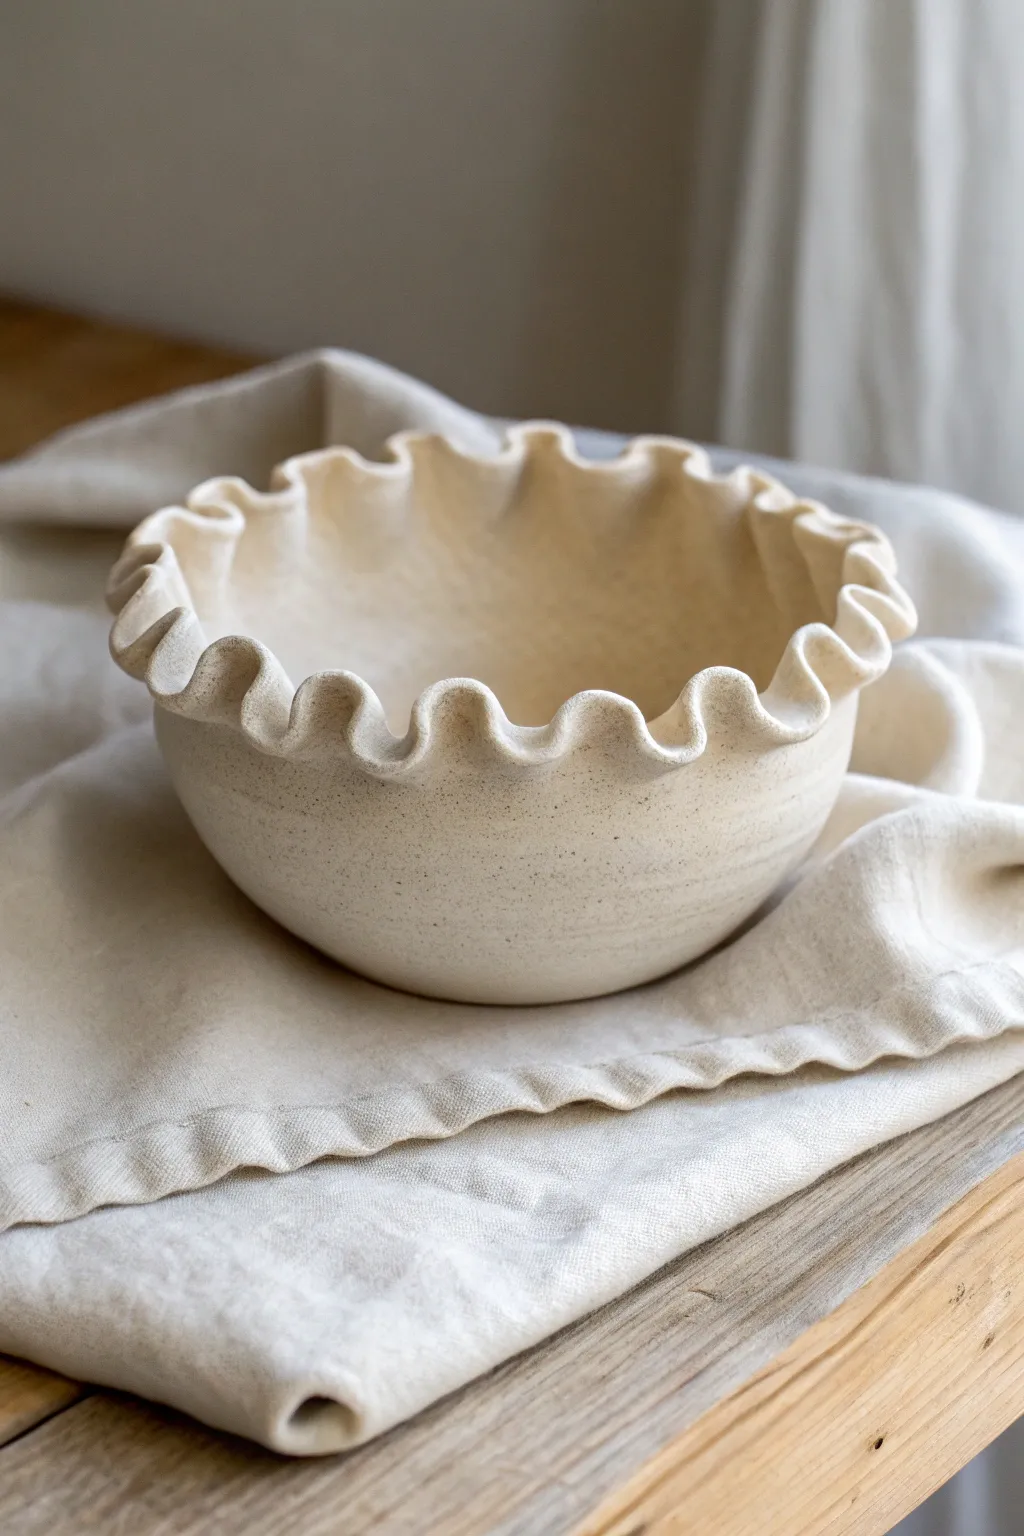
This charming ceramic bowl features a deeply scalloped, ruffled rim that looks like fabric billowing in a breeze. The soft, speckled creamy glaze highlights the organic texture of the clay, creating a piece that feels both rustic and refined.
Step-by-Step Guide
Materials
- Stoneware clay (speckled or white)
- Potter’s wheel or banding wheel (optional but helpful)
- Wooden sculpting tool or rounded stick
- Sponge
- Water in a small container
- Needle tool
- Metal or rubber smoothing rib
- Creamy matte white glaze (food safe)
- Kiln
Step 1: Forming the Base
-
Prepare the Clay:
Begin with a ball of well-wedged clay, about the size of a grapefruit. Wedging is crucial to remove air bubbles and ensure the clay is consistent. -
Establish the Pinch Pot:
Push your thumb deep into the center of the ball, leaving about half an inch of clay at the bottom for the base. -
Pinch the Walls:
Using your thumb on the inside and fingers on the outside, gently pinch and rotate the clay. Work from the bottom upward to thin out the walls evenly. -
Expand the Form:
Continue pinching until you have a wide, open bowl shape. Aim for a wall thickness of roughly 1/4 inch, keeping it uniform all around. -
Smooth the Surface:
Take a smoothing rib (or your fingers) and compress the walls. Drag the rib up from the base to the rim to refine the shape and remove prominent finger indentations.
Use Gravity
Work with the bowl right-side up; gravity helps the ruffles droop slightly for a more natural, fabric-like look.
Step 2: Creating the Ruffled Rim
-
Ensure Plasticity:
Check that the rim is still moist and plastic. If it has dried out too much, lightly dab it with a damp sponge. -
Mark Spacing:
Lightly mark even intervals around the top edge with a needle tool to guide where your waves will go. This helps keep the ruffles symmetrical. -
Begin the Wave:
Place your thumb on the inside of the rim and your index and middle fingers on the outside in a ‘V’ shape. -
Push and Pull:
Gently push outward with your thumb while simultaneously pulling inward with your outside fingers to create the first curve. -
Continue the Pattern:
Move immediately to the next section and reverse the motion if you want an alternating wave, or simply repeat the push-out motion at intervals while supporting the clay in between. -
Deepen the Folds:
Go around the rim a second time to exaggerate the curves. I find that pushing a round-handled tool sideways into the valleys of the wave helps create that distinct, deep ruffle seen in the image. -
Refine the Edge:
Use a damp sponge or a piece of chamois leather to gently smooth the very top edge of the rim. This softens any sharp angles and makes the wave look fluid.
Cracking Rims?
If the rim cracks while bending, the clay is too dry. Mist it heavily and wait 10 mins, or wrap in damp plastic.
Step 3: Finishing and Glazing
-
Slow Drying:
Cover the bowl loosely with plastic to let it dry slowly. The thin rim will want to dry faster than the base, so slow drying prevents warping or cracking. -
Bisque Fire:
Once the piece is bone dry, fire the bowl in the kiln to a bisque temperature (usually cone 04 or 06, depending on your clay body). -
Clean the Bisqueware:
Wipe the fired bowl with a damp sponge to remove any kiln dust, which can prevent the glaze from adhering properly. -
Apply Glaze:
Dip the bowl into a creamy, matte white glaze. Ensure you get coverage into all the deep folds of the ruffled rim. -
Wipe the Foot:
Clean the bottom of the bowl (the foot) with a sponge so no glaze touches the kiln shelf during the final firing. -
Glaze Fire:
Fire the bowl again to the maturity temperature of your clay and glaze (often cone 5 or 6 for stoneware). -
Cool Down:
Allow the kiln to cool completely before opening. This protects the glaze surface from thermal shock and crazing.
Now you have a beautifully textured bowl perfect for holding fruit or acting as a standalone centerpiece.
Scalloped Coil Rim With Thumb Pinches
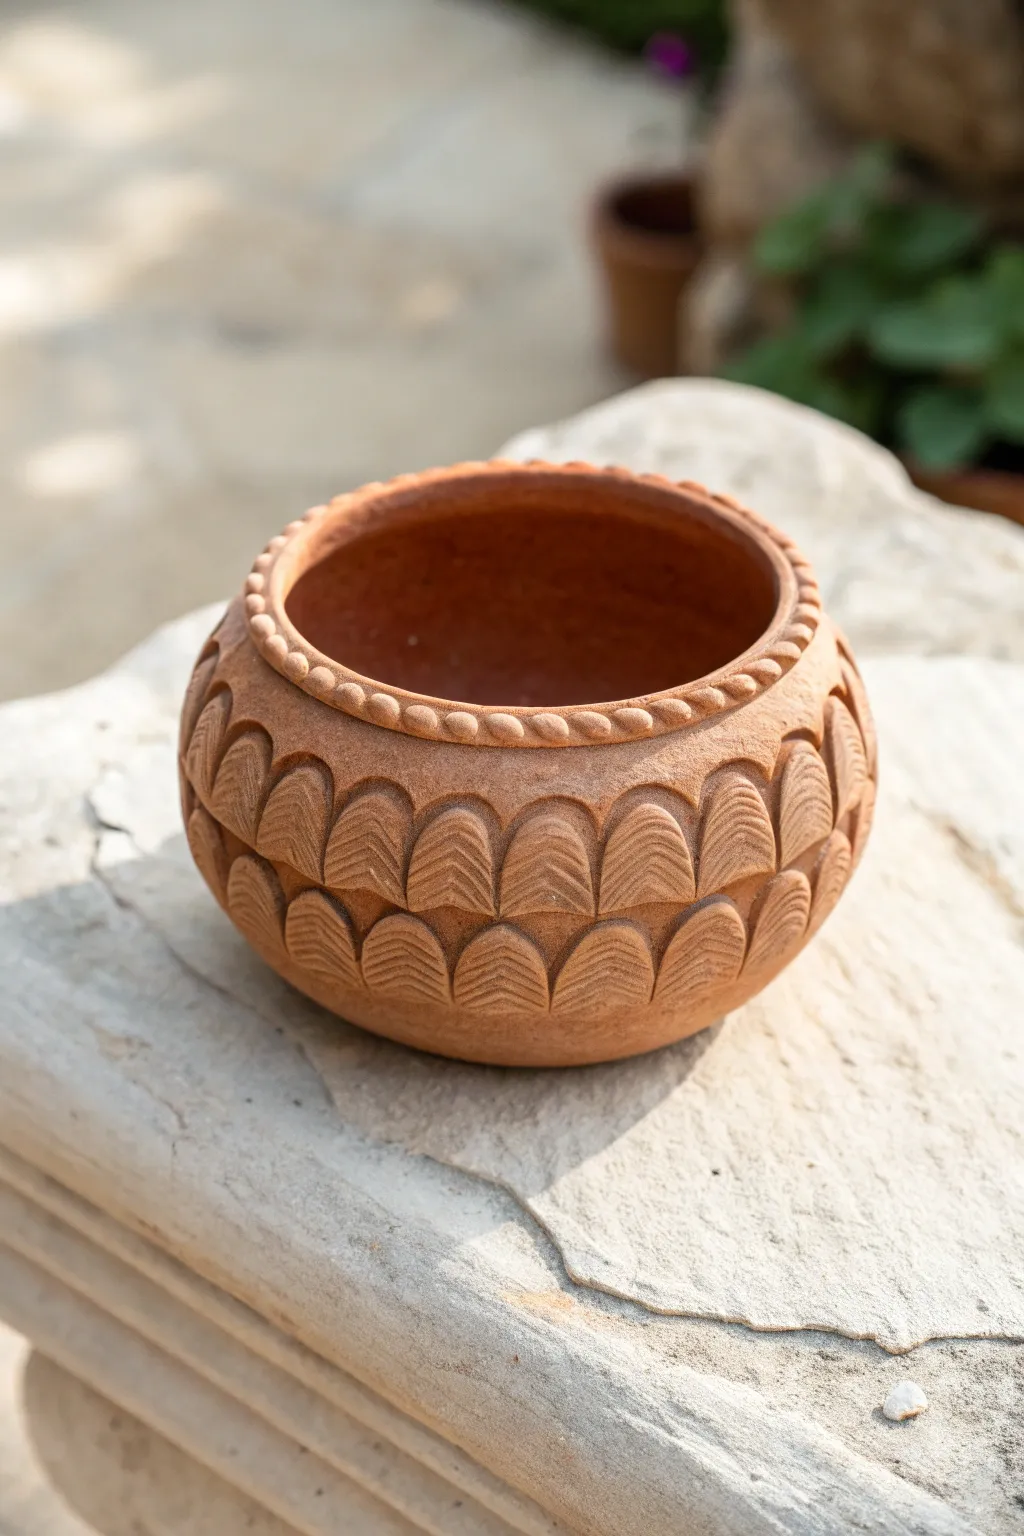
This charming vessel features a beautifully textured surface with repeating scalloped arches that mimic feathers or leaves. The warm terracotta clay and the braided rope rim give it a classic, earthy feel perfect for any garden setting.
Detailed Instructions
Materials
- Terracotta or earthenware clay (grogged for strength)
- Wooden modeling tool with a curved edge
- Pin tool or needle tool
- Small loop tool
- Serrated rib or scoring tool
- Soften sponge
- Bowl of water/slip
Step 1: Building the Form
-
Start the base:
Begin with a ball of terracotta clay about the size of a large grapefruit. Using your thumb, press into the center and gently pinch outwards while rotating the ball to open up a basic bowl shape. -
Build up the walls:
Roll out thick coils of clay, about the thickness of your finger. Score and slip the rim of your pinch pot base, then layer the coils on top to build the height. -
Smooth and shape:
Blend the coils together thoroughly on both the inside and outside using your thumb or a wooden rib. If you want that perfect roundness shown in the photo, gently paddle the outside with a wooden paddle while supporting the wall from the inside. -
Refine the surface:
Before adding texture, smooth the exterior surface with a slightly damp sponge or a metal rib to remove any severe coil marks, creating a clean canvas for your carving.
Even Spacing Trick
Use a paper strip measured to your pot’s circumference. Fold it to divide it into equal segments, then use it to mark exactly where your scallops should start.
Step 2: Creating the Scalloped Texture
-
Mark the rows:
Use a needle tool to very lightly scribe two horizontal guide lines around the belly of the pot where your two rows of scallops will sit. -
Outline the arches:
Lightly sketch the repeating arch or scallop shapes within your guide lines. Stagger the top row and bottom row so the peaks of the bottom row sit between the arches of the top row, like fish scales. -
Carve the relief:
Using a small loop tool, carefully carve away the negative space between the arches to make them stand out in relief. You want the scallop shape to be raised slightly above the background surface. -
Add the feathering:
Take a wooden modeling tool or a small knife tool. Press rhythmic, angled indentations into each scallop shape. Start from the center vertical line of the scallop and press outwards and downwards to create that chevron or leaf-vein texture. -
Clean up the edges:
Go back with a damp brush or fingertip to smooth any sharp crumbs of clay left from the carving process.
Step 3: Adding the Rope Rim
-
Roll a thin coil:
Roll out a much thinner coil of clay, roughly 1/4 inch thick. This will become the decorative rim. I prefer to roll this on a slightly damp canvas so it doesn’t dry out too fast. -
Attach the coil:
Score the very top lip of your pot and brush on some slip. Lay the thin coil gently onto the rim. -
Create the rope effect:
Instead of blending this coil, use the side of a small wooden tool or brush handle to press diagonal indentations across the coil at regular intervals. This mimics a twisted rope look.
Clay Too Dry?
If the clay cracks while pressing the leaf texture, mist it with water and wrap it in plastic for 30 minutes to rehydrate the surface before trying again.
Step 4: Finishing Touches
-
Final smoothing:
Check the interior one last time to ensure it is smooth and watertight (if you plan to glaze the inside). Run a sponge around the foot of the pot to soften any sharp edges. -
Drying:
Let the pot dry slowly under loose plastic for a day or two to equalize the moisture, then uncover it to dry completely before biscuit firing. -
Firing:
Fire the piece to the appropriate temperature for your specific clay body. The example image is unglazed to show off the natural clay texture, but you could add a clear glaze if desired.
Once fired, this textured beauty will be ready to house your favorite succulents or stand alone as a sculptural piece
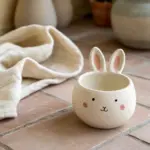
Beehive-Style Coil Pinch Pot
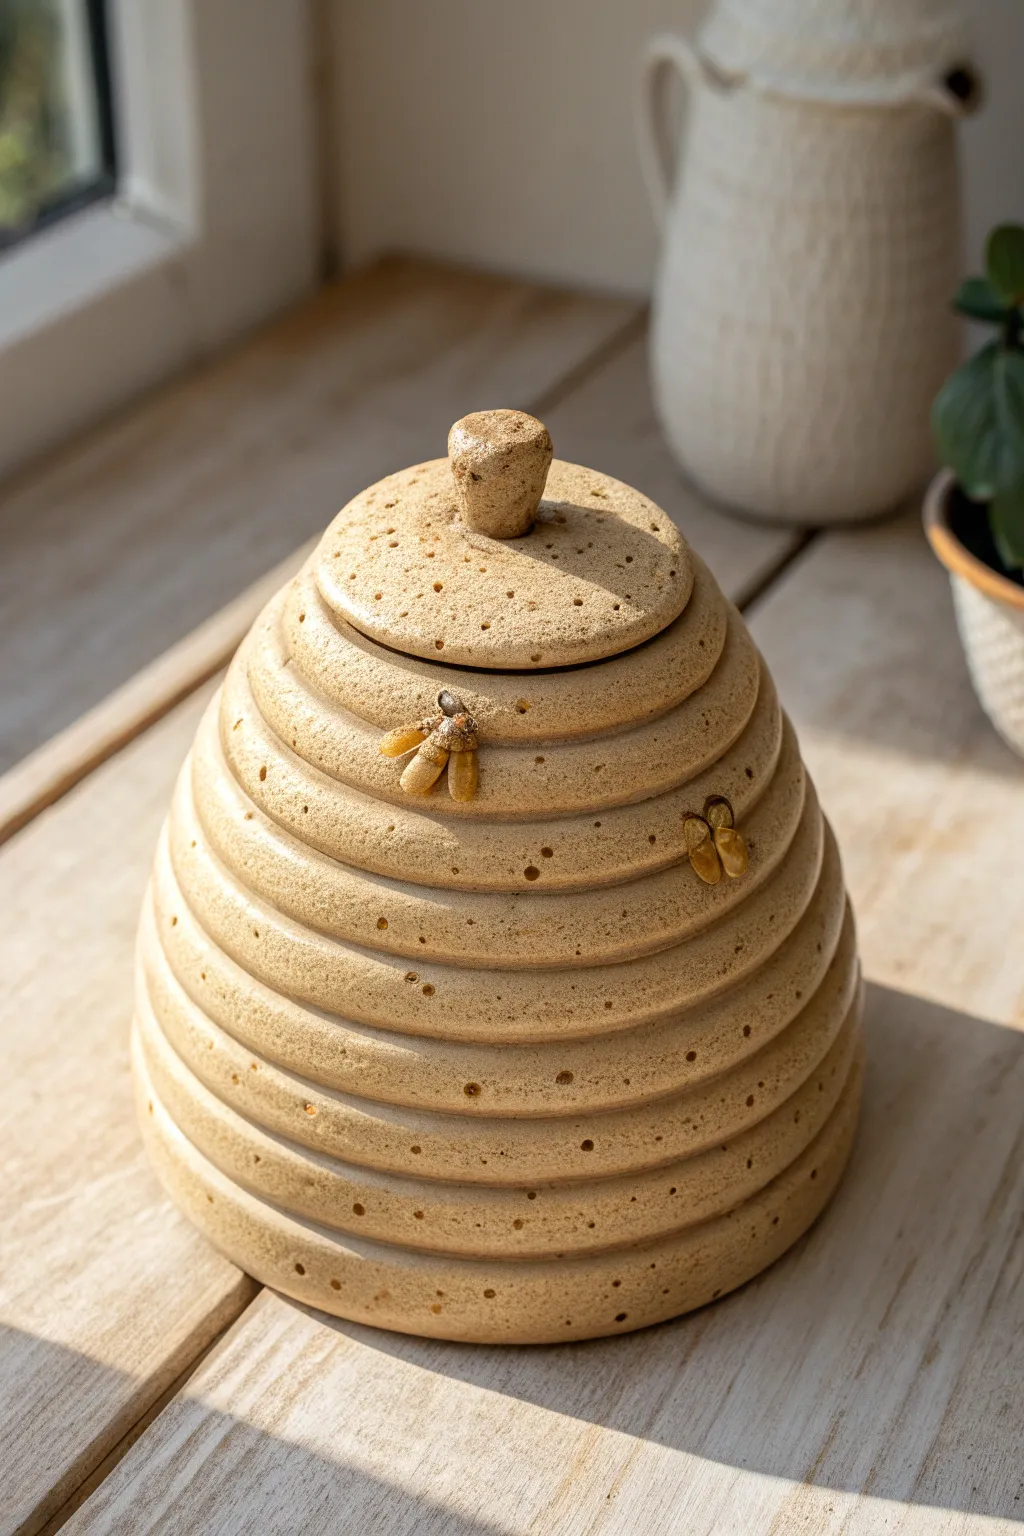
Embrace the warmth of nature with this charming beehive-style coil pot, perfect for storing honey sticks or serving as a whimsical countertop accent. The project features a distinct ribbed texture formed by unsmoothed coils, topped with a fitted lid and decorated with delightful amber-colored bees.
Step-by-Step
Materials
- Speckled buff stoneware clay (or polymer clay for non-functional decor)
- Clay scoring tool or fork
- Slip (clay mixed with water)
- Wooden modeling tool or spoon
- Needle tool
- Sponge
- Rolling pin (optional)
- Small paintbrush
- Honey/Amber glaze
- Clear matte glaze
Step 1: Base Construction
-
Create the foundation:
Start by rolling a ball of clay roughly the size of a tangerine and flatten it into a disc about 1/4 inch thick. This will be the sturdy floor of your beehive. -
Roll your coils:
Roll out several long, even snakes of clay. Aim for a thickness similar to a pencil or your pinky finger. Keeping them consistent will help your hive shape stay symmetrical. -
Attach the first ring:
Score the outer edge of your base disc and brush on a little slip. Lay your first coil around this edge, gently pressing it down to adhere it without flattening the roundness of the coil. -
Build upward:
Continue stacking coils one on top of the other. For each layer, score and slip the contact points. To create the wider belly of the hive, place each new coil slightly further outward than the one below it. -
Taper the form:
Once you reach the desired width (usually after 4-5 coils), begin placing the subsequent coils slightly inward. This creates the classic dome or skep shape. -
Blend the interior:
While the outside maintains its ribbed look, firmly smooth the coils together on the *inside* of the pot. I find using a wooden spoon handle helps reach the bottom while supporting the walls from the outside.
Sagging Walls?
If the hive starts slumping as you build the “belly,” stop and let the clay stiffen for 30 minutes. You can also use a hairdryer on a low setting to firm up the lower coils before continuing upward.
Step 2: Lid and Details
-
Form the rim:
Build the top opening to your desired size, ensuring the final coil is level. You can use a damp sponge to gently even out the rim. -
Create the lid slab:
Roll a small slab of clay and cut a circle slightly larger than your pot’s opening. This will be the base of your lid. -
Add the lid flange:
On the underside of the lid, attach a small ring of clay that fits *inside* the pot’s rim. This flange prevents the lid from sliding off. -
Texture the lid:
Add one or two small coils to the top of the lid slab to continue the ribbed pattern, blending them smoothly towards the center. -
Attach the handle:
Form a small, organic knob shape for the handle. Score and slip the center of the lid, then press the knob firmly into place. Create a faux-texture on the knob by gently dabbing it with a stiff brush or sea sponge. -
Sculpt the bees:
Roll tiny ovals of clay for bee bodies and flattened teardrops for wings. Score and slip them onto the side of the pot. -
Add surface texture:
Using a needle tool, poke random small holes all over the hive surface (avoiding the bees) to mimic a porous, natural nesting material.
Pro Tip: Seamless look
When joining a new coil to an old one, cut the ends at a 45-degree angle. Overlapping these angled cuts creates a stronger bond and hides the seam much better than butt-joining flat ends.
Step 3: Finishing
-
Bisque fire:
Allow the piece to dry slowly and completely before firing it in a kiln to the bisque stage. -
Glaze the bees:
Carefully paint the bee bodies with a honey or amber-colored glaze. Keep the wings lighter or unglazed for contrast. -
Apply the main finish:
Dip or brush the entire hive body and lid with a clear matte glaze. This seals the piece while letting the natural speckles of the clay shine through. -
Final firing:
Fire the piece a second time according to your clay and glaze specifications (likely cone 5 or 6 for stoneware).
Now you have a sweet little sanctuary ready to hold your treasures
Spiral Coil Pinch Pot With Snail Swirl
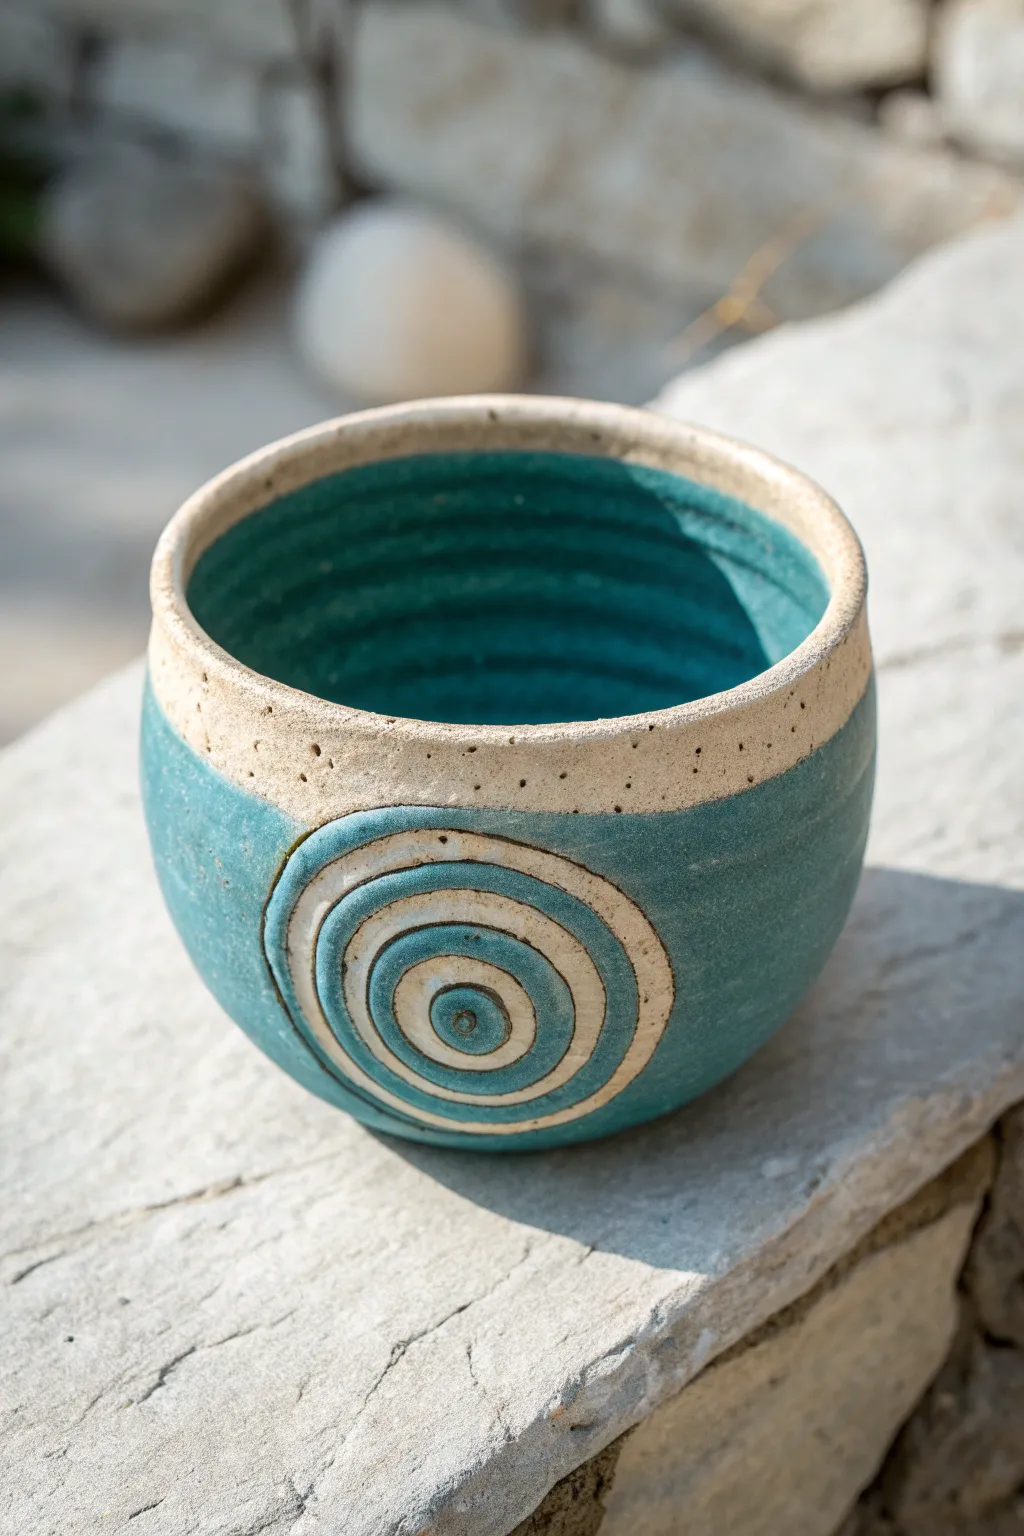
This charming ceramic bowl balances rustic texture with vibrant color, featuring a raw clay rim and a hypnotic spiral relief. The distinct “snail swirl” on the side adds a tactile focal point that breaks up the smooth turquoise glaze.
Step-by-Step Guide
Materials
- Speckled stoneware clay (mid-fire)
- Pottery wheel or banding wheel (optional but helpful)
- Clay cutting wire
- Sponge
- Rib tool (wooden or silicone)
- Needle tool
- Loop tool for trimming
- Turquoise/Teal dipping glaze (semi-opaque)
- Wax resist
- Small paintbrush for wax
- Kiln (bisque and glaze firing capability)
Step 1: Forming the Base
-
Prepare the Clay:
Start by wedging a softball-sized ball of speckled stoneware clay to remove air bubbles and ensure consistency. -
Open the Form:
Using the pinch pot method, gently press your thumb into the center of the ball while rotating it in your hand. Pinch the walls evenly from bottom to top to thin them out. -
Refine the Shape:
Aim for a rounded, slightly bulbous shape. If you have a banding wheel, place the pot on it to help you smooth the exterior and ensure the rim is roughly level. -
Add Texture (Optional):
While the interior of the example shows rings similar to throwing lines, you can recreate this in a hand-built pot by running a rib tool or your finger horizontally around the inside walls as you rotate the pot.
Cracking Spiral?
If the spiral cracks away during drying, the pot was likely too dry when you attached it. Score deeper next time and use plenty of slip.
Step 2: Creating the Snail Swirl
-
Roll a Coil:
Roll a small, thin coil of clay, roughly the thickness of a pencil lead or slightly thicker. -
Wind the Spiral:
On a flat surface, wind the coil tightly into a flat disc or ‘snail’ shape. Score the back of this spiral and slip it. -
Attach the Design:
Score a circle on the side of your pot where you want the detail. Press the spiral firmly onto the scored area so it bonds completely with the wall. -
Blend the Edges:
To make it look like an integral relief (as seen in the photo) rather than just an added coil, use a modeling tool to smooth the outer seam of the spiral into the pot wall, leaving the inner spiral grooves distinct. -
Dry Slowly:
Cover the pot loosely with plastic to let it dry slowly to the leather-hard stage. This prevents the added coil section from cracking away.
Step 3: Glazing and Finishing
-
Bisque Fire:
Once bone dry, fire the piece to bisque temperature (usually Cone 04) according to your clay body’s specifications. -
Wipe Down:
After the pot cools, wipe it with a damp sponge to remove any kiln dust that could interfere with glazing. -
Apply Wax Resist:
This is crucial for the two-tone look. I carefully paint liquid wax resist over the top inch of the rim (exterior only) and directly over the raised spiral design. -
Clean the Spiral:
Ensure the wax covers the high points of the spiral rings but try to keep the deep grooves unwaxed if possible, though a full wax resist wipe-back method works too. -
Dip the Glaze:
Dip the entire pot into a bucket of turquoise glaze. Hold it for about 3 seconds to get good coverage. -
Wipe Back:
Immediately use a damp sponge to wipe any beadlets of glaze off the waxed areas (the rim and the spiral). The wax should have resisted most of it, but a gentle wipe clarifies the raw clay. -
Refine the Spiral:
If glaze got onto the spiral ridges, wipe it away so the speckled clay shows through. Leave the glaze settled deep in the grooves of the spiral for contrast. -
Clean the Foot:
Wipe the bottom of the pot clean to prevent it from sticking to the kiln shelf. -
Glaze Fire:
Fire the pot a second time to the maturation temperature of your glaze and clay (often Cone 5 or 6).
Level Up: Oxide Wash
Apply iron oxide wash to the raw clay rim and spiral before waxing. This darkens the speckles and creates a toasted, rustic definition.
Enjoy using your new bowl for snacks or simply as a stunning piece of shelf decor
Corrugated Coil Pinch Pot Texture
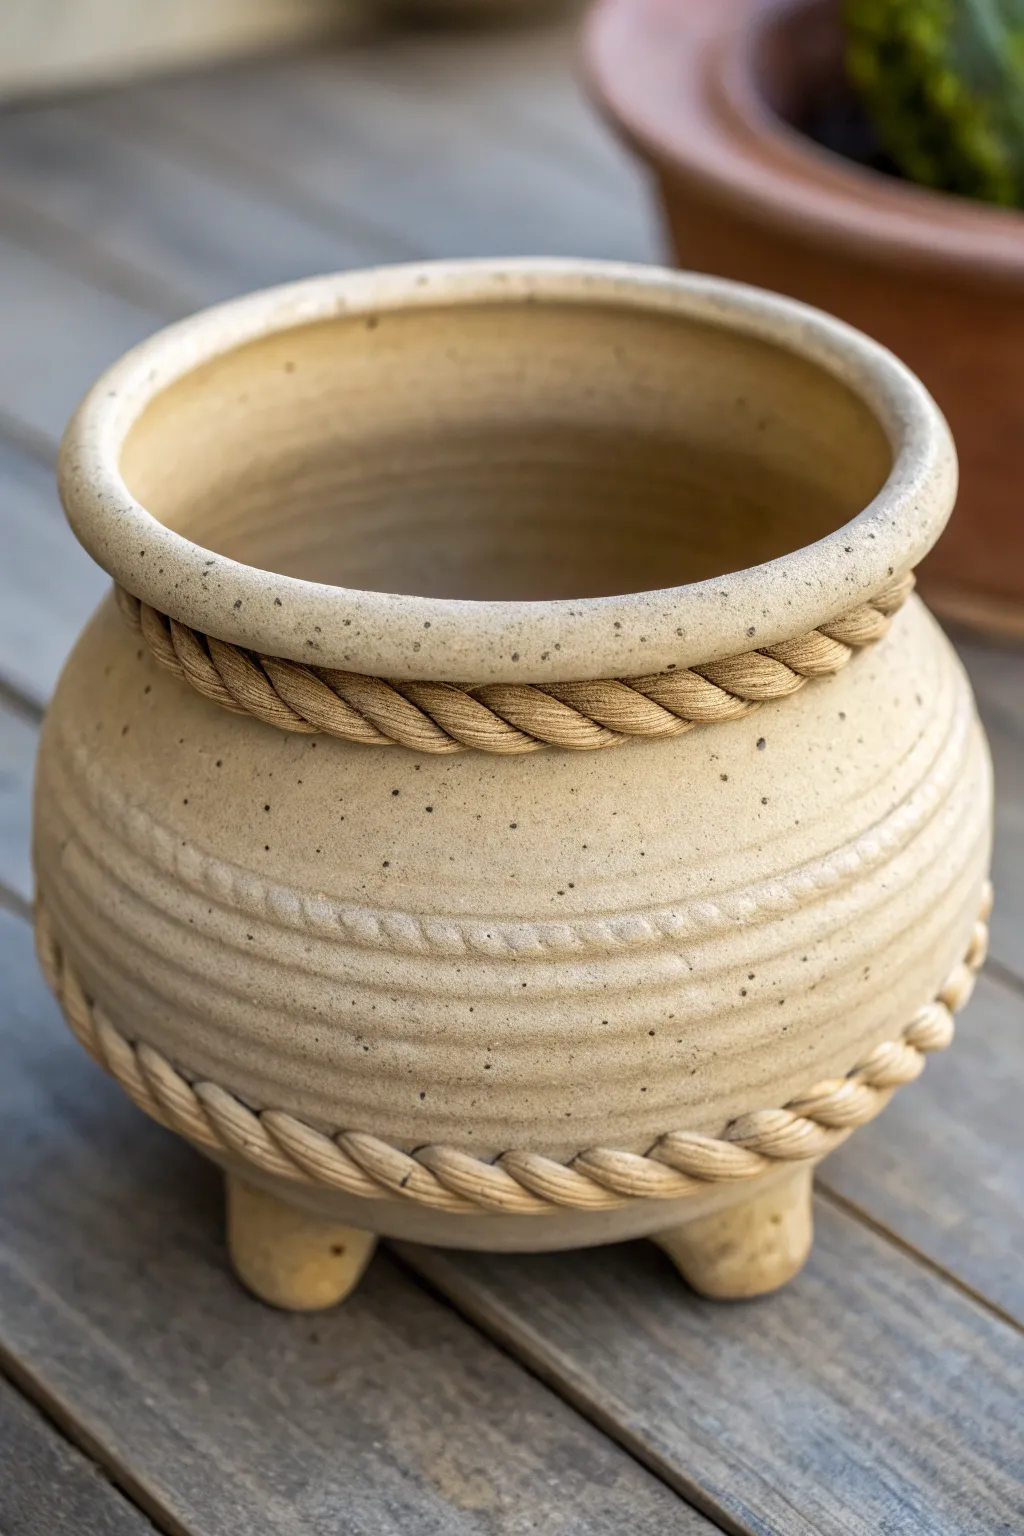
This charming, rustic planter combines classic coil building with intricate texture work, featuring distinct twisted-rope accents and a subtle corrugated body. The piece sits on three sturdy feet and is finished with a speckled beige glaze that mimics natural stone.
Step-by-Step
Materials
- Stoneware clay (preferably speckled)
- Potter’s wheel (or banding wheel for hand-building)
- Serrated rib tool
- Smooth wooden rib tool
- Scoring tool or fork
- Slip (clay and water mixture)
- Sponge
- Canvas work surface
- Speckled oatmeal or sand matte glaze
- Kiln
Step 1: Forming the Base & Body
-
Prepare the Base:
Begin by rolling out a thick slab or flattening a ball of clay to create a circular base approximately 4 inches in diameter and half an inch thick. -
Build the Walls:
Roll out several long coils of clay. Score and slip the outer edge of your base, then stack the coils to build the walls upwards. For this pot, you want a bulbous shape, so layer the coils slightly outward as you go up to the midline, then slightly inward toward the rim. -
Smooth the Interior:
With one hand on the outside for support, use your fingers or a smooth wooden rib to blend the coils together on the inside until the surface is seamless. -
Blend the Exterior:
Repeat the smoothing process on the exterior. Ensure the walls are of even thickness. I like to use a metal kidney rib here to get a really nice curve before adding texture. -
Create Corrugation:
To achieve the corrugated look on the central band, hold a rounded wooden tool or use your fingers to press gentle horizontal grooves into the clay as the pot rotates on a banding wheel. You can also leave the coil joints slightly visible but smoothed over to create this effect naturally.
Twist Trick
When twisting your clay coils to make the rope, keep your hands slightly damp. If the clay is too dry, the coils will crack and split as they wrap around each other.
Step 2: The Rope Accents
-
Roll Thin Coils:
Roll out two very long, even coils of clay, roughly the thickness of a pencil. -
Twist the Rope:
Lay the two coils side-by-side. Gently twist them around each other to create a tight rope pattern. You will need enough length to circle the pot’s widest point near the bottom and the narrower section near the rim. -
Attach Bottom Rope:
Identify where the pot begins to curve underneath. Score and slip this area generously. Press the first twisted rope securely onto the pot, joining the ends by blending the clay so the seam is invisible. -
Attach Top Rope:
Repeat the process for the rim area. Score a line about an inch below the actual opening and attach the second rope coil. -
Clean the Twist:
Use a small, damp sponge or a modeling tool to clean up any slip that squeezed out from behind the ropes, re-defining the twist definition if it got flattened during attachment.
Go High Contrast
Try leaving the rope sections unglazed (raw clay) and glazing only the body. The contrast between texture and smooth glaze makes the details pop.
Step 3: Refining & Finishing
-
Form the Feet:
Roll three equal-sized balls of clay. Flatten them slightly into tapered, stubby cone shapes. -
Attach the Feet:
Flip the pot upside down (carefully supporting the rim). Score and slip the bottom of the pot in a tripod arrangement. Press the feet firmly onto the base. -
Level the Pot:
Turn the pot right-side up and gently press it down onto the table to ensure it sits level and doesn’t rock. -
Refine the Rim:
Smooth the very top rim of the pot with a chamois or damp sponge to ensure it is rounded and comfortable to the touch. -
Slow Drying:
Cover the pot loosely with plastic to let it dry slowly. This is crucial for pots with added attachments like feet and ropes to prevent cracking. -
Bisque Fire:
Once bone dry, fire the piece to bisque temperature (usually cone 04). -
Glazing:
Apply a speckled oatmeal or sand-colored matte glaze. Dip into a bucket for even coverage, or brush on 3 coats. Shake off excess glaze so it doesn’t obscure the rope texture. -
Final Firing:
Fire to the maturity temperature of your clay and glaze (likely cone 5 or 6). Allow to cool completely before removing from the kiln.
This pot makes a timeless home for succulents or small houseplants, bringing an earthy warmth to any shelf
Carved Coil Lines On A Pinch Pot Form
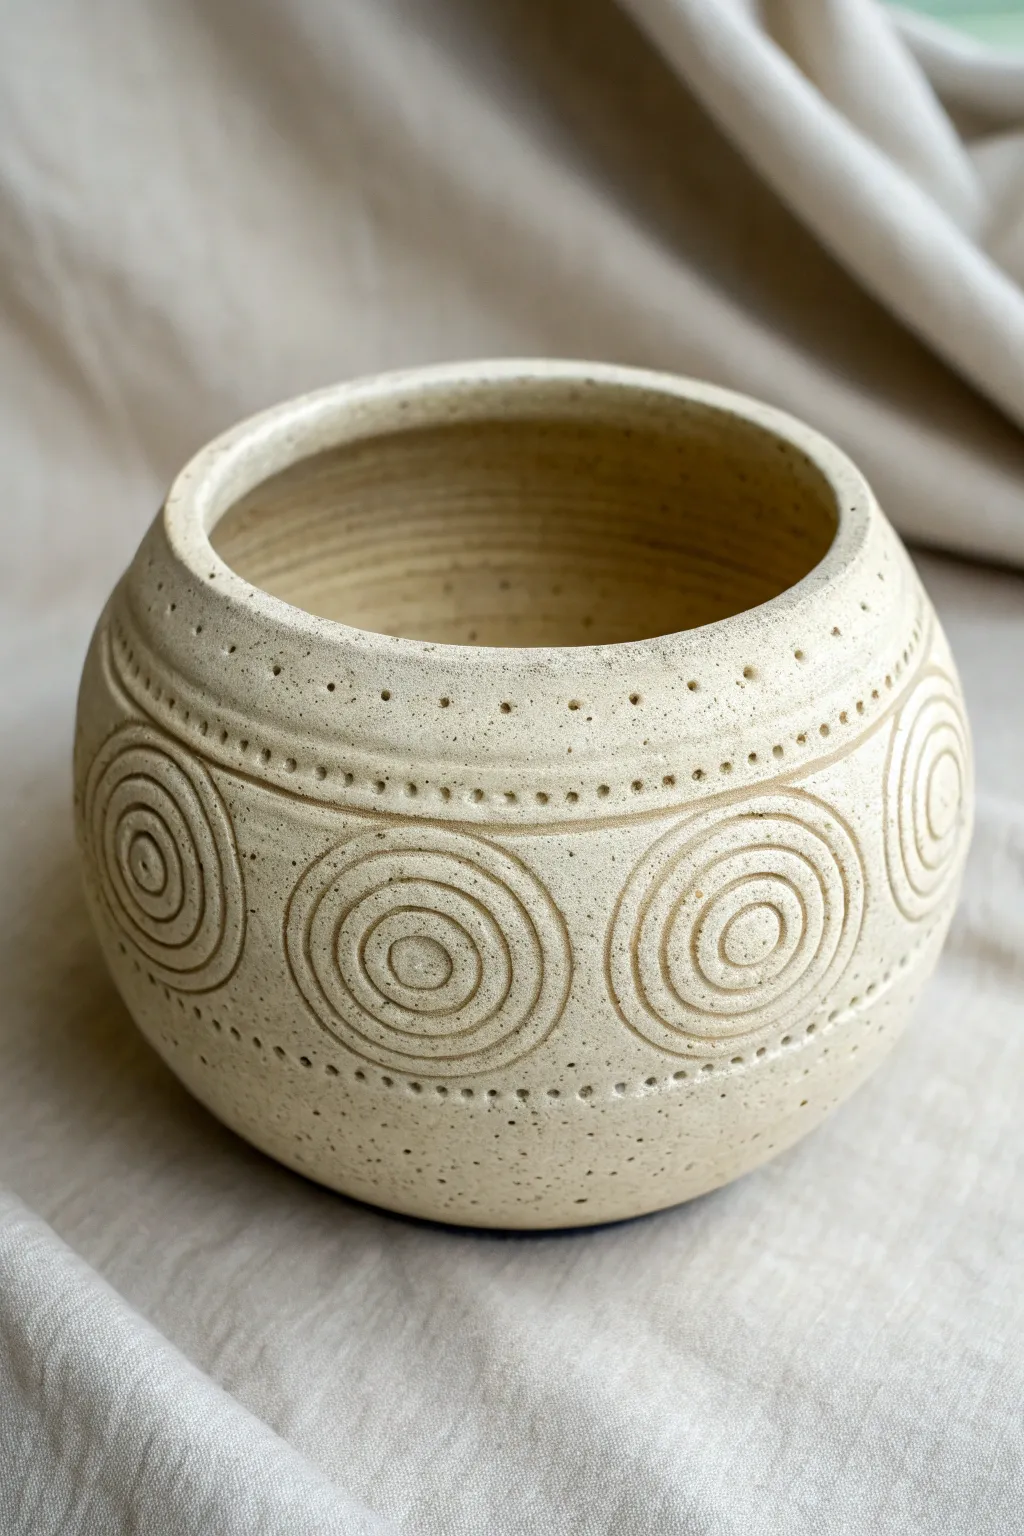
This earthy, speckled vessel combines the hand-building charm of a pinch pot with the precision of sgraffito-style carving. The design features soothing concentric circles flanked by rows of delicate dotted lines, creating a tactile and rhythmic pattern around the soft, rounded form.
Step-by-Step Tutorial
Materials
- Speckled buff stoneware clay (or similar mid-fire clay)
- Small carving tool (loop tool or needle tool)
- Rib tool (metal or rubber)
- Sponge
- Water
- Pottery wheel (for banding) or banding wheel
- Matte cream or clear glaze (food safe if intended for use)
- Kiln
Step 1: Building the Form
-
Start the pinch pot:
Begin with a ball of wedged speckled clay about the size of a grapefruit. Press your thumb into the center, stopping about a half-inch from the bottom. -
Pinch the walls:
Rotate the ball in one hand while rhythmically pinching the walls with the thumb and fingers of your other hand. Aim for an even thickness of about 1/4 inch, extending the walls upward and slightly inward at the top to create a globe shape. -
Smooth the surface:
Once you have the basic rounded shape, use a flexible rib tool to compress the exterior walls. This removes your fingerprints and creates a smooth blank canvas for carving. -
Refine the rim:
Gently tap the rim upside down on a flat surface to level it, then compress the lip with a damp sponge or a piece of chamois to make it rounded and pleasant to touch. -
Let it firm up:
Allow the pot to dry to a ‘leather-hard’ stage. This is crucial; the clay needs to be firm enough to hold its shape while carving but soft enough to cut smoothly without chipping.
Uneven Carving Depths?
If your carving tool is dragging or creating jagged edges, your clay is likely too dry. Mist it lightly with water, wrap it in plastic, and let it sit for an hour to rehydrate slightly before trying again.
Step 2: Carving the Design
-
Mark your guidelines:
Place your pot on a banding wheel. While spinning the wheel slowly, lightly trace two horizontal parallel lines around the upper section of the pot and two around the lower section using a needle tool. These will act as the borders for your main pattern. -
Divide the space:
Measure the circumference of the central band and lightly mark vertical tick marks to divide the space evenly for your circles. This ensures your concentric circles won’t overlap or leave awkward gaps. -
Carve the center circles:
Using a small loop tool or a carving needle, carve the innermost circle at each marked interval. Press firmly enough to create a distinct groove but not so deep you risk piercing the wall. -
Expand the rings:
Carefully carve two or three larger rings around each center point. Try to keep the spacing between rings consistent, mimicking the ripples in a pond. -
Connect the pattern:
If you wish, you can subtly connect the outer edges of the circles with a faint horizontal line, or simply let them stand alone within the central band.
Add Color Contrast
Use an underglaze or a dark wash (like black iron oxide) inside the carved lines before glazing. Wipe away the excess on the surface to leave dark, defined circles that really stand out.
Step 3: Adding Detail and Finishing
-
Add the dotted borders:
On the horizontal guidelines you traced earlier (above and below the circles), use a dull pencil point or a small hole-punch tool for clay to press a row of small, uniform dots. -
Add secondary dot rows:
Repeat the dotting process to create a second row of dots slightly further away from the main band, framing the entire design beautifully. -
Clean up burrs:
Wait until the pot is bone dry, then use a stiff brush or a slightly abrasive green kitchen sponge to gently knock off any crumbled clay bits or sharp ridges left from carving. -
Bisque fire:
Load the bone-dry pot into the kiln and fire it to cone 04 (or your clay body’s bisque temperature). -
Glaze application:
Dip or brush the pot with a matte cream glaze. I find that a matte finish highlights the carving texture better than a high gloss. Make sure the glaze isn’t applied too thickly, or it might fill in your carved lines. -
Wipe back (optional):
If you want the speckled clay to really pop, you can wipe the glaze back with a sponge so it remains mostly in the carved recesses, leaving the high points bare. -
Final firing:
Fire the pot again to the maturity temperature of your clay and glaze (likely cone 5 or 6 for stoneware).
Now you have a beautifully textured vessel perfect for holding small trinkets or a succulent plant
Lidded Coil Pinch Pot With Seat Rim
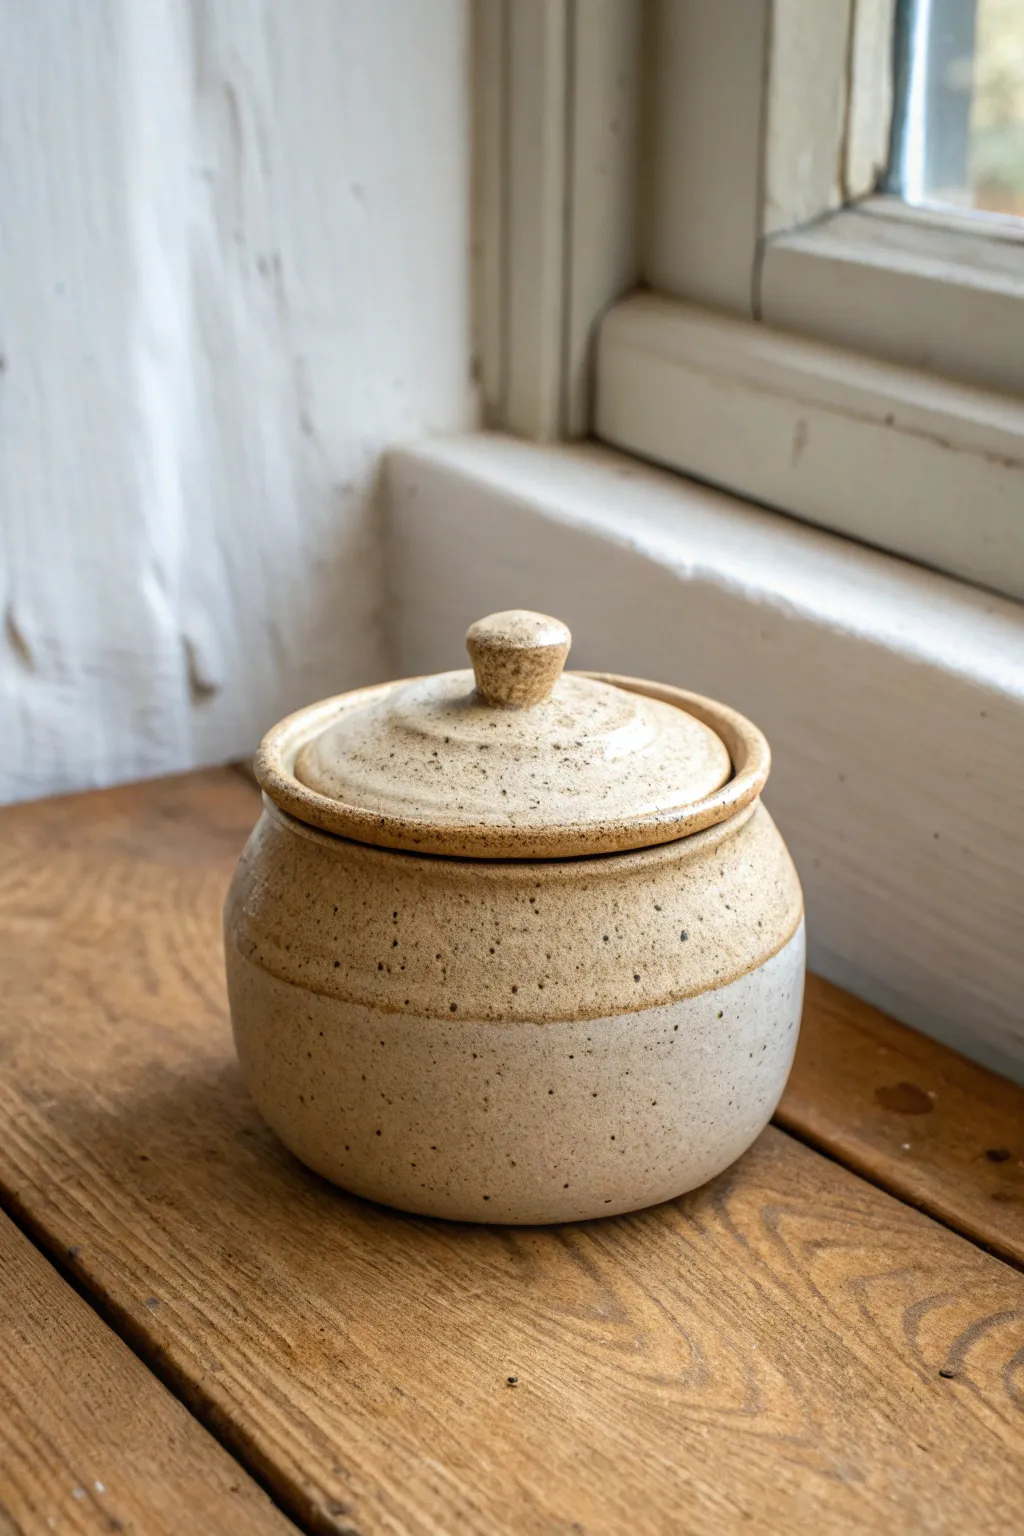
This charming lidded jar combines the organic feel of a pinch pot with the structural precision of a seated rim, finished in a warm, speckled glaze. It’s perfect for storing small treasures or serving salt at the table, blending rustic aesthetics with functional design.
Step-by-Step
Materials
- Stoneware clay (speckled or light-colored)
- Pottery wheel (optional, can be hand-built)
- Needle tool
- Loop tool or trimming tools
- Rib tool (metal or wood)
- Sponge
- Scoring tool or serrated rib
- Slip (clay slurry)
- Speckled cream glaze
- Clear matte glaze (optional)
- Kiln
Step 1: Forming the Pot Body
-
Prepare the clay:
Begin with a ball of well-wedged clay about the size of a grapefruit. If hand-building, pinch the center to open it up. If throwing, center the clay on the wheel and open the floor to your desired width. -
Shape the walls:
Pull up the walls to create a cylinder first. Then, gently belly out the form from the inside to create that rounded, bulbous shape seen in the image. Aim for an even thickness of about 1/4 inch. -
Create the shoulder:
As you reach the top third of the pot, gently collar the clay inward to create a shoulder. This inward curve is crucial for supporting the eventual lid assembly. -
Form the seat rim:
This is the most critical part. Instead of finishing with a simple lip, flatten the top rim slightly. Then, using a tool or your finger, create a recessed ‘gallery’ or ledge just inside the rim. This inner shelf, or seat, will hold the lid securely in place. -
Refine the surface:
Use a rib tool to smooth the exterior, removing finger marks or coil lines while refining the curve. A smooth surface will show off the speckles in the glaze beautifully.
Uneven Lid?
If your lid wobbles, apply a tiny amount of grinding paste to the rim after the final firing and twist the lid back and forth to grind them into a perfect match.
Step 2: Crafting the Lid
-
Measure the opening:
Using calipers, measure the diameter of the gallery (the inner seat) you just created. The lid needs to fit snugly inside this measurement. -
Form the lid slab:
Roll out a small slab of clay or flatten a ball. Cut a circle that is wider than the gallery. You want the lid to overhang the opening slightly while the bottom part sits inside. -
Create the flange:
If throwing, you can trim the lid upside down to create a flange that fits the gallery. If hand-building, attach a small coil to the underside of the lid circle, sized to fit inside the jar’s rim, preventing it from sliding off. -
Add the curve:
Gently press the center of the lid upwards from underneath to give it a slight dome shape, mirroring the curve of the pot’s shoulder. -
Attach the knob:
Roll a small ball of clay into a tapered knob shape. Score and slip the center of the lid top and attach the knob securely. Smooth the connection point so it looks seamless.
Texture Play
Before glazing, gently tap the exterior with a stiff brush or coarse sponge to add subtle pores and dents, enhancing the rustic, organic quality of the finished surface.
Step 3: Trimming and Finishing
-
Let it firm up:
Allow both the pot and lid to dry to a leather-hard state. This makes them sturdy enough for trimming without warping. -
Trim the foot:
Flip the pot over and trim a neat foot ring. This lifts the form visually and gives it a professional finish. I like to make sure the inside curve of the foot matches the inside curve of the pot. -
Check the fit:
Place the lid on the pot. If it’s too tight, carefully sand or trim the flange. Remember that clay shrinks, so a slightly loose fit is safer than a too-tight one. -
Bisque fire:
Once bone dry, fire the pieces in the kiln for a bisque firing (typically cone 04 or 06).
Step 4: Glazing
-
Wax the contact points:
Apply wax resist to the gallery (seat) of the pot and the flange/underside rim of the lid. This prevents the lid from fusing to the pot during firing. -
Design the glaze line:
The image shows a distinct unglazed line near the rim. You can achieve this by waxing over the top inch of the pot before dipping, or by carefully wiping back the glaze with a sponge afterwards. -
Apply the glaze:
Dip the pot into a speckled cream stoneware glaze. If you want the two-tone effect, ensure the glaze is thinner on the top section or use a slightly darker transparent glaze over a speckled clay body. -
Clean the foot:
Wipe any glaze off the bottom foot ring with a damp sponge to save your kiln shelves. -
Final fire:
Fire the piece to maturity (often cone 5, 6, or 10 depending on your clay). The heat will bring out the iron speckles in the clay or glaze, creating that beautiful toasted look.
Once cooled, your sturdy little jar is ready to hold spices, jewelry, or simply sit pretty on a windowsill
Barnacle-Studded Coil Pinch Pot
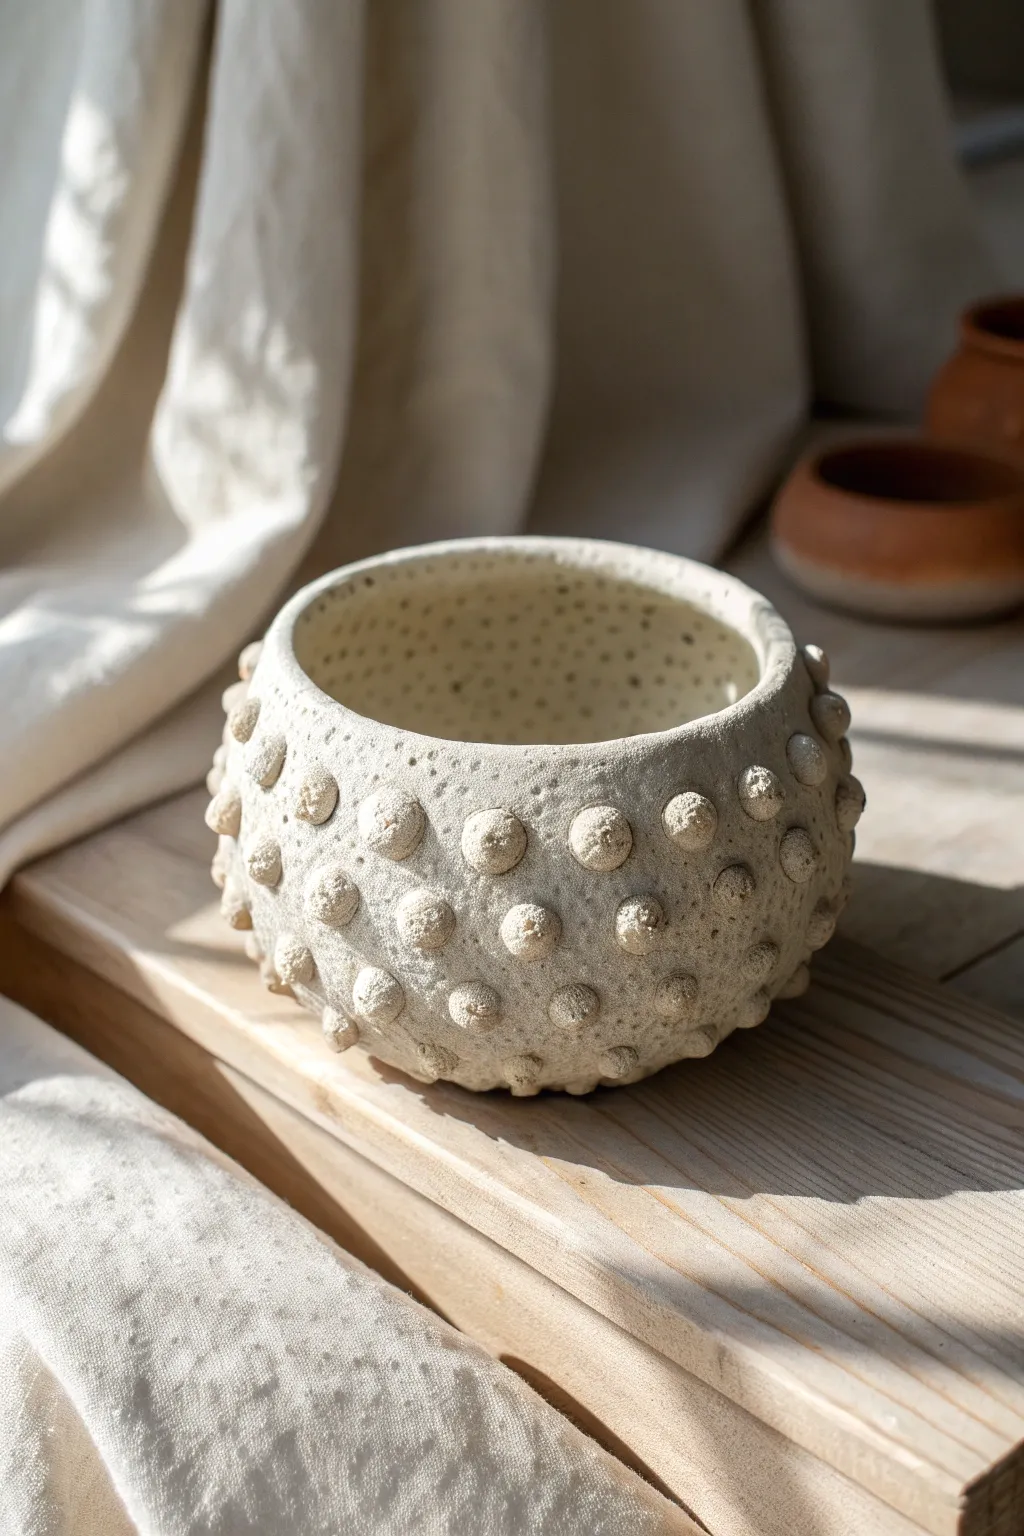
This textured vessel brings a touch of oceanic wonder into your home with its organic form and repeating raised knobs that mimic sea urchins or barnacles. The raw, stony finish enhances the natural aesthetic, making it a perfect sculptural piece for a sunlit shelf.
Step-by-Step
Materials
- White or speckled stoneware clay
- Pointed wooden modeling tool
- Serrated rib tool (metal or wood)
- Small sponge
- Slip (clay mixed with water)
- Scoring tool or needle tool
- Paintbrush (for applying slip)
- Wooden paddle (optional)
Step 1: Forming the Base Vessel
-
Prepare your clay:
Begin by wedging a softball-sized amount of stoneware clay to remove air bubbles and ensure a uniform consistency. -
Start the pinch pot:
Form the clay into a smooth ball in your hands. Insert your thumb into the center, stopping about a half-inch from the bottom. -
Open the walls:
Gently pinch and rotate the ball, pulling the clay outward and upward to create the basic bowl shape. Aim for a wall thickness of about 1/4 inch. -
Refine the curve:
Continue pinching to curve the walls slightly inward at the top, creating an enclosed, spherical form rather than a wide-open bowl. -
Smooth the interior:
Use your thumb or a slightly damp sponge to compress and smooth the inside floor and walls, erasing your finger marks. -
Shape the exterior:
Gently paddle the outside of the pot with a wooden paddle or your hand to ensure the curve is even and symmetrical.
Adhesion Tip
Twist the clay balls slightly as you press them onto the slipped surface. This little twist helps lock the clay particles together for a stronger bond.
Step 2: Creating the Texture
-
Rough the surface:
Take a serrated rib tool and drag it across the entire exterior surface in multiple directions. This creates a gritty, stone-like texture that contrasts beautifully with the studs. -
Roll the studs:
Pinch off many small pieces of spare clay and roll them into varying sizes of balls, ranging from pea-sized to slightly larger spheres. -
Score the attachment sites:
Using your needle tool, scratch small cross-hatch marks all over the exterior of the pot where you plan to place the studs. Random placement feels more organic than a grid. -
Apply slip:
Dab a small dot of slip onto each scored area on the pot using your paintbrush. -
Attach the first heavy layer:
Press the larger clay balls onto the slipped areas firmly enough to adhere, but gently enough to maintain their rounded shape. -
Fill with smaller studs:
I like to fill the gaps between large studs with the smaller clay balls to create a dense, encrusted look. -
Create the pitted texture:
Take your dull wooden modeling tool or the back of a small paintbrush and gently poke the center of each stud to create a small crater. -
Texturize the studs:
Lightly tap the surface of each attached stud with the serrated rib or a stiff bristle brush to match the rough texture of the main bowl.
Oceanic Glazing
Apply a wash of iron oxide or a dark stain before glazing, then wipe it back. The dark color will remain in the crevices and stud pits, emphasizing depth.
Step 3: Finishing Touches
-
Detail the rim:
Use your needle tool to poke tiny, shallow holes along the flat top rim of the pot, creating a perforated look similar to coral. -
Interior texture:
Extend that dotted texture slightly down into the interior rim for continuity. -
Final drying check:
Check that all attachments are secure. If any stud feels loose, re-score and re-slip immediately. -
Slow drying:
Cover the pot loosely with plastic to let it dry very slowly. This prevents the thick studs and thin walls from drying at different rates and cracking. -
Firing suggestions:
Fire to the appropriate temperature for your clay body. A matte white or dry textural glaze works best to highlight the relief without filling in the details.
Enjoy the tactile nature of your new ocean-inspired vessel as it adds organic charm to your space