When I need fresh inspiration, I lean on a mix of cute, functional, and totally doable best clay ideas that still feel special when they’re finished. Here are my go-to projects I’d happily make (and gift) again and again—no fancy setup required.
Tiny Animal Charms for Keychains
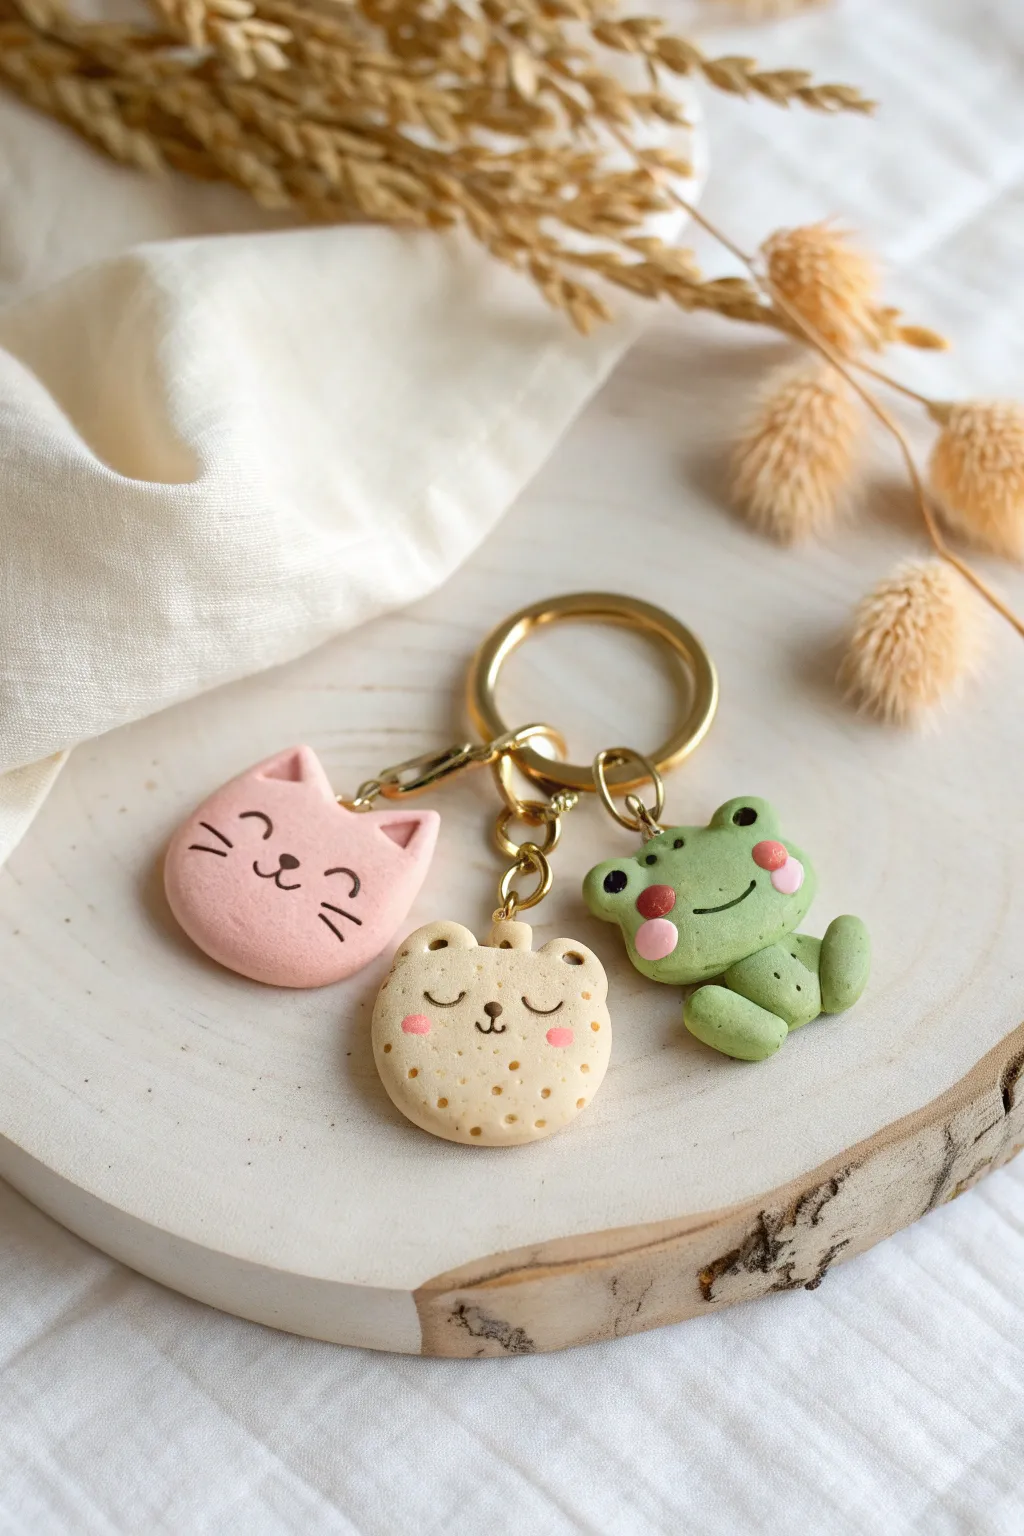
Charm your keys with this adorable set of three polymer clay friends: a blushing cat, a cookie-bear, and a cheerful frog. These matte-finish charms use soft pastel tones and simple shapes to create a whimsical, unified aesthetic perfect for beginners.
How-To Guide
Materials
- Polymer clay (Soft pink, beige/tan, moss green, white, black)
- Acrylic rolling pin
- Small circle cutter (approx. 1 inch)
- Needle tool or toothpick
- Ball stylus tool
- Eye pins (gold)
- Jump rings and keychain hardware (gold)
- Black acrylic paint
- Fine detail paintbrush
- Matte varathane or polymer clay glaze
- Oven for baking
Step 1: Prepping the Base Shapes
-
Condition the clay:
Begin by thoroughly kneading your pink, beige, and green clays separately until they are soft and pliable. This prevents cracks later on. -
Roll out the slabs:
Use your acrylic rolling pin to flatten each color into a slab about 1/4 inch thick. You want them sturdy enough to withstand being on a keychain. -
Cut the circles:
Use your circle cutter to punch out one circle from the pink clay (cat) and one from the beige clay (bear). For the frog, you’ll need to hand-shape a slightly more rounded, organic lump rather than a perfect circle. -
Smooth the edges:
Gently rub the cut edges with your finger to soften the sharp angles left by the cutter, giving the charms a soft, pillowy look.
Clean Clay Pro-Tip
Keep baby wipes or a scrap piece of white clay nearby. Clean your hands and tools between colors (especially before touching the beige clay) to avoid lint and color transfer.
Step 2: Sculpting the Cat & Bear
-
Form the cat ears:
Take two tiny triangles of pink clay. Attach them to the top of the pink circle, blending the seams downward with a modeling tool or your finger so they become one solid piece. -
Shape the bear ears:
Roll two very small balls of beige clay. Press them onto the top left and right of the beige circle. Use a small ball tool to indent the center of each ear slightly. -
Texture the cookie bear:
To give the bear a ‘cookie’ appearance, gently poke small indentations all over the face using a needle tool, avoiding the center area where the face features will go. -
Insert eye pins:
Carefully trim your eye pins to the right length. Push one into the top center of each head (between the ears). I like to add a dab of liquid clay or ‘Bake and Bond’ to the shaft to ensure it stays put.
Step 3: Sculpting the Frog
-
Add frog eyes:
Roll two small balls of green clay and attach them to the top of the green head base. Blend the seams at the back and sides, but keep the definition in the front. -
Create the body:
Form a slightly smaller, flattened oval of green clay for the body and attach it beneath the head. -
Attach the legs:
Roll two small logs of green clay for the legs. Bend them into a ‘U’ shape to look like folded frog legs and press them onto the sides of the body. -
Add frog cheeks:
Take two tiny flattened discs of pink clay and press them onto the frog’s face for rosy cheeks. Add the eye pin to the top of the head now.
Level Up: Texture Play
Before baking, use a toothbrush to gently tap the surface of the ‘cookie bear.’ This creates a realistic baked-good texture that looks great once glazed.
Step 4: Baking & Detailing
-
Bake the charms:
Place all three pieces on a ceramic tile or baking sheet. Bake according to your clay manufacturer’s instructions (usually 275°F/130°C for 15-30 minutes). -
Cool down:
Let the charms cool completely before handling. Polymer clay is slightly soft when hot and hardens as it cools. -
Paint facial features:
Using a very fine brush and black acrylic paint, carefully draw the sleeping eyes (curved lines) and nose/mouth on the cat and bear. For the frog, paint a wide smile and two black dots for eyes. -
Add blushing details:
Mix a tiny bit of red or pink paint with water to make a glaze, or use pink chalk pastels. Dab small rosy cheeks onto the bear and cat. -
Seal the charms:
Once the paint is fully dry, coat each charm with a layer of matte varnish to protect the paint and give the clay a professional finish. -
Assemble the keychain:
Open your jump rings using pliers (twist, don’t pull). Attach the charms to the chain links of your main keyring hardware and close the rings securely.
Now you have a custom set of tiny companions ready to travel with you everywhere you go


Terrazzo-Style Earrings in Bold Shapes
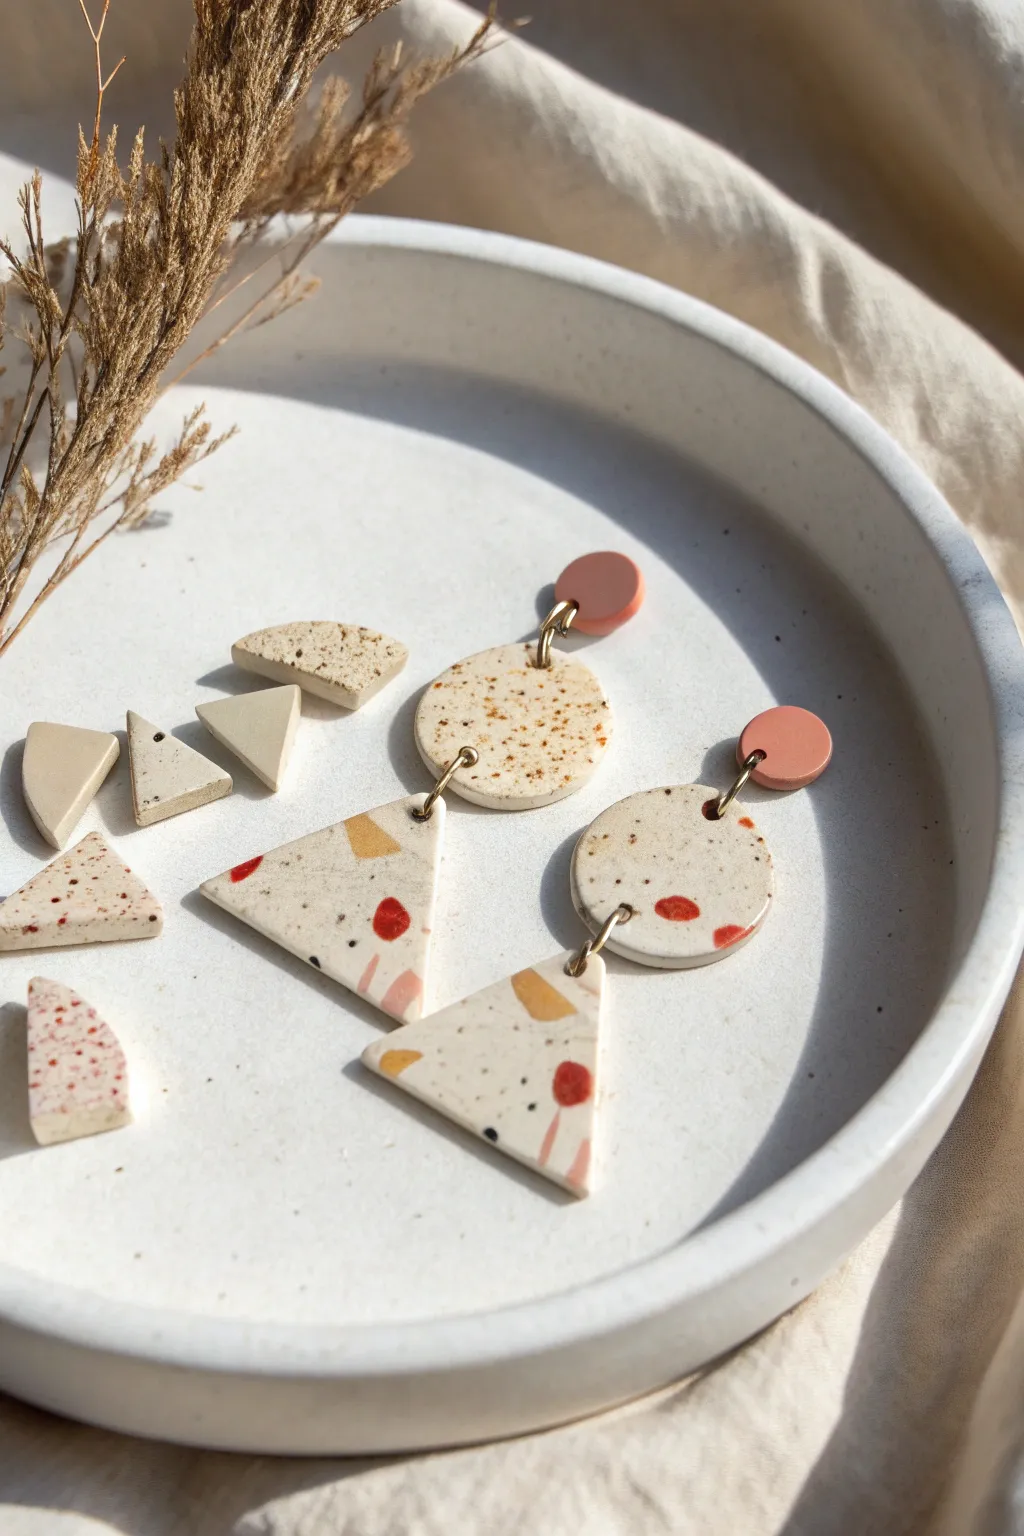
These striking polymer clay earrings combine modern geometric shapes with a playful, organic terrazzo pattern. With warm earth tones and a lovely speckled cream base, they offer a sophisticated yet handmade aesthetic perfect for any outfit.
Detailed Instructions
Materials
- Polymer clay in cream/white (granite effect optional)
- Polymer clay in accent colors: terracotta, mustard yellow, speckled brown
- Rolling pin or pasta machine
- Clay cutters: small circle (approx. 10mm), medium circle (approx. 20mm), large triangle
- X-Acto knife or clay slicer
- Parchment paper or ceramic tile
- Hand drill or pin vibe
- Jump rings (gold)
- Earring posts and backs
- Superglue or liquid clay
- Sandpaper (grits 400-1000)
Step 1: Preparing the Clay Base
-
Condition the base clay:
Start by conditioning your cream or white clay until it is soft and pliable. If you want a subtle speckled look like the original image, mix in a tiny pinch of black pepper or use a pre-mixed ‘granite’ effect clay. -
Roll out the slab:
Roll the conditioned base clay into a flat slab, about 3mm thick. Ensure it is even, as this will determine the weight and durability of your earrings.
Step 2: Creating the Terrazzo Pattern
-
Prepare accent colors:
Take small amounts of your terracotta, mustard, and brown clays. Roll them into very thin sheets. -
Chop chipping pieces:
Use your blade to chop these thin color sheets into tiny, irregular shards and chips. Vary the sizes—some should be tiny specks, others distinct chunks. -
Apply the chips:
Scatter the colored chips randomly over your cream slab. Aim for a balanced but organic distribution, leaving some negative space to let the cream background shine through. -
Burnish the surface:
Cover the slab with parchment paper and gently roll over it with your rolling pin. This pushes the chips into the base clay creating a flush, smooth surface without distorting the shapes too much.
Sticky Situation?
If clay sticks to your cutters, dip them in cornstarch or water before cutting. This creates a release barrier for clean, sharp edges.
Step 3: Cutting and Baking
-
Cut the top studs:
From a plain section of terracotta or pink clay (no terrazzo), cut out two small circles for the ear studs. -
Cut the middle connectors:
Using your medium circle cutter, punch out two round shapes from the terrazzo slab. -
Cut the bottom drops:
Use the large triangle cutter to create the main focal pieces from the terrazzo slab. Smooth the edges of all pieces with your finger to remove any stray clay bits. -
Pierce holes:
Before baking, use a needle tool or toothpick to poke holes where the jump rings will go. You’ll need holes at the top and bottom of the medium circles, and just the top of the triangles. -
Bake the batch:
Arrange all pieces on a ceramic tile or baking sheet. Bake according to your brand of clay’s instructions—usually 275°F (130°C) for about 30 minutes. Tent with foil to prevent scorching.
Make it Shine
Coat the finished baked pieces with a layer of UV resin or glossy polyurethane varnish to give the terrazzo chips a polished, ceramic-like look.
Step 4: Finishing and Assembly
-
Sand for smoothness:
Once cool, wet sand the edges and surfaces using fine-grit sandpaper. This step is crucial for revealing the crispness of the terrazzo pattern. -
Buff clean:
Wipe the pieces with a damp cloth or wash them gently with soapy water to remove sanding dust. -
Attach earring posts:
Apply a dab of superglue to the back of the small plain terracotta circles and press the earring posts firmly in place. Let dry completely. -
Connect middle tier:
Using pliers, open a jump ring and connect the bottom of the stud piece (you may need to drill a hole here if you didn’t glue the post high enough) or simpler: connect the plain circle to the middle terrazzo circle via a jump ring if you drilled the top component. -
Note on the stud:
Actually, looking at the design, the top plain circle is a post. So, drill a small hole at the *bottom* of the plain circle component to attach it to the middle piece. -
Final assembly:
Connect the middle terrazzo circle to the large bottom triangle with another gold jump ring. Ensure all rings are closed tightly so pieces don’t slip off.
Enjoy wearing your unique, handcrafted art pieces that add an artistic touch to your style


Happy Magnets in a Mini Set
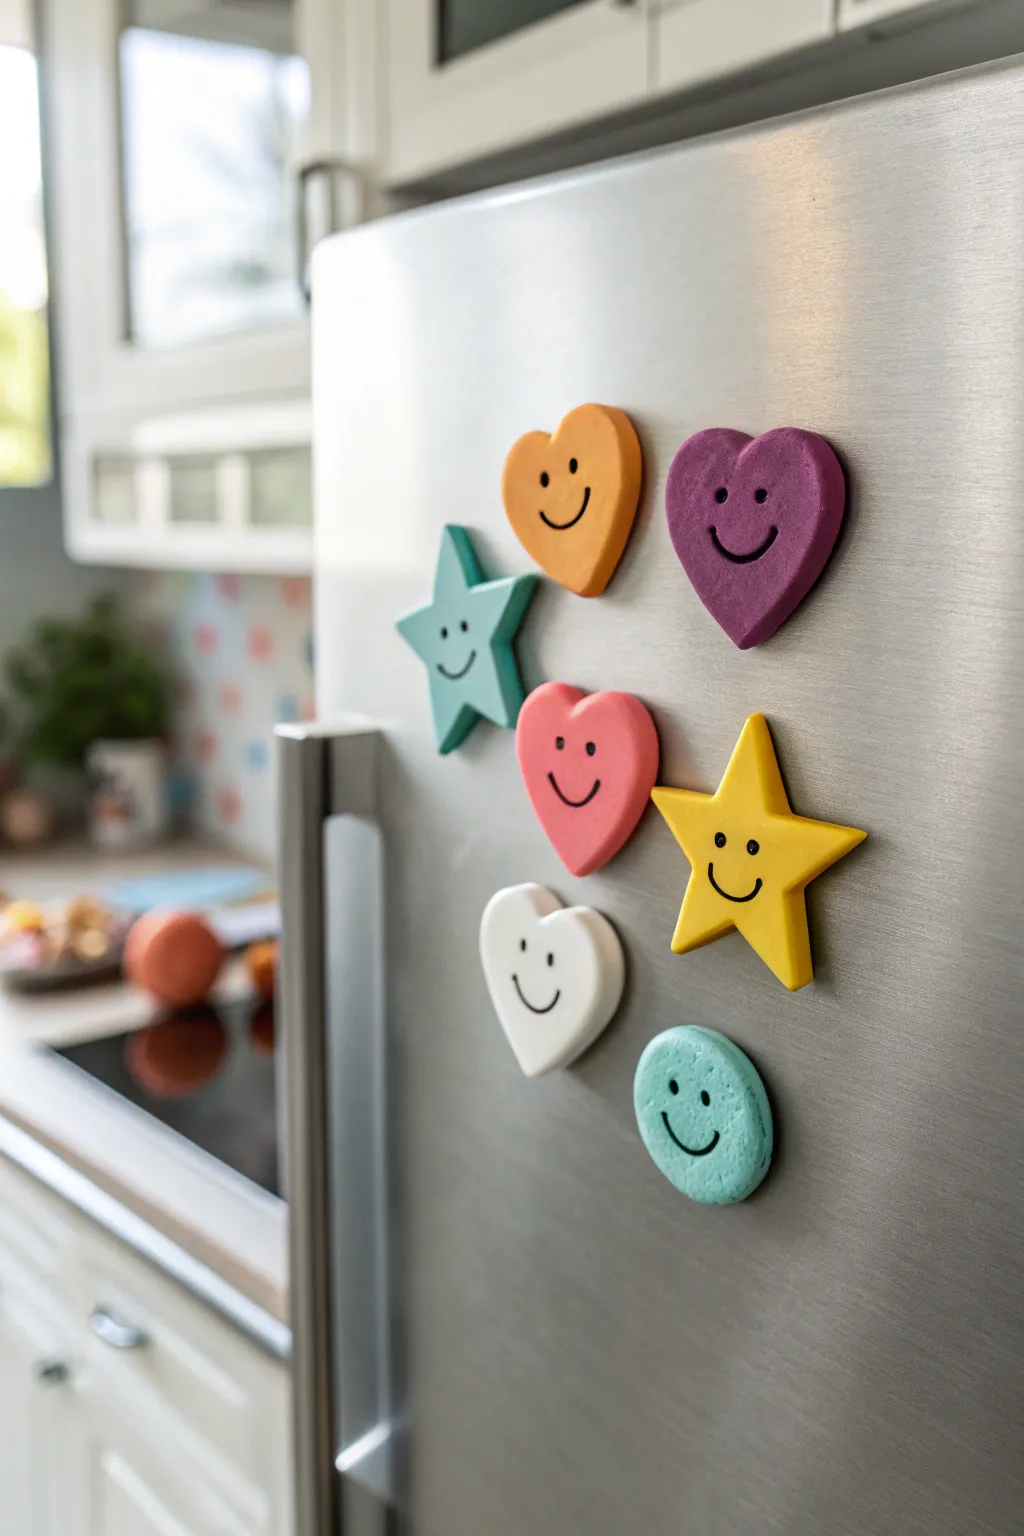
Brighten up your kitchen with this cheerful collection of smiley-faced magnets made from polymer clay. These chunky, colorful shapes—hearts, stars, and circles—are simple to mold and guaranteed to bring a dose of joy to your fridge door.
Step-by-Step Guide
Materials
- Polymer clay in assorted colors (orange, purple, teal, pink, white, yellow, light blue)
- Black acrylic paint or fine-tip permanent marker
- Rolling pin or clay roller
- Cookie cutters (heart, star, circle/round)
- Small round piping tip or straw (optional, for eye indenting)
- Fine detail paintbrush
- Strong craft glue (e.g., E6000)
- Round ferrite or neodymium magnets
- Baking sheet
- Parchment paper
- Matte varnish (optional)
Step 1: Prepping and Shaping
-
Condition the clay:
Start by kneading each color of polymer clay individually until soft and pliable. This warmth prevents cracking later on. -
Roll it out:
Roll your first color of clay into a slab that is about 1/4 inch thick. You want these magnets to have a nice, chunky feel, so avoid rolling it too thin. -
Cut the shapes:
Press your chosen cookie cutter firmly into the clay slab. For the hearts, use orange, purple, pink, and white clay. Use teal and yellow for the stars, and light blue for the round ‘cookie’ shape. -
Soften the edges:
After cutting, gently tap the edges of the clay shapes with your finger to round off any sharp corners left by the cutter. This gives them a softer, friendlier look. -
Inspect the surface:
Check for any fingerprints or lint. I usually do a quick pass with a little rubbing alcohol on my finger to smooth out any imperfections before moving to the details.
Step 2: Adding the Faces
-
Plan the placement:
Decide where you want the face to go. Centered works best for the hearts and circle, while the stars look cute with the face positioned slightly lower on the main body. -
Add the eyes:
Use a small dotting tool, the back of a paintbrush, or even the end of a toothpick to gently press two small divots for the eyes into the raw clay. -
Create the smile:
Use a curved tool or carefully drag a toothpick to carve a simple, upward-curving smile line below the eyes. Keep the impression clean but not too deep. -
Bake the clay:
Place all your shapes on a parchment-lined baking sheet. Bake according to your specific clay package instructions (usually around 275°F/135°C for 15-30 minutes per 1/4 inch of thickness). -
Cool down completely:
Let the shapes cool fully on the baking sheet. Touching them while warm can inadvertently leave marks or cause warping.
Sticky Clay Problems?
If your clay sticks to the table or cutter, lightly dust your work surface and tools with cornstarch or baby powder before rolling.
Step 3: Finishing Touches
-
Fill the details:
Once cool, dip a very fine brush into black acrylic paint. Carefully fill in the eye divots and the smile line you carved earlier. -
Cleanup technique:
If you paint outside the lines, quickly wipe the surface with a damp paper towel or baby wipe. The paint will stay in the carved grooves while cleaning off the top surface. -
Seal (Optional):
If you prefer a matte finish like the original inspiration, you can leave them as is. For extra durability, apply a thin coat of matte varnish. -
Glue the magnet:
Apply a dab of strong craft glue to the back of the clay shape. -
Secure the backing:
Press the magnet firmly into the glue. Let it cure flat for at least 24 hours to ensure a permanent bond.
Pro Tip: Better Smiles
Use a cut straw bent in half to stamp the smile perfectly every time. It creates a consistent, smooth curve without jagged edges.
Now you have a charming set of smiley faces ready to hold up your grocery lists and photos


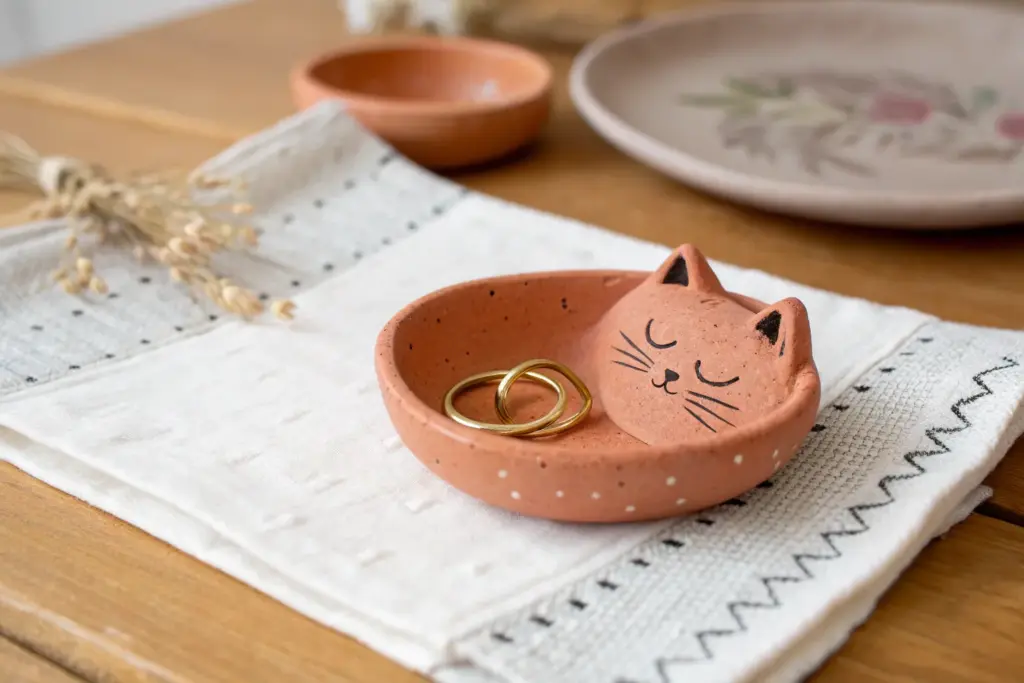
Cute Food Friends Mini Figures

Celebrate the autumn season with this adorable tiny pumpkin pal that brings a smile to any desk or shelf. Its smooth, segmented body and cheerful expression capture the cozy charm of fall perfectly.
Step-by-Step Guide
Materials
- Orange polymer clay
- Green polymer clay
- Black polymer clay (or small black beads)
- Pink polymer clay (pale shade)
- Needle tool or toothpick
- Ball stylus tool
- Acrylic roller
- Blade or craft knife
- Baking sheet and parchment paper
- Oven (for baking polymer clay)
Step 1: Shaping the Base
-
Prepare the orange clay:
Begin by conditioning your orange polymer clay. Knead it in your hands until it is soft, pliable, and free of any air bubbles. -
Form the main sphere:
Roll the conditioned clay into a smooth ball about the size of a walnut. Check for any lint or dust and gently pick it off. -
Flatten the base:
Gently press the ball down onto your work surface just enough to create a flat bottom so the pumpkin sits securely without rolling.
Step 2: Creating the Pumpkin Ridges
-
Mark the center:
Use a needle tool or toothpick to poke a small indentation at the very top center of the sphere. This will interact with the stem later. -
Score the lines:
Using the side of a needle tool or a blunt knife, gently press vertical lines from the top center hole down to the bottom center. Start by dividing the ball into four quarters. -
Add detail lines:
Add one more vertical line in between each of the quarter lines. You should end up with a segmented look typical of pumpkins. -
Soften the grooves:
I like to run my fingertip gently over the indented lines to smooth the sharp edges, making the sections look puffy and round rather than sliced.
Texturing Tip
Before baking, lightly dust the pumpkin’s surface with cornstarch using a soft brush. This removes shine and gives it a realistic matte velvety finish.
Step 3: Adding the Stem
-
Create the stem base:
Take a small pea-sized amount of green clay. Shape it into a cone, then flatten the bottom slightly. -
Texture the stem:
Use your needle tool to drag vertical lines up the side of the green cone to simulate a woody texture. Twist the top slightly for character. -
Attach the stem:
Place the green stem directly onto the top center indentation of your orange pumpkin. Press gently to bond the clays together.
Fixing Dust Specks
If you spot dust on the light clay, dip a cotton swab in a tiny bit of rubbing alcohol or baby oil and gently wipe the surface before baking.
Step 4: Bringing it to Life
-
Mark eye sockets:
Decide on the ‘front’ face. Use a small ball stylus to make two small indents where the eyes will go, spacing them moderately apart. -
Add the eyes:
Roll two teeny-tiny balls of black clay. Place them into the sockets and press gently so they don’t protrude too much. -
Create the cheeks:
Roll two slightly larger balls of pale pink clay. Flatten them into small discs and press them just below and to the outside of the eyes. -
Carve the smile:
Using a needle tool or a small curved blade, press a tiny ‘U’ shape between the eyes for the mouth. Keep the incision clean and simple.
Step 5: Finishing Up
-
Final inspection:
Check the pumpkin from all angles. Smooth out any fingerprints created during the face application process. -
Bake the project:
Place the pumpkin on a parchment-lined baking sheet. Bake according to your brand of clay’s specific temperature and time instructions. -
Cool down:
Allow the figure to cool completely inside the oven or on the tray before handling to ensure durability.
Now you have a sweet little autumn companion ready to keep you company

The Complete Guide to Pottery Troubleshooting
Uncover the most common ceramic mistakes—from cracking clay to failed glazes—and learn how to fix them fast.
Tiny Clay Whistles or Little Bells
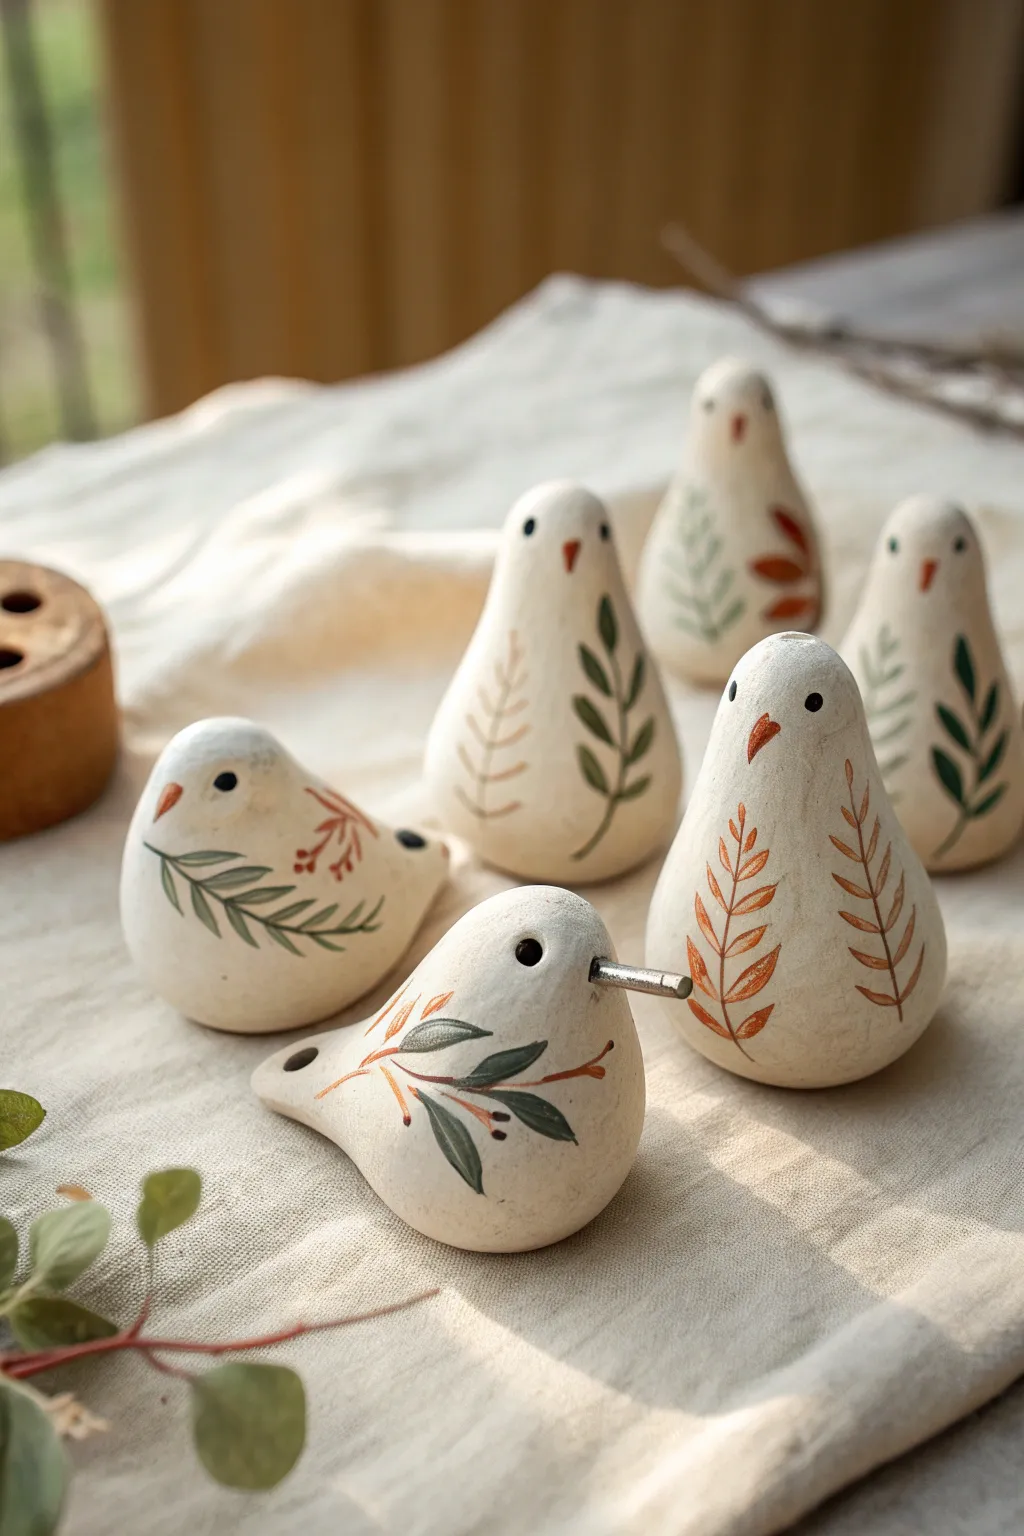
These charming, minimalist clay birds double as gentle whistles, bringing a touch of nature indoors with their earthy tones and botanical illustrations. Their smooth, matte finish and simple teardrop shapes make them a perfect beginner project for exploring ceramic whistles.
Detailed Instructions
Materials
- White stoneware clay or air-dry clay (if not firing)
- Small wooden modeling tools
- Popsicle stick or flat wooden spatula
- Needle tool
- Slip (clay mixed with water)
- Underglaze paints (terracotta, sage green, dark green)
- Fine detail paintbrush (size 0 or 00)
- Clear matte glaze (optional)
- Small sponge
Step 1: Shaping the Bird Body
-
Prepare the clay:
Start with a ball of clay roughly the size of a plum. Wedge it well to remove air bubbles, as trapped air can cause cracks during drying or firing. -
Pinch pot base:
Press your thumb into the center of the ball to create a basic pinch pot. Gently pinch and rotate the walls to ensure an even thickness of about 1/4 inch. -
Close the form:
Gradually pinch the opening of the pot closed to trap a hollow pocket of air inside. Smooth the seam completely so you have a sealed, hollow sphere or egg shape. -
Refine the silhouette:
For the standing birds, gently roll the clay into a teardrop shape with a wider base. For the sitting birds, keep the shape lower and more oval. -
Smooth the surface:
Use a slightly damp sponge to wipe away any fingerprints or lumps. The surface needs to be very smooth for the botanical painting later.
No Sound?
If the whistle won’t make a noise, the air isn’t hitting the sharp bevel edge correctly. Re-insert your stick into the airway and gently adjust the angle to point directly at the bevel blade.
Step 2: Creating the Whistle Mechanism
-
Make the mouthpiece:
On the tail end of the bird, press a small, rectangular block of clay to form the mouthpiece area. Blend this seamlessly into the body. -
Insert the airway:
Using a flat popsicle stick or specialized bevel tool, push into the mouthpiece to create a rectangular channel. This channel should go straight into the hollow body. -
Cut the bevel:
On the underside of the bird, just where the airway channel ends, cut a small 45-degree angle notch (the bevel). The sharp edge of this notch splits the air to create sound. -
Test the sound:
Blow gently through the mouthpiece. If it doesn’t whistle, adjust the angle of the bevel edge slightly until you get a clear tone. Be patient; this is the trickiest part. -
Pierce the eyes:
Use a small needle tool or the back of a paintbrush to poke two small, symmetrical holes for the eyes. This also acts as a necessary air vent if you are kiln firing. -
Add a beak:
Pinch a tiny amount of clay from the front of the face to form a beak, or attach a small cone of clay using the score-and-slip method.
Vary the Pitch
Change the sound by changing the size! Larger hollow cavities produce deeper, lower hoots, while smaller, tighter bird bodies will create higher-pitched chirps.
Step 3: Decorating and Finishing
-
Dry to leather hard:
Let your birds dry until they are ‘leather hard’—firm to the touch but still cool. This is the ideal stage for painting with underglazes. -
Paint the beak:
Using a terracotta or burnt orange underglaze, carefully paint the small beak. -
Sketch the stems:
With a fine detail brush and sage green underglaze, paint simple, curved lines starting from the base of the bird, mimicking wild grass stems. -
Add leaves:
Switch to a darker green for contrast. Along the stems, dab small, almond-shaped strokes to create leaves. I find that varying the pressure on the brush helps create natural leaf shapes. -
Paint botanical accents:
Using the terracotta color again, add small fern-like fronds or tiny berries alongside the green leaves to balance the warm color palette. -
Final drying:
Allow the clay to dry completely (bone dry). This usually takes 2-3 days depending on humidity. -
Firing:
If using stoneware, bisque fire the pieces. You can then leave them raw for a matte texture or apply a clear matte glaze and fire again. If using air-dry clay, simply seal with a matte acrylic varnish.
Group your finished birds together on a linen cloth to enjoy their serene, handcrafted presence