A good clay jewelry box is basically a tiny treasure chest—practical enough to corral your rings, but cute enough to leave out on your dresser. Here are some of my favorite clay jewelry box ideas that range from classic and elegant to totally playful, so you can match your vibe (and your skill level).
Classic Lidded Pinch-Pot Jewelry Box
This rustic, pinch-pot style jewelry box brings a touch of wabi-sabi charm to your dresser with its speckled clay body and exposed raw edges. The gentle off-white glaze and simple knob handle create a timeless vessel perfect for safeguarding your favorite rings.
Step-by-Step Tutorial
Materials
- Speckled stoneware clay (white or light buff)
- Pottery wheel (optional, can be hand-built)
- Wooden modeling tool
- Pin tool
- Sponge
- Scoring tool or serrated rib
- Slip (liquid clay)
- Loop tool for trimming
- Matte white glaze
- Kiln
Step 1: Forming the Base
-
Prepare the Clay:
Begin by wedging a softball-sized ball of speckled stoneware clay to remove air bubbles. Divide this into two portions: a larger one for the base (about 2/3) and a smaller one for the lid. -
Center and Open:
Center the larger ball of clay on the wheel head. Open it up gently, keeping the floor flat and about 1/4 inch thick to ensure stability. -
Pull the Walls:
Pull the walls up to create a short cylinder, aiming for a height of about 2 inches. Keep the walls vertical rather than bowing them out, as this creates a cleaner, more modern look. -
Refine the Rim:
Compress the rim with a damp sponge or piece of chamois. Use your wooden tool to create a slight gallery—an inner ledge—just inside the rim. This is crucial for the lid to sit securely. -
Smooth and Cut:
Smooth the exterior with a rib tool to reveal the clay’s speckled texture. Undercut the base slightly with a wooden knife, then wire the piece off the wheel but leave it on the bat to firm up to leather-hard.
Step 2: Creating the Lid
-
Measure the Opening:
Before throwing the lid, use calipers to measure the diameter of the gallery you created on the base. -
Throw the Lid Shape:
Using the smaller clay ball, throw a flat, shallow disc upside down on the wheel. Ensure the width matches your caliper measurements so it fits the gallery perfectly. -
Trim the Excess:
While the clay is still workable, trim away excess clay from the outer edge to match the visual curve of your base piece. -
Dry to Leather Hard:
Allow both the base and the lid to dry slowly until they are leather-hard—firm enough to handle without deforming, but soft enough to carve.
Clay Shrinkage Tip
Remember stoneware shrinks about 12% total. Throw the pot slightly larger than you want the finished jewelry box to be.
Step 3: Trimming and Assembly
-
Trim the Base:
Invert the base onto the wheel head and center it. Use a loop tool to trim the bottom, creating a clean foot ring. I like to leave a small band of raw clay texture near the bottom for visual interest. -
Refine the Lid Top:
Place the lid (right side up) onto the base or a chuck. Trim the top surface to a gentle, smooth dome shape. -
Form the Handle:
Roll a very small coil or ball of clay. Shape it into a small, organic button knob. It shouldn’t be perfectly round; a little irregularity adds character. -
Attach the Knob:
Score the center of the lid and the bottom of the knob. Apply a dab of slip and press the knob firmly into place. Smooth the connection point with a small modeling tool. -
Bisque Fire:
Allow the piece to dry completely (bone dry). Load it into the kiln and bisque fire firmly to cone 04.
Make it Luxe
Apply a thin luster overglaze of 22k gold solely on the knob handle for a chic, high-contrast mixed material look.
Step 4: Glazing and Finishing
-
Wax Resist:
Apply wax resist to the foot ring of the base and the rim where the lid will touch (the gallery). Wax the underside of the lid rim as well to prevent the pieces from fusing during firing. -
Wipe Down:
Briefly wipe the bisque ware with a damp sponge to remove any dust, which helps the glaze adhere evenly. -
Glaze Application:
Dip the piece into a matte white glaze. The goal is a medium thickness—too thick and you hide the speckles; too thin and it feels rough. -
Expose the Detail:
Using a slightly damp sponge, carefully wipe the glaze off the very edge of the lid and the knob’s rim to expose the raw, toasted clay color seen in the reference image. -
Final Fire:
Fire the piece to cone 5 or 6 (depending on your clay body specifications). Let the kiln cool completely before unloading.
Once cooled, your durable little vessel is ready to hold treasures for years to come


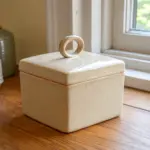
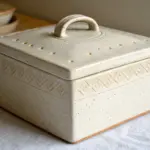
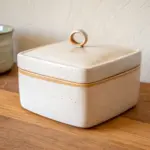
Clean Slab-Built Square With Crisp Edges
Embrace the understated elegance of this slab-built square box, featuring soft edges and a smooth, creamy finish perfect for holding your favorite rings. This project mimics the look of high-end ceramic decor with clean lines and a deceptive simplicity that complements any vanity.
Step-by-Step Guide
Materials
- White polymer clay or air-dry clay (porcelain finish preferred)
- Rolling pin or pasta machine
- Two depth guides (wooden slats or playing cards)
- Square cookie cutter (approx. 3-4 inches) or ruler and craft knife
- Clay scratching tool or needle tool
- Liquid clay (for polymer) or slip/water (for air-dry)
- Cornstarch or baby powder (as release agent)
- Fine-grit sandpaper (400-800 grit)
- Soft sponge
- Matte or satin varnish
Step 1: Preparing the Slabs
-
Condition the Clay:
Begin by thoroughly kneading your white clay until it is warm, pliable, and free of air bubbles. If using polymer clay, ensure it is fully conditioned to prevent cracking later. -
Roll Even Sheets:
Place your clay between two depth guides (about 1/4 inch thick) or set your pasta machine to a medium-thick setting. Roll out a uniform slab. Consistency is key for that high-end, store-bought look. -
Cut the Faces:
Using a square cutter or a ruler and craft knife, cut out two identical squares for the top and bottom. Then, cut four rectangular strips for the walls. The length of the strips should match the side of your square, minus the wall thickness if you are butting joints, or be precise for mitered corners. I find mitered corners give the cleanest finish. -
Dry Fit:
Before joining, hold the pieces together gently to ensure your measurements are correct. Trim any excess clay now while it’s still workable.
Step 2: Construction
-
Bevel the Edges:
For the crispest box, cut the vertical edges of your wall strips at a 45-degree angle. This allows them to join seamlessly without exposing end grain. -
Score and Slip:
Rough up the edges you intend to join with a scratching tool. Apply a small amount of liquid clay (or water/slip) to these roughened areas to act as glue. -
Assemble the Walls:
Press the four wall pieces together to form a bottomless square frame. Use a square object inside to ensure 90-degree angles. -
Attach the Base:
Score the bottom edge of your wall frame and the perimeter of your base square. Press them firmly together. -
Smooth the Seams:
Use a modeling tool or your finger to smooth the exterior and interior seams until they are invisible. Roll a thin snake of clay to reinforce the inside seams if needed. -
Create the Lid Flange:
To keep the lid secure, add a smaller square ‘lip’ or inner wall to the underside of the lid piece, indented about 1/4 inch from the edge so it fits snugly inside the box base.
Keep it Clean
Work on a piece of clean white paper or tile. Dust and lint are very visible on white clay, so keep baby wipes nearby to clean your hands and tools instantly.
Step 3: Refining and Finish
-
Soften the Corners:
Once assembled but before hardening, gently tap the corners and edges with a flat tool or your finger to slightly round them off. This gives the box that soft, organic pillowy look seen in the photo rather than sharp geometric edges. -
Bake or Dry:
Follow your specific clay manufacturer’s instructions to bake (polymer) or dry (air-dry). If air-drying, turn the piece occasionally to prevent warping. -
Sanding for Perfection:
This step makes the difference between ‘homemade’ and ‘handmade.’ Once hardened, wet-sand the piece under running water using high-grit sandpaper to achieve a flawlessly smooth, stone-like surface. -
Final Wipe Down:
Clean off all sanding dust with a damp cloth and let it dry completely. -
Seal:
Apply a thin coat of matte or satin varnish to protect the surface while maintaining that natural, unglazed earthenware aesthetic.
Gilded Edge
Once fully dry, paint a very fine line of gold leaf paint or liquid gold leaf along the very seam where the lid meets the box for a touch of luxury.
Place your new box on your dresser and enjoy the satisfaction of storing your treasures in something you made yourself


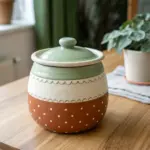
Clay-Covered Tin Trinket Box Makeover
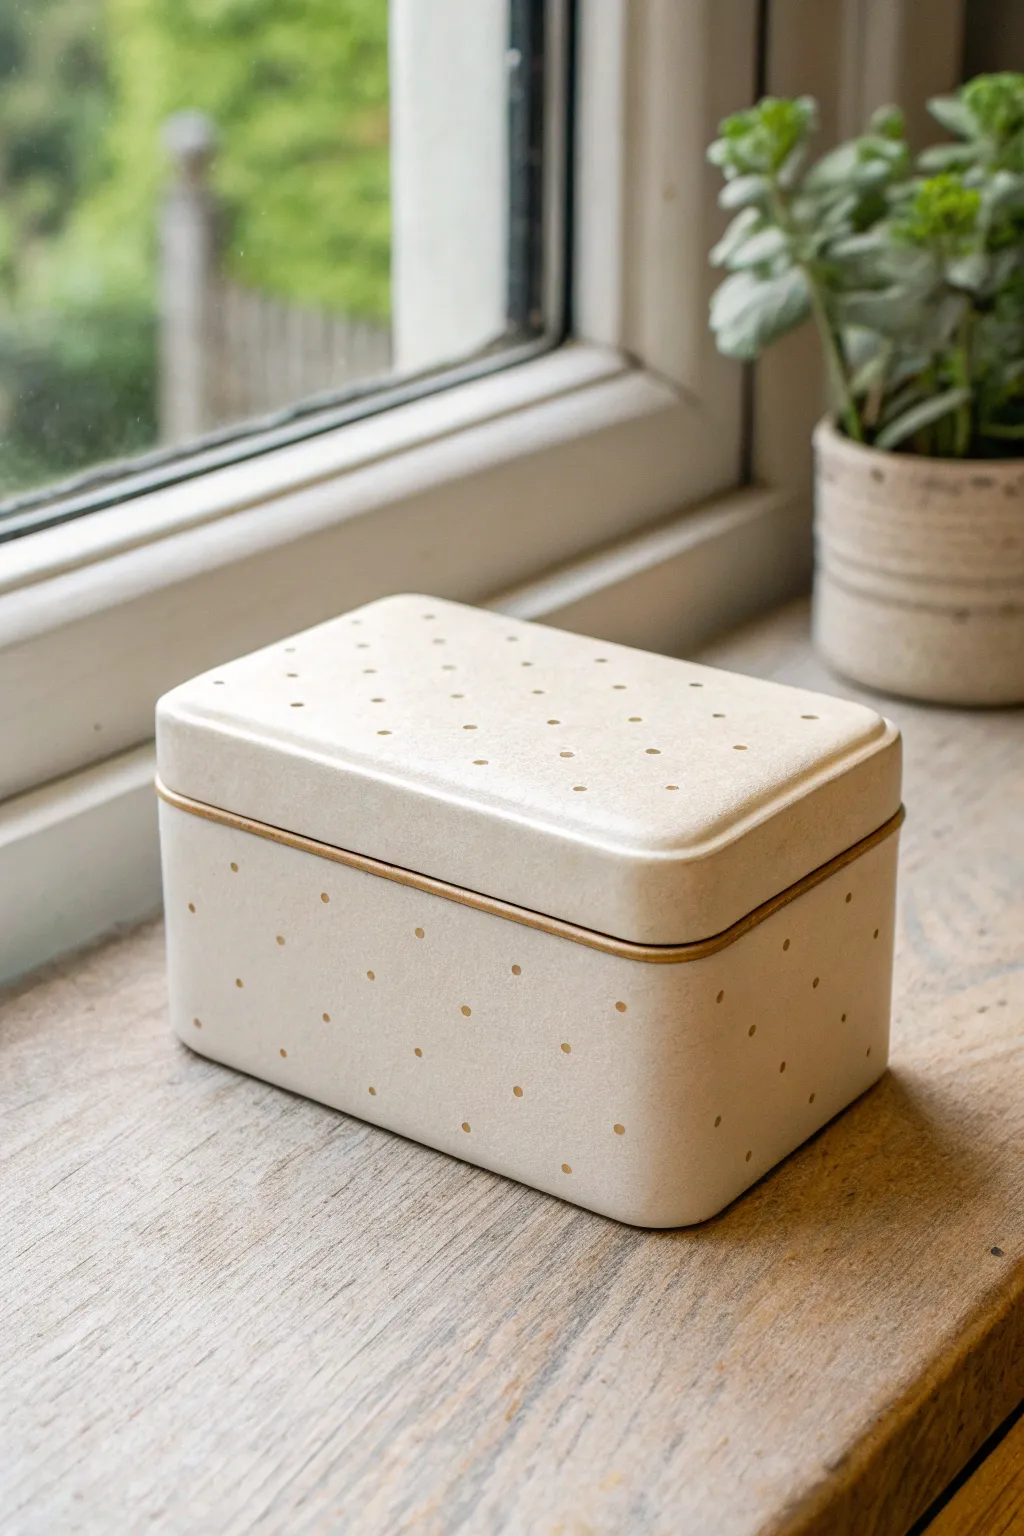
Transform a plain metal tin into a chic, minimalist trinket box using polymer clay and simple texturing. This project features a soft cream finish with delicate gold-accented indentations, perfect for holding small treasures on a windowsill or vanity.
Step-by-Step
Materials
- Rectangular metal tin with lid (cleaned and dried)
- Polymer clay (cream, beige, or white)
- Liquid polymer clay (bakeable adhesive)
- Rolling pin or pasta machine
- Craft knife or tissue blade
- Small dotting tool or a blunt toothpick
- Gold acrylic paint
- Fine detail paintbrush
- Oven for baking
- Paper towel or wet wipe
Step 1: Preparing the Tin
-
Clean surface:
Begin by thoroughly washing your metal tin to remove any grease or residue. Dry it completely to ensure the clay adheres properly. -
Sand for grip:
Lightly sand the exterior surfaces of the tin with fine-grit sandpaper. This creates a rougher texture which helps the clay form a mechanical bond. -
Apply adhesive:
Brush a thin layer of liquid polymer clay over the outside of the base and the top of the lid. Avoid the rim area where the lid slides onto the base so the box can still close effortlessly.
Step 2: Applying the Clay
-
Condition clay:
Knead your cream polymer clay until it is soft and pliable. Warm clay prevents cracking and ensures a smooth finish. -
Roll out sheets:
Roll the clay into a thin, even sheet, approximately 2-3mm thick. I prefer using a pasta machine on a medium setting for consistent thickness, but a rolling pin works just fine. -
Cover the lid top:
Cut a rectangle slightly larger than the lid. Place it on top, smoothing it from the center outward to remove trapped air bubbles. -
Trim lid edges:
Gently fold the clay over the rounded corners. Use your craft knife to trim the excess clay flush with the bottom edge of the lid’s rim. -
Cover the base:
Cut a long strip of clay to wrap around the sides of the tin base. Apply it carefully, joining the seams at the back or a corner. Smooth the seam with your finger or a clay tool until it disappears. -
Refine the edges:
Trim the clay on the base so it stops just below the metal rim. You want that original gold or silver metal lip exposed to act as a decorative accent and to ensure the lid fits snugly. -
Smooth imperfections:
Use your finger dipped in a tiny bit of baby oil or cornstarch to buff away fingerprints and create a silky matte surface.
Air Bubble Trouble?
If a bubble appears after baking, pierce it with a pin and inject a tiny drop of superglue, then press flat. Next time, prick bubbles before baking.
Step 3: Adding Texture & Baking
-
Create the grid:
Visualizing a grid pattern, use a dotting tool to gently press indentations into the clay. Don’t press all the way to the metal; just deep enough to create a small divot. -
Pattern consistency:
Work in diagonal or straight rows to maintain a uniform look. The slight irregularity adds to the handmade charm. -
Bake carefully:
Place the tin pieces on a baking sheet or tile. Bake according to your clay manufacturer’s instructions (usually around 275°F for 15-30 minutes). Let the tin cool completely in the oven to prevent the clay from shocking and cracking.
Level Up The Look
Instead of gold paint, press tiny seed beads or flat-back crystals into the raw clay indentations before baking for a touch of added sparkle and texture.
Step 4: Finishing Touches
-
Apply gold accent:
Once cool, dip a fine brush into gold acrylic paint. Carefully dab a small amount of paint into each indented dot. -
Clean up excess:
If you get paint outside the dot, quickly wipe the surface gently with a damp paper towel. The paint will stay in the recess while wiping off the smooth surface. -
Seal (optional):
For extra durability, you can apply a matte varnish, though the natural finish of the clay often looks best for this specific style.
Enjoy styling your new sophisticated storage box on your favorite shelf


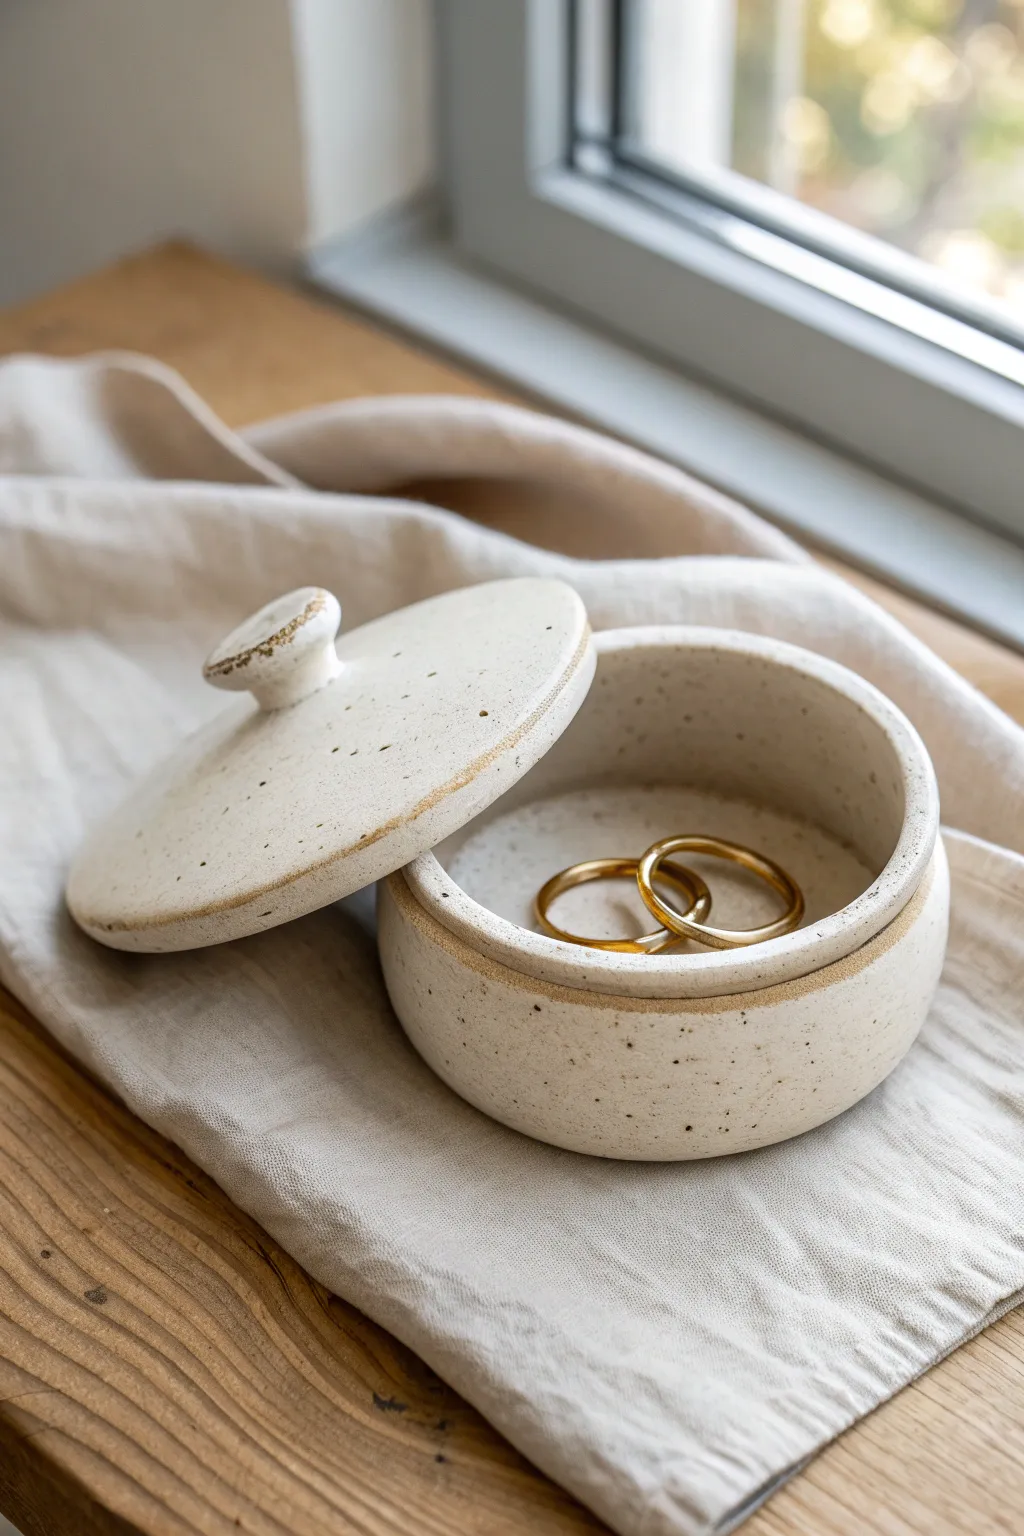
Round Box With Simple Knob Lid Pull
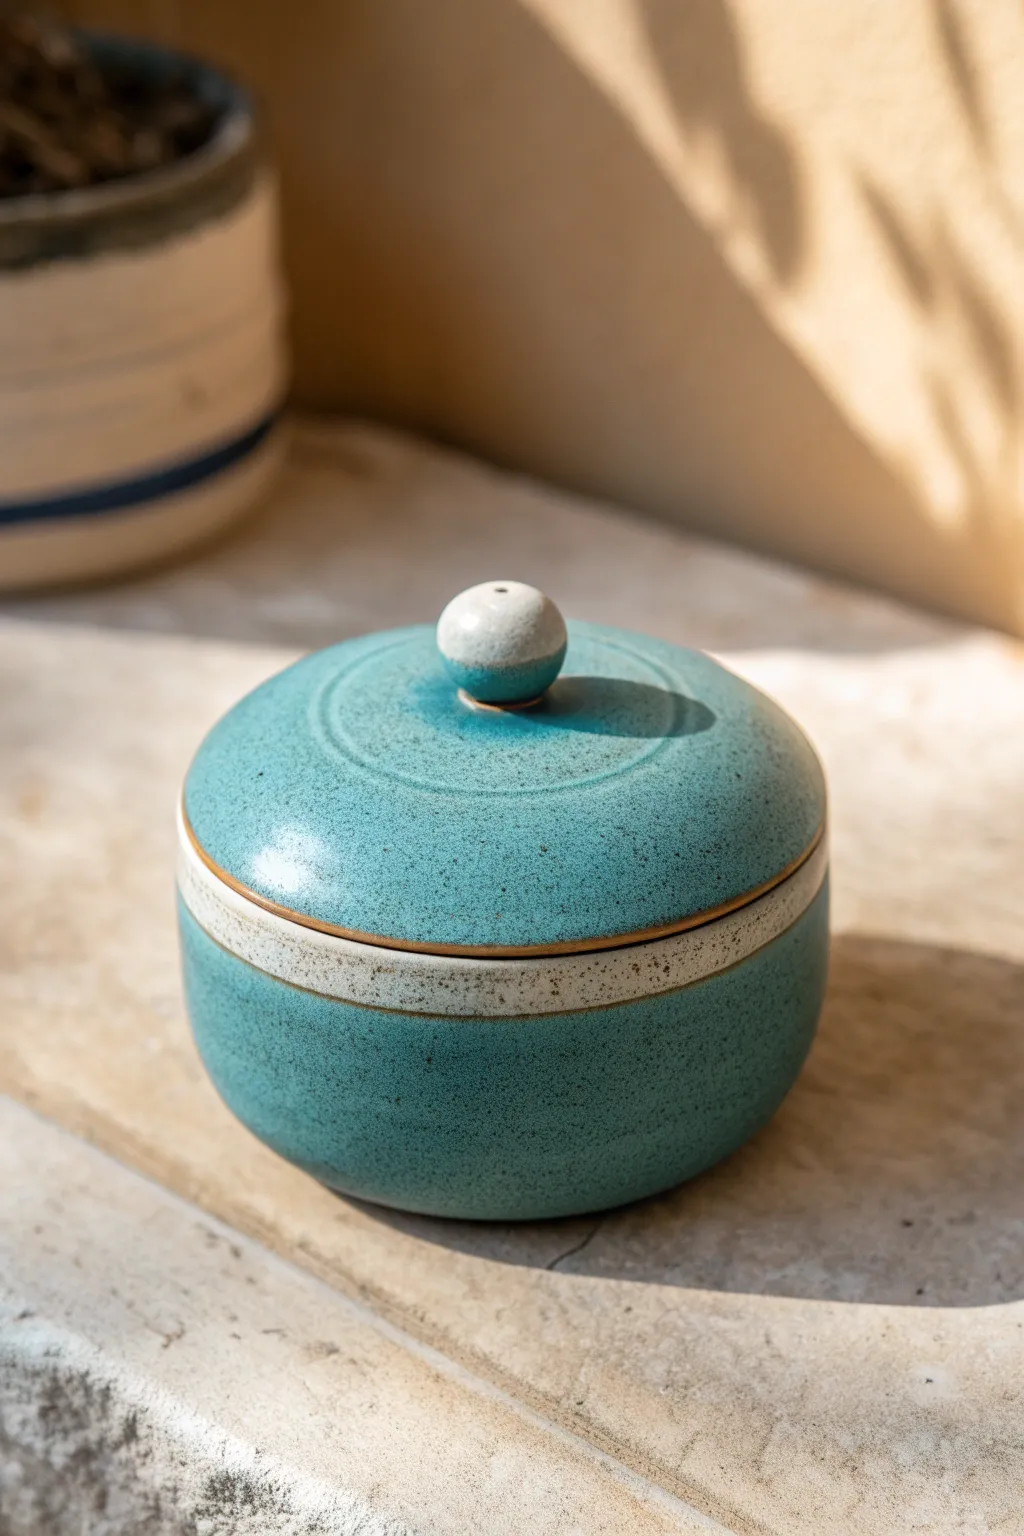
This charming, round jewelry box captures the essence of modern rustic pottery with its soothing teal glaze and exposed raw clay details. The simple knob lid creates a functional yet elegant silhouette, perfect for safe-keeping rings or small treasures.
Detailed Instructions
Materials
- White stoneware clay (mid-fire)
- Pottery wheel
- Throwing tools (sponge, wire cutter, rib)
- Trimming tools
- Needle tool
- Calipers
- Speckled teal glaze (for cone 5/6)
- Wax resist emulsion
- Paintbrush
- Kiln
Step 1: Throwing the Body
-
Center the clay:
Start with about 1 pound of white stoneware clay. center it firmly on the wheel head, ensuring a wide, flat base for stability. -
Open and widen:
Open the form down to leaving about a 1/4 inch floor. Pull the floor out wide to creating a cylindrical base rather than a bowl shape. -
Pull the walls:
Pull the walls up vertically, aiming for a consistent thickness. Shape the profile into a gentle, rounded curve that tucks in slightly at the rim. -
Prepare the gallery:
This is crucial for the lid fit. Use a wooden rib to creating a flat, distinct gallery (shelf) inside the rim where the lid will sit. Measure the diameter with calipers before cutting it off the wheel.
Shrinkage Tip
Remember clay shrinks! Throw the lid slightly larger than the gallery measurement if you are worried, as you can always trim clay away, but you can’t add it back.
Step 2: Creating the Lid
-
Throw the lid structure:
Using a smaller ball of clay (about 0.5 lbs), throw a shallow bowl shape upside down. This will become the domed lid. -
Measure for fit:
Use your caliper measurement from the box body to sizing the lid flange exactly. It needs to be precise to sit snugly on the gallery. -
Refine the dome:
Smooth the exterior curve of the lid with a kidney rib to ensure it matches the round aesthetic of the base. -
Trim the lid:
Once leather hard, flip the lid over and trim the top surface to remove excess weight and refine the curve. -
Attach the knob:
Score and slip the center of the lid. Roll a small ball of clay for the knob, attach it securely, and then place it back on the wheel to refine the knob perfectly round.
Texture Twist
Before glazing, try carving subtle fluting or vertical lines into the body below the wax line. The glaze will break beautifully over the texture.
Step 3: Finishing and Glazing
-
Bisque fire:
Allow both pieces to bone dry completely, then load them into the kiln for a bisque firing to cone 04. -
Clean surface:
Wipe the bisqued pieces with a damp sponge to remove any dust that might resist the glaze. -
Apply wax resist:
This is the signature detail. Carefully paint a band of wax resist around the upper rim of the box body and the very edge of the lid. This will keep the clay bare. -
Wax the knob:
I also like to dab a little wax on the very top half of the knob for visual continuity with the rim stripe. -
Dip glaze:
Dip the body (interior and exterior) and the lid into your speckled teal glaze. The wax will repel the glaze from the stripe. -
Clean up:
Use a sponge to wipe away any stray droplets of glaze that may have beaded up on the waxed areas. -
Glaze fire:
Fire the final pieces to cone 5 or 6 (depending on your specific clay and glaze instructions).
Place the finished box on your vanity or gift it to a friend who appreciates handmade ceramics

The Complete Guide to Pottery Troubleshooting
Uncover the most common ceramic mistakes—from cracking clay to failed glazes—and learn how to fix them fast.
Heart-Shaped Keepsake Jewelry Box
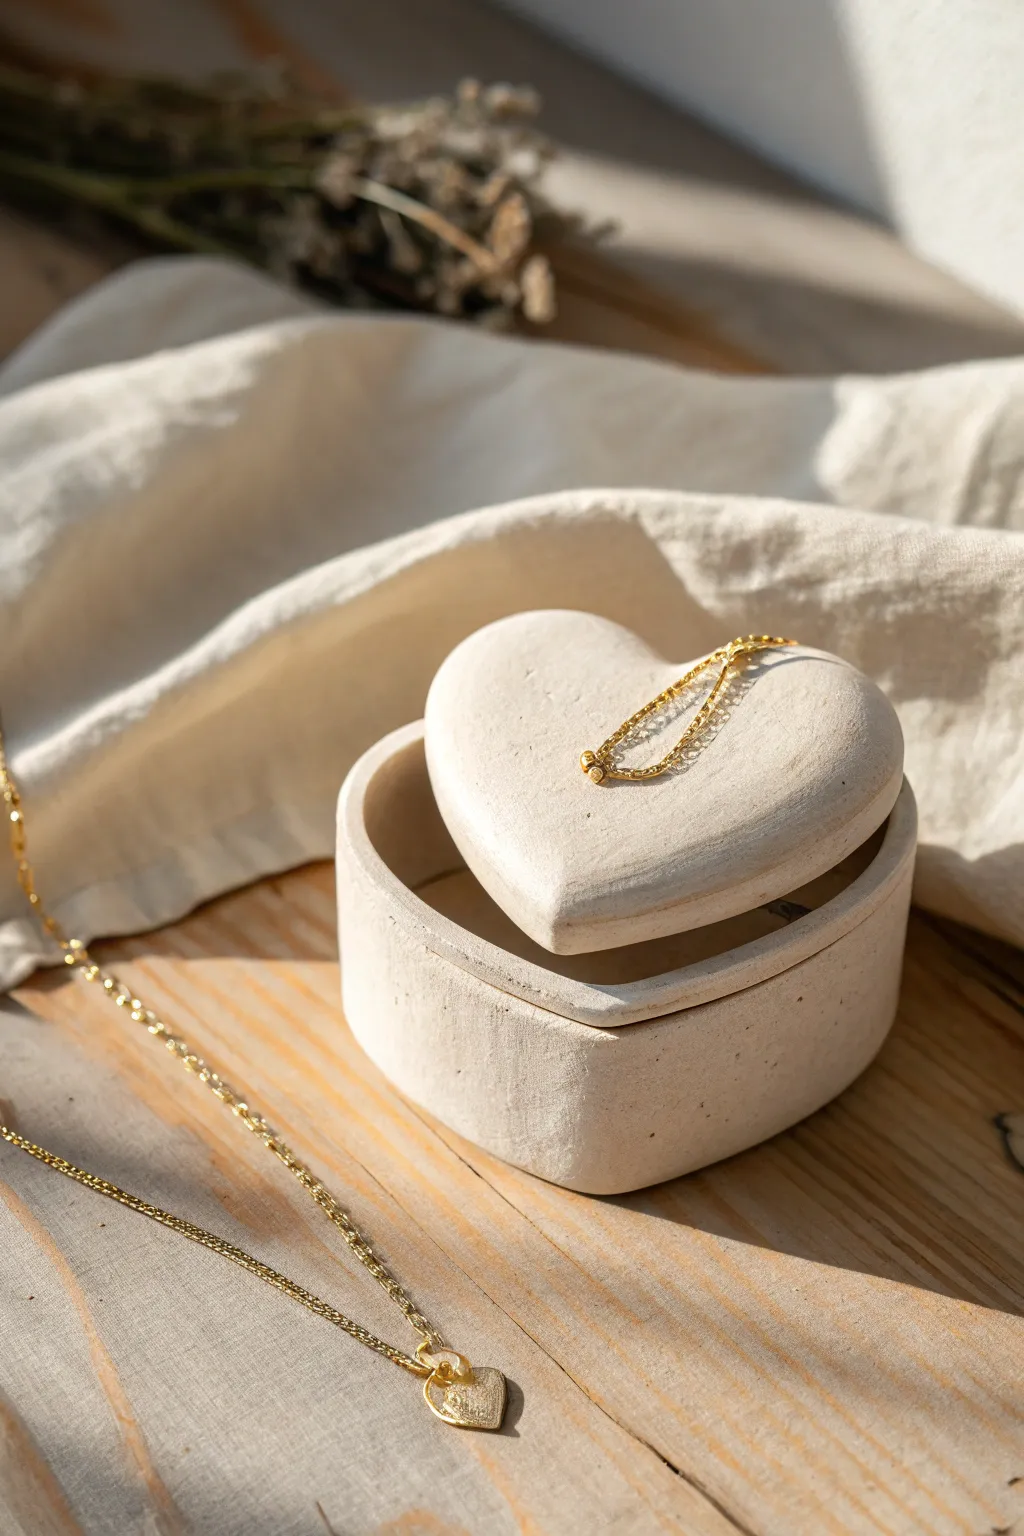
This elegant, matte-finish clay box is the perfect home for your most treasured trinkets. With its organic texture and soft, rounded edges, it perfectly balances modern minimalism with handmade warmth.
How-To Guide
Materials
- White specialized air-dry clay (or polymer clay with a stone effect)
- Rolling pin
- Heart-shaped cookie cutter (large)
- Craft knife or clay scalpel
- Clay sculpting tools (specifically a smoothing tool)
- Bowl of water
- Sponge
- Fine grit sandpaper (400-600 grit)
- Clear matte varnish or sealant (optional but recommended)
Step 1: Preparing the Base and Lid
-
Condition the Clay:
Begin by kneading a substantial chunk of your white clay until it is warm, pliable, and free of air bubbles. This prevents cracking later on. -
Roll the Slabs:
Roll out the clay on a flat surface to an even thickness of about 1/4 inch (6mm). You want it thick enough to be sturdy but not chunky. -
Cut the Base and Lid:
Use your large heart-shaped cookie cutter to punch out two identical heart shapes. One will become the absolute bottom, and the other will be the lid. -
Refine the Lid:
Take one of the heart cutouts and gently smooth the top edges with a damp finger to create a slightly domed, pillowy effect like the one in the photo. Set this aside to firm up slightly.
Cracks Appearing?
If you see hairline cracks while drying, mix a tiny bit of clay with water to make a paste. Fill the crack, smooth it over, and let it dry again.
Step 2: Building the Walls
-
Create a Coil or Strip:
Roll out a long snake of clay or cut a flat strip from your remaining rolled slab. A flat strip (about 1 inch wide) usually creates cleaner walls for this boxy look. -
Score and Slip:
Identify your base heart piece. Use your sculpting tool to scratch up the outer perimeter (scoring) and add a tiny bit of water (slip) to act as glue. -
Attach the Wall:
Carefully drape your clay strip around the perimeter of the heart base. Press it firmly onto the scored area. -
Join the Ends:
Where the two ends of the wall meet (ideally at the ‘V’ at the top of the heart or the point at the bottom), cut them at an angle and blend the clay together seamlessly. -
Creating the Inner Lip:
To keep the lid secure, roll a very thin snake of clay. Attach this to the *inside* of the lid piece, about 3mm from the edge. This creates a stopper so the lid doesn’t slide off.
Step 3: Refining and Drying
-
Blend the Seams:
Use a modeling tool to drag clay from the wall down onto the base, blurring the line where they connect. Do this on both the inside and outside. -
Smooth the Surface:
Dip a sponge or your finger in water and gently rub the entire surface. I find this step crucial for removing fingerprints and achieving that soft, stone-like appearance. -
Initial Drying:
Let the box and lid dry separately for about 24-48 hours. Place them on a wire rack or rotate them occasionally to ensure even airflow. -
Sanding:
Once bone dry, take your fine-grit sandpaper and gently buff the entire piece. Focus on the rim of the box and the edge of the lid to ensure they sit flush against each other. -
Texture Check:
The goal is a finish that looks like raw ceramic or limestone, so don’t polish it until it’s shiny; just remove sharp burrs. -
Sealing:
Apply a thin coat of matte varnish to protect the clay from moisture and oils, especially if you plan to store metal jewelry inside.
Add a Gold Accent
For a luxe touch, paint just the rim of the lid with liquid gold leaf paint after the sealant has fully dried.
Now you have a serene little vessel ready to hold your favorite necklace or ring safely
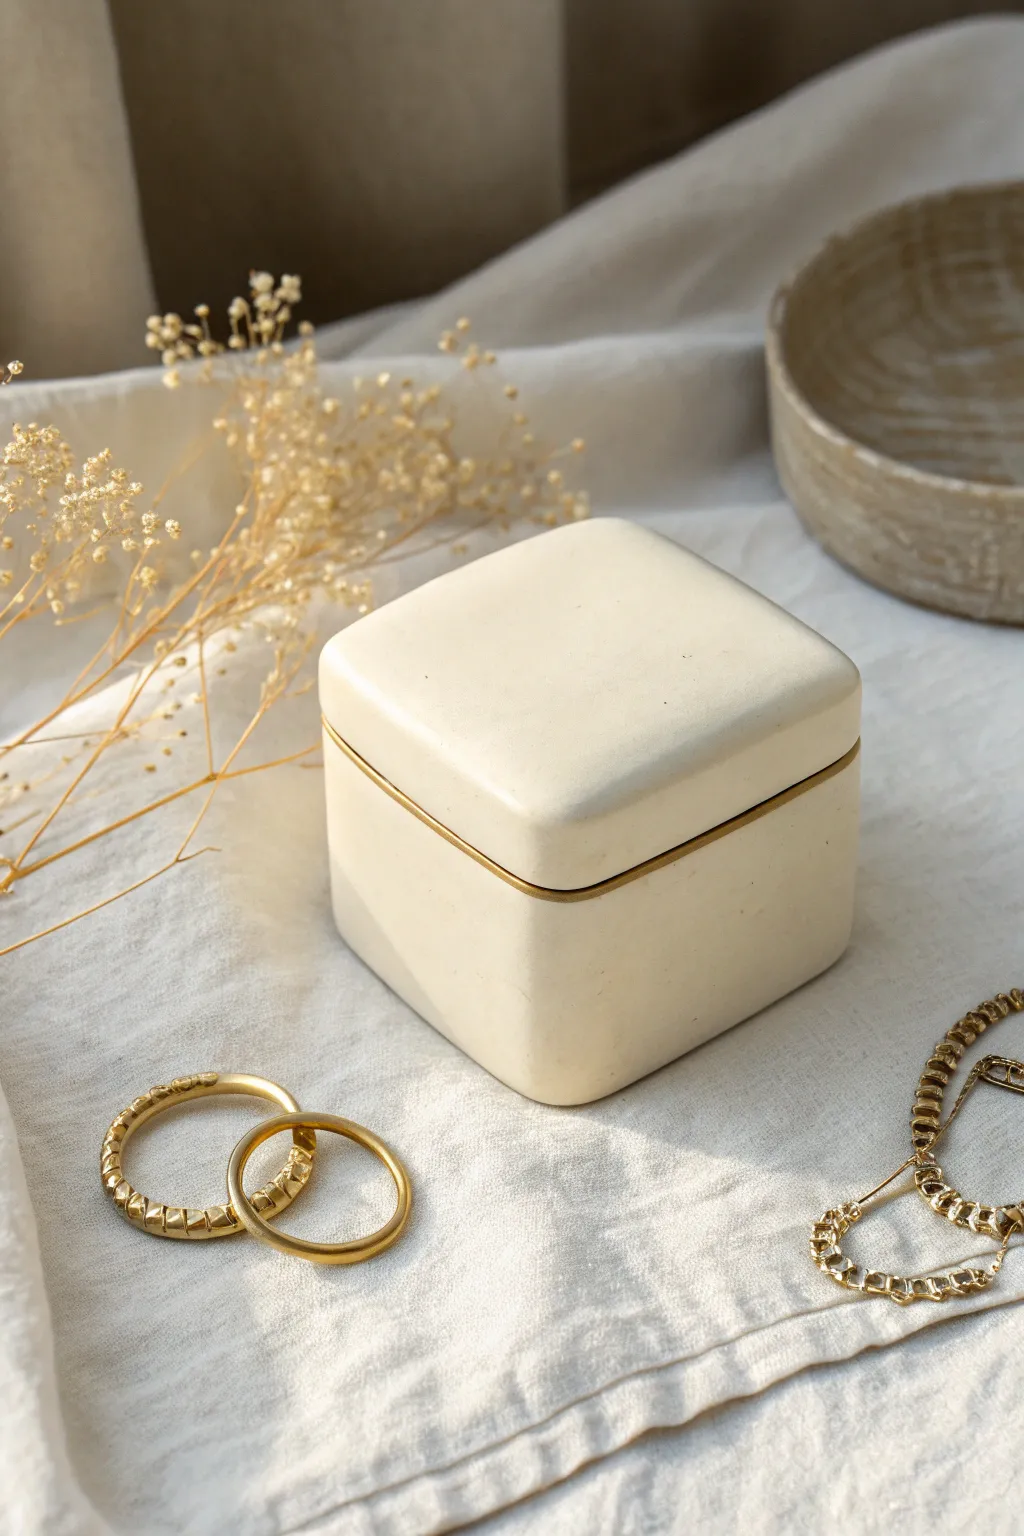
Minimal Terrazzo Speckle Jewelry Box
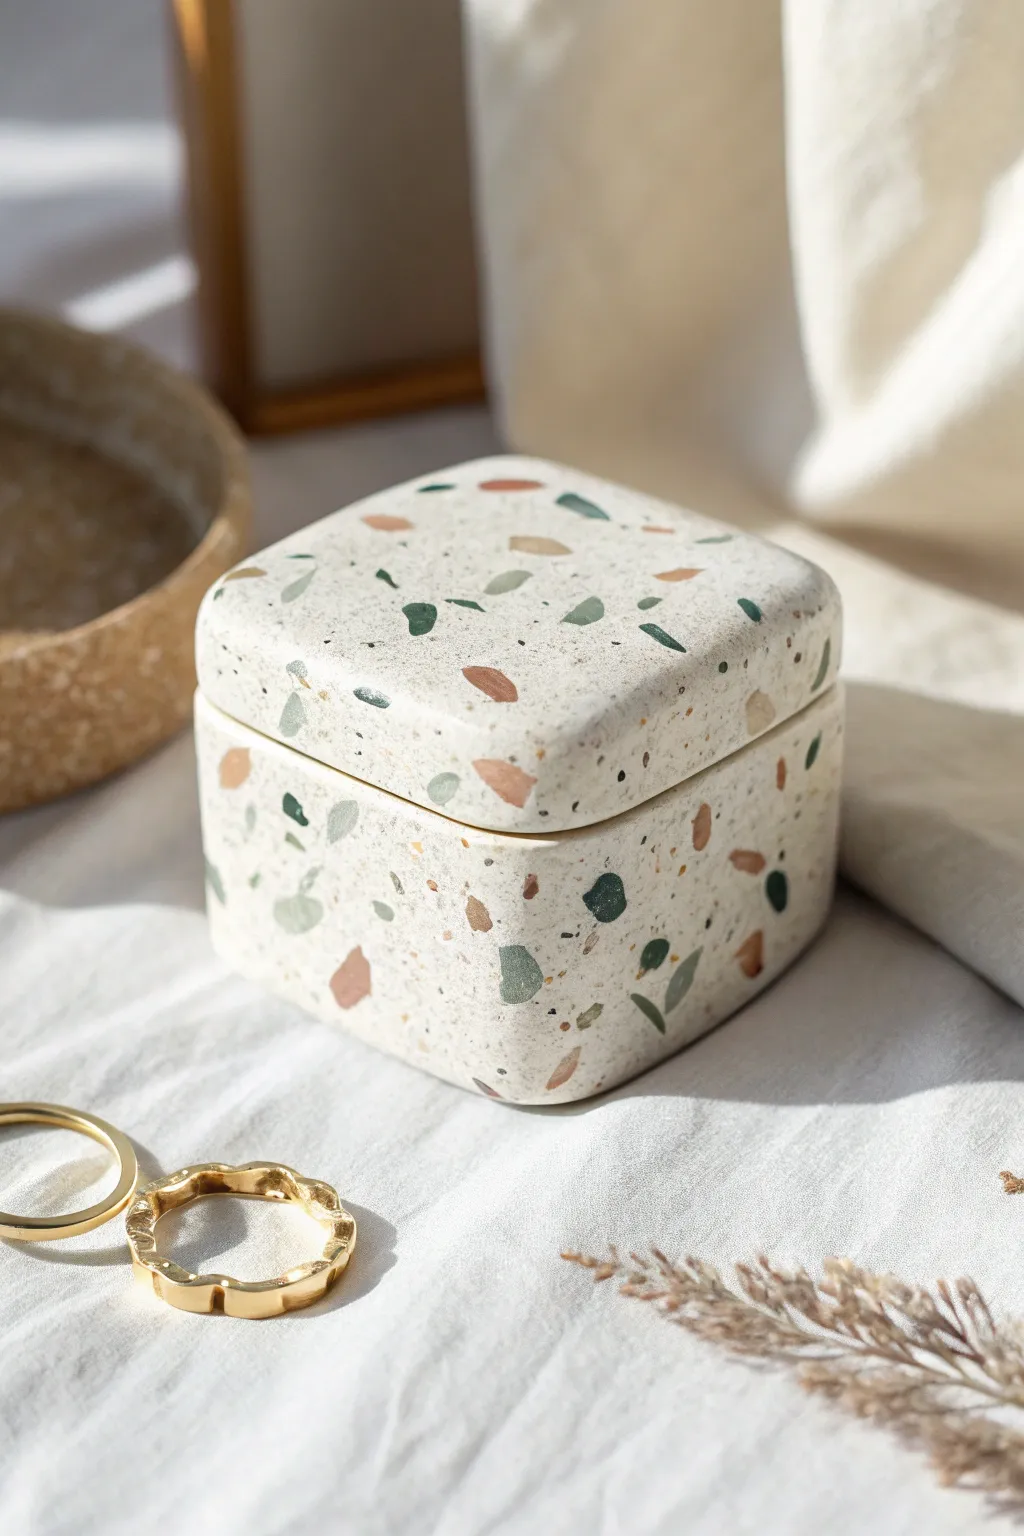
Elevate your vanity with this sophisticated square jewelry box, featuring a trendy terrazzo effect. The blend of muted earth tones and deep greens against a creamy white base creates a timeless, minimal aesthetic that looks like real stone.
Detailed Instructions
Materials
- White or cream polymer clay (approx. 2-3 blocks)
- Colored polymer clay (Sage Green, Terracotta, Tan, Dark Green, Black)
- Acrylic roller or pasta machine
- Tissue blade or sharp craft knife
- Square cookie cutter (approx. 3-4 inches) or stiff cardstock template
- Cornstarch (for release)
- Oven-safe glass or metal square form (optional for structure)
- Sanding paper (grit 400, 600, and 1000)
- Matte varnish or sealant (optional)
- Liquid polymer clay (for bonding)
Step 1: Prepping the Terrazzo Chips
-
Roll Colored Sheets:
Begin by conditioning small amounts of your colored clays—sage, terracotta, tan, dark green, and a tiny pinch of black. Roll each color out into a very thin sheet, roughly 1mm thick or the thinnest setting on your pasta machine. -
Bake the Sheets (Optional Tip):
Some artists prefer to chop raw clay, but for sharper, distinct ‘stone’ chips, I like to bake these thin sheets for just 10 minutes first. This makes them easier to cut into geometric shards without smearing. -
Create the Chips:
Once your colored sheets are ready (either raw or par-baked), use your tissue blade to chop them into irregular fragments. Aim for a mix of sizes—mostly small speckles with a few larger statement chunks for that authentic terrazzo look. -
Mix Your Base:
Condition your white or cream polymer clay thoroughly until it is soft and pliable. If the clay is too sticky, dust your hands lightly with cornstarch.
Pro Tip: Chip Visibility
Add ‘micro-speckles’ by grating a tiny bit of black clay with a spice grater into your white mix. It adds depth resembling real granite texture.
Step 2: Forming the Patterns
-
Embed the Chips:
Flatten your white clay slightly and sprinkle a generous layer of your colored chips over the surface. Fold the white clay over the chips, roll it out, and fold it again. Repeat this process until the chips are distributed throughout the block, not just on the surface. -
Roll the Final Slab:
Roll your terrazzo-infused white clay into a uniform slab, approximately 1/4 inch thick. You want the walls of your box to be sturdy. -
Smooth the Surface:
Pass the acrylic roller over the surface firmly to ensure all chips are flush. If any chips look buried under a thin film of white clay, don’t worry; sanding later will reveal them.
Troubleshooting: Dirty Clay
White clay picks up lint easily. Keep wet wipes nearby to clean hands and tools frequently, or use gloves to keep the white base pristine.
Step 3: Constructing the Box
-
Cut the Base and Lid:
Using your square cutter or template, cut two identical squares from your slab. One will be the bottom of the box, and one will be the top of the lid. -
Cut the Walls:
Cut four rectangular strips for the box sides. Ensure the length of the strips matches the side length of your base square, accounting for the thickness of the adjoining walls if you are doing butt joints. -
Assemble the Box Body:
Score the edges of the base square and apply a thin line of liquid polymer clay. Press the wall strips onto the base. Use your finger or a clay tool to smooth the seams on both the inside and outside until they are invisible. -
Create the Lid Rim:
To make the lid fit vividly, cut four thinner strips of clay. Attach these to the *underside* of your lid square, inset slightly from the edge (about the thickness of the box walls). This inner rim creates a lip that keeps the lid from sliding off. -
Round the Corners:
Gently gently press the sharp corners of the box and lid with your palms to create a softened, rounded silhouette similar to the reference image.
Step 4: Finishing Touches
-
Final Bake:
Place your assembled box and lid on a ceramic tile or baking sheet. Bake according to your clay manufacturer’s instructions, typically around 275°F (130°C) for 30-45 minutes to ensure durability. -
Cool Down:
Allow the pieces to cool completely in the oven with the door cracked open. This gradual cooling helps prevent cracks. -
Sand for Texture:
Wet sand the box under running water, starting with 400 grit to remove fingerprints and expose the colored chips distinctively. Move to 600 and then 1000 grit for a silky smooth finish. -
Buff or Seal:
For a natural stone look, buff the surface vigorously with a denim cloth. If you prefer protection against makeup stains, apply a very thin layer of matte varnish.
Place your favorite rings inside and admire your modern, handmade storage piece


What Really Happens Inside the Kiln
Learn how time and temperature work together inside the kiln to transform clay into durable ceramic.
Faux Marble Swirl Lid With Matching Base
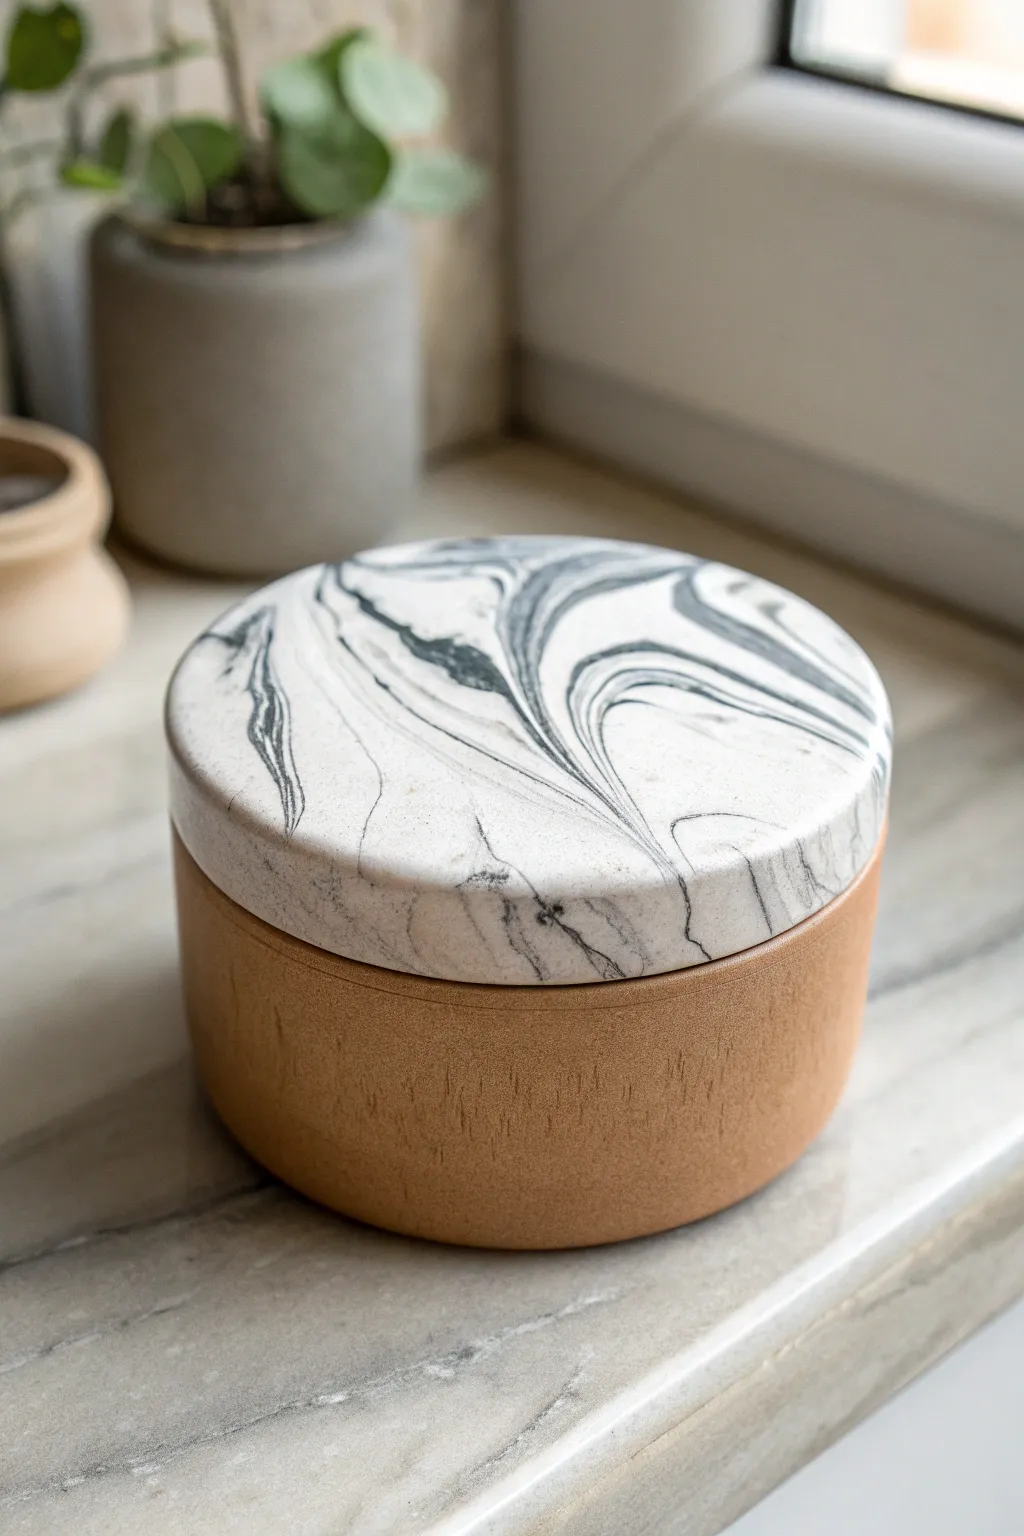
Elevate your vanity with this sophisticated two-tone jewelry box, featuring a warm, earthy base paired with a striking black and white faux marble lid. The organic swirl pattern ensures every piece is unique, creating a modern, high-end look from simple polymer clay.
Step-by-Step Tutorial
Materials
- Polymer clay (white, black, and terracotta/tan)
- Acrylic rolling pin
- Round clay cutter (approx. 3-4 inch diameter)
- Clay blade or tissue blade
- Small disk magnet (optional, for closure)
- Gloss glaze or polyurethane varnish
- Soft paintbrush
- Wet/dry sandpaper (400, 600, and 1000 grit)
- Oven and baking sheet
- Cornstarch (to prevent sticking)
- Heat gun (optional)
Step 1: Forming the Base
-
Condition the clay:
Start by thoroughly conditioning your terracotta or tan colored clay until it is soft and pliable. You want a consistent, warm earth tone for the base. -
Roll the structural sheet:
Roll out a portion of the tan clay to a medium thickness (about 1/4 inch) to form the bottom of the box. Use your round cutter to stamp out a perfect circle. -
Create the walls:
Roll a long snake of the remaining tan clay and flatten it into a long, rectangular strip with your rolling pin. Trim the edges so it is uniform in height (about 2 inches tall). -
Assemble the cylinder:
Carefully wrap the rectangular strip around the circumference of your circle base. I like to bevel the ends where they meet at a 45-degree angle to create a seamless join. -
Smooth the seams:
Use a modeling tool or your finger to blend the clay where the wall meets the base and where the wall ends join. Smooth the outside texture gently to give it a matte, natural finish similar to the reference photo. -
Add an inner lip:
Roll a thinner strip of clay and attach it to the inside top edge of the wall, extending it slightly upwards. This recessed rim will hold the lid securely in place. -
Pre-bake tightly:
Bake the base according to the manufacturer’s instructions for your specific brand of clay. Let it cool completely before fitting the lid.
Clean Veins Pro-Tip
For sharper marble veins, let the clay rest for 20 minutes after mixing but before rolling. This cools the clay down, preventing colors from muddying together.
Step 2: Creating the Marble Lid
-
Prepare marble colors:
Condition a large block of white clay and a smaller amount of black clay. Simplicity is key here; use about a 10:1 ratio of white to black. -
Chop and combine:
Roll the black clay into thin snakes. Chop the white clay into rough logs. Combine them by twisting the black snakes around the white logs. -
Twist and fold:
Twist the combined log until it looks like a candy cane, then fold it in half. Repeat this twist-and-fold process 2-3 times, but be careful not to overmix, or you will get grey clay instead of distinct veins. -
Form the marble block:
Squish the twisted log into a ball. Use your acrylic roller to flatten this ball into a thick slab (matching the thickness of your base walls). Look for those dramatic swirls shown in the image. -
Cut the lid shape:
Using the same round cutter from the base step, cut your lid. If the base shrank slightly during baking, you might need to trim this circle slightly by hand to match the outer diameter of the finished base. -
Refine the edges:
Smooth the edges of your marble disk with your finger to remove any sharp cuts from the blade. Ensure the top surface is perfectly flat. -
Final Bake:
Place the marble lid on your baking sheet. Bake according to package directions. To prevent scorching the white clay, you can tent a piece of aluminum foil over the top.
Step 3: Finishing and Polishing
-
Wet sanding:
Once cooled, place the lid in a bowl of water. Use 400 grit sandpaper to remove any fingerprints, then move to 600 and 1000 grit for a silky smooth feel. -
Cleaning up:
Wash off any sanding residue and dry the piece thoroughly. The water reveals the true contrast of the marbling. -
Buffing the base:
For the tan base, skip the heavy sanding to maintain that slight texture. Just lightly buff any rough spots on the rim. -
Glazing:
To achieve the polished stone look seen in the photo, apply a thin coat of gloss glaze or polyurethane varnish to the marble lid only. -
Final assembly check:
Place the lid on the base. If the fit is too tight due to glaze, you can lightly sand the inner lip of the base.
Fixing Air Bubbles
If you see a bump in your smooth marble surface before baking, prick it gently with a needle and smooth the air out with your finger to keep the surface flat.
Now you have a stunning, functional piece of art to store your treasures
Vintage Rose Bouquet Lid Topper
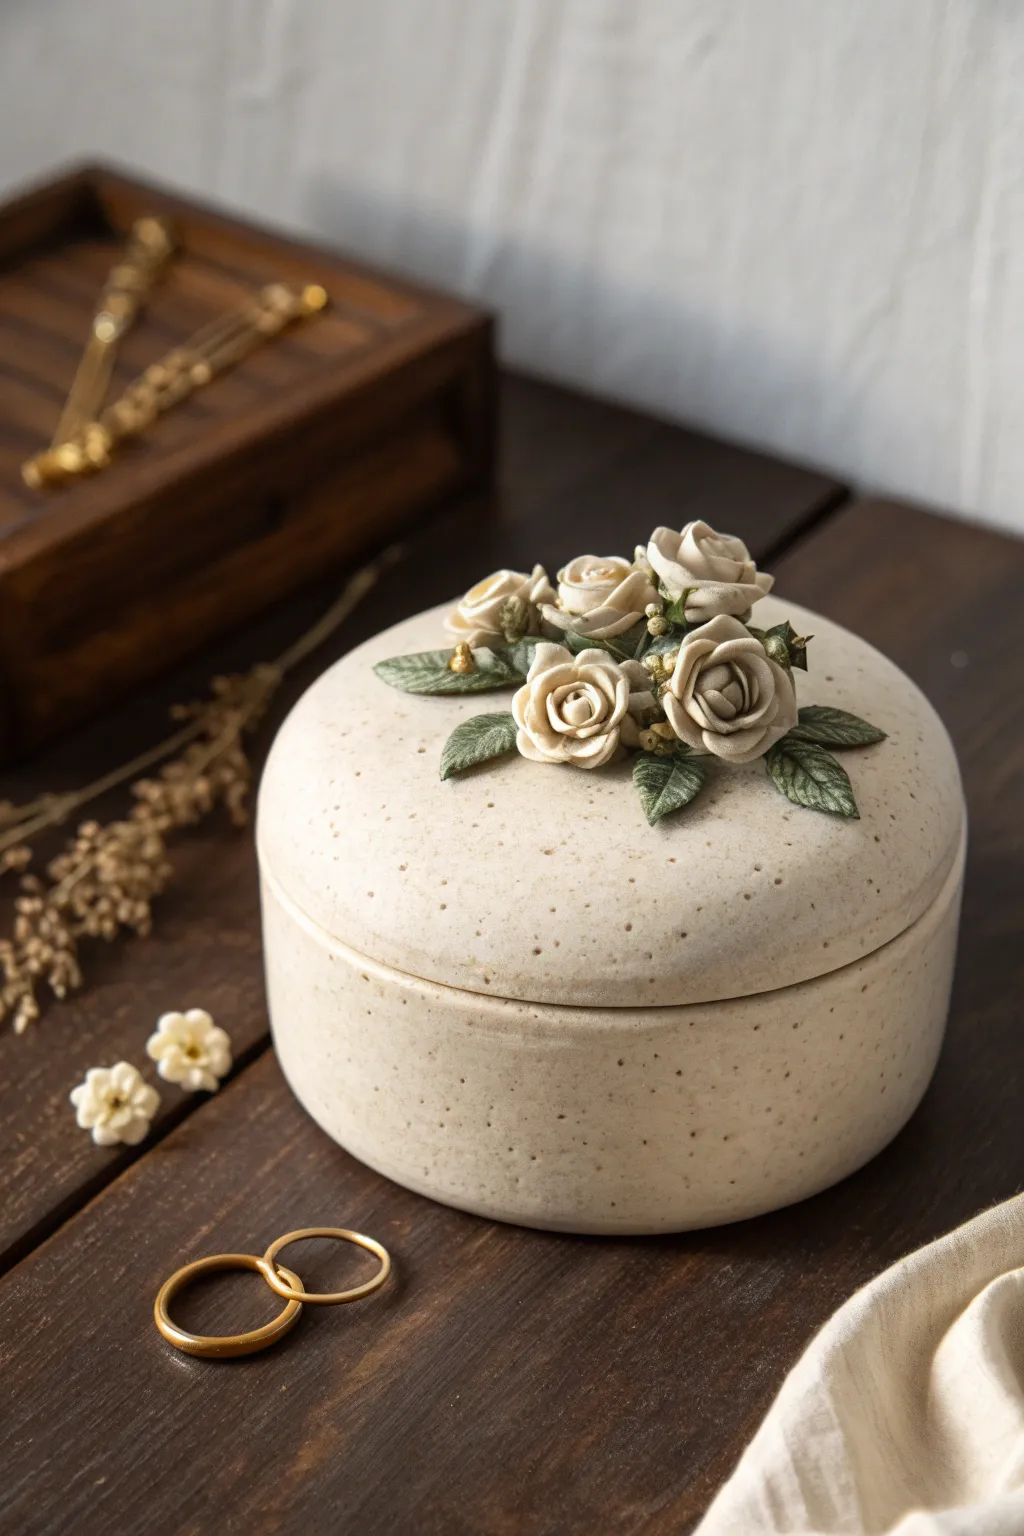
This elegant trinket box brings a touch of romantic nostalgia to any vanity with its creamy, speckled finish and delicate bouquet of sculpted clay roses. The combination of a rustic, stone-like texture with refined floral details creates a timeless piece perfect for storing your most treasured rings.
Step-by-Step
Materials
- Polymer clay (white or cream)
- Speckled clay (or black pepper/ground vanilla bean for mixing)
- Round cookie cutter (approx. 4-inch diameter)
- Rolling pin or pasta machine
- Aluminum foil (for armature)
- Olive green polymer clay (for leaves)
- Detailing needle tool
- Ball stylus tool
- Liquid polymer clay (Bake and Bond)
- Matte varnish
- Fine grit sandpaper
Step 1: Base and Lid Construction
-
Prepare the Speckled Clay:
If you aren’t using pre-mixed speckled clay, condition your white clay until soft and mix in a pinch of coarse black pepper or dried vanilla bean specks. Knead until the speckles are evenly distributed throughout the batch. -
Create the Base Foil Core:
Ball up a piece of aluminum foil and flattening it into a hockey puck shape that is slightly smaller than your desired box interior. This acts as a sturdy core to build the clay around. -
Form the Box Base:
Roll out a sheet of speckled clay to about 1/4 inch thickness. Wrap a strip around the foil puck for the walls and place a circle on the bottom. Smooth all seams together with your fingers so no join lines are visible. -
Refine the Shape:
Gently roll the edges against your work surface to ensure the walls are straight and the bottom is flat. The form should look like a simple, clean cylinder. -
Cut the Lid:
Roll out a slightly thicker sheet of clay for the lid. Use your large circle cutter to stamp a perfect round shape that matches the diameter of your base. -
Curve the Lid Edges:
Gently gently press and smooth the edges of the lid downwards with your thumb to create a soft, domed curve rather than a sharp 90-degree angle. This gives it that soft ‘pottery’ look. -
Add the Lip:
Create a smaller ring of clay and attach it to the underside of the lid using liquid clay. This inner lip will keep the lid from sliding off the base.
Clay Too Soft?
If your clay gets sticky or mushy while sculpting the tiny rose petals, pop it in the fridge for 10 minutes. Cooler clay holds fine detail much better.
Step 2: Sculpting the Floral Topper
-
Mix Leaf Colors:
Take your olive green clay and mix in a tiny amount of the speckled cream clay. This creates a muted, sage-like green that harmonizes better with the box than a bright, raw green. -
Form the Leaves:
Roll small teardrops of green clay and flatten them. Use your needle tool to impress a central vein and tiny angled lines for texture. Create about 6-8 leaves of varying sizes. -
Make Rose Centers:
For the roses, roll a very thin strip of cream clay and coil it tightly to create the center bud. Make 3 large centers and 3 smaller buds. -
Build Petals:
Flatten tiny balls of clay into thin, rounded petals. Wrap these around your center coil, overlapping each one slightly. I find sticking the base to a toothpick while building makes this easier. -
Flare the Petals:
Once your roses reach the desired size (make three prominent blooms and a few smaller buds), gently roll the outer edges of the petals backward with your finger to simulate an open bloom. -
Arrange the Bouquet:
Apply a dab of liquid clay to the center of the lid. Place your leaves first, radiating outward, then nestle the roses into the center, pressing them gently so they bond with the lid. -
Add Micro Details:
Roll tiny spheres of clay (some green, some gold-colored if desired) and cluster them in the gaps between flowers to look like tiny unopened buds or berries.
Level Up: Gilded Edges
For a luxe antique feel, lightly dry-brush gold acrylic paint onto the edges of the rose petals and leaves after the piece has been baked and cooled.
Step 3: Finishing Touches
-
Texture Check:
Before baking, give the whole box a once-over. Are there fingerprints? Smooth them out with a drop of baby oil or touch up the speckled texture with a stiff brush. -
Bake:
Bake the base (with foil inside) and lid separately according to your clay package instructions. Usually, this is around 275°F (135°C) for 30 minutes. -
Remove Foil:
Once the base is completely cool, carefully pick out the foil core from the inside. The clay will be hard, so you can pry the foil away from the walls without damage. -
Sand and Varnish:
Lightly sand the bottom rim if it’s uneven. Finally, apply a coat of matte varnish to protect the surface while maintaining that natural, unglazed ceramic appearance.
Place this lovely handmade box on your dresser and enjoy the vintage charm it adds to your room

TRACK YOUR CERAMIC JOURNEY
Capture glaze tests, firing details, and creative progress—all in one simple printable. Make your projects easier to repeat and improve.
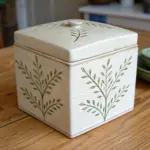
Embossed Lace Texture With Antique Finish
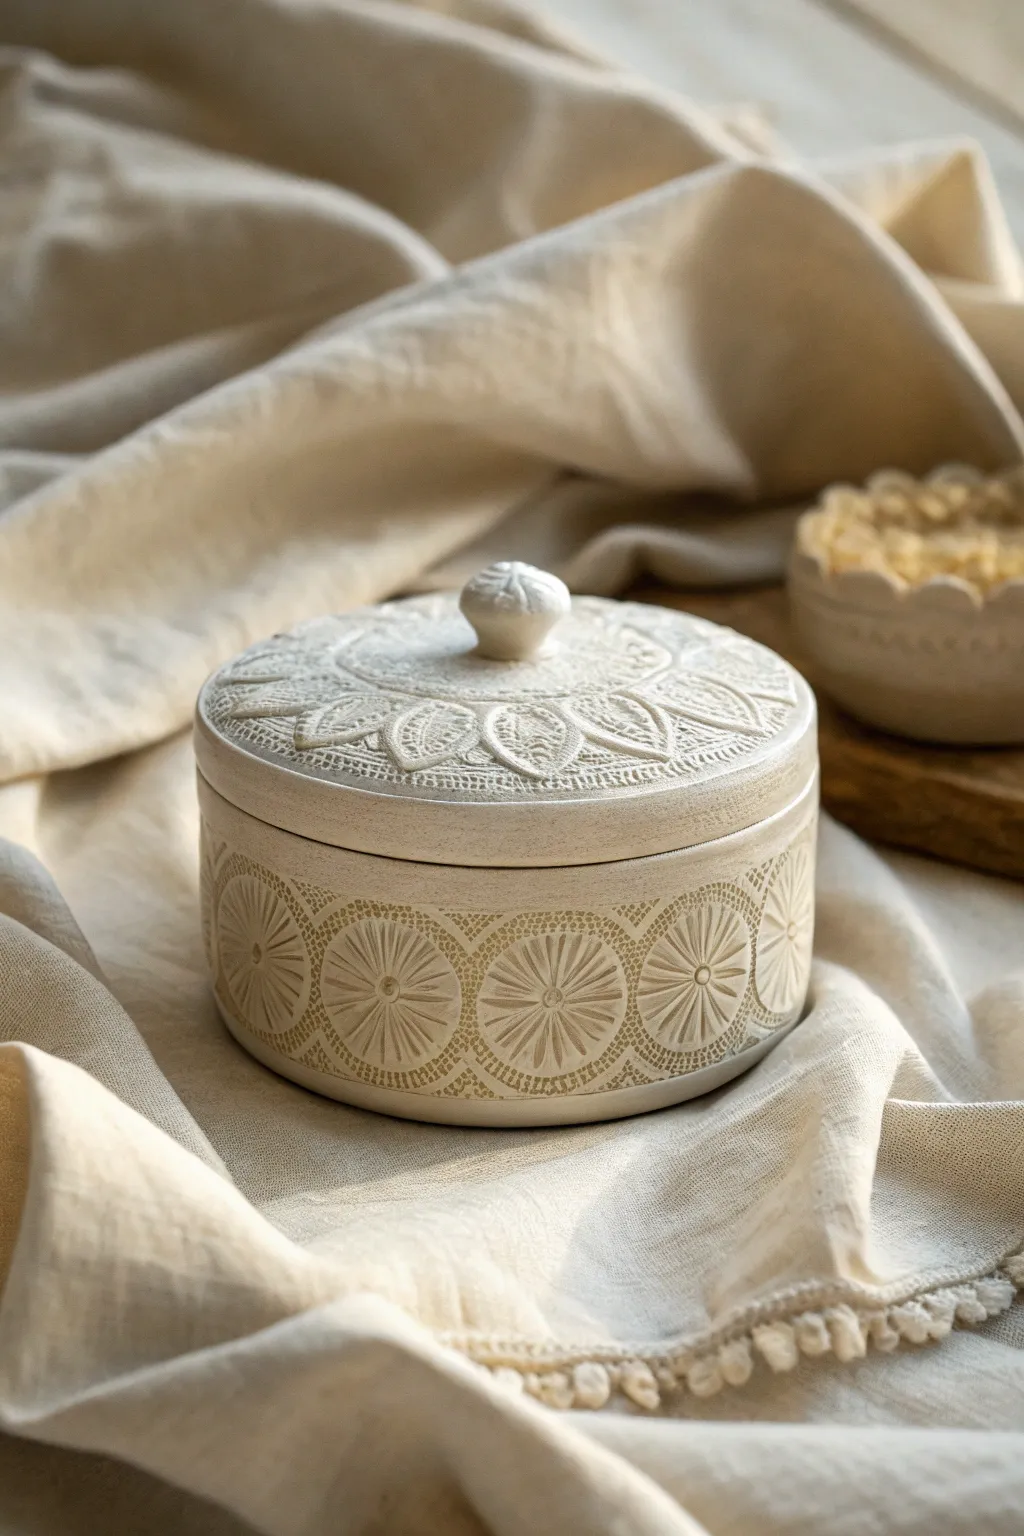
This elegant jewelry box captures the timeless beauty of antique stonework with its intricate embossed patterns and soft, cream-colored finish. By impressing lace textures directly into clay, you’ll create a sophisticated storage piece that looks like a treasured heirloom straight from the kiln.
Step-by-Step Guide
Materials
- White smooth air-dry clay (approx. 500g)
- Small round knob (wooden or pre-made clay)
- Round cookie cutters (two sizes: one for box diameter, one slightly larger for lid)
- Rolling pin
- Textured lace ribbon or lace doily (for embossing)
- Modeling tools or a dull knife
- Slip (clay mixed with water)
- Fine-grit sandpaper
- Acrylic paints: Cream/Off-White, Raw Umber (diluted for antique wash)
- Matte spray varnish
- Cardboard core or jar (to use as a mold for the base shape)
- Clear plastic wrap
Step 1: Forming the Base
-
Prepare the mold:
Find a cardboard tube or a glass jar that matches your desired box diameter. Wrap the outside tightly with plastic wrap to prevent the clay from sticking during the drying process. -
Roll the side strip:
Roll out a portion of air-dry clay into a long, rectangular strip about 5mm thick. Ensure the length is enough to wrap fully around your mold with a little overlap. -
Emboss the pattern:
Before cutting to size, lay your textured lace ribbon across the center of the clay strip. Press it firmly and evenly into the clay with your rolling pin to imprint the intricate pattern, then gently peel it away. -
Cut to size:
Trim the top and bottom edges of the strip to create straight lines, ensuring the strip is the height you want for your box walls. Wrap this strip around the plastic-covered mold. -
Join the seam:
Cut through both overlapping layers of clay at an angle to create a seamless join. Score these edges, apply a little water or slip, and smooth the join together with a modeling tool or your finger so it becomes invisible. -
Create the base:
Roll out a slab of clay for the bottom. Place your wrapped mold (with the clay wall) onto this slab and trace around it. Cut out the circle, score the edges, and attach it firmly to the bottom of the wall piece, blending the clay upwards for a strong seal.
Fixing Warped Lids
If your lid warps while drying, dampen the underside slightly and place it under a heavy book overnight to flatten it back out.
Step 2: Crafting the Lid
-
Roll the lid slab:
Roll out another slab of clay, slightly thicker than the walls. Use your larger circular cutter to cut a circle that will sit comfortably atop the box walls. -
Emboss the lid design:
Place a circular lace doily or arrange lace strips in a radial flower pattern on the clay circle. Press firmly with the rolling pin to transfer the texture. Be careful not to distort the circle shape too much. -
Add the inner lip:
To keep the lid from sliding off, roll a small snake of clay and form a ring slightly smaller than the box’s inner diameter. Attach this ring to the *underside* of the lid using scoring and slip. -
Attach the knob:
Score the center of the lid’s top side and the base of your decorative knob. Apply slip and press the knob firmly into the center. Smooth out any excess slip with a small brush. -
Dry completely:
Allow both pieces to dry fully for 24-48 hours. I find it helpful to gently remove the base from the mold once it’s leather-hard so the inside dries evenly.
Go Pro: Velvet Luxury
Cut a circle of self-adhesive velvet or felt to line the bottom inside of the box for a professional, jewelry-safe interior.
Step 3: Refining and Finish
-
Sand imperfections:
Once fully dry, use fine-grit sandpaper to smooth any rough edges on the rims or the bottom. Be gentle over the embossed areas to preserve the texture. -
Base coat:
Paint the entire box and lid (inside and out) with a creamy off-white acrylic paint. You may need two coats for opaque coverage. Let this dry completely. -
Create an antique wash:
Mix a small amount of raw umber paint with plenty of water. The consistency should be very thin, like ink or tea. -
Apply the wash:
Brush this watery mix over the textured areas, ensuring it gets into all the tiny impressed crevices of the lace pattern. -
Wipe back:
Immediately use a damp paper towel or sponge to wipe the surface. The dark paint will stay in the recesses, highlighting the lace design, while the raised surfaces return to cream. -
Seal the piece:
Finish by spraying the box with a matte varnish to protect the finish without adding an unnatural shine.
Now you have a charming, stone-effect keepsake box ready to hold your favorite rings or trinkets.
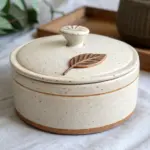
Leafy Vine Relief Wrap Around the Sides
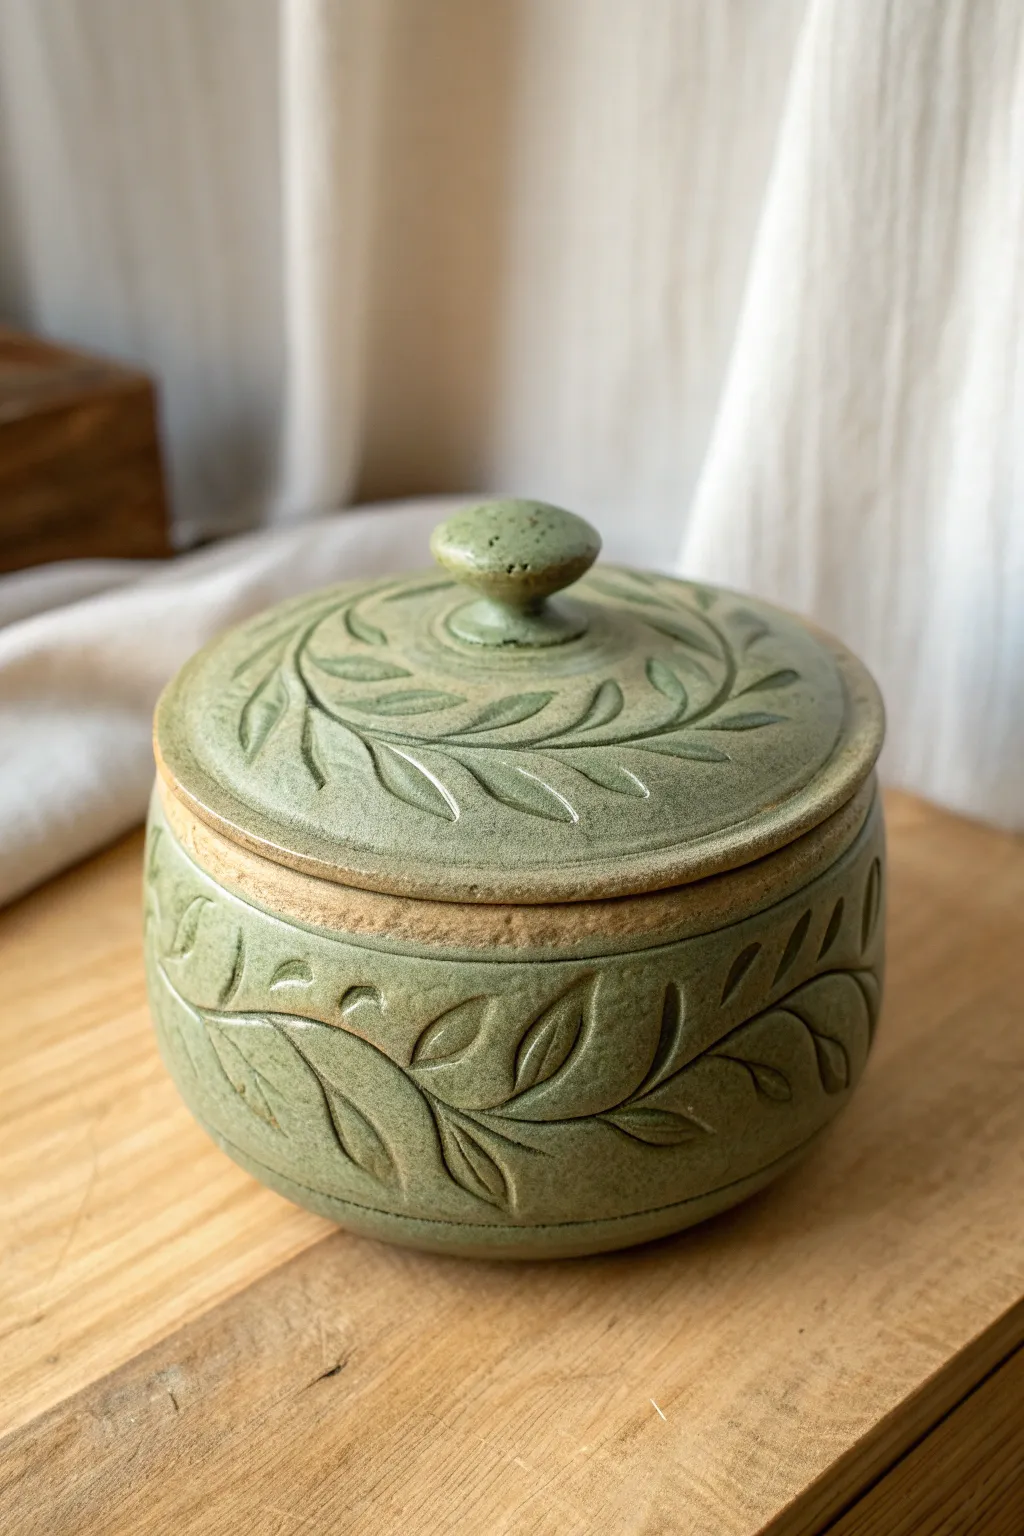
Bring the serenity of the woods into your home with this delicately carved lidded vessel. Featuring a continuous vine motif that wraps seamlessly around the body and lid, the textured green surface contrasts beautifully with the exposed raw clay rim.
Step-by-Step
Materials
- Stoneware clay (smooth or lightly grogged)
- Pottery wheel (or coil building tools for hand-building)
- Needle tool
- Carving tools (loop tool and small ribbons)
- Sponge
- Wire cutter
- Green matte glaze
- Wax resist
- Kiln
Step 1: Throwing and Shaping
-
Center and open:
Begin by wedging about 2-3 lbs of clay. Center it firmly on the wheel head and open the clay to create a flat internal floor, roughly 4 inches wide. -
Pull the walls:
Pull the walls up into a rounded cylinder shape. Aim for a slightly bulbous belly that tapers inward just a bit at the rim. Keep the walls thick enough (about 1/4 inch) to allow for carving later without cutting through. -
Create the gallery:
At the rim, use a wooden rib or your thumb to split the clay slightly, creating a sunken ‘gallery’ or ledge where the lid will eventually sit. Smooth this area carefully so lids fit flush. -
Throw the lid:
Measure the diameter of your gallery using calipers. Throw a separate lid right-side up (or inverted, depending on your preference) including a small knob at the center. Ensure the flange matches your caliper measurement precisely.
Fixing a Wobbly Lid
If the fired lid rattles, apply a small dab of grinding paste (valve grinding compound) to the gallery, put the lid on, and twist back and forth to sand them into a perfect fit.
Step 2: Carving the Design
-
Leather hard stage:
Allow both pieces to dry to a sturdy leather-hard state. I find trimming is best done when the clay is firm enough to not warp but soft enough to carve smoothly. -
Trim the base:
Invert the pot on the wheel, secure it with clay lugs, and trim a neat foot ring. Refine the curve of the belly to ensure it is uniform for your carving canvas. -
Sketch the vine:
Lightly sketch a flowing vine pattern around the circumference using a needle tool. Create a similar circular pattern on the lid, radiating outward from the knob. -
Carve the relief:
Using a small loop tool, carve away the negative space around the leaves. You don’t need to go deep—just shallow enough to let the leaves stand out. Angle your tool to bevel the edges of the leaves slightly for a softer look. -
Add leaf details:
Use a sharp needle tool or a very fine ribbon tool to incise the central veins into each leaf. Keep your lines fluid to mimic organic growth. -
Texture the background:
Gently tap the carved-out background areas with a stiff brush or a specialized texture tool to create a subtle pitted surface, contrasting with the smooth leaves. -
Clean up:
Before firing, smooth any sharp burrs of clay with a slightly damp sponge or your fingertip, but be careful not to erase your texture.
Variation: Seasonal Colors
Change the glaze to a deep amber or autumnal orange to transform this spring vine box into a harvest-themed vessel perfect for storing dried spices.
Step 3: Glazing and Finishing
-
Bisque fire:
Load the pieces into the kiln and bisque fire them to Cone 04 (or your clay body’s recommended temperature). -
Apply wax resist:
Brush wax resist carefully onto the gallery ledge of the pot and the corresponding flange of the lid. For the look in the photo, allow a small strip of raw clay to remain unglazed on the vertical rim of the lid as well. -
Glaze application:
Dip the pot and lid into a matte green stoneware glaze. The glaze should pool slightly in the recessed areas around the leaves, highlighting the relief. -
Wipe back:
If the glaze covers the relief too thickly, gently wipe the raised surfaces of the leaves with a damp sponge to let the clay color bleed through slightly during firing. -
Final fire:
Fire to the glaze’s maturity temperature (e.g., Cone 5 or 6). Once cooled, check the fit of the lid and sand the bottom if necessary.
Place your finished box on a shelf where the light can catch the subtle ridges of your organic carving
Faux Metal Patina Trinket Box Look
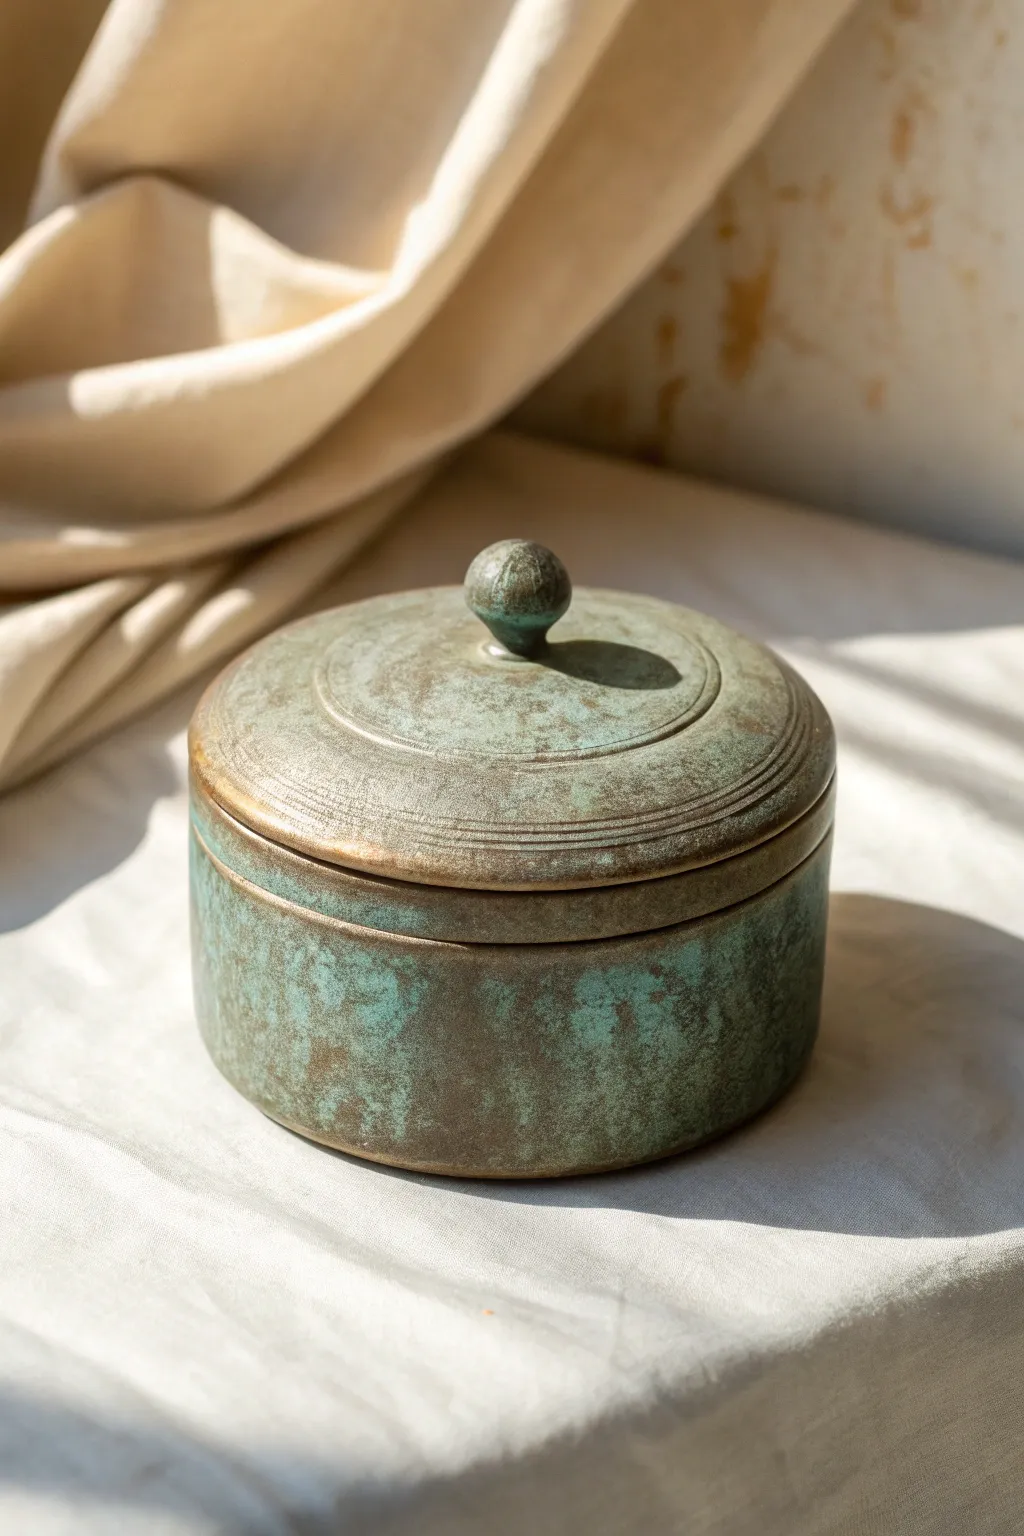
Transform ordinary air-dry clay into an ancient-looking relic with this convincing faux bronze technique. By layering paints and textures, you’ll create a weathered verdigris finish that looks like it’s been aging for centuries.
How-To Guide
Materials
- Air-dry clay (white or terracotta)
- Round cookie cutters or a template
- Rolling pin
- Slip (clay mixed with water)
- Clay sculpting tools or a butter knife
- Sanding sponge (fine grit)
- Dark brown acrylic paint
- Bronze or copper metallic acrylic paint
- Turquoise or verdigris acrylic paint
- Sea sponge or stiff bristle brush
- Matte spray varnish
- Baking soda (optional for texture)
Step 1: Forming the Box
-
Roll the base:
Begin by conditioning your clay until pliable, then roll it out to an even thickness of about 1/4 inch. Cut two identical circles using your cutter—one for the base and one for the lid. -
Create the walls:
Roll out a long, rectangular strip of clay. Measure the circumference of your base circle to ensure the strip is long enough to wrap around it fully, adding a little extra for the seam. -
Attach the walls:
Score the edges of the base circle and the bottom edge of your clay strip. Apply a little slip to the scored areas. Wrap the strip around the base, pressing firmly to join them. Smooth the seam where the strip ends meet, blending the clay so the join disappears. -
Add lid details:
Take your second circle (the lid) and use a sculpting tool to carve two concentric circles into the surface lightly. Don’t cut all the way through; just create indented grooves for visual interest. -
Fit the lid:
To ensure the lid stays on, roll a smaller strip of clay and attach it to the *underside* of the lid in a circle. This inner ring should fit snugly inside the box walls to keep the lid from sliding off. -
Sculpt the knob:
Roll a small ball of clay for the handle. Flatten one side slightly and score both the knob and the center of the lid. Attach with slip, smoothing the transition at the base of the knob so it looks like one solid piece. -
Dry and refine:
Allow the box to dry completely, which usually takes 24-48 hours depending on humidity. Once bone dry, use a fine-grit sanding sponge to smooth out any rough fingerprints or sharp edges.
Secret Ingredient
Mix a tiny pinch of baking soda into your teal paint. It creates a gritty, crusty texture that mimics real oxidized metal deposits perfectly.
Step 2: Creating the Faux Finish
-
Base coat:
Paint the entire box, inside and out, with a layer of dark brown acrylic paint. This acts as the shadow layer and ensures no white clay shows through. -
Metallic layer:
Once the brown is dry, dry-brush a layer of bronze or copper metallic paint over the surface. Use a light hand; you want the dark brown to remain visible in the crevices and grooves. -
Prepare the patina:
Mix your turquoise paint. For a crusty, authentic texture, I find that mixing a pinch of baking soda into the paint creates a realistic oxidized feel. -
Apply the patina:
Dab the turquoise mixture onto the box using a sea sponge or a stiff brush. Focus heavily on areas where oxidation would naturally occur—around the base, under the lid rim, and inside the carved grooves. -
Blot and blend:
While the turquoise paint is still wet, quickly blot some of it away with a paper towel or rag. You want to reveal the bronze underneath on the ‘high points’ while leaving the green in the textured low points. -
Add depth:
If the transition looks too stark, dilute a tiny bit of the dark brown paint with water to make a wash. Lightly glaze over areas that need more shadow to integrate the green and bronze layers. -
Highlighting:
Finally, add extremely light touches of bright gold or fresh copper to the very top of the knob and the rim of the lid. This suggests areas where the box would be touched often, wearing away the patina. -
Seal the work:
Finish with a coat of matte spray varnish to protect the paint job and remove any unwanted glossy sheen from the acrylics.
Too Much Green?
If you overdo the patina, don’t panic. Let it dry completely, then dry-brush a little bronze metallic paint back over the ‘high spots’ to reclaim the metal look.
Place your finished box on a shelf and enjoy the look of an artifact without the antique price tag
Boho Geometric Pattern Jewelry Box
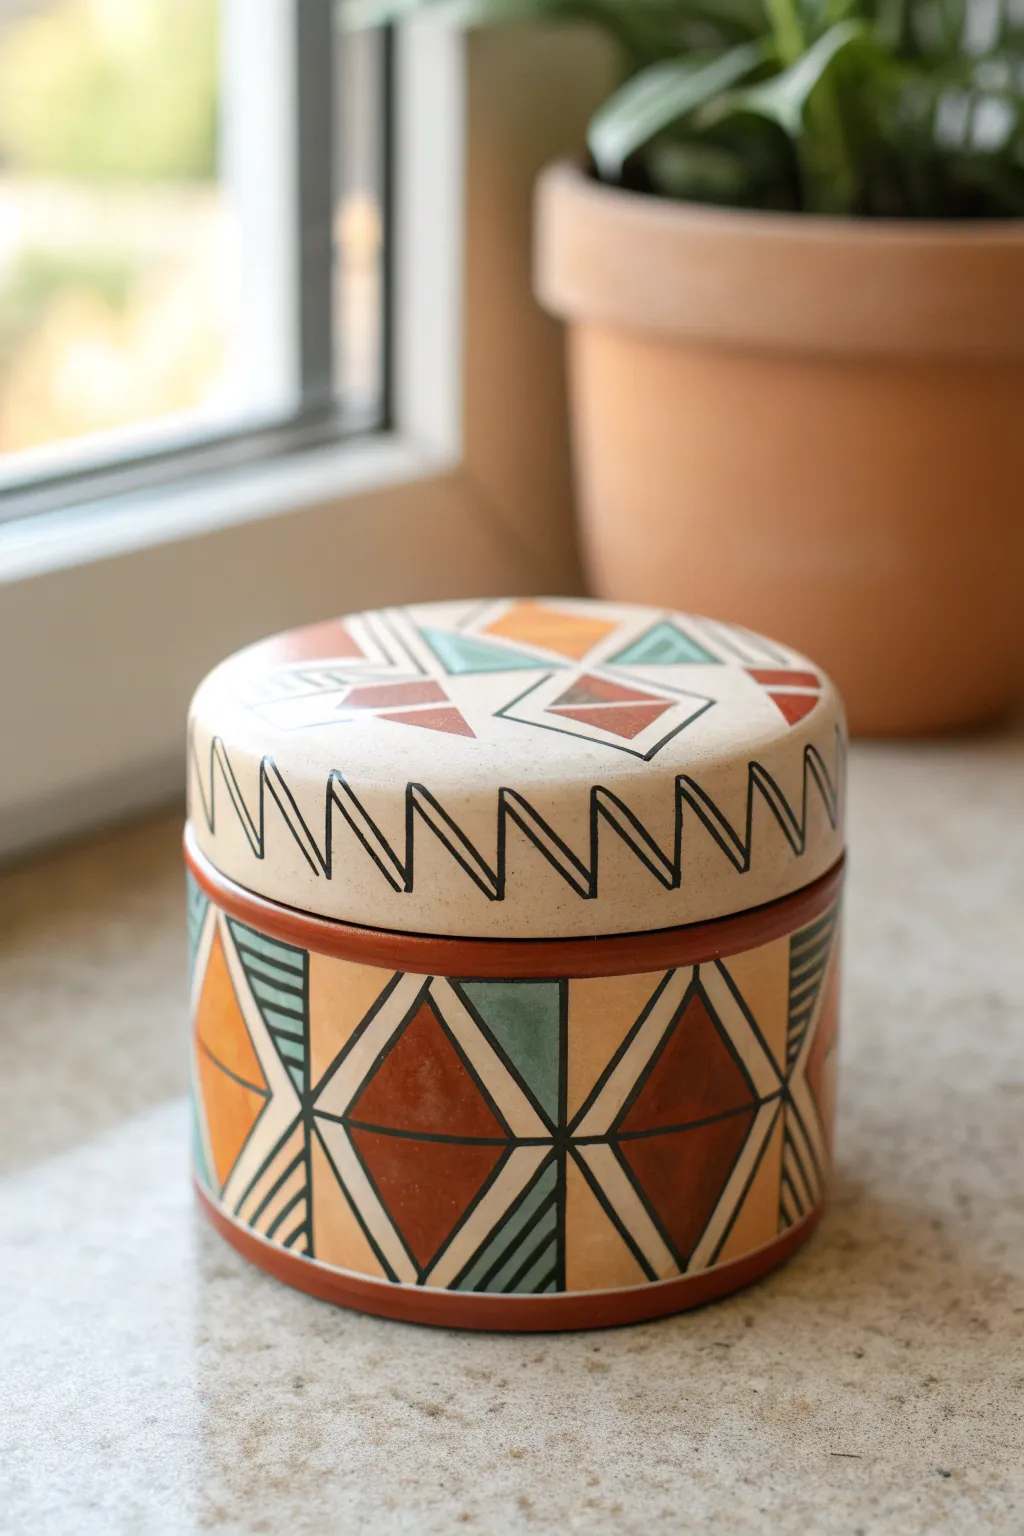
Capture the warmth of the southwest with this earthy, geometric clay box. Featuring bold diamond motifs and a playful zigzag rim, this piece combines warm terra cotta tones with cool teal accents for a striking storage solution.
Step-by-Step
Materials
- White or cream air-dry clay (or polymer clay)
- Terra cotta colored acrylic paint
- Muted teal or sage green acrylic paint
- Mustard yellow or warm ochre acrylic paint
- Black fine-liner paint pen or permanent marker
- Fine detail paintbrush (size 0 or 00)
- Medium flat paintbrush
- Rolling pin
- Round cookie cutters (two sizes slightly different for lid/base fit)
- Clay knife or craft blade
- Ruler
- Sandpaper (fine grit)
- Matte spray varnish
Step 1: Sculpting the Base Form
-
Roll the slab:
Begin by conditioning your clay until it is smooth and pliable. Roll it out on a flat surface to an even thickness of about 1/4 inch (6mm) to ensure the walls will be sturdy. -
Cut the base:
Use your smaller circle cutter (around 3-4 inches diameter) to punch out the bottom of the box. Set this circle aside on a piece of parchment paper. -
Create the walls:
Cut a long rectangular strip of clay. The length should match the circumference of your circle base, and the height should be about 2.5 inches. Measure carefully with your ruler. -
Assemble the cylinder:
Wrap the rectangular strip around the circumference of the circle base. Score the edges (make small scratches) and add a dab of water or liquid clay to join them. Smooth the seam inside and out until it disappears. -
Form the lid:
Roll out a second slab slightly thicker than the first. Use the slightly larger circle cutter so the lid will sit comfortably over the box walls. Or, cut a circle the same size as the base and add a small inner lip so it sits flush. -
Smooth and dry:
Dip your finger in water and run it over all edges to soften any sharpness. Let the pieces air dry completely for 24-48 hours, or bake according to package directions if using polymer clay.
Pattern Advice
Use a flexible sewing tape measure to divide the circumference of your box evenly before sketching the diamonds to ensure the pattern meets perfectly at the back.
Step 2: Painting the Design
-
Draft the grid:
Once fully dry and lightly sanded, lightly sketch your pattern with a pencil. I find it helpful to mark vertical lines first to space out the large diamonds evenly around the base. -
Base coat the diamonds:
Using your detail brush, paint the central diamond shapes with the terra cotta color. Keep the edges relatively neat, but don’t worry about perfection yet—the outline will help later. -
Add secondary colors:
Fill in the triangular sections adjacent to the main diamonds. Alternate between the muted teal and the mustard yellow to create that diverse boho palette shown in the reference. -
Paint the rims:
Paint a solid band of terra cotta along the very bottom edge of the box and the bottom rim of the lid to frame the design. -
Detail the lid:
Recreate the geometric pattern on the top surface of the lid. Use smaller triangles and diamonds radiating from the center, mixing your three main colors. -
The zigzag border:
On the side edge of the lid (the vertical rim), paint a continuous zigzag line using your black paint pen. Ensure the peaks and valleys reach almost to the top and bottom of the rim. -
Outline the geometry:
Using the black paint pen or a very steady hand with the liner brush, outline every colored shape on the base and lid. This black line gives the piece its distinctive graphic look. -
Add stripe details:
Focus on the negative space triangles (the white or unpainted areas). Use the black pen to draw three or four parallel diagonal lines inside specific triangles for added texture. -
Clean up:
Check for any smudges. If you went outside the lines, you can touch up with a bit of white or cream paint to match the raw clay background. -
Seal the work:
Take the box outside or to a well-ventilated area. Apply two light coats of matte spray varnish to protect the paint and give the box a finished, professional ceramic feel.
Wobbly Lines?
If your black outlines aren’t crisp, switch from a brush to a waterproof archival ink pen. It gives much more control over the clay surface than bristles do.
Place this stylish little container on a sunny windowsill to hold your favorite rings or trinkets
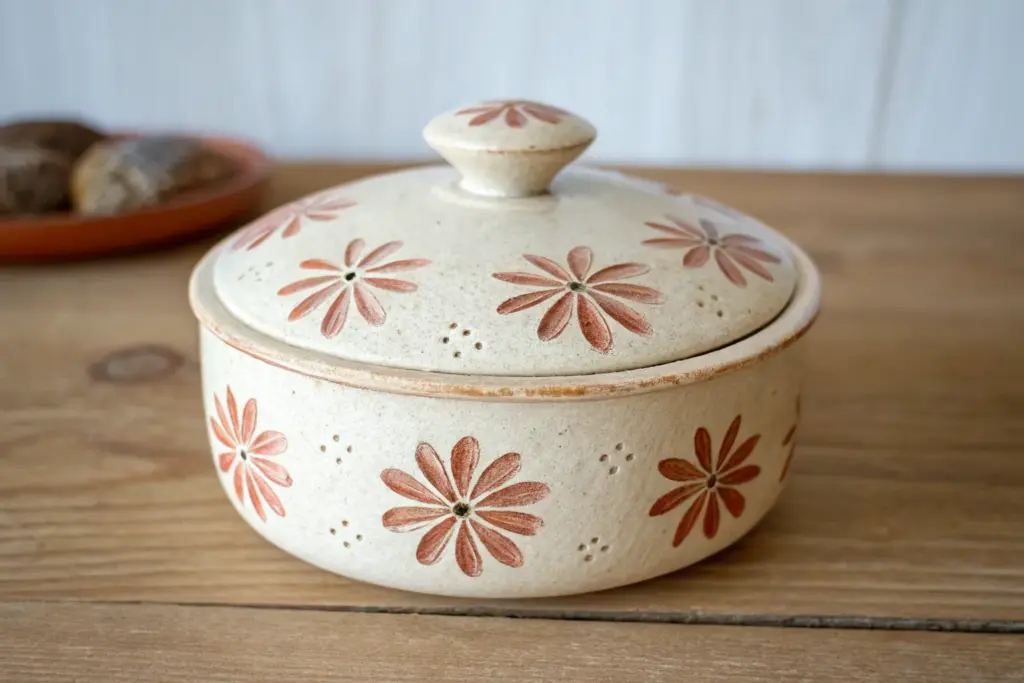
Bright Folk-Art Painted Trinket Box
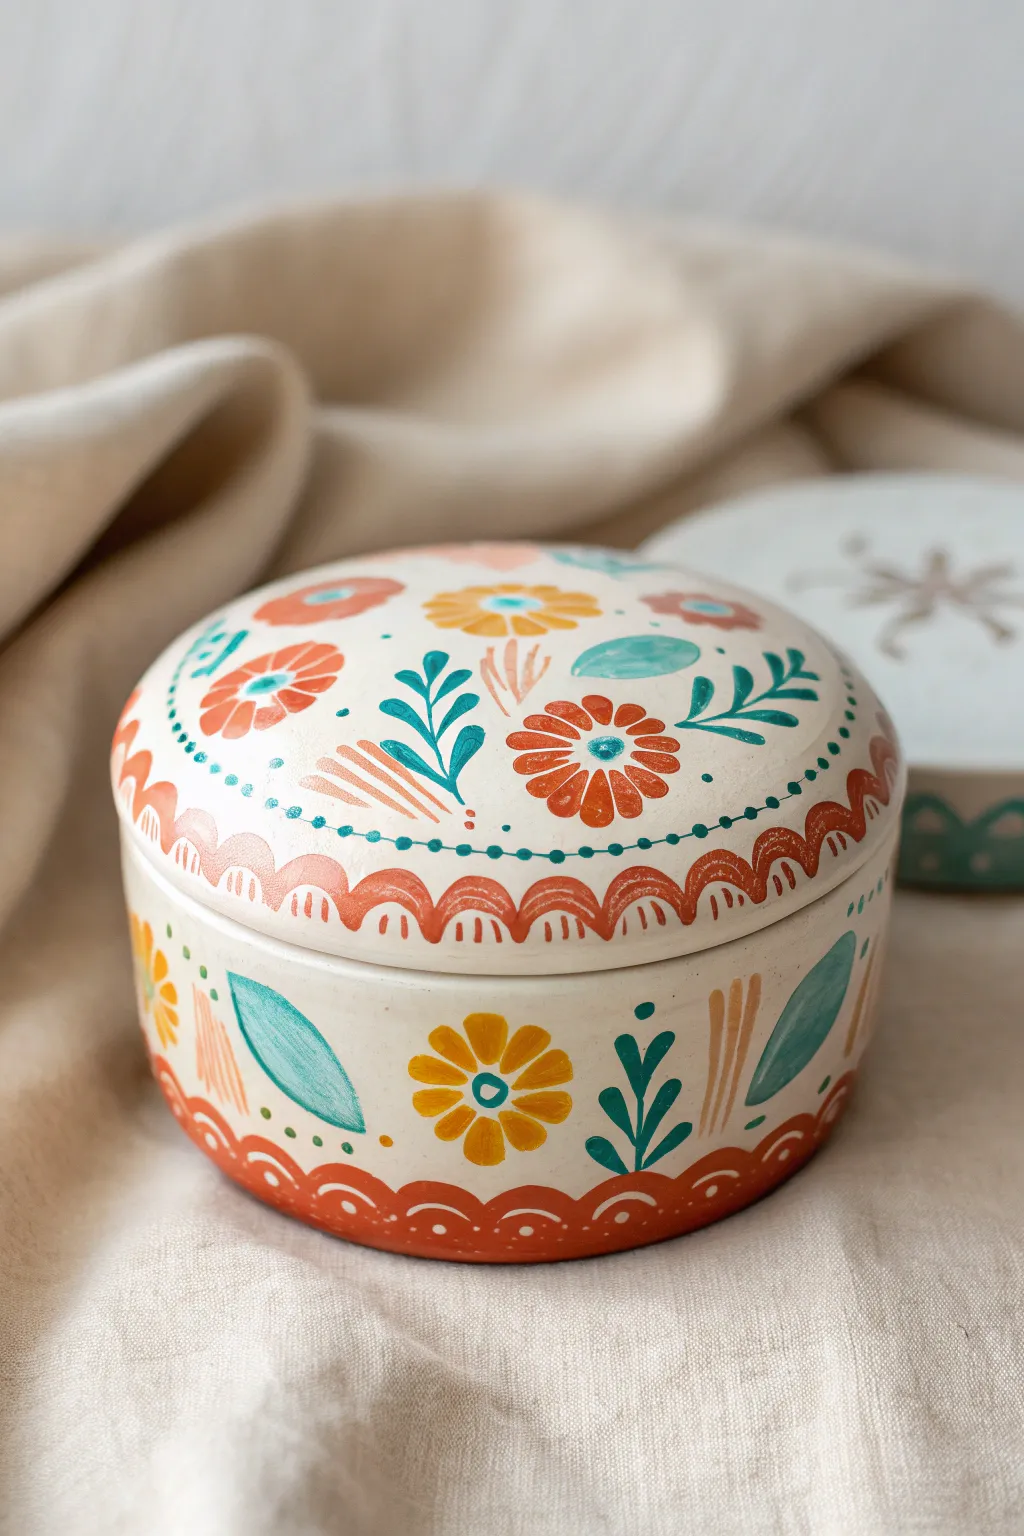
Bring a touch of cottage charm to your vanity with this hand-painted clay trinket box. Featuring cheerful folk art florals in warm oranges, yellows, and teals, this project transforms a simple ceramic blank into a delightful heirloom-quality piece.
How-To Guide
Materials
- Round ceramic or bisque box with lid (approx. 4-5 inches diameter)
- Acrylic paints (matte finish): Burnt orange, mustard yellow, teal/turquoise, forest green, warm white, light pink
- Fine detail brushes (sizes 0, 1, and 2)
- Small round brush (size 4)
- Pencil for sketching
- Palette or small plate
- Water cup and paper towels
- Matte clear acrylic sealer (spray or brush-on)
- Sandpaper (fine grit, optional for smoothing bisque)
Step 1: Base Preparation
-
Prepare the surface:
Begin by wiping down your ceramic box with a damp cloth to remove any dust or oils. If the surface feels rough, give it a very light sanding with fine-grit sandpaper, then wipe it clean again. -
Apply the base coat:
Mix a warm white or cream acrylic paint. Apply an even coat over the entire exterior of the box and the lid. Let it dry completely. I prefer to apply a second thin coat to ensure the ceramic color doesn’t peek through, creating a solid canvas for the flowers.
Uneven Brushing?
If your acrylic paint looks streaky, don’t pile it on thick. Instead, wait for the first layer to dry completely, then add a second thin coat for smooth, opaque coverage without brushstrokes.
Step 2: Planning and Sketching
-
Mark the center:
Lightly find the center of the lid with your pencil. You won’t necessarily paint right here, but it helps distribute the floral motifs evenly around the circle. -
Sketch the main flowers:
Using a very light touch, sketch 3-4 large circular flower shapes on the lid and 3-4 on the side of the box. Don’t worry about petals yet; just place the circles to balance the composition. -
Add leaf placement:
Sketch broad, leaf-shaped outlines in the empty spaces between your flower circles on both the lid and the base. These should flow in a single direction to create a sense of movement.
Dotting Perfection
For perfectly round dots on the border or flower centers, use different sized nail dotting tools or the heads of sewing pins instead of a brush tip.
Step 3: Painting the Lid Design
-
Paint the main blooms:
Load a size 2 brush with burnt orange. Paint the petals of your largest flowers on the lid. These specific folk flowers have distinctive separated petals that radiate from a center point, almost like bold dashes. -
Add yellow accents:
Using the mustard yellow and a clean brush, paint smaller floral shapes or secondary flowers in the gaps. For variation, paint some of the flower centers solid yellow. -
Fill the foliage:
Switch to your teal or turquoise paint. Fill in the large leaf shapes you sketched earlier. Keep the paint opaque but flat. -
Detail the stems:
With your finest brush (size 0) and forest green paint, create the delicate stems. Add sprigs with small, teardrop-shaped leaves coming off the main stems to fill white space. -
Add linear details:
Use a light pink or diluted orange to add linear ‘wheat’ stalks or straight decorative lines between the curving floral elements.
Step 4: Painting the Base and Borders
-
Repeat motifs on the base:
Turning your attention to the bottom half of the box, replicate the floral pattern. Alternate a yellow flower, a teal leaf, and an orange accent around the circumference. -
Draft the scalloped border:
Lightly pencil a scalloped line along the bottom rim of the lid and the bottom edge of the base. Ensure the humps are relatively even in width. -
Paint the orange trim:
Fill in the area below your pencil line with the burnt orange paint to create a heavy, decorative border. This grounds the design. Let this dry thoroughly before adding white details. -
Add border details:
Once the orange border is dry, use a fine brush with white paint to add a small dot inside each scallop hump and a curved line following the upper edge of the orange paint.
Step 5: Fine Details and Sealing
-
flower centers:
Return to the main orange flowers. Use teal paint to place a small dot in the center of the yellow middles to tie the color palette together. -
Dotted accents:
Dip the non-brush end of your paintbrush into teal or green paint. Dot a decorative ring around the center cluster of the lid, or create chains of small dots to connect floral elements. -
Leaf veining:
If you want extra detail, mix a slightly lighter shade of teal and paint a very thin central vein line down the middle of the large leaves. -
Final inspection:
Look over the box for any stray pencil marks. If the paint is fully cured, you can gently erase visible graphite marks with a white vinyl eraser. -
Seal the artwork:
Apply two thin coats of matte acrylic sealer to protect your painting from scratches and dust. Allow sufficient drying time between coats as per the manufacturer’s instructions.
Place your finished box on a dresser or shelf to add a beautiful handmade accent to your room
Ocean Shell Lid With Sea-Blue Texture
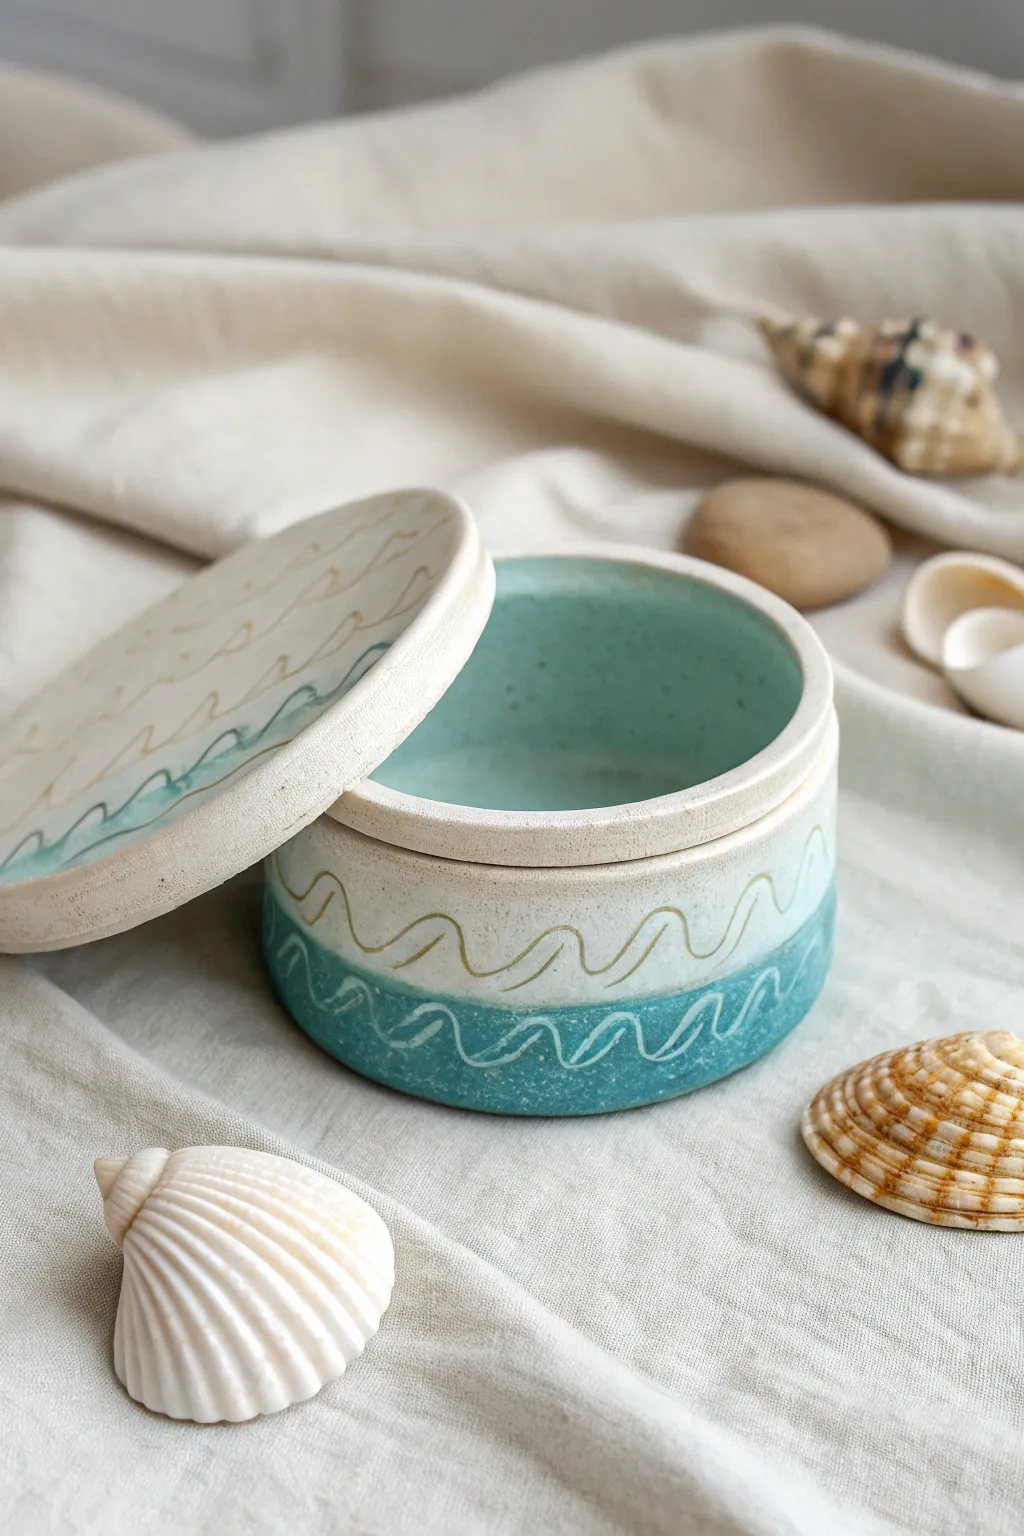
Capture the serene beauty of the seaside with this two-tone ceramic jewelry box featuring rhythmic wave patterns. The interior reveals a stunning pool of sea-blue glaze, making it a perfect vessel for your most treasured trinkets.
Step-by-Step
Materials
- White stoneware or porcelain clay body
- Rolling pin with guide strips (approx. 1/4 inch)
- Circle templates or cutters (4-inch and 3.5-inch)
- Needle tool and scoring tool
- Pottery sponge
- Slip (clay and water mixture)
- Carving tool (small loop or sgraffito tool)
- Teal or turquoise underglaze
- Clear transparent glaze
- Kiln (or access to a firing service)
- Small paintbrush
Step 1: Forming the Base
-
Roll the Slabs:
Begin by wedging your white clay thoroughly to remove air bubbles. Roll it out into an even slab using your rolling pin and guide strips to ensure a consistent thickness of about 1/4 inch. -
Cut the Components:
Using a 4-inch circle cutter or template, cut out the base of your box. Next, cut a long rectangular strip for the walls; measure the circumference of your base circle to get the length right, adding a tiny bit of overlap. -
Attach the Wall:
Score the outer edge of the circular base and the bottom edge of your rectangular strip. Apply a generous amount of slip to both scored areas. -
Secure the Seam:
Wrap the strip around the base, pressing firmly to join them. Where the wall ends meet, cut them at a simplistic 45-degree bevel for a cleaner join, score, slip, and smooth the seam together inside and out. -
Refine the Form:
Use a damp sponge to smooth the connection point between the wall and the floor. Run your finger along the rim to round it off slightly so it isn’t sharp.
Warped Lid Woes?
If your lid rocks or doesn’t sit flat after firing, dampen the rim slightly and gently sand it against a flat surface or sandpaper to level it out.
Step 2: Creating the Lid
-
Cut the Lid Slab:
Roll out a fresh slab of clay. Cut another 4-inch circle that matches the diameter of your box’s exterior. -
Add a Flange:
To keep the lid from sliding off, you need a flange. Cut a smaller strip of clay and attach it to the *underside* of the lid circle. This ring should fit just inside the walls of your box base. Measure carefully! -
Test the Fit:
Gently place the lid upside down on the box to ensure the flange fits snugly but not too tightly, accounting for clay shrinkage. Adjust if necessary while the clay is still workable. -
Slow Drying:
Cover both pieces loosely with plastic and let them dry to a ‘leather hard’ state. This is crucial for the carving step.
Add a Handle
Before drying, sculpt a small seashell, pebble, or driftwood shape from scrap clay and score-and-slip it to the center of the lid for a functional handle.
Step 3: Decoration and Glazing
-
Apply Underglaze:
Once leather hard, paint the bottom half of the box’s exterior with two to three coats of teal underglaze. I like to let this dry briefly between coats to ensure opacity. -
Carve the Waves:
Using a sharp carving tool, gently carve through the teal underglaze to reveal the white clay beneath. Create a continuous, flowing wave pattern around the base. -
Detail the White Clay:
On the upper, unpainted half of the box and the top of the lid, use a fine tool to lightly incise similar wave patterns directly into the raw clay. -
Bisque Fire:
Allow the piece to dry completely until bone dry (this may take several days). Fire the pieces in a kiln to cone 04 for the bisque firing. -
Glaze the Interior:
Pour a teal or turquoise glaze into the interior of the box, swirl it to coat the walls and floor evenly, and pour out the excess. -
Detail and Clear Glaze:
If desired, paint thin lines of teal glaze into the incised lines on the white sections.Finally, dip or brush a clear transparent glaze over the entire piece (except the bottom that touches the kiln shelf). -
Final Firing:
Fire the piece again to the maturity temperature of your clay and glaze (typically cone 5 or 6 for stoneware).
Now you have a serene, ocean-inspired vessel ready to hold your favorite jewelry or keepsakes
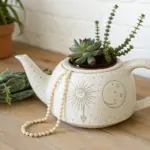
Mushroom Forest Jewelry Box With Cute Details
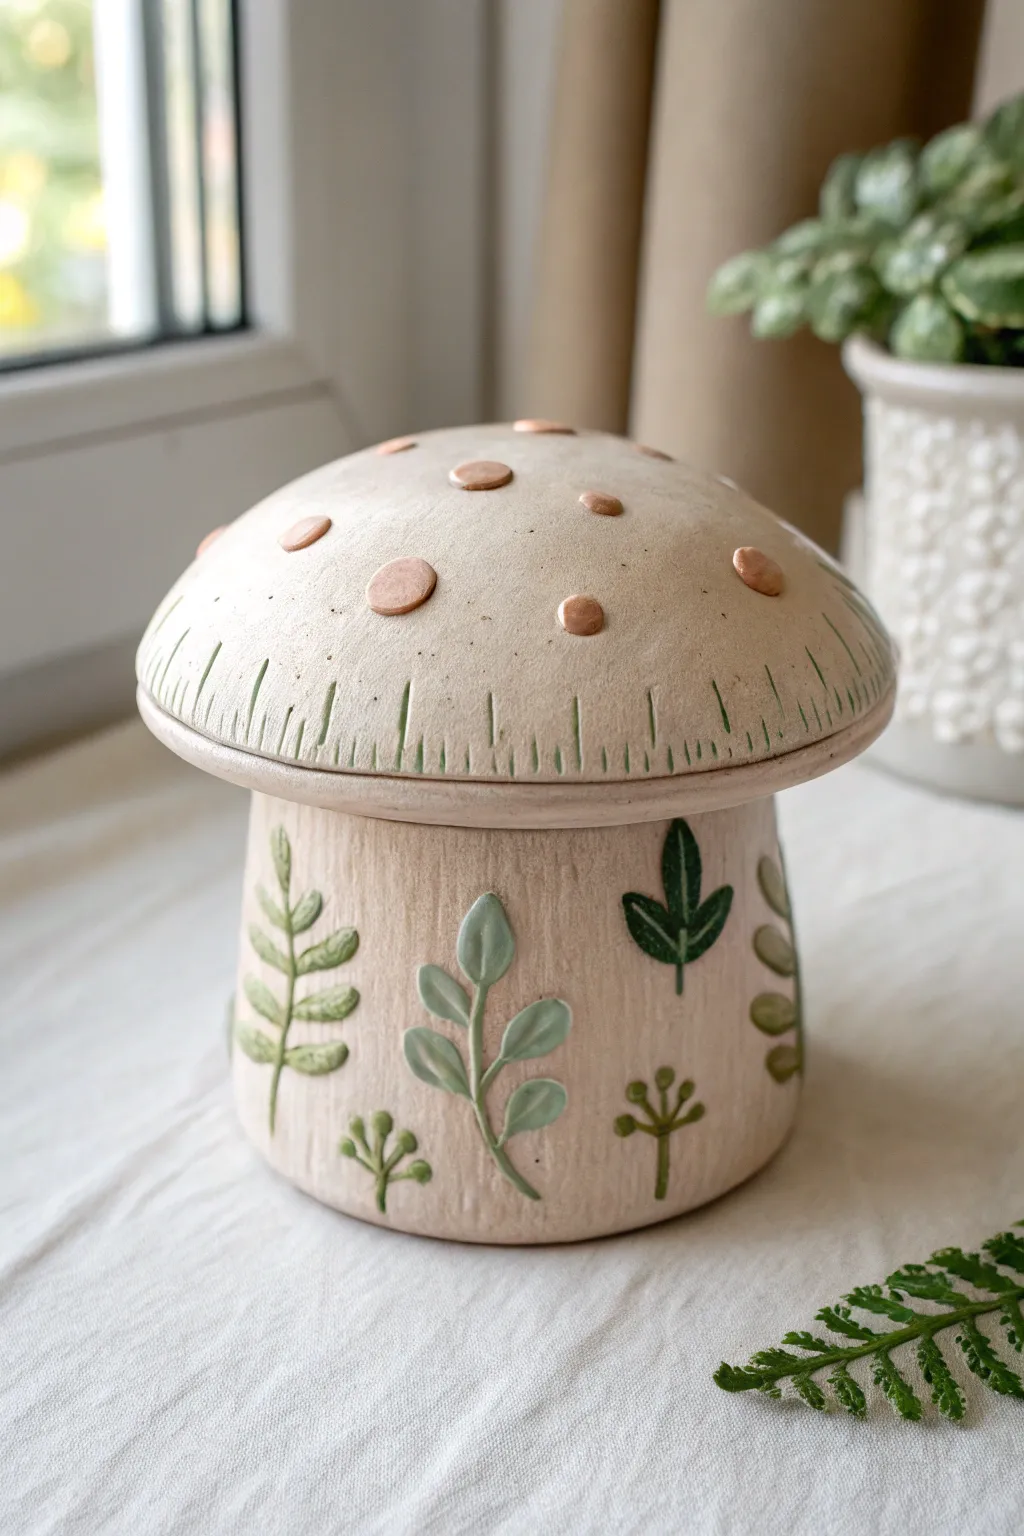
Bring a touch of the forest floor into your home with this adorable mushroom-shaped jewelry box. Sculpted from clay, it features subtle, earthy tones and delicate raised leaf details that give it a charming, handcrafted feel perfect for storing dainty treasures.
Step-by-Step Guide
Materials
- Air-dry clay or polymer clay (white or beige)
- Rolling pin
- Circle cutter or bowl (approx. 4-5 inches diameter)
- Clay knife or scalpel tool
- Modelling tools (needle tool, ball stylus)
- Small bowl (for shaping the cap)
- Slip (clay mixed with water) or scoring tool
- Acrylic paints (cream/beige, terracotta, sage green, forest green)
- Fine detail paintbrushes
- Matte varnish or sealant
- Sandpaper (fine grit)
Step 1: Shaping the Base and Lid
-
Roll the base slab:
Start by rolling out a medium-thickness slab of clay for the stem. You want it sturdy enough to hold weight but not too heavy. Cut a rectangular strip that will form the cylinder walls and a circular base for the bottom. -
Form the cylinder:
Stand the rectangular strip on its edge and curl it into a cylinder shape, matching the circumference to your base circle. Join the edges by scoring the clay (scratching crisscross marks) and applying a little water or slip. -
Smooth the seams:
Attach the cylinder to the circular base using the same score-and-slip method. Use a modeling tool or your finger to smooth the seams inside and out until they are invisible, ensuring the walls slighty taper outward at the top. -
Create the mushroom cap:
Roll out a larger circle of clay for the lid. Drape this circle over a small, rounded bowl covered in plastic wrap to give it that classic domed mushroom shape. Trim the edges so they are even. -
Add the inner rim:
To keep the lid secure, roll a small coil of clay and attach it to the *inside* or underside of the domed cap. Position it so it fits snugly inside the rim of your cylinder base.
Lid Won’t Fit?
If the lid shrinks differently than the base during drying, simply use sandpaper to carefully shave down the inner rim of the lid until it slots perfectly into the base.
Step 2: Sculpting the Details
-
Add texture to the cap:
Using a needle tool or knife, gently carve shallow, vertical lines all around the rim of the mushroom cap to mimic the gills peeking out. Keep these lines fairly short and evenly spaced. -
Create the spots:
Flatten small balls of clay into discs of varying sizes. Score the backs of these discs and press them randomly onto the top of the mushroom cap to create the raised spots. -
Sculpt the foliage:
Roll tiny amounts of clay into thin coils for stems and small teardrops for leaves. Arrange these onto the side of the mushroom base to form botanical sprigs. -
Detailing the leaves:
Press the clay leaves firmly onto the base to adhere them. I find using a needle tool to press a center vein into each leaf helps secure it while adding realistic detail. -
Vary the botanical shapes:
Create visual interest by making different types of plants—some with rounded leaves, some thin and fern-like, and others with small ball-shaped berries.
Step 3: Finishing and Painting
-
Dry thoroughly:
Allow your mushroom box to dry completely. If using air-dry clay, this may take 24-48 hours; if using polymer, bake according to package instructions. -
Sand for smoothness:
Once fully cured, use fine-grit sandpaper to gently smooth out any rough fingerprints or sharp edges, being careful not to sand off your raised details. -
Apply base coat:
Paint the entire mushroom (lid and base) with a creamy beige or oatmeal color. You might need two coats for opaque coverage. -
Paint the spots:
Using a small brush, carefully paint the raised spots on the cap with a muted terracotta or soft brown shade. -
Highlight the gills:
Mix a very watery wash of sage green or light grey paint. Brush it into the carved gill lines on the rim, then quickly wipe the surface with a paper towel so the color stays only in the crevices. -
Paint the foliage:
Paint the raised leaves and stems on the base. Use sage green for the rounded leaves and a darker forest green for the spikier leaves to create depth. -
Add a wash (optional):
To enhance the rustic look, you can apply a very diluted brown wash over the textured base and wipe it back, leaving slight shadows around the raised leaves. -
Seal the piece:
Protect your work with a coat of matte varnish. This seals the paint and gives the box a lovely, finished ceramic look without being too glossy.
Add a Surprise
Paint a tiny ladybug or a hidden snail on the underside of the mushroom cap for a delightful secret detail that is only revealed when the box is opened.
Now you have a charming woodland keepsake to hold your favorite rings and trinkets
Pastel Character Face Kawaii-Style Box

This adorable jewelry box combines minimal pastel aesthetics with a charming sleeping face design that brings immediate warmth to any vanity. With its soft cream base and delicate polka dots, this project transforms a simple wooden or papier-mâché box into a sweet, personality-filled keepsake.
Step-by-Step Tutorial
Materials
- Unfinished wooden box or sturdy papier-mâché box (rectangular with rounded corners)
- Fine-grit sandpaper (220 grit)
- White or cream matte acrylic paint (base color)
- Soft pink or warm coral acrylic paint (cheeks and dots)
- Dark green or charcoal acrylic paint (eyes and mouth)
- Flat synthetic paintbrush (medium width)
- Small round detail brush (size 0 or 1)
- Round foam pouncers or a pencil eraser
- Matte finish sealant spray or varnish
- Paper palette or paper plate
- Water cup and paper towels
Step 1: Preparation and Base Coat
-
Prep the Surface:
Begin by lightly sanding your unfinished box to remove any rough splinters or uneven textures. Wipe away the dust with a slightly damp cloth to ensure a smooth painting surface. -
First Coat:
Apply a generous coat of your creamy white acrylic paint to the entire exterior of the lid and base. Use long, even strokes to minimize brush marks. -
Inspect and Dry:
Allow the first layer to dry completely. If the wood grain is still showing through, apply a second or even third coat until you have an opaque, solid finish. -
Smooth the Finish:
Once fully dry, lightly run your sandpaper over the painted surface one last time if there are any raised bumps, then wipe clean. This creates that professional ‘store-bought’ texture.
Clean Lines Hack
If you struggle with painting steady curved lines for the eyes, try using a fine-tip acrylic paint marker instead of a brush. It offers much more control.
Step 2: Painting the Face
-
Pencil Sketch:
Use a pencil very lightly to mark the placement for the eyes and mouth. The eyes should be wide-set, curved upwards like crescents, with a tiny ‘u’ shape for the smiling mouth in the center. -
Painting the Eyes:
Load your fine detail brush with the dark green or charcoal paint. Carefully trace over your pencil marks for the eyes, keeping the line thickness consistent. -
Painting the Mouth:
Using the very tip of your detail brush, paint the small smile. I find resting my pinky finger on the box while painting helps stabilize my hand for these tiny curves. -
Adding Cheeks:
Dip a medium-sized round foam pouncer (or use a large brush to hand-paint a circle) into the pink or coral paint. Press gently below the outer edge of each eye to create the rosy cheeks. -
Refining Cheeks:
If the coverage on the cheeks looks uneven, wait for it to dry and dab a second layer of pink on top for a vibrant pop of color.
Make it Sparkle
Mix a tiny amount of glitter medium into your sealant just for the rosy cheeks to give the character a subtle, magical shimmer when it catches the light.
Step 3: Adding the Polka Dots
-
Choosing the Tool:
For the polka dots on the lower half of the box, you can use a smaller foam pouncer, the handle end of a paintbrush, or even a pencil eraser dipped in paint. -
Base Pattern:
Dip your chosen tool into the same pink paint used for the cheeks. Start stamping dots on the lower half of the box in a staggered, diagonal brick pattern. -
Lid Details:
Add a few stray dots to the side rim of the lid to connect the design, ensuring they don’t overlap awkwardly with the face on top. -
Spacing Check:
Step back and look at your spacing. It doesn’t have to be mathematically perfect—slightly organic spacing adds to the handmade charm.
Step 4: Final Touches
-
Drying Time:
Let all the detail work dry completely for at least an hour to prevent smearing during the sealing process. -
Sealing:
Apply a coat of matte spray varnish or brush-on sealant. This protects that lovely face from scratches and everyday wear while keeping the finish soft and non-reflective.
Place your favorite rings inside and enjoy the calm, drowsy expression looking back at you every morning
Mini Cake Tier Jewelry Box With Frosting Trim
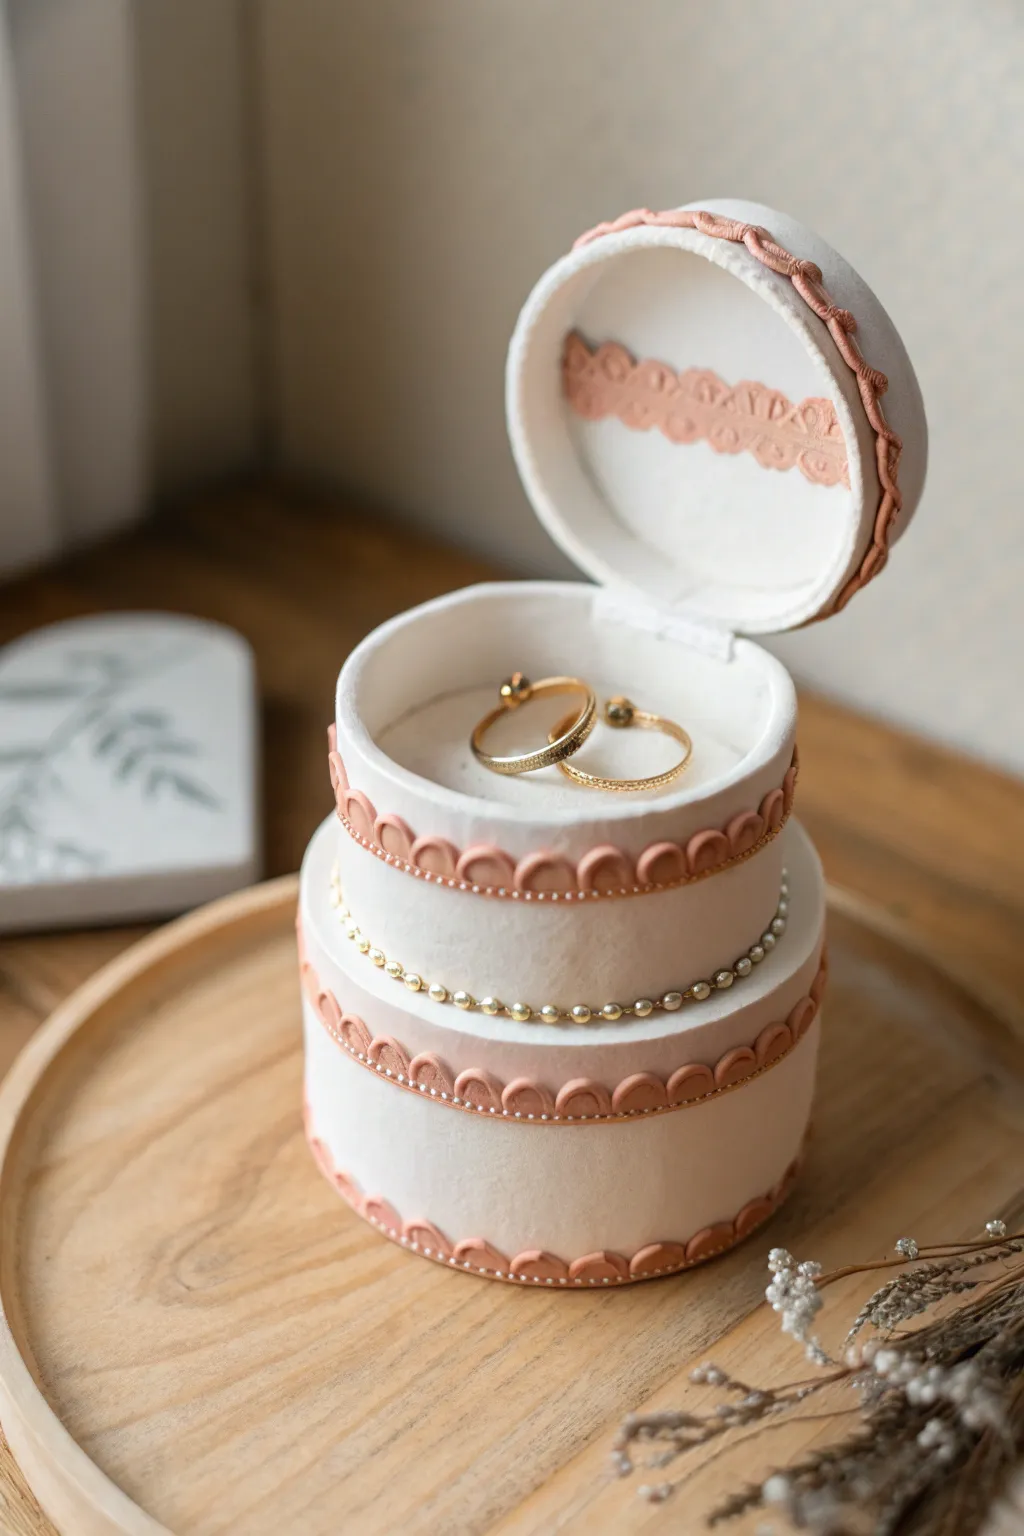
Treat your favorite rings to something sweet with this delightful clay jewelry box designed to look like a tiered wedding cake. With its delicate peach frosting scallops, faux pearl accents, and clever hinged lid, it’s as functional as it is charming.
Step-by-Step Guide
Materials
- White polymer clay (approx. 2-3 blocks)
- Peach or light coral polymer clay
- Rolling pin or pasta machine
- Round cookie cutters (two sizes: 2.5-inch and 3-inch)
- Clay knife or craft blade
- Texture sponge or stiff brush
- Small ball stylus tool
- Liquid polymer clay (Translucent or White)
- Gold micro-beads or caviar beads
- Small piece of fabric or ribbon (for the hinge)
- Super glue
- Gloss glaze (optional)
Step 1: Forming the Cake Structure
-
Prepare the Bases:
Condition your white clay until it’s soft and pliable. Roll it out to a uniform thickness of about 1/4 inch. Using your circular cutters, cut out two circles from the larger cutter and one from the smaller cutter. These will be the floors and lid of your box. -
Cut the Wall Strips:
Roll out a long strip of white clay, also 1/4 inch thick. Measure the circumference of your larger circle base. Cut a strip to this length with a height of about 1.5 inches for the bottom tier. Repeat for the smaller top tier, making this strip roughly 1 inch tall. -
Assemble the Bottom Tier:
Wrap the longer strip around one large base circle. Smooth the seam where the ends meet carefully with your finger or a clay tool until invisible. Use a little liquid clay as ‘glue’ to secure the wall to the base circle. -
Create the Second Tier:
Take the second large circle (this acts as the ceiling of the bottom tier and floor of the top tier). Attach the smaller wall strip to the top center of this circle, blending the seams just like the bottom tier. You should now have a bottom drum and a ‘lid’ that has a smaller drum on top. -
Texture the Surface:
To give the box a realistic fondant or buttercream cake texture, gently dab the exterior surfaces with a texture sponge or a stiff stippling brush. This removes fingerprints and adds a matte, edible look. -
Initial Bake:
Bake these structural pieces (the bottom open cylinder and the tiered lid piece) according to your clay package instructions, usually around 275°F (135°C) for 15-20 minutes. Let them cool completely before decorating.
Clean Cuts Pro Tip
Chill your clay in the fridge for 10 minutes before cutting the scallop shapes. Cooler clay is firmer and holds sharp details better without dragging.
Step 2: Frosting and Decoration
-
Make the Frosting Trim:
Condition the peach clay. Roll out thin snakes of clay and flatten them slightly. Using a small round cutter or the end of a piping tip, cut small semi-circles to create a scalloped effect along one edge of the strip. -
Apply Bottom Trim:
Apply a thin line of liquid clay around the bottom edge of the baked base. Press your peach scalloped strip onto the base. Use a small stylus to press a tiny indentation into the top center of each scallop, securing it to the white clay. -
Add Middle and Top Trim:
Repeat the scalloping process for the rim of the bottom tier and the rim of the top tier. Ensure the scallops curve downward. I find it easiest to work in sections so the clay doesn’t dry out or stretch too much. -
Add the Decorative Band:
For the very top lid (the smallest circle), add a strip of peach clay texture with a pattern roller or lace imprint across the center inside the lid for a hidden detail when opened. -
Apply Gold Accents:
Place a tiny drop of liquid clay into the indentations you made on each peach scallop. Carefully place a gold micro-bead into each spot using tweezers. -
Create the Pearl Strand:
Apply a line of liquid clay around the base of the top tier. Carefully press a string of gold beads or individually place gold caviar beads around the perimeter to look like a pearl necklace. -
Top Lid Hinge:
If you want the very top circle to open (as shown), bake a separate small flat circle for the top. We will attach this with a fabric hinge later. -
Final Bake:
Bake the entire assembled piece again for a full 30 minutes to cure the decorations. If you notice any darkening, tent the project with aluminum foil.
Step 3: Assembly and Finishing
-
Attach the Hinge:
Once fully cooled, cut a small rectangular strip of ribbon or sturdy fabric. Superglue half of it to the inside back wall of the top tier, and the other half to the underside of the top lid piece. -
Add the Ring Holder:
Roll a small snake of scrap white clay and cover it with a thin sheet of white felt or velvet. Glue this into the center of the top tier to hold your rings upright. -
Clean Up:
Check for any loose beads and secure with a tiny dab of superglue if needed. Your jewelry box is now ready.
Troubleshooting Cracks
If cracks appear after baking, fill them with a mix of liquid clay and solid clay, smooth over, and re-bake for 10 minutes to seal everything seamlessly.
Place this sweet little box on your vanity to keep your treasures safe and stylish
Burger or Donut Novelty Jewelry Box
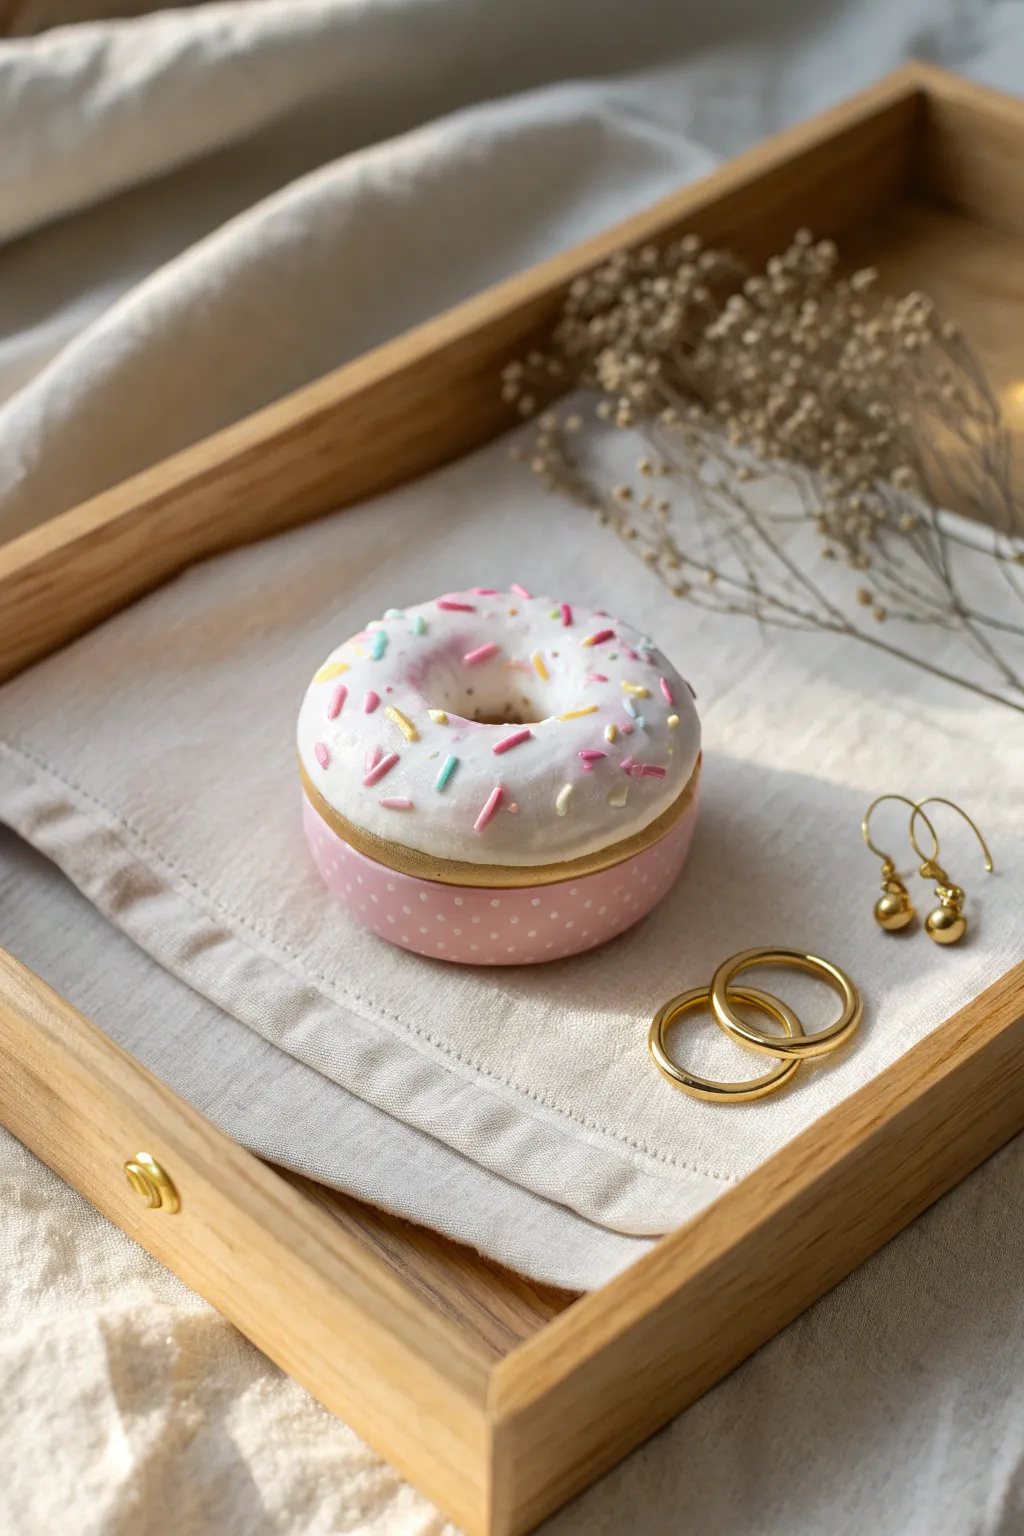
Satisfy your sweet tooth with this adorable faux-dessert storage solution. Modeled to look like a freshly frosted treat, this polymer clay box features realistic texture and a hidden compartment perfect for rings or small earrings.
Detailed Instructions
Materials
- Polymer clay (pink, white, tan/beige)
- Liquid polymer clay (translucent or white mixed with white clay)
- Clay roller or pasta machine
- Circle cutters (large and small)
- Needle tool or toothpick
- Aluminum foil
- Soft pastel chalks (golden brown, orange)
- Fluffy paintbrush
- Extruder or clay gun (optional for sprinkles)
- Gloss glaze or resin
- Small magnets (optional for closure)
Step 1: Forming the Dough Base
-
Prepare the Core:
Ball up a piece of aluminum foil into a flattened disc shape about 2 inches wide to serve as the lightweight core of your box. -
Roll the Base Clay:
Condition and roll out a thick sheet of tan or beige polymer clay. It should be thick enough to completely cover your foil armature without tearing. -
Cover the Form:
Wrap the tan clay around the foil disc, smoothing the seams carefully until you have a perfect, seamless bun shape. -
Create the Donut Hole:
Use a small circle cutter to punch the center out of the dough shape. Smooth the inner edges so the clay meets nicely in the middle; this creates that classic ring shape. -
Slice the Box:
Using a very sharp tissue blade, carefully slice the donut shape horizontally in half. This creates your lid and your base. Remove the foil core gently if possible, or smooth clay over it to create the interior lining. -
Refine the Interior:
Roll a thin strip of tan clay and attach it to the interior rim of the bottom half. This creates a lip that will hold the lid securely in place when closed. -
Add Texture:
Use a toothbrush or a ball of crinkled aluminum foil to tap texture onto the outside of the ‘dough’ for a realistic baked look.
Fixing a Stuck Lid
If the lid doesn’t fit after baking, gently sand the inner lip of the bottom piece with fine-grit sandpaper until it slides on smoothly.
Step 2: Frosting & Decoration
-
Shade the Dough:
Scrape some golden brown and orange soft pastels into a powder. Use a fluffy brush to dust this over the textured tan clay, focusing on the edges for a golden-baked effect. -
Prepare the Bottom Glaze:
Roll out a thin sheet of pink clay. Cut a strip and wrap it around the bottom half of the donut box, or smooth it over the bottom curve to mimic a pink-glazed bottom or wrapper effect. -
Add Polka Dots:
Take tiny bits of white clay, roll them into microscopic balls, and press them onto the pink bottom section in a regular pattern to match the reference box. -
Mix the Icing:
Mix white polymer clay with liquid polymer clay (or use a movement aid product) until you have a consistency resembling thick frosting or whipped cream. -
Apply the Frosting:
Spread your white ‘frosting’ generously over the top half (the lid). Let it drip slightly over the edges, but keep it clear of the seam so the box opens easily. -
Create Sprinkles:
While the frosting is wet, roll extremely thin snakes of pink, blue, yellow, and white clay. Pre-baking these thin strands for 5 minutes makes them easier to cut into uniform sprinkles. -
Decorate:
Cut your thin clay strands into tiny segments and press them gently into the wet white frosting. Use tweezers for precise placement. -
Final Bake:
Reassemble the box (ensure the inner lip isn’t sticking) or bake halves separately according to your clay package instructions. I usually prop the lid on a bit of batting so it keeps its shape. -
Glaze:
Once cooled, coat the frosting area with a gloss glaze or UV resin to give it that sticky, sugary shine.
Strawberry Scent
Mix a tiny drop of vanilla or strawberry fragrance oil into the frosting clay mix before applying for a scratch-and-sniff jewelry box.
Now you have a charming place to store your treasures that looks good enough to eat
Secret Compartment Double-Lid Jewelry Box
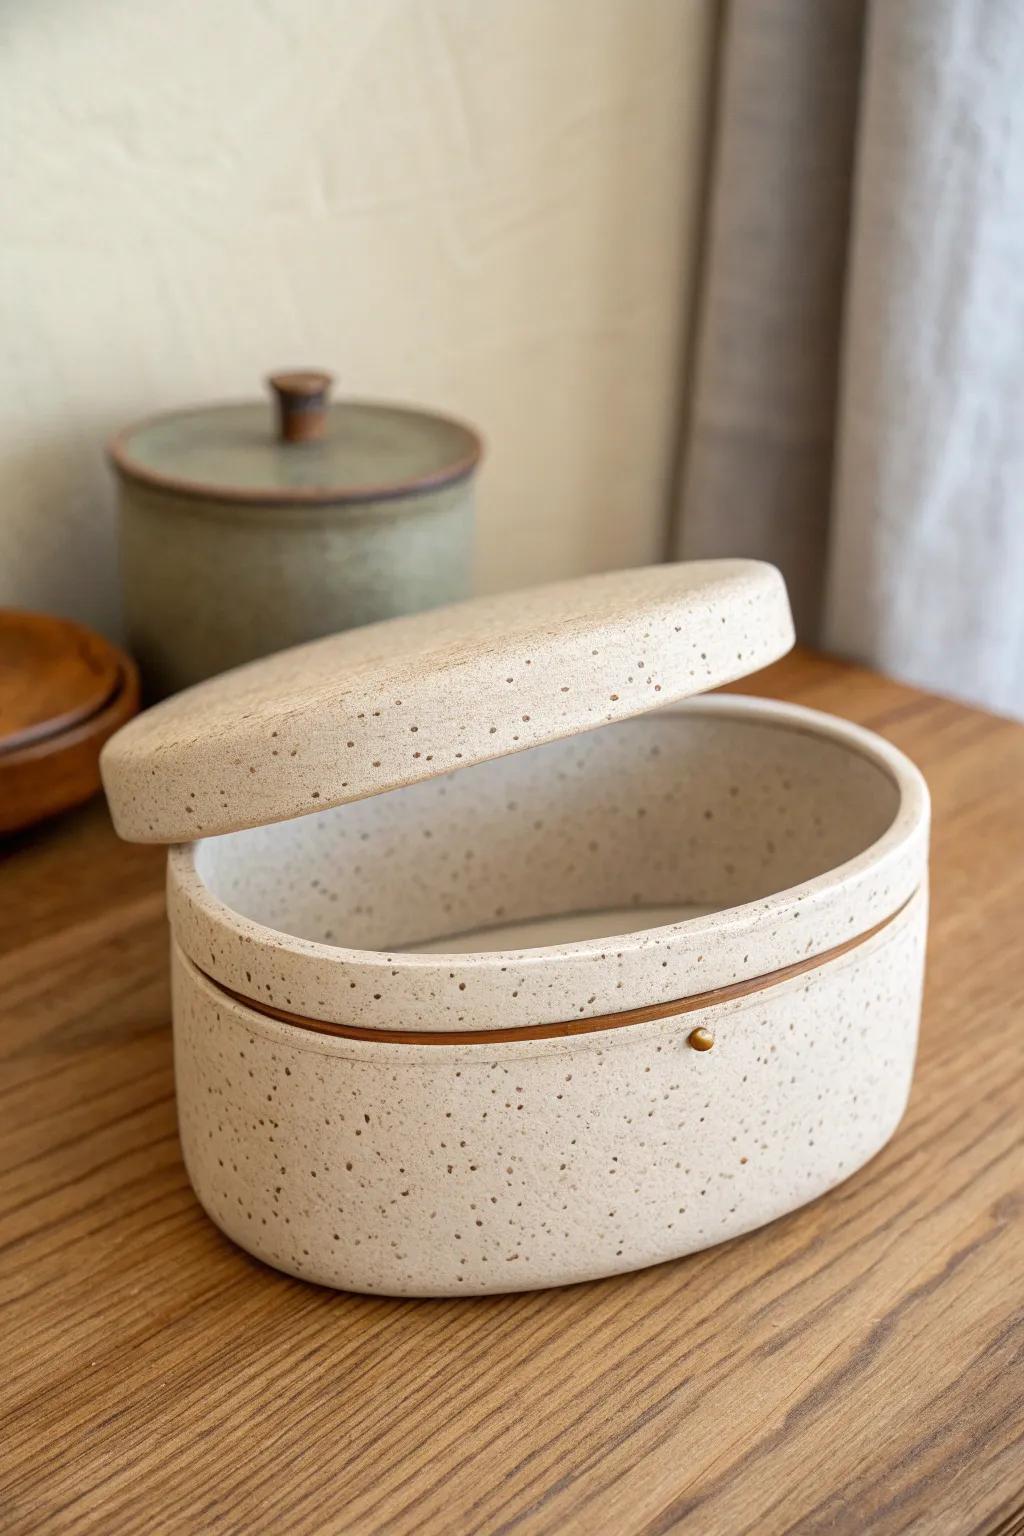
Create a sleek and minimalist ceramic jewelry box that features a stunning speckled clay body and a hidden wooden accent band. The organic oval shape and subtle brass detail give this piece a modern artisan feel perfect for hiding away precious trinkets.
Step-by-Step Guide
Materials
- Speckled stoneware clay (buff or white with iron flecks)
- Pottery wheel (or extensive hand-building tools for coil/slab)
- Throwing bats
- Ribs (kidney shaped: metal, wooden, and soft rubber)
- Needle tool
- Wire clay cutter
- Trimming contour tool
- Thin wooden veneer strip (walnut or cherry)
- Small brass pin or knob/bead
- Clear matte glaze
- Sponge
- Pottery caliper
- Superglue or epoxy
Step 1: Throwing the Form
-
Center the clay:
Begin with a substantial ball of speckled clay on the wheel. This project works best if thrown bottomless or with a thick base to trim later, but for this oval shape, we will throw a round cylinder first and alter it. -
Throw a tall cylinder:
Pull up the walls to a consistent thickness, aiming for a height of about 5-6 inches. Keep the rim slightly thicker than the walls to support the lid later. -
Cut the gallery:
Using a needle tool, carefully slice the cylinder horizontally at the halfway point while the wheel is spinning slowly to separate the lid from the base. -
Alter the shape:
While the clay is still plastic but firm enough to hold shape, gently squeeze the round cylinder on opposite sides to create the oval profile. Do this for both the lid and the base simultaneously to ensure they match. -
Attach the base slab:
For an oval pot, I prefer to throw a bottomless cylinder. Now, roll out a slab of clay, score and slip the bottom edge of your oval wall, and attach it to the slab. Cut away the excess slab clay.
Warping Prevention
Make sure you dry the lid sitting ON the base. Drying them together allows them to shrink at the same rate, ensuring the oval shape stays perfectly aligned.
Step 2: Refining and Fitting
-
Create the interior flange:
Because this is a box, the lid needs to sit securely. You can either throw a separate interior gallery or, easier for oval shapes, build a small clay coil on the inside rim of the bottom piece so it rises up to catch the lid. -
Create the wood recess:
Carve a shallow channel around the exterior circumference where the lid meets the base. This groove should be the exact width of your wooden veneer strip. -
Dry to leather hard:
Cover the pieces loosely with plastic and let them dry slowly to a leather-hard state. This is crucial for maintaining the oval shape without warping. -
Trim the foot:
Flip the bottom piece over and trim the underside to create a clean, flat surface or a very subtle foot ring. -
Smooth the surface:
Use a smooth metal rib or a damp sponge to compress the exterior walls. This brings the specks in the clay to the surface and creates a buttery smooth finish. -
Accommodate the brass pin:
Using a small drill bit or needle tool, create a tiny hole at the front center of the lid rim if you plan to insert the brass pin stud, or simply mark the spot for gluing later.
Gaping Lid?
If the lid rattles or has gaps after firing, you can add small felt dots or a thin strip of adhesive cork to the inside ledge to dampen the sound and tighten the fit.
Step 3: Finishing Touches
-
Bisque fire:
Load the kiln and bisque fire the pieces to your clay body’s specifications (usually Cone 04-06). -
Glaze application:
Dip or spray the piece with a clear matte glaze. A clear glaze is essential here to let the natural speckles of the clay body shine through. -
Wipe the recess:
Carefully wipe any glaze out of the exterior groove you carved for the wood plain; the wood needs to adhere to bare or thinly glazed clay, but bare is best for glue adhesion. -
Glaze fire:
Fire the piece for the second time to the maturation temperature of your clay (likely Cone 5/6 or Cone 10). -
Prepare the wood strip:
Cut your wooden veneer strip to exact length. You may need to steam it or soak it briefly in hot water to make it pliable enough to bend around the oval curves without snapping. -
Attach the accent band:
Apply a strong epoxy to the unglazed groove and press the veneer strip into place. Use rubber bands or masking tape to clamp it tight while the glue cures. -
Add the hardware:
Finally, secure the small brass bead or pin into the pre-made hole or glue it directly onto the wood band or ceramic lip for that elegant finishing detail.
Now you have a sophisticated, gallery-worthy container ready to hold your favorite jewelry pieces