When I’m craving a quick, colorful project, I almost always reach for polymer clay rings—they’re tiny, satisfying, and you can make a whole collection in one creative burst. Here are my favorite polymer clay ring ideas, starting with the classics and moving into the fun, unexpected designs that always get compliments.
Chunky Solid-Color Band Rings

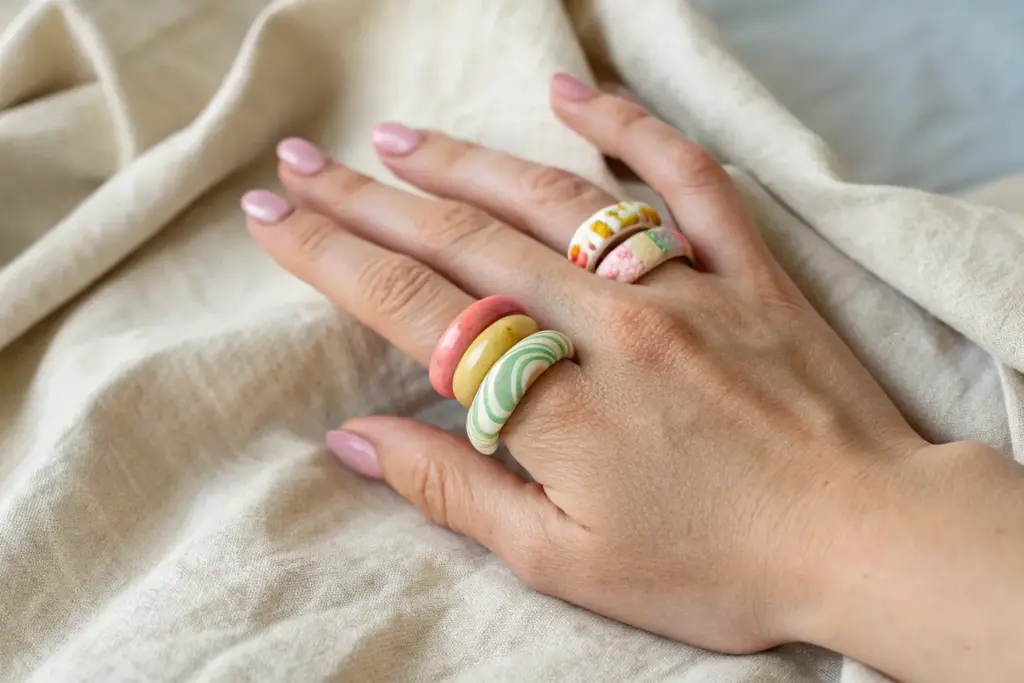
Embrace the bold simplicity of these satisfyingly chunky band rings, designed to be worn stacked for maximum impact. Their soft, matte finish and organic, slightly uneven texture give them a modern artisanal feel that pairs perfectly with casual linen outfits.
Detailed Instructions
Materials
- Polymer clay in muted pink, mustard yellow, and teal
- Ring sizing mandrel (or a dowel matching your ring size)
- Acrylic rolling pin
- Tissue blade or craft knife
- Medium and fine-grit sandpaper (400 to 1000 grit)
- Cornstarch or baby powder (as a release agent)
- Oven thermometer
- Baking sheet and cardstock
- Matte varnish (optional)
Step 1: Preparing the Clay Base
-
Condition firmly:
Begin by conditioning your first color of polymer clay. Knead it thoroughly until it is pliable and warm, which prevents cracking during the shaping process. -
Roll a thick snake:
Roll the conditioned clay into a smooth, even log. For that extra chunky look seen in the photo, aim for a thickness of about 1/2 inch (1.2 cm). -
Prepare the mandrel:
Lightly dust your ring mandrel or wooden dowel with a pinch of cornstarch. This small step ensures the clay won’t stick to the tool when you slide it off later. -
Wrap and size:
Wrap the clay log around the mandrel at your desired ring size. Gently press the two ends together. Since polymer clay has no elasticity, ensure the fit is snug but not tight. -
Slice the join:
Use your tissue blade to cut through both overlapping ends of the clay log simultaneously at a 45-degree angle. Remove the excess scraps to create a perfect, seamless join.
Seamless Smooth Tip
Use a tiny drop of liquid polymer clay or ‘Bake & Bond’ on the cut seams before pressing them together. It acts like glue and prevents the ring from snapping at the join later.
Step 2: Shaping and Refining
-
Fuse the seam:
gently push the cut ends together on the mandrel. Use a sculpting tool or your fingertip to smudge the clay across the seam until the line disappears completely. -
Shape the profile:
While it’s still on the mandrel, gently roll the ring against your work surface to flatten the outer edge slightly if you want a boxier profile, or smooth it with wet fingers for a rounded, organic shape. -
Smooth imperfections:
Dip your finger in a tiny bit of water (or baby oil) and run it over the entire surface of the ring to smooth out any fingerprints or deep tooling marks. -
Repeat for the stack:
Repeat the rolling and shaping process with your mustard yellow and teal clays to complete the trio. Keep the thickness consistent so they look cohesive when stacked.
Step 3: Baking and Finishing
-
Prepare for the oven:
Carefully slide the formed rings off the mandrel. Place them on a baking sheet lined with cardstock or parchment paper to prevent shiny spots from forming where the clay touches the metal. -
Bake carefully:
Bake strictly according to your clay manufacturer’s instructions. I always use an oven thermometer here because temperature spikes can scorch these beautiful matte colors. -
Let them cool:
Allow the rings to cool completely in the oven with the door cracked, or on a wire rack. Don’t handle them while hot, as the clay is still fragile. -
Initial abrasion:
Once cool, take a piece of 400-grit sandpaper and sand the entire surface dry. In this project, we actually want visible texture, so don’t polish it to a shine. -
Refine the edges:
Pay special attention to the inner rim where the ring touches your finger. Use fine-grit sandpaper to round this edge off for comfortable wear. -
Create the matte look:
The key to the specific look in the photo is the finish. You can either leave the sanded clay raw for a stone-like texture or apply a very thin layer of ultra-matte varnish for protection without shine.
Textured Twist
Before baking, lightly roll the unbaked ring over a piece of canvas fabric or coarse sandpaper. This imitates the subtle, organic surface texture seen in the reference photo.
Enjoy mixing and matching your new chunky rings with different outfits for a bold pop of color


Marbled Swirl Statement Rings
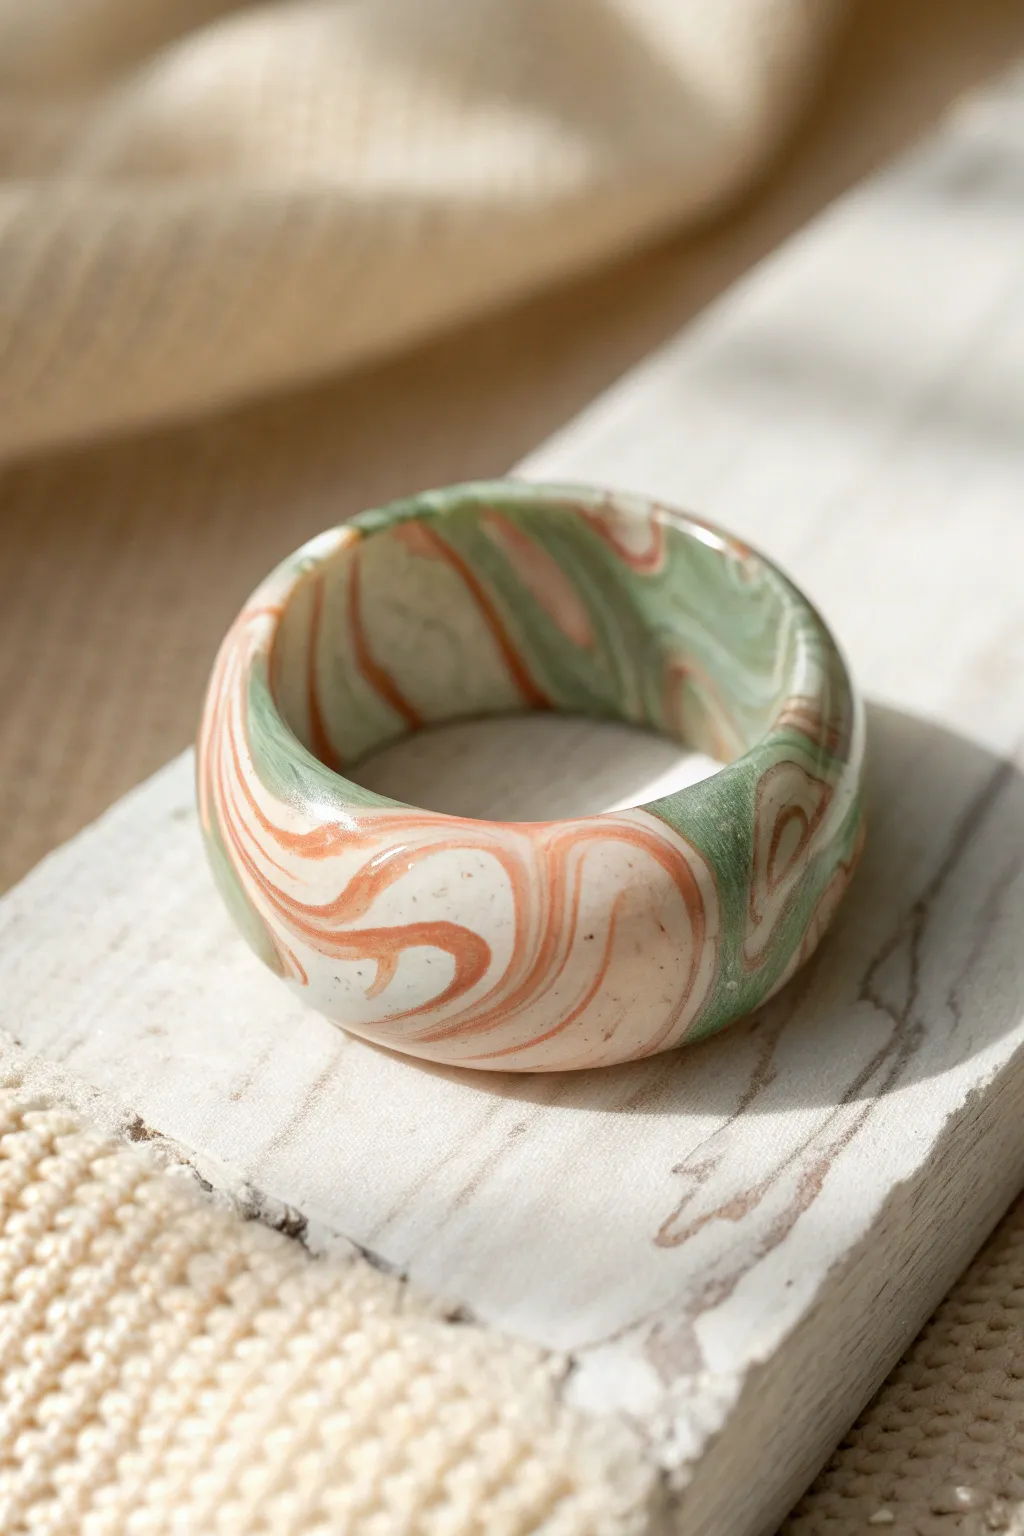
Create a bold statement piece with this chunky polymer clay ring featuring fluid swirls of sage green, terracotta peach, and creamy white. The organic marbling technique ensures every single ring is completely one-of-a-kind.
Step-by-Step Tutorial
Materials
- Polymer clay (Sage Green, Peach/Terracotta, White/Cream)
- Acrylic roller or pasta machine
- Tissue blade or craft knife
- Ring mandrel (metal or wood)
- Sandpaper (wet/dry, grits 400-1000)
- Buffing wheel or denim cloth
- UV resin or gloss varnish (optional for extra shine)
Step 1: Prepping the Palette
-
Condition the clay:
Start by thoroughly conditioning each color of clay separately until they are soft and pliable. Warm clay mixes better and prevents cracking later. -
Create logs:
Roll each color—sage green, peach, and cream—into snakes or logs of roughly equal thickness, about 1/4 inch diameter. -
Draft the ratio:
Decide on your color balance. For the look in the photo, use slightly more cream than the colored clays to keep the design airy. Cut the logs accordingly. -
Bundle colors:
Twist the three colored snakes together into one large rope. Fold the rope in half and twist it again. -
Compress and roll:
Roll the twisted rope into a smooth log on your work surface to compress the strands together and remove air pockets.
Clean Seams Pro Tip
Cut your ring strip ends at a 45-degree angle rather than straight down. The increased surface area creates a stronger bond and makes blending the seam significantly easier.
Step 2: Creating the Marble Effect
-
Fold and twist:
Repeat the twist-and-fold process 2-3 times. Be careful not to over-mix, or the colors will turn muddy instead of distinct swirls. -
Check the pattern:
Slice the log in half with your blade to check the cross-section. If the marbling looks too chunky, give it one more fold and roll. -
Flatten the slab:
Roll the marbled log into a thick ribbon or slab, about 4-5mm thick. Use your acrylic roller or the widest setting on a pasta machine. -
Select the best section:
Inspect your slab for the most pleasing swirl pattern. This will be the visible face of your ring. -
Cut the strip:
Use your tissue blade to cut a clean, straight strip from the slab. The width determines how chunky the ring will be; 12-15mm is good for a statement look.
Step 3: Shaping and Baking
-
Size the ring:
Wrap the clay strip around your ring mandrel at the desired size mark. Cut the excess clay where the ends meet. -
Join the seam:
Gently push the cut ends together. Use a sculpting tool or your finger to smooth the clay over the seam so it becomes invisible. -
Dome the edges:
While on the mandrel, gently tap the edges of the ring with your fingers to round them off, creating that soft, domed profile seen in the image. -
Double check fit:
Ensure the clay isn’t stuck to the mandrel. Give it a tiny twist to loosen it, but leave it on the mandrel for baking to hold the shape. -
Bake:
Bake according to your clay brand’s instructions (usually 275°F/130°C for 30 minutes). I recommend propping the mandrel up so the ring doesn’t touch the baking tray directly.
Muddy Color Solution
If your colors blended into a brown mess, you over-mixed. Stop twisting sooner next time. The swirls should look distinct like candy, not blended like paint.
Step 4: Refining the Finish
-
Cool down:
Let the ring cool completely before removing it from the mandrel. Polymer clay is slightly soft when hot. -
Wet sand:
Use wet/dry sandpaper under running water. Start with 400 grit to smooth any bumps, then move to 600 and 1000 for a satin finish. -
Buff to shine:
Vigorously rub the ring with a piece of denim or use a buffing wheel on a rotary tool to bring out a natural sheen. -
Optional glaze:
If you prefer a high-gloss glass look, apply a thin layer of UV resin or polymer clay gloss varnish and cure.
Now you have a stunning, polished ring ready to stack or wear solo


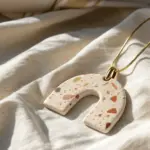
Terrazzo Confetti Band Rings
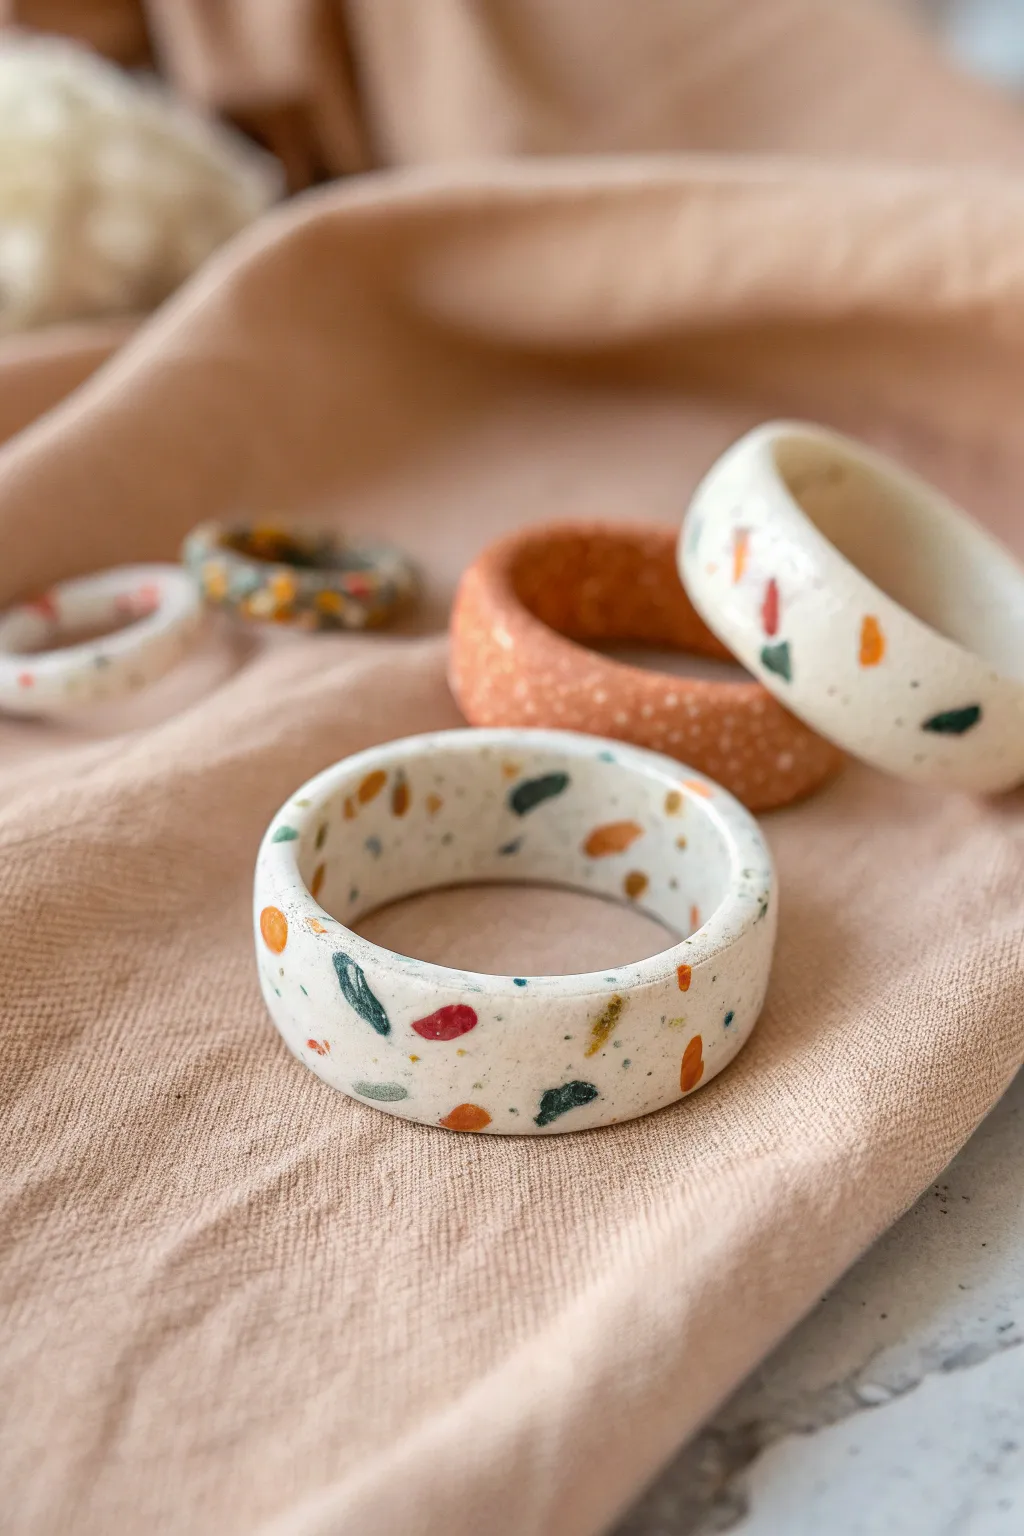
These wide-band rings mimic the classic, speckled look of terrazzo flooring with a modern twist. By embedding tiny, irregular chips of colored clay into a white base, you create a playful, stylish accessory that looks like high-end stone but feels lightweight.
Step-by-Step Guide
Materials
- Polymer clay (White or Ecru for base)
- Small scraps of polymer clay in various colors (teal, orange, mustard, terracotta, green)
- Rolling pin or pasta machine
- Tissue blade or X-Acto knife
- Ring sizing tool (or a paper template)
- Metal ring mandrel or an oven-safe cylindrical object (like a socket wrench socket)
- Parchment paper
- Baking sheet
- Sandpaper (various grits: 400, 600, 1000)
Step 1: Creating the Terrazzo Chips
-
Prepare the chip colors:
Condition your small scraps of colored clay until they are soft and pliable. You want a nice mix of warm and cool tones like the ones in the photo—mustard yellow, teal blue, terracotta orange, and deep green work beautifully together. -
Flatten the scraps:
Roll each color out very thinly. If you have a pasta machine, use one of the thinnest settings; if not, use your rolling pin to get them paper-thin. -
Bake the thin sheets:
Place these thin sheets on a piece of parchment paper and bake them for about 10–15 minutes according to the package temperature. We want them partially cured so they are brittle enough to chop up easily. -
Chop into confetti:
Once the thin sheets have cooled, use your tissue blade to chop them into irregular, tiny pieces. Aim for variety in size—some tiny speckles and some slightly larger chunks—to create that authentic terrazzo texture.
Step 2: Forming the Ring Base
-
Condition the base clay:
Thoroughly condition your white or ecru clay. It needs to be flexible but firm enough to hold the ring shape. -
Roll out the base:
Roll the white clay into a slab that is roughly 3mm to 4mm thick. This thickness provides durability for the ring band. -
Add the confetti:
Scatter your pre-baked colored chips onto the white slab. Press them down gently with your fingers to ensure they stick to the raw clay surface. -
Embed the chips:
Run your rolling pin over the slab again. This will press the chips firmly into the white clay, making the surface smooth and flush. I like to roll in multiple directions so the chips stretch slightly and look organic. -
Measure your size:
Use a strip of paper to measure the circumference of your finger (or the finger you are making the ring for) and mark the length. -
Cut the band:
Using your tissue blade, cut a long, straight strip from your terrazzo slab. The width should be roughly 1 cm to match the wide band style shown in the image.
Chip Stickiness
If your baked chips aren’t sticking to the raw base, brush a very thin layer of liquid polymer clay or translucent liquid sculpey onto the white slab before sprinkling the confetti.
Step 3: Shaping and Finishing
-
Wrap the mandrel:
Wrap a small piece of parchment paper around your metal ring mandrel or cylindrical mold to prevent sticking. -
Form the ring:
Wrap your terrazzo strip around the mandrel where it matches your ring size. Carefully join the two ends together. -
Smooth the seam:
Use a clay tool or your finger to gently blend the seam where the ends meet. You can add a tiny bit of liquid clay here if it’s struggling to stick, smoothing it until the join is invisible. -
Final bake:
Place the mandrel (with the ring still on it) onto a baking sheet. Bake for the full recommended time—usually 30 to 45 minutes—to ensure maximum strength. -
Cool down:
Let the ring cool completely on the mandrel before attempting to remove it. Polymer clay is slightly soft when hot and could warp if you pull it off too soon. -
Sand the surface:
Using wet sandpaper, start with the 400 grit to remove any fingerprints or unevenness. This step is crucial because sanding reveals the sharp edges of the terrazzo chips. -
Refine the finish:
Move up to 600 and then 1000 grit sandpaper. Sand the inside edges of the ring specifically to ensure it is comfortable to wear. -
Buff (Optional):
For a matte finish like the photo, simply wash off the sanding dust. If you prefer a sheen, rub the ring briskly with a soft denim cloth to buff it.
Clean Edges
If the edges of your ring look rough after cutting the strip, lightly run your finger dipped in a little cornstarch or baby oil along the rim to smooth it out before baking.
Enjoy styling your new ring stack with different color combinations for every season


Pastel Checkerboard Rings
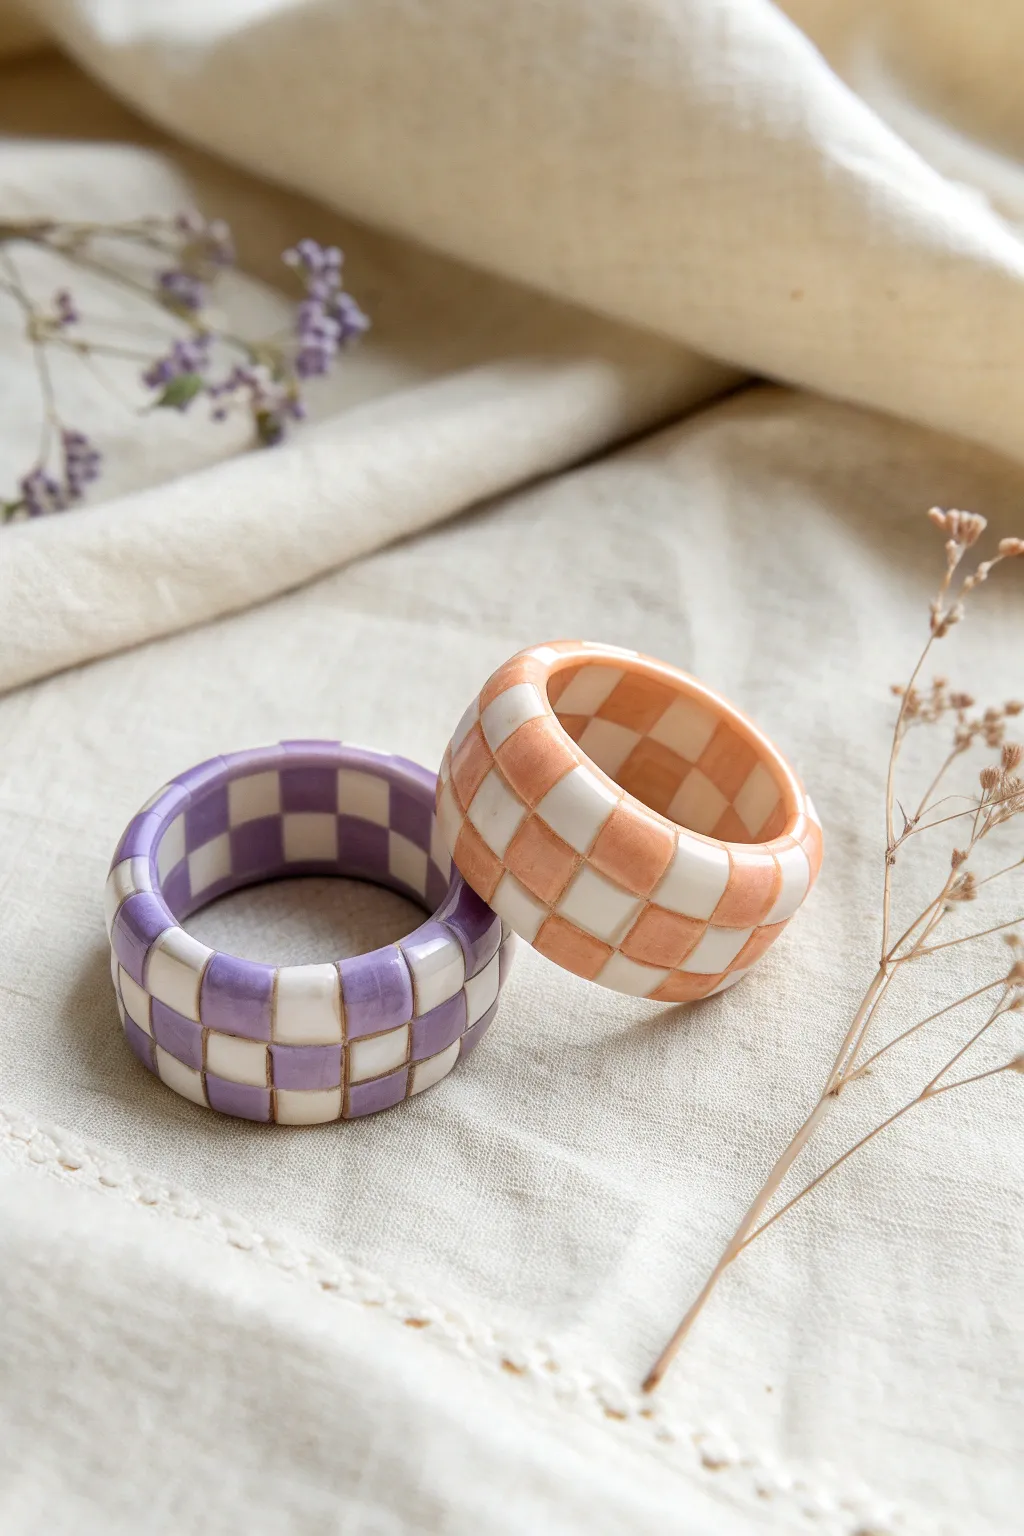
Embrace the fun of retro patterns with these delightful polymer clay checkerboard rings. Their chunky silhouette and soft pastel palette make them the perfect statement accessory for a breezy daily look.
Detailed Instructions
Materials
- Polymer clay (white, pastel purple, pastel peach)
- Clay roller or pasta machine
- Tissue blade or X-Acto knife
- Circle cutter set (approx. 2cm diameter or size 7-8 ring size)
- Smaller circle cutter (for the inner hole)
- Grid mat or ruler
- Gloss glaze or UV resin
- Soft paintbrush
- Oven
Step 1: Creating the Checkered Canes
-
Condition the Clay:
Begin by conditioning your white and colored clays separately until they are soft and pliable. This prevents cracks later on. -
Roll Square Logs:
Shape the white clay and your chosen pastel color (purple or peach) into two rectangular logs. They should be roughly the same width and height, about 1cm by 1cm. -
Check for Uniformity:
Use your acrylic roller or paddle to flatten the sides of the logs, ensuring they are perfect squares in cross-section. -
Slice Strips:
Using your tissue blade, slice 4 even slabs from the white log and 4 even slabs from the pastel log. Aim for a thickness of roughly 3mm per slice. -
Assemble Stripes:
Stack the slices in an alternating pattern (white, color, white, color) to form a striped block. Gently press the layers together to eliminate air gaps. -
Create a Second Block:
Make a second striped block, but reverse the starting color (color, white, color, white). You now have two striped rectangular prisms. -
Slice the Blocks:
Turn the striped blocks on their sides. Slice them perpendicularly to create new striped slabs. -
Form the Checkerboard:
Take a slice from your first block and a slice from your second block. Stack them so the colors alternate like a chessboard. -
Build Height:
Ismetimes I like to stack about 3 or 4 of these checkered slices to get enough width for a chunky ring. Gently compress the stack from all sides to fuse the checks into a solid cane.
Clean Cuts Matter
Chill your clay cane in the fridge for 15 minutes before slicing. Firm clay distorts much less, keeping your checkerboard squares sharp.
Step 2: Shaping and Finishing
-
Slice a Ring Blank:
Cut a slice from your main checkerboard cane that is approximately 5-6mm thick. This will be the face of your ring. -
Create the Center Hole:
Using the smaller circle cutter, punch a hole directly in the center of your checkerboard slice. Save the inner clay for later scraps. -
Cut the Outer Circle:
Center your larger circle cutter around the hole you just made and punch out the ring shape. You now have a flat, doughnut-shaped checkerboard disc. -
Refine the Edges:
Gently smooth the inner and outer edges with your finger. If the checks distorted during cutting, gently push them back into square shapes. -
Bake:
Place the rings on a parchment-lined baking sheet or ceramic tile. Bake according to your clay manufacturer’s instructions (usually 275°F/135°C for 15-30 minutes). -
Cool Down:
Allow the rings to cool completely in the oven or on a wire rack before handling them. -
Sand (Optional):
If there are rough edges, use fine-grit sandpaper (400 to 1000 grit) wet-sand the ring under running water for a smooth finish. -
Glaze:
Apply a thin layer of gloss glaze or UV resin to seal the clay and make the colors pop. Cure the resin under a UV lamp or let the glaze air dry fully.
Make it Irregular
Deliberately squish the ring slightly into an oval or organic shape before baking for a trendy, wavy aesthetic instead of a perfect circle.
Wear your new pastel rings stacked together for a maximalist look or gift one to a friend.

What Really Happens Inside the Kiln
Learn how time and temperature work together inside the kiln to transform clay into durable ceramic.
Cow Print Pop Rings
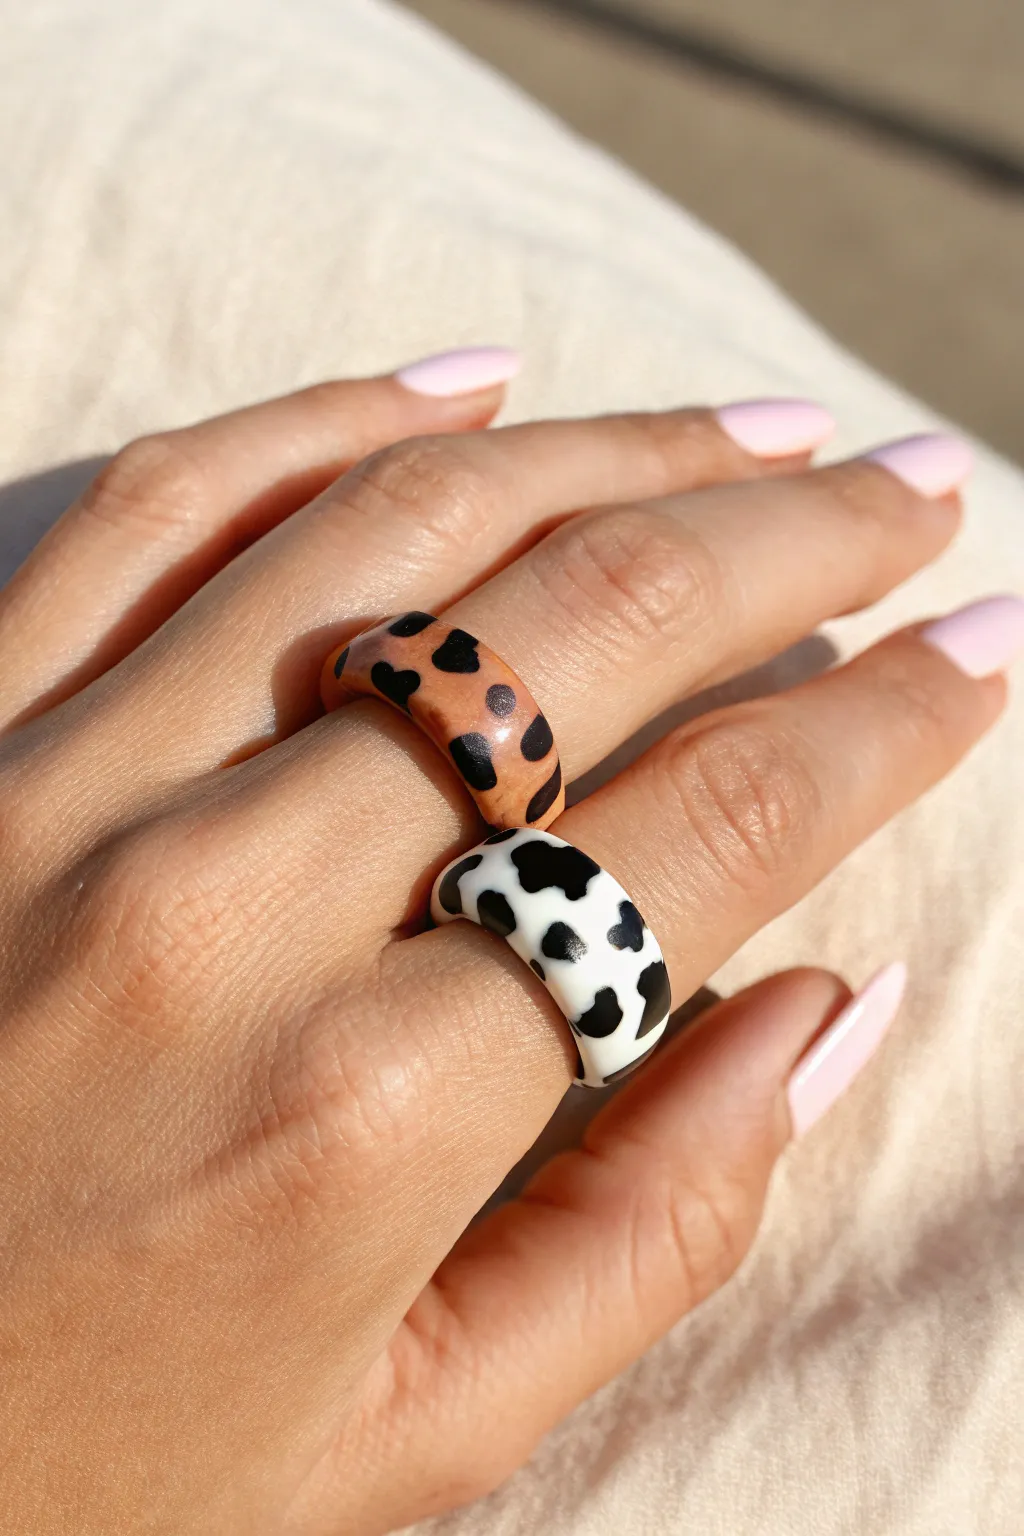
Embrace the fun side of fashion with these chunky, 90s-inspired statement rings featuring a classic cow print. You’ll learn how to craft two distinct colorways—one traditional monochromatic and one in a warm, toasted caramel tone.
How-To Guide
Materials
- Polymer clay (White, Black, and Caramel/Tan)
- Acrylic rolling pin or clay machine
- X-acto knife or clay blade
- Ring sizing mandrel (or a lipstick tube/dowel of appropriate size)
- Parchment paper
- Glossy polymer clay varnish or UV resin
- Small paintbrush
- UV lamp (if using resin)
- Fine grit sandpaper (400-1000 grit)
Step 1: Prepping the Base
-
Condition the clay:
Start by warming up your white clay in your hands, kneading it until it is soft and pliable. Do the same for your caramel/tan clay and a smaller amount of black clay for the spots. -
Roll out the sheets:
Using an acrylic roller or a pasta machine on a medium-thick setting (approx. 3-4mm), roll out your white clay into an even strip. Repeat this process with the caramel clay. -
Create the spots:
Take your black clay and roll it into a very thin snake. Cut tiny, irregular pieces off the snake and flatten them slightly with your finger to create organic, amoeba-like shapes. -
Apply the pattern:
Gently press the black flattened spots onto your white clay strip in a random pattern. Leave some breathing room between spots to mimic real cow hide. Repeat with the caramel strip. -
Smooth the surface:
Once the spots are placed, gently roll over the clay strips again with your acrylic roller. This embeds the black spots flush into the base clay so the surface is seamless and smooth.
Uneven Spots?
If your black spots distort too much when rolling, chill the clay in the fridge for 10 minutes before the final roll-over. This keeps the pattern crisp.
Step 2: Shaping the Rings
-
Measure your size:
Wrap a strip of paper around your finger to find the correct length, or use a ring mandrel to determine the circumference needed for your ring. -
Cut the strips:
Using your clay blade, trim the patterned clay sheets into clean, straight rectangular strips. Aim for a width of about 10-12mm for that chunky look. -
Form the ring:
Wrap the clay strip around your ring mandrel or dowel. Ensure the fit is snug but not stretched. -
Join the seam:
Where the two ends of the clay meet, slice vertically through both overlapping layers with your blade to create a perfect butt joint. Remove the excess scraps. -
Smooth the connection:
Gently gently rub the seam with your finger or a clay tool to blend the clay together. I find a light rolling motion helps erase the line completely. -
Refine the edges:
While still on the mandrel, gently tap the edges of the ring to round them off slightly so they aren’t sharp against the skin.
Step 3: Baking and Finishing
-
Bake:
Place the rings (still on the mandrel if metal/safe, or carefully slide them off onto parchment paper) into the oven. Bake according to your clay manufacturer’s instructions, usually at 275°F (135°C) for 30 minutes. -
Cool down:
Let the rings cool completely before handling. Polymer clay is strongest once it has returned to room temperature. -
Sand for smoothness:
If there are any bumps or fingerprints, wet sand the ring under running water using fine-grit sandpaper until the finish is silky smooth. -
Apply finish:
Brush on a thin layer of glossy varnish or UV resin to seal the clay and give it that high-shine, ceramic look. -
Cure or dry:
Allow the varnish to air dry thoroughly, or cure the UV resin under a UV lamp for 2-3 minutes until hard and tack-free.
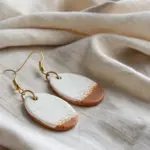
Coordinate!!
Make a matching pair of earrings using the leftover patterned clay scraps. Cut out simple circles or arches for a complete groovy set.
Slide on your new accessories and enjoy the playful pop of pattern they add to your hand
Smiley Face Doodle Rings
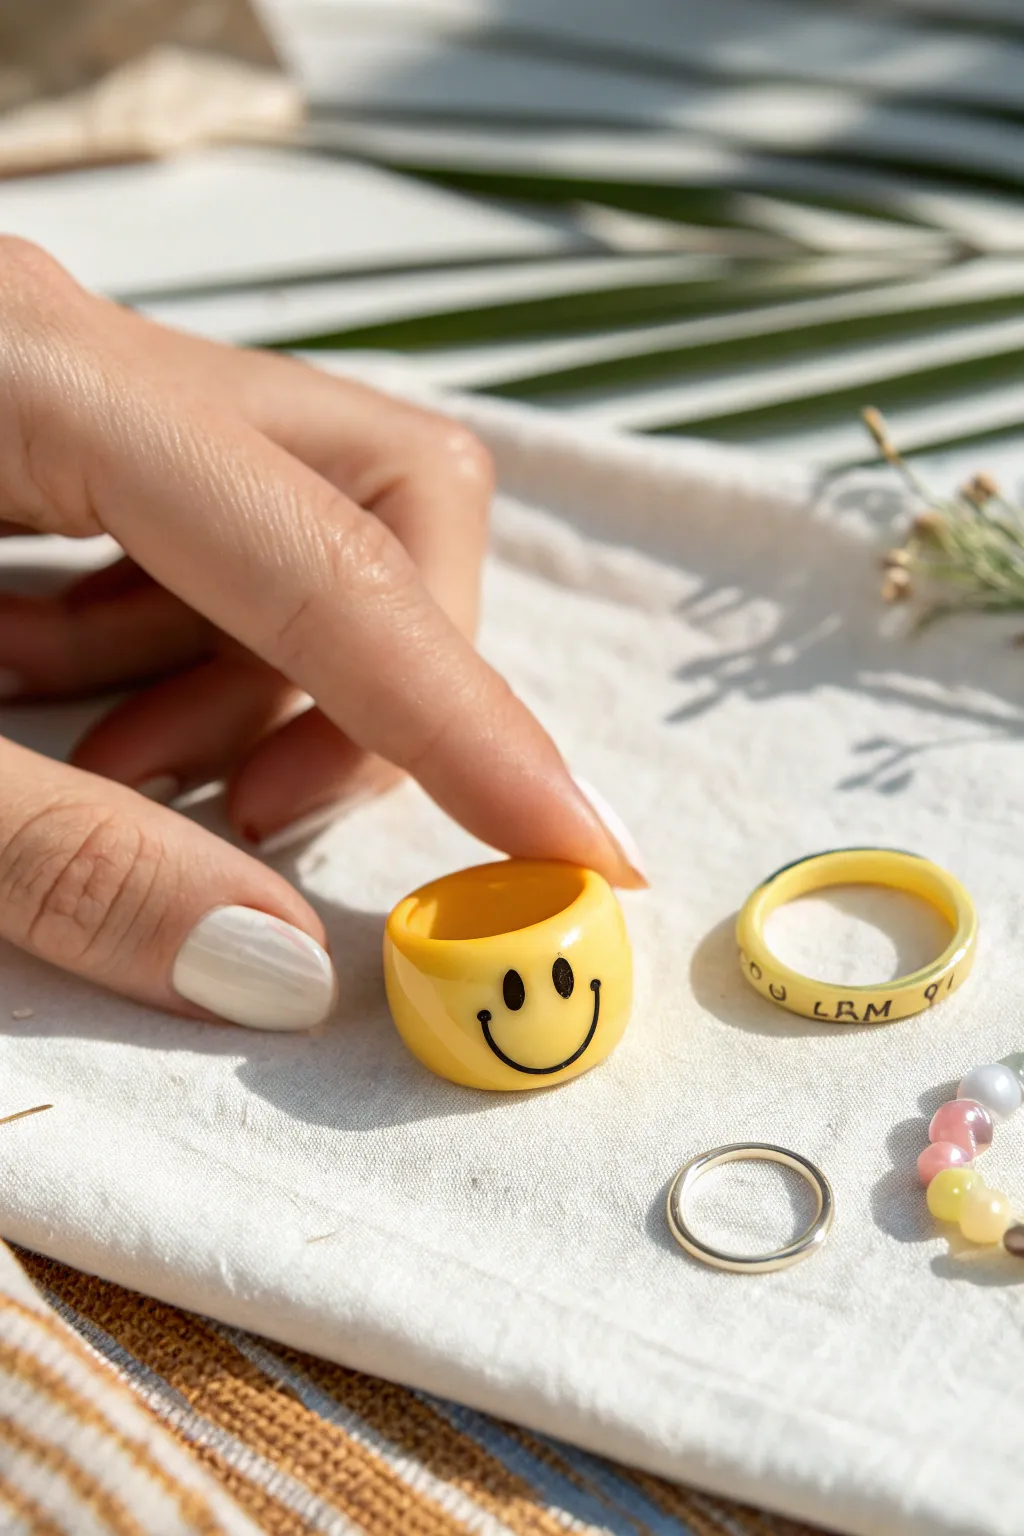
Brighten your jewelry collection with this bold, chunky ring that radiates happiness. Featuring a solid mustard-yellow band and a charming looped doodle smile, this piece captures the carefree vibe of summer vacation.
Step-by-Step Guide
Materials
- Mustard yellow polymer clay
- Liquid polymer clay (translucent or yellow)
- Black acrylic paint or black Posca marker (fine tip)
- Ring sizing mandrel (or a DIY paper tube)
- Small rolling pin
- Essential modeling tools (needle tool, flexible blade)
- Fine-grit sandpaper (400 to 1000 grit)
- UV resin or high-gloss polymer clay varnish
- Paintbrush for glazing
- Cornstarch or baby powder (for release)
Step 1: Forming the Ring Base
-
Condition the Clay:
Begin by thoroughly conditioning your mustard yellow polymer clay. Knead it in your hands until it is soft, pliable, and free of any air bubbles. -
Roll a Snake:
Roll the conditioned clay into a long, thick log or snake. Aim for a thickness of about 1/2 inch to 3/4 inch, depending on how chunky you want the final ring to be. -
Flatten Slightly:
Gently press down on the log with your acrylic roller just enough to create a flat inner surface where it will touch your finger, leaving the outside rounded and dome-like. -
Size the Band:
Wrap the clay strip around your ring mandrel at the desired size. Remember that polymer clay doesn’t shrink, so size it exactly to fit. -
Create the Seam:
Cut through both overlapping ends of the clay simultaneously with a flexible blade to create a clean join. Remove the excess clay. -
Blend the Joint:
Push the cut ends together on the mandrel. Use a modeling tool or your fingertip to smooth the seam completely so it becomes invisible. I find a tiny dab of baby oil helps blend the clay seamlessly. -
Refine the Shape:
While still on the mandrel, gently pat the sides of the ring to ensure the walls are even and the edges are rounded, not sharp. -
First Bake:
Bake the ring according to your specific clay manufacturer’s instructions (usually 275°F/130°C for 30 minutes). Let it cool completely before sliding it off the mandrel.
Smooth Seams
If you struggle to hide the seam where the ring connects, try brushing a tiny amount of liquid clay or clay softener over the joint before smoothing it with a silicone tool.
Step 2: Adding the Smiley Details
-
Sand for Smoothness:
Once cool, lightly wet-sand the ring with fine-grit sandpaper to remove any fingerprints or bumps. Rinse and dry thoroughly. -
Draft the Face:
Lightly sketch the position of the eyes and smile using a pencil. Center the face on the front of the band. -
Paint the Features:
Using a fine-tip paintbrush and black acrylic paint, or a black paint marker, carefully draw the two oval eyes. -
Doodle the Smile:
Draw the smile as a simple curved line. Add tiny vertical ticks at the ends of the smile to mimic the ‘doodle’ style shown in the photo. -
Dry the Paint:
Allow the paint to dry completely. A heat gun can speed this up, but be careful not to overheat the clay.
Step 3: Glazing and Finishing
-
Prepare the Resin:
To get that glossy, store-bought plastic look, we need a thick clear coat. Prepare your UV resin or a high-gloss polyurethane varnish. -
Apply the Glaze:
Mount the ring on a dowel or tool handle to hold it steady. Brush a generous layer of resin or varnish over the entire outside of the ring. -
Check for Drips:
Rotate the ring slowly to even out the coating and prevent pooling at the bottom. -
Cure or Dry:
If using UV resin, cure it under a UV lamp for 2-3 minutes. If using varnish, hang it to dry for the recommended time (usually several hours). -
Final Inspection:
Check for any sticky spots or missed areas. The ring should now look like a solid piece of glossy yellow lucite.
Clear Coat Magic
For a hyper-realistic plastic look, do two thin coats of UV resin rather than one thick one. This prevents bubbles and creates that deep, glassy shine seen in the photo.
Slip on your new chunky ring for an instant pop of color and cheer


The Complete Guide to Pottery Troubleshooting
Uncover the most common ceramic mistakes—from cracking clay to failed glazes—and learn how to fix them fast.
Yin-Yang Split Color Rings
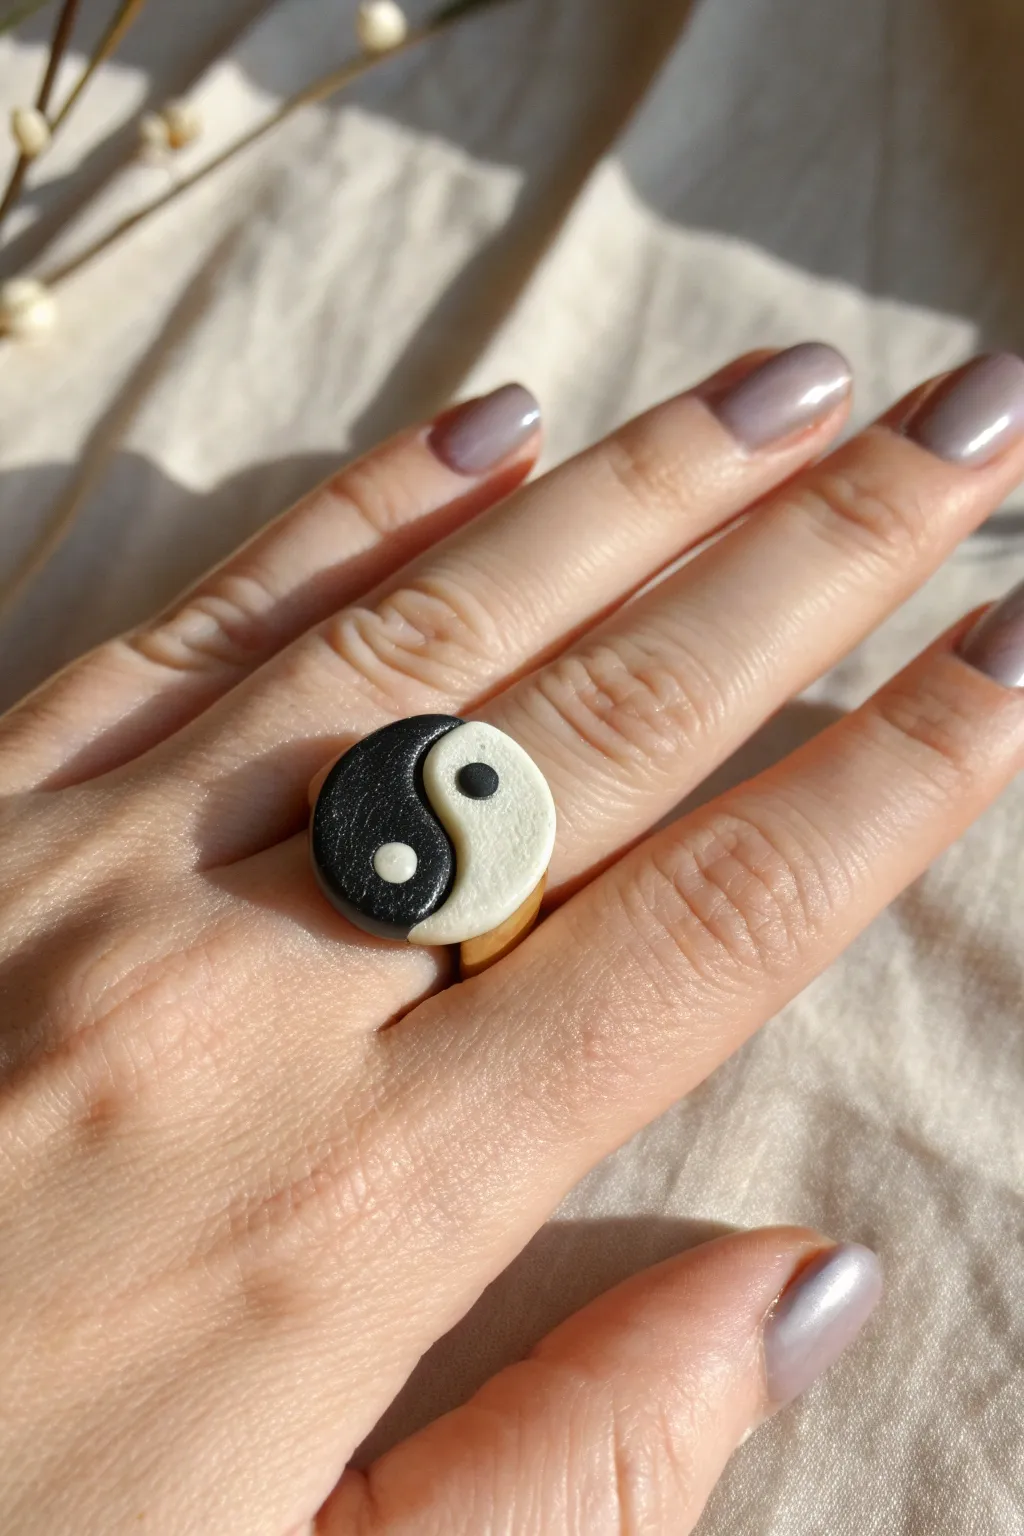
Find your center with this chunky, statement ring featuring the classic Yin-Yang symbol. The design combines a bold, balanced top with a comfortable, neutral band for a piece that looks great with any outfit.
Step-by-Step
Materials
- Black polymer clay
- White polymer clay
- Beige or gold polymer clay (for the band)
- Circle cutter (small, approx. 1.5 – 2 cm)
- Small dotting tool or toothpick
- Acrylic rolling pin
- Blade or craft knife
- Ring mandrel (optional, or a tough paper tube)
- Smoothing tool or your finger
Step 1: Creating the Symbol
-
Condition the clay:
Start by warming up your black and white polymer clay separately in your hands until they are soft and pliable. This prevents cracks later on. -
Roll out sheets:
Roll both colors out into small sheets of even thickness, aiming for about 3mm thick. -
Cut the circles:
Use your small circle cutter to punch out one black circle and one white circle. Set the excess clay aside. -
Create the S-curve:
Take your craft knife and carefully cut a flowing ‘S’ shape through the center of both the black and white circles. Try to make these cuts as identical as possible. -
Combine the halves:
Take the left side of the black circle and the right side of the white circle (or vice versa) and press them gently together on your work surface to form a new, complete circle. Save the other halves for a second ring! -
Smooth the seam:
Gently rub the seam where the two colors meet with your finger or a smoothing tool so they bond together without distorting the round shape. -
Make the dots:
Roll a tiny ball of black clay and a tiny ball of white clay. Flatten them slightly into small discs. -
Place the dots:
Place the white dot onto the center of the black tear-drop shape, and pressure firmly. Repeat with the black dot on the white side. I like to gently roll over the top with the acrylic roller once to embed them flush with the surface.
Clean Cuts Only
If your circle cutter sticks to the clay, dip it in a little cornstarch or water before cutting. This helps the clay release instantly without distorting the perfect circle shape.
Step 2: Forming the Band & Assembly
-
Prepare the band clay:
Condition your beige or gold clay and roll it into a thick log. -
Flatten the strip:
Flatten the log into a thick strip, wide enough to support the Yin-Yang topper comfortably. -
Measure the size:
Wrap the strip around your ring mandrel (or a cylinder roughly the size of your finger) to check the fit, cutting off the excess length where the ends meet. -
Join the band:
Blend the seams of the band together smoothly on the underside or back, ensuring the ring is a continuous loop. -
Prepare the connection point:
Flatten the top part of the ring band slightly to create a platform for the Yin-Yang symbol to sit on. -
Attach the topper:
Place the Yin-Yang circle onto the flattened platform of the ring band. You can use a tiny dab of liquid clay (Bake and Bond) here for extra security if you have it. -
Blend the underside:
Use a modeling tool to gently drag a little clay from the underside of the topper down onto the band, smoothing it out to mechanically lock the two pieces together. -
Final check:
Check the shape one last time to ensure the circle is still round and the band hasn’t warped. -
Bake:
Bake the ring according to your specific clay brand’s manufacturer instructions (usually 275°F/135°C for 15-30 minutes). -
Cool and finish:
Allow the ring to cool completely before wearing. You can add a coat of gloss glaze if you want it shiny, but the matte finish looks very modern.
Glittery Galaxy
Use polymer clay that has subtle glitter or mica powder mixed in (like ‘Granite’ or ‘Pearl’ colors) instead of plain black and white for a celestial, starry night effect.
Enjoy wearing this symbol of balance on your finger
Speckled Faux-Stone Band Rings
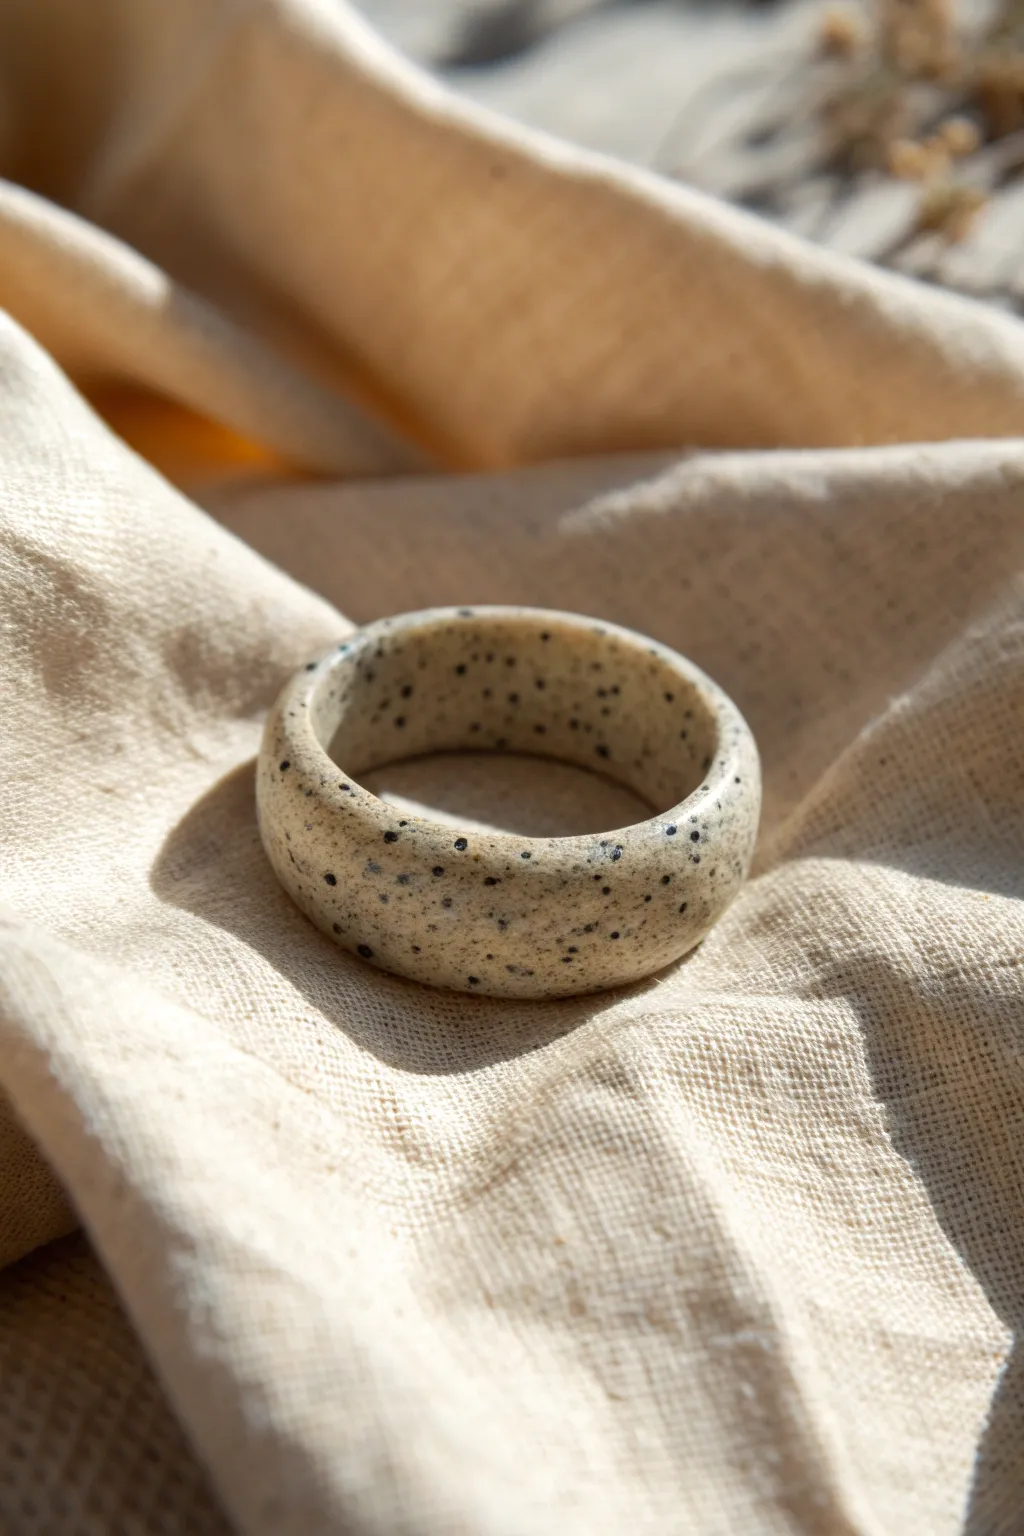
Recreate the natural elegance of polished river stones with this speckled polymer clay band. This faux-granite look is surprisingly achievable and results in a smooth, minimalist accessory perfect for everyday wear.
Step-by-Step Guide
Materials
- Polymer clay (beige or sand color)
- Black pepper or black embossing powder
- Translucent polymer clay
- Acrylic rolling pin
- Ring mandrel (metal or wood)
- Tissue blade or clay knife
- Fine-grit sandpaper (400, 600, 800 grits)
- Liquid polymer clay (optional)
- Buffing wheel or denim cloth
Step 1: Mixing the Clay
-
Condition the base:
Start by thoroughly conditioning your beige or sand-colored polymer clay until it is soft and pliable. -
Add translucency:
Mix in a small amount of translucent clay (about 1 part translucent to 3 parts beige). This gives the final ‘stone’ a more realistic, slightly deep appearance rather than a flat plastic look. -
Create the speckles:
Flatten your clay mixture into a pancake. Sprinkle a generous pinch of coarsely ground black pepper or black embossing powder onto the surface. -
Incorporate the texture:
Fold the clay over to trap the speckles and roll it out. Fold and roll repeatedly until the specks are evenly distributed throughout the batch.
Pepper Protocol
If using black pepper, bake at slightly lower temps for longer to avoid burning the spices. Embossing powder is heat-safe and darker.
Step 2: Forming the Band
-
Roll a snake:
Roll your speckled clay into a thick, even snake. The thickness of the snake will determine the width and chunkiness of your ring band. -
Flatten slightly:
Gently press down on the snake with your acrylic roller just enough to create flat top and bottom surfaces, forming a rectangular strip with rounded edges. -
Size the band:
Wrap a strip of paper around your finger to find the length needed, or use a ring sizing chart. Cut your clay strip to this length, adding a tiny bit extra for the seam. -
Join the ends:
Wrap the clay strip around your ring mandrel at the correct size mark. Carefully press the two cut ends together. -
Smooth the seam:
Use a modeling tool or your finger to blend the clay across the seam line. I find a light rolling motion with a smooth tool helps the join disappear completely. -
Refine the shape:
While on the mandrel, gently pat the clay to ensure it is uniform in thickness all the way around. Smooth out any fingerprints.
Step 3: Baking and Finishing
-
Bake the ring:
Bake the ring while it is still on the mandrel (ensure your mandrel is oven-safe!) according to your clay package’s temperature instructions. Usually, this is around 275°F (130°C) for 30 minutes. -
Cool down:
Allow the ring to cool completely before removing it from the mandrel to prevent warping the shape. -
Initial sanding:
Start wet-sanding the ring with 400-grit sandpaper. This removes any final imperfections or fingerprints and exposes the speckles beautifully. -
Refining the surface:
Move up to 600-grit and then 800-grit sandpaper, sanding under running water for an ultra-smooth finish. -
Buff to shine:
Vigorously rub the ring with a piece of heavy denim or use a buffing wheel on a rotary tool. This creates the soft, matte sheen seen in the photo without needing glossy varnish.
Granite Variance
Add tiny bits of white or grey clay along with the black specks. Chopping them finely mimics complex granite mineral patterns.
Enjoy styling your new ring with linen outfits for a natural, earthy aesthetic

TRACK YOUR CERAMIC JOURNEY
Capture glaze tests, firing details, and creative progress—all in one simple printable. Make your projects easier to repeat and improve.
Knot And Bow Rings
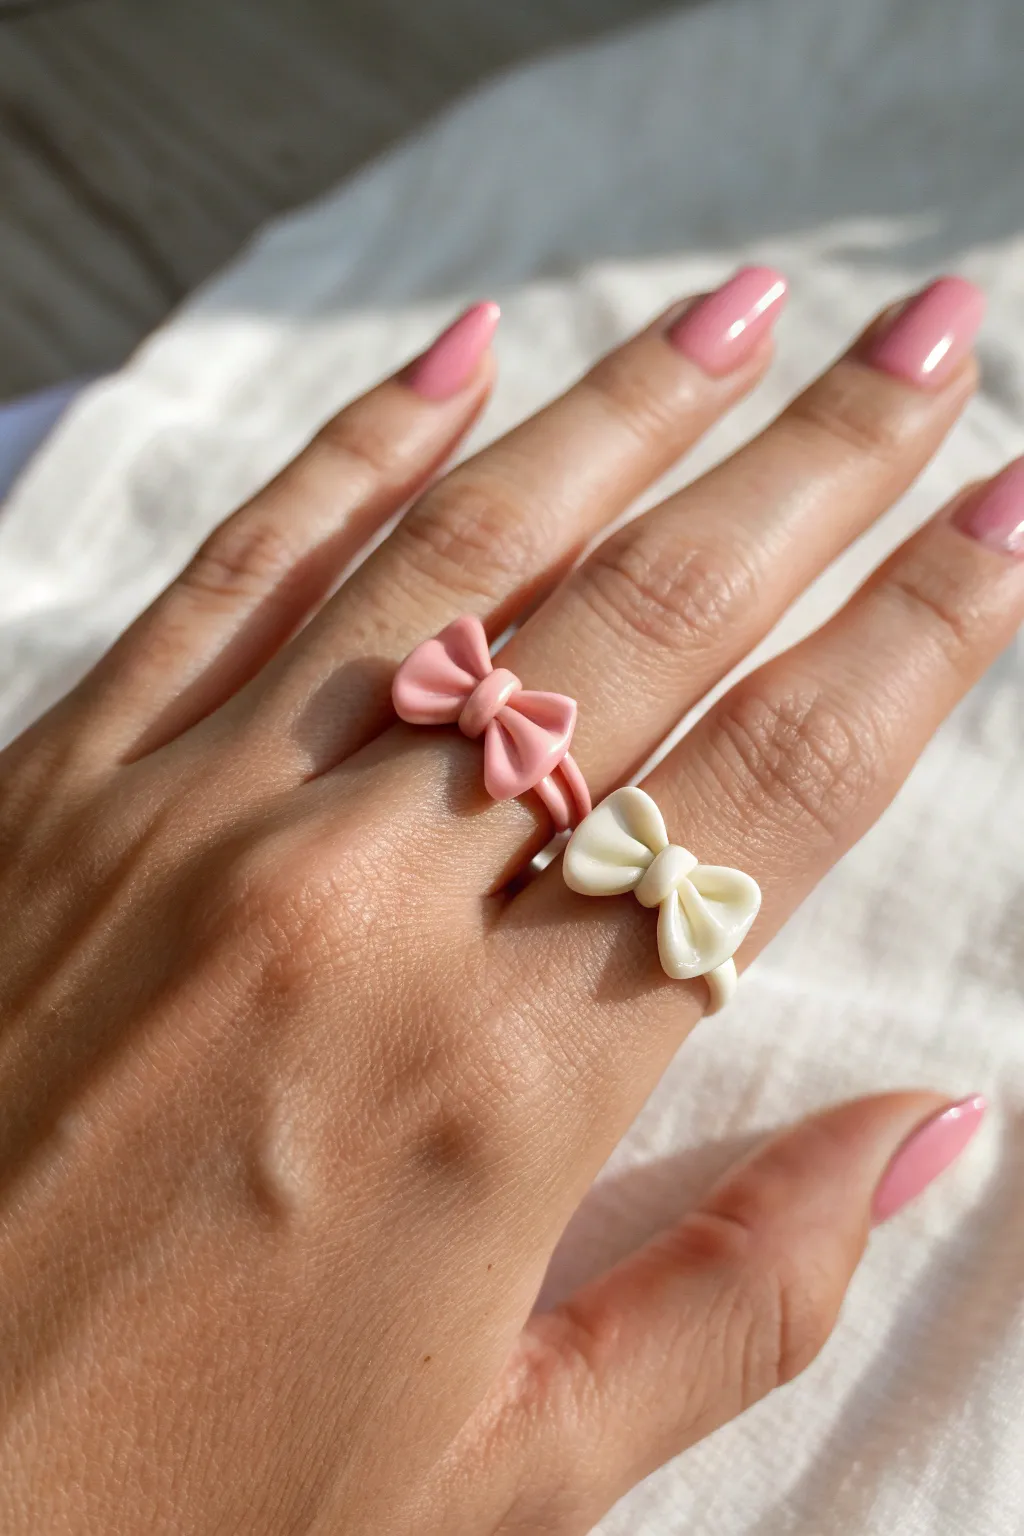
These adorable bow rings feature a soft, pillowy aesthetic that mimics the look of folded fabric or fondant. The design pairs a simple, smooth band with a dimensional bow, creating a sweet and dainty accessory perfect for combining in pastel shades.
How-To Guide
Materials
- Polymer clay (light pink and creamy white)
- Ring mandrel or thick marker (sized to your finger)
- Rolling pin or pasta machine
- Flexible tissue blade
- Dotting tool or small ball stylus
- Clean ceramic tile or glass work surface
- Liquid polymer clay (Fimo Liquid, TLS, or Bake & Bond)
- Oven thermometer
- Fine-grit sandpaper (optional)
Step 1: Preparing the Band
-
Condition the Clay:
Begin by thoroughly conditioning your pink or white clay until it is soft and pliable. Warm clay is less likely to crack when bending it into a ring shape. -
Roll Snakes:
Roll a portion of the clay into a long, even snake. Aim for a thickness of about 3mm to 4mm—thick enough to be durable but thin enough to look delicate. -
Size the Band:
Wrap the clay snake around your ring mandrel at your desired size. Cut the excess clay where the ends meet using your flexible blade. -
Join the Seams:
Gently smooth the seam where the two ends meet with your fingertip. You can roll the mandrel slightly on your work surface to ensure the band is perfectly round and the seam disappears. -
Pre-Bake:
Bake the band on the mandrel according to your clay manufacturer’s instructions (usually 20-30 minutes). I prefer to bake the band first so it provides a solid foundation for the bow, preventing the ring from squishing while I work.
Step 2: Sculpting the Bow
-
Sheet the Clay:
While the band cools, roll out a thin sheet of matching clay, approximately 2mm thick. -
Cut a Strip:
Cut a rectangular strip from the sheet. For a petite bow like the ones pictured, a strip about 6mm wide and 2.5cm long is a good starting point. -
Fold the Loops:
Bring the two ends of the strip toward the center to create two loops, pressing the ends down lightly in the middle. Do not flatten the loops; keep them puffy and open. -
Pinch the Center:
Gently pinch the center where the ends met to create the ‘cinched’ look of a bow. If necessary, use a dotting tool to deepen the dimple in the middle slightly. -
Create the Knot:
Roll a very small, thin strip of clay for the center knot. Wrap this strip vertically around the pinched center of your bow, concealing the seam where the loops meet. -
Shape the Fabric Look:
Using a blunt tool or your fingers, carefully mold the loops so they look like soft fabric folds. Ensure the ‘knot’ piece wraps cleanly around to the back.
Keep it Clean
White and light pink clay pick up dust easily. Keep a scrap piece of ‘garbage clay’ nearby to roll in your hands periodically, which pulls offlint before you touch your project.
Step 3: Assembly and Final Cure
-
Prep for Attachment:
Once your ring band is cool, apply a tiny drop of liquid polymer clay to the spot where you want the bow to sit. This acts as a strong glue during baking. -
Attach the Bow:
Gently press your sculpted bow onto the liquid clay spot on the band. Becareful not to crush the loops. -
Blend the Underside:
For extra durability, you can use a small silicone tool to smooth the clay from the bottom of the bow onto the band slightly, though the liquid clay usually holds it well enough for light wear. -
Final Shape Check:
Give the bow a final fluff with your tool if it got flattened during attachment. The loops should stand up proudly. -
Final Bake:
Place the ring back in the oven. Propping it up against a small mound of baking soda or on a crumpled foil bed can help keep the bow upright if gravity is pulling it sideways. -
Cool and Finish:
Allow the ring to cool completely before handling. If you want a glossy finish like ceramic, apply a coat of resin or polyurethane varnish, though a matte finish looks very chic too.
Glazed Donut Look
To get that ultra-shiny, wet look seen in high-end resin rings, coat your finished baked piece with UV resin and cure under a lamp for a durable, glass-like finish.
Now you have a charming set of custom bow rings ready to mix and match with your outfit