If you’re in a pink era, clay bead bracelets are the easiest way to wear that sweet color in a way that still feels fresh and handmade. Here are my favorite cute pink clay bead bracelet ideas, starting with the classics and moving into the playful, studio-style twists I can’t stop making.
All-Pink Heishi With Gold Spacers
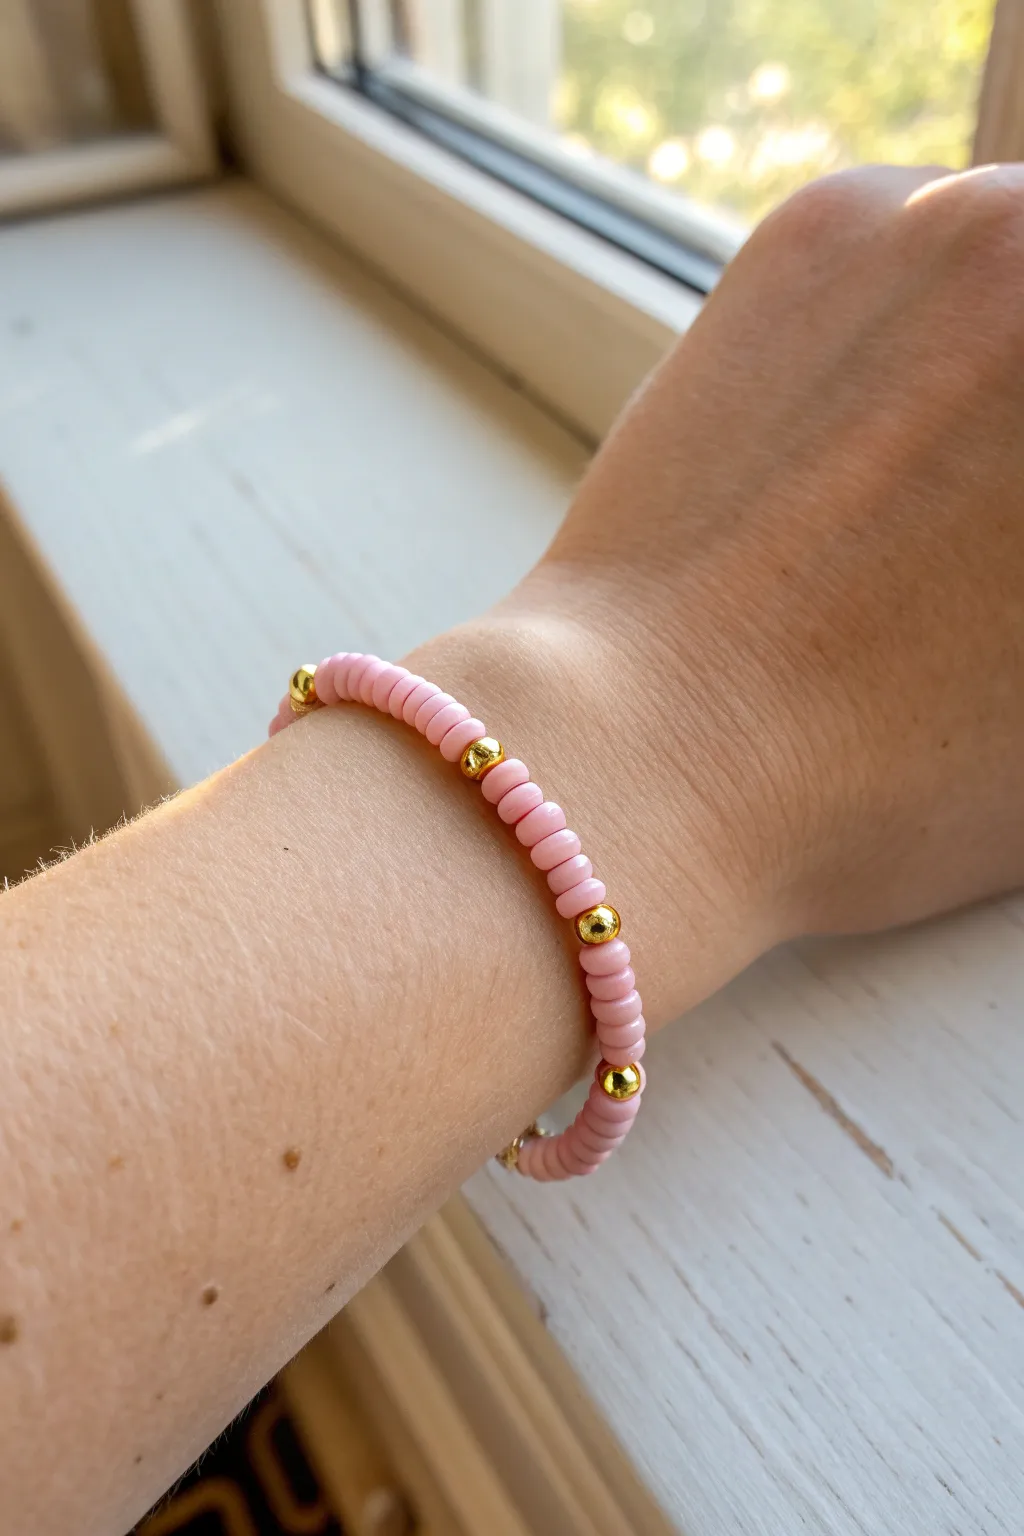
Embrace minimalist elegance with this delicate bracelet design, featuring soft pink Heishi beads punctuated by shining gold accents. It is a perfect beginner-friendly project that looks effortlessly chic whether worn solo or stacked with other favorites.
Step-by-Step Guide
Materials
- Pink polymer clay Heishi beads (approx. 4mm or 5mm)
- Gold spherical spacer beads (3mm or 4mm)
- Elastic stretch cord (0.7mm or 0.8mm)
- Scissors or jewelry snips
- Super glue or jewelry cement (optional)
- Tape or a bead stopper clip
- Measuring tape
Step 1: Preparation
-
Measure your wrist:
Wrap a measuring tape comfortably around your wrist where you want the bracelet to sit. Note this measurement and add about half an inch to ensure a comfortable fit that isn’t too tight. -
Cut the cord:
Cut a piece of elastic stretch cord roughly 10-12 inches long. Having this extra length makes tying the final knots much easier than struggling with short ends. -
Pre-stretch the elastic:
Hold both ends of your cut cord and give it a few firm tugs. Pre-stretching helps prevent the bracelet from loosening up and sagging after you wear it a few times. -
Secure the end:
Attach a bead stopper clip to one end of the cord, or simply use a piece of tape to stick the end to your table. This prevents your beads from sliding right off while you work.
Keep It Tidy
Use a bead board or a simple felt mat while working. Heishi beads are flat and roll away easily; the texture of the loose fabric keeps them in place while you bead.
Step 2: Stringing the Pattern
-
Start the sequence:
Thread approximately 10 to 12 pink clay Heishi beads onto the cord. The exact number depends on how widely spaced you want your gold accents to be. -
Add a gold accent:
Slide one gold spherical spacer bead onto the cord after your section of pink beads. -
Repeat the pattern:
Add another set of 10-12 pink beads, followed by another gold spacer. Consistency is key here, so try to keep the count of pink beads the same between every gold bead for a symmetrical look. -
Check the length:
Periodically wrap the beaded cord around your wrist to check the sizing. Stop adding beads once the ends meet comfortably without stretching the cord tight. -
Final bead adjustment:
Ensure your pattern starts with pink beads and ends with a gold spacer (or vice versa) so the pattern flows seamlessly when the ends are joined.
Step 3: Finishing Touches
-
Prepare for the knot:
Remove the tape or bead stopper carefully. Bring both ends of the cord together, ensuring there are no gaps between the beads. -
Tie the first knot:
Tie a simple overhand knot (like the first step of tying shoelaces) and pull it tight gently to bring the beads into a circle. -
Secure with a surgeon’s knot:
For extra security, tie a surgeon’s knot next. This is like a regular knot, but you loop the end through twice before pulling tight. I find this holds stretch cord much better than a standard square knot. -
Glue the knot:
Dab a tiny drop of super glue or specialized jewelry cement onto the knot. This prevents it from slipping undone over time. -
Hide the closure:
While the glue is still slightly wet, you can try to slide the knot inside the hole of the nearest bead if the hole is large enough. If not, just let it dry completely. -
Trim the excess:
Once the glue is fully dry, use your scissors to trim the excess cord tails close to the knot, being careful not to snip the main bracelet cord.
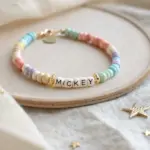
Add a Charm
Personalize the design by adding a single gold letter charm or a small heart pendant next to one of the gold spacer beads for a custom touch.
Slip your new bracelet on and enjoy the subtle sparkle of gold against the matte pink


Blush Ombré Fade
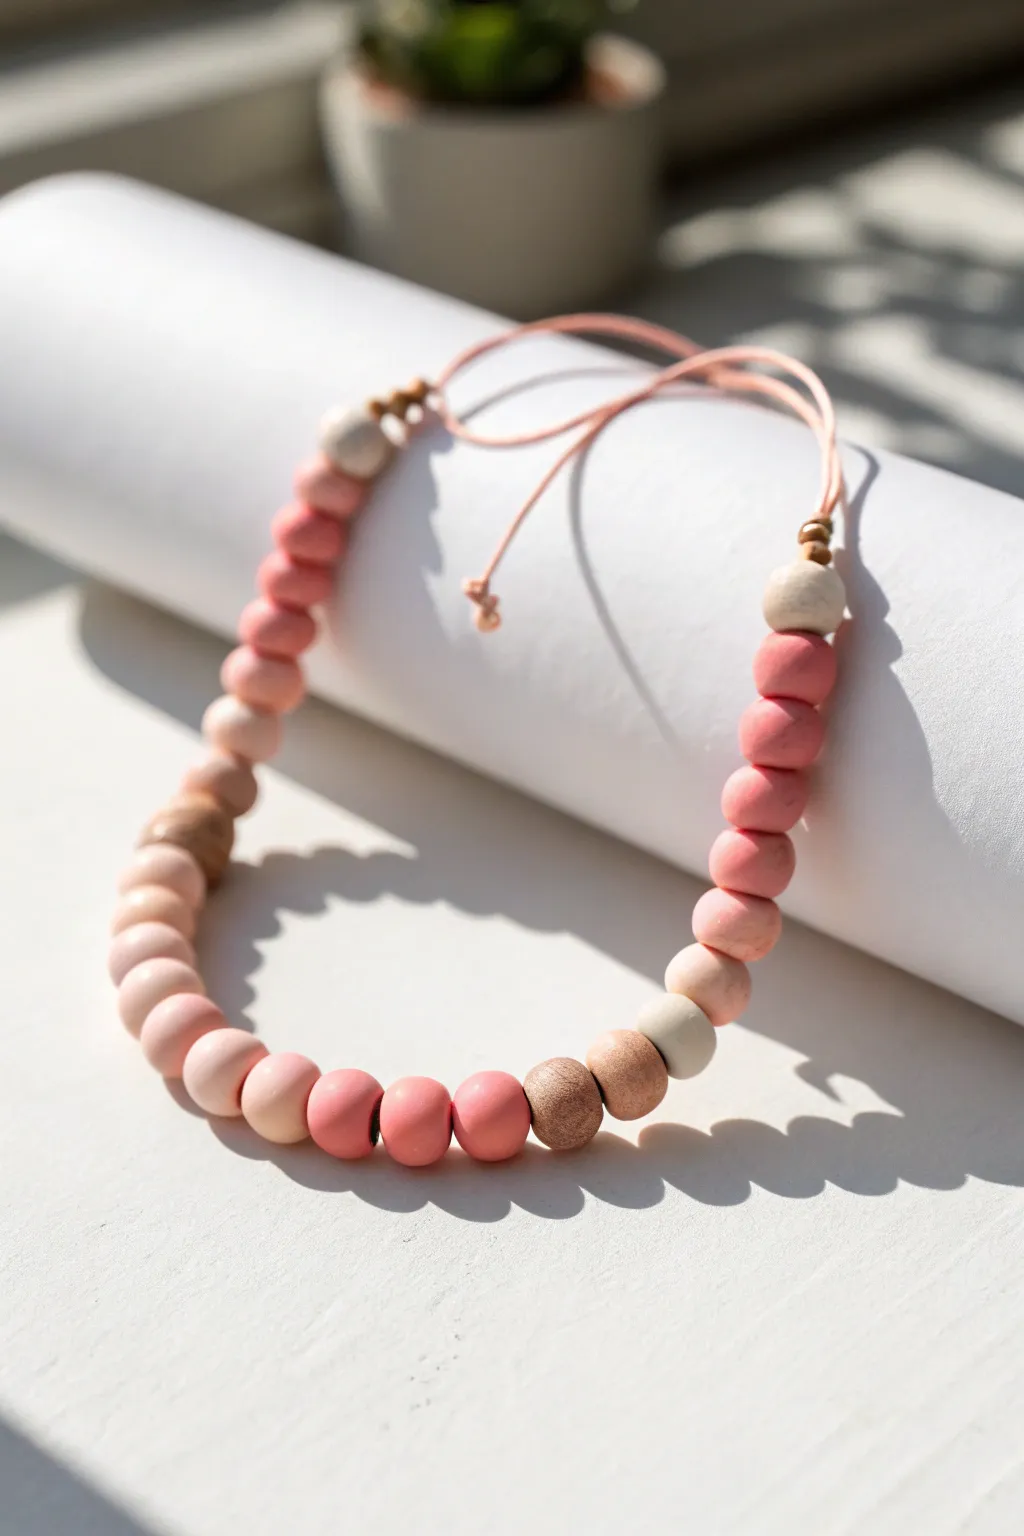
This project combines the warmth of natural wood with soft, matte textures in a stunning pink gradient. The adjustable cord closure makes it versatile enough to wear as a long pendant or a shorter statement piece.
Detailed Instructions
Materials
- 20mm round wooden beads (unfinished beech or maple)
- 20mm round silicone or polymer clay beads (in dark rose, medium pink, blush, and cream)
- Small 6mm wooden spacer beads
- 1.5mm satin nylon cord (blush pink or tan)
- Scissors
- Lighter or thread burner
- Tape or clipboard
- Beading needle (optional but helpful)
Step 1: Planning and Preparation
-
Cut the cord:
Start by measuring and cutting a substantial length of your satin nylon cord. For an adjustable necklace like this, I usually cut about 40 inches to ensure plenty of room for the sliding knots. -
Prepare the ends:
Use a lighter to carefully melt the very tips of your cord. Roll them quickly between your fingers while warm (be careful!) to create a stiff, needle-like point. This will make stringing so much easier without fraying. -
Layout your design:
Before stringing anything, lay your beads out on a flat surface or bead board to finalize the pattern. The beauty of this piece is the asymmetry and ombré effect. -
Establish the pattern:
Looking at the reference, create a focal section at the bottom. Mix textures by placing a natural wood bead next to a matte clay bead. Start the gradient with darker pinks on one side, fading into blush, cream, and then natural wood as you move up the sides.
Step 2: Stringing the Beads
-
Start the central section:
Begin threading your beads onto the cord, starting with the darkest pink focal beads. Ensure the holes are clean and clear of debris. -
Add texture variation:
Interperse the unfinished wooden beads randomly within the lower section. The contest between the smooth wood and the soft-touch clay/silicone is key to this look. -
Build the sides:
Continue stringing up both sides, graduating specifically to lighter blush tones, then cream, and finally finishing the top sections with mostly natural wood beads. -
Check the length:
Once all large beads are on, hold the necklace up to your chest to check how the beaded portion sits. You want the beaded section to cover the front of the neckline fully. -
Add finish beads:
At the very top of each beaded side, add one or two small 6mm wooden spacer beads. These act as stoppers and add a professional finish before the bare cord begins.
Stiff Cord Ends?
If your cord ends keep fraying, dip them in a tiny drop of superglue or clear nail polish. Let it dry until hard, then trim the tip at an angle to create a sharp, needle-free threader.
Step 3: Creating the Adjustable Closure
-
Secure the beads:
Tie a simple overhand knot tightly against the last small spacer bead on both sides. This keeps your bead arrangement centered and secure so they don’t slide around the cord. -
Form the overlap:
Lay the two loose ends of the cord parallel to each other, overlapping by about 4 inches. You can tape these down to a table to keep them steady while you work. -
Tie the first sliding knot:
Take the right cord end and loop it around the left main cord. Tie a sturdy knot around the main cord, but not so tight that it can’t slide. -
Tie the second sliding knot:
Repeat the process with the left cord end, looping it around the right main cord and knotting it securely. -
Test the mechanism:
Gently pull the two knots away from each other and then push them together to ensure the adjustable mechanism works smoothly. -
Trim the tails:
Cut off the excess cord sticking out from your sliding knots, leaving just a tiny stub (about 2-3mm). -
Seal the knots:
Carefully use your lighter to melt the small stubs into the knot itself. Press the melted nylon flat against the knot with the side of the lighter to seal it permanently. -
Add decorative end knots (optional):
If you prefer dangling ends instead of a continuous loop, leave tails on your sliding knots and tie small stopper knots at the very ends to prevent them from slipping through.
Wood Finishing
To deepen the color of the wooden beads and protect them, rub a small amount of coconut oil or beeswax polish onto them with a soft cloth before stringing.
This simple, modern necklace adds a perfect pop of soft color to any outfit


Pink and White Candy Stripes
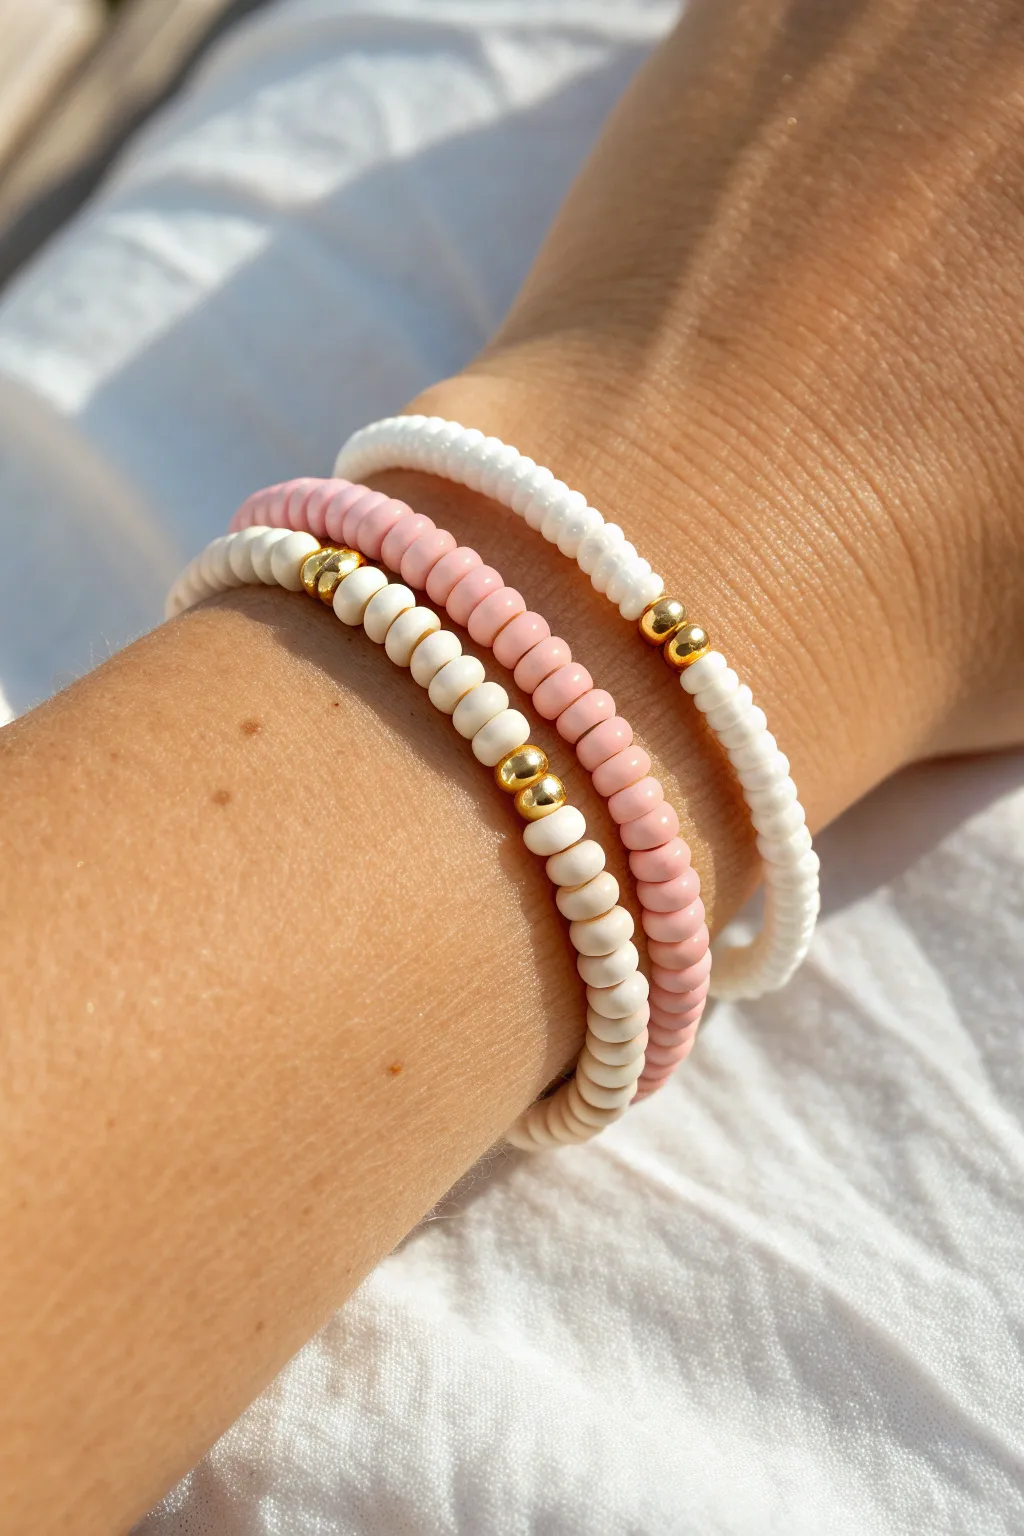
This delicate stack features three coordinating bracelets that mix soft textures with a touch of metallic shine. By combining opaque white and pastel pink glass seed beads with spherical gold accents, you create a timeless set perfect for warm weather styling.
How-To Guide
Materials
- Opaque white seed beads (size 8/0 or 6/0)
- Opaque pastel pink seed beads (size 8/0 or 6/0)
- Beige or cream seed beads (size 8/0 or 6/0)
- Gold spherical spacer beads (3mm or 4mm)
- Strong elastic bead cord (0.5mm or 0.8mm clear)
- Super glue or jewelry adhesive
- Scissors
Step 1: Planning Your Stack
-
Measure your wrist:
Before cutting any cord, wrap a piece of string around your wrist to find your measurement. Add about half an inch for a comfortable fit, or more if you prefer a loose drape. -
Cut the elastic:
Cut three strands of elastic cord, each about 4-5 inches longer than your final wrist measurement. The extra length makes tying the finishing knots much easier. -
Pre-stretch the cord:
Gently pull on each strand of elastic several times to pre-stretch it. This crucial step prevents your bracelets from stretching out and becoming loose after you wear them.
Knot Slipping?
If your elastic knots feel slippery, try roughening the cord ends slightly with sandpaper before tying, or use a tiny dab of clear nail polish if you lack glue.
Step 2: Creating the White Accent Bracelet
-
Start finding the center:
Thread opaque white seed beads onto your first cord until you have covered about half the length needed for your wrist. -
Add gold accents:
Slide on two gold spherical spacer beads right after your row of white beads. These will act as the focal point of the bracelet. -
Finish the beaded row:
Continue adding white seed beads until you reach your desired total length. Double-check the size by wrapping it around your wrist before knotting.
Step 3: Creating the Solid Pink Bracelet
-
Begin the pink strand:
For the second bracelet, simply thread your pastel pink seed beads continuously onto the second piece of cord. This bracelet acts as the colorful anchor of the stack. -
Check for consistency:
Ensure all beads are uniform in size; discard any misshapen ones to keep the strand looking professional and smooth. -
Reach the target length:
Stop beading once this pink strand matches the length of your white bracelet. Uniform sizing helps the stack sit comfortably together.
Mix & Match Metals
Swap the gold spacer beads for silver or rose gold to match your other jewelry, or mix metal finishes within the same stack for an eclectic modern vibe.
Step 4: Creating the Patterned Bracelet
-
Start with neutral beads:
On your third cord, thread cream or beige seed beads for about 2 inches. This forms the base tone for the mixed bracelet. -
Insert gold spacers:
Add two gold spherical beads to match the style of the first bracelet. Placing these spacers randomly or centered creates visual cohesion across the set. -
Add a white section:
Thread about an inch of white seed beads next. I like to keep this section asymmetrical for a more organic look. -
Finish with cream beads:
Complete the strand by filling the rest of the length with your cream or beige beads until it matches the other two strands.
Step 5: Finishing the Stack
-
Tie the first knot:
Take the ends of your first bracelet and tie a simple overhand knot, pulling it tight against the beads without causing them to buckle. -
Secure with a surgeon’s knot:
Follow up with a surgeon’s knot (looping the elastic through twice before pulling tight) for extra security. -
Apply adhesive:
Place a tiny drop of super glue or jewelry adhesive directly onto the knot. Let it dry completely before trimming the excess cord. -
Hide the knot:
If possible, slide the finished knot inside one of the larger gold beads or adjacent seed beads to conceal it. -
Repeat for all strands:
Finish the remaining two bracelets using the same knotting and gluing method.
Slide your new trio onto your wrist and enjoy the subtle shimmer of your handmade accessory


Hot Pink Pop Color Blocks
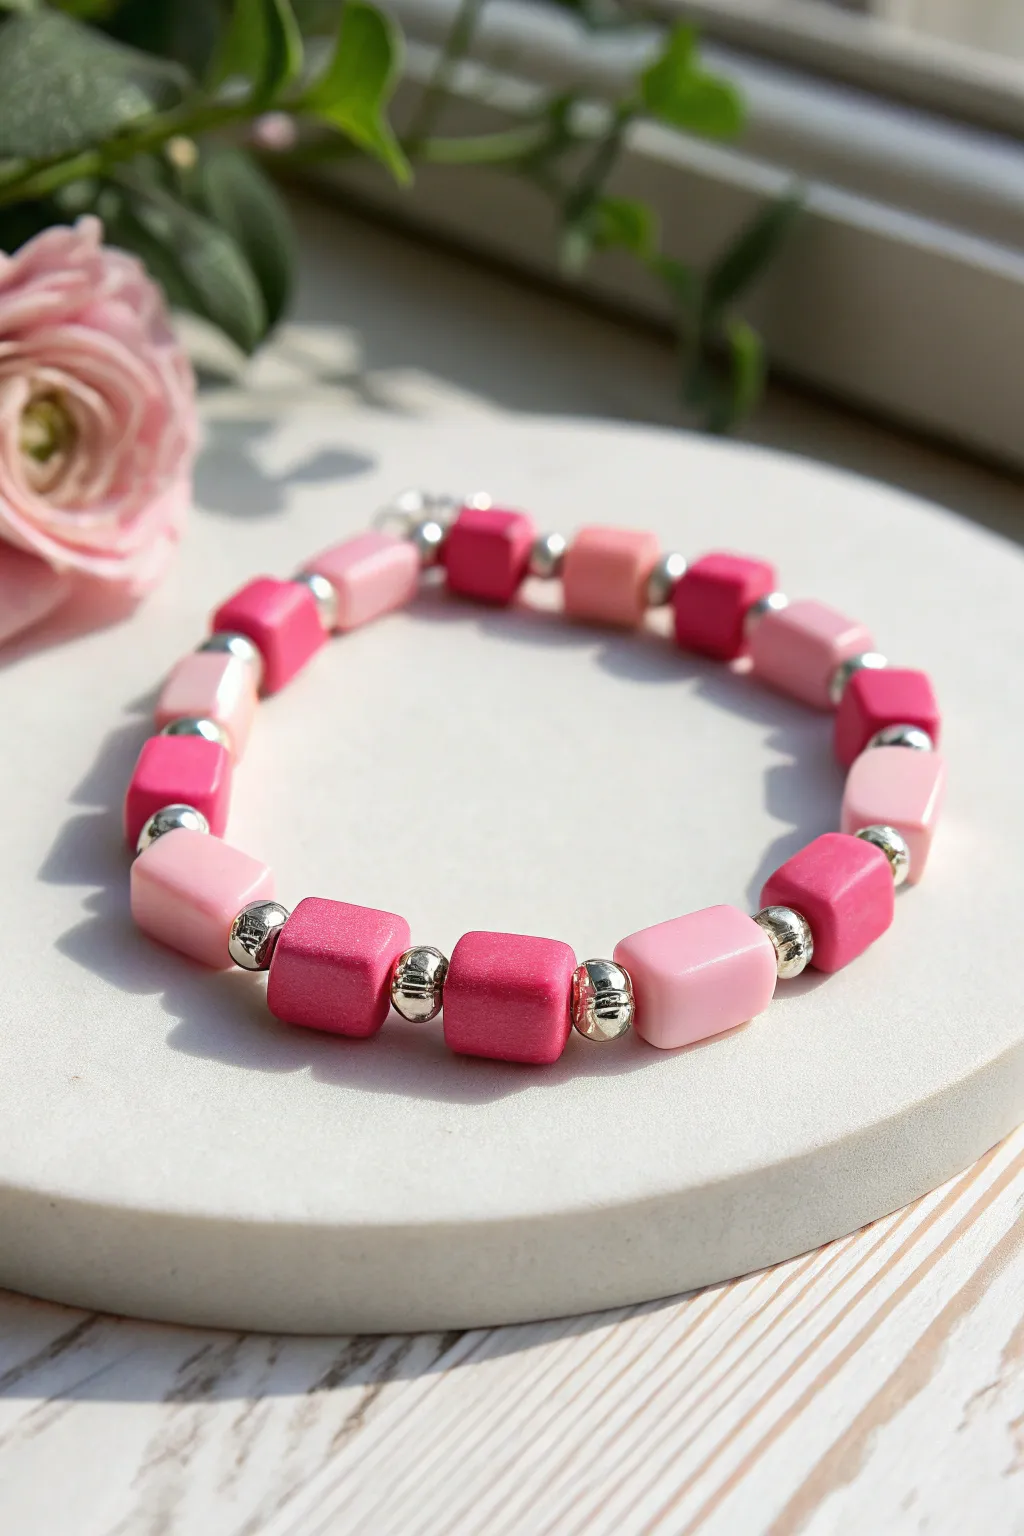
Embrace the playful contrast of hot pink and sweet pastel with this chunky block bead bracelet. The silver spacer beads add a polished metallic shine that elevates the clay cubes from simple to chic.
Step-by-Step Tutorial
Materials
- Square polymer clay beads (approx. 8-10mm) in hot pink
- Square polymer clay beads (approx. 8-10mm) in light pastel pink
- Silver round spacer beads (3-4mm)
- Strong elastic beading cord (0.8mm or 1mm)
- Super glue or jewelry cement
- Scissors
- Beading needle (optional but helpful)
Step 1: Preparation
-
Measure your wrist:
Wrap a piece of string around your wrist to find your size, then add about half an inch for a comfortable fit. The chunky beads take up a bit of inner circumference, so err on the looser side. -
Cut the cord:
Cut a length of elastic cord about 10-12 inches long. Having this extra length makes the final knotting process much less frustrating than working with short ends. -
Pre-stretch the elastic:
Give your cut piece of elastic a few firm tugs. This pre-stretching step helps prevent the bracelet from sagging or loosening up immediately after you finish making it. -
Plan your pattern:
Lay your beads out on a bead board or a towel to prevent rolling. The pattern is simple but effective: one hot pink cube, one silver spacer, one light pink cube, one silver spacer. Repeat this sequence until you reach your desired length.
Uneven Gaps?
If square beads bunch up or gap awkwardly, your spacers might be too small. Using slightly larger round spacers gives the square corners room to turn.
Step 2: Stringing the Beads
-
Secure the end:
Place a piece of tape or a bead stopper on one end of your elastic cord to stop the beads from sliding right off as you work. -
Start with a spacer:
Thread a single silver spacer bead onto the cord first. Starting and ending with spacers (or planning to hide the knot inside a larger cube bead) makes for a seamless finish. -
Add the first block:
Slide on a hot pink clay cube bead. Ensure the hole is clear of any clay debris; sometimes I use a pin to poke through them first if they look clogged. -
Insert a spacer:
Add another silver round bead. These spacers act as hinges, allowing the square beads to sit comfortably around the curve of your wrist without bunching up. -
Add the contrast block:
Slide on a light pink square bead. Push it down so it sits snugly against the spacer. -
Continue the sequence:
Ideally, you want to maintain the alternating rhythm: silver spacer, hot pink, silver spacer, light pink. Continue stringing until you have used all your laid-out beads. -
Check the fit:
Wrap the strung beads around your wrist to check the size. The ends should meet comfortably without deep gaps between the beads.
Step 3: Finishing Touches
-
Prepare to knot:
Remove the tape or bead stopper carefully, holding both ends of the elastic firmly. -
Tie the surgeon’s knot:
Cross the ends like a normal knot, but loop one end through the circle twice before pulling tight. This extra friction holds the elastic much better than a standard overhand knot. -
Tighten securely:
Pull the cords tight, stretching the elastic slightly as you do so to lock the knot in place. -
Add a second knot:
For extra security, tie one more standard overhand knot on top of your surgeon’s knot. -
Apply adhesive:
Dab a tiny drop of super glue or jewelry cement directly onto the knot. Be careful not to get glue on the visible parts of the beads. -
Hide the knot:
While the glue is still wet, gently slide one of the adjacent square beads over the knot so it completely disappears inside the bead hole. -
Trim the ends:
Once dry, use your scissors to snip the excess elastic cord as close to the bead hole as possible without cutting the knot itself.
Level Up
Replace one pink block with a letter bead to add an initial, or swap the silver spacers for gold ones for a warmer, vintage aesthetic.
Wear your new color-blocked creation stacked with other pink accessories for a bold statement look

The Complete Guide to Pottery Troubleshooting
Uncover the most common ceramic mistakes—from cracking clay to failed glazes—and learn how to fix them fast.
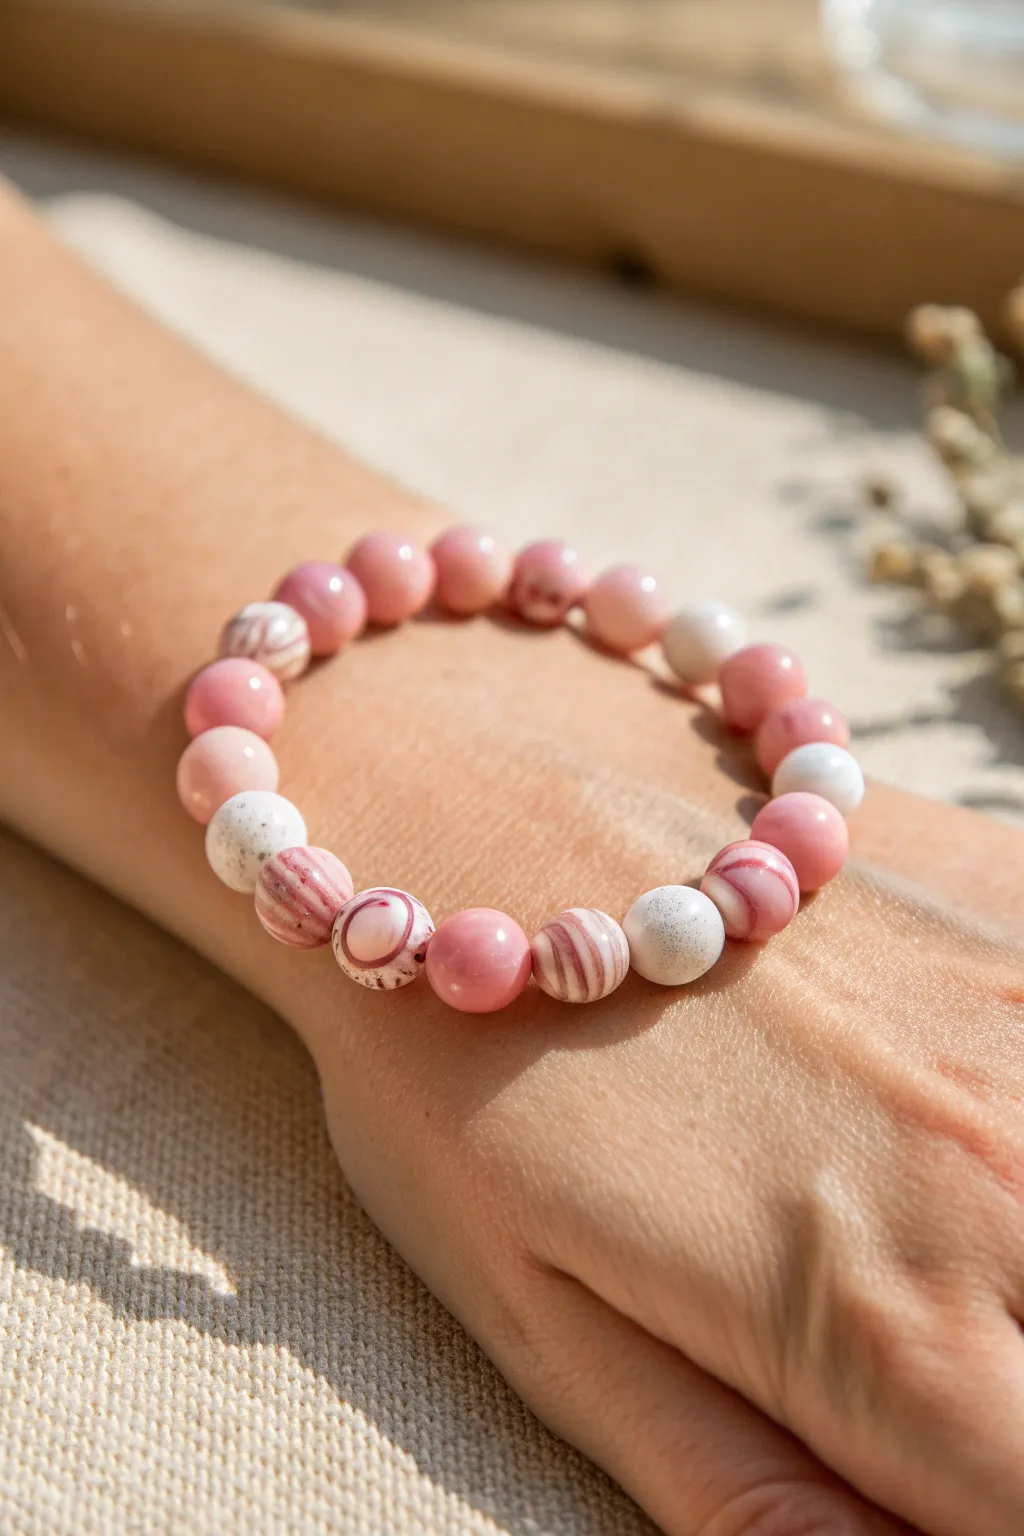
Tiny Heart Bead Center in Pink
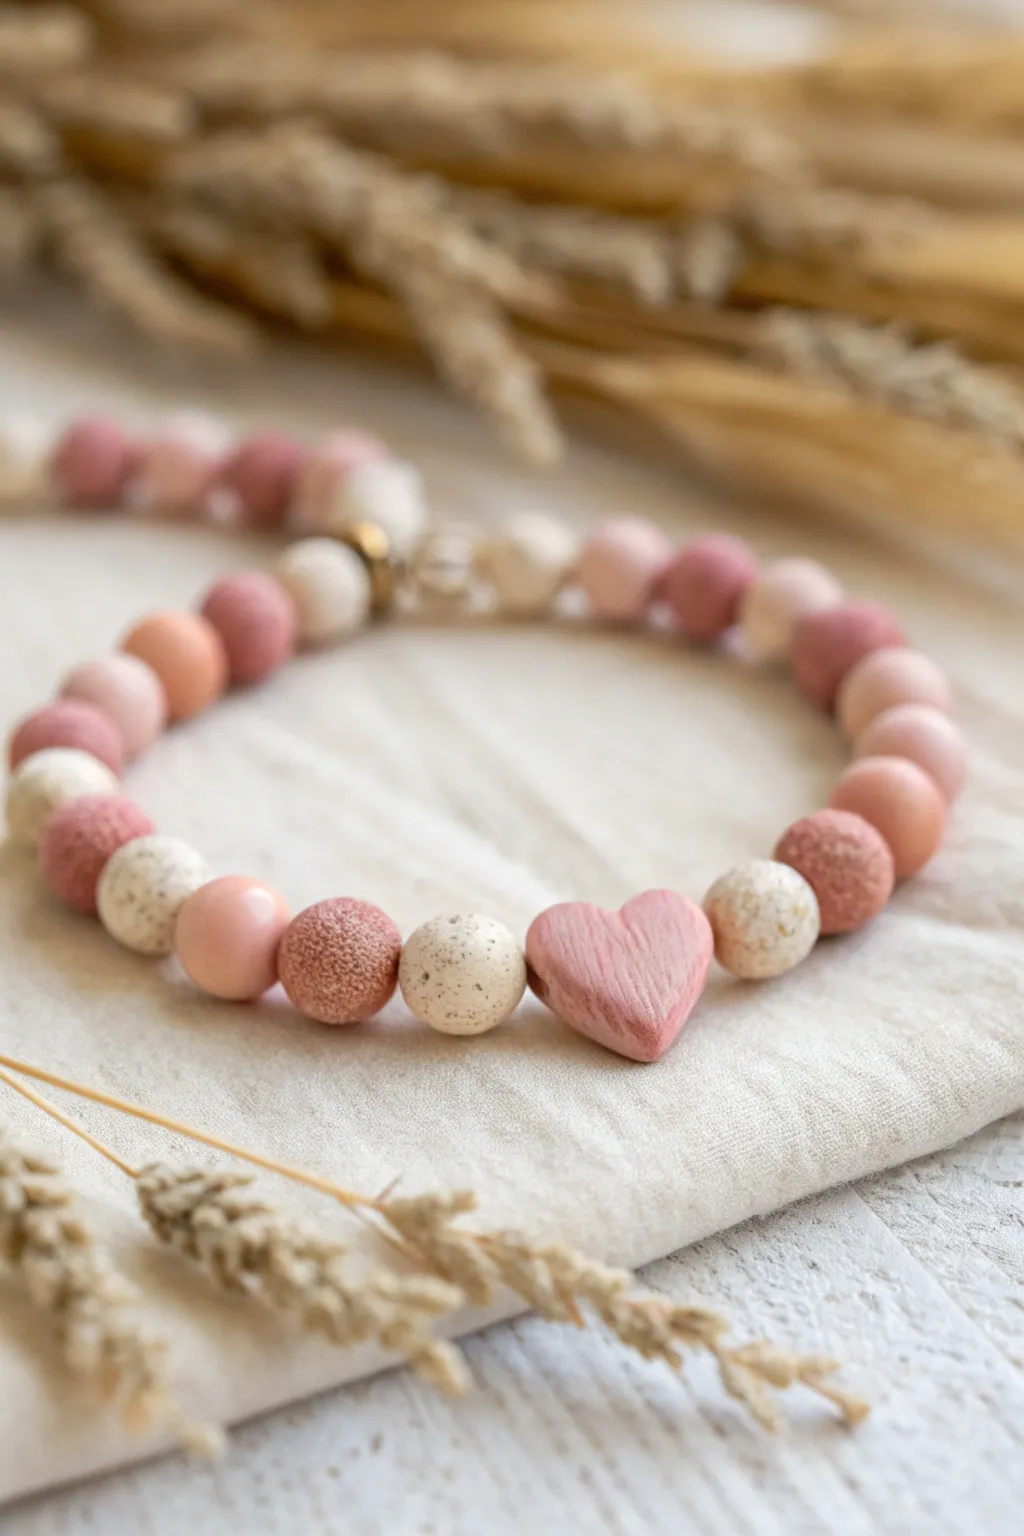
This charming beaded bracelet features a soft palette of blush, terracotta, and speckled cream tones anchored by a hand-carved heart centerpiece. The varied textures—ranging from smooth polish to rustic stone-like speckles—add a wonderful tactile quality to this simple yet heartfelt accessory.
Step-by-Step
Materials
- Polymer clay (colors: translucent cream, blush pink, terracotta, granite-effect/speckled beige)
- Stretch cord (0.7mm or 0.8mm)
- Texturing tools (stiff toothbrush, small ball of aluminum foil, or coarse sandpaper)
- Clay carving tool or exacto knife
- Hand drill or bead reamer
- Bead roller (optional but helpful)
- Oven for baking
- Super glue or E6000
- Small metal crimp beads (optional)
- Sandpaper (fine grit)
Step 1: Creating the Clay Beads
-
Condition the clay:
Begin by thoroughly conditioning each color of polymer clay separately until they are soft and pliable. For the speckled beads, mix a bit of granite-effect clay with cream clay to achieve that subtle stone look. -
Portion the rounds:
Pinch off small, equal-sized pieces of clay for your round beads. Aim for roughly 8mm to 10mm in diameter, keeping the sizes relatively consistent. -
Roll spheres:
Roll each piece between your palms or use a bead roller to create smooth, perfect spheres. Organize them by color: solid blush, solid terracotta, and the speckled cream. -
Add texture:
For the rustic beads like the darker terracotta and the speckled cream ones, gently roll the unbaked spheres over a piece of coarse sandpaper or tap them lightly with a stiff toothbrush to create a stone-like surface. -
Leave some smooth:
Keep the light blush pink beads smooth to provide a nice visual contrast against the textured ones.
Hole Distortion?
If bead holes squat or distort when piercing raw clay, let the formed beads rest in the fridge for 15 minutes to firm up before piercing them.
Step 2: Sculpting the Heart Centerpiece
-
Form the heart base:
Take a slightly larger portion of blush pink clay (about twice the size of your round beads) and flatten it slightly into a thick disc. -
Carve the shape:
Using your crafting knife, cut a ‘V’ shape out of the top and taper the bottom into a point to form a heart. Smooth the cut edges with your fingertip. -
Add wood-grain texture:
Use a needle tool or knife to gently score vertical lines down the face of the heart, mimicking a carved wood texture. Don’t press too hard; just scratch the surface. -
Enhance the finish:
I like to lightly brush a tiny amount of cornstarch over the heart before texturing to prevent the tool from dragging. -
Pierce the holes:
Carefully pierce holes through all beads using a needle tool or bead pins. For the heart, pierce it horizontally through the widest part so it will lay flat on the wrist.
Step 3: Baking and Assembly
-
Bake the batch:
Arrange your beads on a baking sheet or tile. Bake according to your brand of polymer clay instructions (usually around 275°F/135°C for 15-30 minutes). -
Cool and inspect:
Allow the beads to cool completely. If any holes closed up during baking, gently reopen them with a small hand drill. -
Plan the pattern:
Lay out your design on a bead board or cloth. Place the heart in the center, flanked by speckled cream beads, then alternate between the textured terracotta and smooth blush beads. -
String the beads:
Cut a length of stretch cord about 10 inches long. Pre-stretch the cord by pulling it firmly a few times to prevent sagging later. -
Thread the design:
Thread your beads onto the cord, maintaining your planned symmetry radiating from the heart. -
Secure the knot:
Tie a surgeon’s knot (looping the cord twice before pulling tight). Add a tiny dot of super glue to the knot for extra security. -
Hide the knot:
While the glue is still tacky, gently pull the knot inside the hole of the nearest bead to hide it seamlessly.
Matte Finish Tip
To keep that natural, stonelike look, avoid glossy glazes. If you want protection, use a matte varnish or buff lightly with denim cloth.
Wear your new bracelet alone for a minimalist look or stack it with gold accents for extra flair
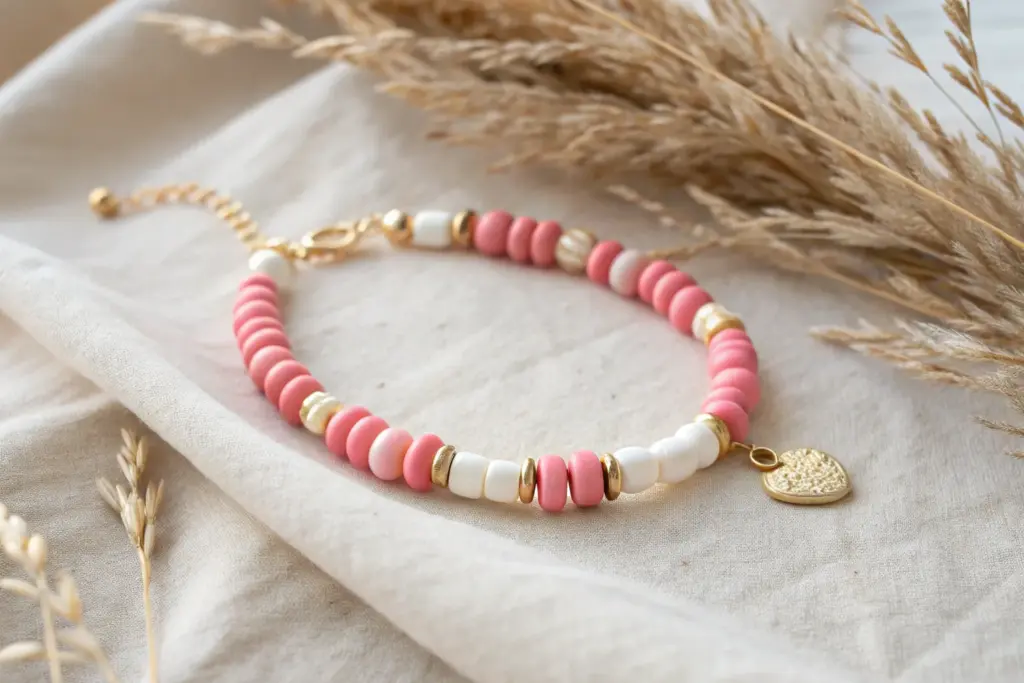
Pink With Pearl-Like Round Accents
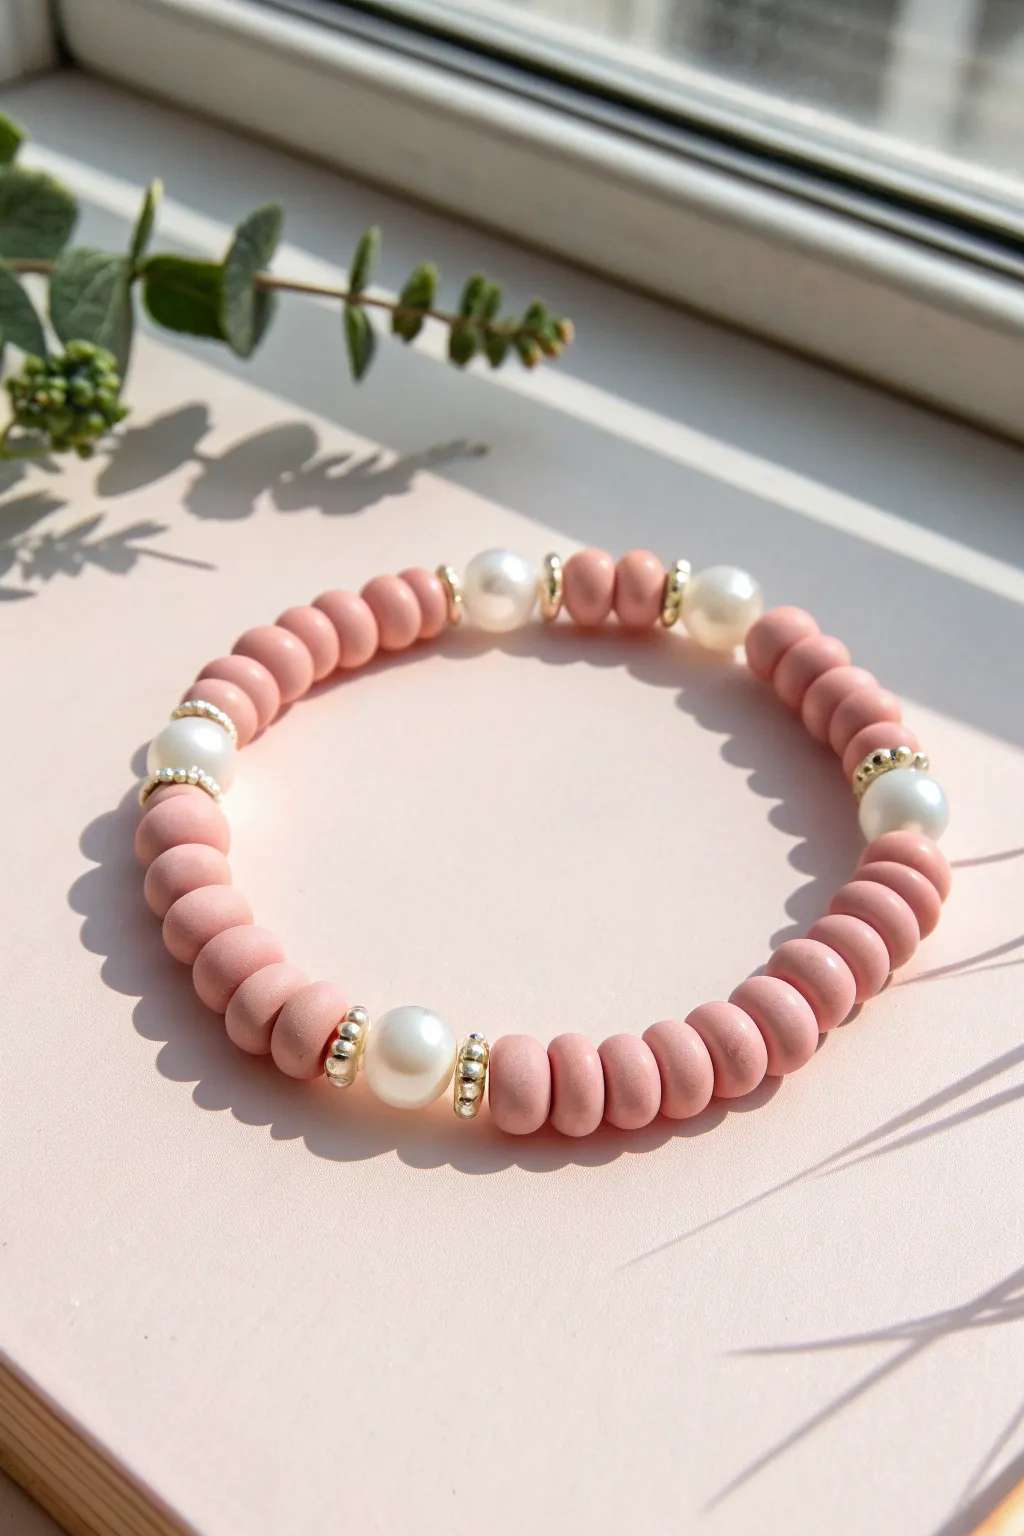
This elegant bracelet combines the trendy, casual look of pink disc beads with the timeless sophistication of faux pearls. The gold accents add just enough shimmer to elevate this piece from everyday wear to a chic accessory.
Step-by-Step Tutorial
Materials
- Pink polymer clay disc beads (approx. 6mm diameter)
- Faux pearl round beads (approx. 8mm diameter)
- Gold-tone spacer beads (small rondelle or disc shape)
- Elastic cord (0.8mm crystal string recommended)
- Scissors
- Super glue or jewelry cement (e.g., G-S Hypo Cement)
- Beading needle (optional, but helpful)
- Tape or bead stopper
Step 1: Preparation & Setup
-
Measure your wrist:
Wrap a flexible measuring tape around your wrist to find your size. Add about half an inch to this measurement to ensure the bracelet fits comfortably without pinching. -
Cut the cord:
Cut a piece of elastic cord roughly 10 inches long. I always like to give myself plenty of extra slack for tying the knot later. -
Secure the end:
Attach a piece of tape or a bead stopper to one end of your cord so your beads don’t slide right off while you work. -
Pre-stretch the elastic:
Gently pull tightly on the cord a few times before you start beading. This pre-stretching prevents the bracelet from loosening up after you wear it for the first time.
Knot Hiding Tip
Try to hide your knot inside a clay bead or the large pearl bead if only the hole is large enough, as gold metal spacers often have sharp edges that can fray the elastic.
Step 2: Designing the Pattern
-
Plan your segments:
Lay out your beads on a design board or grooved mat. The pattern featured here relies on blocks of pink clay beads separated by the pearl accents. -
Count the clay beads:
For the pictured look, create small stacks of approximately 6 to 8 pink clay beads. This creates a solid block of color between each focal point. -
Arrange the focal points:
Between each block of pink clay, you will place a specific sequence: one gold spacer, one pearl bead, and a second gold spacer.
Beads Won’t Lay Flat?
If your clay disc beads are twisting or looking uneven, string them tighter. Gaps allow them to flip; a snug fit keeps them perfectly aligned in a straight cylinder.
Step 3: Stringing the Beads
-
Start with pink:
Begin by threading your first segment of 6-8 pink clay beads onto the elastic cord. -
Add the first accent:
Slide on a gold spacer, followed by a white pearl, followed by another gold spacer. -
Repeat the pattern:
Continue alternating your pink clay segments and your pearl-and-gold combinations. Keep checking the length against your wrist as you go. -
Adjust for fit:
If you end on a pearl section but need a little more length, you can add one or two extra pink clay beads to the adjacent sections to even it out without disrupting the visual rhythm. -
Check the symmetry:
Try to finish the stringing with a pink section so that when you tie it, the knot will hide seamlessly between clay beads rather than near a bulky pearl.
Step 4: Finishing Touches
-
Prepare to tie:
Remove the tape or bead stopper carefully, holding both ends of the elastic firmly. -
Tie a surgeon’s knot:
Cross the ends, wrap one end around twice, and pull tight. Then cross them again to complete the knot. Pull the elastic taut to secure it. -
Secure with glue:
Dab a tiny drop of super glue or jewelry cement directly onto the knot. Let it dry for a few moments so it won’t come undone. -
Hide the knot:
Once the glue is tacky but not fully hard, gently tug the elastic so the knot slides inside the hole of one of the adjacent beads. -
Trim the excess:
Using sharp scissors, trim the tails of the elastic cord as close to the bead as possible without cutting the knot itself.
Now you have a charming, sophisticated bracelet ready to stack or wear on its own


What Really Happens Inside the Kiln
Learn how time and temperature work together inside the kiln to transform clay into durable ceramic.
Pink and Lilac Sweet Stack

Embrace a soft, romantic aesthetic with this set of three harmonizing bracelets featuring muted pink, lilac, and nude tones. The smooth texture of polymer clay disc beads is elevated by scattered gold accents, creating a versatile stack that feels both casual and polished.
Step-by-Step
Materials
- Polymer clay heishi beads (6mm or 8mm) in Creamy Nude
- Polymer clay heishi beads in Muted Lilac (matte finish)
- Polymer clay heishi beads in Rose Pink
- Gold tone metallic spacer beads (different styles: small rondelles, textured rings, and plain bands)
- Elastic stretch cord (0.8mm clear)
- Beading needle (collapsible eye)
- Super glue or jewelry cement
- Scissors
- Bead stopper or tape
- Ruler
Step 1: Preparation & Sizing
-
Measure your wrist:
Wrap a flexible measuring tape strip of paper around your wrist to find your size. Add about 0.5 inches to this measurement to ensure a comfortable fit that doesn’t pinch. -
Cut the elastic:
Cut three pieces of elastic cord, each about 10-12 inches long. This extra length is crucial for tying secure knots later without struggling. -
Secure the ends:
Attach a bead stopper or simply place a piece of tape on one end of each cord to prevent your beads from sliding off while you design. -
Thread the needle:
Thread your first piece of elastic through the collapsible eye needle. While you can bead by hand, I find a needle makes picking up these flat disc beads much faster.
Step 2: Bracelet 1: The Creamy Nude Base
-
Create the main pattern:
String approximately 12-15 Creamy Nude clay beads onto the cord. These will form the tranquil base of the first bracelet. -
Add gold accents:
Slide on a textured gold ring spacer, followed by a plain gold band spacer, and another textured ring. This grouping creates a rich metallic focal point. -
Continue the pattern:
Repeat the process: string another section of 12-15 nude beads, followed by the gold spacer trio. Continue until you reach your desired length.
Knot Slipping?
If your elastic knot feels insecure, try ‘sanding’ the very ends of the elastic with an emery board before tying. The rough texture helps the knot grip tightly.
Step 3: Bracelet 2: The Muted Lilac Textures
-
Start the second strand:
Switch to your Muted Lilac beads. Notice that these beads have a slightly more organic, matte variance in the image, so don’t worry if they aren’t perfectly uniform. -
Space with gold:
For this design, use single, slightly wider gold band spacers. String about 2 inches of lilac beads, then add one gold spacer. -
Complete the strand:
Continue alternating large sections of purple clay beads with single gold spacers until the bracelet matches the length of the first one.
Mix It Up
Personalize the stack by adding white alphabet beads into the Creamy Nude bracelet to spell out a name or a motivating word like ‘DREAM’ or ‘LOVE’.
Step 4: Bracelet 3: The Rose Pink Pop
-
Begin the pink layer:
pick up your Rose Pink beads. These add a warmer tone to the stack. -
Create gold clusters:
String a section of pink beads, then add a cluster of three small gold rondelle spacers (the tiny donut-shaped ones). The multiple small golds create a beaded ‘texture’ distinct from the other bracelets. -
Finish the design:
Repeat the pink bead sections and small gold clusters until the strand is complete.
Step 5: Finishing Touches
-
Pre-stretch the cord:
Before tying, gently pull on the ends of the elastic cord for each bracelet. This ‘pre-stretching’ prevents the bracelet from loosening up the first time you wear it. -
Check the fit:
Wrap the unfinished strands around your wrist one last time to ensure they sit comfortably together as a stack. -
Tie the surgeon’s knot:
Remove the needle and tape. Tie a simple overhand knot, but do not pull tight yet. Perform a surgeon’s knot by crossing the threads and looping one end through twice before pulling tight. -
Secure with glue:
Dab a tiny drop of super glue or jewelry cement directly onto the knot. Wait a few seconds for it to become tacky. -
Hide the knot:
If possible, slide the knot inside one of the larger gold spacer beads or the hole of a clay bead to conceal it. -
Trim excess:
Once the glue is fully cured (usually 10-15 minutes), use sharp scissors to trim the excess elastic tails close to the bead.
Slip these beauties on your wrist and enjoy the dreamy color palette you’ve put together
Pink and Mint Sorbet Palette
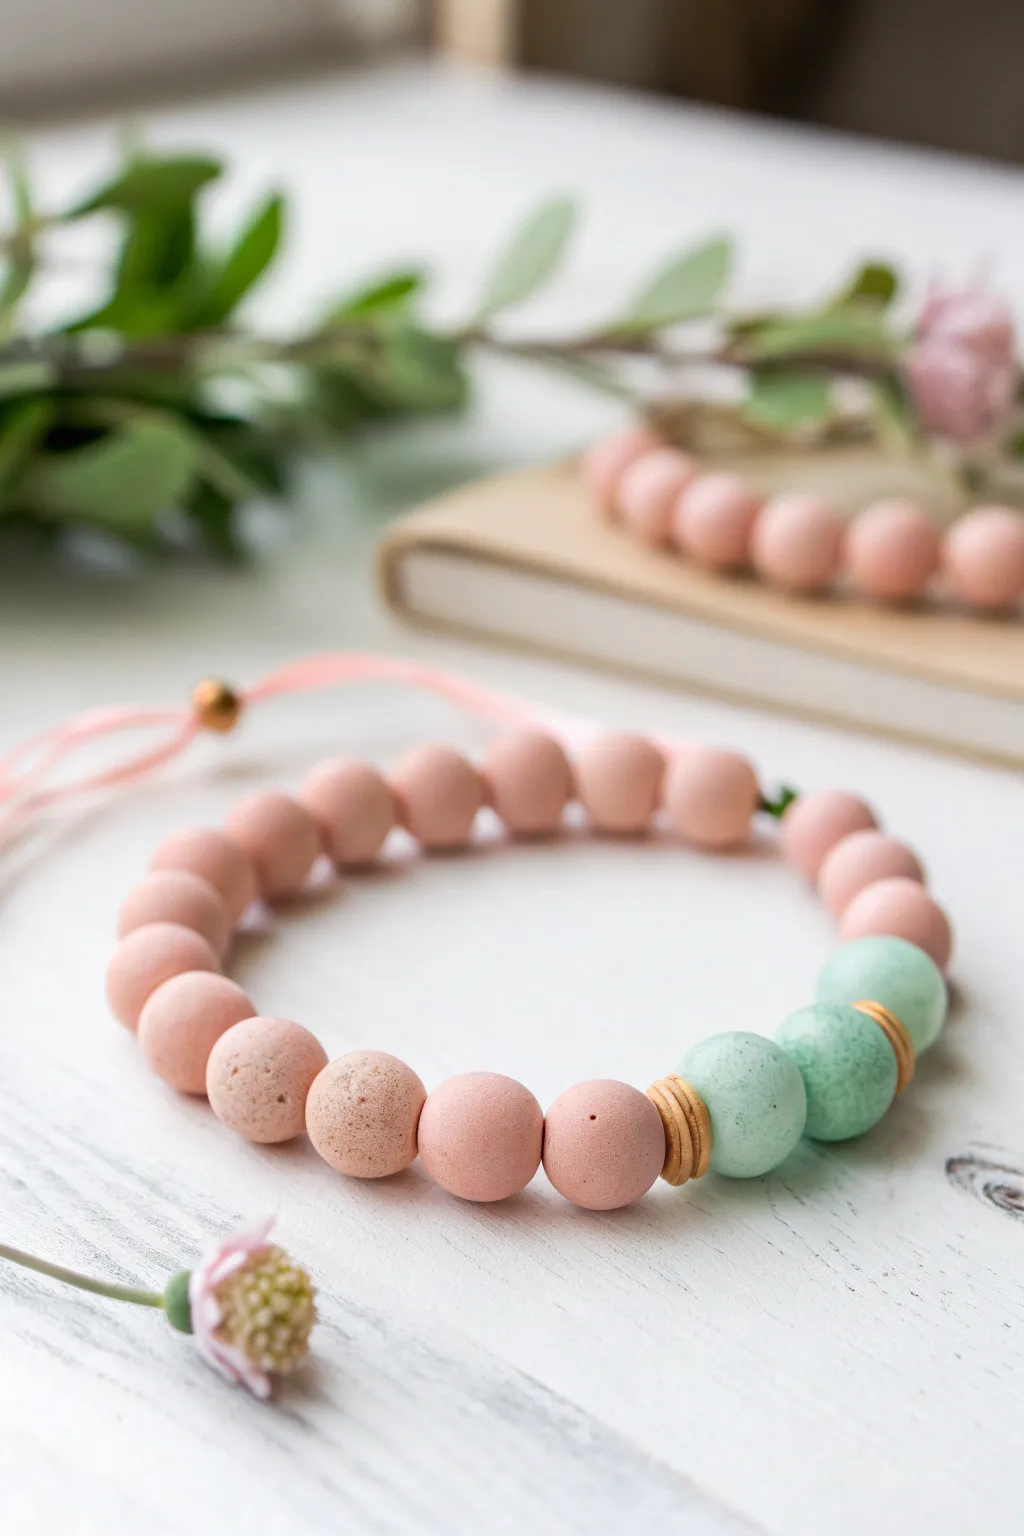
This charming bracelet mimics the soft, refreshing hues of a summer sorbet with its combination of dusty rose and cool mint tones. The texture of the clay beads adds an organic, handmade feel that pairs beautifully with the simple wooden accents.
Step-by-Step Tutorial
Materials
- Polymer clay in ‘Dusty Rose’ or ‘Blush Pink’
- Polymer clay in ‘Mint Green’ or ‘Seafoam’
- Coarse sea salt or sugar (for texturing)
- Wooden spacer discs (approx. 6mm)
- Pink nylon or waxed cotton cord (0.8mm or 1mm)
- Bead reamer or toothpick
- Oven for baking
- Baking sheet with parchment paper
- Scissors
Step 1: Crafting the Clay Beads
-
Condition the Clay:
Begin by warming up your pink polymer clay in your hands. Knead it until it becomes soft and pliable to prevent cracking later on. -
Form the Base Spheres:
Roll the pink clay into a long log and slice it into equal segments. Roll each segment between your palms to create smooth, uniform spheres roughly 10-12mm in diameter. You will need about 15-18 pink beads depending on your wrist size. -
Create the Mint Accents:
Repeat the process with the mint green clay. Create three spheres of the exact same size as your pink ones. -
Apply Texture:
To achieve that porous, earthy look seen in the photo, gently roll your unbaked beads in a small amount of coarse sea salt or sugar. Press the granules lightly into the surface so they stick, but don’t deform the sphere shape. -
Pierce the Holes:
Using a bead reamer or a sturdy toothpick, carefully pierce a hole through the center of each bead. I find twisting the tool while pushing through prevents the bead from squishing. -
Bake the Beads:
Arrange your beads on a parchment-lined baking sheet. Bake according to your polymer clay package instructions (usually around 275°F/135°C for 15-30 minutes). -
Wash and Finish:
Once fully cooled, submerge the beads in warm water to dissolve the salt or sugar. Use a soft brush to scrub away any residue, revealing the pitted texture underneath. Pat them completely dry.
Step 2: Assembling the Bracelet
-
Prepare the Cord:
Cut a length of pink cord approximately 12 inches long. This gives you plenty of room to knot and adjust. -
Plan the Pattern:
Lay out your beads on a flat surface. The pattern should be a continuous row of pink beads, uninterrupted except for the focal point. -
Arrange the Focal Point:
For the focal section, place the three mint beads together. Place one wooden spacer disc before the first mint bead, one between the first and second, one between the second and third, and one after the final mint bead. -
String the Beads:
Thread the cord through your arranged beads. Start with half of your pink beads, add the spacer-mint-spacer combination, and finish with the remaining pink beads. -
Check the Fit:
Wrap the strung beads around your wrist to check the sizing. Add or remove pink beads as necessary until the ends of the bead row just barely touch. -
Create the Closure:
Bring the two cord ends together and tie a simple overhand knot with both strands to secure the loop, or create an adjustable sliding knot (macrame square knot) if you prefer flexibility. -
Add End Details:
Thread a single small bead onto each loose cord end and tie a knot at the very tip to keep them in place. Trim any excess cord close to the knot.
Natural Texture Hack
Instead of salt, gently roll raw beads across a piece of coarse sandpaper or a clean piece of pumice stone for a subtle, stony matte finish.
Scent Infusion Idea
Since these beads are porous clay, place a drop of essential oil (like rose or peppermint) on them after baking to turn this into a diffuser bracelet.
Now you have a refreshing accessory perfect for adding a pop of color to any neutral outfit

TRACK YOUR CERAMIC JOURNEY
Capture glaze tests, firing details, and creative progress—all in one simple printable. Make your projects easier to repeat and improve.
Pink Strawberry Charm Moment
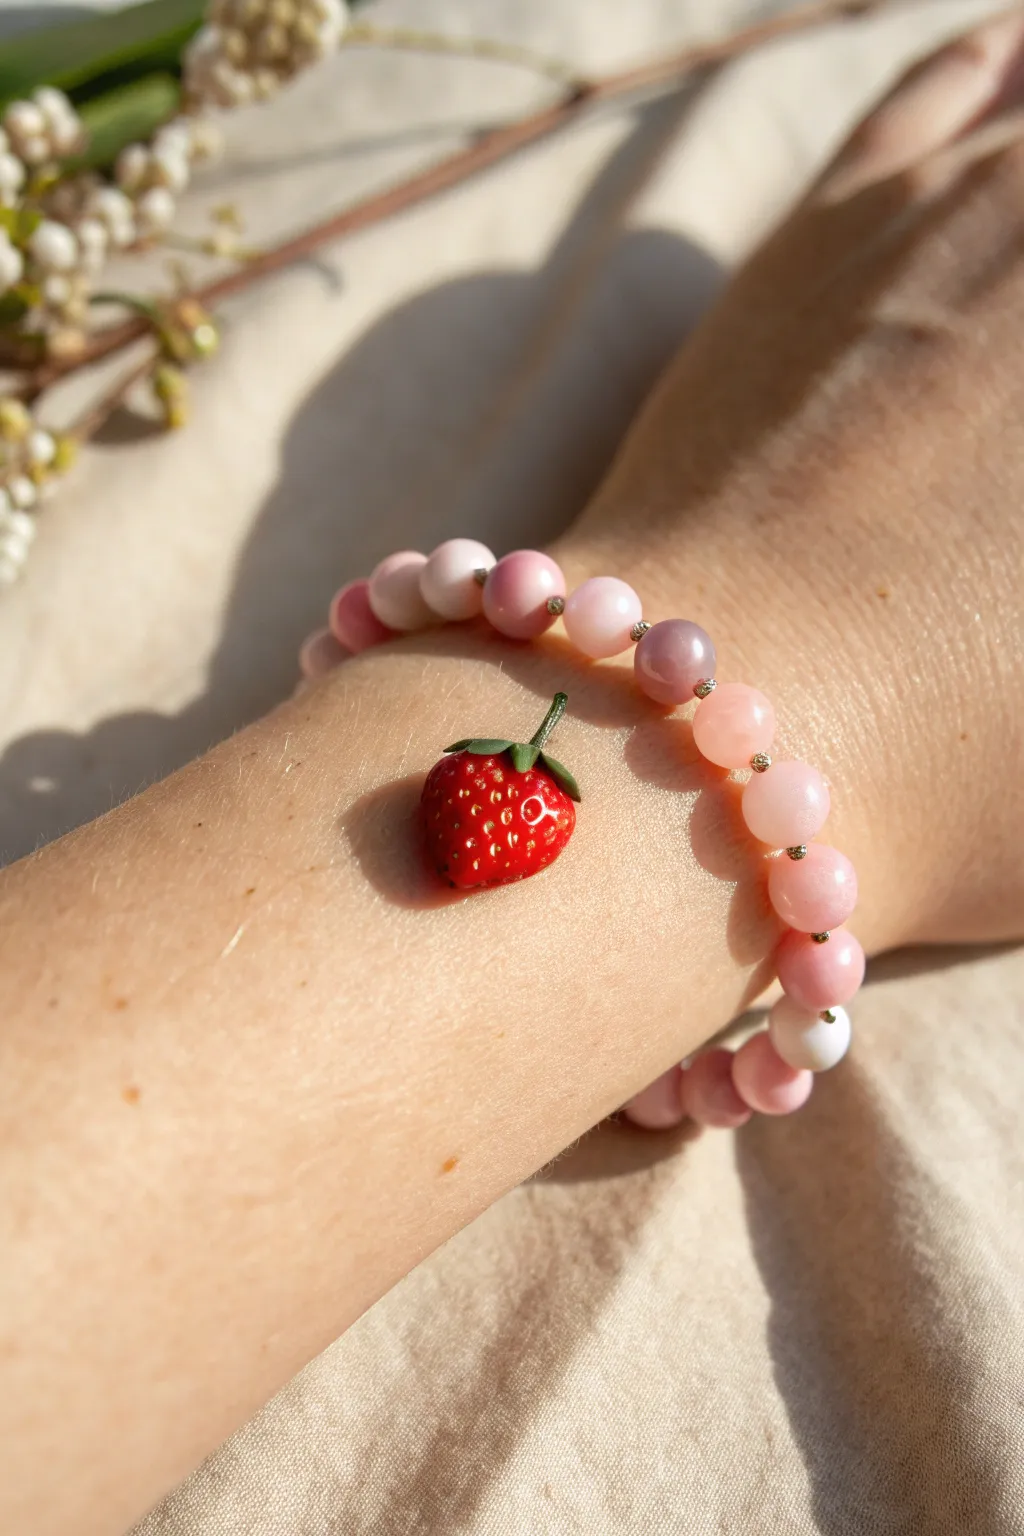
This charming bracelet combines soft, dreamy pink hues with a vibrant, realistic strawberry accent for a playful touch of summer sweetness. The mix of milky pink agate or quartz beads creates a gentle gradient that makes the bright red fruit pop beautifully against the wrist.
Detailed Instructions
Materials
- 8mm pink gemstone beads (mix of rose quartz, pink opal, and pink agate)
- Small gold or silver spacer beads (2mm crimp covers or tiny round beads)
- Realistic polymer clay strawberry charm with loop or bail
- Strong elastic cord (0.8mm or 1mm)
- Jewelry glue (such as G-S Hypo Cement)
- Scissors or wire cutters
- Bead stopper or tape
- Optional: Jump ring (if charm needs attachment)
Step 1: Preparation & Sorting
-
Select your palette:
Begin by sorting through your pink gemstone beads. The beauty of this piece lies in the variation, so pick a mix of translucent rose quartz, milky pink opal, and slightly darker mauve agate beads to create depth. -
Prepare the cord:
Cut a piece of elastic cord about 10-12 inches long. This generous length makes it much easier to tie the final knot without struggling. -
Pre-stretch the elastic:
Before stringing anything, firmly pull on the elastic cord a few times. This prevents the bracelet from stretching out permanently as soon as you wear it. -
Secure the end:
Place a bead stopper or a piece of tape on one end of the cord so your beads don’t slide off while you work.
Charm Flipping?
If the strawberry spins upside down, add two tiny gold spacers directly on either side of the charm’s loop. This acts as a hinge and keeps it facing outward.
Step 2: Stringing the Design
-
Start the pattern:
Thread a single gold spacer bead followed by three pink beads. Mixing the shades of pink randomly often looks more organic than a strict pattern. -
Establish the rhythm:
Continue the pattern: add a gold spacer bead, then three or four pink beads. The tiny metal spacers add just a hint of sparkle and break up the stone texture. -
Check the fit:
Periodically wrap the strand around your wrist. You want it to sit comfortably without digging in, usually requiring about 6.5 to 7 inches of beads for an average wrist. -
Position the charm:
Once you have reached the halfway point of your desired length, it is time for the star of the show. Thread your strawberry charm onto the elastic. -
Center the fruit:
To make the charm sit nicely, I usually like to flank it with two pink beads directly, rather than the metal spacers, which can sometimes cause the charm to twist. -
Finish the strand:
Continue stringing the remaining pink beads and spacers until you reach the other end of the cord, mirroring the length of the first half. -
Final sizing check:
Bring the two ends together around your wrist one last time to ensure the size is perfect before sealing the deal.
Pro Tip: Bead Balance
Use darker pink beads near the strawberry and lighter ones at the back. This subtle weight distribution helps keep the heavy charm centered on top of your wrist.
Step 3: Finishing Touches
-
The surgeon’s knot:
Remove the bead stopper. Tie the ends together using a surgeon’s knot: cross left over right, then right over left, looping the second pass through twice for extra grip. -
Tighten securely:
Pull all four strands (the two tail ends and the two bracelet sides) firmly to tighten the knot close to the beads. -
Apply adhesive:
Dab a tiny drop of jewelry glue directly onto the knot. Be careful not to stick the beads together, just the cord. -
Hide the knot:
While the glue is still slightly tacky, slide one of the adjacent large hole beads over the knot to hide it inside. -
Dry time:
et the bracelet sit undisturbed for at least 15 minutes to allow the glue to cure completely. -
Trim excess:
Once dry, use your small scissors to trim the excess elastic tail ends as close to the bead hole as possible without nicking the main knot.
Now you have a delightful accessory that brings a fresh pop of color to any outfit
Pink Sea Charm Summer Bracelet
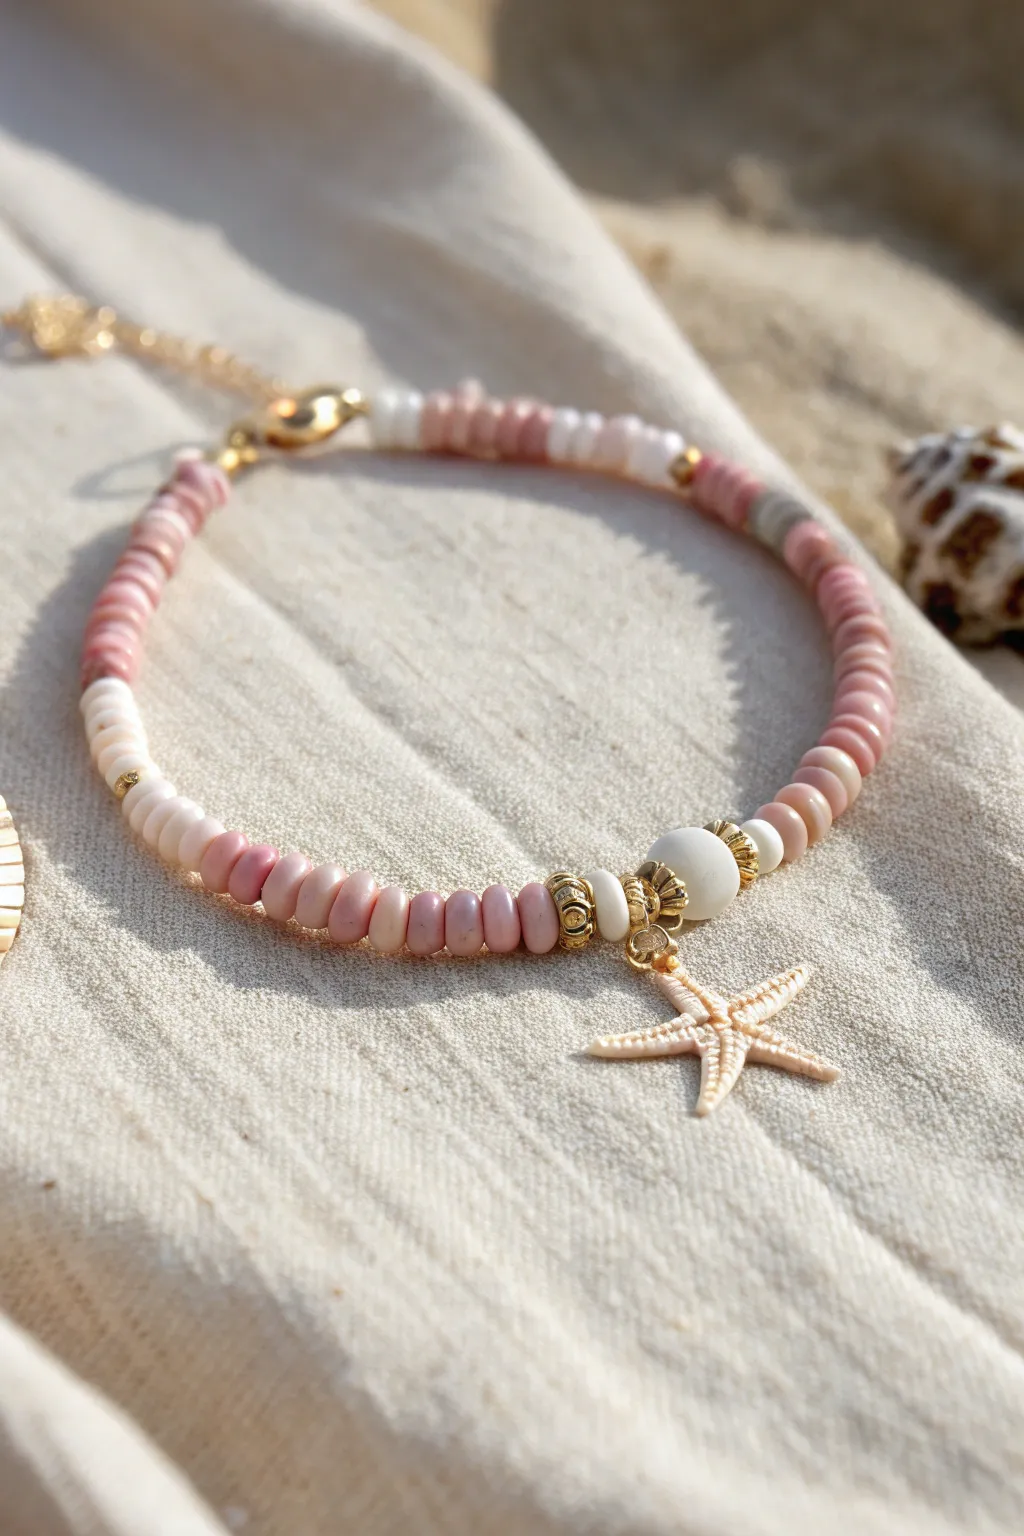
Capture the essence of a beach day with this charming bracelet featuring soft pink vinyl disc beads and touches of ocean-inspired white and gold. The delicate starfish pendant adds a whimsical focal point that makes this accessory perfect for summer styling.
Step-by-Step Guide
Materials
- Pink Heishi (vinyl disc) beads (approx. 4-6mm)
- White Heishi beads
- Gold tone crimp beads
- Gold tone jump rings (4mm or 5mm)
- Starfish charm (cream or white)
- Gold tone spacer beads (textured or disc-shaped)
- 2 Large white round beads (ceramic or shell)
- Beading wire or strong elastic cord
- Lobster clasp and extension chain
- Flat nose pliers
- Wire cutters
Step 1: Planning and Preparation
-
Measure your wrist:
Before you begin, wrap a piece of string around your wrist to find a comfortable length, then add about an inch to account for the clasp and bead bulk. -
Cut the cord:
Cut a length of beading wire or elastic that is at least 4 inches longer than your measured wrist size to give yourself plenty of room to work with the ends. -
Secure the first end:
If using beading wire, thread a crimp bead onto one end, loop the wire through a jump ring or the loop of your lobster clasp, and thread it back through the crimp bead. Flatten the crimp bead securely with pliers. -
Map out your pattern:
Lay out your beads on a bead board or a textured cloth to prevent them from rolling away. Seeing the pattern before stringing helps ensure symmetry.
Uneven Tension?
If the bracelet feels stiff or kinks, you’ve pulled the wire too tight before crimping. Leave a tiny bit of slack (1-2mm) inside the loop so beads can rotate.
Step 2: Stringing the Beads
-
Begin with the side sections:
Start by threading about an inch of the pink Heishi beads. This creates the main color base for the back half of the bracelet. -
Add a gold accent:
Slide on a single small gold spacer bead or a white Heishi bead to break up the pink pattern slightly, then continue with another section of pink beads. -
Create the transition:
As you approach the center focal point, add a short sequence of white Heishi beads mixed with a gold spacer to lead the eye toward the middle. -
String the focal beads:
On the left side of the center, thread a textured gold spacer followed by one of the large white round beads. -
Prepare the charm:
Using your flat nose pliers, carefully open a jump ring and attach your starfish charm to it. Close the jump ring securely so there is no gap. -
Center the charm:
Slide a decorative gold bail or a larger jump ring onto the main wire between the two large white beads. Hang your starfish charm from this central point. -
Complete the focal point:
Thread the second large white round bead followed by another textured gold spacer to mirror the other side.
Step 3: Finishing Touches
-
Mirror the pattern:
Isolate the pattern you created on the first half and replicate it in reverse order. String the transition beads, followed by the main pink Heishi sections. -
Check the fit:
I always like to wrap the bracelet around my wrist one last time before sealing it to ensure the charm sits exactly in the center and the length is correct. -
Add the final crimp:
Thread a crimp bead onto the open end of the wire, followed by the ring of your extension chain or the other half of your clasp. -
Loop and secure:
Pass the wire back through the crimp bead and pull it taut, but leave just enough slack so the bracelet remains flexible and isn’t stiff. -
Flatten the crimp:
Use your pliers to flatten the crimp bead firmly. Give the wire a gentle tug to make sure it holds fast. -
Trim excess wire:
Using your wire cutters, trim the tail of the wire as close to the bead as possible, or tuck the tail into the adjacent beads for a cleaner finish.
Layer Up
Make a matching stack by creating two simpler bracelets using just the pink Heishi beads and gold spacers without the central starfish charm.
Now you have a breezy, beach-ready accessory to wear all summer long
Pink Checkerboard Rhythm

This charming bracelet uses a soft palette of blush, rose, and berry tones to create a subtle yet playful checkerboard-inspired pattern. The addition of gold accents elevates the design, making it perfect for stacking or wearing as a dainty solo piece.
How-To Guide
Materials
- Polymer clay heishi beads (6mm or similar) in light shell pink
- Polymer clay heishi beads in warm rose pink
- Textured round beads in burgundy/dark berry (approx. 6mm, frosted glass or stone)
- Gold focal beads (rondelle spacers with imprinted details)
- Gold ball spacer beads (3mm)
- Elastic stretch cord (0.7mm or 0.8mm)
- Gold lobster clasp
- Gold crimp bead covers
- Gold jump rings
- Extension chain (optional)
- Jewelry pliers (flat nose)
- Scissors and jewelry glue (like E6000)
Step 1: Planning Design
-
Analyze the pattern:
Before stringing, take a close look at the rhythmical sequence. The core pattern consists of alternating small groups of light and medium pink heishi beads, punctuated occasionally by a single darker berry bead. -
Sort your beads:
Separate your beads into piles: light pink heishi, rose pink heishi, dark berry rounds, and your gold accents. Having them pre-sorted speeds up the stringing process immensely. -
Measure your cord:
Cut a length of elastic cord about 10-12 inches long. This gives you plenty of extra room for tying knots without struggling against a tight cord.
Knot Security Trick
Pre-stretch your elastic cord before beading! Pull it firmly a few times. This prevents the bracelet from stretching out and becoming loose after the first few wears.
Step 2: Stringing the Pattern
-
Start the sequence:
Secure one end of your cord with a bead stopper or a piece of tape. Begin threading your beads. Start with a section of the pink heishi pattern: try stringing 2 light pinks, then 2 rose pinks, repeating this ‘checkerboard’ feel for about an inch. -
Add a dark accent:
Slide on one of the textured dark berry beads. These darker beads act as visual anchors that break up the lighter pink sections. -
Build the first section:
Continue the 2-light, 2-rose pattern. Depending on your wrist size, aim for about 1.5 to 2 inches of beading before placing your first gold accent. -
Insert the gold focal bead:
Thread on a thicker gold spacer bead. In the example, we see a decorative gold rondelle with stamped details. I find that framing this gold bead with two heishi beads of the same color helps it stand out. -
Continue the pattern:
Resume the alternating pink heishi pattern. Remember to intersperse those dark berry beads at somewhat regular intervals—maybe every 10-12 heishi beads. -
Midpoint check:
Wrap the strand around your wrist to check the length. You are halfway done when the beaded portion covers the top of your wrist. -
Symmetry variation:
You don’t need perfect symmetry. Notice how the example bracelet has a second gold focal bead placed asymmetrically. Add your second gold spacer now if you like that organic look. -
Finish the strand:
Continue beading until the strand measures your desired wrist size (standard is about 6.5 to 7 inches). End with a few simple heishi beads rather than a focal bead.
Texture Play
Mix in varying materials for the pink sections. Try matte ceramic beads alongside shiny glass or raw stone beads to add sophistication to the simple color scheme.
Step 3: Finishing Touches
-
Prepare for closure:
On the final end of the cord, thread on a gold crimp bead (don’t crush it yet!) and then a small gold jump ring attached to your clasp mechanism. -
Create the loop:
Thread the cord back through the crimp bead to create a loop around the jump ring. Pull it snug but not tight—the beads need room to flex. -
Knot the elastic:
Even though we are using crimps, tying a surgeon’s knot with the elastic tails provides extra security. Pull the knot tight and dab a tiny spot of jewelry glue on it. -
Hide the knot:
Slide the crimp bead over the knot. Using your flat nose pliers, gently compress the crimp bead cover over the knot to hide it and secure the loop. -
Repeat on the other side:
Attach the other half of your clasp or extension chain to the starting end of the bracelet using the same crimp bead and knotting method. -
Trim excess:
Once the glue is fully dry (give it at least 15 minutes), trim any excess elastic cord close to the crimp covers. -
Final connection:
Use your pliers to open the jump rings slightly if needed to attach the lobster clasp on one side and the extension chain on the other. Close them securely.
Now you have a lovely, custom-fitted bracelet ready to add a soft pop of color to your daily outfit
Pink Confetti Sprinkle Mix
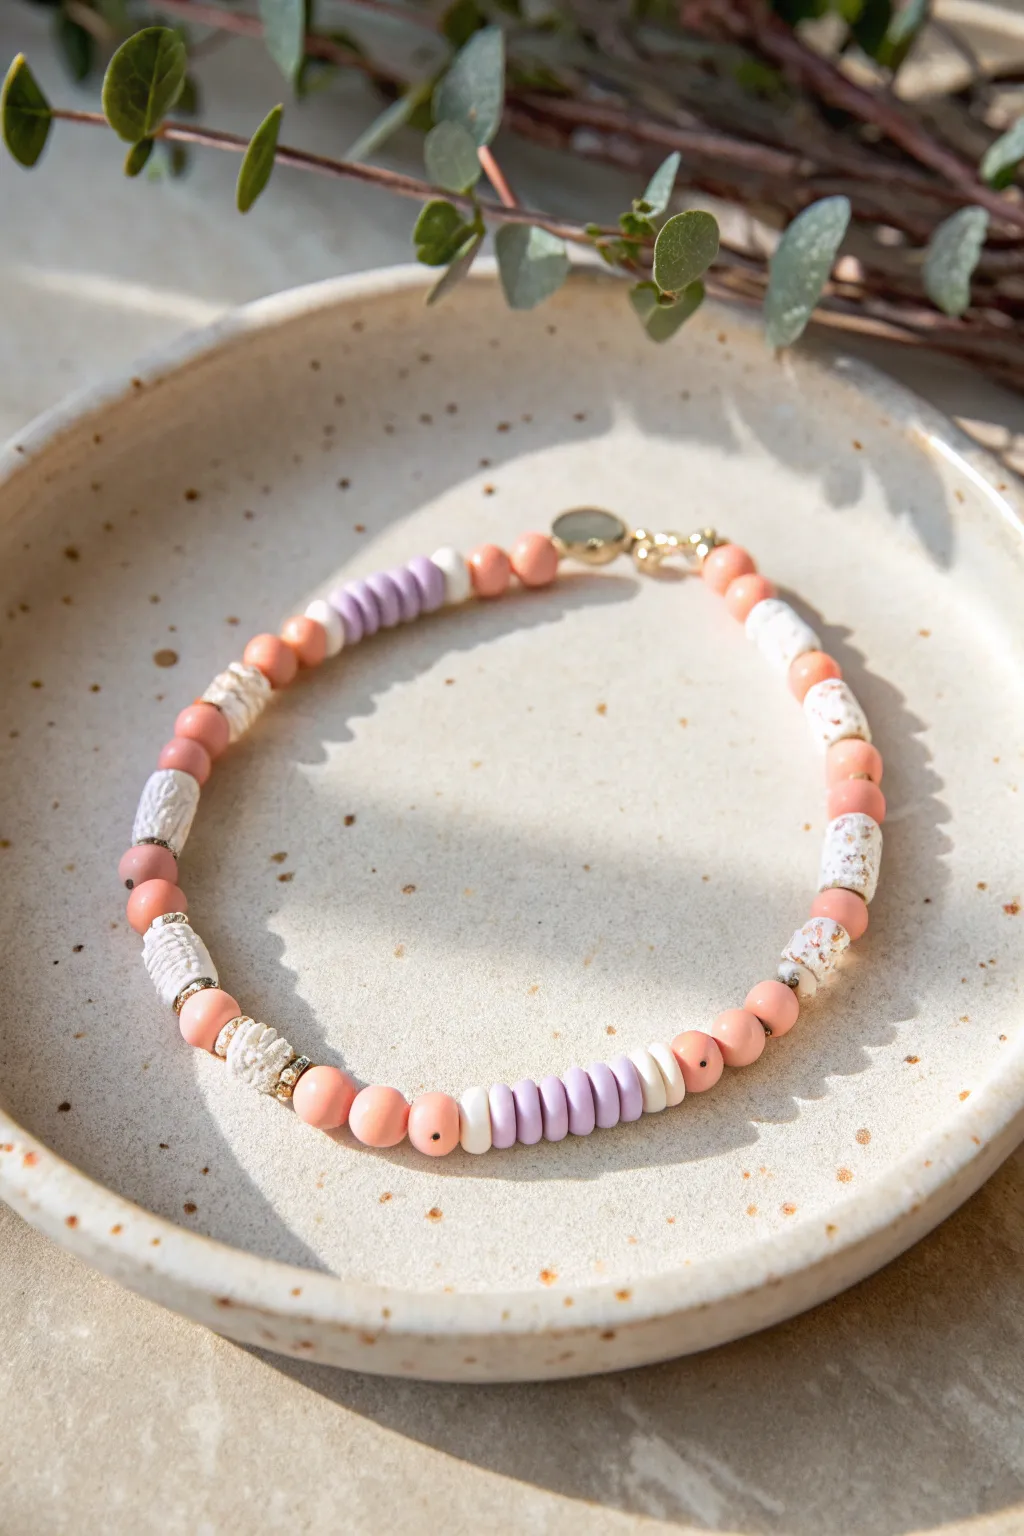
This charming bracelet combines soft peach-pink tones with lavender accents and speckled white beads that look just like birthday cake confetti. It’s a sweet, playful accessory that mixes textures and shapes for a unique, handmade feel.
Step-by-Step Tutorial
Materials
- Elastic beading cord (0.5mm clear)
- Peach/Pink round clay or wood beads (approx. 6mm)
- White polymer clay Heishi beads with gold/brown speckles (8mm)
- Lavender purple flat polymer clay disc beads
- Solid white flat polymer clay disc beads
- Small gold daisy spacer beads
- Gold tone crimp beads
- Gold tone jump rings and lobster clasp
- Jewelry pliers (chain nose)
- Scissors
Step 1: Planning Your Pattern
-
Measure your wrist:
Before cutting any string, wrap a measuring tape around your wrist to find your size. Add about 0.5 to 1 inch to this measurement depending on how loose you want the fit. -
Prepare the cord:
Cut a piece of elastic cord about 10-12 inches long. Having this extra length makes tying the final knot much easier than working with a short tail. -
Lay out the design:
I always find it helpful to layout the beads on a bead board or a piece of felt first. Arrange them in a circular shape to visualize the final pattern before threading.
Knot Security Tip
Pre-stretch your elastic cord by pulling it gently a few times before beading. This prevents the bracelet from stretching out and becoming loose after wearing it.
Step 2: Creating the Bead Sequence
-
Start the confetti section:
Begin threading with a section of the speckled white Heishi beads. Add about 3-4 of these textured discs to start the pattern. -
Add pink round beads:
Slide on three of the peach-pink round beads. These add a nice height difference compared to the flat discs. -
Insert a gold spacer:
Place a tiny gold daisy spacer bead after the third pink bead to add a hint of metallic shine. -
Start the lavender block:
Thread on one single solid white disc bead to act as a bookend. -
Build the lavender stack:
Add approximately 5-6 lavender purple disc beads. This creates a distinct block of color. -
Finish the lavender block:
Close this color block with another single solid white disc bead. -
Repeat the pink rounds:
Add three more peach-pink round beads to mirror the previous side. -
Transition with texture:
Thread on a section of the speckled white Heishi beads. Use about 4-5 beads here for a slightly longer textured section. -
Create a variation:
Create the next segment using just two pink round beads separated by a speckled white disc bead in the middle. -
Continue the pattern:
Continue repeating these elements—the lavender blocks, the pink rounds, and the speckled white sections—until you reach your desired length. Feel free to vary the number of pink beads (2 or 3) to keep it organic.
Managing Heishi Beads
If the flat clay beads are hard to pick up individually, slide the tip of your needle or cord through them while they are lying flat on the table.
Step 3: Finishing Touches
-
Check the size:
Wrap the beaded strand around your wrist one last time to ensure the fit is correct before securing it. -
Add the hardware:
Thread a crimp bead onto one end of the elastic, followed by a jump ring attached to your lobster clasp. -
Loop back through:
Take the tail of the elastic and thread it back through the crimp bead to create a loop holding the clasp. -
Secure the crimp:
Use your jewelry pliers to flatten the crimp bead firmly. Do the same on the other end with a jump ring suitable for the clasp to latch onto. -
Tie a surgeon’s knot:
For extra security, tie the elastic ends in a tight surgeon’s knot near the crimp beads. Dab a tiny bit of clear glue on the knot if you like. -
Conceal and trim:
Once the glue is dry, trim the excess elastic carefully. If the holes of the adjacent beads are large enough, slide the tail and knot inside for a seamless finish.
Enjoy styling your new bracelet stacked with other gold jewelry or worn solo for a pop of pastel color
Pink Marble Swirl Bead Look
This charming bracelet combines the softness of solid pink with the organic beauty of marble swirls. By blending clay techniques, you’ll create a trio of bead styles—solid, speckled, and swirled—that come together for a cohesive, hand-crafted accessory.
Step-by-Step
Materials
- Polymer clay in light pink
- Polymer clay in dark rose/magenta
- Polymer clay in white
- Black pepper or grounded vanilla bean (for speckling)
- Bead piercing pin or needle tool
- Acrylic roller
- Circle cutter (small, approx 1cm)
- Elastic stretch cord (0.8mm)
- Super glue or jewelry adhesive
- Baking sheet and parchment paper
- Wet sandpaper (400 and 800 grit)
Step 1: Preparing the Clay Stocks
-
Condition the white clay:
Start with your white polymer clay. Knead it thoroughly in your hands until it is warm, pliable, and free of cracks. -
Create the speckled mix:
Take about half of your conditioned white clay. Flatten it out and sprinkle a tiny pinch of ground black pepper or vanilla bean specks onto it. Fold the clay over and knead until the specks are evenly distributed, mimicking a natural stone look. -
Condition the pinks:
Condition your light pink and dark rose clays separately. Ensure they are soft enough to blend easily without crumbling.
Step 2: Creating the Bead Designs
-
Form the solid pink beads:
Roll a portion of the light pink clay into a log. Cut equal segments and roll them in your palms to create smooth, uniform spheres. Set these aside. -
Form the speckled white beads:
Repeat the previous step with your speckled white clay mixture, aiming for the same size spheres as the pink ones. -
Make the marble log:
To create the swirled beads, roll snakes of white, light pink, and a smaller amount of the dark rose clay. Twist these three snakes together into one thick rope. -
Fold and twist:
Fold the twisted rope in half and twist it again. Repeat this folding and twisting process 2-3 times, but be careful not to over-mix; you want distinct lines of color, not a muddy blend. -
Shape the marbled beads:
Cut segments from your marbled rope. Roll each segment into a ball. As you roll, the swirls will stretch and curve around the sphere, creating that beautiful geode effect.
Pro Tip: Better Holes
Refrigerate your raw rolled beads for 15 minutes before piercing. The cold clay is firmer and won’t squish into an oval shape as you push the needle through.
Step 3: Baking and Assembly
-
Pierce the beads:
Use a bead piercing pin or needle tool to gently poke a hole through the center of each bead. Twist the pin as you push to avoid squashing the sphere shape. -
Check the exit holes:
I like to poke back through from the opposite side once the needle emerges, which ensures a clean hole without jagged edges. -
Bake the beads:
Arrange the beads on a parchment-lined baking sheet. Bake according to your brand of clay’s instructions (usually around 275°F/135°C for 30 minutes). -
Cool and sand:
Allow the beads to cool completely. If there are fingerprints, gently wet sand them under water using 400 grit followed by 800 grit sandpaper for a silky finish. -
Measure the cord:
Cut a piece of elastic cord about 10 inches long. Pre-stretch the cord by pulling it gently a few times to prevent sagging later. -
String the pattern:
Thread your beads onto the elastic. Alternate between the designs—try a pattern like ‘marbled, solid pink, speckled white’—or place the marbled ones as focal points. -
Check the fit:
Wrap the strung beads around your wrist to check the size. Add or remove beads until it sits comfortably without gaps. -
Tie the knot:
Tie a surgeon’s knot (right over left, left over right twice). Pull tight. -
Secure and trim:
Apply a tiny dot of super glue to the knot. Let it dry, then trim the excess cord ends, tucking the knot inside a bead hole if possible.
Level Up: Glossy Finish
After baking and sanding, coat just the swirled marble beads with a water-based polyurethane gloss varnish to make the color striations pop like real gemstones.
Wear your new custom creation with pride or gift it to a friend who loves soft pastels
Dusty Rose Neutral Pink Stack
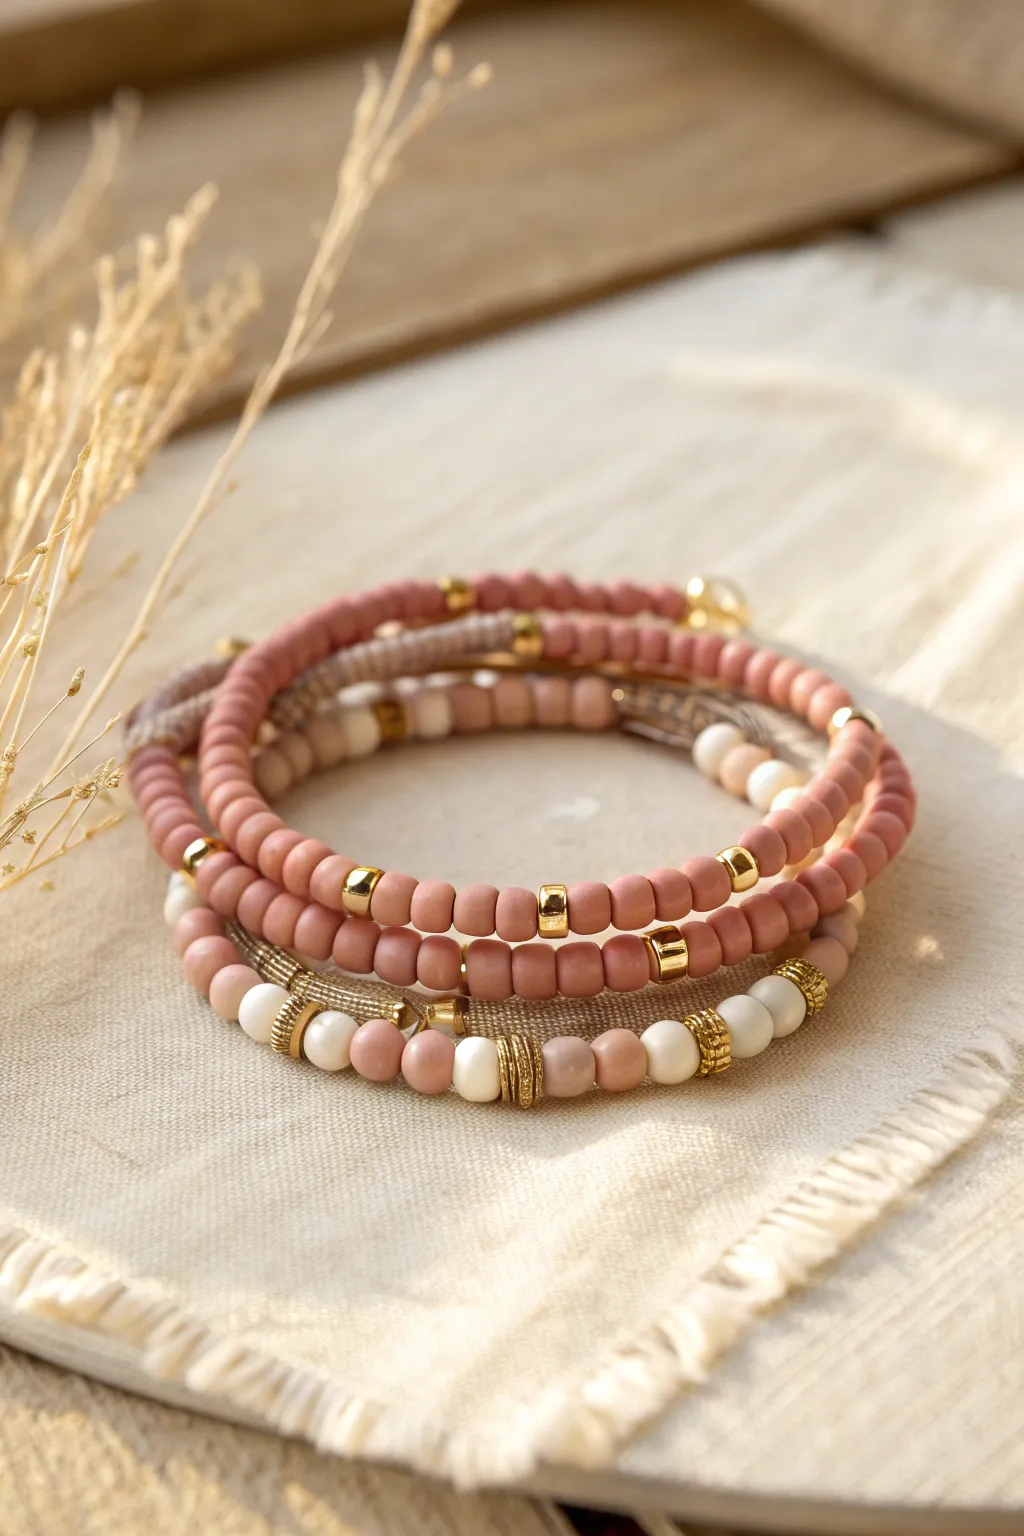
This elegant bracelet stack combines matte textures with warm metallic accents for a sophisticated, earthy look. The soft dusty rose palette makes it a versatile accessory that pairs beautifully with neutral wardrobe staples.
Step-by-Step Guide
Materials
- 6mm dusty rose polymer clay heishi beads (matte finish)
- 6mm cream or white polymer clay rondelle beads
- 4mm gold cube spacer beads
- 6mm gold textured wheel spacer beads
- 0.8mm clear elastic stretch cord
- Jewelry adhesive (e.g., G-S Hypo Cement)
- Scissors
Step 1: Planning and Preparation
-
Measure your wrist:
Before cutting any cord, wrap a measuring tape around your wrist. Add about half an inch to your measurement for a comfortable fit, then add another 3-4 inches to account for tying the knot later. -
Design the layout:
Lay out a bead design board or a soft felt mat. This prevents your beads from rolling away while you work. I like to lay out my patterns loosely first to visualize the final balance of colors. -
Cut the cord:
Cut three lengths of elastic cord, each about 10-12 inches long. Pre-stretch the elastic by pulling gently on segments of the cord several times to prevent the bracelet from sagging later.
Knot Slipping?
If the elastic feels too slick while tying, rub the ends with a little beeswax or rough them up gently with fine sandpaper to give the knot more grip.
Step 2: Creating the Solid Rose Strand
-
Start the first pattern:
For the simplest bracelet in the stack, begin stringing the dusty rose heishi beads onto your first piece of cord. You’ll need enough to cover about 90% of your wrist size. -
Add accent spacing:
Thread a gold cube spacer bead, then add roughly 12-15 more rose beads. This creates a rhythm without overwhelming the soft color. -
Complete the loop:
Continue this alternating pattern until the strand reaches your desired length completely. Double-check the fit by wrapping it around your wrist before tying.
Step 3: Creating the Mixed Textured Strand
-
Begin the mixed strand:
For the second bracelet, we want more texture. Start with three dusty rose heishi beads followed by one gold wheel spacer. -
Introduce the cream accent:
Thread one cream or white rondelle bead next to the gold wheel. This brightens the overall look and breaks up the darker pink tones. -
Sandwich the accent:
Place another gold wheel spacer immediately after the cream bead. This frames the white bead in gold, giving it a premium feel. -
Repeat the sequence:
Add three more dusty rose beads and repeat the entire sequence (3 pink, 1 gold wheel, 1 cream, 1 gold wheel) until the bracelet is complete.
Add a Charm
Attach a small gold leaf or coin charm to the mixed texture strand using a jump ring for added movement and bohemian flair.
Step 4: Creating the Minimalist Accent Strand
-
Use primarily rose beads:
For the third bracelet, aim for a cleaner look that bridges the other two. Fill almost the entire length with just the dusty rose heishi beads. -
Insert focal points:
Instead of frequent spacing, place just 3 or 4 gold cube beads randomly or at equal distant points (like the quarters of a clock) around the bracelet.
Step 5: Finishing Touches
-
Tie the surgeon’s knot:
Take the ends of your first bracelet. Cross right over left, then left over right and pull tight. Repeat this knotting process carefully to secure the beads. -
Apply adhesive:
Place a tiny drop of jewelry cement directly onto the knot. This is crucial for longevity, especially with stretchy bracelets. -
Hide the knot:
While the glue is still tacky but starting to set, gently pull the knot inside one of the larger bead holes if possible. If the holes are too small, ensure the knot is trimmed neatly. -
Trim excess cord:
Once the glue is fully dry (usually 10-15 minutes), use your sharp scissors to snip the excess elastic as close to the knot as you safely can. -
Final assembly:
Repeat the tying and gluing process for the remaining two bracelets. Stack them together on your wrist to see the completed dusty rose set come to life.
Enjoy styling your new stack with soft linens or denim for a relaxed, artistic vibe
Pink and Clear “Jelly” Contrast
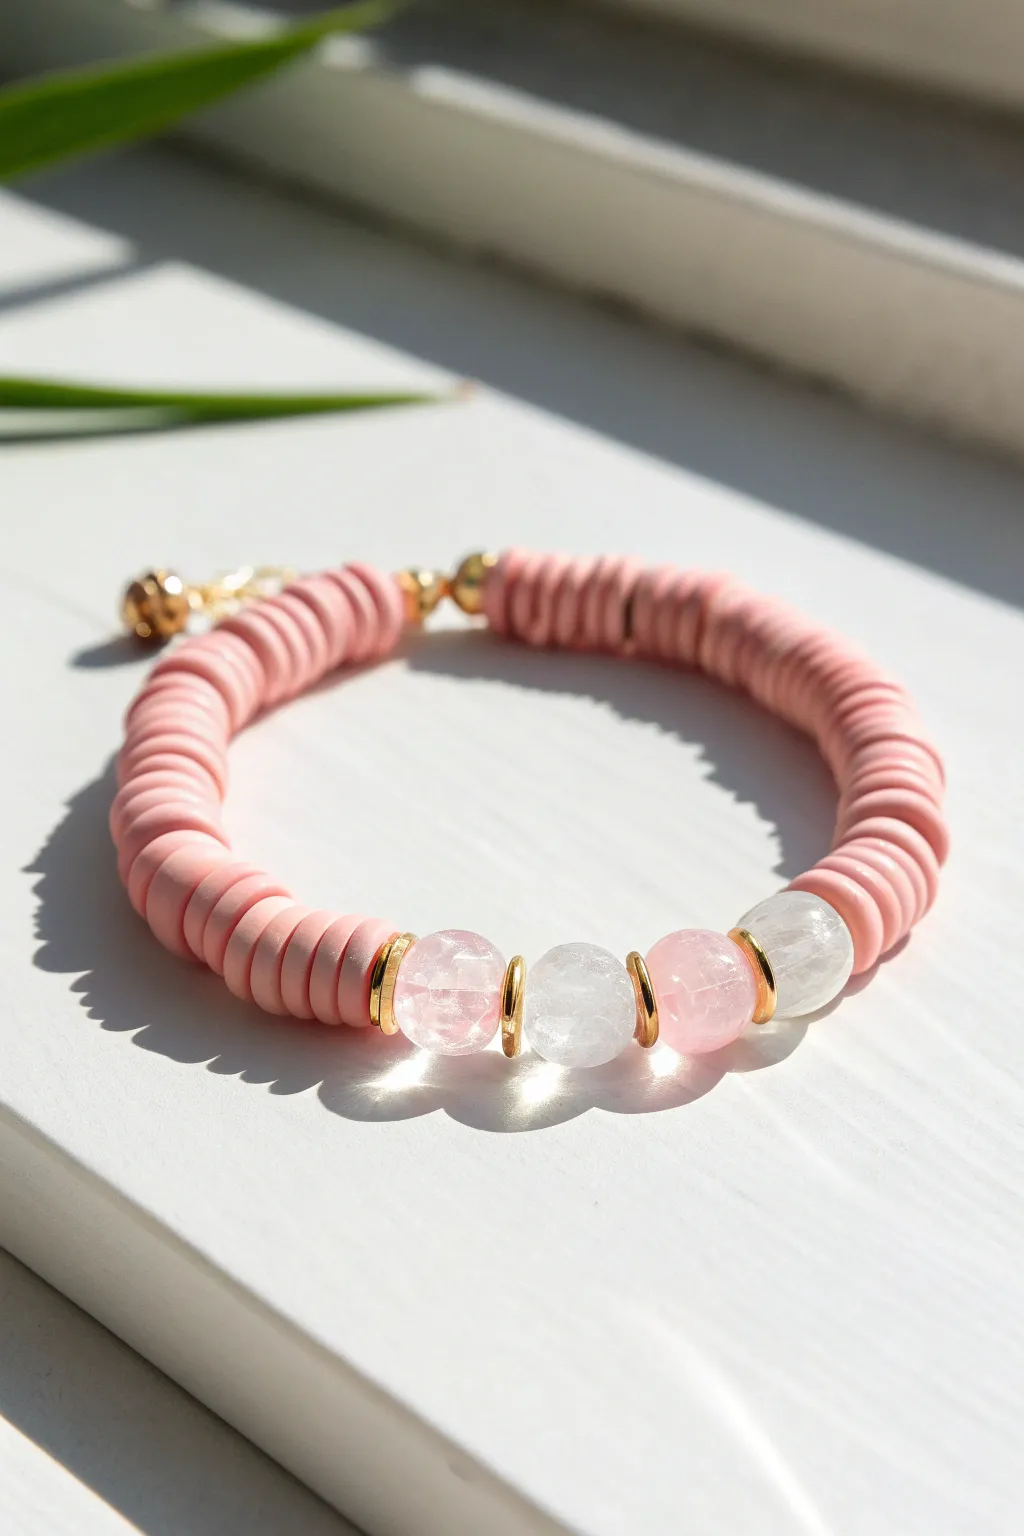
This elegant design elevates standard polymer clay beads by pairing them with semi-precious quartz accents. The soft matte texture of the clay disks contrasts beautifully with the translucent shine of the crystal rounds, creating a sophisticated piece perfect for stacking or wearing solo.
How-To Guide
Materials
- Matte pink polymer clay heishi beads (6mm)
- 2 Round Rose Quartz beads (8mm)
- 2 Round Clear Quartz or ‘Jelly’ beads (8mm)
- Small gold-plated disk spacer beads
- Gold tone crimp beads and covers
- Gold tone jump rings and lobster clasp
- Clear elastic beading cord (.8mm) or beading wire
- Jewelry pliers (flat nose)
- Scissors or wire cutters
- Beading needle (optional)
Step 1: Preparation
-
Measure your wrist:
Wrap a measuring tape loosely around your wrist to determine the desired length. Add about half an inch to this measurement to account for the bulk of the larger beads. -
Cut the cord:
Cut a piece of elastic cord about 10-12 inches long. This extra length ensures you have plenty of room to tie knots without struggling. -
Pre-stretch the elastic:
Pull on the ends of your elastic cord gently several times. This ‘pre-stretching’ technique prevents the bracelet from sagging or loosening after you wear it for the first time. -
Secure the end:
Place a piece of tape or a bead stopper on one end of the cord so your beads don’t slide off while you work. I usually just use a small piece of masking tape on the table edge.
Gold Preservation
To keep your gold spacers shining longer, apply a thin coat of clear nail polish to them before stringing. This simple step prevents tarnishing from skin oils.
Step 2: Creating the Focal Section
-
Start the center pattern:
Thread one gold disk spacer onto the cord, followed immediately by one pink Rose Quartz round bead. -
Add separation:
Slide on another gold disk spacer to act as a barrier between the stones. -
Add the clear element:
Thread one clear ‘jelly’ or clear quartz bead, followed by another gold spacer. -
Repeat the pattern:
Add your second pink Rose Quartz bead, a gold spacer, your second clear quartz bead, and finally one last gold spacer. You should now have four main stone beads separated by gold disks. -
Center the design:
Slide this entire group of beads to the middle of your cord to visualize the focal point.
Step 3: Beading the Strap
-
Fill the left side:
Begin adding the pink clay heishi beads to the left side of your focal group. Add enough beads to cover roughly half of the remaining length needed for your wrist size. -
Fill the right side:
Switch to the other side of the focal group and thread an equal number of pink clay beads. -
Check the fit:
Wrap the unfinished strand around your wrist to check the size. Add or remove a few clay disks from each side until the ends meet comfortably without gaps.
Stiff Bracelet?
If the bracelet feels too rigid, you pulled the cord too tight before crimping. Leave a tiny bit of slack (about 1 mm) so the beads can rotate and drape naturally.
Step 4: Finishing the Closure
-
Prepare for crimping:
If you are using beading wire and a clasp (as shown in the inspiration photo), slide a crimp bead onto one end, followed by a wire guardian or jump ring attached to one half of the clasp. -
Secure the first side:
Loop the wire back through the crimp bead and use flat nose pliers to squash the crimp flat, securing the loop. Trim the excess wire tail close to the bead. -
Thread the second side:
On the other end, slide on a crimp bead, followed by the jump ring attached to the other half of the clasp. -
Tighten the strand:
Pass the wire back through the crimp bead and pull it taut so there are no gaps between the clay disks, but be careful not to make it rigid. -
Final crimp:
Flatten the final crimp bead with your pliers and trim the remaining wire. Alternatively, if using elastic, tie a strong surgeon’s knot, dot it with super glue, and hide the knot inside one of the larger bead holes.
Now you have a stunning, boutique-style accessory ready to add a soft pop of color to your outfit
Half-and-Half Two-Pink Split
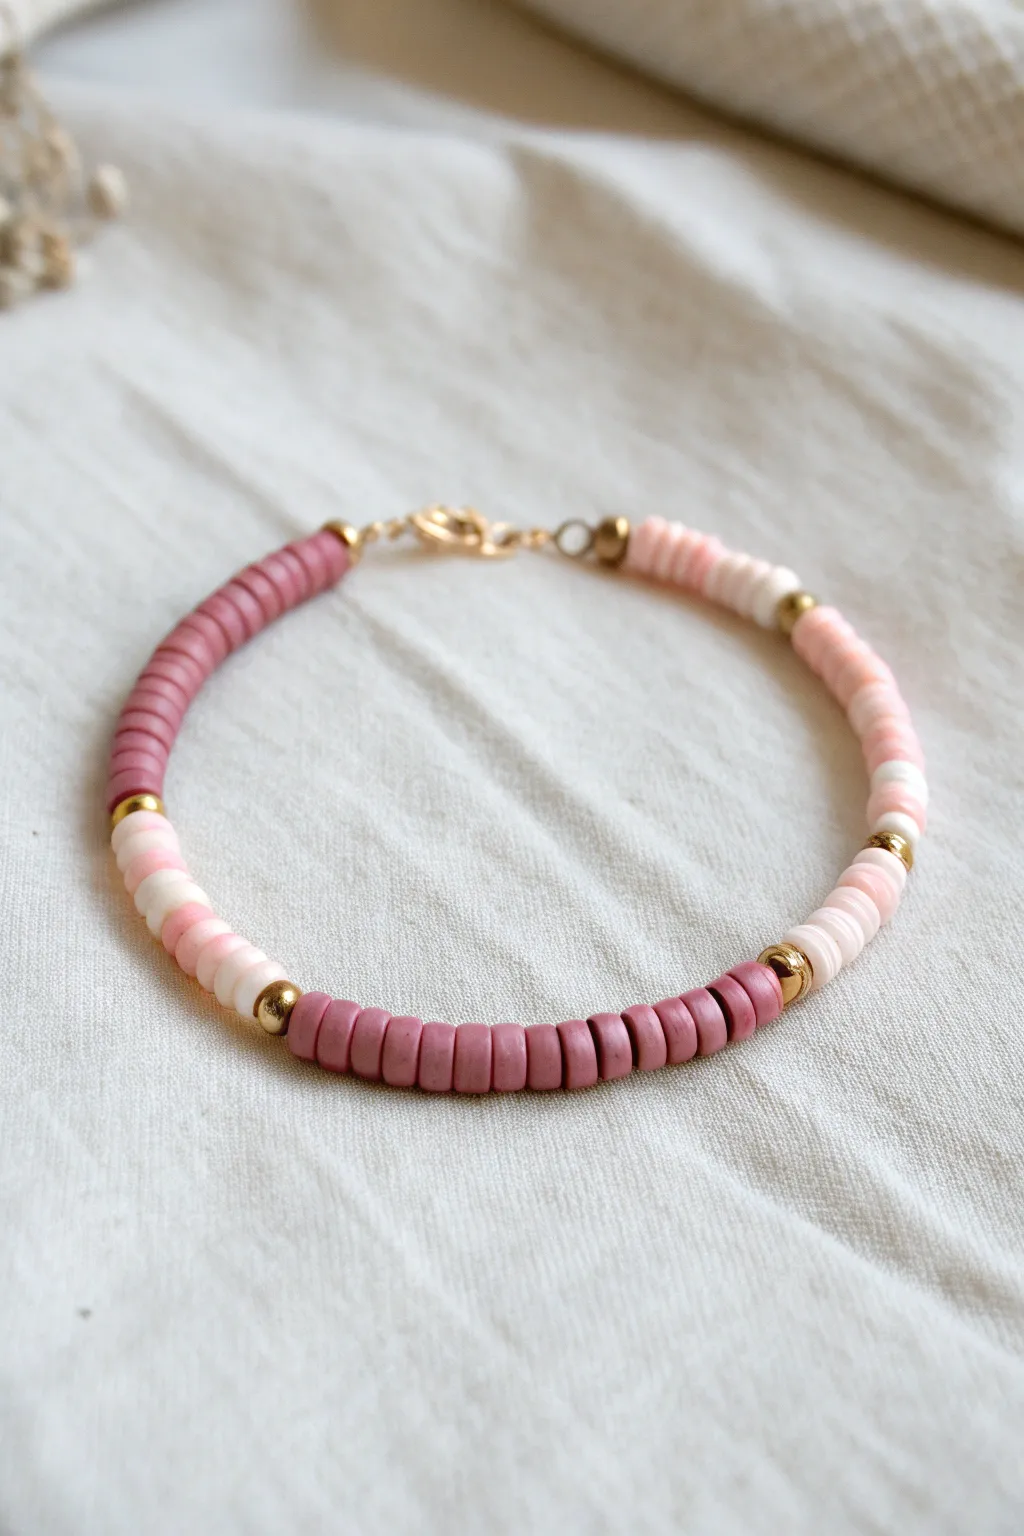
This charming bracelet features a modern split design, contrasting dusty mauve clay discs with speckles of pale pink and white. The gold spacer beads add a touch of elegance, making it a versatile accessory that stacks beautifully with others.
Step-by-Step Guide
Materials
- 6mm dusty mauve polymer clay heishi beads
- 6mm pale pink/white mixed polymer clay heishi beads
- 4mm gold round spacer beads (metal or plated)
- Stretch cord (0.8mm recommended)
- Small gold lobster clasp
- Gold jump rings (open)
- Jewelry glue (GS Hypo Cement or similar)
- Scissors
Step 1: Preparation
-
Measure your wrist:
Before cutting any cord, wrap a measuring tape loosely around your wrist to find your size. For a standard fit, add about half an inch to your measurement. -
Cut the cord:
Cut a piece of stretch cord roughly 10-12 inches long. Having this extra length makes tying the knots much easier later on, preventing the beads from slipping off while you work. -
Pre-stretch the string:
Hold both ends of your cut cord and give it a few gentle tugs. Pre-stretching helps prevent the bracelet from sagging or loosening immediately after you wear it. -
Secure one end:
Attach a piece of tape or a bead stopper to one end of the cord. This is crucial so your beads don’t slide right off the other side as you string them.
Step 2: Beading the Pattern
-
Start the first section:
Begin by threading on the dusty mauve polymer clay beads. You will want to string enough beads to cover slightly less than half of your desired bracelet circumference. -
Visual check:
Hold the strung section against your wrist or a ruler. Since this is a split design, this block of solid color should wrap around one side of your wrist. -
Add gold accent:
Slide on one gold round spacer bead. This metallic pop acts as the transition point between your two color blocks. -
Start the second section:
Now, switch to your pale pink and white mixed beads. Thread these on until this section matches the length of your first dusty mauve section. -
Check symmetry:
Lay the cord down in a circle shape to see if the two halves look balanced. If one side looks shorter, add a few more beads to even it out. -
Finish the beadwork:
Add your second gold spacer bead at the end of the pale pink section. You should now have a long strand with a gold bead at each transition point.
Sticky Situation
If you accidentally get glue on a clay bead, wipe it immediately with a damp cloth before it cures. Acetone can damage polymer clay, so avoid harsh removers.
Step 3: Adding Hardware & Finishing
-
Attach the clasp side:
Thread the cord through the small loop at the base of your lobster clasp. Slide the clasp down so it sits snugly against the last gold bead. -
Prepare the jump ring side:
On the other end of the bracelet (where you started), ensure you have a jump ring ready. If you are tying a knot directly, you can bring the two ends of the cord together now. -
The surgeon’s knot:
Bring both cord ends together to close the loop. Tie a standard overhand knot, but loop the string through twice instead of once before pulling tight. This is a surgeon’s knot. -
Secure the knot:
To ensure it holds, I like to add a tiny drop of jewelry glue directly onto the knot. Let this dry for a few minutes before trimming anything to ensure maximum durability. -
Hide the knot:
Once dry, trim the excess cord tail close to the knot. If possible, gently tug the cord to slide the knot inside the hole of the nearest bead to hide it. -
Final adjustment:
Roll the bracelet gently onto your wrist to test the fit. The split design should show distinct halves of color separated by the gold accents.
Make It Yours
For a personalized touch, replace the center few beads of the white section with gold letter beads to spell out a name or short word.
Enjoy wearing your stylish new two-tone accessory.
Pink Tiny Flower Bead Accents
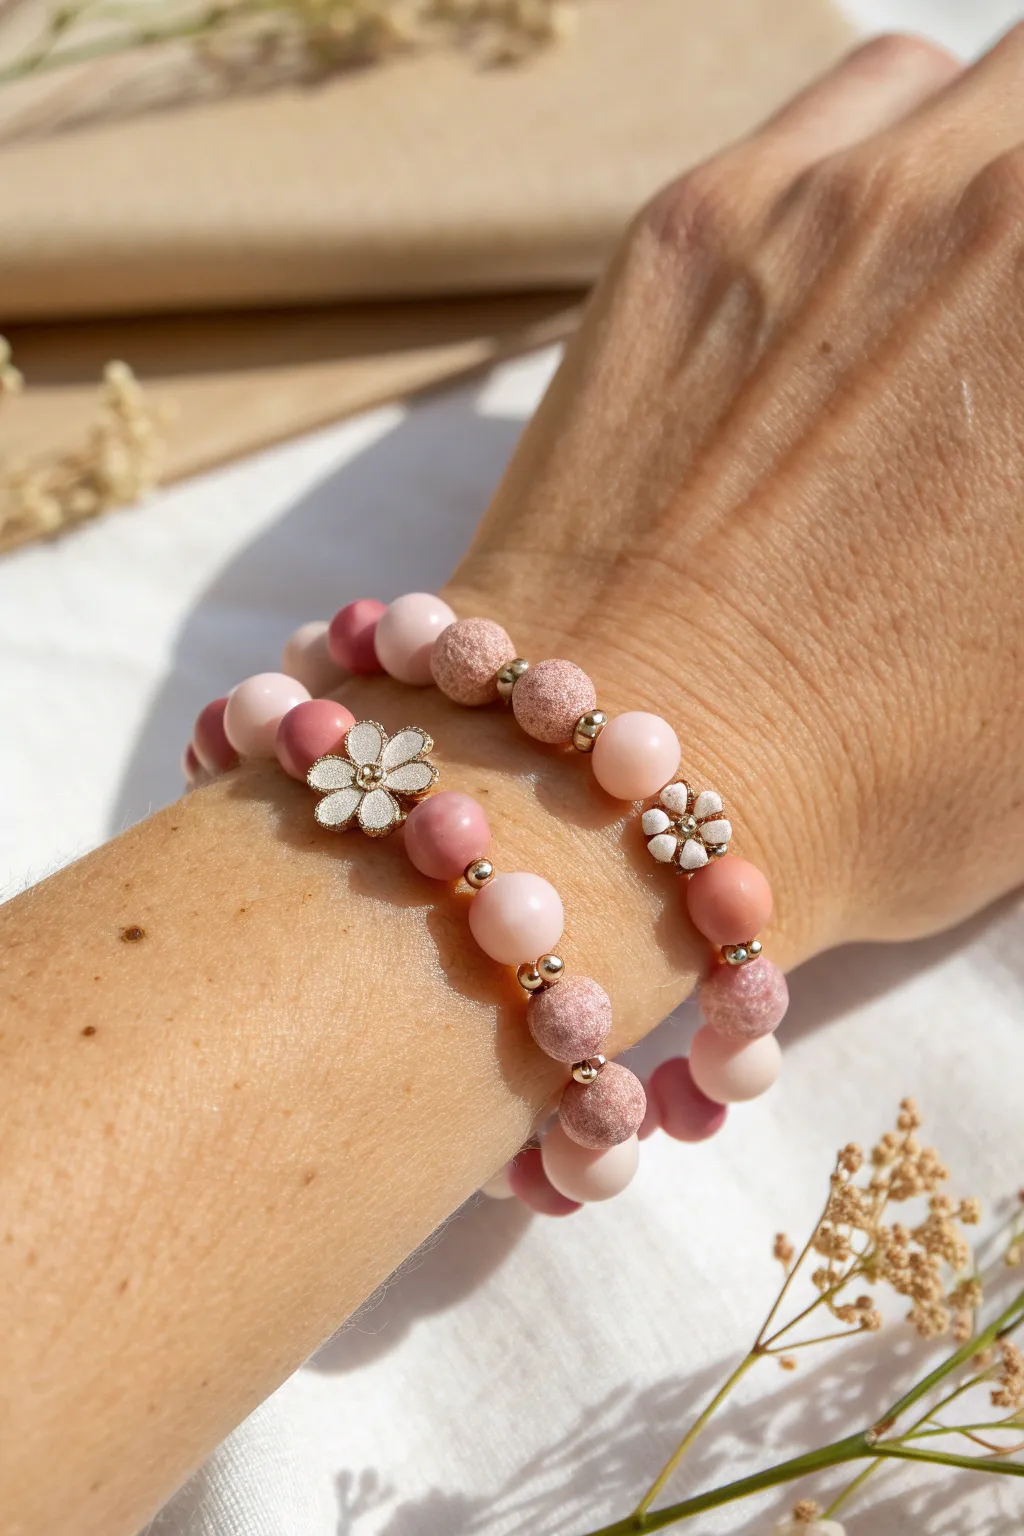
Capture the essence of spring with this darling duo of stretch bracelets, featuring a soft palette of blush pinks and dusty rose tones. The star of the show consists of delicate enamel flower accents nestled between textured clay-look beads and smooth polished stones for a mix of finishes that feels both playful and elegant.
Detailed Instructions
Materials
- 0.8mm clear elastic stretch cord
- 8mm smooth round beads (rose quartz or pink agate)
- 8mm textured/sugar bead rounds (dusty rose polymer clay or resin)
- 8mm matte pink round beads
- White enamel flower metal connectors or beads (approx 10-12mm)
- 2mm or 3mm gold-plated round spacer beads
- Jewelry glue (GS Hypo Cement recommended)
- Scissors
Step 1: Designing the Pattern
-
Measure your wrist:
Before cutting anything, wrap a piece of string around your wrist to find your comfortable size, adding about half an inch for a comfortable fit. -
Cut the cord:
Cut two lengths of elastic cord, each about 10-12 inches long. This extra length is crucial for tying secure knots later without struggling. -
Pre-stretch the elastic:
Give each piece of cord a few firm tugs. This pre-stretching step helps prevent the finished bracelet from sagging or loosening after the first few wears. -
Lay out the first strand:
For the first bracelet (the one closer to the hand), lay out your pattern on a bead board or towel. Create a repeating sequence: one textured bead, one gold spacer, one smooth pink bead, one gold spacer. -
Incorporate the focal point:
Decide where your flower accent will go. In the image, the flower sits between two smooth pink beads, framed by spacers, breaking the repeating pattern.
Knot Security Trick
Make sure your knot is hidden inside a solid bead, not the flower bead or a spacer. Spacers are too small, and flower centers may be exposed.
Step 2: Stringing the Beads
-
Secure the end:
Place a piece of tape or a bead stopper on one end of your first cord to stop beads from sliding off while you work. -
Begin stringing strand one:
Thread your beads following the pattern layout. Start with a bead that has a slightly larger hole if possible, as this makes hiding the knot easier later. -
Add the flower accent:
When you reach the center point, thread on your white enamel flower bead. Ensure the gold spacers on either side are snug against the petals. -
Check the length:
Wrap the unfinished strand around your wrist to check the fit. Add or remove a bead sequence if it feels too tight or too loose. -
String the second strand:
Repeat the process for the second bracelet. For visual interest, I like to slightly vary the pattern here—perhaps group two smooth beads together or space the flowers differently so they don’t stack directly on top of each other.
Adding Texture
Swap the textured ‘sugar’ beads for lava stones. You can then add a drop of essential oil to the porous lava beads for a scented aromatherapy bracelet.
Step 3: Finishing Touches
-
Prepare for the knot:
Remove the tape/stopper. Bring the two ends of the elastic together carefully, ensuring there are no gaps between the beads. -
Tie the surgeon’s knot:
Cross the right end over the left, loop it under, and pull tight. Then, cross the left end over the right, loop it under *twice*, and pull firmly. -
Tighten securely:
Pull the cords tight, stretching the elastic slightly as you tighten the knot to lock it in place. -
Glue the knot:
Apply a tiny drop of jewelry glue directly onto the knot. Wait a few moments for it to become tacky. -
Hide the knot:
While the glue is still slightly wet but not runny, slide the nearest large-hole bead over the knot to conceal it completely inside the bead. -
Trim excess cord:
Once dry, trim the remaining tails of the elastic cord very close to the bead hole using sharp scissors.
Slip on your stacked set and enjoy the pop of floral charm on your wrist
Pink Star Dangle Detail
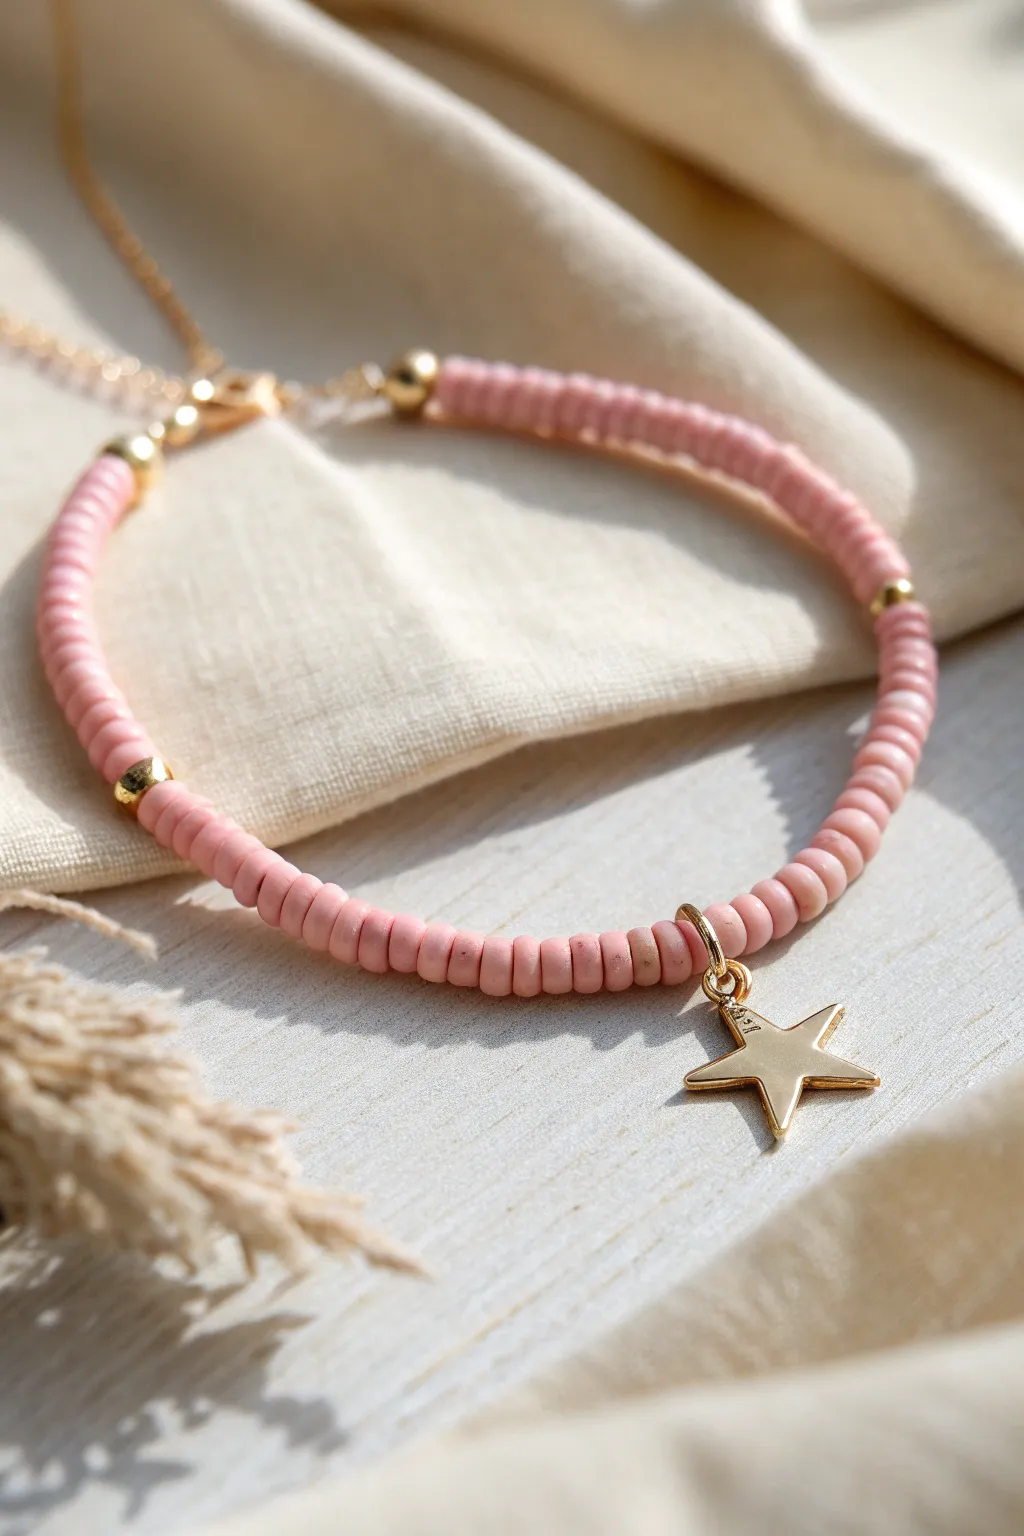
This delicate bracelet pairs the soft, matte texture of pink clay disc beads with the gleam of gold accents for a look that’s effortlessly chic. The singular gold star charm acts as a dreamy focal point, making this piece perfect for stacking or wearing alone as a subtle statement.
Step-by-Step Guide
Materials
- Pink polymer clay disc (heishi) beads (approx. 4-6mm)
- Small gold round spacer beads (approx. 3-4mm)
- Gold star charm with jump ring
- Elastic beading cord (0.5mm – 0.8mm clear)
- Jewelry glue or clear nail polish
- Scissors
- Tape or bead stopper
- 2 pairs of flat-nose pliers (optional, for jump ring)
Step 1: Setting the Stage
-
Measure and Cut:
Cut a piece of elastic cord roughly 10-12 inches long. You want plenty of excess cord to make tying the final knot easier without fumbling. -
Secure the End:
Attach a piece of tape or a bead stopper to one end of your cord. This simple step prevents your beautiful beadwork from sliding right off as you string. -
Plan Your Pattern:
Lay out your beads on a flat surface or bead board. The design features long sections of pink clay beads interrupted by single gold spacers. Decide on the interval—roughly 15-20 pink beads between each gold accent works well.
Step 2: Stringing the Beads
-
First Pink Section:
Begin threading the pink clay heishi beads onto the elastic. Keep adding them until you have a section about 1.5 to 2 inches long. -
Add a Gold Spacer:
Slide on one small gold round spacer bead. This breaks up the matte texture of the clay with a little metallic shine. -
Continue the Pattern:
Add another section of pink clay beads, matching the length or count of your first section as closely as possible. -
Second Gold Accent:
Thread on your second gold spacer bead. Check your work periodically by wrapping it loosely around your wrist to gauge the fit. -
Approaching the Center:
Continue stringing pink beads until you reach the midpoint of your desired bracelet circumference. This is where your star charm will live.
Knot Slipping?
If your elastic knot feels loose, pre-stretch the cord firmly before stringing. This removes ‘slack’ from the material so it stays tight after tying.
Step 3: The Star Feature
-
Prep the Charm:
If your gold star charm doesn’t have a jump ring attached, use your pliers to carefully open a jump ring, slide the star on, and close it securely. -
String the Charm:
Thread the elastic directly through the jump ring of your star charm so it sits freely on the cord. -
Complete the Circle:
Resume your pattern of pink beads and gold spacers on the other side of the star. Try to mirror the pattern from the first half so the star stays centered. -
Check the Size:
Wrap the strand around your wrist one last time. It should fit comfortably snug without stretching the elastic yet. Add or remove a few pink beads at the ends to adjust.
Celestial Stack
Make two companion bracelets: one with all gold spacers and one with white clay beads. Wear them together for a dreamy, mixed-metal celestial stack.
Step 4: Finishing Touches
-
Prepare to Knot:
Remove the tape or bead stopper carefully while holding both ends of the elastic cord firmly. -
The Surgeon’s Knot:
Tie a surgeon’s knot—this is like a standard overhand knot, but you loop the end through twice before pulling tight. This extra loop adds significant friction and security. -
Tighten Evenly:
Pull the cords tight, but do it slowly and gently to avoid snapping the elastic. You should feel the knot cinch down securely between the beads. -
Secure with Glue:
Apply a tiny dab of jewelry glue or clear nail polish directly onto the knot. I find a toothpick helps place the glue precisely without getting it on the beads. -
Hide the Knot:
While the glue is still slightly tacky but not wet, slide a gold spacer bead or one of the clay beads over the knot if the hole is large enough. This hides the mechanics for a professional finish. -
Trim Excess:
Once the glue is fully dry (give it at least 15 minutes), use your scissors to trim the excess cord ends as close to the knot as possible.
Slip on your new starry accessory and enjoy the gentle pop of color it brings to your wrist
Pink “Galaxy” Beads With Metallic Pops
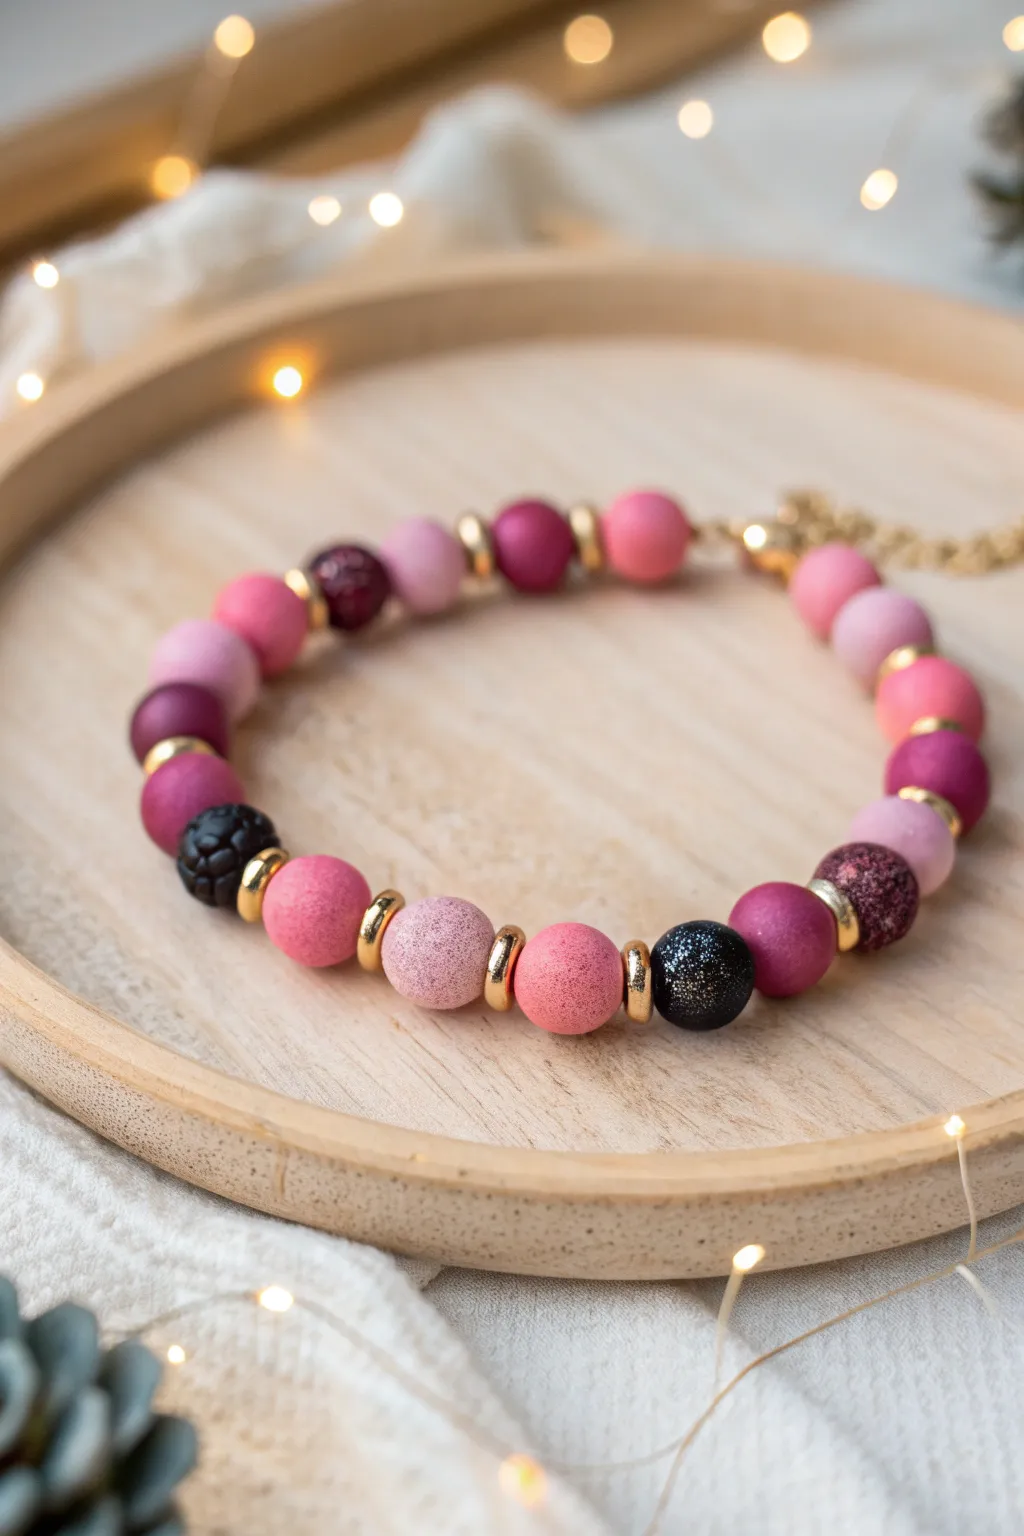
This charming bracelet combines soft matte pinks with dramatic, glittery dark beads for a cosmic look that feels sophisticated yet playful. Gold accents break up the color palette, adding a touch of elegance to this simple stringing project.
How-To Guide
Materials
- Polymer clay (shades of pink: blush, magenta, rose, bright pink)
- Polymer clay (black and dark purple)
- Fine glitter (silver or holographic)
- Gloss glaze or resin (for galaxy beads)
- Gold plated spacer beads (disc or rondelle shape)
- Gold plated crimp beads and covers
- Gold jump rings and lobster clasp
- Beading wire (flexible, tiger tail)
- Bead reamer or toothpick
- Sandpaper (fine grit)
- Jewelry pliers (flat nose and cutting)
- Oven for baking clay
Step 1: Creating the Matte Pink Beads
-
Condition the Pink Clay:
Start by conditioning your various shades of pink polymer clay. Knead each color separately until soft and pliable to prevent cracking during baking. -
Create Custom Shades:
If you want a gradient look like the photo, mix small amounts of white into your darker pinks to create softer intermediate hues. I personally like to create 3-4 distinct shades for variety. -
Roll the Spheres:
Pinch off equal amounts of clay and roll them between your palms to create smooth, round spheres approximately 8-10mm in diameter. -
Add Texture (Optional):
For the sugary texture seen on some beads, gently roll the unbaked spheres on a piece of coarse sandpaper or dab them lightly with a stiff toothbrush. -
Pierce the Beads:
Using a bead pin or toothpick, carefully poke a hole through the center of each sphere. Rotate the bead as you pierce to keep the shape round.
Step 2: Crafting the Galaxy Beads
-
Mix the Galaxy Base:
Take a small amount of black clay and mix in a tiny pinch of dark purple to add depth. This creates the ‘night sky’ base. -
Incorporate Glitter:
Knead fine silver or holographic glitter directly into the dark clay. Alternatively, roll the finished sphere in a light dusting of glitter for a surface-level sparkle. -
Shape and Pierce:
Roll these into spheres matching the size of your pink beads and pierce the centers just as before. -
Bake the Beads:
Arrange all your beads on a baking sheet or tile. Bake according to your polymer clay manufacturer’s instructions (usually around 275°F/135°C for 15-30 minutes). -
Cool and Glaze:
Once baked and fully cooled, apply a coat of gloss glaze or UV resin specifically to the dark galaxy beads to make the glitter pop and give them a wet, glass-like look.
Glitter Control
Work with the dark, glittery clay last or wash hands thoroughly before touching the pink clay. Glitter transfers easily and is hard to remove from light colors.
Step 3: Assembly
-
Prepare the Wire:
Cut a length of beading wire about 9 inches long. This gives you plenty of extra room to work with the clasp. -
Start the Strand:
String a crimp bead onto one end, loop the wire through a jump ring (attached to one half of your clasp), and thread it back through the crimp bead. -
Secure the End:
Flatten the crimp bead tight using flat-nose pliers. Cover it with a gold crimp cover for a professional finish. -
Begin Stringing:
Start threading your beads. Alternate between the matte pinks and the glossy galaxy beads to create a balanced pattern. -
Add Gold Accents:
Place a gold spacer bead between every single clay bead. This separation is crucial for the high-end look shown in the image. -
Check Length:
Wrap the strand around your wrist occasionally to check the fit. Add or remove beads until you reach your desired circumference. -
Finish the Clasp:
Thread on a final crimp bead, loop through the other side of your clasp or chain extender, and pass the wire back through the crimp and the last couple of beads. -
Final Secure:
Crimp the bead tightly and trim any excess wire flush with the beads.
Level Up: Texture Play
Instead of sandpaper, roll wet unbaked pink beads in fine clear embossing powder. When baked, it melts slightly for a unique, gritty ‘sugar bead’ texture.
Now you have a stunning, custom-fit bracelet ready to wear or gift