In my studio, mixed media ceramics are where clay starts a conversation with everything else I love—fiber, metal, wood, and all the little found treasures that make a piece feel alive. Here are some cozy, doable ideas to help you blend fired clay with other materials for that irresistible contrast of hard and soft, matte and shiny, simple and unexpected.
Leather Strap Handles on Simple Mugs
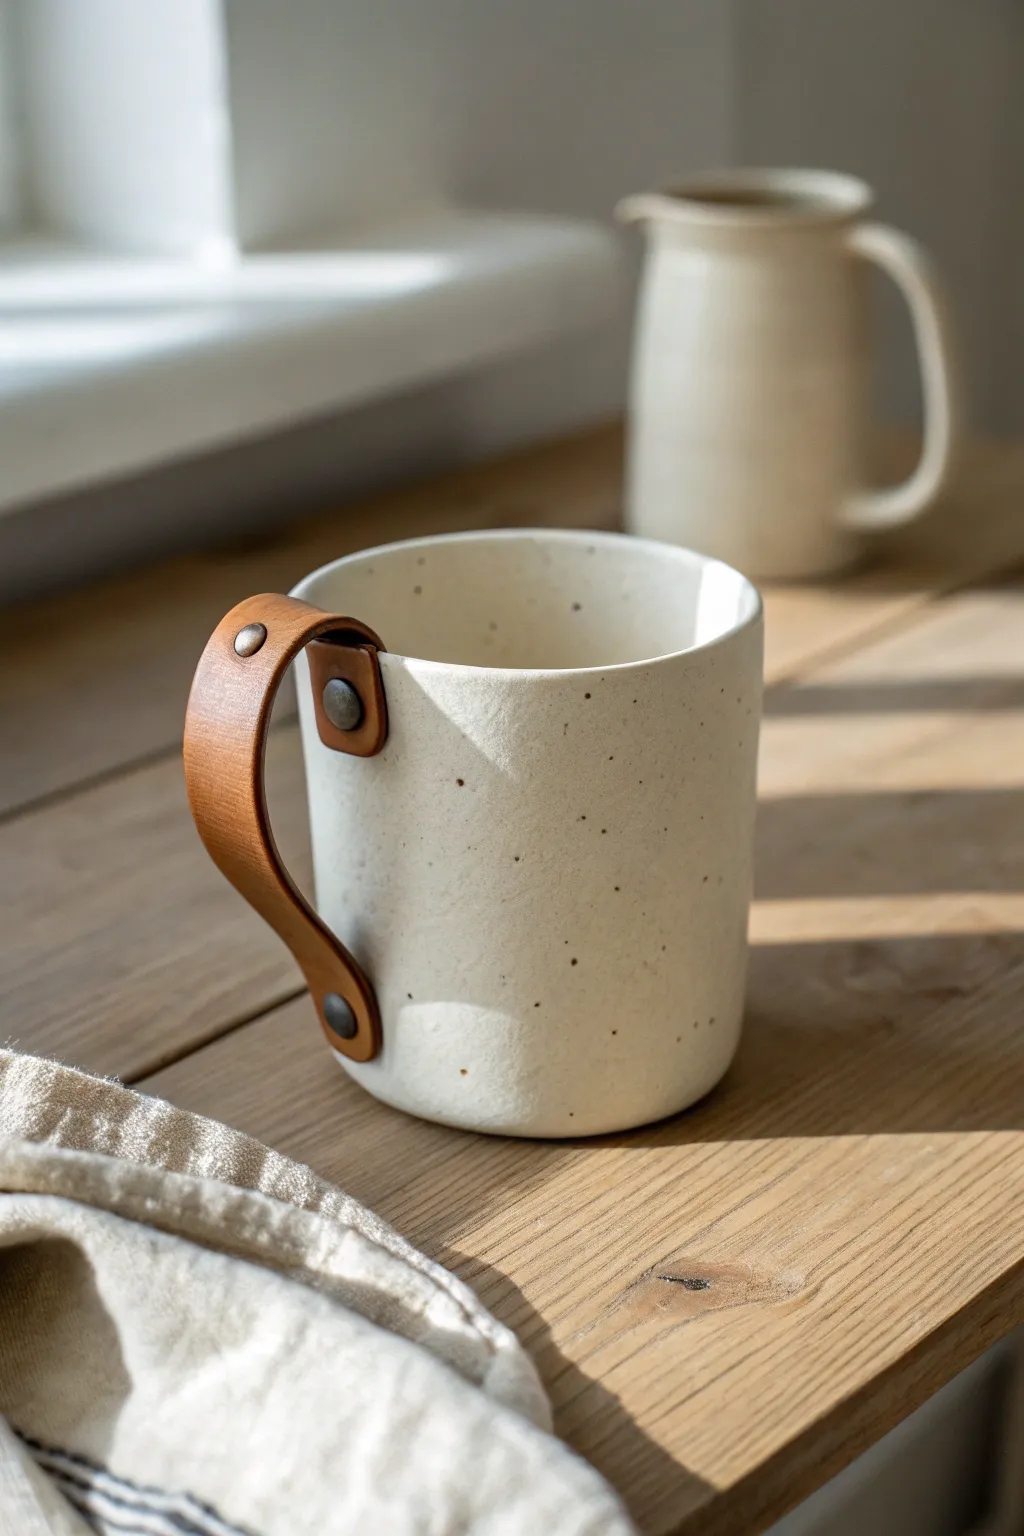
Marrying the warmth of organic clay with the durability of vegetable-tanned leather creates a piece that feels both modern and timeless. This project guides you through wheel-throwing a speckled clay body and transforming it with a removable leather strap handle held in place by antique brass rivets.
Detailed Instructions
Materials
- Speckled stoneware clay (mid-fire)
- Pottery wheel and basic throwing tools (sponge, needle tool, rib)
- Wire cutter
- Vegetable-tanned leather strip (approx. 3/4 inch wide)
- Leather hole punch
- Antique brass rivets (two sets) and rivet setter tool
- Clear or food-safe matte glaze
- Wooden bat
- Sharp knife or X-Acto blade
- Ruler
- Sandpaper (fine grit)
Step 1: Shaping the Clay Vessel
-
Center and open:
Begin with about 1 – 1.5 lbs of speckled stoneware on your wheel. Center the clay firmly before opening it up, establishing a flat interior floor about 3 inches wide. -
Pull the walls:
Pull the walls up into a simple cylinder shape. Aim for straight, vertical sides rather than a flared rim to maintain that contemporary look seen in the photo. -
Refine the surface:
Use a metal or rubber rib to compress the outside walls, removing any throwing lines. This smooth canvas is crucial for highlighting the clay’s natural speckles later. -
Trim the rim:
Carefully level the rim with your needle tool and smooth it with a chamois or your finger to ensure it will be comfortable to drink from. -
Dry to leather hard:
Wire the pot off the bat and let it dry slowly to a leather-hard state. It needs to be firm enough to handle without warping, but soft enough to punch holes.
Step 2: Preparing for Mixed Media
-
Trim the foot:
Flip the leather-hard mug over and trim the bottom. A flat bottom with a slight bevel works best for this minimalist style, rather than a tall foot ring. -
Measure hole placement:
Determine where your handle will attach. Mark two points vertically aligned on the side of the mug— one near the rim (about 1 inch down) and one near the base (about 1 inch up). -
Create attachment points:
Using a hole punch tool designed for clay or a small drill bit, create two holes at your marked points. Ensure these holes are slightly larger than your rivets, as the clay will shrink during firing. -
Clean the edges:
Smooth around the punched holes with a damp sponge or fingertip to remove any sharp burrs that could cut into the leather strap later. -
Final drying and bisque:
Allow the mug to dry completely to bone dry, then fire it to bisque temperature according to your clay’s specifications.
Loose Fitting Rivets?
If the clay shrunk too much and the rivet wobbles, add a small leather washer on the inside of the mug between the clay and the rivet back to tighten the fit.
Step 3: Glazing and Finishing
-
Apply glaze:
Dip the bisque mug into a clear or semi-matte white glaze. I personally love how a transparent matte glaze allows the iron speckles to pop through without overpowering the form. -
Clean coordinates:
Double-check that the glaze hasn’t clogged your attachment holes. If it has, use a small tool to clear them before firing. -
Glaze fire:
Fire the mug to maturity (usually Cone 5 or 6 for stoneware). Let it cool completely before moving to the assembly phase. -
Cut the strap:
Cut your leather strip to length. A 5 to 6-inch length usually provides a comfortable loop, but test the arch against your hand before cutting. -
Punch leather holes:
Punch holes in both ends of the leather strap corresponding to the distance of the holes on your ceramic mug. -
Set the top rivet:
Thread the rivet post through the top hole of the mug (from the inside out), then through the leather. Snap the rivet cap on. Use your rivet setter and a hammer to secure it tightly. -
Secure the bottom:
Repeat the riveting process for the bottom hole, creating a secure loop. The leather should bow out gently to form a handle.
Stamp It
Before assembly, stamp your initials or a small symbol into the leather strap near the bottom rivet for a branded, high-end custom finish.
Now you have a stunning, functional piece that perfectly blends industrial hardware with earthy ceramics


Metal Wire Wraps for Edges and Feet
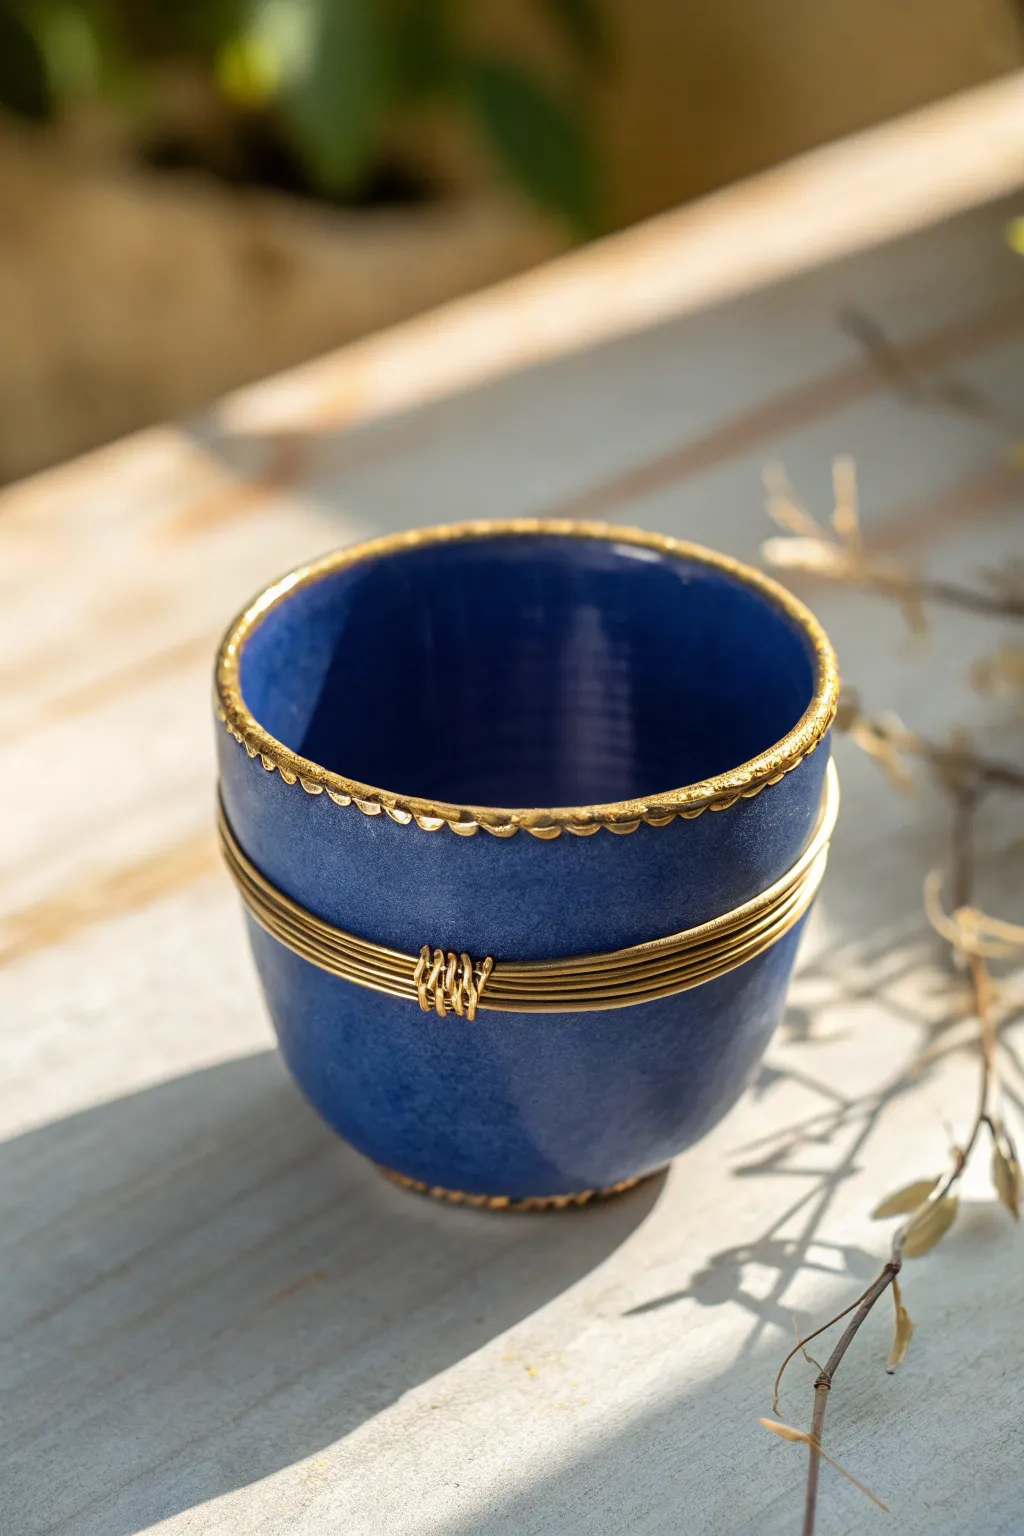
Elevate a simple ceramic form into a regal artifact using deep indigo glaze and metallic accents. This project combines the ancient art of kintsugi-inspired gilding with modern mixed media techniques, featuring a scalloped gold rim and a distinctive wire-wrapped waist.
Step-by-Step Guide
Materials
- Small bisque-fired ceramic cup or bowl
- Deep glossy blue glaze (indigo or cobalt)
- Small paintbrush for glazing
- Gold luster or overglaze (low fire)
- Gold colored brass or copper wire (approx. 20 gauge for wrapping, 24 gauge for binding)
- Wire cutters
- Needle-nose pliers
- Ceramic kiln
- Clear epoxy or heavy-duty jewelry glue (optional)
- Fine grit sandpaper
Step 1: Glazing and Firing
-
Prep the bisque:
Begin with a clean, bisque-fired ceramic vessel. Wipe it down with a damp sponge to remove any kiln dust or oils from your hands, ensuring the glaze adheres perfectly. -
Apply the base glaze:
Stir your deep blue glaze thoroughly. Pour a small amount inside the cup, swirl to coat the entire interior, and pour out the excess. Wipe the rim clean immediately with a damp sponge. -
Glaze the exterior:
Brush three even coats of glaze onto the exterior of the cup. Allow each coat to dry to the touch before applying the next. Be careful to stop the glaze just short of the foot ring to prevent it sticking to the kiln shelf. -
First firing:
Fire the piece in your kiln according to the specific cone requirements of your clay and glaze combination. Once cooled, remove the piece.
Step 2: Gilding the Edges
-
Outline the rim:
Using a very fine liner brush and your gold luster, paint a steady band along the very top edge of the rim. I find that resting my pinky finger on the cup helps stabilize my hand for a smoother line. -
Create the scalloped detail:
Just below the rim band, carefully paint small, connected semi-circles or dots to create a scalloped ‘lace’ effect. Allow the luster to pool slightly for a richer gold look. -
Gild the foot:
Flip the cup over and repeat the scalloped gold application around the foot of the vessel, mirroring the design on the rim. -
Luster firing:
Return the piece to the kiln for a low-fire luster firing (usually Cone 018-019). Ensure proper ventilation as luster fumes can be strong.
Loose Wires?
If the wire wrap slips down the tapered bowl, apply a tiny dot of E6000 glue or clear epoxy at the back of the coil to tack it to the ceramic surface
Step 3: The Wire Wrap
-
Measure the main wire:
Take your thicker (20 gauge) gold wire. Wrap it around the middle of the cup’s belly to estimate length. You want enough wire to circle the cup about 5-6 times. -
Cut the wire:
Cut the wire to length, leaving a few extra inches just in case. It’s better to trim excess later than to be short. -
Begin the wrap:
Start coiling the wire around the cup. Hold the starting end tight against the ceramic surface. You may need a dab of glue to hold the very first end in place if it slips. -
Stack the coils:
Continue wrapping, ensuring each new loop sits snugly against the previous one. Aim for a neat stack of 4 to 6 parallel wires without overlapping them. -
Secure the ends:
Once you have your desired width, bring the two ends of the wire (the start and finish) together at the same point on the circumference.
Make it a Set
Use different wire gauges for a varied look on a matching set or try oxidized copper wire against a white glaze for a rustic, antique aesthetic
Step 4: The Binding Knot
-
Prepare binding wire:
Cut a short piece (about 4 inches) of the thinner 24 gauge wire. This will act as the ‘clasp’ that holds the main coil together. -
Create the vertical wrap:
Position the cut ends of your main coil so they are touching. Place the thin wire perpendicular to the coil stack, centered over the cut ends. -
Bind the coil:
Wrap the thin wire vertically around the entire stack of horizontal wires. Loop it tightly 4-5 times, creating a small metallic ‘cuff’ that hides the cut ends of the main wire underneath. -
Tuck and trim:
Use your needle-nose pliers to pull the binding wire tight. Trim the excess close to the bundle and use the pliers to gently press the sharp ends inward so they don’t snag on clothing or skin. -
Final adjustment:
Slide the wire assembly slightly if needed to ensure it sits straight on the vessel’s waist. If it feels loose, a tiny drop of clear epoxy hidden under the binding knot will secure it permanently.
Now you have a stunning vessel that balances rustic texture with elegant shine


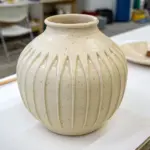
Wooden Lids for Lidded Jars
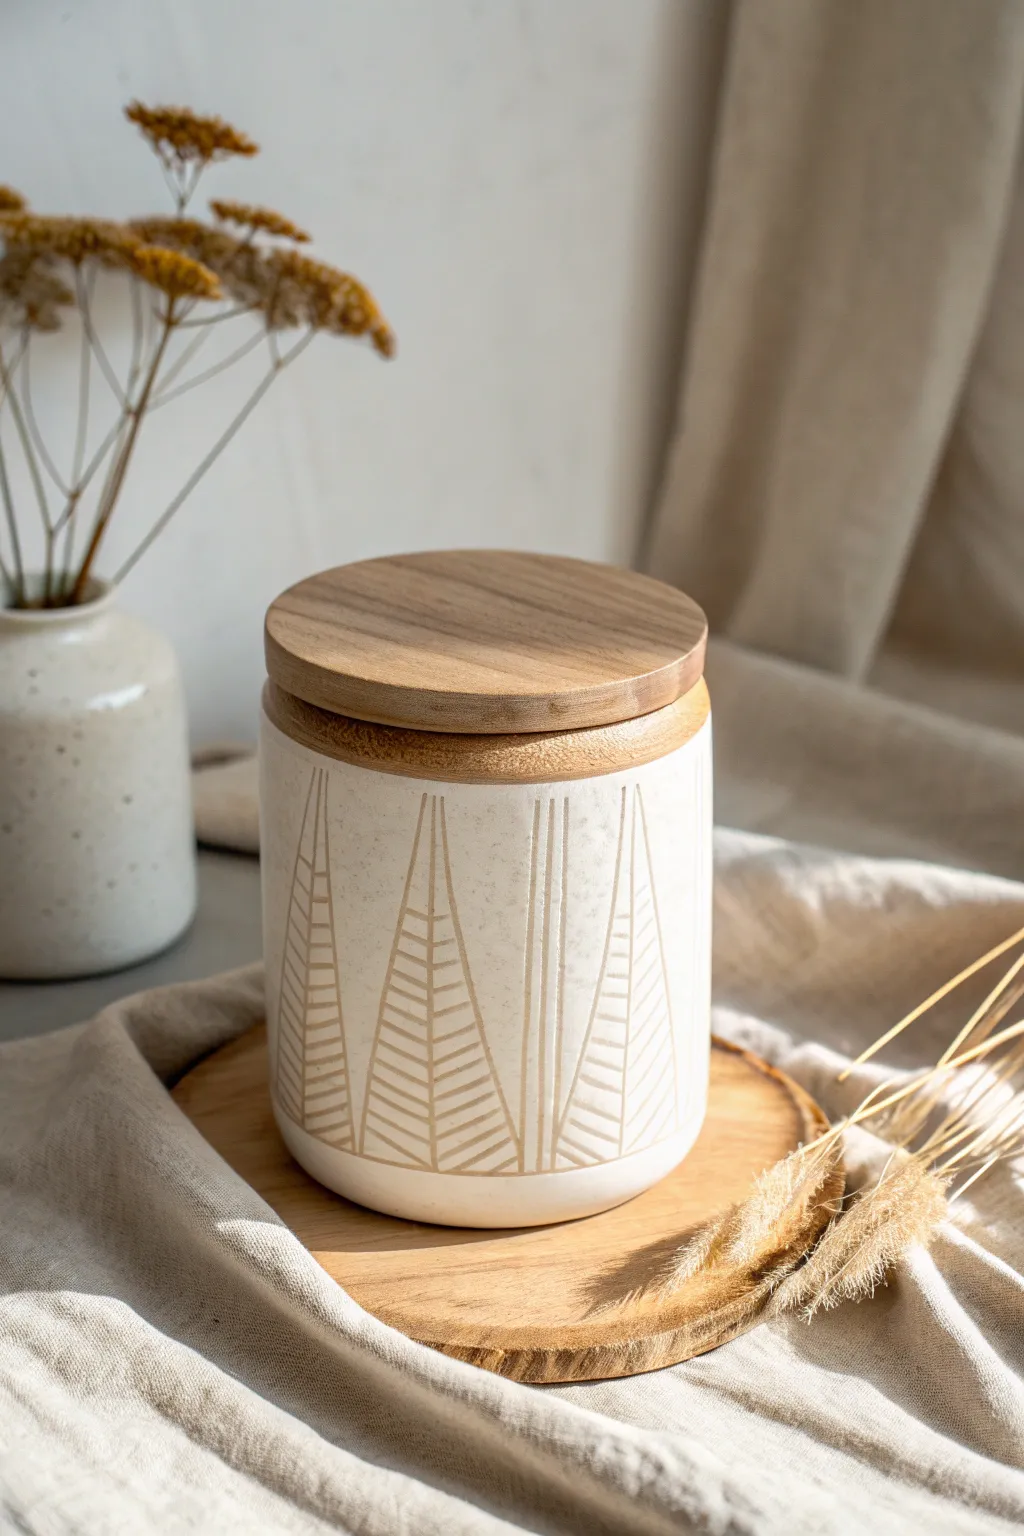
This elegant mixed media project combines the warmth of raw clay with sleek, speckled glaze and natural wood. The geometric tree motifs are created using a carving technique called sgraffito, revealing the beautiful clay body beneath the creamy white surface.
Detailed Instructions
Materials
- Stoneware clay (buff or light brown speckle)
- Pottery wheel (or slab roller for hand-building)
- Throwing tools (sponge, ribs, wire cutter)
- Calipers
- Cream matte glaze (brush-on or dipping)
- Wax resist
- Sgraffito loop tool or sharp carving needle
- Hardwood blank (walnut or oak)
- Wood lathe (or access to woodturning tools)
- Sandpaper (120 to 400 grit)
- Food-safe wood oil or wax finish
Step 1: Forming the Vessel
-
Throw the cylinder:
Begin by centering about 2-3 lbs of clay on your wheel. Open the clay and pull the walls up to form a straight-sided cylinder, approximately 6 inches tall and 5 inches wide. -
Refine the rim:
Creating a distinct gallery for the lid isn’t strictly necessary for this design as the lid will sit on top, but do ensure the rim is flat and compressed. Use a rib to smooth the walls perfectly straight. -
Measure immediately:
Before removing the pot from the wheel, measure the inner and outer diameter of the rim with calipers. Write these measurements down, accounting for about 12% shrinkage during firing. -
Trim the foot:
Once the piece is leather hard, trim a clean, simple flat bottom or a very subtle foot ring to match the modern aesthetic.
Shrinkage Math
A standard stoneware clay shrinks ~12%. If your leather-hard jar opening is 4 inches, the final opening will be around 3.5 inches. Turn the wood lid AFTER the jar is fired to ensure a perfect fit.
Step 2: Glazing and Carving (Sgraffito)
-
Apply the glaze:
Normally you glaze after bisque firing, but for this sgraffito technique, we are applying a layer of underglaze or a specific ‘carve-able’ slip/engobe to the leather-hard clay. Alternatively, if using standard glaze, bisque fire first, then dip the entire jar in a creamy white matte glaze. -
Plan the design:
Lightly mark vertical guidelines around the circumference of the jar to space out your geometric trees evenly. Use a soft pencil which will burn out in the kiln. -
Carve the outlines:
Using a sharp needle tool or fine loop tool, carve long, vertical triangular shapes. The lines should be clean and straight, extending from the base almost to the rim. -
Add the details:
Inside the vertical triangles, carve horizontal ladder-like lines. Apply steady pressure to cut through the white layer and reveal the raw clay body beneath. -
Add accents:
Between the main triangular shapes, carve slender vertical lines to add rhythm to the pattern. -
Clean up:
Gently brush away any clay burrs or crumbs with a soft brush. Be careful not to smudge the white surface if it’s still powdery. -
Final Fire:
Fire the ceramic piece according to your clay and glaze specifications (typically Cone 5 or 6 for stoneware).
Step 3: Crafting the Wooden Lid
-
Select your timber:
Choose a piece of kiln-dried hardwood like walnut or oak that complements the clay tone. A contrasting grain looks beautiful against the matte ceramic. -
Turn the lid profile:
Mount the wood on a lathe. Turn a simple, flat disc that is slightly wider than the outer diameter of your fired ceramic jar. -
Create the inset:
Carefully turn a ‘step’ or rabbet on the underside of the lid. This inner circle needs to fit inside the jar’s opening. Test the fit frequently against the finished ceramic jar—it should be snug but not tight. -
Refine the top:
Sand the top surface and the edges while still on the lathe. I like to slightly round over the top edge for a softer feel in the hand. -
Sand to finish:
Work through your sandpaper grits from 120 up to 400 for a buttery smooth finish. -
Seal the wood:
Apply a generous coat of food-safe mineral oil or a beeswax blend. Buff it with a lint-free cloth to bring out the rich color and grain of the wood.
Add a Silicone Seal
For an airtight canister perfect for coffee or tea, turn a groove into the lid’s inset lip and add a rubber O-ring or silicone gasket.
Place your custom lid on the jar and admire the beautiful contrast between the organic clay textures and the polished wood grain.


Macramé-Hung Ceramic Planters
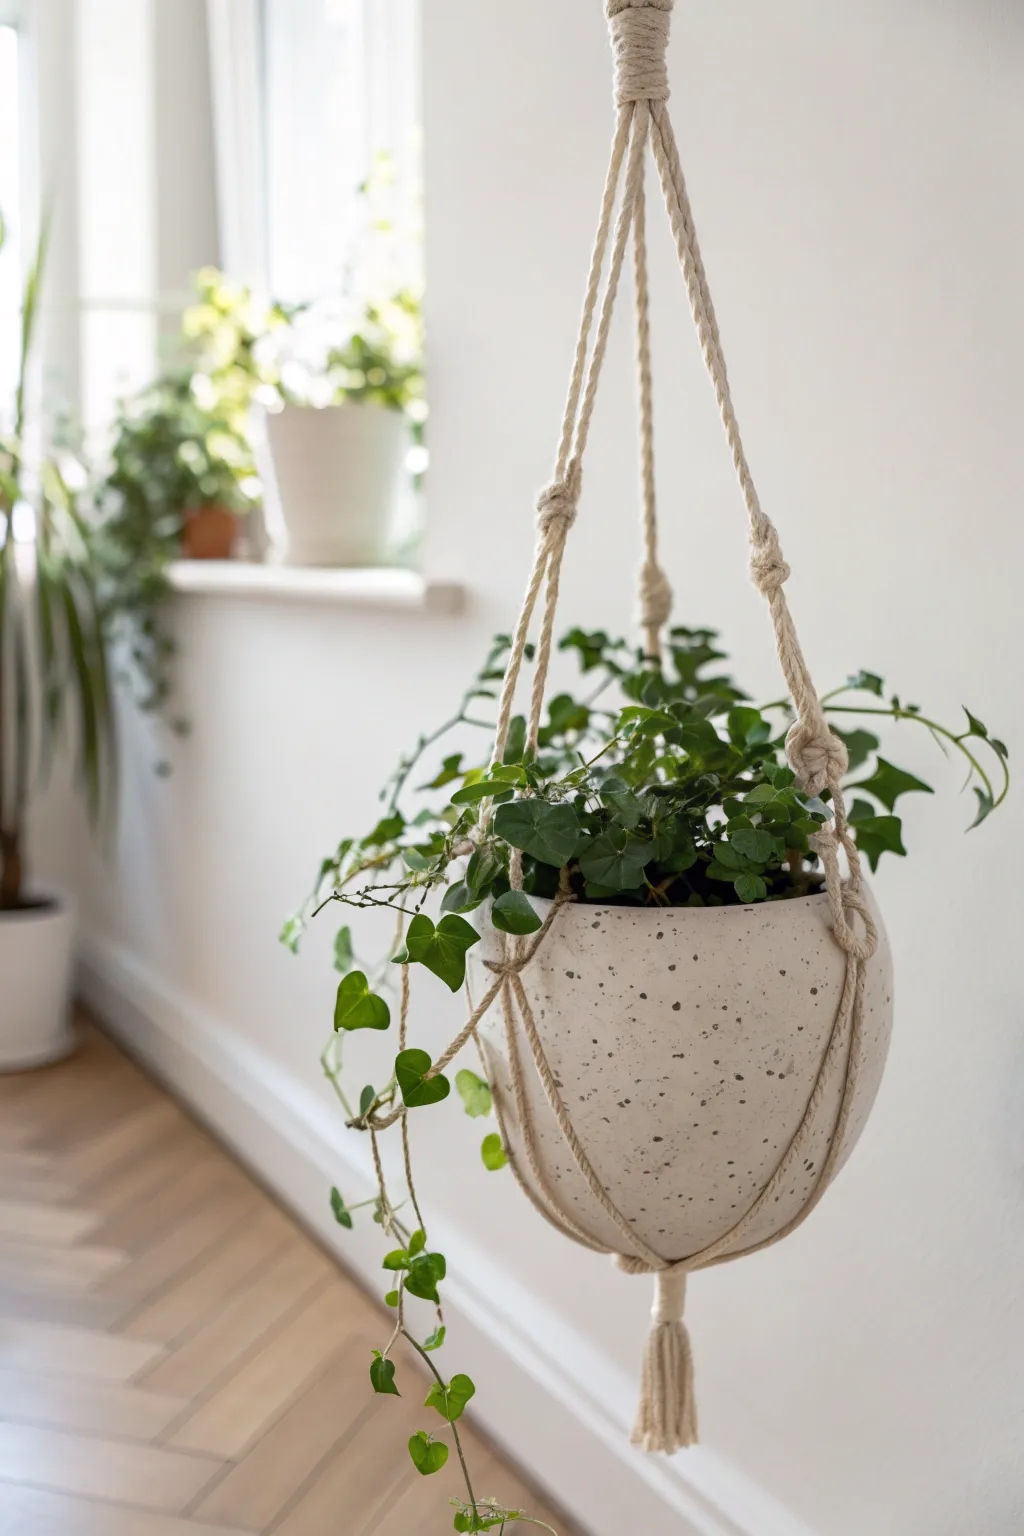
Bring a touch of organic warmth to your vertical space with this combination of wheel-thrown clay and natural fibers. This project pairs a speckled stoneware bowl with a classic macramé sling to frame your favorite trailing vines in simple elegance.
Step-by-Step Guide
Materials
- Speckled stoneware clay (approx. 2-3 lbs)
- Pottery wheel and tools (sponge, wire cutter, rib, trimming tools)
- Matte white glaze
- Natural cotton macramé cord (4mm or 5mm thickness)
- Wooden or metal hanging ring (2 inch diameter)
- Measuring tape
- Scissors
- Comb (optional, for fringe)
Step 1: Creating the Ceramic Bowl
-
Center and open:
Begin by wedging your speckled clay thoroughly to remove air bubbles. Center the clay on the wheel and open it up, aiming for a rounded, bowl-like interior rather than a flat bottom. -
Pull the walls:
Pull the clay upward to create a bulbous form. You want a height of about 6-7 inches. Keep the walls even, but allow slightly more thickness at the rim for durability. -
Shape the curve:
Use a kidney rib on the inside to push the belly of the pot outward, creating a satisfying, round curve. Smooth the outside with a metal rib to refine the profile. -
Dry and trim:
Let the piece dry to leather-hard consistency. Invert it on the wheel and trim a rounded bottom. Avoid a distinct foot ring; a smooth, continuous curve works best for sitting in a rope sling. -
Bisque fire:
Once bone dry, fire the piece to bisque temperature (usually cone 04) to prepare it for glazing. -
Glaze application:
Dip or pour a matte white glaze over the entire piece. The key here is using a glaze that allows the natural iron speckles from the clay body to bleed through during the final firing. -
Final firing:
Fire the pot to maturity (cone 5 or 6 depending on your clay). Let it cool completely before handling.
Step 2: Knotting the Hanger
-
Measure and cut:
Cut 8 lengths of cotton cord, each measuring about 12-14 feet long. This might seem excessive, but knots consume a surprising amount of length. -
Attach to ring:
Thread all 8 cords through your hanging ring until they are folded in half, giving you 16 working strands. Secure them directly below the ring with a ‘gathering knot’ (also known as a wrapping knot) using a separate short piece of cord. -
Divide the strands:
Separate the 16 strands into 4 groups of 4. These will form the four ‘legs’ of your planter. -
Create spiral arms:
For each group of 4, use the outer two cords to tie a series of half-square knots around the inner two core cords. Repeating the same half-knot causes the design to spiral naturally. Continue for about 12-15 inches. -
Transition to square knots:
After the spiral section, switch to tying standard square knots (alternating the leading cord). Tie two or three distinct square knots to create a visual break, like the ‘beads’ seen in the reference image. -
Form the basket:
Drop down about 4 inches below the square knots. Take two cords from one group and knot them with two cords from the adjacent group using a square knot. Repeat around the circle to connect all groups. -
Second basket tier:
Drop down another 3 inches and repeat the alternating connection process. This creates the net that will actually hold the pot. -
Final gathering knot:
Gather all strands together at the bottom. Tie a large, tight gathering knot about 3 inches below the last row of knots to secure the base. -
Trim the tassel:
Trim the remaining hanging cord to your desired tassel length. For a fuller look, I usually untwist the strands of the tassel and comb them out slightly. -
Assembly:
Place your finished ceramic pot into the net, ensuring it sits level. Adjust the cords so they space evenly around the belly of the pot before potting your plant.
Glazing Success
To ensure maximum speckle visibility, wipe the bisque-ware with a damp sponge right before glazing. This helps thin the application slightly so the clay’s character shines through.
Dip-Dye Finish
Add an ombre effect by dip-dyeing the bottom tassel of the macramé. Mix fabric dye in a bowl and soak just the bottom 2 inches for a subtle gradient pop of color.
Hang your new creation in a sunny window and watch the light play across the texture of the clay and cord

The Complete Guide to Pottery Troubleshooting
Uncover the most common ceramic mistakes—from cracking clay to failed glazes—and learn how to fix them fast.
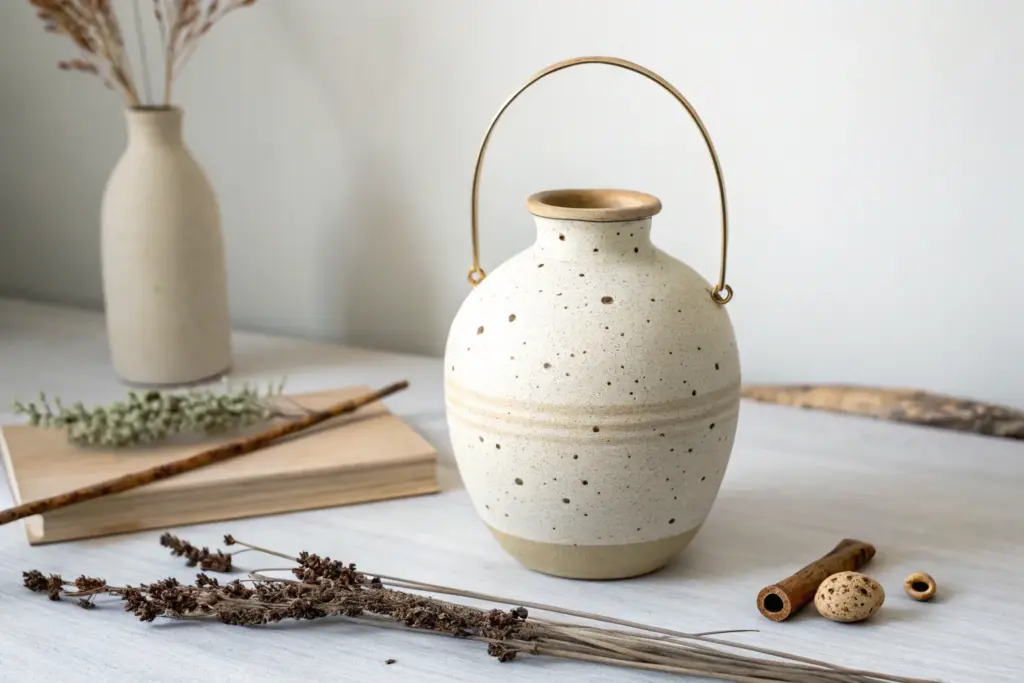
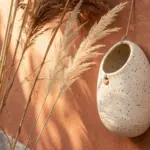
Driftwood + Bud Vase Pairings
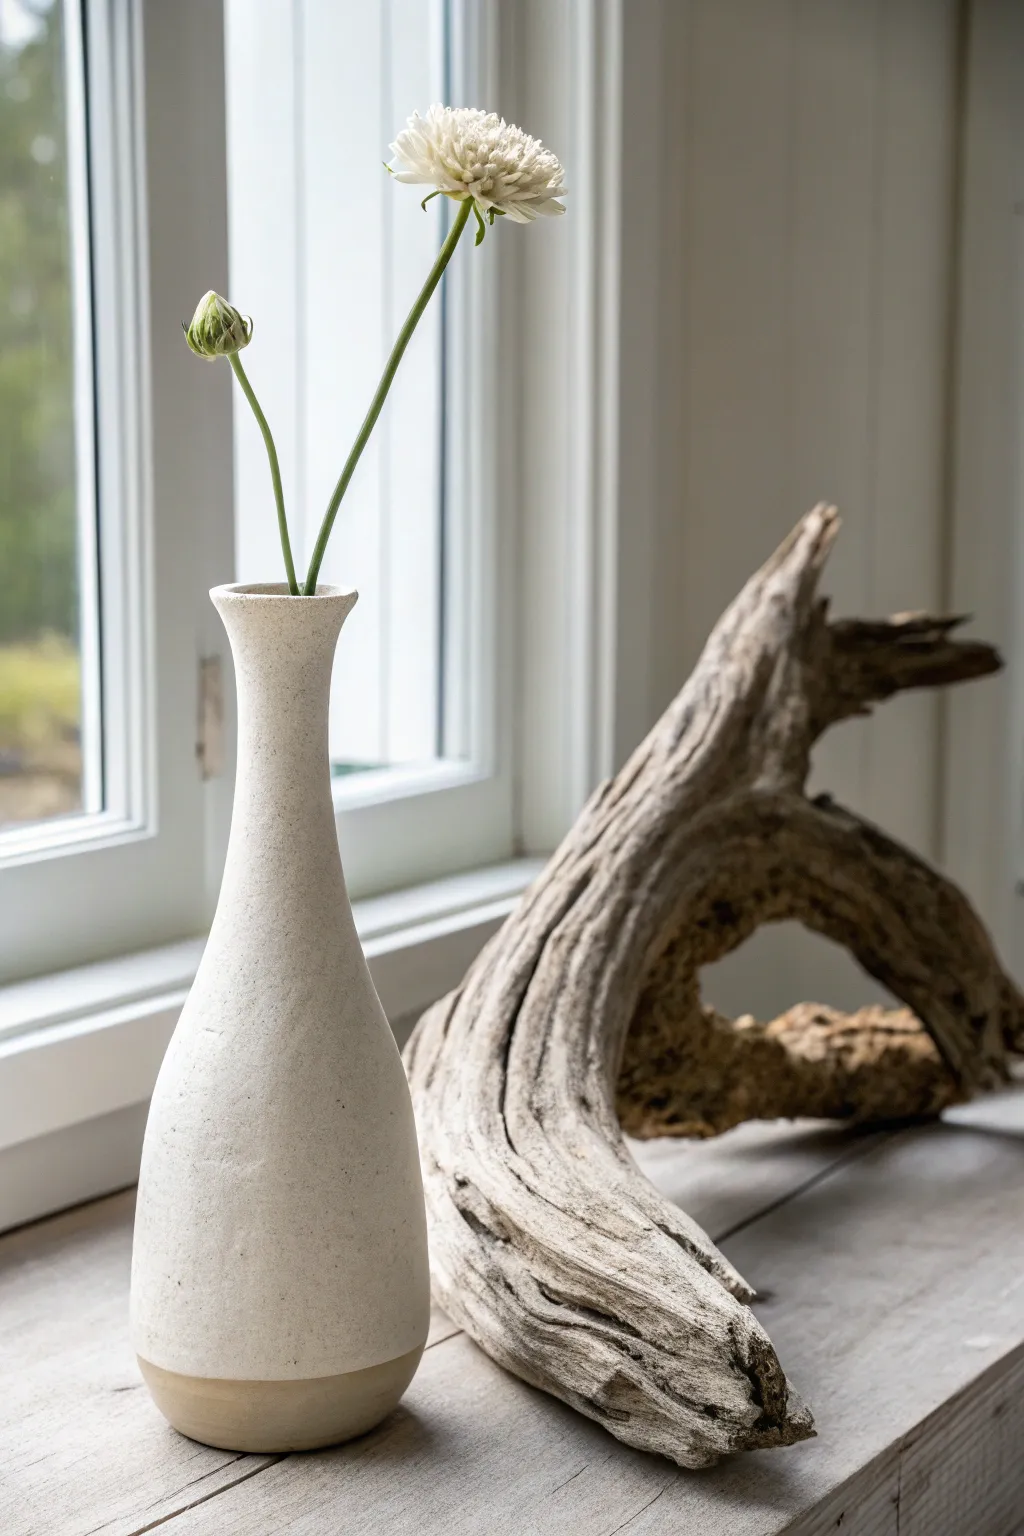
This elegant bud vase brings the serene atmosphere of the coast indoors, featuring a creamy, speckled glaze that contrasts beautifully with a raw clay base. Paired with a sculptural piece of driftwood, it creates a minimalist yet organic display perfect for a windowsill.
Step-by-Step
Materials
- Stoneware clay (preferably a speckled buff or sand-colored body)
- Potter’s wheel (or coil-building tools for hand builders)
- Throwing tools: sponge, rib, wire cutter
- Trimming tools
- Matte white or cream glaze (stoneware temperature)
- Wax resist
- Kiln
- Large, arched piece of driftwood
- Sandpaper (optional for driftwood)
Step 1: Shaping the Form
-
Center the clay:
Start with about 1.5 to 2 pounds of well-wedged speckled stoneware clay. Center it firmly on the wheel head, ensuring a stable base for the tall form. -
Open and pull:
Open the clay to create a narrow floor, no wider than 2 inches. Begin pulling the walls upward into a cylinder, keeping the walls relatively thick at the bottom to support the eventual height. -
Collar the neck:
Once you have significant height, begin to gently collar the clay inward starting from the belly up to the rim. This creates the tapered, iconic bud vase silhouette. -
Create the belly:
Using a rib and internal pressure, gently push the lower section outward to create a subtle swelling or ‘belly’ near the bottom, while keeping the neck long and slender. -
Flare the rim:
At the very top, use your fingers or a chamois to gently flare the rim outward. This small detail helps support flower stems and adds visual balance. -
Refine the surface:
Run a metal or rubber rib up the exterior while the wheel spins slowly to remove throwing lines and smooth the surface texture.
Step 2: Trimming and Drying
-
Leather hard drying:
Allow the piece to dry until it reaches the leather-hard stage. It should be firm enough to handle without deforming but soft enough to carve. -
Trim the foot:
Invert the vase on the wheel (using a chuck if the neck is too narrow to stand). Trim the bottom inch to create a defined, straight-sided foot area. This section will remain unglazed. -
Smooth the transition:
Use a damp sponge to smooth the area where the trimmed foot meets the belly of the vase, ensuring a crisp line. -
Bisque fire:
Let the vase dry completely to the bone-dry stage. Load it into the kiln and bisque fire to approximately Cone 04.
Clean Lines
Use masking tape instead of freehand wax for a razor-sharp line between the glazed body and the raw clay foot.
Step 3: Glazing and Finishing
-
Wax the base:
Apply wax resist to the bottom inch of the vase and the underside of the foot. I prefer to apply the wax slightly higher than the trimmed line to ensure a clean demarcation. -
Glaze application:
Dip the vase into a matte white or cream glaze. Hold it upside down for a few seconds to let excess glaze drip off the rim. -
Clean up:
Once the glaze is dry to the touch, use a damp sponge to wipe any stray droplets off the waxed bottom section. Any speckles in the clay body will likely burn through the matte glaze during firing. -
Glaze fire:
Fire the vase to maturity (usually Cone 5 or 6 depending on your clay and glaze). Allow the kiln to cool naturally.
Earthy Tones
Add 2% iron oxide to your clear glaze bucket to create a warmer, antique cream tone that highlights the clay speckles.
Step 4: Styling the Pair
-
Driftwood prep:
Select a piece of driftwood with a distinct arch or curve. If it’s rough, lightly sand it to prevent snagging, but maintain its weathered texture. -
Arrangement:
Place the vase in front of or beside the driftwood arch. The curve of the wood should frame the vertical lines of the vase. -
Floral selection:
Add one or two stems of scabiosa or similar delicate wildflowers. Keep the stems long to echo the height of the vase and the reach of the wood.
Now you have a serene, nature-inspired vignette ready to brighten any corner of your home
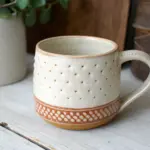
Fabric Bands for Textured Tumblers
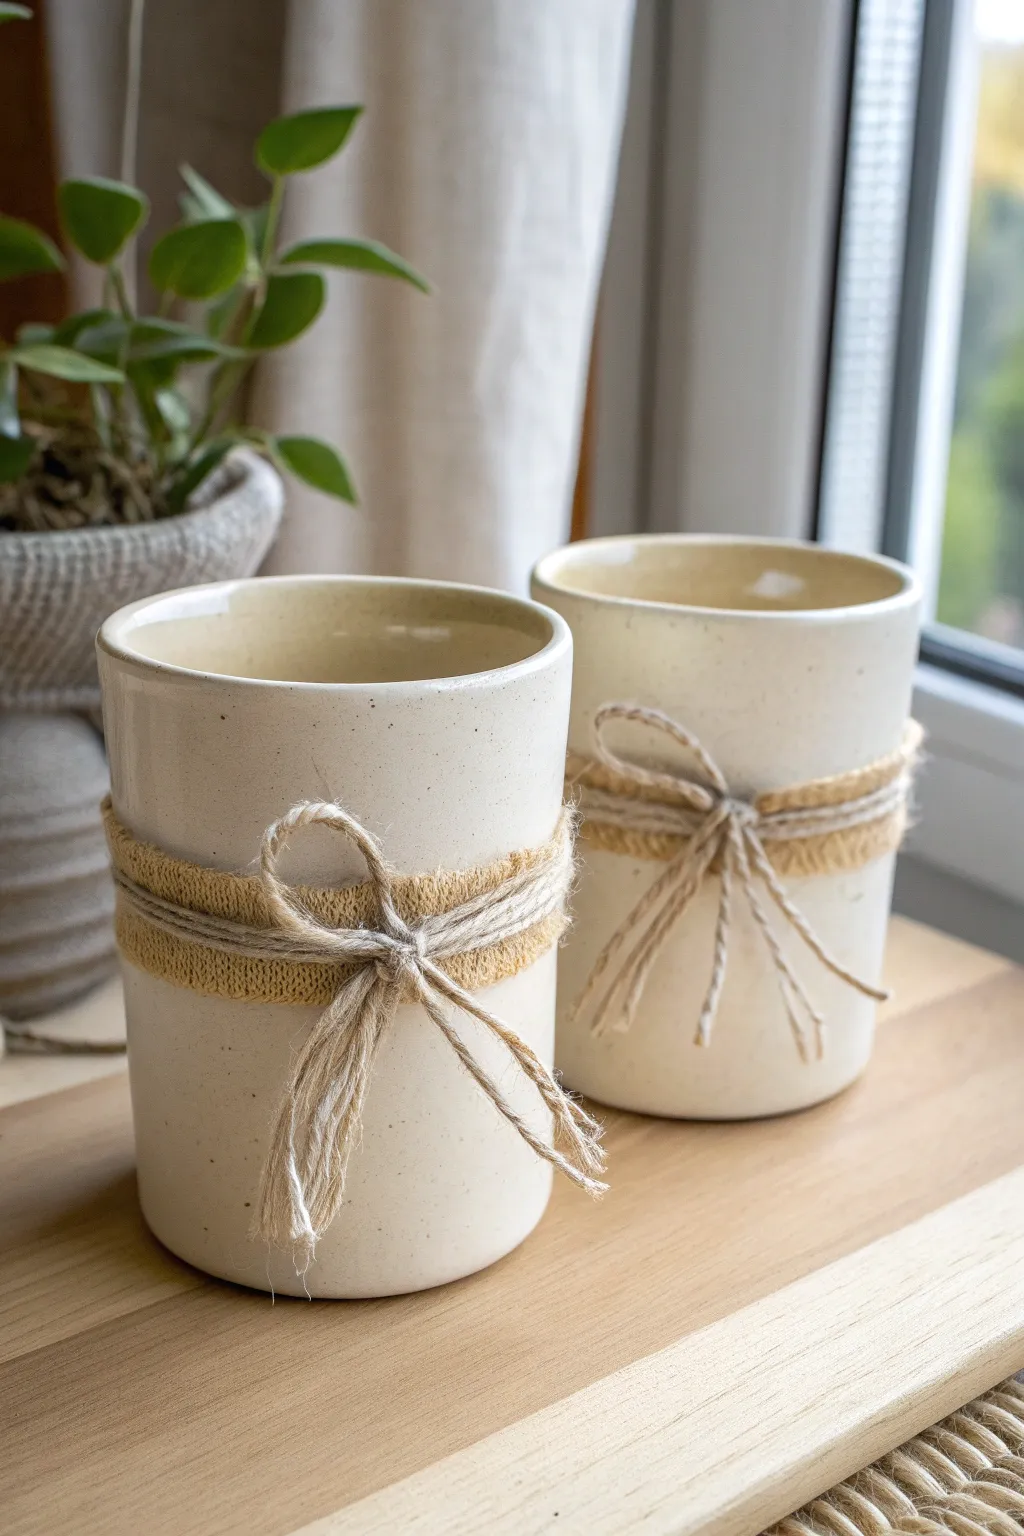
Marrying soft, organic textiles with sturdy ceramics creates a delightful tactile contrast perfect for cozy home decor. This project transforms simple speckled tumblers into charming vessels by adding a textured fabric band and a rustic twine bow.
Detailed Instructions
Materials
- High-fire white stoneware clay (speckled)
- Pottery wheel (or slab roller for hand-building)
- Cylindrical rib tool
- Sponge
- Cutting wire
- Clear or transparent cream glaze
- Kiln
- Coarse-weave beige fabric ribbon (burlap or linen blend), approx 1-inch wide
- Natural jute twine
- Scissors
- Strong craft glue or hot glue gun (optional)
Step 1: Forming the Vessels
-
Prepare the Clay:
Begin by wedging your speckled stoneware clay thoroughly to remove air pockets. For two matching tumblers, weigh out two equal boules of clay, approximately 1 to 1.5 lbs each. -
Center and Open:
Throw the clay onto the wheel head and center it. Open the clay up, establishing a flat interior floor rather than a curved bowl shape, aiming for a width of about 3 inches. -
Pull the Walls:
Pull the walls straight up into a cylinder. Keep the walls even in thickness, avoiding a heavy bottom. Aim for a finished height of about 4.5 to 5 inches. -
Refine the Shape:
Use a rib tool on the exterior to smooth out throwing lines and ensure the sides are perfectly straight and vertical. The surface needs to be relatively smooth so the fabric ban sits flat later. -
Finish the Rim:
Using a chamois or a damp sponge, gently compress and round off the drinking rim. A smooth rim is crucial for a functional tumbler. -
Dry and Bisque:
Wire the pots off the wheel and let them dry slowly to leather hard. Once bone dry, fire them in the kiln for a bisque cycle according to your clay’s specifications.
Sliding Fabric?
If the fabric slips on the smooth glaze, apply a tiny dab of clear silicone adhesive under the knot. It holds firmly but peels off easily when it’s time to wash.
Step 2: Glazing and Firing
-
Apply Glaze:
Dip your bisqued tumblers into a clear or semi-transparent cream glaze. This transparency is key to letting the natural clay speckles shine through the finish. -
Clean the Foot:
Wipe the bottom of the tumblers and up the side about 1/4 inch with a damp sponge to prevent the pot from sticking to the kiln shelf. -
Glaze Fire:
Load the kiln and fire to the maturity temperature of your clay and glaze combination (likely Cone 5 or 6). Allow the kiln to cool completely before unloading.
Fray Check
To keep the fabric ribbon from unraveling too much over time, run a very thin line of clear fabric glue or fray-check solution along the cut vertical edges.
Step 3: Adding the Mixed Media Detailing
-
Measure the Fabric:
Wrap your coarse-weave fabric ribbon around the middle of the finished tumbler to determine the length. Cut the strip so the ends just slightly overlap. -
Secure the Band:
Wrap the fabric band tightly around the tumbler. You can use a tiny dot of hot glue to secure the overlap, or simply rely on the twine tension if you want the wrap to be removable for washing. -
Prepare the Twine:
Cut a long length of jute twine, roughly four times the circumference of the cup. This extra length allows for wrapping multiple times and tying a bow. -
Wrap the Twine:
Find the center of your twine and place it over the seam of the fabric band. Wrap the ends around the back and bring them forward again to encircle the cup twice. -
Tie the Knot:
Bring the twine ends to the front center. Tie a firm knot right over the fabric band to cinch everything tightly in place. -
Create the Bow:
Tie a standard shoelace bow. Pull the loops out generously so they droop slightly, mimicking the relaxed look in the image. -
Trim the Ends:
Trim the tails of the twine so they hang down about two inches. I personally like to fray the very tips of the twine for a softer, aged appearance.
Now you have a set of beautifully textured tumblers ready for a warm drink by the window


What Really Happens Inside the Kiln
Learn how time and temperature work together inside the kiln to transform clay into durable ceramic.
Resin Inlay in Carved Sgraffito Lines
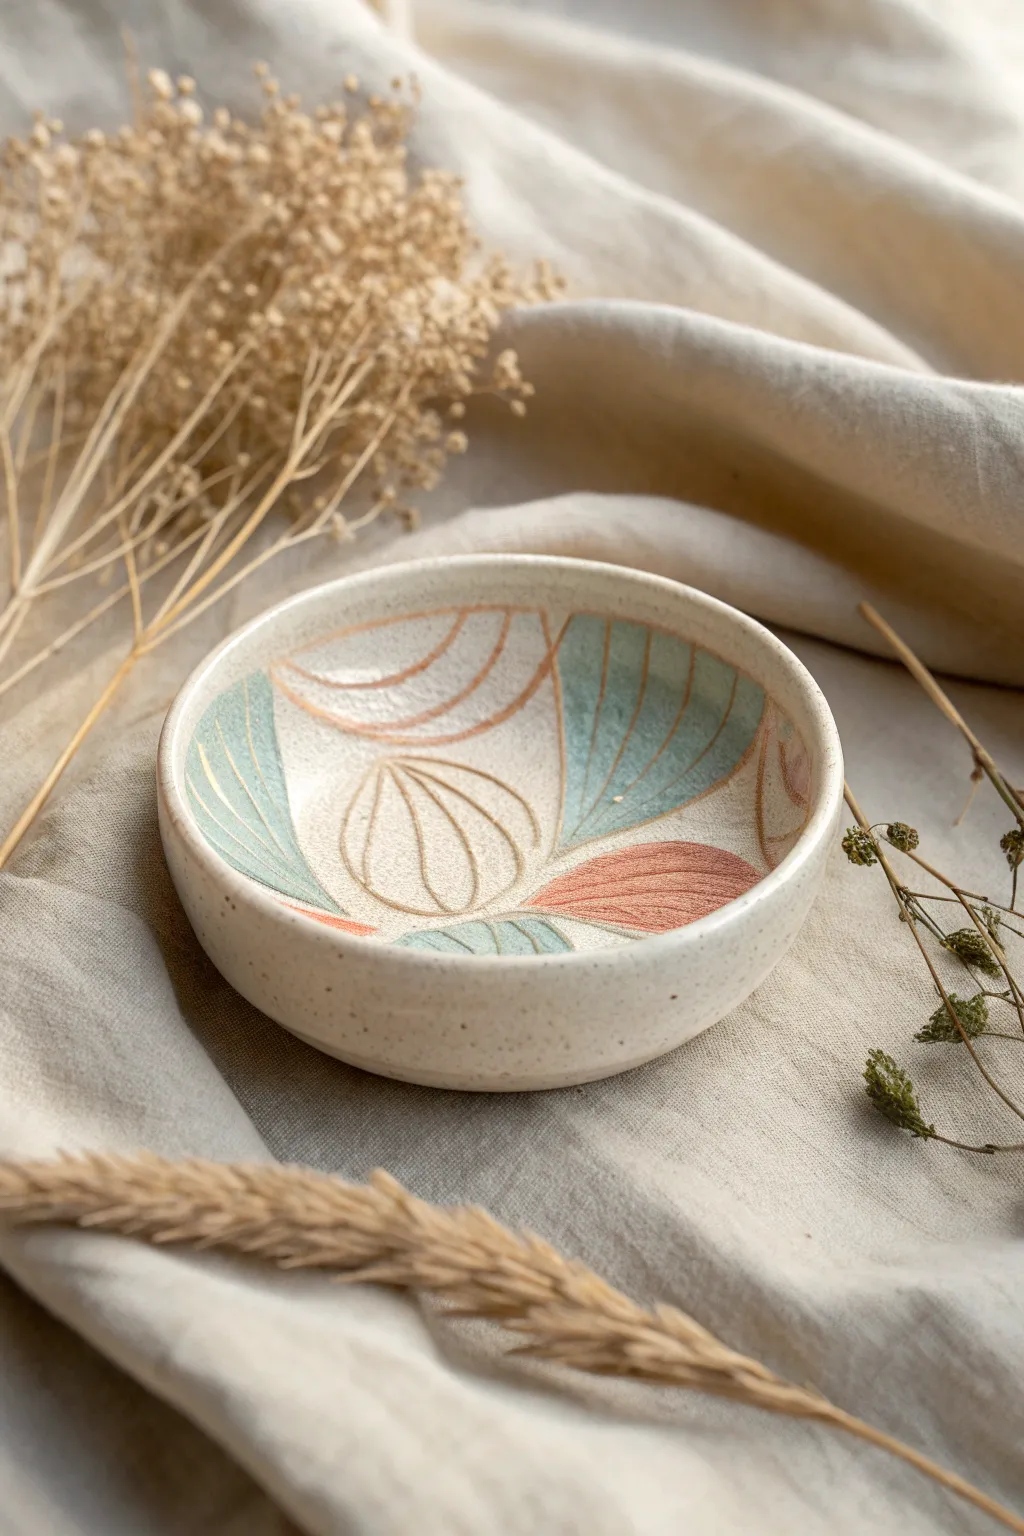
Marrying the ancient art of sgraffito with modern resin techniques creates a stunning, dimensional finish. This bowl features delicate botanical carvings filled with soft teal and coral pigments, sealed within sleek resin lines for a mixed-media masterpiece.
Step-by-Step Tutorial
Materials
- Stoneware clay body (speckled buff recommended)
- Pottery wheel or slab roller for forming
- Loop tools and fine needle carving tools
- Bisque firing kiln
- Two-part clear epoxy resin
- Powdered pigments or alcohol inks (teal, coral/terracotta)
- Syringe with a fine tip or precision applicator bottle
- Clear glaze (matte or satin finish)
- Mixing cups and stir sticks
- Sandpaper (various grits from 220 to 600)
- Respirator/mask and gloves
Step 1: Forming and Carving
-
Shape the vessel:
Begin by throwing a simple, low-profile bowl on the wheel or slump a slab into a mold. Aim for a vessel with a gentle curve and a distinct rim, approximately 6-8 inches in diameter. -
Dry to leather hard:
Allow the piece to dry slowly until it reaches a leather-hard state. The clay should be firm enough to hold its shape but soft enough to carve cleanly without chipping. -
Sketch the design:
Lightly sketch your botanical motifs onto the interior surface using a soft pencil or a dull needle tool. Focus on large, sweeping leaf shapes and rounded stylized distinct lines. -
Carve the channels:
Using a fine loop tool or a sharp U-gouge, carve out the main design lines. Unlike traditional sgraffito where you scratch through slip, here you are creating deep channels (about 2-3mm deep) that will later hold the resin. -
Refine the edges:
Clean up any clay burrs or crumbs from the carving process with a soft brush or a slightly damp sponge. The cleaner your channels are now, the sharper your final inlay will be. -
Bisque fire:
Once bone dry, fire the bowl to bisque temperature (usually Cone 06/04). This hardens the clay and prepares it for the initial glazing.
Sticky Situation?
If resin spills onto the glazed area, don’t wipe it! Let it cure slightly until it’s gummy, then peel it off with a craft knife. Wiping wet resin just smears a thin, impossible-to-remove film.
Step 2: Glazing and Sealing
-
Apply clear glaze:
Dip or brush a clear matte or satin glaze over the entire piece. Avoid filling your carved channels thickly with glaze; wipe them back slightly with a damp sponge if needed so the grooves remain deep. -
Glaze fire:
Fire the piece to its final maturity temperature (e.g., Cone 5/6). The bowl is now fully ceramic and vitrified, ready for the mixed media element. -
Clean surface prep:
Ensure the fired bowl is completely clean and free of dust or oils. Use rubbing alcohol to wipe down the carved channels.
Glow Up
Mix a tiny amount of phosphorescent (glow-in-the-dark) powder into your lighter colored resin. During the day it looks normal, but it will create a magical glowing outline at night.
Step 3: Resin Inlay Application
-
Mix the resin:
In a well-ventilated area, mix a small batch of two-part epoxy resin according to the manufacturer’s ratio. Stir slowly to avoid introducing too many air bubbles. -
Tint the resin:
Separate the mixed resin into two small cups. Add teal pigment to one and coral/terracotta to the other. You want an opaque color, but don’t overload the resin with powder or it won’t cure properly. -
Fill the syringe:
Load your precision syringe with the teal resin mixture first. If the resin is too runny, let it sit for 5-10 minutes to thicken slightly for better control. -
Inject the resin:
Carefully inject the colored resin into the corresponding carved channels. I prefer to overfill slightly, as the resin may settle or shrink a tiny amount as it cures. -
Pop bubbles:
Run a lighter flame quickly over the surface or use a toothpick to pop any micro-bubbles that rise to the top of the resin lines. -
Repeat with coral:
Clean your tool or switch syringes, then repeat the filling process with the coral-colored resin for the accent leaves. -
Cure completely:
Place the bowl on a strictly level surface and cover it with a box to prevent dust from settling. Allow the resin to cure for at least 24-48 hours.
Step 4: Finishing
-
Wet sanding:
Once fully hard, wet sand the interior of the bowl. Start with 220 grit to level the resin flush with the ceramic surface, then move up to 400 and 600 for a smooth finish. -
Polish:
Wipe the bowl clean and use a polishing compound or a microfiber cloth to bring a soft sheen back to the resin lines, making them pop against the matte ceramic.
Display your finished bowl where the light can catch the subtle contrast between the earthy clay and the smooth, colorful resin lines
Ceramic Vessels on Concrete Bases
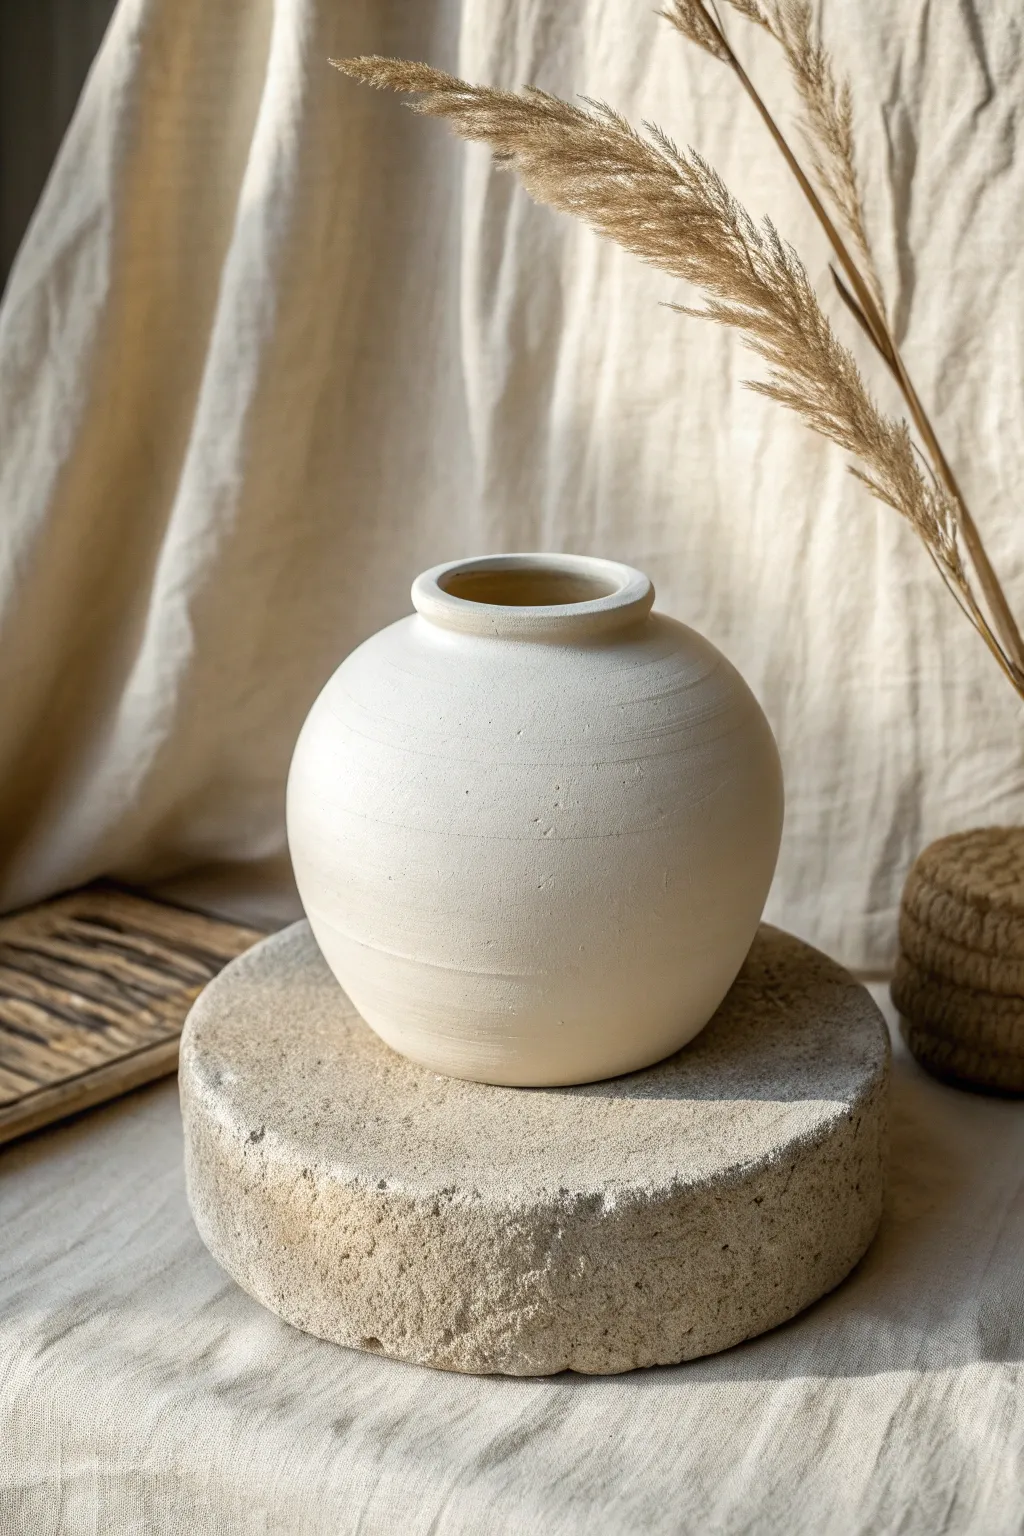
This project explores the serene intersection of refined ceramics and rugged, raw textures. You will create a perfectly imperfect spherical vessel and pair it with a cast concrete or carved stone base for a sculptural, minimalist centerpiece.
How-To Guide
Materials
- White stoneware or porcelain clay (approx. 3-4 lbs)
- Pottery wheel (or coil/pinch tools for hand-building)
- Rib tools (metal and wood)
- Sponge and bucket
- Wire cutter
- Carving tools
- Matte white glaze or underglaze
- Concrete mix (aggregate-free for smoother finish, or standard for texture)
- Round mold for concrete (cut bucket or silicone cake pan)
- Chisel and hammer (optional, for distressing)
- Sandpaper (various grits)
- Clear matte sealant (optional)
Step 1: Shaping the Vessel
-
Center the clay:
Begin by wedging your clay specifically to remove air bubbles, then slam it onto your wheel bat. Focus on centering the mound perfectly, keeping your hands wet to reduce friction. -
Open and lift:
Open the clay to create the floor, leaving it slightly thicker than usual to support the weight of the belly. Pull the walls upward into a cylinder first to get the height. -
Creating the belly:
Gently push the walls outward from the inside using a rib or your fingers. I like to work slowly here, expanding the form gradually to achieve that full, rounded spherical shape without collapsing the shoulder. -
Collar the neck:
As you reach the top third, gently collar the clay inward to narrow the opening. Keep the rim thick enough to create that distinctive, rolled lip shown in the image. -
Refine the surface:
While the wheel is spinning slowly, use a metal rib to smooth the exterior. Don’t aim for perfection; leave subtle horizontal throwing lines to enhance the hand-turned aesthetic. -
Trim and dry:
Cut the pot from the wheel and let it dry to leather-hard. Flip it over and trim the foot so it sits flat, rounding the bottom curve to match the overall silhouette.
Make it Raw
For the exact texture in the photo, skip the exterior glaze entirely. Sand the raw clay smooth, fire it, and apply a liquid quartz sealer to protect the porous surface.
Step 2: Creating the Base
-
Prepare the mold:
Select a round form slightly wider than your vessel. A cut-off plastic bucket bottom or a large silicone cake mold works well. Grease the interior generously with release agent or cooking spray. -
Mix the substrate:
Mix your concrete or stone-casting plaster according to the package instructions. For the sandy texture seen in the photo, you might add a handful of vermiculite or coarse sand to the mix. -
Pour and vibrate:
Pour the mixture into the mold to a depth of about 3 inches. Tap the sides of the mold vigorously to release large trapped air bubbles, settling the mix. -
Cure and demold:
Allow the base to cure for at least 48 hours before removing it from the mold. It will look polished at this stage, but we want to change that. -
Distress the edge:
Using a chisel and hammer, gently chip away at the edges of the concrete puck. Work your way around to create a rough, hewn look that contrasts with the smooth vase.
Level Up: Intentional Cracks
Add ‘sodium silicate’ to the clay surface while stretching the belly on the wheel. This creates a crackled, bark-like texture that pairs beautifully with the stone base.
Step 3: Finishing Touches
-
Bisque fire:
Fire your clay vessel to bisque temperature (usually cone 04) once it is bone dry. -
Glaze application:
Apply a matte white glaze. If you want the specific raw look from the photo, you might choose a bare clay exterior method—sand the bisque ware until smooth and leave it unglazed on the outside, only glazing the interior for water tightness. -
Final firing:
Fire the vessel to the maturation temperature of your specific clay body. -
Weathering the base:
If the concrete looks too new, rub a diluted mixture of black acrylic paint and water over the rough edges, then wipe it back immediately with a rag to highlight the texture. -
Assembly:
Place the finished ceramic vessel atop your stone base. The weight of the ceramic should keep it stable, but you can use a small dab of museum wax for security if displayed in a high-traffic area.
The quiet interplay between the smooth ceramic curve and the rough, hewn base creates a sophisticated sculpture perfect for a calm corner

TRACK YOUR CERAMIC JOURNEY
Capture glaze tests, firing details, and creative progress—all in one simple printable. Make your projects easier to repeat and improve.
Found-Object Collage on Matte Pots
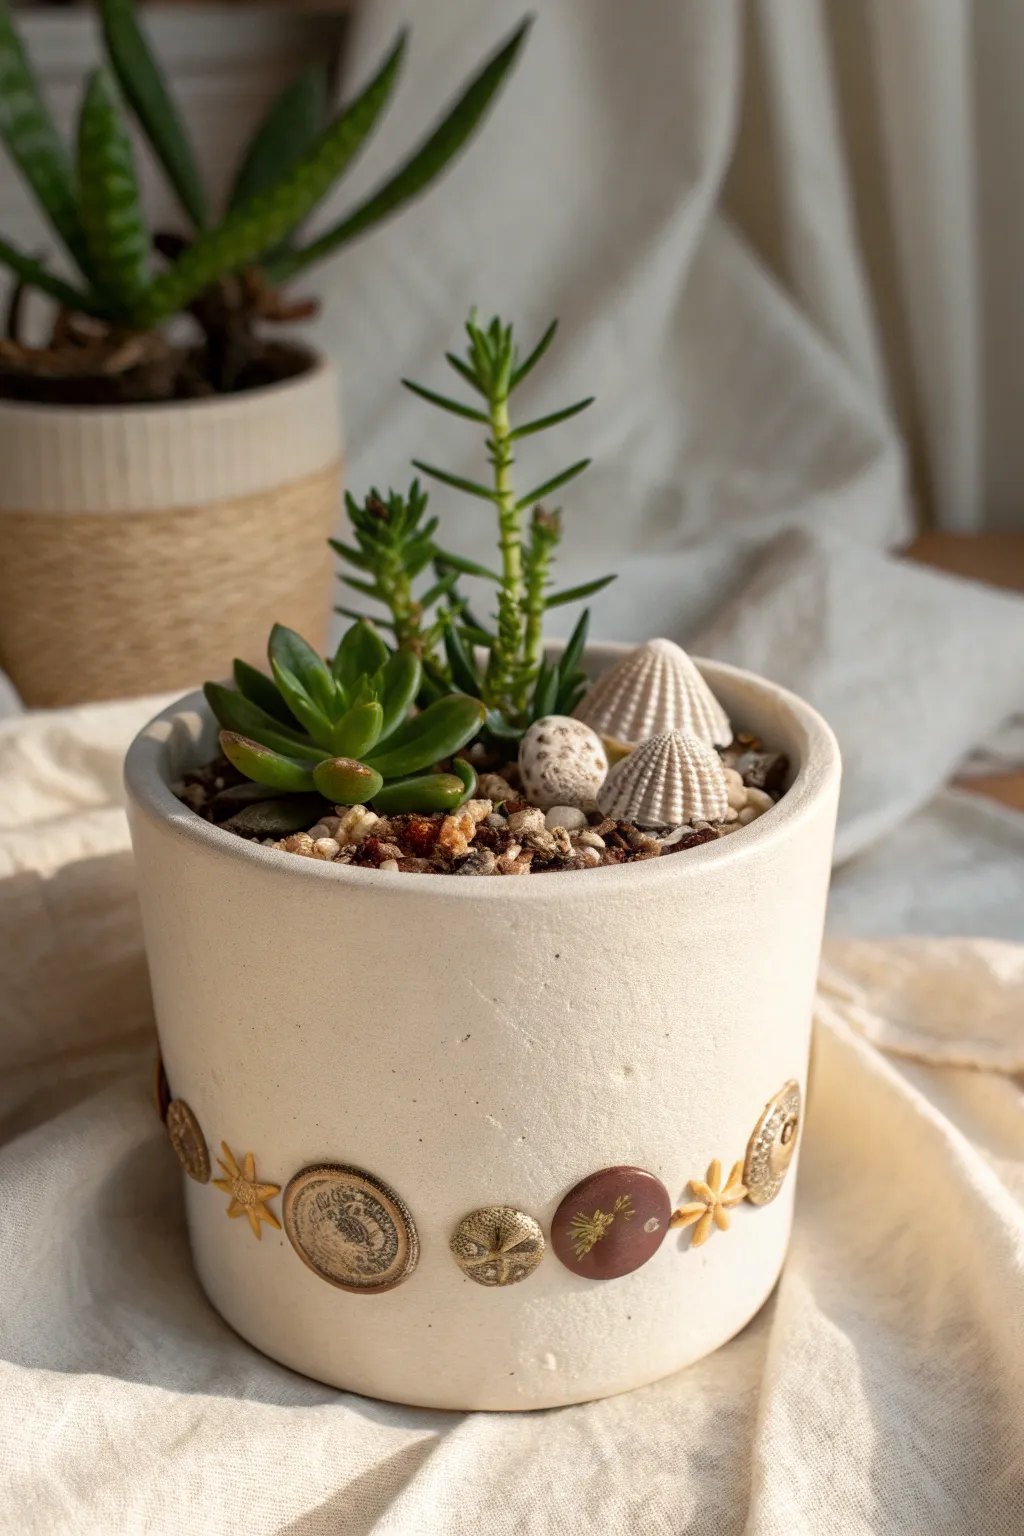
Transform a simple matte ceramic vessel into a piece of eclectic art by collaging vintage metal buttons and charms along its base. The juxtaposition of the weathered, antique metals against the smooth, modern white surface creates a striking and storied aesthetic.
Detailed Instructions
Materials
- White matte ceramic pot (cylindrical)
- Assorted vintage metal buttons (brass, bronze, copper)
- Small metal charms or jewelry findings (stars, coins, medallions)
- E6000 craft adhesive or heavy-duty ceramic glue
- Toothpicks or a fine-tip glue applicator
- Isopropyl alcohol and cotton pads
- Tweezers
- Painter’s tape (optional)
- Succulents and potting soil (for finishing)
- Decorative top dressing (white gravel, small seashells)
Step 1: Preparation & Layout
-
Clean the surface:
Before attaching anything, wipe the lower portion of your pot thoroughly with isopropyl alcohol and a cotton pad. This removes invisible oils or dust that might weaken the bond. -
Audit your collection:
Gather your vintage buttons and findings. Look for a mix of textures—smooth coins, ridged buttons, and starburst charms—but try to keep them within a cohesive warm metal color palette of brass, copper, and bronze. -
Remove shanks:
If your vintage buttons have shank backs (loops) rather than flat backs, use wire cutters to snip them off as flush as possible. A metal file can help smooth down any sharp nub that remains so the button sits flat against the pot. -
Dry run the arrangement:
Lay out your design on a flat surface first. I find it helpful to line them up against a ruler to mimic the straight line around the pot’s base, alternating between larger round buttons and smaller star shapes to create a balanced rhythm.
Design Rhythm
Don’t aim for perfect symmetry. Using ‘visual weight’ works better—balance a large dark button with two smaller bright brass charms next to it.
Step 2: Adhering the Collage
-
Establish the height:
Decide on the placement line. For this look, stick to the bottom third of the pot, roughly an inch or two from the base. You can use a strip of painter’s tape as a temporary guide to keep your line straight. -
Prepare the adhesive:
Dispense a small amount of E6000 glue onto a scrap piece of cardboard. Using a toothpick allows for much more precise application than squeezing directly from the tube. -
Anchor with a large piece:
Start with one of your larger focal points, like a coin-style button. Apply a dab of glue to the back and press it firmly onto the pot for about 30 seconds to let the initial tack take hold. -
Add spacing elements:
Next to your anchor piece, place a smaller element, like a small brass star. Leave a few millimeters of white space between items; breathing room keeps the design from looking cluttered. -
Continue the pattern:
Work your way around the circumference of the pot, glueing one piece at a time. Alternate your shapes—circle, star, circle, star—or create small clusters depending on your layout plan. -
Check alignment:
Every three or four pieces, take a step back and look at the pot from eye level to ensure your line isn’t drifting upwards or downwards. -
Secure heavy items:
If a particularly heavy metal button feels like it’s sliding down the vertical surface, use a small piece of tape to hold it in place while the glue cures. -
Clean up overflow:
If any glue oozes out from behind a button, use a clean toothpick or a cotton swab dipped in a tiny bit of acetone to wipe it away immediately before it hardens. -
Let it cure:
Once the entire band is complete, set the pot aside in a safe, well-ventilated area for at least 24 hours. The adhesive needs this time to fully cure and become waterproof.
Step 3: Planting & Styling
-
Add drainage layers:
If your pot doesn’t have a hole, add a layer of gravel at the bottom, followed by succulent-specific potting soil. -
Plant the succulents:
Nestle a variety of succulents into the soil. Combine a taller, vertical variety (like the needle-like succulent shown) with lower, rosette-forming types to mimic the variety in your button collage. -
Top dress the soil:
Cover the exposed dirt with a layer of coarse, multi-colored sand or small polished pebbles. This mimics the earthy tones of the metal buttons. -
Add nature’s buttons:
Finish the look by placing two or three small, textured seashells on top of the soil. Their ridges and shapes will visually echo the vintage buttons on the exterior.
Sliding Charms?
If vertical gravity defeats your glue, lay the pot on its side, cradled in a towel. Glue one section, let it dry for 20 mins, rotate, and repeat.
This customized pot now holds a dual garden of living plants and preserved history, ready for a sunny windowsill
Ink and Paint Details Sealed Over Glaze
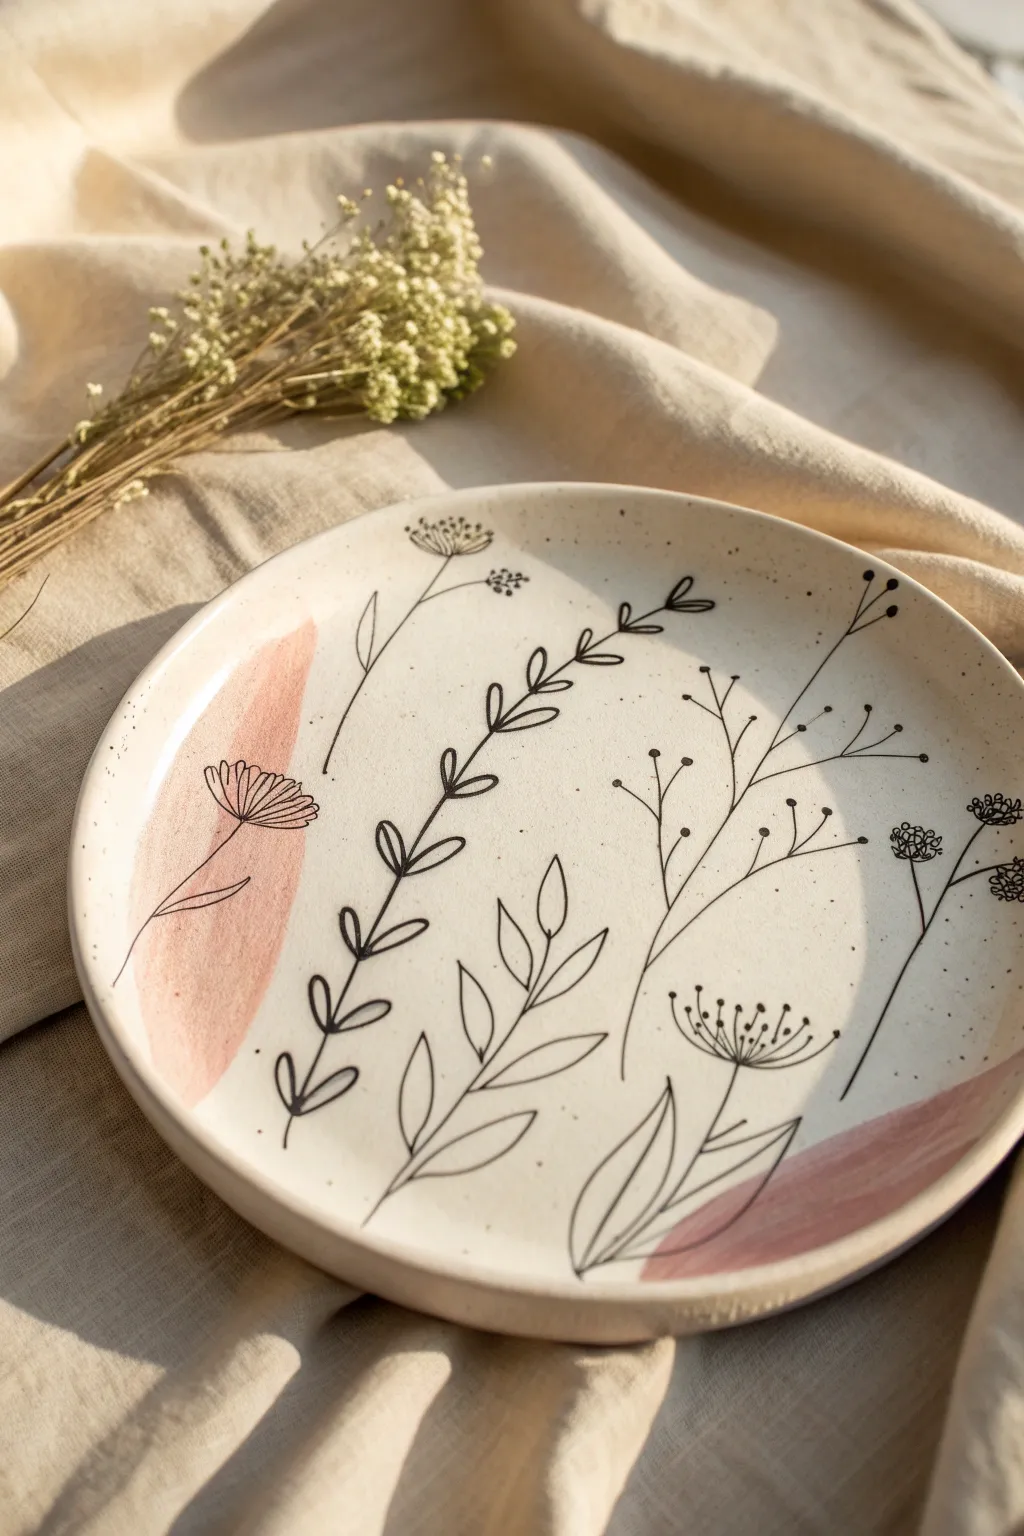
Transform a simple ceramic plate into a delicate piece of art by layering watercolor-style washes with crisp, illustrative line work. This mixed media technique allows you to add detailed drawings and soft color accents on top of an already glazed surface, preserving them permanently with a specialized sealant.
Step-by-Step Tutorial
Materials
- Bisque-fired ceramic plate (or a plain, matte-white glazed plate for a shortcut)
- Clear ceramic glaze (if starting from bisque)
- Pebeo Porcelaine 150 paint (Powder Pink or similar)
- Pebeo Porcelaine 150 fine tip marker (Black)
- Soft watercolor brush (round, size 6 or 8)
- Rubbing alcohol
- Lint-free cloth
- Kitchen oven (for curing Porcelaine 150) or Kiln (if doing traditional overglaze)
- Palette or small dish
- Water
Step 1: Preparation & Base Glaze
-
Prepare the surface:
If you are starting with a bisque-fired plate, apply a clear or white dipping glaze and fire it in the kiln according to the clay specifications. If you are upcycling a store-bought plate, ensure it is thoroughly clean. -
Clean with alcohol:
Wipe the entire surface of the fired, glazed plate with rubbing alcohol on a lint-free cloth. This removes invisible oils or fingerprints that could repel the mixed media paints.
Ink refusing to stick?
If the marker ink beads up or separates on the glazed surface, the plate is likely too glossy or oily. Wipe it again with rubbing alcohol, or lightly buff the area with super-fine steel wool for grip.
Step 2: Adding the Color Washes
-
Dilute the paint:
Squeeze a small amount of the pink porcelain paint onto your palette. Mix it with a few drops of water or the compatible thinner medium to create a translucent, watercolor-like consistency. -
Apply the first swoop:
Load your soft brush heavily with the diluted pink mixture. In a confident, sweeping motion, drag the brush near the left edge of the plate, creating a curved, organic shape. Let the brush naturally run out of pigment at the tail end. -
Add secondary accents:
Repeat the process on the opposite side of the plate, perhaps near the bottom right rim. Keep the strokes loose and imperfect to mimic the effortless look of the reference image. -
Dry completely:
Allow these pink washes to dry fully. This is crucial—if they are wet, the marker pen in the next step will bleed. I recommend waiting at least 24 hours to be safe, or using a hair dryer on a low, cool setting to speed it up.
Add metallic accents
For a luxe finish, trace over a few leaf veins or the plate rim with a gold porcelain outliner or Gold luster (if you have a kiln) after the black ink has dried but before baking.
Step 3: Illustrating the Botanicals
-
Prime the marker:
Shake the black porcelain marker well. Press the tip gently on a scrap piece of paper until the ink flows smoothly and black. -
Draw the central stem:
Start with the prominent vine in the center. Draw a curved line extending from the bottom center up towards the top right. Add small, paired leaves along the stem, keeping the shapes simple and almond-like. -
Add the large leaf:
near the bottom center, draw a larger, multi-leaf branch. Use continuous lines to draw the veins inside the leaves for that illustrative, sketchy quality. -
Sketch the dandelion puff:
On the left side, over the pink wash, draw a thin stem. Top it with a semi-circle and radiate lines outward to create a stylized dandelion or coneflower head. -
Create airy variety:
Fill the empty space on the right with taller, thinner wildflower sprigs. Use tiny dots at the ends of straight lines to create seed pods or buds, varying the height so the design feels balanced but natural. -
Add subtle speckling:
To mimic the speckled clay look, gently tap the tip of the marker straight down to create tiny random dots around the floral elements. Focus these near the rim and empty spaces.
Step 4: Curing and Sealing
-
Final drying time:
Let the black ink dry for another 24 hours. The surface must be completely moisture-free before heat setting. -
Bake to cure:
Place the plate in a *cold* kitchen oven. Set the temperature to 300°F (150°C). Once it hits temperature, bake for 35 minutes. -
Cool down slowly:
Turn the oven off and leave the plate inside until the oven is completely cool. Removing it while hot can cause thermal shock and crack your plate.
Now you have a beautifully illustrated plate that is durable enough for gentle hand washing to preserve your art
Lace-Up Rims Using Grommet-Style Holes
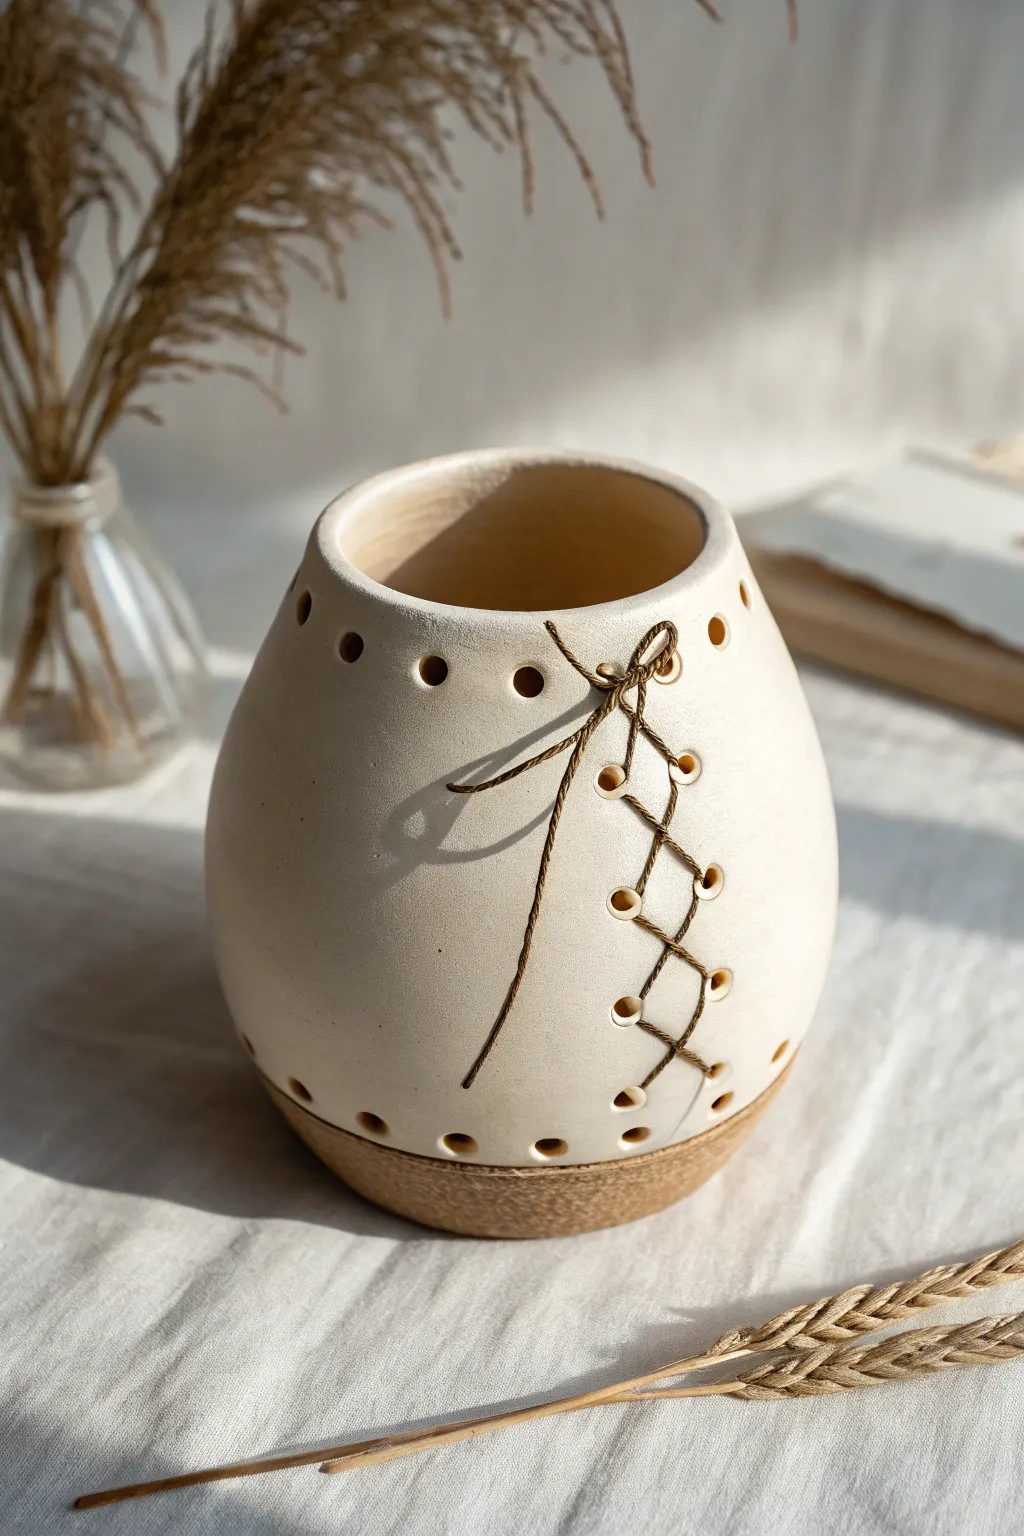
This project combines the rustic warmth of stoneware with tactile fiber art elements, featuring a charming corset-style lacing detail. The smooth, matte white glaze contrasts beautifully with the exposed clay base and natural hemp twine, creating a cozy piece perfect for holding dried grasses or tealights.
How-To Guide
Materials
- White stoneware clay or porcelain
- Pottery wheel (or coil/slab building tools)
- Hole punch tool (approx. 5-7mm diameter)
- Small drill bit (for cleaning holes)
- Matte white glaze
- Wax resist
- Natural hemp twine or jute cord
- Sanding sponge
- Pin tool or needle tool
- Rib tool (wood and rubber)
Step 1: Forming the Vessel
-
Throw the Body:
Center about 2-3 pounds of clay on your wheel. Open the clay and pull the walls to create a rounded, belly-shaped form that tapers slightly inward at the top rim. Aim for an even wall thickness of about 1/4 inch. -
Refine the Shape:
Using a flexible metal or rubber rib, smooth the exterior while pushing gently from the inside to create that nice, volumetric curve. Ensure the rim is rounded and smooth, not sharp. -
Trim the Base:
Once leather hard, trim the bottom of the pot. Instead of a traditional foot ring, I prefer trimming a flat or slightly concave bottom that transitions sharply into the textured lower band shown in the photo. -
Texture the Base:
While the pot is still leather hard, use a rasp or a textured rib on the bottom inch of the vessel to create a rough, grippy texture that mimics the look of woven fiber or heavy grog.
Shrinkage Check
Remember clay shrinks! Punch your holes 15-20% larger than your intended cord thickness. If the holes shrink too much, your twine won’t fit through after the final firing.
Step 2: Creating the Lace-Up Detail
-
Mark Hole Placements:
Using a needle tool, lightly mark two vertical parallel lines about 1.5 inches apart where you want the lacing to go. Mark spots for pairs of holes down these lines, spacing them evenly (about 1 inch apart). Also mark a decorative ring of holes around the upper rim and just above the textured base. -
Punch the Holes:
Use a specialized circular hole cutter or a drinking straw to punch clean holes through the leather-hard clay at your marked points. Support the wall from the inside with your hand to prevent warping. -
Clean and Refine:
Smooth around each hole with a damp sponge or fingertip. It is crucial to remove any burrs or sharp edges now, as they will snag your cord later. -
Bisque Fire:
Allow the piece to dry completely, ensuring it dries slowly to prevent cracking around the holes. Bisque fire to Cone 04 (or your clay body’s specifications).
Glaze Clogging?
If glaze fuses inside a hole despite waxing, use a diamond-grit bead reamer tool under running water to gently grind the opening clear without cracking the pot.
Step 3: Glazing and Finishing
-
Wax Resist Application:
Apply wax resist to the textured bottom section of the pot. Carefully paint wax inside the punched holes as well; this prevents glaze from clogging them. -
Glaze Application:
Dip or pour a matte white glaze over the entire piece. The wax will keep the bottom texture raw and exposed. If any glaze gets into the holes, clean it out immediately with a small twist drill bit or damp brush. -
Glaze Firing:
Fire the piece to maturity (Cone 5/6 for stoneware). Make sure the piece is stable on the kiln shelf. -
Prepare the Cord:
Cut a long length of hemp twine or jute cord. To make lacing easier, you can dip the ends in a little wax or glue to create an impromptu aglet (shoelace tip). -
Lace the Corset:
Start from the bottom pair of vertical holes. Thread the twine through from the inside out, crossing over to the opposite side as you move upward, mimicking a shoe-lacing pattern. -
Tie the Bow:
Once you reach the top pair of lacing holes, pull the cord snug but not so tight that it puts tension on the ceramic. Tie a simple bow and let the ends drape naturally.
Place your finished vessel in a spot with good natural light to highlight the texture contrast between the smooth glaze and the rustic twine
Shadow-Extension Displays With Painted Backdrops
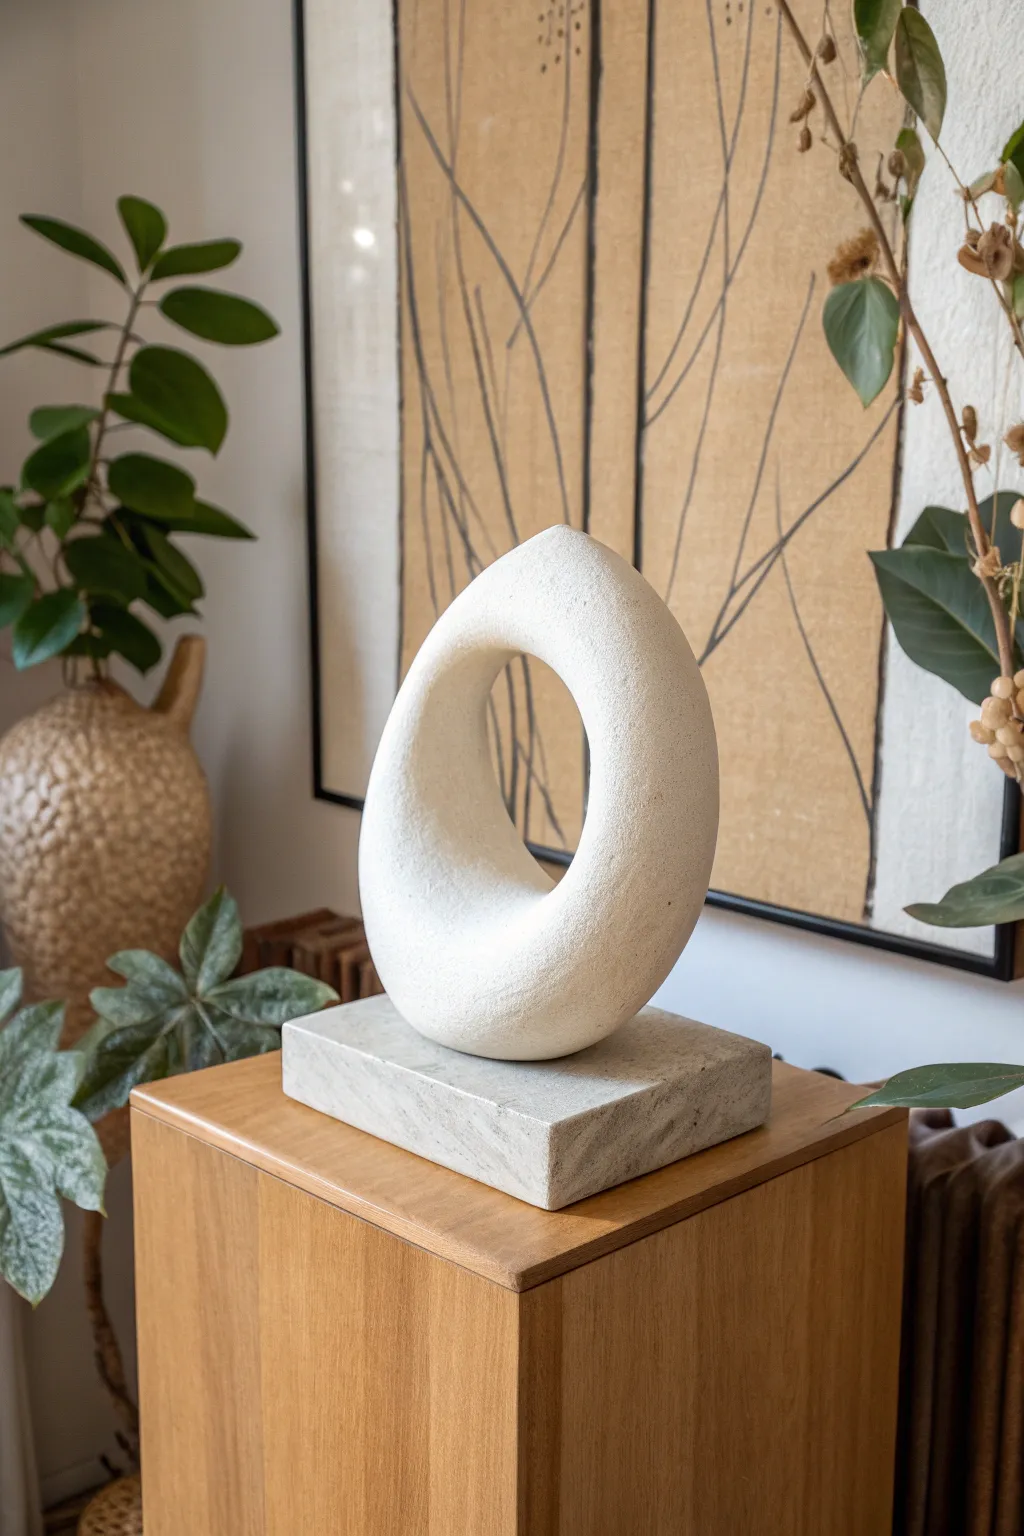
Embrace the beauty of negative space with this minimalist abstract sculpture that marries organic curves with a raw, earthy texture. Its roughly hewn surface and serene, looping form make it a perfect centerpiece for a calming, Japandi-inspired interior.
Step-by-Step Guide
Materials
- Air-dry clay (stone or white color)
- Aluminum foil
- Masking tape
- Heavy cardboard or armature wire for core support
- Rectangular wooden block or stone slab for the base
- Acrylic coarse texture gel or sandy texture paste
- White gesso or chalk paint (warm white/cream)
- Fine grit sandpaper
- Epoxy adhesive
- Sponge or stiff bristle brush
- Sculpting tools
Step 1: Armature Construction
-
Plan the shape:
Begin by sketching your ideal teardrop or ovoid shape on a piece of paper to determine the scale. Aim for a height of about 10-12 inches for a substantial tabletop piece. -
Build the core:
Crumple aluminum foil into a long, thick snake. Bend this foil snake into your desired loop shape, ensuring the bottom is slightly flatter where it will attach to the base. -
Reinforce the form:
Wrap the foil tightly with masking tape. This compresses the air pockets and creates a firmer ‘skin’ for the clay to grip onto, preventing the foil from springing back out of shape. -
Check stability:
Stand the armature up on your work surface. If it wobbles significantly, add more bulk to the bottom of the loop using extra foil and tape until it feels balanced.
Stone Effect Secret
Mix dried coffee grounds or fine sand into your gesso or paint. This cheap hack creates an incredibly convincing raw stone texture.
Step 2: Clay Sculpting
-
Condition the clay:
Take your air-dry clay and knead it thoroughly until it is warm and pliable. This prevents cracking later on. -
Apply the initial layer:
Flatten chunks of clay into pancakes and drape them over your armature. Press them firmly into the texture of the masking tape. -
Seal the seams:
As you add more clay, wet your fingers slightly and smooth the seams where pieces join. You want a unified surface before you start detailing. -
Refine the curve:
If I notice a lumpy area, I sometimes use a kidney rib tool to scrape and smooth the curve, ensuring the transition from thick to thin is graceful. -
Emphasize the point:
Gently pinch and mold the top of the loop to create a subtle, soft peak. It shouldn’t be sharp, but rather a gentle culmination of the upward sweep. -
Allow to dry:
Let the sculpture dry completely. This can take 24-48 hours depending on humidity. Rotate it occasionally so all sides get airflow.
Step 3: Texturing and Finishing
-
Sand imperfections:
Once bone dry, use fine-grit sandpaper to remove any sharp ridges or fingerprints. Don’t make it perfectly smooth; we want an organic feel. -
Create the stone texture:
Mix a coarse texture gel or sandy paste with a small amount of warm white acrylic paint. It should look like thick oatmeal. -
Apply the texture:
Stipple this mixture onto the sculpture using a sponge or stiff bristle brush. Dab it on rather than brushing to create a pitted, limestone-like surface. -
Build depth:
Let the first coat dry, then apply a second, lighter coat of just the white paint on the highest points to highlight the texture. -
Prepare the base:
If you are using a wooden block, consider painting it a faux-stone grey or sealing it with a matte varnish. If using a real stone tile, wipe it clean of dust. -
Mount the sculpture:
Mix a two-part epoxy adhesive. Apply a generous amount to the flat bottom of your sculpture and press it firmly onto the center of your base. -
Secure and cure:
Hold it in place for a few minutes until the bond grabs, then let it cure undisturbed according to the glue manufacturer’s instructions. -
Final touch-ups:
Check the seam where the sculpture meets the base. If visible, dab a tiny bit of texture paste there to blend the transition seamlessly.
Color Wash Depth
After the white coat dries, apply a very watery wash of beige paint, then immediately wipe it off. Ideally, pigment remains only in the pits.
Place your finished sculpture near a window where the changing light can play across its textured surface throughout the day