Whenever you want something sweet, quick, and totally doable, easy cute clay projects are my go-to. Think tiny shapes, simple faces, and that instant happy feeling when a mini character pops to life in your hands.
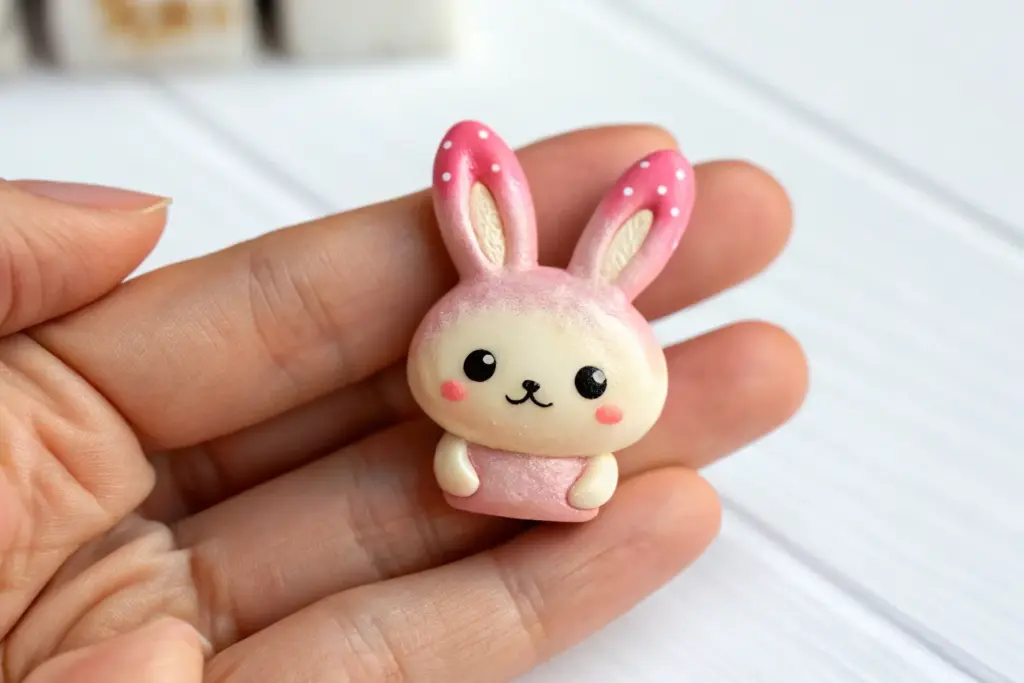
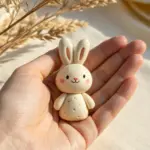
Chibi Bunny Mini Figurines
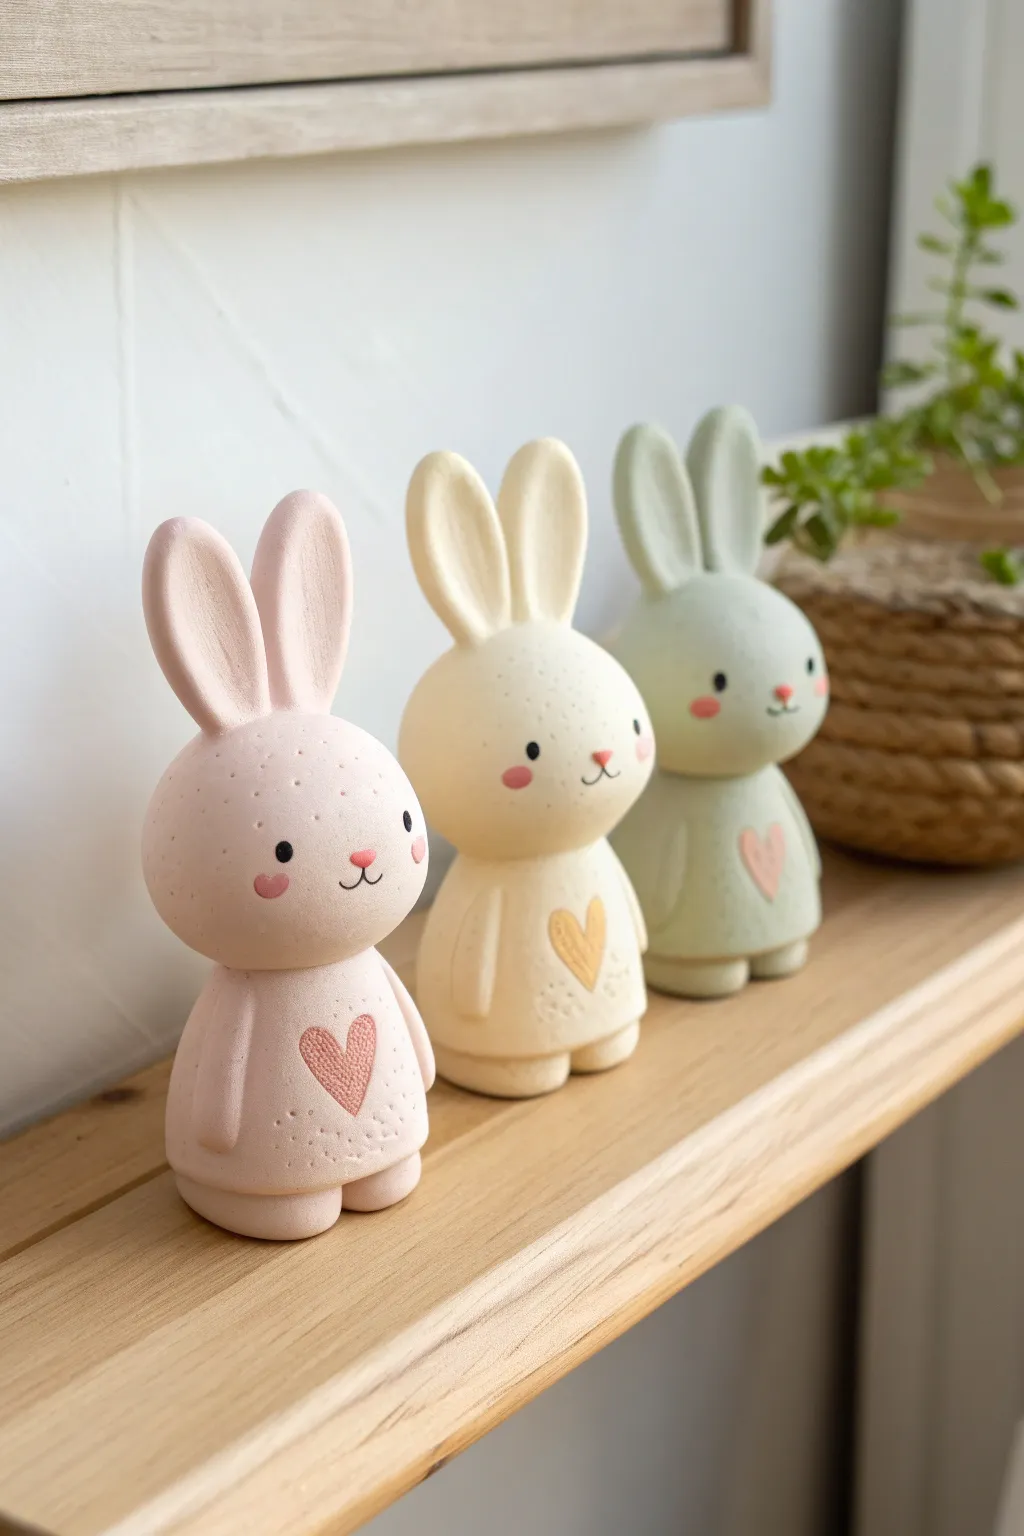
These adorable, chubby bunny figurines bring a soft touch of spring to any shelf with their matte pastel finish and sweet heart details. Their simple, rounded shapes make them perfect for beginners, while the speckled texture adds a professional, ceramic-like quality.
Step-by-Step Guide
Materials
- Polymer clay (white, pink, pale yellow, mint green)
- Acrylic rolling pin
- Ball stylus tools (various sizes)
- Needle tool or toothpick
- Small heart-shaped cutter (optional) or craft knife
- Black acrylic paint
- Pink acrylic paint or soft pastel chalk
- Fine detail paintbrush
- Toothbrush or stipple sponge (for texturing)
- Baking sheet and parade paper (if using polymer clay)
- Matte varnish (optional)
Step 1: Shaping the Bodies
-
Mix your colors:
Start by conditioning your white clay. Divide it into three portions. Keep one white (or mix very lightly with yellow for cream), and mix the others with tiny amounts of red and green clay to achieve soft, pastel marshmallow tones like the ones shown. -
Form the head:
Roll a smooth sphere of clay about the size of a golf ball for the head. Slightly flatten the bottom so it will sit securely on the neck area later. -
Create the body:
Roll a slightly larger cylinder shape for the body. Taper it gently towards the top so it looks a bit like a sturdy gumdrop. Press the rounded top flat so it can support the head. -
Attach head to body:
Press the head firmly onto the body. I like to insert a small piece of toothpick or wire between the two pieces to act as an internal armature for extra stability. -
Shape the feet:
Roll two small balls of matching clay and flatten them into thick discs. Place these under the body, spaced slightly apart, to form the little feet. -
Add the arms:
Create two small sausage shapes for the arms. Attach them vertically to the sides of the body, blending the top seam slightly into the shoulder area so they look seamless.
Clay Splitting?
If you see cracks while shaping, your clay might be too dry. Add a drop of clay softener or baby oil and knead thoroughly until it’s pliable again.
Step 2: Ears and Details
-
Form the ears:
Roll two medium-sized logs of clay. Flatten them gently and taper the ends to create the long, rounded bunny ears. They should be quite thick and substantial. -
Attach the ears:
Place the ears on top of the head. Use a blending tool or your finger to smooth the clay where the ears meet the skull so there is no visible separation line. -
Create the heart impression:
On the tummy, use a small heart cutter to gently impress a shape, or carefully carve a shallow heart outline with a needle tool. You can fill this indentation later with paint or a differently colored piece of clay. -
Add texture:
Before baking, gently tap the entire surface of the bunny with an old toothbrush or a stipple sponge. This gives that lovely porous, stone-like texture seen in the photo. -
Poke texture holes:
Use a needle tool to add random, deeper pinpricks smoothly across the forehead and body, enhancing the ceramic look.
Make it a Trio
Vary the heights slightly. Make one bunny taller with longer ears and another slightly shorter and rounder to give the group dynamic personality.
Step 3: Finishing Touches
-
Bake the clay:
Bake your figurines according to the manufacturer’s instructions on your specific package of clay. Let them cool completely before painting. -
Paint facial features:
Using a very fine brush and black paint, add two small dots for eyes wide apart. Paint a small ‘Y’ shape or curved anchor shape for the nose and mouth. -
Add blush:
Dip a Q-tip into pink pastel dust or thinned pink paint and gently dab it onto the cheeks to give them a rosy glow. -
Highlight the heart:
Paint the heart on the tummy with a contrasting pastel shade—pink for the cream bunny, or coral for the green bunny. You want a matte finish, not glossy.
Set your bunnies on a shelf or windowsill to enjoy their cheerful company


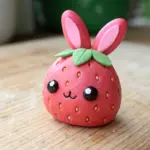
Smiling Strawberry Charms
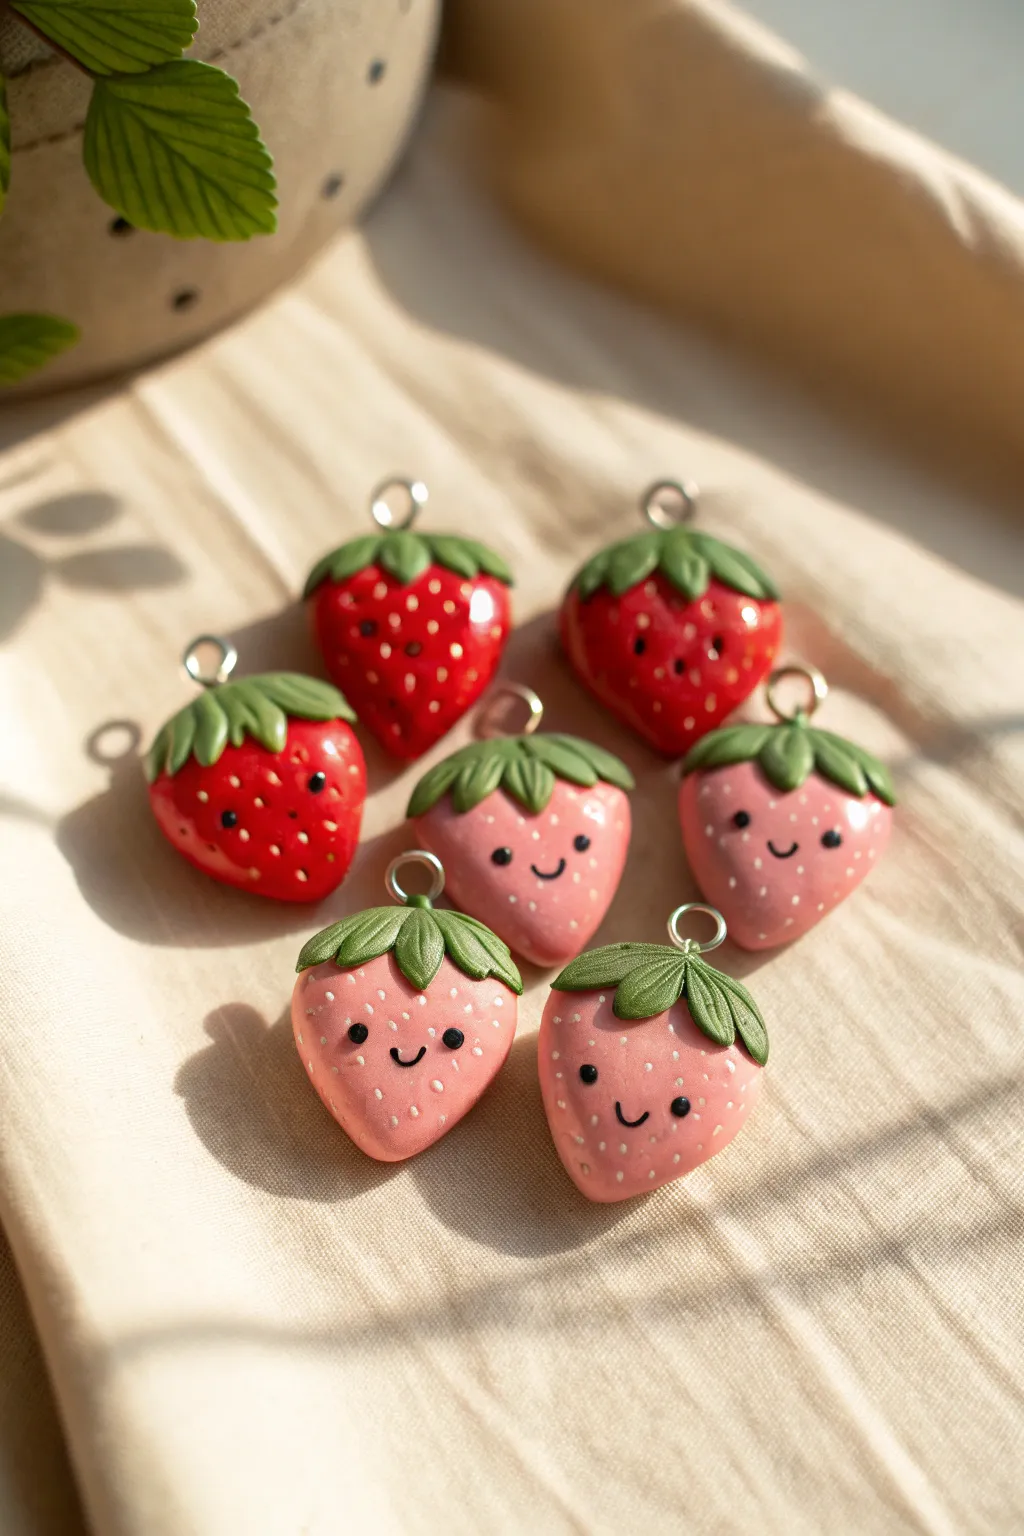
These adorable blushing berries are the perfect beginner project to brighten up your keychain or jewelry collection. With their cheerful expressions and customizable colors, these clay charms are as sweet to make as they are to look at.
Step-by-Step Tutorial
Materials
- Polymer clay (Bright Red, Light Pink, Leaf Green)
- Black acrylic paint or polymer clay (for eyes/mouth)
- White acrylic paint (for seed details)
- Liquid polymer clay (optional, for securing stems)
- Eye pins (silver or gold tone)
- Needle tool or toothpick
- Ball tool (small)
- Gloss glaze or polyurethane varnish
- Fine detail paintbrush
- Baking sheet and parchment paper
- Oven
Step 1: Shaping the Berries
-
Prepare the Clay:
Start by conditioning your red and pink clay until it is soft and pliable. Roll balls of clay approximately 1 inch in diameter, or adjust the size depending on how large you want your final charms to be. -
Form the Strawberry Shape:
Gently roll one end of the ball between your palms to taper it, creating a soft, rounded cone shape. Flatten the top slightly where the leaves will sit, but keep the overall form plump and rounded. -
Texture the Surface:
Using a needle tool or the tip of a toothpick, gently press small indentations all over the surface of the fruit to mimic seeds. Be careful not to press too deep; you just want surface texture. -
Smooth the Canvas:
Leave a small, smooth area in the center of the strawberry’s front face without seed textures. This blank space is where you will eventually paint the cute facial expression.
Juicy Finish Tip
For a super glossy, glass-like finish, use UV resin instead of varnish. Cure it under a UV lamp for 2 minutes to make your strawberries look like hard candy.
Step 2: Adding Leaves and Hardware
-
Create Leaf Segments:
Condition your green clay and roll out five to six tiny tear-drop shapes for each strawberry. Flatten them gently with your finger. -
Texture the Leaves:
Use your needle tool to score a central vein down the middle of each leaf. I like to add tiny diagonal lines radiating from the center vein for a more realistic leafy texture. -
Assemble the Calyx:
Arrange the leaves in a star pattern on top of the strawberry, pressing them gently so they curve down onto the fruit’s shoulders. -
Secure the Loop:
Insert a metal eye pin through the center of the green leaves and push it down into the body of the strawberry. If the clay is firm, add a dab of liquid clay to the pin’s shaft for extra grip before inserting.
Wobbly Eye Pins?
If your metal eye pin pulls out after baking, remove it completely, add a drop of superglue to the hole, and reinsert the pin. It will hold permanently once dry.
Step 3: Baking and Detailing
-
Bake the Charms:
Place your strawberries on a baking sheet lined with parchment paper. Bake according to your specific polymer clay manufacturer’s instructions (usually around 275°F/130°C for 15-30 minutes). -
Cool Down:
Allow the charms to cool completely before handling. Painting on warm clay can ruin your brushes and make the paint dry clumpily. -
Paint the Face:
Dip a fine detail brush or a ball tool into black acrylic paint. Dot two small eyes in the smooth area you reserved earlier, and paint a tiny ‘U’ shape for a smile between them. -
Highlight the Seeds:
For the seed indentations, use a very fine brush with white paint (for pink berries) or a creamy yellow (for red berries) to fill the tiny holes. Wipe away excess surface paint quickly with a damp cloth if it spills over. -
Add Eye Sparkles:
Once the black eye paint is dry, add a microscopic dot of white paint to the upper corner of each eye to bring the expression to life. -
Seal the Charm:
Finish by coating the entire strawberry with a gloss glaze. This protects the paint and gives the fruit a juicy, shiny appearance.
Now you can string these charming berries onto a necklace or keychain to carry a little sweetness wherever you go


Blob Bear Desk Buddy
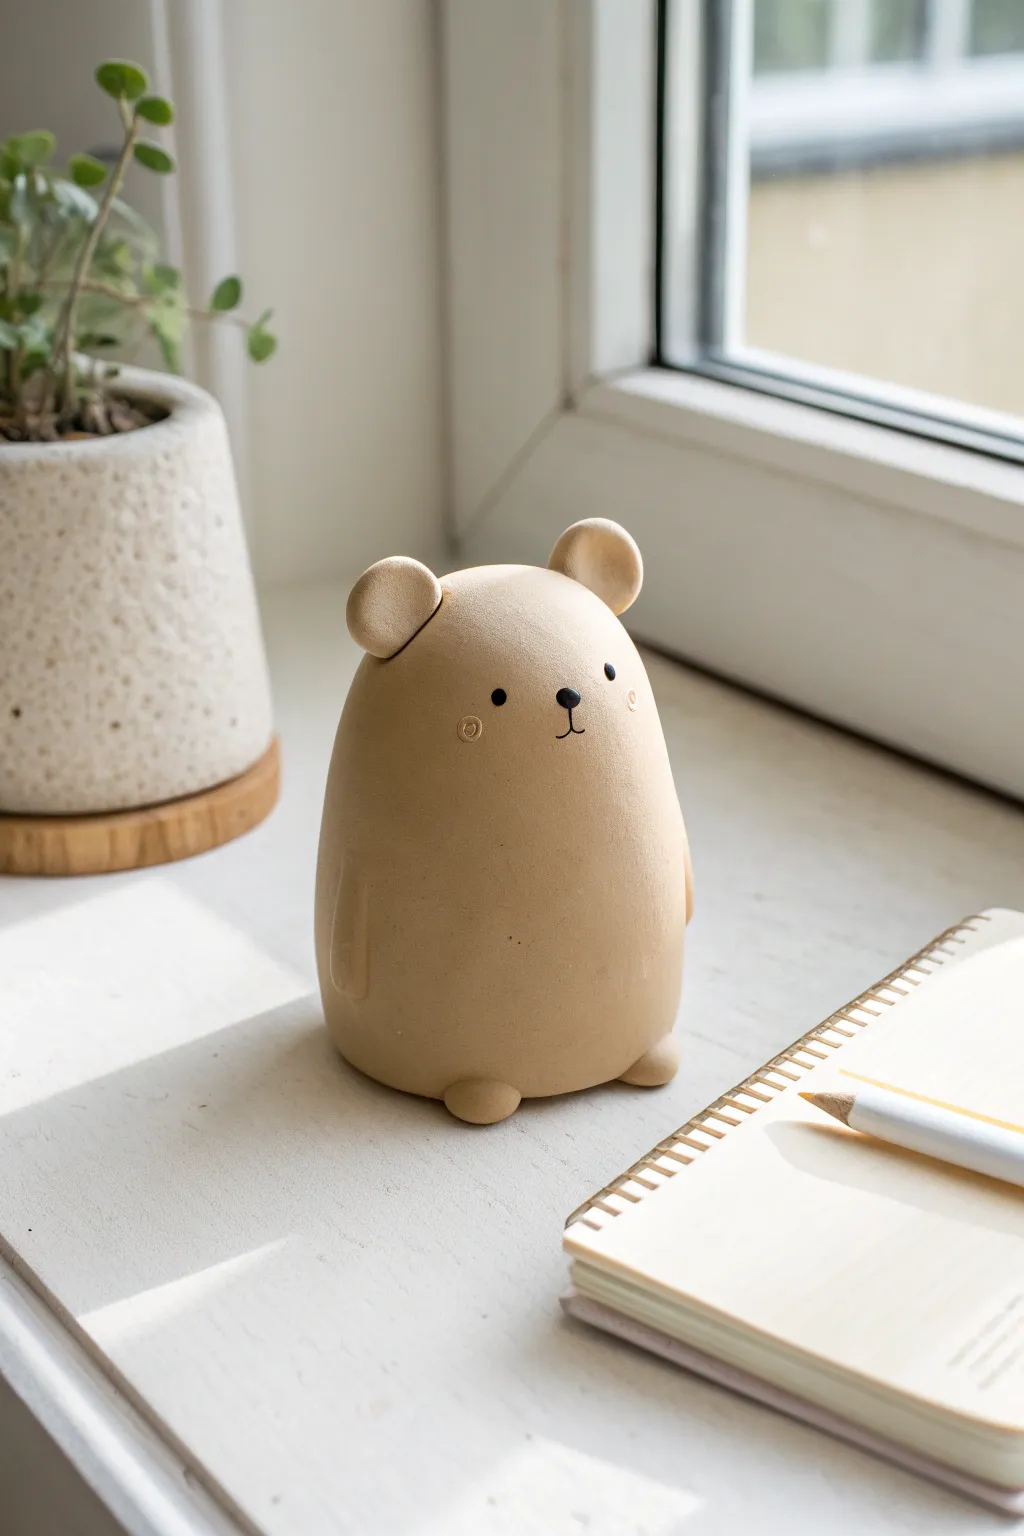
This minimalist bear figure combines a smooth, pear-shaped silhouette with adorable, tiny features for the perfect desk companion. Its gentle beige tone and simple expression give it a modern, calming aesthetic that fits beautifully on any windowsill or workspace.
Step-by-Step Guide
Materials
- Polymer clay or air-dry clay (beige/sand color)
- Black acrylic paint
- Fine detail paintbrush or dotting tool
- Clay sculpting tools (smoother, needle tool)
- Water (if using air-dry clay)
- Matte varnish (optional)
Step 1: Shaping the Base
-
Condition the clay:
Start by warming up a large handful of beige clay in your hands. Knead it thoroughly until it is soft, pliable, and free of cracks. -
Form the main body:
Roll the clay into a smooth ball first, then gently roll it back and forth on your work surface to elongate it slightly. You want a shape that is wider at the bottom and slightly narrower at the top, resembling a sturdy pear or a gumdrop. -
Flatten the base:
Tap the bottom of your pear shape firmly against the table. This creates a flat surface so your bear will stand upright without wobbling. -
Smooth the surface:
Scan the body for any fingerprints or seams. If you are using air-dry clay, use a tiny bit of water on your finger to buff these out; for polymer clay, gentle rubbing usually does the trick.
Cracks Appearing?
If air-dry clay cracks while drying, mix a tiny bit of fresh clay with water to make a paste (slip) and fill in the gaps, then sand smooth once dry.
Step 2: Adding Features
-
Create the ears:
Pinch off two small, pea-sized balls of clay. Flatten them slightly into thick discs. -
Attach the ears:
Place the discs on top of the head, spacing them apart evenly. Blend the bottom seam of the ear into the head using a sculpting tool so they look like they grew naturally from the body, rather than just being stuck on. -
Form the feet:
Make two more small balls of clay, slightly smaller than the ears. Place these at the very bottom front of the body. -
Secure the feet:
Press the feet gently upward into the body so they flatten slightly on the bottom but remain rounded on top. Smooth the connection points on the underside. -
Add the arms:
Roll two thin, small sausages of clay for the arms. Press these vertically into the sides of the body, blending them so they look almost flush with the bear’s silhouette, barely protruding. -
Final smooth:
Give the entire piece one last check for roughness. I find that lightly brushing the clay with a soft, dry paintbrush can help remove tiny crumbs before drying.
Symmetry Hack
Look at your bear in a mirror while sculpting. The reflection instantly reveals lopsided ears or uneven shoulders that your eyes might miss directly.
Step 3: Finishing Touches
-
Dry or bake:
If using polymer clay, bake according to the package instructions (usually around 275°F/135°C for 15-30 minutes depending on thickness). If using air-dry clay, leave it in a dry spot for 24-48 hours. -
Paint the eyes:
Once fully hardened and cool, use a dotting tool or the back of a paintbrush dipped in black acrylic paint to stamp two small, round eyes. -
Paint the nose and mouth:
Using your finest brush, paint a tiny inverted triangle or oval for the nose between the eyes. Draw a thin, vertical line down from the nose, splitting into a distinctive ‘W’ or anchor shape for the mouth. -
Score the cheeks:
Instead of painting cheeks, use a needle tool to gently scratch tiny spirals or circles into the cheek area for a subtle, textured blush effect. -
Seal the piece:
Protect your paint job with a coat of matte varnish if you want to prevent scratches.
Place your little bear on a window ledge where the light can catch its smooth curves


Frog Toothbrush Holder
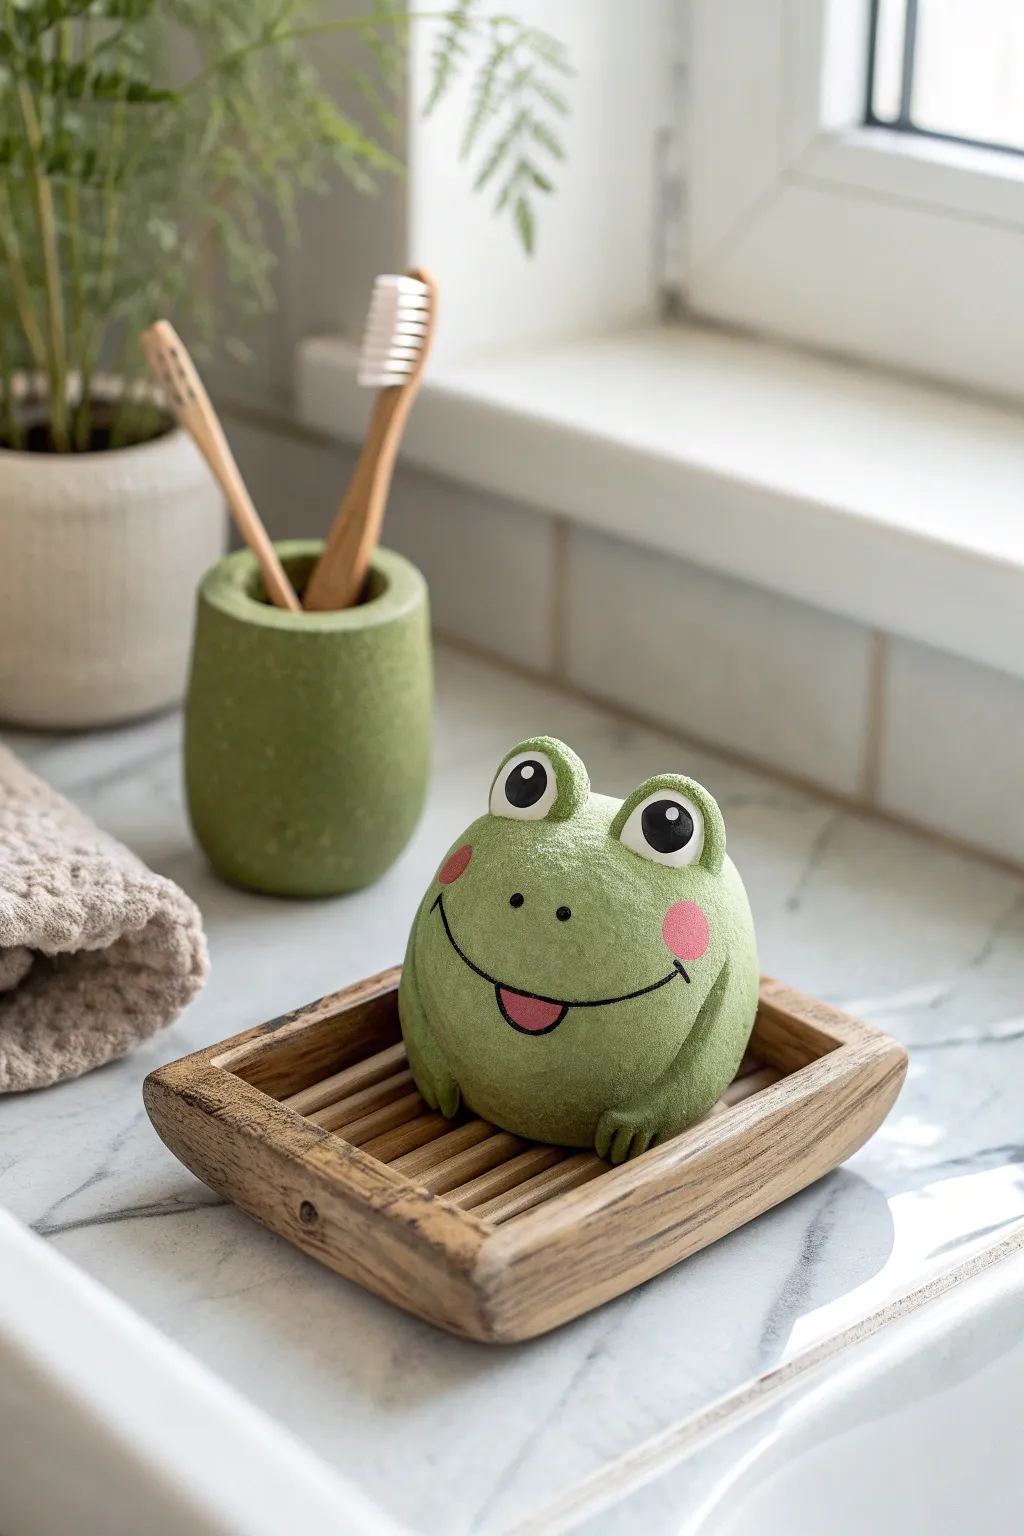
Bring a touch of cheer to your bathroom counter with this adorable little frog, sculpted from clay with a delightful textured finish. This project features big, expressive eyes and a sweet, simple smile that creates a charming companion for your daily routine.
Detailed Instructions
Materials
- Air-dry clay (white or light grey)
- Acrylic paints: sage green, white, black, pink, darker pink
- Paintbrushes: medium flat brush, fine detail brush
- Texturing tool: stiff bristle brush or a ball of aluminum foil
- Water cup
- Aluminum foil (for armature core)
- Small rolling pin
- Modeling tools or a toothpick
- Matte varnish or sealant
Step 1: Shaping the Body
-
Create the core:
Crumple a piece of aluminum foil into a tight, slightly flattened sphere about the size of a tennis ball. This saves clay and keeps the figurine lightweight. -
Cover with clay:
Roll out a thick sheet of air-dry clay and wrap it completely around your foil ball. Smooth the seams with a little water until you have a seamless, round pebble shape. -
Form the base:
Gently tap the bottom of the sphere against your work surface to create a flat base so the frog sits securely. -
Add texture:
While the clay is still wet, take a stiff bristle brush or a crumpled ball of foil and gently tap it all over the surface. This creates the stone-like texture visible in the photo.
Step 2: Adding Features
-
Make the eyes:
Roll two smaller balls of clay for the eye sockets. Attach them to the top of the head using a score-and-slip method (scratching the surfaces and adding a bit of water), blending the bottom edges into the head. -
Add the feet:
Create two small oval shapes for the feet. Press them onto the bottom front of the body on either side. -
Detail the toes:
Use a modeling tool or a toothpick to press three indentations into each foot to define the toes. -
Sculpt the smile:
Use your needle tool to carefully carve a wide, curved line for the mouth. Make it nice and broad to give him that happy expression. -
Refine the texture:
Go back over any areas where your modeling might have smoothed out the texture, tapping gently to ensure the finish is uniform. -
Let it dry:
Allow the sculpture to dry completely. This usually takes 24-48 hours depending on the thickness of your clay.
Stone Effect
Mix a tiny bit of baking soda into your green paint. It enhances the granular, stone-like texture created during the sculpting phase.
Step 3: Painting and Finishing
-
Base coat:
Paint the entire body with a sage green acrylic paint. You might need two coats for full opacity. -
Paint the eyes:
Using a smaller brush, paint large white circles inside the raised eye sockets. -
Add pupils:
Paint bold black circles inside the white areas, leaving them slightly cross-eyed for a cute look. Add a tiny white dot in each pupil for a highlight. -
Rosy cheeks:
Mix a soft pink color and paint two circular blush spots on the cheeks. -
Define the mouth:
Use a fine liner brush and black paint to trace the carved smile line. -
Paint the tongue:
Paint a small, semi-circle in a darker pink or red just below the black smile line to look like a tongue sticking out. -
Add nostrils:
Dot two small black points between the eyes for the nose. -
Seal the work:
I like to finish with a coat of matte varnish to protect the paint and preserve that natural, stone-like appearance.
Cracking Clay?
If small cracks appear as it dries, mix a slurry of clay and water (slip) and paint it into the cracks, then smooth over.
Place your little finished friend on a bathroom shelf or soap dish to enjoy every day

The Complete Guide to Pottery Troubleshooting
Uncover the most common ceramic mistakes—from cracking clay to failed glazes—and learn how to fix them fast.
Tiny Cat Ring Dish
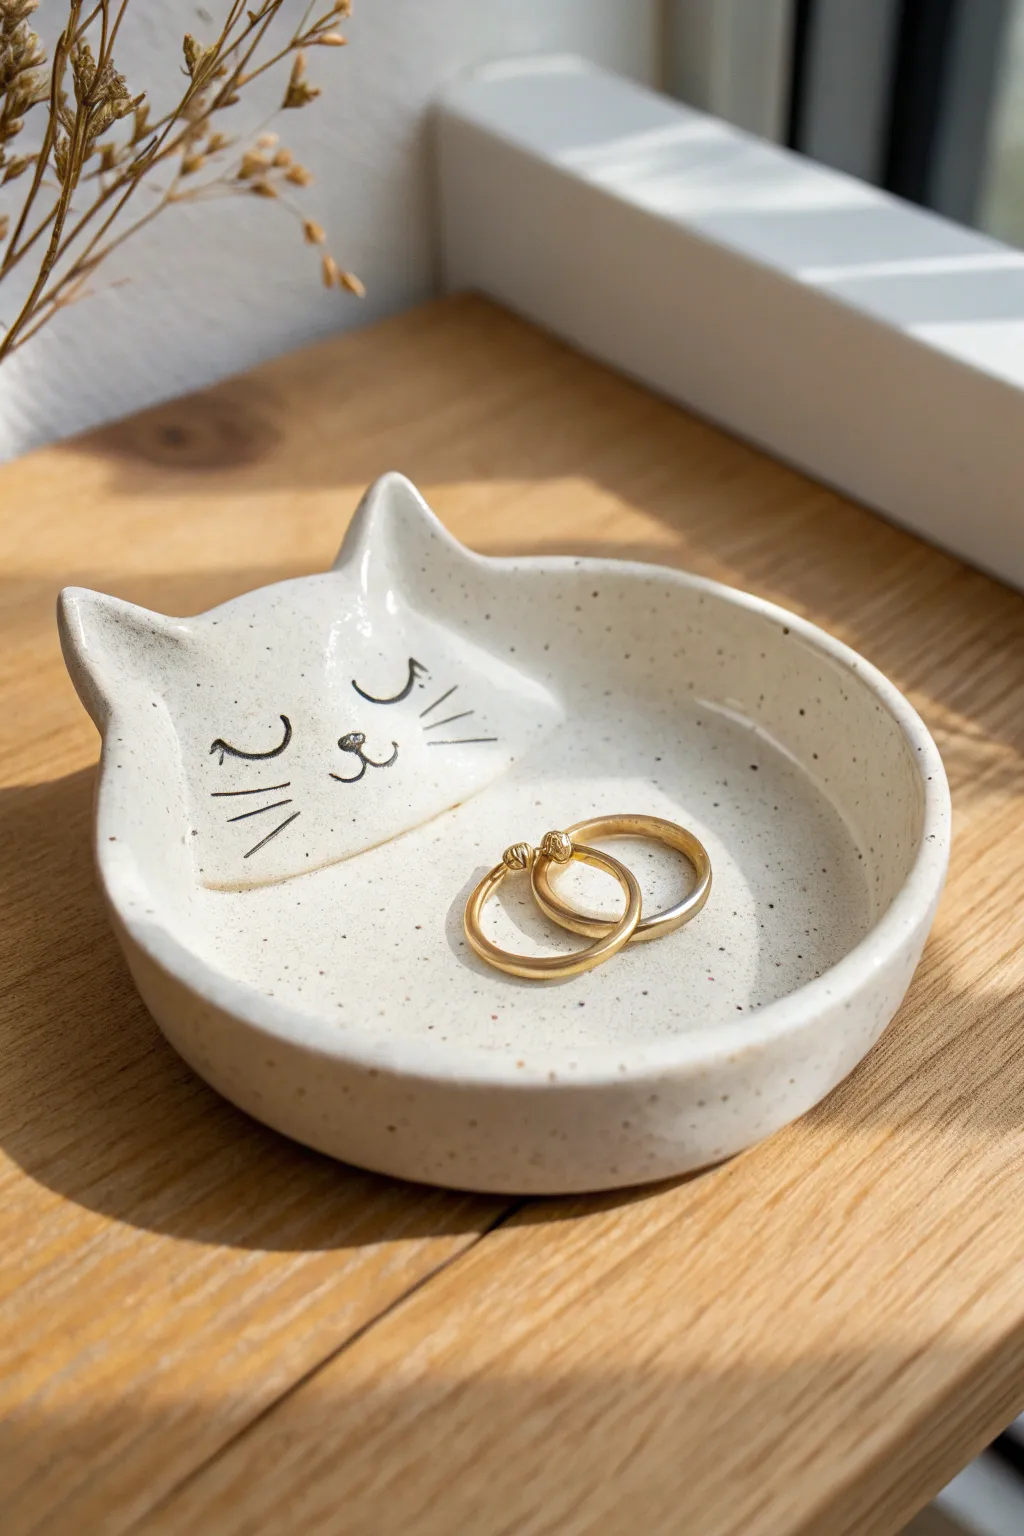
This adorable ring dish features a sleeping kitty face sculpted right into the rim, creating a sweet spot to safeguard your favorite jewelry. With its milky white glaze and subtle speckles, it looks like a high-end ceramic piece you can easily make at home.
Step-by-Step Guide
Materials
- Air-dry clay (white) or polymer clay
- Rolling pin
- Round cookie cutter or bowl (approx. 3-4 inch diameter)
- Black acrylic paint
- Very fine detail paintbrush
- Glossy varnish or glaze (food safe if using polymer clay)
- Bowl of water and sponge (for smoothing)
- Clay knife or craft blade
- Sandpaper (fine grit)
- Old toothbrush (optional for speckling)
Step 1: Shaping the Dish
-
Roll the base:
Begin by taking a ball of white clay and kneading it until soft and pliable. Use your rolling pin to flatten it into an even slab, about 1/4 inch thick. Aim for a consistent thickness so it dries evenly. -
Cut the circle:
Press your round cookie cutter or a small bowl into the clay slab to cut out a perfect circle. Remove the excess clay from around the edges. -
Form the ears:
Take two small scraps of the leftover clay and shape them into triangles. Gently attach these to the top edge of your circle to form the cat’s ears. Blend the seams thoroughly with a little water or slip so they don’t pop off later. -
Raise the rim:
Gently pinch and lift the edges of the circle all the way around to create a raised rim. You want to create a shallow bowl shape. -
Sculpt the face area:
The unique part of this dish is the raised face. Add a small, flat semi-circle of clay inside the bowl, right below the ears. Smooth the edges down so it looks like a subtle raised platform where the face will go. -
Refine the shape:
Dip your finger in water and run it along the rim and the join lines to smooth everything out. Ensure the ears are perky and the transition from the ‘face platform’ to the rest of the dish is gentle. -
Drying time:
Place your creation in a safe spot to dry. If using air-dry clay, this might take 24-48 hours. I find flipping it over halfway through helps the bottom dry completely.
Fixing Cracks
If you see hairline cracks as the clay dries, mix a tiny bit of fresh clay with water to make a paste (slip). Fill the cracks, smooth over, and let dry again.
Step 2: Painting & Finishing
-
Sand until smooth:
Once bone dry, take fine-grit sandpaper and gently sand away any rough fingerprints or sharp edges on the rim. Wipe away the dust with a barely damp cloth. -
Add speckles:
To mimic the stone-like ceramic look, dilute a tiny drop of black or brown paint with water. Dip an old toothbrush in it and run your thumb over the bristles to flick tiny speckles onto the dish. Less is more here. -
Paint the features:
Using your finest detail brush and black acrylic paint, carefully draw two closed eyelids in a ‘U’ shape on the raised face section. -
Nose and mouth:
Paint a tiny upside-down triangle for the nose centered between the eyes. Connect a small ‘w’ shape beneath it for the mouth. -
Whiskers:
Add three short, thin lines on each cheek for whiskers. Keep your hand steady and use very light pressure for delicate lines. -
Glaze it:
Once the paint is fully dry, apply a coat of glossy varnish or glaze over the entire dish. This seals the clay and gives it that shiny ceramic finish. -
Final cure:
Let the varnish cure according to the manufacturer’s instructions before placing any jewelry inside.
Golden Touch
For a luxe variation, paint the rim of the dish or the tips of the cat’s ears with liquid gold leaf or metallic gold paint before varnishing.
Now you have a sweet little guardian for your rings on your nightstand
Kawaii Cloud Magnets
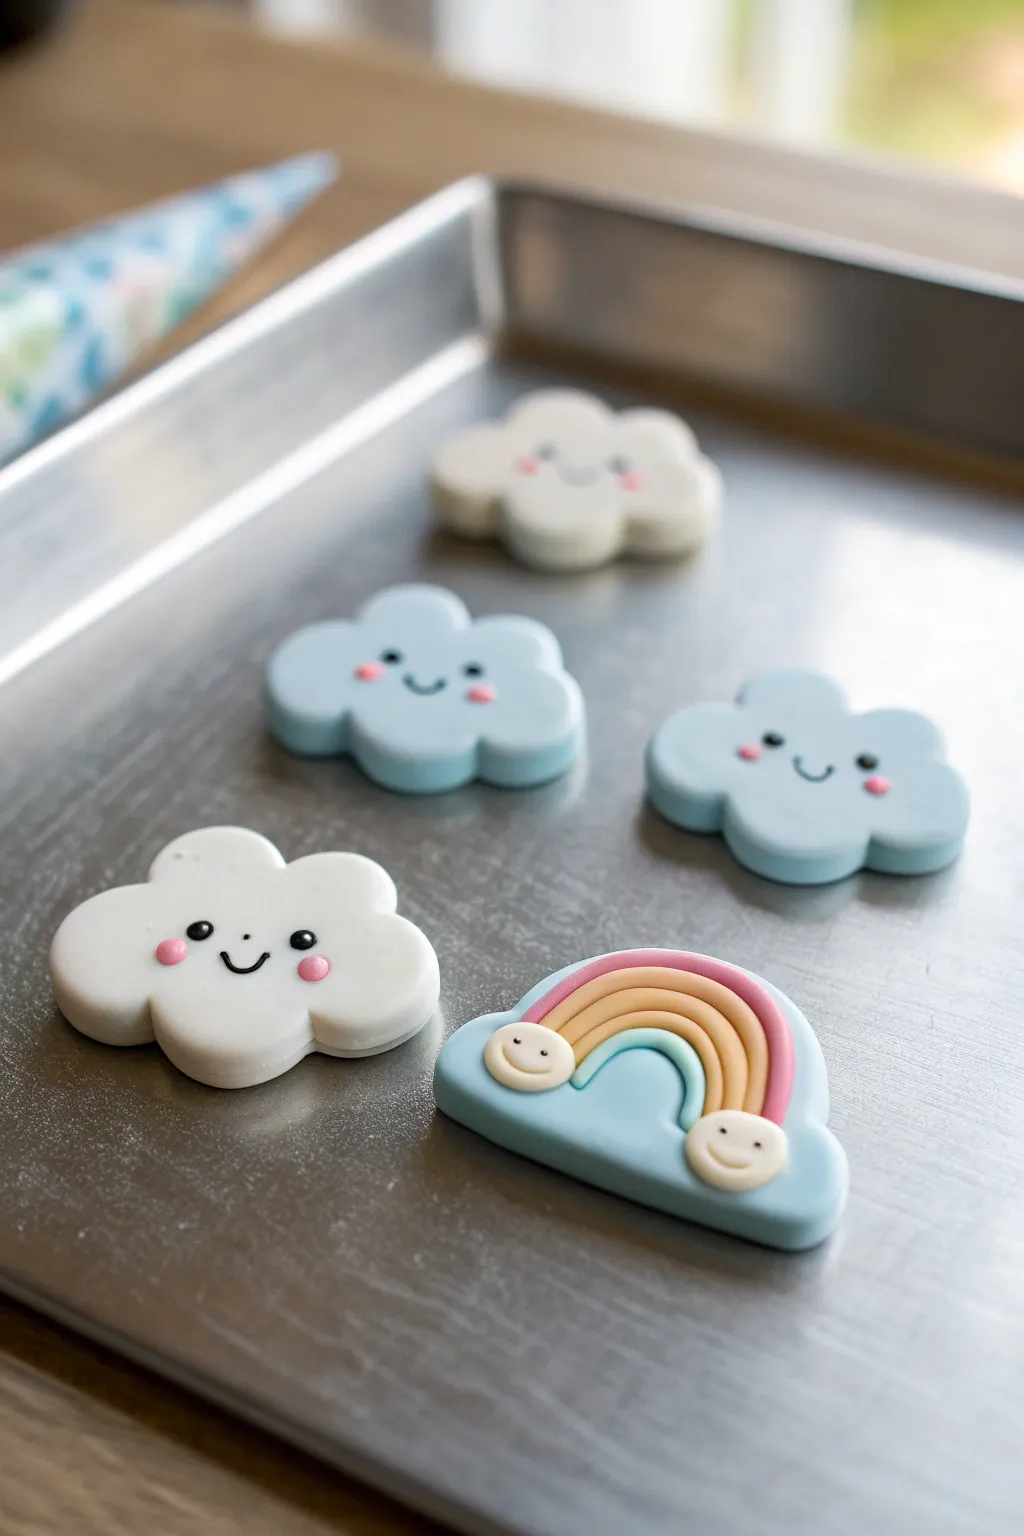
Bring a little sunshine to your fridge with these adorable smiling cloud and rainbow magnets. Their smooth, matte finish and charming rosy cheeks make for a sweet addition to any magnetic surface.
Step-by-Step Tutorial
Materials
- White polymer clay or air-dry clay
- Light blue polymer clay or air-dry clay
- Pink polymer clay
- Yellow polymer clay
- Small amount of black clay or black acrylic paint
- Cloud-shaped cookie cutters (small)
- Small rolling pin
- Needle tool or toothpick
- Dotting tool or ball stylus
- Strong craft glue
- Small round magnets
- Glaze (optional, for a glossy look)
Step 1: Shaping the Base Clouds
-
Condition the clay:
Begin by kneading your white and light blue clay separately until they are soft, pliable, and free of cracks. -
Roll out the slab:
Using a small rolling pin, roll the clay out to a thickness of about 1/4 inch (6mm). You want them thick enough to be sturdy but not too heavy for the magnets. -
Cut the shapes:
Use your cloud-shaped cookie cutters to punch out several cloud shapes from both the white and blue clay slabs. Gently push them out of the cutter to avoid distorting the edges. -
Smooth the edges:
Run your finger lightly around the cut edges of each cloud to soften them. This gives the finished magnet that professional, rounded look rather than a sharp, cookie-cutter edge.
Step 2: Creating the Rainbow Magnet
-
Prepare the rainbow base:
I find it easiest to start with a shaped base, so cut out one more blue cloud shape. Gently stretch it horizontally just a bit to make it slightly wider to accommodate the rainbow arch. -
Roll tiny snakes:
Roll very thin coils (snakes) of pink, yellow, and white clay. Try to keep them even in thickness. -
Form the arch:
Curve the coils into arches and arrange them on the blue base, pressing gently so they adhere. Trim the excess clay at the bottom with your needle tool so they sit flush against the cloud shape. -
Add mini clouds:
Roll two small balls of white clay and flatten them slightly. Place one at each end of the rainbow arch to serve as the rainbow’s own little clouds.
Fixing Fingerprints
Before baking, brush the unbaked clay lightly with a little baby oil or cornstarch to smooth out any stubborn fingerprints.
Step 3: Adding the Kawaii Faces
-
Mark eye placement:
Before committing with black clay or paint, use a needle tool to lightly mark two dots where the eyes will go. Spacing them wide apart creates that classic cute look. -
Create the eyes:
Roll incredibly tiny balls of black clay and press them into the marked spots. Alternatively, if the pieces are too small to handle, you can paint these dots on after baking (or drying). -
Sculpt the smile:
Use a small, curved tool or the side of a straw to impress a tiny ‘u’ shape between the eyes for a smiling mouth. For the black outline look, roll a wispy thread of black clay and lay it into the indentation. -
Apply rosy cheeks:
Roll tiny balls of pink clay and flatten them into thin discs. Press these gently onto the clay just below and to the outside of the eyes.
Glittery Skies
Mix a pinch of fine iridescent glitter into your white clay before rolling it out for clouds that have a magical, subtle sparkle.
Step 4: Finishing Up
-
Bake or dry:
If using polymer clay, bake according to the package instructions (usually 275°F/135°C for 15-30 minutes). If using air-dry clay, leave them in a dry, safe spot for 24-48 hours. -
Attach the magnets:
Once the clouds are fully cool or dry, flip them over. Apply a dab of strong craft glue to the back and press a round magnet firmly into place. -
Let the glue set:
Allow the glue to cure completely before sticking your new creations to the fridge to ensure the magnets stay put.
Enjoy arranging your cheerful little weather system on your refrigerator or magnetic board


What Really Happens Inside the Kiln
Learn how time and temperature work together inside the kiln to transform clay into durable ceramic.
Mini Dino With Spikes
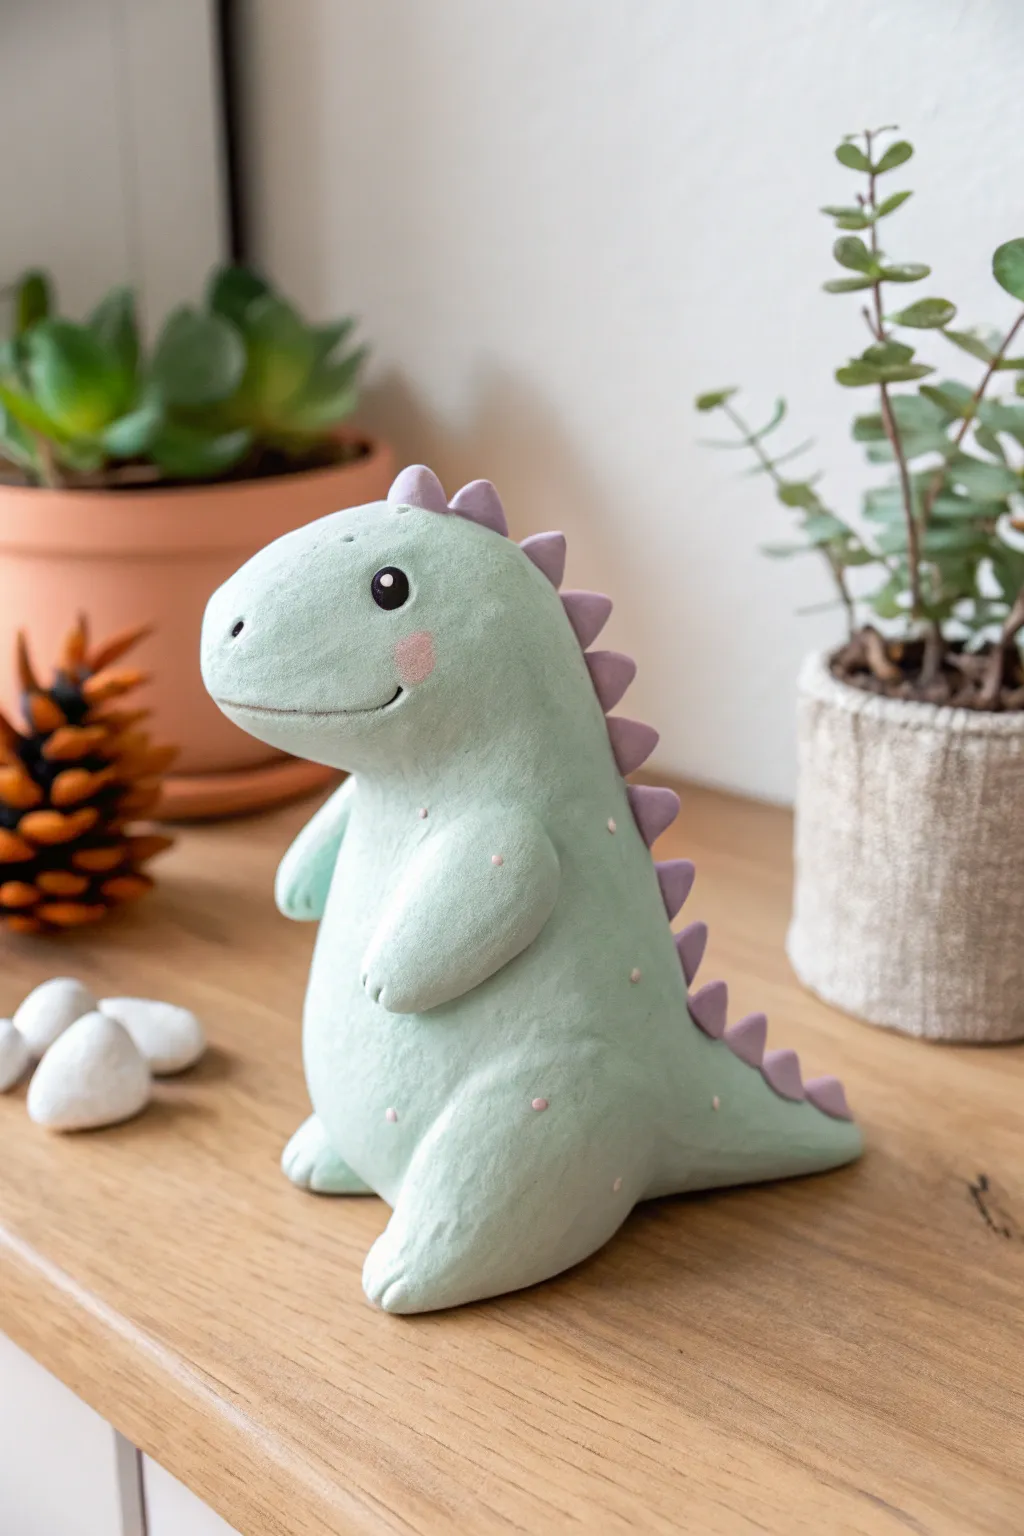
This adorable mini dinosaur brings a touch of whimsy to any desk or shelf with its soft pastel green body and gentle purple spikes. Its chubby shape and sweet expression make it a perfect beginner-friendly sculpting project that radiates charm.
Detailed Instructions
Materials
- Polymer clay (Pastel Green, Lavender/Light Purple, White, Black, Pink)
- Clay sculpting tools (needle tool, ball stylus)
- Rubbing alcohol and Q-tips (for smoothing)
- Small paintbrush
- Aluminum foil (for armature core)
- Acrylic rolling pin
- Baking sheet and parchment paper
- Oven (if using polymer clay)
Step 1: Forming the Body Frame
-
Create the core:
Start by scrunching a piece of aluminum foil into a pear shape, roughly 2-3 inches tall. This saves clay and keeps the figurine lightweight while helping it bake evenly. -
Prepare the green clay:
Condition your pastel green clay by kneading it until it’s soft and pliable. Roll it into a large ball, then flatten it into a thick sheet using your acrylic rolling pin. -
Cover the armature:
Wrap the green clay sheet around your foil pear. Gently smooth the seams with your thumbs until the foil is completely hidden and the surface is uniform. -
Shape the silhouette:
Mold the larger bottom part into a chubby tummy and the narrower top part into the head. Gently pull a bit of clay forward on the face to create a slight snout area.
Clean Clay Tip
Keep baby wipes or hand sanitizer nearby. Clean your hands thoroughly when switching between dark colors (like the black eyes) and light colors to avoid staining.
Step 2: Extremities and Details
-
Add the legs:
Roll two medium-sized balls of green clay for the legs. Flatten the bottoms against your work surface to create a stable base, then press and blend them onto the bottom sides of the body so he sits securely. -
Attach the arms:
Create two smaller tear-drop shapes for arms. Attach these to the upper chest area, blending the shoulder joint smoothly into the body while leaving the little rounded hands free. -
Sculpt the tail:
Roll a cone of green clay. Attach the wider end to the lower back of the dinosaur, blending the clay thoroughly so there is no visible seam. Curve the tail slightly to the side so it wraps around the body. -
Add toes:
Use a needle tool or small knife to gently press two or three indentations into the ends of the feet and hands to suggest toes. -
Smooth the surface:
Before adding details, I like to lightly brush the clay with a little rubbing alcohol or baby oil to remove any fingerprints and ensure a professional smooth finish.
Step 3: Face and Spikes
-
Create the spikes:
Roll out a small snake of lavender purple clay. Cut it into small, triangular segments. -
Attach the spikes:
Starting at the top of the head and working down to the tip of the tail, press the purple triangles onto the spine. Gently blend the base of each spike into the green body. -
Make the eyes:
Roll two tiny balls of black clay and flatten them slightly onto the face. Add a microscopic dot of white clay to the top right of each black eye for a lifelike sparkle. -
Add the smile:
Use a needle tool or the edge of a small spoon tool to carve a gentle, curved smile line just under the snout. -
Apply blush:
Take a tiny amount of pink clay and flatten it extremely thin. Press this onto the cheek area to create a rosy blush spot. -
Add decorative spots:
Roll tiny pinhead-sized balls of pink or light purple clay. Press these randomly onto the dinosaur’s belly and back for extra texture and cuteness.
Make It a Planter
Before baking, gently press a small air plant into the top of the dino’s head or back to create a divot, turning your sculpture into a tiny, functional planter.
Step 4: Baking and Finishing
-
Inspect carefully:
Do a final check for lint or dust. Remove any specks carefully with a needle tool or Q-tip. -
Bake the project:
Place your dinosaur on parchment paper on a baking sheet. Bake according to your clay package instructions (usually around 275°F or 135°C for 15-30 minutes per 1/4 inch of thickness). -
Cool down:
Let the sculpture cool completely in the oven with the door cracked open to prevent cracking from thermal shock. -
Optional glaze:
For a matte look like the photo, leave it as is. If you prefer shine, apply a thin coat of water-based polyurethane varnish.
Now you have a charming prehistoric companion ready to guard your favorite houseplants
Sleepy Ghost Keychain
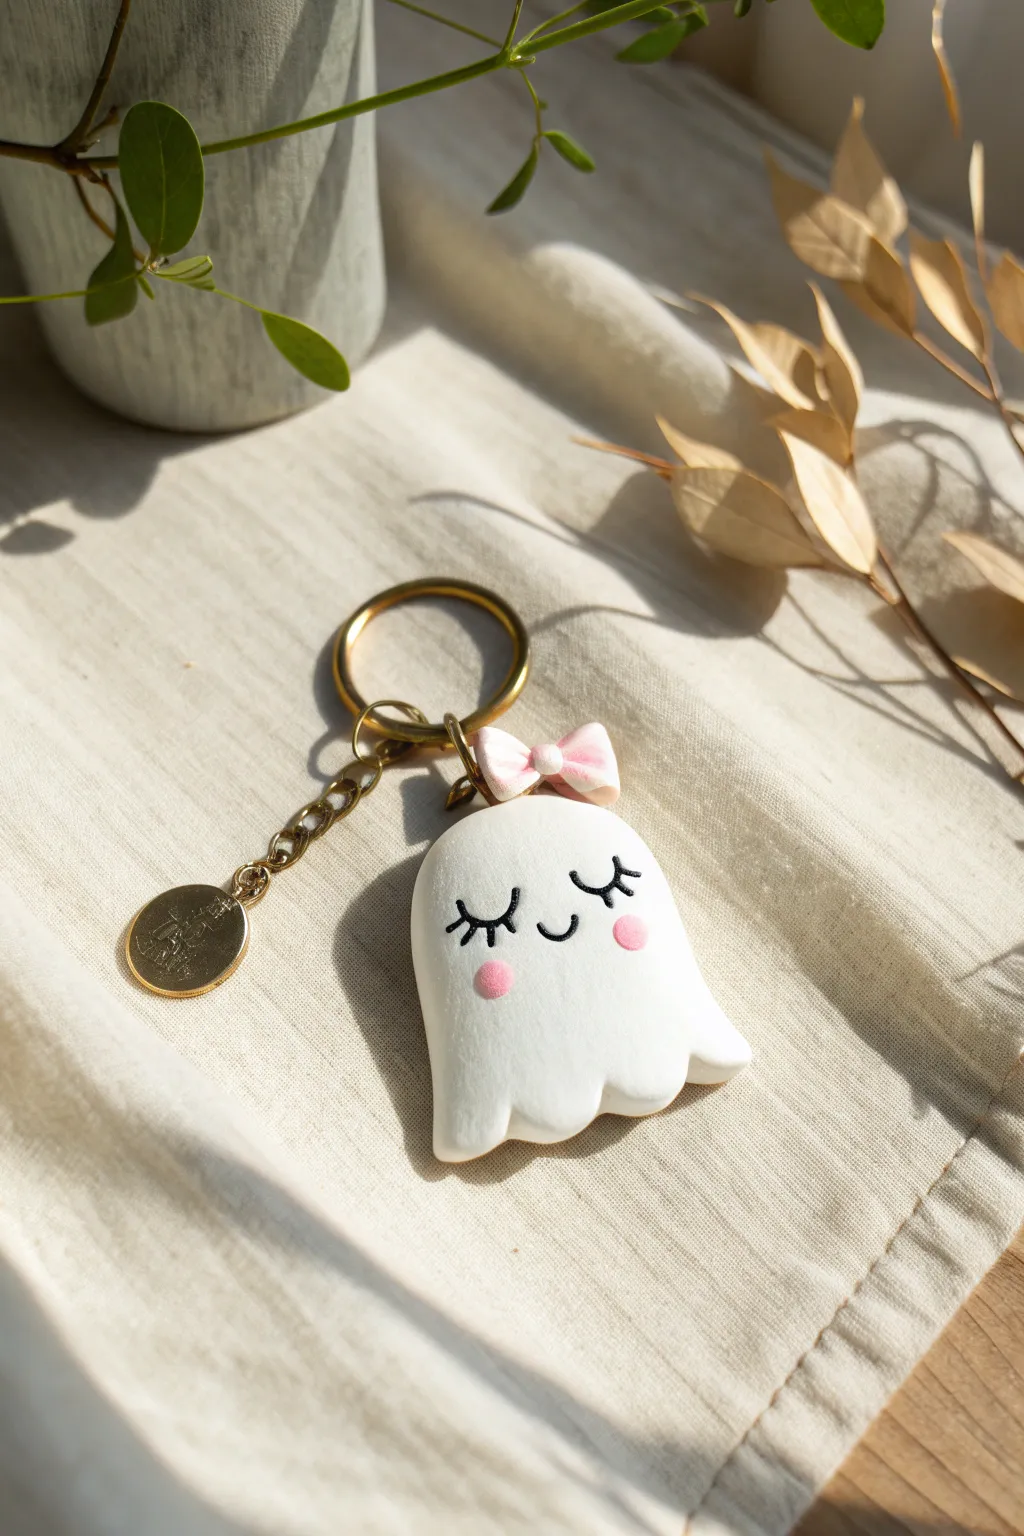
Create a boo-tifully serene accessory with this sleepy ghost keychain project. This smooth, matte-finish charm captures a sweet expression complete with blushing cheeks and a tiny pink bow, perfect for adding a touch of whimsy to your keys.
How-To Guide
Materials
- White polymer clay
- Soft pink polymer clay
- Black acrylic paint or fine-tip permanent marker
- Fine-grit sandpaper (optional)
- Eye pin
- Gold keychain hardware (split ring, chain, jump rings)
- Small round metal charm (optional)
- Clay sculpting tools (needle tool, small ball tool)
- Oven (for baking polymer clay)
- Glaze or matte varnish (optional)
- Super glue
Step 1: Sculpting the Base
-
Condition the clay:
Start by taking a chunk of white polymer clay and kneading it in your hands until it becomes soft, pliable, and warm. -
Form the main shape:
Roll the clay into a smooth ball, free of cracks, and then gently flatten it into a thick, rounded dome shape. It should look like a flattened gumdrop. -
Create the ghostly skirt:
Using your thumb and forefinger, gently pinch and pull the bottom edge of the dome to flare it out slightly. -
Add the wavy bottom:
Use a modeling tool or the handle of a paintbrush to press indentations into the bottom edge, creating a wavy, undulating hemline characteristic of a classic ghost sheet. -
Smooth the surface:
Go over the entire ghost with your finger to smooth out any fingerprints. I find a tiny drop of baby oil can help achieve a flawless finish here.
Clean Clay Tip
White clay picks up dust easily. Have a piece of scotch tape ready to dab your workspace and hands clean, or wipe your hands with a wet wipe before starting the white base.
Step 2: Adding Details & Hardware
-
Make the bow loops:
Take a tiny amount of pink clay and divide it into two equal pea-sized balls. Flatten them into small triangles and join the points in the center to form the bow loops. -
Finish the bow:
Roll a minuscule sausage of pink clay and wrap it around the center where the two triangles meet. Press this completed bow gently onto the top right of the ghost’s head. -
Insert the eye pin:
Trim an eye pin to about half an inch long. Dip the end in a tiny bit of liquid clay or super glue and insert it straight down into the top center of the ghost’s head. -
Bake the clay:
Place your ghost on a baking sheet lined with parchment paper. Bake according to your specific brand of clay’s instructions (usually around 275°F for 15-30 minutes). -
Cool down:
Let the piece cool completely inside the oven or on a cooling rack before handling it further to prevent breakage.
Glow Up
Switch the standard white clay for glow-in-the-dark polymer clay! Your little ghost will look sweet during the day and spookily luminous at night.
Step 3: Painting & Assembly
-
Sand for smoothness:
If there are any rough spots or fingerprints after baking, gently buff the surface with fine-grit sandpaper under running water. -
Draw the eyes:
Using a very fine paintbrush and black acrylic paint, or a fine-tip permanent marker, draw two curved ‘U’ shapes for closed, sleepy eyes. -
Add eyelashes:
Carefully add three tiny lashes to the outer corner of each closed eye for a feminine touch. -
Paint the smile:
Paint a small, simple smiley mouth right between the eyes using the same black paint or marker. -
Apply the blush:
Dip a small ball tool or the end of a paintbrush into pink paint (or use soft pastel dust) and dot on two rosy cheeks just below the eyes. -
Seal (optional):
If you want extra durability, coat the ghost in a matte varnish. Avoid glossy finishes if you want to replicate the soft look of the example image. -
Attach the keychain:
Using pliers, open the jump ring on your gold keychain hardware and loop it through the eye pin you baked into the ghost. -
Add the charm:
Attach the small metal charm to the chain using a smaller jump ring to mirror the look in the photo. -
Secure everything:
Close all jump rings tightly with your pliers to ensure your ghostly friend doesn’t fly away.
Now you have a charming little companion ready to guard your keys

TRACK YOUR CERAMIC JOURNEY
Capture glaze tests, firing details, and creative progress—all in one simple printable. Make your projects easier to repeat and improve.
Happy Avocado Mini
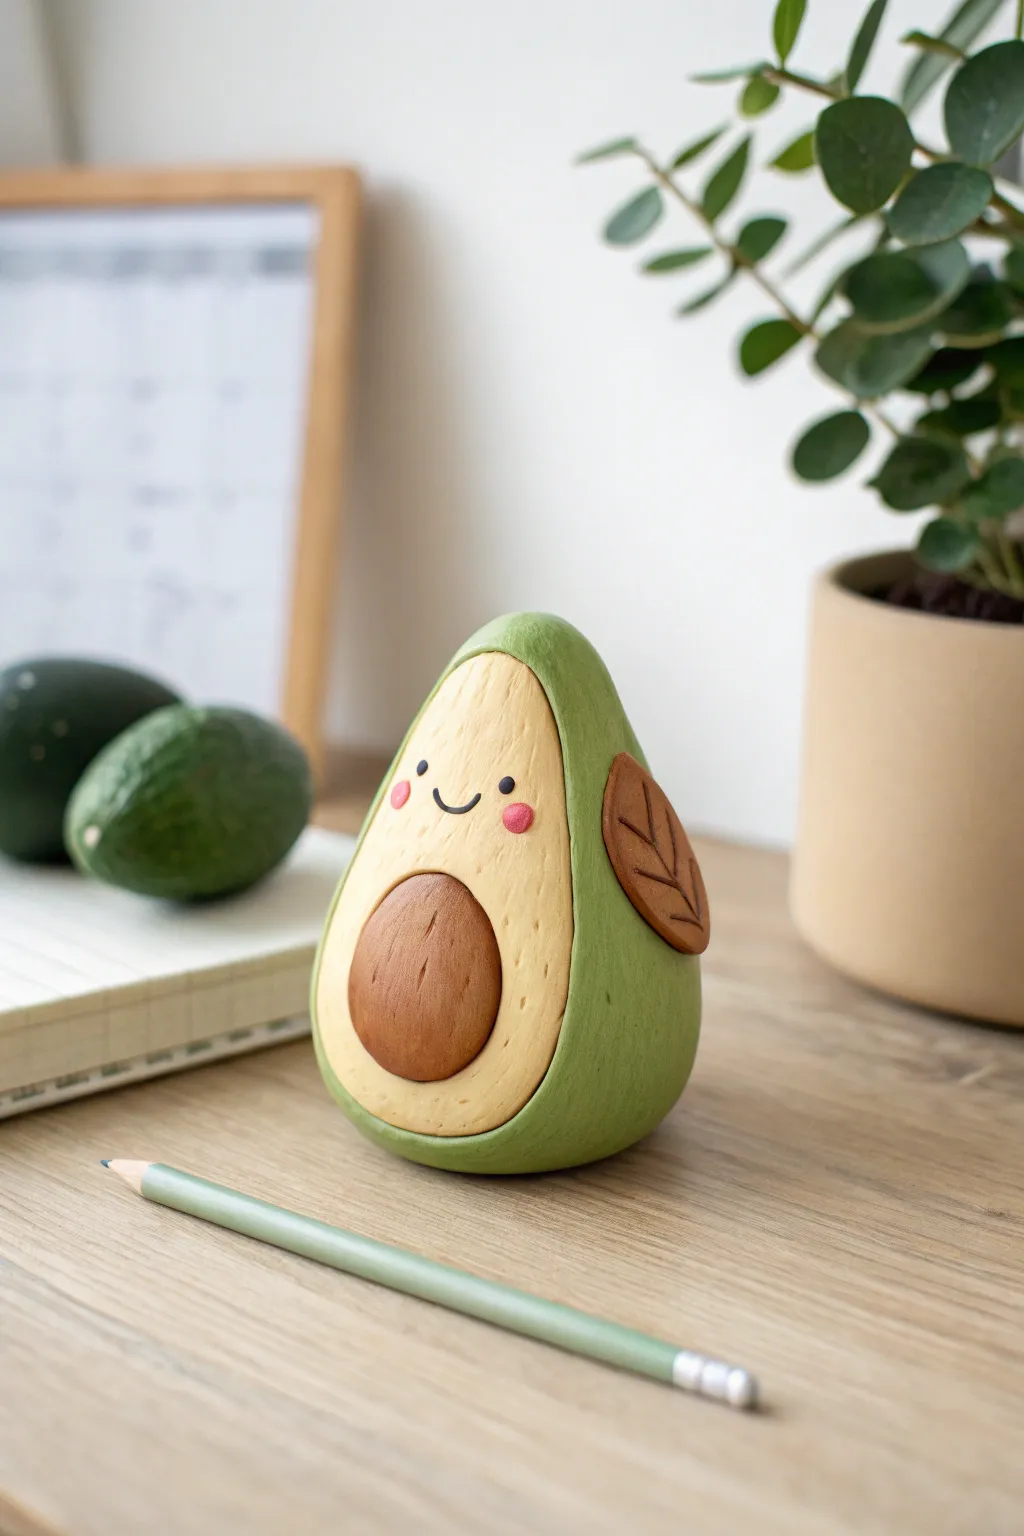
This adorable clay avocado friend brings a cheerful vibe to any desk or shelf with its sweet little smile and wobbly shape. The smooth, matte finish gives it a polished look while retaining the charm of a handmade creation.
Step-by-Step Guide
Materials
- Polymer clay (light yellow/cream, light green, dark olive green, brown, pink, black)
- Small rolling pin
- Clay sculpting tools (needle tool, ball stylus)
- Craft knife
- Oven for baking
- Parchment paper
- Soft brush (optional for texture)
- Matte varnish (optional)
Step 1: Forming the Body
-
Create the avocado core:
Start by taking a medium-sized ball of cream or pale yellow clay mixed with a tiny bit of green. Roll it into a smooth egg shape, slightly wider at the bottom. -
Flatten the front:
Gently press the front of the egg shape against your work surface or use your thumb to create a flat, angled plane where the face and pit will eventually go. It should look like a sliced avocado half. -
Prepare the skin:
Roll out a sheet of light olive green clay so it is about 2–3mm thick. This will be the outer skin. -
Wrap the body:
Place the cream-colored egg onto the green sheet. Carefully wrap the green clay around the back and sides of the egg, trimming away any excess at the front edge with a craft knife. -
Blend the seam:
Use your fingers to smooth the transition where the green skin meets the cream face. You want a distinct line but no gaps. I find gently rolling the edge on the table helps bond them. -
Texture the skin:
Use a toothbrush or a stiff bristle brush to tap gently all over the green skin area. This mimics the rough, bumpy texture of real avocado skin.
Step 2: Adding the Details
-
Shape the pit:
Take a ball of medium brown clay and flatten it into a thick, rounded disc. This will be the seed. -
Texture the pit:
Before attaching it, use a needle tool to scratch delicate vertical lines onto the brown disc to give it a wood-like ‘pit’ texture. -
Attach the pit:
Press the brown pit firmly onto the lower center of the cream face. If your clay is dry, a dab of liquid clay or water helps it stick. -
Make the leaf:
Shape a small piece of darker brown or reddish-brown clay into a teardrop shape and flatten it slightly. -
Decorate the leaf:
Use your needle tool to score a central vein and diagonal veins onto the leaf shape. -
Attach the leaf:
Press the leaf onto the side of the green body, curving it slightly so it looks like it’s hugging the avocado.
Clean Clay Only
Light clay acts like a magnet for dust! Wipe your hands and surfaces with a baby wipe before handling the cream color to avoid trapped lint.
Step 3: The Kawaii Face
-
Create eye sockets:
Use a small ball stylus to make two tiny indents in the cream area, just above the pit. -
Add the eyes:
Roll two minuscule balls of black clay and press them into the indents you just made. Flatten them gently so they don’t protrude too much. -
Add the smile:
Roll an incredibly thin snake of black clay. Cut a tiny U-shape segment and press it between the eyes to create a smile. Use a needle tool to curve the ends upward. -
Blush those cheeks:
Take two tiny dots of pink clay and flatten them onto the cheeks, right below the eyes. -
Bake carefully:
Place your avocado on parchment paper and bake according to your clay manufacturer’s instructions, usually around 275°F (130°C) for 15-30 minutes.
Blending Hack
If the seam between the skin and flesh looks messy, roll a very thin snake of clay and lay it over the join, then smooth it down.
Now you have a smiling pocket-sized companion to keep you company during your workday
Bubble Tea Cup Charm
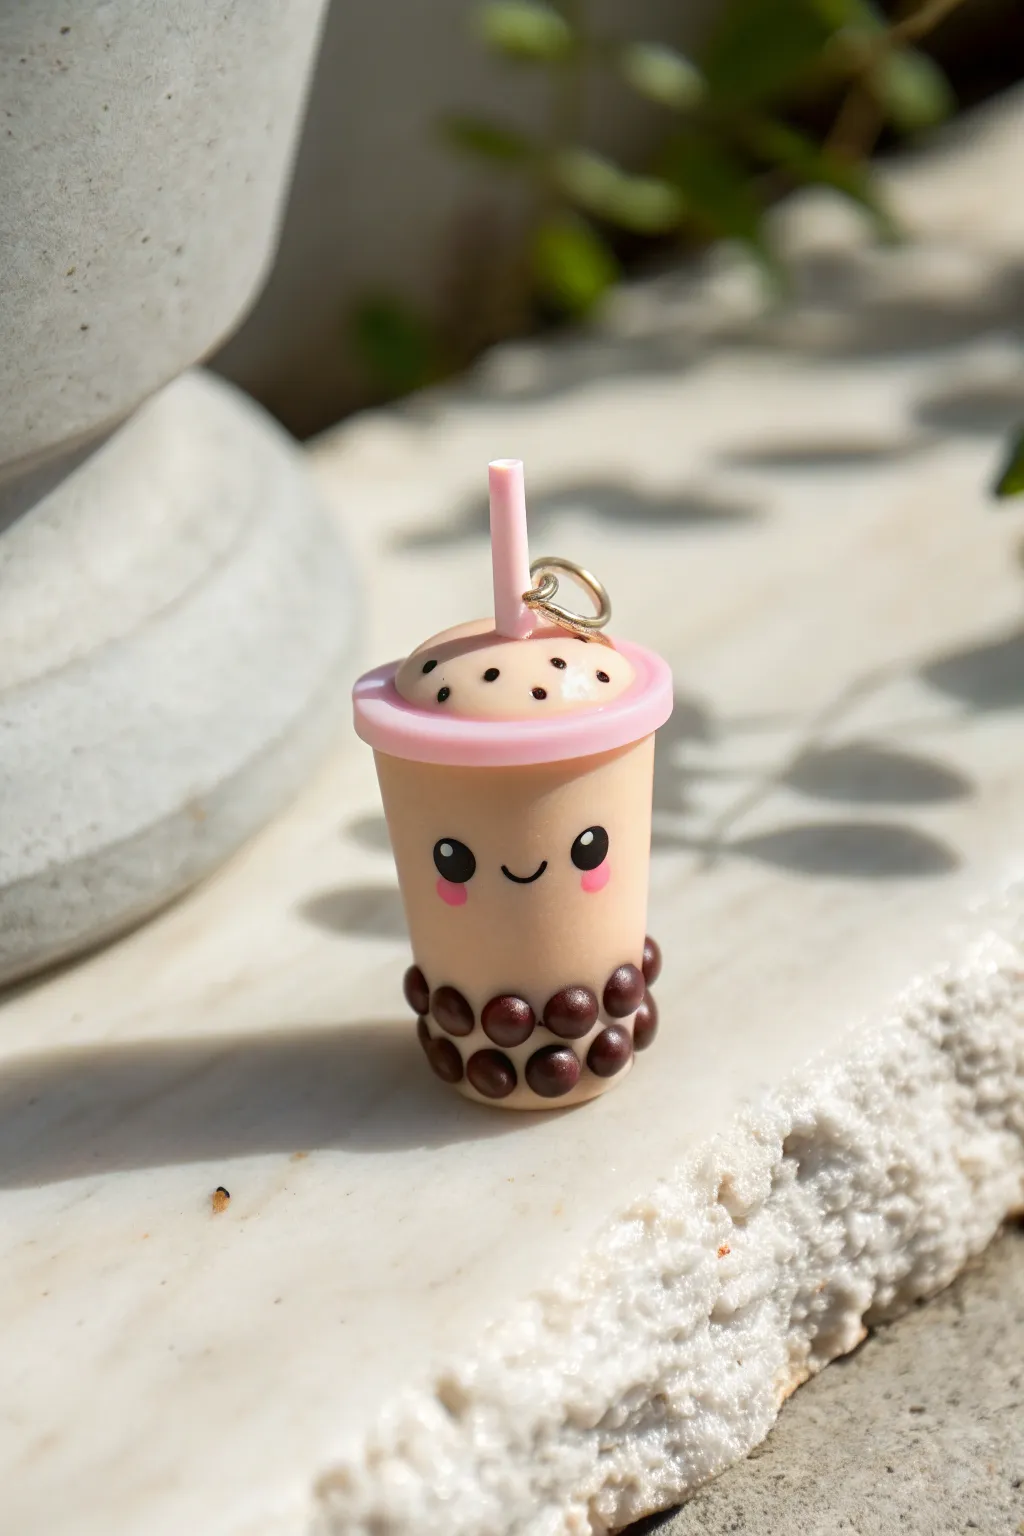
Carry your favorite drink everywhere with this adorable bubble tea charm made from polymer clay. With its blushing cheeks, round tapioca pearls, and pastel pink straw, it’s the perfect sweet accessory for a keychain or backpack.
Step-by-Step Tutorial
Materials
- Polymer clay (beige/tan, dark brown, pastel pink, black)
- Small eye pin or jump ring
- Liquid polymer clay (optional, for sauce)
- Dotting tool or toothpick
- Rolling pin or smooth round object
- Craft blade
- Gloss glaze or polyurethane varnish
Step 1: Shaping the Cup Base
-
Mix the perfect tea color:
Begin by conditioning your beige or tan clay. If it’s too dark, mix in a generous amount of white clay until you have a creamy milk tea shade. -
Form the main cylinder:
Roll the clay into a log and trim the ends to make a cylinder about an inch tall. Gently tap the top and bottom on your work surface to flatten them. -
Create the tapered look:
To mimic a real cup, gently roll the bottom half of the cylinder with slightly more pressure so it tapers down, making the base slightly narrower than the rim. -
Add the boba pearls:
Roll tiny spheres of dark brown clay. These will be your tapioca pearls. -
Attach the pearls:
Here I prefer to press the pearls firmly around the bottom edge of the beige cup, creating two staggered rows that wrap entirely around the base. Make sure they stick well.
Sticky Situation?
If fingerprints are ruining your smooth cup, lightly dust your fingertips with cornstarch before handling the beige clay. It smooths out imperceptibly.
Step 2: Adding the Face and Lid
-
Add the rosy cheeks:
Take two minuscule pieces of pink clay and flatten them into ovals. Press these onto the cup’s ‘face’ area, spacing them apart for the eyes. -
Create the eyes:
Roll two small balls of black clay. Flatten them gently just above the pink cheeks. Adding tiny white highlights to the eyes with paint or white clay really brings it to life. -
Shape the tiny smile:
Roll a microscopically thin snake of black clay. Cut a tiny U-shape and gently press it between the eyes using a needle tool or toothpick. -
Make the lid rim:
Roll out a sheet of pink clay and cut a circle slightly larger than the top of your cup. This will be the flat rim. -
Form the dome:
Make a dome shape from beige or light pink clay to represent the top of the slushy drink. Place this dome on top of your flat pink circle. -
Assemble the top:
Place the lid assembly onto the beige cup body, ensuring the pink rim overhangs slightly like a real lid. -
Insert the straw:
Roll a small tube of pink clay for the straw. Insert a piece of wire or toothpick inside to keep it straight, then push it into the center of the dome.
Flavor Variations
Change the ‘flavor’ by using purple clay (taro), green (matcha), or yellow (mango). Make a whole rainbow set for different moods.
Step 3: Detailing and Finishing
-
Texture the top:
Using a needle tool, add tiny indentations all over the beige dome to simulate the texture of bubbles or foam. -
Add sauce details:
Roll extremely tiny bits of brown clay and flatten them randomly onto the dome to look like chocolate specs or syrup drops. -
Secure the hardware:
Insert your eye pin into the top of the dome, near the straw. Include a drop of liquid clay or bake-and-bond on the pin shaft for extra security. -
Bake the charm:
Bake your creation according to your specific clay package instructions, usually around 275°F (135°C) for 15-20 minutes. -
Cool it down:
Allow the charm to cool completely before touching it, as hot clay is fragile. -
Glaze for shine:
Brush a coat of gloss glaze over the boba pearls and the eyes to make them look wet and shiny, leaving the cup matte for contrast.
Attach your hardware and enjoy showing off your sweet new accessory
Mini Rainbow Arch Decor
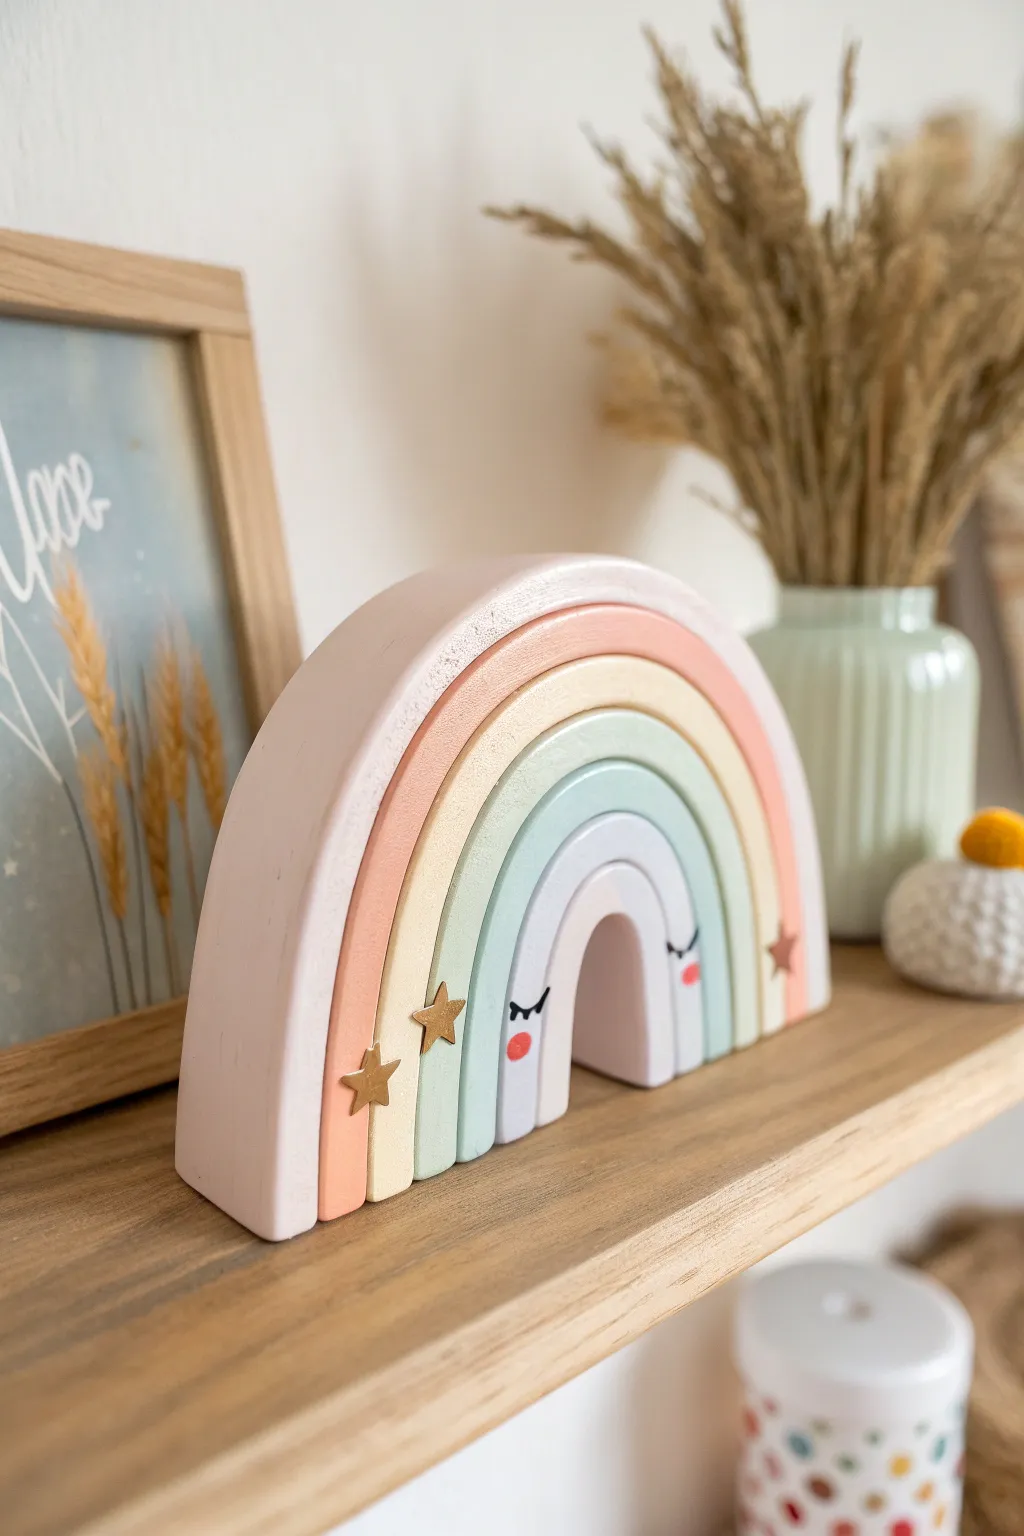
Add a touch of whimsy to any nursery or shelf with this adorable pastel rainbow arch. This deceptively simple clay project uses layering and soft colors to create a cozy, decorative piece featuring sweet sleepy eyes and golden star accents.
Detailed Instructions
Materials
- Air-dry clay (white)
- Rolling pin
- Sharp craft knife or clay blade
- Various circle cutters or bowls (nesting sizes)
- Sandpaper (fine grit)
- Acrylic paints (pastel pink, peach, cream, mint green, baby blue, lavender)
- Gold paint or gold star stickers
- Fine detail paintbrush
- Flat shader paintbrush
- Matte varnish or sealant
Step 1: Shaping the Arches
-
Roll out the clay:
Begin by taking a large chunk of white air-dry clay and kneading it until soft. Roll it out on a flat surface to an even thickness of about 3/4 inch (2 cm). You want these arches to be chunky enough to stand on their own. -
Cut the base shape:
Using your largest bowl or round cutter as a template, cut a large semi-circle. This determines the overall size of your rainbow. Make sure the bottom edge is perfectly flat so it will stand upright. -
Create nested arches:
Use progressively smaller bowls or circle cutters to create the concentric inner arches. Gently press them into the clay semi-circle to mark your lines, or cut directly if using blades. -
Separate the layers:
Carefully slice along the marked lines with your craft knife to separate the individual arches. You should end up with 5 or 6 independent rainbow bands. -
Smooth the edges:
Dip your finger in a little water and run it along the cut edges of each arch to smooth out any roughness or stray clay burrs. -
Adjust the fit:
Before drying, test the fit by nesting them back together. If the gaps are too tight, trim a tiny sliver off the inner curve of the larger arches so they will sit comfortably once painted. -
Dry completely:
Lay the arches flat on a clean surface to dry. Air-dry clay this thick can take 24-48 hours. I like to flip them over halfway through to ensure the undersides dry evenly.
Uneven Arches?
If your arches warped while drying and won’t stand straight, gently sand the bottom flat against a piece of sandpaper taped to a table until flush.
Step 2: Painting and Assembly
-
Sand for smoothness:
Once fully dry and hard, use fine-grit sandpaper to gently buff the surface and edges. This crucial step gives you that professional, wood-toy finish. -
Mix your palette:
Prepare your pastel palette. You’ll need a soft pink, peach/apricot, cream yellow, mint green, baby blue, and a pale lavender. Mixing a bit of white into standard colors helps achieve that milky pastel look. -
Paint the outer arch:
Start with the largest arch using the soft pink. Apply smooth, even strokes with a flat shader brush. Let the first coat dry and apply a second for full opacity. -
Paint the middle layers:
Proceed inwards, painting the next arch peach, then cream, then mint, and then blue. Keep the edges clean. If paint drips down the side, wipe it immediately. -
Paint the center arch:
Paint the smallest, central arch in the pale lavender shade. This piece will be the ‘face’ of the rainbow. -
Add the face details:
Using your finest detail brush and black paint, carefully draw two small, curved lines for eyelids on the lavender arch. Add tiny vertical lashes. Below the eyes, paint two small red or dark pink ovals for rosy cheeks. -
Add golden stars:
On the cream and mint layers (the 3rd and 4th arches from the outside), adhere small gold star stickers. Alternatively, you can paint small five-pointed stars using metallic gold paint. -
Varnish:
Finish the project by applying a coat of matte varnish over all separate pieces. This protects the paint and removes the chalky feel of the clay. -
Final assembly:
Because air-dry clay shrinks slightly, you don’t need to glue the arches together; they are designed to be stacked as a toy or decor. Simply arrange them on your shelf and enjoy the view.
Make it Sparkle
Mix a tiny pinch of ultra-fine iridescent glitter into your final matte varnish coat for a magical shimmer that catches the sunlight.
Place your finished rainbow on a floating shelf or dresser to bring a calm and dreamy vibe to the room
Chubby Penguin Buddy
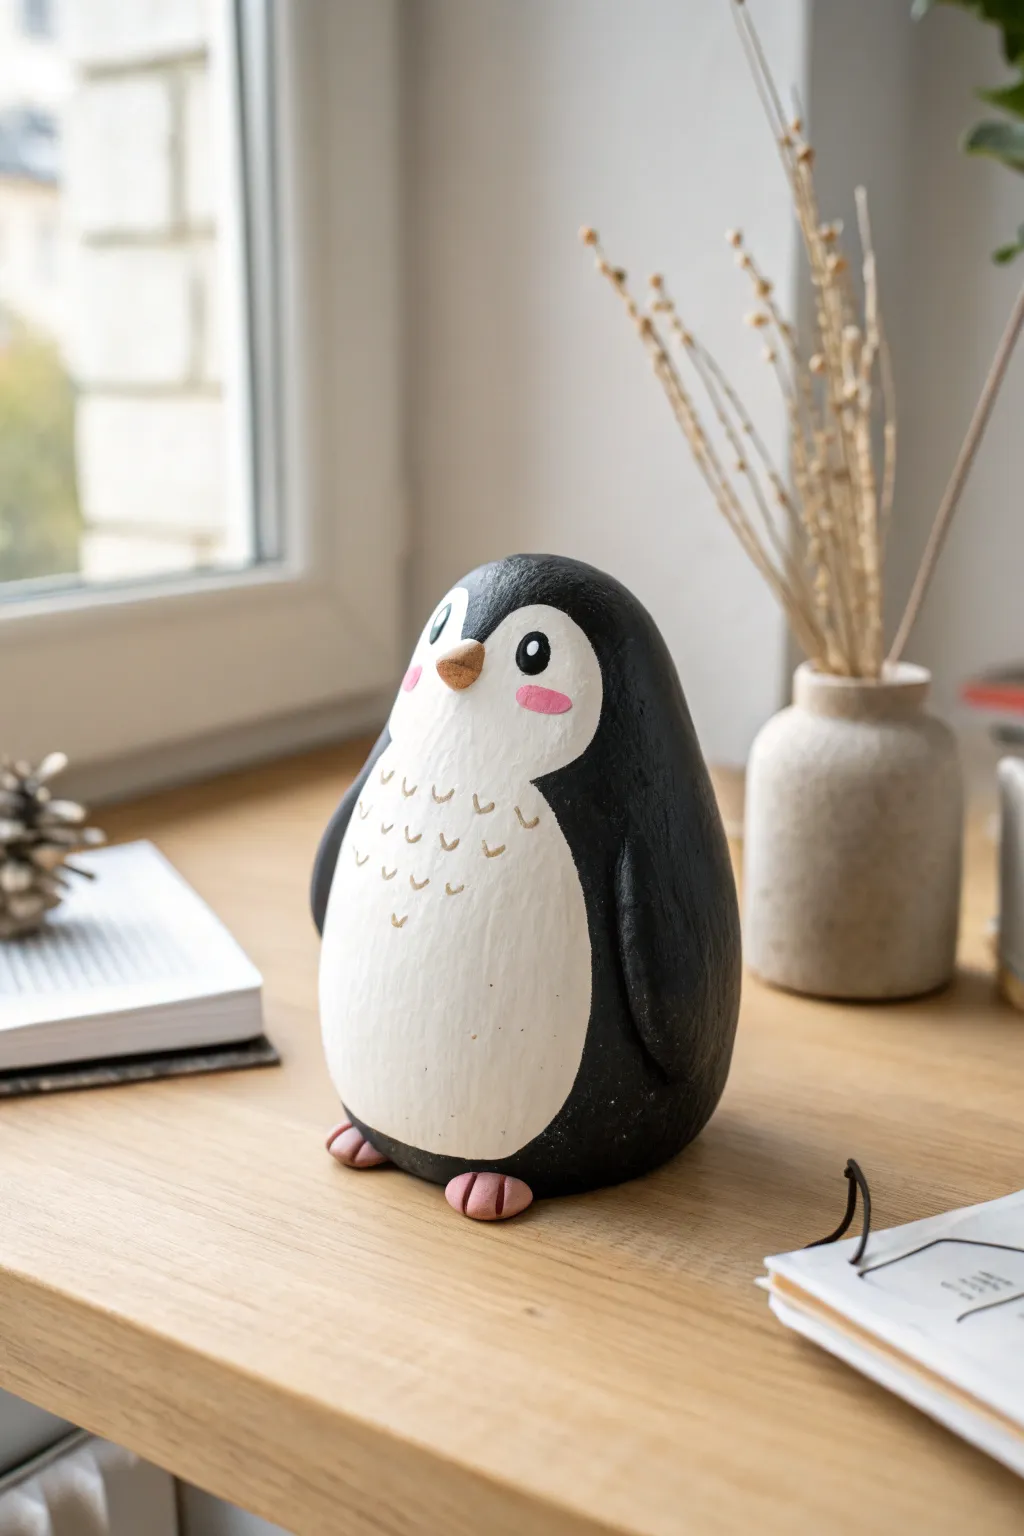
This adorable, stout little penguin is the perfect desk companion to bring a smile to your face while you work. With its smooth, rounded shape and sweet blushing cheeks, this project is ideal for beginners looking to master simple forms and clean painting techniques.
Step-by-Step
Materials
- Air-dry clay or polymer clay (white)
- Acrylic paints (black, white, soft pink, light brown/gold)
- Small flat brush
- Fine detail brush or dotting tool
- Sculpting tools (hook tool and smoothing tool)
- Water and sponge (for smoothing)
- Matte varnish or sealant
- Aluminum foil (optional, for armature)
Step 1: Sculpting the Base Form
-
Form the core:
Start by conditioning your clay until it is soft and pliable. Roll a large handful into a smooth ball about the size of a tennis ball or slightly smaller. -
Shape the body:
Gently roll the ball on your work surface to elongate it slightly into a stout egg shape. Lightly tap the bottom against the table to create a flat base so the penguin stands securely on its own. -
Refine the surface:
Dip your finger in a little water (for air-dry clay) or baby oil (for polymer clay) and smooth out any fingerprints or cracks. The goal is a seamless, pebble-like finish. -
Add the feet:
Roll two small, pea-sized balls of clay. Flatten them slightly into ovals and attach them to the very bottom front edge of the body. Use a sculpting tool to impress two small lines into each foot for toes. -
Sculpt the wings:
Create two long, teardrop shapes from the clay. Attach them vertically to the sides of the body, starting just below the ‘head’ area. Blend the top seam into the body clay so they look integrated, but leave the bottom tips slightly lifted away from the body. -
Create the beak:
Roll a tiny cone of clay. Attach it to the center of the face area, pointing slightly downward. Blend the back edge onto the face seamlessly. -
Dry or bake:
If using air-dry clay, let the figure sit for 24-48 hours until completely hard. If using polymer clay, bake according to the manufacturer’s temperature and time instructions, then let cool completely.
Step 2: Painting and Details
-
Base coat the belly:
Using a flat brush, paint a large oval shape on the front of the penguin in opaque white. This will be the belly and face area. You might need two coats to get solid coverage. -
Define the white mask:
Extend the white paint upwards around the beak area, curving it over the eyes to create that classic ‘heart-shaped’ face mask typical of penguins. -
Paint the body black:
Carefully paint the rest of the body black. Use the edge of your brush to create a clean, crisp line where the black meets the white belly area. I find painting slowly here makes a big difference. -
Color the beak and feet:
Mix a light brown or golden-orange shade and paint the beak. For the feet at the bottom, use a soft, muted pinkish-brown tone. -
Add feathered texture:
Once the white belly is dry, mix a diluted light brown or grey. Using your finest brush, paint tiny ‘v’ or ‘u’ shapes in sporadic rows across the chest to simulate soft feathers. -
Paint the eyes:
Use a dotting tool or the back of a paintbrush dipped in black to create two vertical oval eyes. Add a tiny white dot in the upper corner of each eye for a spark of life. -
Add the blush:
Dip a dry brush into a tiny amount of pink paint and dab it on a paper towel until almost dry. Gently stipple pink oval cheeks just below the eyes. -
Seal the work:
Once all paint is thoroughly dry, apply a coat of matte varnish. This removes the ‘chalky’ look of the paint and protects your new little friend from dust.
Smooth Surface Secret
Before painting, lightly sand your dried clay with fine-grit sandpaper (400+) to remove tiny bumps. A smooth canvas makes the painted lines much sharper.
Winter Costume
Before baking or drying, sculpt a tiny clay scarf or a knit cap to place on your penguin for a cozy, winter-themed variation.
Place your finished penguin on a windowsill or desk where his cheerful expression can brighten your daily routine
Mini Mushroom Friends
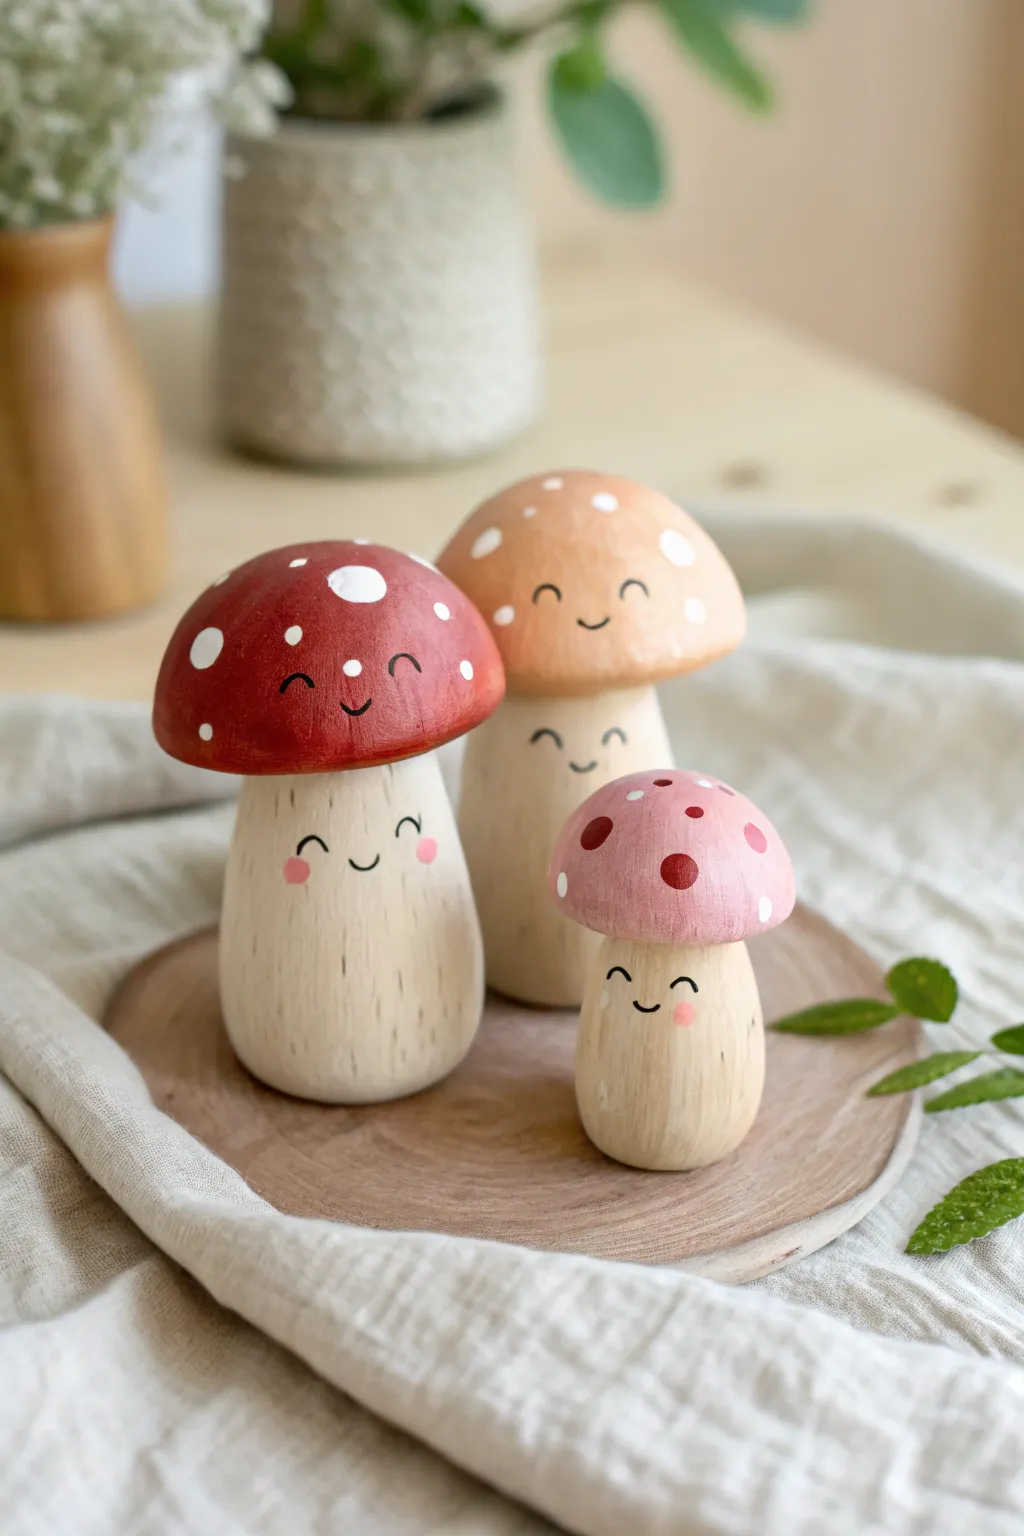
Create a charming family of rustic mushrooms, featuring a stylized wood-grain texture and sweet, sleepy expressions. These little forest friends combine painted caps with a natural wood-effect stalk for a cozy, handcrafted look.
Detailed Instructions
Materials
- Air-dry clay or polymer clay (white or beige)
- Acrylic paints (Red, pink, light brown/tan, white, dark brown)
- Small flat paintbrush
- Fine detail liner brush (size 00 or 000)
- Needle tool or toothpick
- Old stiff-bristled brush or toothbrush (for texture)
- Matte sealant or varnish
- Aluminum foil (for armature core)
Step 1: Sculpting the Shapes
-
Prepare the cores:
Since the mushrooms have thick bodies, crumble small balls of aluminum foil into rough oval shapes. This saves clay and helps the shapes dry more evenly. -
Form the stalks:
Condition your clay, then flatten a sheet and wrap it around your foil cores. Roll the shapes on your work surface to smooth them into stout, cylindrical stalks that widen slightly at the bottom for stability. -
Texture the wood grain:
Before the clay hardens, take a needle tool or a stiff toothbrush and gently drag vertical lines up and down the stalks. Vary the pressure to create uneven, natural-looking grooves that mimic bark or wood grain. -
Shape the caps:
Roll three balls of clay in varying sizes—large, medium, and small. Flatten the bottoms and gently curve the tops into domes. The largest cap should be wider and rounder, while the smallest can be slightly more bulbous. -
Attach and smooth:
Score the top of each stalk and the underside of each cap. Apply a dab of water (for air-dry) or liquid clay (for polymer) and press them firmly together. Smooth the seam under the cap if necessary, or leave it distinct. -
Initial drying:
Let the mushrooms dry completely according to your clay’s instructions. Air-dry clay may take 24-48 hours given the thickness, so patience is key here.
Step 2: Painting the Base Layers
-
Base coat the stalks:
Mix a very light beige or cream color. Paint the entire stalk area, ensuring you get paint into the little textured grooves you made earlier. -
Enhance the texture:
Once the base is dry, mix a watery wash of light brown paint. Brush this over the stalks and quickly wipe the surface with a paper towel. The darker paint will stay in the carved lines, instantly popping that wood-grain effect. -
Paint the red cap:
Take your largest mushroom and paint the cap a deep crimson red. You may need two thin coats for opaque coverage. -
Paint the brown cap:
For the medium mushroom, mix a soft, warm tan or café-au-lait color and cover the cap entirely. -
Paint the pink cap:
For the smallest friend, use a soft pastel pink. This creates a lovely color variation across your trio.
Uneven Texture?
If your wood grain looks too messy, lightly sand the surface after the clay dries but before painting. This knocks back rough ridges while keeping the grooves needed for the paint wash.
Step 3: Adding Details and Faces
-
Add polka dots:
Using the handle end of a paintbrush or a dotting tool, dab white dots onto the red and tan caps. For the pink cap, try using a slightly darker rusted red color for the dots to add visual interest. -
Sketch the faces:
Wait until the caps are fully dry to avoid smudging. Very lightly mark where you want the eyes and mouths with a pencil. Notice how the faces appear on both the caps AND the stalks for double the personality. -
Paint the eyes:
Using your finest liner brush and thin black (or dark brown) paint, carefully paint small U-shapes for sleeping/smiling eyes. I find resting my pinky on the table helps steady my hand for these tiny curves. -
Add the smiles:
Paint a tiny, simple curve for the mouth right between the eyes. Keep the lines thin and delicate. -
Apply rosy cheeks:
Dip a dry brush or a Q-tip into a tiny amount of pink paint. Dab off the excess on paper first, then gently blush the cheeks on the lighter stalk faces. -
Final coat:
allow the paint to cure fully, then apply a matte varnish to protect your work without making it too shiny, preserving that natural tactility.
Pro Tip: Weighted Base
Mushrooms can be top-heavy! While forming the foil core, slip a small metal washer or a smooth pebble into the bottom. This prevents them from tipping over once the heavy caps are added.
Arrange your trio on a shelf or among potting plants for a whimsical touch of woodland magic
Star Face Trinket Dish
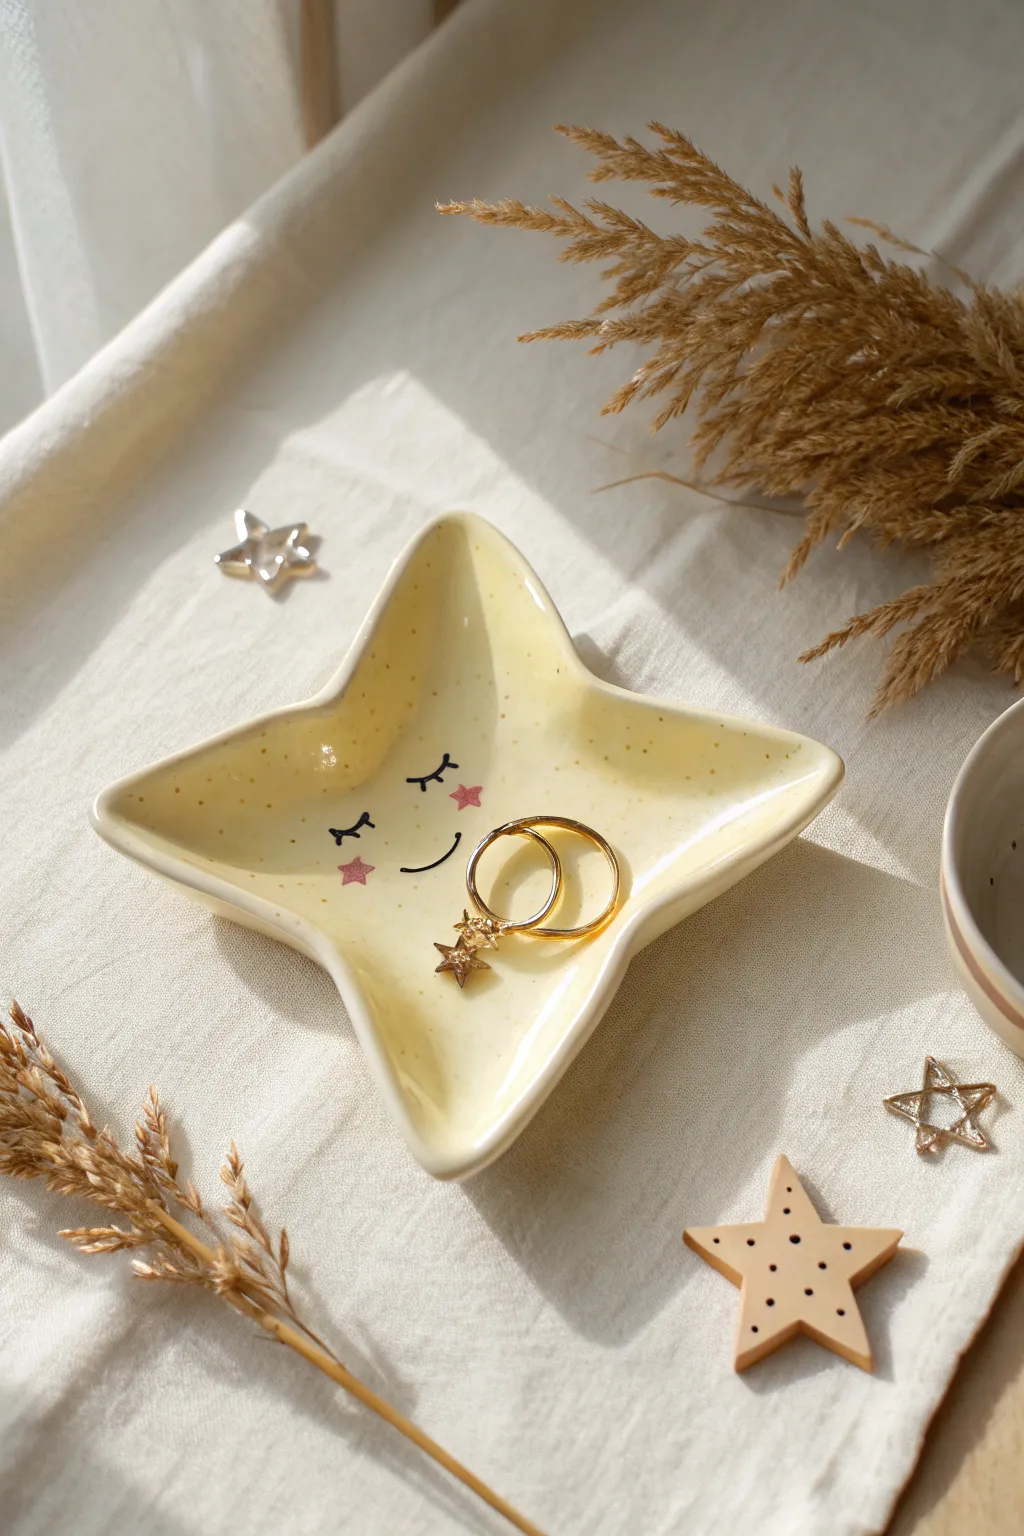
Brighten up your bedside table with this adorable celestial trinket holder, perfect for keeping your rings safe while you dream. This star-shaped dish features a soft yellow speckled finish and a sweet, sleeping face that adds a touch of whimsy to your decor.
How-To Guide
Materials
- Air-dry clay (white)
- Acrylic rolling pin
- Star-shaped cookie cutter (medium to large size)
- Sandpaper (fine grit)
- Acrylic paints: Pale yellow, black, pink
- Old toothbrush (for speckling)
- Fine detail paintbrush or black paint pen
- Glossy varnish or sealant (Mod Podge or resin)
- Small bowl or sponge
- Water cup
- Parchment paper
Step 1: Shaping the Star
-
Prepare the Clay:
Begin by taking a handful of white air-dry clay and kneading it in your hands until it becomes soft, warm, and pliable. This conditioning step prevents cracks later on. -
Roll it Out:
Place your clay onto a sheet of parchment paper. Using your acrylic rolling pin, roll the clay out evenly until it is about 1/4 inch thick. Try to keep the thickness consistent across the entire slab. -
Cut the Shape:
Press your star-shaped cookie cutter firmly into the center of the clay slab. Wiggle it slightly to ensure a clean cut, then lift the cutter away. -
Remove Excess:
Peel away the excess clay from around your star shape. Gently smooth the rough edges of the star with a damp fingertip to round them off nicely. -
Create the Curve:
Carefully lift your clay star and gently press the center downwards while pulling the five points slightly upward to create a shallow bowl shape. You can rest the star inside a small bowl to help it hold this curved shape while it dries. -
Let it Dry:
Allow the clay to dry completely according to the package instructions. This usually takes 24-48 hours. Don’t rush this step, as moisture can ruin the painting phase. -
Sand for Smoothness:
Once fully dry and hard, use a piece of fine-grit sandpaper to buff away any uneven bumps or sharp edges, particularly around the rim of the star.
Smooth Operator
Use a little bit of water on your finger to smooth out any fingerprints or cracks in the raw clay before drying. A smooth base makes painting much easier.
Step 2: Painting and Details
-
The Base Coat:
Mix a small amount of white paint into your yellow acrylic to create a soft, pastel buttercream shade. Paint the entire surface of the dish, including the back and sides. Let this coat dry. -
Speckle Effect:
To achieve the speckled ceramic look, dilute a tiny drop of brown or darker yellow paint with water. Dip an old toothbrush into this mixture and run your thumb across the bristles to flick tiny specks onto the dish. -
Draw the Face:
Using a very fine detail brush or a black paint pen, carefull draw two curved lines for closed eyes near the center of the star. Add three small lashes to the outer corner of each eye. -
Add the Smile:
Paint a small, simple ‘U’ shape between the eyes for a smiling mouth. Keep the lines thin and delicate for the cutest expression. -
Rosy Cheeks:
Dip a small brush into pink paint and stamp two tiny stars (or simple dots) onto the cheeks, just below the eyes. -
Seal the Deal:
Protect your artwork with a coat of glossy varnish or sealant. This gives it that professional ceramic shine and protects the paint from chipping.
Uneven Drying?
If the points of your star start curling too much while drying, gently weigh the center down with a small, lightweight object like a coin or bottle cap.
Now your jewelry has a cozy spot to rest every night
Cute “Squishy” Monster Pencil Topper
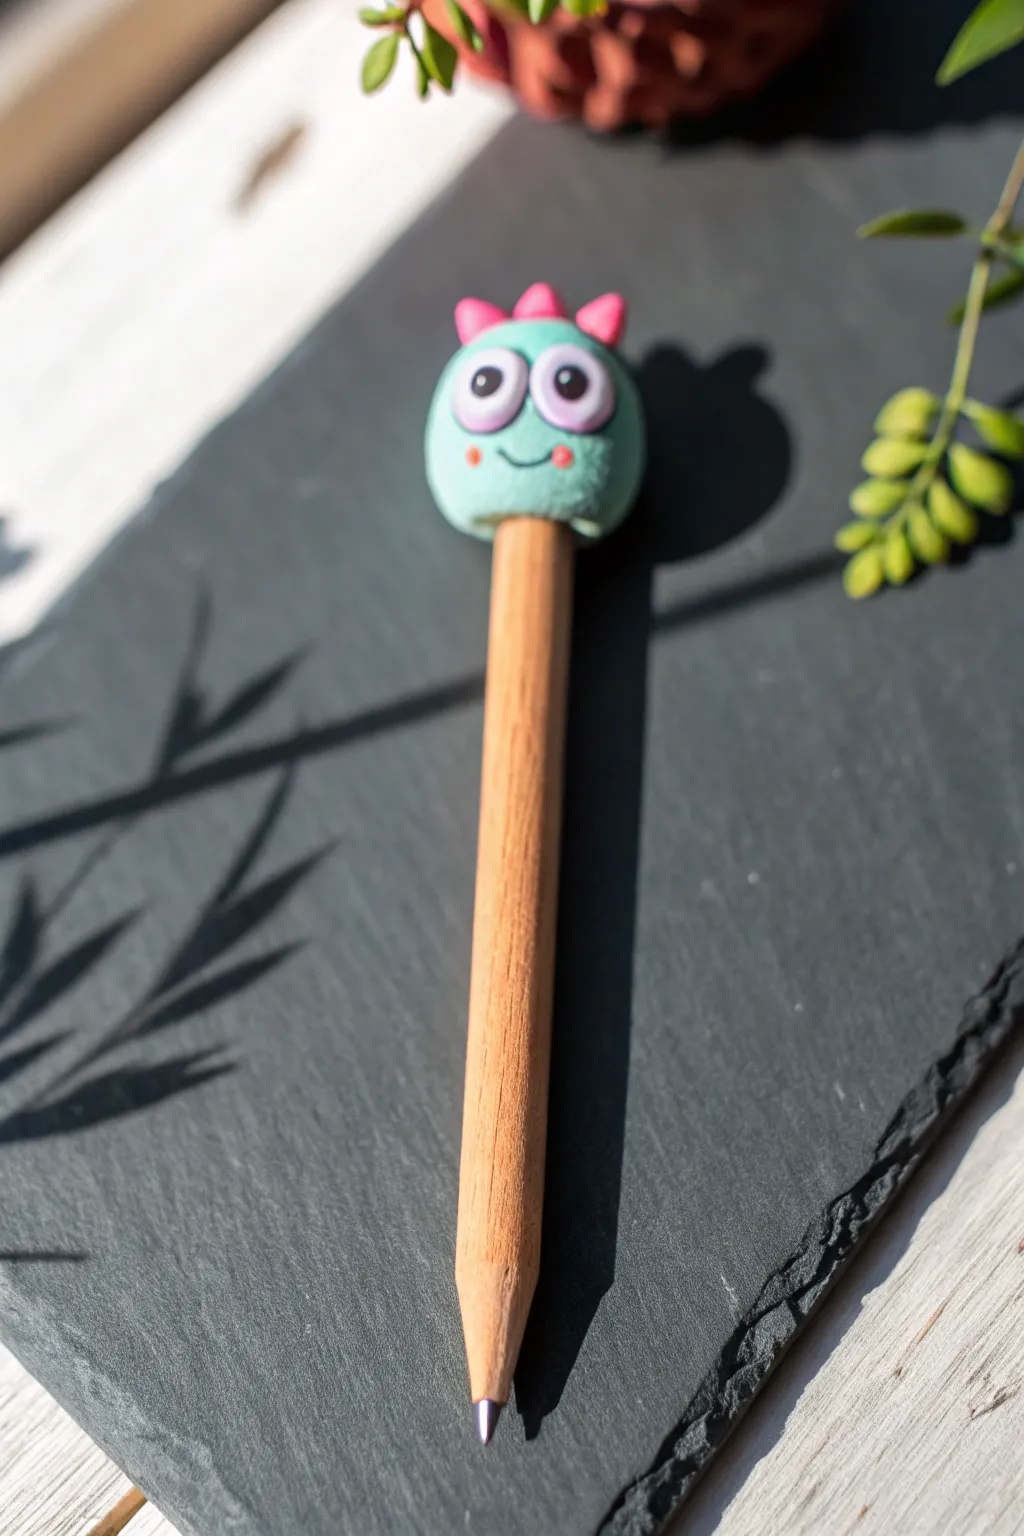
Transform a boring plain pencil into a whimsical writing companion with this adorable monster topper. Featuring a soft mint-green head, oversized startled eyes, and tiny pink spikes, this project adds instant personality to your desk supplies.
How-To Guide
Materials
- Polymer clay (Mint Green, White, Purple, Black, Pink)
- Wooden pencil (standard size, unsharpened or sharpened)
- Clay sculpting tools (ball tool, needle tool)
- Baking sheet and parchment paper (if using oven-bake clay)
- Strong craft glue (optional but recommended)
- Acrylic roller or smooth round object
Step 1: Forming the Base
-
Condition the clay:
Start by kneading your mint green clay until it is soft and pliable. This warmth helps prevent cracking later on. -
Shape the head:
Roll the green clay into a smooth ball, roughly 1 inch in diameter. Ensure there are no major seams or cracks on the surface. -
Create the pencil socket:
Gently push the eraser end of your pencil into the bottom of the clay ball. Insert it about halfway into the sphere to create a secure fit, then carefully wiggle it back out so you can bake the clay separately (or leave it in if your pencil is oven-safe).
Sticky Situation
If the clay slides too much on the pencil before baking, wrap a tiny piece of masking tape around the pencil end first for grip.
Step 2: Adding Personality
-
Make the eye sockets:
Using a small ball tool or just your thumb, press two shallow indentations side-by-side on the front of the face where the eyes will sit. -
Form the whites of the eyes:
Roll two small balls of white clay. Flatten them slightly into discs and press them into the indentations you just made. They should be touching in the middle for that goofy look. -
Add the irises:
Take two even smaller pieces of purple clay, roll them into balls, flatten them, and place them in the center of the white discs. -
Place the pupils:
Roll two tiny specks of black clay. Press these onto the purple circles. I like to place them slightly askew to give the monster a silly expression. -
Add highlights:
For a spark of life, add the tiniest possible dot of white clay to the upper corner of each pupil.
Step 3: Details & Finishing
-
Create the smile:
Use a needle tool or a curved clay tool to impress a small U-shape smile below the eyes. Press gently so you don’t distort the head shape. -
Apply blush:
Roll two minuscule balls of pink clay. Press them onto the cheeks at the ends of the smile using a flat tool to blend them slightly into the green surface. -
Make the spikes:
Form three small cones from pink clay. These will be the monster’s hair or spikes. -
Attach the spikes:
Press the three pink cones onto the very top of the head in a row. Blend the seams at the base of the cones slightly with a small tool to ensure they stick. -
Final texture check:
Inspect your monster for any accidental fingerprints. You can gently smooth them out with a drop of baby oil on your finger if needed. -
Bake the project:
If using oven-bake clay, place the head (removed from the pencil if it’s not wood) on a baking sheet. Bake according to the manufacturer’s instructions for your specific brand of clay. -
Cool down:
Allow the clay to cool completely before handling. It hardens as it cools. -
Secure the topper:
Once cool, place a drop of strong craft glue into the hole at the bottom of the head and insert the pencil. Hold it in place for a moment until the glue grabs.
Monster Mash-up
Try using glow-in-the-dark clay for the eyes or the body so your monster buddy keeps you company during late-night study sessions.
Now your new little monster friend is ready to help you tackle any writing task