If you want a low-pressure clay date that still feels special, tiny projects are the sweet spot. I love ideas where you each make one piece, then swap, match, or gift them at the end like a little handmade souvenir.
Matching Pinch Pot Snack Bowls
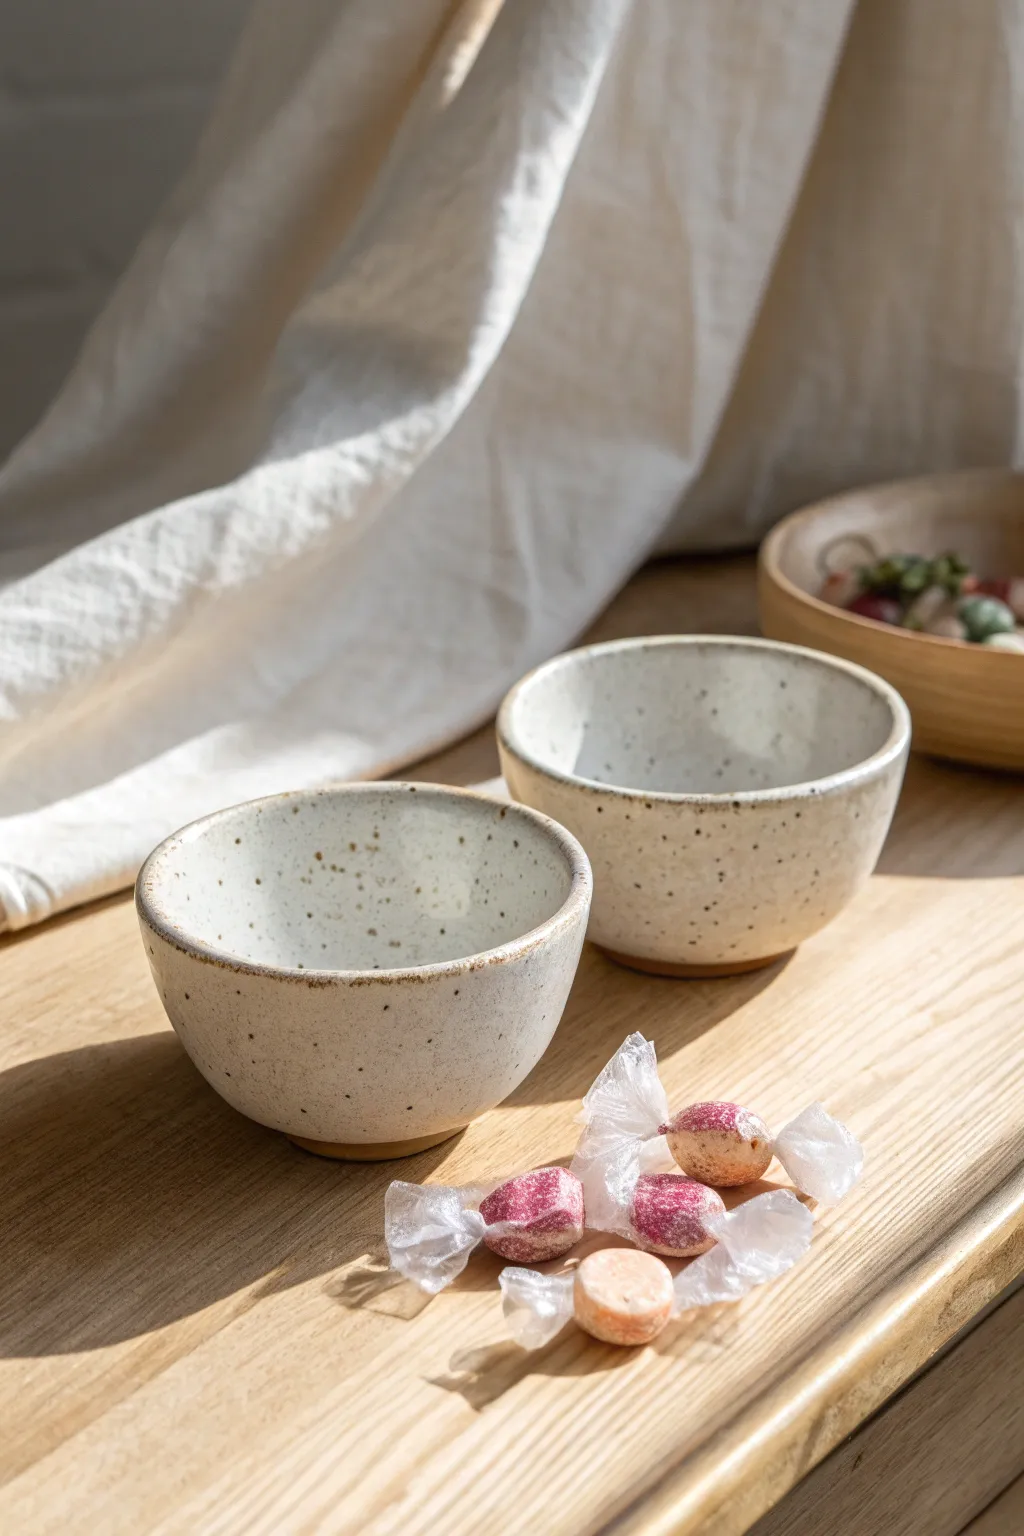
These charming, rustic snack bowls are the perfect beginner pottery project for a cozy creative date. The natural speckled clay and simple milky glaze give them a timeless, handmade feel that beautifully highlights your favorite treats.
Step-by-Step Guide
Materials
- Speckled Stoneware Clay (cone 5/6)
- Pottery sponge
- Water cup
- Wooden rib tool (optional)
- Needle tool or clay knife
- Transparent or Milk White Glaze (food safe)
- Kiln access (or local firing studio)
Step 1: Forming the Bowls
-
Prepare the Clay:
Start by cutting two equal-sized lumps of speckled clay, each about the size of a tennis ball. Wedging the clay briefly helps remove air bubbles and ensures the consistency is even. -
Shape the Sphere:
Roll each lump of clay between your palms until you have a smooth, round ball. Pat it gently to round out any flat spots. -
Open the Pot:
Hold the clay ball in one hand and push your thumb deep into the center, stopping about a half-inch from the bottom. This base thickness is crucial for a sturdy bowl. -
Pinch the Walls:
With your thumb inside and fingers on the outside, gently pinch and rotate the clay. Work your way from the bottom up to the rim in a rhythmic spiral motion. -
Even Out Thickness:
Continue pinching until the walls are roughly 1/4 inch thick. Aim for consistency rather than perfection; the handmade wobbles add character. -
Refine the Shape:
Set the bowl on a flat surface and gently cup the sides to shape it into a deep, rounded curve rather than a wide plate. Repeat this process for the second bowl to match.
Keep it clean
Use a designated ‘clean hand’ for picking up tools and a ‘messy hand’ for touching wet clay. This prevents muddy fingerprints from ruining your smooth surfaces.
Step 2: Refining and Drying
-
Smooth the Rim:
Use a slightly damp sponge to compress and smooth the rim. I like to run the sponge gently over the lip to round it off, making it comfortable to touch. -
Smooth the Interior:
Take a damp sponge or a flexible rib tool and smooth the inside of the bowl to remove deep finger marks, creating a nice surface for glaze later. -
Define the Foot:
Once the clay is ‘leather hard’ (stiff but cool), flip the bowls over. You can gently press the center bottom with your thumb to create a slight indentation or leave it flat for stability. -
Final Cleanup:
Wipe away any rough crumbs or sharp bits on the surface with your sponge. Let the bowls dry slowly under loose plastic for a day, then uncover to bone dry completely.
Step 3: Glazing and Firing
-
Bisque Fire:
Fire the bone-dry bowls in a kiln to bisque temperature (usually Cone 04). This turns the fragile clay into hard ceramic ready for glazing. -
Wipe Down:
Use a clean, damp sponge to wipe any kiln dust off the bisque-fired bowls. This prevents glaze crawling or bubbles. -
Apply Glaze:
Dip the bowls into your milk-white or transparent glaze, or brush on 2-3 even coats. The goal is a semi-opaque finish that lets the clay’s natural speckles show through. -
Clean the Foot:
Wipe the entire bottom of the bowl and a tiny ring up the side completely clean of glaze. Any glaze left here will fuse the bowl to the kiln shelf. -
Glaze Fire:
Place the bowls back in the kiln for the final glaze firing (usually Cone 5 or 6). Once cooled, sand the bottom lightly if needed to ensure it won’t scratch your table.
Cracking walls?
If the rim starts cracking while you pinch, the clay is too dry. Dip your fingers in water briefly to rehydrate the edge, then compress cracks immediately with a sponge.
Enjoy using your new matching set for your next movie night snacking session

His-and-Hers Trinket Dishes
These charming, minimalist trinket dishes are the perfect low-pressure project for a creative date night. With their organic speckling and smooth, glazed finish, they offer a professional ceramic look that you can easily achieve at home with polymer or air-dry clay.
How-To Guide
Materials
- Polymer clay (white and terracotta/blush)
- Black pepper or dried coffee grounds (for speckles)
- Acrylic rolling pin
- Circle cutters or a small bowl to trace
- Craft knife
- Smooth work surface (ceramic tile or glass)
- Small sponges for smoothing
- High-gloss varnish or glaze
- Soft bristle brush
- Fine grit sandpaper
Step 1: Prepping and Mixing the Clay
-
Condition the clay:
Start by warming up your polymer clay in your hands. Knead it thoroughly until it becomes soft, pliable, and easy to work with. If you’re doing a date night, split the block so you each have a piece to work on. -
Add the speckled effect:
To achieve that faux-ceramic stoneware look, flatten your conditioned clay slightly and sprinkle a pinch of ground black pepper or dried coffee grounds onto the surface. -
Fold and knead:
Fold the clay over the speckles and knead it again until the particles are evenly distributed throughout the batch. Add more if you want a denser pattern. -
Roll it out:
Place the clay on your smooth work surface. Use the acrylic rolling pin to roll the clay into an even slab, aiming for a thickness of about 1/4 inch.
Step 2: Shaping the Dishes
-
Cut the circles:
Use a large circle cutter or place a small bowl upside down on the clay slab to trace a circle. Cut out the shape cleanly with a craft knife. -
Soften the edges:
Dip your finger in a little water (or baby oil for polymer clay) and run it gently around the cut rim to smooth out any sharp edges or drag marks from the knife. -
Create the lip:
Gently curve the edges of the circle upward to create a shallow bowl shape. I like to pinch the clay lightly between my thumb and forefinger while rotating the piece to get an even wall height. -
Refine the shape:
Place the dish back on the surface and press the center flat gently to ensure it will sit effectively. Use a damp sponge to smooth out fingerprints on the inside and outside walls.
Secret Ingredient
Don’t have pepper? Finely crushed dried tea leaves or even actual vanilla bean specks create amazing, organic textures in clay.
Step 3: Baking and Finishing
-
Bake the clay:
Preheat your oven according to the manufacturer’s instructions on your specific package of clay. Place the dishes on a parchment-lined baking sheet and bake for the required time. -
Cool down completely:
Once bakes, turn off the oven and let the dishes cool down slowly inside, or remove them and let them rest on a wire rack until they are room temperature. -
Sand for smoothness:
Take a piece of fine-grit sandpaper and wet it slightly. Gently sand the rims and the outer walls of the dishes to remove any remaining imperfections or bumps. -
Dust off debris:
Wipe the dishes down thoroughly with a damp cloth or rinse them under water to ensure all sanding dust is removed before the next step. -
Apply the first coat of glaze:
Using a soft bristle brush, apply a thin, even layer of high-gloss varnish or sculpey glaze to the entire surface of the dish. -
Let it cure:
Allow the first coat to dry completely. This usually takes about 30 minutes to an hour depending on the brand of varnish used. -
Add a second coat:
Apply a second layer of gloss to give it that -
Final cure:
Let the final coat dry for at least 24 hours to ensure the finish is hard and durable before placing jewelry inside.
Make it Metallic
Paint the very rim of the dish with liquid formatting leaf gold after baking but before glazing for a chic, high-end finish.
Place your new matching dishes on a bedside table to hold your daily essentials in style

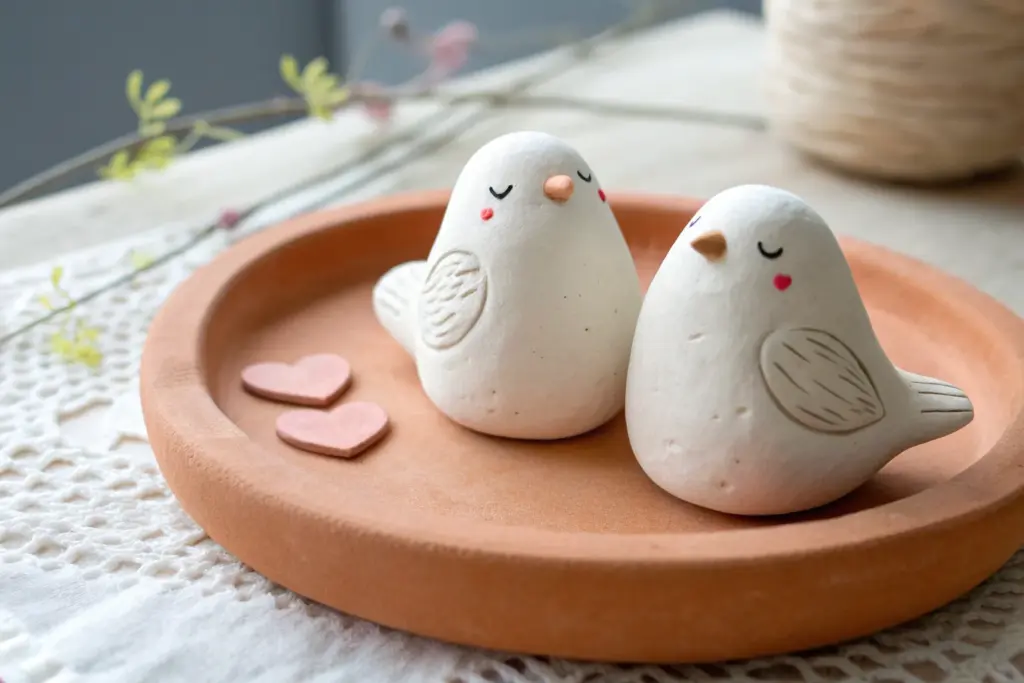
Heart-Shaped Ring Holders
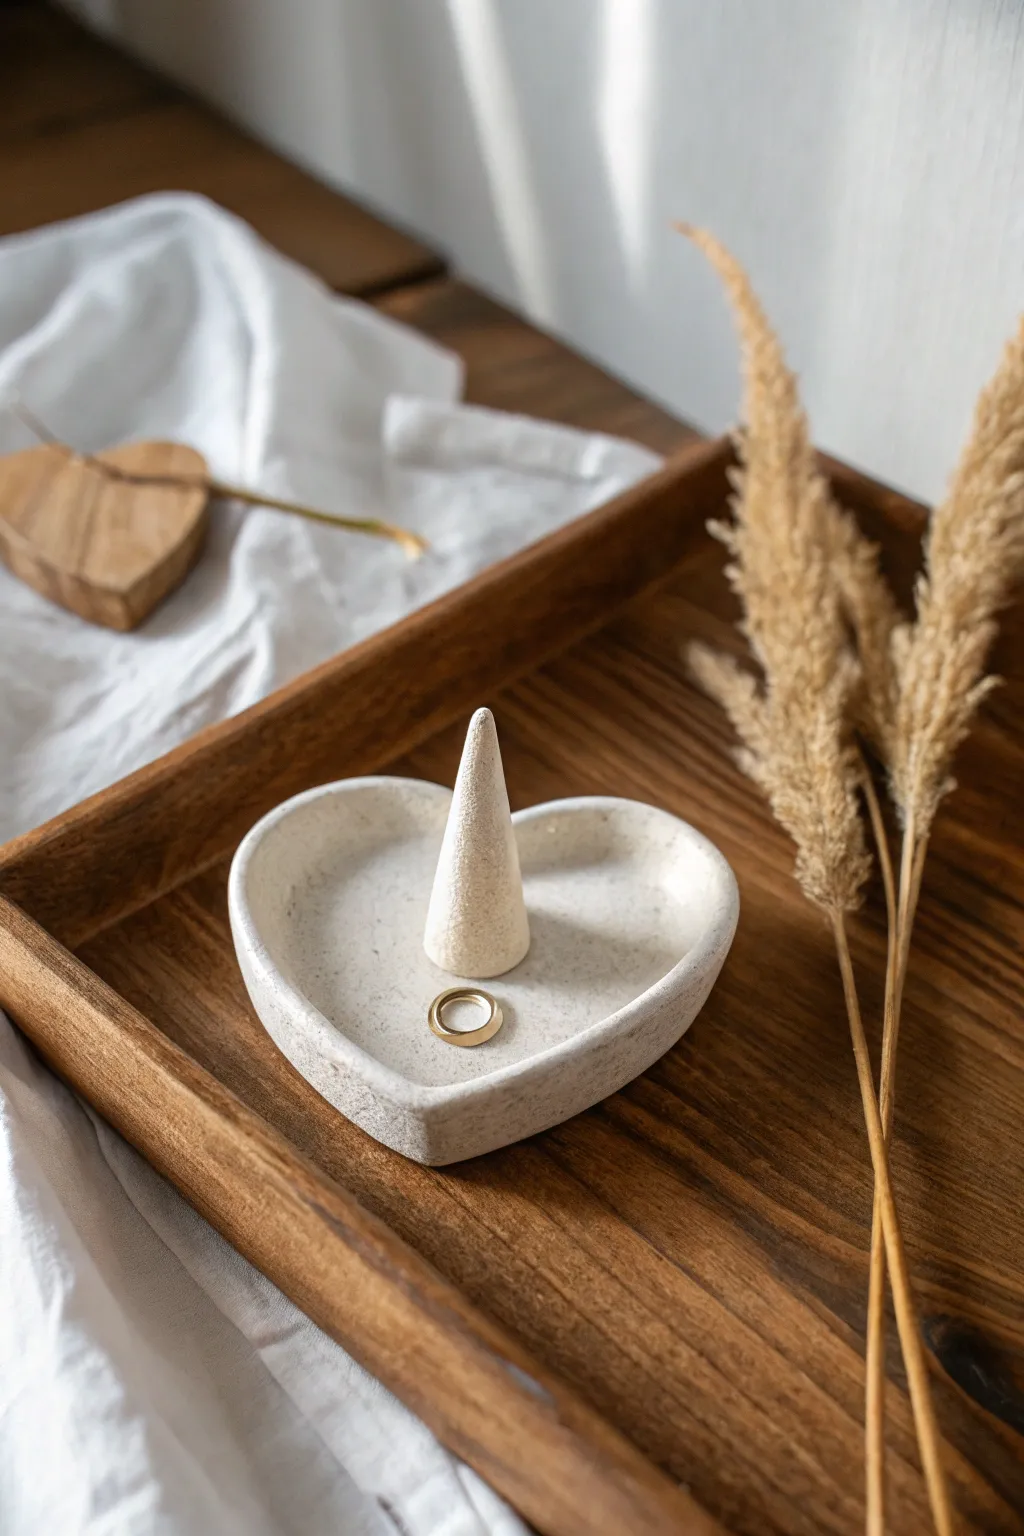
This charming trinket dish combines a romantic heart shape with a functional cone center, perfect for keeping rings safe. The speckled finish gives it a modern, organic pottery feel that looks effortlessly chic on any bedside table.
Detailed Instructions
Materials
- Speckled pottery clay (or air-dry clay with added speckles)
- Clay roller or rolling pin
- Heart-shaped cookie cutter (medium to large)
- Needle tool or fettling knife
- Small sponge
- Small bowl of water
- Slip (clay mixed with water to a paste)
- Scoring tool (or an old toothbrush)
- Sanding sponge (fine grit)
- Matte clear sealant or glaze (optional)
Step 1: Shaping the Base
-
Prepare your workspace:
Lay down a piece of canvas or a silicone mat to prevent the clay from sticking to your table. Take a ball of clay about the size of a lemon and knead it briefly to remove air bubbles. -
Roll out the slab:
Use your roller to flatten the clay into an even slab. Aim for a thickness of about 1/4 inch (6mm)—not too thin, or the bottom might crack during drying. -
Cut the heart:
Press your heart-shaped cookie cutter firmly into the slab. If you don’t have a cutter, you can sketch a heart lightly with a needle tool and cut it out by hand for a more organic look. -
Smooth the edges:
Dip your finger in a little water and gently run it along the cut edge of the heart to soften any sharp corners left by the cutter. -
Create the rim:
Gently pinch and lift the edges of the heart upwards to create a shallow wall. I like to continuously smooth the clay with my thumb as I lift to cultivate that nice inward curve shown in the photo.
Clean Edges Trick
Use a damp paintbrush instead of your finger to smooth the tight inner corner of the heart rim; it reaches crevices easily without denting the shape.
Step 2: Crafting the Cone
-
Form the cone shape:
Take a smaller piece of leftover clay and roll it into a thick coil. Roll one end with more pressure to tapering it into a cone shape. -
Refine the cone:
Stand the cone up on your work surface gently tap the base/bottom to make it perfectly flat. Use your fingers to smooth the sides until it looks symmetrical. -
Check the proportions:
Place the cone loosely into the center of your heart dish to ensure it isn’t too tall or too wide. Adjust as needed by rolling it further. -
Score the attachment points:
Use your scoring tool to scratch rough hatch marks onto the bottom of the cone and the center of the heart dish where the cone will sit. -
Add slip and attach:
Dab a generous amount of slip onto the scored areas. Press the cone firmly onto the center of the dish. Give it a tiny wiggle to lock the clay particles together.
Step 3: Finishing Touches
-
Blend the seam:
Use a small modeling tool or your pinky finger to smooth the clay where the cone meets the base. You want it to look like one seamless piece. -
Final sponge wipe:
Take a damp (not soaking) sponge and wipe the entire piece. This removes fingerprints and brings the speckled grain to the surface. -
Slow drying:
Place the dish away from direct sunlight or drafts. Let it dry slowly for 24-48 hours. If edges dry too fast, they might curl, so cover loosely with plastic if necessary. -
Sand for perfection:
Once fully dry (bone dry), use a fine-grit sanding sponge to gently buff away any remaining rough spots, especially around the rim. -
Seal or fire:
If using air-dry clay, apply a matte clear sealant to protect the finish. If using ceramic clay, it’s now ready for the kiln.
Make It Yours
Before drying, stamp initials or a date into the bottom of the heart for a personalized anniversary gift.
Enjoy displaying your favorite rings on this sweet, handcrafted piece

Cute Face Magnets Set
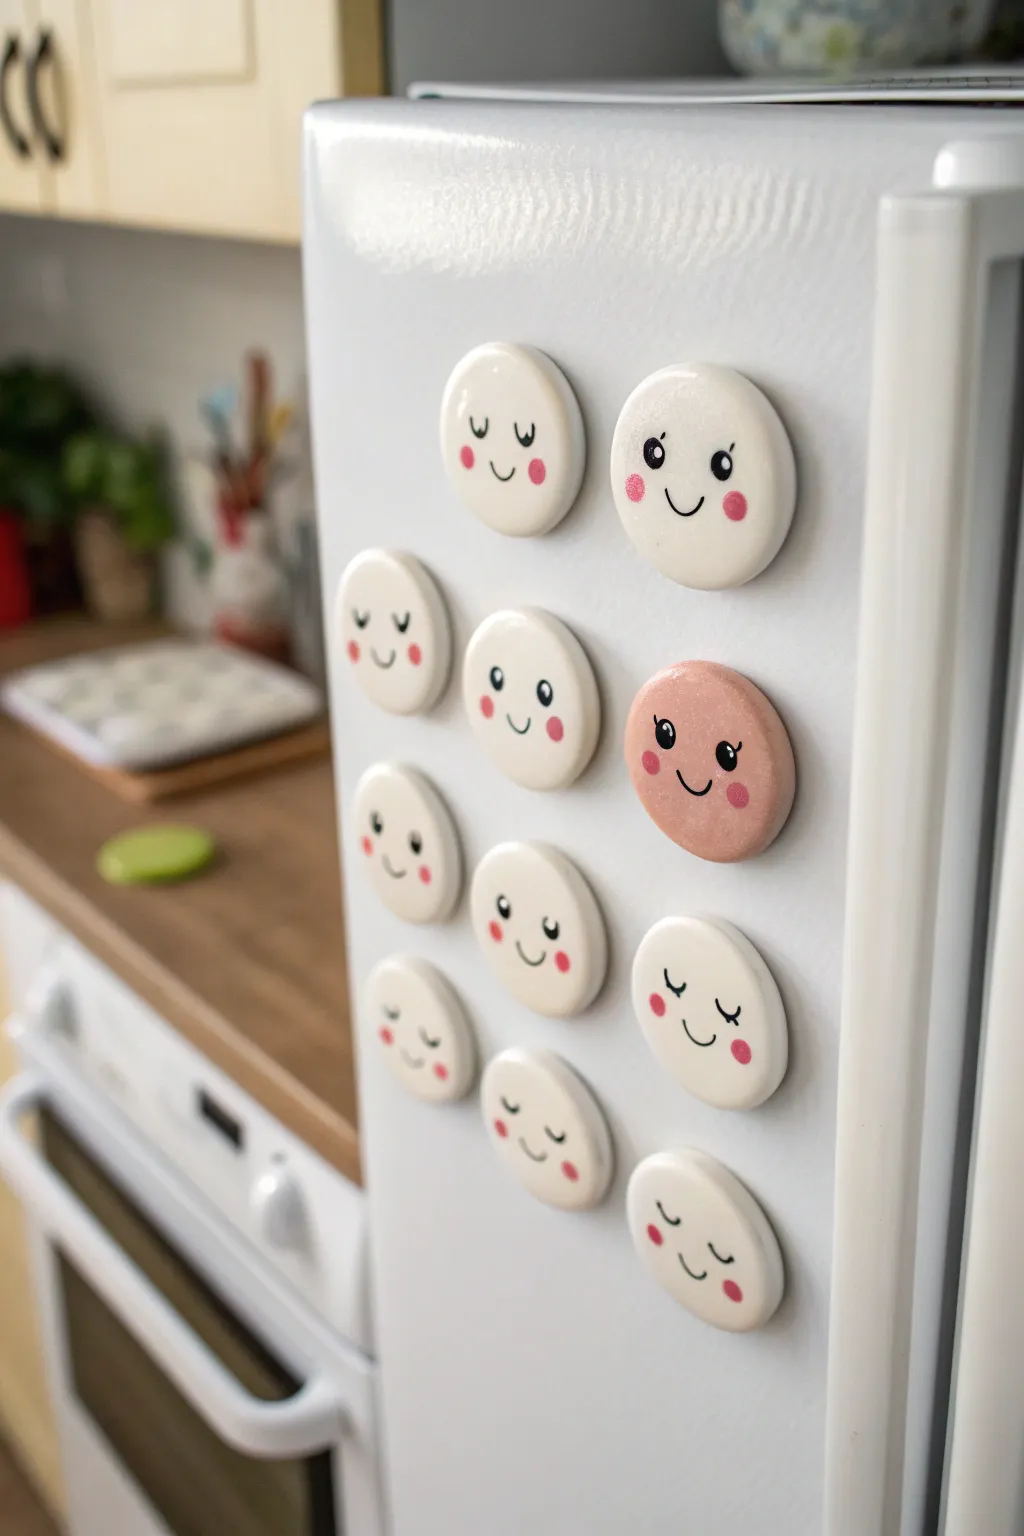
These adorable face magnets bring a touch of playful personality to your fridge with their simple, clean design and sweet expressions. Made from basic air-dry clay and painted with minimalist details, this set includes a mixture of white faces and a single charming pink accent magnet.
Step-by-Step
Materials
- White smooth air-dry clay (or polymer clay)
- Acrylic paints (White, Black, Soft Pink, Peach)
- Fine detail paintbrushes (size 0 and 00)
- Circular cookie cutter or small round cup (approx. 1.5 inches diameter)
- Rolling pin
- Sandpaper (fine grit, 400 or higher)
- Gloss varnish or clear sealant
- Round ceramic magnets (strong)
- Superglue or heavy-duty craft glue
- Parchment paper or non-stick mat
- Dotting tool or toothpick
Step 1: Shaping the Clay Rounds
-
Condition the clay:
Begin by taking a chunk of white air-dry clay and kneading it in your hands until it is soft, pliable, and free of cracks. If the clay feels dry, I like to dampen my fingers slightly to restore moisture. -
Tint one portion:
Separate a small ball of clay (enough for one or two magnets). Mix in a very small drop of peach or pink acrylic paint, kneading it thoroughly until the color is uniform and matches the pink magnet seen in the photo. Leave the rest white. -
Roll out the slab:
Place your clay on a piece of parchment paper. Use a rolling pin to flatten the clay to an even thickness of about 1/4 inch (6mm). Ensure it’s not too thin, or the magnets won’t have enough depth. -
Cut the circles:
Using your circular cutter, press firmly into the clay to cut out your shapes. You’ll want to make about 10-12 circles to create a full set like the one shown. -
Smooth the edges:
Dip your finger in a little water and gently run it around the cut edge of each circle to smooth out any sharp ridges or burrs left by the cutter. The goal is a soft, rounded finish. -
Dry completely:
Keep the circles on a flat surface to dry. Depending on your humidity and clay type, this takes 24-48 hours. Flip them over halfway through the drying process to ensure the bottoms dry evenly and don’t warp.
Step 2: Painting the Expressions
-
Sand for perfection:
Once fully dry and hard, lightly sand the surface and edges with fine-grit sandpaper. This creates the ultra-smooth, porcelain-like finish visible in the photo. -
Prime the surface:
To get that crisp white look, apply two thin coats of white acrylic paint to the white circles. Let the first coat dry before applying the second. -
Sketch the faces:
Use a very light pencil to sketch different expressions on each circle. Vary them up: try wide-set eyes, winking eyes, sleeping eyes (u-shaped curves), and simple smiles. -
Paint the eyes and mouth:
Using your finest brush and black paint, carefully trace over your pencil lines. For the open eyes, paint small black circles. Add tiny eyelashes on the outer corners for extra cuteness if desired. -
Add eye highlights:
For the open eyes, dip a toothpick or a clean dotting tool into white paint. Add a tiny white dot in the upper corner of each black pupil to create a ‘sparkle’ effect. -
Paint rosy cheeks:
Mix a soft pink paint. Using a dotting tool or the back end of a paintbrush, stamp two round pink circles onto the cheeks of each face. Keep the paint fairly thick so it stands out slightly.
Smooth Surface Secret
Before painting, wipe your dried clay pieces with a slightly damp baby wipe. This removes sanding dust that can make your paint job look gritty or uneven.
Step 3: Assembly and Finishing
-
Seal the artwork:
Once the face details are completely dry, coat the front and sides of each magnet with a high-gloss varnish. This replicates the shiny, ceramic look of the magnets in the image and protects the paint. -
Let the varnish cure:
Allow the varnish to dry fully according to the bottle instructions. Ensure no dust settles on them while they are sticky. -
Attach the magnets:
Flip the clay circles over. Place a drop of strong superglue or heavy-duty craft adhesive in the center of the back. -
Press and hold:
Press a round ceramic magnet into the glue. Hold it firmly for 30 seconds to ensure a tight bond. Let the glue cure completely (usually overnight) before sticking them to your fridge.
Make Them 3D
Before drying the clay, press tiny, flattened balls of clay onto the face area to create raised 3D cheeks, then paint them pink later for tactile texture.
Now you have a charming gallery of friendly faces ready to brighten up your kitchen space

The Complete Guide to Pottery Troubleshooting
Uncover the most common ceramic mistakes—from cracking clay to failed glazes—and learn how to fix them fast.
Stamp-Texture Coaster Duo
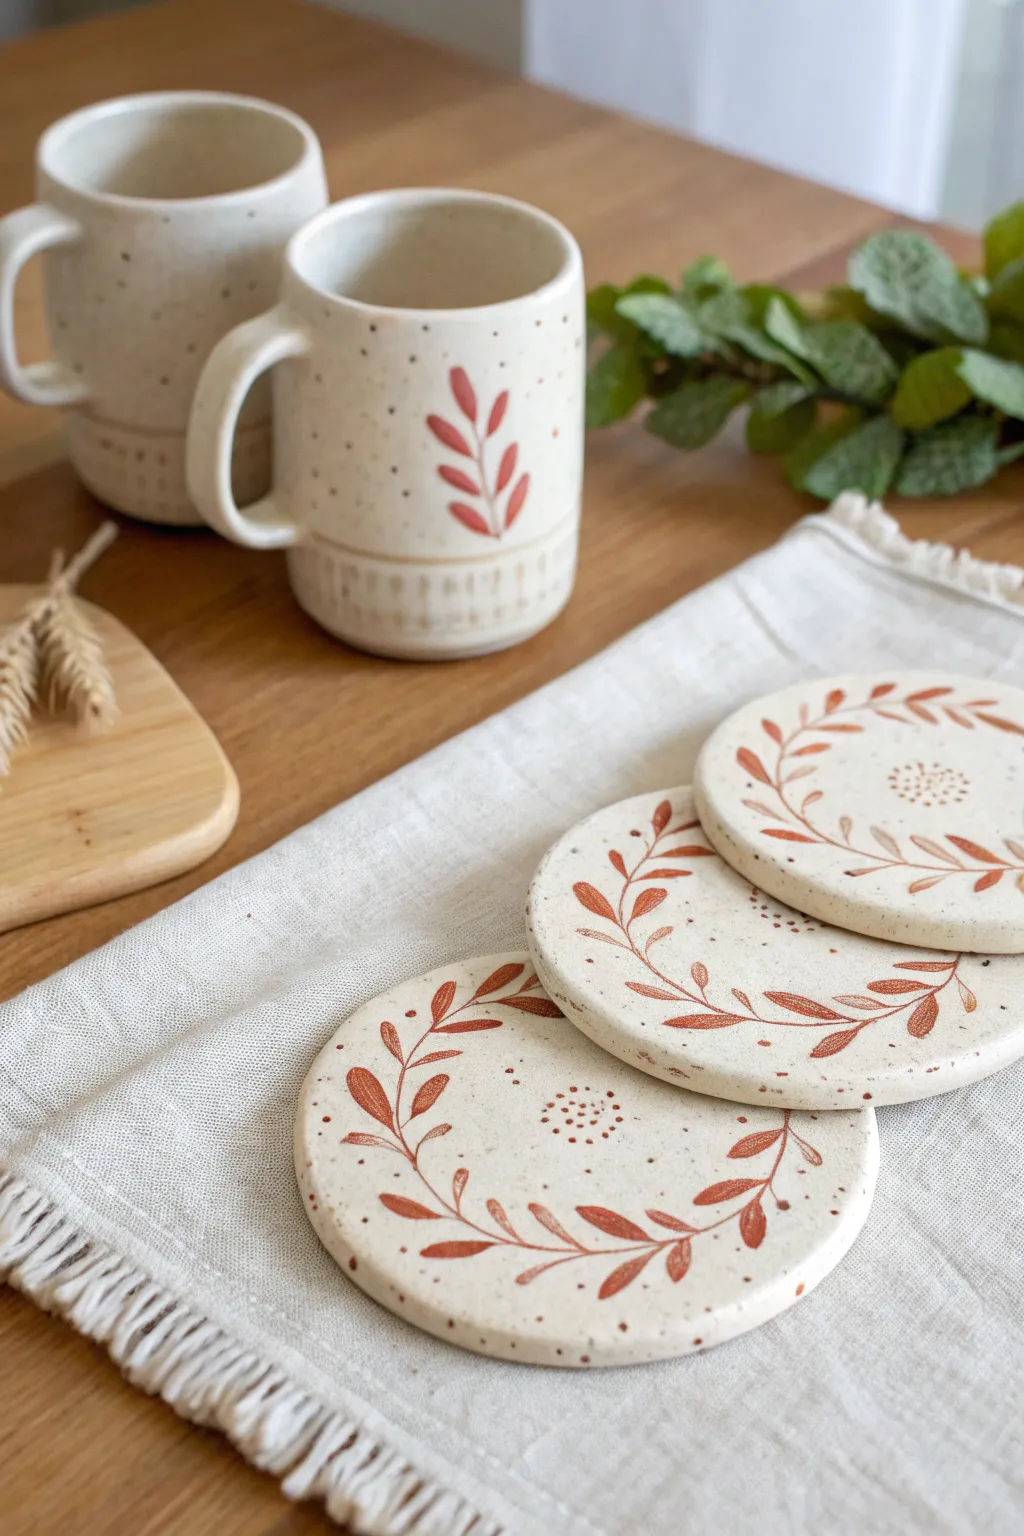
Bring warmth to your coffee table with these charming, rustic clay coasters featuring a delicate wreath of autumnal leaves. The natural speckled finish and hand-painted rust-colored motifs create a cozy, artisanal feel perfect for a relaxing clay date.
Step-by-Step Tutorial
Materials
- White stoneware clay with speckles (or plain white air-dry clay)
- Rolling pin
- Circular cookie cutter (approx. 4 inches) or a bowl to trace
- Sponge
- Needle tool or toothpick
- Small fine-tip paintbrush
- Rust or terracotta colored underglaze (or acrylic paint if using air-dry clay)
- Clear glaze (or varnish for air-dry clay)
- Fettling knife or clay rib
- Canvas or cloth work surface
Step 1: Shaping the Base
-
Prepare your clay:
Begin by wedging a ball of speckled white stoneware clay to remove any air bubbles. If you are using air-dry clay without speckles, you can knead in some dried coffee grounds or black pepper for a faux-speckled look. -
Roll out the slab:
Place your clay on a canvas surface to prevent sticking. Use a rolling pin to flatten the clay into an even slab, aiming for a consistent thickness of about 1/4 inch. -
Cut the circles:
Using a 4-inch circular cookie cutter, press firmly into the clay to create your coaster shapes. If you don’t have a cutter, place a small bowl upside down and trace around it with a needle tool. -
Smooth the edges:
Lift the circles carefully. Dip a small sponge in water and gently run it around the circumference of each coaster to soften any sharp edges left by the cutter. -
Flatten and refine:
Run a rubber rib or your damp sponge lightly over the surface to ensure it is perfectly flat and smooth, ready for painting.
Step 2: Designing the Wreath
-
Plan your spacing:
Before committing to paint, lightly mark four equidistant points around the edge of the coaster with a needle tool to guide where your leaf stems will start and end. -
Paint the main stems:
Load a fine-tip brush with rust-colored underglaze. Paint a thin, curved line connecting your marked points, creating a circular flow around the coaster’s border. Leave a small gap between the stem ends. -
Add the leaves:
Along each curved stem, paint small, almond-shaped leaves. Use a ‘press and lift’ motion with your brush—press down for the belly of the leaf and lift up to create a sharp point. -
Create the center detail:
In the very center of the coaster, dip the wrong end of your paintbrush or a toothpick into the underglaze and dab a small cluster of dots in a circular formation. -
Add decorative accents:
Fill any empty negative space around the wreath with tiny random dots using the tip of your brush to enhance the whimsical, speckled vibe.
Keep it Flat
To ensure your coasters stay perfectly flat while drying, place a wooden board gently on top of them (sandwiching them) once they are leather hard.
Step 3: Firing and Finishing
-
Initial drying:
Place your coasters on a flat board and cover them loosely with plastic to dry slowly. This prevents the edges from curling up as the moisture evaporates. -
Bisque fire:
Once fully bone dry, fire the pieces in a kiln to cone 04 (standard bisque temperature). If using air-dry clay, simply let them dry completely for 24-48 hours. -
Apply clear glaze:
For ceramic clay, dip the bisqued coasters into a clear, transparent glaze. Shake off any excess drips and wipe the bottom clean with a sponge so it doesn’t stick to the kiln shelf. -
Final smooth check:
Check the surface for any bubbles in the glaze and smooth them down with your finger before the final firing. -
Glaze fire:
Fire the coasters again to the maturation temperature of your clay body (likely cone 5 or 6 for stoneware). For air-dry projects, apply a coat of gloss varnish or resin sealant instead.
Mix & Match
Paint the leaf design in different seasonal colors—try olive green for spring or deep mustard yellow for a late summer vibe.
Now you have a beautiful handmade set ready for your next coffee break
Tiny Bud Vase Pair
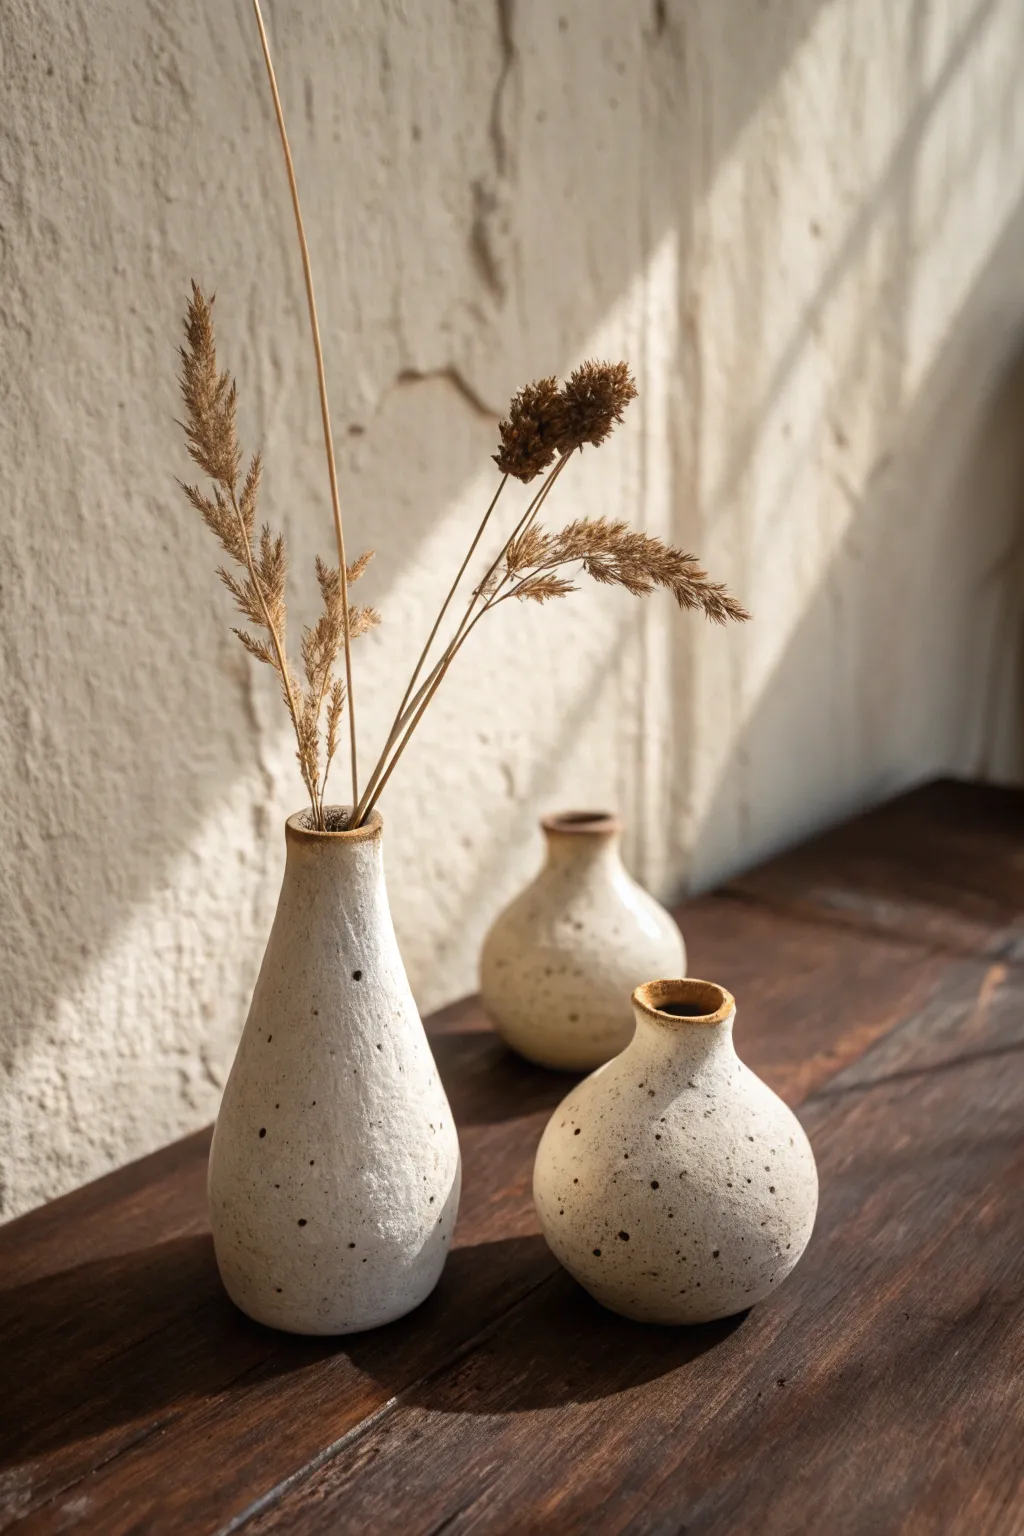
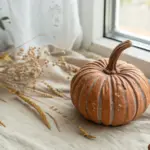
Embrace the imperfect beauty of wabi-sabi with this set of textured, minimalist bud vases. Featuring a speckled finish that mimics natural stone, these petite vessels serve as the perfect home for your favorite dried grasses or single stems.
Step-by-Step
Materials
- White air-dry clay or stoneware clay (approx. 1 lb)
- Small bowl or cup of water
- Potter’s needle tool or toothpick
- Flat wooden modeling tool
- Sponge
- Acrylic paints (Cream/Off-White, Black/Dark Brown)
- Old toothbrush
- Sea salt or course sand (optional for texture)
- Matte spray varnish
Step 1: Shaping the Sphere Vase
-
Prepare the Clay:
Start with a ball of clay roughly the size of a tangerine. Knead it warmly in your hands to remove air bubbles and make it pliable. -
Create a Pinch Pot:
Push your thumb into the center of the ball, stopping about a half-inch from the bottom. Gently pinch and rotate the clay between your thumb and fingers to open up the internal space while maintaining a round exterior. -
Define the Neck:
Instead of keeping the rim wide, gently collar the clay inward at the top. Use your thumb and index finger to encircle the opening and slowly squeeze it narrower. -
Refine the Lip:
Once the neck is narrowed, smooth the very top edge with a wet finger to create a slight, soft flare. This should look organic rather than perfectly machine-cut.
Cracking at the rim?
If the clay starts splitting while you shape the neck, dip your finger in water and smooth the cracks immediately. Keep your movements slow to prevent stress on the clay.
Step 2: Forming the Tear-Drop Vase
-
Roll a Coil:
For the taller vase, start with a slightly larger amount of clay. Roll it into a thick cylinder or carrot shape on your work surface. -
Hollow the Form:
Stand the cylinder upright. Using your thumb or a modeling tool, bore a hole down the center, being careful not to pierce through the base. -
Shape the Belly:
Gently push the clay walls outward from the inside at the bottom slightly to create a weighted, tear-drop base. The top section should remain slender. -
Smooth the Transitions:
Use a damp sponge to wipe down both vases. This smooths out fingerprints but leaves the natural undalations of the hand-building process intact.
Make it Waterproof
Air-dry clay isn’t waterproof! To hold fresh flowers effectively, insert a small glass test tube or plastic vial inside the dried clay form before arranging.
Step 3: Adding Texture & Finishing
-
Create Surface Texture to Mimic Stone:
Before the clay dries, take an old toothbrush or a crumpled ball of foil and gently tap the entire surface of the vases. This removes the ‘plastic’ smooth look of clay. -
Dry Completely:
Set your vases aside to dry. I find this usually takes 24-48 hours depending on humidity; the clay should turn completely chalky white. -
Base Coat Painting:
Paint the exterior of the vases with a matte cream or off-white acrylic paint. You may need two coats for full opacity. -
The Speckle Technique:
Dilute a small amount of dark brown or black paint with water until it’s inky. Dip an old toothbrush into this mixture. -
Apply the Speckles:
Running your thumb across the bristles, flick the paint spray onto the vases. Test on paper first to control the droplet size. Aim for a mix of tiny mists and slightly larger dots. -
Highlighting the Rim:
Mix a little brown paint into your cream base color to get a tan shade. Carefully paint the very top rim of each vase to mimic exposed stoneware clay. -
Seal the Vases:
Once the paint is fully dry, spray the vases with a matte varnish to protect the finish without adding unwanted shine.
Enjoy styling these rustic little vessels on a sunlit shelf or bedside table


What Really Happens Inside the Kiln
Learn how time and temperature work together inside the kiln to transform clay into durable ceramic.
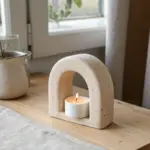
Simple Tea Light Holders
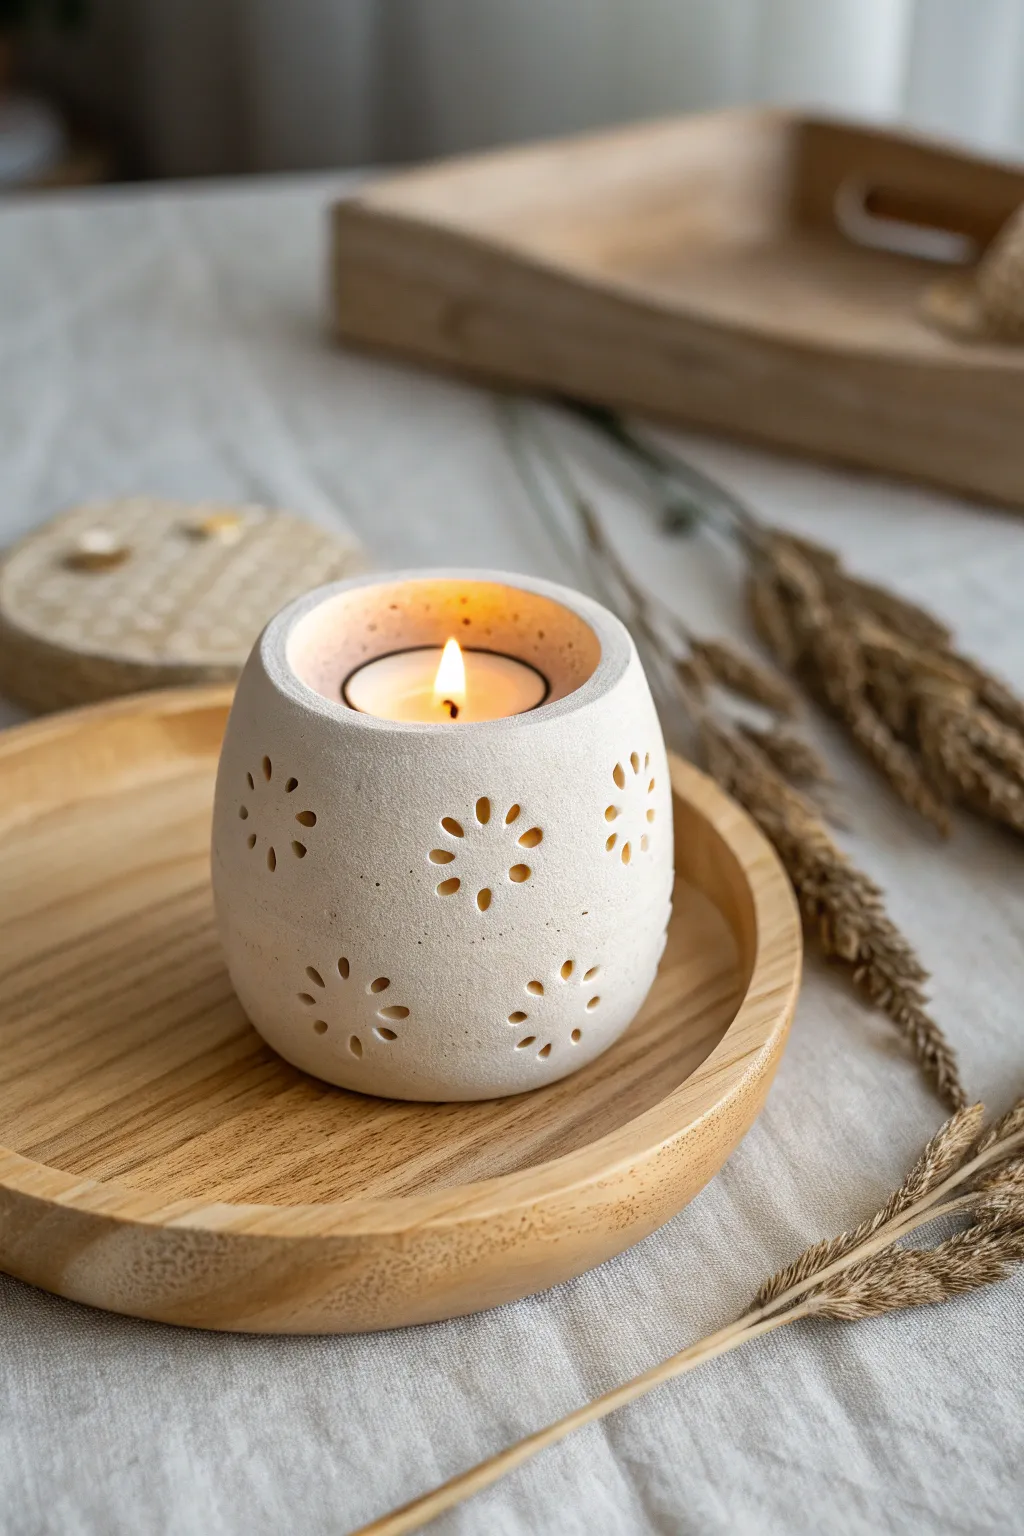
This charming, rounded tea light holder features delicate flower cutouts that cast beautiful shadows when lit. Its soft, bulbous shape and matte texture give it a cozy, organic feel perfect for a relaxing craft night.
Step-by-Step Guide
Materials
- White air-dry clay (or white stoneware clay)
- Small rolling pin
- Rolling guides or wooden slats (approx. 5-7mm thick)
- Small circular cookie cutter (approx. 8-10cm diameter)
- Cylinder mold (like a soda can or glass jar)
- Clay knife or craft knife
- Small drinking straw or specialized clay hole punches
- Small sponge
- Bowl of water
- Fine-grit sandpaper
Step 1: Forming the Base
-
Condition the Clay:
Begin by working a handful of white clay in your hands to warm it up. Knead it until it feels pliable and smooth, removing any air bubbles that might be trapped inside. -
Roll the Slab:
Place your clay on a canvas cloth or non-stick mat. Use your rolling guides on either side to ensure an even thickness, then roll the clay out into a long rectangle, roughly 5-7mm thick. -
Cut the Rectangle:
Using a knife and a ruler, cut a clean rectangle strip. The length needs to be just enough to wrap around your chosen cylinder mold with a tiny bit of overlap, and the height should be about 8-10cm. -
Wrap the Cylinder:
Ideally, wrap your cylinder mold in a piece of paper or cling film first for easy removal. Wrap your clay strip around the mold. -
Join the Seam:
Where the two ends of the clay meet, score both edges (scratch them up with a tool) and add a little water (slip). Press them firmly together. -
Smooth the Join:
Use your finger or a modeling tool to smudge the clay across the seam line until it disappears completely. Do this on both the outside and inside if reachable.
Clean Hole Trick
Let the clay dry to a ‘leather hard’ state (stiff but cool) before punching holes. The clay will cut much cleaner without deforming the wall shape.
Step 2: Shaping and Detailing
-
Create the Bulb Shape:
Gently gently slide the clay cylinder off your mold. Now, cup your hands around the form and gently press inwards at the top and bottom rims to curve them slightly, creating that rounded, ‘fat’ belly shape. -
Add the Bottom:
Roll out a small separate piece of clay. Place your cylinder on top of it and trace around the base. Cut out this circle, score the edges, and attach it to the bottom of your cylinder to seal it. -
Smooth the Edges:
Dip your sponge lightly in water and run it over the top rim to round it off smoothly. You want a soft, stone-like lip, not a sharp cut edge. -
Mark the Flower Centers:
Using a toothpick, lightly dot where you want the center of each flower to be. I like to stagger them—one row around the middle, and maybe another row offset below or above. -
Punch the Petals:
Take a small straw or a tiny clay hole cutter. Press it into the clay to create the petal holes around your center marks. Arrange 6-8 holes in a circle to form a daisy shape. -
Clean the Cutouts:
If the clay gets pushed inside, use a needle tool to gently flick the excess bits out. You can smooth the tiny holes with a damp brush. -
Dry Slowly:
Set the piece aside in a spot away from direct sunlight or drafts. Let it dry slowly for 24-48 hours. Turning it upside down halfway through helps the bottom dry evenly.
Collapsing Walls?
If your shape sags while working, gently stuff the inside with soft tissues or paper towels to support the walls until the clay stiffens up.
Step 3: Finishing
-
Sand for Texture:
Once bone dry, take your fine-grit sandpaper and gently rub the entire surface. This removes fingerprints and gives that lovely matte, stone finish seen in the photo. -
Dust Off:
Use a dry, soft paintbrush to sweep away all the clay dust, especially from inside the little flower holes. -
Seal (Optional):
If using air-dry clay, you can apply a matte varnish for protection, though leaving it raw preserves the natural texture best for this specific look.
Place a tea light inside and enjoy the warm, patterned glow your creation casts on the table
Alphabet Initial Charms
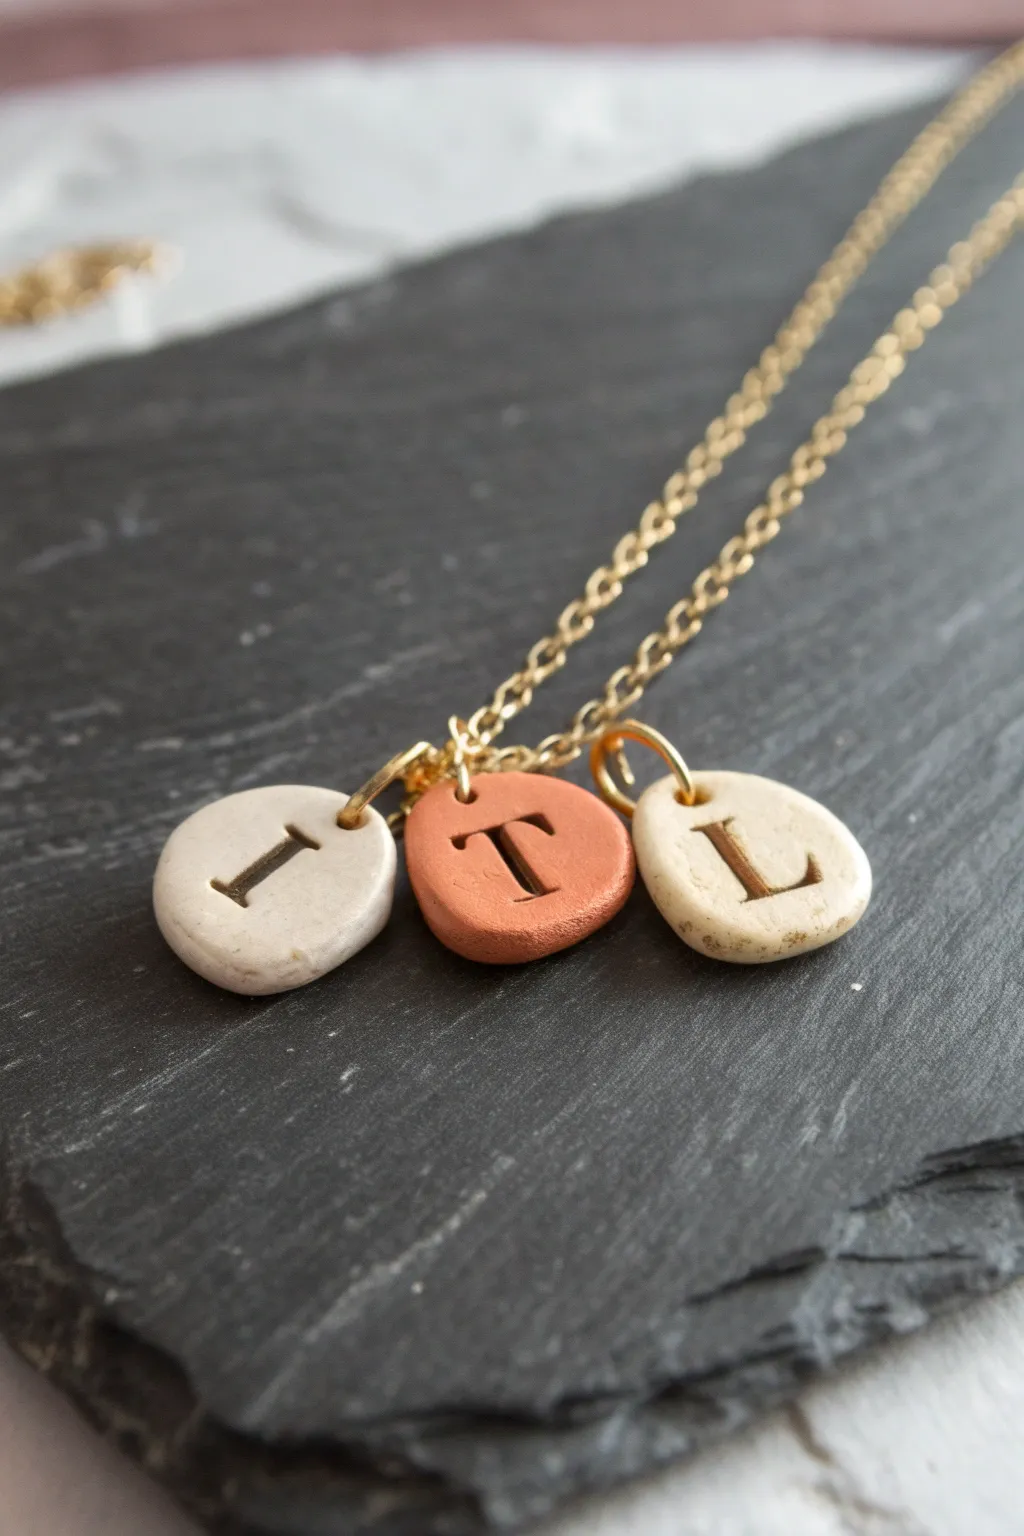
Create personalized, minimalist jewelry with these sweet, pebble-like initial charms. The rough edges and stamped letters give them an artisanal, handmade feel perfect for gifts or keeping close to your heart.
Step-by-Step Tutorial
Materials
- Polymer clay (white and terracotta colors)
- Small alphabet letter stamp set
- Gold jump rings (6mm or 8mm)
- Gold chain necklace
- Rolling pin or acrylic roller
- Small circle cutter (approx. 0.5 inch) or a bottle cap
- Needle tool or toothpick
- Parchment paper or baking tile
- Acrylic paint (brown or black) for antiquing (optional)
- Gloss glaze or varnish (optional)
Step 1: Shaping the Clay
-
Conditioning:
Start by warming up a small amount of polymer clay in your hands. Knead it until it becomes soft, pliable, and easy to work with without cracking. -
Rolling out:
Place the ball of clay onto parchment paper or a smooth work surface. Use your roller to flatten it to a thickness of about 1/4 inch (6mm). You want them slightly chunky, like little stones. -
Cutting the shapes:
Use your small circle cutter to punch out rounds. If you don’t have a cutter, you can roll small balls and flatten them with your thumb for a more organic look. -
Softening edges:
Gently tap the edges of your cut circles with your finger to remove any sharp cut lines. I like to press slightly on the sides to warp the perfect circle into a more natural, pebble-like oval shape. -
Making the hole:
Take your needle tool or toothpick and pierce a hole near the top edge of the charm. Wiggle the tool slightly to ensure the hole is large enough for your jump ring to fit through later.
Stamp Stuck?
If the clay sticks to your stamp, lightly dust the surface of the clay with cornstarch or dip the stamp in water before pressing to ensure a clean release.
Step 2: Stamping and Baking
-
Positioning the stamp:
Select your desired letter from your stamp set. Align it carefully over the center of the clay pebble. -
Pressing the impression:
Press the stamp firmly and evenly into the clay. Don’t push all the way through; you just want a deep, clear impression of the letter. Rock it very slightly if needed to get all serif details. -
Refining:
If the stamping process distorted the shape of the pebble, gently reshape it with your fingers while avoiding the stamped area. -
Baking prep:
Arrange your charms on a baking sheet lined with parchment reference. Make sure they aren’t touching each other. -
Baking:
Bake according to your specific polymer clay package instructions. This is usually around 275°F (135°C) for 15-30 minutes depending on thickness. Let them cool completely before handling.
Step 3: Finishing Touches
-
Highlighting the letter:
To make the letter pop like in the photo, dip a small brush in brown or black acrylic paint diluted with a tiny bit of water. -
Filling the groove:
Paint into the stamped groove, ensuring the recessed area is fully covered. Don’t worry about being messy here. -
Wiping back:
Immediately take a damp paper towel or cloth and wipe strictly across the surface. This removes paint from the top but leaves it trapped inside the stamped letter for contrast. -
Opening jump rings:
Using two pairs of pliers (or your fingers if the metal is soft enough), twist a gold jump ring open. Always twist side-to-side, never pull the ends apart. -
Assembly:
Slide the open jump ring through the hole in your clay charm. Before closing it, loop it onto your gold chain. -
Closing up:
Twist the jump ring back into a closed position, ensuring the ends meet perfectly flush so the heavy charm doesn’t slip off.
Add Some Marble
Twist white and terracotta clay together before rolling. Stop when you see streaks for a sophisticated marble effect instead of solid colors.
Wear your new initial necklace proudly or wrap it up as a thoughtful DIY present

TRACK YOUR CERAMIC JOURNEY
Capture glaze tests, firing details, and creative progress—all in one simple printable. Make your projects easier to repeat and improve.
Mini “You + Me” Keychains
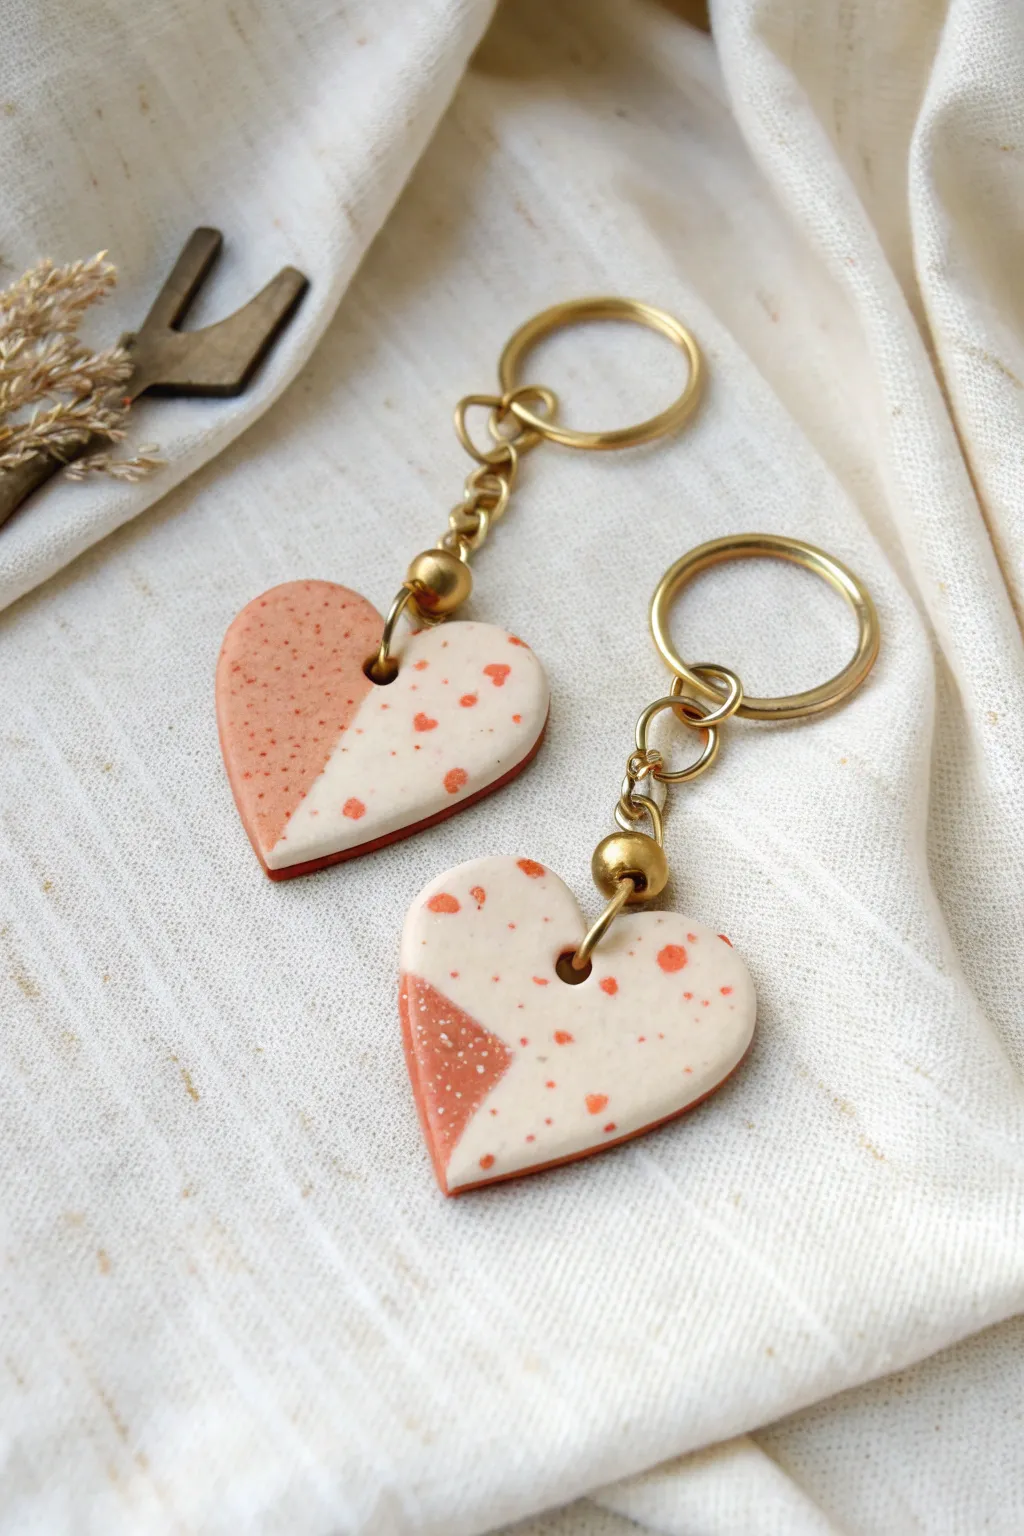
These charming polymer clay hearts feature a modern color block design with delicate speckling that creates a faux-ceramic look. They make the perfect low-pressure project for a date night, resulting in a sweet keepsake you can both carry daily.
Step-by-Step Guide
Materials
- Polymer clay (terracotta or rust orange)
- Polymer clay (cream or beige)
- Polymer clay (dark brown or black for speckling)
- Acrylic roller or glass jar
- Heart-shaped clay cutter (medium size)
- X-acto knife or clay blade
- Toothpick or small circular cutter (for the hole)
- Oven and baking sheet
- Parchment paper
- Glossy glaze or polyurethane varnish (optional)
- Paintbrush (for glazing)
- 2 Gold keychains with jump rings
- 2 Gold bead spacers (large hole)
- Jewelry pliers
Step 1: Preparing the Clay Slabs
-
Condition the base colors:
Start by warming up your terracotta and cream clays separately in your hands. Knead them until they are soft, pliable, and free of cracks. -
Roll out the cream clay:
Using your acrylic roller, flatten the cream clay into a smooth sheet about 3mm thick. Try to keep the thickness consistent so the final heart lies flat. -
Prepare the terracotta accent:
Roll out the terracotta clay to the exact same thickness as the cream sheet to ensure a seamless join later on. -
Create the faux-ceramic speckles:
Take a tiny amount of dark brown or black clay and crumble it into microscopic bits. Sometimes I like to use a mixture of black and terracotta crumbs for depth. -
Embed the speckles:
Sprinkle these tiny crumbs randomly over your cream clay sheet. Gently roll over the sheet again with the acrylic roller just enough to press the crumbs flush into the surface without distorting the shape too much. -
Add color speckles:
Repeat the speckling process on the cream sheet using tiny crumbs of the terracotta clay to tie the color palette together.
Clean Cut Tip
To avoid distortion when lifting the clay, place a piece of plastic wrap over the clay before using your cutters. This creates a lovely domed edge.
Step 2: Assembling the Design
-
Cut geometric shapes:
Use your blade to cut a clean, straight diagonal line across a portion of your cream clay sheet. -
Create the color block:
Cut a matching straight edge on your terracotta clay sheet. Simply press the two cut edges together gently on your work surface so they bond. -
Smooth the seam:
Place a piece of parchment paper over the join and lightly roll over it to merge the two colors into one single, flat slab. -
Cut out the hearts:
Position your heart cutter over the clay slab so that the diagonal seam runs through the heart shape—experiment with different angles for variety. Press down firmly to cut two hearts. -
Pierce the holes:
Use a toothpick or a tiny straw to poke a hole near the top center of each heart. Make sure the hole is large enough for your jump ring to fit through freely. -
Refine the edges:
Gently smooth the sides of the hearts with your fingertip to remove any sharp bits or drag marks left by the cutter.
Emboss It
Before baking, use small letter stamps to gently press your initials or a significant date into the back of the clay for a hidden personalized touch.
Step 3: Finishing Touches
-
Bake the pieces:
Preheat your oven according to the clay package directions (usually around 275°F or 130°C). Bake the hearts on a parchment-lined sheet for about 15-20 minutes. -
Cool down:
Let the hearts cool completely before handling them. They will be slightly soft when hot but will harden as they return to room temperature. -
Apply glaze (optional):
For that shiny ceramic look seen in the photo, brush a thin layer of gloss glaze over the front and sides. Let it dry fully. -
Prepare the hardware:
Open a large jump ring using your jewelry pliers. Thread a gold bead onto the jump ring first if you want it to sit right at the base. -
Connect the keychain:
Loop the jump ring (with the bead) through the hole in the clay heart, and then attach the keychain loop. Close the jump ring securely with your pliers. -
Final check:
Give the hardware a gentle tug to ensure everything is secure, and repeat the assembly for the second keychain.
Give one heart to your partner and keep the other so you re always connected by your creative date night
Paired Mini Planter Markers
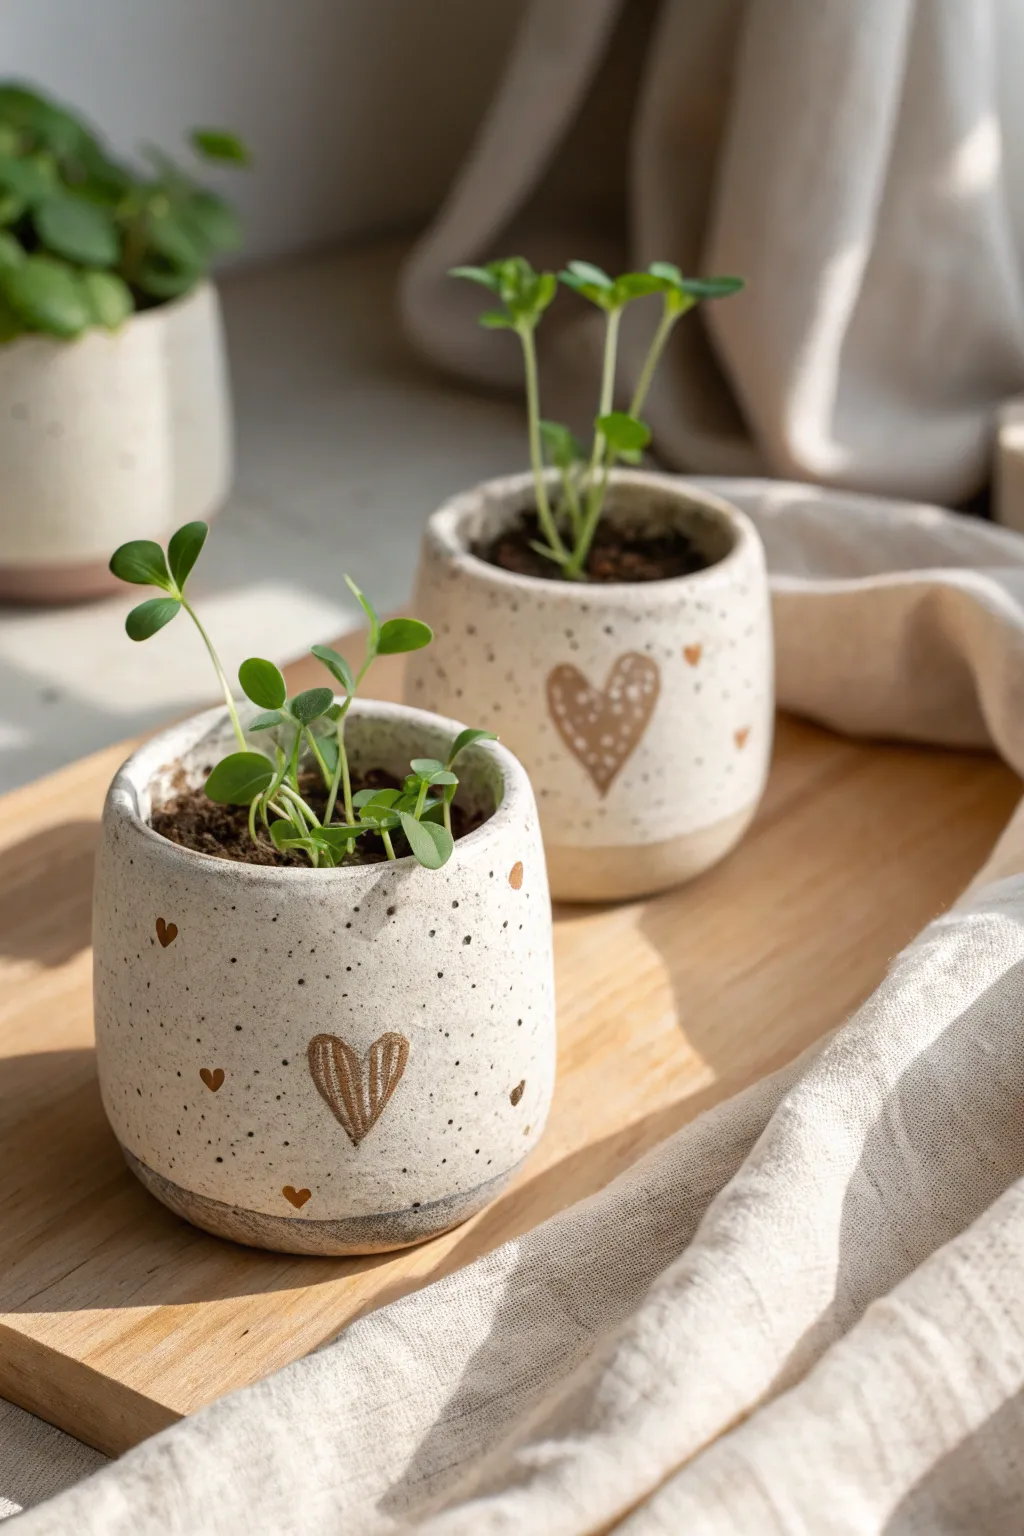
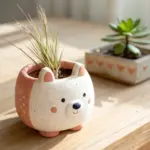
These darling mini planters feature a charming speckled finish and sweet metallic heart accents, perfect for small succulents or seedlings. The handcrafted, slightly irregular shape adds an organic warmth that makes them ideal for a cozy clay date.
Detailed Instructions
Materials
- White or light beige air-dry clay (or polymer clay)
- Speckled clay additive or black acrylic paint (if not using speckled clay)
- Geometric heart stamp or small paintbrush
- Gold metallic acrylic paint
- Gold paint pen (fine tip)
- Rolling pin
- Circular cookie cutter or jar lid (approx. 4 inches)
- Small bowl or cup (to use as a mold)
- Clay sculpting tools or a butter knife
- Bowl of water
- Sponge
- Clear sealant or glaze (matte or satin)
- Fine grit sandpaper
Step 1: Shaping the Base
-
Prepare the Clay:
Begin by conditioning your clay. If you are using plain clay and want the speckled look shown, knead in a small amount of dried coffee grounds or black pepper for texture, or plan to create the speckles with paint later. -
Roll Out the Slab:
Roll your clay out on a flat surface to an even thickness of about 1/4 inch. Aim for a consistent thickness to ensure even drying. -
Cut the Base:
Use your circular cutter or jar lid to cut out a round base for your pot. Set this aside gently. -
Create the Walls:
Roll out a long rectangular strip of clay. This will become the wall of your planter. Measure the circumference of your base to know how long the strip needs to be. -
Assemble the Pot:
Score (scratch) the edges of your base circle and the bottom edge of your rectangular strip. Dab a little water (slip) on the scored areas. -
Connect the Seams:
Wrap the strip around the base, pressing the scored edges together firmly. Where the two ends of the wall meet, score and slip them, then blend the seam with your finger or a tool until it disappears. -
Smooth the Edges:
Dip your finger or a slightly damp sponge into water and smooth out the rim and the connection points. I like to leave the rim slightly rounded for that soft, handmade look. -
Form the Curve:
Gently gently press the walls outward from the inside to create a slight belly or curve to the pot, rather than straight vertical walls.
Heart Texture Trick
For the hatched heart look, scratch the lines into the wet clay before painting, then paint over the texture later.
Step 2: Decorating & Finishing
-
Drying Phase:
Let the pots dry completely according to your clay package instructions. This usually takes 24-48 hours for air-dry clay. -
Sanding:
Once bone dry, use fine-grit sandpaper to smooth any rough bumps or sharp edges on the rim. -
Create the Speckles:
If your clay wasn’t pre-speckled, dilute a tiny drop of black acrylic paint with water. Dip an old toothbrush or stiff brush in it and flick the bristles to spray fine speckles all over the white surface. -
Outline the Heart:
Using a pencil, very lightly sketch a heart shape on the front of the pot. Keep it simple and centered. -
Paint the Gold Heart:
Use your metallic gold paint and a small brush to fill in the heart shape. You may need two coats for a solid, opaque shine. -
Add Small Details:
With a fine-tip gold paint pen or a tiny detail brush, add smaller mini-hearts scattered around the main one if desired, or add the hatched lines texture inside the main heart shown in the reference. -
Seal the Pot:
Apply a coat of clear sealant or glaze to the entire pot. This protects the paint and makes the clay more durable. -
Final Cure:
Allow the sealant to cure fully before placing any soil or plants inside. If using with real plants, remember these don’t have drainage holes, so use them as cover pots or water very sparingly.
Cracking Seams?
If seams crack while drying, fill the gap with a ‘paste’ made of clay scraps and water, then smooth and dry again.
Now you have a pair of adorable planters ready to house your favorite tiny greens
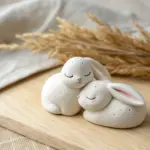
Tiny Animal Buddy Sculptures
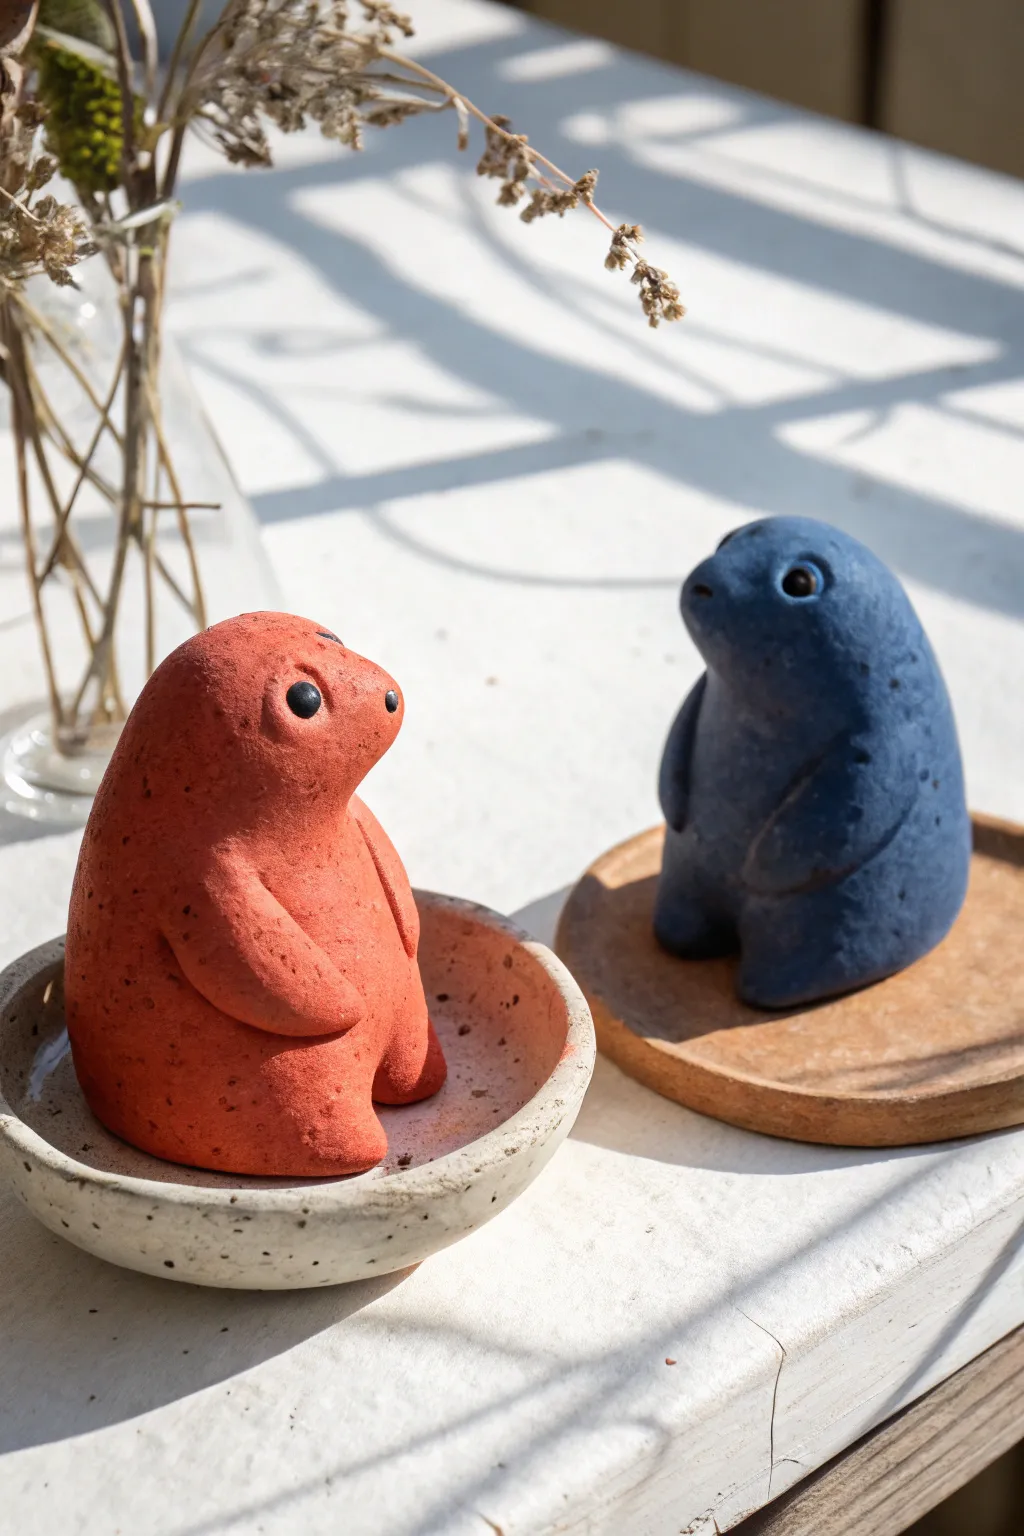
These delightfully chubby, stylized creatures are the perfect low-stress sculpting project, featuring smooth, simple curves and adorable dot eyes. With their muted matte textures and organic shapes, they look like friendly river stones come to life.
Step-by-Step
Materials
- Air-dry clay (or polymer clay)
- Acrylic paints (Terracotta orange, Slate blue, Black)
- Fine-grit sandpaper
- Small bowl of water
- Needle tool or toothpick
- Soft paintbrush
- Ball stylus tool (optional)
- Matte varnish or sealant
Step 1: Shaping the Base Body
-
Create the lump:
Start with a ball of clay roughly the size of a tangerine for each figure. Roll it between your palms until it is smooth and free of major cracks. -
Form the pear shape:
Gently gently roll the top third of the ball to narrow it slightly, creating a subtle pear or gumdrop shape. The bottom should remain heavy and wide so the figure sits stably. -
Flatten the base:
Tap the bottom of your shape firmly on your work surface to create a flat seating area. I like to press it down a few times to ensure it won’t wobble later. -
Define the head:
Using your thumb, smooth the transition between the narrower top (the head) and the wider bottom (the body), keeping the neck area very thick and subtle. There shouldn’t be a sharp indentation.
Smoother Seams
If using air-dry clay, keep a small dish of water nearby. Frequently dipping your finger and running it over the clay ‘heals’ micro-cracks instantly.
Step 2: Adding Features
-
Pull tiny legs:
At the bottom front of the figure, pinch two very small sections of clay and pull them slightly forward to form stubby little legs. Smooth them back into the main body so they look integrated, not stuck on. -
Sculpt the arms:
Roll two small, thin elongated teardrops of clay for the arms. Press these onto the sides of the body, curving them slightly forward toward the belly. -
Blend the seams:
Dip your finger in a tiny bit of water and smooth the clay where the arms attach to the body. The goal is to make the arms look like they are emerging from the mass, not just pasted on top. -
Shape the snout:
Gently pinch the front of the face area to create a very subtle, rounded snout. It shouldn’t be pointy; just a soft protrusion to give the profile some character. -
Refine the surface:
Check the entire sculpture for fingerprints or lumps. Use a wet finger or a damp sponge to glide over the surface until it is velvety smooth.
Give Them Props
Before drying, sculpt a tiny clay leaf, flower, or ball for your creature to hold in its little nubby hands for extra personality.
Step 3: Finishing Touches
-
Dry thoroughly:
Let the figures dry completely according to your clay package’s instructions. Air-dry clay often takes 24-48 hours to fully cure depending on thickness. -
Sand for texture:
Once dry, lightly sand the surface with fine-grit sandpaper. This removes any final imperfections and creates that stone-like texture visible in the photo. -
Apply base color:
Paint the red figure with a matte terracotta orange and the blue figure with a muted slate blue. You may need two coats for opaque coverage. Avoid glossy paints to keep the natural look. -
Add speckling (optional):
To mimic the stone texture, mix a slightly darker shade of your base color, load an old toothbrush, and gently flick tiny speckles onto the dried paint. -
Create the eyes:
Using the back of a paintbrush or a ball stylus, dip into black paint and stamp two small, round dots on the sides of the head. Keep them widely spaced for maximum cuteness. -
Seal the work:
Finish with a matte varnish to protect the paint without adding unnatural shine.
Place your new ceramic friends near a sunny window and enjoy their quiet company
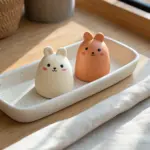
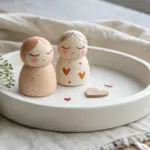
Food-with-a-Face Mini Figures
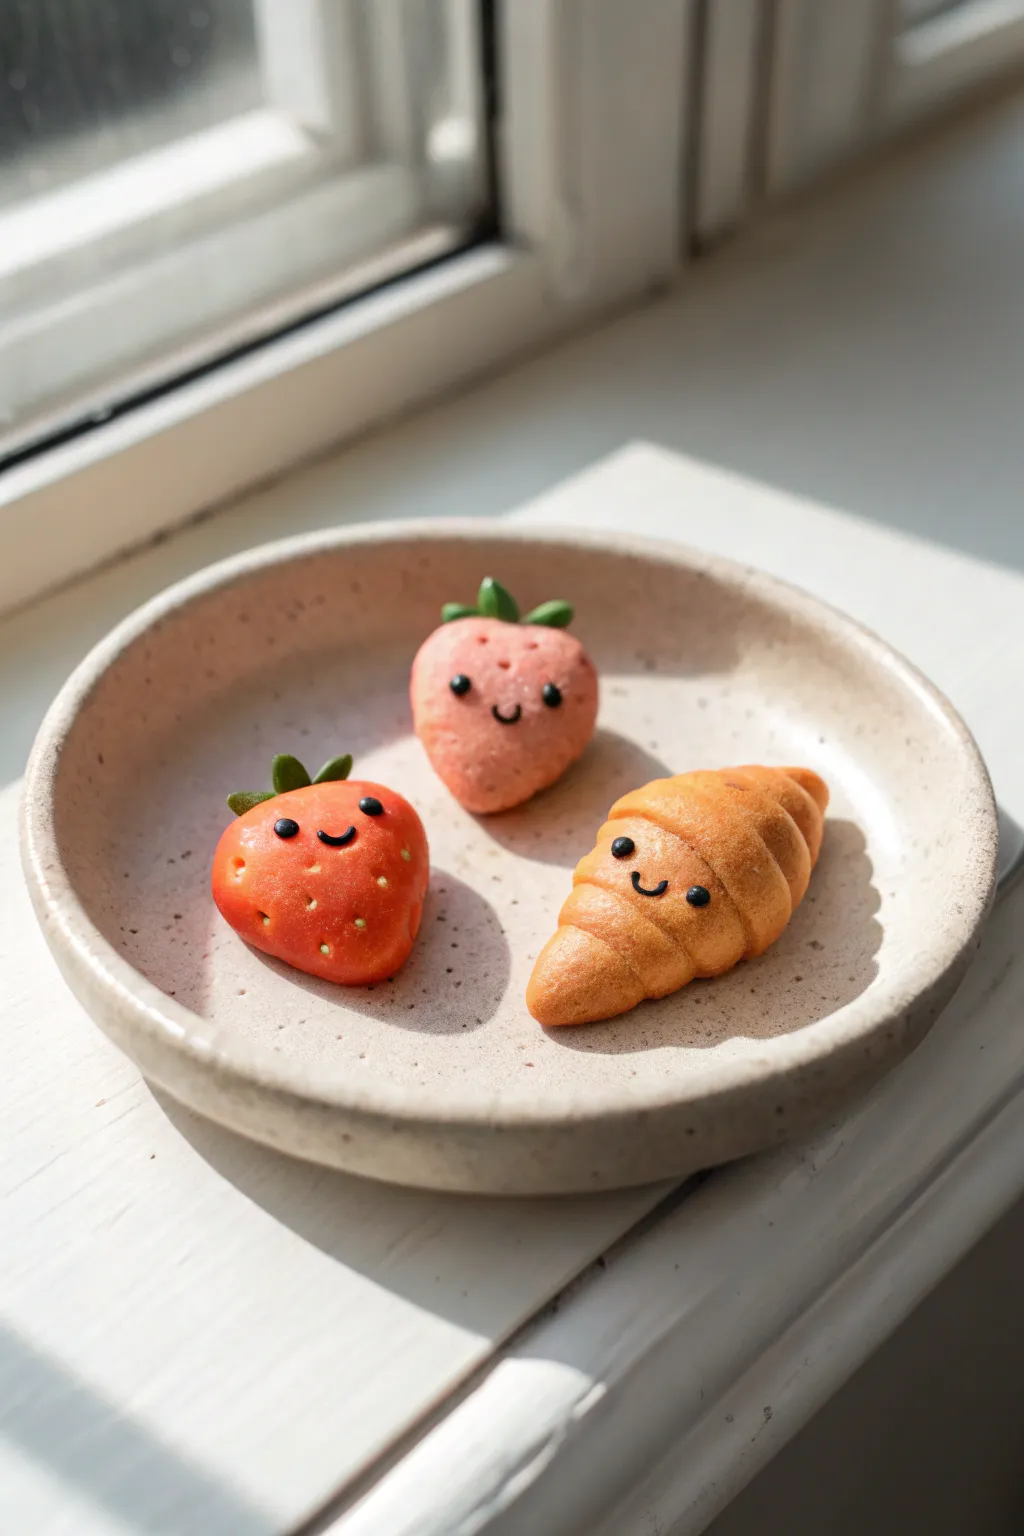
These adorable miniature food friends are the perfect low-stress project for a creative date night. With their charming little smiles and textured details, you’ll sculpt two sweet strawberries and a golden croissant that look good enough to eat but are meant for display.
Detailed Instructions
Materials
- Polymer clay (Red, pink, tan/beige, green, black)
- Set of soft pastels (orange, brown, red) for shading
- Detailing needle tool or toothpick
- Soft paintbrush
- Glaze or varnish (satin or matte)
- Baking sheet and parchment paper
- Oven (if using polymer clay)
Step 1: Sculpting the Strawberries
-
Base Shape:
Start by conditioning a small ball of red clay and a slightly smaller ball of pink clay until soft and pliable. -
Forming the Body:
Roll each ball into a rounded cone shape, flattening the top slightly where the leaves will go and rounding out the bottom point so it looks plump. -
Texture:
Using a needle tool, gently poke small indentations all over the surface of the strawberry bodies to mimic seed pockets, leaving a small smooth area in the center for the face. -
Leaves:
Take a tiny amount of green clay and flatten it into a small star shape or teardrops. Press these gently onto the top flat part of your berries. -
Stems:
Add a tiny, thin cylinder of green clay to the center of the leaves to create the stem. -
Shading:
Personally, I like to lightly brush some red pastel dust onto the bottom of the pink strawberry to give it an Ombré ripened look.
Step 2: Crafting the Croissant
-
Basic Log:
Condition a piece of tan or beige clay and roll it into a cylinder that is thicker in the middle and tapered at both ends. -
Flattening:
Gently flatten the tapered cylinder so it is more of a long triangle or teardrop shape. -
Rolling Up:
Starting from the wide base of the triangle, roll the clay up toward the pointed tip to create the classic croissant spiral. -
Curving:
Bend the rolled shape slightly into a crescent moon curve to give it character. -
Baking Color:
To get that golden-brown baked look, shave some orange and brown chalk pastel into a powder. Dust the top ridges of the croissant with a soft brush, focusing on the raised areas.
Sticky Situation
Is the clay getting too soft and showing fingerprints? Pop the clay in the fridge for 10 minutes to firm it up before adding the final details
Step 3: Bringing Them to Life
-
The Eyes:
Roll extremely tiny balls of black clay. Press them gently into the smooth face areas you reserved earlier on all three figures. -
The Smiles:
Roll a microscopic ‘snake’ of black clay and curve it into a ‘U’ shape. Carefully place this between the eyes using a needle tool. -
Alternative Face:
If handling tiny clay bits is too tricky, you can bake first and paint the faces on later with acrylic paint and a fine liner brush. -
Seed Details:
For the red strawberry, you can fill the seed indentations with tiny specks of yellow clay or paint them yellow after baking for extra realism. -
Baking:
Place all figurines on parchment paper and bake according to your specific clay brand’s instructions (usually 275°F for 15-30 minutes). -
Cooling:
Let the figures cool completely before handling to prevent fingerprints or breakage. -
Sealing:
Apply a thin coat of satin or matte varnish to protect the surface, especially if you used pastel shading, to seal the pigments in place.
Turn them into jewelry
Before baking, screw a small eye-pin into the top of the strawberry or the center of the croissant to easily turn these into charms for a necklace or earrings
Arrange your polite little pastries on a trinket dish and enjoy their happy company
Sun-and-Moon Matching Set
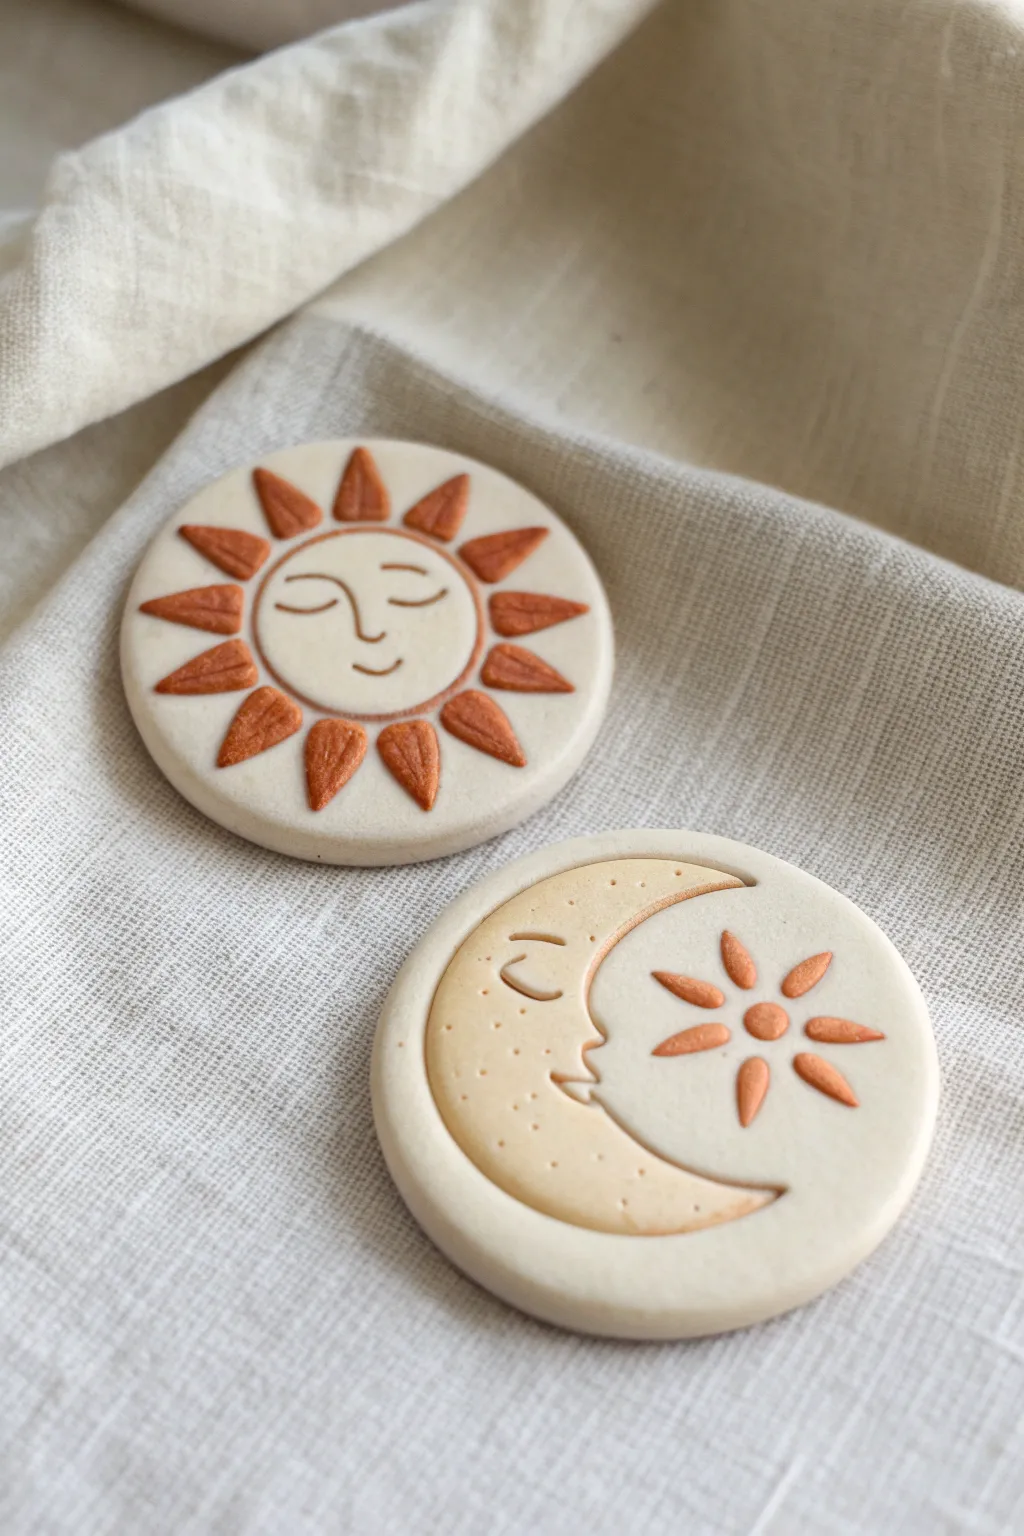
Celebrate the harmony of opposites with this adorable sun and moon matching set, perfect for a crafty date night. These small, decorative discs feature charming carved faces and painted details in warm terracotta tones that bring a cozy, celestial vibe to any space.
Step-by-Step
Materials
- Polymer clay (white or cream)
- Acrylic paint (terracotta or reddish-brown, and a lighter tan)
- Rolling pin
- Circle cookie cutter (approx. 3-4 inches)
- Needle tool or toothpick
- Small detail paintbrush
- Clay carving tools (optional but helpful)
- Parchment paper
Step 1: Creating the Base
-
Condition the Clay:
Begin by kneading your white or cream polymer clay in your hands until it becomes soft, pliable, and free of any cracks. -
Roll it Out:
Place the clay on a sheet of parchment paper to prevent sticking. Use a rolling pin to flatten it into an even slab, aiming for a thickness of about 1/4 inch. -
Cut the Circles:
Using your circle cookie cutter, punch out two identical circles. Peel away the excess clay from the edges so you are left with two perfect discs. -
Smooth the Edges:
Dip your finger in a tiny bit of water (or baby oil if the clay is sticky) and gently run it around the circumference of the circles to soften any harsh cuts left by the cutter.
Uneven Lines?
If your carved lines get bumpy, dip a Q-tip in rubbing alcohol and gently smooth the clay surface before baking.
Step 2: Carving the Sun
-
Sketch the Face:
On the first disc, use a needle tool to very lightly trace a smaller circle in the center. Inside this, sketch two curved lines for sleepy eyes, a small ‘L’ shape for the nose, and a simple curve for a smile. -
Define the Features:
Once you are happy with the placement, go back over your lines with slightly more pressure to carve the facial features into the clay. -
Create the Rays:
Using the needle tool, draw triangle shapes radiating outward from the central face circle towards the edge of the disc. Aim for about 10-12 triangles. -
Add Texture:
Inside each triangular ray, draw a single straight line down the center to mimic a leaf or petal vein structure.
Make them Magnets!
Glue round ceramic magnets to the back using E6000 glue after baking to turn these into cute fridge decor.
Step 3: Carving the Moon
-
Outline the Crescent:
On the second disc, lightly sketch a large crescent moon shape on the left side. The inner curve should have a small bump for the nose and lips. -
Add Facial Details:
Carve a sleepy eye and a small smile onto the crescent moon shape. -
Texture the Moon:
Use the tip of your needle tool to gently poke tiny dots randomly across the surface of the crescent moon for a cratered texture. -
Carve the Star:
In the open space on the right side of the disc, carve a small circle. Surround it with 6-8 teardrop shapes to create a flower-like star.
Step 4: Finishing Touches
-
Bake the Clay:
Transfer the parchment paper with the discs to a baking sheet. Bake according to your clay package instructions (usually 275°F for 15-30 minutes). -
Cool Completely:
Remove the pieces from the oven and let them cool down completely before you attempt to paint them. -
Paint the Rays and Star:
Using a small detail brush, carefully fill in the triangular sun rays and the star shape with your terracotta-colored acrylic paint. -
Paint the Details:
Use the very tip of your brush to fill in the carved lines of the sun’s face and the circle around it with the same terracotta paint. -
Paint the Moon:
Mix a small amount of white into your terracotta paint to create a lighter tan shade. Paint the entire surface of the crescent moon shape with this color. -
Highlight the Features:
I prefer to use a darker brown or the original terracotta color to carefully trace the carved eye and mouth of the moon so they stand out against the tan background. -
Protect the Piece:
Once the paint is fully dry, apply a thin layer of matte varnish or sealant to protect your handiwork from scratches.
Now you have a charming set of celestial art pieces to keep or share with your favorite person
Mini Memory “Date Token” Coins

Immortalize your favorite little shared memories or inside jokes with these bespoke clay coins. The finished pieces have a smooth, earthen finish and clean, debossed designs that feel like ancient currency from your own personal kingdom.
How-To Guide
Materials
- Polymer clay or air-dry clay (terracotta, chocolate brown, and ochre colors)
- Small round cookie cutter or bottle cap (approx. 1.5 inch diameter)
- Acrylic roller or smooth glass jar
- Rubber alphabet stamp set (miniature size)
- Clay carving tools or a dull needle tool
- Small heart and star shaped stamps (or shaped cutters)
- Fine-grit sandpaper (400-600 grit)
- Parchment paper or ceramic tile surface
- Matte varnish (optional)
Step 1: Preparing the Clay Base
-
Condition the clay:
Begin by warming the clay in your hands. Knead it thoroughly until it is soft, pliable, and free of cracks. If you want a marbled look, mix two similar earthy tones together but stop before they fully blend. -
Roll out the slab:
Place your clay on parchment paper. Using your acrylic roller, roll the clay out to an even thickness of about 1/4 inch (6mm). You want them thick enough to take a deep impression without warping. -
Check for smoothness:
Inspect the surface for any air bubbles or lint. Gently smooth them out with your fingertip or a light roll. A super smooth surface is key for that professional coin look. -
Cut the rounds:
Press your round cutter firmly into the clay slab to cut your coin shapes. Twist slightly to release the clay from the table surface, but try not to distort the circle. -
Refine the edges:
Once cut, gently tap the edges of the circle with your finger to round them off. This removes the sharp ‘cut’ look and makes the token feel more like a minted coin.
Sticky Stamps?
If your rubber stamps are sticking to the raw clay and ruining the finish, lightly dust the stamp surface with cornstarch or dip it in water before pressing it down.
Step 2: Stamping and Detailing
-
Create the border:
Use a tool with a small circular rim (like the back of a pen cap or a specific clay tool) to press a subtle ring indented just inside the outer edge of the coin. -
Stamp the central icon:
Select your heart or star stamp. Press it firmly into the absolute center of the coin. Apply even pressure so the impression is deep and clean, but be careful not to push all the way through. -
Align your text:
Plan your phrase. Since sticking individual letters can be tricky, I like to arrange the rubber stamps on the table first to visualize the spacing along the bottom curve. -
Impress the letters:
Start with the middle letter of your phrase at the bottom center of the coin to ensure symmetry. Work your way outward to the left and right, rocking the stamps gently to get a crisp impression. -
Add manual details:
If you don’t have a star stamp for the second design, use a dull needle tool or toothpick to hand-draw the star. Create the outline first, then gently press the inner lines to create a faceted, 3D effect. -
Clean up stray marks:
If your fingernails left any tiny divots while holding the coin, gently buff them out with a vigorous rub of your fingertip.
Step 3: Finishing Touches
-
Bake or dry:
If using polymer clay, bake according to the package instructions (usually 275°F/135°C for 15-30 minutes). If using air-dry clay, let them sit in a cool, dry place for 24-48 hours, flipping halfway through. -
Cool down:
Allow the coins to cool completely on the baking sheet or tile. They are fragile while warm, so patience is important here. -
Sand the imperfections:
Take your fine-grit sandpaper and very gently sand the outer rim of the coin to remove any sharp bits or irregularities from the cutting process. -
Enhance the design (optional):
To make the text pop, you can brush a tiny amount of diluted dark brown acrylic paint into the grooves and wipe the surface clean immediately, leaving the dark paint only in the recessed letters. -
Seal the surface:
Apply a very thin coat of matte varnish if you want to protect the tokens from fingerprints, though leaving them raw gives a lovely natural stone texture.
Pro Tip: Uniform Thickness
Place two playing cards or craft sticks on either side of your clay while rolling. Resting the roller on these guides ensures every part of the slab is perfectly level.
Scatter these little tokens of affection around the house or use them as unique gift toppers for your next anniversary
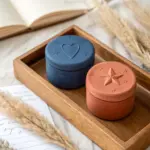
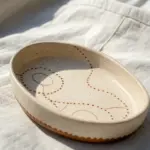
Tiny Keepsake Box With Two Lids
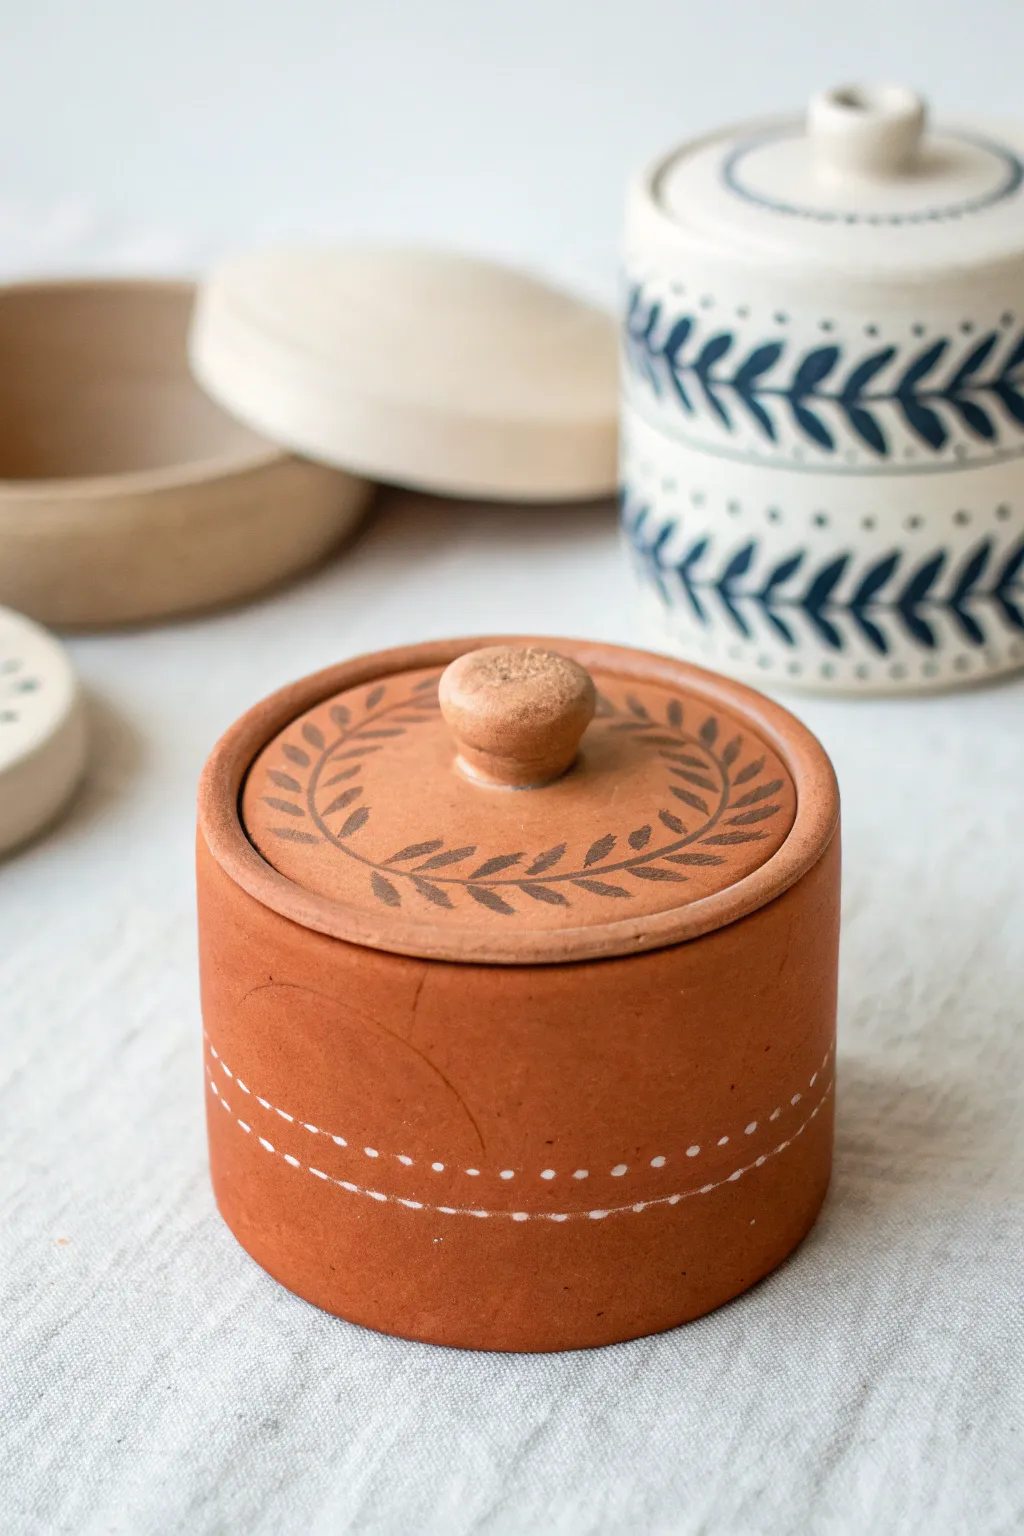
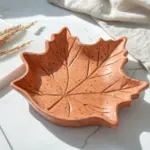
This charming little lidded vessel combines the warmth of terracotta clay with delicate painted details for a rustic, handmade feel. It features a snug-fitting lid with a leaf wreath design and simple dotted accents around the base, perfect for holding small treasures.
Detailed Instructions
Materials
- Terracotta-colored air-dry clay or polymer clay
- Rolling pin
- Circle cutters (two sizes: one for the base/lid, one slightly smaller)
- Clay knife or craft blade
- Slip (water + clay mixture) or liquid clay adhesive
- Clay smoothing tool or sponge
- Fine grit sandpaper
- Acrylic paint (Dark brown and White)
- Fine detail paintbrushes (size 0 or 00)
- Matte varnish or sealant
Step 1: Forming the Base
-
Roll the slab:
Begin by conditioning your terracotta clay until it’s pliable. Roll it out into an even slab, approximately 1/4 inch thick. Ensuring consistent thickness here is key for the structural integrity of the walls. -
Cut the components:
Using your larger circle cutter, punch out a circle for the base. Next, cut a long rectangular strip from the slab. The length should be slightly longer than the circumference of your base circle, and the width determines the height of your box. -
Attach the wall:
Score (scratch) the outer edge of the base circle and one long edge of your rectangular strip. Apply a dab of slip or adhesive to the scored areas. -
Wrap and seam:
carefully wrap the strip around the base circle. Where the two ends of the wall meet, cut through both overlapping layers at a diagonal angle. Remove the excess clay and press the fresh edges together to create a seamless join. -
Smooth the surfaces:
Use a smoothing tool or a slightly damp sponge to blend the seams on both the outside and inside of the box. I find using a little water on your finger works wonders to erase fingerprints. -
Trim the rim:
If the top edge of your cylinder looks uneven, slice it gently with your blade to level it off, then smooth the rim with your finger.
Step 2: Creating the Lid
-
Cut the lid circles:
Roll out a fresh slab of clay. Cut one circle using the same large cutter you used for the base. Cut a second circle using a slightly smaller cutter—this inner circle will keep the lid from sliding off. -
Assemble the lid:
Score the center of the large circle and the back of the smaller circle. Apply adhesive and press them together, ensuring they are perfectly centered. -
Shape the knob:
Roll a small ball of clay for the handle. Flatten the bottom slightly and shape the top into a soft, mushroom-like or tapered knob shape. -
Attach the knob:
Score the top center of the lid and the bottom of your knob. Join them securely with slip, blending the clay at the base of the knob so it looks like one cohesive piece. -
Dry or bake:
If using air-dry clay, set the pieces aside to dry completely for 24-48 hours. If using polymer clay, bake according to the package instructions. -
Sand for smoothness:
Once fully cured or dry, gently sand any rough edges or uneven spots on the rim and lid with fine-grit sandpaper.
Lid Won’t Fit?
If the lid is too tight after drying, wrap sandpaper around a dowel and gently sand the inner rim of the lid. If it’s too loose, you can add a thin coil of clay to the inner lip and refinish.
Step 3: Painting the Details
-
Paint the wreath stem:
Using a fine detail brush and dark brown acrylic paint, draw a thin, circular line on the top of the lid, surrounding the knob. It doesn’t need to be a perfect circle; a sketchy quality adds character. -
Add the leaves:
Along the stem line, paint small, simple tear-drop or oval shapes to represent leaves. Angle them in pairs or alternating patterns, pointing in the direction of the circle. -
Paint the base accents:
Switch to white paint. Carefully paint two parallel dotted lines around the lower third of the box’s body. I like to rotate the box on a lazy susan to keep my hand steady. -
Seal the piece:
Once the paint is thoroughly dry, apply a coat of matte varnish. This brings out the rich color of the terracotta and protects your hand-painted design.
Glazed Interior
Make the box food-safe or waterproof by coating just the interior with a high-gloss resin or waterproof sealant. This creates a beautiful contrast with the matte exterior.
Place your finished box on a shelf or gift it to a friend as a sweet, handmade gesture
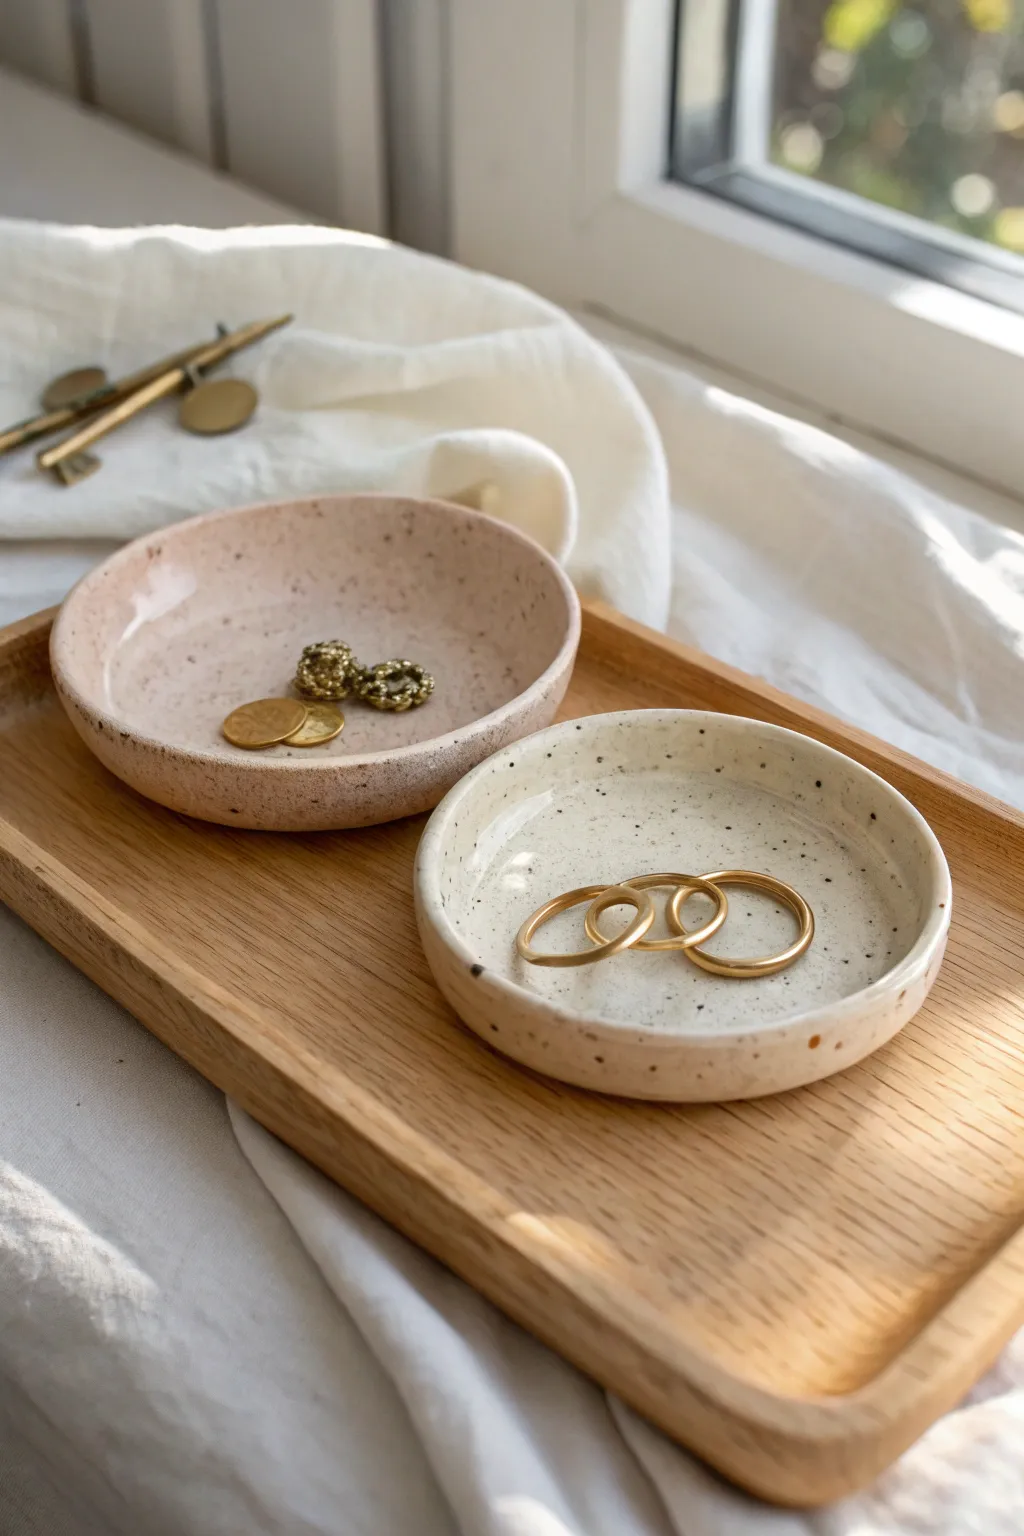
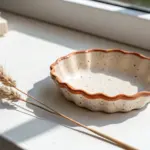
Painted Pattern “Swap” Dishes
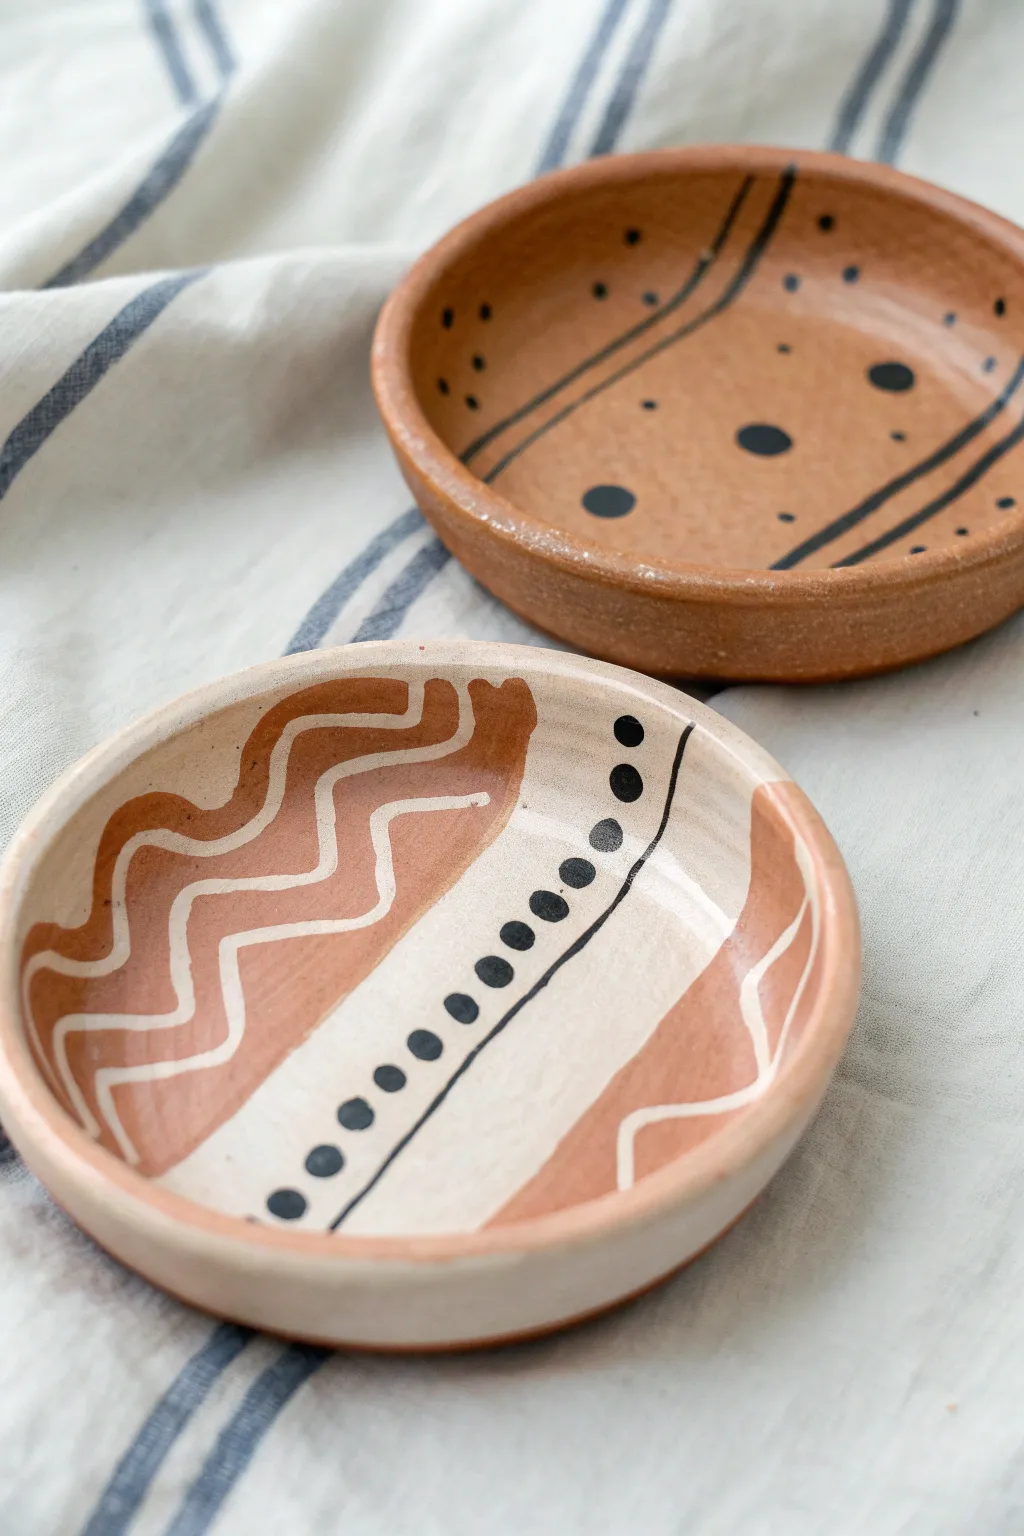
These charming, shallow trinket dishes play with negative space and earthy tones, creating a matched set that feels cohesive without being identical. The design relies on a beautiful ‘swap’ of base colors—one warm terra cotta and one creamy white—accented with simple geometric lines and dots for a modern, handmade look.
Step-by-Step Guide
Materials
- Air-dry clay (terra cotta and white)
- Acrylic paints (black, white, terra cotta)
- Clear acrylic sealer or varnish (matte or satin finish)
- Small rolling pin
- Circle cutter or small bowl (for tracing)
- Craft knife or clay tool
- Fine detail paintbrush (size 0 or 1)
- Small flat paintbrush
- Cup of water
- Sandpaper (fine grit)
Step 1: Shaping the Clay Base
-
Roll out the clay:
Begin by taking a handful of white air-dry clay and rolling it out on a smooth surface until it is about 1/4 inch thick. Repeat this process with a separate ball of terra cotta colored clay if you have it; otherwise, you can paint the second dish later. -
Cut the circles:
Using a circle cutter or by tracing around a small bowl, cut out two identical circles, one from each clay slab. Remove the excess clay scraps. -
Form the rim:
Gently pinch the edges of the clay circles upward to create a shallow rim. Smooth the edges with a bit of water on your finger to remove any cracks or roughness. -
Create the foot (optional):
If you want slightly raised dishes, dampen the bottom and attach a small coil of clay in a ring shape, smoothing the seam so it attaches firmly. -
Smooth and dry:
Do a final pass with a damp sponge or finger to ensure the surface is perfectly smooth. Let the dishes dry completely, which usually takes 24-48 hours depending on humidity. -
Sand the surface:
Once fully dry and hard, lightly sand any rough edges or bumps particularly around the rim to create a professional finish. Wipe away the dust with a dry cloth.
Paint looking streaky?
A common issue with acrylics! Don’t overload the brush. Instead, apply multiple thin layers, allowing each layer to dry fully (about 15 mins) before adding the next one.
Step 2: Painting the Terra Cotta Design
-
Base coat preparation:
If you used plain white clay for both bowls, paint one entire bowl with terra cotta acrylic paint now. I like to do two thin coats for opaque coverage. Let it dry completely. -
Add diagonal lines:
Using black acrylic paint and a fine detail brush, paint two parallel diagonal lines across the upper left section of the dish. Repeat this on the lower right section to frame the center. -
Paint the large dots:
Load your brush with black paint and carefully dab three to four medium-sized dots in the central open space between your diagonal lines. -
Add small speckles:
Using the very tip of your smallest brush or even a toothpick, add tiny black specks randomly around the larger dots and near the lines to create texture.
Clean Lines Hack
If you struggle with steady hands for the straight lines, place a strip of washi tape or painter’s tape on the dried clay to act as a stencil guide.
Step 3: Painting the Cream Design
-
Base coat the second dish:
Ensure your second dish is a clean, creamy white. If the clay has discolored, give it a fresh coat of cream or white acrylic paint. -
Block out color sections:
Mix a terra cotta paint shade that matches your first bowl. Paint two large, organic sections on the left and right sides of the bowl, leaving a wide white strip running diagonally through the center. -
Add white waves:
Once the terra cotta sections are dry, use a fine brush with white paint to draw squiggly, wavy lines over the painted terra cotta areas. -
Paint the divider line:
Switch to black paint and draw a thin, straight diagonal line separating the white central strip from the right terra cotta section. -
Add the dot border:
Along the left side of the white strip, paint a row of black dots that graduate in size—starting larger at the top and getting smaller toward the bottom. -
Let the paint set:
Allow all paint to dry thoroughly for at least an hour to prevent smearing during the sealing process.
Step 4: Finishing Touches
-
Apply sealer:
Brush a coat of clear acrylic varnish over the entire surface of both dishes (front and back). This protects the paint from chipping. -
Final cure:
Let the Varnish cure according to the bottle instructions ensuring they aren’t touching anything while sticky.
Enjoy styling your new matching set on a bedside table to hold your favorite rings or keys