If you’ve got a few blocks of Sculpey oven-bake clay sitting on your table, you’re basically holding a whole afternoon of cute, satisfying projects. I’m sharing my favorite oven-bake polymer clay ideas—the kind that feel totally doable, even if you’re still getting the hang of shaping and smoothing.
Classic Arch and Dangle Oven-Bake Clay Earrings
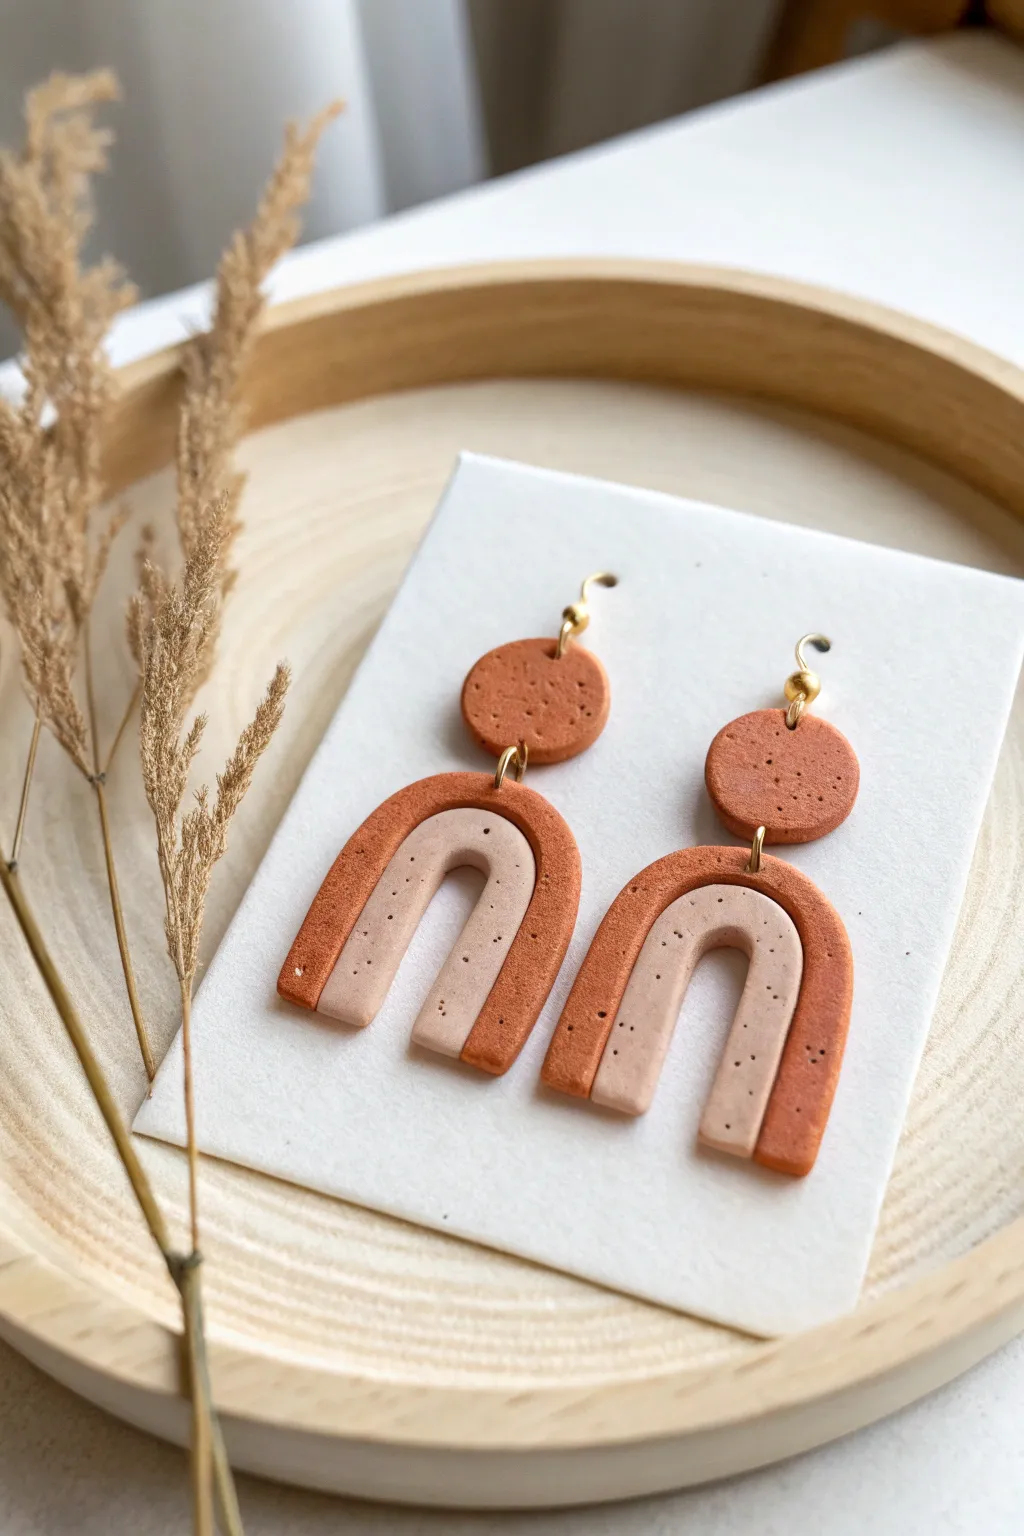
These trendy clay earrings capture a warm, desert-inspired aesthetic with their earthy terracotta and sand tones. The subtle speckled texture mimics natural stone, giving the modern arch shapes a sophisticated, organic finish.
Step-by-Step Tutorial
Materials
- Polymer clay in terracotta/burnt orange
- Polymer clay in beige/sand
- Black pepper or dried coffee grounds (for speckling)
- Acrylic rolling pin
- Small circle clay cutter (approx. 10mm)
- Arch or U-shape clay cutters (nested sizes) or a craft knife
- Parchment paper or ceramic tile
- Needle tool or toothpick
- Jump rings (gold finish)
- Fishhook ear wires
- Jewelry pliers (flat nose and round nose)
- Wet sandpaper or denim fabric (for finishing)
- Oven (for baking)
Step 1: Preparing the Speckled Clay
-
Condition the base colors:
Begin by conditioning your terracotta and beige polymer clays separately. Knead them warm in your hands until they are soft and pliable, ensuring there are no air bubbles trapped inside. -
Add texture:
To achieve the granite-like effect seen in the photo, flatten each color into a pancake. Sprinkle a tiny pinch of ground black pepper or finely ground dried coffee onto the clay. Fold the clay over to trap the speckles. -
Mix thoroughly:
Knead the clay repeatedly to distribute the speckles evenly throughout the material. If you want a heavier texture, add more speckles gradually, but be careful not to dry out the clay formula. -
Roll out slabs:
Using your acrylic roller, roll both clay colors out onto a flat surface like a ceramic tile or parchment paper. Aim for a consistent thickness of about 3mm to 4mm for durability.
Fixing Fingerprints
Before baking, dip a cotton swab in a tiny bit of acetone or rubbing alcohol and gently brush over the clay surface. This dissolves fingerprints and leaves a smooth finish.
Step 2: Cutting and Shaping
-
Cut the top studs:
Take your small circle cutter and press firmly into the terracotta slab to cut two identical circles. These will form the top stud portion of the earrings. -
Create the outer arches:
Using the terracotta slab again, cut two large U-shapes. If you don’t have a specific cutter, you can print a template and trace around it with a craft knife for precision. -
Create the inner arches:
Switch to your beige speckled clay. Cut two smaller U-shapes that are sized to fit snugly inside the larger terracotta arches. -
Assemble the rainbows:
Gently place the beige inner arch inside the terracotta outer arch. Press them together very lightly along the seam so they adhere; you can use a tiny amount of liquid clay as glue if needed. -
Smooth the seams:
On the back of the earring, gently smooth the clay across the join line with your finger or a smoothing tool to ensure the piece is structurally sound. -
Pierce holes:
Use a needle tool to poke a hole at the bottom of each circular stud and at the top center of each main arch piece. Ensure the hole is large enough for your jump rings.
Step 3: Baking and Assembly
-
Bake the pieces:
Arrange all pieces on a parchment-lined baking sheet or ceramic tile. Bake according to your specific brand of clay’s package instructions—usually between 265°F and 275°F (130°C to 135°C) for 30 minutes. -
Cool down:
Once baked, turn the oven off and let the pieces cool completely inside the oven or on the counter before handling. This prevents the warm clay from snapping. -
Sand and buff:
Check the edges for any rough spots. I like to rub the edges with a piece of denim or use wet fine-grit sandpaper to smooth everything out for a professional matte finish. -
Open the jump rings:
Use two pairs of pliers to twist a jump ring open (twist sideways, never pull apart). Feed it through the hole in the arch and the hole in the circular stud. -
Attach ear wires:
Close the jump ring securely. Finally, open the loop on your fishhook ear wire, slide it onto the hole of the top circular stud (or add a second small jump ring if needed for direction), and close it tight.
Make It Glossy
For a totally different vibe, coat the baked and cooled pieces with UV resin or a gloss glaze. The shine will make the ‘granite’ speckles pop and look more like polished stone.
Wear your new earthy arches with pride or wrap them up as a handmade gift for geometric jewelry lovers


Mini Food Charms With Cute Faces
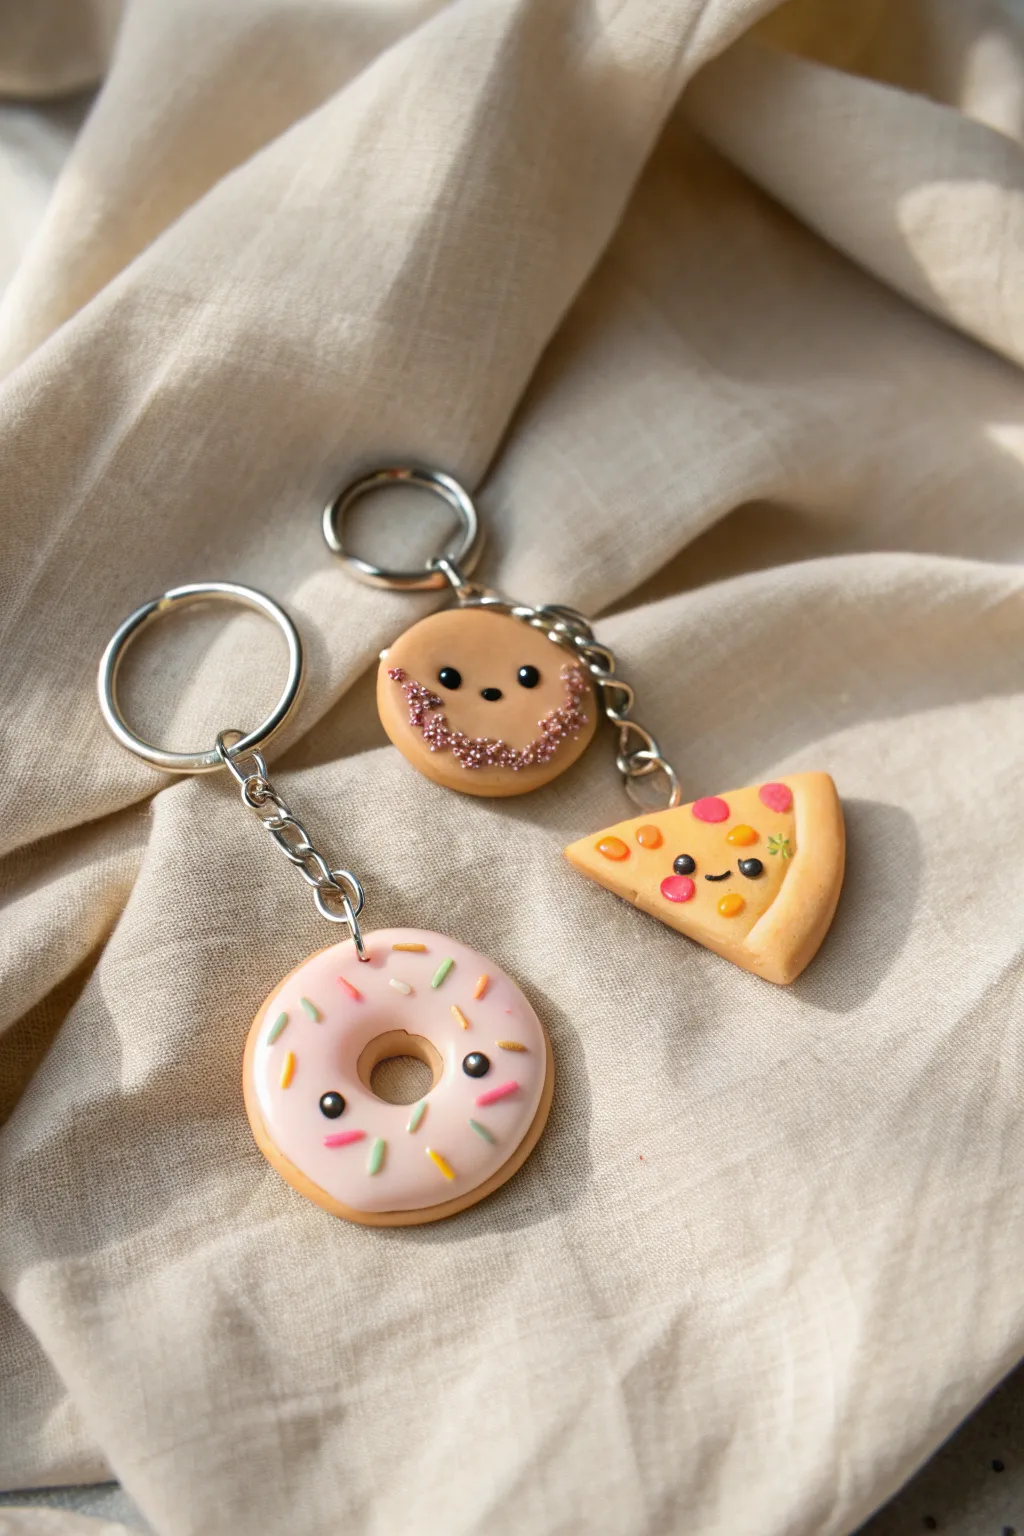
Transform simple balls of clay into adorable, smiling snack companions that brighten up any set of keys. These mini food charms—a donut, a cookie, and a slice of pizza—feature sweet kawaii faces and realistic textures that make them look good enough to eat.
Step-by-Step
Materials
- Polymer clay (Tan/Beige, Pink, Yellow, Brown, Black, Red, Green)
- Small eye pins or screw eyes
- Keychain rings with jump rings
- Liquid polymer clay (optional, for sauce)
- Dotting tool or toothpick
- Needle tool
- Rolling pin or pasta machine
- Small round cutter (for donut)
- Texture tool (like a toothbrush or sandpaper)
- Glaze or polyurethane varnish (glossy)
Step 1: Shaping the Bases
-
Mix your dough color:
Start by mixing white, translucent, and a tiny bit of brown clay to create a realistic ‘baked dough’ color. You want a warm beige tone that serves as the base for all three charms. -
Form the donut:
Roll a medium-sized ball of the beige clay and flatten it slightly into a thick disk. Use a small round cutter or the back of a large piping tip to remove the center hole. Smooth the edges with your finger to round them off, removing that sharp ‘cut’ look. -
Create the cookie base:
Roll another ball of beige clay, slightly smaller than the donut, and press it flat into a thick circle. This will be the round cookie charm. -
Shape the pizza slice:
Take a portion of the beige clay and shape it into a triangle with rounded corners. Pinch the crust edge slightly upwards to make it look thicker than the point, mimicking a real slice of pizza. -
Add texture:
Gently tap a toothbrush or crumpled aluminum foil over the surface of the cookie and the pizza crust. This subtle texture mimics the airy, baked quality of real dough.
Step 2: Decorating & Details
-
Ice the donut:
Roll out a thin sheet of pink clay. Cut a circle shape that is slightly smaller than your donut base. Place it on top and gently stretch the edges down the sides to look like flowing icing. Pierce the center hole to match the base. -
Sprinkle the donut:
Roll incredibly thin snakes of clay in various pastel colors (green, yellow, dark pink). Chop these snakes into tiny rice-sized bits and press them gently onto the pink icing. -
Cheese and toppings for pizza:
Mix a little yellow into your beige clay or use a triangular sheet of yellow clay to create the melted cheese layer. Place it on the pizza slice, leaving the crust exposed. Add tiny circles of red clay for pepperoni and minuscule green specks for herbs. -
Decorate the cookie:
For the cookie’s ‘dipped’ look, apply a layer of textured brown clay or thick brown liquid clay to the bottom third. You can simulate crumbs by chopping brown clay into dust and pressing it into this area.
Keep It Clean
Keep baby wipes nearby to clean your hands between colors. White and beige clay pick up lint easily, so clean hands and surfaces are crucial for a professional look.
Step 3: Bringing them to Life
-
Mark eye placement:
Before adding the black clay, use your needle tool to mark two tiny indents where the eyes will go. Spacing them somewhat wide apart gives that classic cute look. -
Add the eyes:
Roll tiny balls of black clam. Place them into the indents you made. Press them down gently so they don’t protrude too much. -
Add the smiles:
Roll an ultra-thin thread of black clay. Cut minuscule curved pieces for the mouths and carefully place them between the eyes using a needle tool. I find using a tiny bit of liquid clay helps these stay put. -
Insert hardware:
Screw a small eye pin into the top of each charm. If needed, add a drop of liquid clay or Bake & Bond to the screw threads before inserting to ensure they hold tight after baking.
Add Sparkle
Mix fine glitter into your ‘icing’ clay or brush a tiny amount of pearlex powder over the cookie texture before baking for a magical, sugary effect.
Step 4: Baking & Assembly
-
Bake the batch:
Place your charms on a ceramic tile or baking sheet lined with paper. Bake according to your clay manufacturer’s instructions (usually 275°F/130°C for 15-30 minutes depending on thickness). -
Cool and inspect:
Allow the charms to cool completely before handling. Check that the eye pins are secure; if loose, remove them, add a dab of superglue, and reinsert. -
Add a glossy finish:
Brush a coat of polyurethane gloss varnish over the ‘wet’ parts—the icing, the pepperoni, and the eyes. This makes them shine and brings the colors to life. -
Assemble the keychains:
Using pliers, open the jump ring on your keychain hardware. Loop it through the eye pin of your charm and close it securely.
Now you have a set of delightful little friends ready to guard your keys or be gifted to someone special


Tiny Animal Figurines for Desk Decor
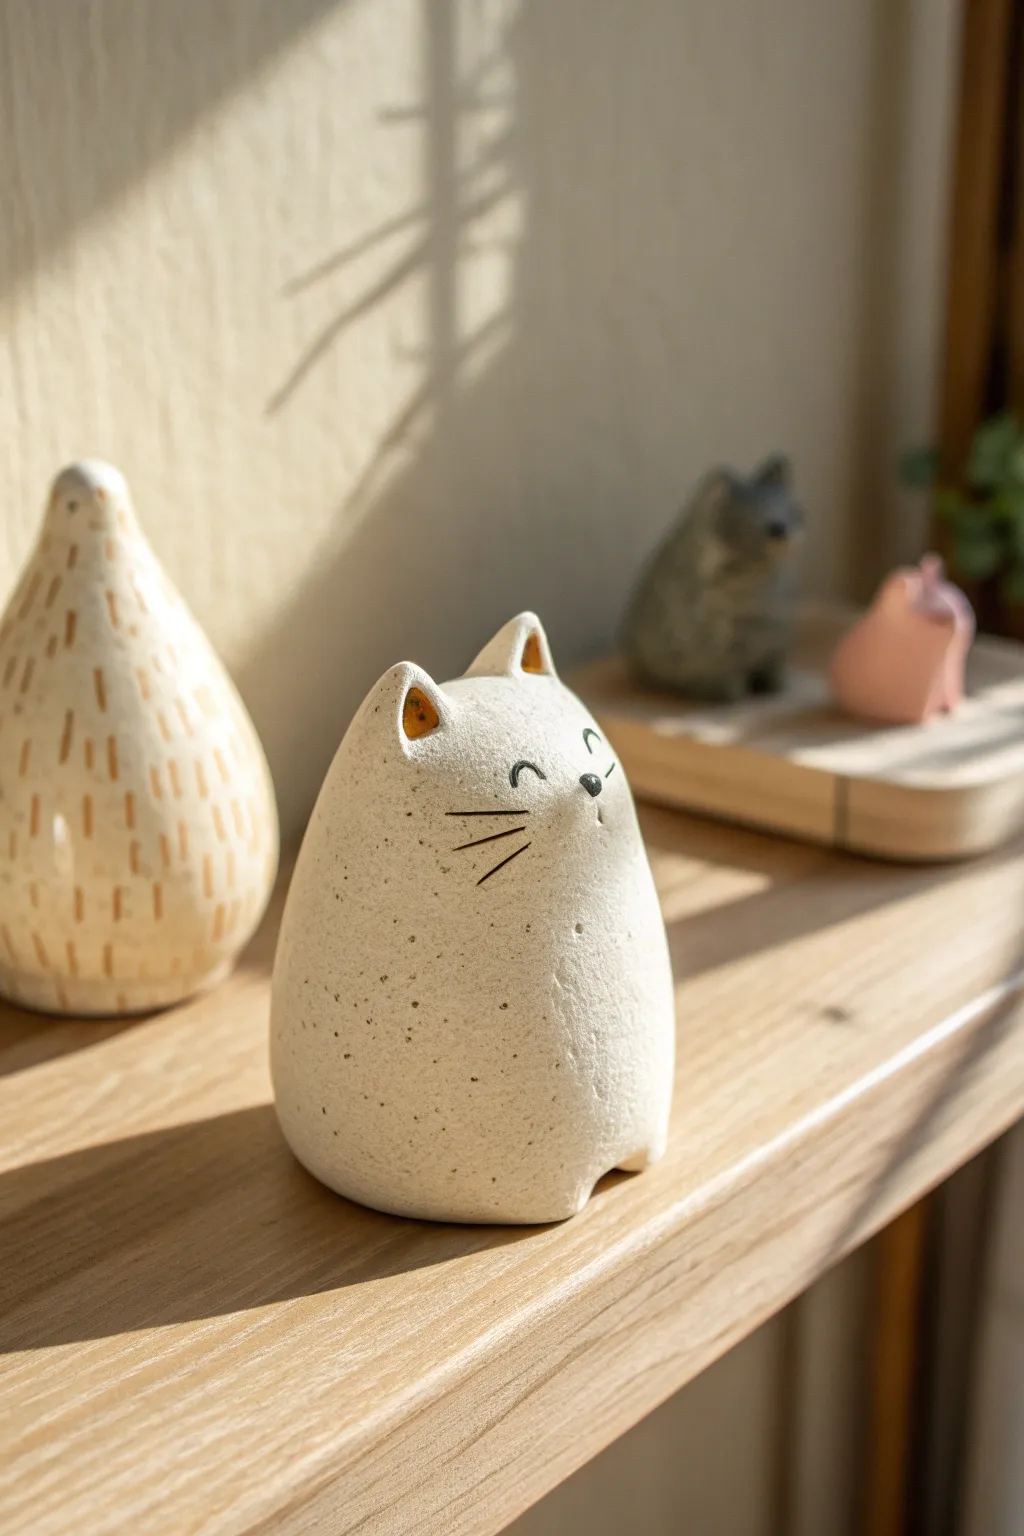
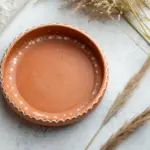
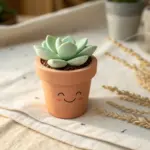
Recreate the charm of stoneware pottery with polymer clay in this minimalist cat figurine project. Its simple, rounded form and speckled cream finish make it a calming, modern addition to any desk setup.
Step-by-Step Tutorial
Materials
- White polymer clay (Sculpey Premo or Soufflé)
- Small amount of translucent liquid clay
- Coarse black pepper or dried used coffee grounds
- Black acrylic paint
- Burnt orange or amber acrylic paint
- Fine detail paintbrush (000 size)
- Needle tool or toothpick
- Foil or scrap clay for armature (optional)
- Fine grit sandpaper (400-600 grit)
- Matte varnish
Step 1: Preparing the Clay Body
-
Create the Speckled Effect:
Before sculpting, condition your white clay until it is soft and malleable. To mimic the stoneware look in the photo, flatten the clay into a pancake and sprinkle a tiny pinch of coarse black pepper or dried coffee grounds onto it. Fold the clay over and knead it thoroughly until the specks are evenly distributed throughout the block. -
Form the Main Shape:
Roll your speckled clay into a smooth ball. While rolling, gently apply more pressure to the top half to let it taper slightly. -
Flatten the Base:
Gently tap the bottom of your pear-shaped taper onto your work surface. You want a wide, stable bottom that narrows toward the head, creating that distinct ‘blob’ silhouette without a defined neck. -
Shape the Ears:
Instead of adding separate pieces, use your fingers to gently pinch and pull two small triangles upward from the top of the head. Smooth the clay down between the ears to create a gentle curve rather than a sharp V-shape. -
Refine the Form:
Look at the figurine from the side. Depending on your preference, you can gently press the front ‘face’ area to be slightly flatter, or leave it rounded. Ensure the surface is free of fingerprints by lightly brushing it with a tiny amount of baby oil or cornstarch.
Fixing Smudges
Line thicker than intended? Use a toothpick dipped in rubbing alcohol to gently “erase” wet acrylic paint mistakes without damaging the baked clay underneath.
Step 2: Adding Details
-
Create Ear Hollows:
Take a small ball tool or the rounded end of a paintbrush handle and press gently into the front center of each ear triangle. This creates the inner ear cavity that we will paint later. -
Sculpt the Nose:
Roll a microscopic ball of clay—truly tiny—and press it into the center of the face. Flatten it slightly so it merges with the face but retains a small bump. -
Add Texture (Optional):
If you want a rougher, more stone-like texture similar to the image, tap the surface gently with a crumpled piece of aluminum foil or a stiff toothbrush. -
Bake the Figurine:
Place your cat on a ceramic tile or baking sheet. Bake according to the package instructions for your specific brand of clay (usually 275°F/130°C for 15-30 minutes per 1/4 inch of thickness). -
Cooling:
Let the piece cool completely in the oven with the door cracked open. This prevents thermal shock and potential cracking.
Step 3: Painting and Finishing
-
Paint the Ears:
Using your fine detail brush, carefully paint the inside depression of the ears with the burnt orange or amber acrylic paint. It mimics the glazing effect seen on ceramic pieces. -
Paint the Nose:
Dab a tiny spot of black acrylic paint directly onto the small nose bump. -
Draw the Eyes:
Using the very tip of your detail brush (or a fine-point black paint marker), draw two small upside-down ‘U’ shapes for the eyes. Keep them widely spaced for a happier expression. -
Add Whiskers:
Paint three thin, straight lines on each cheek area for whiskers. Keep your hand steady and try to make the strokes quick and light for sharp ends. -
Sand the Finish:
For a true matte pottery feel, I prefer to lightly sand the surface (avoiding the painted areas) with fine-grit sandpaper after the paint is dry. This removes any shine and enhances the speckled texture. -
Seal the piece:
Finish by applying a thin coat of matte varnish to protect the paint. Avoid glossy finishes if you want to maintain the natural stone aesthetic.
Pro Tip: Granite Look
Can’t find specific ‘granite’ clay? Mix 1 part translucent clay with 4 parts white clay before adding your pepper flakes. This adds visual depth similar to real stone.
Place your little stone-look friend on your desk for a touch of serenity


Easy Oven-Bake Clay Refrigerator Magnets

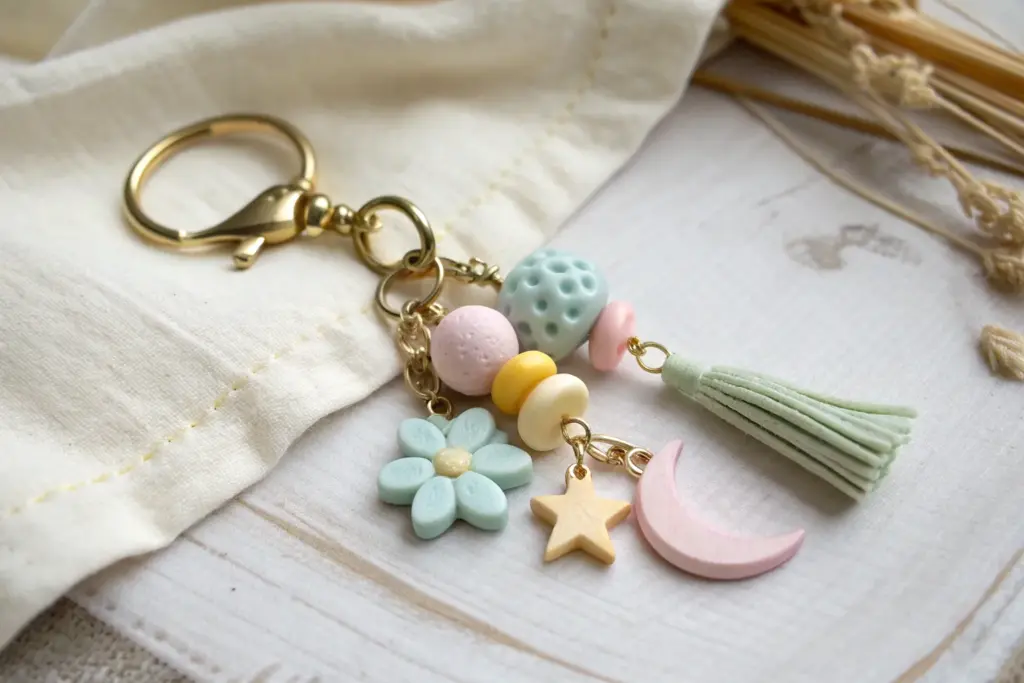
Brighten up your kitchen with these charming, handcrafted clay magnets featuring a folksy heart design and scattered stars. The main heart piece showcases a delightful faux-stitched border and a pattern of tiny white hearts against a warm red background.
How-To Guide
Materials
- Polymer clay (Red, Beige/Cream, Green, Orange)
- Acrylic rolling pin
- Heart-shaped clay cutter (medium to large size)
- Star-shaped clay cutters (various small sizes)
- Needle tool or toothpick
- Small dotting tool or fine paintbrush
- White acrylic paint
- Dark brown or black acrylic paint
- Gloss glaze or polyurethane varnish
- Strong round craft magnets
- Super glue (cyanoacrylate) or heavy-duty craft glue
- Baking sheet and parchment paper
- Oven (for baking according to clay package)
Step 1: Creating the Heart Base
-
Condition the Clay:
Start by warming the red polymer clay in your hands, kneading it until it is soft and pliable. This conditioning step prevents cracks later. -
Roll Out the Red:
Using your acrylic rolling pin, flatten the red clay to an even thickness of about 1/4 inch (6mm). You want it sturdy enough to hold a magnet securely. -
Cut the Shape:
Press your heart-shaped cutter firmly into the red clay slab. Wiggle it slightly to ensure a clean cut, then remove the excess clay and smooth the edges with your fingertip.
Step 2: Adding the Decorative Border
-
Roll the Beige Clay:
Condition and roll out a sheet of beige or cream-colored clay, slightly thinner than your red base. -
Cut the Border Strip:
You can either use a slightly larger heart cutter to make a ring or, for a more handmade look, cut a thin strip of beige clay about 1/4 inch wide. -
Attach the Border:
Gently press the beige strip around the perimeter of the red heart. If it doesn’t stick immediately, use a tiny amount of liquid clay or bake-and-bond as adhesive. -
Refine the Seams:
Smooth out any joints where the beige strip meets, ensuring a continuous loop that mimics a fabric appliqué border.
Glue Not Holding?
If the magnet pops off, roughen the back of the baked clay with sandpaper before gluing. This creates ‘tooth’ for the adhesive to grip better.
Step 3: Making the Star Companions
-
Prep Star Colors:
Condition your green, orange, and remaining red clay. Roll them out to a similar thickness as the heart base. -
Cut Stars:
Use your small star cutters to punch out several star shapes in different colors. Feel free to gently curve the points slightly for a whimsical feel. -
Add Texture:
Before baking, use a needle tool to gently imprint dots or small holes into the surface of the green and orange stars for extra visual interest.
Level Up: 3D Effect
Instead of painting the tiny white hearts, use very thin slices of a white clay cane or tiny cutouts of white clay and press them in before baking.
Step 4: Baking and Assembly
-
Bake the Pieces:
Place all your clay hearts and stars on a parchment-lined baking sheet. Bake according to the manufacturer’s temperature and time instructions—usually around 275°F (135°C) for 15-30 minutes. -
Cool Down:
Remove the tray from the oven and let the pieces cool completely. The clay hardens fully as it cools, so don’t handle them while hot. -
Paint the Details:
Using a fine brush or dotting tool, paint tiny white hearts onto the red center of your main magnet. I like to practice on paper first to get the spacing right. -
Add the Stitching:
Dip a toothpick or fine tool into dark brown or black paint. Carefully create small dots along the beige border to simulate stitching threads. -
Seal the Work:
Once the paint is completely dry, apply a coat of gloss glaze or varnish to protect the surface and give it a finished shine. -
Attach Magnets:
Flip the pieces over. Apply a drop of super glue to the back of each clay shape and press a round magnet firmly into place. Let the glue cure for at least an hour.
Now your fridge has a personal, cozy touch that serves a practical purpose.

What Really Happens Inside the Kiln
Learn how time and temperature work together inside the kiln to transform clay into durable ceramic.
Textured Pendant With Color Blocking
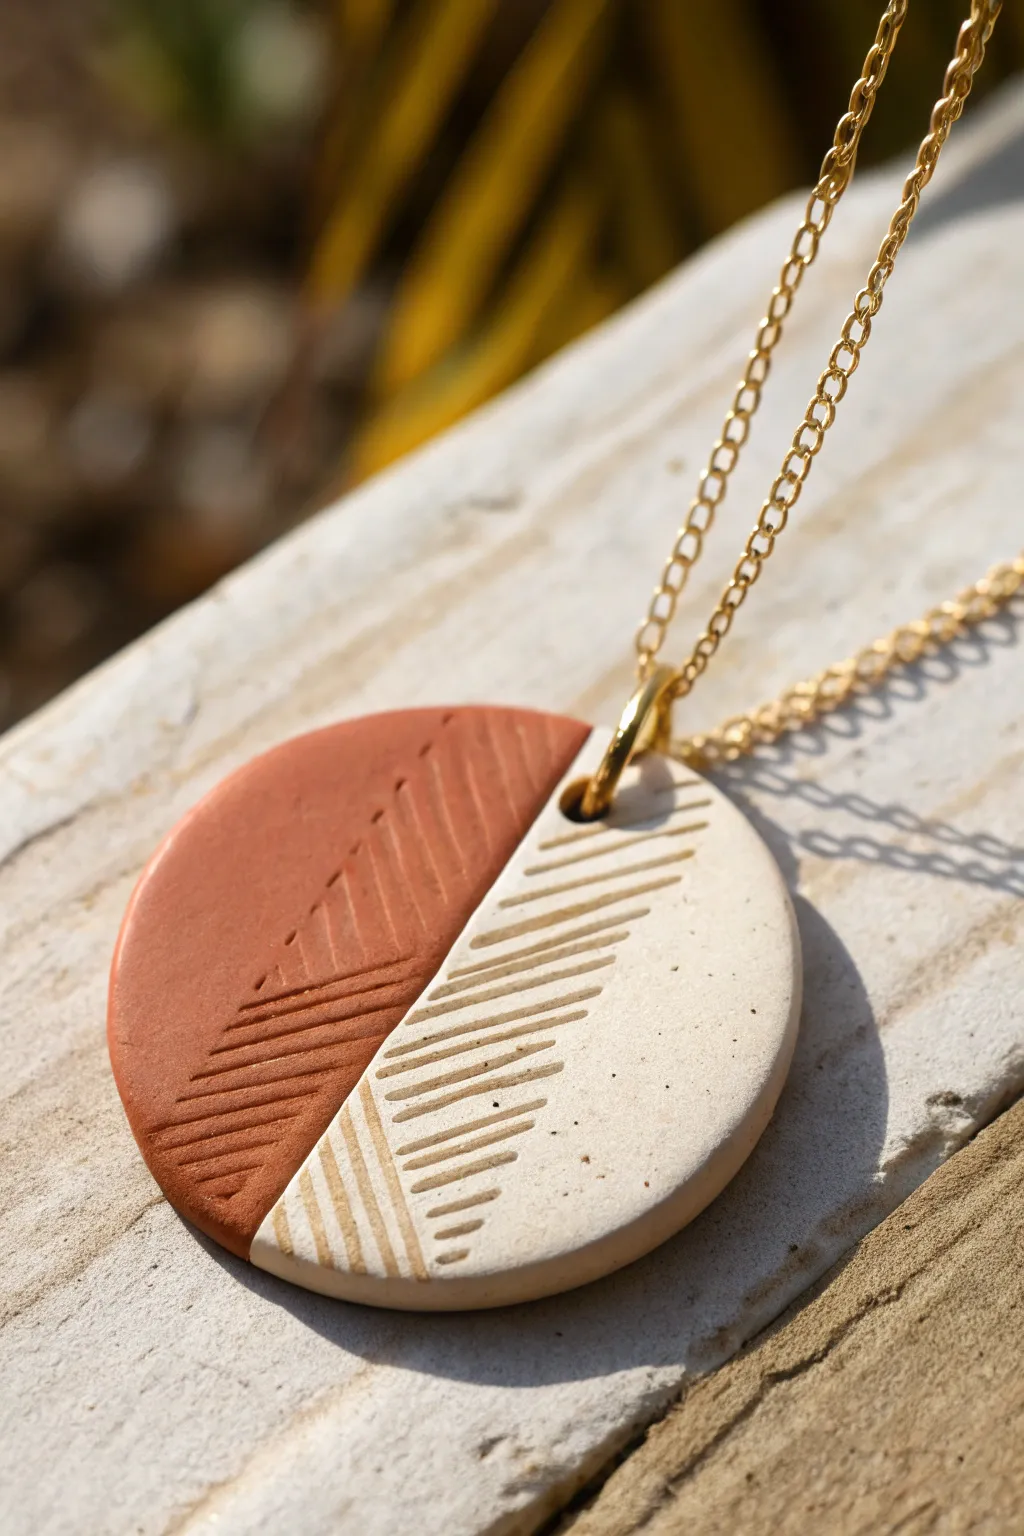
This modern pendant combines earthy terracotta tones with creamy white clay for a sophisticated, minimalist look. The diagonal ridge texture adds a tactile dimension that makes this simple circular shape feel truly artisanal.
How-To Guide
Materials
- Terracotta colored polymer clay (e.g., Sculpey Premo or Soufflé)
- White or Beige polymer clay (e.g., Granite or plain White)
- Acrylic roller or pasta machine
- Circle clay cutter (approx. 1.5 – 2 inches)
- Sharp tissue blade or X-Acto knife
- Texture tool (texture sponge, comb, or ribbed tool)
- Small jump ring (gold)
- Necklace chain (gold)
- Jewelry pliers
- Work surface (tile or glass mat)
- Drill bit or toothpick (for the hole)
- Fine grit sandpaper (optional)
Step 1: Preparing the Base
-
Condition the Clay:
Start by warming up both the terracotta and white polymer clays in your hands. Knead them separately until they are soft, pliable, and free of cracks. -
Roll Out Sheets:
Using an acrylic roller or a pasta machine on a medium setting (around 3mm thick), roll both colors into flat, even sheets. -
Cut the Junction Line:
Use your tissue blade to cut a straight, clean edge on both the terracotta and white sheets. This will be the seam where the two colors meet. -
Join the Colors:
Place the two straight edges together on your work surface. Gently push them against each other so they stick, but try not to distort the straight line. -
Smooth the Seam:
Roll over the seam lightly with your acrylic roller to bond them together into a single sheet. If the back looks uneven, you can smooth the seam with your finger.
Clean Seams
To ensure the seam between colors is super strong, apply a tiny amount of liquid polymer clay (like Bake & Bond) to the edges before pressing them together.
Step 2: Shaping and Texturing
-
Cut the Circle:
Position your circle cutter over the joined clay so that the seam runs vertically through the shape, roughly splitting the circle in half. Press down firmly to cut your pendant shape. -
Remove Excess:
Peel away the excess clay from around the circle, leaving your two-toned disc on the work surface. -
Plan the Texture:
Visualize a diagonal line cutting across the pendant. You will be applying texture to the lower portion, covering the area where the two colors meet. -
Apply Diagonal Lines:
Using a texture tool or a comb, press diagonal lines into the clay. Start from the bottom edge and work upwards, stopping at an imaginary diagonal boundary line. -
Refine the Edges:
If the stamping process distorted the round shape, gently tap the edges back into a perfect circle with your finger or the side of the blade. -
Create the Hole:
Use a toothpick or a small drill bit to pierce a hole near the top edge of the pendant (in the terracotta section or right on the seam depending on your preference like the image). Make sure the hole is big enough for your jump ring.
Gold Accents
After baking, highlight the textured grooves with a little bit of gold acrylic paint or metallic wax to make the pattern pop and match the chain.
Step 3: Baking and Assembly
-
Bake the Piece:
Place the pendant on a ceramic tile or a parchment-lined baking sheet. Bake according to your specific clay package instructions (usually 275°F/130°C for 15-30 minutes). -
Cool Down:
Allow the pendant to cool completely in the oven or on a wire rack. Do not handle it while hot as it can be fragile. -
Sand Edges (Optional):
If there are any rough spots on the rim, I like to lightly sand the edges under running water with fine-grit sandpaper for a professional finish. -
Open Jump Ring:
Using two pairs of jewelry pliers, twist the jump ring open (twist ends away from each other, don’t pull apart). -
Attach Chain:
Thread the open jump ring through the hole in your clay pendant and loop the necklace chain through it as well. -
Close and Finish:
Twist the jump ring closed securely so the gap disappears. Your geometric pendant is now ready to wear.
This stylish necklace makes a perfect handmade gift or a chic addition to your own wardrobe
Ombre Gradient Slabs for Modern Pieces

Embrace the warmth of nature with these beautifully muted, terracotta-inspired clay rainbows. Perfect for jewelry components, wall hangings, or simply as decorative accents, this project uses an ombre palette to create a cohesive and modern aesthetic.
Step-by-Step Tutorial
Materials
- Polymer clay (terracotta, dark brown, beige, white, and translucent)
- Acrylic rolling pin
- Clay slicer blade (tissue blade)
- Circle cutters (various small sizes)
- Needle tool or toothpick
- Ceramic tile or baking sheet
- Parchment paper
- Oven (for curing)
Step 1: Color Mixing & Conditioning
-
Establish the palette:
Start by selecting your main colors. You want a gradient effect, so choose a dark brown, a terracotta or rust orange, a soft peach-beige, and a cream or white. If you don’t have these exact shades, mix them yourself to get that custom earthy feel. -
Create the speckled stone look:
For the lightest arch, create a faux-stone effect. Mix a large portion of white clay with a tiny pinch of black or dark brown clay. Chop the dark clay into dust-like particles first, then fold it into the white clay until you have consistent speckles throughout. -
Condition the clay:
Ideally, you want the clay to be pliable and warm. Knead each color block thoroughly in your hands until it is smooth and free of cracks. This prevents breakage later. -
Roll out slabs:
Using your acrylic roller, flatten each color of clay into a sheet of even thickness, roughly 1/4 inch thick. Ensuring uniform thickness is key for a flat finished product.
Clean Cuts Pro Tip
Chill your clay sheets in the fridge for 10 minutes before cutting. Firm clay resists dragging and smushing, giving you much sharper edges on your strips.
Step 2: Cutting the Arches
-
Use cutters for the center:
For the smallest, innermost arch shape, use a small circle cutter to punch out a round piece. Then, use your clay slicer to cut that circle in half, creating a semi-circle. -
Cut the larger arches:
There are two ways to do this. You can use graduated sizes of circle cutters to create nested rings, or you can cut strips. For this distinctive look, we will cut straight strips of clay about 1/4 inch wide. -
Shape the first strip:
Take a strip of your second color and gently curve it over the central semi-circle. Press it lightly against the edge so they adhere, but don’t squish the shape. -
Continue layering:
Repeat this process with the next color strip, draping it over the previous arch. Continue until you have three or four layers, creating a full rainbow shape. -
Create the sets:
Make four distinct rainbows. Vary the color order for each one to create visual interest. For example, make one with a dark outer ring and light center, and another with the reverse. -
Trim the bottoms:
Once your arches are assembled, take your long clay slicer blade. Line it up with the bottom edge of the rainbow and press down firmly to create a perfectly flat base where all the legs end evenly.
Jewelry Level Up
Before baking, poke a small hole at the top of the largest arch. After curing, add a jump ring and string to turn these into trendy bohemian pendants or rearview mirror charms.
Step 3: Detailing & Finishing
-
Add texture:
On the speckled cream arches, use a needle tool to gently poke small indentations along the curve. This adds a nice tactile element that mimics porous stone. -
Make matching accents:
Use your leftover rolled clay to punch out several small circles in various colors. These can be used as connector pieces if you turn these into jewelry, or simply as part of the decorative set. -
Final smooth:
Gently run your finger over the surface of the clay to smooth out any fingerprints. You can also use a bit of cornstarch on your finger to help glide over the clay without leaving marks. -
Prepare for baking:
Transfer your pieces carefully to a ceramic tile or a baking sheet lined with parchment paper. -
Bake:
Bake the clay according to the manufacturer’s instructions on the package. Usually, this is around 275°F (135°C) for 15-30 minutes, depending on thickness. -
Cool it down:
Let the pieces cool completely on the baking sheet before handling them. They are fragile while warm but harden as they return to room temperature.
Now you have a stunning set of earthy, modern clay pieces ready for your next creative assembly


The Complete Guide to Pottery Troubleshooting
Uncover the most common ceramic mistakes—from cracking clay to failed glazes—and learn how to fix them fast.
Bake-Your-Own Texture Stamps for Future Clay Projects
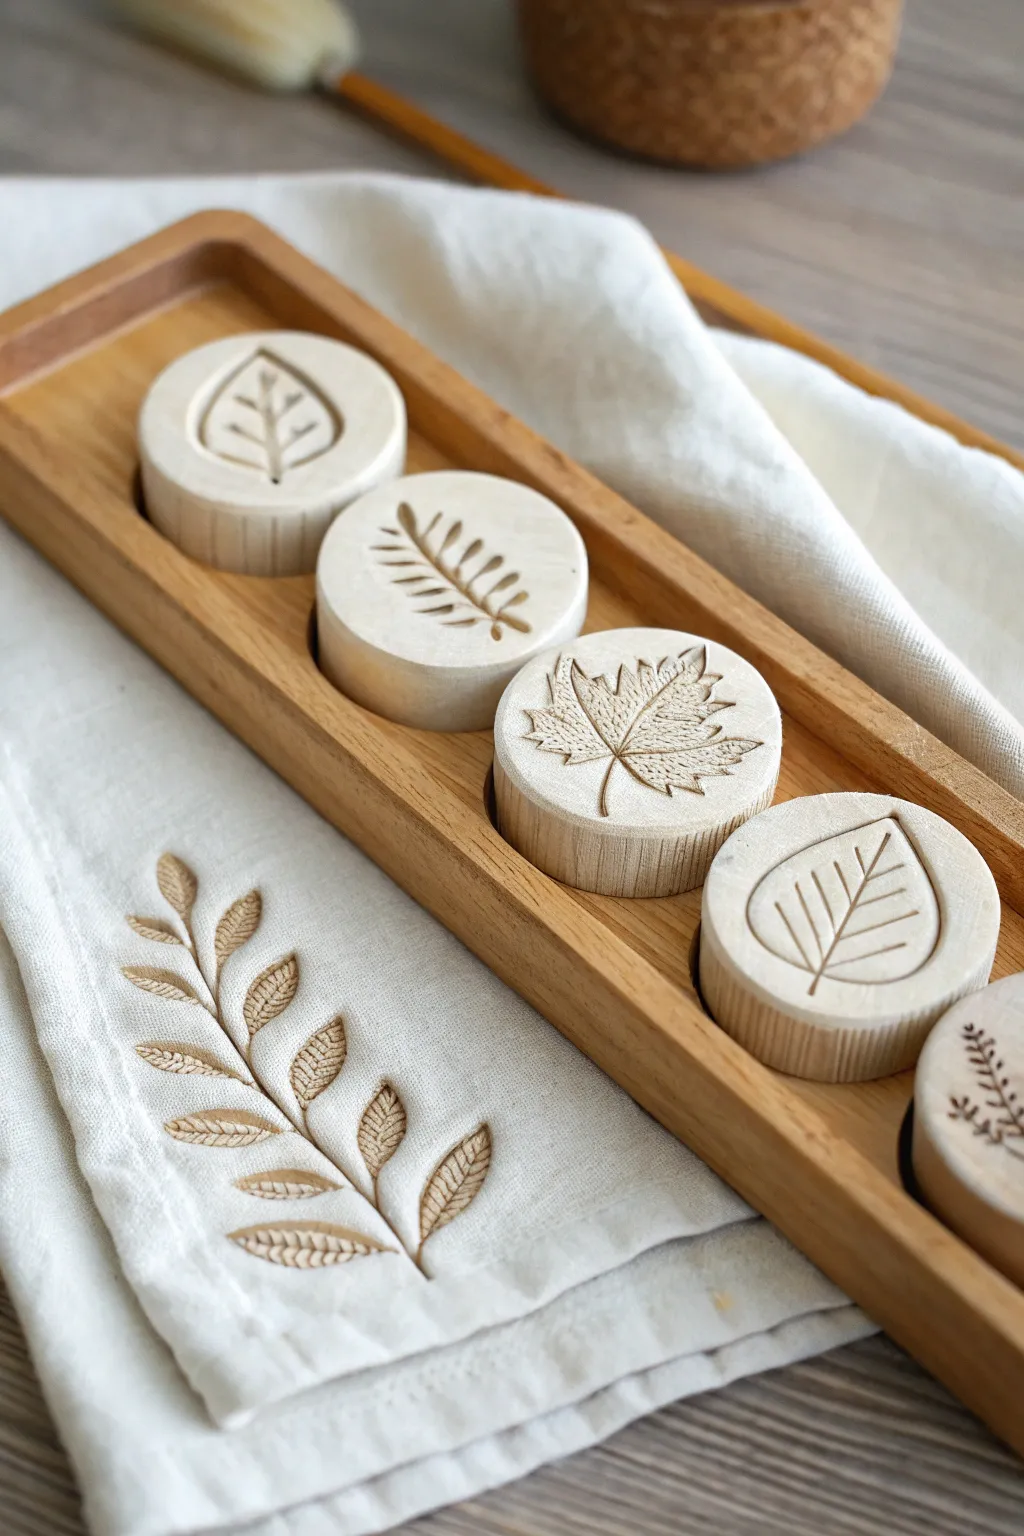
Create a set of durable, nature-inspired texture stamps using oven-bake clay, perfect for adding intricate details to your ceramic, soap, or future polymer clay creations. These round stamps feature deeply impressed botanical designs and are finished to look like smooth, pale stone or light wood.
Step-by-Step Tutorial
Materials
- White or beige polymer clay (Sculpey or Fimo)
- Round cookie cutter (approx. 2-3 inches diameter)
- Clean rolling pin or acrylic roller
- Carving tools (needle tool, small loop tool, or linoleum cutter)
- Sandpaper (fine grit)
- Cornstarch or baby powder (release agent)
- Tracing paper and pencil (optional for pattern transfer)
- Oven and baking sheet
- Parchment paper
Step 1: Prepping and Shaping the Discs
-
Condition the Clay:
Start by kneading your white or beige polymer clay in your hands. You want it warm and pliable, but not sticky. Conditioning removes air bubbles and prevents cracking during baking. -
Roll Out a Slab:
Using your roller, flatten the clay into a slab. For sturdy stamps like these, aim for a significant thickness—about 3/4 of an inch to 1 inch thick. This gives you plenty of depth for carving and a solid grip when using them later. -
Cut the Rounds:
Press your round cookie cutter vertically into the slab to create clean discs. If the clay sticks, dust the cutter with a little cornstarch first. -
Smooth the Edges:
Gently push the discs out of the cutter. Use your finger, dipped in a tiny bit of water or baby oil, to smooth the sharp top edge and the vertical sides so the stamp feels comfortable in the hand.
Step 2: Designing and Carving
-
Plan Your Botanicals:
Sketch simple leaf or fern designs on paper first. You can draw directly onto the raw clay with a pencil to lightly mark your guide lines, or sketch on tracing paper and rub the back to transfer the faint graphite lines. -
Carve the Main Veins:
Using a needle tool or a V-gouge tool, carve the central spine of your leaf first. Press deeply enough to create a distinct impression, removing the tiny snakes of clay as you go. -
Add Secondary Veins:
Branching out from the center line, carve the angled veins. Vary the spacing and angle depending on the type of leaf—make the maple leaf veins radiate from a central point, while the fern veins should be parallel. -
Create Texture and Depth:
For the maple leaf or broader leaves, use a fine needle tool to scratch tiny cross-hatching or stippling inside the leaf shape. This adds that intricate, realistic texture seen in the reference image. -
Detail the Negative Space:
Check the smooth areas around your leaf design. Ensure they are flat and clean so that only the leaf pattern will imprint when you use the stamp. -
Ribbed Edges (Optional):
If you want the fluted edge look on the side of the stamp, gently press the side of a ruler or dull knife vertically around the circumference of the disc to create deeper groove lines.
Clean Release
Before using your new stamp on raw clay, lightly dust the surface with cornstarch or spritz with water. This prevents the raw clay from getting stuck in your detailed carving.
Step 3: Baking and Finishing
-
Bake the Stamps:
Place your finished discs on a baking sheet lined with parchment paper. Bake according to the manufacturer’s instructions for your specific brand of clay (usually around 275°F or 135°C). -
Extended Baking Time:
Since these discs are quite thick, I usually bake them for an extra 15-20 minutes longer than the package suggests for thinner items to ensure the core is fully cured and hard. -
Cool Down:
Let the stamps cool completely in the oven with the door cracked open. This slow cooling helps prevent thermal shock or cracking. -
Sand for Smoothness:
Once cool, take fine-grit sandpaper and gently sand the flat surface of the stamp. You want to remove any burrs or raised bits of clay that might snag when you use the stamp later. -
Test the Impression:
Test your new tool on a scrap piece of clay. If the impression isn’t deep enough, you can usually carve a tiny bit more into the baked clay with a sharp linoleum cutter, though it’s harder than working with raw clay.
Make a Rolling Stamp
Instead of a flat disc, form a thick cylinder of clay. Carve a continuous vine pattern around the curved outside to create a rolling texture tool for borders.
Your custom nature stamps represent a permanent addition to your crafting toolkit, ready to impress beautiful details into countless future projects