If you’ve got a little block of air dry clay and a pile of rings and earrings that keep wandering off, you’re already halfway to a cute solution. These jewelry holder ideas are the kind of quick, satisfying projects I love making for a dresser top—pretty enough to leave out, practical enough to actually use.
Classic Pinch Pot Jewelry Dish

Embrace the beauty of imperfection with this stone-look jewelry dish that celebrates raw textures. Its organic shape and speckled surface make it the perfect minimalist resting place for your daily rings and studs.
How-To Guide
Materials
- White air-dry clay (stone effect or plain)
- Small bowl of water
- Medium-grit sandpaper
- Old toothbrush or stiff bristle brush
- Sealing varnish (matte finish)
- Optional: dried coffee grounds or sand for texture
Step 1: Shaping the Base
-
Prepare the Clay:
Start with a ball of air-dry clay about the size of a tangerine. Knead it thoroughly until it’s warm and pliable. -
Add Texture (Optional):
If you are using plain white clay but want that speckled, stone-like look, knead in a pinch of dried coffee grounds or fine sand at this stage. -
Begin the Pinch:
Hold the clay ball in one palm and press your thumb gently into the center, stopping about a half-inch from the bottom. -
Pinch the Walls:
Slowly rotate the ball while pinching the clay between your thumb and fingers. Work your way upward from the base to thin out the walls. -
Check Thickness:
Aim for a consistent thickness of roughly 1/4 inch throughout the bowl. It should feel sturdy but not chunky. -
Flatten the Bottom:
Gently tap the base of your bowl against your work surface to create a flat bottom so it won’t wobble.
Cracking Up?
If small cracks appear while the clay dries, mix a tiny bit of fresh clay with water to make a paste (slip) and fill them in with your finger.
Step 2: Texturing and Refining
-
Create the Lip:
Instead of smoothing the rim perfectly, use your fingers to gently uneven the edge. Press down slightly in random spots to give it that organic, wobbly height variation visible in the photo. -
Add Surface Texture:
Take an old toothbrush or a stiff brush and tap the bristles firmly against the exterior and interior surfaces. This creates the porous, stone-like pockmarks. -
Detail the Rim:
Use the brush to dab specifically along the rim edge. I find this helps the rim look naturally weathered rather than intentionally shaped. -
Initial Drying:
Let the piece sit for about 30 minutes until it’s leather-hard—firm to the touch but still holds moisture. -
Refine the Shape:
Now that it’s firmer, if the bowl has sagged, gently push the walls back into a cupped shape. You can dampen your finger slightly to smooth over any cracks that appeared during drying.
Step 3: Finishing Up
-
Full Dry:
Allow the dish to air dry completely for 24-48 hours. Turn it over halfway through the process to ensure the bottom dries evenly. -
Edge Sanding:
Once bone dry, take your sandpaper and gently run it over the very top of the rim. Don’t smooth it completely; just knock off any sharp or snaggy bits. -
Dust Off:
Wipe the entire piece with a dry cloth or soft brush to remove clay dust from the sanding process. -
Seal the Interior:
Apply a thin coat of matte varnish to the inside of the bowl. This protects the clay from natural oils on your jewelry. -
Seal the Exterior:
Finish by sealing the outside. A matte finish is key here to maintain that raw, unglazed ceramic aesthetic.
Gold Speckle Hack
Flick a toothbrush loaded with watered-down gold paint over the dry bowl for a chic speckle effect before sealing.
Enjoy styling your new handmade dish on your nightstand as a home for your favorite treasures


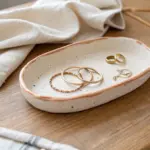
Raised-Rim Oval Catchall Dish
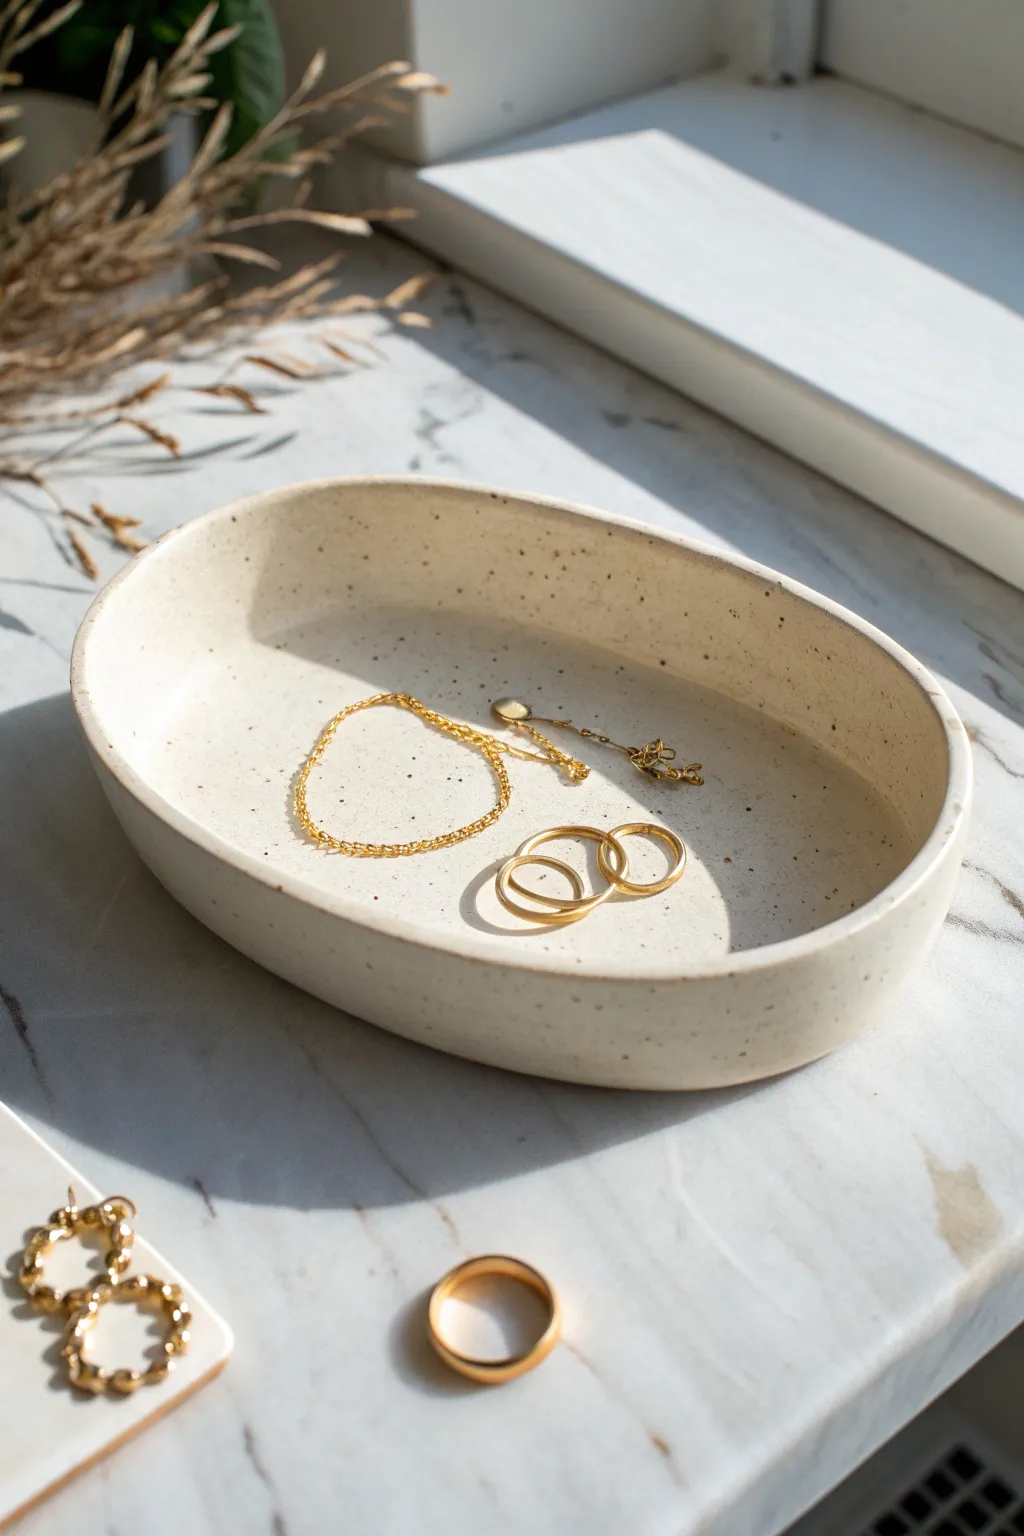
This minimalist oval dish features a creamy matte finish with subtle, faux-ceramic speckles and substantial raised walls. It is the perfect size for holding your daily rotation of gold rings and delicate chains.
How-To Guide
Materials
- White air dry clay (approx. 300g)
- Acrylic rolling pin
- Two wooden guide slats (approx. 5mm thick)
- Oval paper template (approx. 15cm x 10cm)
- Craft knife or clay needle tool
- Small bowl of water
- Sponge
- Fine grit sandpaper (200 and 400 grit)
- Cream or off-white acrylic paint
- Dark brown or black acrylic paint
- Old toothbrush
- Matte varnish or sealant
Step 1: Shaping the Base
-
Prepare your clay:
Start by kneading a large handful of white air dry clay until it is warm, pliable, and free of air bubbles. If the clay feels too dry or crumbly, dip your fingers in water and work it in. -
Roll the slab:
Place your clay between two wooden guide slats on a smooth work surface or canvas mat. Use the acrylic roller to flatten the clay until the roller rests on the slats, ensuring an even thickness across the entire slab. -
Cut the oval shape:
Lay your oval paper template gently on top of the rolled clay. Using a sharp craft knife or needle tool, trace around the perimeter cleanly. Remove the excess clay but save it for the walls. -
Smooth the edges:
Dip your finger in a little water and run it along the cut edge of your oval base to remove any sharp ragging or crumbs left by the knife.
Seamless Transitions
Use a damp makeup sponge instead of a regular kitchen sponge for smoothing. The dense foam creates an incredibly smooth, porcelain-like surface before drying.
Step 2: Building the Walls
-
Create a coil:
Take the excess clay and roll it into a long, even snake or coil. It needs to be long enough to go around the entire circumference of your oval base. -
Flatten the coil:
Gently press down on the coil with your roller or fingers to flatten it into a long strip, roughly 1.5 to 2 cm high. -
Score and slip:
Use your needle tool to make small hatch marks (scoring) along the top edge of your oval base and the bottom edge of your clay strip. Dab a little water (slip) onto the scored areas. -
Attach the wall:
Place the strip onto the edge of the base, pressing firmly to adhere. Where the two ends of the strip meet, cut them at an angle and blend them together seamlessly. -
Blend the seams:
This is the most crucial part for structural integrity. Use a modeling tool or your thumb to drag clay from the wall down onto the base on the inside, and from the base up onto the wall on the outside.
Stone Effect
Mix dried tea leaves or used coffee grounds directly into the wet clay before rolling it out for a natural, embedded texture instead of painted speckles.
Step 3: Refining and Drying
-
Smooth the joins:
Once the seams are blended, use a slightly damp sponge to smooth out all tool marks. Pay special attention to the interior curve where the wall meets the floor to ensure a gentle, rounded transition. -
Level the rim:
Flip the dish upside down gently on a flat surface to ensure the top rim is perfectly level. You can lightly tap it against the table to flatten the top edge. -
Let it dry:
Place the dish on a wire rack to dry. It typically takes 24-48 hours. I like to flip it over halfway through the drying process to ensure the bottom dries evenly and doesn’t warp. -
Sand for perfection:
Once bone dry, use 200 grit sandpaper to remove any large bumps. Switch to 400 grit for a silky smooth finish, rounding off the top rim and bottom edges.
Step 4: Painting the Faux Ceramic Look
-
Apply base color:
Paint the entire dish with two coats of cream or off-white acrylic paint. Allow the first coat to dry completely before applying the second to avoid streaks. -
Prepare the speckles:
Dilute a very small amount of dark brown or black paint with water until it has an inky consistency. -
Splatter effect:
Dip an old toothbrush into the diluted paint. Hold it over the dish and run your thumb across the bristles to flick tiny speckles onto the surface. Practice on a piece of paper first to control the density. -
Seal the piece:
After the paint is fully dry, apply two thin coats of matte varnish. This protects the clay from moisture and gives it that finished ceramic feel.
Now you have a chic, modern vessel ready to organize your favorite accessories


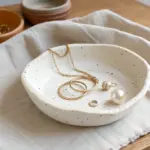
Scalloped Edge Ring and Stud Dish
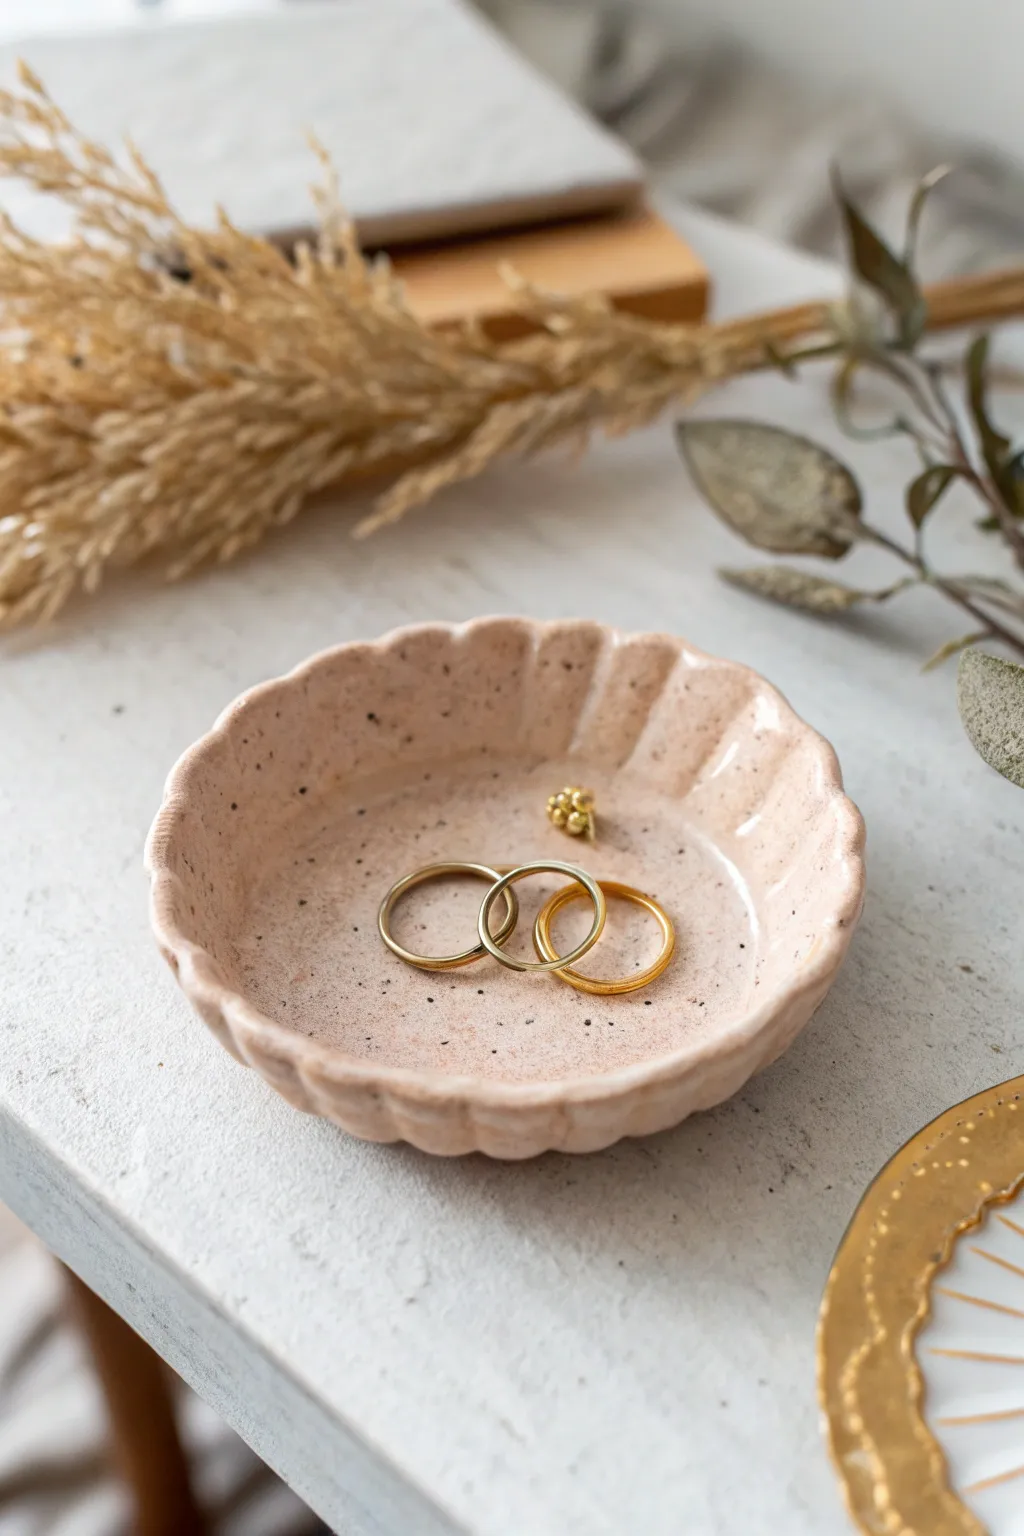
This delicate dish features soft scalloped edges and a charming speckled finish that mimics high-end ceramic glaze. It is the perfect size for keeping your favorite everyday rings and stud earrings safe on your bedside table.
Step-by-Step
Materials
- Air-dry clay (white)
- Acrylic rolling pin
- Circle cookie cutter (approx. 3-4 inches)
- Modeling tool or smooth chopstick
- Small sponge
- Sandpaper (fine grit)
- Acrylic paint (pale nude/pink)
- Acrylic paint (black or dark brown)
- Old toothbrush
- High-gloss varnish or sealant
- Paintbrush
Step 1: Shaping the Clay
-
Condition the clay:
Begin by taking a handful of air-dry clay and kneading it in your hands until it feels soft, warm, and pliable without cracks. -
Roll out the slab:
Place the clay on a smooth surface or canvas mat. Use your acrylic rolling pin to roll it out to an even thickness of about 1/4 inch. -
Cut the base:
Press your circle cookie cutter firmly into the clay to create a perfect round shape. Peel away the excess clay from the outside. -
Smooth the edges:
Dip your finger in a tiny bit of water and run it gently around the cut edge of the circle to smooth out any roughness left by the cutter. -
Create the curve:
Gently lift the clay circle and place it into a shallow bowl or a curved saucer to help it hold a concave shape while we work on the details. -
Form the scallops:
Using the side of a modeling tool, a chopstick, or even your pinky finger, gently press indentations into the inner rim of the dish every half-inch around the circumference. -
Refine the fluting:
After pressing the indentations, use your fingers to gently pinch the clay between the dents, encouraging the scalloped edges to flare slightly outward. -
Smoothing check:
Take a slightly damp sponge to carefully wipe away any fingerprints or tool marks on the surface, ensuring the scallops remain distinct but soft. -
Dry thoroughly:
Let the dish dry completely in a cool, dry place for 24-48 hours. I find turning it over halfway through the drying process helps the bottom dry evenly.
Glazing Trick
Use a clear UV resin instead of standard varnish for the final coat. It cures instantly under a UV lamp and creates a glass-like, waterproof finish.
Step 2: Finishing and Painting
-
Sand imperfections:
Once fully cured and hard, use fine-grit sandpaper to buff away any remaining rough spots on the rim or base. Wipe away the dust with a dry cloth. -
Apply base color:
Mix a pale nude-pink acrylic paint. Apply two thin coats to the entire dish, allowing the paint to dry completely between layers. -
Prepare the speckle:
Dilute a small amount of black or dark brown acrylic paint with water until it has an inky, fluid consistency. -
Splatter effect:
Dip an old toothbrush into the diluted dark paint. Hold it over the dish and run your thumb across the bristles to flick tiny speckles onto the surface. -
Dry the speckles:
Allow the splatter paint to dry completely. This usually takes only about 15-20 minutes since the droplets are so small. -
Seal the piece:
Apply a generous coat of high-gloss varnish to the entire dish. This gives it that glazed ceramic look and protects it from moisture. -
Second coat options:
For extra durability and shine, wait for the first coat of varnish to cure and apply a second layer.
Cracking Clay?
If small cracks appear while drying, don’t panic. Mix a tiny bit of fresh clay with water to make a paste and fill the cracks, then sand smooth once dry.
Now you have a chic, speckled spot to store your treasures that looks just like expensive pottery


Yin-Yang Split Compartment Holder
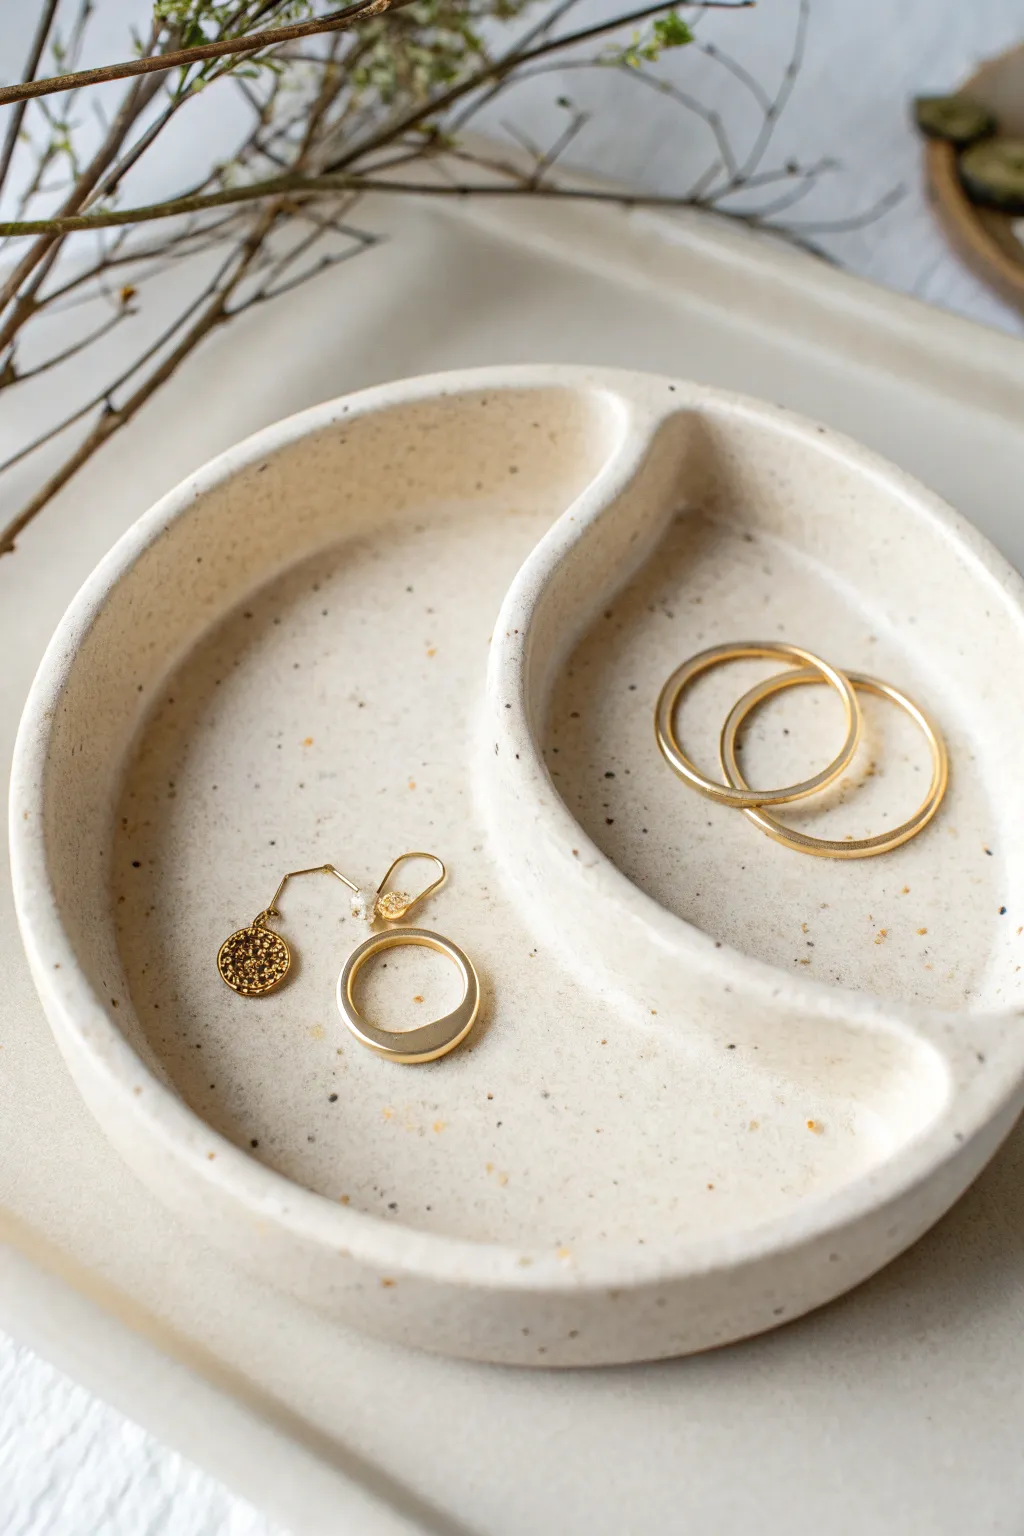
Embrace harmony in your organization with this beautifully minimal split-compartment jewelry holder. Featuring a curved S-divider reminiscent of a yin-yang symbol, the subtle speckled finish gives it a sophisticated, ceramic-like stoneware appearance without needing a kiln.
How-To Guide
Materials
- White air dry clay
- Rolling pin
- Circle template (small bowl or round cookie cutter, approx. 4-5 inches)
- Craft knife or clay tool
- Small bowl with water
- Sponge or soft paintbrush
- Fine grit sandpaper
- Acrylic paint (black/dark brown for speckles)
- Old toothbrush or stiff paintbrush
- Matte or satin varnish
Step 1: Base Construction
-
Condition the clay:
Begin by kneading a good handful of white air dry clay until it feels warm, pliable, and free of cracks. -
Roll the slab:
Using your rolling pin, flatten the clay into an even slab about 1/4 inch thick. Rotate the clay frequently to prevent it from sticking to your work surface. -
Cut the base:
Place your circular template onto the slab and cut around it cleanly with a craft knife to create the perfect round base. -
Prepare the rim coil:
Roll out a long, even snake of clay, aiming for the same thickness as your base slab. This will form the outer wall. -
Score and slip:
Rough up the outer edge of your base circle and one side of your clay snake using a needle tool or knife. Dab a little water (slip) onto the scored areas to act as glue. -
Attach the wall:
Gently press the coil onto the perimeter of the base. Cut off any excess length and smooth the joining seam where the two ends meet. -
Blend the seams:
Use your thumb or a modeling tool to drag clay from the coil down onto the base on the inside, and from the base up to the coil on the outside, creating a seamless transition.
Stone Effect
Mix dried coffee grounds or black pepper directly into the wet white clay while kneading. This creates a natural, embedded texture instead of painted speckles.
Step 2: Creating the Divider
-
Form the S-curve:
Roll a second snake of clay, slightly shorter than the diameter of your dish. Lay it inside the dish to test the fit, bending it into a gentle S-shape that touches opposite sides of the inner wall. -
Secure the divider:
Score and slip the bottom of the S-curve and the vertical points where it meets the outer wall. Press it firmly into place. -
Smooth connections:
Just like the outer wall, blend the clay of the divider into the base and the sidewalls so it looks like one solid piece rather than an attachment. -
Level the height:
Check the height of your divider against the outer rim. I prefer to trim or gently press it down so the divider sits slightly lower than or flush with the exterior walls. -
Refine with water:
Dip your finger or a sponge in a tiny bit of water and run it over all edges to round them off and remove fingerprints. Don’t over-wet the clay, or it may warp.
Step 3: Finishing Touches
-
Allow to dry:
Let the piece dry completely in a cool, dry place for 24-48 hours. Turn it over halfway through if possible to help the bottom dry evenly. -
Sand for smoothness:
Once fully cured and bone dry, use fine-grit sandpaper to buff away any uneven bumps or sharp ridges on the rim. -
Create the speckles:
Dilute a small drop of black or dark brown acrylic paint with water. Dip an old toothbrush into the mixture. -
Splatter effect:
Hold the toothbrush over the dish and run your thumb across the bristles to flick tiny specks of paint onto the surface. Practice on paper first to control the size of the dots. -
Seal the piece:
Protect your work with a coat of matte or satin varnish. This deepens the speckled look and ensures durability against scratches from your jewelry.
Color Block
Paint the two inner compartments different pastel colors (like sage and blush) before speckling, keeping the divider and rim natural white for contrast.
Place your new divider on your vanity and enjoy the organized calm it brings to your daily routine

The Complete Guide to Pottery Troubleshooting
Uncover the most common ceramic mistakes—from cracking clay to failed glazes—and learn how to fix them fast.
Leaf-Shaped Necklace Catchall
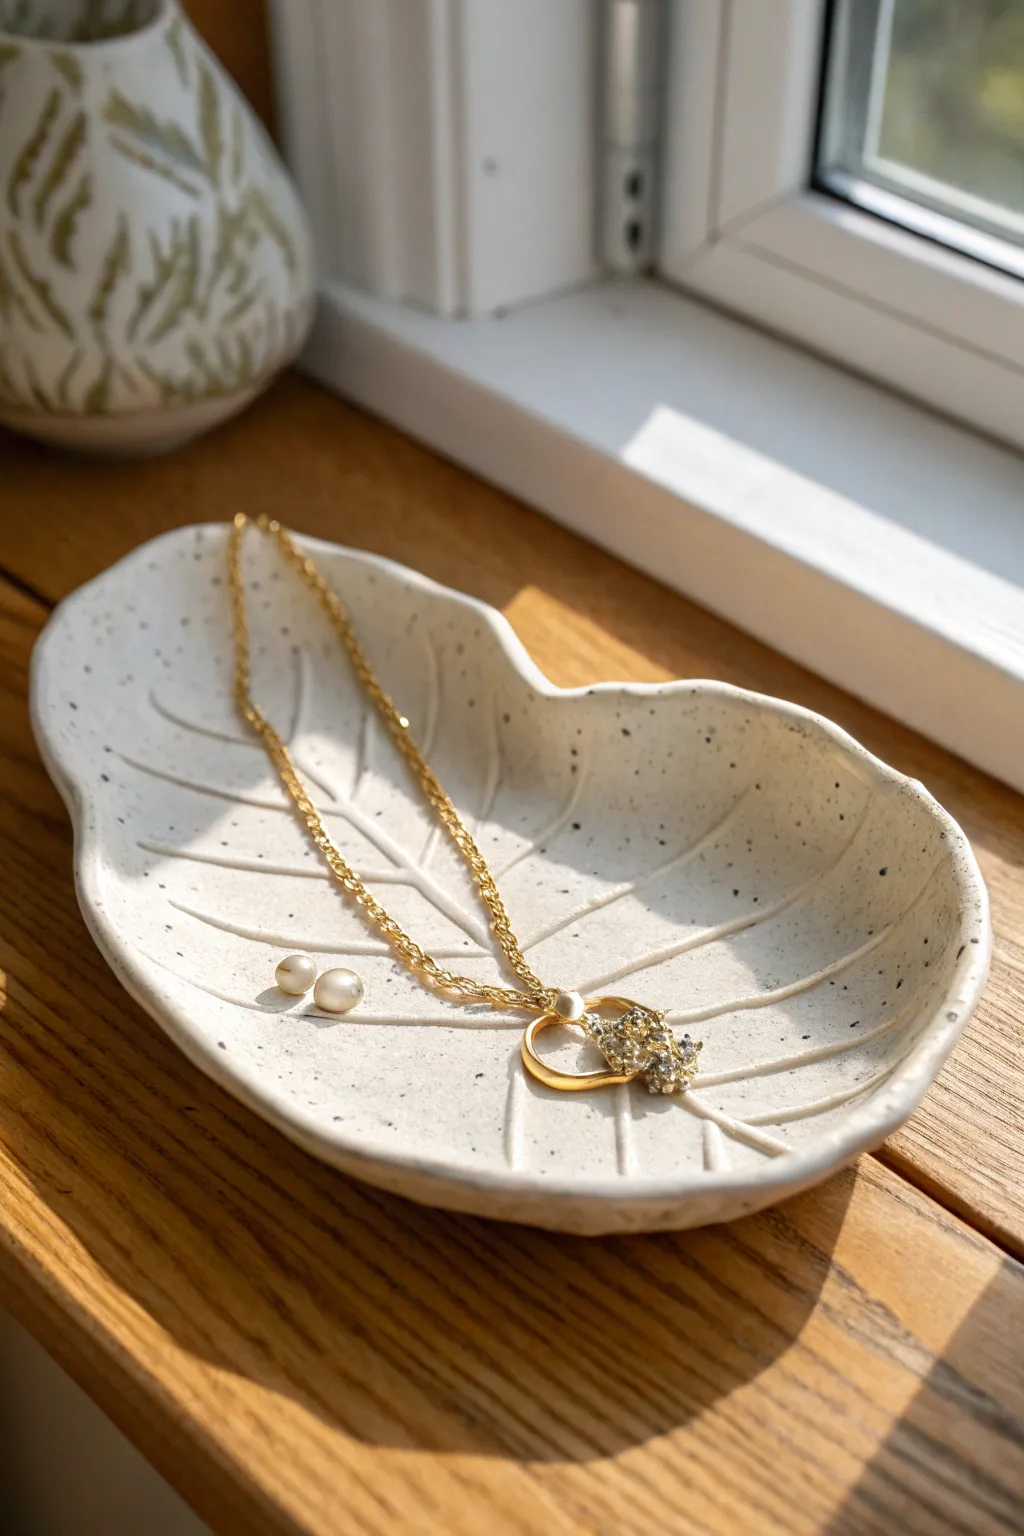
Bring a touch of nature indoors with this gracefully curved catchall dish, perfect for cradling your delicate necklaces and studs. Its organic, speckled finish mimics natural stone, while the deep vein impressions add both texture and visual interest to your vanity.
Step-by-Step Tutorial
Materials
- White or granite-effect air dry clay
- Rolling pin
- Parchment paper or canvas mat
- Fresh leaf (with prominent veins) or a leaf template
- Craft knife or clay needle tool
- Small bowl or dish (for drying form)
- Sandpaper (fine grit)
- Clear acrylic sealant (matte or gloss)
- Optional: Black and brown acrylic paint (for speckling)
- Old toothbrush (if adding speckles manually)
Step 1: Shaping the Clay
-
Condition the clay:
Begin by grabbing a handful of air dry clay, roughly the size of a tennis ball. Knead it in your warm hands until it feels soft, pliable, and free of any internal air bubbles. -
Roll it out:
Place your clay onto a piece of parchment paper or a canvas working mat. Using your rolling pin, roll the clay out evenly until it is about 1/4 inch thick. Try to maintain a consistent thickness so the dish dries without cracking. -
Impress the texture:
If you are using a real leaf, place it vein-side down onto your clay slab. If you don’t have a broad leaf handy, you can draw the veins later. Press the leaf firmly into the clay with your rolling pin to transfer those beautiful natural details. -
Cut the shape:
Use your craft knife or needle tool to trace around the perimeter of the leaf. If you aren’t using a real leaf, freehand a simple, organic leaf shape or trace a paper template you’ve printed out. -
Peel and reveal:
Gently peel the excess clay away from your cut shape. If you used a real leaf for texture, carefully lift it off by the stem to reveal the intricate vein pattern stamped into the white surface. -
Smooth the edges:
Dip your finger in a tiny bit of water and run it along the cut edges of your clay leaf. This softens the harsh cut lines and gives the piece a more refined, professional ceramic look. -
Add manual details:
If your leaf didn’t leave a strong impression, or if you cut a freehand shape, use your needle tool to gently carve a central vein line and several branching veins. Don’t press too hard; you just want surface texture.
Cracking Edges?
If you see hairline cracks while the clay is drying in the bowl, smooth a tiny bit of fresh, wet clay (slurry) into the crack with your finger immediately to bond it back together.
Step 2: Forming and Drying
-
Create the curve:
Lift your clay leaf carefully and place it inside a shallow bowl or saucer. Let the clay slump naturally into the curve of the bowl; this gravity-assisted shaping creates the raised edges needed to hold jewelry securely. -
Dry completely:
Set the bowl aside in a cool, dry place away from direct sunlight. Allow the clay to dry for at least 24 to 48 hours. When the top feels dry/chalky, gently flip it over to ensure the bottom dries out fully. -
Sand for smoothness:
Once the dish is bone dry and hard, take your fine-grit sandpaper and lightly buff the edges. You want to remove any sharp points or roughness left from the cutting process.
Step 3: Finishing Touches
-
Clean the surface:
Wipe the dish down with a dry cloth or a soft brush to remove the sanding dust. The surface needs to be totally clean before sealing. -
Create the speckled effect:
If you didn’t use granite-effect clay, mix a tiny bit of water with black or dark brown acrylic paint. Dip an old toothbrush into the mixture, aim it at the dish, and run your thumb across the bristles to flick tiny specks of paint onto the surface. -
Let the paint set:
I prefer to let these speckles dry for about 20 minutes to ensure they don’t smear during the sealing process. -
Seal the dish:
Apply a coat of clear acrylic sealant over the entire dish, front and back. A matte finish looks very natural, but a gloss finish will mimic glazed pottery. -
Final cure:
Allow the sealant to cure according to the bottle instructions before placing your jewelry inside.
Texture Pro Tip
For deeper, more realistic vein impressions, use a leaf with a stiff, woody stem (like a hydrangea or oak leaf) rather than a soft, fleshy one.
Now you have a serene, minimalist spot to keep your favorite daily jewelry safe and organized
Shell Trinket Dish for Tiny Pieces
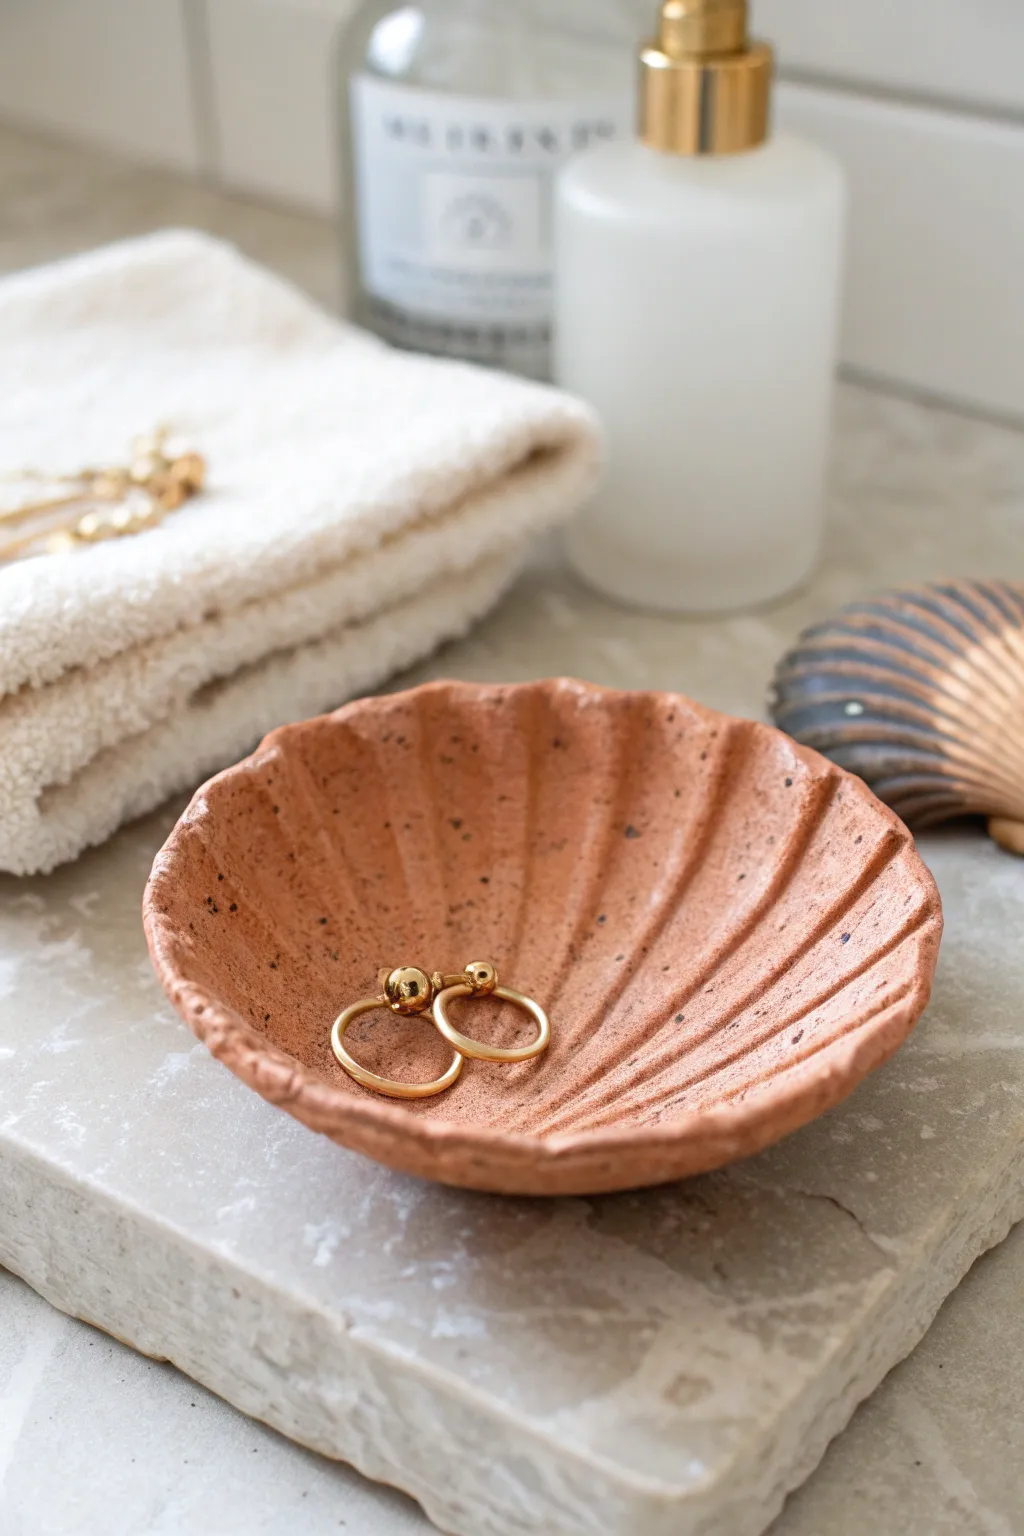
Capture the organic beauty of the seaside with this charming scallop shell trinket dish. Mimicking the warm tones of weathered stoneware, its speckled terracotta finish makes it the perfect landing spot for your delicate gold hoops.
Detailed Instructions
Materials
- Air dry clay (terracotta or white)
- Acrylic paint (terracotta/burnt sienna, dark brown)
- Real scallop shell (for template or texture) or printed template
- Rolling pin
- Parchment paper
- Clay sculpting tools or a butter knife
- Small bowl (for shaping)
- Stiff bristle brush (e.g., old toothbrush)
- Matte sealant or varnish
- Water and sponge
Step 1: Shaping the Base
-
Condition the Clay:
Begin by taking a handful of air-dry clay and kneading it in your hands until it becomes pliable and warm. If you are using white clay, you can knead in a small amount of terracotta acrylic paint now to tint the entire batch, or plan to paint it later. -
Roll it Out:
Place the clay on a sheet of parchment paper to prevent sticking. Use a rolling pin to flatten the clay into an even slab, aiming for a thickness of about 1/4 inch (6mm). Avoid going too thin, as the ridges need depth. -
Cut the Shape:
Place a real scallop shell or a paper template lightly on top of your clay slab. Using a clay tool or knife, carefully trace around the perimeter to cut out your scallop shape. Remove the excess clay. -
Smooth the Edges:
Dip your finger in a little water and gently run it along the cut edges of your clay shell. This smooths out any harsh cut lines and gives the piece a more organic, hand-molded feel.
Step 2: Adding Texture & Form
-
Create the Ridges:
Using a modeling tool or the back of a butter knife, gently press indentations into the clay, fanning out from the narrow bottom point to the wide top edge. Press deeply enough to create distinct ribs but be careful not to slice through. -
Refine the Fan:
Soften the sharp indentation lines by running a damp finger or sponge along the grooves. You want the ridges to look rolled and natural, like a real shell, rather than sharply carved. -
Add Curve:
Lift your clay shell carefully and place it inside a small rounded bowl. Gently press the center down so the shell takes on a curved, concave shape. This ensures it can actually hold jewelry later. -
Dry Completely:
Leave the shell in the bowl to dry for at least 24-48 hours. Drying times vary by humidity, but the clay should turn lighter and feel hard to the touch. Flip it occasionally if the bottom stays damp.
Cracking Up?
If small cracks appear while drying, don’t panic. Mix a tiny bit of fresh clay with water to make a paste (‘slip’) and fill in the cracks. Smooth over with a finger and let dry again.
Step 3: Painting & Finishing
-
Base Coat:
If you didn’t tint your clay earlier, paint the entire dried shell with a terracotta or burnt orange acrylic paint. Apply two thin coats for opaque coverage, letting it dry between layers. -
The Speckle Effect:
To create the convincing stone-like texture, mix a small amount of dark brown paint with a few drops of water to make it fluid. Dip a stiff brush or old toothbrush into the mixture. -
Flick the Paint:
Hold the brush over the dish and run your thumb across the bristles to flick tiny speckles onto the surface. I suggest testing this on a piece of paper first to control the spray density. -
Seal the Dish:
Once the paint is fully dry, apply a coat of matte varnish or sealant. This protects the paint from chipping and gives the dish a finished, professional look without making it unnaturally shiny. -
Final Cure:
Allow the sealant to cure according to the bottle instructions before placing any jewelry inside.
Gilded Edge
For a lux upgrade, use a fine detail brush to paint the very rim of the shell with metallic gold liquid leaf. It beautifully highlights the organic curves against the matte terracotta.
Your new coastal-inspired catchall is ready to keep your favorite earrings safe and stylish


What Really Happens Inside the Kiln
Learn how time and temperature work together inside the kiln to transform clay into durable ceramic.
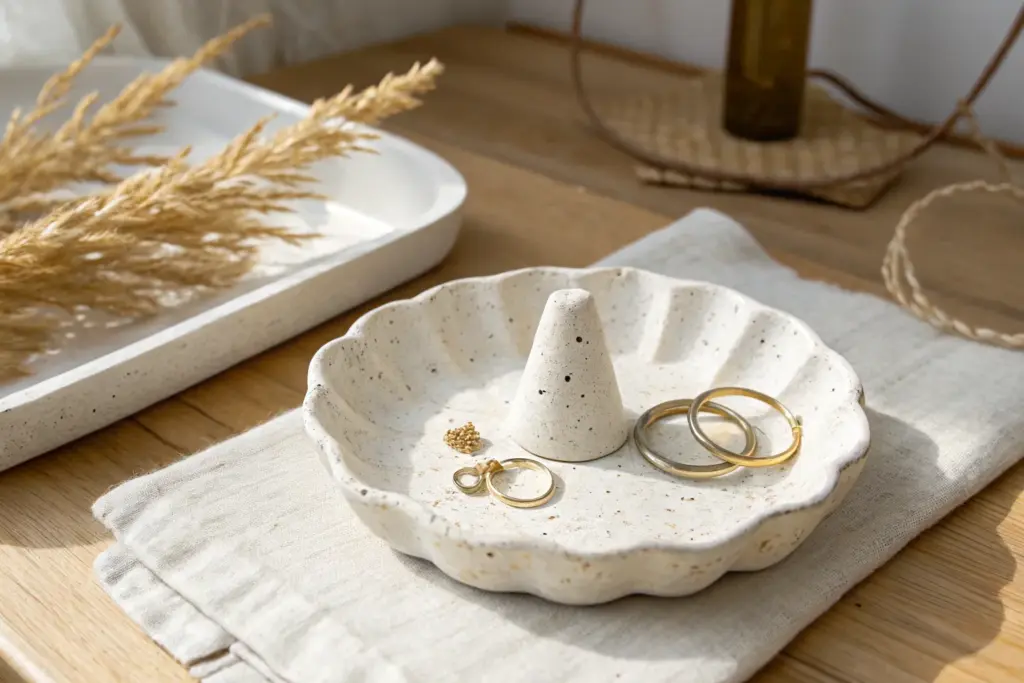
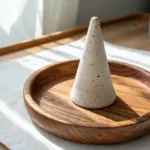
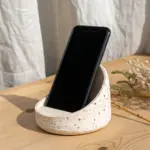
Minimal Ring Cone Stand
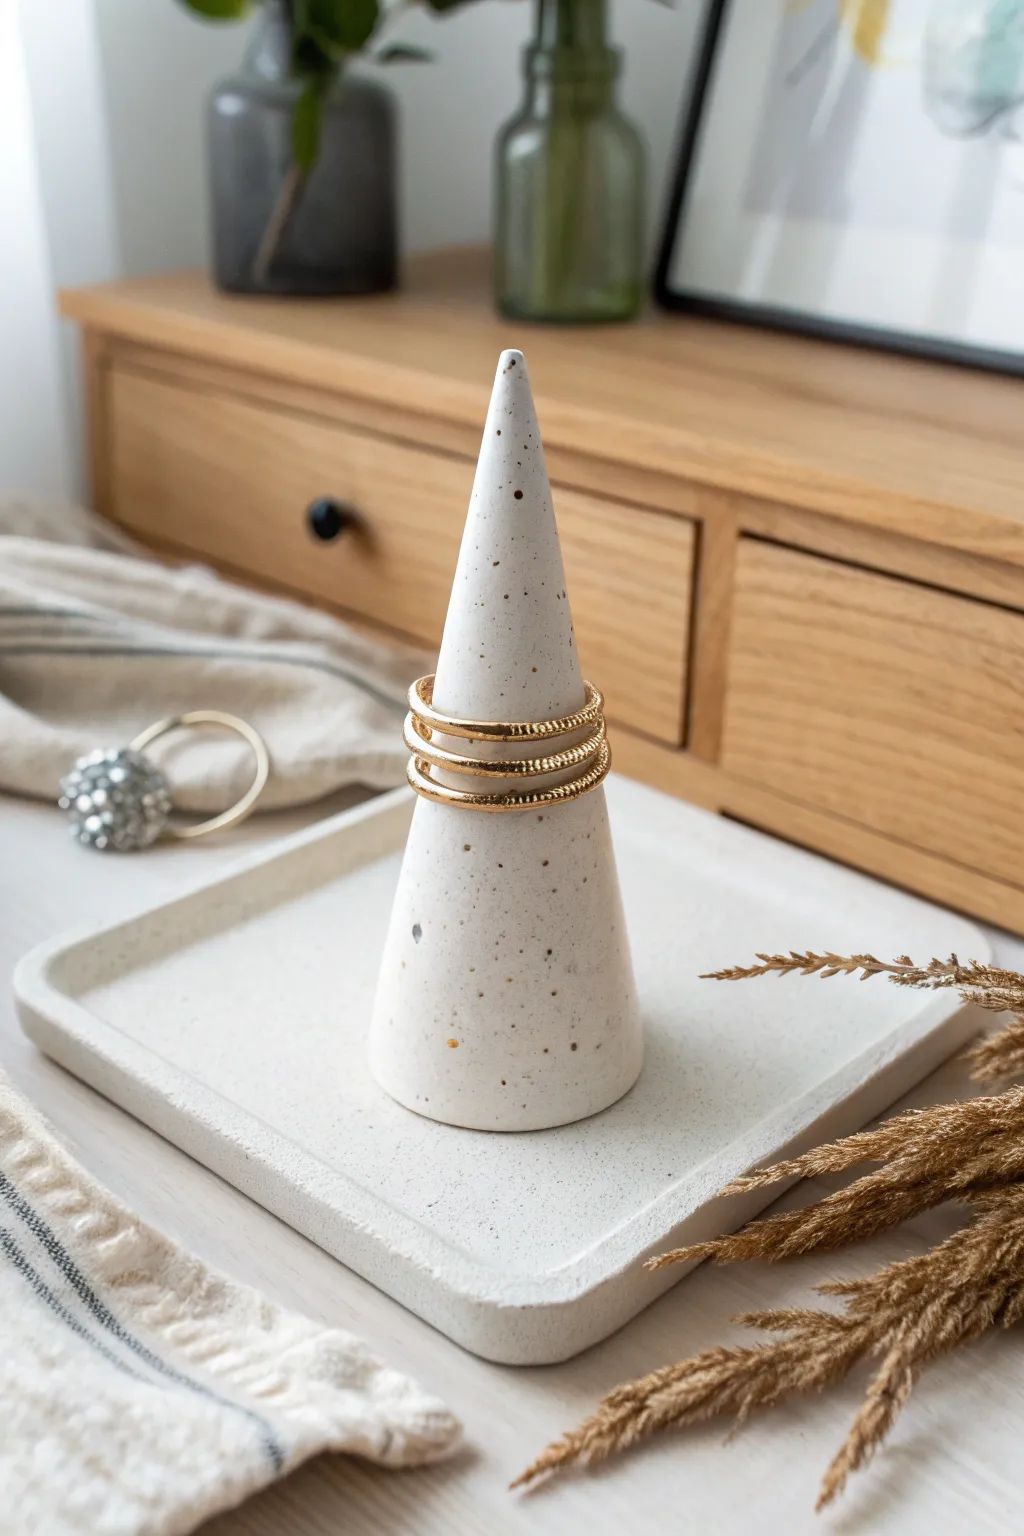
This minimalist jewelry holder combines a sleek conical form with a textured, modern square base, mimicking the look of natural speckled ceramic. It is the perfect stylish catch-all for your favorite rings and adds a touch of Scandinavian simplicity to any dresser.
Step-by-Step Tutorial
Materials
- White air-dry clay (approx. 200g)
- Acrylic rolling pin
- Sharp craft knife or clay blade
- Sandpaper (medium and fine grit)
- Small bowl of water
- Acrylic paint (black and brown)
- Old toothbrush or stiff bristle brush
- Ruler
- Clear matte varnish or sealant
- Sponge or soft brush for sealing
- Optional: Clay smoothers or shaper tools
Step 1: Shaping the Cone
-
Condition the clay:
Start by taking a chunk of white air-dry clay and kneading it in your hands until it becomes warm, pliable, and free of cracks. -
Form a cylinder:
Roll the clay into a smooth, thick log or cylinder shape on your work surface. -
Taper the top:
Using the palm of your hand, apply more pressure to one end of the log while rolling back and forth to begin creating a tapered point. -
Refine the cone shape:
Stand the clay up on its flat end. Gently stroke the sides upward with damp fingers to smooth the transition and sharpen the point, aiming for a height of about 3-4 inches. -
Flatten the bottom:
Press the cone firmly onto your work surface to ensure the base is perfectly flat. I like to twist it slightly as I press down to ensure it stands completely straight without leaning. -
Smooth the surface:
Dip your finger in water and run it over the entire surface of the cone to remove fingerprints and minor imperfections.
Step 2: Creating the Square Base
-
Roll out a slab:
Take a second portion of clay and roll it out with your acrylic rolling pin until it is an even slab, approximately 1/4 inch thick. -
Measure and cut:
Use a ruler and your craft knife to cut a perfect square. A 4×4 or 5×5 inch square works well for this design. -
Soften the edges:
Run a damp finger along the sharp cut edges of the square to round them slightly, giving it a more finished, ceramic look. -
Create the lip:
Gently pinch the outer perimeter of the square upwards to create a slight raised rim. This keeps small items from rolling off the tray. -
Attach the cone:
Score the center of the tray and the bottom of your cone with the craft knife (making cross-hatch marks). Add a dab of water to form a slip. -
Bond the pieces:
Press the cone firmly onto the center of the square base. Use a modeling tool or your finger to smooth the seam where the cone meets the base so they look like one solid piece.
Cracks appeared?
Make a ‘clay paste’ by mixing a small bit of dry clay with water. Fill the cracks with this paste, let it dry, and then sand smooth.
Step 3: Finishing and Speckling
-
Allow to dry:
Let the piece dry completely for 24-48 hours. Turn it occasionally if possible to ensure the bottom of the base dries evenly. -
Sand until smooth:
Once fully dry, use medium-grit sandpaper to remove any large bumps, followed by fine-grit sandpaper to achieve a porcelain-smooth finish. -
Prepare the speckle paint:
Dilute a small amount of black and dark brown acrylic paint with water until it reaches a very watery, ink-like consistency. -
Apply the splatter:
Dip an old toothbrush into the diluted paint. Hold it near the clay piece and run your thumb across the bristles to flick tiny speckles onto the surface. -
Control density:
Go lightly at first—you can always add more speckles, but you can’t take them away. Aim for a random, natural stone distribution. -
Seal the piece:
After the paint flecks are completely dry, apply a coat of clear matte varnish to protect the clay from moisture and give it a finished feel.
Faux Stone Look
Mix a tiny amount of black pepper or used loose tea leaves directly into the wet white clay before shaping for built-in texture.
Place your new ring holder on your vanity and enjoy the satisfaction of organizing your jewelry on a piece of art you made yourself
Hand-Shaped Ring Holder Dish
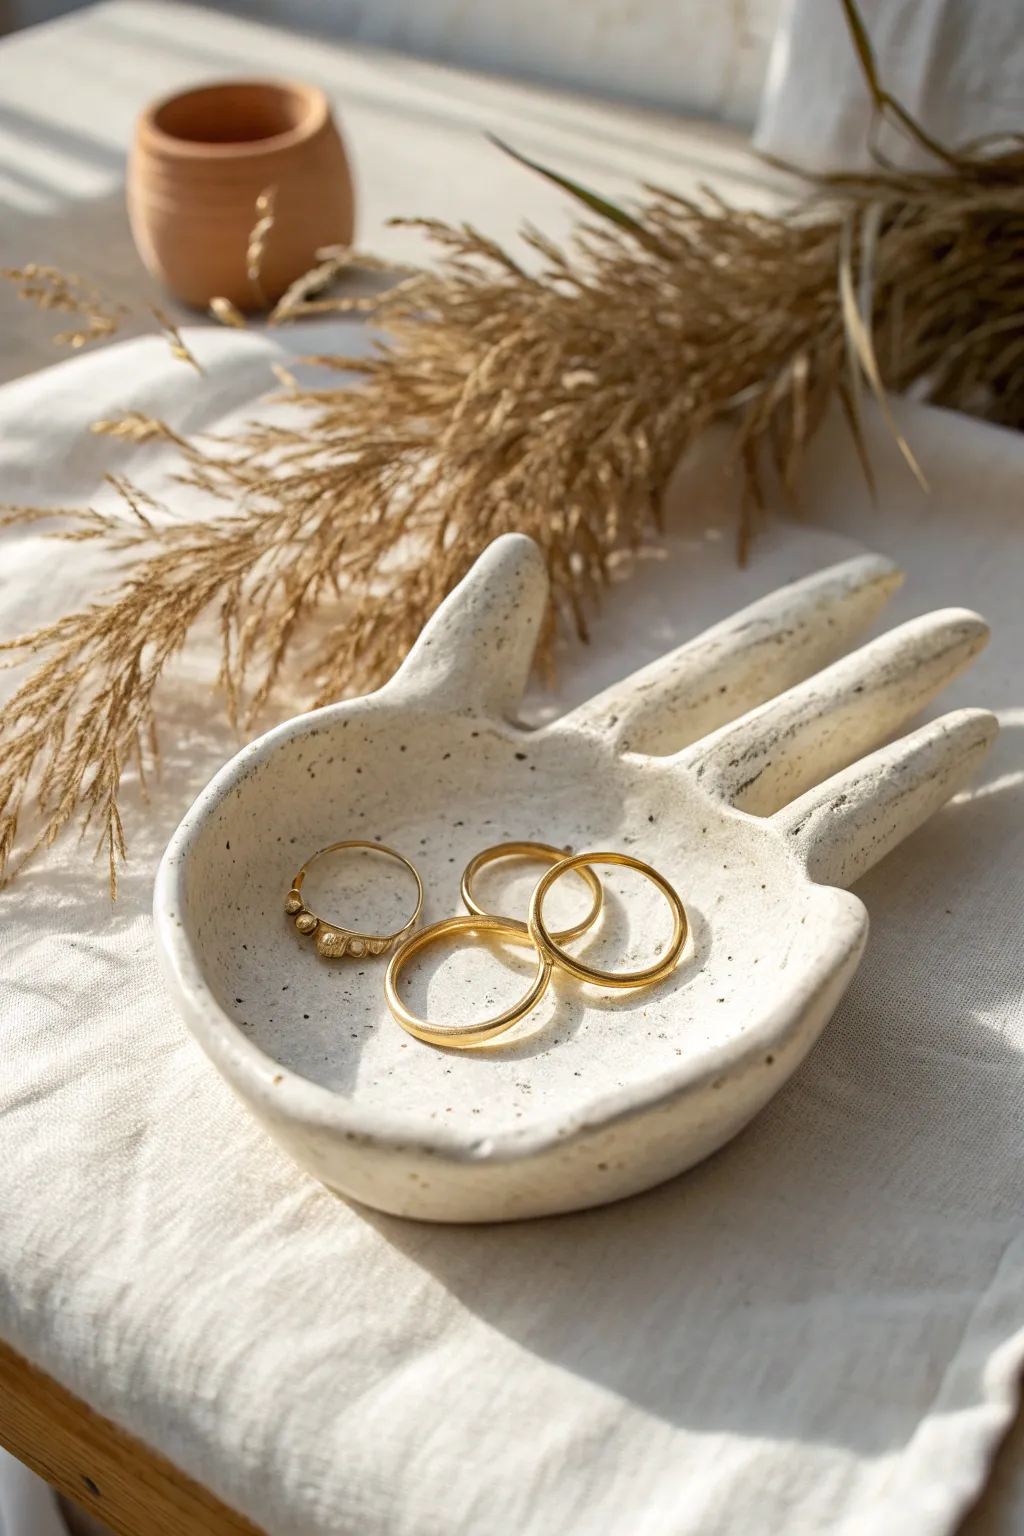
This charming, hand-shaped catch-all brings a sculptural, modern touch to your vanity. With its deep, cupped palm and naturally speckled finish, it offers the perfect resting spot for your favorite gold rings.
Detailed Instructions
Materials
- White or cream air-dry clay
- Rolling pin
- Used coffee grounds (dried)
- Craft knife or clay needle tool
- Small bowl relative to hand size
- Plastic wrap
- Small sponge
- Small cup of water
- Fine-grit sandpaper (optional)
- Matte finish clear sealant spray
Step 1: Preparation & Shaping
-
Condition the clay:
Begin by taking a generous handful of air-dry clay. Knead it in your hands for a few minutes until it becomes warm, pliable, and free of any initial cracks. -
Add texture:
To recreate that beautiful speckled stoneware look seen in the photo, sprinkle a pinch of dried coffee grounds onto your clay ball. Fold the clay over itself and knead repeatedly until the specks are evenly distributed throughout the mass. -
Roll it out:
Place the clay on a smooth surface or canvas mat. Use a rolling pin to flatten it into an even slab, aiming for a thickness of about 1/4 inch. Don’t go too thin, or the fingers may become fragile. -
Trace your hand:
Rest your hand gently on the clay slab with your fingers spread just slightly—keep them relatively close together to form a solid dish shape. Lightly trace around your hand with a needle tool or toothpick. Alternatively, sketch a stylized hand shape directly onto the clay if you prefer the slightly elongated, artistic look in the reference. -
Cut the shape:
Using your craft knife, carefully cut along the traced line. Remove the excess clay and set it aside for future projects.
Step 2: Forming & Refining
-
Smooth the edges:
Dip your finger into a little water and run it along the cut edges of the fresh clay. This softens the sharp cuts into rounded, organic curves. -
Prep the mold:
Take a small bowl that has a nice curvature and line the inside with plastic wrap. This prevents sticking and helps the clay release later. -
Create the curve:
Gently lift your clay hand and drape it into the lined bowl. Press the palm area down gently so it takes on the concave shape of the bowl, allowing the fingers to curve upward naturally. -
Adjust the fingers:
While the clay is in the bowl, ensure the fingers aren’t drooping awkwardly. You want a gentle, cupped slope. I like to smooth the connection points between the fingers now to ensure they are strong. -
Sponge finish:
Take a slightly damp sponge and lightly pat the entire surface. This removes fingerprints and exposes the coffee ground speckles a bit more.
Natural Speckles
For speckles, dry used coffee grounds in the oven at low heat first. Wet grounds will mold inside the clay!
Step 3: Drying & Finishing
-
Initial dry:
Leave the clay inside the bowl to dry for at least 24 hours. Drying it in the form is crucial so it retains that cupped shape. -
Remove from mold:
Once the top feels stiff and dry to the touch, carefully lift the hand out of the bowl and peel off the plastic wrap. -
Finish drying:
Flip the hand over and let it rest upside down on a drying rack for another 24 to 48 hours. This ensures the bottom dries completely and prevents warping. -
Sand imperfections:
If there are any rough nuances or sharp bits on the edges, use fine-grit sandpaper to gently buff them away until smooth. -
dust off:
Wipe the piece with a dry cloth or soft brush to remove any clay dust from sanding. -
Seal the piece:
In a well-ventilated area, spray the dish with a matte clear acrylic sealer. This protects the clay from moisture and gives it a professional, finished look without adding unwanted glossy shine.
Gilded Touch
Paint the very rim of the dish with liquid leaf gold paint for a luxurious, high-end ceramic look.
Now you have a custom, artistic piece ready to cradle your daily jewelry treasures

TRACK YOUR CERAMIC JOURNEY
Capture glaze tests, firing details, and creative progress—all in one simple printable. Make your projects easier to repeat and improve.
Stackable Tiered Trinket Towers
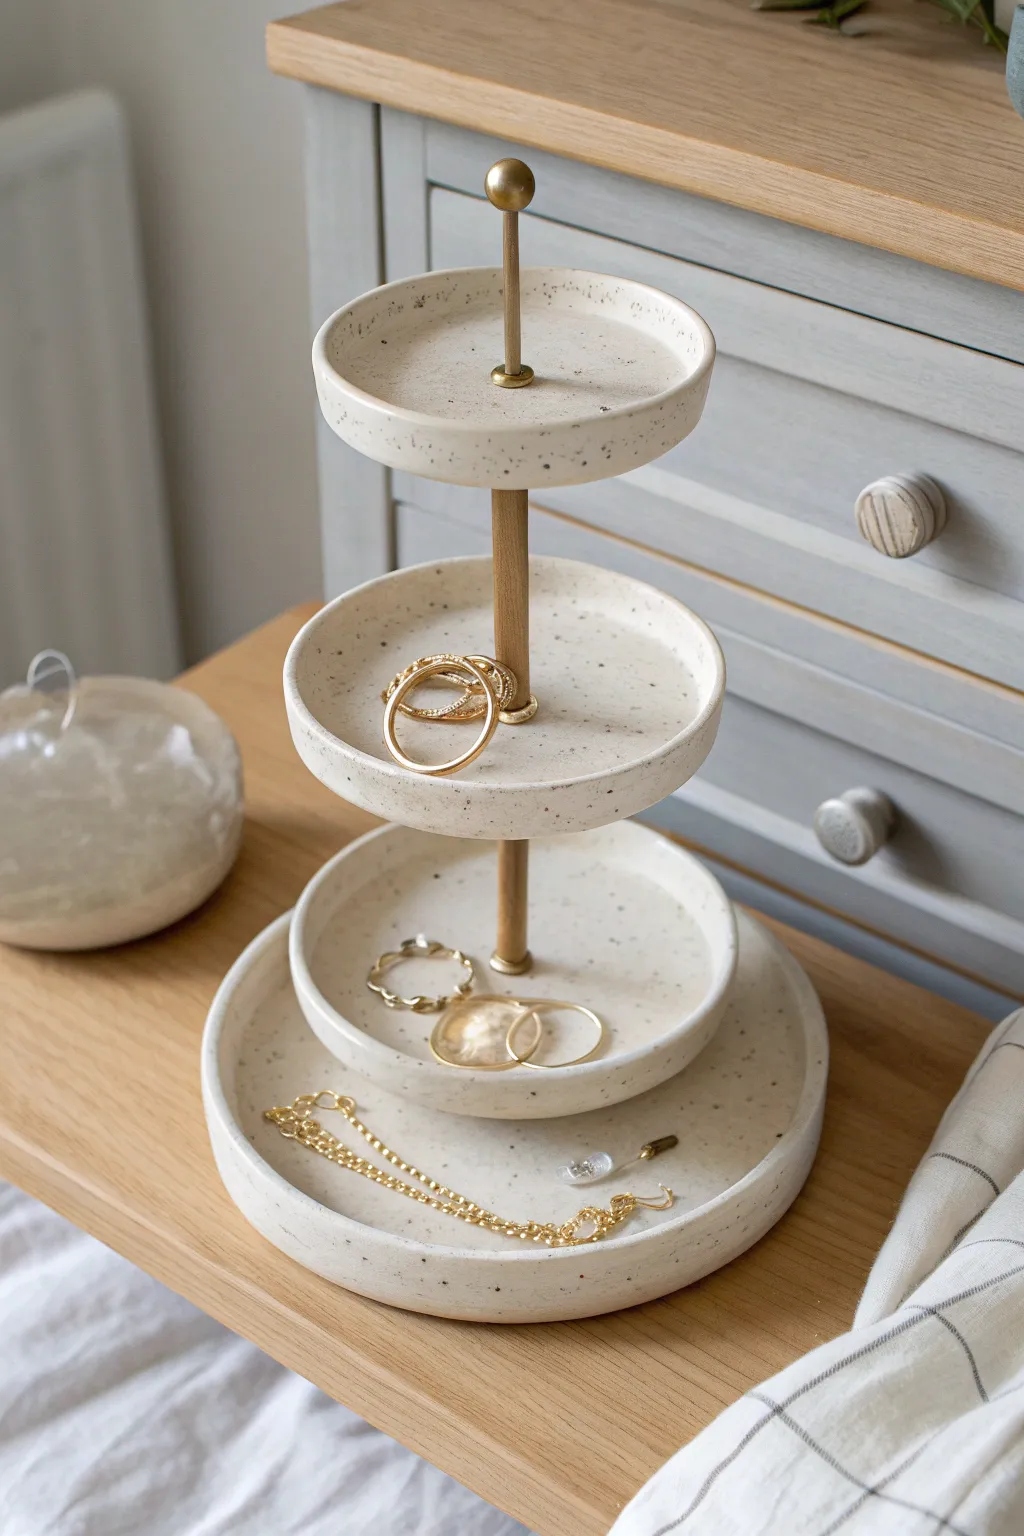
Elevate your vanity with this sophisticated three-tier jewelry stand that combines the organic look of speckled ceramic with the clean lines of modern design. The neutral stone effect pairs beautifully with brass hardware, creating a professional-looking finish that belies its humble air dry clay origins.
Detailed Instructions
Materials
- White or cream-colored air dry clay (approx. 500g)
- Acrylic rolling pin
- Circle cookie cutters or templates (graded sizes: approx. 3.5″, 4.5″, 6.5″)
- Wooden dowel (approx. 0.25-0.3″ diameter)
- Fine grit sandpaper (220-400 grit)
- Acrylic paint (black, brown/tan)
- Old toothbrush or bristle brush
- Gloss or satin varnish/sealant
- Brass finish paint or gilding wax (optional for hardware)
- Strong craft glue or epoxy
- Drill with bit matching dowel size (or piercing tool for wet clay)
- Small wooden finial or bead for the top
Step 1: Shaping the Tiers
-
Prepare your workspace:
Begin by covering your working surface with wax paper or a silicone mat to prevent sticking. Knead your air dry clay until it is soft, pliable, and free of cracks. -
Roll out the clay:
Roll the clay out to an even thickness of about 1/4 inch (6mm). Using depth guides or two stacks of playing cards on either side of your roller can ensure a perfectly uniform slab. -
Cut the circles:
Using your circle cutters or paper templates and a craft knife, cut out three distinct sizes. For this specific tiered look, aim for a small top tier (3.5″), a medium middle tier (4.5″), and a larger base tray (6.5″). -
Create the lips:
Cut a long strip of clay about 1/2 inch wide for each tray. Carefully attach this strip around the circumference of each circle base. Score the contact areas with a needle tool and use a bit of water or slip (clay mixed with water) to bond them securely. -
Smooth the seams:
Use a damp sponge or your finger to blend the strip into the base until the seam disappears completely. Smooth the top edge of the rim so it is rounded and seamless. -
Create the center holes:
Find the exact center of the two smaller trays (top and middle). Use a cutter or the dowel itself to punch a hole through the center that is slightly larger than your wooden dowel to account for shrinkage. -
Drill the base (optional):
For the bottom tray, create a shallow indentation in the center rather than a full hole, so the dowel sits inside but doesn’t go through to the table.
Stay Straight
When gluing the dowels, lean a book or ruler against the structure while the glue sets. A crooked center post is very noticeable once finished!
Step 2: Refining and Assembly
-
Dry thoroughly:
Allow the clay pieces to dry completely. This usually takes 24-48 hours depending on humidity. Flip them occasionally to prevent warping. -
Sand to perfection:
Once bone dry, sand all edges and surfaces with fine-grit sandpaper. This step is crucial for achieving that faux-ceramic look; remove any fingerprints or uneven texture. -
Speckle the surface:
Mix a small amount of black and brown acrylic paint with water until it’s quite fluid. Dip an old toothbrush into this mixture and flick the bristles with your thumb over the clay pieces to create a random, organic speckled pattern. -
Prepare the hardware:
Cut your wooden dowel into two sections. The length depends on how much space you want between tiers; 3-4 inches per section usually works well. Sand the ends smooth. -
Paint the hardware:
Paint the wooden dowels and the top finial. For the look in the photo, paint the dowel a matte wood tone or soft brown, and use a metallic brass paint or gilding wax on the finial and any connecting washers you may want to add visually. -
Seal the clay:
Apply two coats of satin or gloss varnish to all clay pieces. This protects the speckles and gives the trays a finished, glazed appearance. -
Assemble the base:
Apply strong glue or epoxy to the bottom of the first dowel section and secure it vertically into the center indentation of the large base tray. Use a square tool to ensure it stands perfectly straight while drying. -
Stack the middle tier:
Slide the middle tray onto the dowel. You may need to glue a small stopper (like a wooden bead or rubber o-ring) underneath the tray on the dowel to hold it at the right height, or glue the tray directly to the top of the first dowel section. -
add the final tier:
Glue the second dowel section on top of the middle tray (aligned with the dowel below). Then attach the top tray in the same manner. -
Crown the tower:
Glue the painted brass-colored finial or bead to the very top center of the smallest tray to hide the top of the dowel and complete the elegant silhouette.
Wobbly Trays?
If a tray slides down the dowel, wrap a discreet rubber band or tiny strip of masking tape around the dowel underneath the tray to act as an invisible shelf support.
Once the glue cures completely, your tiered display is ready to organize your favorite rings and necklaces in style
Wall-Mounted Clay Peg Jewelry Board
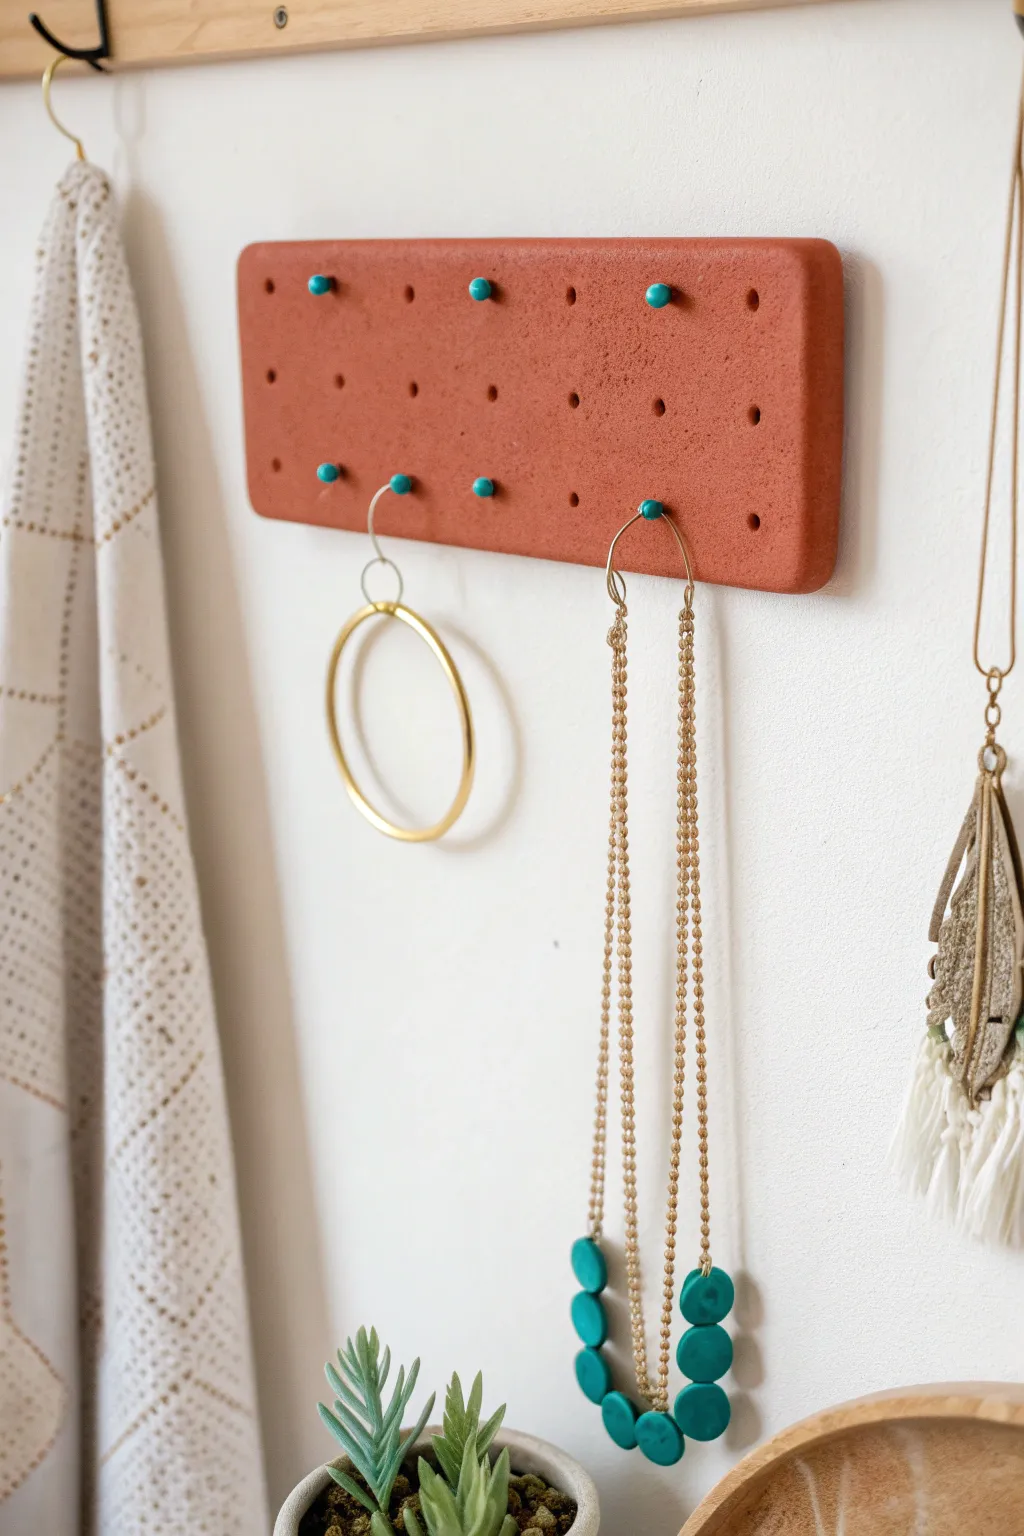
Usually, jewelry storage is purely functional, but this wall-mounted pegboard turns your accessories into a piece of modern art. Crafted from air-dry clay in a warm terracotta hue with contrasting turquoise pegs, it offers a customizable and chic way to organize necklaces and earrings.
Step-by-Step Guide
Materials
- Terracotta colored air-dry clay (or white clay + terracotta acrylic paint)
- Rolling pin
- Parchment paper or craft mat
- Ruler
- Craft knife or clay cutter
- Small circular cutter or straw (approx. 5-6mm diameter)
- Wooden dowel (sized to fit your holes)
- Turquoise acrylic paint
- Small paintbrush
- Fine-grit sandpaper
- Strong craft glue (e.g., E6000)
- Sawtooth hangers or Command strips for mounting
- Bowl of water (for smoothing)
Step 1: Shaping the Base
-
Prepare your workspace:
Lay down parchment paper or a silicone mat to prevent sticking. Take a large chunk of terracotta air-dry clay and knead it until it’s pliable and smooth. -
Roll out the slab:
Use your rolling pin to flatten the clay into a large, even slab. Aim for a thickness of about 1/2 inch (1.2 cm) to ensure the board is sturdy enough to hold weight without cracking. -
Cut the rectangle:
Using a ruler and a sharp craft knife, cut a clean rectangle from the slab. A size of roughly 4 inches by 10 inches works well for a versatile display, but you can adjust this to fit your wall space. -
Smooth the edges:
Dip your finger in a little water and run it along the cut edges of the rectangle to smooth out any sharpness or roughness. I like to gently round the corners just a tiny bit for a softer look. -
Mark the grid:
Lightly press your ruler into the clay to mark a grid for your peg holes. Space your marks evenly, perhaps every 1 inch, creating a uniform pattern of dots where the holes will go.
Warping Woes?
If the clay edges curl up while drying, gently weigh them down with a heavy book or board (use parchment paper in between) during the final drying stage.
Step 2: Creating the Grid
-
Punch the holes:
Take your straw or a small circular clay cutter and press straight down into the clay at each marked spot. Twist slightly and lift to remove the clay plug. Ensure you go all the way through if you want pass-through holes, or about halfway if you want seated pegs. -
Clean up the holes:
If the clay deformed slightly while punching, gently push the edges back into shape. Use a damp brush to smooth the rim of each hole so they look polished. -
Let it dry:
Transfer the slab (still on the parchment paper) to a safe, flat spot. Let it dry completely for 24-48 hours. Carefully flip it over halfway through the drying process to prevent warping.
Style Upgrade
Instead of wood pegs, use brass rod pieces or gold-painted screws for a luxe, metallic finish that contrasts beautifully with the matte clay.
Step 3: Making & Finishing the Pegs
-
Cut the dowels:
While the board dries, take your wooden dowel and cut several small pieces, about 1 inch long each. You’ll need as many pegs as you plan to use, plus a few extras. -
Sand the dowels:
Use fine-grit sandpaper to smooth the cut ends of the wooden dowels so they aren’t rough or splintery. -
Paint the pegs:
Paint the exposed ends of the dowels (or the whole peg if you prefer) with turquoise acrylic paint. You may need two coats for a vibrant, opaque finish. Let them dry. -
Sand the base:
Once your clay board is fully dry, gently sand the edges and surface to remove any imperfections or fingerprints. Wipe away dust with a slightly damp cloth. -
Seal the refined clay:
If you want extra durability, apply a matte varnish to the terracotta board. This helps protect the raw clay look while making it easier to dust later.
Step 4: Assembly
-
Test the fit:
Insert your painted pegs into the holes to test the fit. If they are too tight, sand the dowel slightly; if too loose, a dab of glue will secure them. -
Glue the pegs:
Apply a small drop of strong craft glue to the unpainted end of each dowel and insert it into your chosen holes. Let the glue cure according to the package instructions. -
Attach mounting hardware:
Flip the board over and attach sawtooth hangers or flat mounting strips to the back using strong adhesive. Ensure they are level so your board hangs straight. -
Mount and style:
Hang your new jewelry board on the wall. Arrange your necklaces and earrings on the pegs and through the empty holes to complete the look.
Now you have a stylish, custom-made spot to showcase your favorite jewelry pieces.