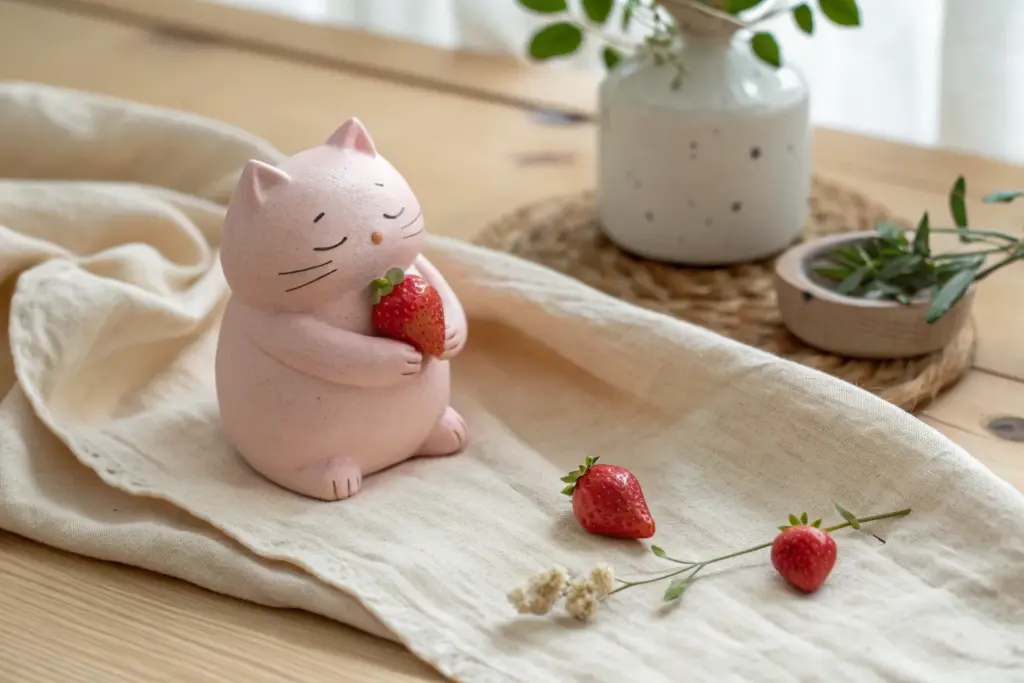
Whenever I’m craving something sweet, cheerful, and super doable, I reach for pink air dry clay and make a few small projects that dry into the cutest little keepsakes. These ideas are all about that soft pastel pink vibe—simple shapes, cozy details, and lots of room to make each piece feel like you.
Pink Heart Trinket Dish
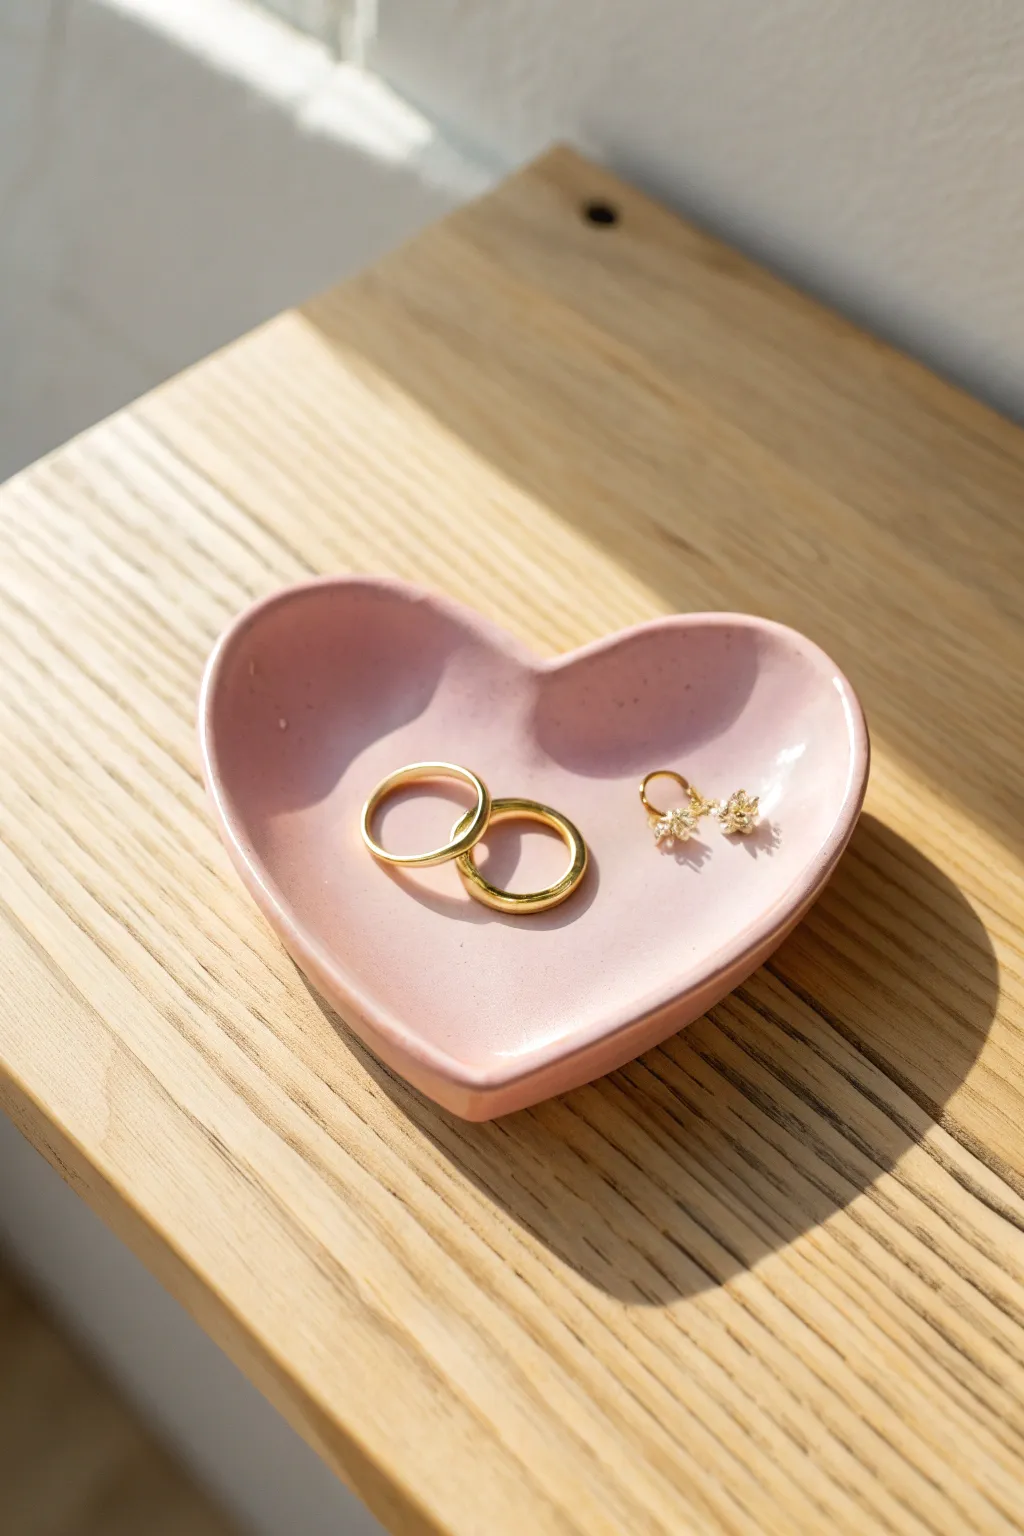
Keep your favorite rings and studs safe in this charming, handmade heart dish. Crafted from air dry clay and finished in a soft blush pink, it makes for a lovely bedside accent or a thoughtful DIY gift.
How-To Guide
Materials
- White air dry clay
- Pink acrylic paint
- Rolling pin
- Heart-shaped cookie cutter (large)
- Small bowl of water
- Fine-grit sandpaper (320 or 400 grit)
- Glossy varnish or sealant
- Paintbrush (soft bristle)
- Parchment paper or craft mat
Step 1: Shaping the Base
-
Prepare your clay:
Start by taking a handful of white air dry clay. Knead it in your hands for a minute or two to warm it up and make it pliable, which helps prevent cracks later. -
Roll it out:
Place the clay on a sheet of parchment paper. Use your rolling pin to flatten the clay into a smooth slab that is roughly 1/4 inch thick. Try to keep the thickness consistent across the entire piece. -
Cut the shape:
Press your large heart-shaped cookie cutter firmly into the clay slab. Wiggle it slightly to ensure a clean cut, then lift the cutter away. -
Remove excess:
Peel away the excess clay from around the heart shape. You can ball this up and store it in an airtight bag for future projects. -
Smooth the edges:
Dip your finger into a small bowl of water. Gently run your damp finger along the raw edges of the heart to smooth out any roughness or sharp bits left by the cutter.
Smooth Surface Secret
Use a makeup sponge instead of a brush for the final paint layer. Dabbing it on creates a flawless, texture-free finish that looks like glazed ceramic.
Step 2: Forming the Dish
-
Curve the edges:
Now, gently lift the edges of the heart upwards with your fingers creating a shallow lip. You want it to curve gently like a bowl rather than having a harsh vertical wall. -
Define the dip:
Press lightly in the center of the heart with your thumb to deepen the ‘dish’ shape while continuing to coax the rim upwards. I find it helpful to cup the heart in my palm during this step to maintain the curve. -
Smooth again:
Check for any fingerprints or dents caused during the shaping process. Use a tiny bit more water on your finger to buff these out until the surface looks pristine. -
Let it dry:
Place the shaped heart on a clean piece of parchment paper in a safe spot. Allow it to air dry completely for 24-48 hours. Flip it over halfway through the drying time to ensure the bottom dries evenly.
Add a Gold Rim
Once your pink paint is dry, paint just the very edge of the rim with liquid gold leaf or metallic gold paint for a luxurious, high-end touch.
Step 3: Painting and Finishing
-
Sand for smoothness:
Once fully dry and hard, take your fine-grit sandpaper and very gently sand the edges and surface. Focus on any uneven spots on the rim to get that professional finish. -
Wipe it down:
Use a dry cloth or a soft brush to whisk away all the sanding dust. You want a perfectly clean surface before painting. -
Apply the first coat:
Squeeze out some pink acrylic paint. Using a soft paintbrush, apply a thin, even layer over the entire top surface and rim of the dish. -
Paint the bottom:
Let the top dry to the touch, then flip it over and paint the underside. Allow this first layer to dry completely. -
Add a second coat:
For a solid, opaque look like the example, apply a second coat of pink paint. This will cover any streaks and deepen the color. -
Seal the deal:
Once the paint is thoroughly dry, apply a coat of glossy varnish or sealant. This protects the paint from scratches and gives the dish a lovely ceramic-like sheen. -
Final cure:
Let the varnish cure according to the manufacturer’s instructions before placing any jewelry inside.
Place your shiny new dish on your nightstand to hold your treasures in style


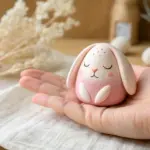
Pink Bunny Pocket Figurine
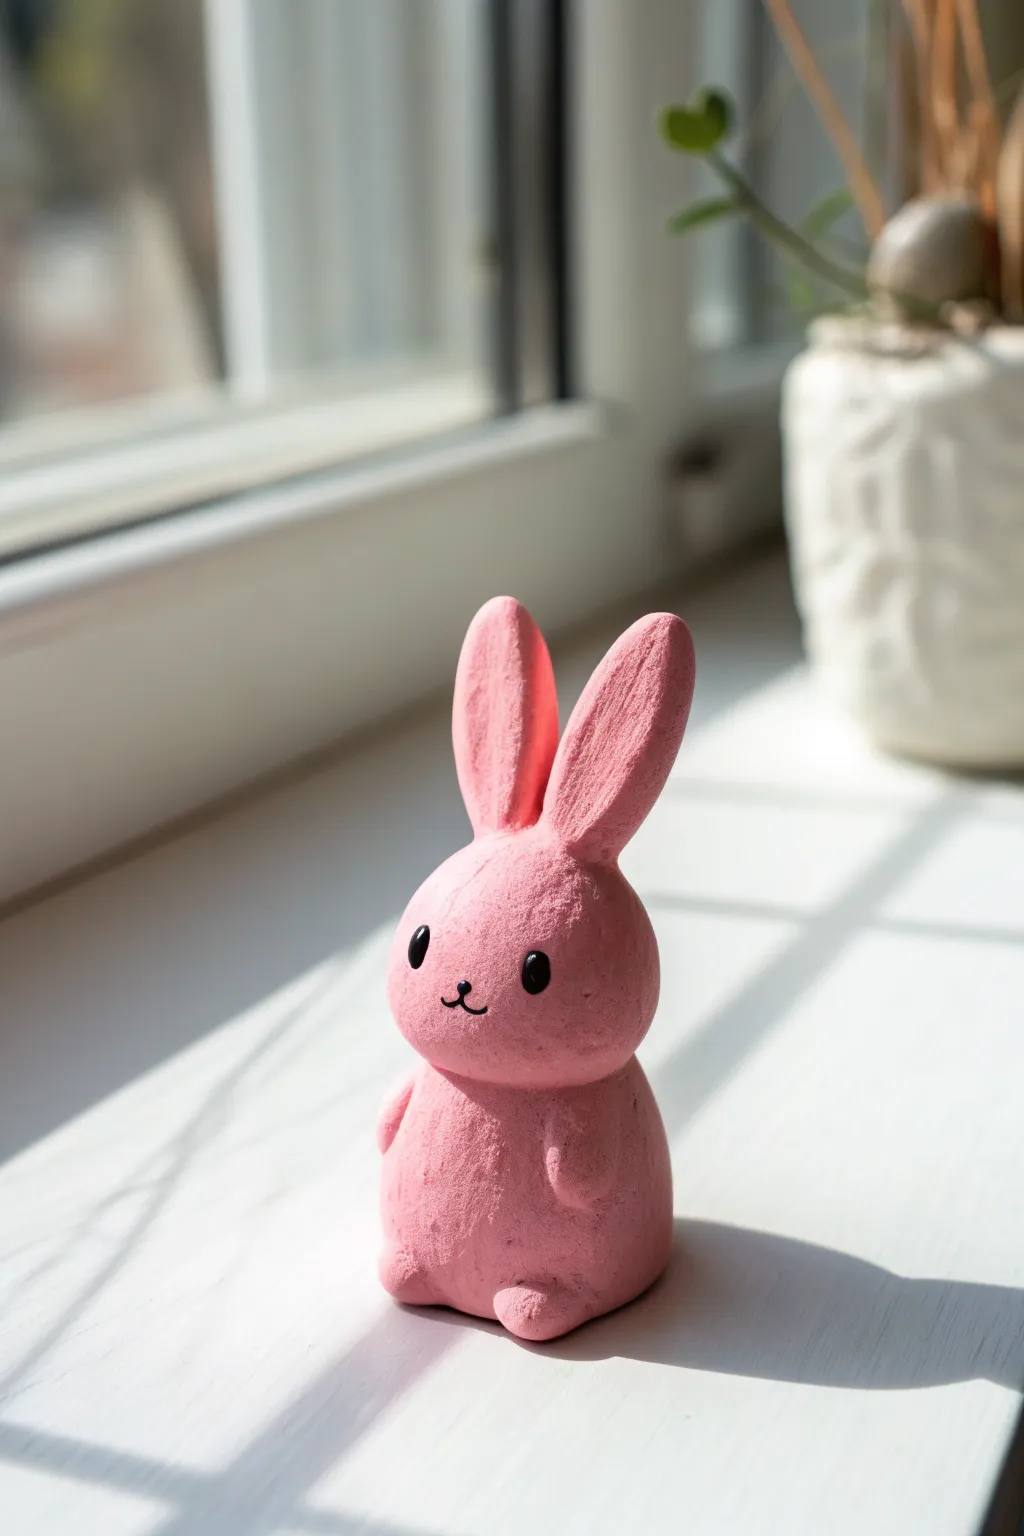
Sculpt a charming little companion with this easy bunny figurine tutorial. The result is a delightfully textured, matte pink rabbit with upright ears and a sweet expression, perfect for brightening up a windowsill or shelf.
Step-by-Step Tutorial
Materials
- Pink air-dry clay (or white clay mixed with pink acrylic paint)
- Black acrylic paint
- Small fine-point paintbrush or toothpick
- Sculpting tool or plastic knife
- Water in a small cup
- Clear matte varnish (optional)
Step 1: Forming the Body and Head
-
Prepare the clay:
Start by kneading your pink clay until it is warm, soft, and pliable. If you are mixing white clay with paint, do this now until the color is uniform. -
Shape the body:
Roll a medium-sized ball of clay (about the size of a walnut) into a smooth sphere. Gently flatten the bottom on your work surface so it stands upright securely. -
Mold the body shape:
Using your fingers, gently taper the top of the sphere slightly to create a pear-like bottom shape, but keep it stout and rounded. -
Create the head:
Roll a second, slightly smaller ball for the head. It should be roughly 2/3 the size of the body piece. -
Attach the head:
Score the top of the body and the bottom of the head with a sculpting tool to create texture. Dab a tiny bit of water on the scored areas and press the head firmly onto the body. -
Blend the seam:
Use your thumb or a smoothing tool to gently blend the clay at the neck seam, ensuring the two pieces are fused while maintaining a distinct head indentation.
Water Control is Key
Keep your fingers slightly damp, not soaking wet. Too much water makes air-dry clay turn into a slippery slime that cracks when drying.
Step 2: Ears and Limbs
-
Form the ears:
Roll two small logs of clay about an inch long. Flatten them slightly and taper one end of each log to a rounded point. -
Attach the ears:
Press the wider ends of the ears onto the top of the head. I like to position them close together and standing straight up for an alert look. -
Smooth the connections:
Use a sculpting tool to drag clay from the base of the ears down onto the head to secure them. Smooth out any tool marks with a damp finger. -
Details for the ears:
If desired, use a tool to gently press a shallow indentation into the front center of each ear for depth. -
Add arms:
Roll two tiny, bean-sized ovals. Press these onto the sides of the body just below the neck, angling them slightly forward so they look like little paws resting on the tummy. -
Create feet:
Roll two more small balls for the feet. Flatten them slightly and attach them to the front bottom of the body so they poke out just a little.
Make it a Trio
Create two more bunnies in different pastel colors like baby blue or mint green to display as a complete Easter set.
Step 3: Finishing Touches
-
Smooth the surface:
Dip your finger in water and run it over the entire sculpture to remove fingerprints. For the texture seen in the photo, you can gently tap the surface with a stiff brush or a textured sponge before it dries. -
Let it dry:
Allow the figurine to dry completely in a well-ventilated area. This typically takes 24-48 hours depending on the brand of clay and humidity. -
Paint the eyes:
Using a very fine brush or toothpick tip dipped in black paint, dab two small vertical ovals for the eyes on the lower half of the face. -
Add the nose and mouth:
Paint a tiny ‘Y’ or anchor shape between the eyes for the nose and mouth. Keep the lines very thin for a delicate expression. -
Add highlights (optional):
Once the black paint is dry, you can add a microscopic dot of white to the eyes for a sparkle, though the reference image keeps them solid black. -
Seal (optional):
If you want to protect your bunny, apply a thin coat of matte varnish. Avoid glossy finishes to maintain the soft look shown in the photo.
Now you have a sweet little sculpture ready to bring a touch of joy to your desk


Pink Pig Ring Holder
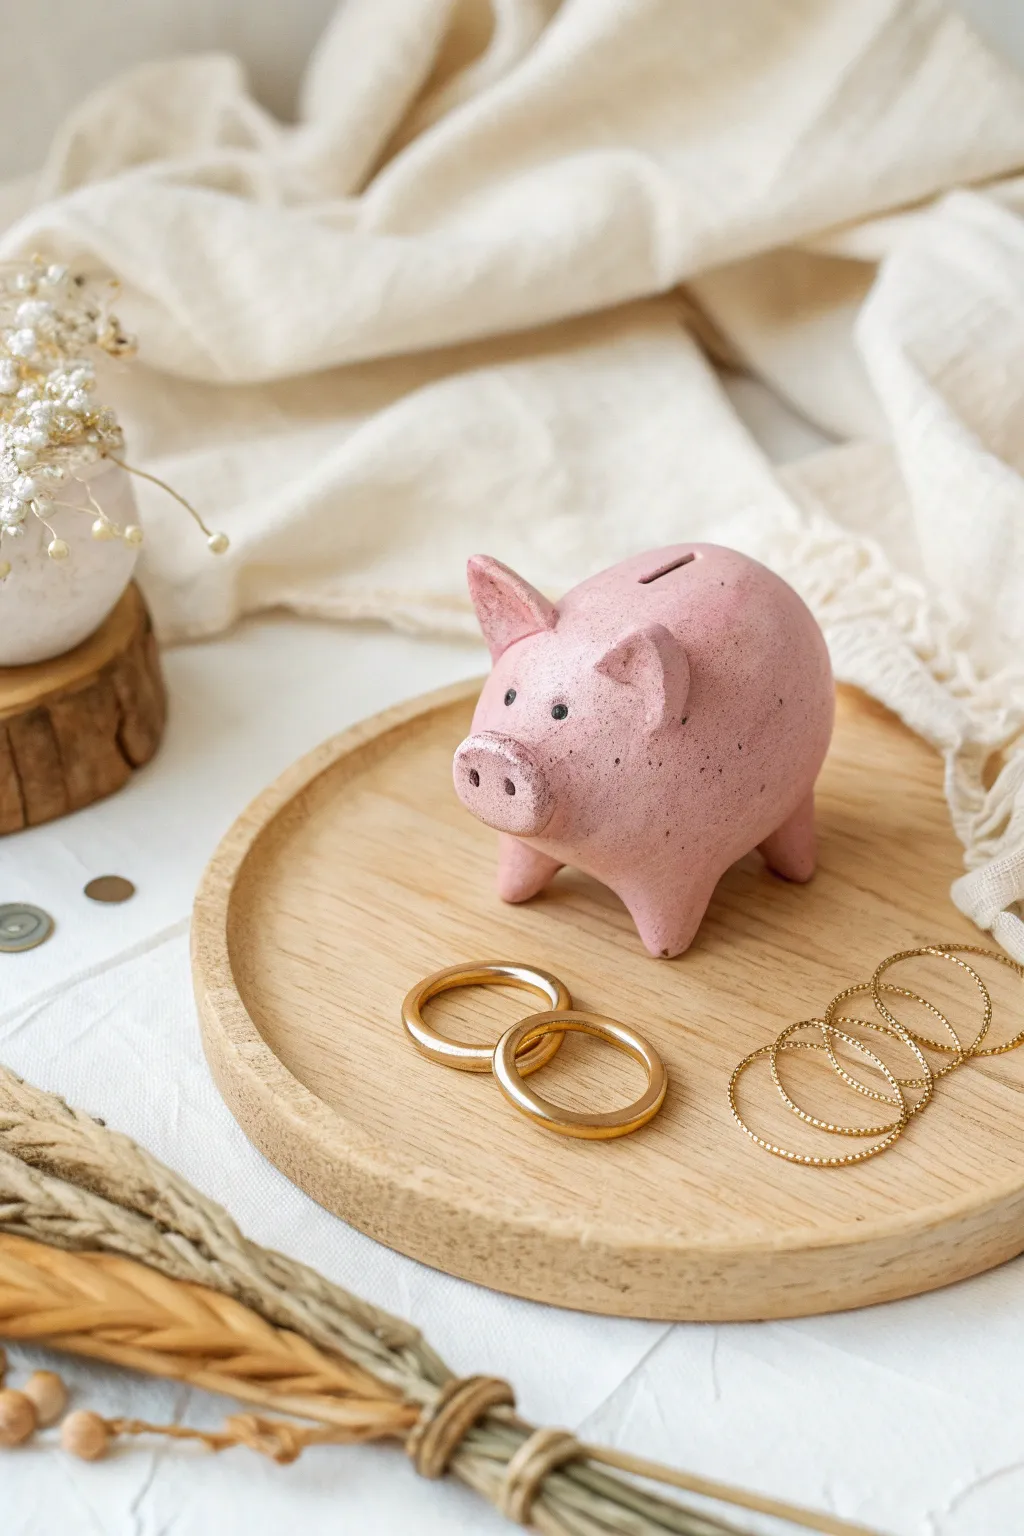
This charming, rustic little piglet isn’t just for decoration; its sturdy shape makes it the perfect guardian for your daily jewelry. Crafted from pink air dry clay with a textured, matte finish, it adds a sweet touch of whimsy to any vanity tray or bedside table.
Detailed Instructions
Materials
- Pink air dry clay (or white clay mixed with pink acrylic paint)
- Small bowl of water
- Modeling tool or butter knife
- Toothpick or needle tool
- Fine-grit sandpaper
- Back acrylic paint
- Small detail paintbrush
- Matte varnish or sealant (optional)
Step 1: Shaping the Body
-
Prepare the base:
Start by conditioning a fist-sized ball of pink air dry clay. Knead it thoroughly in your hands until it is warm, pliable, and free of cracks. -
Form the oval:
Roll the clay into a smooth ball first, then gently elongate it between your palms to create a stout oval shape, slightly wider at the back for the pig’s body. -
Create the legs:
Instead of attaching separate legs, try pinching them directly from the main body. Turn the oval over and gently pull four small, equal sections of clay downwards from the corners. -
Refine the stance:
Tap the pig gently on your work surface to flatten the bottom of the feet so it stands level. Use water on your fingertip to smooth any seams or cracks that formed while pulling the legs.
Crack Control
If small cracks appear while the clay is drying, mix a tiny bit of fresh clay with water to make a paste (slip) and fill the cracks, then smooth over.
Step 2: Adding Features
-
Make the ears:
Pinch off two very small, pea-sized pieces of extra clay. Flatten them into triangles and curve them slightly to mimic the shape of pig ears. -
Attach the ears:
Score the top of the head where you want the ears to go, dab a little water there, and press the ears firmly into place. Blend the clay at the base of the ear into the head using a modeling tool so they don’t fall off. -
Form the snout:
Roll a small button of clay and flatten it into an oval disc. Score the front of the pig’s face and the back of the disc, add water, and press the snout onto the face. -
Detail the nose:
Using the blunt end of a toothpick or a small dotting tool, press two indentations into the snout to create the nostrils. -
Create the coin slot:
Even though this is for rings, the classic bank look needs a slot. Use a modeling knife or a fettling tool to carefully cut a rectangular slot along the top center of the pig’s back. -
Smooth the surface:
Dip your finger in water and run it over the entire sculpture. You want a relatively smooth finish, but a few subtle finger marks add to the organic, handmade charm seen in the photo.
Step 3: Finishing Touches
-
Let it dry:
Allow the pig to air dry completely. This usually takes 24-48 hours depending on humidity. Rotate it occasionally so the bottom dries evenly. -
Sand imperfections:
Once fully hard, take fine-grit sandpaper and very gently buff away any sharp ridges or rough patches, particularly around the feet and ears. -
Paint the eyes:
Using a very fine detail brush and black acrylic paint, dab two small dots above the snout for the eyes. Keep them wide-set for a cuter expression. -
Add texture (optional):
For the speckled look shown in the image, I like to dilute a tiny bit of brown or grey paint with water and flick it onto the pig using an old toothbrush. -
Seal the piece:
Protect your ring holder by applying a coat of matte varnish. This will keep the clay safe from moisture and give it a finished, professional look.
Curly Tail
Roll a tiny clay snake and coil it into a spring shape. Attach it to the back using the score-and-slip method for an adorable 3D tail detail.
Place your favorite gold bands on the tray next to your new friend for a display that is both functional and joyous

Pink Flamingo Mini Planter
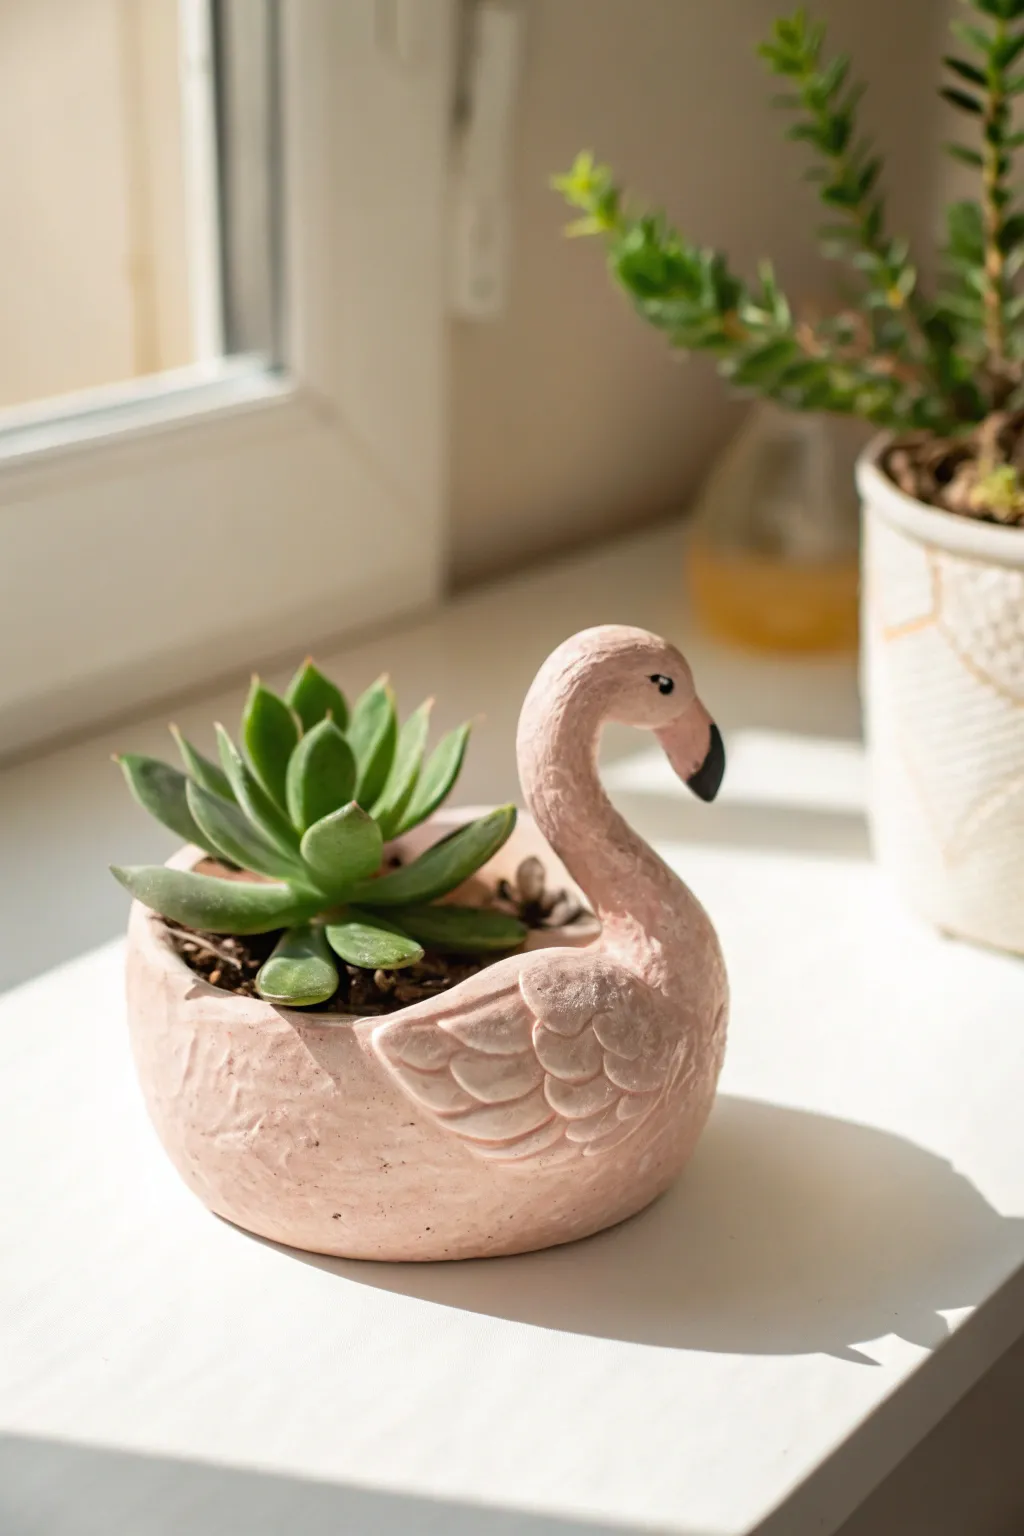
This adorable mini planter transforms a simple pinch pot into a graceful flamingo with sculpted wing details and a whimsical curved neck. The textured, matte finish gives it a charming handmade quality perfect for housing small succulents.
How-To Guide
Materials
- Pink air-dry clay (or white clay and pink acrylic paint)
- Small bowl relative to your desired planter size (for shaping)
- Clay carving tools or a wooden skewer
- Water in a small cup
- Rolling pin
- Black and white acrylic paint
- Fine detail paintbrush
- Clear sealant or varnish (optional but recommended for planters)
- Sandpaper (fine grit)
Step 1: Forming the Body
-
Prepare the Base:
Start with a ball of pink air-dry clay roughly the size of a large orange. Condition it by kneading it in your hands until it becomes soft, pliable, and free of cracks. -
Create the Pinch Pot:
Press your thumb into the center of the ball, leaving about a half-inch thick base. Gently pinch and rotate the clay between your thumb and fingers to open up the bowl shape. -
Shape the Walls:
Continue lifting the walls of the pot until they are relatively even in thickness. Aim for a slightly squat, rounded shape rather than a tall cup shapes so the flamingo looks stable. -
Smooth the Surface:
Dip your finger in a little water and run it over the exterior and interior to smooth out major fingerprints, though a little texture adds character.
Step 2: Sculpting the Flamingo
-
Roll the Neck:
Take a separate piece of clay and roll it into a thick snake, tapering it slightly at one end for the head. It should be proportional to your bowl, usually about 3-4 inches long. -
Attach the Neck:
Score (scratch hatch marks) the clay on the rim of the bowl and the bottom of the neck piece. Add a dab of water (slip) and press the neck firmly onto the rim. -
Blend the Seams:
Using a modeling tool or your finger, drag the clay from the neck down onto the body and vice versa until the seam disappears completely. This bond must be strong to support the head. -
Curve the Neck:
Gently bend the clay snake into an ‘S’ shape to create the classic flamingo neck arch. The head should face slightly downward. -
Shape the Head:
Mold the tapered end into a rounded head shape. Pull a tiny bit of clay out to form the downwards-curved beak.
Sagging Neck?
If the long neck droops while formatting, support it with a crumpled ball of paper towel or aluminum foil. Leave this prop in place until the clay is fully dry.
Step 3: Adding Details
-
Make the Wings:
Flatten two small balls of clay into teardrop shapes. These will be the wings on the side of the body. -
Carve Feathers:
Score the back of the wings and the side of the body, then attach them firmly. Use a clay tool or skewer to impress ‘U’ shaped scallops into the wings to mimic layered feathers. -
Refine the Tail:
Slightly pinch the clay at the rear of the pot (opposite the neck) to create a subtle tail point. -
Texturize:
For that rustic look, you can dab the surface gently with a crumpled piece of foil or a stiff brush to remove the ‘perfect’ smoothness.
Level Up: Drainage
Before drying, use a straw to punch a hole in the bottom center. This allows excess water to escape, keeping your succulent roots healthy and rot-free.
Step 4: Finishing Touches
-
Let it Dry:
Allow the planter to dry completely. This usually takes 24-48 hours depending on humidity. Turn it occasionally so the bottom dries evenly. -
Paint the Beak:
Using a fine brush, paint the tip of the beak black. Add a thin stripe of white or light pink separating the black tip from the pink face if desired. -
Add Eyes:
Paint a small black dot for the eye on either side of the head. Only a tiny speck is needed. -
Seal (Important):
Since this is a planter, apply a waterproof sealer to the inside to protect the clay from moisture. A matte varnish on the outside will protect the paint without making it too shiny.
Pop in your favorite succulent and enjoy the tropical vibe on your windowsill

What Really Happens Inside the Kiln
Learn how time and temperature work together inside the kiln to transform clay into durable ceramic.
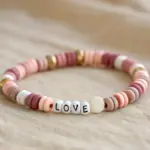
Pink Stars and Hearts Ornaments
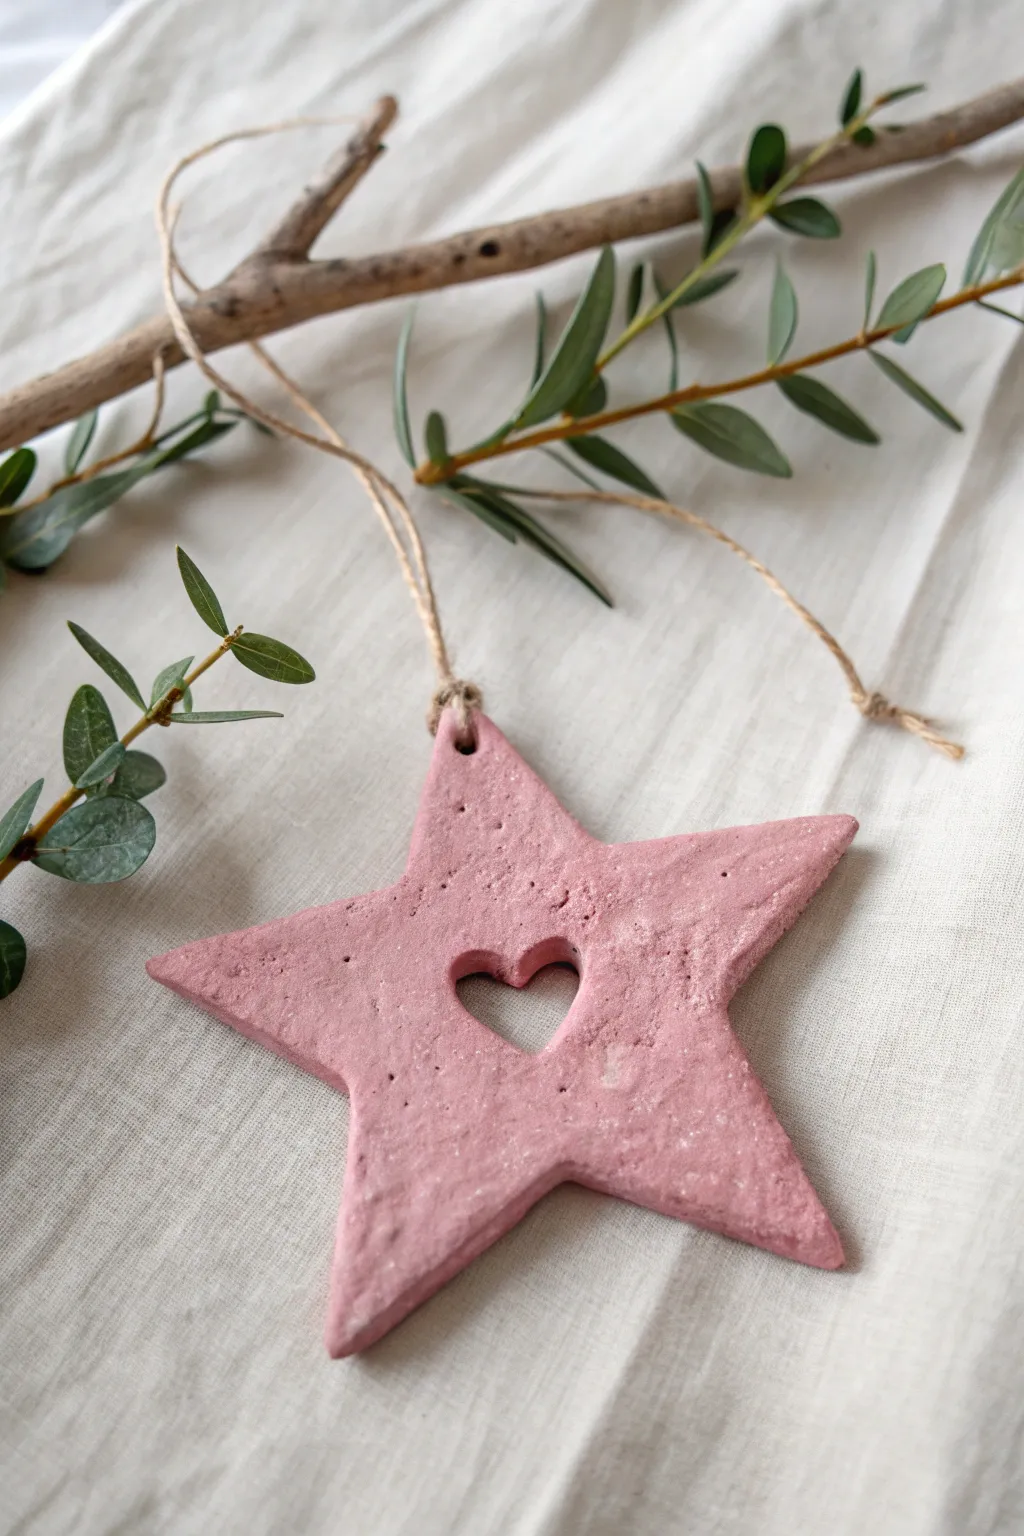
This charming project combines the simplicity of shape with a delightful textured finish, creating a sweet rustic ornament. The soft pink hue and cutout heart detail make it perfect for festive decor or as a loving handmade gift.
How-To Guide
Materials
- White air-dry clay
- Pink acrylic paint (or food coloring)
- Star-shaped cookie cutter
- Small heart-shaped cutter
- Rolling pin
- Parchment paper or non-stick mat
- Natural jute twine
- Toothpick or skewer
- Fine-grit sandpaper (optional)
- Bowl for mixing
Step 1: Preparing the Clay
-
Measure the clay:
Start by grabbing a handful of white air-dry clay, roughly the size of a tennis ball, which will be enough for a few ornaments. -
Add color:
Flatten the ball slightly and create a well in the center. Add a small dollop of pink acrylic paint directly into the depression. -
Knead thoroughly:
Fold the clay over the paint and begin kneading. It will look messy at first, but keep folding and pressing until the color is completely uniform and streak-free. -
Adjust the shade:
If the pink is too pale, add another tiny drop of paint and knead again. Remember that air-dry clay often dries slightly lighter than the wet color.
Cracks Appearing?
If small cracks form while drying, mix a tiny bit of wet clay with water to make a paste and smooth it into the cracks with your finger.
Step 2: Shaping the Star
-
Roll it out:
Place your pink clay on a sheet of parchment paper. Use a rolling pin to smooth it out to an even thickness of about 1/4 inch (6mm). -
Check thickness:
Ensure the clay isn’t rolled too thin, as this can make the star points fragile. A slightly chunkier look adds to the rustic charm shown in the photo. -
Create texture (optional):
For that distinctive grainy look seen in the image, you can gently pat the surface with a piece of rough muslin cloth or even a crumpled ball of foil before cutting. -
Cut the star:
Press your large star-shaped cookie cutter firmly into the clay. Wiggle it very slightly to ensure a clean cut before lifting it away. -
Create the heart:
Position the small heart cutter exactly in the center of the star. Press down to remove the middle section, creating the negative space heart. -
Clean the edges:
Gently dip your finger in water and smooth any rough edges around the star points and the inner heart cutout to remove loose clay bits.
Add Some Sparkle
Before the clay dries, lightly press coarse sanding sugar or clear glitter into the surface for a subtle, frosty winter shimmer.
Step 3: Finishing Touches
-
Make the hanging hole:
Using a toothpick or a skewer, poke a hole through the top point of the star. Make circular motions to widen it enough for the twine to pass through. -
Dry the ornament:
Leave the star on the parchment paper to dry in a safe area. Flip it over gently after about 12 hours so the bottom side dries evenly. -
Check for dryness:
Allow 24 to 48 hours for full drying. The clay will feel hard and lighter in color when it is completely set. -
Add the hanger:
Cut a length of natural jute twine, approximately 8 inches long. -
Thread the twine:
Pass one end of the twine through the hole in the top point of the star. -
Secure the loop:
Bring the ends of the twine together and tie a simple overhand knot near the ends to create a rustic hanging loop.
Now you have a lovely handmade decoration ready to hang on a branch or give to a friend
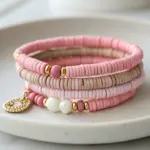
Pink Scalloped Jewelry Tray
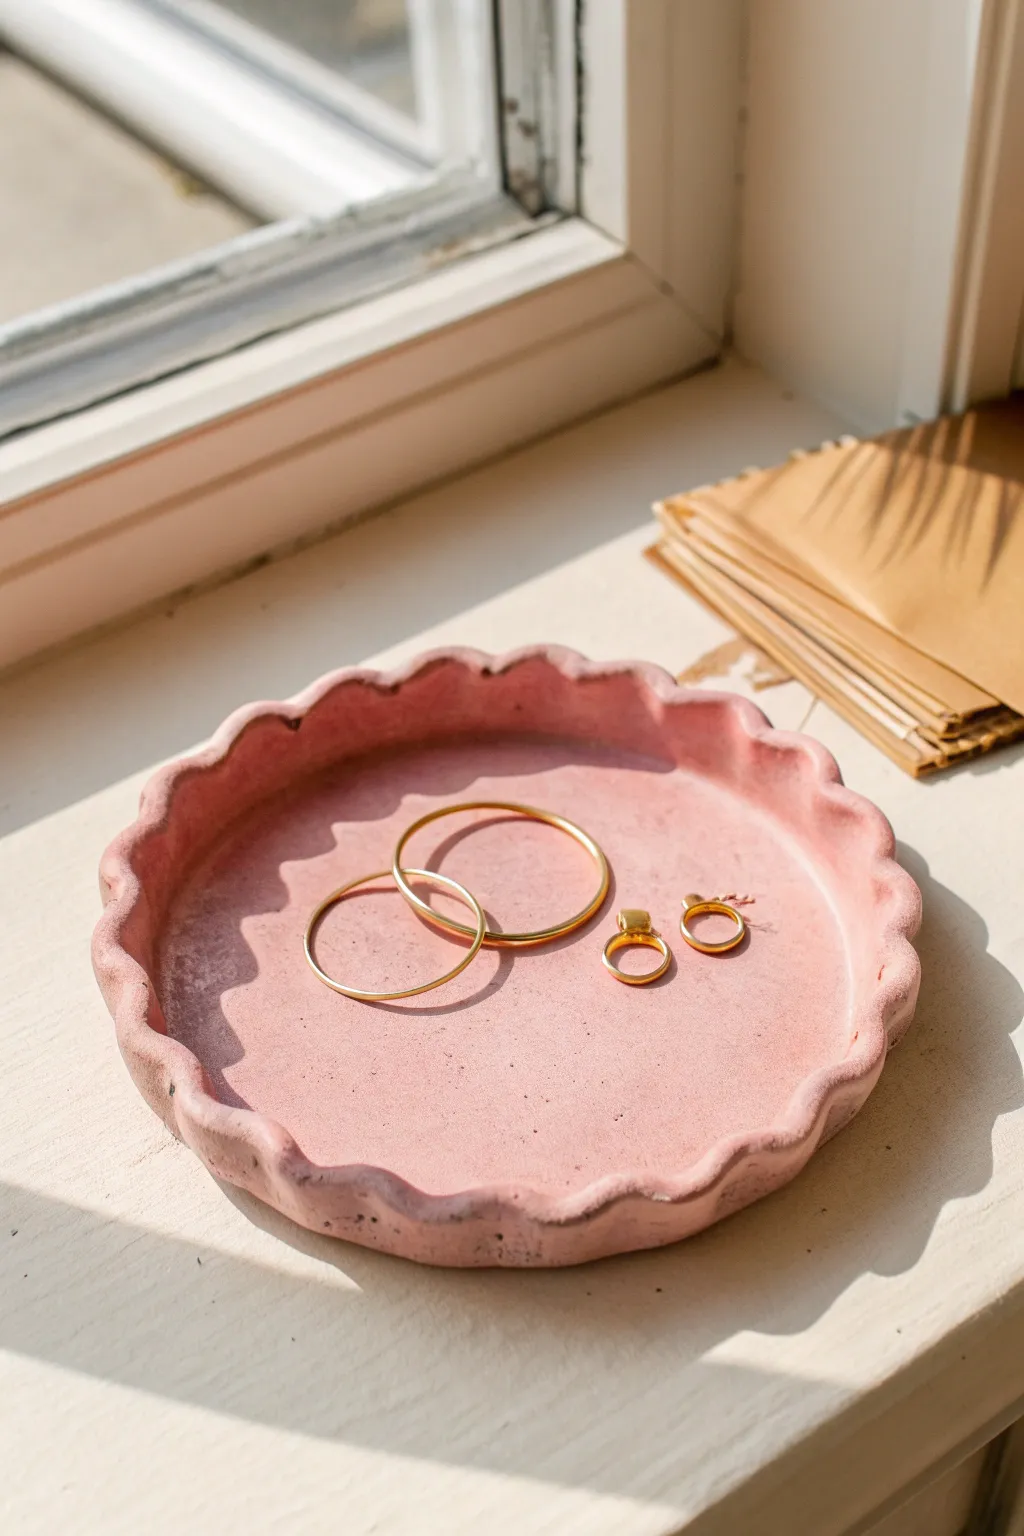
This charming, blush-pink tray combines a trendy scalloped edge with a soft, matte finish that mimics the look of high-end concrete decor. It creates the perfect designated spot for your favorite gold bands and everyday jewelry pieces.
Step-by-Step Guide
Materials
- White air-dry clay
- Acrylic paint (Dusty Pink or Blush)
- Rolling pin
- Circular template (like a bowl or lid approx. 5-6 inches)
- Small round cutter or bottle cap (approx. 0.5-0.75 inch diameter)
- Craft knife or clay needle tool
- Cup of water
- Sponge or fine-grit sandpaper
- Matte sealant/varnish
- Wax paper or craft mat
Step 1: Preparing the Base
-
Condition the Clay:
Begin by taking a handful of white air-dry clay. Knead it thoroughly in your hands to warm it up and ensure it is pliable and free of air bubbles or dry patches. -
Tinting (Optional):
While many paint after drying, I prefer to mix a small drop of pink acrylic paint directly into the wet clay for a consistent base color. Knead until the color is uniform, adding more paint if you want a deeper hue. -
Roll It Out:
Place the clay onto a piece of wax paper or a craft mat. Using a rolling pin, roll the clay out to an even thickness of about 1/4 inch (approx. 5-6mm). -
Cut the Circle:
Place your bowl or circular template gently on top of the rolled slab. Use your craft knife to trace around the edge, creating a perfect circle, and peel away the excess clay.
Cracks while drying?
Mix a tiny amount of fresh clay with water to create a paste. Fill the cracks, smooth with a damp finger, and let it dry again slowly away from direct sunlight.
Step 2: Creating the Scalloped Wall
-
Roll a Snake:
Gather your leftover clay and roll it into a long, even snake or coil. This will become the wall of your tray, so ensure it is long enough to wrap around the circumference of your base circle. -
Flatten into a Strip:
Gently flatten the snake using the rolling pin until it forms a strip. Aim for the same thickness as your base, about 1/4 inch thick and perhaps 3/4 inch tall. -
Create the Scallops:
Using a small round cutter or a bottle cap, press gently into just the top edge of the strip to bite out semi-circles. Continue this along the entire length of the strip to create the scalloped pattern. -
Clean the Edges:
Dip your finger in a little water and smooth out the sharp edges of your scallops. Air dry clay can be brittle, so softening these curves now prevents chipping later. -
Score and Slip:
Use a needle tool or toothpick to scratch rough hatch marks (scoring) around the top edge of your base circle and the bottom edge of your scalloped strip. Apply a little water or liquid clay (slip) to these scratched areas.
Make it luxe
After the matte seal dries, paint just the very top edge of the scallops with liquid gold leaf or metallic gold paint for a glamorous, gilded rim effect.
Step 3: Assembly and Refining
-
Attach the Wall:
Carefully lift your scalloped strip and place it onto the edge of the base circle. Wrap it around until the ends meet. -
Join the Seams:
Where the two ends of the strip meet, blend the clay together using a modeling tool or your finger so the seam disappears. Try to hide the join in the ‘valley’ between two scallops if possible. -
Blend the Bottom:
Use your thumb or a modeling tool to smudge the clay from the inner wall down onto the base, creating a seamless transition. Do the same on the outside seam so the wall and base become one solid unit. -
Smooth the Texture:
Dip a sponge lightly in water and run it over the entire piece to remove fingerprints and tool marks. Don’t use too much water, or the clay will become mushy. -
Dry Slowly:
Place the tray in a cool, dry area away from direct heat. Let it dry for at least 24-48 hours. Turn it over gently halfway through the process to let the bottom dry evenly.
Step 4: Finishing Touches
-
Sand for Perfection:
Once fully bone dry, use fine-grit sandpaper to gently buff away any remaining rough spots or uneven edges on the scallops. -
Paint Application:
Apply your dusty pink acrylic paint. Use a soft brush to get into the crevices of the scallops. Let the first coat dry, then apply a second coat for full, opaque coverage. -
Add Texture (Optional):
To achieve the stone-like texture seen in the photo, dip a toothbrush into slightly darker pink paint and flick tiny speckles onto the tray before the base coat is fully cured. -
Seal the Piece:
Finish with a coat of matte varnish. This is crucial for durability and will protect the paint from chipping when you toss your keys or rings into the tray.
Place your new tray on a sunny sill and enjoy organizing your trinkets in style


The Complete Guide to Pottery Troubleshooting
Uncover the most common ceramic mistakes—from cracking clay to failed glazes—and learn how to fix them fast.
Pink Lace-Texture Keepsake Dish
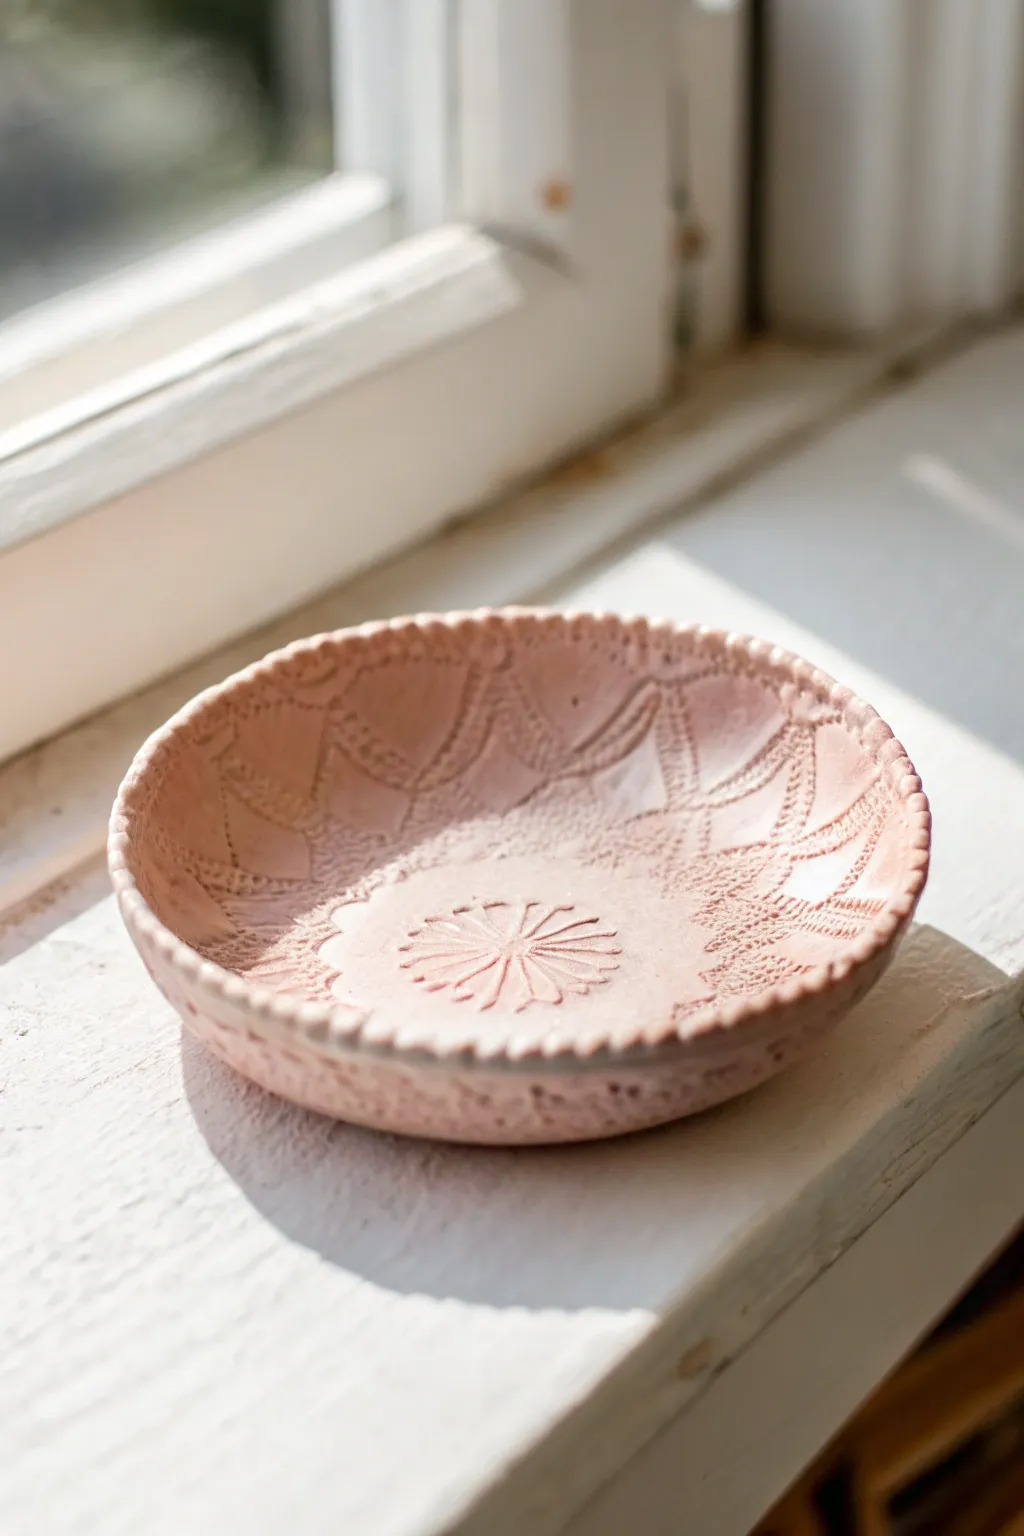
This delicate little dish captures the intricate beauty of lace in soft pink clay, creating a vintage-inspired piece perfect for holding rings or earrings. The natural light highlights every raised detail, making it a functional keepsake that looks deceptively fancy but is wonderfully simple to make.
Step-by-Step
Materials
- Pink air dry clay (or white clay mixed with pink acrylic paint)
- Vintage lace doily or textured silicone mat
- Rolling pin
- Round cookie cutter or bowl (approx. 4-5 inches diameter)
- Small bowl for shaping (to use as a mold)
- Wooden modeling tool or skewer
- Fine-grit sandpaper
- Clear matte or satin varnish
- Parchment paper or canvas mat
- Sponge and water
Step 1: Preparing the Clay
-
Condition the Clay:
Begin by kneading your pink air dry clay thoroughly in your hands. You want it warm and pliable to prevent cracking later. If you are tinting white clay yourself, knead in a pea-sized amount of pink acrylic paint until the color is completely uniform. -
Roll out the Base:
Place the clay on a piece of parchment paper or a canvas mat to prevent sticking. Use your rolling pin to flatten the clay into a smooth slab that is roughly 1/4 inch thick. Aim for an even thickness throughout. -
Position the Texture:
Take your lace doily and lay it carefully over the center of your clay slab. Ensure there are no wrinkles or folds in the fabric before you proceed. -
Imprint the Pattern:
With the lace in place, roll over the slab again firmly. Press hard enough that the lace pattern embeds deeply into the clay surface, but not so hard that the clay becomes wafer-thin. I like to do one firm pass to keep the pattern crisp. -
Reveal the Design:
Gently peel back the lace doily from one corner to reveal the intricate impression left behind. If you missed a spot, carefully lay it back down and press with your fingers.
Cracking Up?
If small cracks appear while drying, mix a tiny bit of fresh clay with water to make a paste (slip). Smooth this into the cracks with your finger and let dry again.
Step 2: Cutting and Shaping
-
Cut the Circle:
Position your round cutter or a bowl upside down over the most interesting part of the lace pattern. Press down firmly to cut out a perfect circle. -
Clean the Edges:
Remove the excess clay from around the circle. Dip your finger in a little water and gently smooth the cut edge to remove any sharpness or burrs. -
Create the Scalloped Rim:
Using a small wooden modeling tool or the dull side of a skewer, gently press indentations into the very top edge of the rim. Space them evenly around the circumference to create a delicate, bead-like or scalloped texture. -
Form the Bowl Shape:
Pick up the clay circle carefully and center it inside your shaping bowl. Gravity will tempt it to sink, so press it gently against the bottom and slightly up the sides to establish the curve. -
Refine the Form:
Ensure the clay makes good contact with the mold so the bottom flattens slightly (essential for stability). Check that your scalloped rim hasn’t been squashed during the transfer.
Step 3: Drying and Finishing
-
Initial Drying:
Let the dish dry inside the mold for at least 24 hours. Keep it away from direct heaters or intense sun, as drying too fast can cause warping. -
Remove from Mold:
Once the clay feels stiff and the top is dry to the touch, carefully pop it out of the bowl. Place it upside down on a drying rack. -
Complete Drying:
Allow another 24 to 48 hours for the bottom (now exposed) to dry completely. The clay should feel room temperature, not cool to the touch, when it is fully cured. -
Sand Imperfections:
If there are any rough spots on the rim or underside, lightly sand them with fine-grit sandpaper. Be very careful not to sand over your beautiful lace texture. -
Seal the Dish:
Apply a thin coat of clear matte or satin varnish to the entire piece. This protects the clay from moisture and gives it a finished, professional look. -
Final Cure:
Let the varnish dry according to the bottle instructions before using your new keepsake dish.
Make it Shine
After the clay dries, highlight the raised lace texture by lightly dry-brushing a metallic gold or pearl white acrylic paint over just the highest points of the pattern.
Place your finished dish on a sunny windowsill to enjoy the intricate shadows cast by your handmade texture
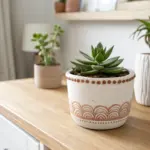
Pink Terrazzo Trinkets
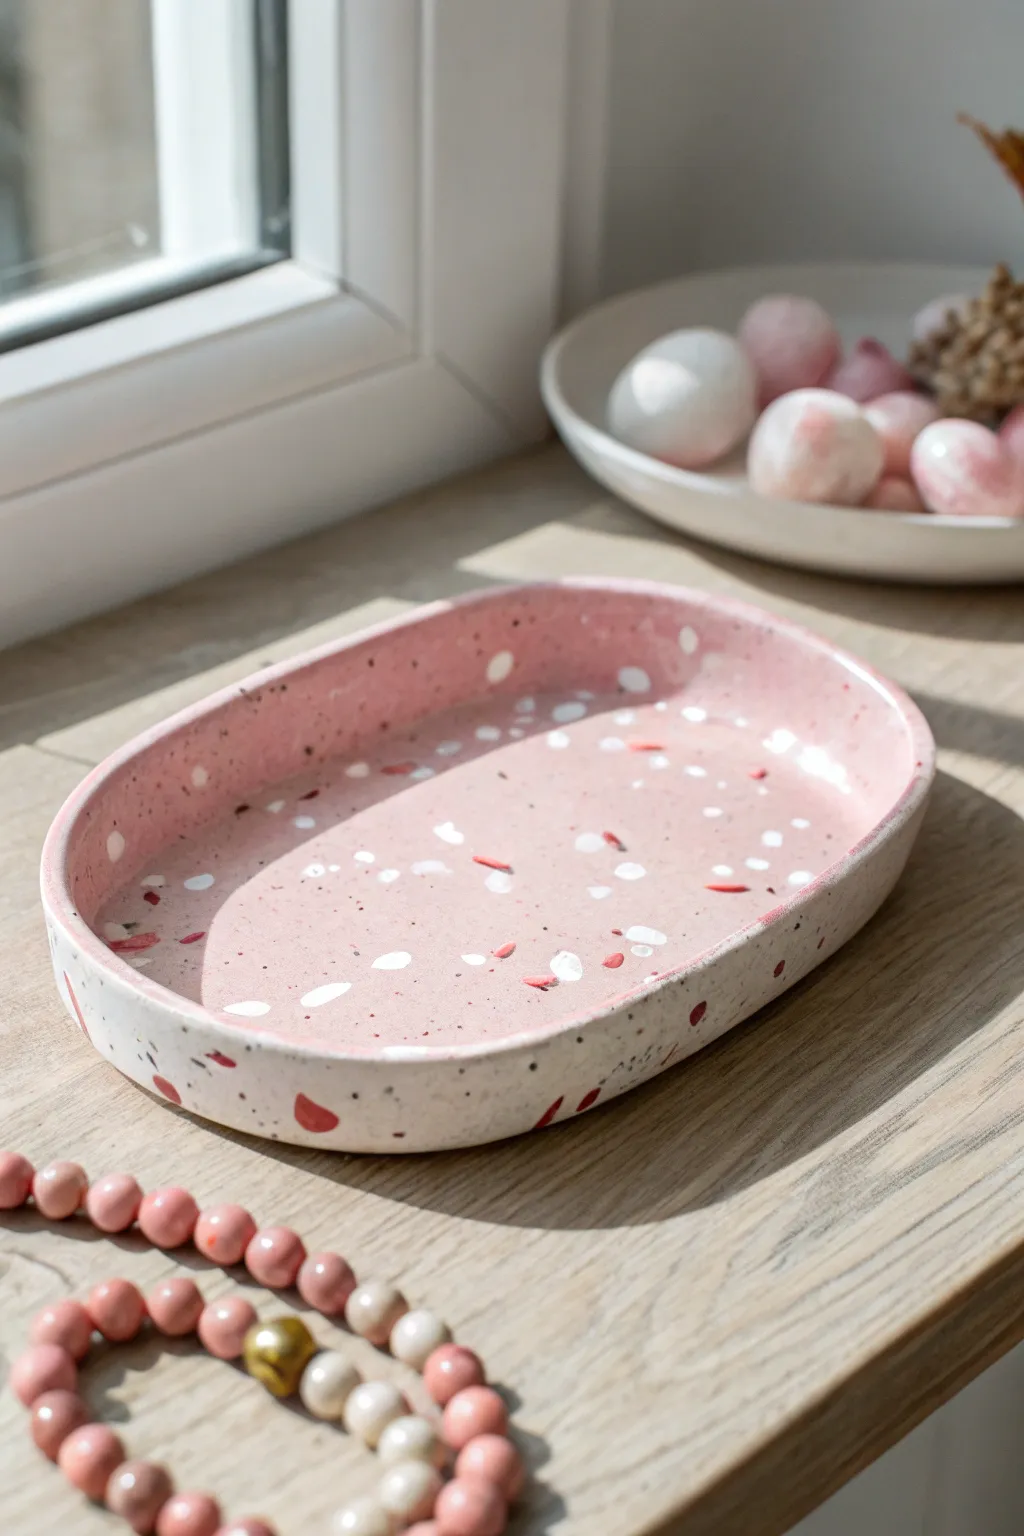
This charming trinket dish combines a soft blush pink base with playful speckles of white and deep rose, perfectly mimicking the classic terrazzo stone look. It’s a functional piece of art that brightens up any vanity while keeping your jewelry organized.
How-To Guide
Materials
- White air dry clay
- Pink acrylic paint (pastel pink and deep rose/red)
- Rolling pin
- Clay knife or craft blade
- Sponge or small brush
- Glossy varnish or sealant
- Small bowl of water
- Sandpaper (fine grit)
- Parchment paper or silicone mat
Step 1: Preparing the Terrazzo Chips
-
Mix chip colors:
Start by taking two small walnut-sized pieces of white air dry clay. Mix a tiny drop of white paint into one piece to brighten it, and a drop of deep rose or red paint into the other to create a strong contrast color. -
Flatten the chip clay:
Roll both colored pieces out very thinly on your work surface, aiming for about 1-2mm thickness. Rough edges don’t matter here. -
Dry the thin sheets:
Let these thin sheets dry for about 20-30 minutes until they are leather-hard or fully dry. They need to be brittle enough to crumble or cut easily. -
Create the chips:
Once dry, break the thin clay sheets into small, irregular shards. I like to vary the sizes, keeping some distinct larger chunks and some tiny crumbs for a natural stone look.
Cracks Appearing?
If small cracks appear while drying, mix a tiny bit of fresh clay with water to make a paste (slip) and fill them in immediately. Smooth with a wet finger.
Step 2: Forming the Base
-
Tint the main clay:
Take a large handful of white clay—enough to form the entire tray. Knead in a small amount of pastel pink acrylic paint until the color is uniform and streak-free. -
Incorporate the chips:
Sprinkle your dried white and deep rose clay chips onto your work surface and press your soft pink clay ball into them. Fold the clay over and knead gently to distribute the chips throughout the mixture without crushing them too much. -
Roll out the slab:
Place the speckled clay on parchment paper. Roll it out into an oval shape about 1/4 inch thick. You might need to press loose chips back into the surface if they pop out. -
Cut the shape:
Use a clay knife to cut a clean, symmetrical oval shape. You can trace around a paper template or a bowl if you want perfect precision. -
Create the rim strip:
Roll out a long snake of the remaining pink clay and flatten it into a long ribbon, roughly the same thickness as your base.
Add Metallic Flare
For a luxe touch, mix gold leaf flakes into your terrazzo chips before kneading. The sanding step will reveal glints of gold alongside the colors.
Step 3: Assembly and Finishing
-
Score and slip:
Score (scratch) the outer edge of your oval base and the bottom edge of your clay ribbon. Apply a little water to act as glue. -
Attach the wall:
Wrap the ribbon around the oval base to create the wall of the tray. Cut off any excess length where the ends meet. -
Blend the seams:
Use your fingers or a modeling tool to smooth the seam where the wall meets the base, both on the inside and outside. Ensure the connection is seamless and strong. -
Smooth the surface:
Dip your finger in water and run it along the top rim and sides to smooth out any fingerprints or cracks. The terrazzo chips might be hidden under a thin layer of pink clay right now; that is normal. -
Let it dry:
Allow the tray to dry completely for 24-48 hours. Turn it over halfway through designed drying time to ensure the bottom dries evenly. -
Reveal the terrazzo:
Once bone dry, take fine-grit sandpaper and sand the surface of the tray. This is the magic step: sanding removes the top layer of pink clay and reveals the distinct white and red chips underneath. -
Dust off:
Wipe away all clay dust with a slightly damp cloth or sponge. -
Seal for shine:
Apply two coats of glossy varnish to protect the clay and make the terrazzo colors pop, giving it that polished ceramic look.
Your finished tray is now ready to hold your favorite rings or simply sit pretty on a sunlit windowsill