If you can roll a ball of clay and press your thumb into it, you’re already halfway to a cute, functional clay ashtray. Here are my favorite beginner-friendly designs that look fun on a table and still have those practical cigarette rests built right in.
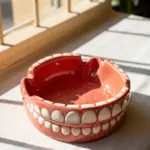
Classic Pinch Pot Clay Ashtray
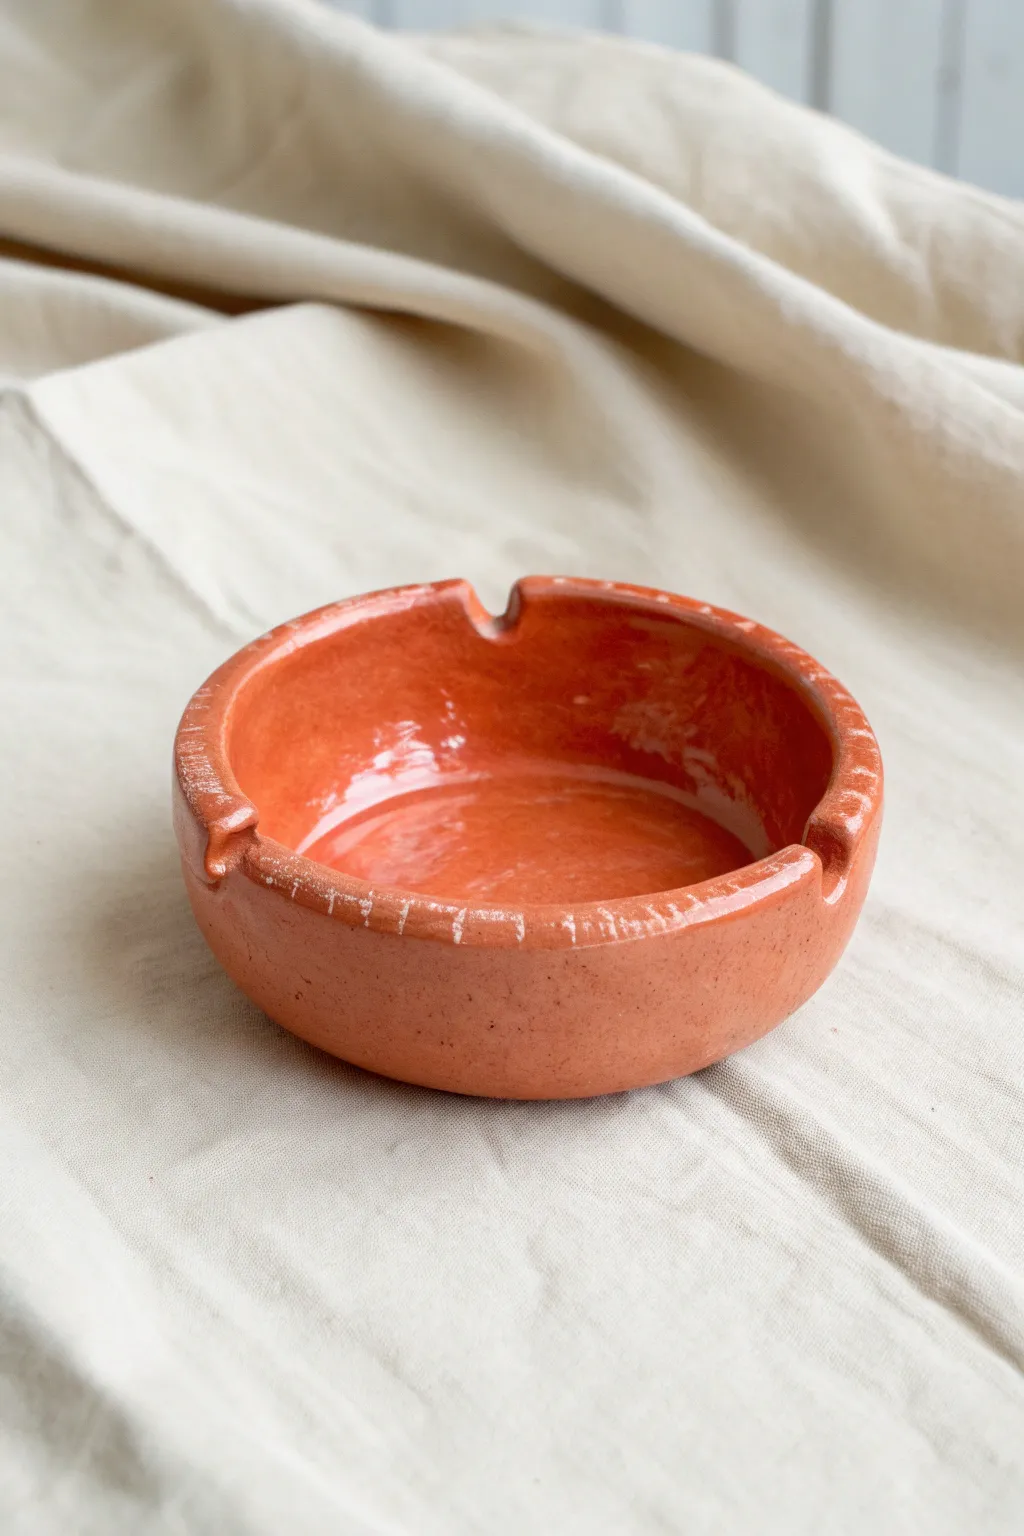
This charming, rustic ashtray brings a warm pop of orange to any table setting with its simple, organic shape. Using the classic pinch pot technique, you’ll create a durable and functional piece that showcases the natural beauty of hand-formed clay and a rich glossy glaze.
How-To Guide
Materials
- Earthenware or stoneware clay (terracotta color recommended)
- Pottery sponge
- Small bowl of water
- Needle tool or fettling knife
- Modeling tool (rounded wood or plastic)
- Rib tool (kidney shaped, smooth)
- Orange glossy glaze (food safe if desired)
- Kiln (or access to a firing service)
- Flat paintbrush for glazing
Step 1: Forming the Base
-
Prepare your clay ball:
Start with a ball of clay roughly the size of a large orange. Pat it between your hands to ensure it is round and compact, knocking out any trapped air bubbles. -
Open the pot:
Hold the ball in one hand and press your thumb into the center, going about three-quarters of the way down. Be careful not to push through the bottom. -
Pinch the walls:
Begin pinching the clay between your thumb (inside) and fingers (outside). Rotate the ball in your hand as you pinch, working from the bottom up to thin out the walls evenly. -
Widen the form:
Continue pinching and turning until you have a wide, low bowl shape. Aim for a wall thickness of about 1/4 inch throughout for durability. -
Flatten the bottom:
Gently tap the pot onto your work surface to create a flat, stable base so the ashtray won’t wobble.
Smooth Operator
To get that super smooth interior curve, use a flexible rubber rib tool. Bend it to match the curve of your bowl and drag it up the inside walls while the clay is still plastic.
Step 2: Refining and Detailing
-
Smooth the interior:
Use a damp sponge or a wet finger to smooth out any heavy fingerprint marks on the inside curve of the bowl. -
Level the rim:
Check the rim of your bowl. If it’s very uneven, you can use a needle tool to trim it level, or simply tap it gently upside down on the table to even it out. -
Mark the notches:
Visualize a clock face on your rim. Mark three or four spots where you want the cigarette rests to be. I usually space them evenly around the circumference. -
Create the rests:
Use the side of a rounded modeling tool or just your pinky finger to press down firmly into the rim at your marked spots. Press until you create a smooth U-shaped indentation. -
Refine the notches:
Smooth the edges of these indentations with a damp finger so they are rounded and soft, not sharp. -
Compress the rim:
Use a rib tool or your thumb to gently compress the rim, rounding it over slightly. This prevents sharp edges after firing and gives it that finished look. -
Final smooth:
Give the entire piece one last wipe with a barely damp sponge to remove any crumbs or rough texture.
Step 3: Firing and Glazing
-
Bisque fire:
Allow your ashtray to dry completely (bone dry). Fire it in a kiln to the bisque temperature appropriate for your specific clay body (usually Cone 04). -
Clean the bisque:
Once fired and cooled, wipe the piece with a damp sponge to remove any kiln dust before glazing. -
Apply the glaze:
Using a soft flat brush, apply 2-3 coats of your orange glossy glaze. Let each coat dry to the touch before applying the next one. -
Check the rim coverage:
Pay special attention to the rim and the notches; the glaze tends to thin out on edges, so ensure you have good coverage there. -
Wipe the foot:
Use a wet sponge to wipe all glaze off the very bottom of the ashtray so it doesn’t fuse to the kiln shelf. -
Glaze fire:
Fire the piece again, this time to the maturity temperature of your glaze (check the bottle label, often Cone 05/06 or Cone 5/6 depending on your clay).
Rustic Texture
Before the clay dries, gently scratch the rim with a stiff brush or scoring tool. The glaze will break over the texture, revealing the clay color underneath for a vintage look.
Once cooled, your vibrant orange ashtray is ready to catch ashes or simply hold trinkets.


Smooth Round Minimalist Ashtray
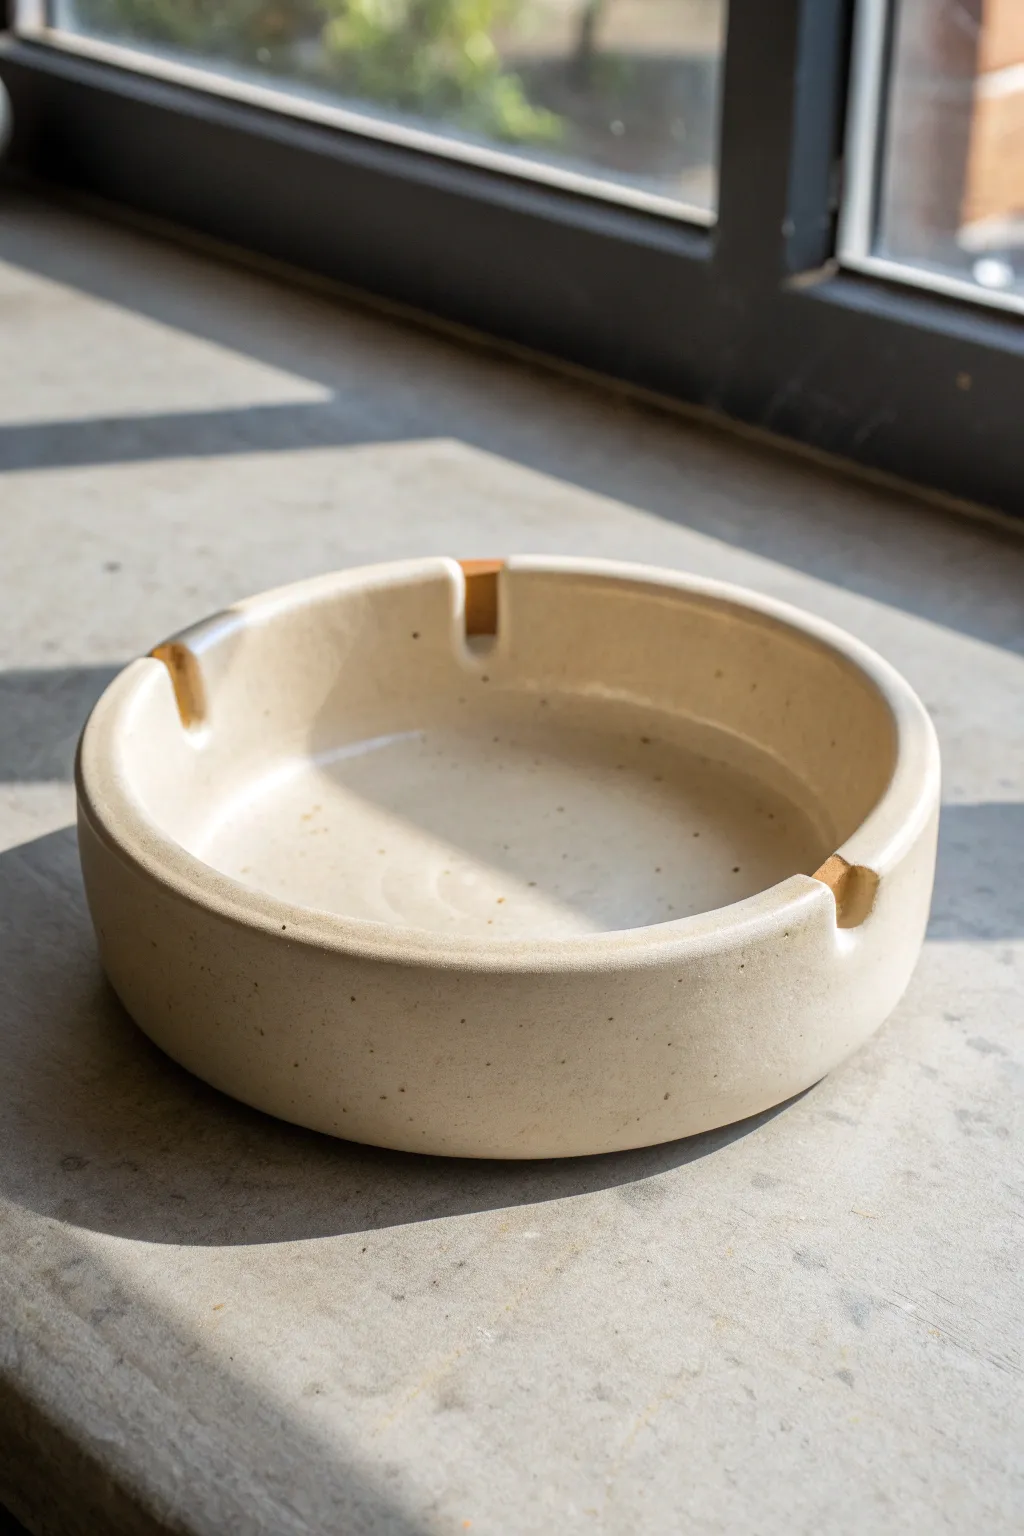
Embrace simplicity with this clean, round ashtray design that fits perfectly into any modern decor. The smooth, creamy glaze and distinct notch details give it a professional finish that belies how easy it is to construct.
Step-by-Step Guide
Materials
- Light stoneware or polymer clay (approx. 1 lb)
- Rolling pin
- Circle template or bowl (approx. 5-6 inches diameter)
- Needle tool or fettling knife
- Sponge
- Rib tool (wooden or silicone)
- Scoring tool or serrated kidney
- Slip (clay glue)
- Soft paintbrush
- Cream speckled glaze (if using ceramic clay)
- Kiln (if using ceramic clay) or oven (if using polymer)
Step 1: Forming the Base
-
Prepare the Clay:
Start by wedging your clay thoroughly to remove any air bubbles. Roll it out on a canvas or cloth surface to an even thickness of about 1/4 inch. -
Cut the Base:
Place your circle template or an upturned bowl onto the slab. Trace around it with your needle tool to cut out a perfect circle. -
Smooth the Edges:
Run a slightly damp finger or sponge along the cut edge of the circle to soften any sharpness or rough bits. -
Prepare the Coil:
Take the remaining clay and roll out a long, even coil. Aim for a thickness of about 1/2 to 3/4 inch, ensuring it’s long enough to wrap around the circumference of your base. -
Flatten the Coil:
Gently press down on the coil with your hand or a rolling pin to flatten it slightly into a rectangular strip. This will form the tall wall of the ashtray.
Cracking Seams?
If the wall separates from the base during drying, it wasn’t scored enough. Next time, really roughen the surface and use plenty of slip to ensure a solid weld.
Step 2: Building the Walls
-
Score the Surfaces:
Take your scoring tool and scratch up the outer edge of the base circle and the bottom edge of your clay strip. Roughing up the surface is key for a strong bond. -
Apply Slip:
Dab a generous amount of slip (or vinegar if your clay is moist enough) onto the scored areas. -
Attach the Wall:
Place the clay strip onto the base, aligning the edges. Press down firmly to join them. Cut off any excess length where the ends meet, score and slip the ends, and join them to complete the circle. -
Blend the Seams:
Using your thumb or a wooden tool, drag clay from the wall down onto the base on the inside. Then, drag clay from the base up onto the wall on the outside. This knits the pieces together. -
Smooth the Connection:
Take a rib tool and run it along the interior and exterior surfaces to completely hide the seams. The wall should look seamless and rise vertically from the base. -
Level the Rim:
Check the height of the wall. If it’s uneven, use your needle tool to trim the top edge level, or invert the piece gently onto a flat table to press the rim even.
Try Adding Texture
Before glazing, lightly sand the exterior for a rougher stone feel, or leave the notches unglazed for a raw clay contrast that highlights the function.
Step 3: Refining and detailing
-
Round the Rim:
With a damp sponge, gently round over the top edge of the wall. We want a soft, rounded lip rather than a sharp corner. -
Mark the Notches:
Decide on the placement for your cigarette rests. Usually, three or four equally spaced notches work best. Mark these spots lightly with your needle tool. -
Create the Notches:
Use a round file tool, the handle of a paintbrush, or your finger to press down firmly into the marked spots on the rim. Creates a smooth, U-shaped depression. -
Clean Up:
Smooth out any displaced clay around the notches with a sponge. The transition into the notch should feel fluid. -
Final Surface Smooth:
I like to go over the entire piece one last time with a very well-wrung-out sponge or a soft rib to remove fingerprints and ensure that minimalist, clean look. -
Dry Slowly:
Cover the piece loosely with plastic so it dries slowly. This prevents warping or cracking, especially at the seam where the wall meets the base.
Step 4: Firing and Glazing
-
Bisque Fire:
Once bone dry, fire the piece to the appropriate cone for your clay body (usually Cone 04 or 06). -
Apply Glaze:
Select a cream or off-white glaze, ideally one with gentle speckles to mimic stone. Pour glaze inside, swirl to coat, and pour out. Brush or dip the exterior. -
Clean the Foot:
Wipe the bottom of the ashtray completely clean of glaze with a sponge to prevent it from fusing to the kiln shelf. -
Final Fire:
Fire the piece again to the maturity temperature of your clay and glaze (often Cone 5 or 6 for stoneware).
Enjoy the sleek simplicity of your new handmade pottery piece


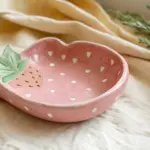
Heart-Shaped Clay Ashtray Dish
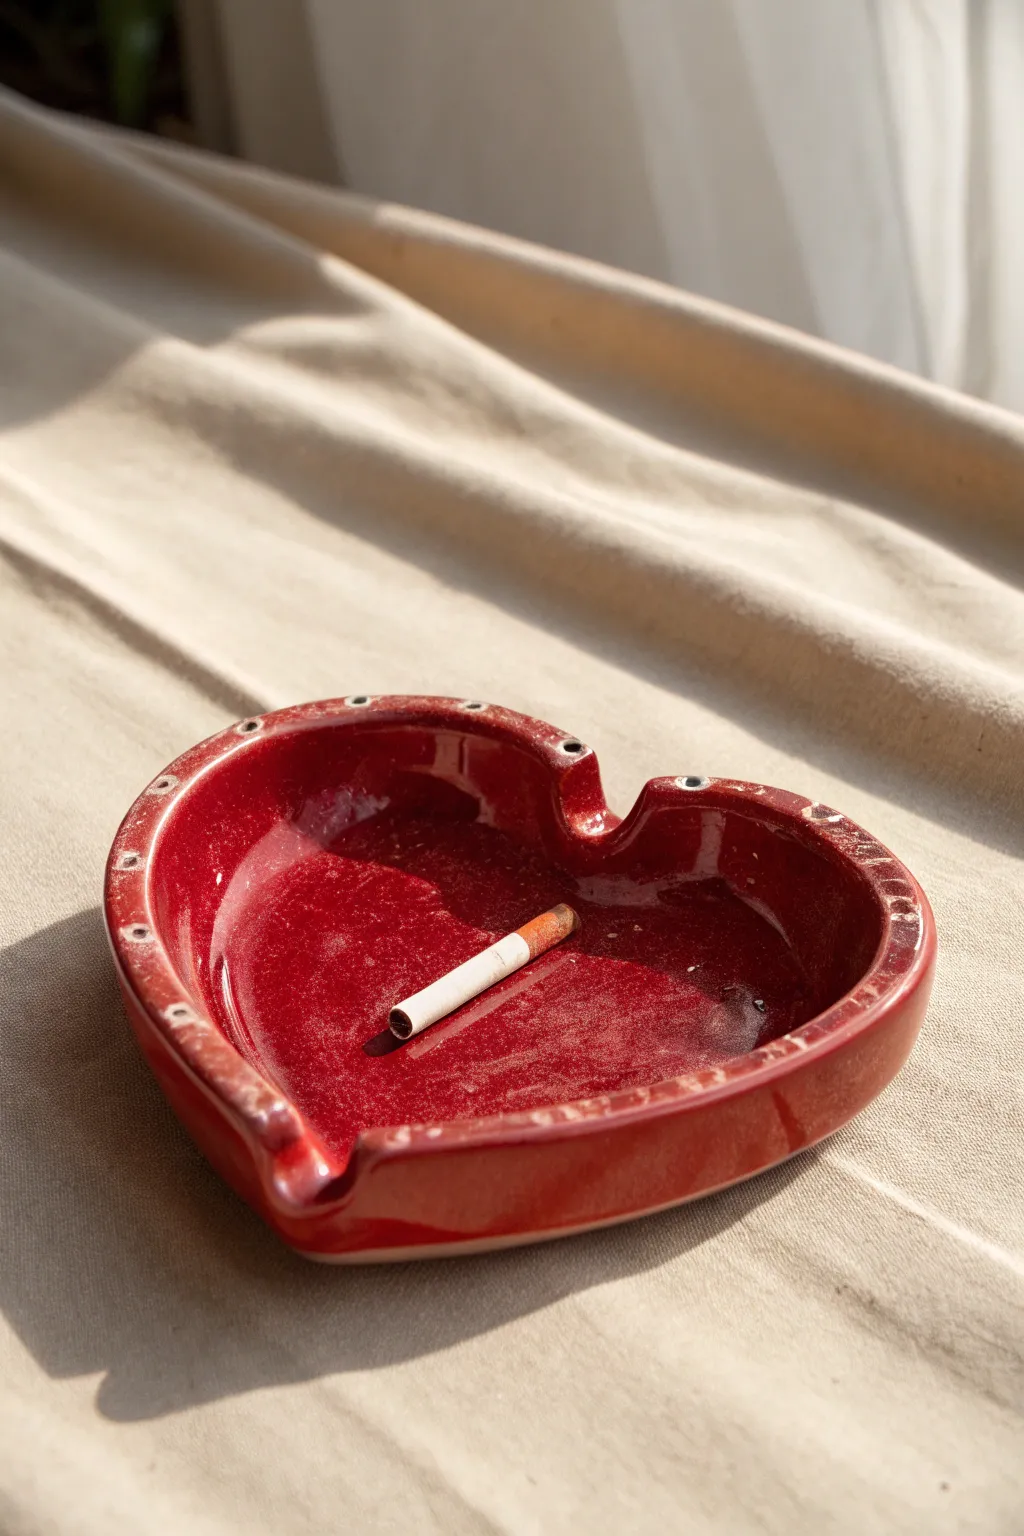
Capture a bit of retro romance with this deep red, heart-shaped ashtray featuring distinctive rim details. The project combines simple slab building with a high-gloss glaze finish to create a piece that feels both nostalgic and modern.
Step-by-Step Guide
Materials
- Air-dry clay or low-fire earthenware clay
- Rolling pin
- Heart-shaped template (paper or cardstock)
- Fettling knife or clay cutter
- Small sponge
- Water cup
- Needle tool or small drill bit
- Glossy red acrylic paint (if using air-dry)
- Glossy red glaze (if using kiln-fire clay)
- High-gloss varnish or sealant (for air-dry)
- Paintbrushes
- Fine grit sandpaper
Step 1: Shaping the Base
-
Prepare your workspace:
Lay down a piece of canvas or a silicone mat to prevent the clay from sticking to your table. Take a substantial chunk of clay and knead it briefly to remove air bubbles. -
Roll the slab:
Use your rolling pin to roll the clay out into an even slab. You want this to be fairly thick and sturdy, roughly 1/4 to 1/2 inch thick, to give the ashtray a nice weight. -
Cut the heart shape:
Place your heart template onto the clay. Trace around it with a needle tool first to get the outline, then cut through cleanly with your fettling knife. -
Smooth the edges:
Dip your finger in a little water and run it along the cut edges of the heart to soften any sharp angles left by the knife.
Cracking Up?
If you see tiny cracks forming while air-drying, mix a small amount of fresh clay with water to make a paste and fill them in immediately before painting.
Step 2: Building the Rim
-
Create a coil:
Roll out a separate long snake of clay. This coil should be thick enough to form a substantial wall, about the thickness of your thumb. -
Score and slip:
Score the outer edge of your heart base and one side of your clay coil. Apply a little water or slip (clay slurry) to the scored areas to act as glue. -
Attach the wall:
Press the coil firmly onto the perimeter of the heart base. Ensure the two ends of the coil meet neatly, blending them together so the seam disappears. -
Blend the seams:
Use a modeling tool or your thumb to drag clay from the coil down onto the base, both on the inside and outside. This structural blending is crucial so the wall doesn’t detach later. -
Create the indent:
At the top cleft of the heart (the V-shape), press gently with your thumb to ensure the wall curves inward comfortably. -
Form cigarette rests:
While the clay is soft, use your pinky finger or a round tool handle to press two or three shallow grooves into the rim where a cigarette would rest.
Step 3: Adding Detail & Drying
-
Create rim holes:
Using a small drill bit or a uniformly round tool, press small, decorative holes into the flat top surface of the rim. Space them evenly around the entire perimeter. -
Refine the surface:
Take a slightly damp sponge and wipe down the entire piece to smooth out fingerprints and imperfections. I find this step really helps the final glaze look professional. -
Dry the piece:
Let the ashtray dry completely. If using air-dry clay, wait 24-48 hours. If firing, follow your kiln schedule for bisque firing now. -
Sand imperfections:
Once fully dry (or bisque fired), lightly sand any rough spots or sharp edges on the rim.
Make it Functional
If using air-dry clay, insert metal washers or small ceramic tiles into the cigarette rests before drying to protect the clay from actual heat.
Step 4: Finishing
-
Apply base color:
Paint the entire ashtray with a deep, rich red. If painting air-dry clay, you may need two or three coats to get an opaque, solid color. -
Detail the rim:
If you want the holes on the rim to stand out, you can gently wipe away a tiny bit of paint from just the hole edges before it dries, or accent them later with a lighter dry brush. -
Glaze or varnish:
This is the most important step for the look. Apply a thick, high-gloss varnish (for air-dry) or a clear gloss glaze (for ceramics) to mimic that glassy, wet look seen in the photo. -
Final cure:
Allow the varnish to cure fully or fire your glaze kiln load. The result should look slick and highly reflective.
Once sealed and glossy, your heart ashtray serves as a striking, functional piece of decor ready for use


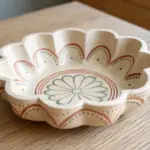
Flower Petal Rim Ashtray
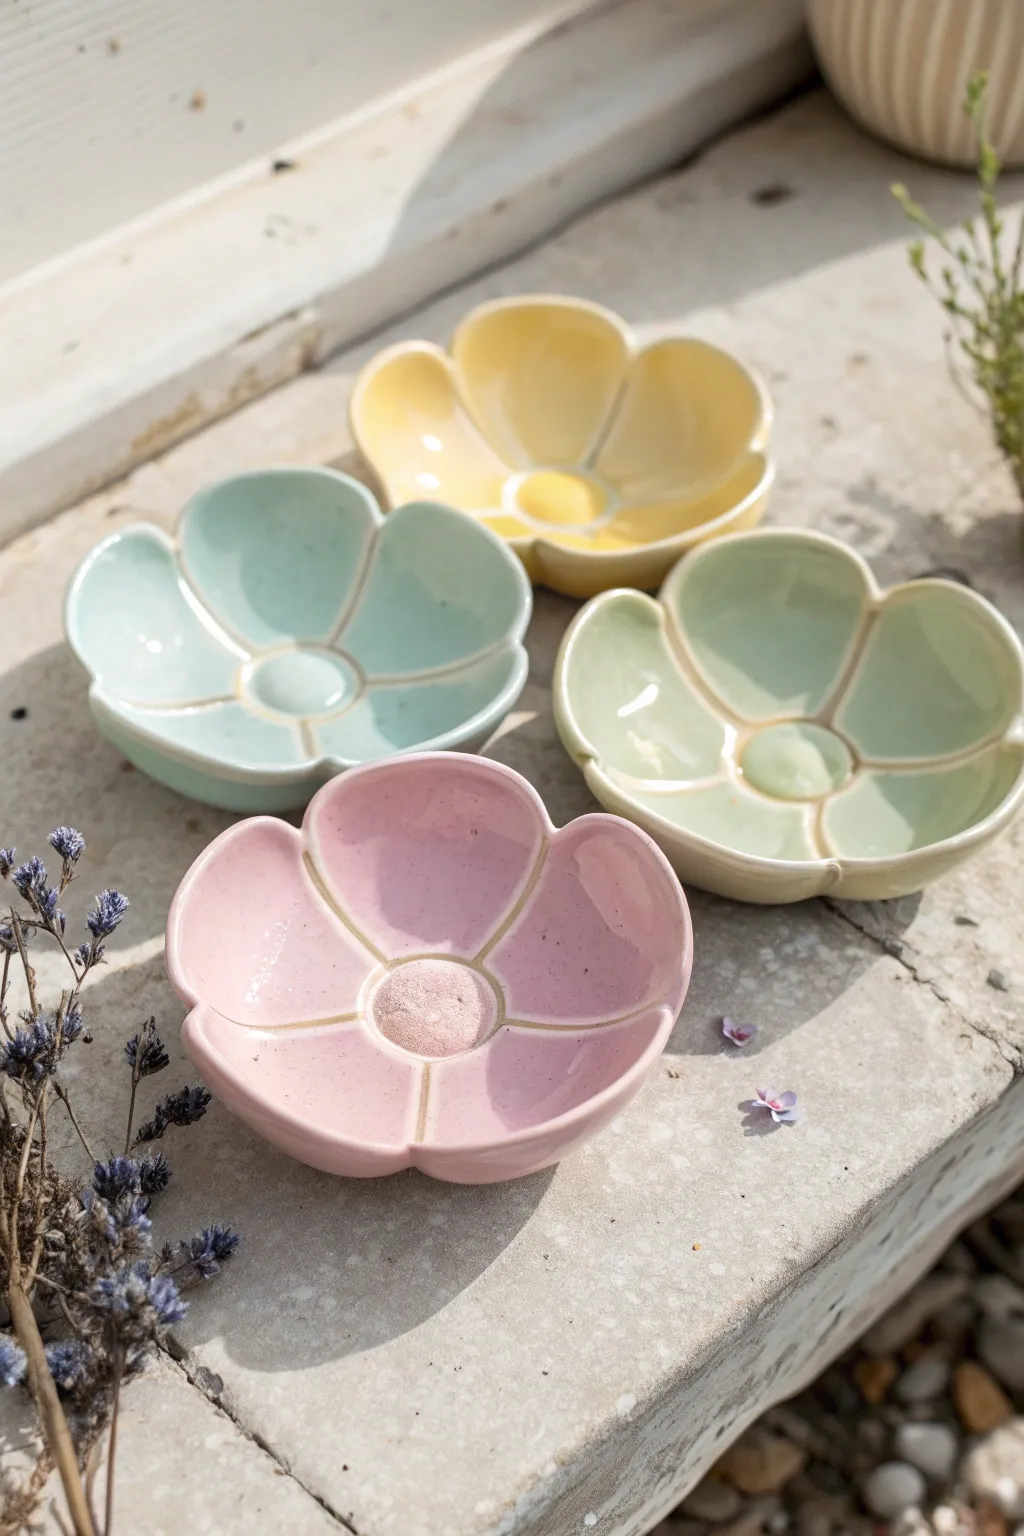
These charming flower-shaped dishes add a touch of whimsy to your decor, functioning perfectly as dainty ashtrays or trinket bowls. With their scalloped petal rims and glossy, pastel glazes, they evoke a delicate, vintage garden aesthetic that is surprisingly simple to sculpt by hand.
Step-by-Step
Materials
- Low-fire white earthenware clay
- Rolling pin
- Canvas mat or cloth (to prevent sticking)
- Small bowl or round cookie cutter (approx. 4-5 inches)
- Fettling knife or needle tool
- Modeling tool or smooth pebble
- Small sponge
- Pastel ceramic glazes (pale pink, sage green, sunny yellow, baby blue)
- Clear gloss glaze (optional, if glazes aren’t self-sealing)
- Kiln (or access to a firing service)
Step 1: Shaping the Flower Base
-
Roll out the slab:
Begin by wedging your white earthenware clay to remove air bubbles. Roll it out on your canvas mat to an even thickness of about 1/4 inch, ensuring the surface is smooth and free of major imperfections. -
Cut the circle:
Place your 4 or 5-inch template (a bowl works well) onto the clay slab and cut around it using a needle tool to create a perfect circle. -
Define the center:
Lightly press a smaller circle object, like a bottle cap or a small coin, into the very center of your clay disk. Don’t cut through; just make a clear indentation to mark the flower’s center pistols. -
Mark the petals:
Using the blunt edge of a modeling tool, gently draw five straight lines radiating from your center circle out to the edge, dividing the clay disk into five equal pie-slice sections. -
Sculpt the petals:
At the edge of each ‘slice’, use your fingers to gently push the clay inward towards the center slightly, creating a scalloped indentation. This transforms your circle into a five-lobed flower shape. -
Deepen the dividers:
Go back over your radiating lines with a rounded modeling tool. Press down firmly to create deep grooves, imitating the separation between petals. These grooves will naturally catch the glaze later.
Step 2: Forming the Bowl
-
Curve the edges:
To turn this flat flower into a bowl or ashtray, cradle the clay in your palm. Gently curl the petals upward, smoothing the underside with your thumb to create a gentle, concave curve. -
Refine the rim:
Run a damp sponge along the entire rim of the dish. This is crucial for rounding off sharp edges and ensuring the scalloped shape looks soft and organic rather than jagged. -
Smooth the center:
Use a small, slightly damp sponge to blot the center circle, softening the harsh line of the indentation so it looks like a natural part of the flower anatomy. -
Dry slowly:
Set your flower bowls aside to dry. Cover them loosely with plastic for the first day to prevent warping, especially at the thin petal tips, then let them dry completely to the bone-dry stage. -
Bisque fire:
Load the bone-dry pieces into the kiln and fire them to cone 04 (or your clay’s specific bisque temperature).
Warping Petals?
If petals warp while drying, rest the clay flower inside a small, shallow bowl lined with paper towel. The bowl acts as a mold, supporting the upward curve until stiff.
Step 3: Glazing and Finishing
-
Wax the bottom:
Before glazing, apply wax resist to the very bottom foot of the bowl to prevent it from sticking to the kiln shelf. -
Apply base color:
Dip or brush your chosen pastel glaze (pink, yellow, green, or blue) over the entire piece. Aim for solid, opaque coverage, usually requiring 2-3 coats if brushing. -
Reveal the details:
This is the trick for the look in the photo: Use a damp sponge to wipe a tiny bit of glaze away from the high points of the ‘ridges’ between the petals and the rim. This allows the white clay body to peek through slightly after firing. -
Glaze fire:
Fire the bowls again, this time to the recommended glaze temperature (often cone 05 or 06 for low-fire glazes). The glaze should melt into a thick, glossy pool in the center and recesses. -
Inspect and cool:
Once the kiln has cooled, remove your pieces. Check that the glaze has pooled nicely in the petal grooves, accentuating the flower structure.
Glossy Finish
To get that super-shiny, wet look seen in the image, apply a layer of clear gloss glaze over your pastel color if your colored glaze is a matte or satin finish.
Now you have a set of durable, blooming ceramics ready to hold ash or jewelry with elegant style

The Complete Guide to Pottery Troubleshooting
Uncover the most common ceramic mistakes—from cracking clay to failed glazes—and learn how to fix them fast.
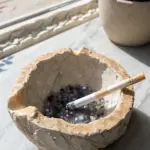
Speckled Terrazzo-Style Ashtray
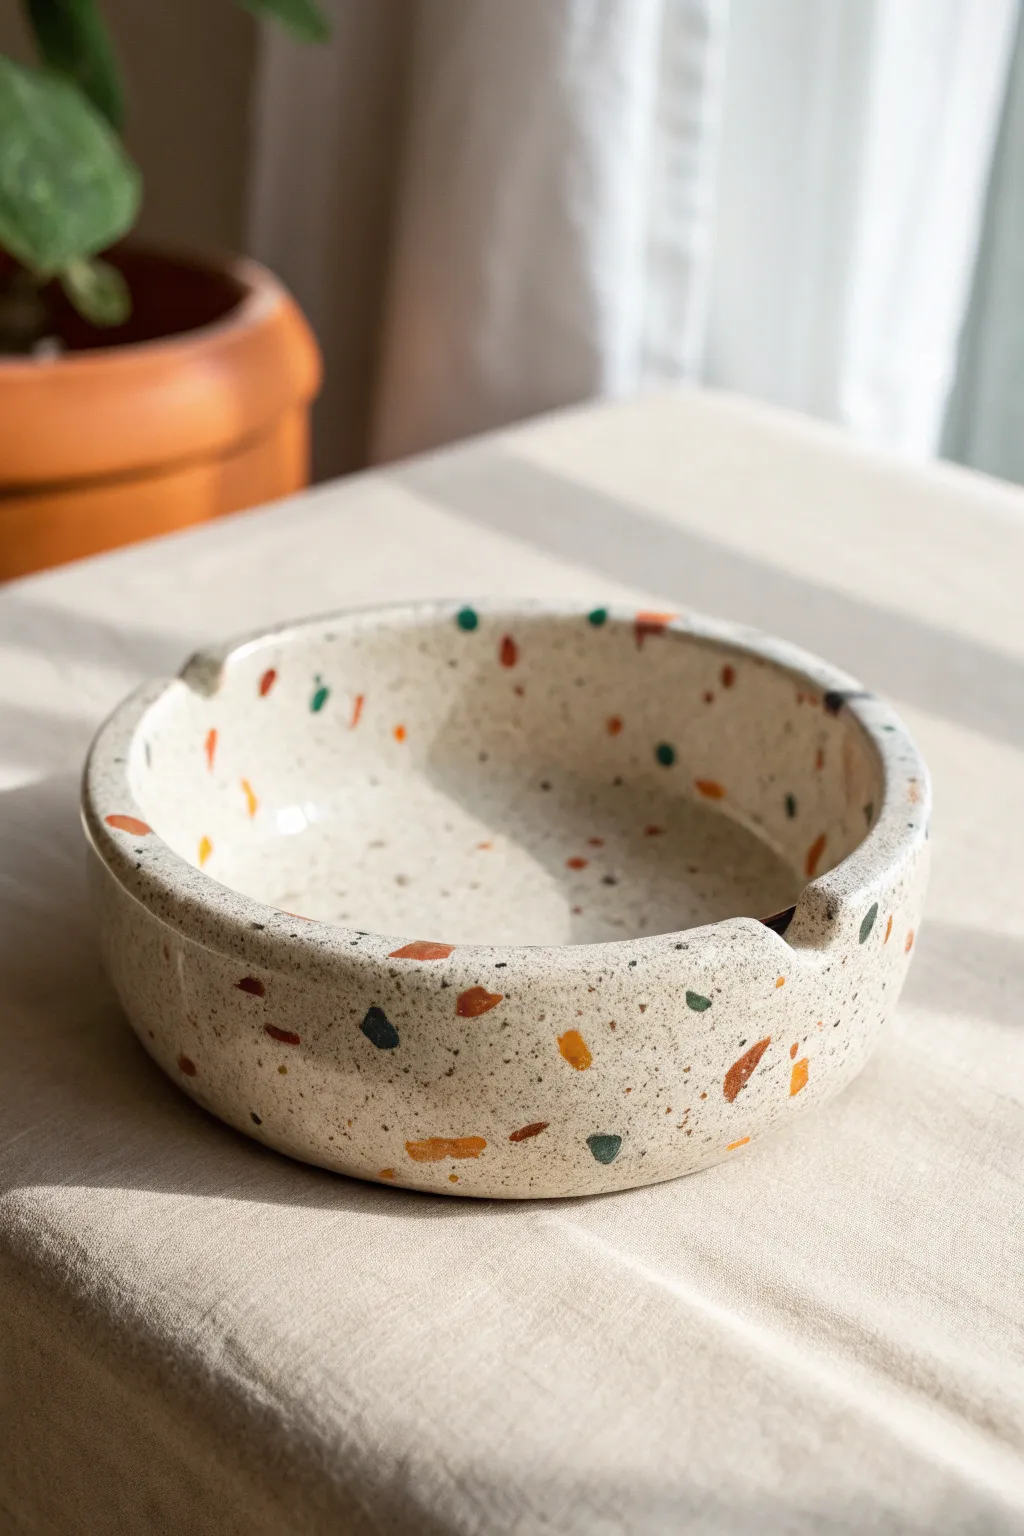
Achieve a sophisticated, modern look with this easy-to-make terrazzo-style ashtray, featuring a warm cream base dotted with playful flecks of color. This project uses a clever clay-mixing technique to create a smooth, patterned finish that looks like high-end ceramic without needing a kiln.
Step-by-Step
Materials
- Polymer clay (white or cream for base)
- Polymer clay scraps (terracotta, green, mustard, black)
- Acrylic rolling pin
- Circle cutter or circular template (approx. 4-5 inches)
- Craft knife or scalpel
- Clay smoothing tool or spoon
- Fine-grit sandpaper (400 to 1000 grit)
- Gloss or matte varnish (optional for sealing)
- Oven and baking tray
Step 1: Preparing the Terrazzo Chips
-
Roll Colored Scraps:
Begin by taking your small amounts of colored clay—terracotta, deep green, mustard, and black. Roll each color out into a very thin sheet, roughly 1mm or thinner. -
Bake the Sheets (Note: This is the secret):
Instead of cutting raw clay, we will bake these thin colored sheets first. Place them on a baking tray or ceramic tile and bake them for about 10–15 minutes according to package instructions. They should be hard but not burnt. -
create the chips:
Once the thin sheets have cooled completely, chop them up irregularly with a craft knife or simply crumble them with your fingers. Aim for a mix of sizes—some tiny specks and some larger, chunky shards to mimic the look of real stone aggregate.
Clean Rolling
Wipe your rolling pin with alcohol or a baby wipe before rolling the white clay. Dust and lint love to stick to light clay and will ruin the clean terrazzo effect.
Step 2: Forming the Base
-
Condition the Base Clay:
Take your large block of white or cream polymer clay. Knead and condition it thoroughly until it is soft, pliable, and free of cracks. -
Incorporate the Chips:
Flatten your conditioned base clay slightly and sprinkle your baked colored chips all over it. Fold the clay over and knead gently to distribute the chips throughout the block. -
Add More Chips to Surface:
I like to save a handful of chips for the very end. Before the final roll, press these reserved chips directly onto the surface to ensure the pattern is clearly visible on top. -
Roll the Slab:
Roll your terrazzo-mixed clay into a slab, approximately 1/4 inch thick. Use an acrylic roller to get an even surface, pressing the chips firmly into the clay body. -
Cut the Base:
Using a large circle cutter or a template, cut out the base of your ashtray. -
Create the Wall:
With the remaining rolled clay, cut a long, straight strip roughly 1 inch wide. The length should be slightly longer than the circumference of your base.
Make it a Set
Use the leftover terrazzo slab to make matching coasters. Roll the remnants flat, cut circles, and follow the same baking and sanding process for a cohesive table set.
Step 3: Assembly & Finishing
-
Attach the Wall:
Wrap the clay strip around the edge of your circular base. Where the ends meet, trim the excess and smooth the seam together using a sculpting tool or your finger. -
Blend the Seams:
Use a smoothing tool to blend the clay from the wall down into the base on the inside and outside. Ensure a tight seal so the piece is solid. -
Add Rests:
While the clay is still soft, use a round object like a pencil or a dowel to gently press indentations into opposite sides of the rim. These will act as rests for cigarettes. -
Smooth the Rim:
Gently run your finger dipped in a little water (or baby oil if the clay is sticky) along the top rim to round off any sharp edges created during cutting. -
Final Bake:
Place your assembled ashtray on a baking sheet. Bake according to your customized clay brand’s instructions, usually around 275°F (135°C) for 30–45 minutes to ensure strength. -
Sand for Smoothness:
Once fully cooled, wet-sand the piece under running water. Start with 400 grit and work up to 1000 grit. This reveals the sharp edges of the colored chips and makes the surface feel like real stone. -
Varnish (Optional):
For a glossy ceramic look, apply a thin coat of polymer clay glaze. If you prefer the matte stone texture shown in the photo, you can leave it sanded and unvarnished.
Place your finished piece on a coffee table or shelf to add an instant artistic touch to your decor
Marbled Swirl Polymer Clay Ashtray
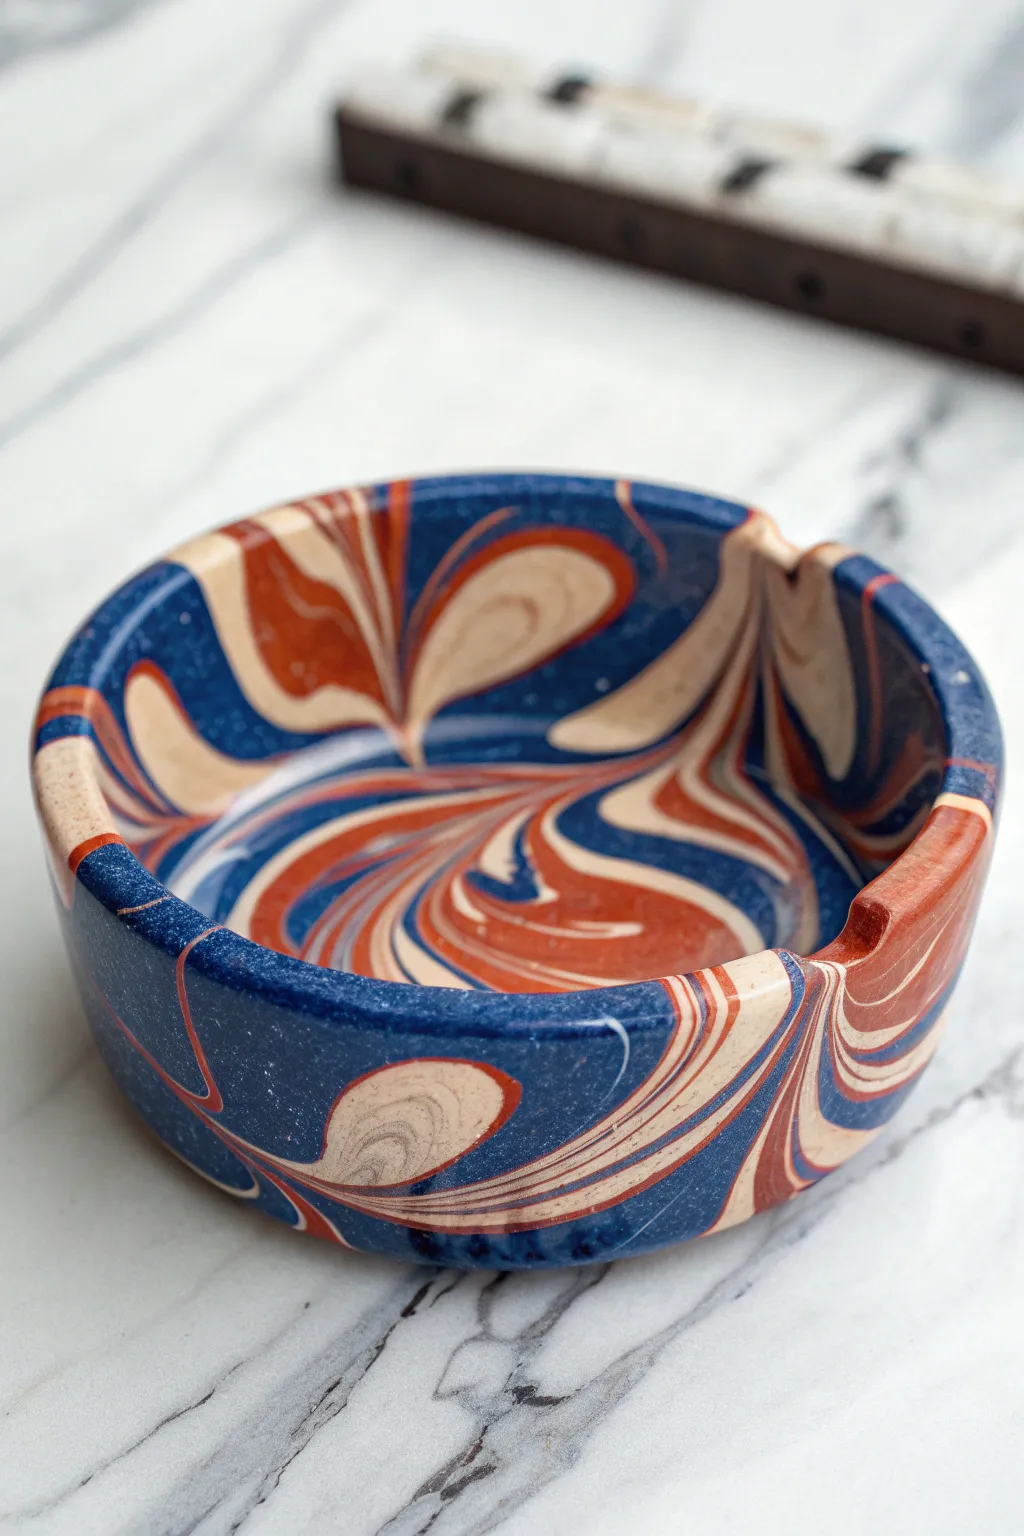
Bring a touch of artistic flair to your space with this stunning marbled ashtray project. Using simple slab-building techniques, you’ll create a functional piece featuring mesmerizing swirls of deep denim blue, rust, and creamy white that mimic natural agate.
How-To Guide
Materials
- Polymer clay (Denim Blue, Rust/Burnt Orange, Ecru/Off-White)
- Acrylic roller or rolling pin
- Circle cutter (approx. 4-5 inches diameter) or template with craft knife
- Long, flexible tissue blade or craft knife
- Small bowl or baking dish (oven-safe, for shaping)
- Cornstarch or baby powder (release agent)
- Fine-grit sandpaper (400-1000 grit)
- Gloss glaze or resin (optional)
Step 1: Prepping and Mixing Colors
-
Condition the clay:
Begin by thoroughly kneading each color of polymer clay separately until they are soft, pliable, and warm to the touch. This step is crucial to prevent cracks later on. -
Create clay logs:
Roll each color into several long, snake-like logs. You’ll want slightly more of the blue clay if you want it to be the dominant background color like in the photo. -
Combine the logs:
Gather your logs together into one thick bundle, twisting them gently around each other like a rope. Don’t over-mix just yet; keep the colors distinct. -
Fold and roll:
Fold the twisted rope in half and twist it again. Roll this out into a longer snake, fold it, and twist again. Repeat this 3-4 times to create the initial marbling pattern. -
Form a block:
Squish your marbled snake into a solid rectangular block or ball, pressing firmly to remove any trapped air bubbles between the layers.
Clean Cuts Matter
Chill your clay block in the fridge for 15 minutes before slicig with the tissue blade. Firm clay slices cleanly without dragging the colors.
Step 2: Creating the Slab and Shape
-
Slice thin layers:
Using your tissue blade, slice thin sheets off your marbled block. This reveals the intricate internal patterns, appearing like cross-sections of geode stone. -
Arrange the slab:
Lay these slices next to each other on your work surface, overlapping their edges slightly, to form a flat sheet large enough for your ashtray base. -
Smooth the seams:
Use your acrylic roller to flatten the assembled slices into a single, cohesive slab. Roll in multiple directions to ensure the seams disappear and the surface is uniform. -
Cut the base:
Use your large circle cutter or a paper template to cut out the main disc for your ashtray. Save the excess scraps for the rim. -
Form the rim strip:
Re-roll the remaining scraps into a long, flat ribbon about 1-1.5 inches tall. I like to ensure this strip is slightly thicker than the base for stability.
Step 3: Assembly and Finishing
-
Attach the wall:
Wrapt the rectangular strip around the edge of your circular base. Gently smudge the clay downward on the inside and outside seams to bond the wall permanently to the floor. -
Smooth the connection:
Use your finger or a smoothing tool to blend the seam where the two ends of the wall meet, ensuring the pattern flows continuously if possible. -
Create the rests:
Use the handle of a paintbrush or your pinky finger to gently press down two or three indentations into the top rim to hold cigarettes. -
Refine the shape:
Check the circular shape from above. If it looks a bit warped, gently press a bowl or round object against the inside to reshape it perfectly. -
Bake:
Place the piece on a baking sheet lined with parchment paper. Bake according to your specific brand’s package instructions (usually 275°F for 15-30 minutes). -
Cool down:
Allow the ashtray to cool completely inside the oven with the door cracked open. This gradual cooling makes the polymer clay stronger. -
Sand the edges:
Once cool, wet-sand the rim and any sharp edges with fine-grit sandpaper under running water to get that professionally smooth stone-like feel. -
Seal (Optional):
For a glass-like finish that protects against ash, apply a thin coat of water-based gloss glaze or UV resin to the interior and rim.
Add Metallic Veins
Before twisting your initial clay logs, wrap a very thin sheet of gold or copper leaf around the blue clay logs. This creates stunning metallic veins.
Place your finished piece on a coffee table and enjoy the sophisticated, faux-stone aesthetic you created by hand


What Really Happens Inside the Kiln
Learn how time and temperature work together inside the kiln to transform clay into durable ceramic.
Bold Checkerboard Y2K Ashtray
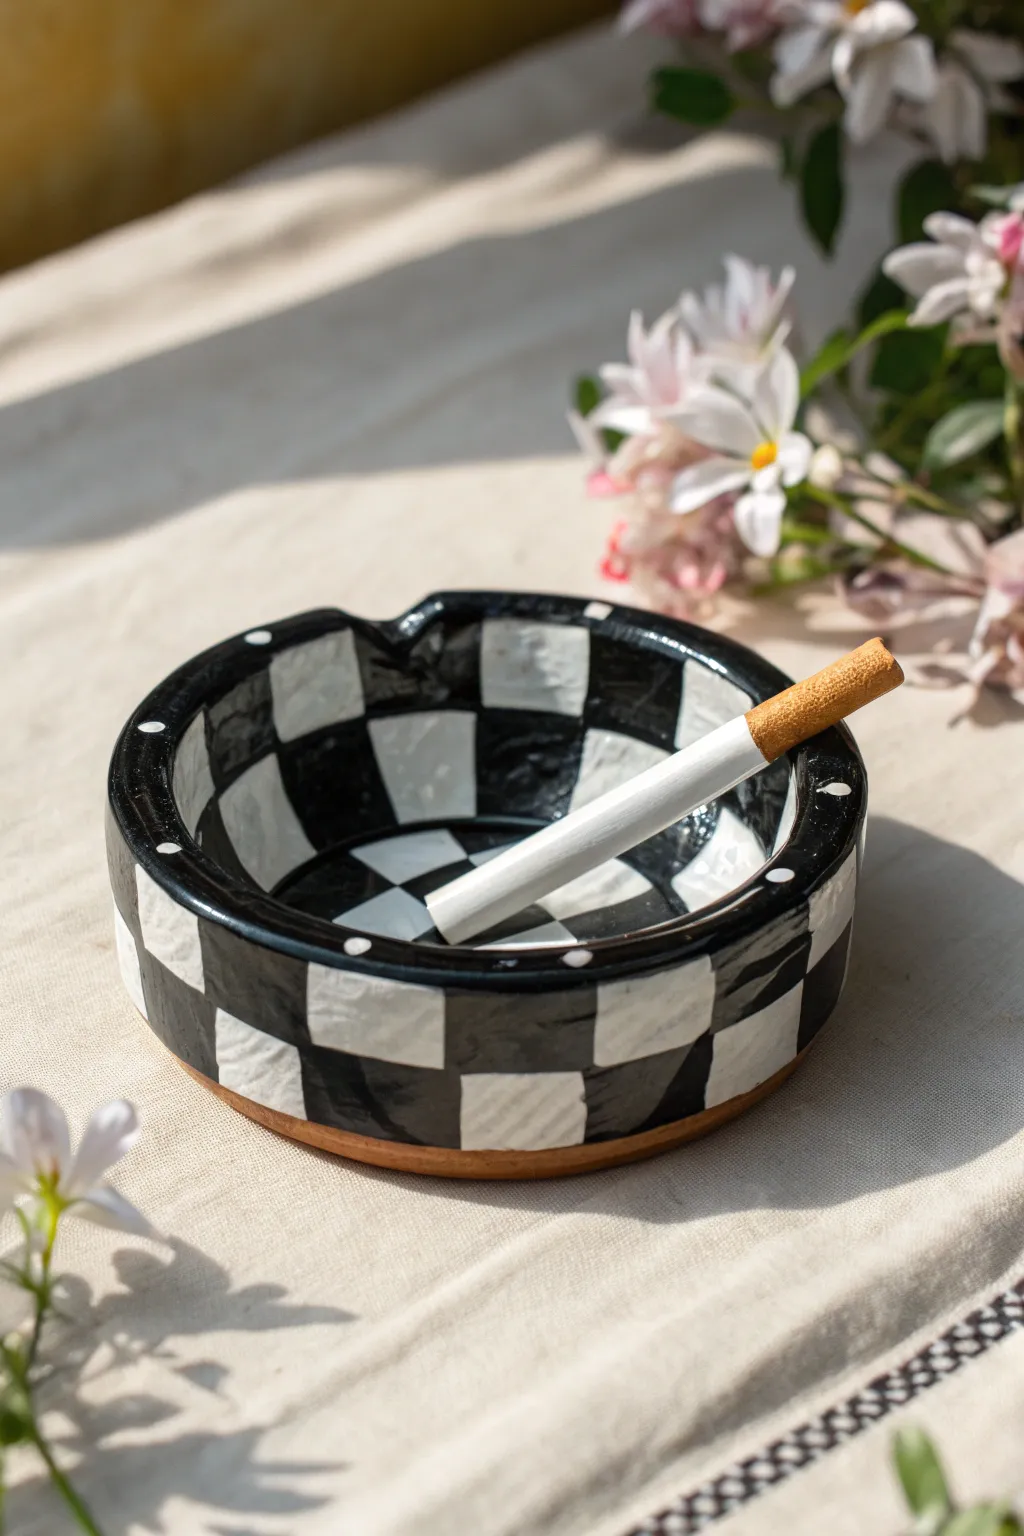
Channel the best of early 2000s aesthetics with this chunky, hand-sculpted ceramic piece featuring a playful black-and-white checkerboard pattern. The slightly imperfect, wobbly organic shape adds charm and proves it’s a one-of-a-kind creation rather than mass-produced. It’s a perfect beginner-friendly project that relies on bold painting rather than complex sculpting skills.
Step-by-Step
Materials
- Air-dry clay or low-fire earthenware clay
- Rolling pin
- Canvas mat or slab roller
- Circular template (about 5 inches diameter)
- Needle tool or sharp knife
- Sponge
- Black and white acrylic paints (for air-dry) or underglazes (for kiln clay)
- Flat shader brush (medium size)
- Detail round brush (small size)
- High-gloss varnish (for air-dry) or clear glaze (for kiln clay)
- Ruler or straight edge
- Pencil for sketching guidelines
Step 1: Sculpting the Form
-
Prepare your clay slab:
Start by wedging a ball of clay to remove air bubbles, then roll it out to a uniform thickness of about 1/4 inch. I find using guide sticks on either side helps keep the thickness consistent. -
Cut the base:
Place your circular template onto the slab and trace around it with a needle tool to cut out a perfect circle for the base of your ashtray. -
Create the walls:
Roll out a long snake of clay, slightly thicker than the base, and coil it around the perimeter of your circle. Alternatively, cut a long rectangular strip from your slab for a more uniform wall. -
Attach the walls:
Score the top edge of the base and the bottom of your wall piece, apply a little water or slip, and press them firmly together. -
Blend the seams:
Using your thumb or a modeling tool, smooth the clay where the wall meets the base on both the inside and outside until the seam is invisible and the transition is seamless. -
Form the indents:
While the clay is still soft, use a thick marker or your finger to gently press down two or three indents into the top rim to hold cigarettes. -
Smooth the surface:
Wipe the entire piece down with a slightly damp sponge to remove fingerprints and crate a smooth canvas for painting, then let the clay dry completely according to manufacturer instructions.
Clean Lines Hack
Use thin automotive detailing tape or washi tape to mask off your grid lines before painting. Press edges down firmly to stop paint bleeding underneath.
Step 2: Mapping the Grid
-
Pencil guidelines:
Once dry (and bisque fired if using kiln clay), use a pencil to lightly sketch vertical lines down the inside walls, across the floor, and up the other side to create the grid structure. -
Horizontal rings:
Sketch concentric rings inside the bowl and horizontal lines around the outside wall to complete your checkerboard grid boxes. -
Mark the colors:
To avoid confusion while painting, lightly mark a small ‘x’ in every square that needs to be painted black.
Step 3: Painting and Finishing
-
Base coat white:
Paint the ‘white’ squares first using your flat shader brush. Even if your clay is white, adding paint ensures the finish looks consistent and intentional. -
Fill in the black:
Using a steady hand, fill in the alternate squares with opaque black paint. Don’t worry if the lines are slightly wobbly; that organic look is key to this style. -
Rim details:
Paint the top rim black, carefully working around the cigarette rests. -
Add polka dots:
For a cute finishing touch, use the back end of a paintbrush dipped in white paint to stamp small dots onto the black rim, or place them centered on the rim. -
Let paint cure:
Allow the paint or underglaze to dry completely before touching the surface to avoid smudging. -
Glaze or varnish:
Seal the deal. For kiln clay, brush on clear glaze and fire again. For air-dry clay, apply two coats of high-gloss varnish to get that shiny ceramic look. -
Clean the bottom:
If you want a professional touch, wipe any excess varnish or glaze off the very bottom foot of the ashtray so it sits flat.
Level Up: Color Pop
Swap the classic B&W for unexpected combos like lavender and neon green, or paint a hidden symbol like a smiley face inside the very center square.
Place your finished piece on a coffee table or vanity to instantly add a touch of playful nostalgia to your space
Simple Evil Eye Motif Ashtray
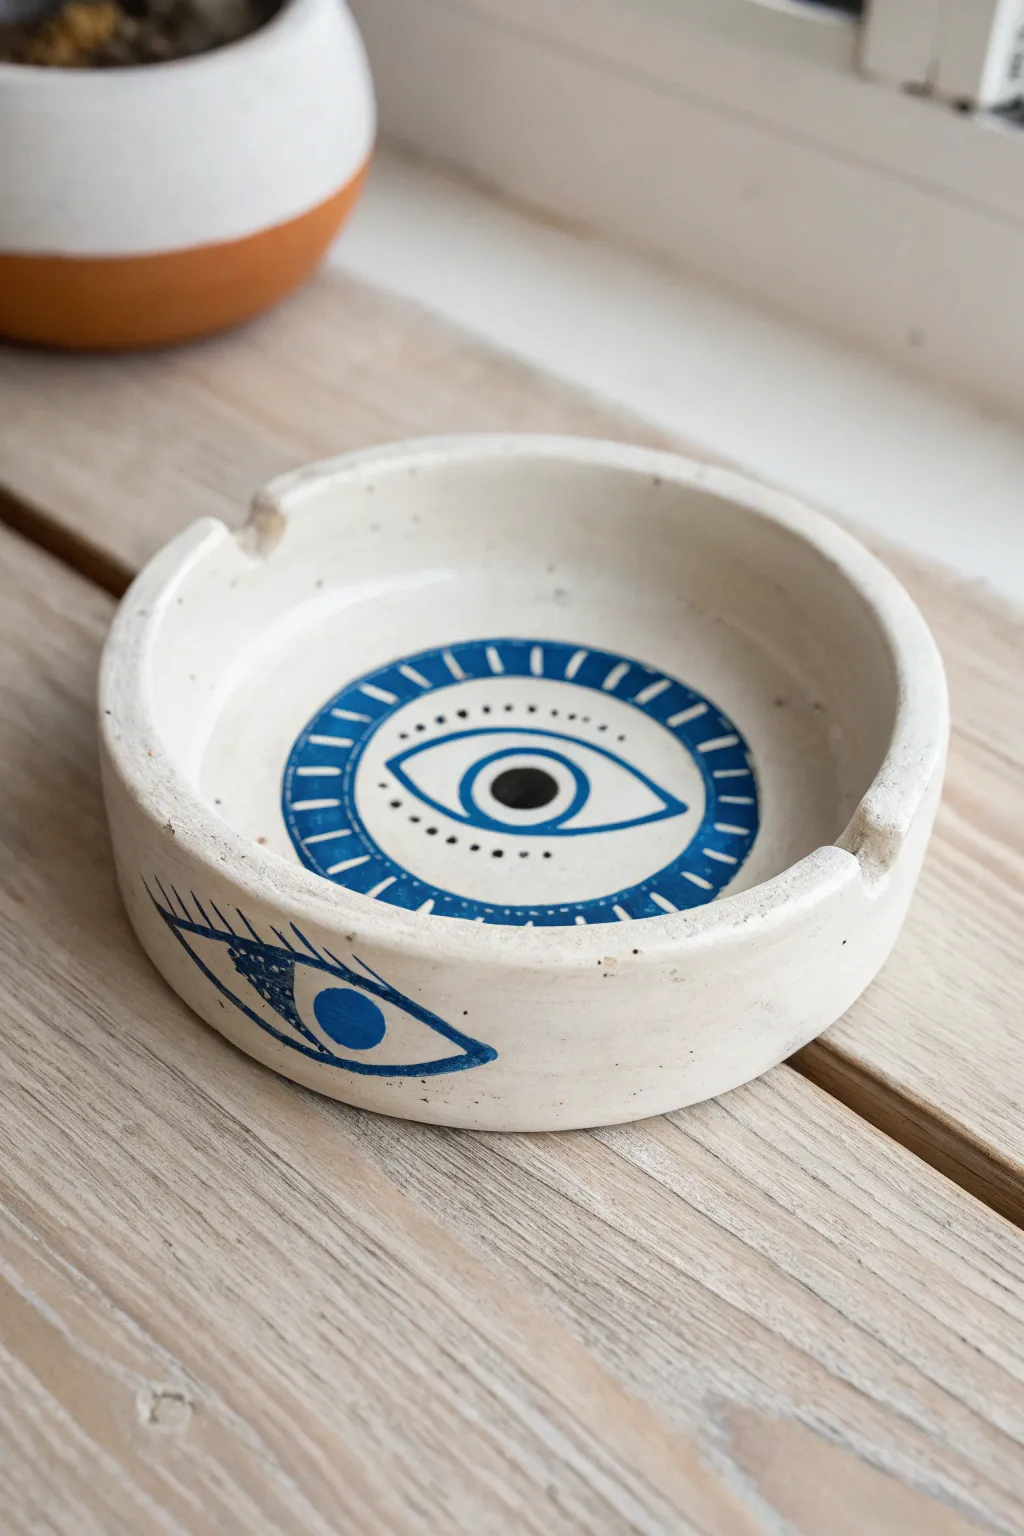
Ward off negativity while adding a touch of rustic charm to your home decor with this handcrafted clay ashtray. Featuring the classic protective talisman in striking cobalt hues against a speckled cream background, this piece is both functional and spiritually symbolic.
Step-by-Step Tutorial
Materials
- Air-dry clay or polymer clay (white or cream)
- Circular cookie cutter or template (approx. 4-5 inches)
- Rolling pin
- A small bowl for water
- Modeling tools (or a butter knife)
- Acrylic paints: Cobalt Blue, Black, White
- Fine detail paintbrush (0 or 00 size)
- Flat shader paintbrush
- High-gloss varnish or sealant
- Sandpaper 400-grit
Step 1: Shaping the Base
-
Prepare the Clay:
Begin by conditioning your clay. Warm a fist-sized ball in your hands and knead it until it’s pliable and smooth, ensuring there are no air bubbles trapped inside. -
Roll the Slab:
Roll the clay out onto a flat, non-stick surface until it is about 1/4 inch thick. Aim for an even thickness throughout to prevent cracking during the drying phase. -
Cut the Circle:
Press your circular cutter or trace around a template to cut out the main base of the ashtray. Remove the excess clay and set it aside for the rim. -
Create the Rim Coil:
Take the remaining clay and roll it into a long, even snake or coil. It should be long enough to wrap around the circumference of your base and about half an inch thick. -
Attach the Rim:
Score the outer edge of your base and one side of your coil with a modeling tool or knife. Apply a dab of water (slip) to the scored areas and press the coil firmly onto the base. -
Blend the Seams:
Using your thumb or a modeling tool, blend the clay coil down into the base on both the inside and outside. I find smoothing the clay in small downward strokes works best to make the seam invisible. -
Form the Cigarette Rests:
While the clay is still soft, use your pinky finger or the handle of a round paintbrush to gently press down two or three indentations into the rim for the cigarettes to rest. -
Smoothen and Dry:
Dip your finger in water and run it over the entire piece to smooth out fingerprints and rough edges. Let the piece dry completely according to your clay’s instructions—usually 24 to 48 hours.
Fixing Cracks
If you spot hairline cracks after the clay dries, mix a small amount of fresh clay with water to make a paste. Fill the crack, smooth it over, and let dry again before painting.
Step 2: Painting the Motif
-
Sand the Surface:
Once fully dry, lightly sand any rough spots or uneven edges with fine-grit sandpaper. Wipe away the dust with a barely damp cloth. -
Base Coat:
Paint the entire ashtray with a creamy white or off-white acrylic paint. You may need two thin coats for full opacity, allowing it to dry between layers. -
Speckled Effect:
To mimic the ceramic look in the photo, dilute a tiny bit of black or brown paint with water. Load a toothbrush and flick the bristles to create a very subtle spray of speckles over the white base. -
Outline the Center Eye:
Using a pencil, very lightly sketch a circle in the center of the tray. Inside that circle, draw the almond eye shape. -
Paint the Blue Iris:
Use your Cobalt Blue paint and a flat brush to paint the thick outer ring of the circle. Create the radial lines (lashes) extending inward using a fine detail brush. -
Add the Pupil:
Paint a black circle in the very center of the eye shape. Once dry, add a tiny dot of white in the black pupil to create a ‘highlight’ reflection. -
Detail the Inner Eye:
Carefully outline the almond eye shape in blue. Add small black dots between the almond outline and the pupil for extra detail. -
Paint the Side Motif:
On the exterior wall of the ashtray, paint the side-profile eye. Draw a long blue almond shape, a filled blue circle for the iris, and long, sweeping lashes extending from the corner. -
Seal the piece:
After the paint has cured for at least an hour, apply two coats of high-gloss varnish. This gives it a ceramic-like shine and protects the paint from ash and heat.
Make it Shine
If using polymer clay, consider using UV resin for the final coat instead of varnish. It creates a glass-like finish that is incredibly durable and heat resistant.
Place your finished piece on a coffee table or patio to enjoy its protective vibes and artisan aesthetic

TRACK YOUR CERAMIC JOURNEY
Capture glaze tests, firing details, and creative progress—all in one simple printable. Make your projects easier to repeat and improve.
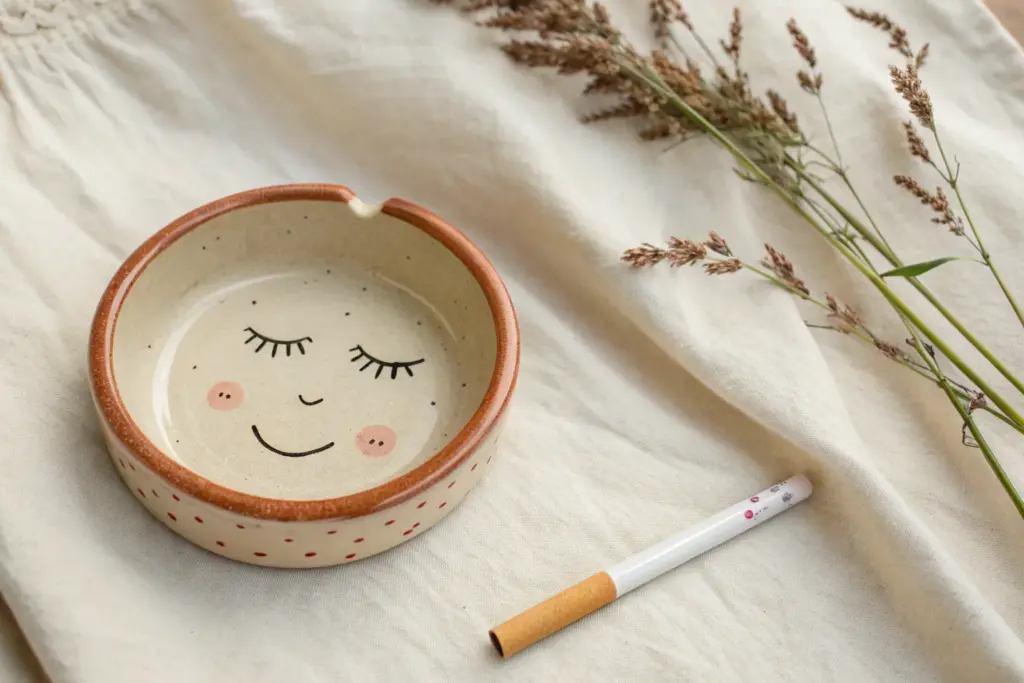
Smiley Face Pop-Art Ashtray
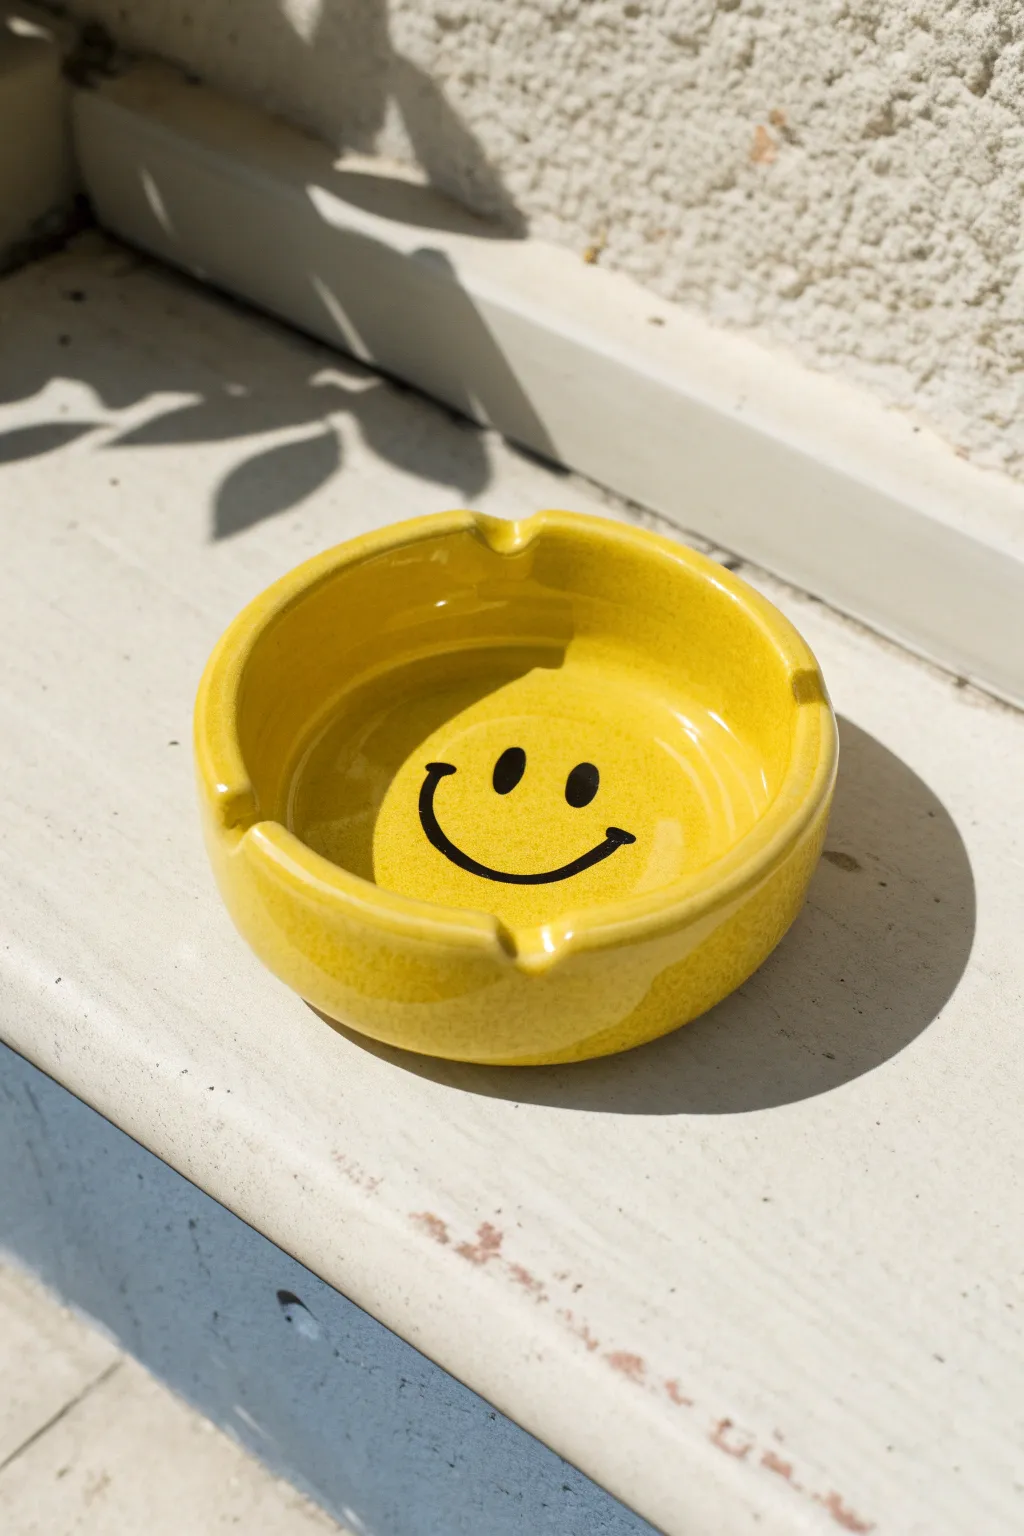
Bring a burst of positivity to your space with this ultra-glossy, vibrant yellow ashtray featuring the iconic smiley face. The clean pop-art lines and cheerful color make this a fun, beginner-friendly project that feels perfectly vintage.
Step-by-Step
Materials
- Air-dry clay or oven-bake polymer clay (white)
- Acrylic rolling pin
- Circle cutter or bowl (approx. 4-5 inches wide)
- Fettling knife or craft blade
- Sponge and water
- Yellow high-gloss acrylic paint (sunshine yellow)
- Black acrylic paint
- Medium flat paintbrush
- Small round detail brush (size 0 or 1)
- High-gloss varnish or sealant (waterproof)
- Round object for molding (optional, to help shape walls)
Step 1: Shaping the Base
-
Prepare the Clay:
Begin by conditioning your clay. Knead a large handful until it is soft, pliable, and free of any air bubbles. If the clay feels too dry, dip your fingers in water to rehydrate it slightly. -
Roll the Slab:
Using your acrylic roller, roll the clay out into a smooth interaction slab. Aim for a consistent thickness of about 1/4 inch to ensure the ashtray feels substantial but not clunky. -
Cut the Base:
cleanly press your circle cutter or a round bowl into the slab to cut out the base circle. Remove the excess clay and set it aside for the walls. -
Create the Wall Strip:
Gather your scrap clay and roll out a long, rectangular strip. It needs to be the same thickness as your base and long enough to wrap around the circumference of your circle. -
Attach the Walls:
Score the outer edge of your base circle and one long edge of your wall strip with a needle tool or fork. Apply a little water or slip (liquid clay) to the scored areas. -
Secure the Seams:
Wrap the strip around the base, pressing the scored edges together firmly. Smooth the vertical seam where the wall ends meet, blending the clay until the join is invisible.
Uneven Rim?
If the top edge looks wavy after attaching the wall, wait until the clay is ‘leather hard’ (stiff but cuttable) and slice across the top with a wire tool or craft knife to level it.
Step 2: Refining and Detail
-
Blend the Connection:
Use your thumb or a modeling tool to smudge the clay from the wall down onto the base on the inside, and from the base up onto the wall on the outside. This reinforces the bond. -
Smooth the Surfaces:
Dip your sponge in water and wring it out almost completely. Gently wipe the entire piece to remove fingerprints and smooth out any bumps. I find spending extra time here makes the glazing look much more professional later. -
Create the Rests:
While the clay is still soft, use your index finger or complete a thick marker to gently press down on the rim in three equidistant spots. This creates the classic indentations. -
Refine the Indentations:
Smooth the edges of your new indentations with a wet finger so they are rounded and comfortable to the touch, not sharp. -
Dry or Bake:
Follow the instructions for your specific clay. If using air-dry clay, let it sit for 24-48 hours until bone dry. If using polymer, bake according to the package directions and let cool completely.
Step 3: Painting the Smiley
-
Base Coat:
Paint the entire ashtray, inside and out, with your sunshine yellow acrylic paint. You will likely need 2 or 3 coats for full opacity, letting it dry between layers. -
Inspect Coverage:
Check for any white spots or streaks. The yellow needs to be solid and opaque to achieve that manufactured pop-art look. -
Outline the Face:
Lightly sketch the smiley face onto the bottom interior surface with a pencil. Draw two vertical oval eyes and a wide U-shape smile with small tick marks at the ends for cheeks. -
Paint the Details:
Using your small detail brush and black paint, carefully fill in the pencil sketch. Keep your hand steady and saturate the black so no yellow shows through. -
Clean Up Edges:
If your black lines wobble, wait for them to dry completely, then use a tiny bit of yellow paint to touch up the edges and sharpen the lines. -
Final Varnish:
Once everything is fully dry, apply a high-gloss waterproof varnish. This is crucial for giving it that ceramic shine and protecting the paint from ash.
Pro Tip: Gloss Factor
To get the extreme shine seen in the photo, apply 2-3 thin coats of polyurethane gloss varnish rather than one thick gloppy coat. It prevents drips and cloudiness.
Let your finished piece cure for a few days before using it to ensure the varnish is rock hard
Tiny Mushroom Accent Ashtray
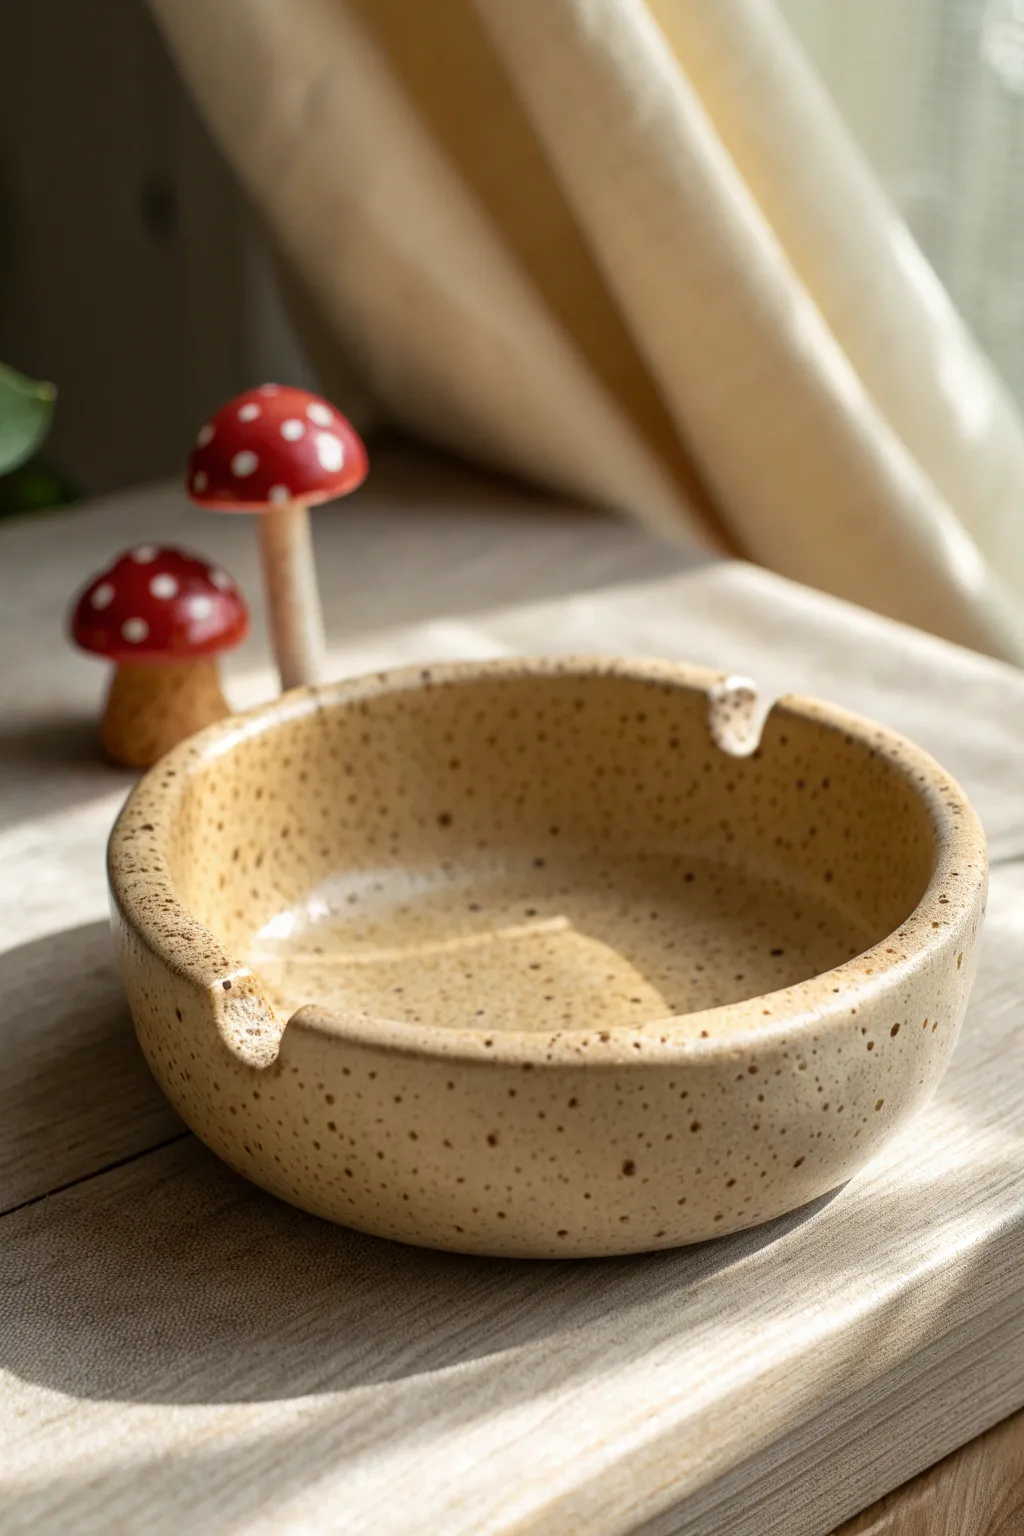
Embrace a cozy cottagecore aesthetic with this simple, speckled clay ashtray featuring a warm, oatmeal finish. This project focuses on minimal design with distinct notches, perfect for pairing with adorable clay mushroom accessories.
How-To Guide
Materials
- Speckled stoneware clay (e.g., buff with iron spots)
- Rolling pin
- Canvas or wooden board
- Circle template or bowl (approx 4-5 inches)
- Needle tool or fettling knife
- Small sponge
- Rib tool (kidney)
- Circular carving loop tool (small)
- Clear or transparent oatmeal glaze
- Kiln (or access to a firing service)
- Water cup
Step 1: Forming the Base
-
Wedge the clay:
Start by wedging a baseball-sized amount of speckled clay to remove air bubbles and ensure an even consistency. -
Roll the slab:
On your canvas or board, roll the clay out into an even slab, aiming for a consistent thickness of about 1/4 inch. -
Cut the circle:
Place your circle template or an overturned bowl onto the slab and trace around it with a needle tool to cut your base shape. -
Create the walls:
Roll out a separate coil of clay about the thickness of your finger. It should be long enough to wrap around the circumference of your circle base. -
Score and slip:
Score the outer edge of your base circle and one side of your coil. Apply a little slip (clay mixed with water) to the scored areas. -
Attach the wall:
Place the coil onto the base edge, pressing firmly to adhere. Cut off any excess coil overlap and blend the ends together seamlessly.
Clean Lines
When joining the coil to the base, blend upwards on the outside and downwards on the inside. This ‘cross-hatch’ motion creates the strongest possible bond for the walls.
Step 2: Refining the Shape
-
Blend the seams:
Using your thumb or a wooden tool, smear the clay from the coil down onto the base on both the inside and outside to lock them together. I usually do the inside first for stability. -
Smooth the surface:
Use a rib tool to smooth the walls, compressing the clay and removing your finger marks. Verify the walls stand up straight at a consistent height. -
Damp sponge finish:
Take a slightly damp sponge and run it over the rim to round it off softly, ensuring there are no sharp edges. -
Carve the notches:
Using a small circular loop tool, gently press into the rim at two opposing points to create the cigarette rests. Wiggle the tool slightly to widen the groove if needed. -
Detail steps:
Smooth the edges of your fresh notches with a damp finger so they integrate naturally into the rim. -
Dry to leather hard:
Let the piece dry slowly under plastic until it is leather hard.
Forest Friends
Use your leftover clay scraps to sculpt tiny mushrooms. Fire and paint them with acrylics later to create the cute background props seen in the photo.
Step 3: Finishing and Firing
-
Sponge cleaning:
Once bone dry, take a barely damp sponge to wipe away any final dust or burrs before the first firing. -
Bisque fire:
Fire the piece to cone 04 (or your clay’s specific bisque temperature). -
Apply glaze:
Dip or brush your transparent oatmeal or clear glaze onto the bisqueware. This allows the natural speckles of the clay to shine through. -
Clean the foot:
Wipe the bottom of the ashtray completely clean of glaze to prevent it from sticking to the kiln shelf. -
Glaze fire:
Fire the piece again to the maturation temperature of your clay and glaze (often cone 5 or 6 for stoneware).
Place your finished piece near a window to let the light catch the subtle glaze texture
Coiled Snake Rim Ashtray
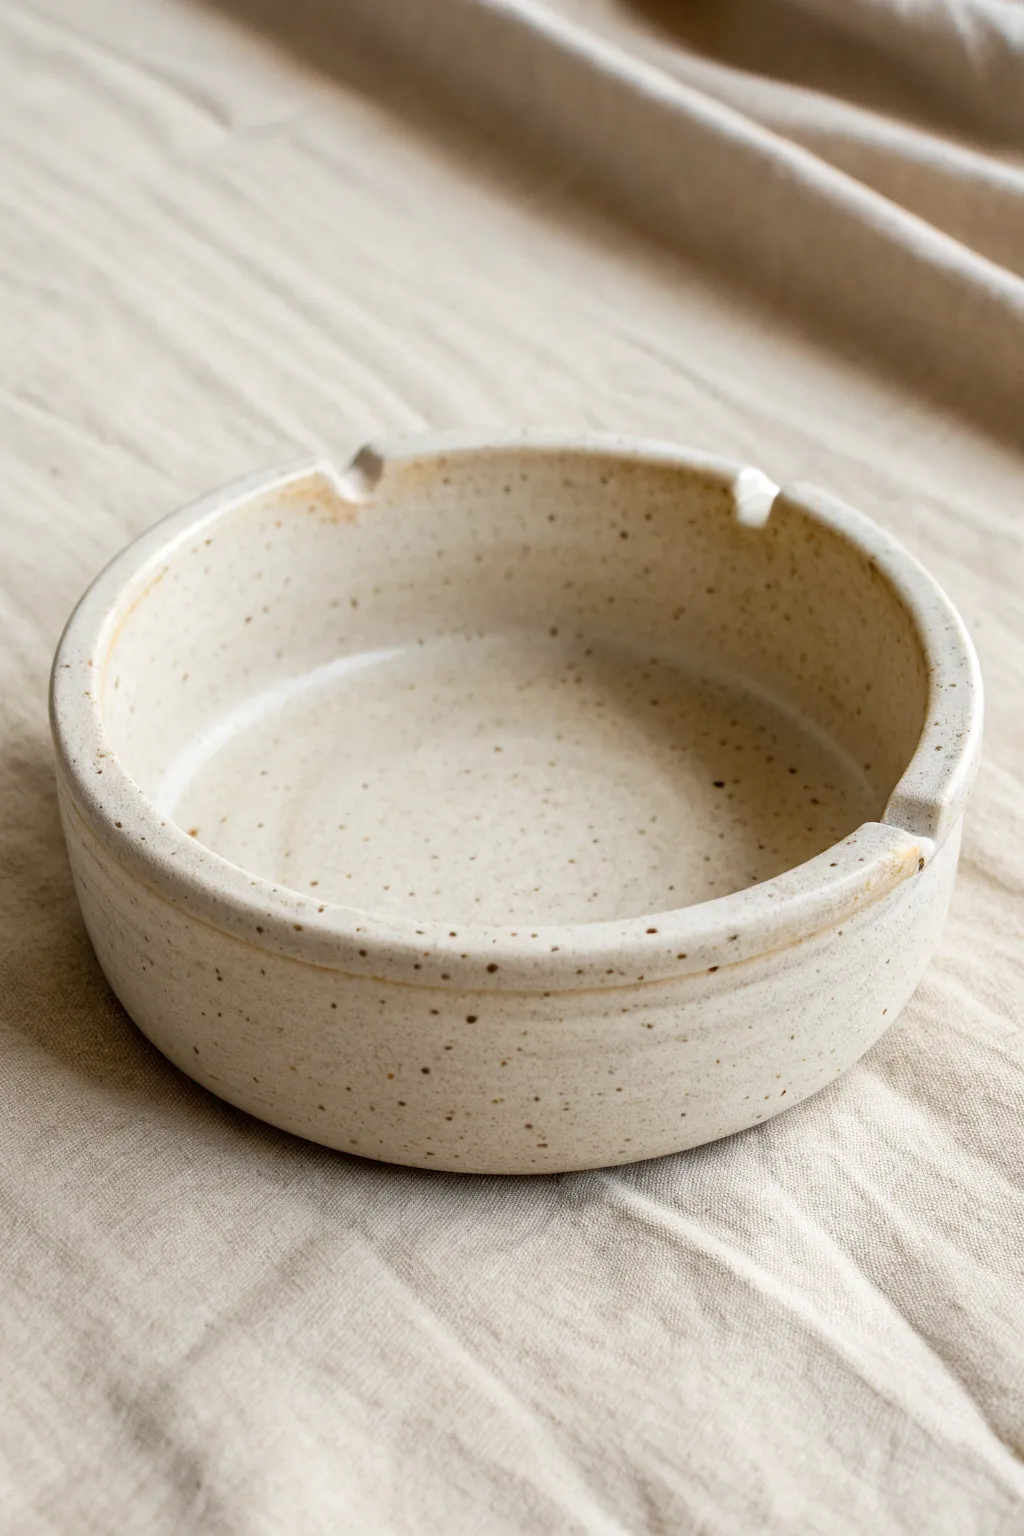
Create a sleek and functional piece of home decor with this deep-dish ceramic ashtray featuring a classic speckled finish. Its sturdy walls and precisely carved notches make it as practical as it is stylish, perfect for adding a touch of handmade charm to any side table.
Step-by-Step Tutorial
Materials
- Speckled Stoneware Clay (2-3 lbs)
- Pottery Wheel (or rolling pin for hand-building)
- Sponge
- Wire Clay Cutter
- Needle Tool
- Loop Trimming Tool
- Rib tool (wooden or silicone)
- Clear or Transparent Gloss Glaze
- Kiln
Step 1: Forming the Base
-
Prepare the Clay:
Begin by thoroughly wedging your speckled stoneware clay. This removes air bubbles and aligns the clay particles, making it much easier to work with on the wheel. -
Center on the Wheel:
Slam the clay ball onto the center of the wheel head. Use your palms and body weight to cone the clay up and down until it runs perfectly smooth and centered. -
Open the Form:
Press your thumbs into the center of the spinning clay, leaving about a half-inch of thickness for the floor. Gently pull the clay outward to establish the width of your astray—about 5 to 6 inches is standard. -
Pull the Walls:
Using water and a steady hand, pull the walls upward. Unlike a bowl, you want these walls to remain relatively vertical and straight, creating a cylinder shape. -
Refine the Rim:
Compress the rim with a piece of chamois or your sponge to ensure it is smooth and strong. A slightly thickened rim adds visual weight and durability. -
Clean the Interior:
Use a sponge to remove any standing water from the bottom of the ashtray to prevent cracking during drying. Run a rib tool along the inside curve to define the transition from floor to wall.
Smooth Operator
Use a soft rubber rib on the outside functionality while throwing. This not only shapes the wall but compresses the surface, bringing the speckles to the forefront.
Step 2: Trimming and Notching
-
Wire Off:
Run your wire cutter under the base of the pot while the wheel is spinning very slowly to release it. Slide it onto a ware board. -
Leather Hard Stage:
Allow the piece to dry until it is leather hard. It should be firm enough to handle without deforming but still cool to the touch and able to be carved. -
Centering for Trim:
Place the piece upside down on the wheel head. Center it carefully and secure it with small coils of soft clay. -
Trim the Foot:
Use a sharp loop tool to trim away excess clay from the bottom, creating a neat foot ring. This elevates the form and gives it a professional finish. -
Mark the Notches:
Flip the ashtray right-side up. Visualize where you want your cigarette rests—usually three or four points evenly spaced around the rim. -
Carve the Notches:
Using a loop tool or the side of a needle tool, gently carve semi-circular indentations into the rim. I like to smooth these cuts immediately with a damp fingertip to remove sharp edges.
Step 3: Glazing and Finishing
-
Bisque Fire:
Place your bone-dry ashtray into the kiln for the bisque firing (usually Cone 04). This hardens the clay and prepares it for glaze. -
Wipe Down:
Once cool, wipe the bisque ware with a clean, damp sponge to remove any kiln dust ensuring the glaze adheres properly. -
Apply Glaze:
Dip the piece into a bucket of clear or transparent gloss glaze. Alternatively, brush on three even coats, allowing drying time between layers. The transparency is key to letting the natural speckles of the clay shine through. -
Clean the Foot:
Thoroughly wipe all glaze off the bottom foot ring. Any glaze left here will fuse the piece to the kiln shelf during firing. -
Glaze Fire:
Fire the piece again to the maturation temperature of your specific clay body (typically Cone 5 or 6 for stoneware).
Cigar Adaptation
If you smoke cigars, widen the notches significantly. Use a larger loop tool to create a broader, shallower cradle that can accommodate a larger gauge comfortably.
Once cooled, your durable new ashtray is ready to handle use with style
Easy Lidded Snuffer Ashtray
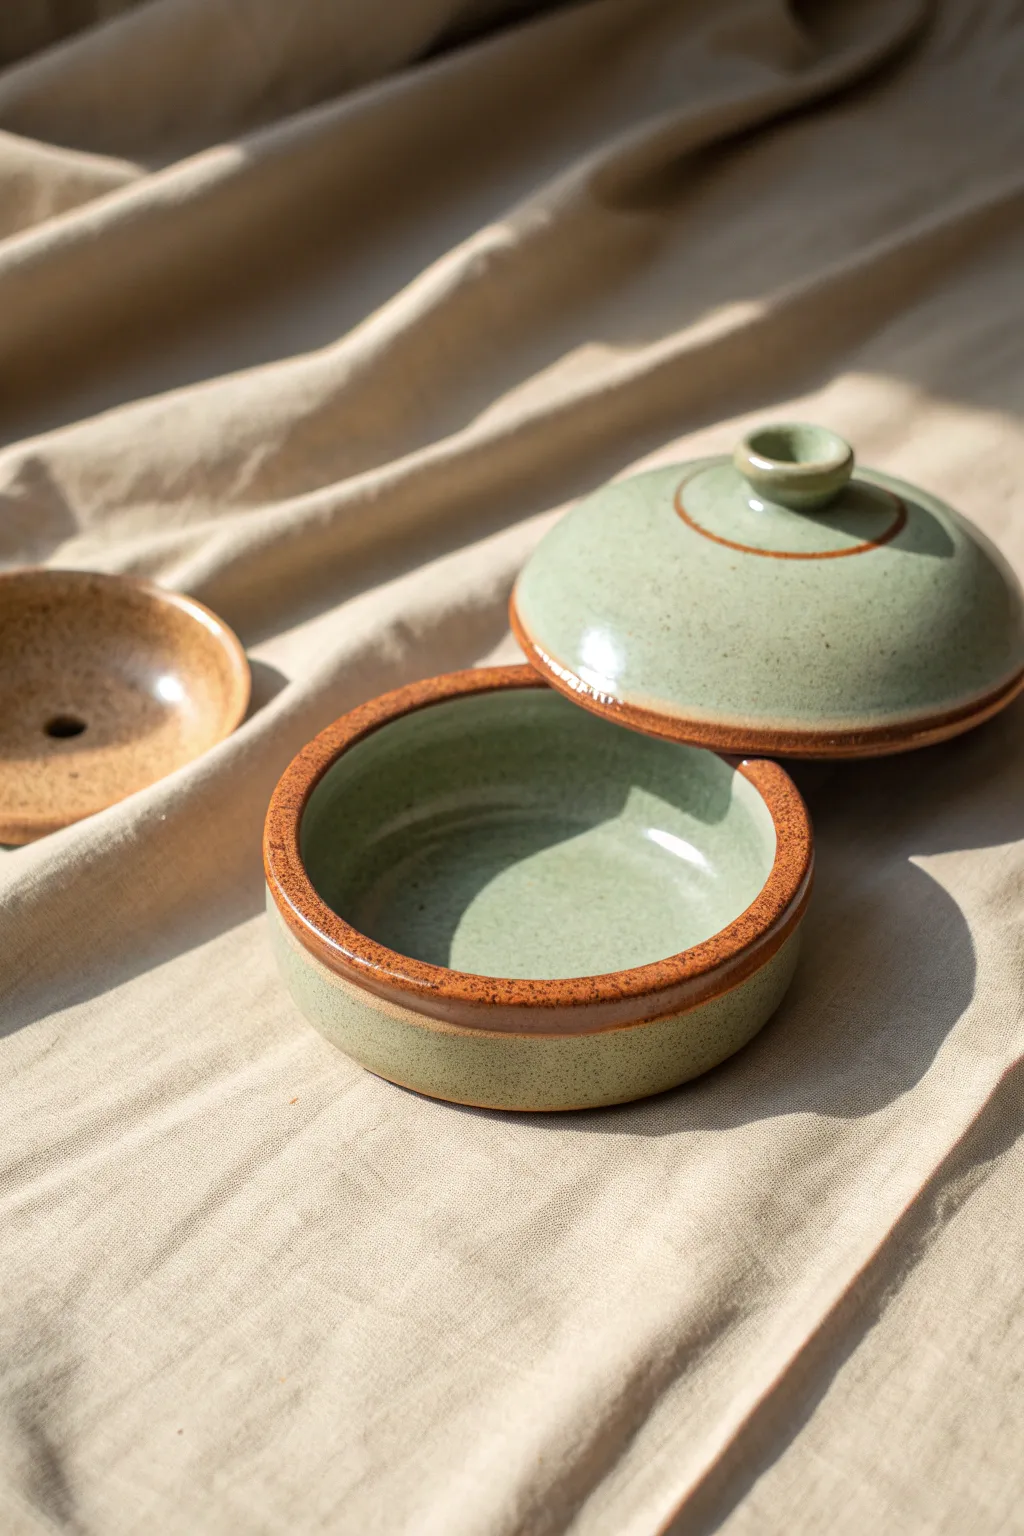
This elegant two-piece ashtray features a classic celadon-style glaze with exposed raw clay accents, giving it a sophisticated, earthy feel. The set creates a functional snuffer system that hides ash away while blending seamlessly with modern home decor.
Detailed Instructions
Materials
- Stoneware clay (speckled or buff)
- Pottery wheel
- Throwing tools (sponge, wire cutter, ribs)
- Trimming tools
- Pin tool
- Calipers
- Sage green celadon glaze
- Clear glaze (optional for interior)
- Wax resist
- Kiln
Step 1: Throwing the Base
-
Center the clay:
Start with about 1.5 lbs of clay on the wheel. Cone it up and down to ensure the clay particles are aligned and the mound is perfectly centered before opening. -
Open the floor:
Press your thumbs into the center to create the opening, leaving the floor about 1/4 inch thick. Compress the floor well with a flat rib to prevent S-cracks during firing. -
Pull the walls:
Pull the walls up into a low, wide cylinder shape. Aim for a height of about 2-3 inches and a width of 4-5 inches. Keep the walls vertical with a slight interior curve. -
Form the gallery:
This is crucial for the lid fit. At the rim, split the clay slightly or push down with a tool to create a recessed shelf (gallery) inside the rim where the lid will sit. Measure this diameter with calipers. -
Refine the rim:
Use a chamois or a piece of plastic to smooth and round the outer rim. It needs to be sturdy enough to handle the lid being taken on and off.
Step 2: Creating the Lid
-
Measure and prepare:
Using a new ball of clay (about 1 lb), center it on the wheel. Check your caliper measurement from the base—you need to match this width exactly. -
Throw a low dome:
Throw a low bowl form upside down (as a dome). Alternatively, throw it right-side up as a shallow bowl, but ensure the rim is flat and matches the caliper measurement. -
Add the knob:
If throwing off the hump or throwing the lid right-side up, you can form the knob immediately. If trimming later, leave extra clay in the center of the dome to carve a knob during the trimming phase. -
Refining the fit:
Before cutting it off the hump or bat, double-check the measurement against the base’s gallery. It should fit snugly but have just a hair of wiggle room to account for glaze thickness later. -
Throwing the insert:
Use a small amount of clay to throw a tiny saucer-like insert (seen on the left in the photo). This shallow dish should fit inside the main bowl and have a center hole for snuffing out smoke.
Clean Lines
Use a damp sponge on a spinning wheel to wipe glaze off the rims. This creates the crisp, perfect ‘raw clay’ circles seen in the photo.
Step 3: Trimming and Glazing
-
Trimming the base:
Once leather hard, trim the bottom of the main bowl to create a clean foot ring. This elevates the piece and gives it a professional finish. -
Trimming the lid:
Place the lid upside down on the wheel (secured with a chuck or clay lugs). Trim away excess weight and refine the knob shape into a simple, rounded button. -
Drying and Bisque Firing:
Allow all three pieces (base, lid, and insert) to dry slowly to prevent warping. Once bone dry, fire them in a bisque kiln according to your clay body’s specifications. -
Wax resizing:
Apply wax resist to the foot ring of the base and the rim where the lid touches the gallery. Also apply wax to the raw clay stripe detail on the lid if you want to recreate the look in the photo. -
Glazing process:
Dip the pieces into a sage green celadon glaze. If you applied wax lines, wipe away any glaze beads that stuck to the wax immediately. -
Exposed clay accents:
To achieve the specific look of the image, wipe the glaze off the very top rim of the bowl and the outer edge of the lid with a damp sponge, revealing the speckled clay body beneath. -
Final Fire:
Load the kiln carefully, ensuring the lid is not placed on the pot during firing unless you have thoroughly waxed the contact points (firing separately is safer). Fire to maturity.
Add Texture
Before the clay dries, gently sponge the bare clay areas with iron oxide wash. This enhances the toasted, speckled look of the rim after firing.
Now you have a stylish, discreet functional piece ready for use or display