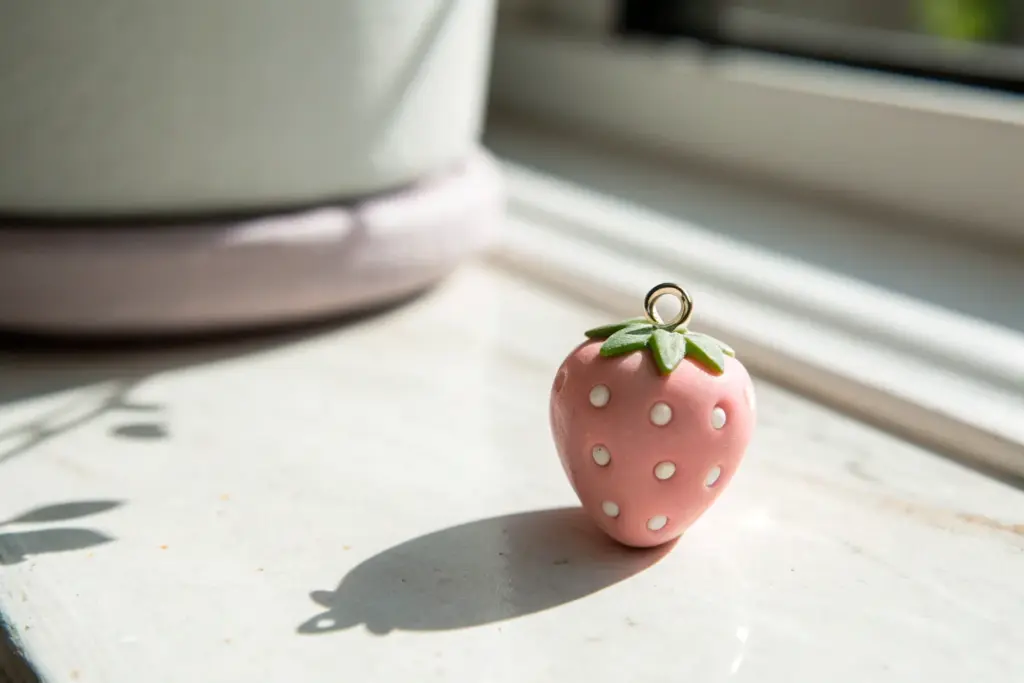
Whenever I’m in the studio, I end up making at least one tiny clay charm—it’s the fastest way to turn a scrap of clay into something ridiculously adorable. These cute clay charms ideas are all small, beginner-friendly, and perfect for turning into jewelry or keychains.
Smiling Mini Donut Charms
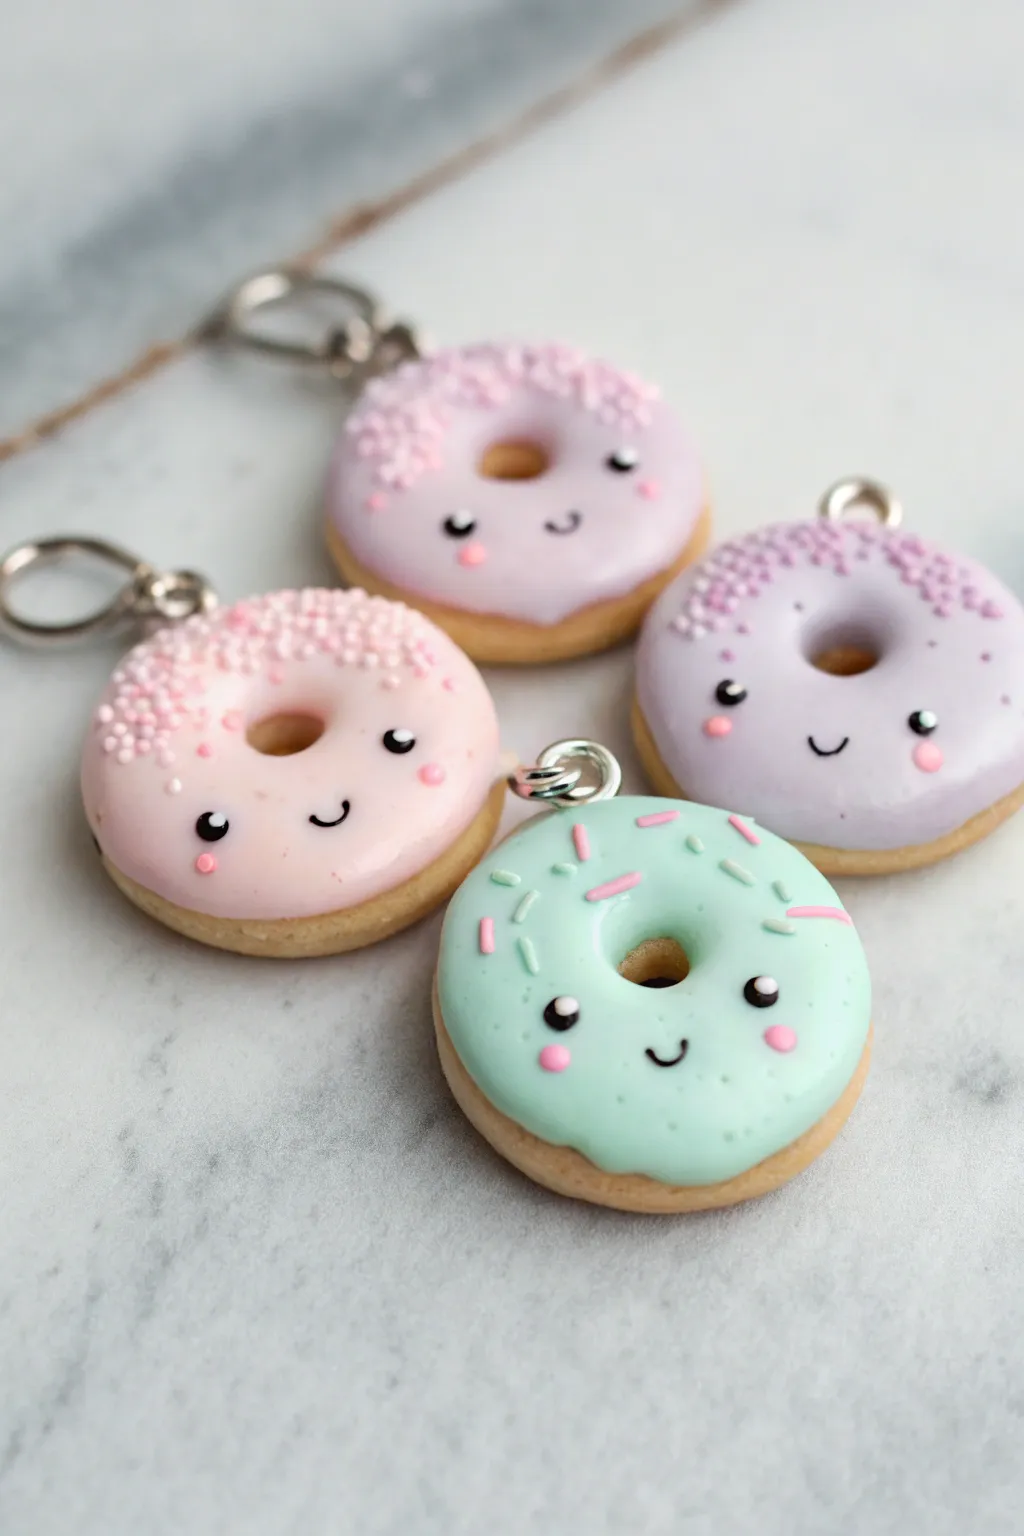
Transform simple polymer clay balls into these adorably sweet donut charms that look good enough to eat. With their pastel frosting, tiny sprinkles, and shy little smiles, they make perfect keychains or jewelry pieces.
Step-by-Step Tutorial
Materials
- Polymer clay (beige/tan for dough)
- Polymer clay (pastel pink, lilac, mint, purple for frosting)
- Liquid polymer clay (Translucent Liquid Sculpey or Fimo Liquid)
- Black and pink acrylic paint or fine-tip paint pens
- Gloss glaze or UV resin (for the wet look)
- Metal jump rings and eye pins
- Dotting tools or toothpicks
- Small round cutter or straw
- Needle tool
- Soft pastel chalks (golden brown/orange for shading)
Step 1: Shaping the Dough Base
-
Condition the clay:
Begin by conditioning your beige or tan clay until it is soft and pliable, ensuring there are no cracks. -
Form the donuts:
Roll four equal-sized balls of tan clay, roughly 1 inch in diameter, and flatten them gently into a thick disc shape. -
Round the edges:
Use your fingers to smooth and round off the edges of the discs so they look like puffy fried dough rather than flat cookies. -
Create the center hole:
Take a small round cutter or a straw and press it directly through the center of each disc to create the donut hole. -
Soften the inner edge:
After cutting the hole, the edges will be sharp. Gently dab inside the hole with your fingertip or a rounded tool to soften this edge for a realistic baked look. -
Add baked texture:
Using a clean toothbrush or a balled-up piece of aluminum foil, lightly tap the surface of the tan clay to give it a realistic, spongy bread texture. -
Shade the dough:
To make them look golden-brown, scrape some golden-brown soft pastel into a powder. Use a soft brush to dust the sides and bottom of the donuts, focusing on the edges.
Sticky Situation
Work on a ceramic tile or piece of glass. This allows you to bake the donuts directly on the surface without having to move them and risk squishing the shape.
Step 2: Frosting and Details
-
Mix liquid frosting:
For the realistic drippy look, mix a small amount of solid colored clay (pink, lilac, mint) with liquid polymer clay until it reaches a thick, frosting-like consistency. -
Apply the frosting:
Carefully dab this frosting mixture onto the top of your donut using a needle tool or toothpick. I find it easiest to tease the clay down the sides in random spots to mimic gravity. -
Avoid the center:
Make sure you leave the very center hole clear, letting the frosting naturally stop just before it falls into the middle. -
Add sprinkles (Clay Method):
For the pink and purple donuts, create micro-sprinkles by rolling incredibly thin snakes of clay, baking them briefly, chopping them up, and pressing them into the raw frosting. -
Add sprinkles (Paint Method):
For the mint donut, roll tiny thin snakes of pink clay and cut them directly onto the wet frosting without pre-baking for a softer look. -
Insert hardware:
Push a small metal eye pin into the top of the donut. You may want to add a dab of liquid clay to the pin’s shaft to help it bond securely during baking. -
Bake carefully:
Bake your donuts according to your clay manufacturer’s instructions, usually around 275°F (130°C) for 15-20 minutes. Let them cool completely.
Step 3: Bringing Them to Life
-
Paint the eyes:
Using a very fine dotting tool or a toothpick dipped in black acrylic paint, place two small dots wide apart on the lower half of the donut. -
Draw the mouth:
With an ultra-fine detail brush or 005 micron pen, draw a tiny ‘u’ shape directly between the eyes for a happy smile. -
Add rosy cheeks:
Dip a larger dotting tool into pink paint and add two soft circles just below and outside the eyes for blushing cheeks. -
Highlight the eyes:
Once the black paint is dry, use a pin to add a microscopic white dot inside the black eyes to give them a spark of life. -
Gloss it up:
Finish by coating only the frosting area and the eyes with a high-gloss glaze or UV resin. This makes the icing look sticky and sweet while protecting the paint. -
Final assembly:
Once the glaze is cured or dry, attach a jump ring to the eye pin to turn your charm into a pendant or keychain.
Scented Surprise
Mix a tiny drop of vanilla or strawberry essential oil into the clay before shaping. Your charms will smell as sweet and realistic as they look.
Enjoy your collection of sweet, smiling pastry friends


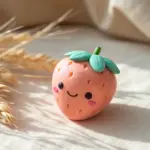
Tiny Fruit Slice Charms With Blush
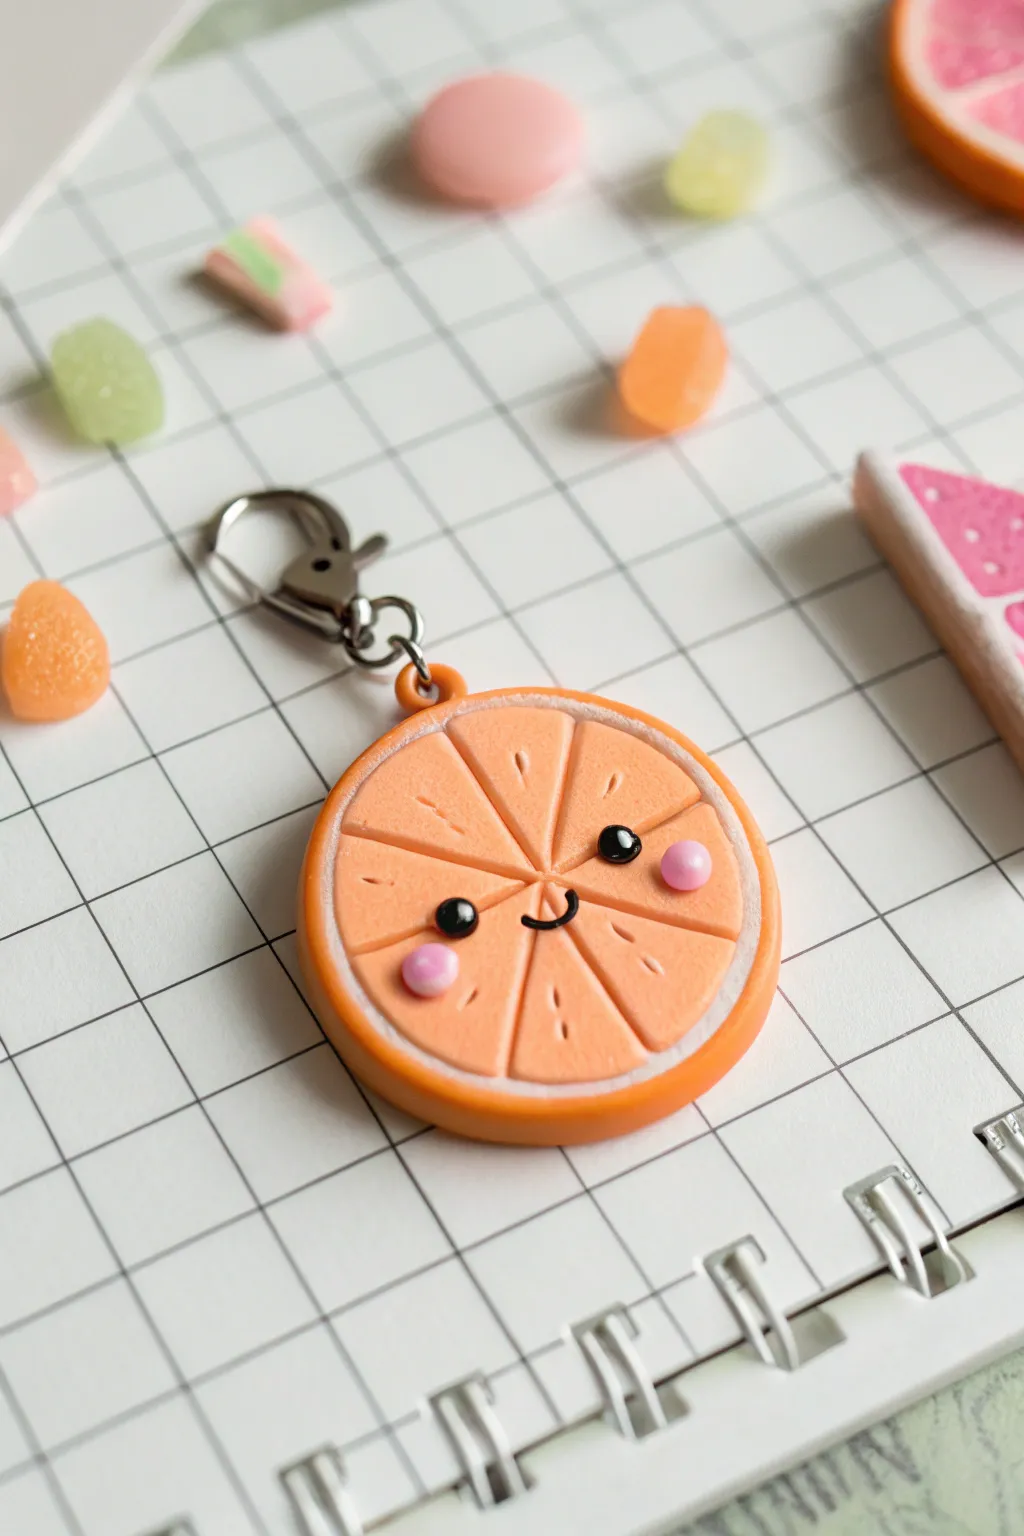
Bring a little vitamin C to your accessory collection with this adorable orange slice charm. Its cheerful, kawaii face and rosy cheeks add a sweet personality to the bright, segmented citrus details.
Step-by-Step Guide
Materials
- Orange polymer clay
- Translucent or white polymer clay
- Black liquid clay or acrylic paint
- Pink polymer clay (very small amount)
- Round clay cutter
- X-Acto knife or clay blade
- Needle tool
- Dotting tool or toothpick
- Eye pin or screw eye
- Lobster clasp keychain
- Gloss glaze (optional)
Step 1: Creating the Citrus Sections
-
Prepare the orange base:
Condition your orange polymer clay until it is soft and malleable. Roll it into a thick log, approximately 1-inch in diameter. -
Create the pith layer:
Roll out a thin sheet of white or translucent clay. Wrap this sheet completely around the orange log, smoothing the seam so it disappears. -
Add the outer rind:
Roll out a medium-thick sheet of orange clay. Wrap this around the white-covered log to form the distinct orange skin. -
Reduce carefully:
Gently roll and reduce the cane slightly to ensure all layers adhere together firmly without distorting the round shape. -
Slice the charm:
Use your sharp blade to cut a clean slice off the cane, roughly 1/4 inch thick. This will be the face of your charm. -
Define the segments:
Using the back of your knife or a needle tool, gently press radial lines into the orange center to suggest fruit segments, being careful not to cut all the way through. -
Add texture:
Take your needle tool and gently stipple tiny dots onto the surface of the orange segments to mimic the juicy texture of real fruit flesh.
Step 2: Adding the Kawaii Face
-
Position the eyes:
Decide where you want the face to sit. Using a small ball tool, make two shallow indentations where the eyes will go. -
Insert the eyes:
Roll two tiny balls of black clay and press them into the indentations, or carefully drop a small amount of black liquid clay into the spots. -
Add highlights:
Using a very fine needle tool or toothpick, add a microscopic dot of white paint to the top corner of each black eye for that sparkling look. -
Create the mouth:
Roll a nearly microscopic snake of black clay and shape it into a ‘U’. Place it centrally between the eyes. -
Apply the blush:
Roll two small balls of pink clay. Flatten them slightly and press them onto the cheeks, just below and to the side of the eyes.
Clean Cuts Pro Tip
Chill your clay cane in the fridge for 10-15 minutes before slicing. This firms up the clay so the circular shape doesn’t get squished while you cut.
Step 3: Finishing Touches
-
Secure the hardware:
Insert a screw eye or eye pin into the top of the ‘rind’. I prefer to add a dab of liquid clay to the pin first for extra grip. -
Bake the charm:
Bake according to your clay manufacturer’s instructions, usually around 275°F (130°C) for 15-20 minutes. -
Cool it down:
Let the charm cool completely before handling it so the clay hardens properly. -
Glaze (optional):
If you want a juicy, wet look, apply a coat of gloss glaze to just the orange fruit part, leaving the rind matte. -
Assemble keychain:
Use jump rings to attach your new fruit slice to the lobster clasp keychain.
Fruit Salad Level Up
Use this same technique with yellow clay for lemons, green for limes, or pink for grapefruits. Make a whole fruit salad bracelet or charm cluster.
Now you have a vibrant, distinctive charm ready to brighten up your keys or backpack


Little Mushroom Buddy Charms
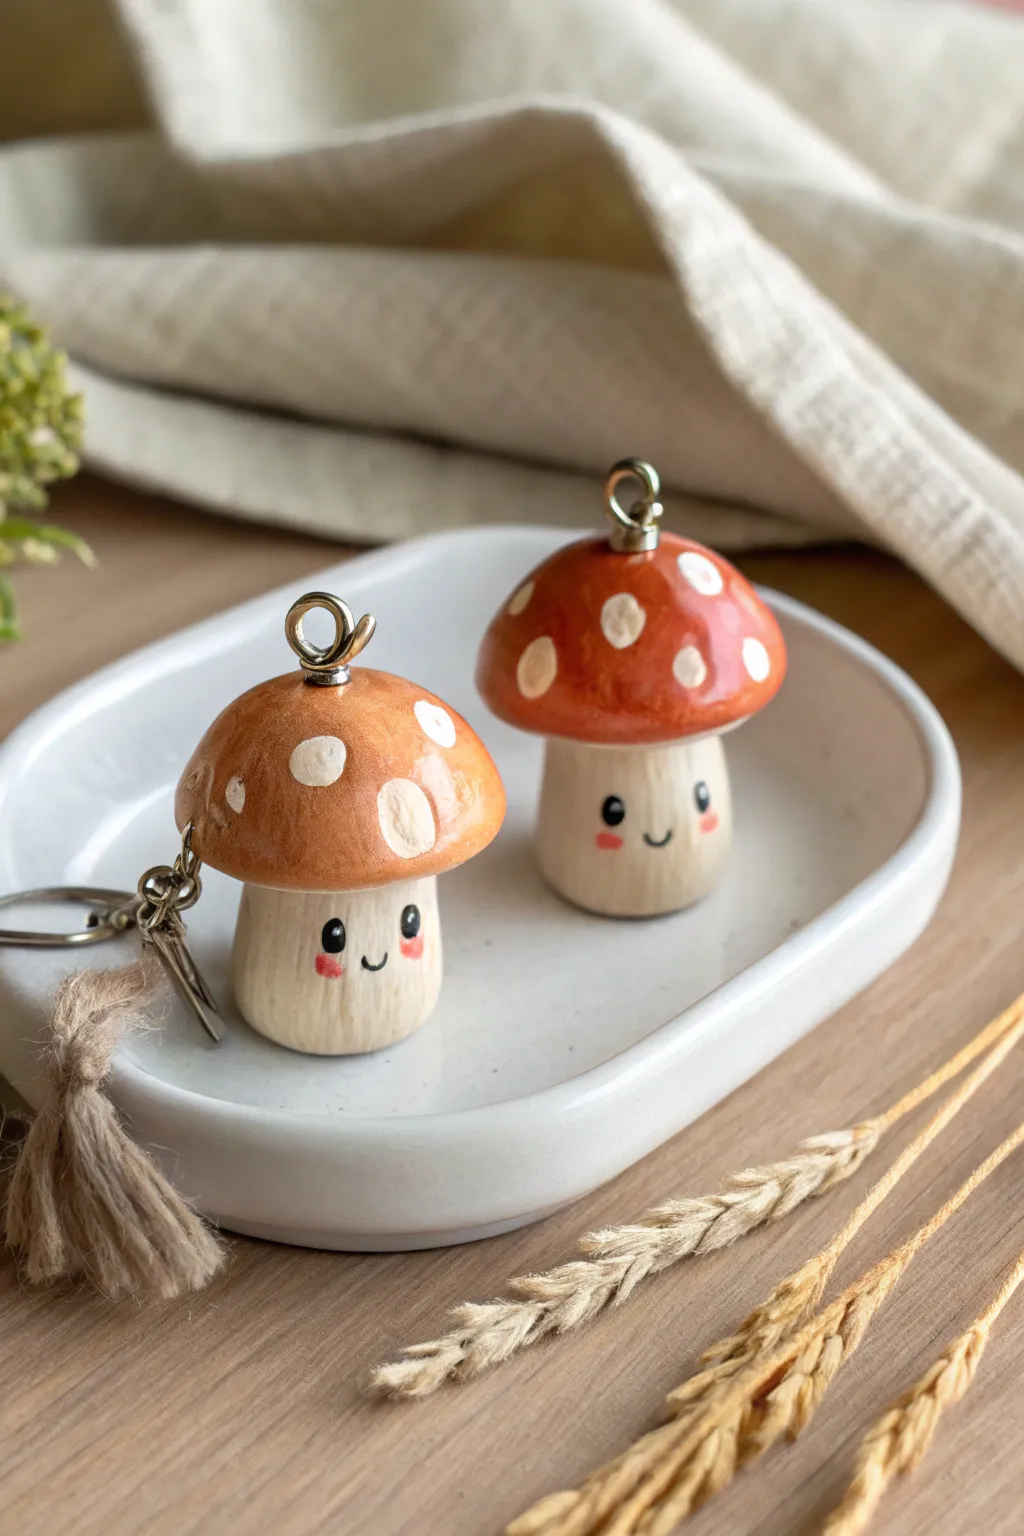
These adorable little mushroom buddy charms bring a touch of the cottagecore aesthetic right to your keychain. With their sweet smiley faces and glossy red caps, they make perfect pocket-sized companions or thoughtful handmade gifts.
Detailed Instructions
Materials
- White polymer clay
- Aluminum foil
- Acrylic paints (burnt orange, white, black, pink)
- Glossy polyurethane varnish or UV resin
- Sculpting tools (needle tool, ball stylus)
- Eye pins (silver or gold tone)
- Jewelry pliers
- Fine detail paintbrush
- Keyring hardware and jump rings
- Optional: Texture sponge or toothbrush
Step 1: Sculpting the Base
-
Prepare the core:
Start by scrunching a tiny ball of aluminum foil, roughly the size of a large marble. This acts as a lightweight armature for the mushroom cap and saves on clay. -
Form the cap:
Condition a piece of white polymer clay until pliable. Flatten it into a thick pancake and drape it over your foil ball, smoothing it down until the foil is completely covered and you have a lovely dome shape. -
Shape the stem:
Roll a separate cylinder of white clay for the stalk. Since these are ‘chunky’ mushrooms, keep the stem thick and slightly wider at the bottom for stability. -
Texture the stem:
To mimic organic growth, gently drag a needle tool or stiff bristle brush vertically up the stem to create subtle striations. I find this texture really helps the paint catch later. -
Connect the parts:
Press the dome cap firmly onto the stem. You can use a small blending tool to smooth the seam underneath where the stem meets the cap, ensuring a strong bond. -
Add the hardware:
Trim an eye pin to about half an inch long. Dip the end in a tiny bit of liquid clay or strong glue and insert it straight down into the center of the mushroom cap. -
Bake the clay:
Bake your pieces according to your specific brand of polymer clay’s instructions (usually around 275°F/130°C for 15-30 minutes). Let them cool completely before painting.
Step 2: Painting and Details
-
Base coat the cap:
Paint the cap with a layer of burnt orange or warm red acrylic paint. You might need two thin coats for full opacity, letting each layer dry in between. -
Add the spots:
Using a small round brush, dab irregular circles of white paint onto the orange cap. Don’t make them perfect circles; organic, slightly messy shapes look more natural. -
Paint the face:
Use a very fine detail brush or a toothpick to paint two small black ovals for eyes on the stem. Add a tiny ‘u’ shape between them for a smile. -
Add the sparkle:
Dip the very tip of a needle tool into white paint and place a tiny dot near the top of each black eye to create a ‘catchlight,’ which brings the character to life. -
Rosy cheeks:
Mix a very watery pink or use a dry-brush technique to gently dab small rosy cheeks right under the eyes. -
Antique the stem:
Dilute a tiny drop of light brown paint with water to make a wash. Brush it over the white stem and immediately wipe most of it off with a paper towel, leaving pigment only in the textured grooves.
Uneven Polish?
If your glaze pools or drips while drying, rotate the charm every few minutes for the first hour, or use UV resin which cures instantly under a lamp.
Step 3: Finishing and Assembly
-
Seal the piece:
Once all paint is perfectly dry, coat the entire mushroom—especially the cap—with a high-gloss varnish or UV resin. This gives it that ceramic-like shine seen in the photo. -
Attach the keyring:
Use your pliers to open a jump ring, slide it through the eye pin on top of the mushroom, and attach your keyring hardware. Close the jump ring securely. -
Add accents:
For extra flair, loop a small piece of twine or hemp cord through the keyring to create a rustic tassel that complements the woodland vibe.
Go For Gold
Paint the distinctive spots on the cap with metallic gold acrylic instead of white for a magical, fairytale forest look.
Now you have a charming little friend to keep your keys company wherever you go


Mini Bubble Tea Cup Charms
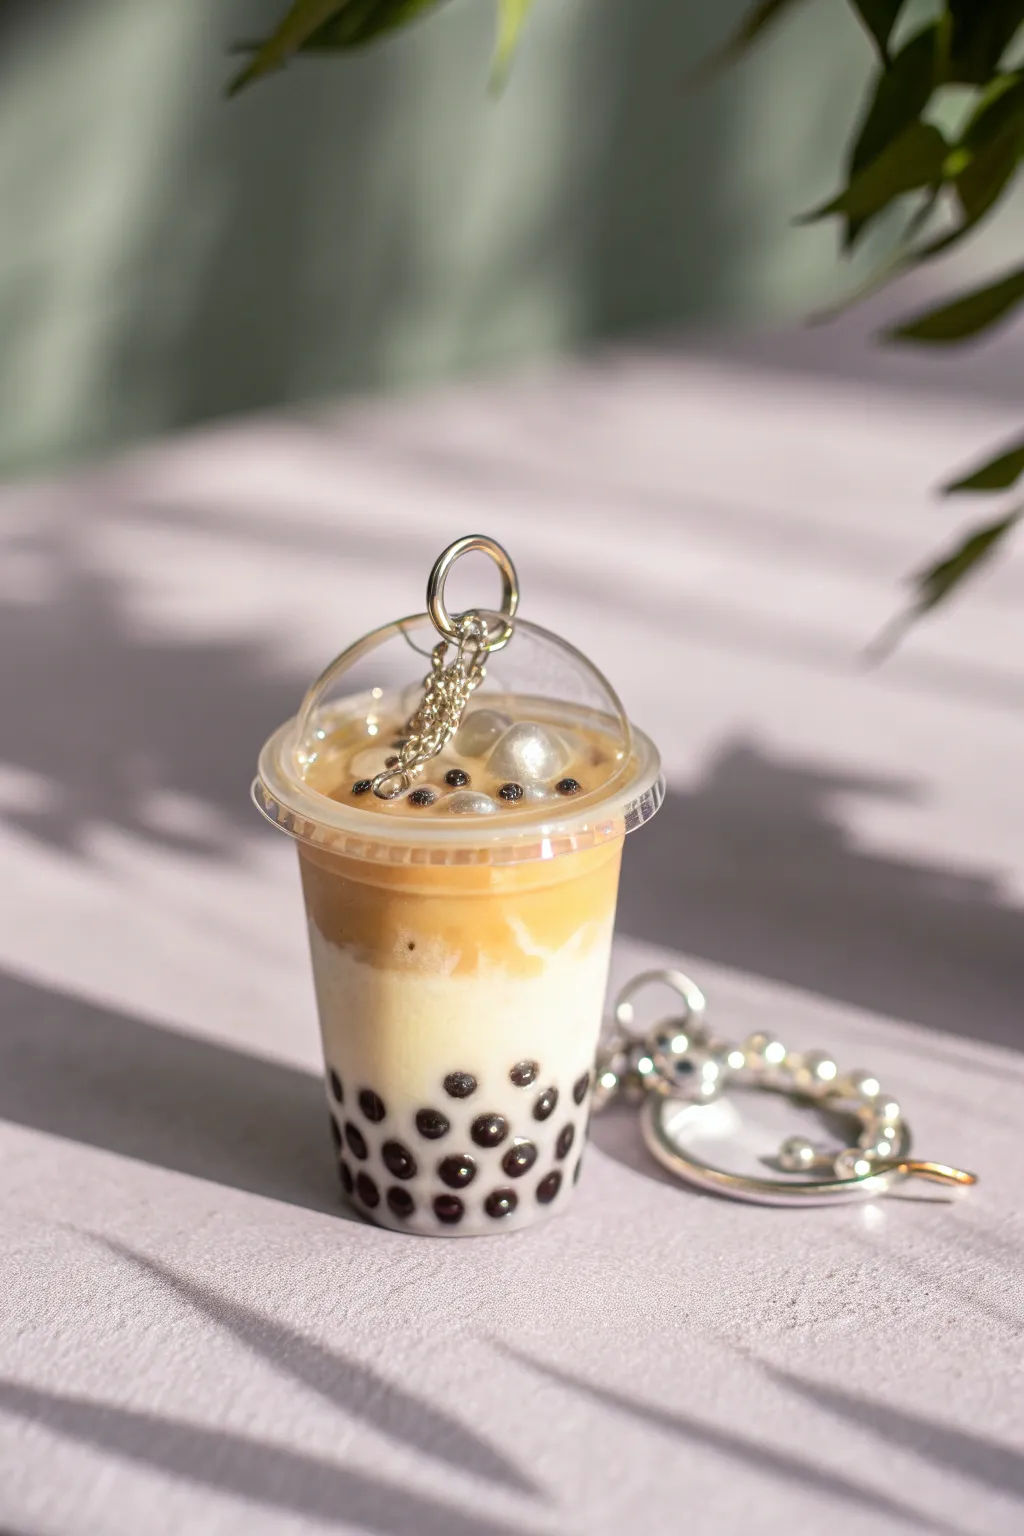
Create a deliciously realistic miniature bubble tea charm that looks good enough to drink. This project features distinct layers of milky tea, sweet brown sugar syrup, and tiny tapioca pearls enclosed in a clear resin cup.
Step-by-Step
Materials
- Miniature clear plastic bubble tea cup with dome lid
- UV resin (clear)
- UV lamp
- Polymer clay (black or dark brown)
- Acrylic paint (white, burnt umber/brown, yellow ochre)
- Toothpicks or needle tool
- Small mixing cups or palette
- Metal jump ring and keychain hardware
- Fake crushed ice or crushed glass glitter (optional)
- Silver microbeads (optional for topping)
Step 1: Preparing the Boba Pearls
-
Roll the clay:
Take a tiny amount of black or dark brown polymer clay. Roll it into a very thin snake, roughly 1-2mm in thickness. -
Cut segments:
Use a blade to cut the snake into tiny, equal-sized segments. These will become your individual boba pearls. -
Shape the pearls:
Roll each segment between your fingers into a small, smooth sphere. You will need about 20-30 pearls depending on the size of your cup. -
Bake the clay:
Bake the clay pearls according to the manufacturer’s instructions. Usually, for pieces this small, 10-15 minutes at the recommended temperature is sufficient. Let them cool completely.
Realistic “Ice”
For an iced tea look, drop small chunks of clear cured resin or crushed glass glitter into the brown tea layer before curing. It mimics ice perfectly.
Step 2: Creating the Milky Layer
-
Mix the milk color:
In a small mixing cup, combine clear UV resin with a drop of white acrylic paint. Add a tiny speck of yellow ochre to warm up the tone so it looks like creamy milk rather than stark white. -
Place the pearls:
Pour a small amount of the milky resin into the bottom of the miniature plastic cup. Carefully drop in your baked clay pearls. -
Arrange the pearls:
Use a toothpick to push the pearls to the outer edges of the cup so they are clearly visible through the plastic. Stack them slightly for a full look. -
Cure the first layer:
Once you are happy with the pearl placement, cure the resin under a UV lamp for about 60-90 seconds until hard. -
Add more milk:
Pour more of your milky resin mixture over the cured pearls, filling the cup about halfway. Cure this layer completely.
Cloudy Resin?
If your transparent tea layer looks cloudy, you might be mixing too vigorously and introducing bubbles. Stir slowly and use a lighter to pop surface bubbles.
Step 3: Adding the Tea Layer
-
Mix the tea color:
Mix a fresh batch of UV resin with burnt umber acrylic paint. You want a translucent, rich brown color that resembles strong tea or brown sugar syrup. -
Create the gradient:
Pour the brown resin on top of the cured milk layer. Don’t worry if the line between them is a bit messy; a little swirl makes it look more realistic. -
Swirl the layers:
Before curing, dip a clean toothpick into the brown layer and gently drag it down slightly into the top surface of the white layer if you want a mixed effect, or just let them settle naturally. I prefer a softer transition, so I mix slightly at the boundary. -
Fill to the brim:
Continue filling with the brown resin until you reach just below the rim of the cup. Cure under UV light.
Step 4: Top Assembly and Hardware
-
Prepare the lid:
Take the dome lid and drill a small hole in the very top center if it doesn’t already have one. This is for your jump ring. -
Attach hardware:
Insert a large jump ring through the hole in the lid. Attach your keychain chain to this ring. -
Add floating details:
Mix a tiny bit of clear resin. Apply it to the top surface of your ‘tea’ layer. You can add a few extra boba pearls or silver microbeads here to look like they are floating on top. -
Seal the cup:
Apply a thin rim of clear UV resin around the edge of the cup. Press the dome lid firmly onto the cup. -
Final cure:
Place the entire assembled charm under the UV lamp for a final 2-3 minute cure to ensure the lid fits securely and all internal resin is set.
Attach this adorable charm to your bag or keys and enjoy your everlasting sweet treat

The Complete Guide to Pottery Troubleshooting
Uncover the most common ceramic mistakes—from cracking clay to failed glazes—and learn how to fix them fast.
Cute Avocado Half Charms
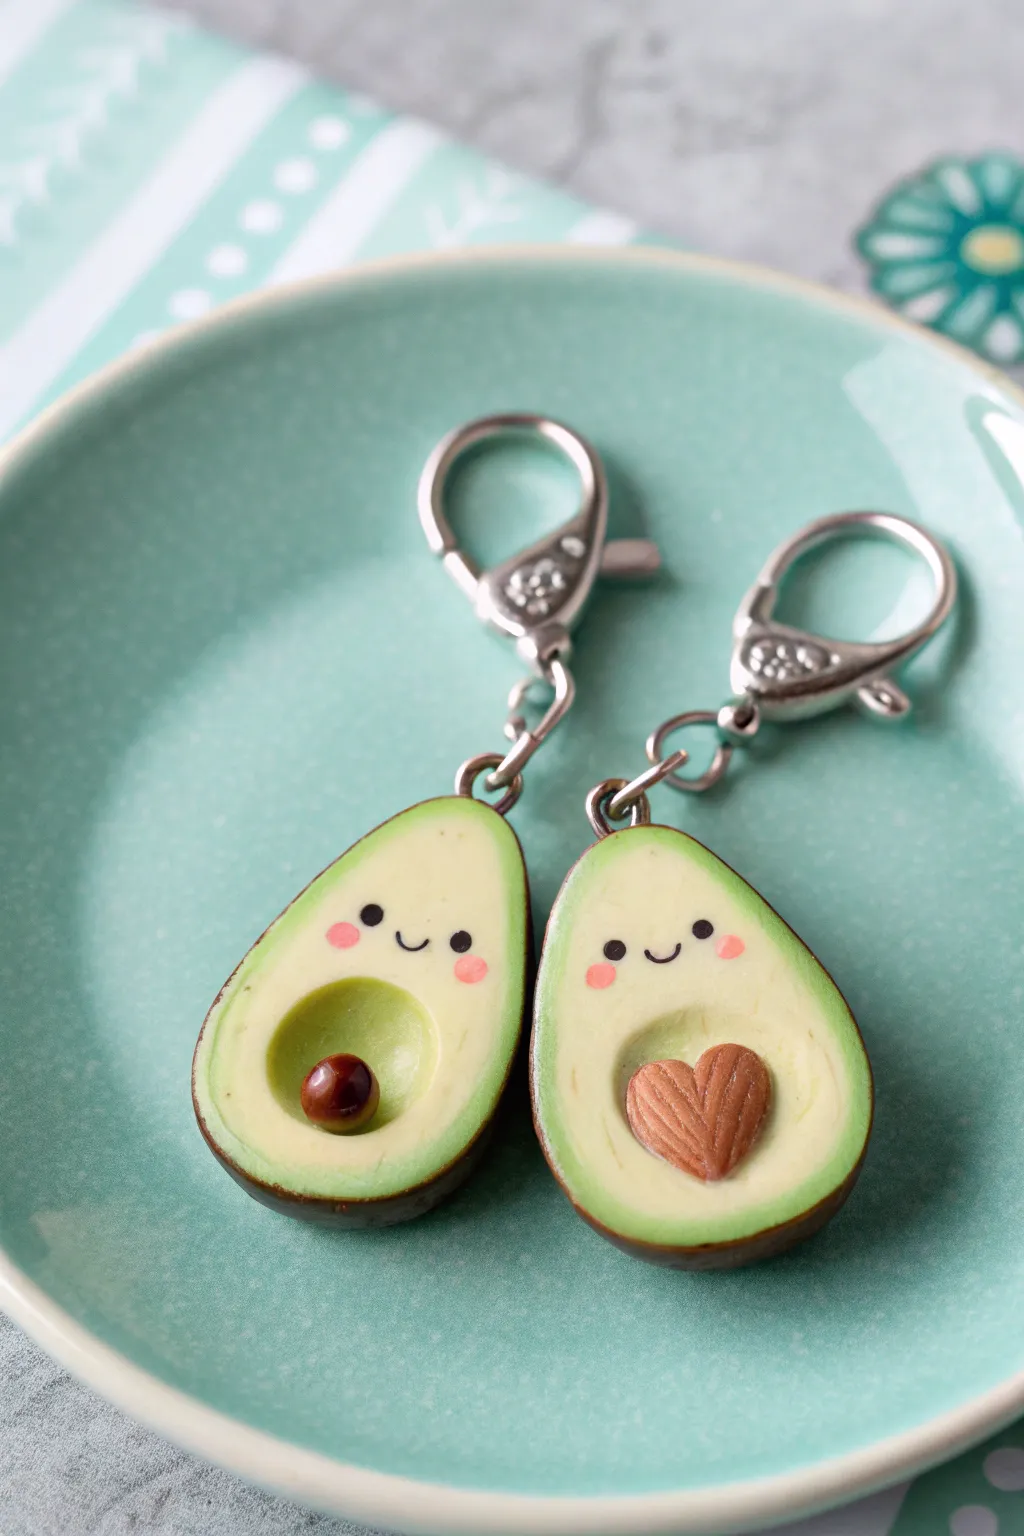
These adorable matching avocado charms are the ultimate symbol of friendship, featuring one charm with the pit and the other with a heart-shaped space where it belongs. Their tiny smiling faces and rosy cheeks add a whimsical touch to this perfect pair of keychains.
How-To Guide
Materials
- Polymer clay in dark green, light lime green, brown, and pink
- Rolling pin or pasta machine
- Craft blade or X-Acto knife
- Dotting tools or ball stylus (various sizes)
- Black acrylic paint
- Fine detail paintbrush or toothpick
- Eye pins (silver)
- Lobster clasp keychains and jump rings
- Gloss glaze or UV resin (optional)
- Oven for baking
Step 1: Shaping the Avocado Base
-
Mix the perfect green:
Start by conditioning your light lime green clay until it is soft and pliable. If the color feels too bright, mix in a tiny speck of yellow or white to get that creamy, ripe avocado flesh tone. -
Form the pear shape:
Roll two equal-sized balls of the lime green clay, roughly the size of a large marble. Gently pinch and roll one end of each ball to taper it, creating the classic pear-like avocado silhouette. Flatten them slightly so they look like cut halves. -
Create the skin layer:
Roll out a thin sheet of dark green clay. It should be thin enough to look like skin but thick enough not to tear during wrapping. -
Wrap the avocados:
Place your lime green pear shapes onto the dark green sheet. Carefully wrap the dark clay around the curved back and sides of the lime shape, trimming away excess from the flat front face. Smoothing the seam where the two greens meet is crucial here for a clean look. -
Smooth the edges:
Use your finger to gently rub the rim of the avocado face, slightly blending the dark green skin inward so it doesn’t look like a separate shell but rather a natural skin layer.
Uneven Clay Surface?
If fingerprints are visible on the smooth green face, lightly brush a drop of baby oil or clay softener over the surface before baking to smooth them out completely.
Step 2: Creating the Pits & Cavities
-
Indent the first half:
For the first charm, take a large ball stylus or the back of a paintbrush and press a round indentation into the lower, wider part of the avocado face to create the seat for the pit. -
Make the round pit:
Roll a small ball of brown clay. Test the fit in the indentation you just made; it should nestle in comfortably but protrude slightly. I usually add a tiny dot of liquid clay or bake-and-bond to secure it in place. -
Indent the second half:
For the matching charm, press a similar round indentation into the lower section. This time, however, we will modify the shape inside. -
Create the heart pit:
Shape a piece of brown clay into a heart. You can do this by rolling a ball, flattening it slightly, and using a needle tool to press an indent at the top and taper the bottom. -
Texture the heart pit:
Before placing the heart, use a needle tool or craft knife to gently score shallow lines vertically down the heart shape, giving it a fibrous, seed-like texture. -
Place the heart:
Press the textured brown heart into the indentation on the second avocado half. Ensure it sits securely.
Create a Texture
To make the avocado flesh look more realistic, gently dab the light green area with a toothbrush before adding the face. This mimics the fruit’s natural texture.
Step 3: Detailing and Assembly
-
Add the hardware:
Insert a silver eye pin into the top center of each avocado. If the pin is too long, trim it first. Pushing it in with a slight twisting motion helps it grip the raw clay. -
Pre-shading cheeks:
Take two tiny specks of pink clay for each avocado. Flatten them into microscopic discs and press them onto the face area to serve as rosy cheeks. -
Bake the charms:
Bake your pieces according to the specific temperature and time instructions on your package of polymer clay. Let them cool completely before handling. -
Paint the faces:
Using a very fine detail brush or a toothpick dipped in black acrylic paint, carefully draw a small ‘U’ shape between the pink cheeks for a smile. Add two small dots for eyes above the cheeks. -
Seal (Optional):
To protect the paint and give the pit a realistic shine, coat the brown pit areas and the painted face with a thin layer of gloss glaze or UV resin. -
Final assembly:
Attach a jump ring to the eye pin loop on each avocado, then connect them to your lobster clasp keychains.
Clip these onto your bags or give one to your best friend to complete the set
Happy Toast and Jam Charms
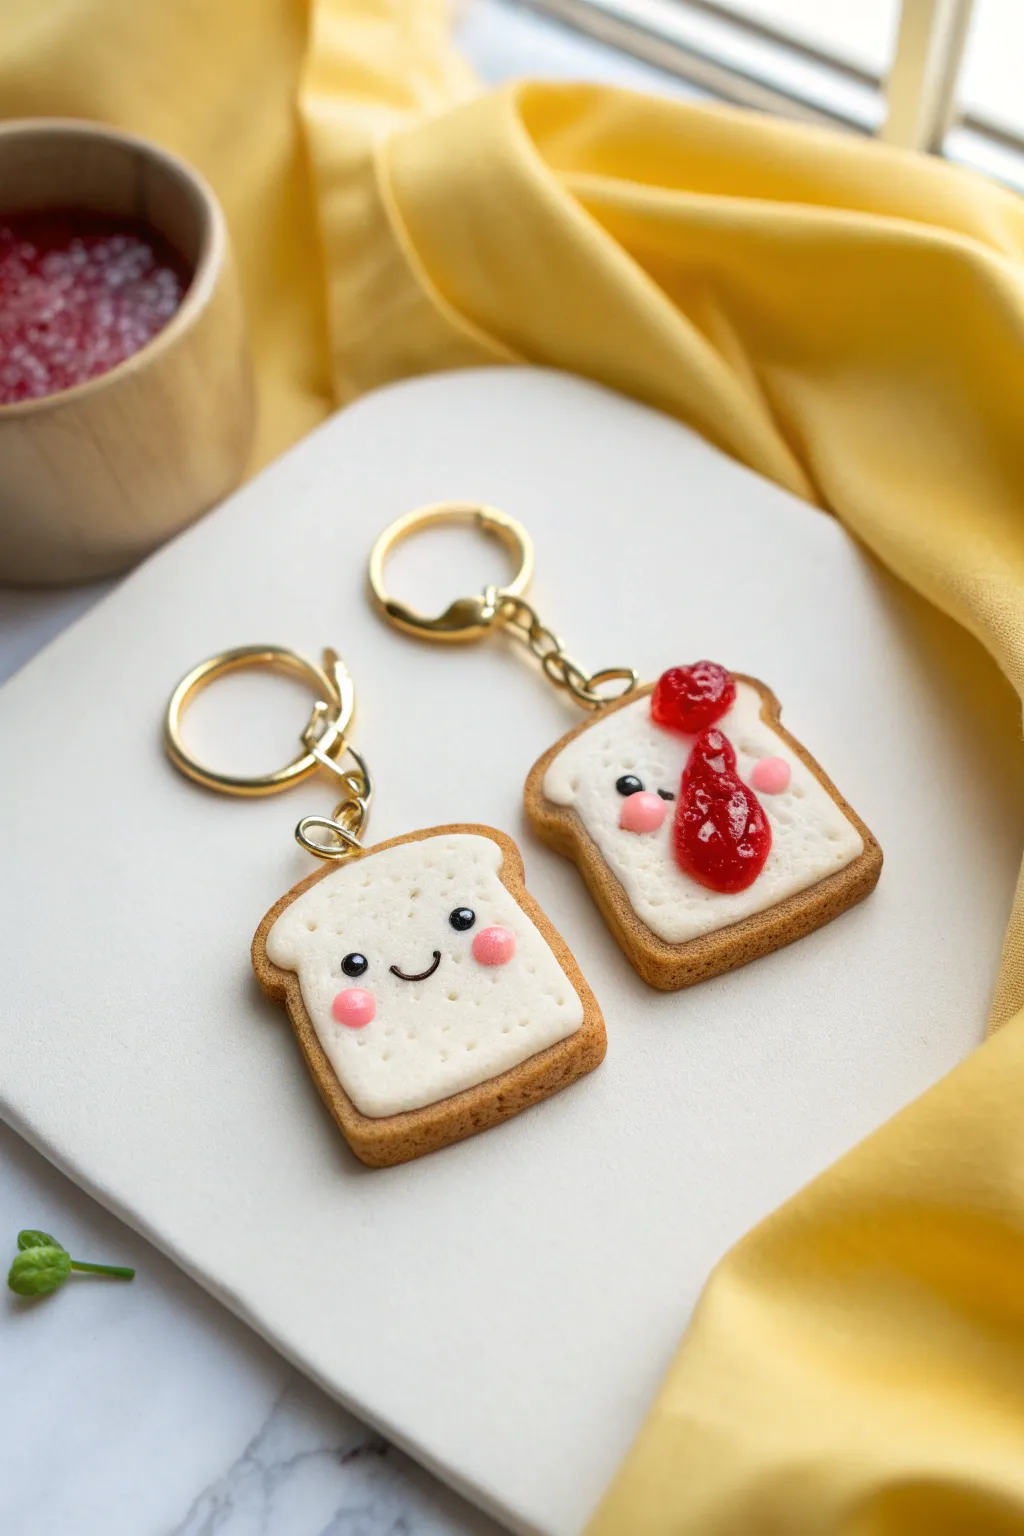
Brighten up your keys with this adorable breakfast duo featuring two slices of perfectly golden toast: one plain and cheery, the other topped with glossy strawberry jam. These polymer clay charms are simple to sculpt but packed with kawaii personality.
Step-by-Step
Materials
- Tan polymer clay (for crust)
- White or translucent white polymer clay (for bread)
- Translucent red polymer clay (for jam)
- Red liquid clay or glaze (optional, for jam effect)
- Black acrylic paint or clay (for eyes/mouth)
- Pink chalk pastel or clay (for cheeks)
- Toothbrush or crumpled foil (for texture)
- Needle tool
- Rolling pin
- Square cookie cutter (optional)
- Eye pins
- Gold keychains with jump rings
- Gloss glaze (UV resin or polyurethane)
Step 1: Shaping the Base
-
Mix the Crust Color:
Start by conditioning your tan clay until it is soft and pliable. If it’s too dark, mix in a little white or translucent clay to get that perfect golden-brown crust shade. -
Roll the Crust Snake:
Roll a long, even snake of the tan clay, about 4-5mm thick. This will wrap around your white bread center to form the crust. -
Prepare the Bread Center:
Roll out a sheet of white clay to the same thickness as your tan snake. Using a blade or a square cutter, cut out two identical squares, slightly rounding the top corners to mimic a loaf shape. -
Assemble the Slice:
Wrap the tan snake securely around the edge of your white bread shape. Gently press the seam where the two colors meet to bond them without distorting the shape. -
Refine the Shape:
Press the assembled slice gently against your work surface to flatten it slightly. Use your fingers to indent the sides slightly to give it that classic bread-slice waist. -
Texture the Bread:
Using an old toothbrush or a ball of crumpled aluminum foil, gently tap the entire surface of the white clay. This stippling creates a realistic fluffy bread texture. -
Add Eye Pins:
Insert a gold eye pin into the top center of each toast slice. If the pin is too long, trim it first with wire cutters to ensure it doesn’t poke through the bottom.
Step 2: Adding Faces & Jam
-
Create Eye Sockets:
Use a small ball tool or the end of a paintbrush to make two small indentations for the eyes on each slice. Place them widely apart for maximum cuteness. -
Add the Eyes:
Roll tiny balls of black clay and press them into the sockets. Alternatively, you can bake the charm first and paint the eyes on later with acrylic paint and a dotting tool. -
Sculpt the Smile:
Roll an ultra-thin thread of black clay for the mouth and gently press it into a U-shape between the eyes. I find using a needle tool helps guide the tiny clay strand into place. -
Dust the Cheeks:
License scrap some pink pastel chalk into a rugged powder. Apply this powder to the cheeks using a dry paintbrush for a soft, blushing effect. You can also use tiny flattened circles of pink clay. -
Make the Jam:
For the jam slice, mix translucent red clay with a tiny bit of solid red. Take small, irregular blobs and press them onto the upper right corner of one toast slice. -
Create Jam Texture:
Use a needle tool or dotting tool to swirl the red clay slightly, making it look spreadable and thick. Add a small ‘drip’ shape extending down toward the face. -
Add Jam Shine (Pre-Bake):
If you have liquid red clay, add a tiny drop over your sculpted jam to make it look wet. If not, don’t worry—the glaze later will do the trick. -
Pre-Bake Check:
Look over your charms for any lint or fingerprints. Use a bit of baby oil or rubbing alcohol on your finger to smooth out any unwanted marks on the tan crust.
Uneven Crust Seams?
If the tan crust separates from the white bread during baking, try applying a tiny amount of liquid clay or ‘Bake and Bond’ between the layers before shaping.
Step 3: Baking & Assembly
-
Bake the Charms:
Bake your pieces according to the clay manufacturer’s instructions (usually 275°F/130°C for 15-30 minutes). Let them cool completely before handling. -
Secure the Eye Pin:
Once cool, gently pull the eye pin out. Add a drop of super glue to the stem and reinsert it. This ensures the hardware won’t fall out with daily use. -
Glaze the Jam:
Apply a thick layer of high-gloss glaze or UV resin *only* to the red jam area. This contrast between the matte bread and shiny jam is key to the realistic look. -
Attach Hardware:
Use flat-nose pliers to open a jump ring and connect your eye pin to the main keychain loop. Close the ring securely so there is no gap.
Strawberry Seeds
Mix tiny specks of black pepper or poppy seeds into your translucent red clay before sculpting the jam for realistic strawberry seed texture.
Now you have a sweet set of charms ready to share with your best friend or keep all to yourself


What Really Happens Inside the Kiln
Learn how time and temperature work together inside the kiln to transform clay into durable ceramic.
Mini Cupcake Charms With Sprinkles
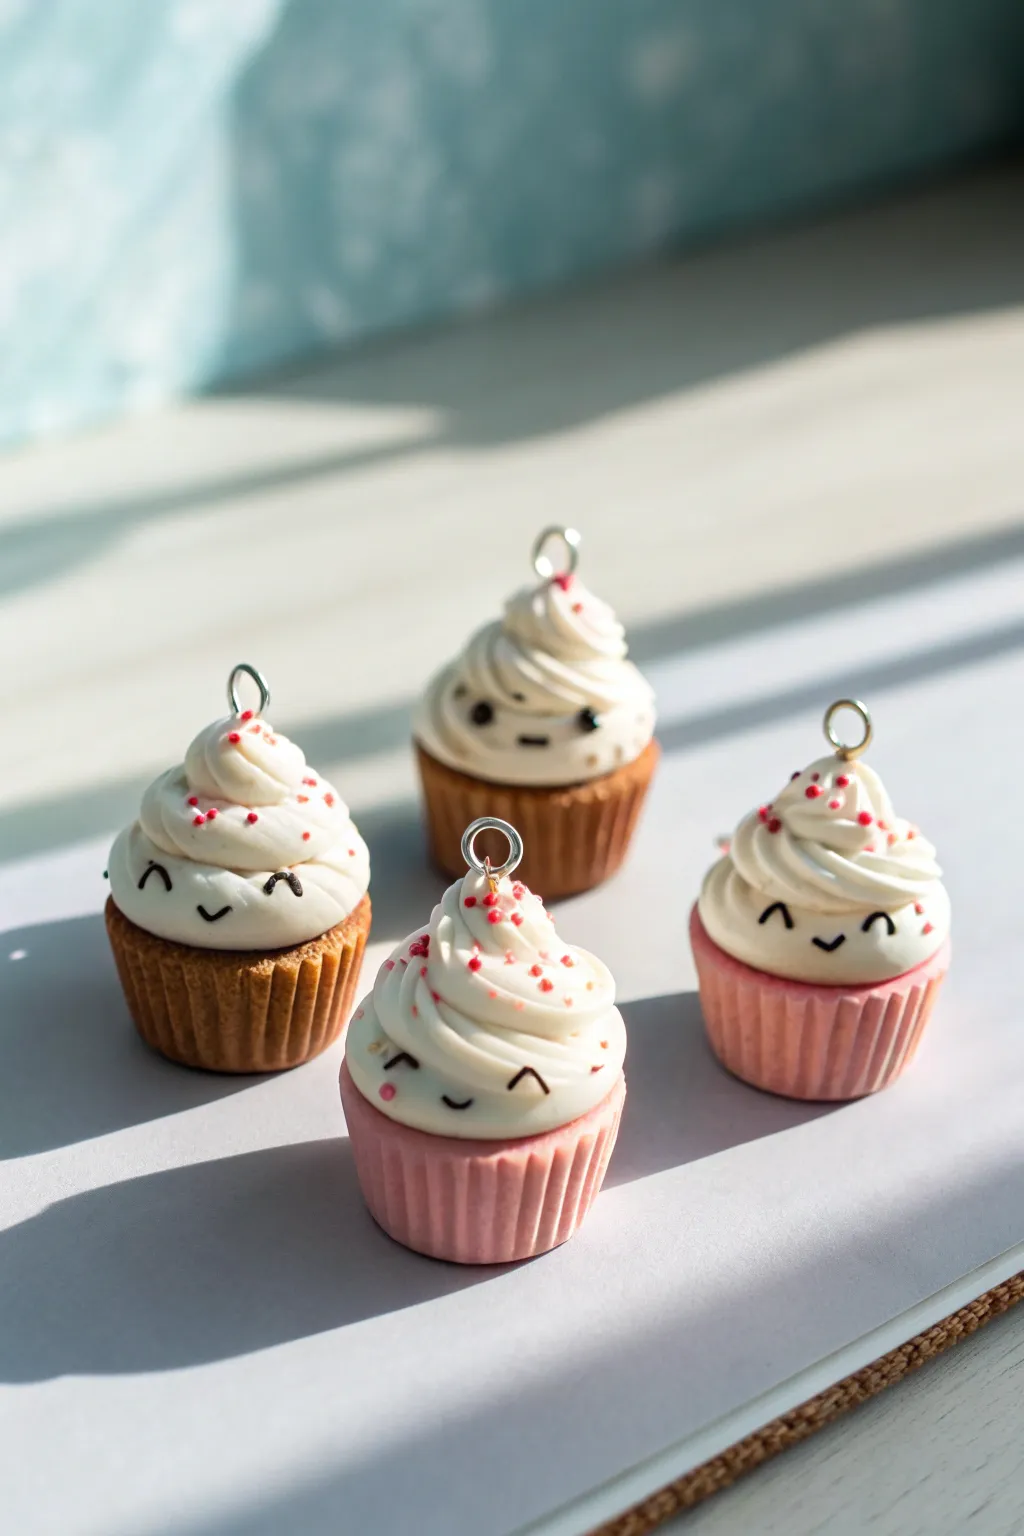
These adorable miniature cupcakes feature perfectly swirled frosting and sweet, tiny faces that bring them to life. Whether you choose a classic chocolate base or a sweet strawberry pink, the detailed ridges and tiny sprinkles make them irresistible additions to any charm bracelet or zipper pull.
Step-by-Step Tutorial
Materials
- Polymer clay (Tan or light brown for cooked dough)
- Polymer clay (Pastel pink)
- Polymer clay (White for frosting)
- Polymer clay (Black for facial details)
- Liquid translucent clay or bake-and-bond
- Small metal star-tipped extrusion piping tool OR a star piping tip
- Silicone cupcake base mold (optional) or needle tool/toothpick
- Eye screws (silver)
- Craft blade or X-Acto knife
- Gloss glaze (water-based polyurethane)
- Small dotting tool or toothpick
- Tiny red or pink microbeads (for sprinkles)
Step 1: Making the Cupcake Base
-
Condition the base clay:
Start by thoroughly conditioning your choice of base color—either the tan ‘biscuit’ color or the pastel pink. Roll it into a smooth, seamless ball about the size of a large marble. -
Shape the cylinder:
Flatten the top and bottom of your ball slightly to create a cylinder shape that tapers just a little bit toward the bottom, mimicking a real cupcake liner. -
Texture the liner:
Using a needle tool or a toothpick, press vertical indentations all around the sides of the cylinder. Space them evenly to create the ribbed texture of a paper cupcake liner. If you have a silicone mold for this shape, just press the clay in and pop it out. -
Create the domed top:
Take a smaller amount of the same base color (or a lighter ‘cake’ color if you prefer) and flatten it into a small dome. Press this onto the top of your textured base to create the muffin top where the frosting will sit.
Step 2: Adding the Frosting Swirl
-
Prepare the frosting clay:
Condition your white clay until it is extremely soft and pliable. If the clay is too stiff, mix in a tiny drop of baby oil or clay softener to improve the flow. -
Extrude the snake:
Roll the white clay into a long snake. For the most realistic look, I like to twist two thin strands together or use a clay extruder with a star-shaped disc to create ridges that look like piped icing. -
Apply adhesive:
Brush a tiny amount of liquid clay or bake-and-bond onto the top of your cupcake base to ensure the frosting sticks permanently. -
Pipe the swirl:
Starting at the outer edge of the cupcake top, coil the ridged white clay snake in a spiral, moving inward and upward. Taper the clay as you reach the peak to create a perfect soft-serve swirl. -
Trim the end:
Carefully cut or pinch off the very tip of the swirl so it looks neat and intentional.
Frosting Texture Tip
To get realistic icing ridges without an extruder, twist two thin snakes of white clay together tightly, then gently roll simply to smooth them. The twist mimics piping perfectly.
Step 3: Details & Assembly
-
Make the eyes:
Take extremely tiny specks of black clay and roll them into thin, curved worms for ‘smiling’ eyes (like an upside-down ‘U’). Alternatively, you can paint these on after baking, but clay details add nice dimension. -
Make the mouth:
Create a tiny ‘V’ or ‘U’ shape from black clay for the mouth. Place the eyes and mouth onto the white frosting area using a needle tool, pressing them gently so they adhere without smashing the frosting ridges. -
Add blush (optional):
If you want rosy cheeks, scrape a tiny bit of pink chalk pastel dust and apply it near the eyes with a soft brush. -
Adding sprinkles:
Before baking, gently press your red or pink microbeads into the top of the frosting. If you don’t have microbeads, roll extremely tiny balls of red clay and scatter them on top. -
Insert hardware:
Screw the metal eye screw into the very top center of the frosting swirl. Remove it, add a dab of liquid clay to the threads, and screw it back in for a secure hold. -
Baking:
Bake your charms according to the manufacturer’s instructions for your specific brand of clay (usually strictly low heat for 15-30 minutes). Let them cool completely before handling. -
Glazing:
For a shiny, delicious finish, apply a coat of gloss glaze strictly to the frosting area, or coat the whole charm for protection.
Make It Sparkle
Mix ultrafine white or iridescent glitter into your gloss glaze before applying it to the frosting. It makes the cupcakes look like they are dusted with edible sugar crystals.
Enjoy hanging these sweet treats on your favorite accessories
Chubby Cat Face Charms
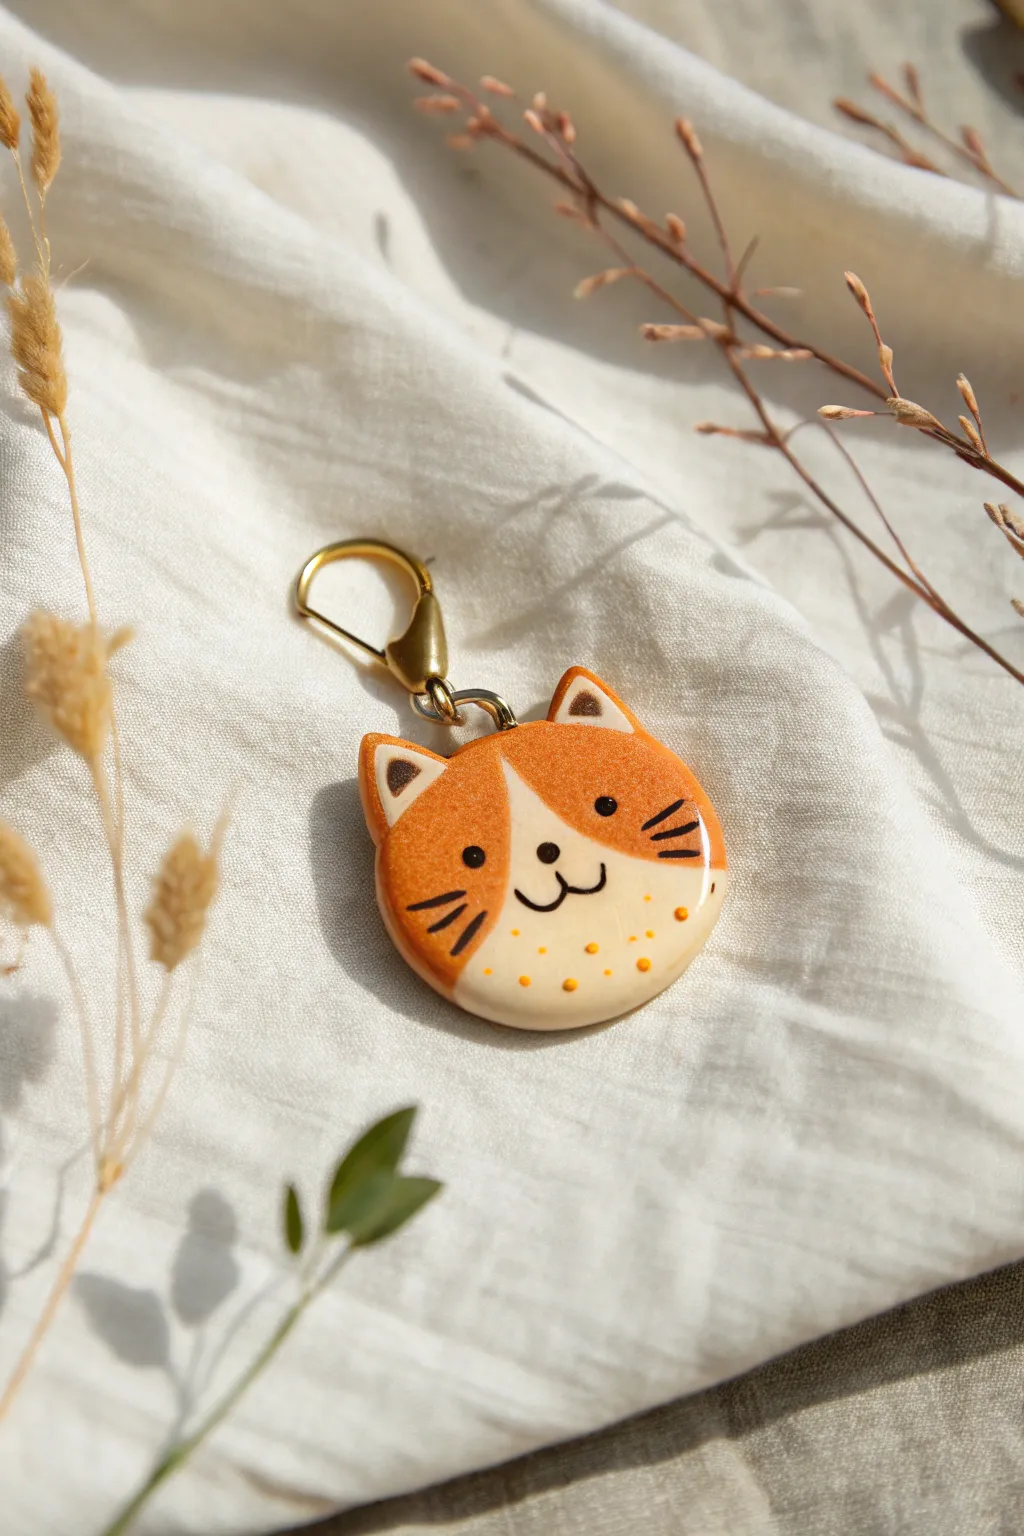
Create a delightful companion with this handcrafted calico cat face charm, featuring warm orange tones and a sweet, simplistic expression. The finished piece has a glossy, professional shine that highlights the tiny details, making it a perfect zipper pull or keychain accessory.
Step-by-Step Guide
Materials
- Polymer clay (Orange, White, Dark Brown)
- Acrylic rolling pin or pasta machine
- Round clay cutter (approx. 1.5 inch)
- X-acto knife or clay blade
- Needle tool or dotting tool
- Black acrylic paint
- Fine detail paintbrush (size 000)
- UV resin or glossy glaze
- UV lamp (if using resin)
- Gold screw eye pin
- Gold lobster clasp and jump ring
- Oven (for baking according to clay package)
- Parchment paper
Step 1: Shaping the Base
-
Condition the clay:
Start by conditioning your orange, white, and dark brown polymer clay separately. Knead them warm in your hands until they are soft and pliable, ensuring there are no air bubbles trapped inside. -
Create the orange base:
Roll the orange clay into a sheet about 1/4 inch thick. You want it substantial enough to be sturdy but not too heavy. -
Cut the circle:
Use your round cutter to punch out a clean orange circle. Smooth the edges gently with your fingertip to remove any harsh cut lines. -
Form the ears:
From the remaining orange clay, hand-shape two small, equal-sized triangles. These should be slightly rounded at the tips rather than sharp. -
Attach the ears:
Press the triangles onto the top of the circle. Use your modeling tool or finger to blend the seams on the back so they are securely attached to the head. -
Add inner ear details:
Roll tiny balls of dark brown clay, flatten them into smaller triangles, and press them into the center of the orange ears using a flat tool to make them sit flush.
Smooth Seams Tip
When attaching the white face patch, lay a piece of cling wrap over the clay before rolling. This prevents the roller from dragging colors and creates a seamless join.
Step 2: Adding the Face Pattern
-
Create the white patch:
Roll out a very thin sheet of white clay. Use your blade to cut a curved, organic shape that will serve as the cat’s muzzle and chest area. -
Apply the white clay:
Gently lay the white shape onto the bottom half of the orange circle. Use a rolling pin lightly over the top to merge the two clay layers into a single smooth surface. -
Insert the hardware:
Take your gold screw eye pin and carefully twist it into the top center of the head, right between the ears. I find twisting it helps it grip the raw clay better than just pushing. -
Clean the surface:
Before baking, use a cotton swab dipped in a little rubbing alcohol or baby oil to wipe away any fingerprints or dust specks from the clay surface. -
Bake the charm:
Place the charm on parchment paper and bake according to your clay manufacturer’s instructions. Let it cool completely before moving to the painting step.
Sparkle Upgrade
Mix a pinch of fine gold glitter into your orange clay before shaping. When you glaze it later, the sparkle will shine through like a magical tabby coat.
Step 3: Painting and Finishing
-
Paint the eyes and nose:
Using the fine detail brush and black acrylic paint, dab two small circles for wide-set eyes and a tiny oval for the nose right where the white and orange sections meet. -
Add the mouth:
carefully paint a small ‘w’ shape extending down from the nose to create that classic smiling cat mouth. -
Detail the whiskers:
Paint three short, horizontal stripes on each cheek area using very light pressure to keep the lines crisp and tapered. -
Add orange freckles:
Mix a tiny bit of orange paint (or use thinned orange clay liquid) to dot subtle freckles on the white chin area for extra texture. -
Seal with resin:
Once the paint is fully dry, apply a generous dome of UV resin over the front of the charm, bringing it right to the edges but not over the side. -
Cure the finish:
Place under a UV lamp for 2-4 minutes until the surface is hard and glassy. If you don’t have resin, several coats of glossy polyurethane varnish work too. -
Attach the clasp:
Open a jump ring with pliers, loop it through the eye pin and your lobster clasp, and close it securely.
Now you have a glossy, adorable charm ready to brighten up your bag or keyring

TRACK YOUR CERAMIC JOURNEY
Capture glaze tests, firing details, and creative progress—all in one simple printable. Make your projects easier to repeat and improve.
Bunny and Bear Head Charms
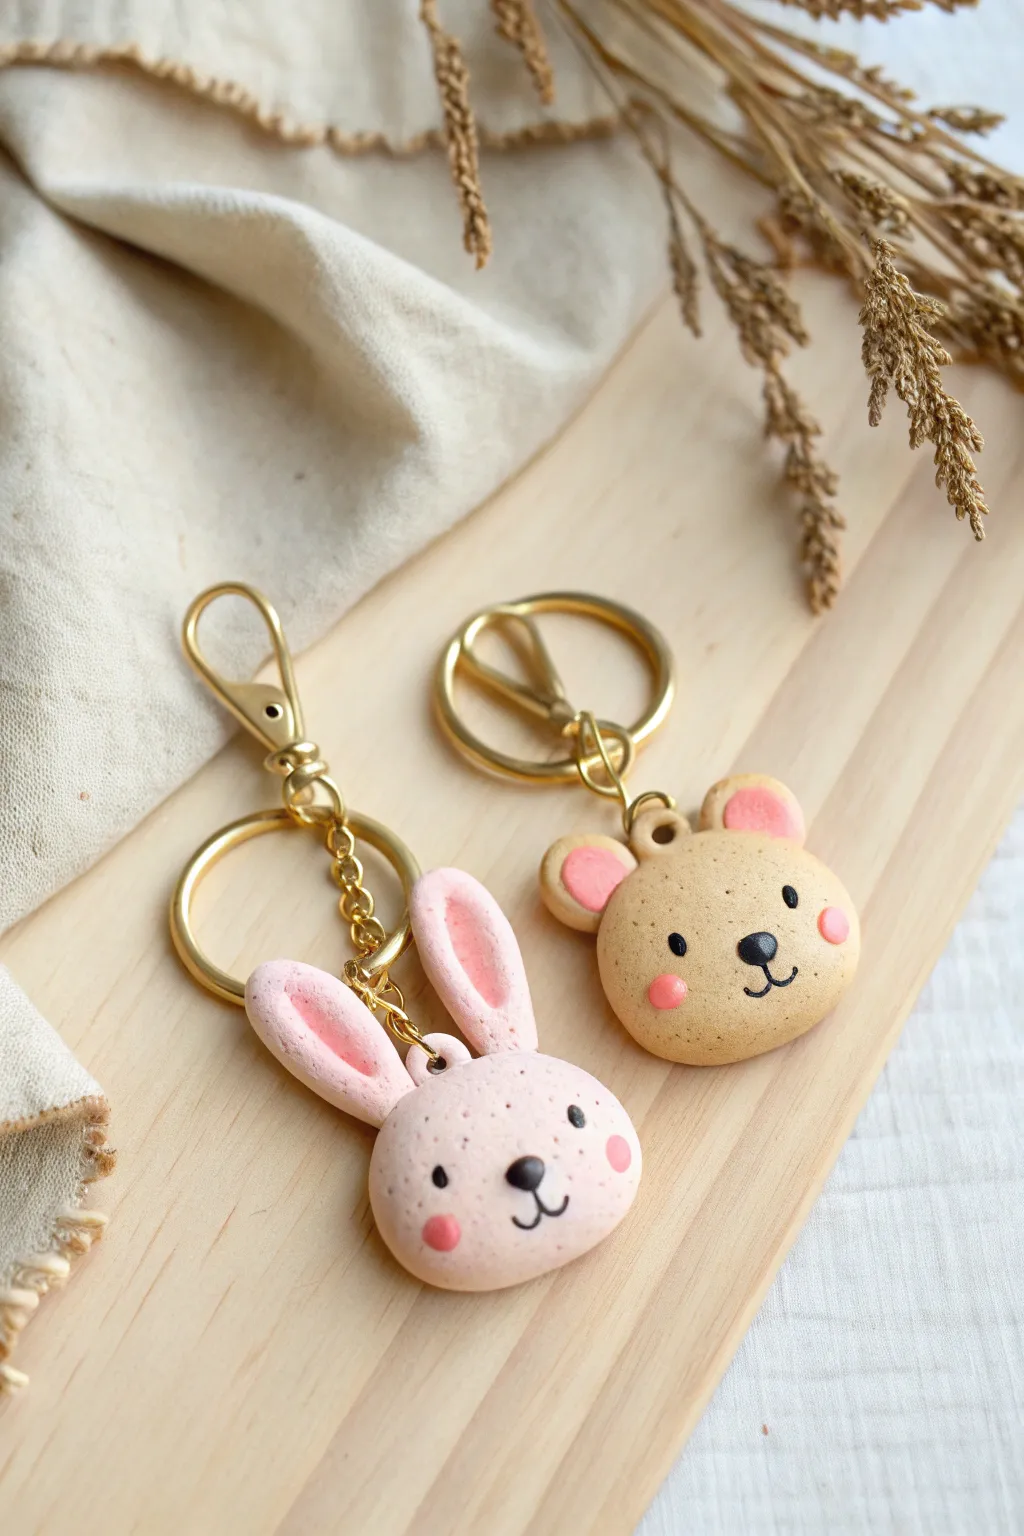
These adorable bunny and bear head charms are the perfect beginner project for working with polymer clay. Featuring soft pastel colors, simple shapes, and gold hardware, they make delightful keychains or bag accessories.
Step-by-Step
Materials
- Polymer clay in light pink, beige, and black
- Gold screw eye pins (2 small)
- Gold keychains with lobster clasps and jump rings
- Ball stylus tool or dotting tool
- Needle tool or toothpick
- Rolling pin (acrylic or glass)
- Small round cutter or shape template
- Jewelry pliers (round nose and flat nose)
- Soft pastel chalk (pink) and a soft brush
- Baking sheet and parchment paper
- Oven
Step 1: Shaping the Base
-
Condition the clay:
Start by kneading your beige clay (for the bear) and pink clay (for the bunny) separately until they are soft, pliable, and free of cracks. -
Form the heads:
Roll two balls of clay, roughly 1 inch in diameter. Slightly flatten them between your palms to create rounded discs. They should be puffy, like a macaron shell, not completely flat. -
Smooth the edges:
Gently tap the edges with your finger to round them off, ensuring there are no sharp corners or fingerprints left on the surface.
Step 2: Adding the Ears
-
Make the bunny ears:
For the bunny, roll two small logs of pink clay. Flatten them slightly into long teardrop shapes. -
Indent the bunny ears:
Use a ball stylus to press a long groove into the center of each pink ear to give them depth. -
Attach bunny ears:
Press the rounded bottom of the ears onto the top of the pink head. Use a needle tool to gently blend the clay at the seam so they don’t fall off. -
Form the bear ears:
Roll two tiny balls of beige clay for the bear. Press them gently onto the top corners of the beige head. -
Detail the bear ears:
For the inner ear simply take tiny dots of pink clay, flatten them, and press them into the center of the beige bear ears. -
Texture the surface:
I like to take an old toothbrush or a needle tool and gently tap the entire surface of the clay to create a subtle, fuzzy texture, avoiding the inner ear areas.
Fixing Fingerprints
If you notice fingerprints on your smooth clay before baking, lightly brush the area with a tiny amount of baby oil or cornstarch to create a flawless matte finish
Step 3: Creating the Faces
-
Mark eye placement:
Using a needle tool, make two tiny guide holes where you want the eyes to sit on both faces to ensure symmetry. -
Add the eyes:
Roll exceptionally tiny balls of black clay. Press them into the guide holes you just created. -
Create the nose:
Roll a slightly larger oval of black clay for the nose and place it centrally below the eyes. -
Draw the mouth:
Roll a microscopic ‘snake’ of black clay to form the mouth lines, or simpler yet, gently paint the mouth lines on after baking with acrylic paint and a fine liner brush for precision. -
Blush the cheeks:
Scrape a little bit of pink soft pastel chalk into a powder. Use a soft brush or your finger to gently dab pink circles onto the cheeks for a rosy glow.
Make it Sparkle
Mix a tiny amount of white glitter into your translucent liquid clay and brush it over the charms after baking for a sugary, glazed donut effect
Step 4: Assembly and Baking
-
Insert hardware:
Screw a gold eye pin into the top center of each charm (between the ears). Remove it, add a dab of liquid clay or bake-and-bond glue to the threads, and screw it back in for security. -
Bake the charms:
Place your creations on a parchment-lined baking sheet. Bake according to your clay package instructions (usually 275°F/135°C for 15-30 minutes). -
Cool down:
Let the charms cool completely in the oven with the door slightly ajar to prevent cracking. -
Attach the keychain:
Use your pliers to open a jump ring. Loop it through the eye pin on the charm and the bottom link of the gold keychain hardware. -
Close the ring:
Twist the jump ring closed securely using two pairs of pliers to ensure no gaps remain.
Now you have a set of charming friends ready to hang on your keys or gift to a loved one
Cloud and Raindrop Dangle Charms
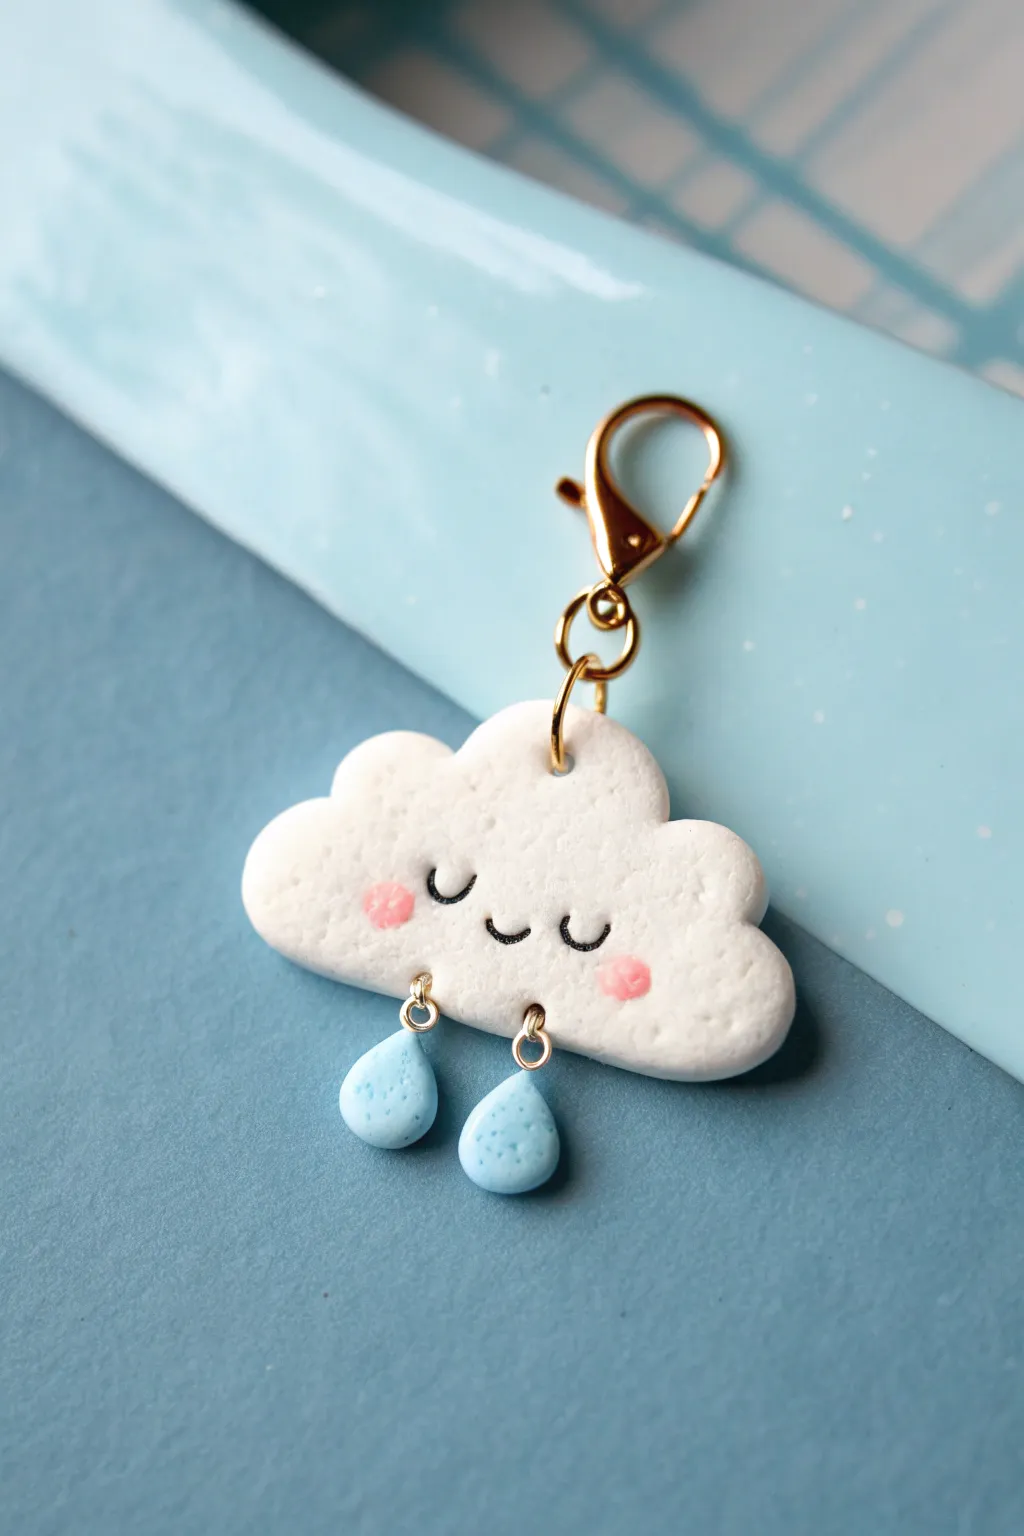
Brighten up even the gloomiest days with this adorable smiling cloud charm. Its gentle textured surface and playful dangling raindrops make it a sweet addition to any zipper pull or planner.
How-To Guide
Materials
- White polymer clay
- Light blue polymer clay
- Pink polymer clay or soft pastels
- Black acrylic paint or fine detail pen
- 3 small screw eye pins (gold)
- 2 small jump rings (gold)
- Lobster clasp keychain finding
- Generic toothbrush or stiff brush (for texturing)
- Dotting tool or toothpick
- Needle tool
- Clay roller
- Small round cutter or oval cutter (optional)
- Gloss glaze (optional for raindrops)
Step 1: Shaping the Cloud Base
-
Condition the white clay:
Begin by kneading a chunk of white polymer clay until it is soft and pliable. Roll it out into a flat sheet about 1/4 inch thick. You want it substantial enough to hold the hardware. -
Cut or mold the shape:
Use a specialized cloud cutter if you have one. If not, shape a flattened oval and use a small round cutter to bite out overlapping semicircles along the edge to create that fluffy cumulus outline. -
Smooth the edges:
Gently tap the rough edges with your fingertip to round them off. The cloud should look soft and puffy, not sharp or angular. -
Insert the top hardware:
Take one screw eye pin. Carefully twist it into the center top of the cloud. If you prefer extra security, add a tiny dab of liquid clay or bake-and-bond to the threads before inserting. -
Add texture:
Take a clean, dry toothbrush or a stiff bristle brush. Gently tap the bristles over the entire surface of the white clay. This creates a lovely stone-like or fluffy matte texture instead of a shiny, smooth one.
Step 2: Adding the Raindrops
-
Form the drops:
Condition a small amount of light blue clay. Roll two tiny balls, then pinch one end of each to form a teardrop shape. -
Texture the rain:
Just like the cloud, give these little drops a light tap with your texture brush so they match the finish of the main piece. -
Insert bottom hardware:
Insert a screw eye pin into the top (pointed end) of each raindrop. -
Prep the cloud for hanging:
On the bottom edge of your white cloud, mark two spots where you want the rain to hang. Use a needle tool to create small pilot holes, then insert a screw eye pin into each spot.
Smudged Smile?
If you mess up the painted face, quickly wipe it away with a cotton swab dipped in rubbing alcohol or acetone before the paint dries.
Step 3: The Cute Face
-
Create rosy cheeks:
Take a miniscule amount of pink clay, flatten it into two tiny circles, and press them onto the cloud face. Alternatively, shave a bit of pink pastel chalk and brush the powder on with a soft brush for a softer blush effect. -
Bake the pieces:
Place the cloud and the two raindrops on a baking tile or parchment paper. Bake according to your clay manufacturer’s instructions (usually 275°F/135°C for 15-30 minutes). -
Cool down:
Let the pieces cool completely before handling. Polymer clay is fragile when warm. -
Paint the expression:
Using a very fine detail brush and black acrylic paint, or a fine-tip permanent marker, draw two U-shapes for closed happy eyes and a smaller U-shape for the smile. I find drawing lightly first helps get the placement right.
Make it Sparkle
Before baking, lightly brush the cloud with white mica powder or bio-glitter to give it a magical, iridescent shimmer suitable for a sun-catcher.
Step 4: Assembly
-
Attach the rain:
Open a small jump ring using two pairs of pliers. Thread it through the loop of a raindrop and one of the bottom loops on the cloud. Close the ring securely. Repeat for the second drop. -
Add the clasp:
Open a slightly larger jump ring (or the one attached to your lobster clasp). Connect it to the top screw eye on the cloud. -
Final check:
Ensure all jump rings are closed flush so nothing slips off. Your charm is now ready to face the weather.
Enjoy your sweet little weather companion on your favorite bag or notebook
Mini Star and Moon Charms
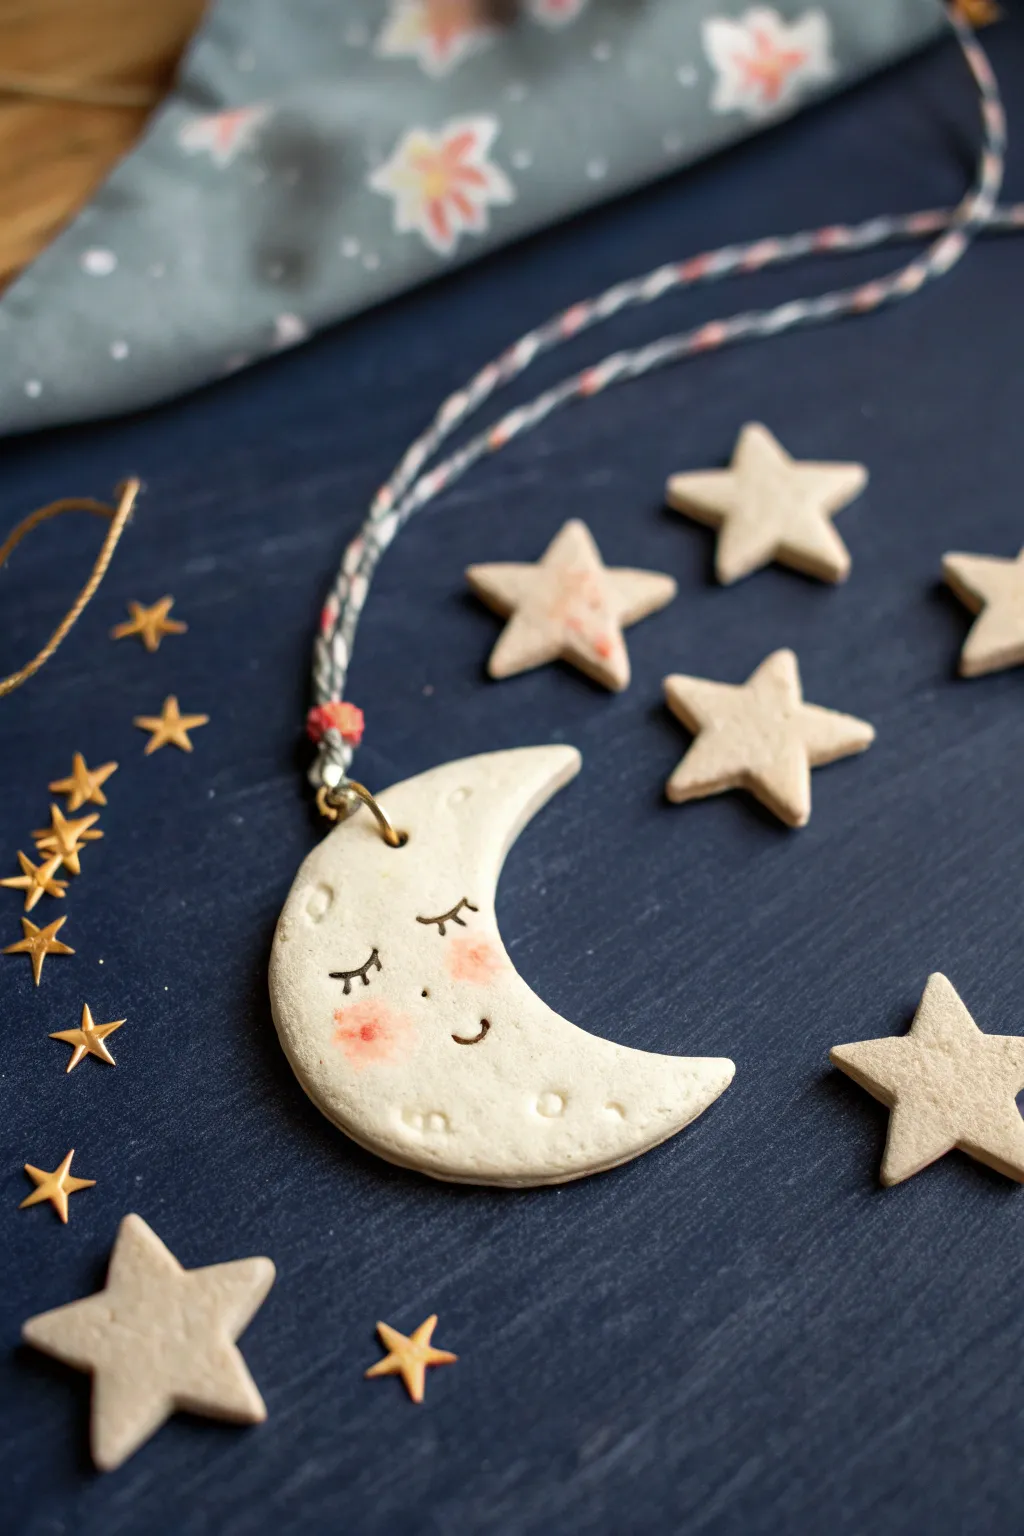
Capture the magic of the night sky with this adorable sleeping moon pendant and matching star charms. The natural, matte finish of the clay gives these celestial pieces a dreamy, handcrafted charm perfect for a cozy necklace.
Detailed Instructions
Materials
- White polymer clay or air-dry clay
- Rolling pin or smooth round jar
- Moon and star cookie cutters (small size)
- Small eye pin or jump ring
- Needle tool or toothpick
- Black acrylic paint or fine-tip marker
- Pink soft pastel chalk or blush powder
- Small soft paintbrush
- Small round tool (like the end of a paintbrush) for texture
- Baker’s twine or necklace cord
- Fine-grit sandpaper (optional)
- Matte varnish (optional)
Step 1: Shaping the Clay
-
Condition the clay:
Begin by warming the white clay in your hands, kneading it until it is soft, pliable, and free of cracks. -
Roll it out:
On a clean, flat surface, roll the clay out to an even thickness of about 1/4 inch (6mm). Avoid rolling it too thin, as the charm needs to be sturdy. -
Cut the moon:
Use your moon-shaped cutter to punch out the main pendant shape. If you don’t have a cutter, use a needle tool to trace and cut a crescent shape freehand. -
Cut the stars:
Use the star cutter to create several small star charms from the remaining rolled clay to accompany your moon. -
Smooth the edges:
Gently run your finger dipped in a little water (for air-dry clay) or baby oil (for polymer) along the cut edges to soften any sharp corners.
Clean Clay Tip
White clay picks up dust easily. Keep a piece of scotch tape handy to dab onto the raw clay surface; it lifts away lint and dust instantly.
Step 2: Adding Details & Hardware
-
Insert the hardware:
Carefully push a small eye pin into the top tip of the crescent moon. If you plan to simply drill a hole later, skip this step. -
Secure the pin:
Pinch the clay gently around the pin’s stem to ensure it’s embedded securely. -
Create dimples:
Using a small round tool or the back of a thin paintbrush handle, press tiny, shallow craters randomly onto the surface of the moon for texture. -
Sculpt the eye:
With a needle tool, carefully press a small curved arc into the center of the face for the closed eyelid. -
Add eyelashes:
Make three tiny, short indentations extending downwards from the arched eyelid to create sleepy lashes. -
Add the mouth:
Press a tiny u-shape slightly below and to the right of the eye to form a sweet, small smile.
Starry Night Glitter
Mix a tiny pinch of fine iridescent glitter into your white clay before rolling it out for a subtle, magical shimmer that catches the light.
Step 3: Finishing Touches
-
Bake or dry:
Follow the manufacturer’s instructions for your specific clay. If baking polymer clay, place pieces on parchment paper. If using air-dry, let them sit for 24-48 hours. -
Sand imperfections:
Once fully cured or dry, use fine-grit sandpaper to gently buff away any fingerprints or rough edges. -
Add rosy cheeks:
Scrape a little pink pastel chalk into a powder. Use a soft, dry brush to gently buff this powder onto the cheek area of the moon and the centers of the stars for a blushing effect. -
Define the features:
Using a very fine detail brush with diluted black acrylic paint, or a fine-tip marker, carefully trace inside the indented eye and mouth lines to make them pop. -
Seal (Optional):
Depending on your clay, you may want to apply a layer of matte varnish to protect the paint and pastel, keeping the finish natural looking. -
String it up:
Thread a length of baker’s twine or cord through the eye hook or hole. You can knot it securely or add a clasp.
Now you have a charming piece of handmade jewelry to wear or hang as a sweet decoration
Heart Locket-Style Charm Pairs
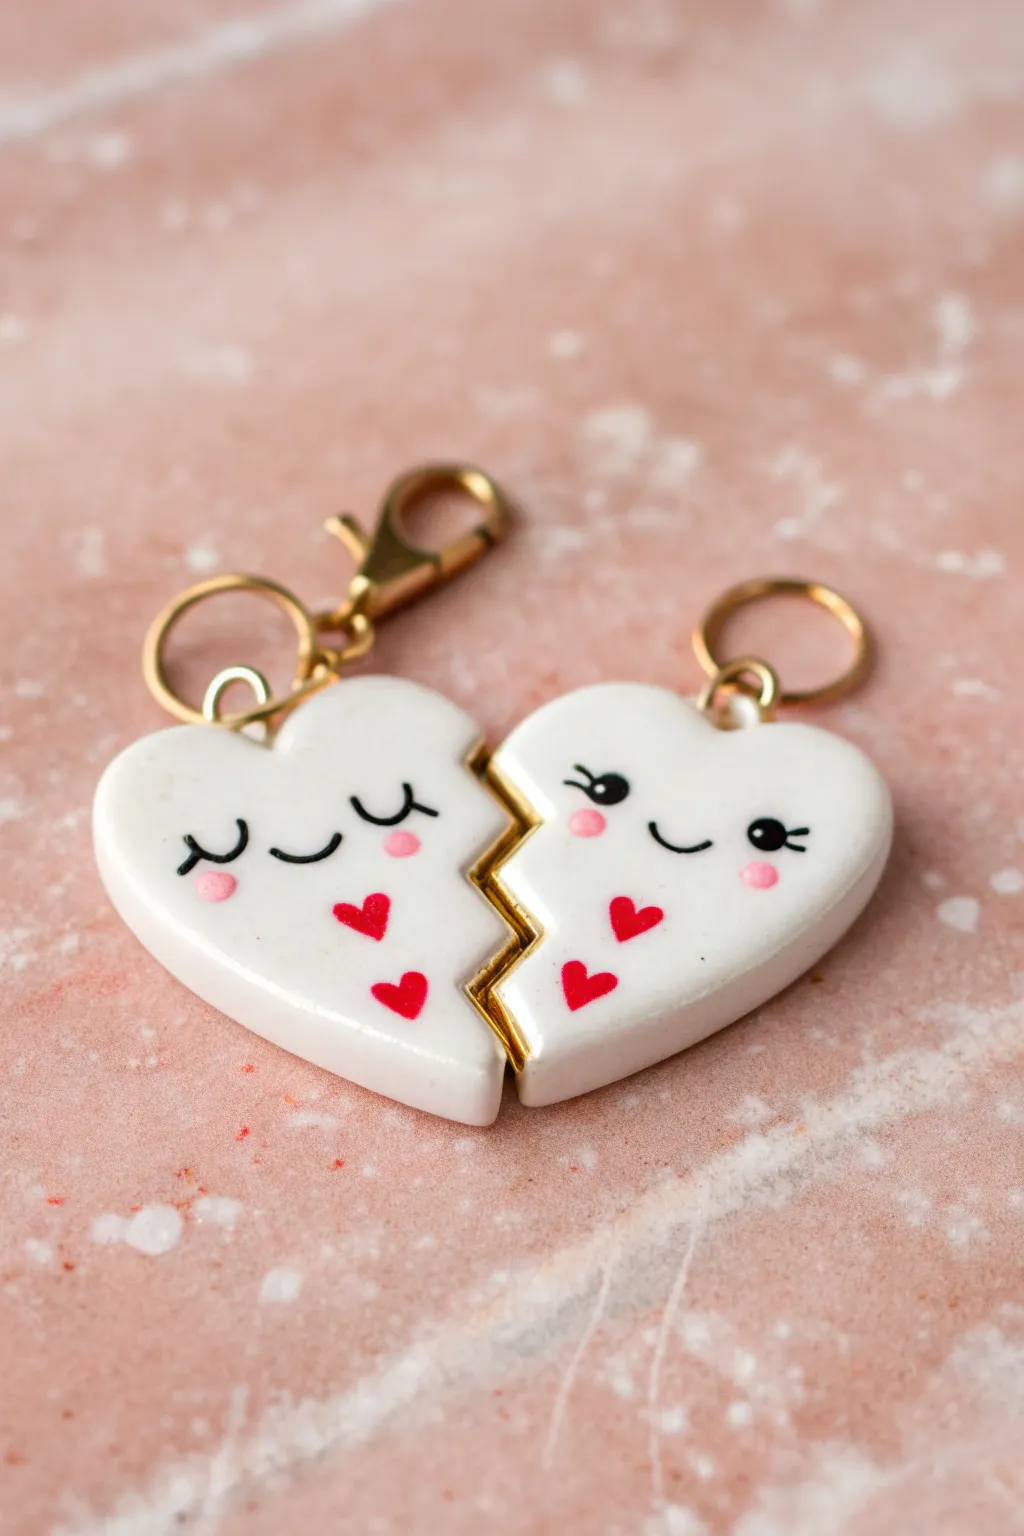
Celebrate friendship with these adorable interlocking heart charms that snap together like a puzzle piece. With their sweet matching faces and jagged gold edges, they make the perfect modern update to the classic ‘best friends forever’ necklace.
Step-by-Step Guide
Materials
- White polymer clay
- Blade or X-Acto knife
- Gold acrylic paint or liquid gold leaf
- Black fine-liner pen (or black acrylic paint)
- Pink acrylic paint
- Red acrylic paint
- Fine detail paintbrush
- Small dotting tool or toothpick
- 2 Gold screw eye pins
- 2 Gold jump rings
- 2 Gold lobster clasps
- High-gloss glaze or UV resin
- Oven for baking
Step 1: Shaping the Clay
-
Condition the clay:
Start by warming a chunk of white polymer clay in your hands until it becomes soft and pliable. Roll it into a smooth ball to remove any air bubbles. -
Create a slab:
Flatten the ball onto your work surface using a rolling pin or an acrylic roller. You want a uniform thickness of about 4-5mm so the charms feel substantial but weren’t too heavy. -
Cut the heart shape:
Use a medium-sized heart cookie cutter to punch out a perfect heart shape. Alternatively, you can sketch a heart on paper, cut it out, and trace around it with your blade for a custom size. -
Create the jagged split:
Using a zigzag crafting blade or carefully cutting freehand with an X-Acto knife, slice the heart vertically down the center. Use a jagged, lightning-bolt pattern so the two halves will puzzle together perfectly. -
Smooth the edges:
Gently tap the cut edges with your finger to soften any sharp corners, but be careful not to distort the jagged pattern, or the pieces won’t fit back together. -
Insert hardware:
Screw a small gold eye pin into the top center of each heart lobe. If the clay distorts while you do this, gently reshape it against your work surface.
Step 2: Baking & Decoration
-
Bake the pieces:
Place your clay pieces on a tile or baking sheet lined with parchment paper. Bake according to your specific brand of polymer clay’s instructions—usually around 275°F (135°C) for 15-20 minutes. -
Cool down:
Let the pieces cool completely before handling. This hardening phase is crucial for the paint to adhere properly. -
Paint the splice:
Using a small brush and gold acrylic paint (or liquid gold leaf for extra shine), carefully paint the jagged inner edge of both heart halves. I find that painting slightly onto the top surface creates a nice defined border. -
Draw the faces:
Using a very fine black marker or a detail brush with black paint, draw the eyes and mouth. Give the left half sleepy, U-shaped eyes with lashes, and the right half open, energetic eyes. Connect them with a simple curved smile. -
Add rosy cheeks:
Dip a dotting tool or the end of a toothpick into pink paint. Gently dab small circles underneath the eyes to create kawaii rosy cheeks. -
Paint mini hearts:
With a fine brush and red paint, add two or three tiny hearts floating near the bottom of each charm half to tie the color scheme together. -
Seal the design:
Once the paint is fully dry, coat the entire front and sides of the charms with a high-gloss glaze or a thin layer of UV resin to protect the artwork and give it a porcelain-like finish.
Keep it clean
White clay picks up dust instantly. Wipe your hands and work surface with a wet wipe or alcohol swab immediately before rolling your final clay ball.
Step 3: Assembly
-
Attach jump rings:
Use two pairs of jewelry pliers to twist open your gold jump rings. Slide one through the eye pin loop on top of a heart half. -
Add the clasp:
Before closing the jump ring, slide on the gold lobster clasp. Twist the jump ring closed securely so there is no gap. -
Repeat:
Repeat the hardware attachment process for the second half of the heart. -
Final test:
Snap the two finished pieces together to marvel at your work before gifting one half to your best friend.
Eye pin loose?
If the screw eye pin feels wobbly after baking, simply unscrew it, add a tiny drop of super glue to the threads, and screw it back into the existing hole.
Now you have a sentimental and stylish set of charms ready for your next friendship necklace project
Tiny Sushi Roll Charms
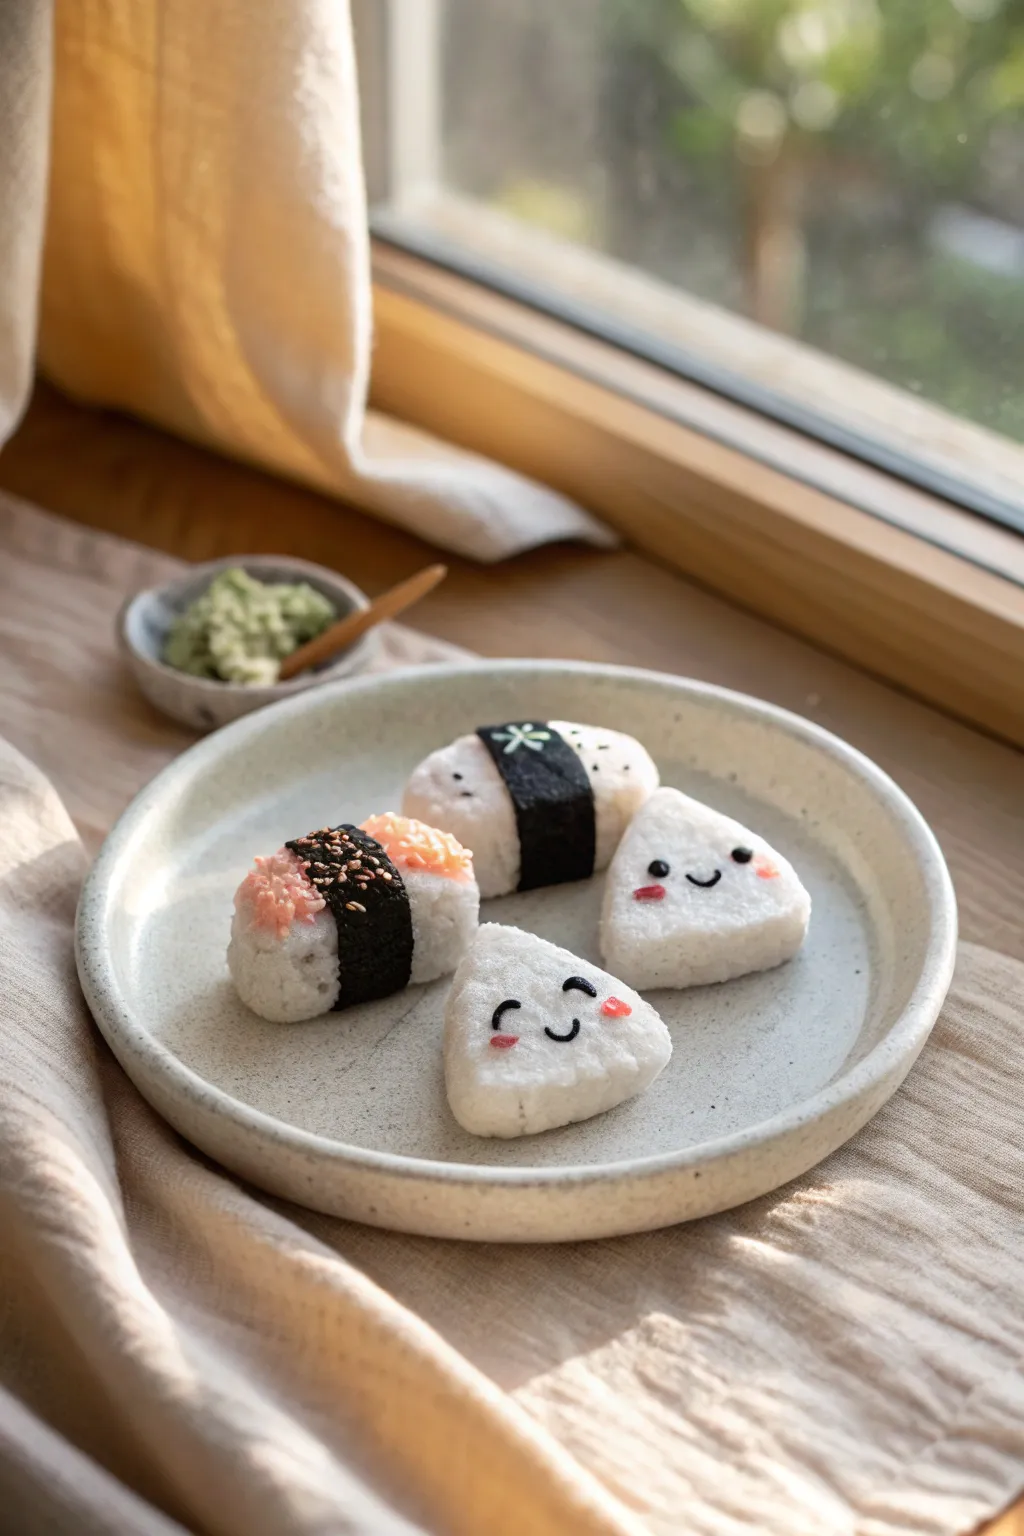
These miniature clay sushi charms capture the adorable aesthetic of Japanese bento culture with tiny smiling faces and realistic textured rice. This project guides you through sculpting two cheerful onigiri rice balls and two distinct sushi rolls, perfect for jewelry or dollhouse displays.
Step-by-Step Tutorial
Materials
- White polymer clay (translucent and opaque mix for realism)
- Black polymer clay
- Pink/salmon polymer clay
- Toothbrush or crumpled foil (for texturing)
- Needle tool or toothpick
- Black acrylic paint
- Pink acrylic paint or chalk pastel
- Fine detail brush or dotting tool
- Liquid clay (optional)
- Craft blade
- Gloss glaze (optional)
Step 1: Rice Preparation
-
Mix the perfect rice shade:
Start by mixing opaque white clay with a very small amount of translucent white. This gives the ‘rice’ a slight depth rather than looking like flat plastic. -
Divide your portions:
Separate your white clay mixture into four equal portions. Roll each piece into a smooth ball to warm up the clay and remove any cracks. -
Establish the shapes:
Gently pinch two of the balls into rounded triangle shapes for the onigiri. For the other two, shape them into elongated, rounded rectangles to form the sushi rolls. -
Create rice texture:
This is the secret to realism: take a clean stiff-bristled toothbrush or a ball of crumpled aluminum foil and tap it repeatedly over the entire surface of all four white shapes. I find rotating the piece while texturing ensures you don’t miss any spots.
Texturing Secret
Work the toothbrush in small circles rather than just stamping it straight down. This creates a fluffier, more chaotic texture that looks exactly like sticky sushi rice.
Step 2: Sushi Rolls & Toppings
-
Prepare the nori:
Roll out a very thin sheet of black clay. Use your craft blade to cut two long, narrow strips, roughly 3-4mm wide. -
Wrap the rolls:
Wrap one black strip around the center of each rectangular sushi piece. Press gently so the ‘seaweed’ adheres to the ‘rice’ texture without squashing the shape. -
Texture the salmon topping:
Take a small pinch of pink clay and mash it slightly with your texturing tool to roughen it up. Press this onto the top of one of your sushi rolls, right next to the seaweed band. -
Add sesame details:
For the pink-topped sushi, roll infinitesimally small specks of tan or white clay. Carefully place these ‘sesame seeds’ on top of the black seaweed band using a needle tool. -
Decorate the second roll:
For the plain rice roll, add a tiny green star or flower shape on top of the black band using green clay, or simply leave it classic black and white.
Make it a Set
Create a tiny wooden tray from balsa wood strips or sculpt a matching clay wasabi pile and ginger rosette to create a full miniature bento display.
Step 3: Onigiri Faces
-
Position the faces:
Decide which side of your triangular rice balls is the front. You want a relatively smooth area amidst the texture for the features to sit nicely. -
Sculpt tiny eyes:
Roll tiny balls of black clay for the eyes. Press them gently onto the face area. You can make one winking by rolling a tiny snake and curving it into a ‘U’ shape. -
Add sweet smiles:
Roll extremely thin snakes of black clay for the mouths. Curve them into smiles and press them onto the clay below the eyes. Use a needle tool to nudge the ends upward for a happier look. -
Apply blush:
Using a dotting tool or toothpick, dab a tiny amount of pink paint (or shaved pink pastel dust) onto the cheeks for that signature kawaii flush.
Step 4: Finishing Touches
-
Check for lint:
Before baking, examine your white clay closely. If any dust or lint has stuck to it, carefully pick it off with a needle tool or a bit of tape. -
Bake carefully:
Bake the pieces according to your clay package instructions. Since these are small, watch the time closely to prevent the white clay from scorching. -
Glaze details:
Once cool, create contrast by brushing a gloss glaze only on the ‘nori’ (black clay) and the eyes. Leave the rice matte for a realistic texture contrast.
Now you have a charming set of sushi friends ready to brighten up a keychain or sit on your desk
Pastel Ice Cream Sandwich Charms
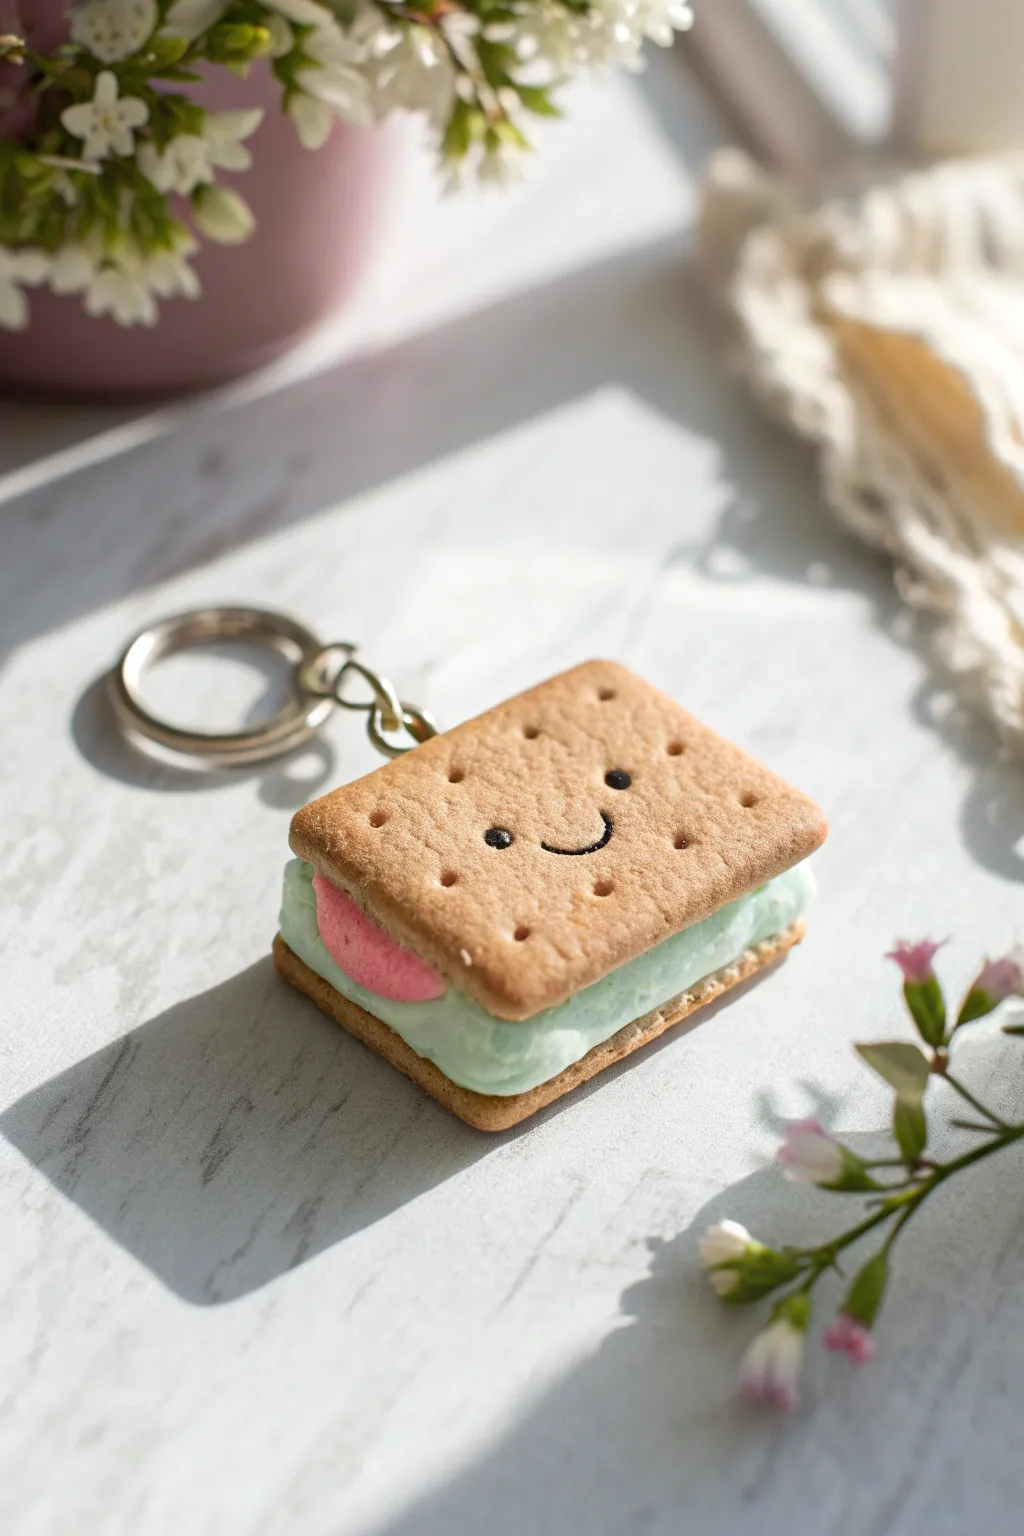
This adorable ice cream sandwich charm combines the texture of a classic tea biscuit with a sweet, pastel filling. The tiny smiley face adds a burst of personality, making it the perfect cheerful addition to your keychain collection.
How-To Guide
Materials
- Light tan polymer clay (biscuit color)
- Pastel mint green polymer clay (filling)
- Small amount of pink polymer clay (tongue)
- Black acrylic paint or clay paint
- Silver keychain hardware with jump ring and eye pin
- Toothbrush or balls of tin foil (for texturing)
- Needle tool or toothpick
- Small square cookie cutter (approx. 1-1.5 inches)
- Dotting tool or small ball tool
- Gloss glaze (optional)
Step 1: Baking the Biscuits
-
Mix the biscuit color:
Start by conditioning your light tan clay. If it looks too dark, mix in a tiny bit of white; if too pale, add a speck of orange or brown to get that perfect golden-baked hue. -
Roll and cut:
Roll out the tan clay to a medium thickness, about 3-4mm. Use your square cutter to punch out two identical squares. These will be the top and bottom crackers. -
Soisten the corners:
Gently tap the corners of your squares with your fingertip to round them slightly so they aren’t sharp or harsh looking. -
Add realistic texture:
Take an old toothbrush or a crumpled ball of aluminum foil and press it gently all over the top surface and sides of both squares. This mimics the baked texture of a real cracker. -
Poke the holes:
Using a dotting tool or a blunt toothpick, press small indentations into the clay in a grid pattern. I usually do 3 rows of 3, but adjust based on your square size. -
Create the face:
On the top biscuit piece, use your smallest dotting tool to mark where the eyes will go. Use a needle tool to gently carve a small, curved smile between the eye marks. -
Pre-bake shading (optional):
For extra realism, brush a tiny amount of soft pastel chalk (in light brown) around the edges of the biscuits to make them look golden brown.
Squished layers?
If the filling squishes too much when pressing layers together, bake the biscuit layers partially (5 mins) first to harden them before assembling the raw filling in the middle.
Step 2: Filling and Assembly
-
Prepare the ice cream:
Condition a chunk of pastel mint green clay. Roll it into a thick slab, slightly thicker than your biscuit layers to make it look generous and creamy. -
Cut the filling:
Cut a square of the mint clay using the same cutter you used for the biscuits. Gently press the sides inward with your fingers so the square becomes slightly smaller than the biscuits. -
Texture the ice cream:
Rough up the sides of the mint square with a needle tool, plucking at the clay to create that fluffy, frozen dairy texture. -
Create the tongue:
Take a tiny pinch of pink clay, correct shape it into a small teardrop, and flatten it. Attach this to the side of the mint filling that corresponds with the smile on the top biscuit. -
Assemble the sandwich:
Stack the bottom biscuit, the mint filling, and the top biscuit. Press them together gently so they bond without squishing the texture. -
Insert hardware:
Trim an eye pin to an appropriate length and insert it into the center of the top edge of the sandwich. Ensure it goes deep enough into the filling for a secure hold.
Add a matte finish
Real biscuits aren’t shiny! Skip the gloss glaze on the biscuit parts. Only use glaze on the pink tongue or the eyes to make them look wet and lively.
Step 3: Finishing Touches
-
Bake carefully:
Bake the charm according to your clay manufacturer’s instructions, usually at 275°F (130°C) for about 15-20 minutes. Let it cool completely. -
Paint the face:
Use a tiny detail brush or a toothpick dipped in black acrylic paint to fill in the eye indents and trace the smile line carefully. -
Secure the pin:
If the eye pin feels loose after baking, pull it out, add a dab of superglue, and insert it back into the hole. -
Final assembly:
Open a jump ring with pliers, loop it through the eye pin, and attach your keychain ring. Close the jump ring securely.
Clip your new biscuit buddy onto your bag and enjoy the sweet compliments
Mini Plant Pot Charms With Faces
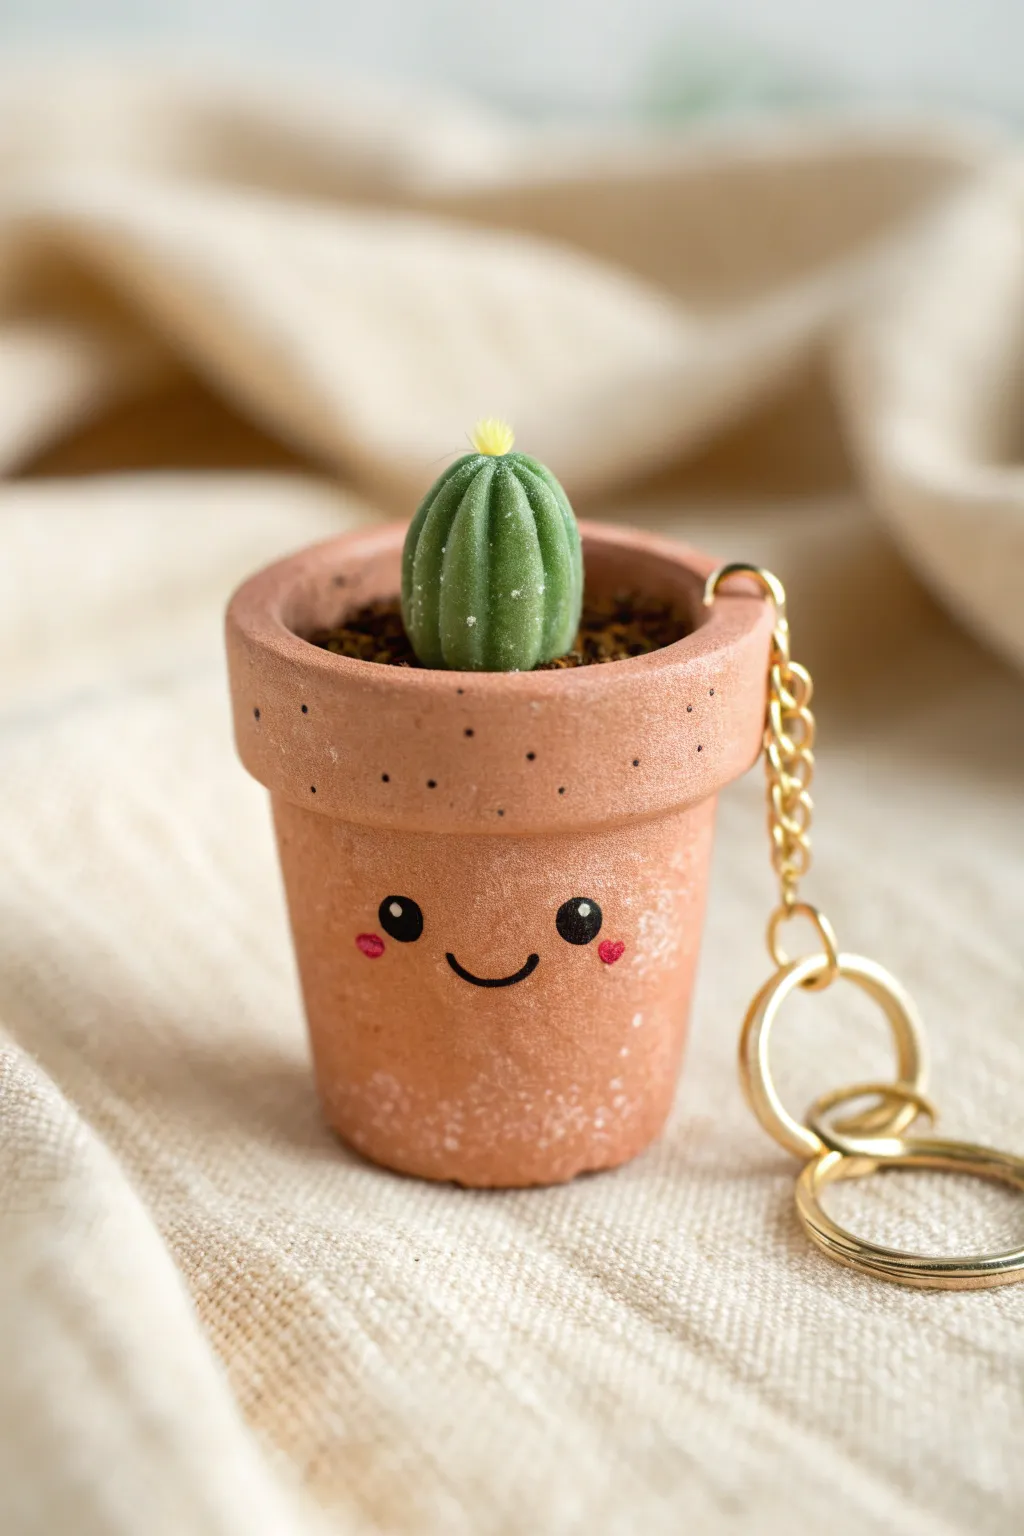
Carry a little burst of desert joy with you everywhere using this adorable miniature potted cactus charm. The classic terracotta look combined with a sweet, simple face makes this tiny succulent the perfect accessory for plant lovers.
Step-by-Step Tutorial
Materials
- Light brown or terracotta-colored polymer clay
- Green polymer clay (medium shade)
- Dark brown or coffee-colored polymer clay (for soil)
- Tiny scrap of yellow clay
- Gold screw eye pin
- Gold keychain ring and chain
- Black acrylic paint
- Pink acrylic paint
- Fine detail paintbrush or dotting tool
- Needle tool or toothpick
- X-acto knife
- Sandpaper or toothbrush (for texture)
- Glaze (optional)
Step 1: Shaping the Pot
-
Form the base:
Start by conditioning your terracotta-colored clay until soft. Roll a marble-sized ball and flatten the top and bottom slightly to create a cylinder shape for the main pot body. -
Indenting the center:
Using the back of a paintbrush or your pinky finger, gently press into the top of the cylinder to create a hollow space for the soil, leaving the walls thick enough to hold their shape. -
Creating the rim:
Roll a thin snake of the same terracotta clay. Flatten it gently into a ribbon, then wrap it around the top edge of your pot to create the classic flower pot rim. Smooth the seam at the back so it disappears. -
Adding texture:
To mimic the porous look of real terracotta, gently tap a piece of rough sandpaper or an old toothbrush against the clay surface. This removes fingerprints and adds realistic grit.
Realism Trick
Mix just a speck of translucent clay into your green cactus clay. This mimics the slightly waxy, light-absorbing quality of real succulents better than opaque clay alone.
Step 2: Planting the Cactus
-
Adding the soil:
Take a small pinch of dark brown clay and rough it up with a needle tool to look crumbly. Press this ‘soil’ into the hollow depression you made earlier, filling it nearly to the brim. -
Forming the cactus body:
Roll a small ball of green clay into a slight oval or egg shape. It should be small enough to sit comfortably inside the pot rim with room to spare. -
Ribbing the cactus:
Use a needle tool or unsharpened knife to press vertical lines from the top center down the sides of the green oval. These indentations create the classic ribbed cactus look. -
Texturing the green:
I like to gently prick the green clay with a needle tool randomly to simulate spine texture without making actual sharp spikes. -
Blooming the flower:
Take a microscopic bit of yellow clay and press it onto the very top center of the cactus. Use a needle to rough it up so it looks fuzzy. -
Assembly:
Press the finished cactus firmly onto the brown soil layer. You can add a drop of liquid clay or bond if you want extra security.
Step 3: Attaching Hardware & Baking
-
Inserting the pin:
Screw the eye pin directly into the rim of the pot. Since the rim is thicker, this is a sturdy spot. Ensure the loop is oriented how you want your keychain to hang. -
Baking:
Bake the piece according to your specific polymer clay package instructions (usually 275°F / 135°C for 15-30 minutes). Let it cool completely before handling.
Level Up: Succulent Variety
Instead of a ball cactus, try rolling tiny teardrop shapes and arranging them in a rosette to create an Echeveria, or make tall cylinders for a snake plant variation.
Step 4: Face & Finishing
-
Painting the eyes:
Dip a stylus or the handle end of a paintbrush into black acrylic paint. Dot two wide-set eyes onto the lower half of the pot. -
Adding the smile:
Using your finest brush, paint a tiny, thin ‘U’ shape between the eyes for a smile. -
Highlighting eyes:
Once the black is dry, use a toothpick to add a tiny white speck to the upper right corner of each eye for a ‘sparkle’ effect. -
Rosy cheeks:
Dip a toothpick into pink paint and dab small oval cheeks just under the outer corners of the eyes. -
Adding dusty details:
For a weathered look, dry brush a tiny amount of white paint over the pot texture. -
Final assembly:
Open the jump ring on your keychain hardware, thread it through the eye pin on the rim, and close it securely with pliers.
Clip this smiling little friend onto your keys and enjoy a touch of gardening wherever you go
Tiny Book and Bookmark Charms
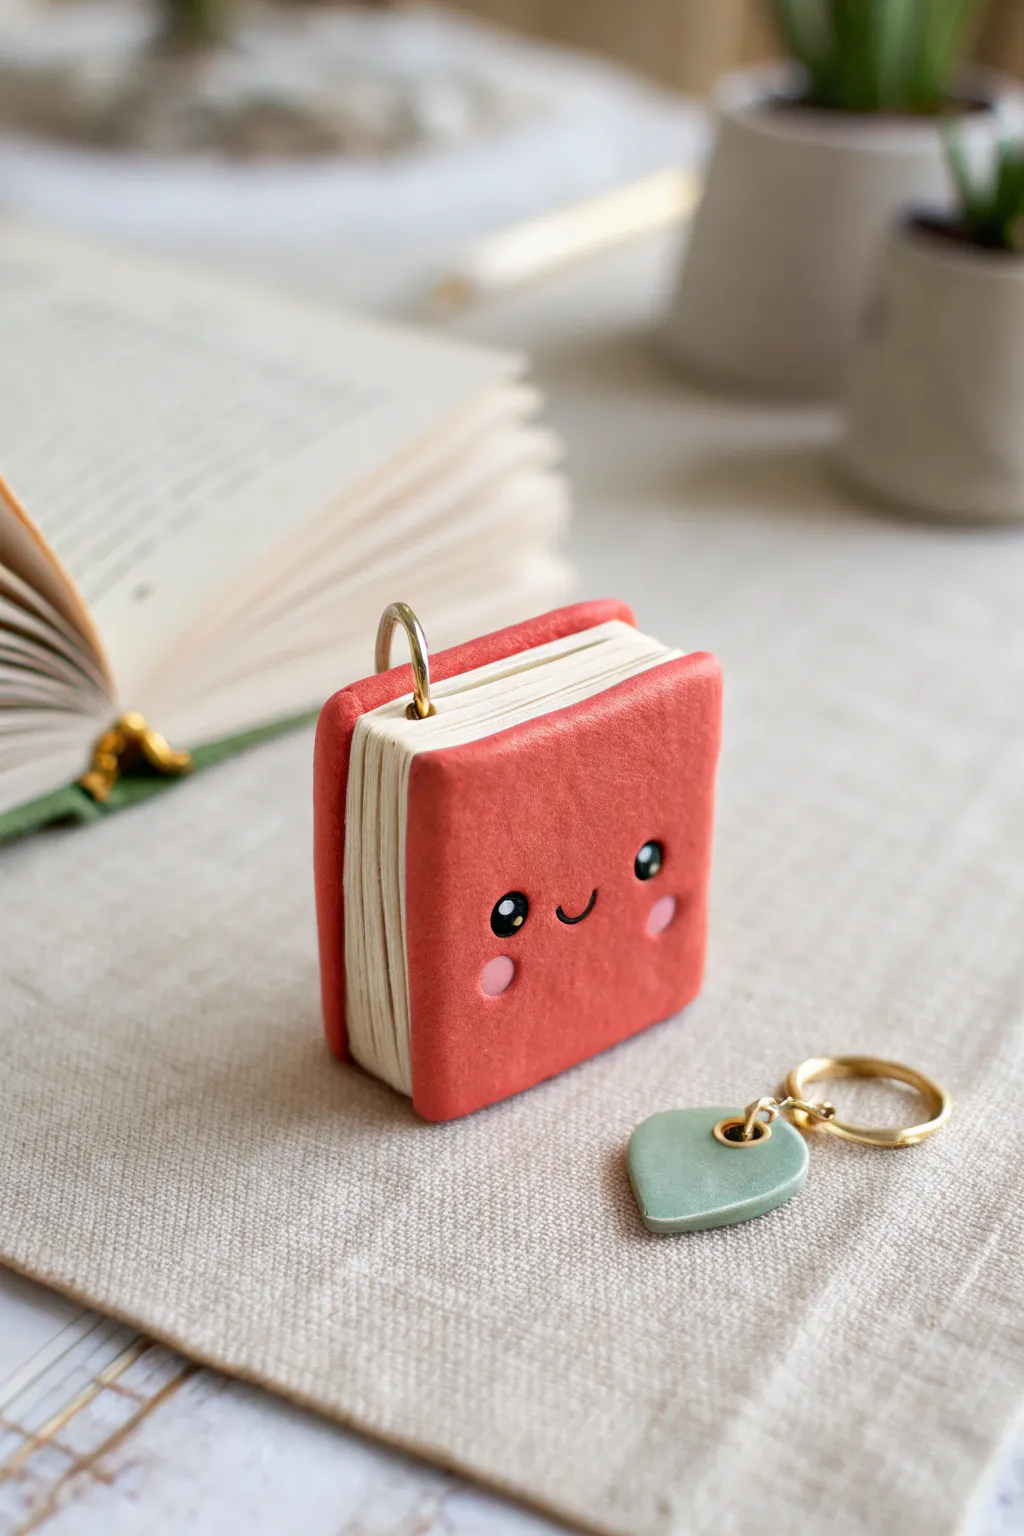
This adorable miniature book charm features a vibrant red cover and a sweet, smiling face that brings the pages to life. Paired with a matching heart charm, this polymer clay set makes the perfect personalized gift for the bookworm in your life.
Step-by-Step Guide
Materials
- Polymer clay (Red, White, Pale Green)
- Black and white acrylic paint
- Pink chalk pastel or pigment powder
- Rolling pin or pasta machine
- Clay blade or craft knife
- Needle tool or dotting tool
- Fine detail paintbrush
- Eye pin or screw eye
- Jump rings and keyring hardware
- Gloss glaze (optional)
Step 1: Creating the Book Pages
-
Condition the white clay:
Begin by conditioning your white polymer clay until it is soft and pliable. Roll it into a thick slab, approximately 1/4 inch thick, which will form the text block of the book. -
Cut the block shape:
Use your clay blade to cut a clean, rectangular block from the white slab. The edges should be straight and sharp to mimic a stack of paper. -
Texture the pages:
Take your needle tool or the dull side of your blade and gently score horizontal lines along three sides of the white block. This creates the illusion of individual book pages stacked together.
Clean Lines Pro-Tip
Before baking, wipe the red cover gently with a baby wipe or a bit of rubbing alcohol on a brush. This removes fingerprints and lint for a flawless, professional finish.
Step 2: crafting the Cover
-
Prepare the red clay:
Condition and roll out a sheet of red polymer clay. It should be thinner than the page block, roughly 1/8 inch thick. -
Measure the cover:
Place your white page block on top of the red sheet to measure the fit. You need a strip long enough to wrap around the back (spine) and cover both the front and back faces, with a tiny bit of overhang. -
Cut and wrap:
Cut the red strip to size. Carefully wrap it around the white block, gently pressing it onto the spine first. Fold it over the front and back, ensuring it adheres well to the white clay without squishing the page texture. -
Refine the edges:
Smooth the edges of the red cover with your finger to remove any sharp cut marks, giving the book a soft, rounded leather-bound look. -
Insert hardware:
Trim an eye pin if it’s too long, or use a screw eye. Insert it securely into the top center of the book spine. I find adding a tiny dab of liquid clay here helps keep it secure after baking.
Step 3: Adding the Kawaii Face
-
Paint the eyes:
Using a very fine dotting tool or the end of a paintbrush, dip into black acrylic paint and place two small dots on the front cover for the eyes. Space them somewhat wide apart for maximum cuteness. -
Add the smile:
With an ultra-fine detail brush and black paint, carefully draw a small ‘U’ shape between the eyes to create a happy smile. -
Apply blush:
Scrape a little pink chalk pastel into powder. Use a dry brush or cotton swab to gently dust two rosy cheeks right underneath the eyes. -
Create eye highlights:
Once the black paint is dry, use a needle tool to add two tiny white dots inside each black eye—one larger, one smaller—to create that sparkling kawaii look.
Level Up: Texture
Before baking, gently press a piece of sandpaper or a toothbrush onto the red clay cover. This creates a realistic faux-leather texture that makes the book look even more authentic.
Step 4: The Heart Companion
-
Cut the heart shape:
Roll out a small amount of pale green clay. Use a small heart cutter or freehand cut a heart shape with your blade. -
Smooth and pierce:
Soften the edges of the heart with your fingertip. Use a tool to poke a hole near the top of the heart for a jump ring, or insert a small eyelet.
Step 5: Finishing Up
-
Bake:
Place both the book and the heart on a tile or parchment-lined tray. Bake according to your specific clay brand’s instructions (usually around 275°F/130°C for 15-30 minutes). -
Cool and assemble:
Let the pieces cool completely. Once hard, attach the heart charm and the book charm to a split ring or keychain using jump rings.
Enjoy carrying your miniature library with you wherever you go
Faux “Shaker” Confetti Charms
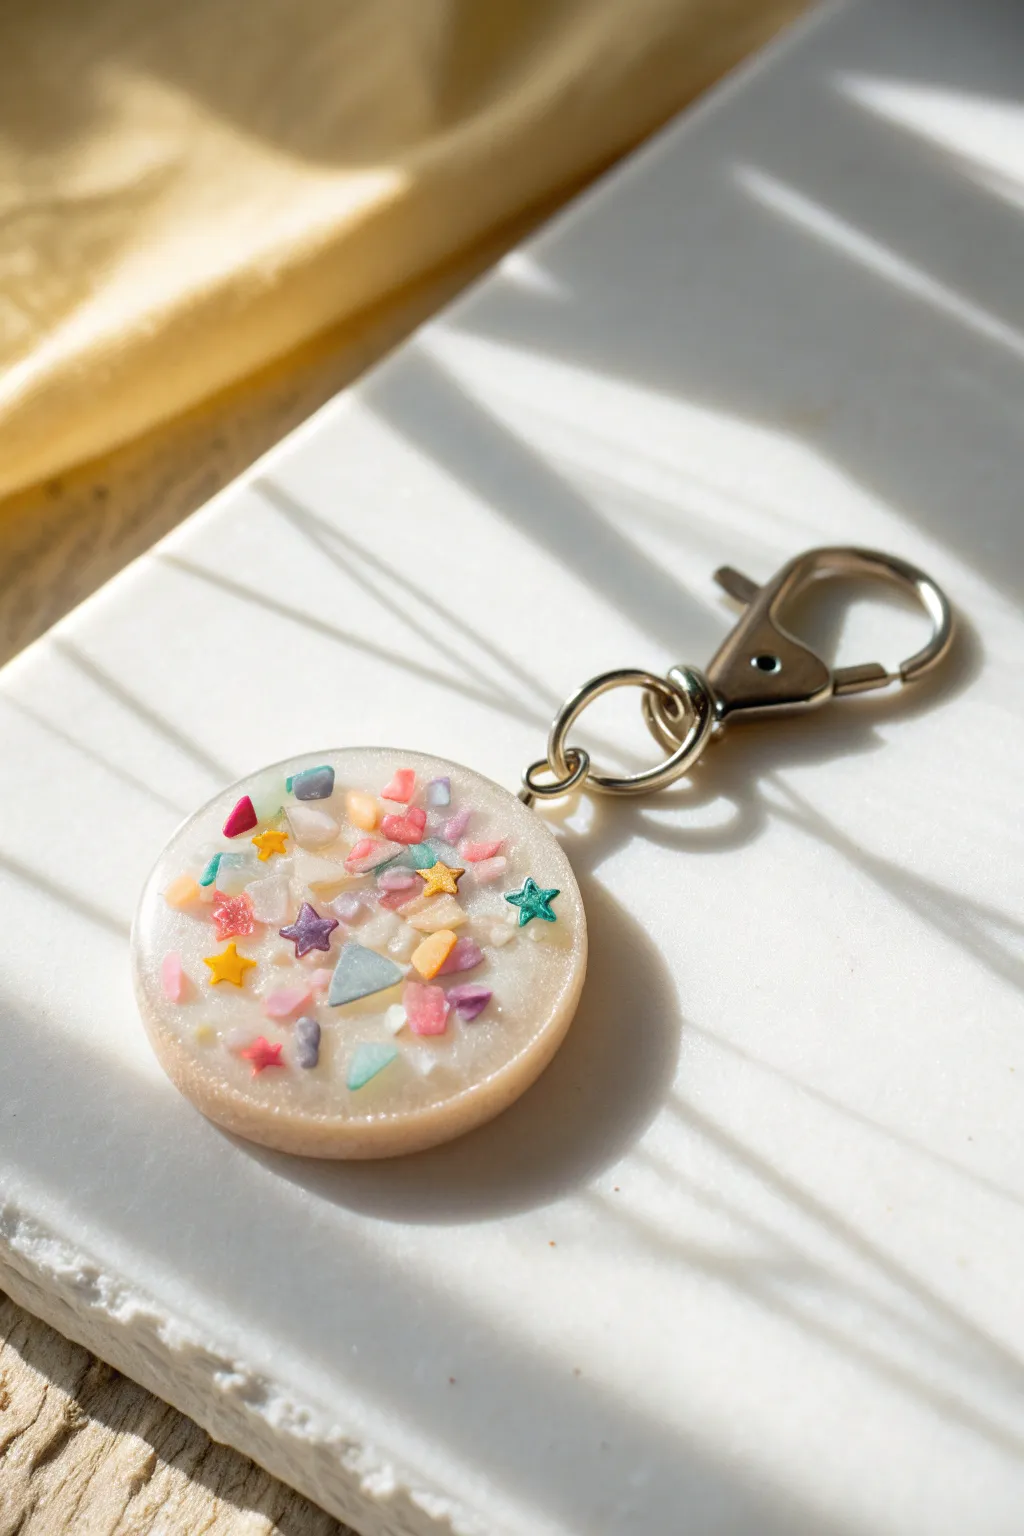
Capture the magic of a shaker charm without the fuss of sealing oils or films. This faux shaker features colorful star sequins and chunky glitter suspended in a dreamy, milky resin base for a polished, durable finish.
Detailed Instructions
Materials
- UV resin (hard type)
- White UV resin pigment or opaque white alcohol ink
- Circular silicone mold (approx. 1.5 inch diameter)
- Assorted confetti mix (stars, triangles, irregular chunks in pastel colors)
- UV lamp
- Toothpick or silicone stir tool
- Hand drill or pin vibe
- Silver jump rings (6mm or 8mm)
- Small lobster clasp keychain finding
- Jewelry pliers
- Silicone mat
Step 1: Creating the Base Layer
-
Mix the resin:
Pour a small amount of clear UV resin onto your silicone mat or into a mixing cup. Add a tiny drop of white pigment. You want a semi-translucent, milky look, so don’t make it fully opaque. -
Pour the first layer:
Pour a thin layer of your milky resin mixture into the circular mold. It should cover the bottom completely but only fill about one-third of the mold’s depth. -
Pop bubbles:
Use a toothpick or a lighter quickly swept over the surface to remove any trapped air bubbles. -
Initial cure:
Place the mold under your UV lamp and cure for about 60 seconds until tacky but stable.
Milkiness Check
Test your white resin mix on a piece of scrap paper first. If it’s too white, add more clear resin. It should look like skim milk, not whole milk.
Step 2: Adding the Confetti
-
Apply adhesive layer:
Add a very thin layer of clear UV resin over the cured milky base. Do not cure this yet; it acts as the glue for your inclusions. -
Place the stars:
Using tweezers or a toothpick dipped in a bit of resin, carefully pick up your star sequins. Place three to four stars creatively around the circle. -
Add chunky glitter:
Sprinkle in the irregular pastel chunks and triangles. I like to concentrate a few clusters near the edges for depth. -
Check density:
Ensure you haven’t overcrowded the charm; you want the milky white background to peek through the colorful bits. -
Lock in the design:
Cure under the UV lamp for a full 2 minutes to freeze everything in place.
Add Subtle Shimmer
Mix ultra-fine iridescent glitter powder into the final clear doming layer. It adds a magical sparkle that catches the light without hiding the confetti.
Step 3: Encapsulating and Finishing
-
Top coat:
Mix a fresh batch of milky resin (or use leftover from the first step) and pour it over the confetti layer, filling the mold to the top. -
Domed finish:
For that smooth, rounded look, add a final drop of clear resin right in the center and let it self-level to the edges, creating a slight dome. -
Final cure:
Cure under the UV lamp for 3-5 minutes. Flip the mold over and cure from the back for another 2 minutes to ensure the light penetrates all the way through the opaque pigment. -
Demold:
Once cool to the touch, gently pop the charm out of the silicone mold. -
Drill the hole:
Use a hand drill or pin vibe to carefully drill a hole near the top edge of the resin circle. -
Assembly:
Open a jump ring with your pliers, thread it through the drilled hole, and attach the lobster clasp before closing the ring securely.
Now you have a durable, dreamy charm ready to brighten up your keys or bag
Glow-in-the-Dark Ghost Charms
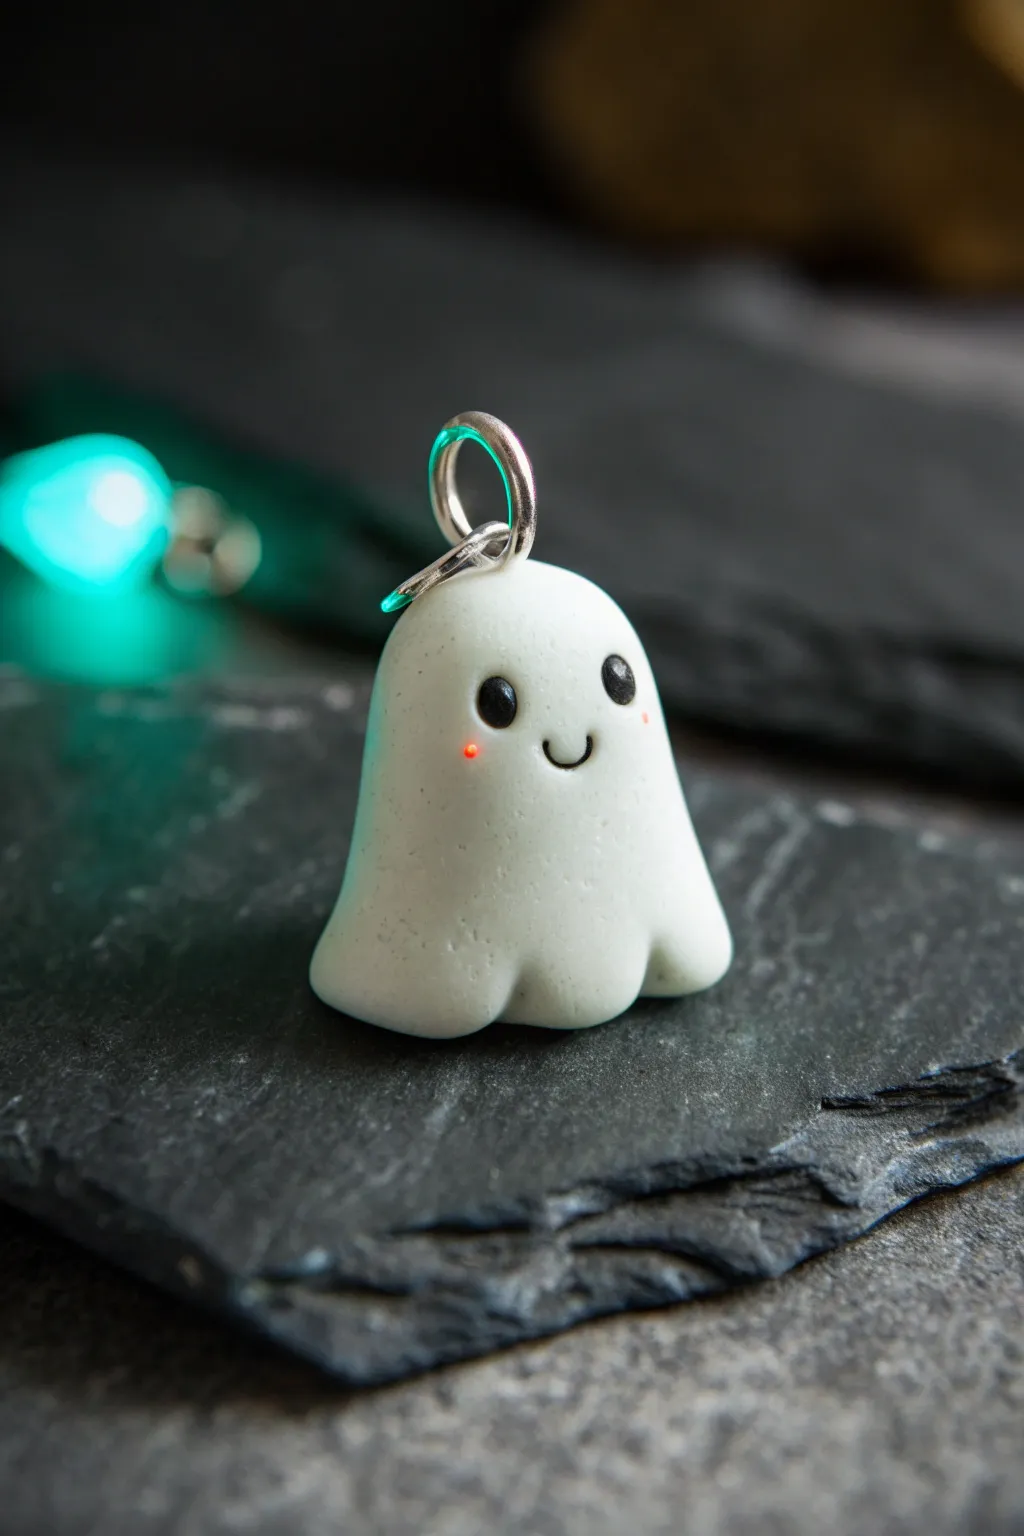
Illuminate your Halloween accessories with this adorable tiny ghost charm that features a classic sheet-ghost silhouette and the sweetest little smile. Crafted from glow-in-the-dark polymer clay, this minimalist phantom is perfect for earrings, zipper pulls, or a dainty necklace pendant.
How-To Guide
Materials
- Glow-in-the-Dark Polymer Clay (e.g., Fimo or Sculpey)
- Black Polymer Clay (tiny amount)
- Red or Pink Polymer Clay (tiny speck)
- Silver Eye Pin
- Silver Jump Ring
- Balling Tools (small size)
- Needle Tool or Toothpick
- Gloss Glaze or water-based polyurethane varnish
- Fine grit sandpaper (optional)
- Ceramic tile or baking mat
- Oven
Step 1: Shaping the Ghost
-
Condition the Clay:
Begin by thoroughly kneading a marble-sized amount of glow-in-the-dark polymer clay. It needs to be warm and pliable to prevent cracks from forming later. -
Form the Base Ball:
Roll the conditioned clay between your palms to create a completely smooth sphere, ensuring there are no lines or fingerprints visible. -
Create a Cone:
Gently roll the top half of the sphere against your work surface to elongate it slightly into a rounded cone shape, while keeping the bottom flat. -
Round the Head:
Use your thumb to gently round off the top of the cone so the ghost has a soft, domed head rather than a pointy peak. -
Shape the Skirt:
At the base of your ghost, use your fingertip to softly flare the clay outward, creating the illusion of a flowing sheet. -
Define the Ruffles:
Press a medium-sized ball tool or the handle of a paintbrush gently into the bottom edge of the skirt at three points to create the wavy, ruffled hem. -
Smooth the Edges:
Run your finger lightly over the ruffled bottom to soften any sharp indentations; the ghostly fabric should look soft and draped.
Dirty Ghost Syndrome?
White and glow clay pick up every speck of dust! Keep a piece of scrap white clay nearby and roll it over your hands and work surface periodically to lift away lint before touching your ghost.
Step 2: Adding the Face & Hardware
-
Mark Eye Sockets:
With a small dotting tool, press two shallow dimples onto the face area where you want the eyes to sit. This helps the black clay stay embedded. -
Roll Tiny Eyes:
Take the tiniest specks of black polymer clay and roll them into two identical, microscopic balls. -
Place the Eyes:
Gently press the black balls into the pre-marked sockets. I usually flatten them just slightly so they don’t bulge out too much. -
Create the Smile:
Roll a thread-thin snake of black clay—thinner than a hair if possible. Cut a tiny segment and curve it into a ‘U’ shape using a needle tool. -
Attach the Smile:
Carefully transfer the smile to the face between the eyes using your needle tool, pressing it gently to bond it to the white clay. -
Add Rosy Cheeks:
Using a needle tip, pick up a microscopic crumb of red or pink clay and place it just under the outer corner of each eye for a blush effect. -
Insert the Eye Pin:
Trim a silver eye pin down to about half an inch. Insert it straight down into the center of the ghost’s head. If the clay distorts, reshape it gently. -
Secure the Pin:
For extra security, you can pull the pin back out, add a dab of liquid clay or bake-and-bond to the shaft, and reinsert it.
Master the Glow
To verify your clay is conditioned enough, turn off the lights! Working the clay activates the glow pigments, so you can check for uneven swirls or dark spots before you even start shaping.
Step 3: Baking and Finishing
-
Bake:
Bake the charm according to your clay manufacturer’s instructions (usually around 275°F/135°C for 15-30 minutes). Use an oven thermometer to ensure accuracy. -
Cool Down:
Allow the ghost to cool completely inside the oven or on the tray; glow clay can be slightly translucent when hot and needs to set. -
Varnish:
Apply a thin layer of gloss glaze over the entire ghost to give it a shiny, finished look and to protect the tiny facial features. -
Attach Jump Ring:
Once the glaze is dry, use pliers to open a silver jump ring, loop it through the eye pin, and twist it closed securely.
Now turn off the lights and watch your friendly little phantom light up the room
Mix-and-Match Charm Stacks
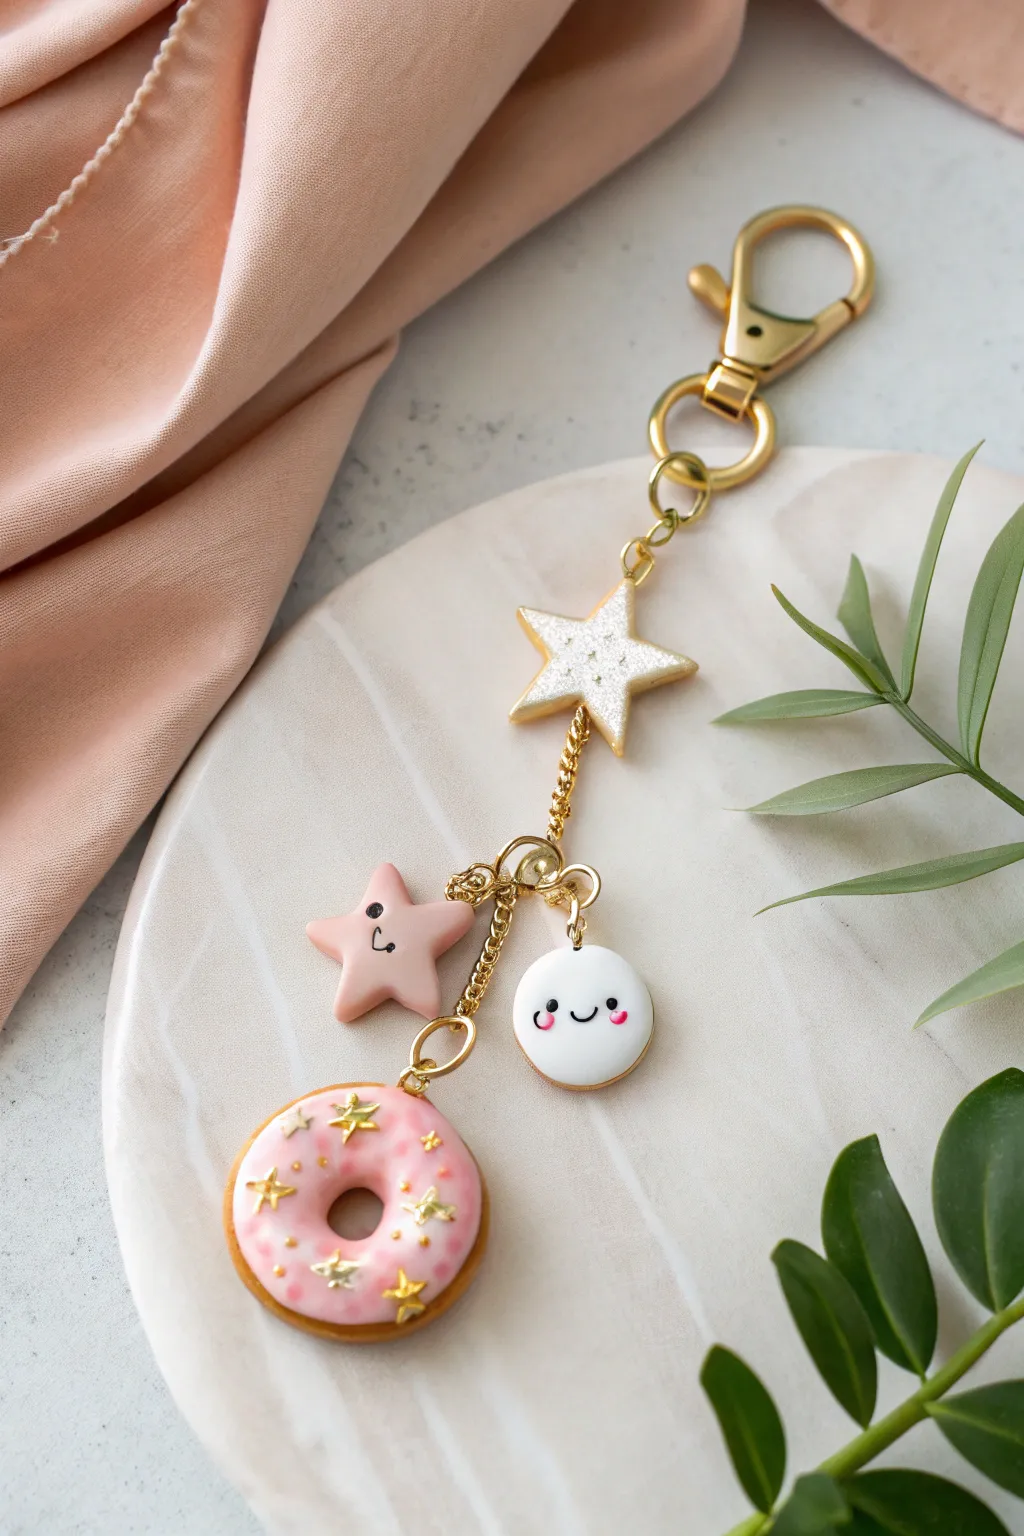
Bring a touch of sweetness to your keys with this delightful charm stack featuring a sparkling star, a happy little cloud face, a blushing star, and a classic pink donut. The combination of varied shapes and sizes creates a playful, jingling accessory that is as fun to make as it is to look at.
Step-by-Step Tutorial
Materials
- Polymer clay (tan/beige, soft pink, white)
- White or translucent liquid clay
- Gold glitter (fine)
- Gold star-shaped confetti or sequins
- Gold acrylic paint
- Gloss glaze (UV resin or polyurethane varnish)
- Eye pins (gold)
- Jump rings (gold, varying sizes)
- Medium link chain (gold)
- Large lobster clasp swivel keychain (gold)
- Needle tool or toothpick
- Small ball tool
- Black acrylic paint or fine detail pen
- Pink chalk pastel (for cheeks)
- Precision clay knife
Step 1: Sculpting the Charms
-
Form the large star:
Start by conditioning white clay and flattening it into a slab about 4-5mm thick. Use a star cutter or a template to cut out a medium-sized star shape. Smooth the edges with your finger to remove any sharp angles. -
Add the glitter effect:
Before the clay cures, press fine gold glitter into the surface of the white star for a shimmer effect, or mix the glitter directly into the clay beforehand. -
Create the donut base:
Roll a ball of tan clay and flatten it slightly. Use a small circle cutter or the back of a large piping tip to remove the center, creating the classic donut ring. Texture the sides gently with a toothbrush for a baked look if desired. -
Frost the donut:
Mix liquid clay with pink polymer clay (or use pre-mixed pink liquid clay) to create a frosting consistency. Carefully apply this to the top of your tan donut, letting it drip naturally down the sides but keeping the bottom clean. -
Sprinkle the donut:
While the ‘frosting’ is wet, gently place tiny gold star sequins randomly over the pink surface using tweezers/tweezers. -
Shape the small star:
Using soft pink clay, cut or mold a smaller, puffier star shape. Round the points so it looks soft and cute. -
Make the happy face charm:
Roll a small ball of white clay and flatten it into a thick disc. This will be the little round ‘cloud’ or face charm.
Secure Those Pins
Make a tiny bend or ‘L’ shape at the bottom of your eye pin before inserting it into the clay. This acts as an anchor once baked so the pin can’t be pulled straight out.
Step 2: Detailing and Baking
-
Insert hardware:
Insert a gold eye pin into the top of each charm. For the donut, go through the top edge; for the stars, go through the top point. I find adding a drop of liquid clay on the pin shaft helps it bond securely inside. -
Bake the batch:
Place all four charms on a tile or parchment-lined baking sheet. Bake according to your brand of clay’s specific instructions (usually roughly 275°F/135°C for 15-30 minutes). -
Add facial features:
Once cool, use a very fine brush with black acrylic paint or a specialized permanent marker to draw simple smiley faces on the small pink star and the white round charm. -
Apply rosy cheeks:
For the blush, scrape a little pink chalk pastel into powder and apply it to the cheeks with a small dry brush, or simply use tiny dots of pink paint. -
Paint the edges:
Carefully paint the edges or the back of the large white glitter star with gold acrylic paint to match the hardware and give it a polished, high-end finish. -
Glazing:
Seal the charms with a gloss glaze or UV resin. Heavy glaze looks especially good on the donut frosting to make it look sugary and wet.
Glitter Gradient
Instead of full glitter, try dusting just the tips of the large star with gold mica powder before baking for an elegant ombré effect.
Step 3: Assembly
-
Prepare the chain:
Cut a short length of gold chain (approx 2 inches). Attach one end to the bottom loop of your large lobster clasp keychain. -
Attach the top charm:
Connect the large glitter star to the very top of the chain (near the clasp) using a jump ring. -
Build the cluster:
Attach the pink star and the white face charm to the middle section of the chain using jump rings. Varying their heights slightly adds visual interest. -
Finish with the donut:
Attach the donut charm to the very bottom link of the chain so it acts as the anchor weight.
Clip this delightful stack onto your bag or keys and enjoy the tiny handcrafted sweetness every day